|
|
|
|
|
|
Yeah, the self centering linkage
It's such a nice solution to that problem and sure beats stripping down 2 gearboxes to swap bell housings! I don't know why it never occurred to me before!
|
| |
|
|
|
|
|
|
|
|
|
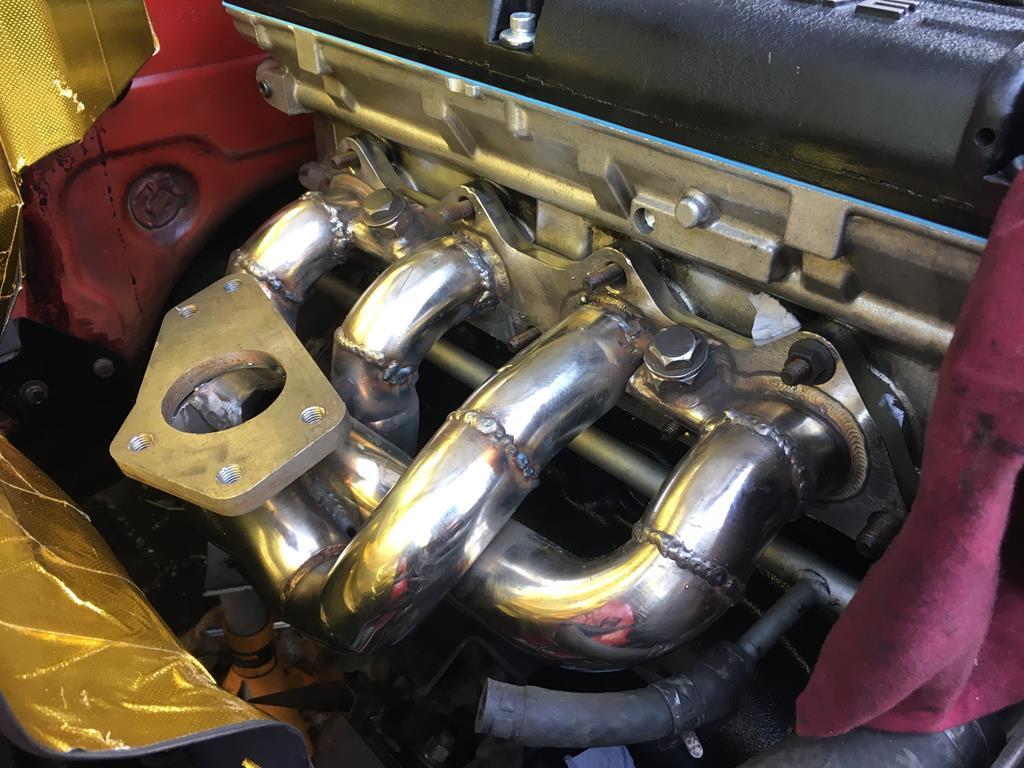
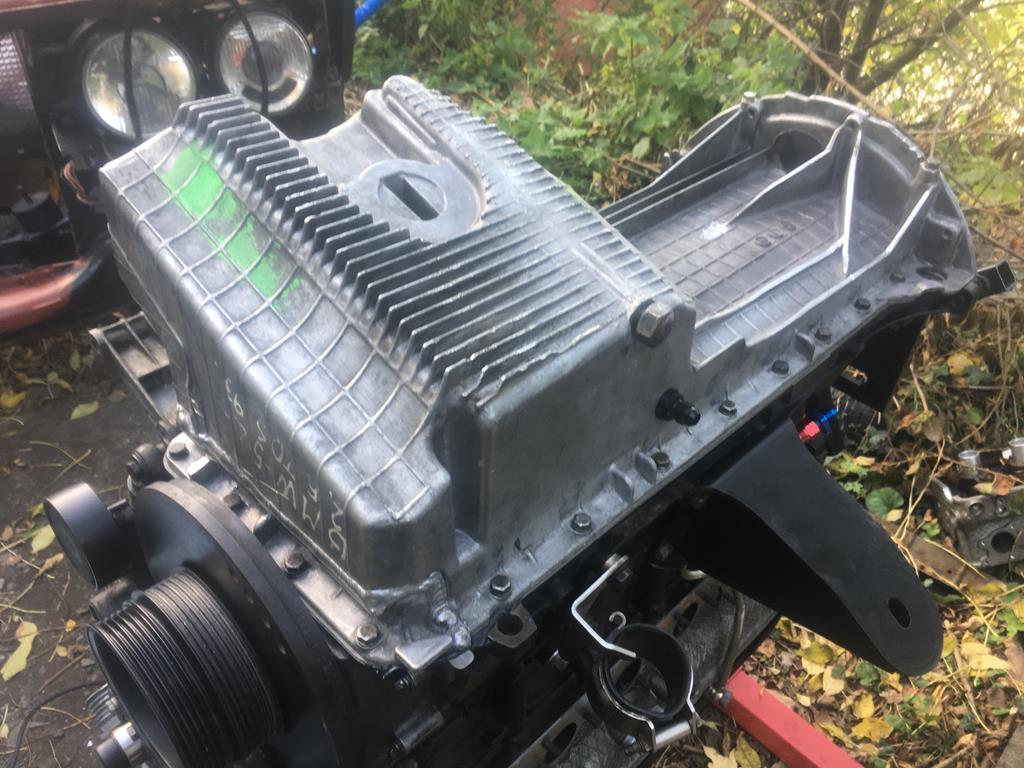
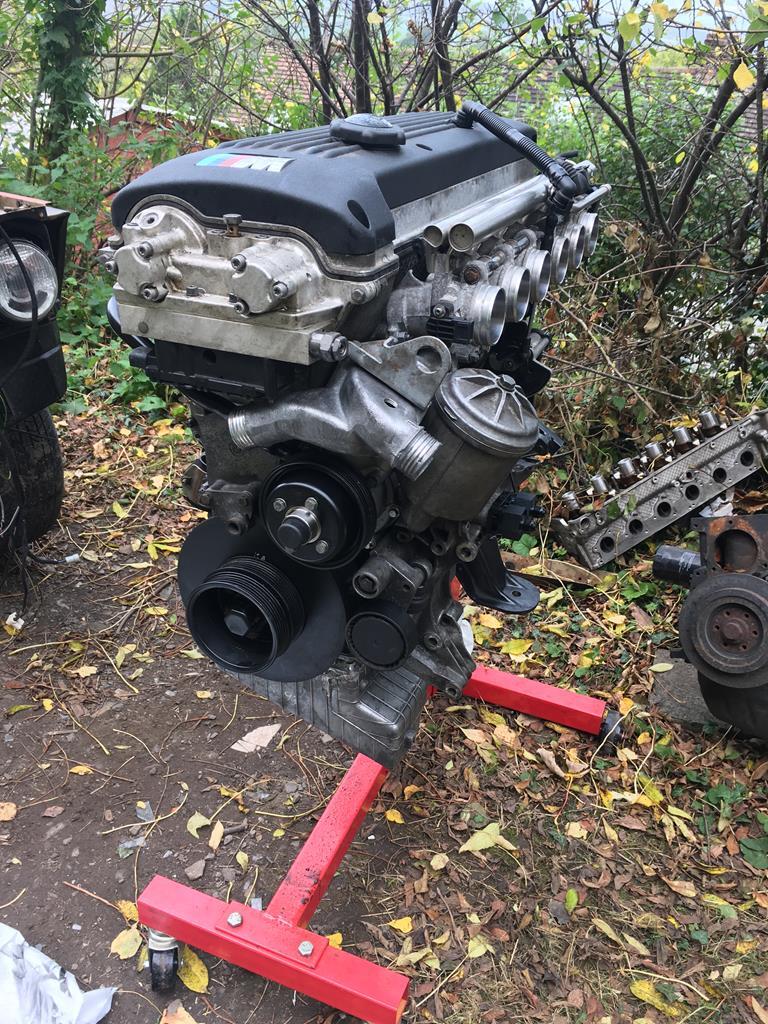
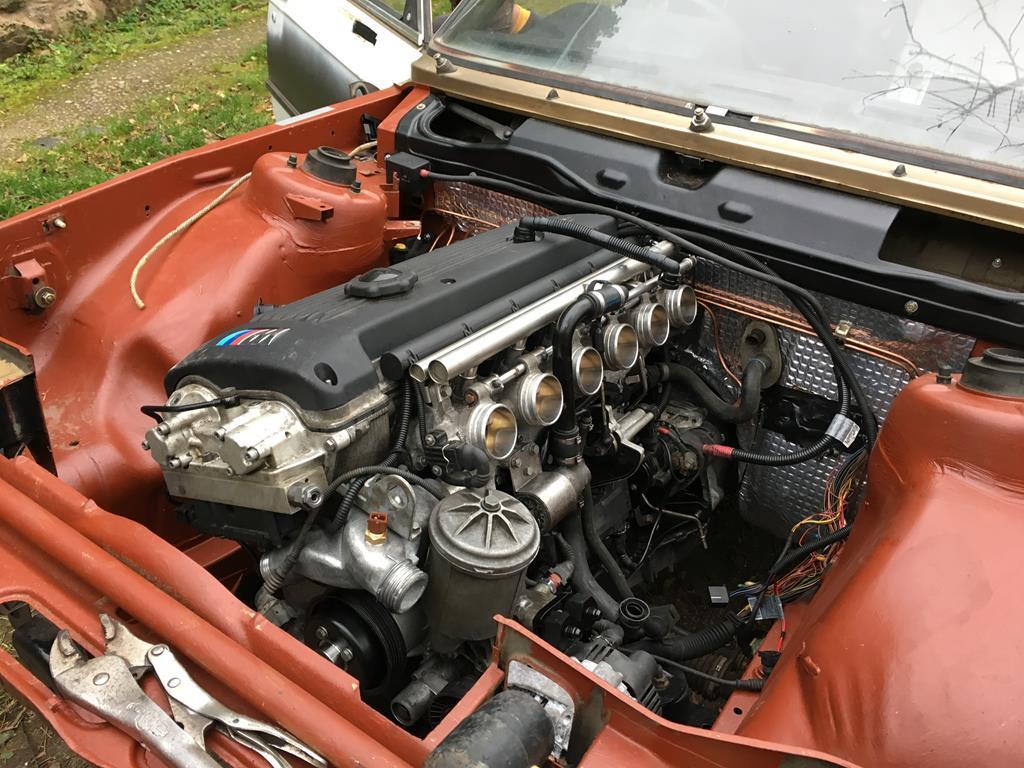
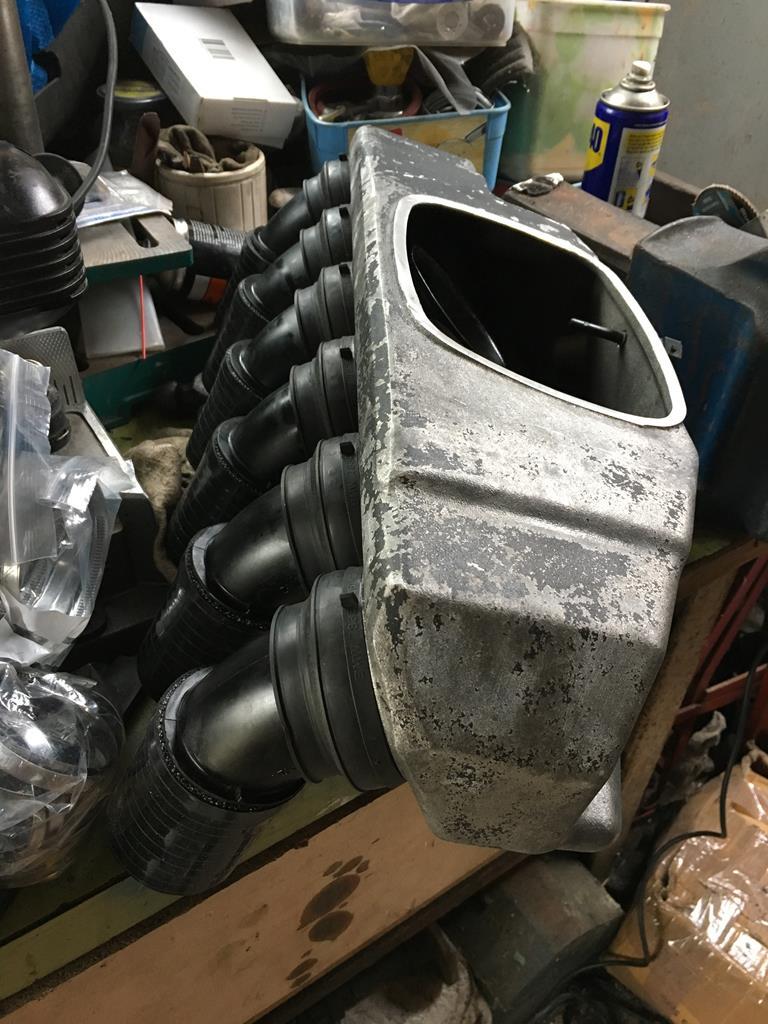
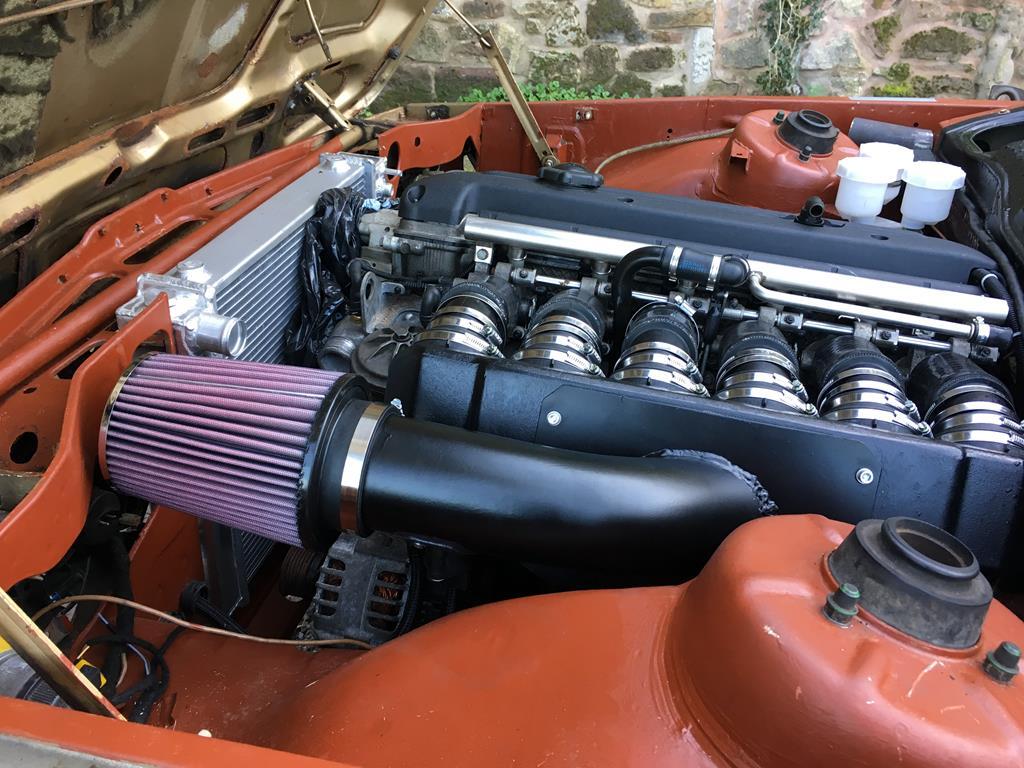
It's good to see this is progressing again. Is the temptation not there to go for velocity stacks? You can make them at home by chopping open the stock M3 airbox  . I've decided to stick with an airbox as they usually make better torque compared to open velocity stacks, and a MAF is usually better at calculating airflow than a MAP/TPS, especially on ITBs. I actually ended up using the velocity stacks from the E46 airbox in the E36 one! Also 6 sock filters and the heat shielding required was looking pretty expensive and i was struggling to think of a clean solution, so ultimately i went with the airbox. 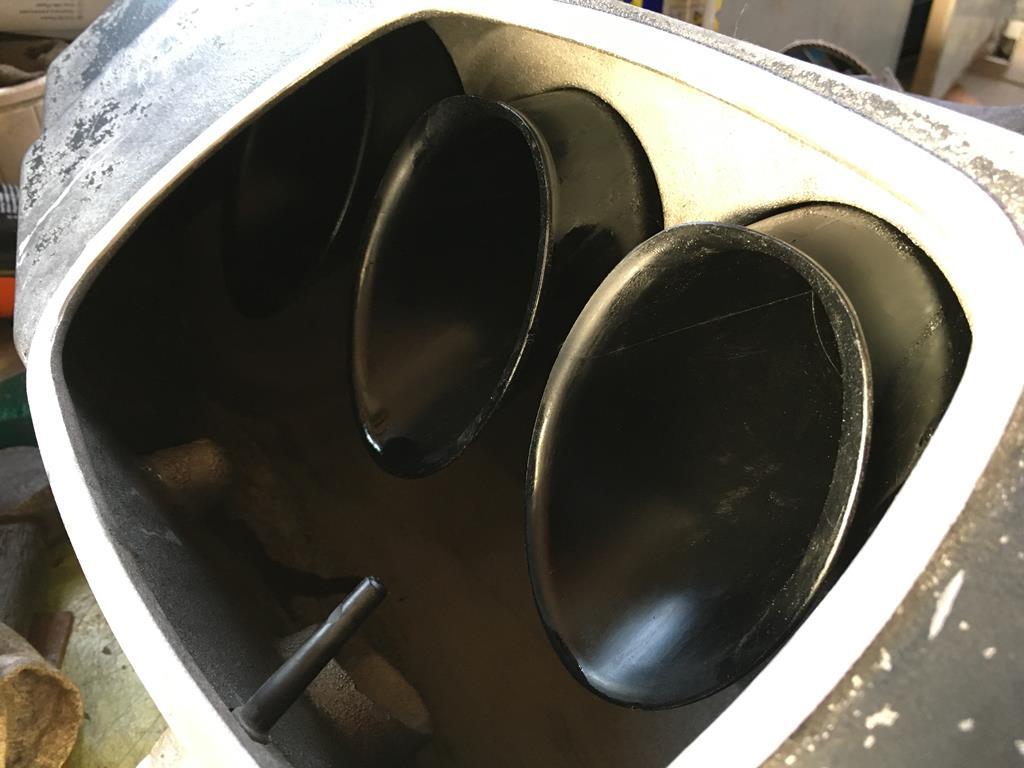 Anyway, after what's seemed like a never ending winter, i've been getting on with the brakes and suspension. Which isn't actually that interesting - just a lot of measuring and then drilling holes really! The Brembos are from an Mitsubishi Evo 6, as they are cheap and well matched (unlike, say, Porsche brembos). The front discs are E39 V8 estate fronts and the rears are E46 330 estate rears. 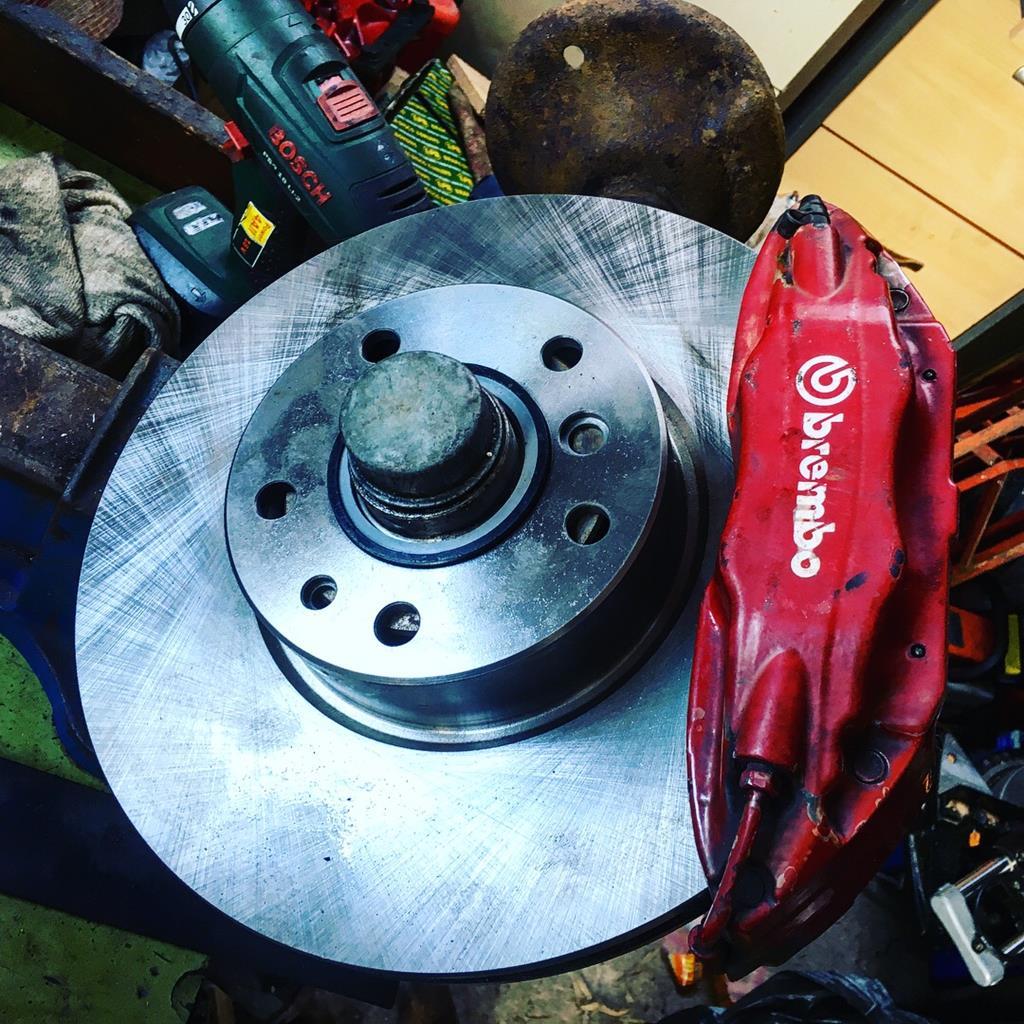 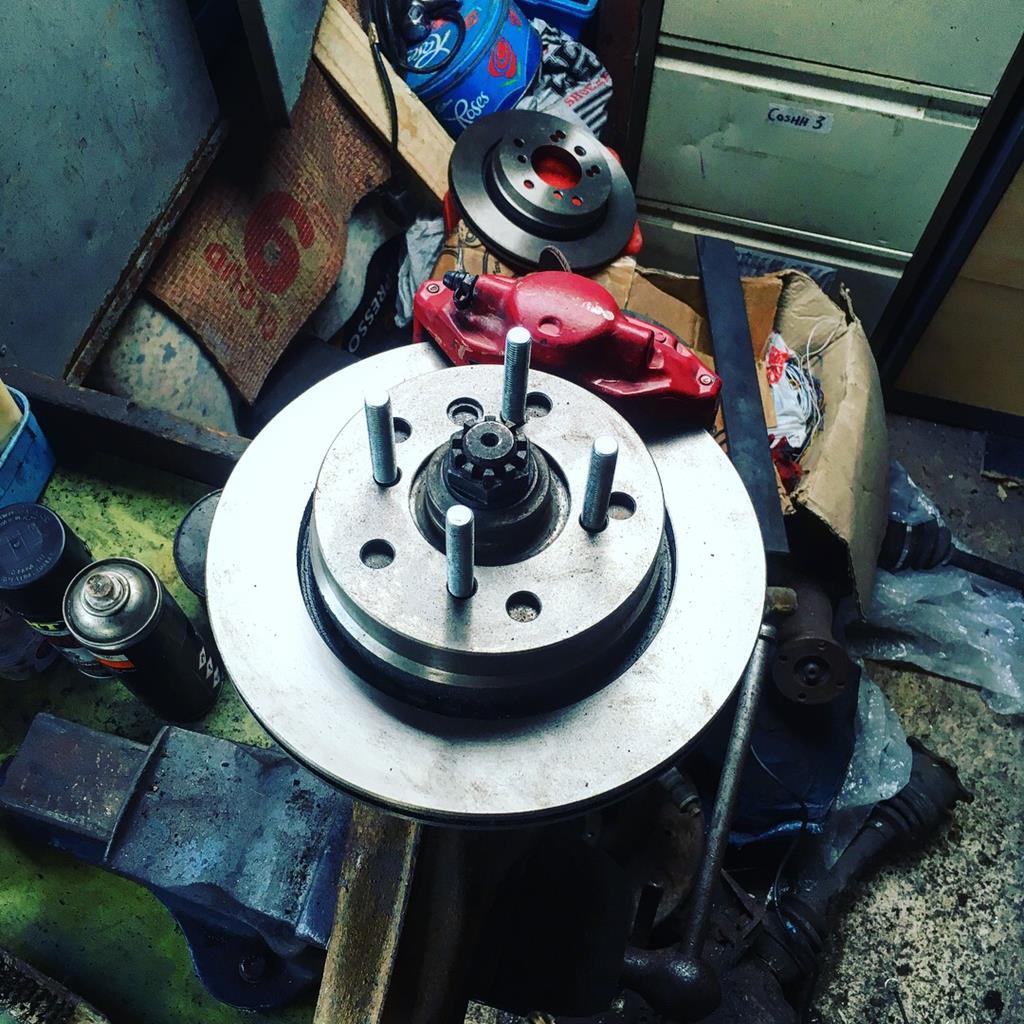 The fronts fit nicely under 16 inch wheels, but 15's are out of the question sadly. 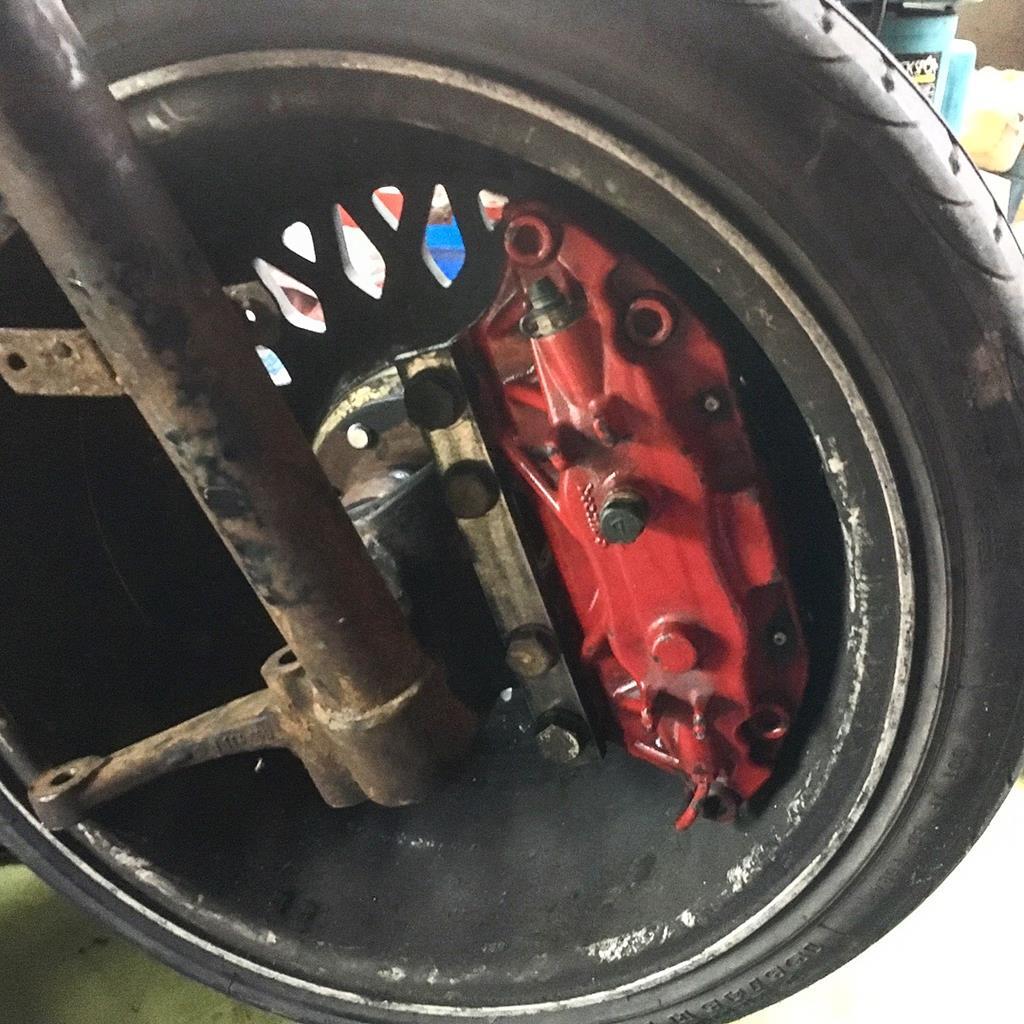 The main challenge was getting the drum in disc handbrake setup working, I ended up using the old drum backing plates and trimming them down. But then the mix of E46 handbrake shoes and expanding lock thing on the E21 cables and mount needed a lot of fettling to work correctly. In hindsight I should have stuck with all E21 323 handbrake components, but we got there in the end! 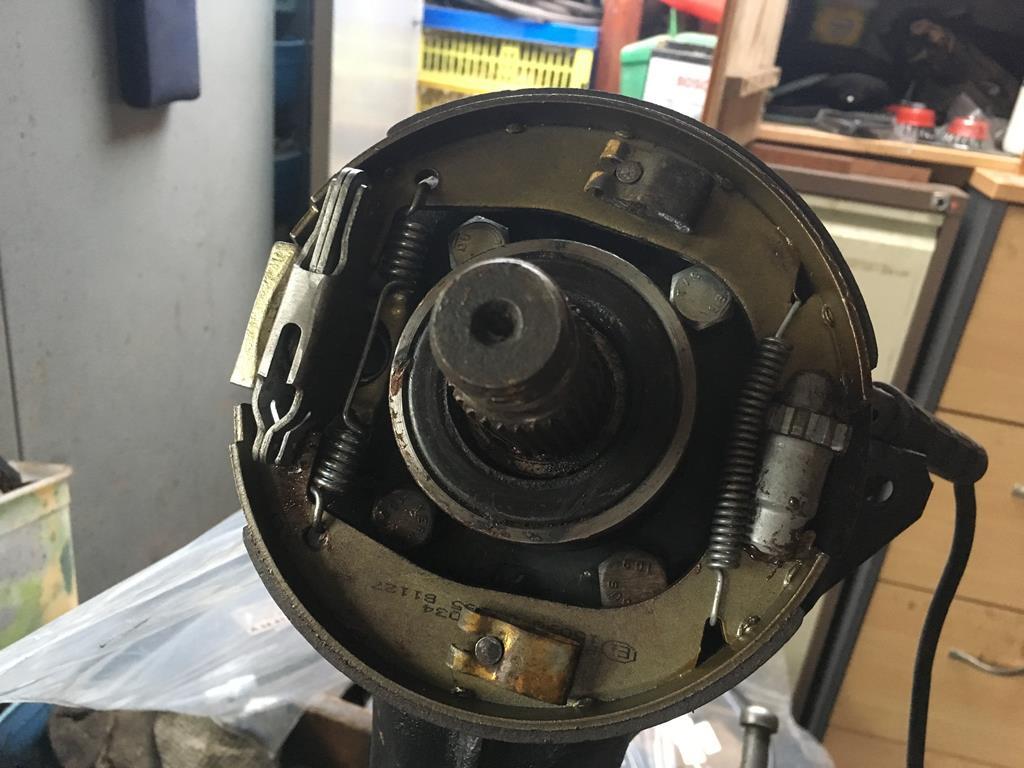 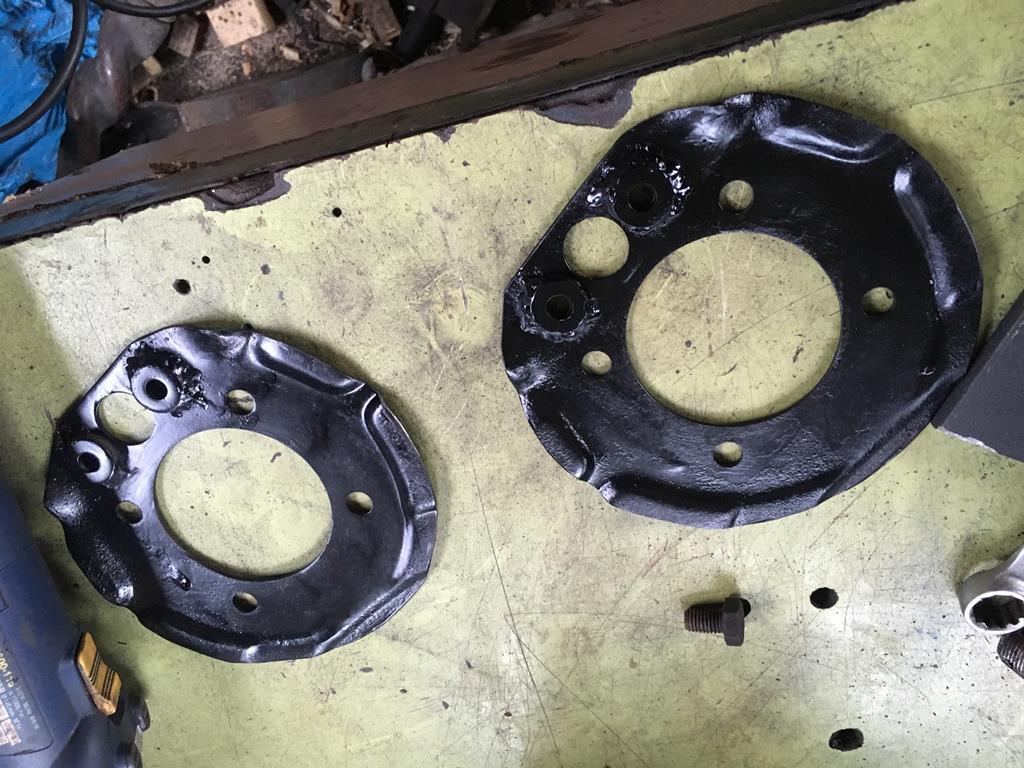 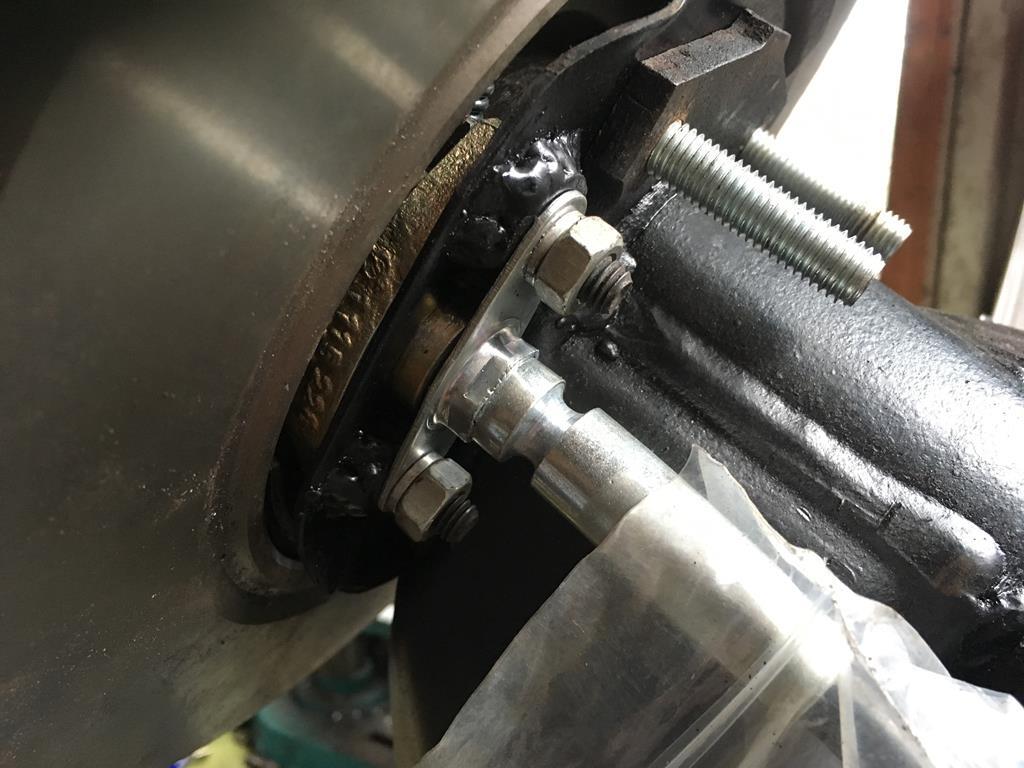 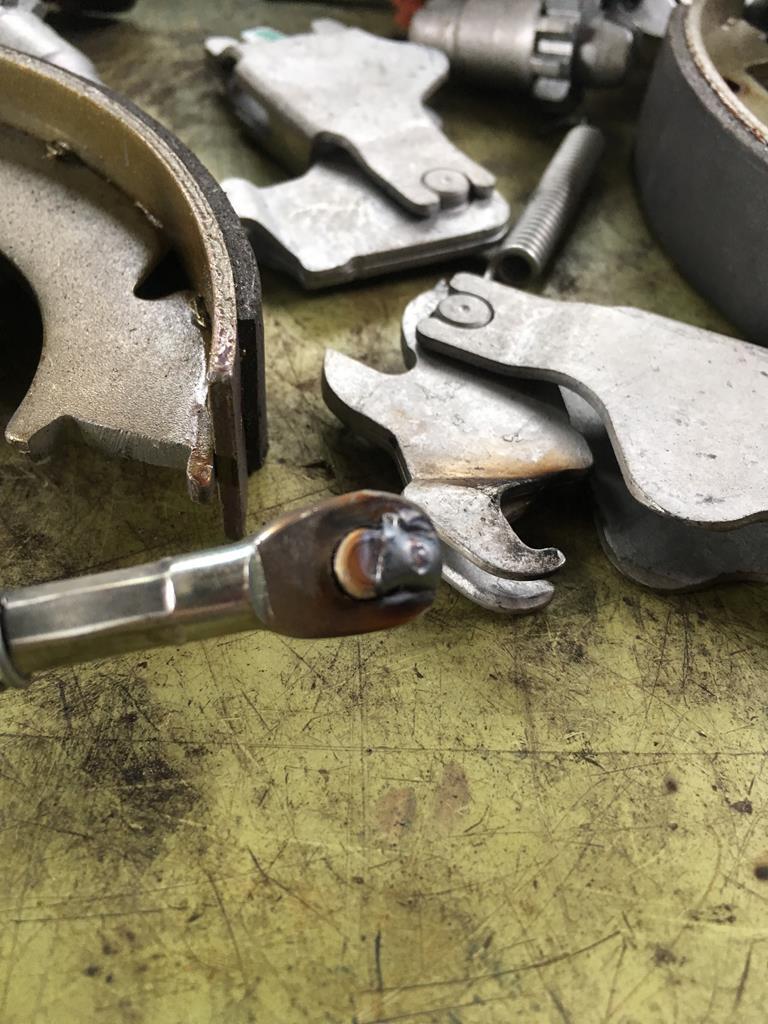 While the suspension was off the car I stripped and painted it all and fitted Spax shocks to the front. The rear already has Koni yellows that have never been driven on. I also modified the rear beam to accept camber/toe bolts and will flip the bushed to dial out the excess rear camber. 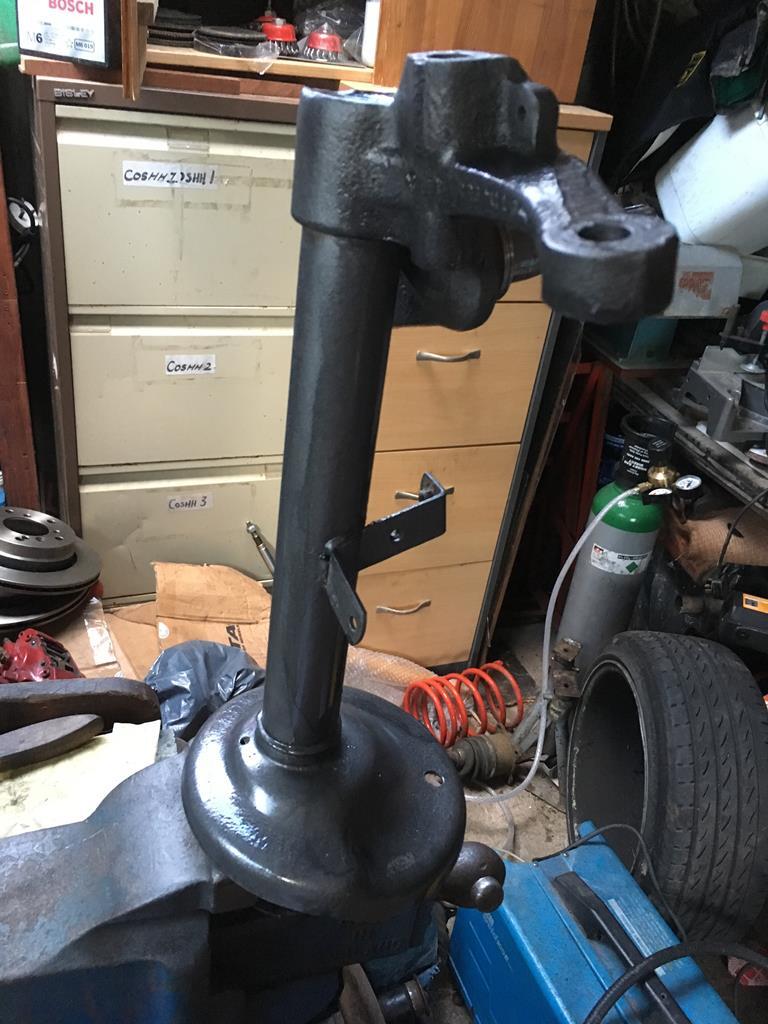 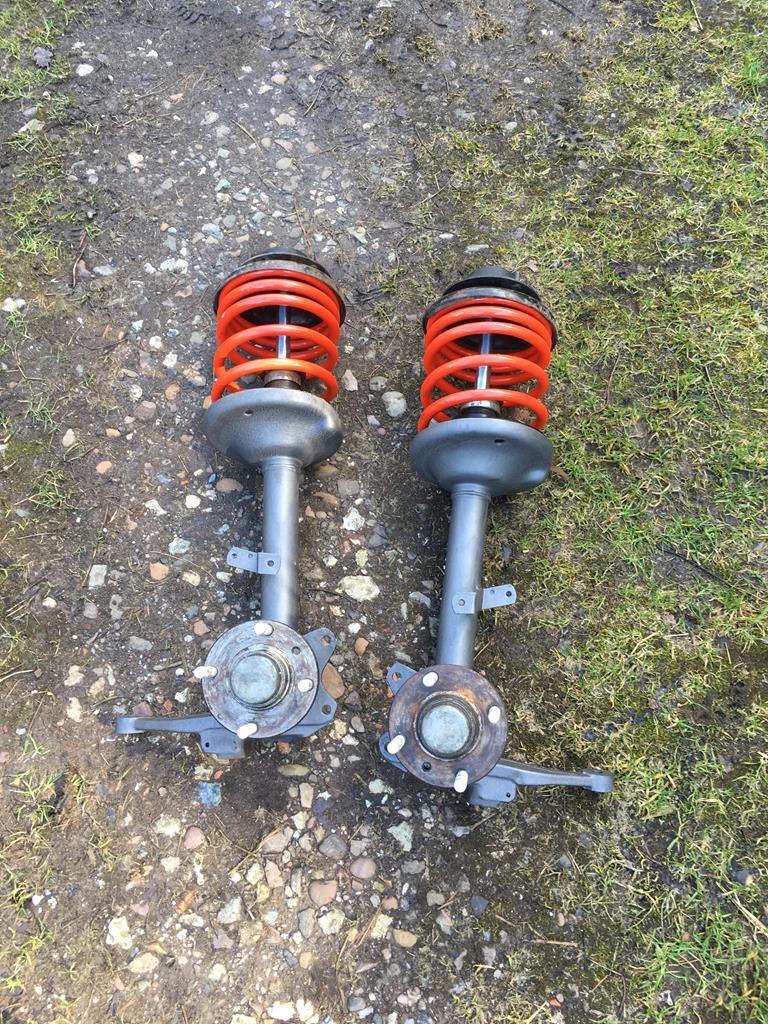 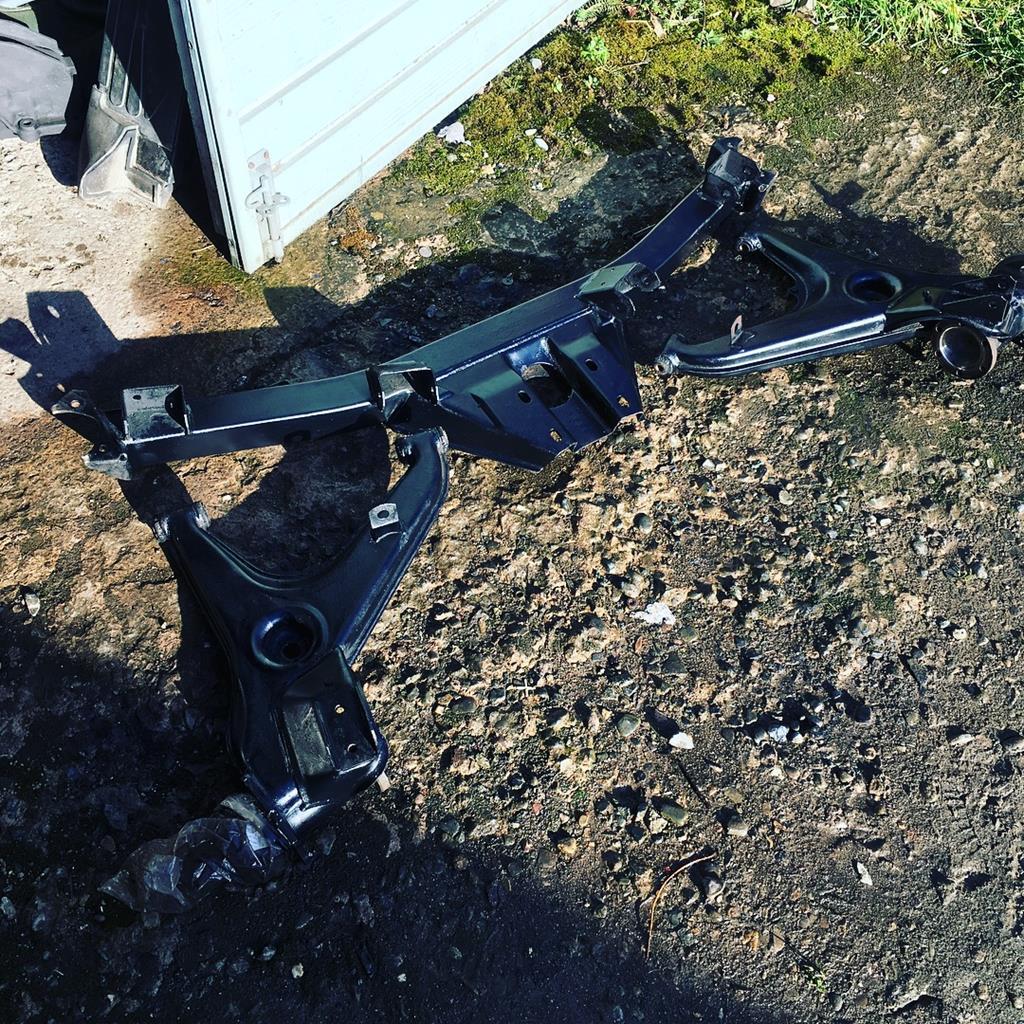 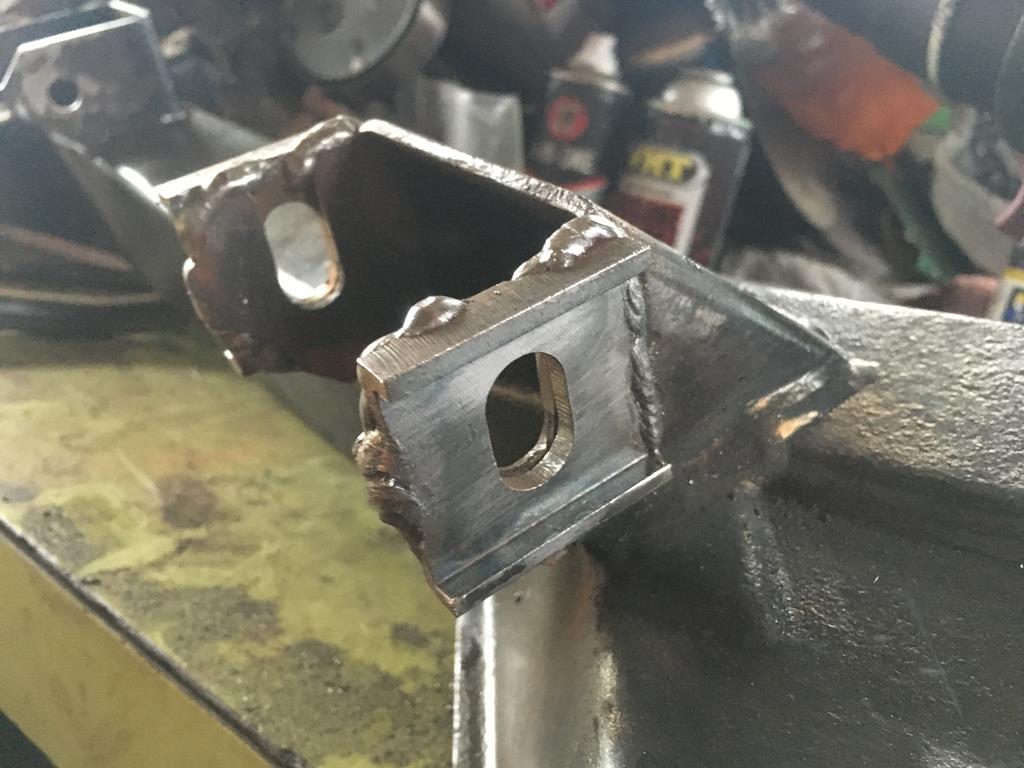 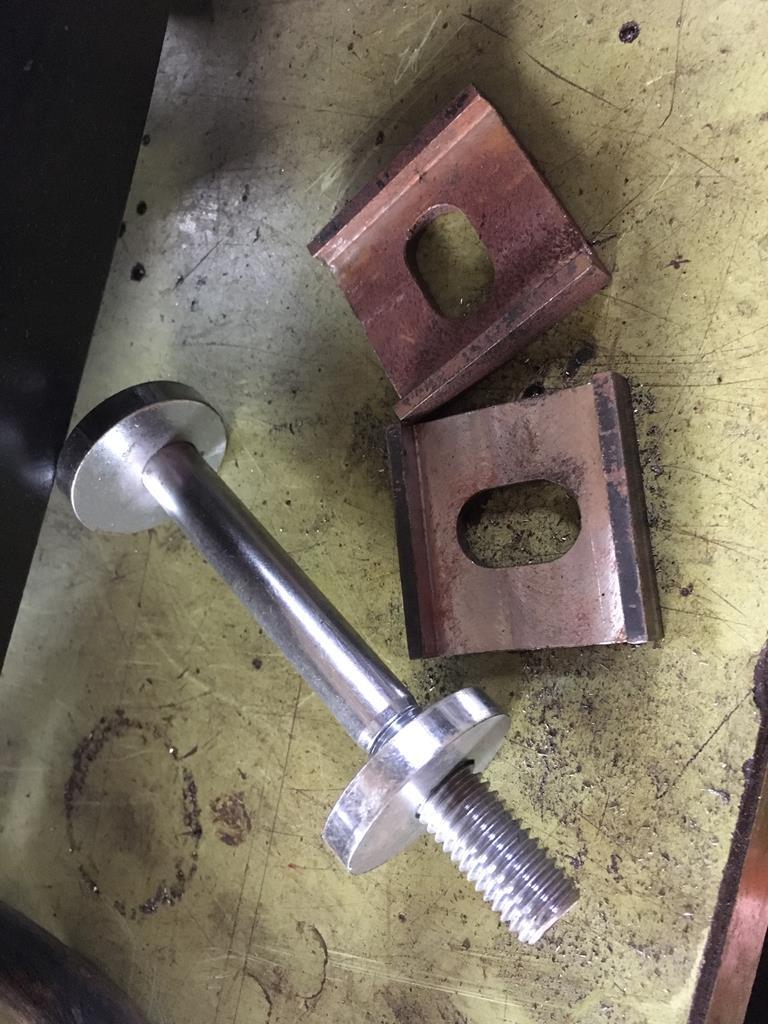 I also cleaned and painted the diff and fitted a cheap 'lunchbox locker' or LSD converter which i've modified the ramp angles of so it might actually work. It works on the same principal as a clutch type LSD but obviously doesn't have any frictions discs, so will probably need frequent oil changes. I dunno, it'll probably be wibblepoo but it's better than spending £600 on an E21 LSD that i'll probably blow up anyway. 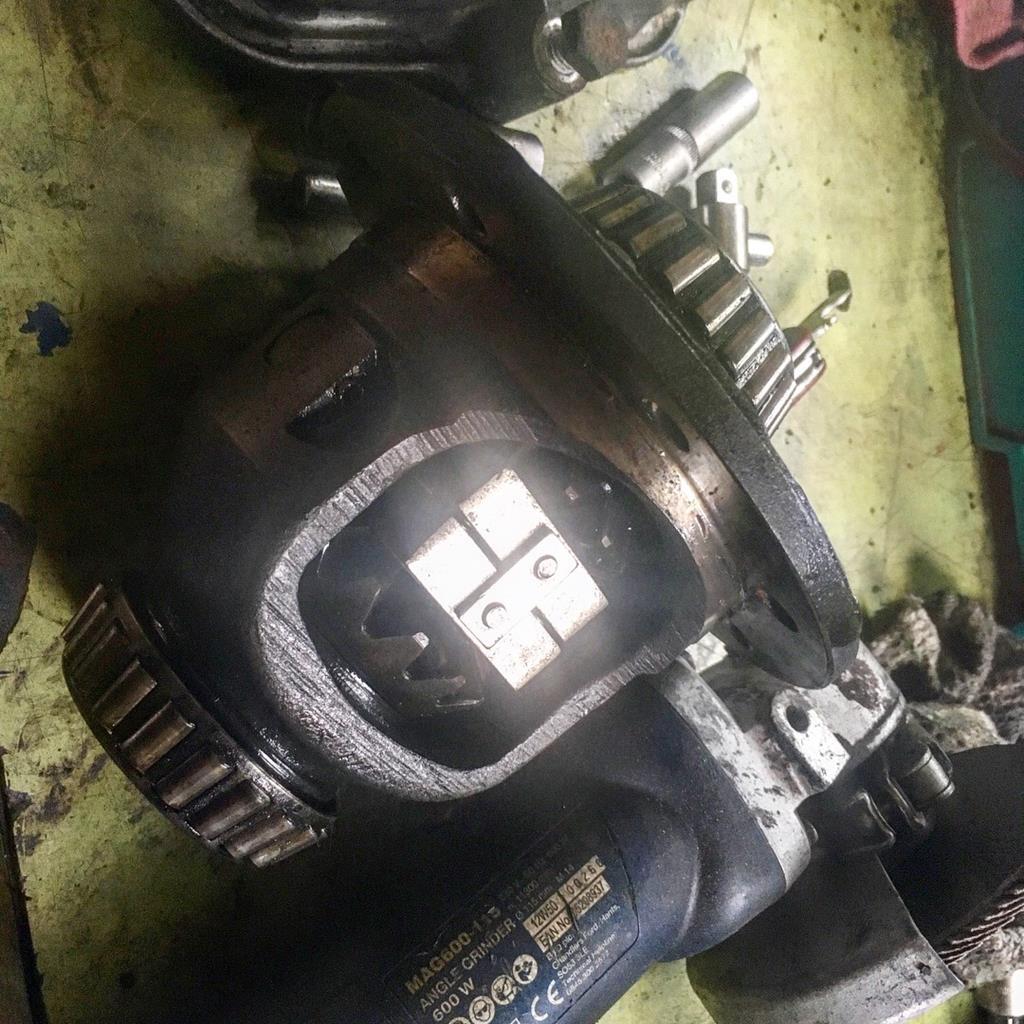 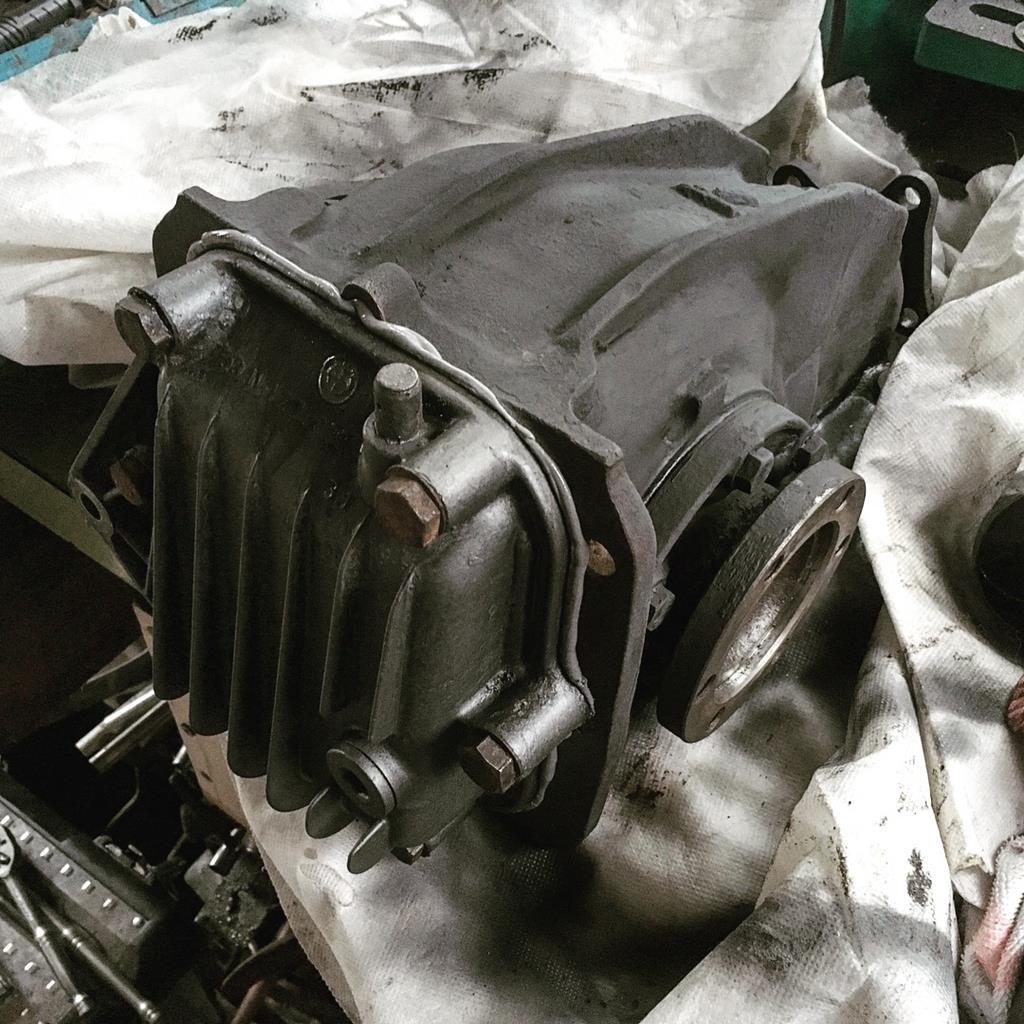  Still a few bits of welding to do before the rear beam can go on, but the fronts are all fitted up and ready to be bled! 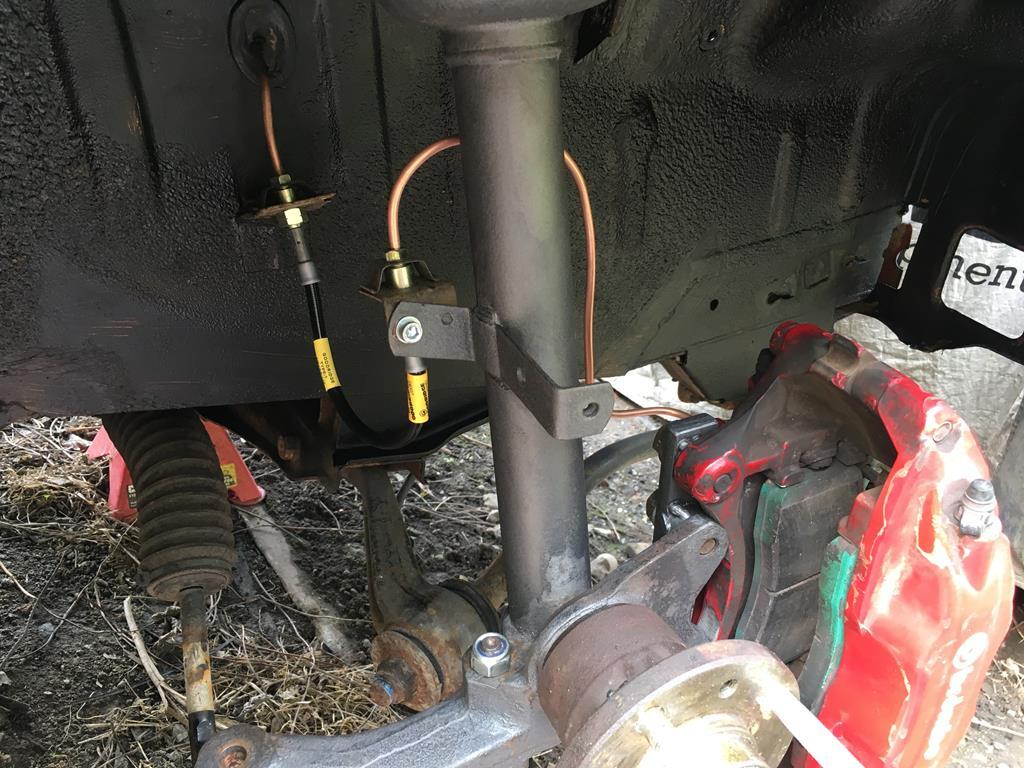 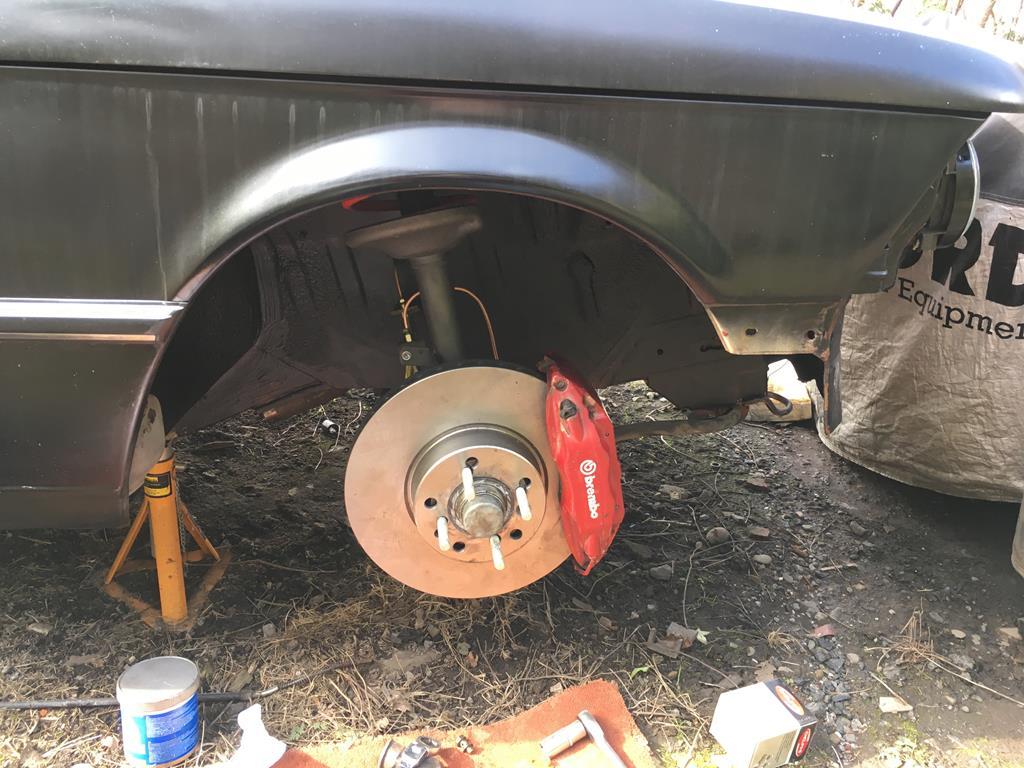 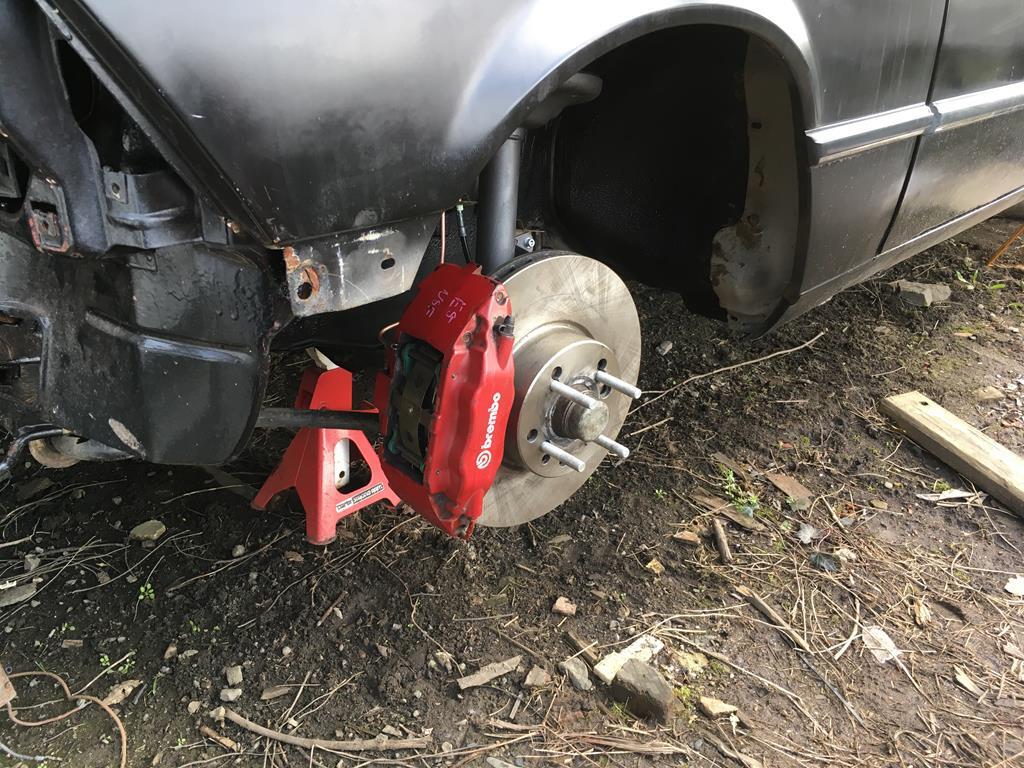 |
| |
|
|
|
|
|
|
|
I don't know what you'll be doing but here is my advice. One thing I will say is that you can get a better manual 'box potentially by buying an SMG 'box and then either machining the bellhousing to accept the manual detent springs or better still, get a self-centralising shifter like the CAE, Samsonas or RTD shifter. This way, the 'box will require no modifcations. Son of a curse word, why didnt i think of that!!! I think key things on a RHD E21 is using the M20 mounts to give you enough clearance around the steering linkage for an exhaust. That does mean you need either velocity stacks or a modified airbox as the standard MAF elbow won't fit. I'm assuming you've already got a suitable sump and oil pickup on the M52, those will bolt up to the S54. Wiring and ECU coding is basically the same as for an M52, but depending on what inlet you use you might need to swap to an AlphaN map (CSL map basically). there are plenty of guys that will code these ECUs for not much money. Also you'll probably need to upgrade the gearbox to cope with the power. Honestly the best solution is a 5 speed from a diesel E34. it's the same box as used in the 3.0 E36 M3 (so bulletproof) but with an M21 bell housing angle. You might even be able to get away with an E30 gearbox cross member and prop and have it all bolt in! |
| |
|
|
|
|
|
Nov 24, 2017 10:59:29 GMT
|
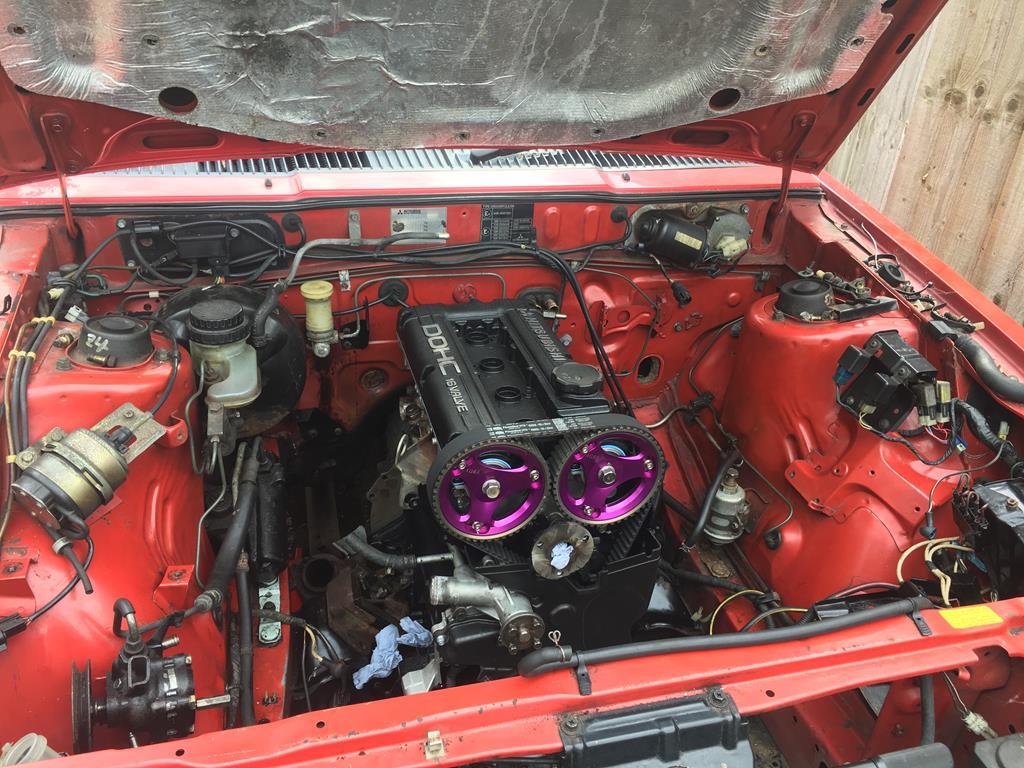
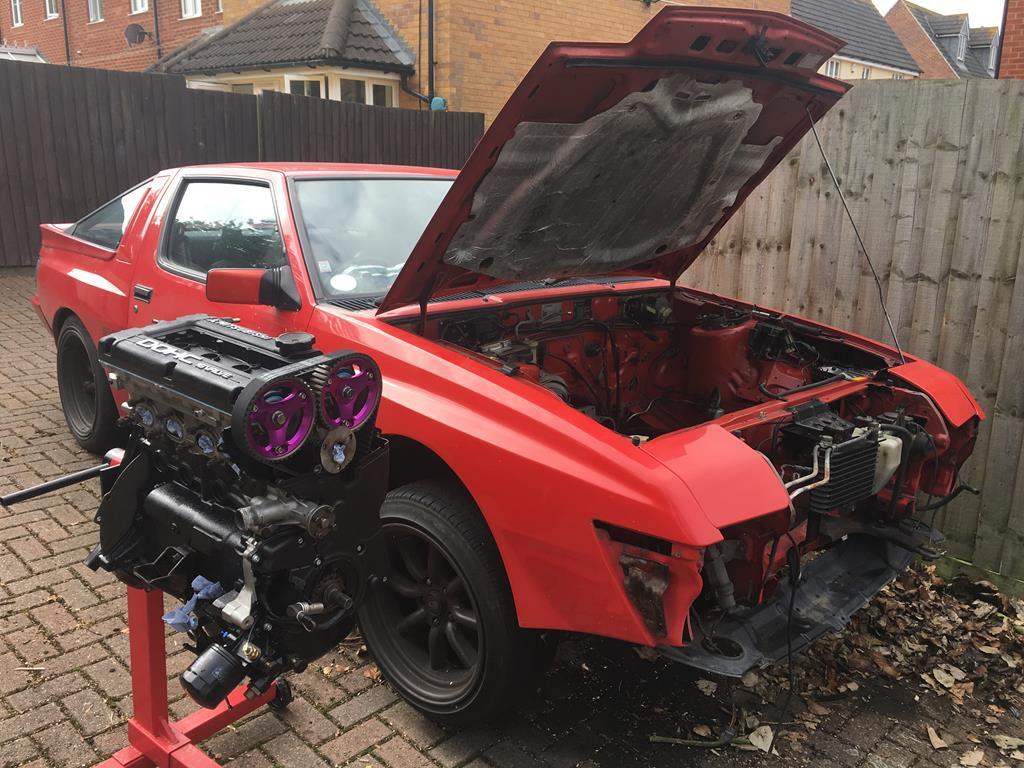
With the engine in and turbo mounted all that was left was charge piping, wiring and then various other brackets and fitting to mount everything back in there. For such a large engine bay with quite a small engine it ended up pretty tight for space, but i got there in the end. The intercooler is a cheap ebay front mount but fitted perfectly where the old intercooler sat. I ran the pipes straight through the rad support panel, rather than the convoluted route the originals took. I also replaced the worn out radiator with an alloy BMW E46 M3 rad that i had left over from another project. amazingly it was a perfect fit, just needed custom rad hoses with a filler neck. For management i'm using a microsquirt. Basically a megasquirt MS2 in a nice case with a waterproof loom connector. I made a complete engine loom from scratch to suit this installation, also went with toyota COPs and a VW 2 wire idle control valve in place of the mitsubishi stepper motor (the microsquirt doesn't have enough outputs to support a stepper motor really) 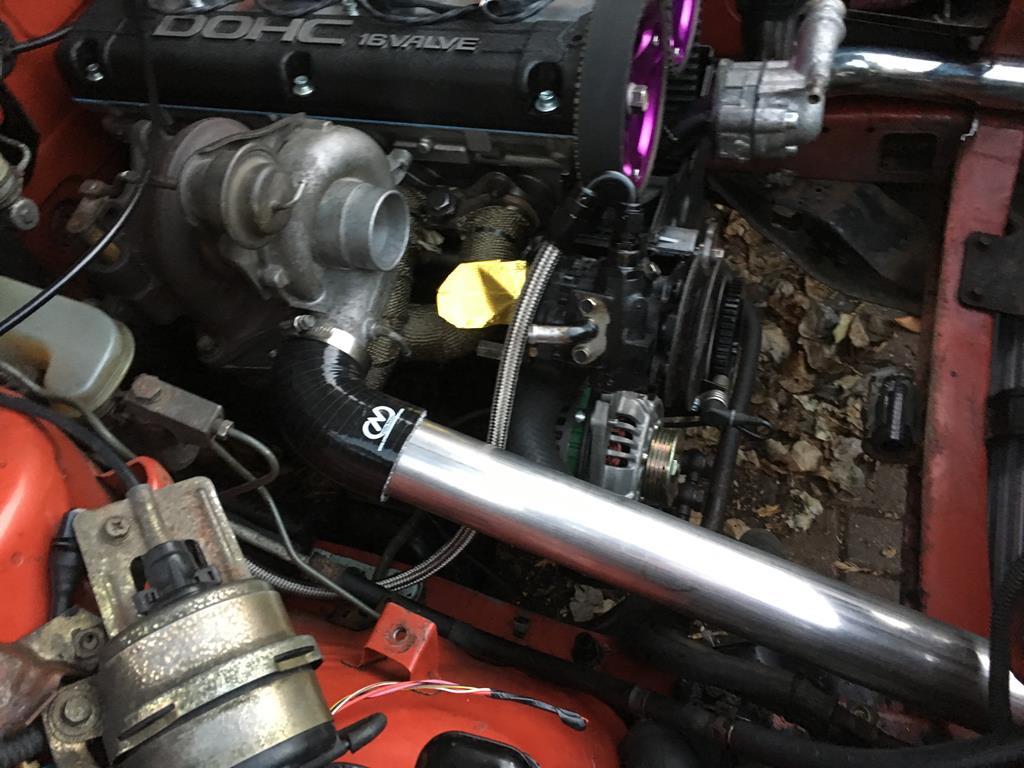 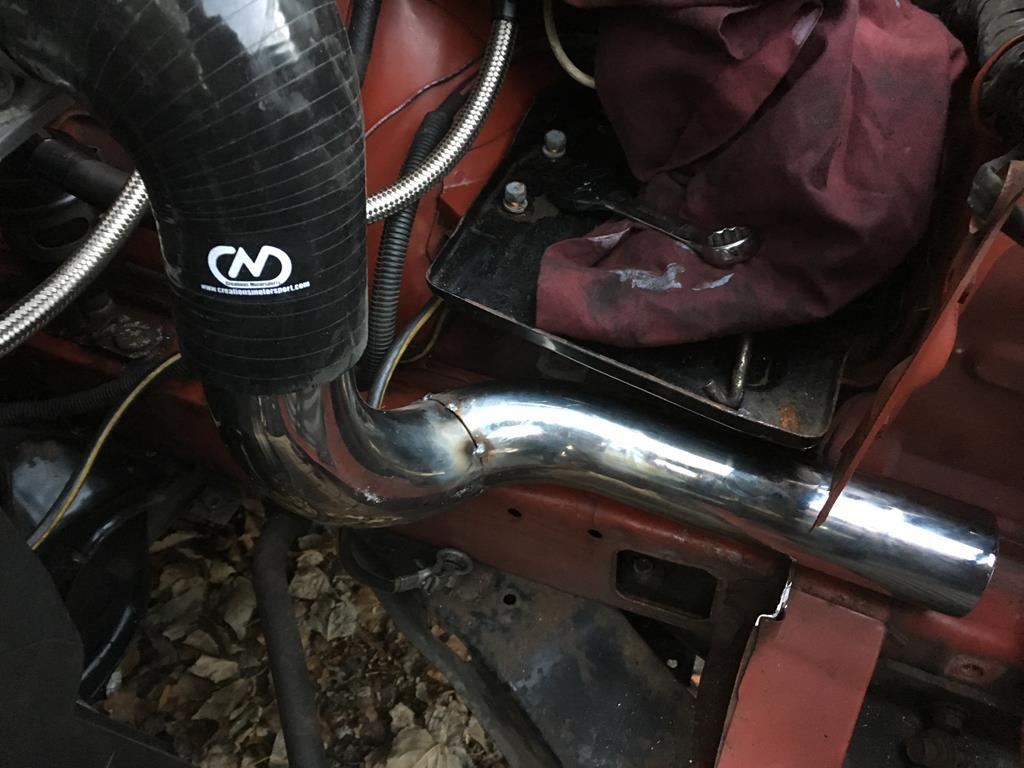 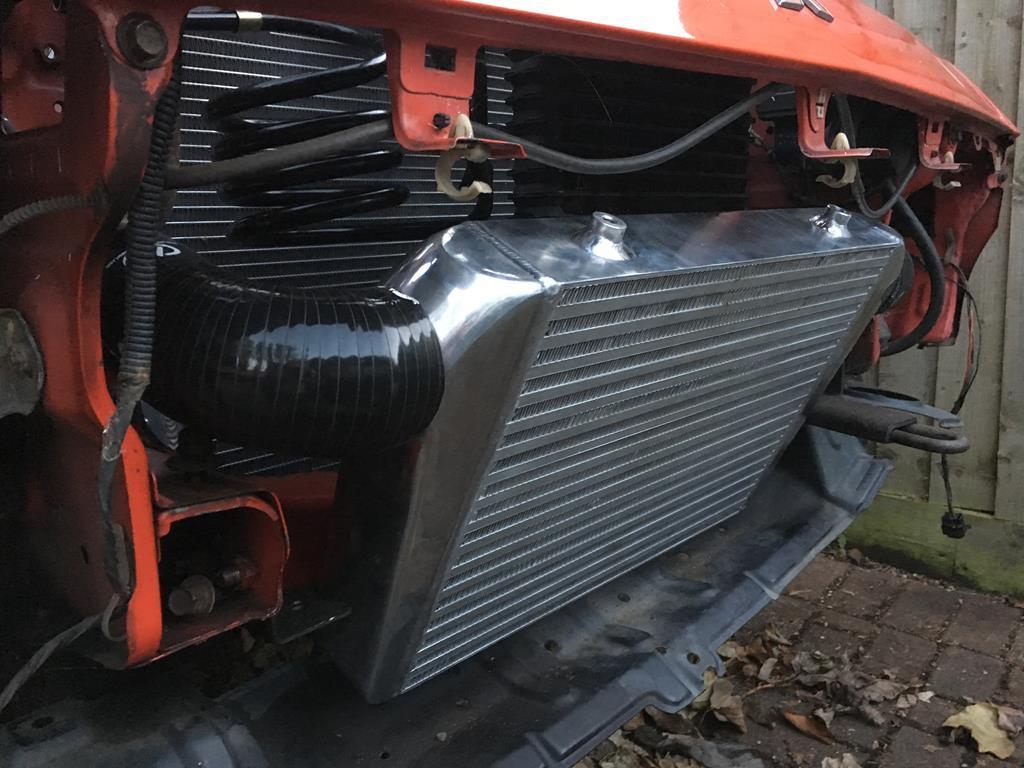 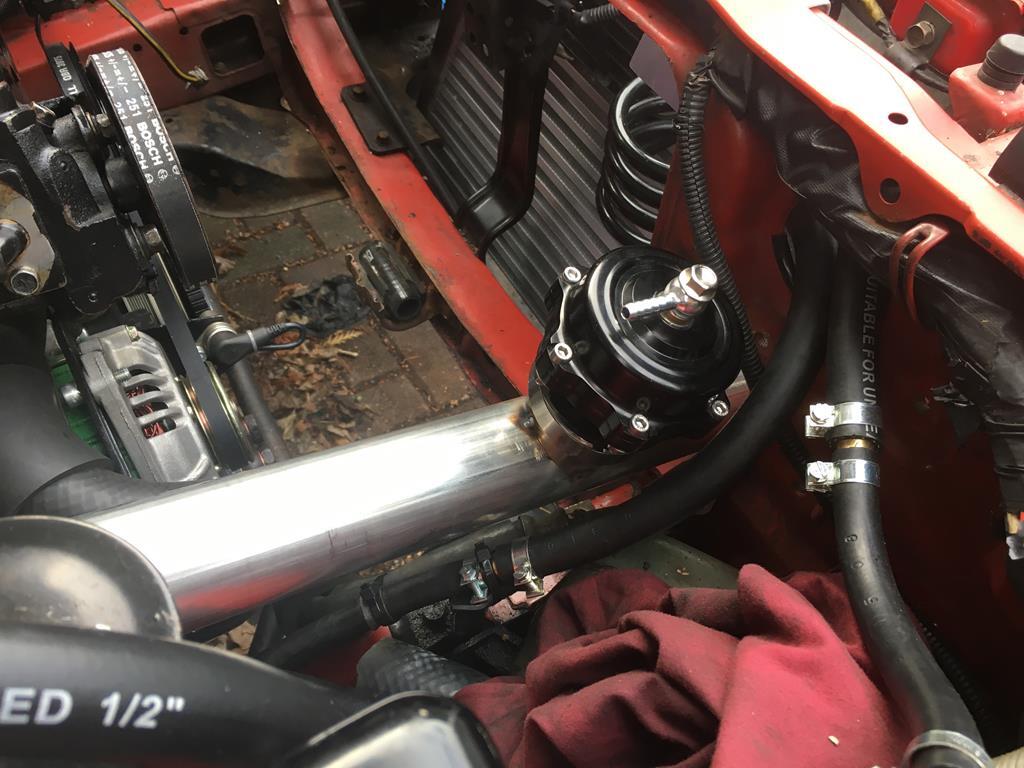 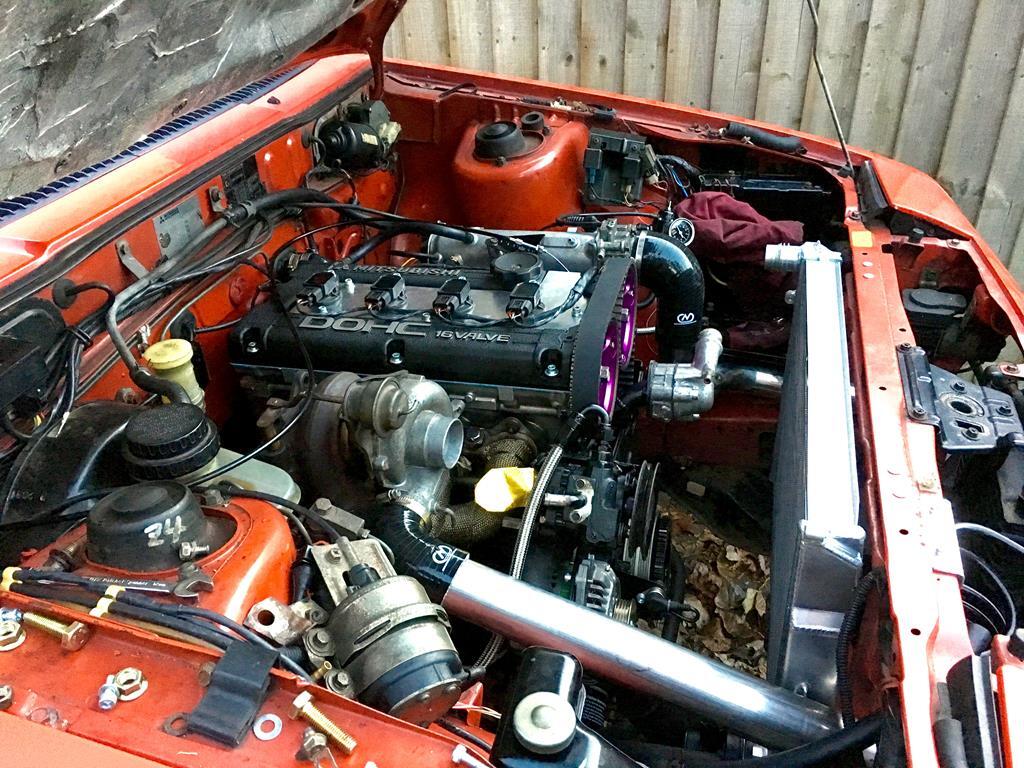 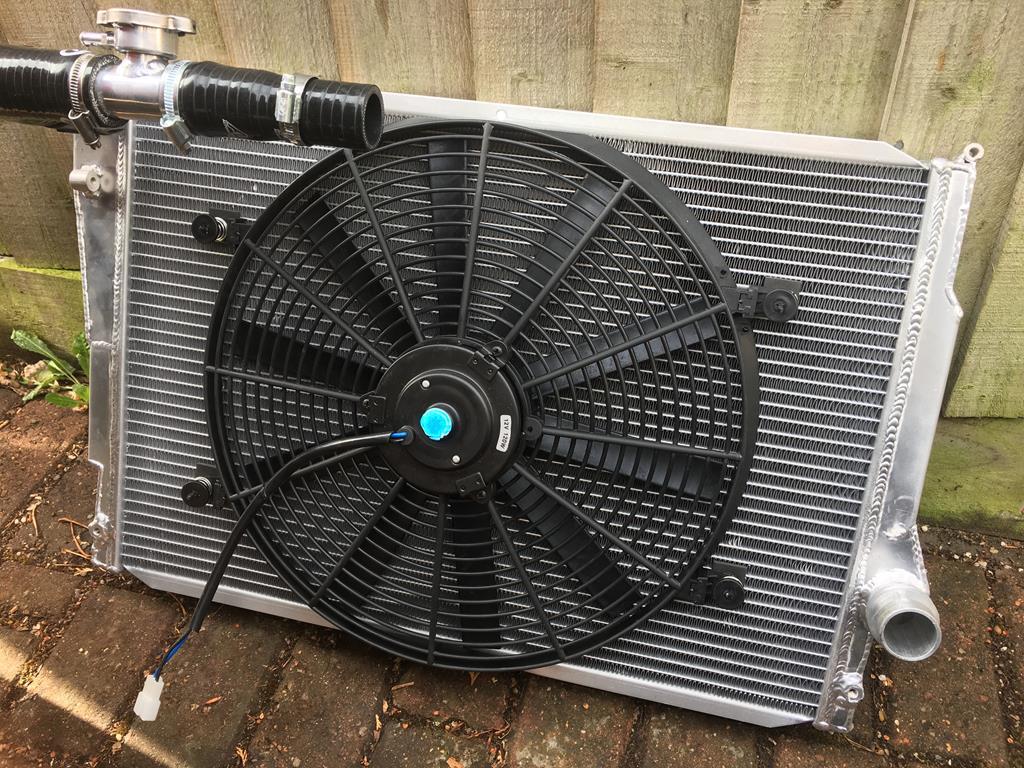 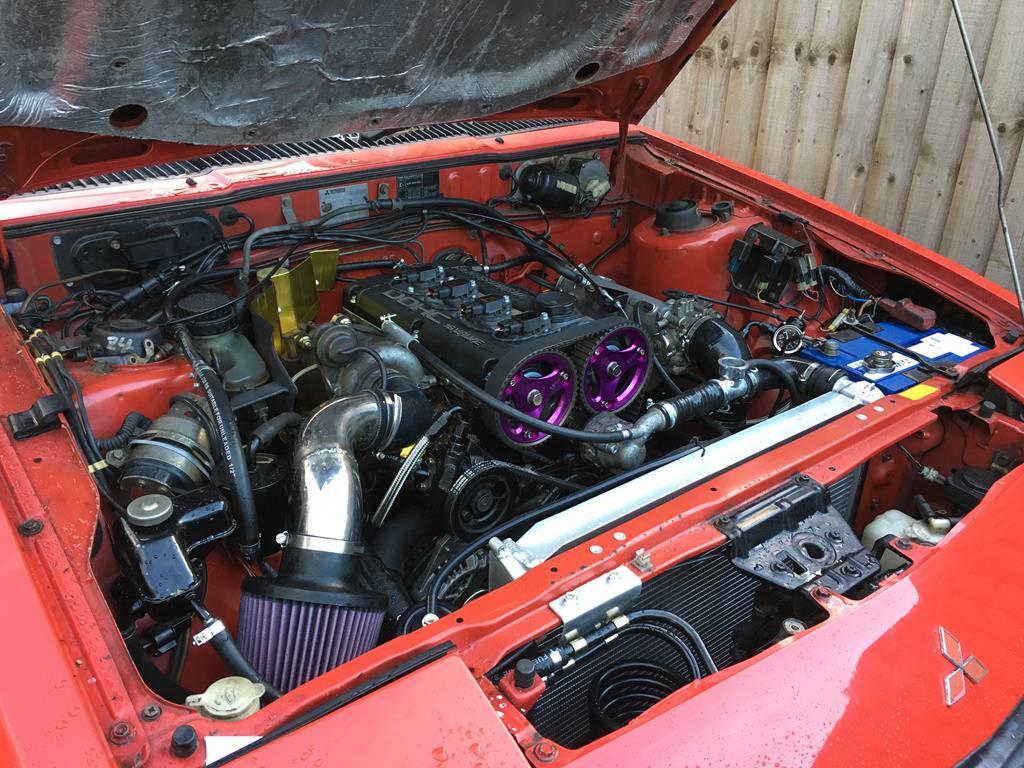 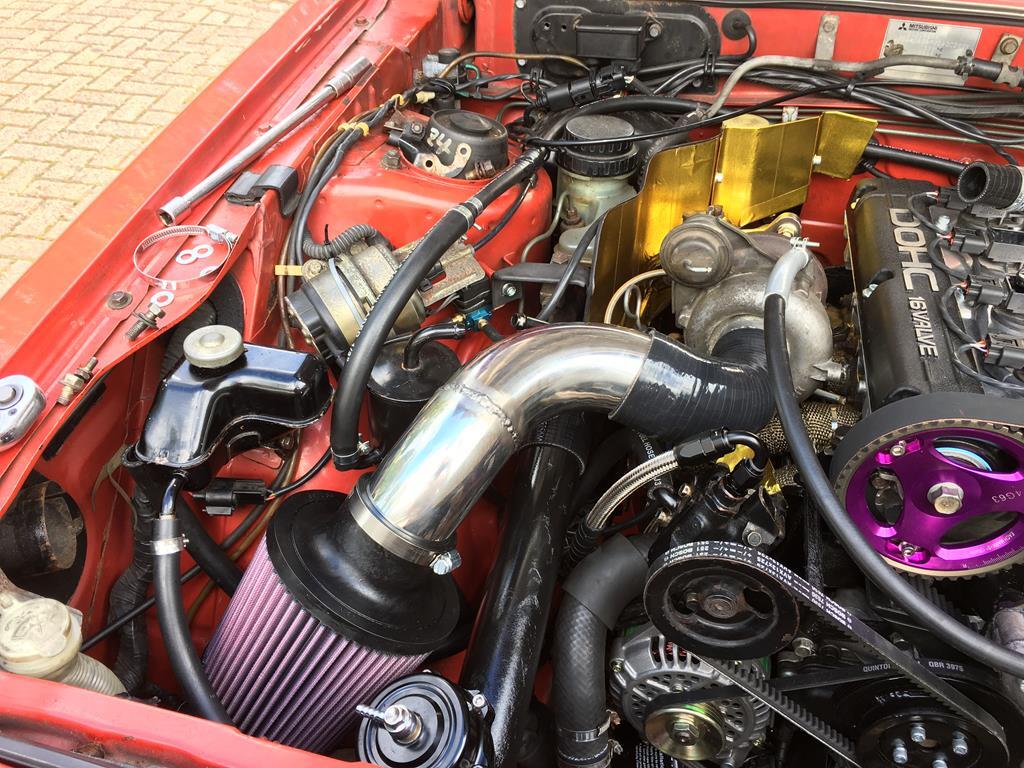 With the engine in and a base map loaded it was then a few weeks of road tuning to get it driving nicely, then fixing all the little bugs and niggles. I had a load of issues with the BMW crank sensor i was using, it kept dropping signal at about 3500 rpm, which was like a hard cut rev limiter. Turned out i had the air gap set to high and vibrations from the engine were engine to make it miss a few teeth. With that fixed I started tuning the higher load stuff, i currently have the boost set to about 14PSI, which is more than enough to make the car good fun. I plan to wind it up to about 20PSI at some point, but want to do that on a dyno to tune it properly and keep a better eye on detonation. Since then, the car really has been my sensible daily! I put it on coilovers not long after the engine build as the shocks were shot, and kept on top of maintenance etc but other than that it hasn't really needed much other than a top up of oil! Its a completely different car to drive without all the turbo lag of the original engine, and pulls well up to about 6500RPM. It will also happily light up the rears in 2nd in the wet, which is entertaining! 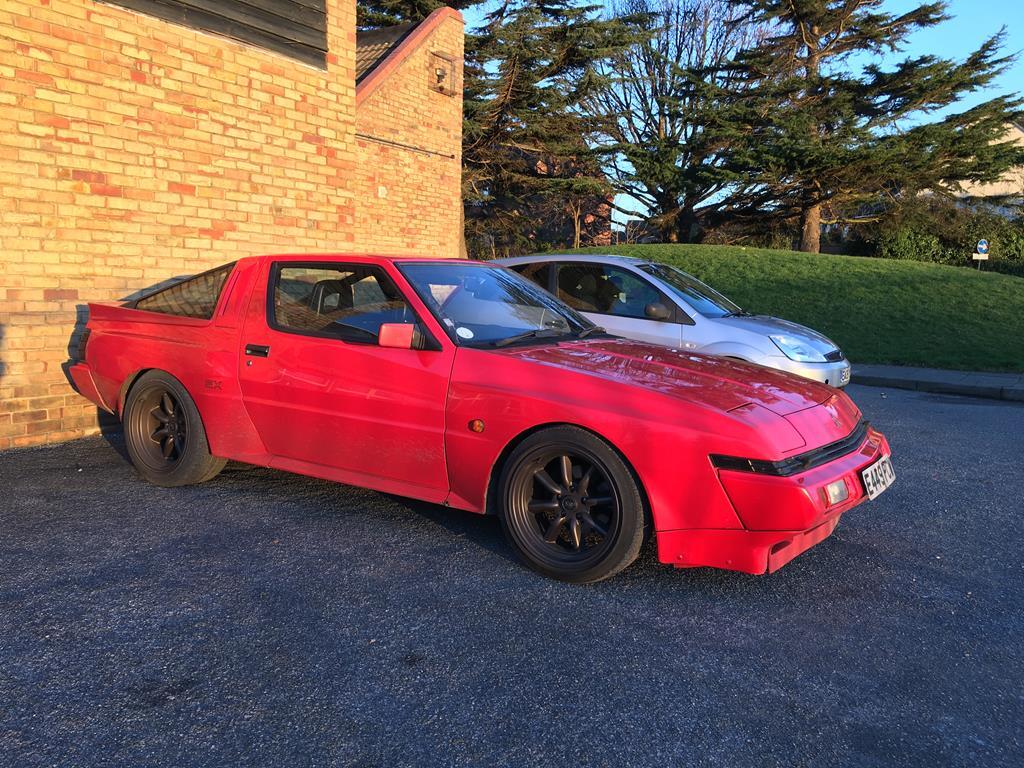 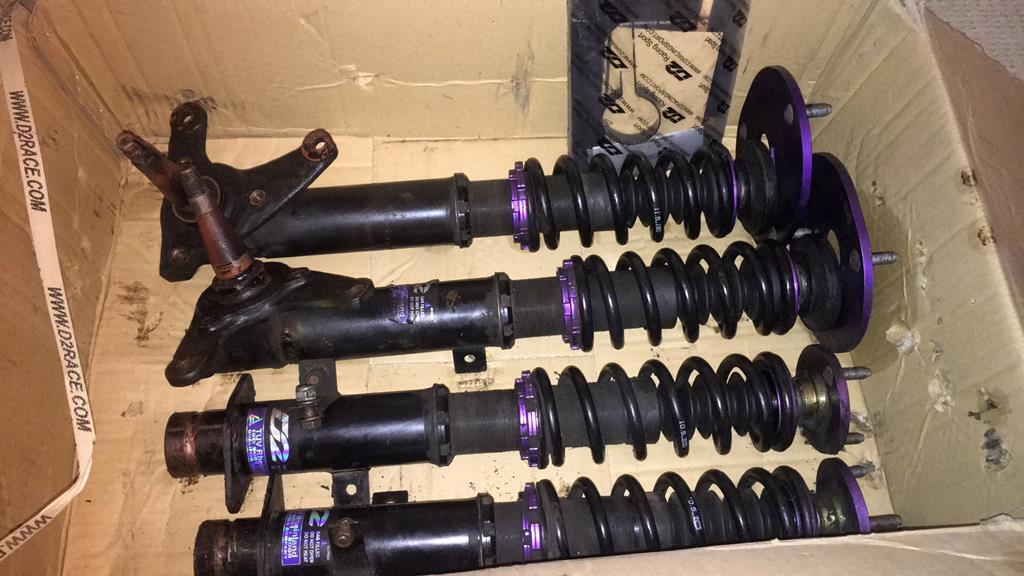 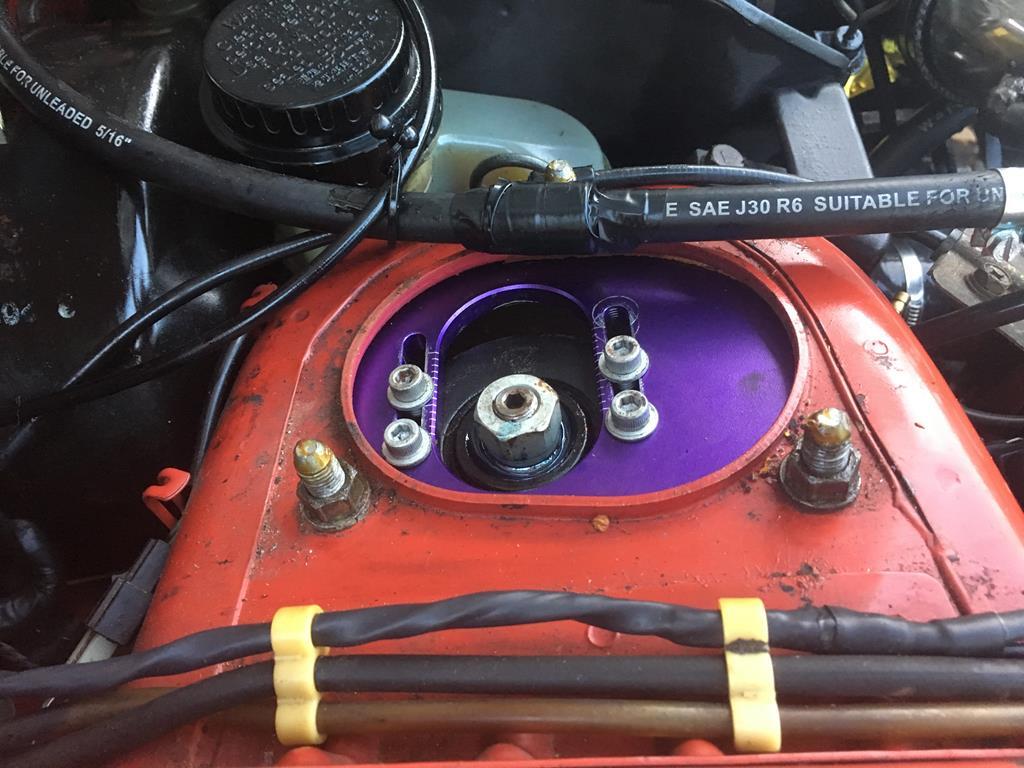 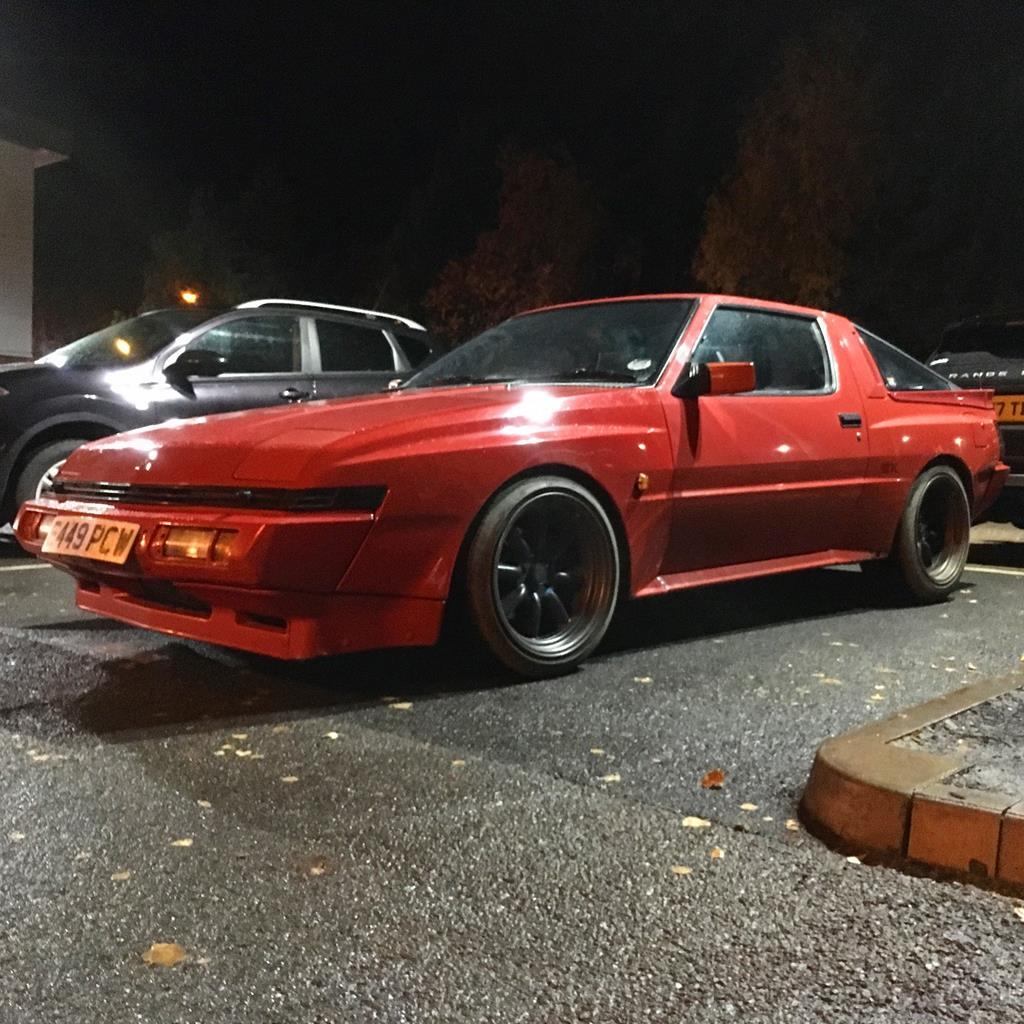 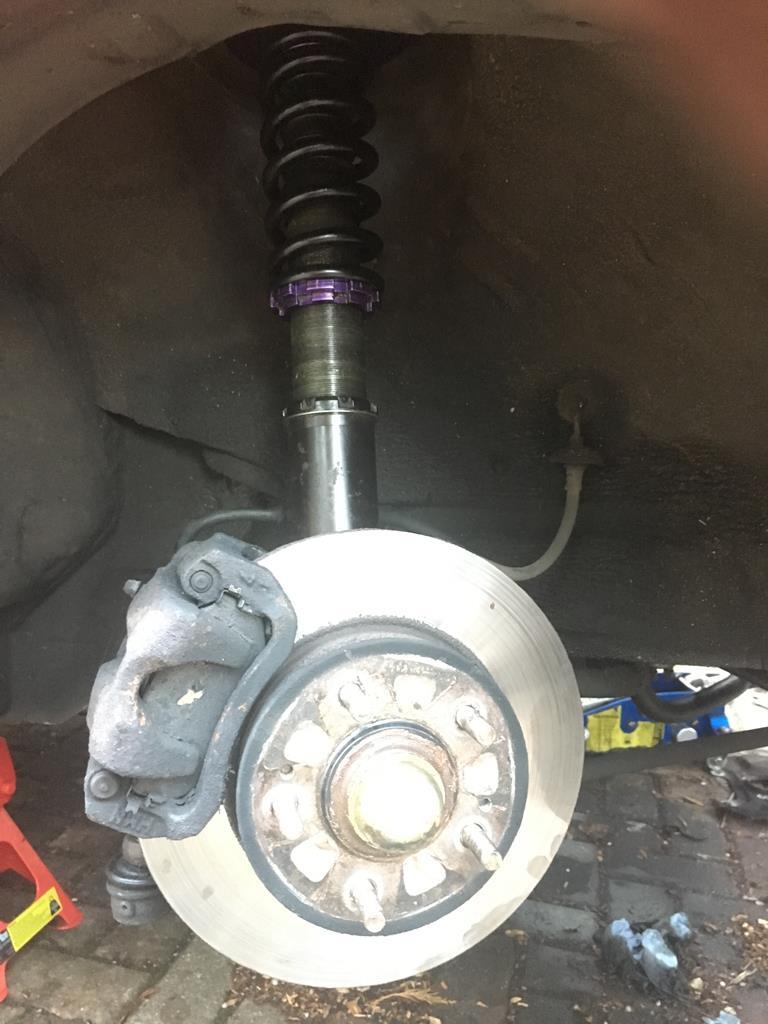 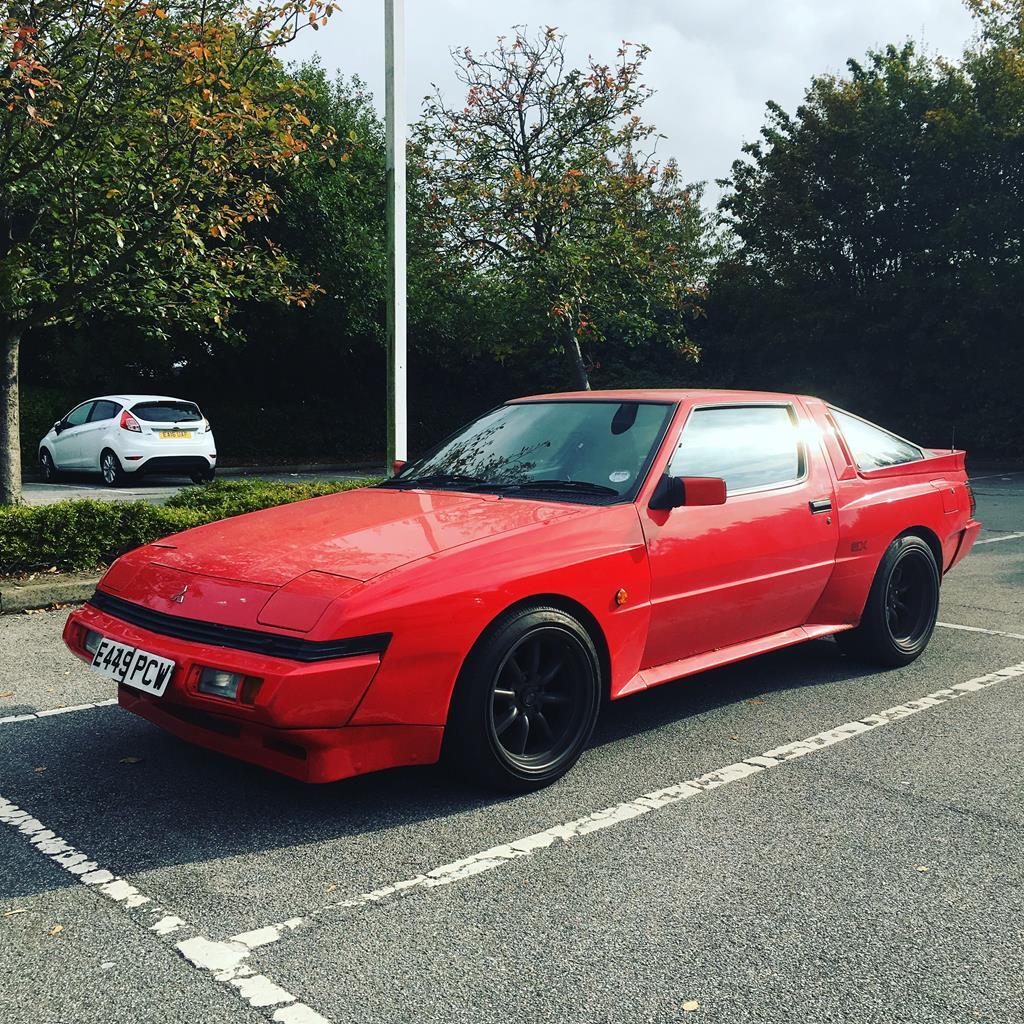 |
| |
|
|
|
|
|
Nov 24, 2017 10:30:50 GMT
|
|
|
| |
|
|
|
|
|
Nov 23, 2017 16:21:49 GMT
|
|
The diff/subframe has been put on the back burner for now. In the interest of getting the car working I’m sticking with the standard E21 diff for now.
The plan is to use a Mitsubishi starion LSD that I have lying around, but I think it will need custom half shafts which I was trying to avoid. Having said that, it’s not really any more work than fitting an E30 or E12 diff and this diff owes me nothing and is a better LSD unit than the bmw ones. I’ll have a look at it again next summer I think!
|
| |
|
|
|
|
|
Nov 23, 2017 11:59:32 GMT
|
|
|
| |
|
|
|
|
|
|
|
|
As you can probably tell by my shiny new avatar, I am in the same boat...
It looks like this is the final nail in the coffin for photobucket. As others have mentioned, it's been going rapidly downhill for the past few months with increasingly intrusive and annoying adverts, and surprisingly none of this is making me want to pay to use the site
Sounds like Imgur or Flickr is the way forward for me, only 3 build threads to sort out... deep joy.
|
| |
|
|
|
|
|
Jun 12, 2017 21:43:28 GMT
|
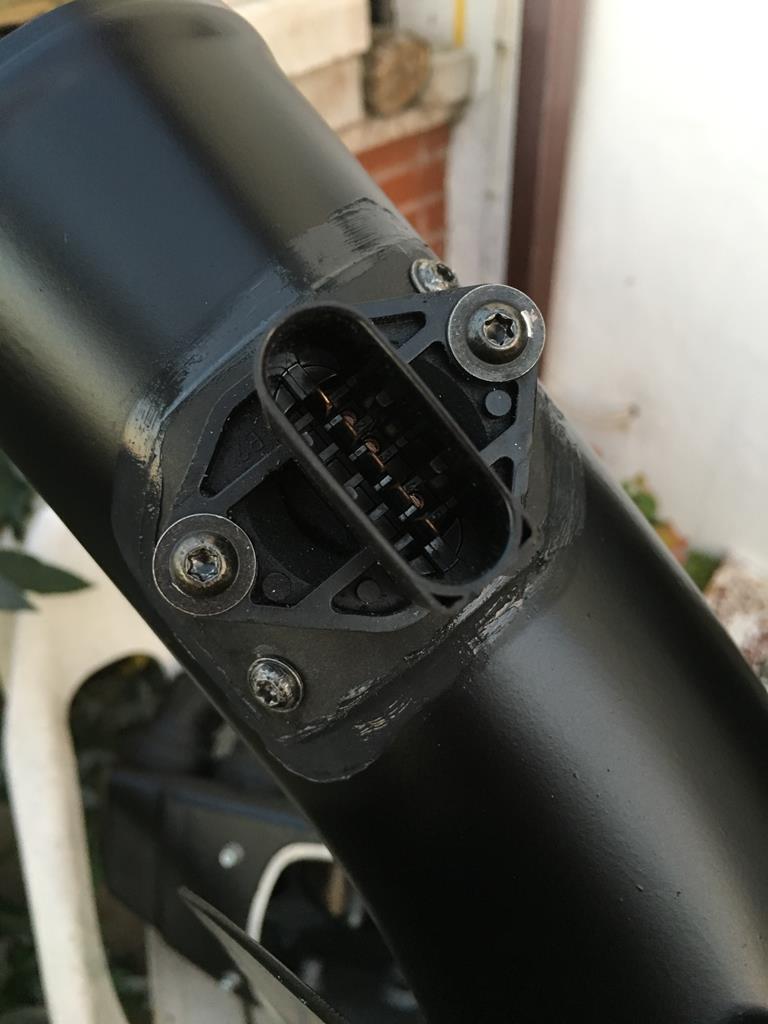
It's been a while, but last weekend I managed to make some more progress on the E21. First job was to finish mounting the gearbox, but first i had to attach the gearbox to the engine again and make sure my tunnel modifications were adequate!  Also seemed like a good time to test the shift linkage, fits perfectly! ![]() So, on to the mount itself! i had though about trying to reuse either the E21 mount or the E46 one, but both would have required a lot of work, so i just made one from scratch. I went with 40mm box and cut it down the middle to get a 20x40mm U section. It also happens that the right hand side of the mount needs to be 20mm higher than the left. ![]() Then just keep adding bits until all the bolt holes are joined up and weld it all together :lol:   Then a test fit to make sure it fits!  I also added a couple of extra bolting point to the car, as per E36 and E46. Probably unnecessary, but it took all of 20 mins and should make it stronger, and drilled 2 access holes so you can get a socket on the underside of the rubber mounts. Finally some paint - epoxy primer and VHT wrinkle black (as thats all i had). It looks a bit curse word to be honest, but no one will ever see it and at least it wont rust!   The mount only took me a few hours; it was finished by saturday afternoon! So I turned my attention to the pedal box that I bought several months ago. you may remember i had already mocked it up in roughly its final position, I just needed to fix it there permanently. To that end, I cut up the old pedal box to use the firewall mount and tacked it in place:  Then cut out the firewall and did a quick mockup to check for master cylinder clearance. It's pretty damn close, but i can live with that   Then all thats left is to weld up the hole and drill some holes:   I added a second mounting point at the bottom so that the pedal box is held in place without the master cylinders:  And thats about as far as I got, i've drilled the big holes for that master cylinders to go through and covered the lot in primer, but i need to buy some clutch and brake switched and get those mounted before the pedal box is finished. On the driveline front, I have a prop that will work without shortening it, but I need to move the CSB mounts on the car to suit but to do THAT really I need to at least mockup the new diff to get the positioning right... The diff is a whole project all on its own - i've got to mount the diff to the beam and make driveshaft adapters and make a whole new rear support thing for it... all kinds of fun i just can be arsed with right now... i think i'll carry on welding for the time being! |
| |
|
|
|
|
|
Apr 24, 2017 16:32:42 GMT
|
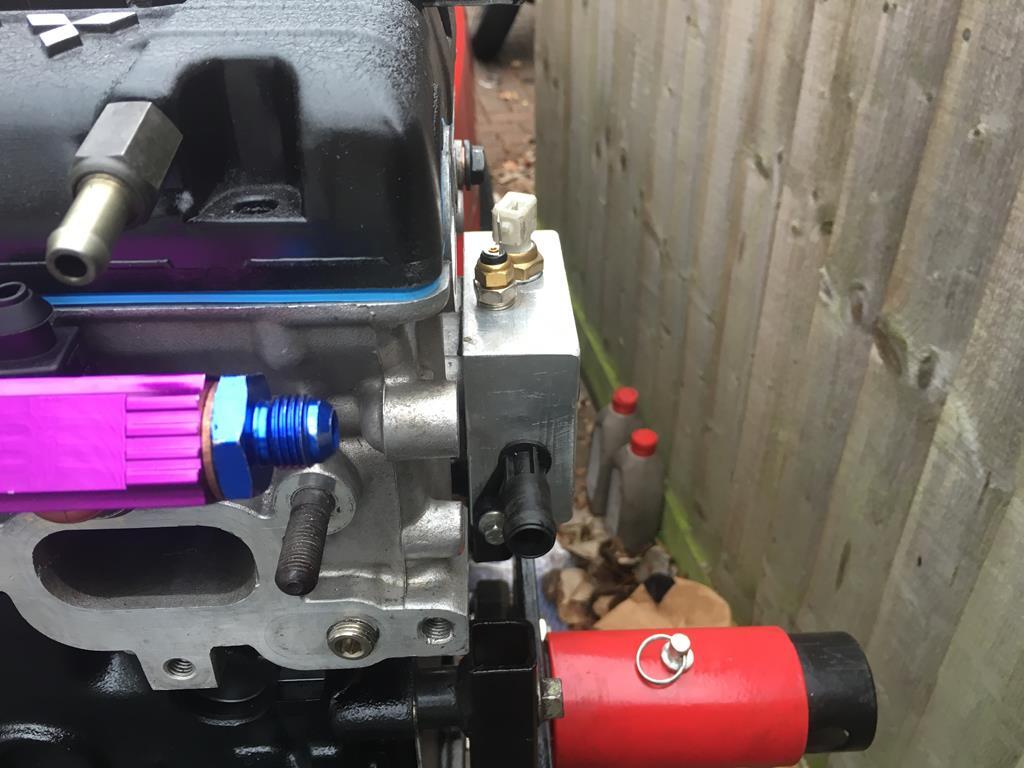
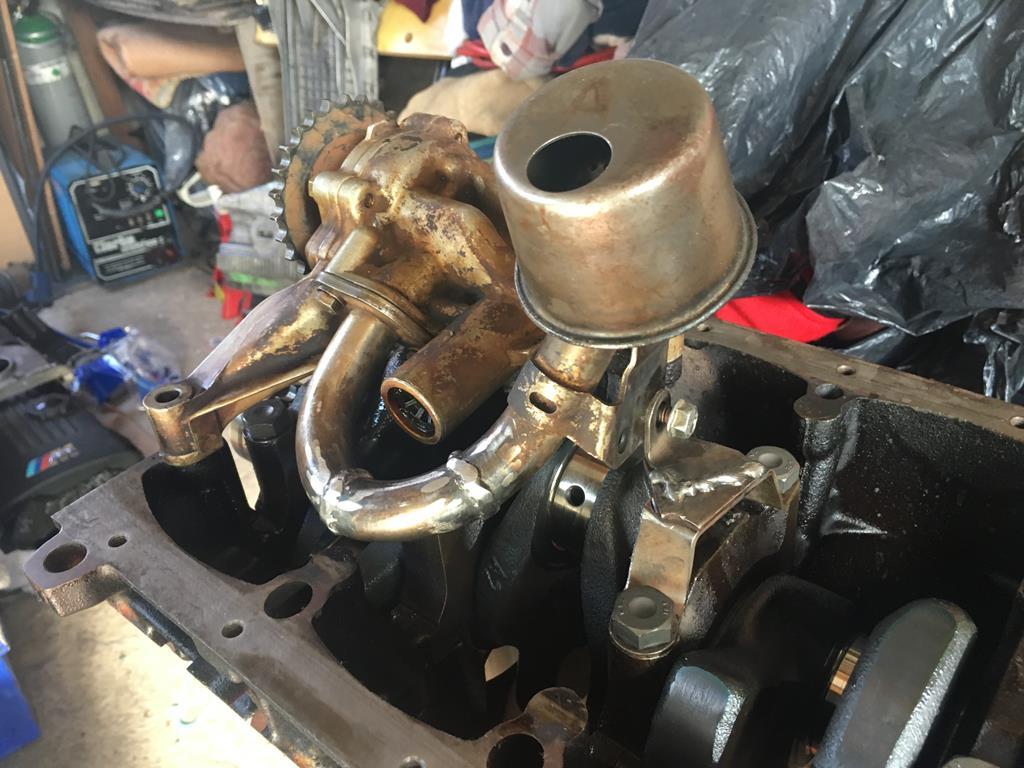
So, I mentioned there were still some bits to make last time, we this post is about the bulk of those bits - the cooling system. The cooling system is probably one of the most awkward parts of this swap, again due to using a transverse engine in a longitudinal engine bay. Ordinarily the thermostat and top hose are connected to the head at the rear but obviously this wont work in a starion as there is a firewall in the way. There are a couple of solutions to this problem - there is a low profile thermostat housing from a 1.6 or 1.8 or something that fits between the head and the firewall, but then you have to route the coolant out past the exhaust and turbo to get to the radiator. Also finding a thermostat housing from a specific early 90s mitsubishi engine isn't exactly easy... Another option would be to route the coolant round and under the intake manifold and them use an inline thermostat, a neat solution but you need to machine an adapter with a rad hose spigot - again, not that easy. The 3rd option (and the one I went with) is to re-route the coolant to exit the head at the front, using an existing core plug to do so. You also need to drill some coolant channels in the rear of the head, and block up the ones at the front to ensure coolant flows and cools the head evenly. This method still requires a custom adapter to mount a thermostat at the front, but i figured i could make one out of steel tube and plate, rather than having to have one machined. After all that, the adapter itself was actually pretty easy to make:  I used a classic mini thermostat housing as it was easier to find, smaller and better looking than the mitsubishi one. It did have a sensor and a heater take off on it, but i welded those up:  heres the finished assembly:   Now, obviously i still need a heater take off from the head and somewhere to put the coolant sensors, so I made a little take off block that goes where the mistubishi thermostat would have:  2x threaded holes for temp sensors (ECU and gauge) and a port on the side for the heater (I used a ford degas spigot - it's the same diameter as the heater on my car and I work for ford so it was 'free')   So quite a bit of custom work, but a fairly clean solution, so worth it in the end I think. |
| |
|
|
|
|
|
|
|
Apr 24, 2017 13:54:38 GMT
|
So, another good weekends work put in on the E21, stitching up the holes I cut last weekend. But first I set about finishing off the gear linkage while I had easy access. Started off cleaning up and welding the carrier back together.   Then I assembled the short shifter I've had kicking around for about 3 years (bought back when I had an E46 but never fitted). This meant I could tack the linkage rod together in the right orientation. And there you go, one baby gear linkage!   I also modified the old rear carrier mount to accept the E46 style bushing - basically it's just a half round 'clip' that holds the bush on the underside of the trans tunnel. No pictures unfortunately! With that done, I moved on to welding up the big hole in the middle of my car. First I cut 2 long strips of steel 30mm wide - I don't need to raise the tunnel quite that much, but having the extra steel will account for the uneven cuts when i removed the tunnel. Then I spaced the old piece of tunnel up from the gearbox, and the sides outwards to give some extra clearance around the gearbox. All thats left is to trim the 2 strips to size/shape and start tacking them in!  I'm just leaving the strips overlapping the old sheet metal. Although this isnt the prettiest method, its stronger and easier to weld (and alot quicker), and given this will all be covered in seam sealer/sound deadening/carpet/center console, I figured looks are probably less important than strength! To finish the job, i made up some closing panels for the front and welded the whole thing up (in a t-shirt, meaning I now have 'sunburnt' forearms).  While i had the welder out i finished off a rust repair i started a few weeks ago. This had been repaired previously, but only the outer skins were done, leaving rust on the inside.   Underneath the car, i decided to move the transmission mounts on the body backwards by a few inches. The transmission bracket should be easier to make this way, and the whole thing should be stronger too. The alternative would be to extend the bracket forwards to meet the mounts, but then the bracket would have a large cantilever. Removed the mounts and trimmed to fit their new position of the floor.  Then welded back in  Finally I covered the whole lot in red oxide primer and called it a day. The rest of the gearbox mount can wait until I have the propshaft.  |
| |
|
|
|
|
|
Apr 20, 2017 19:58:38 GMT
|
looking good fella, just stitch up that little hole you made in the tunnel and you will be golden, out of interest is the old box a 4 speed or 5 speed? Haha sounds easy when you put it like that!! The old box was a 4 speed, I don't think many people sprang for the 5 speed option on a lowly 320 to be honest. |
| |
|
|
|
|
|
Apr 20, 2017 19:50:27 GMT
|
just had to refresh my memory, lancer evo head on starion 2 litre block and crank ! Yeah it's a bit of a memory refresh for me as well! all this took place last summer!  |
| |
|
|
|
|
|
Apr 20, 2017 19:48:51 GMT
|
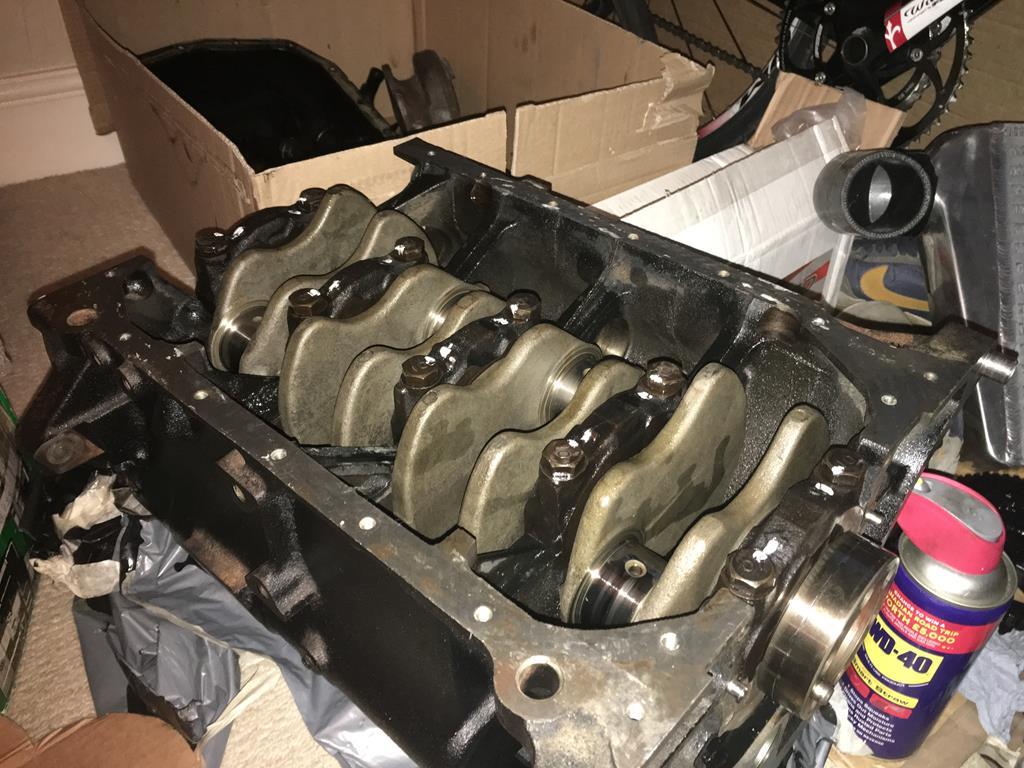
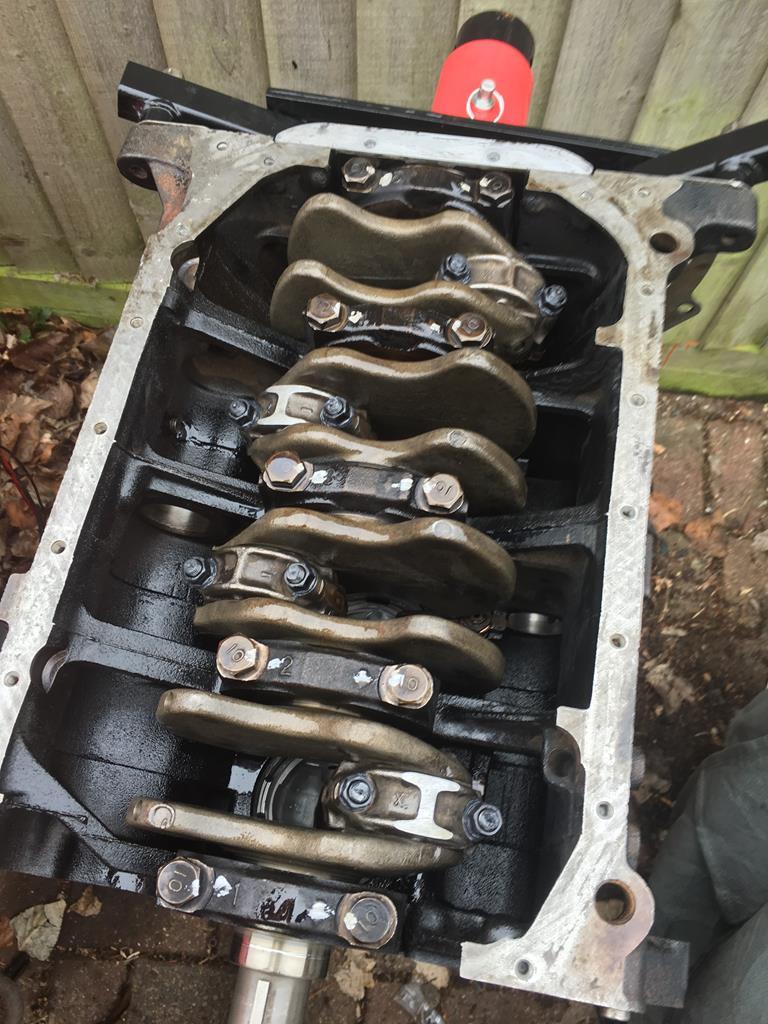
Then on to the bottom end   Found this in the bottom of the sump - never a good sign  Big ends off next. Cyl 1 was the worst, with cyl 4 not far behind. The source of another knocking noise, no doubt. Luckily the crank was in good condition and didn't need grinding or polishing.  It seems the failing big ends have also taken out the balance shaft bearings. I have a feeling this was the worst of the noises, as it was more RPM dependant than load dependant.   I left the engine with the new head on, as there are still quite a few bits to make and parts to find before the engine can be rebuilt properly.  |
| |
|
|
|
|
|
Apr 20, 2017 19:17:09 GMT
|
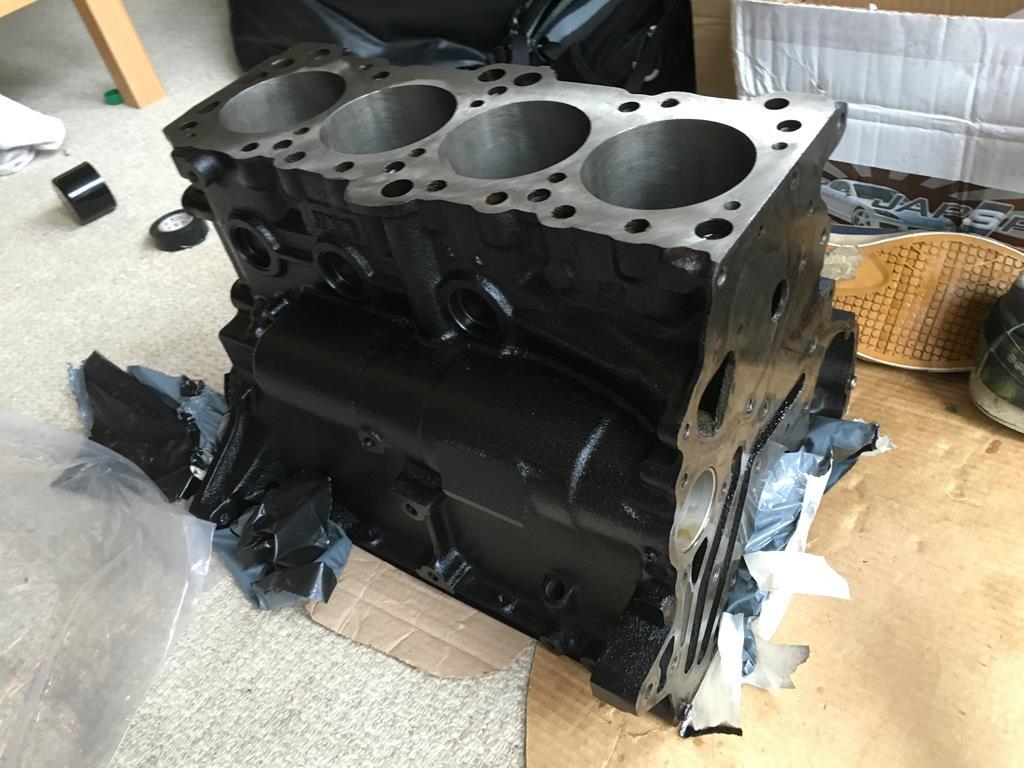
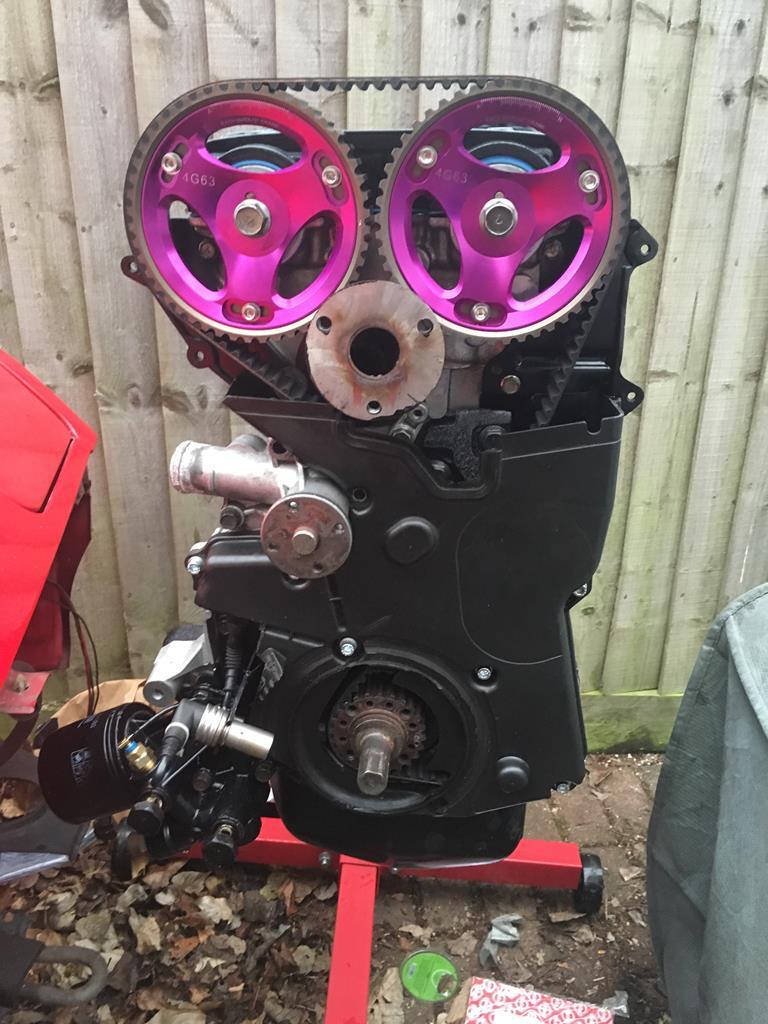
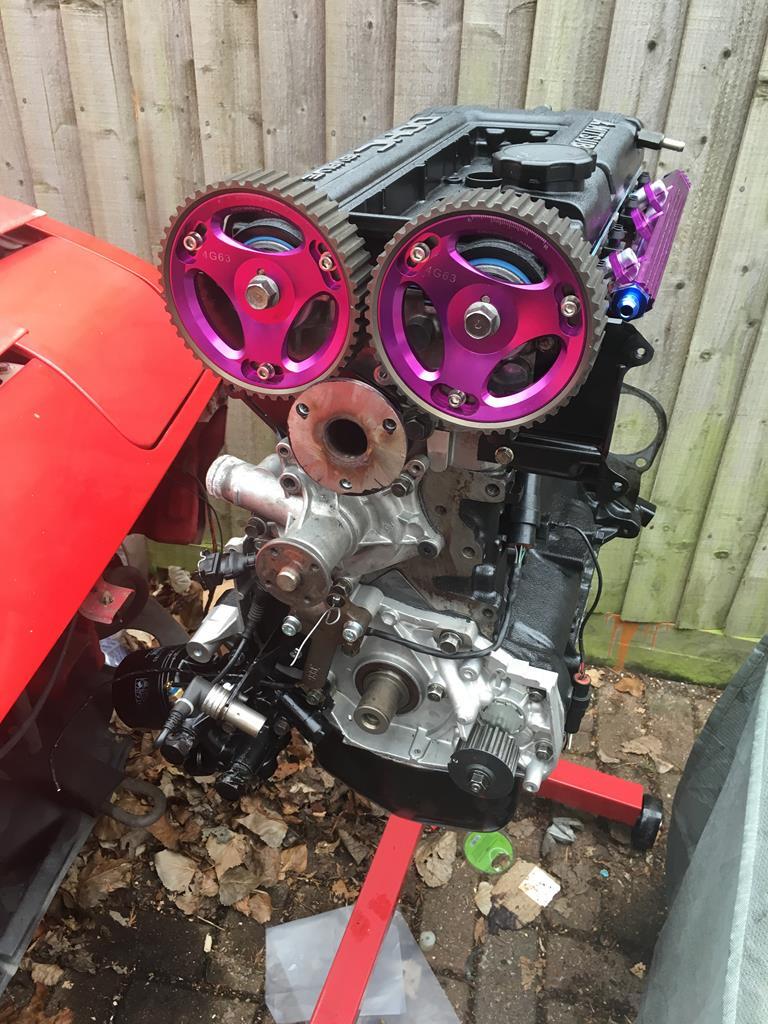
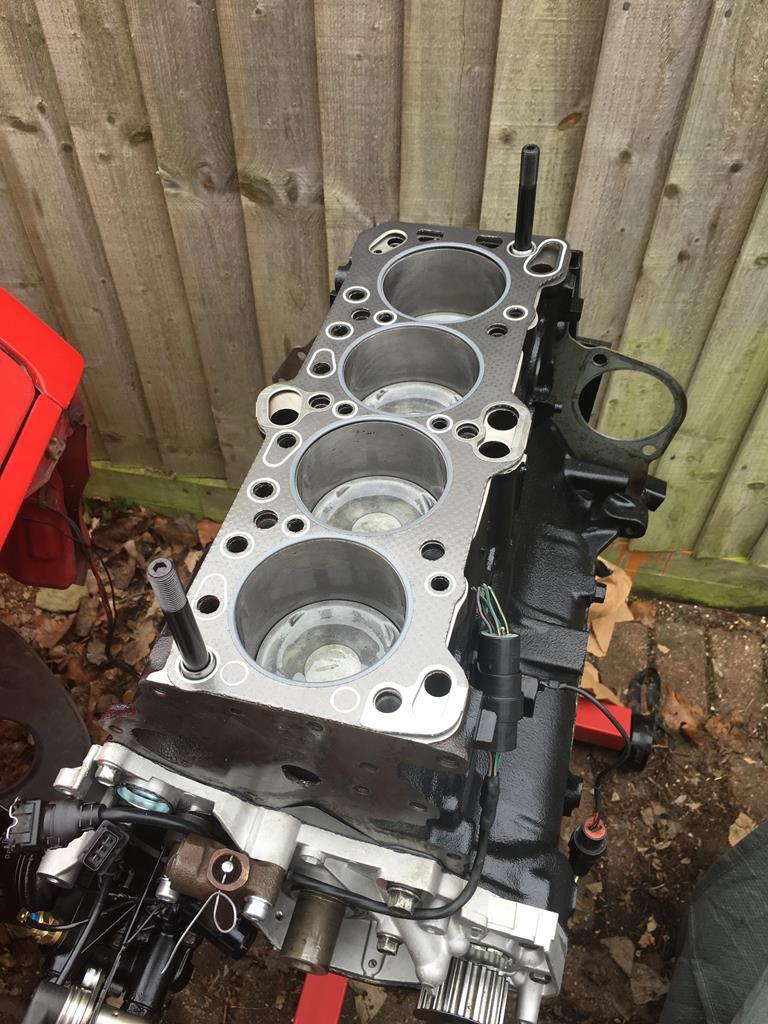
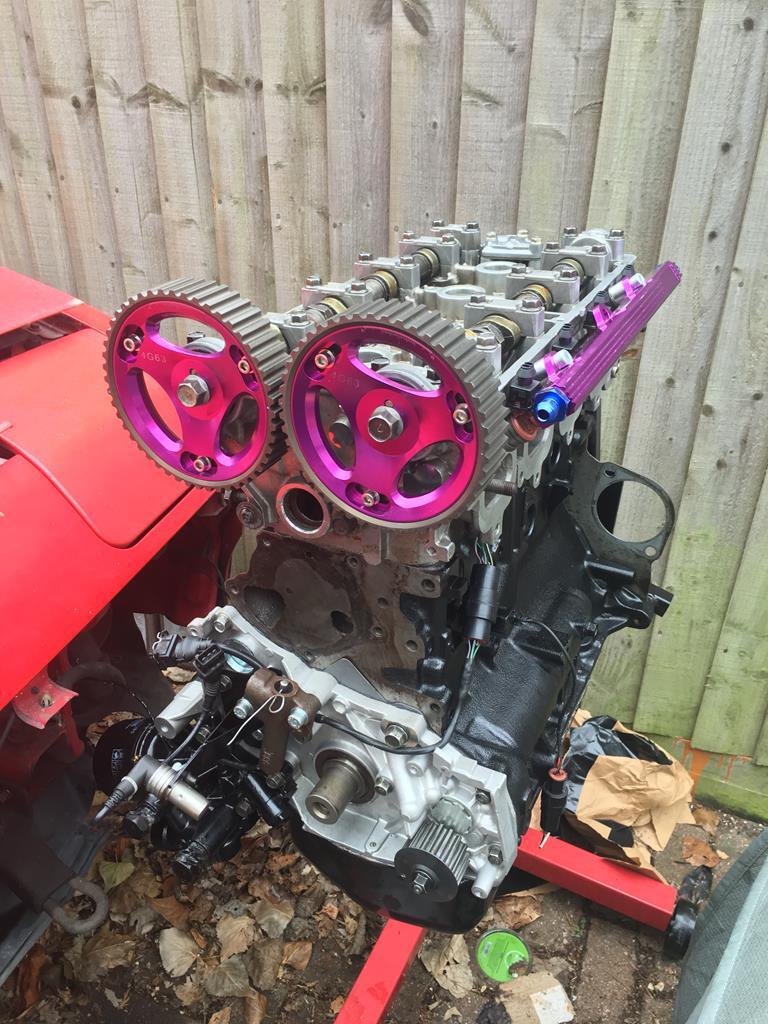
Right it's been a while, i guess i should update this thread.... I think we'd pretty much got up to taking the old engine out... I did play with turbo options a bit before hand, but i can cover that later on (it was quite a saga). So, with daily duties being taken over by this trusty Italian steed, I cracked on with getting the SOHC lump out.  Not many picture of the removal, mostly just taking old oily bits off until you can get the engine out!  The rad pretty much disintegrated when i unbolted it, so i though that deserved a pic.  All in all it was a pretty smooth engine removal, not too long later I had this:  Since I need the block and crank in order to build the new engine, the next step is to strip down the old engine and see what condition everything is in.   The head had quite a bit of burned oil residue, usually a sign of infrequent oil changes, but not terrible by any means  Head off. The gasket looks in good condition and the block not overly corroded in the water passages.  The pistons looked okay but the bores were very polished, and the piston running clearance was visibly excessive (up around 1.5mm on one of them). So that explains the knocking when cold then! We'll later find out the bores are far from cylindrical!  At this point it was time for a quick mockup - it's gonna look good!  |
| |
|
|
|
|
|
Apr 19, 2017 21:20:58 GMT
|
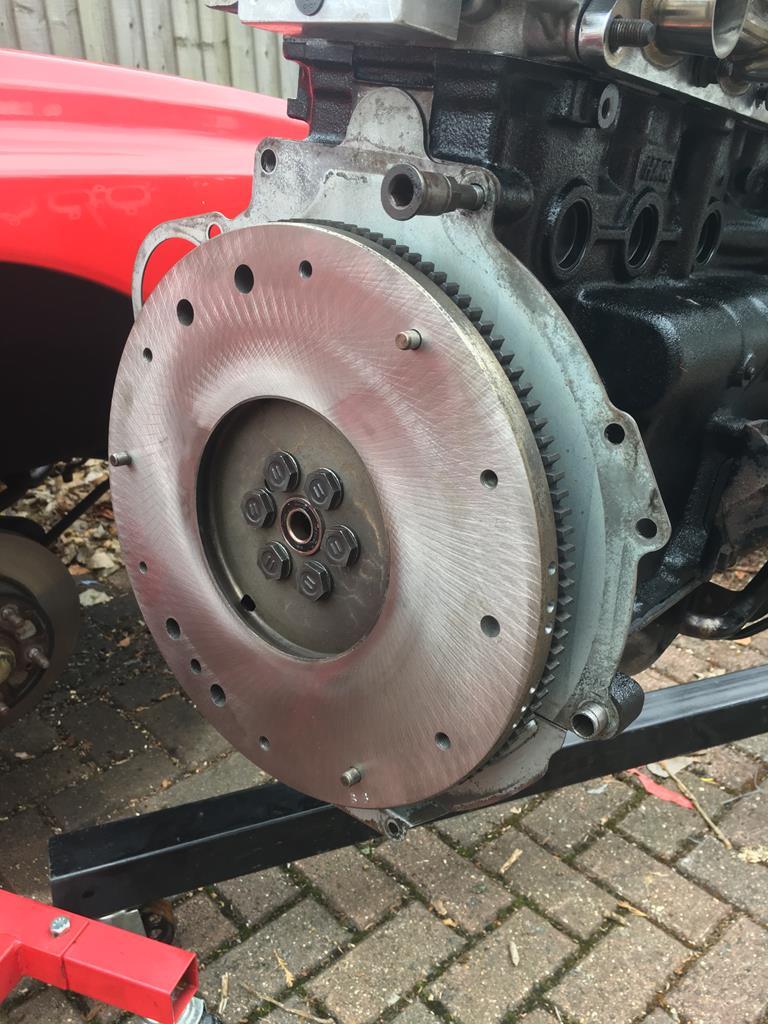
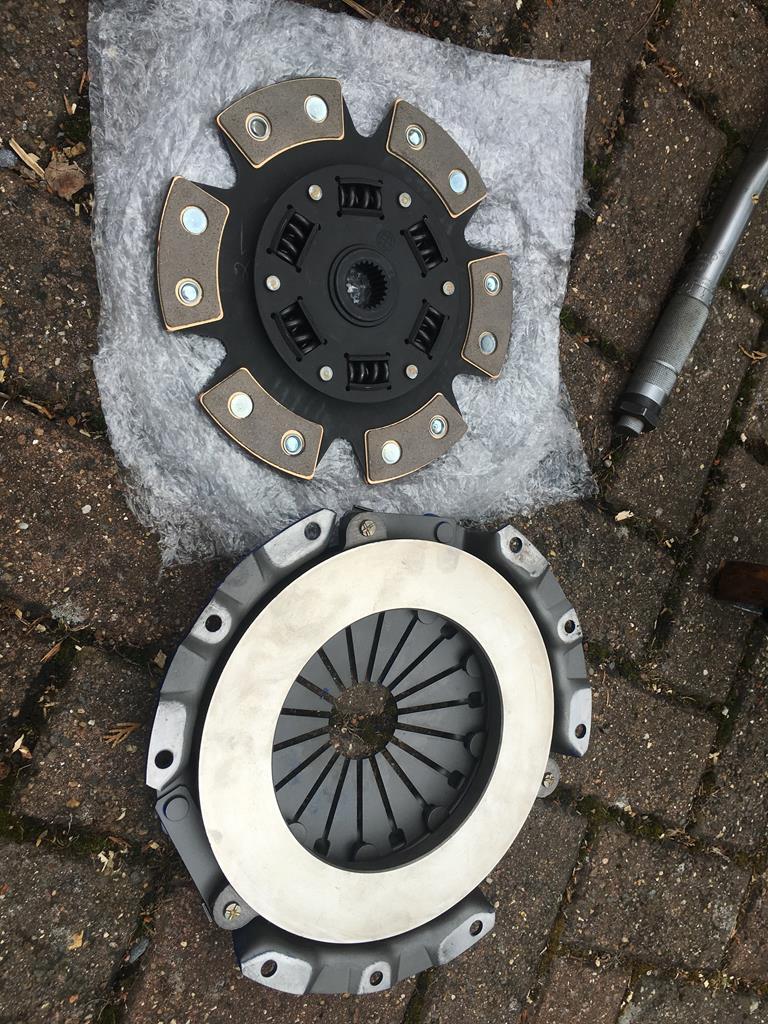
Long time no see! Don't worry, I have been chipping away at bits of the BMW (no literally), but this weekend I made a start on one of the biggest jobs - fitting the gearbox. Obviously the first job is to remove the old gearbox, where i was to busy swearing and crawling around under the car to take pictures, but eventually it was free. And here it is next to the M3 box that will be replacing it....  Yeah, that's quite a size difference! Next up, mount the new gearbox to the M20. As the pilot bearing is bigger on the M3 box I had to remove the clutch and flywheel and then demolish remove the M20 pilot bearing. After lots of struggle I got it up in the tunnel  At first, I thought it fitted quite well, but with it pushed up against the top of the tunnel it was still about 10mm lower than it needs to be, so I had to take a brave pill...  This got it to the right height, but it was still touching the body, so some more cutting happened:  There, fits like a glove now! Just a small hole for me to patch up... By this time I was truly knackered and covered in bruises, so i had a quick look at the gearbox mount and shift linkage and called it a day. For the mount i think i'll use the E21 mount upside down as a starting point and go from there, it's pretty much the right shape, just needs some modifications.  The linkage started out as an E46 330 5 speed linkage, which I then chopped about 8 inches out of. The finished thing will be propper diddy!  Then today i've been measuring up prop shafts and have hopefully found one that wont need modifying, but we shall see when it arrives! |
| |
|
|
|
|
|
|
|
Excuse my ignorance but I am converting my BMW E30 M3 to wasted spark standalone ignition set-up using DTA and I was wondering if this meant I could run coil on plug? Any help using small words and easy to follow phrases would be much appreciated. Thanks, Mark. In short, yes. But as mentioned, you need to use coils with built in ignitors - all the BMW ones i've seen are of this type. Basically any coils with 3 or 4 pin plugs will work. And to those saying you'll get weaker spark, i'm running coils from a 1.3 yaris in wasted spark on my starion - they seem fine at 10psi boost and 7500rpm! |
| |
|
|
|
|
|
|
|
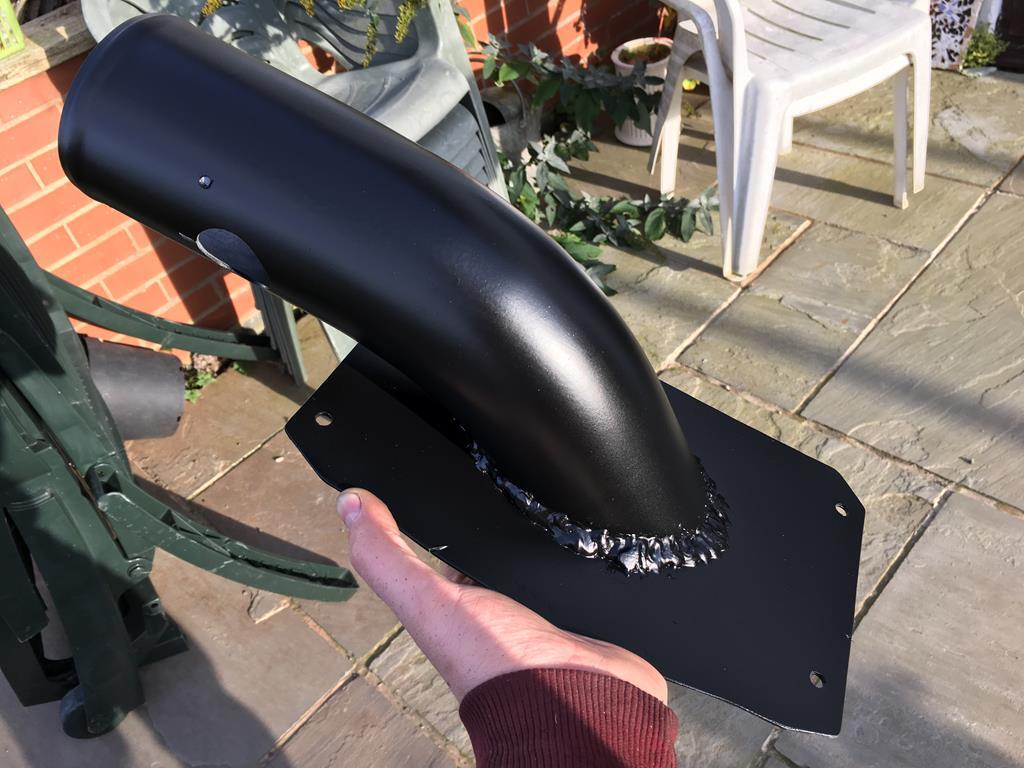
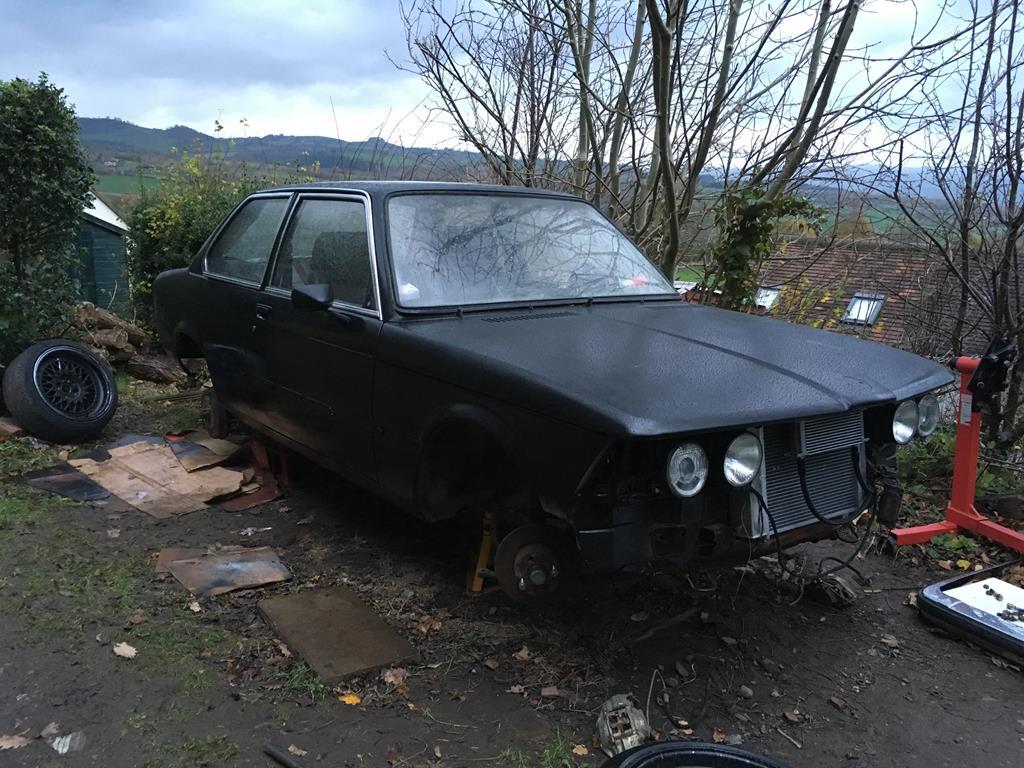
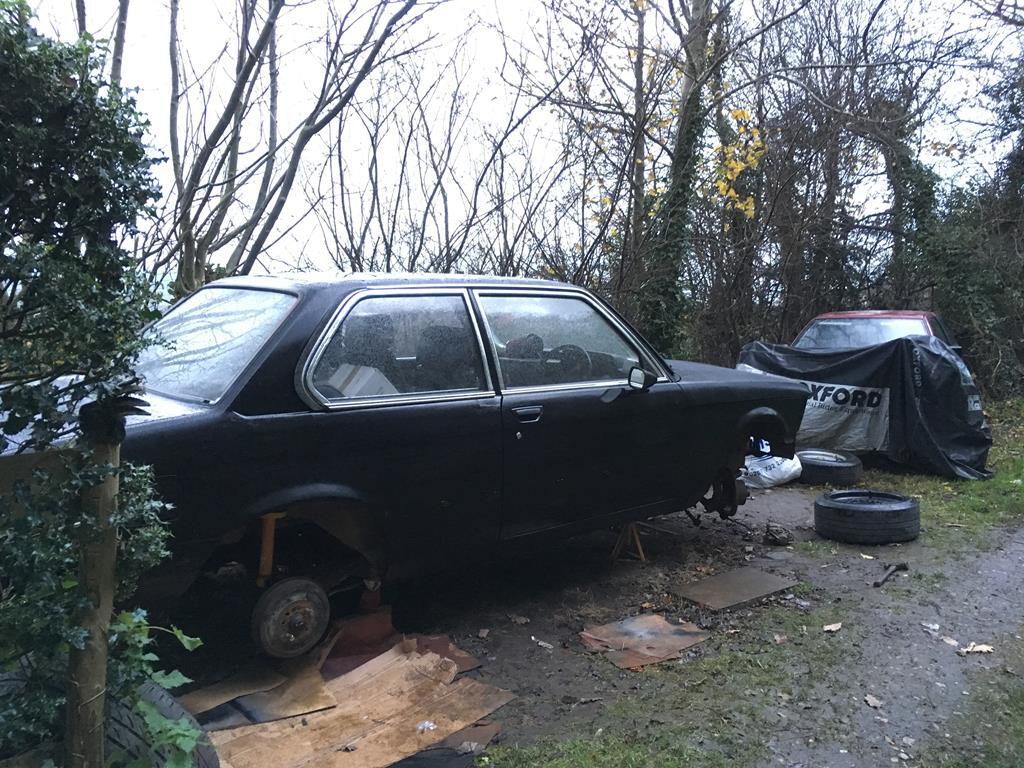
I know it's been a while, but i have been chipping away at this project. Nothing that interesting or critical, but still jobs that need to be done sooner or later! The next main job on the list is to get the gearbox mounted and all the sheet metal work that will involve (see here for an idea of what to expect: www.bimmerforums.com/forum/showthread.php?142866-Post-a-Random-Pix-of-Your-E21/page81). While i'm at it i'll finish off the pedal box install and fix the rust in the foot wells and sills, but i'm waiting for warmer weather before I start that weldathon! The engine build is stopped waiting for piston rings (been on order for 3 weeks now) and I also need to get the head skimmed, so not much more to be done there. I do need to look at the sump, but again - welding - cold outside - can't be bothered! :lol: So, to keep me busy, and keep some momentum on this, I finally got round to picking up my motorsport valance from my mate. I bought this about 6 months ago and got said friend to collect it for me and stash it in his garage. I needed a new valance because, as you may remember, my original one looked like this  Not long after getting the car, I picked up a typ 2 valance as it was cheap and nearby, but it still needed a bit of work and i prefer the typ 1 valance to be honest. Ideally I wanted a motorsport valance, but all sellers wanted £300+ for one and, frankly, I'm too cheap for that! So when this knackered one turned up on ebay for £35 i snapped it up! It needed a LOT of work, but worth the risk i'd say. Here it is once i'd got it home - very twisted, peeling paint and bodged cracks at both corners.  First task was to get it un-twisted, so I removed the rubbing strips and the worst of the loose paint and left it hooked over the radiator with some things weighing it down for a week.  Worked a treat!  Next up, the cracked corners:   Started by removing the various layers of paint and filler, and the previous repair - a sheet of metal riveted behind the crack. This probably would have worked if they'd drilled the end of the crack to stop it growing.  Other side:  Weld up the cracks and holes with ABS filler rod and a soldering iron.   Then sand down   I'll need to do another pass with the welding rod to bring up the low spots (instead of using filler), but all in all it's turned out alright. The welds seem to have taken well and the welded area is strong and flexible, just like the rest of the bumper! I still need to strip the rest of the paint. Although alot of it peeled right off, the bits that remain are stuck fast! I've tried sanding, but the paint is over 1mm thick in places so it takes aaaaages to get down to plastic!  |
| |
|
|
|
|
|
Feb 16, 2017 18:13:18 GMT
|
|
Thanks!
It's just a little Clarke 100E. Great for car work as its low power but has 6 power settings.
I'll admit welding that manifold was probably a bit much for it, but I was only filling holes
|
| |
|
|
|
|
|
Feb 16, 2017 15:47:20 GMT
|
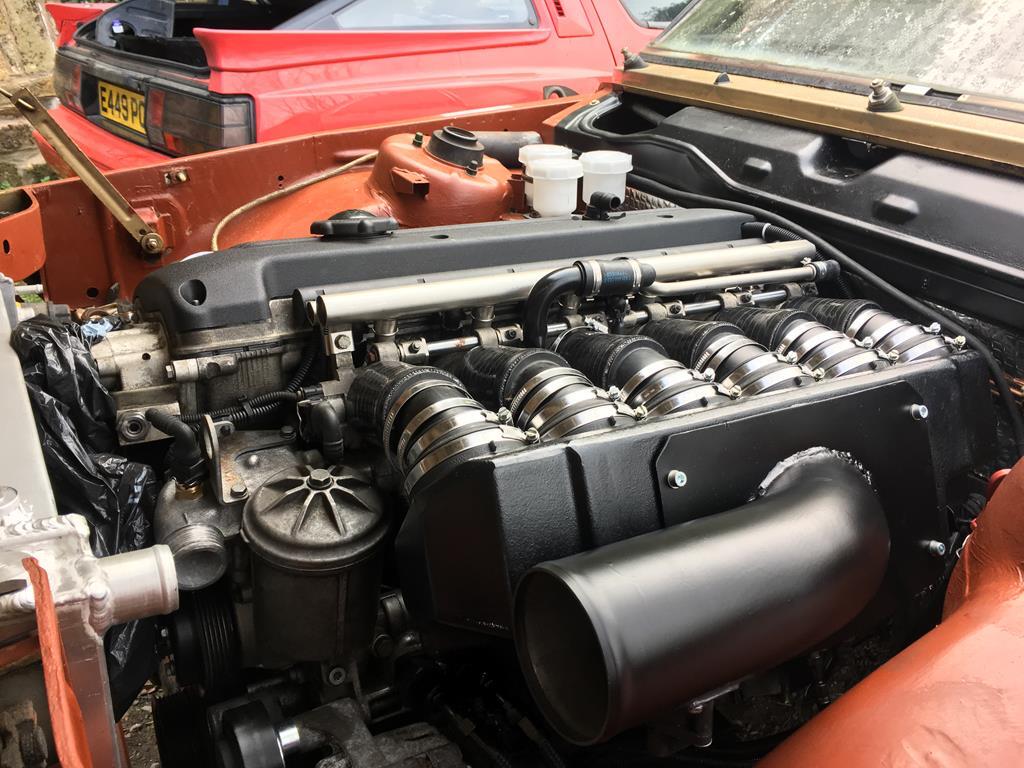
So, next little challenge I tackled was the intake manifold. As I’m sure some of you are aware, on a transverse engine the inlet manifold usually points to the rear of the engine. This is fine in a transverse situation as there is lots of room above the gearbox for intake piping. When mounting the same engine longitudinally, as in my case, it just ends up pointed at the firewall. Most people when doing this swap get around this issue by blanking up the original opening, and welding a new flange for a throttle body on the opposite end of the manifold. See below pic as an example.  Although this is perfectly functional, it always ends up looking a bit to modified for my tastes. Also finding an early Evo/Galant 16v intake manifold is not that easy. Later evo manifolds, however, are cheap and plentiful and, crucially, point the other way! As I mentioned earlier, from Evo IV onwards the 4g63 had a major overhaul moving from the passenger side of the engine bay to the drivers side. Early:  Late:  As a result of this, the intake manifold ends up ‘pointing the other way’ as it were. Unfortunately it doesn’t bolt straight up to an early head, as the injector positions also changed. Early style engines have the injectors mounted in the cyl head, on late engines they are mounted in the intake manifold. The EGR port also swaps sides, but EGR won’t be required on this build. Aside from that, the bolt patterns and port sizes are the same, so I just need to weld up the injector holes and chop off some surplus material. Simples! Here is the bit we need to fill  First, pre-heat the manifold to as hot as the oven goes. This help stop the manifold acting as a heatsink for the weld and allows some half-decent penetration.  Then, weld up any unwanted injector holes  Grind smooth and dress with a fine file (ideally you’d face it off on a mill, but I don’t have a mill so this will have to do)  Then after some more trimming and grinding, we have a manifold that bolts up and points the right way!   I also drilled, tapped and plugged the EGR port on the head as this manifold doesn't cover it.  |
| |
|
|
|
|


 .
.