|
|
|
May 18, 2022 19:01:11 GMT
|
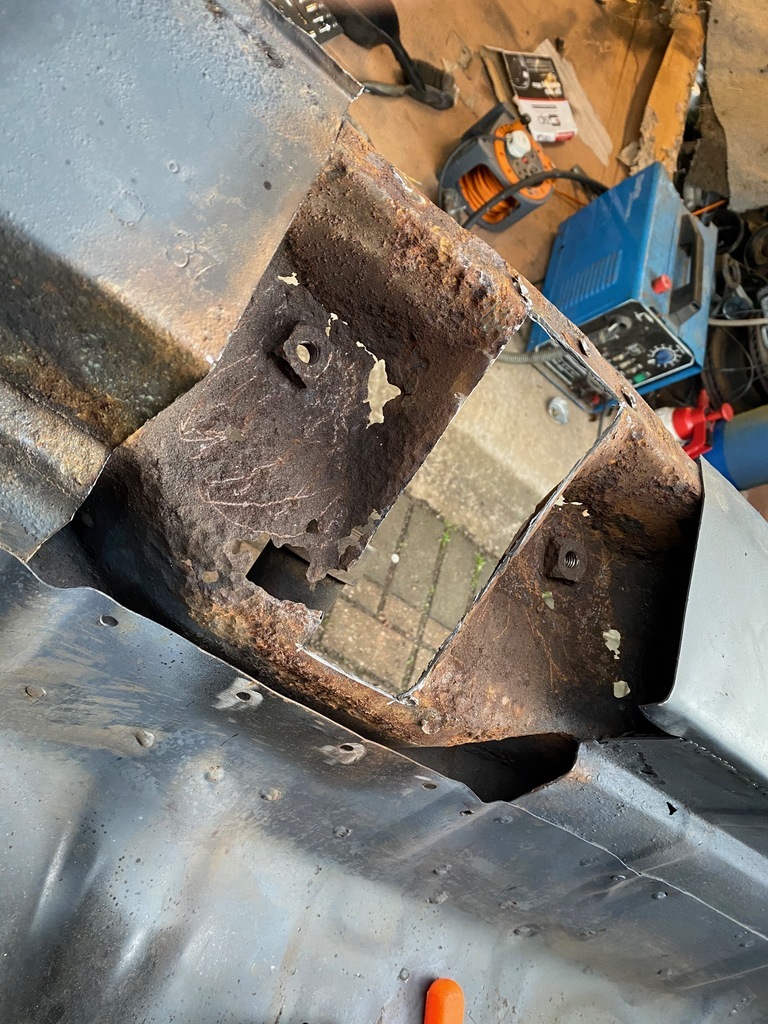
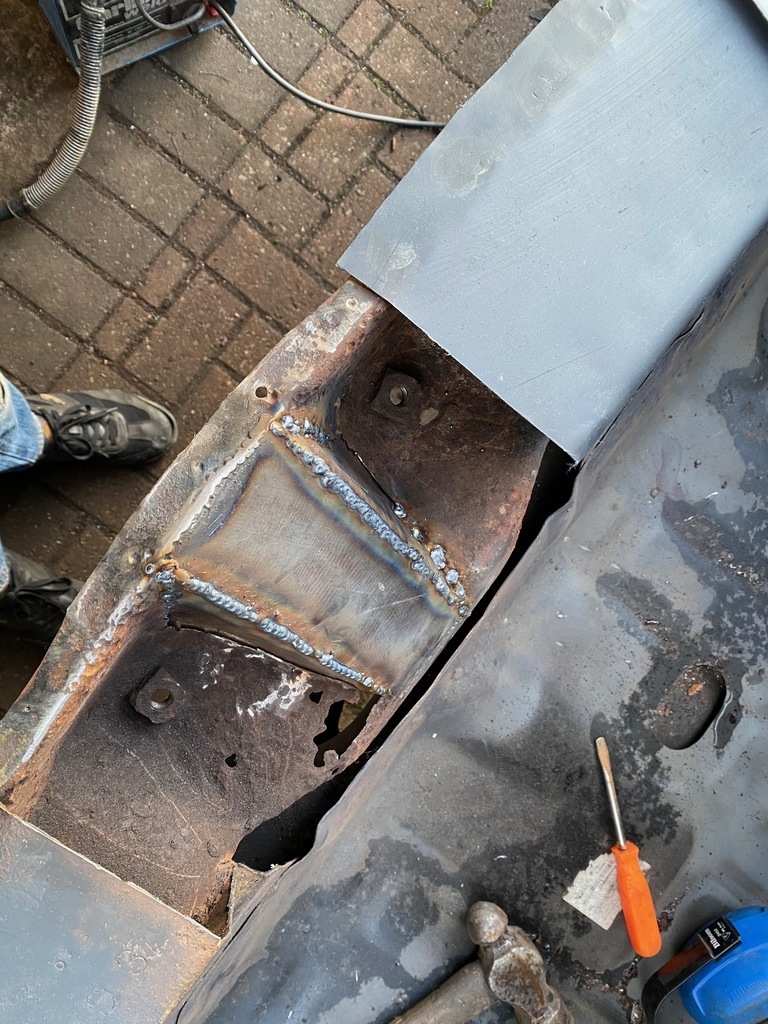
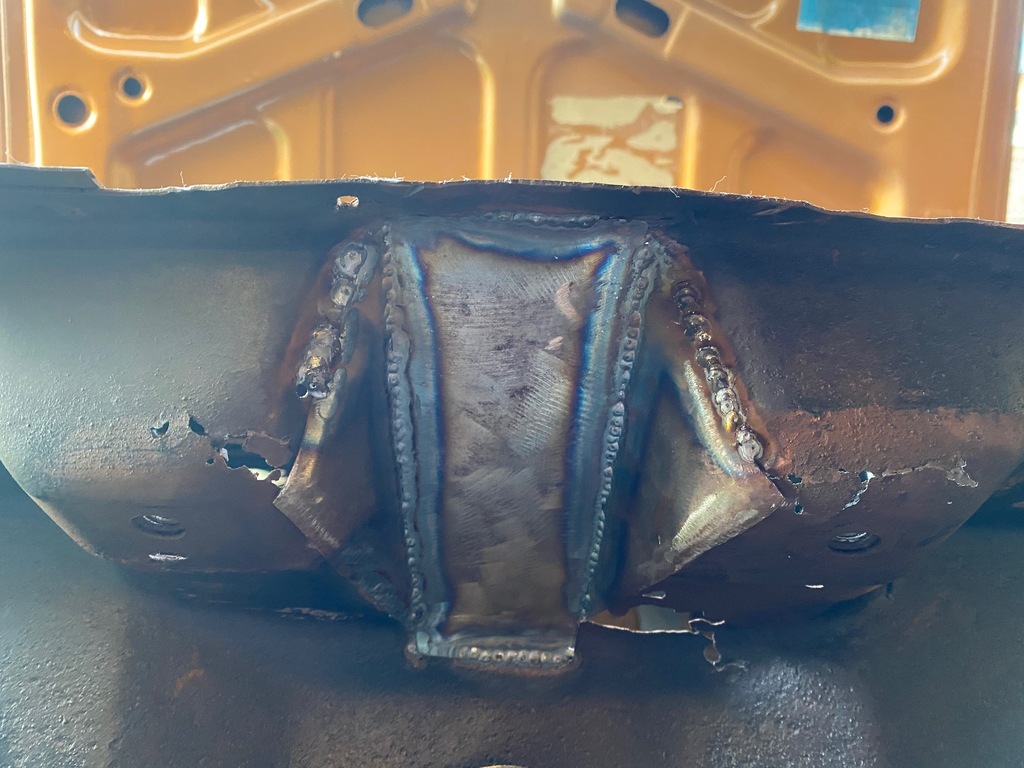
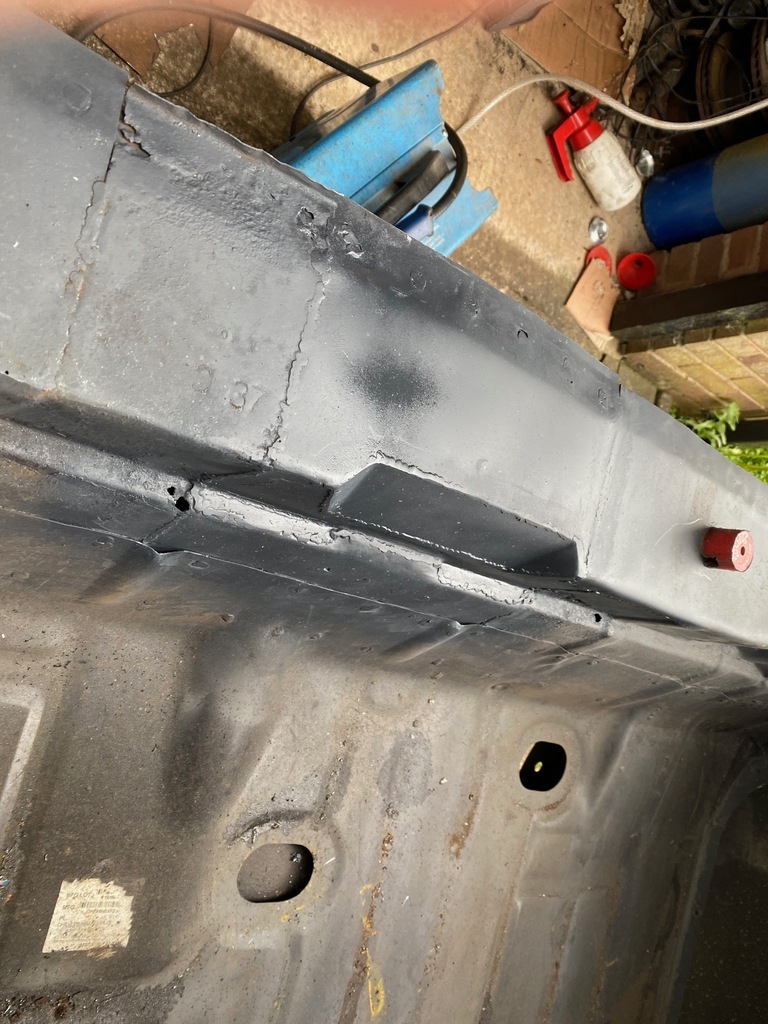
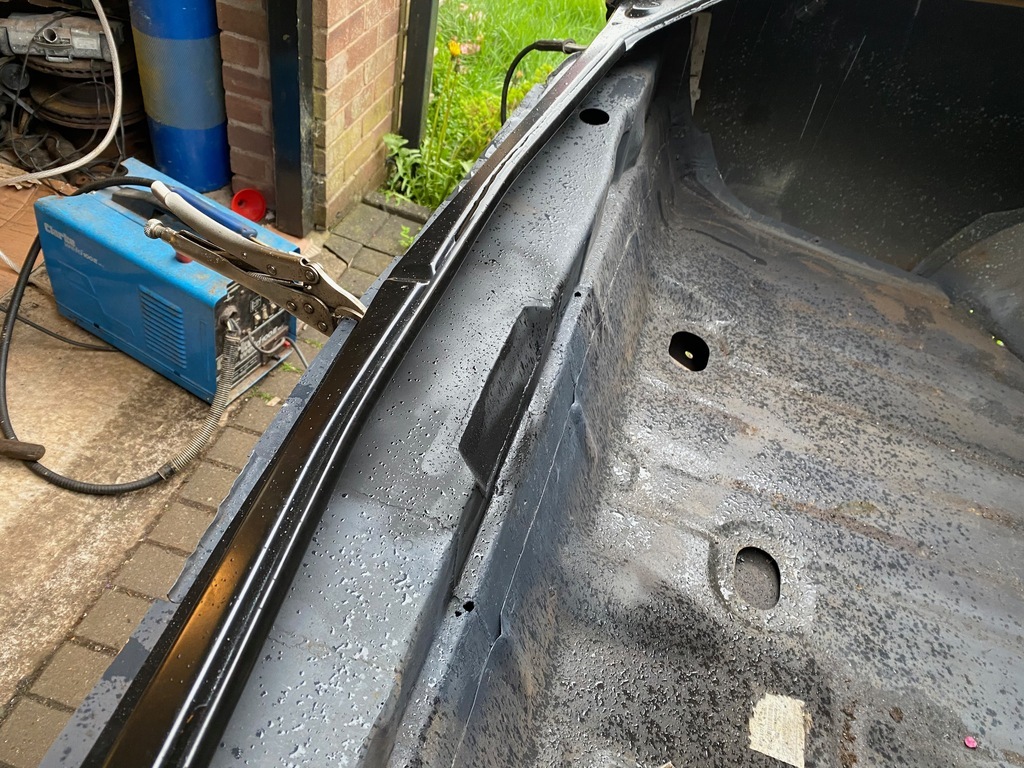
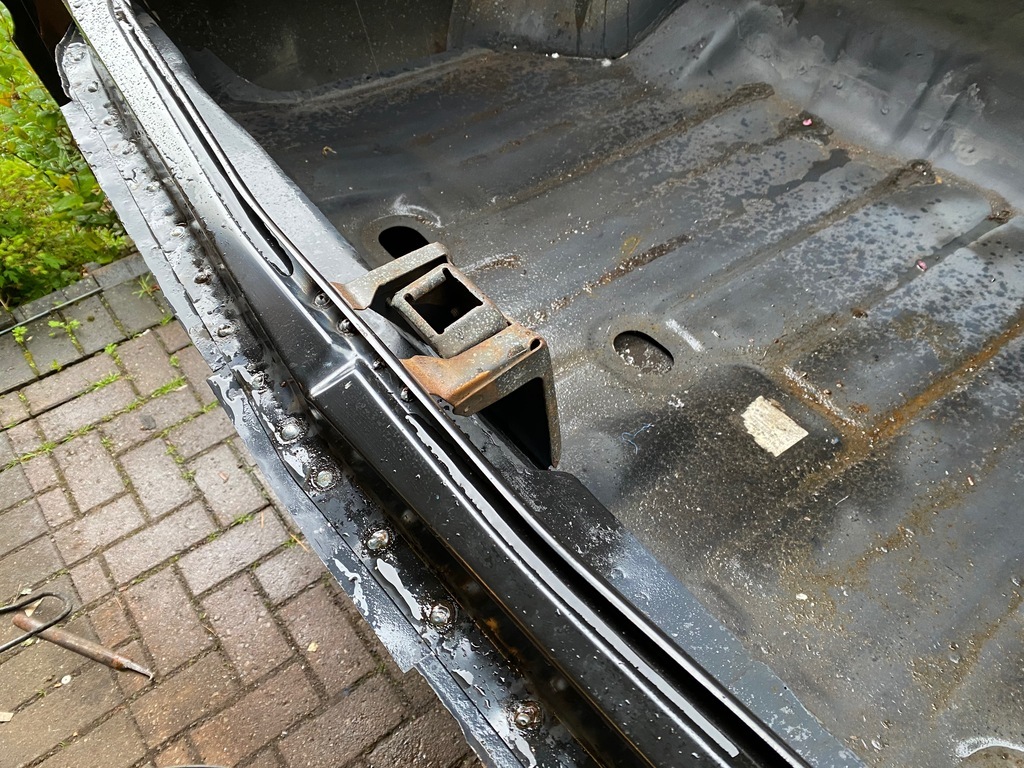
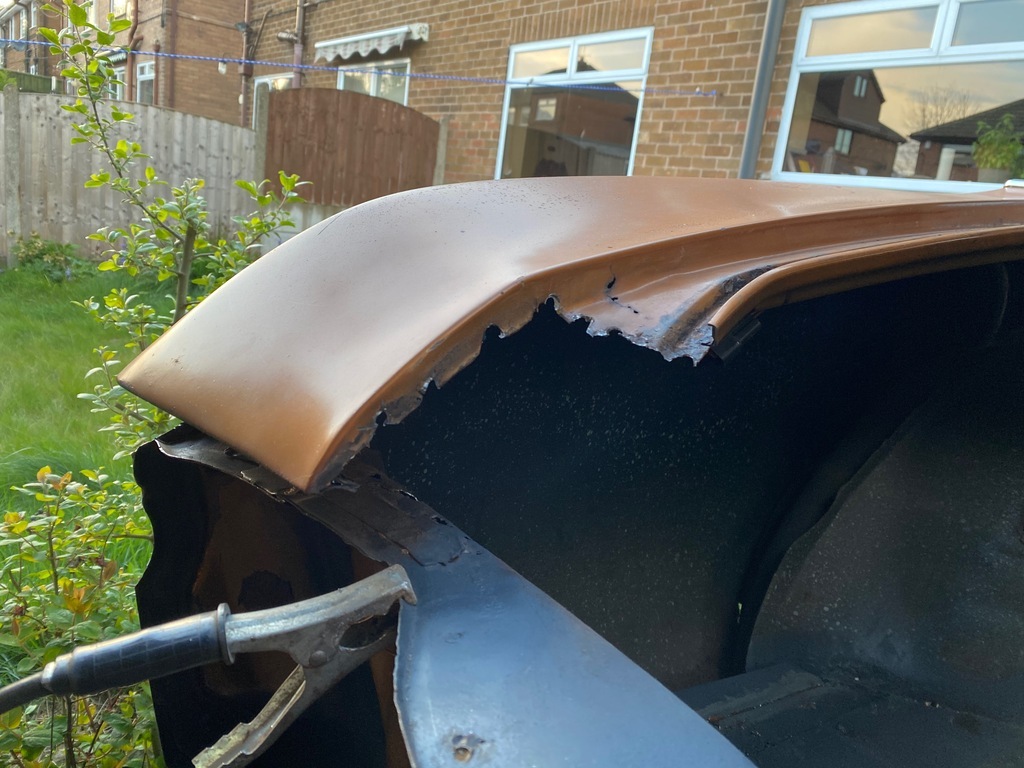
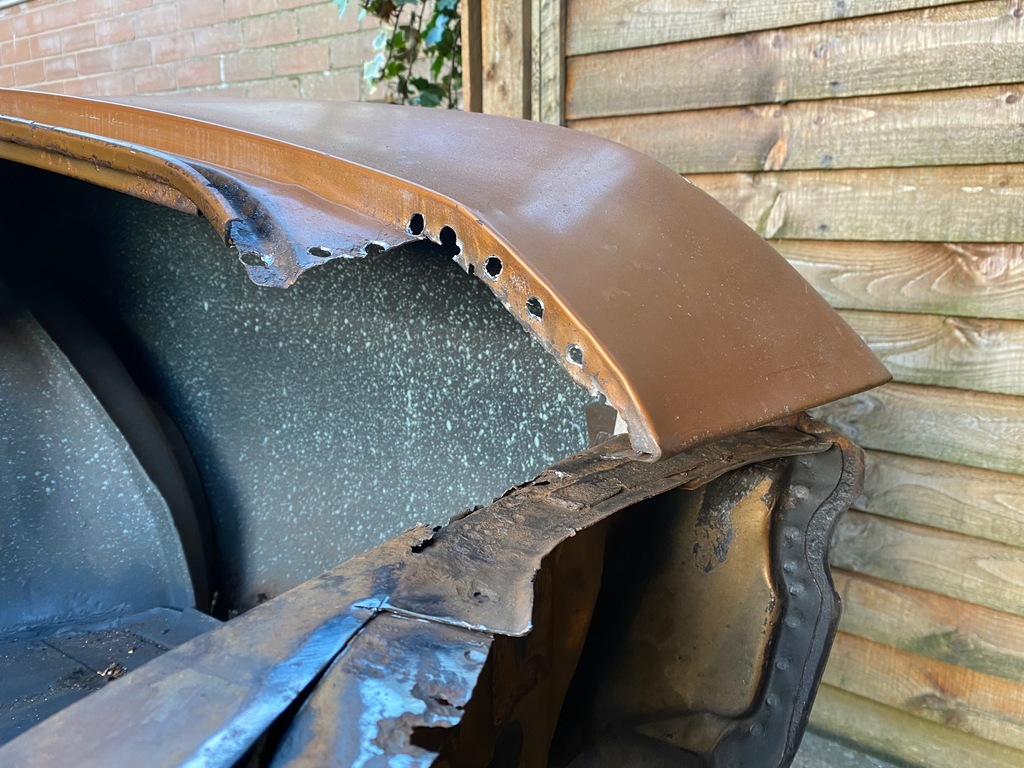
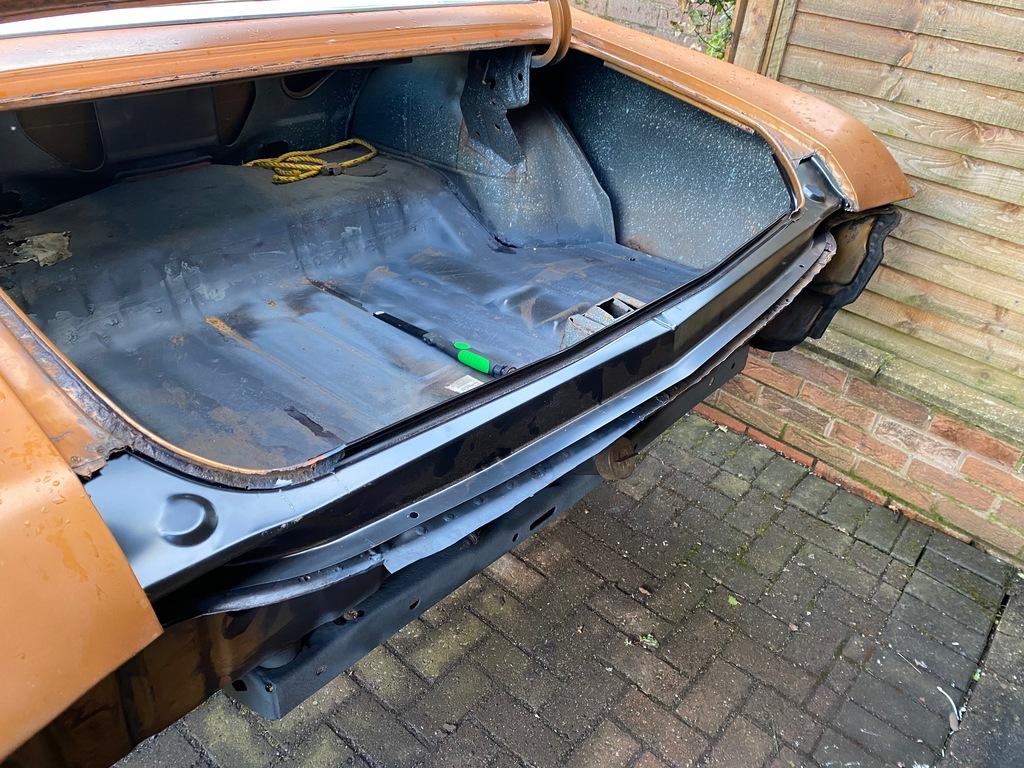
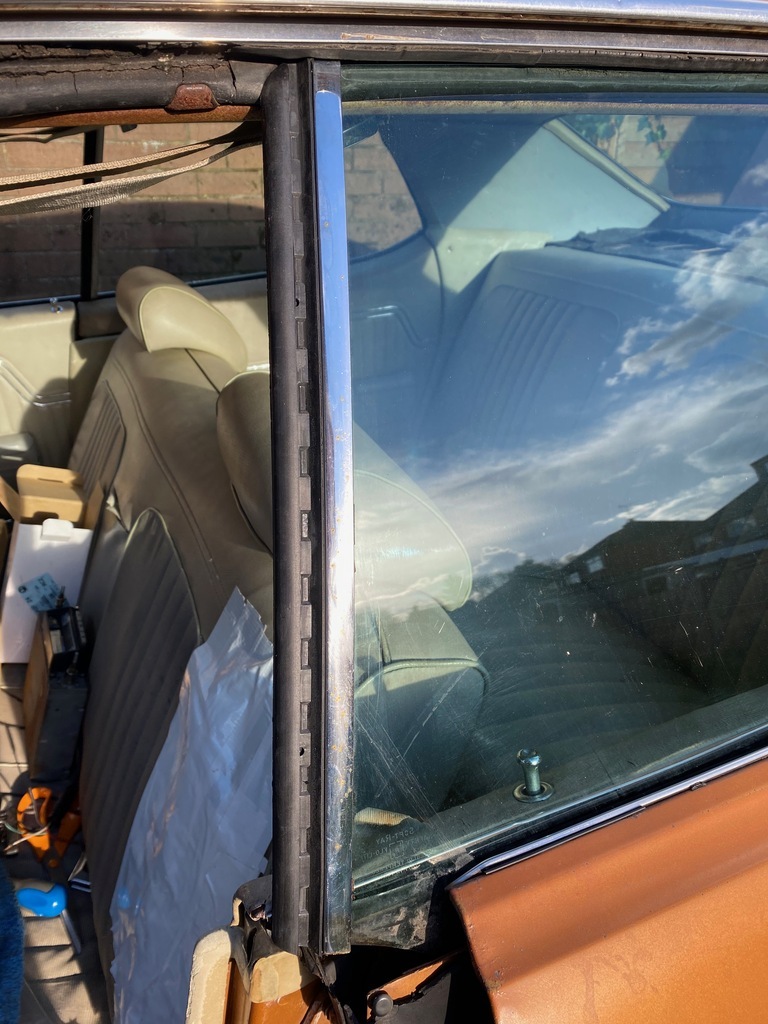
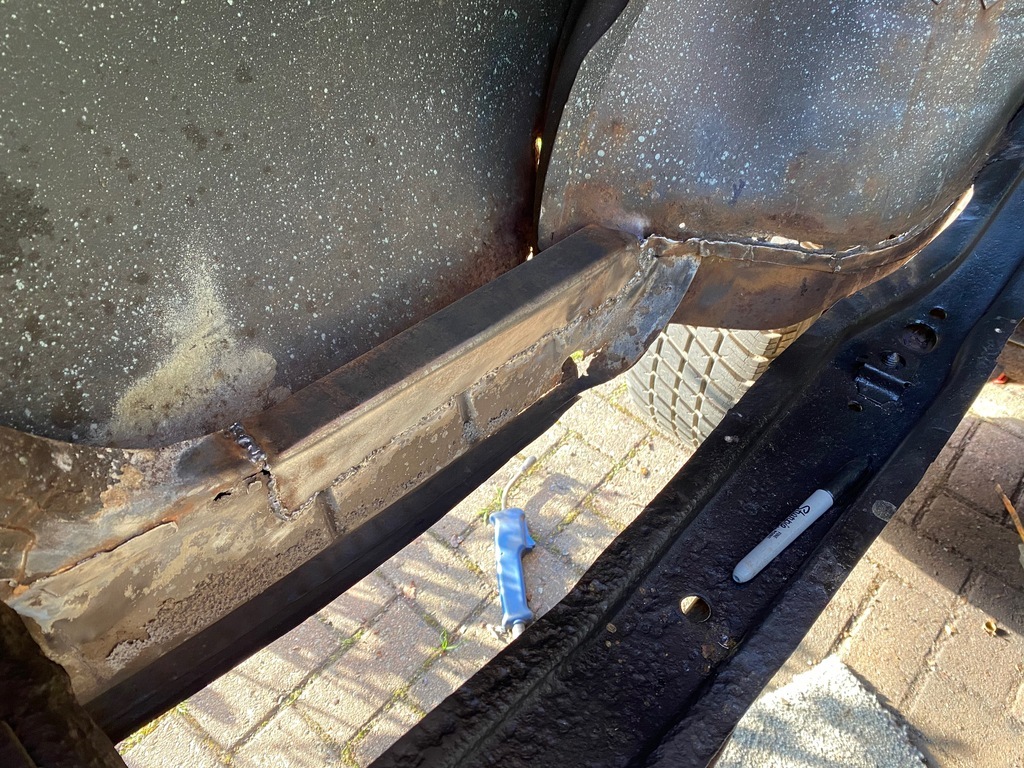
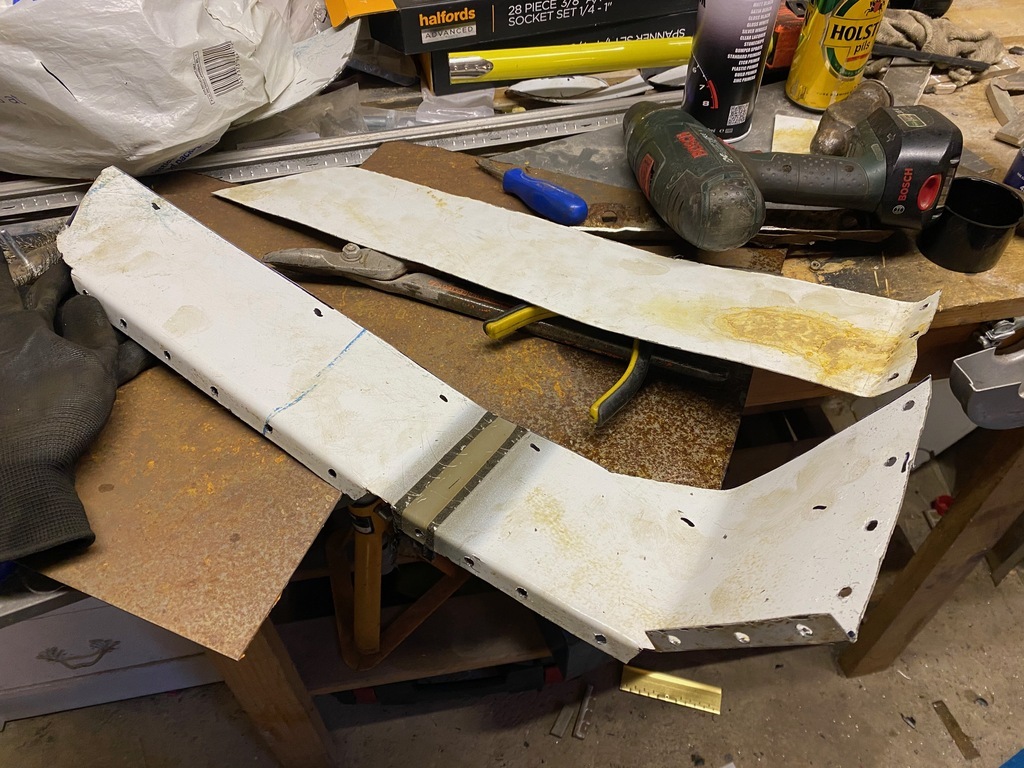
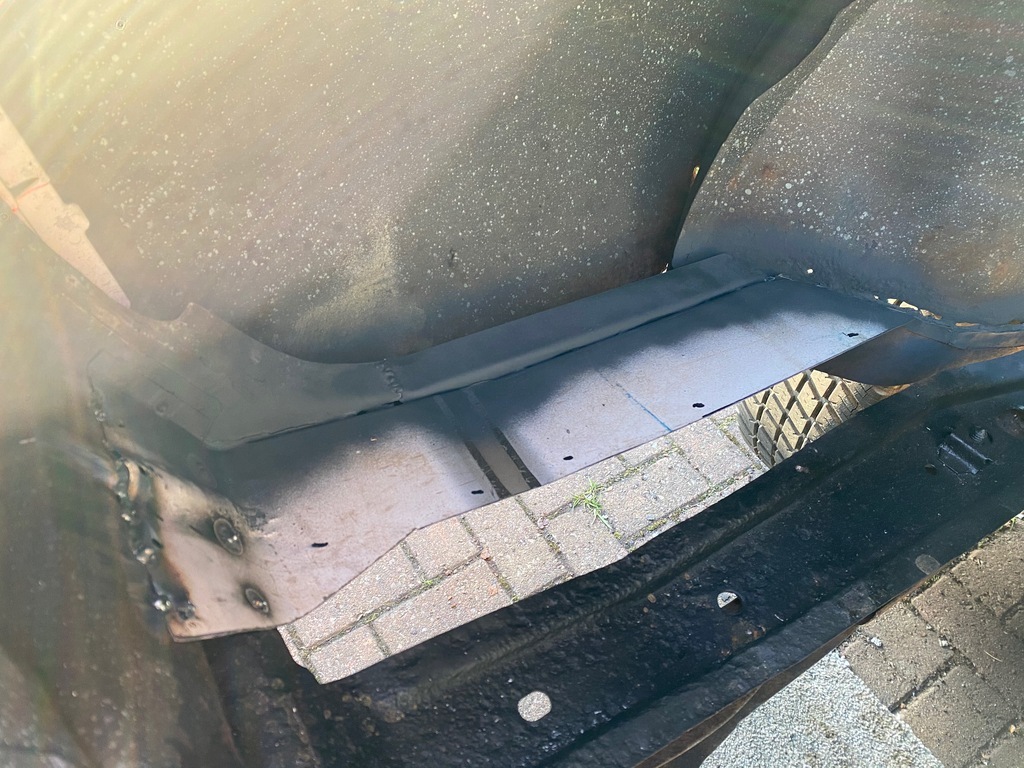
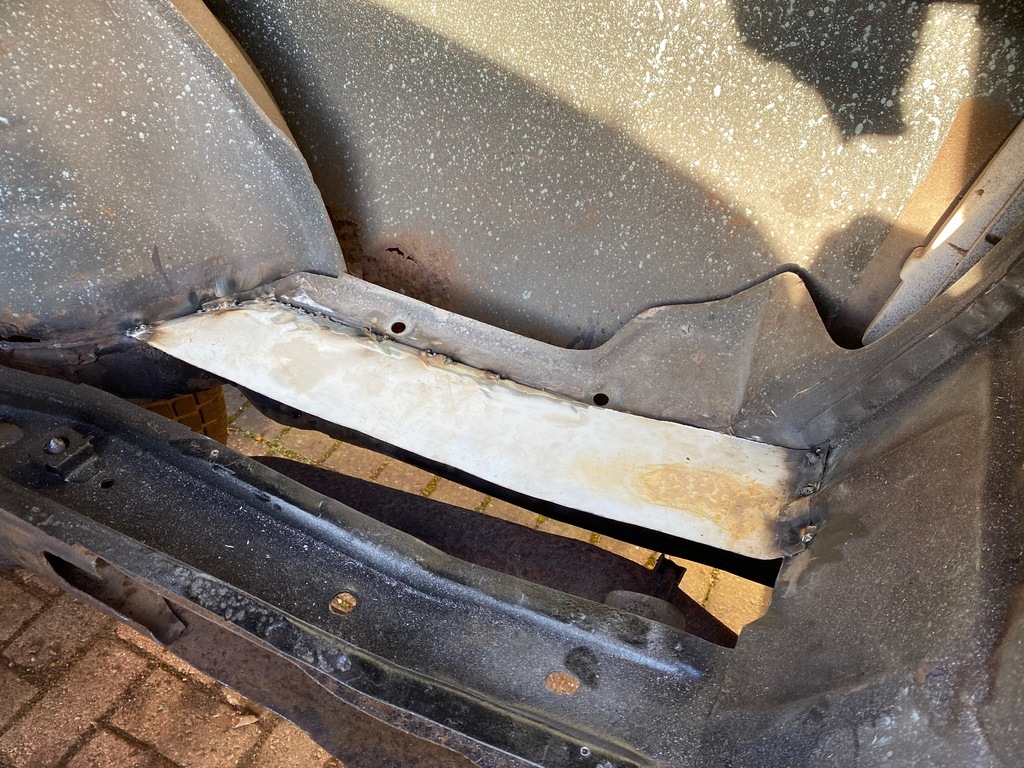
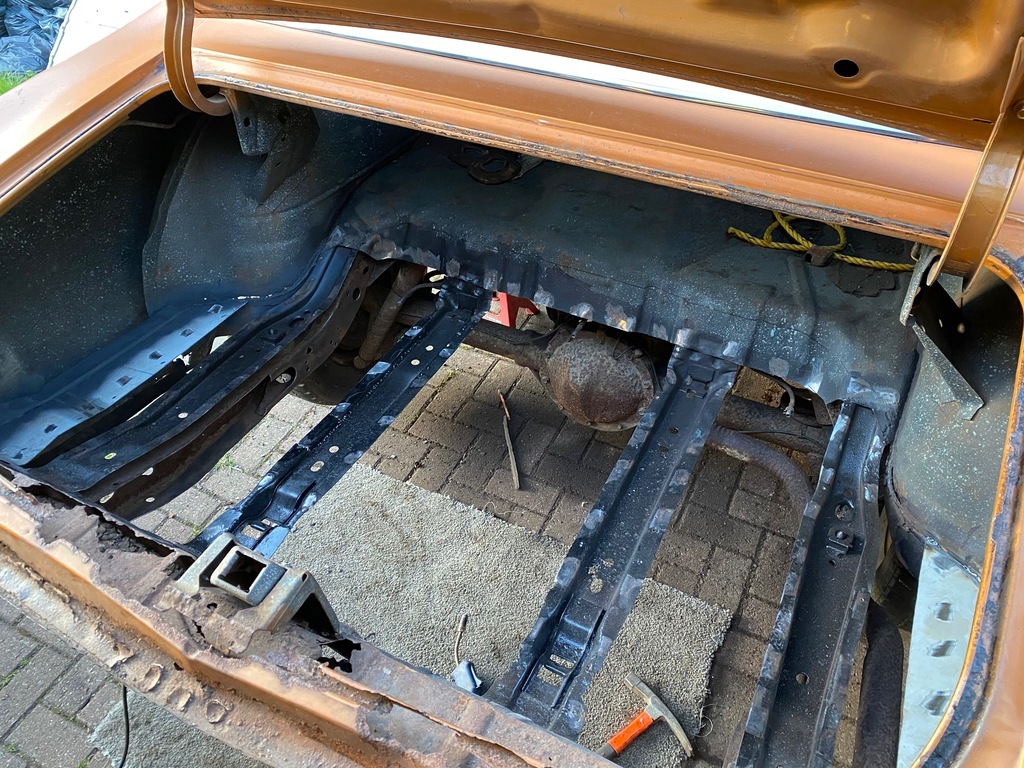
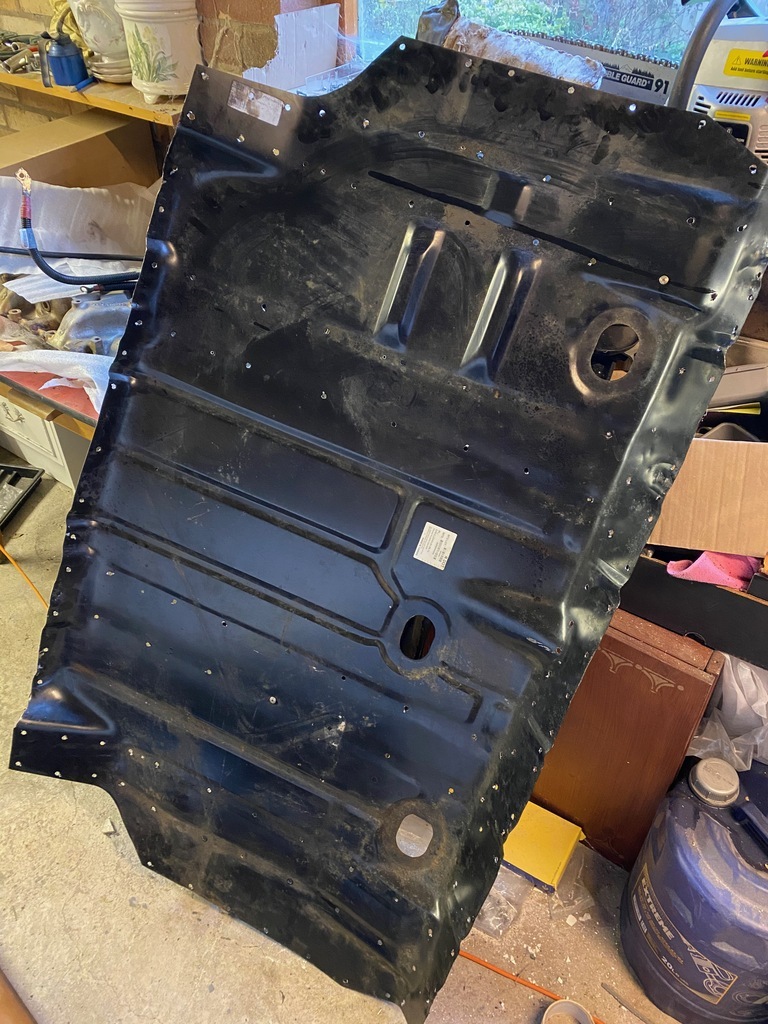
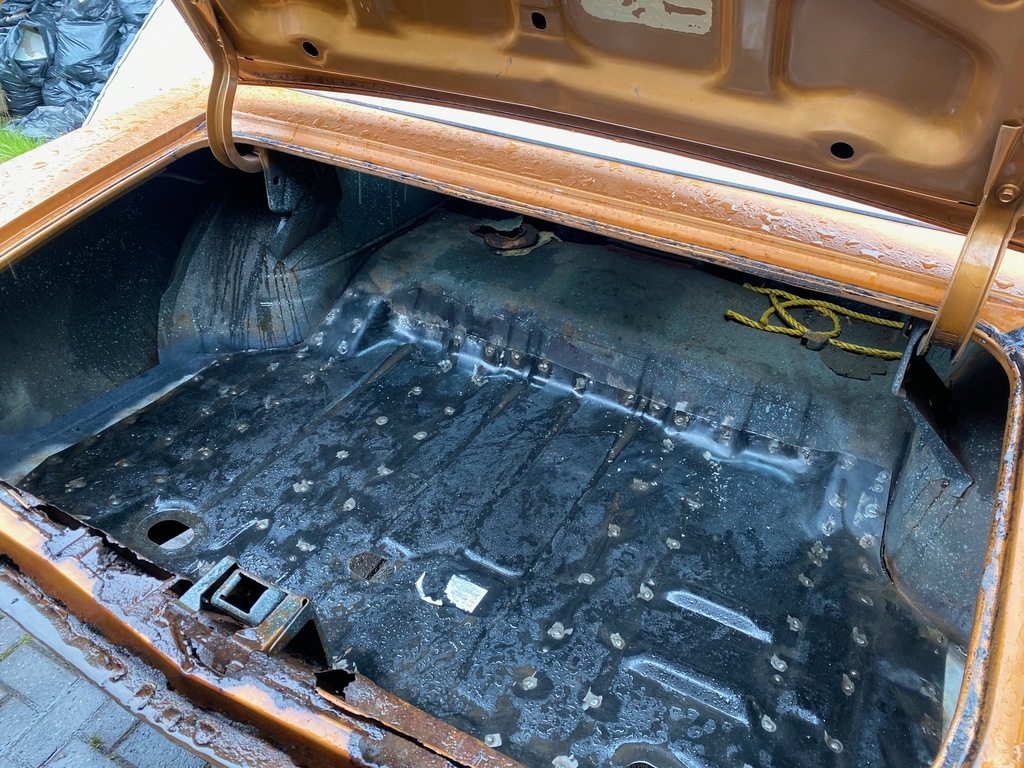
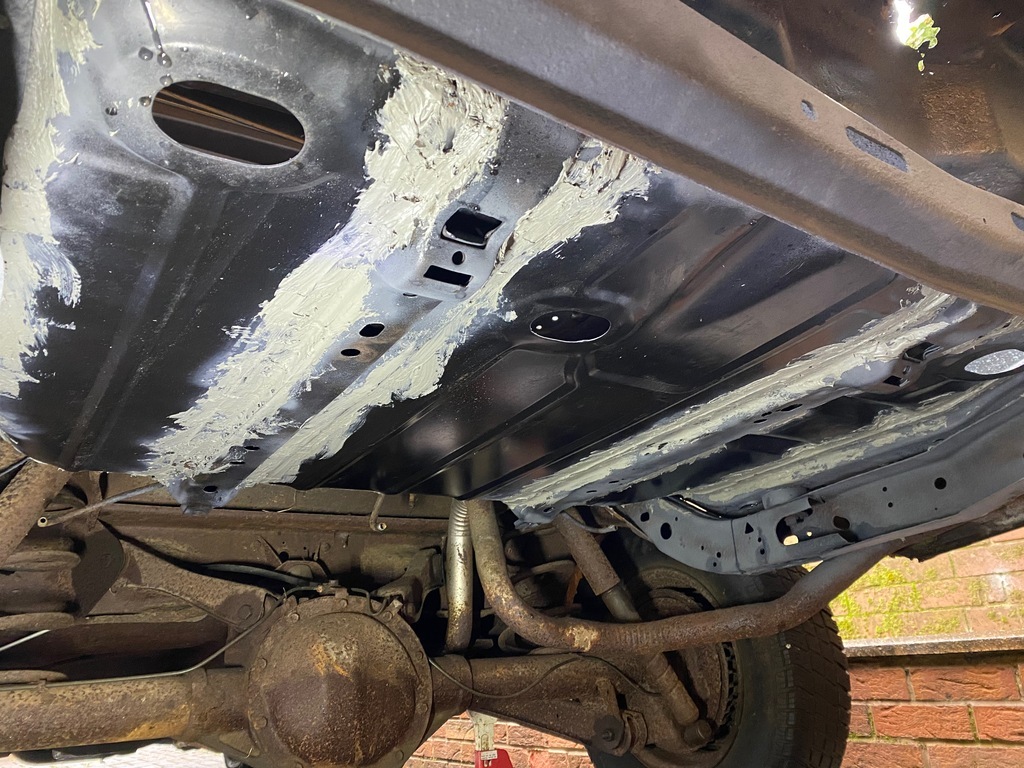
Did you bed the cam in properly when it was fitted? Seen quite a few engines with lifter issues in the last 18 months but we've never had a problem with the ones we've built, but we run them in HARD with high zinc oil and a ton of break in lube. Well thats just it - i followed the break in procedure of 2000rpm for 20mins, but with regular semi synth oil, and i didnt use any assembly lube, just engine oil. I think thats probably what caused it. For the new one i have mineral oil and break in lube for added zinc and ZDDP, and lots of assembly lube. anyway, while the engine was out I decided to tackle the scuttle panel. I knew something was up in this area because A: rust kept falling on my feet and B: when you drove in the rain water would track up the inside of the windscreen and splash in your face. First step, remove all the chrome and see how bad it is 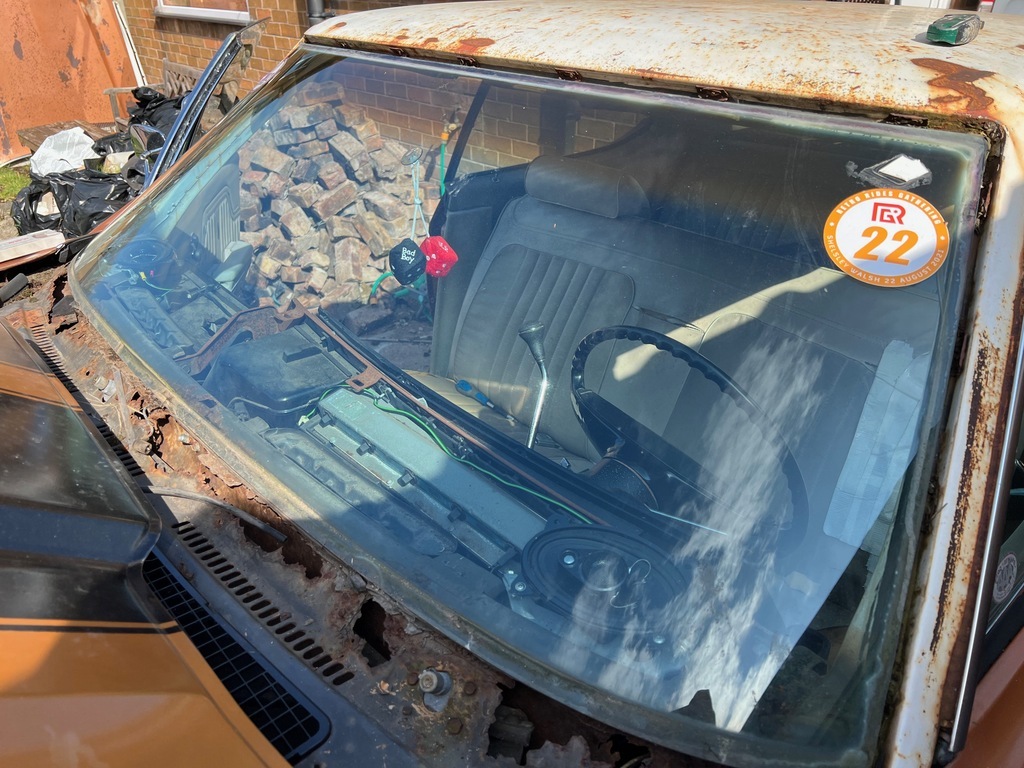 yeah. not great. The windscreen had also come unbonded down both sides, so there was only a small strip of glue along the top still holding it in. 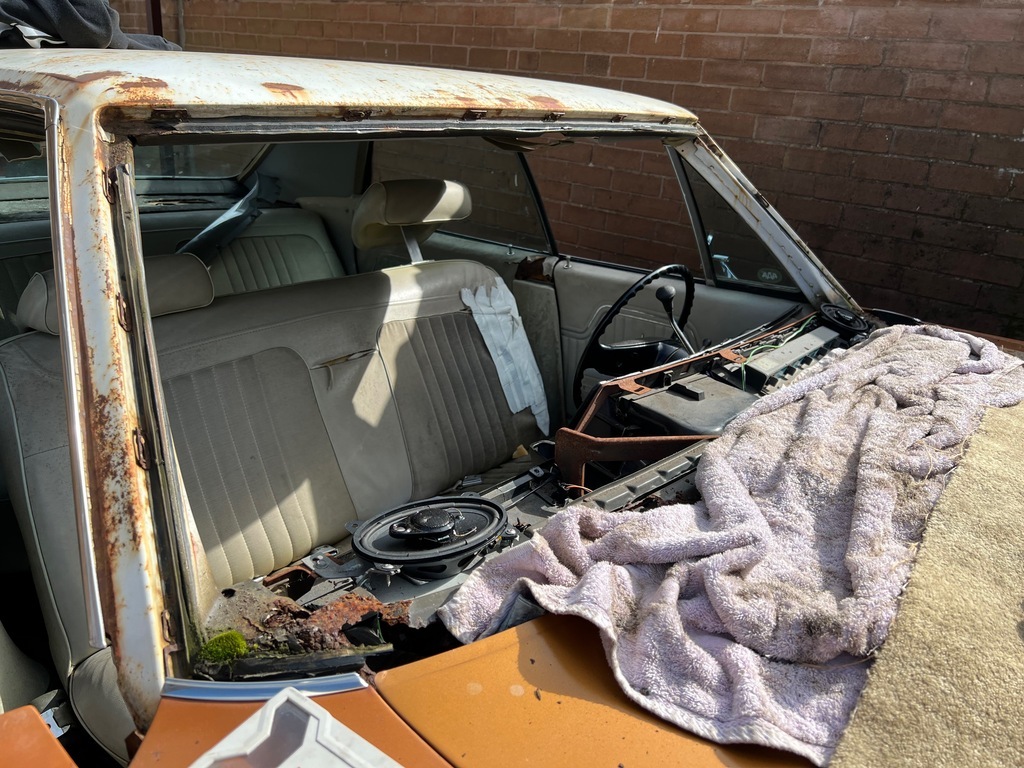 That did make it pretty easy to remove, on the plus side. As for the rest of it, you know the drill: cut, grind, bend, grind, weld, grind, paint. 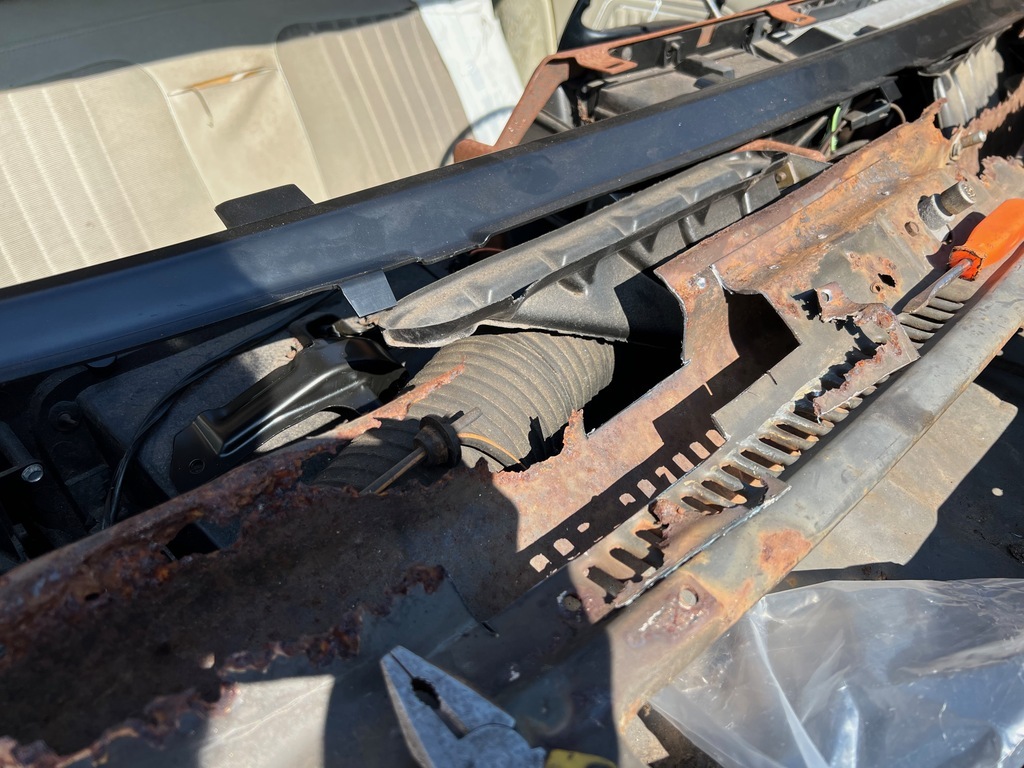 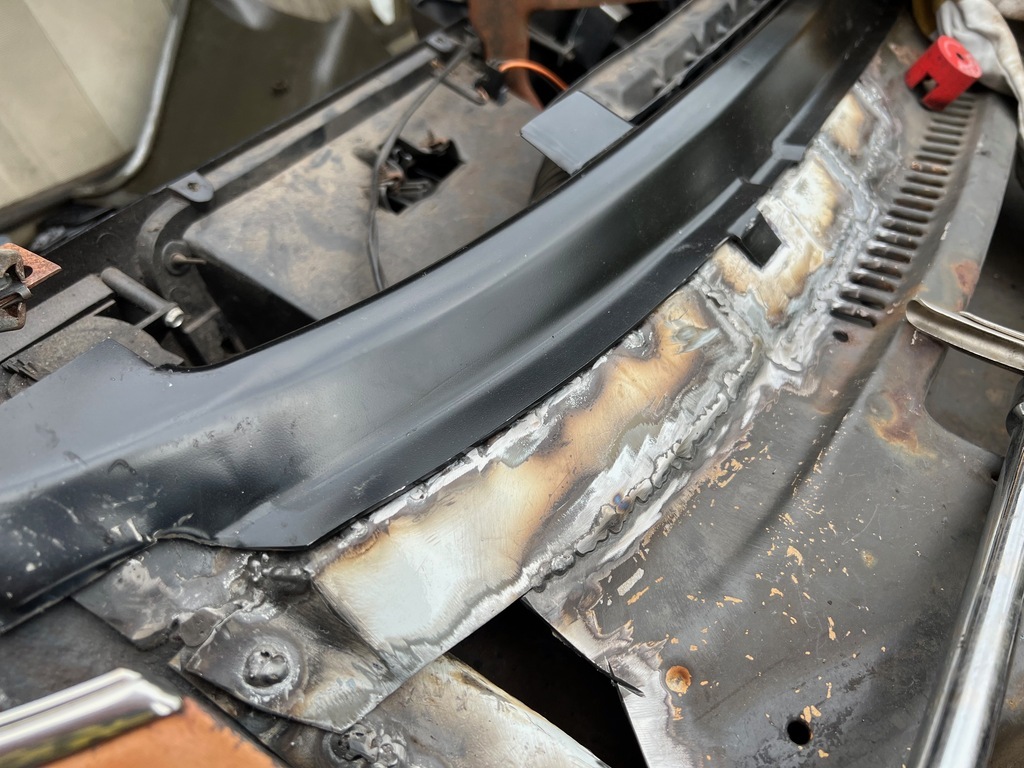 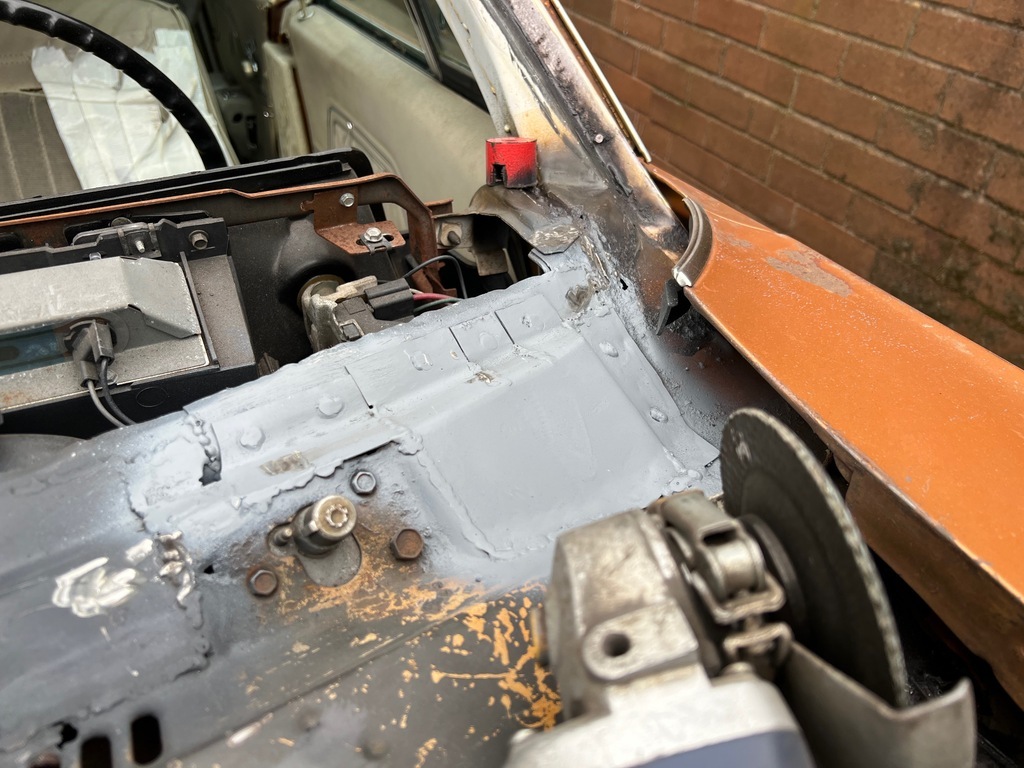 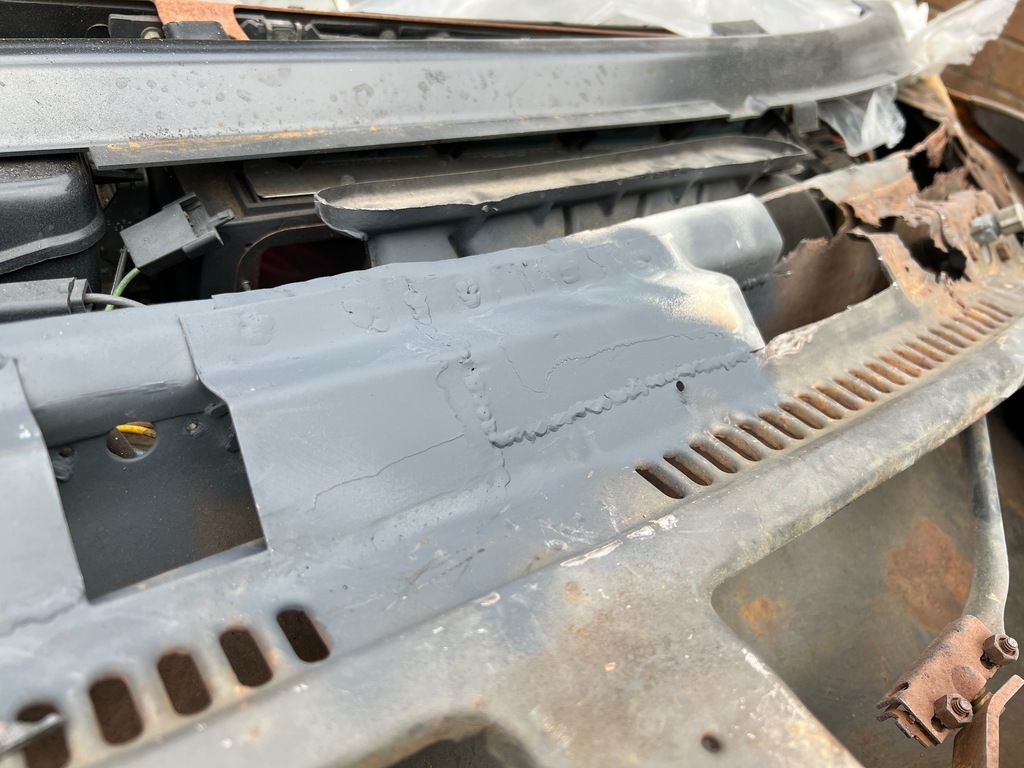 With that lot done (and a lot more not photographed), I had a replacement panel for the windscreen channel. This was fairly cheap even with shipping, and saved me having to make up a fairly complex panel 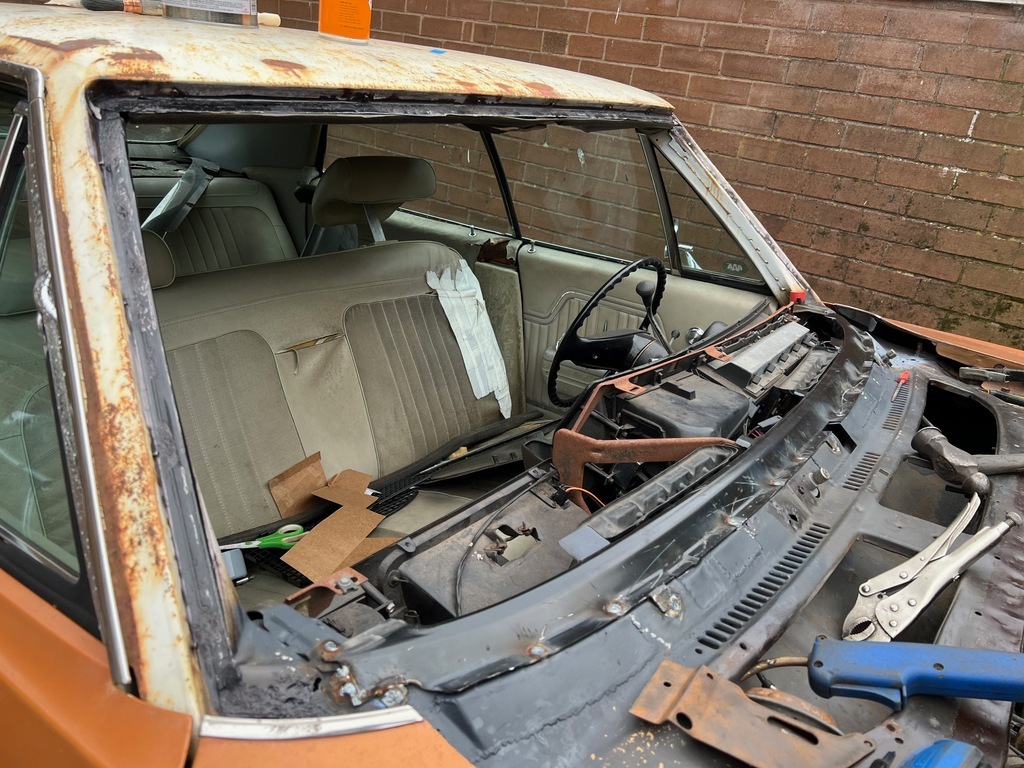 Then seam sealed and painted 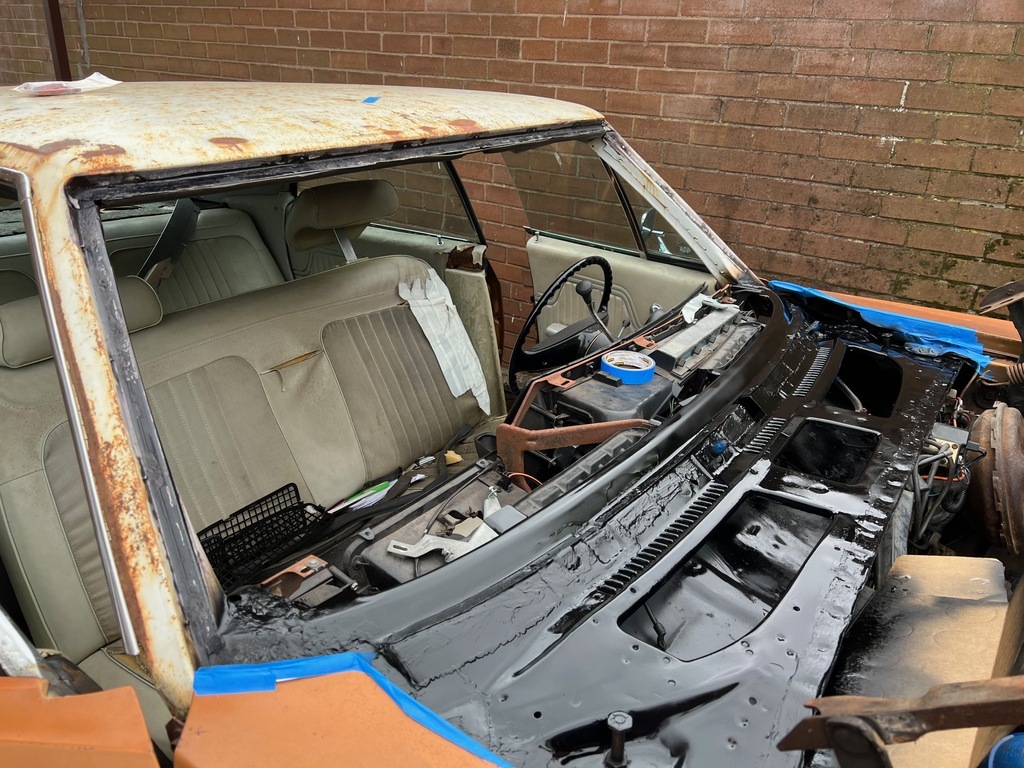 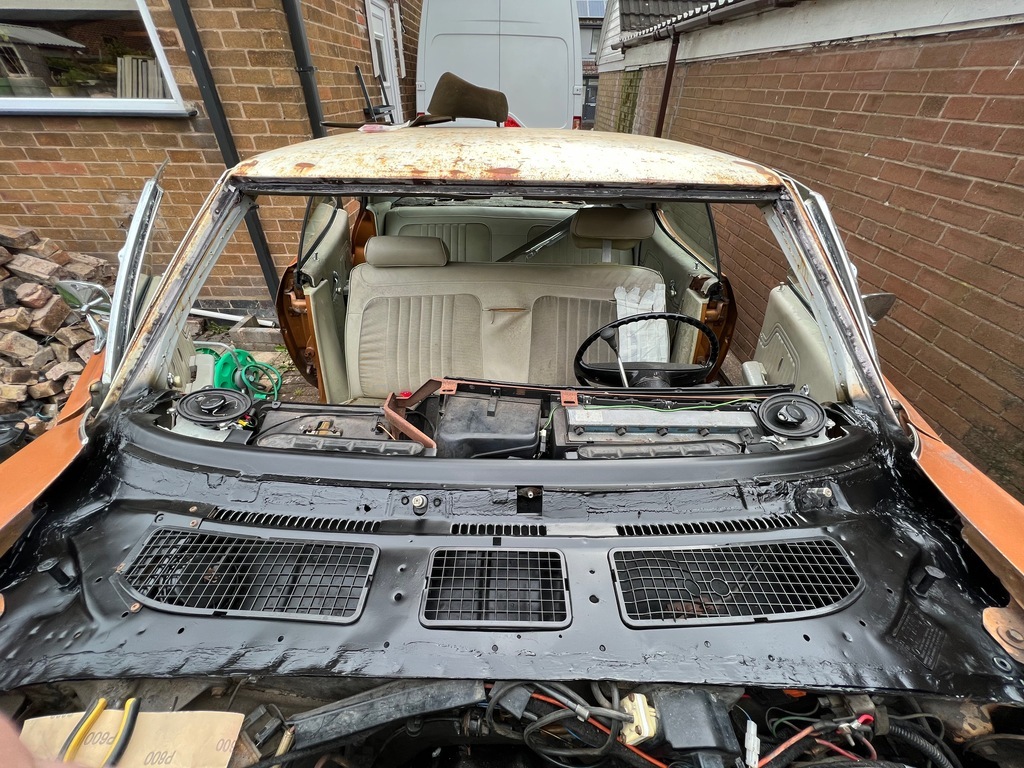 then time to bond the windscreen back in. First primer and new clips for the trim. 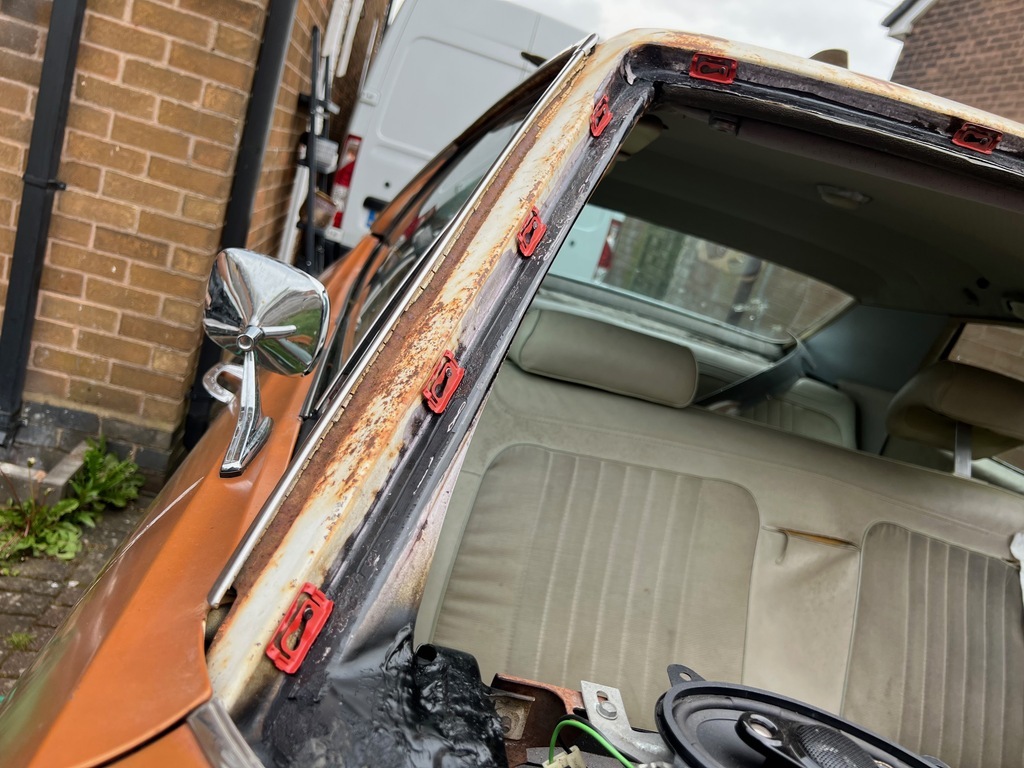 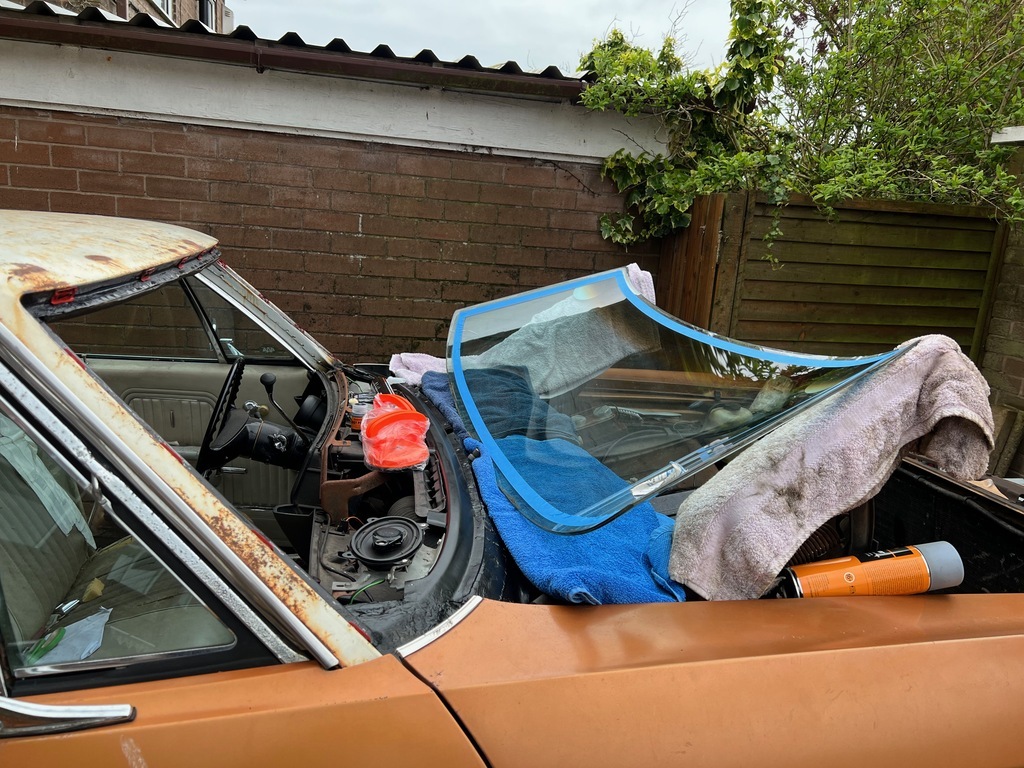 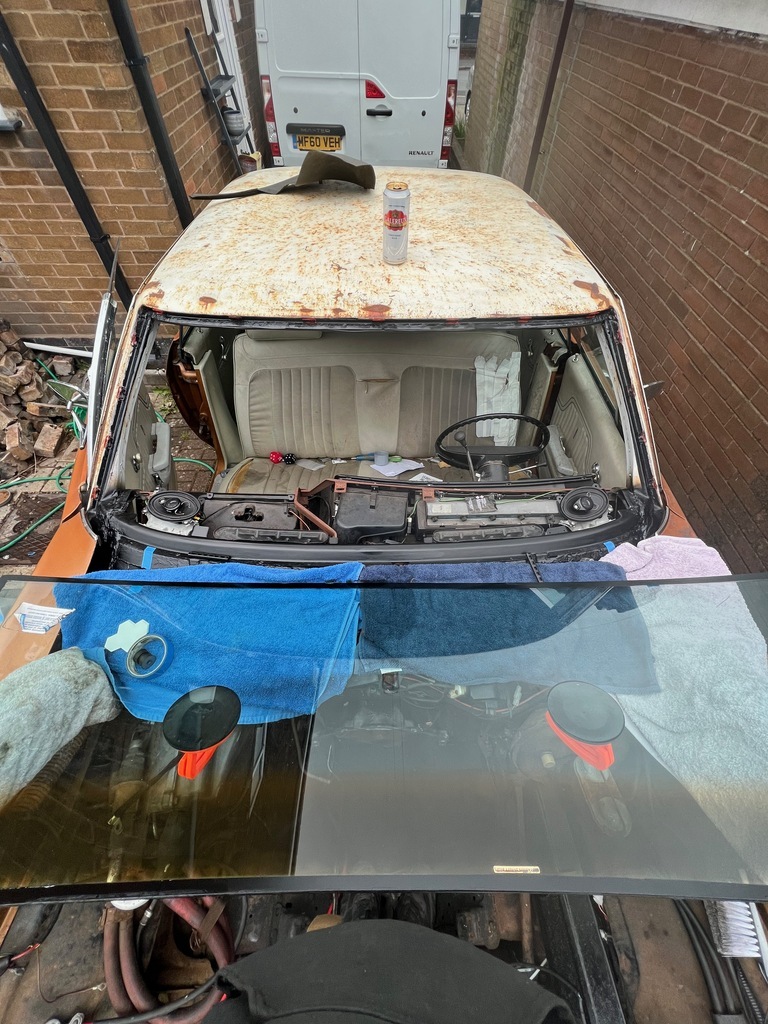 Them simply glue the screen in, and re fit all the trim 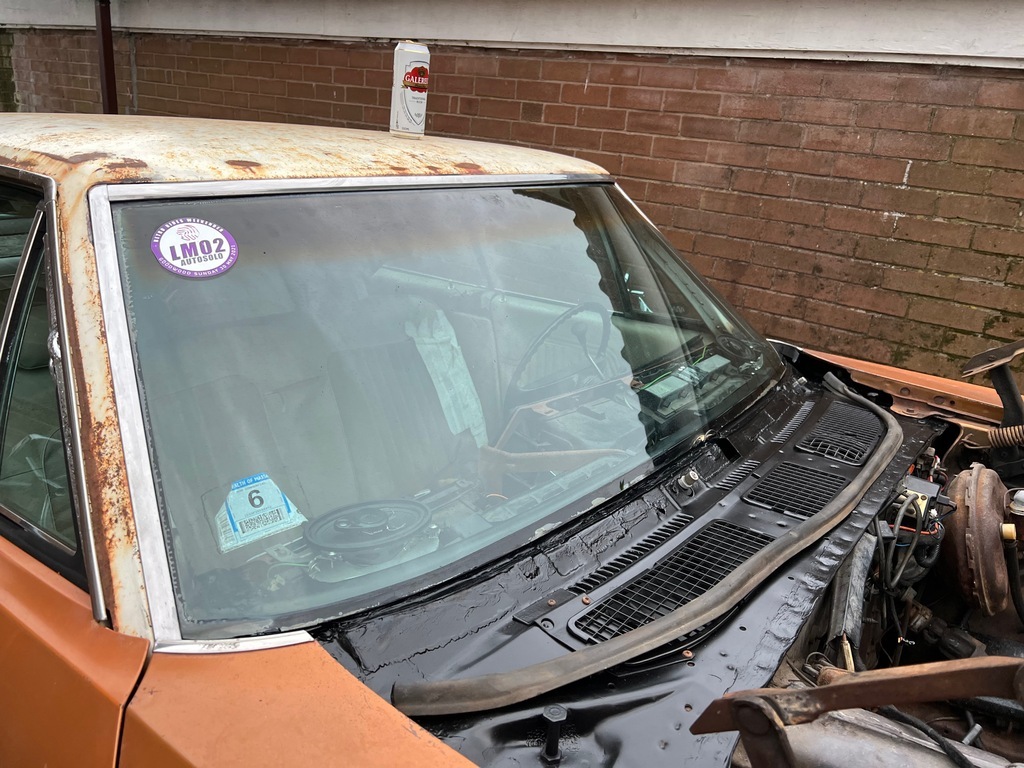 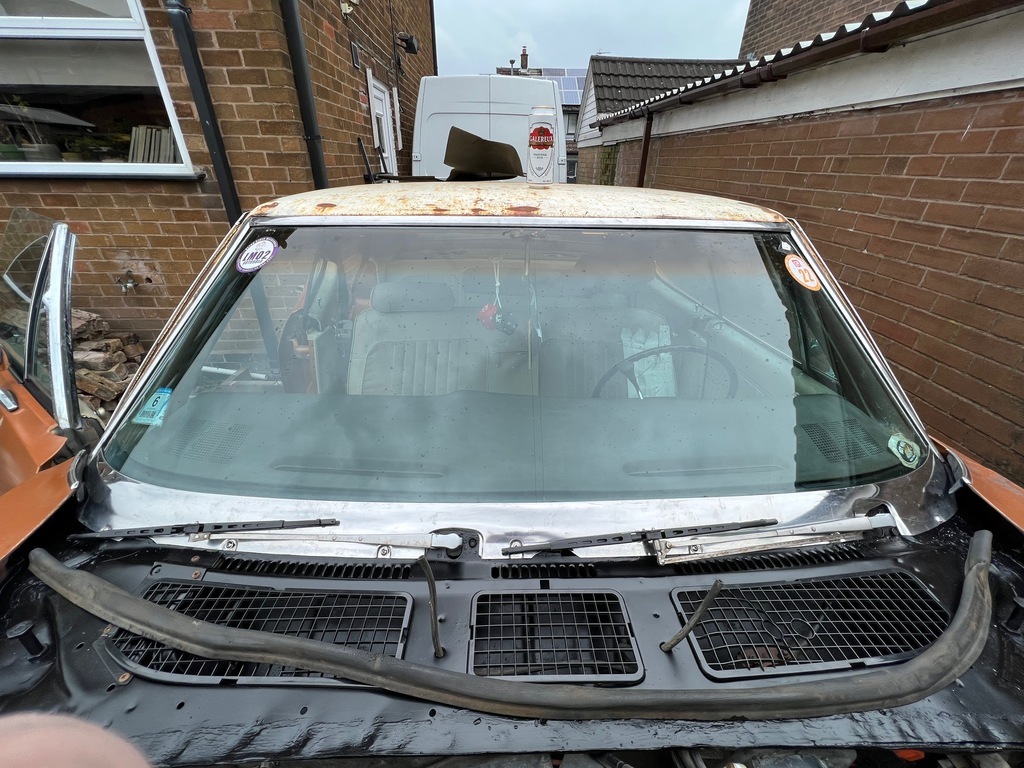 Annoyingly i managed to crack the screen putting it back in, so it will need replacing again at some point in the future, but at least for now its watertight. |
| |
|
|
|
|
|
|
|
Apr 25, 2022 21:49:08 GMT
|
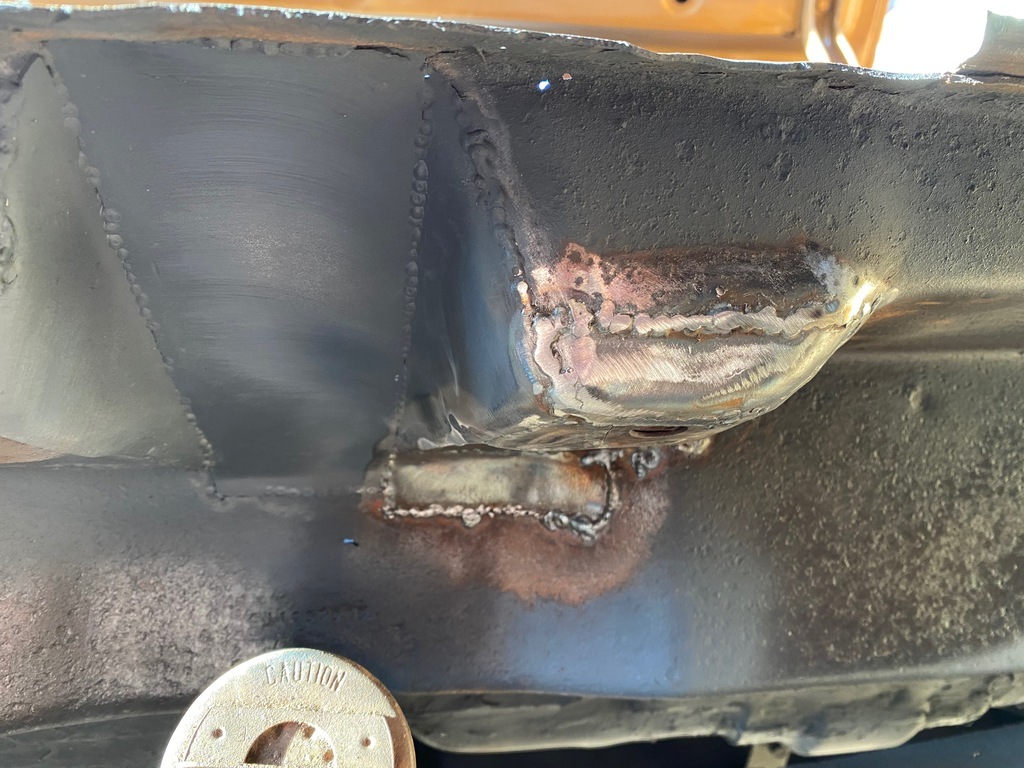
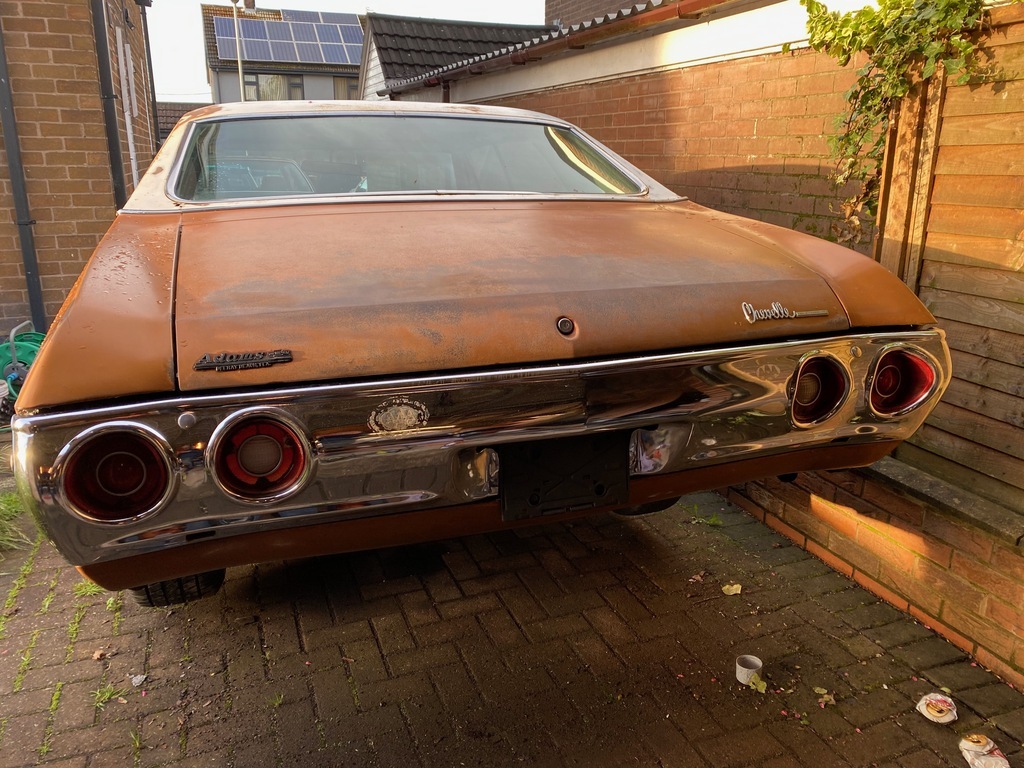
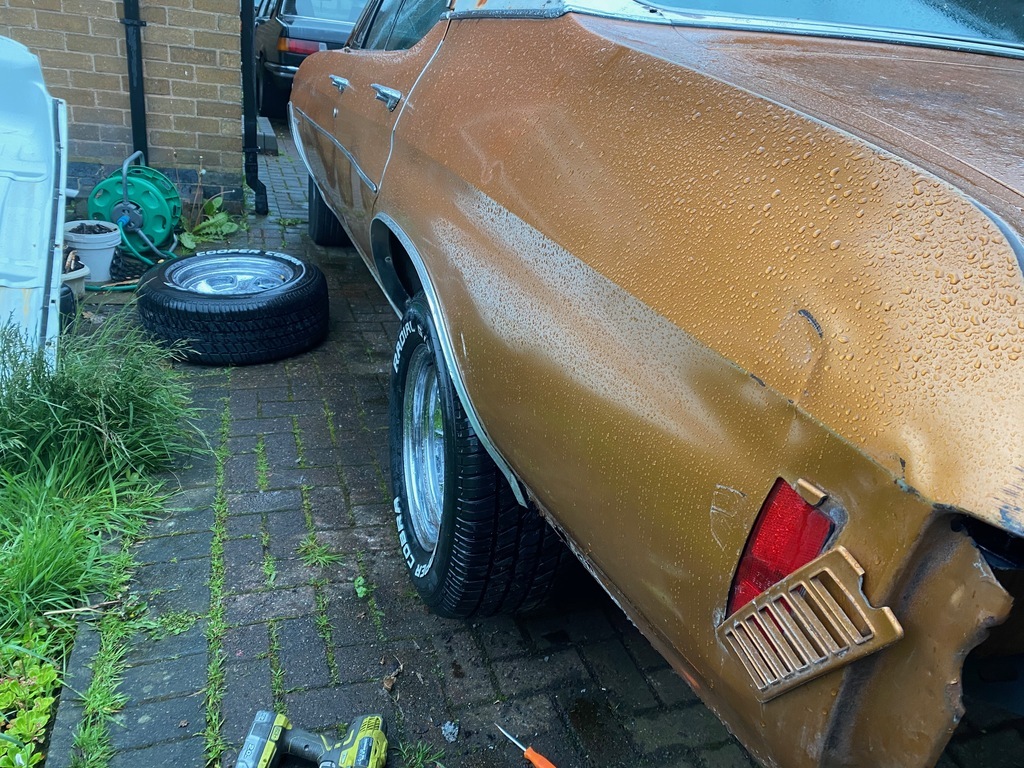
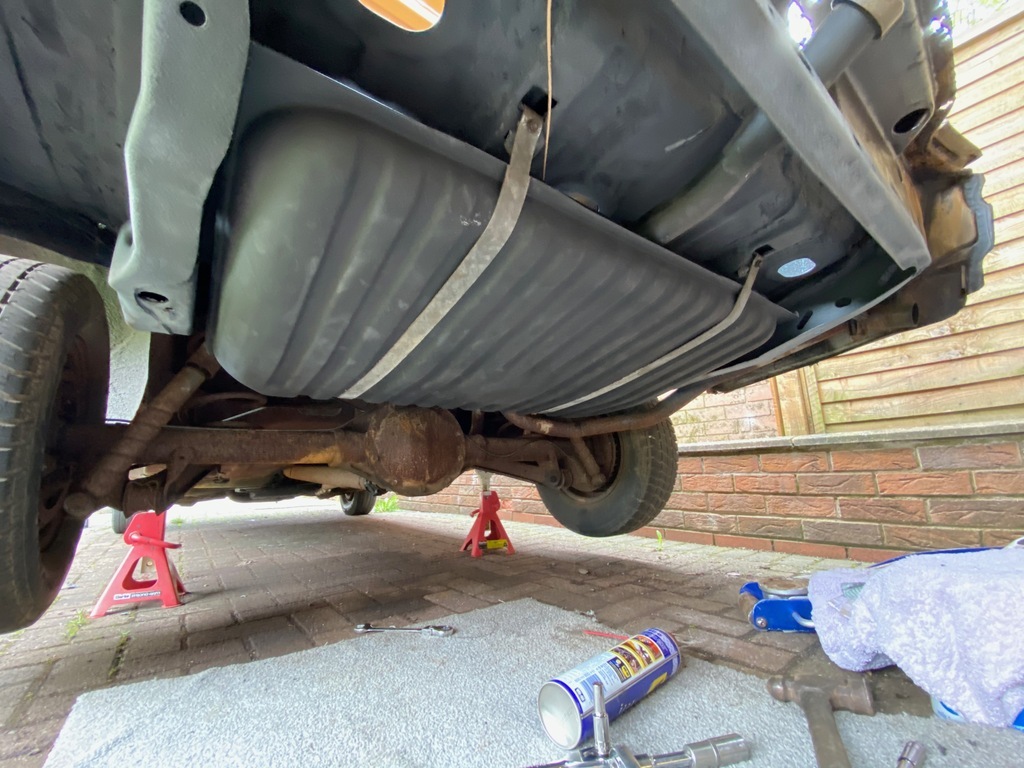
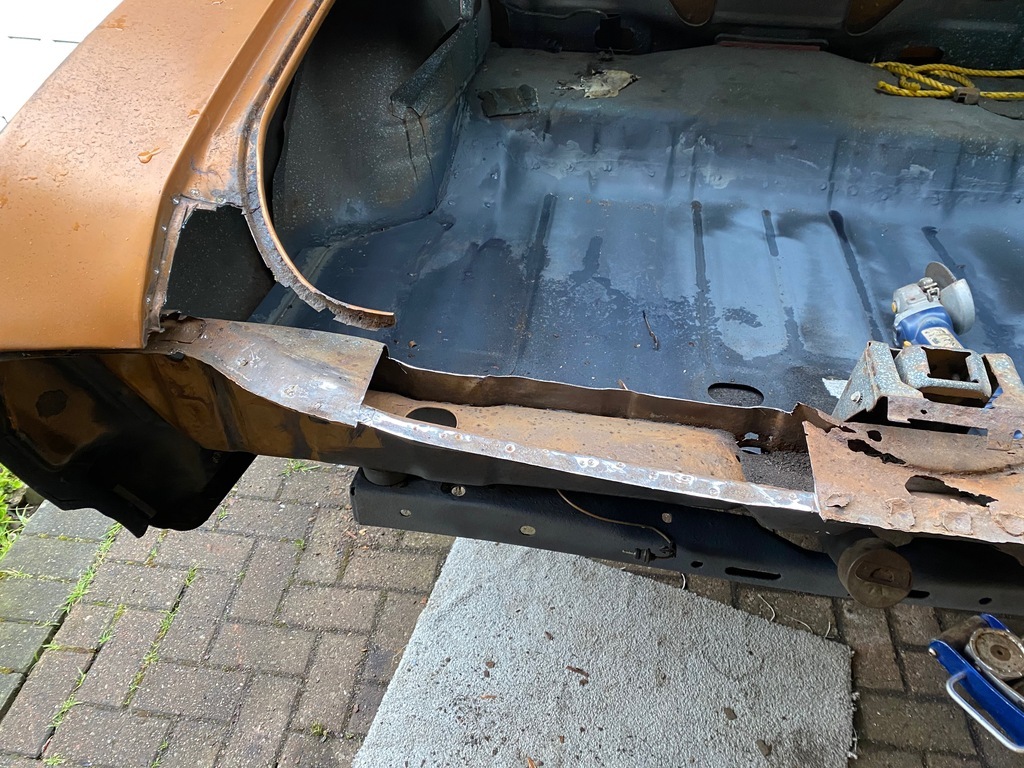
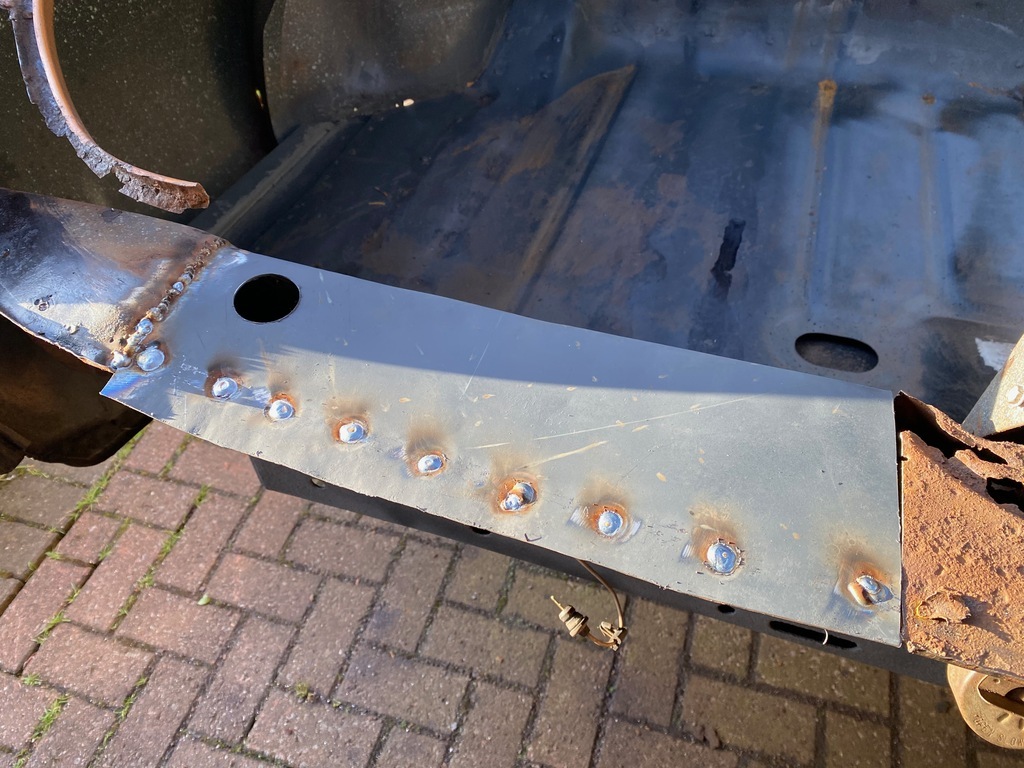
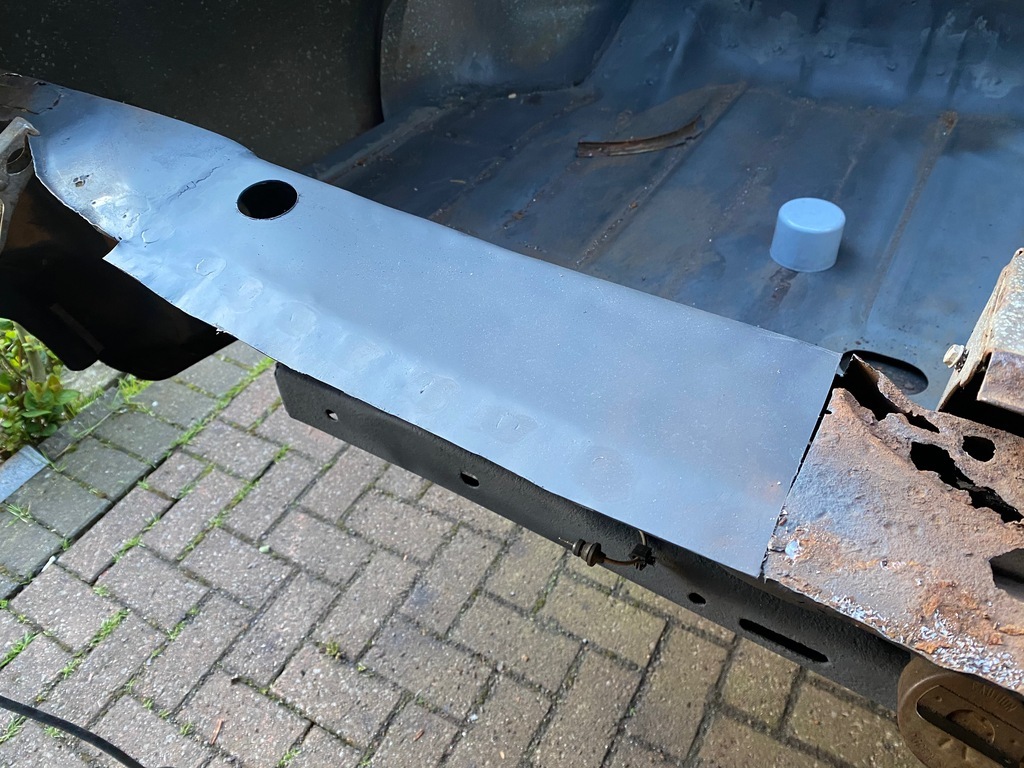
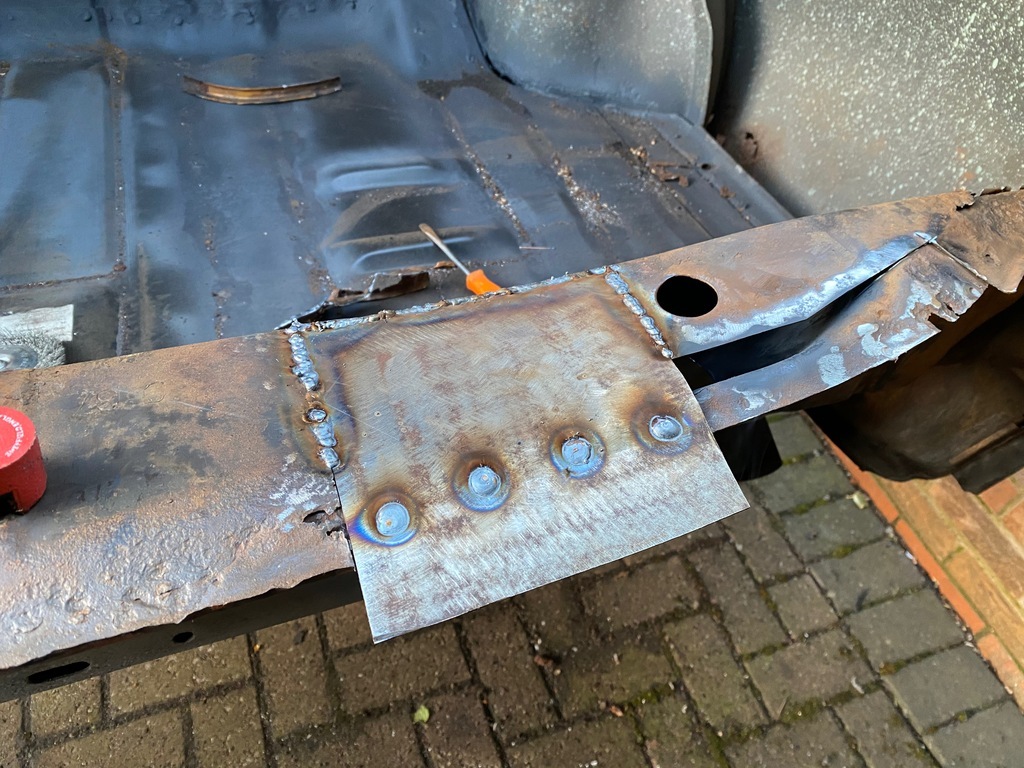
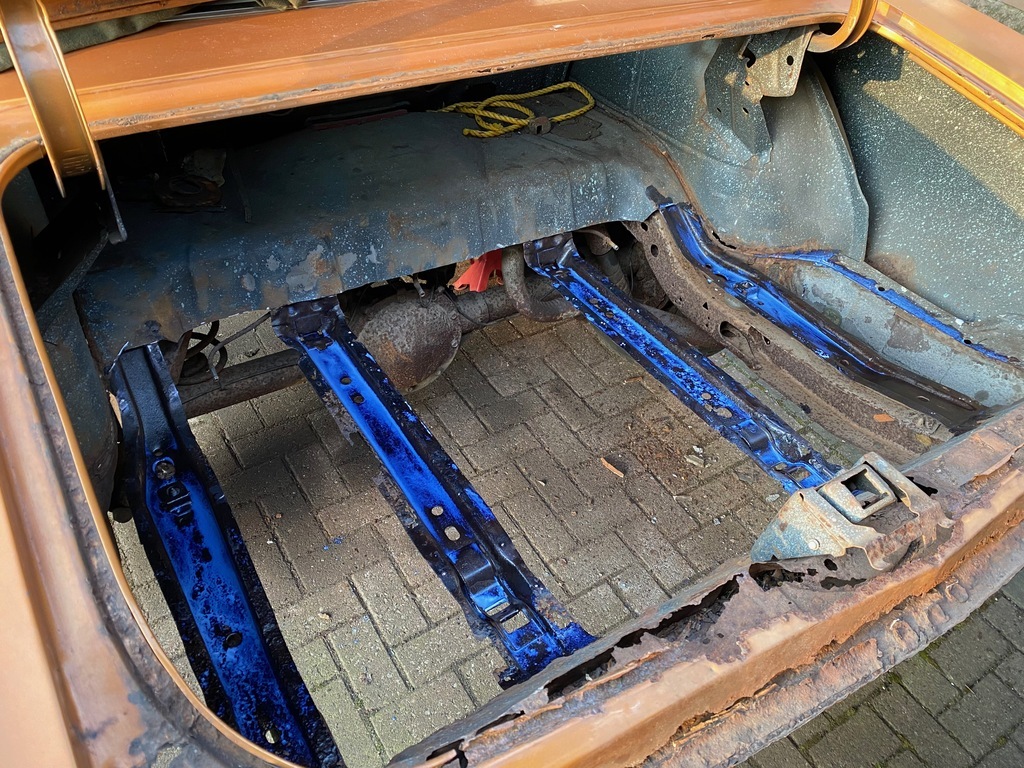
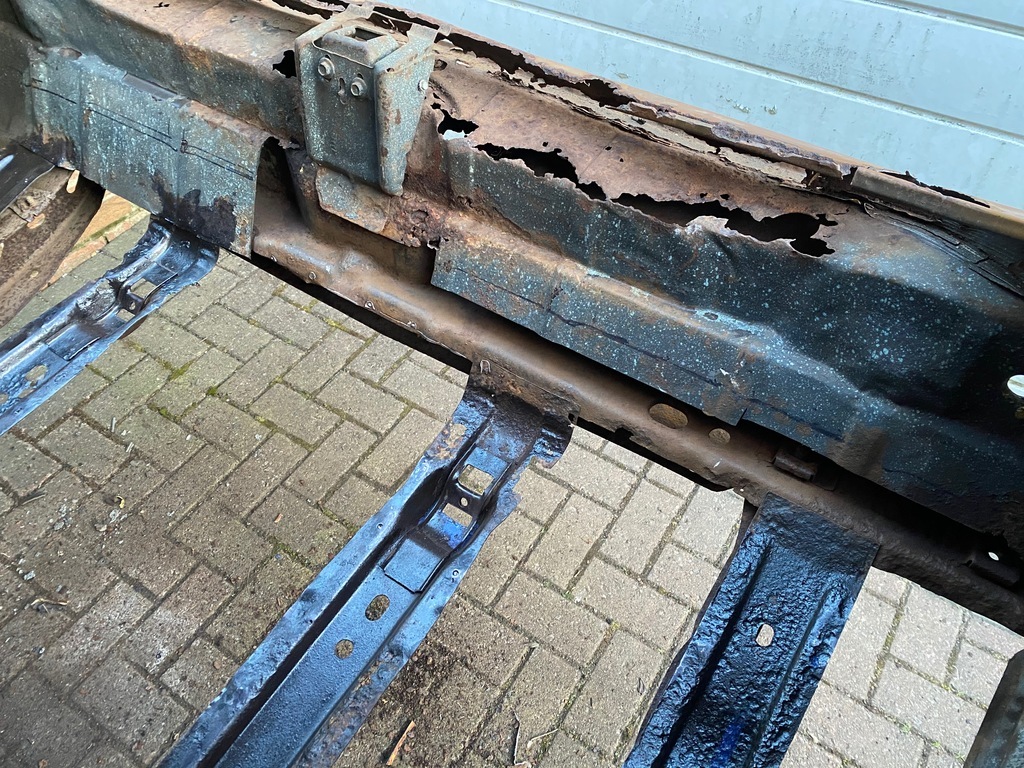
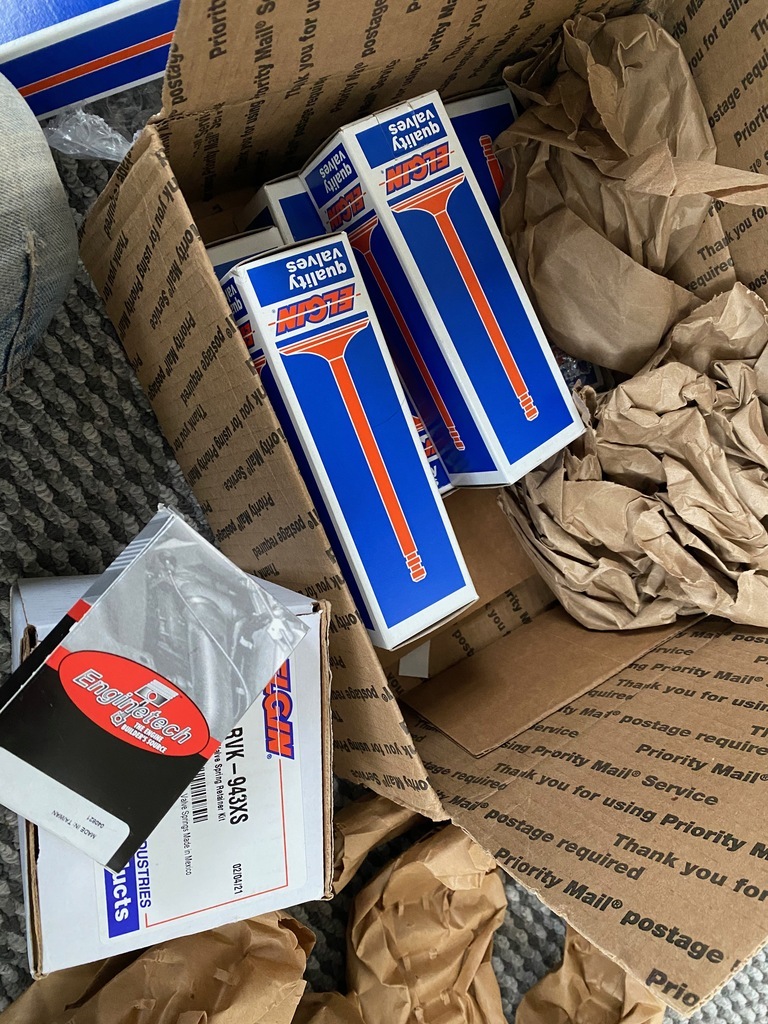
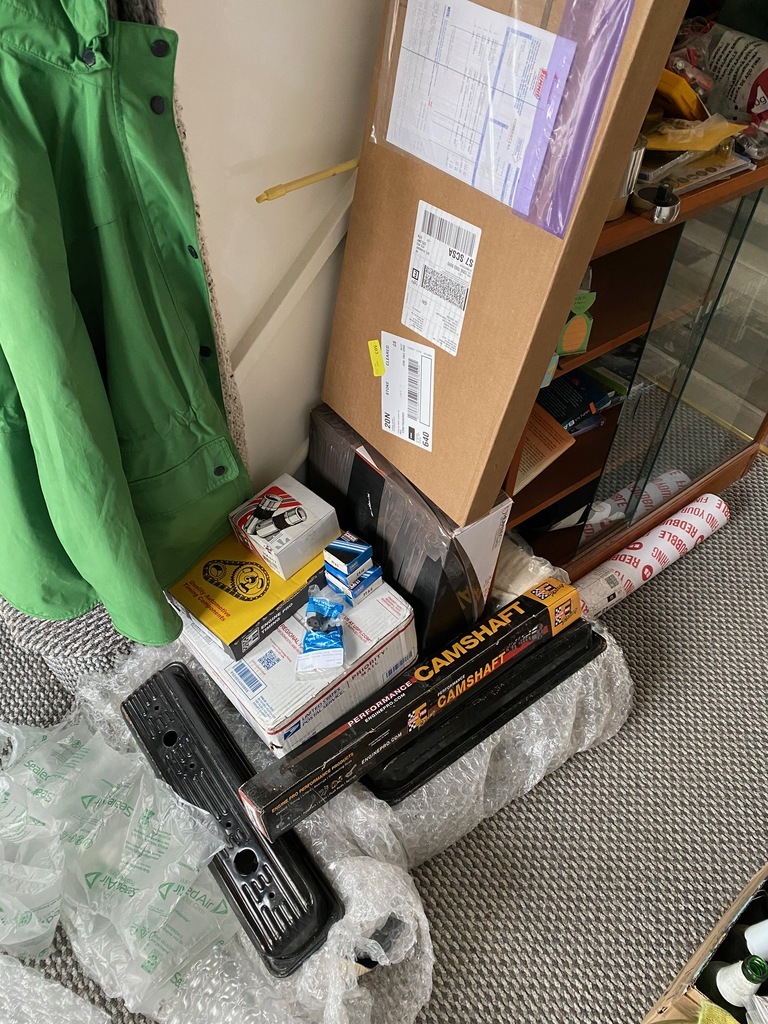
Well it's been a while, but it's time for an update. I've had this car for just over a year now and once again, it's weeks to the RRG weekender and i'm struggling to get it ready  To bring us up to date from the last time, the engine mods were all done and it was ready to head up the hill at the gathering, but then as i was leaving work to head down to shelsley, it started making this nice tapping noise... Obviously i did the right thing, and just carried on heading down to worcestershire. Needless to say, it didn't get any better on the journey and was definitely running on 7 cylinders by the time we got there. When i got it home i pulled the plugs and figured out #6 was the cylinder that was down on a guy. So really the only thing to do was what i probably should have done in the first place and just rebuild the engine. I scabbed a bit of help form a freind and we got the engine out in a morning: 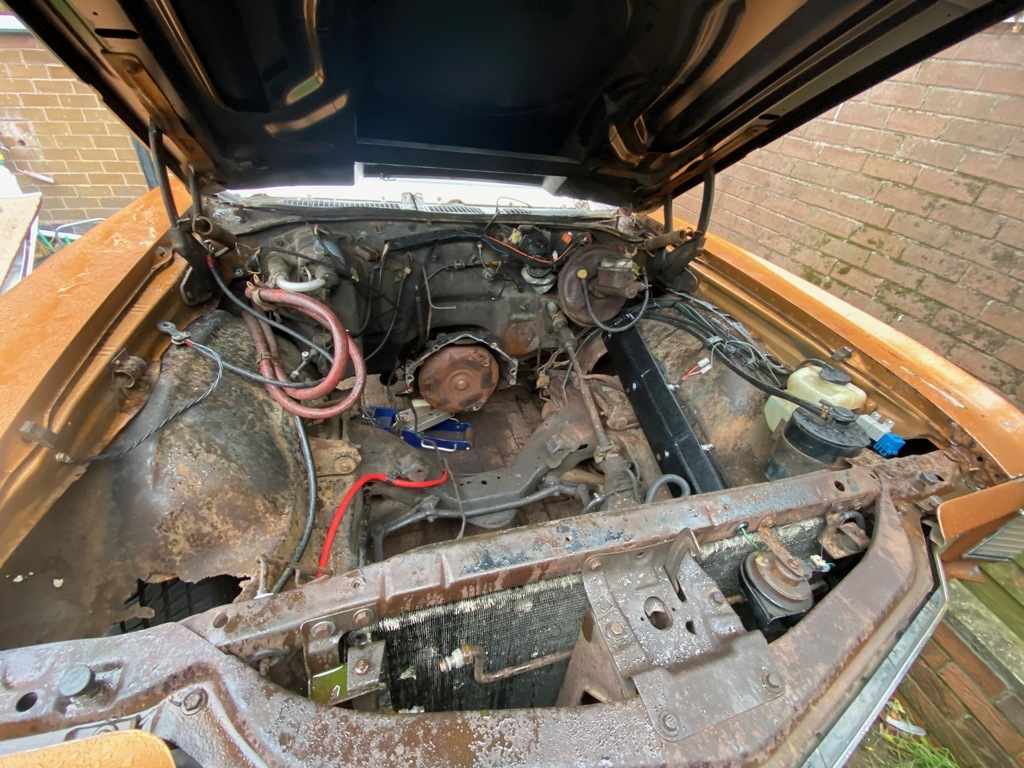 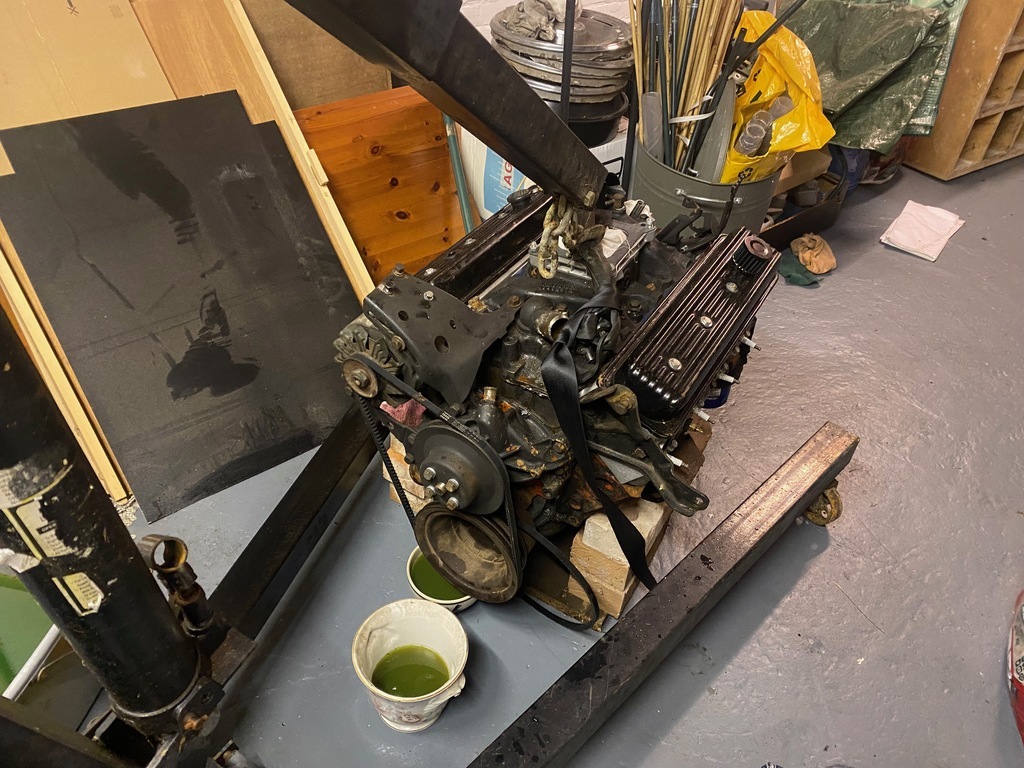 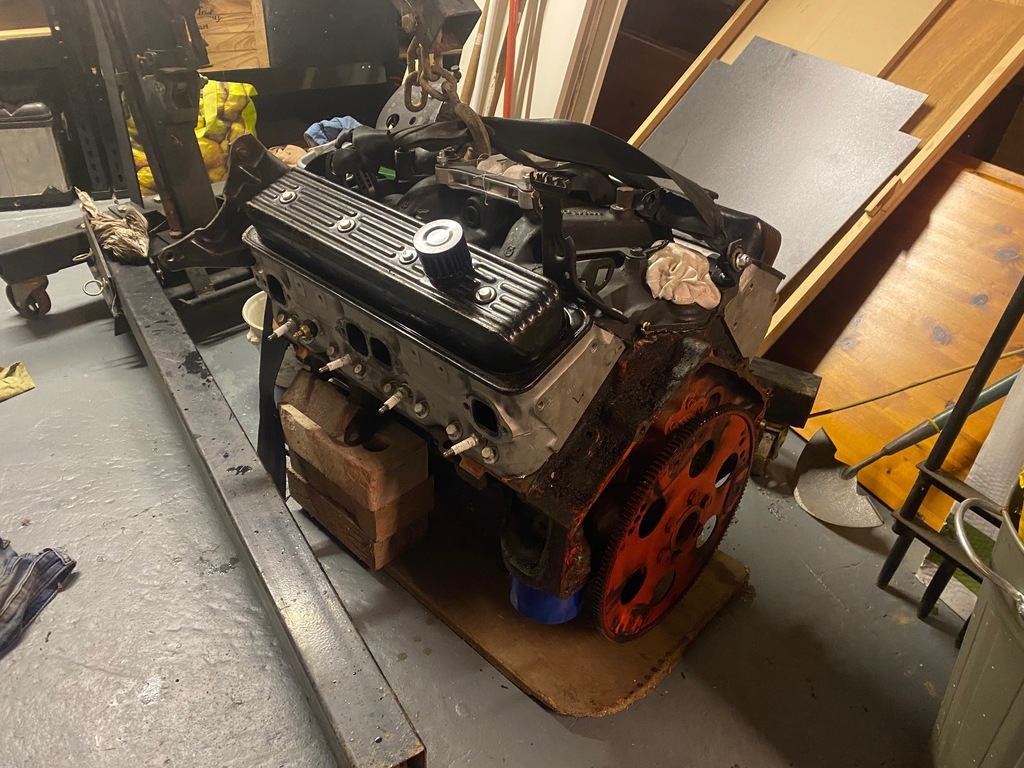 I then set about stripping it down and finding out what went wrong! 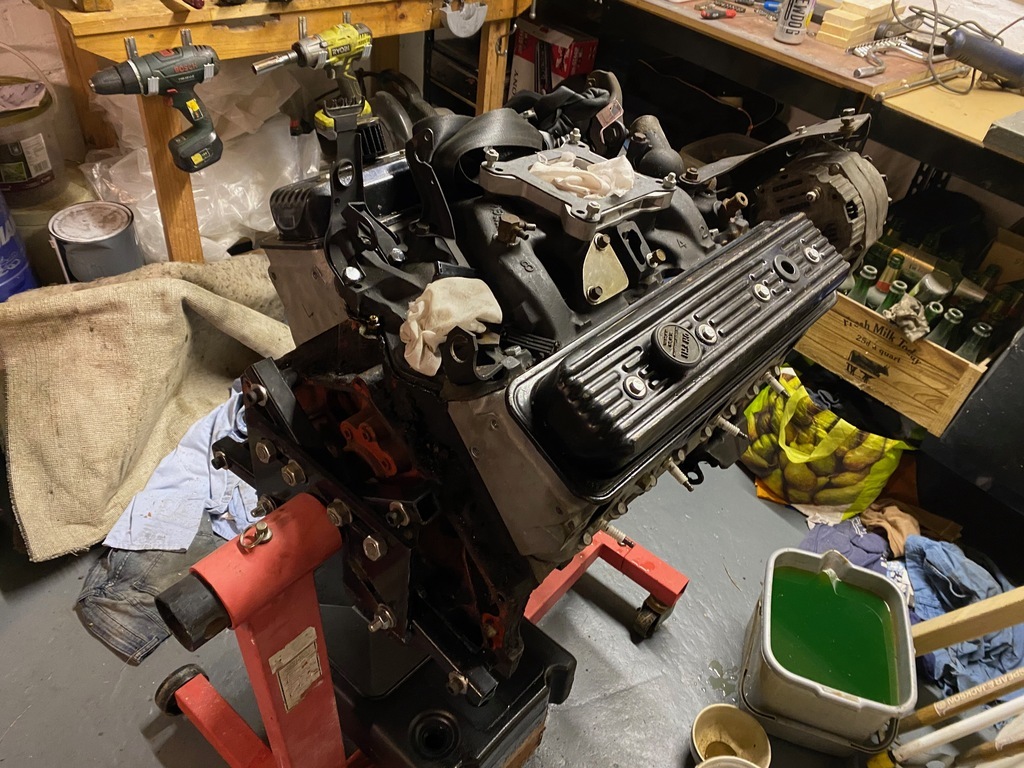 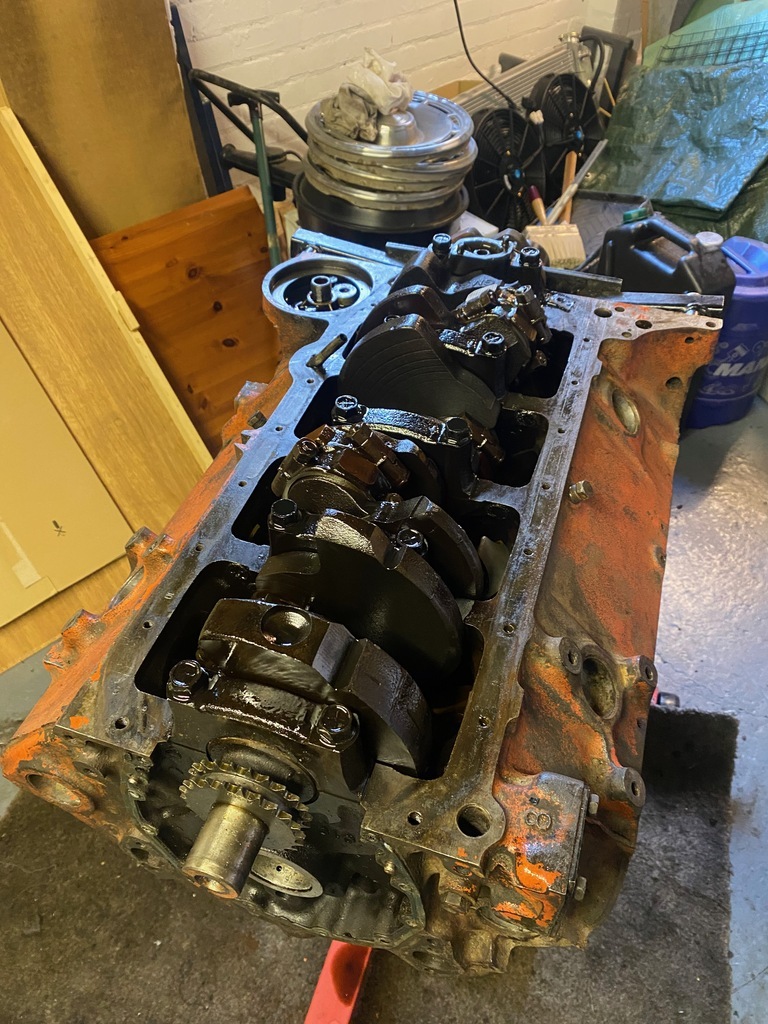 This was the mess in the bottom of the sump 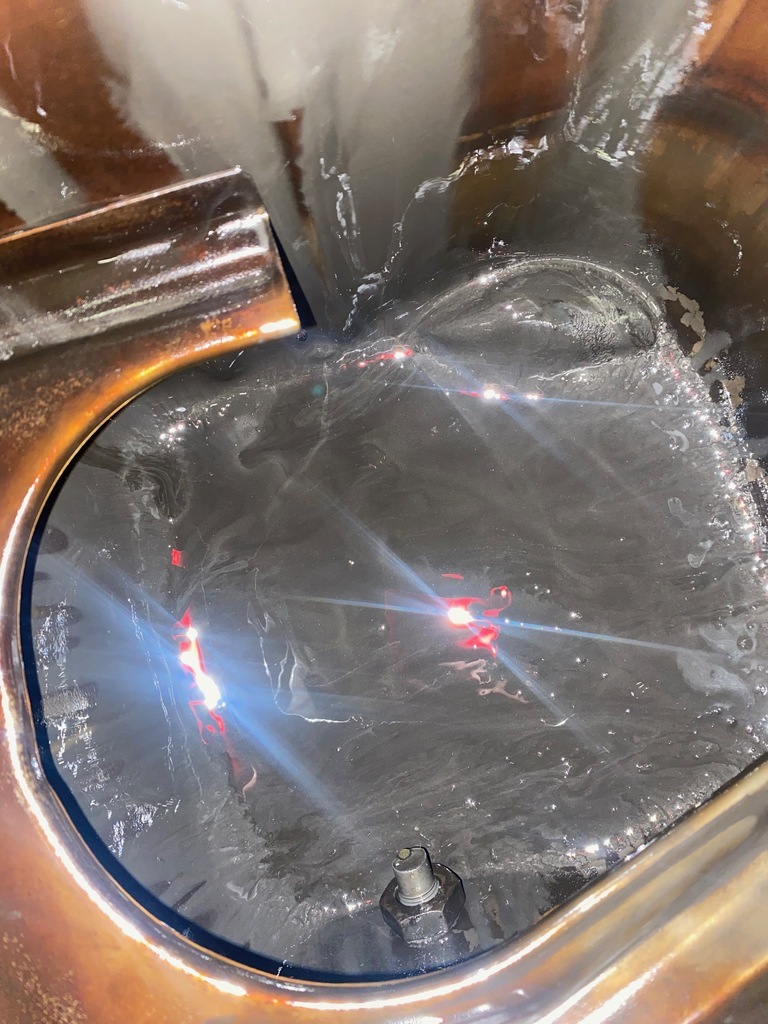 Well thats not a good sign... 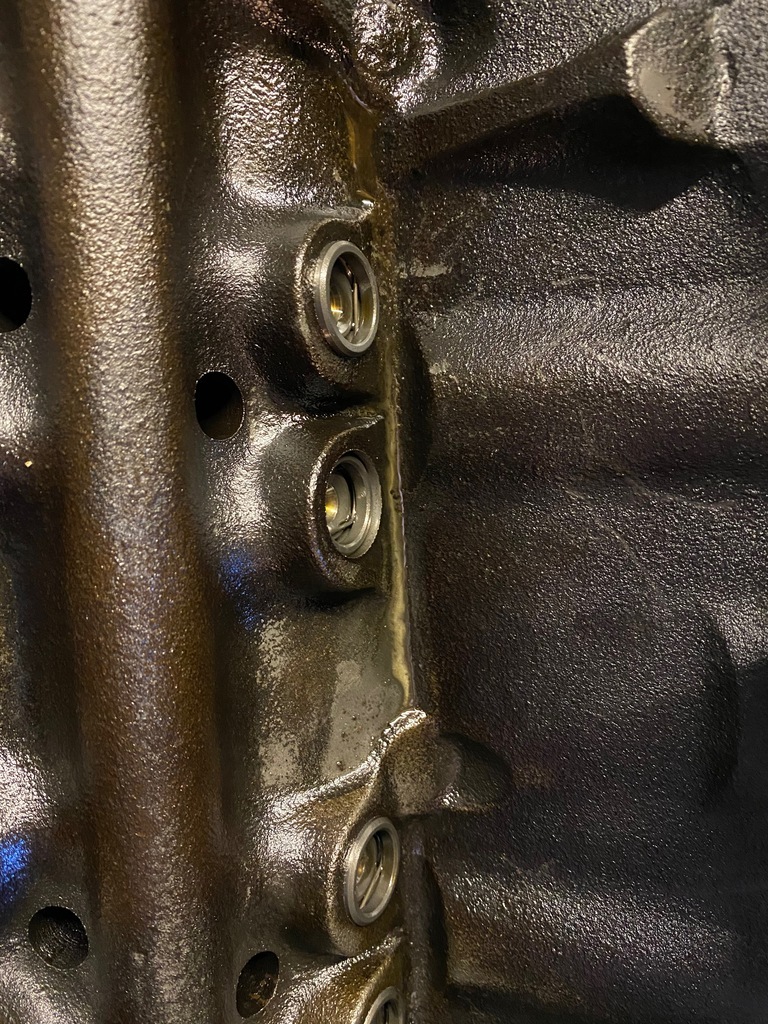 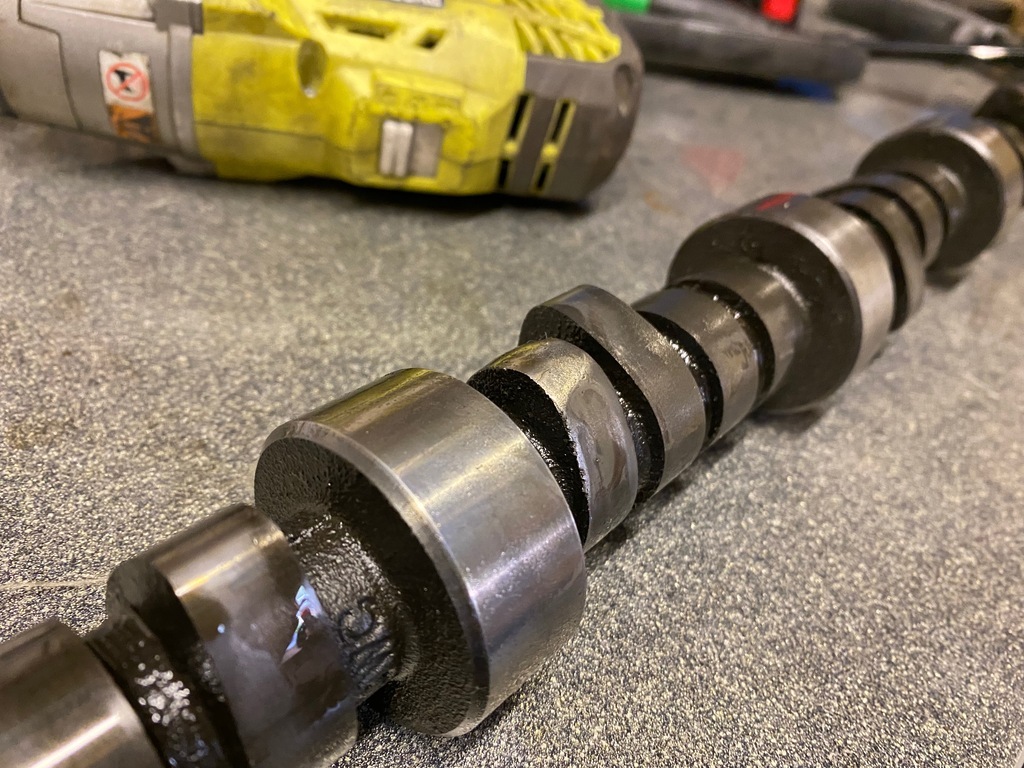 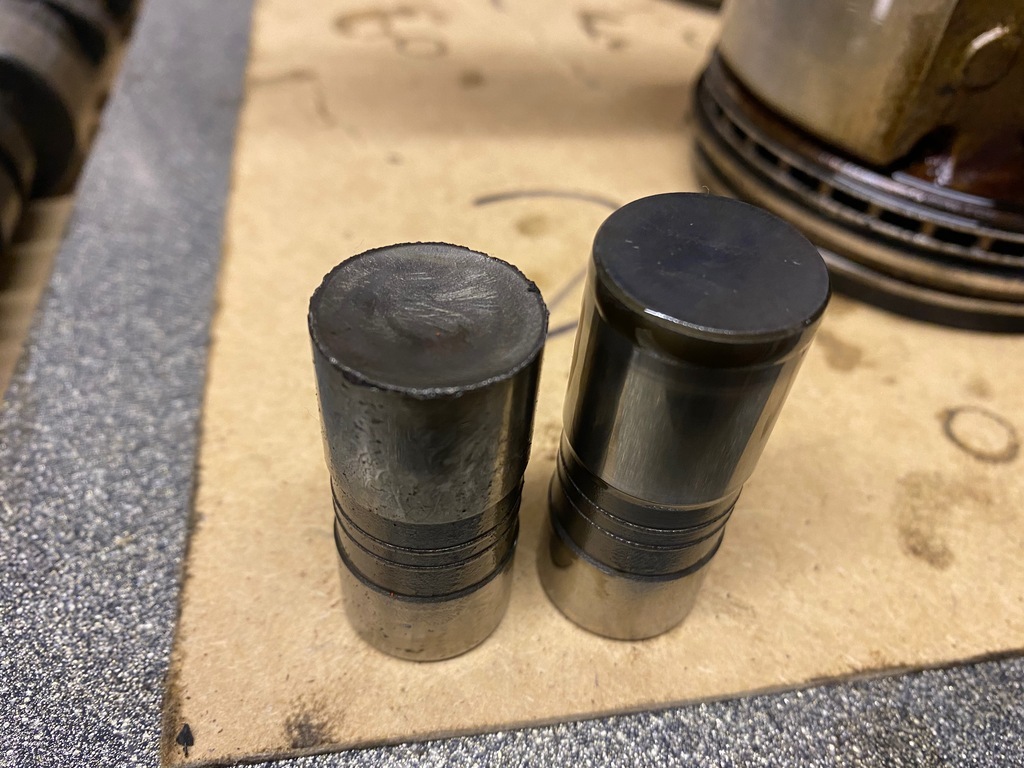 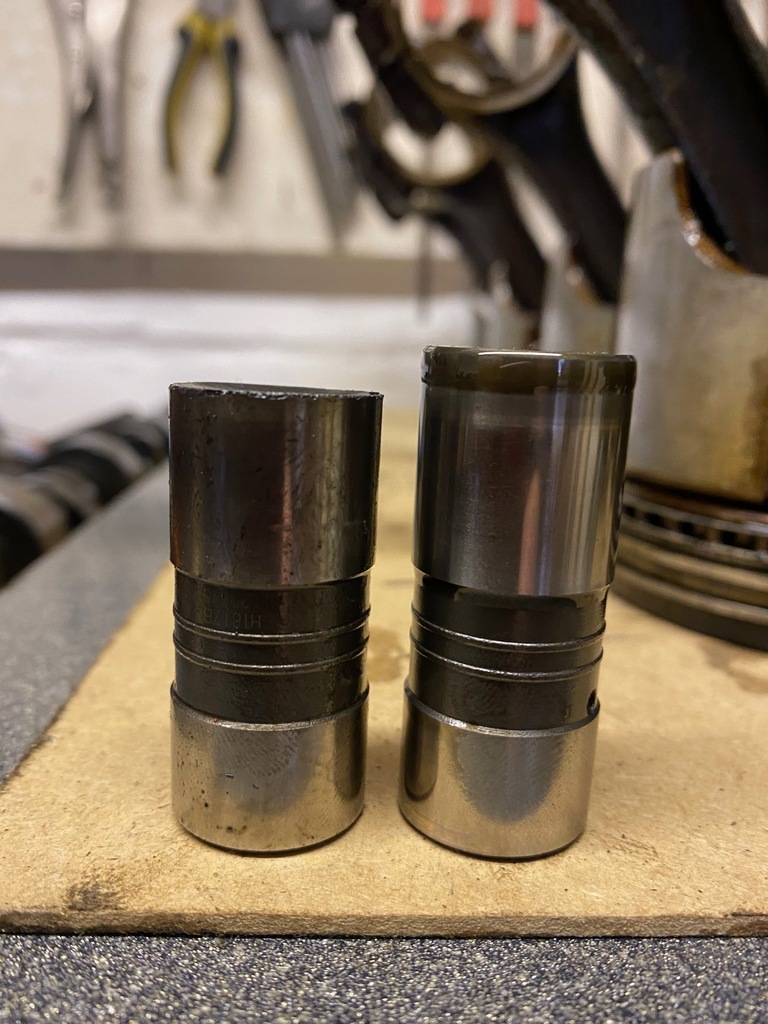 It looks like Ebays finest camshaft/lifter combo has thrown in the towel. Also all of the plain bearings are looking very tired, i expect all of the lifter material in the oil for 200 miles hasn't helped. 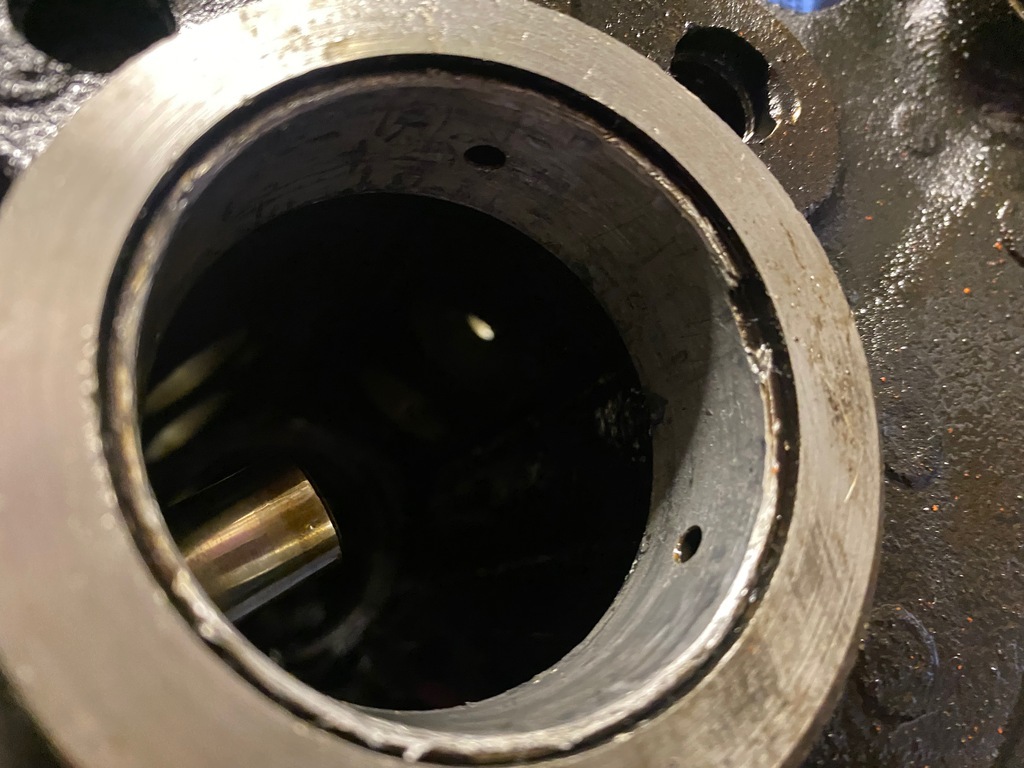 The rest of the engine seems okay really, no major scoring on the crank and nothing too scary on the cylinder walls. So really just a new camshaft and the consumables: rings, bearings, gaskets etc. |
| |
Last Edit: May 15, 2022 13:07:11 GMT by Splitty456
|
|
|
|
|
Aug 17, 2021 18:51:04 GMT
|
|
|
| |
Last Edit: Aug 17, 2021 18:51:47 GMT by Splitty456
|
|
|
|
|
|
|
Nice work on the engine and exhaust, This is looking better with each update, What's going to be next, bodywork or will you keep the current patina ?? Nigel Yeah, bodywork is next on the agenda, followed by interior. Theres still a fair bit of welding that need doing to make it watertight but thats less important than burnouts  I'm trying to keep the patina as much as possible, where paint is required i'm attempting some faux patina - you'll see the first attempt soon |
| |
|
|
|
|
|
Aug 15, 2021 22:24:32 GMT
|
With the engine breathing mods done, it needed a better exhaust to suit. I found some used Schoenfeld long tube headers on Facebook and for the exhaust I went with a summit racing 2.25 inch dual exhaust kit in aluminised steel. I would have preferred stainless but they didn’t have any in stock… 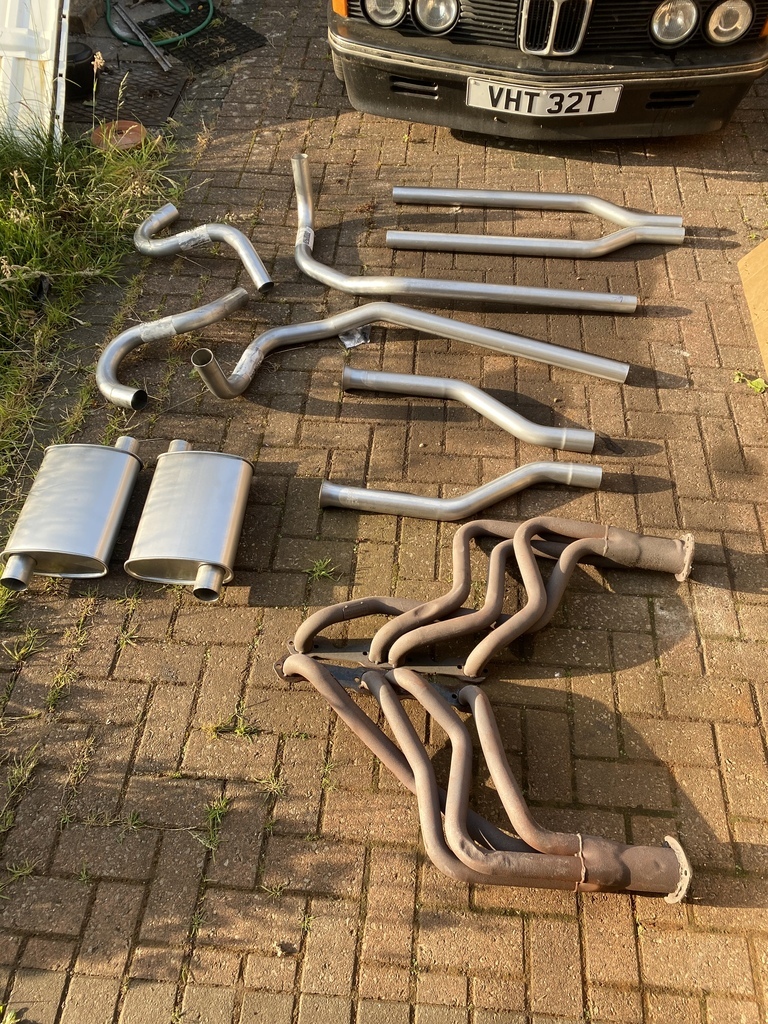 This is a true dual system by design, but I think I prefer the sound of a H pipe, so first step is to make up a H pipe! 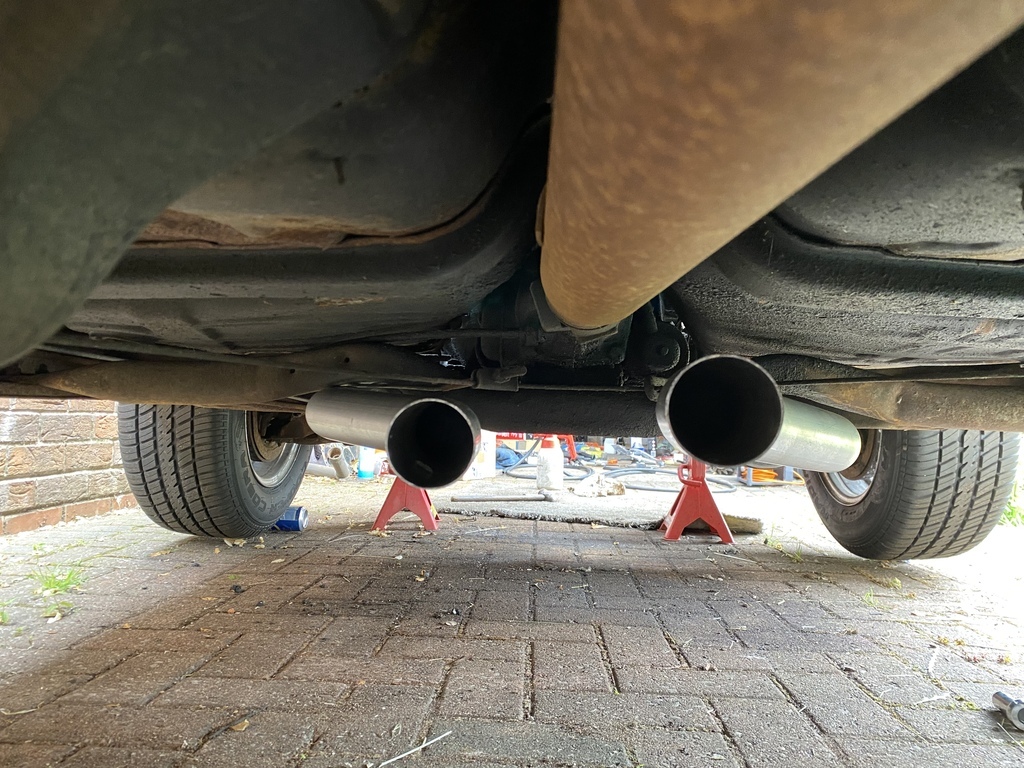 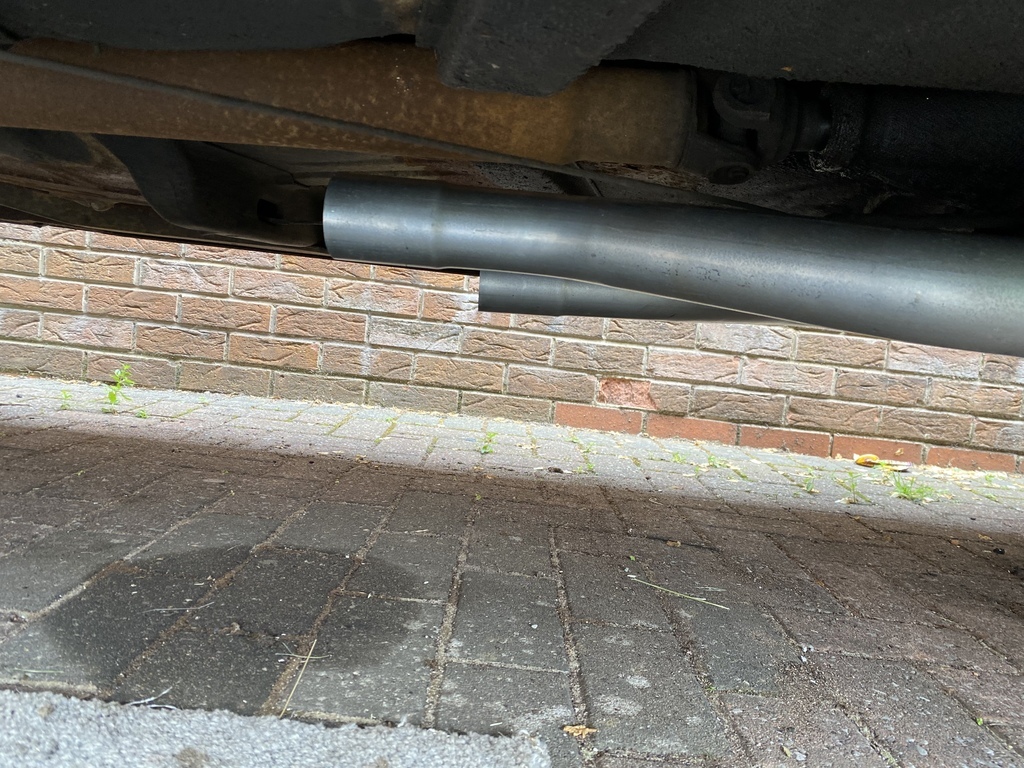 Actually, the first step is to get the reducer pipes to line up properly… the headers I have had come off a G body el Camino and I think they’d been tweaked a bit to clear the cross member on that car. A simple matter of adjusting the angle of the flange on the passengers side pipe. I also took about 5 inches out of it to make it end level with the drivers side (for some reason the drivers side collector had been shortened?) 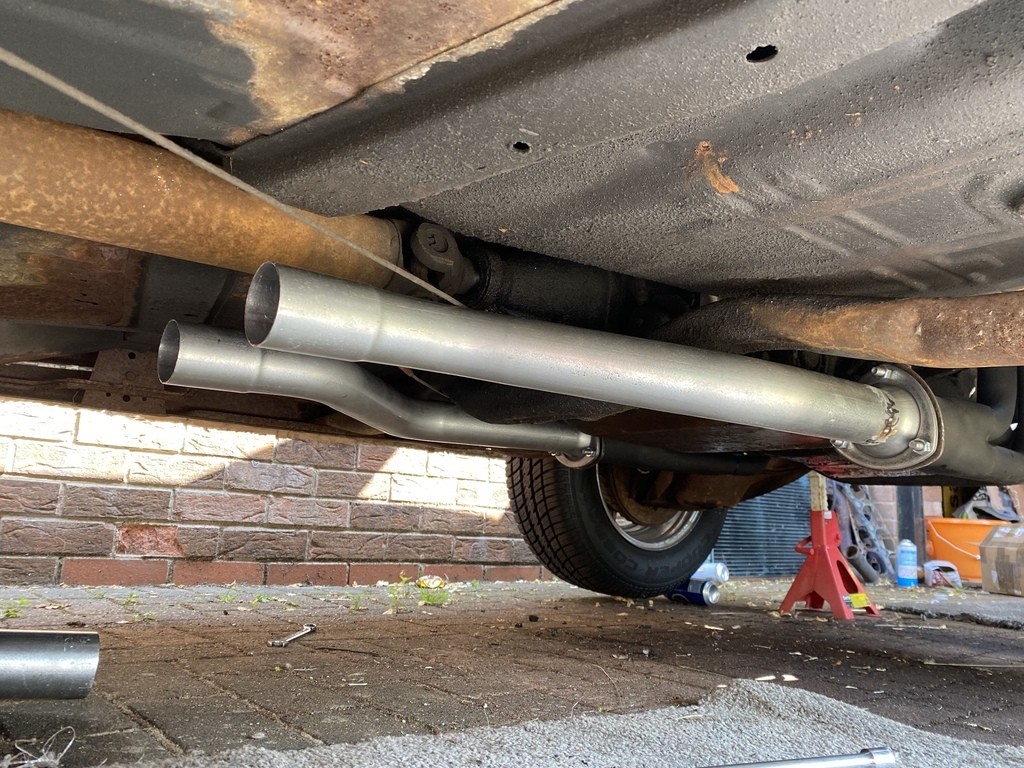 Much better. Now on with the H pipe 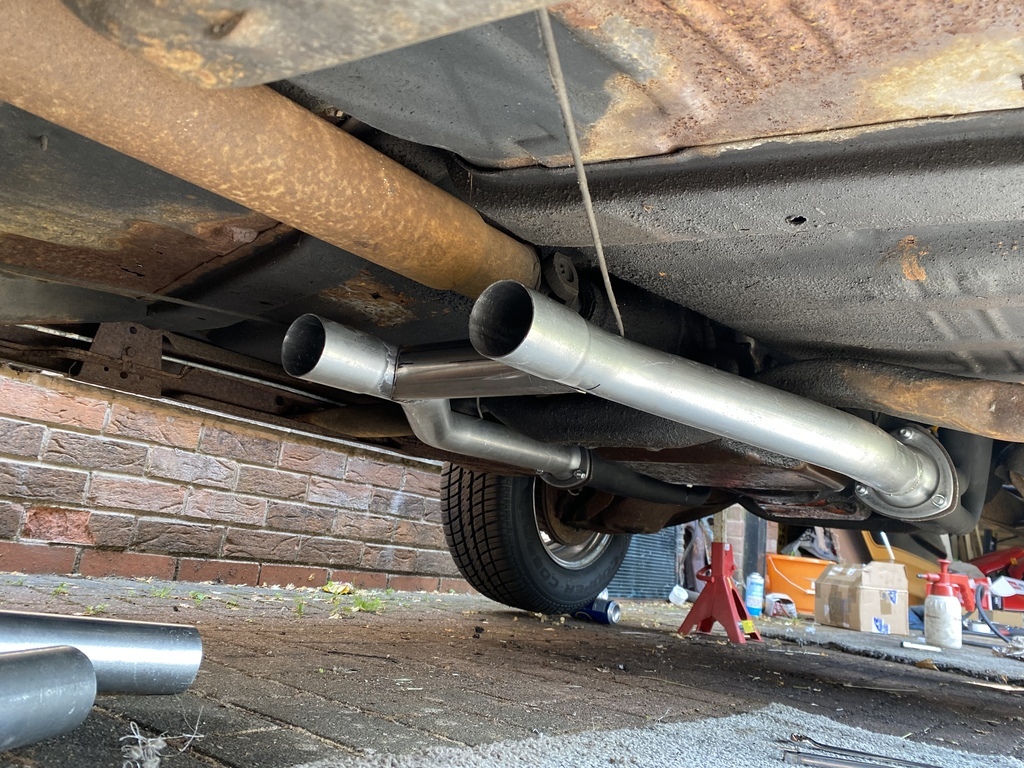 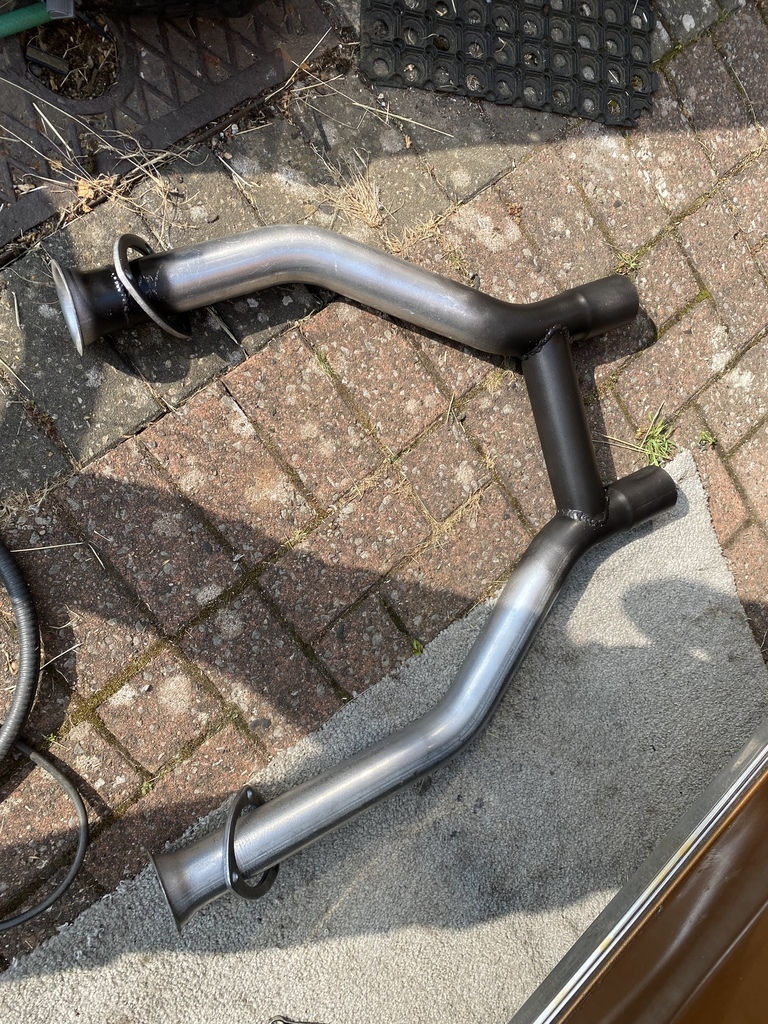 Then on with the rest of the mid pipes to the first mount at the rear of the silencers. 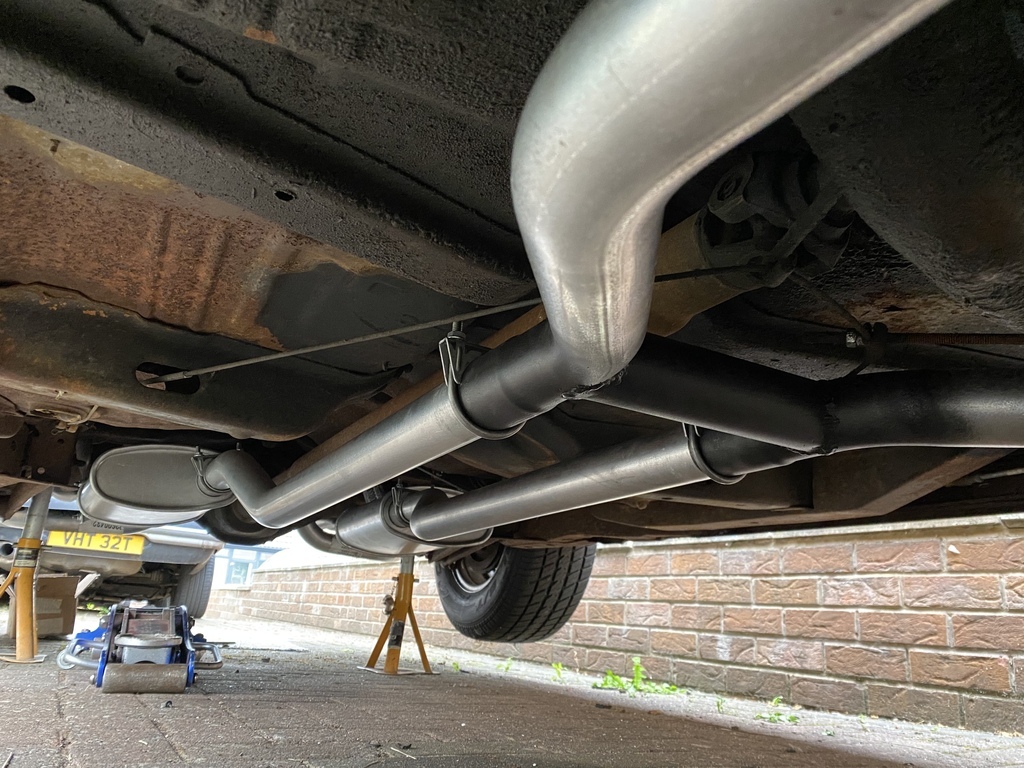 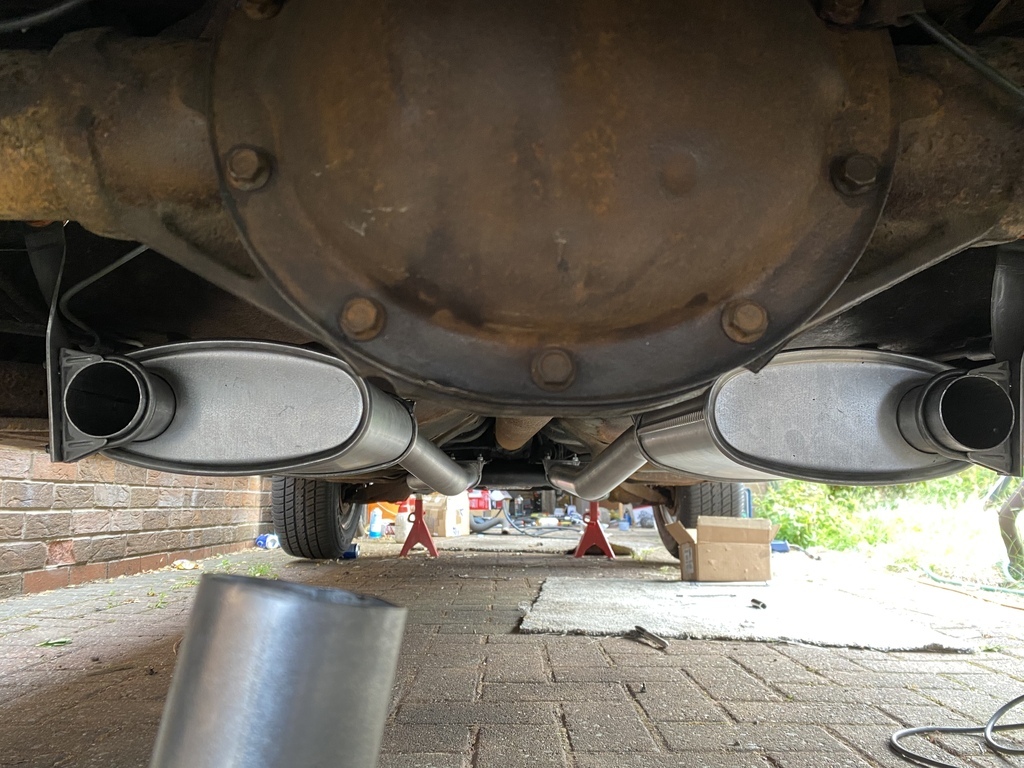 I had to modify the mount brackets slightly to use the original mounting holes in the frame - presumably the kit is made for a 2 door and the 4 door frame differs slightly in this area? 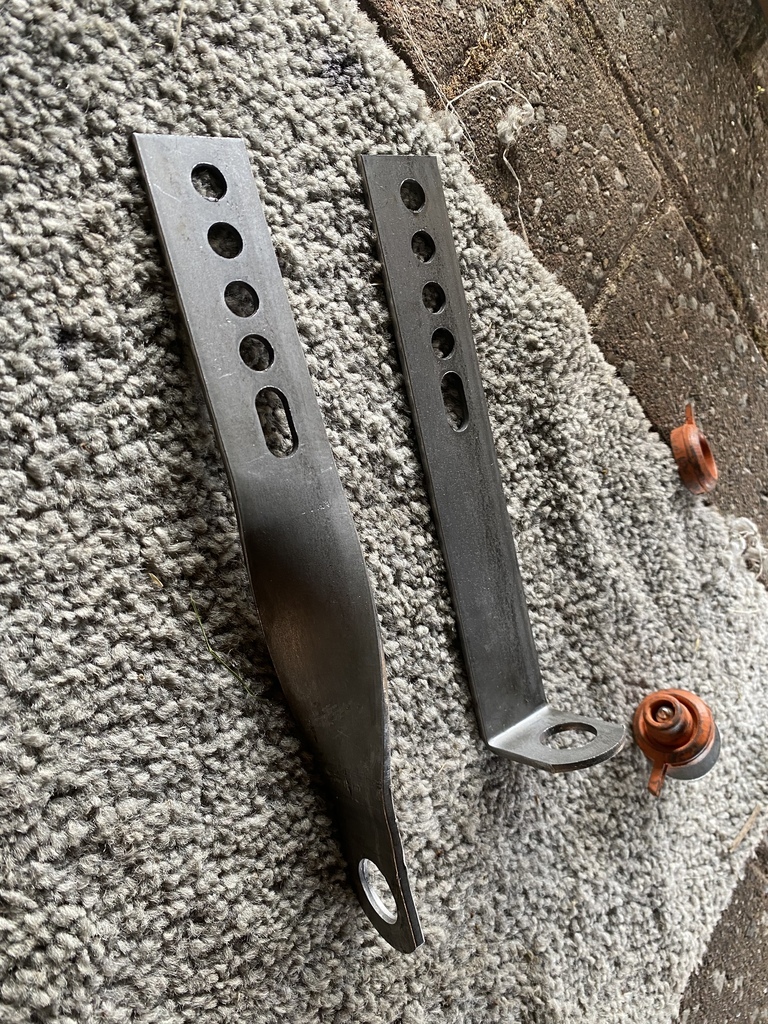 With the silencers in place, the tail pipes can be fitted and cut to length, unless you like the wheel barrow look 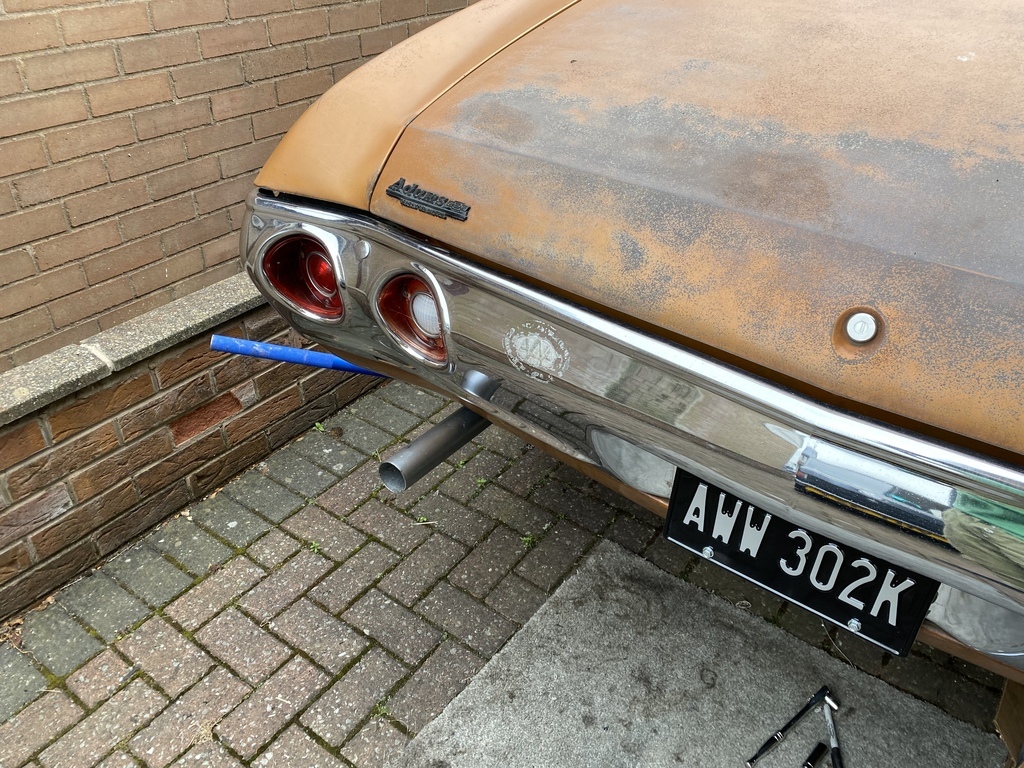 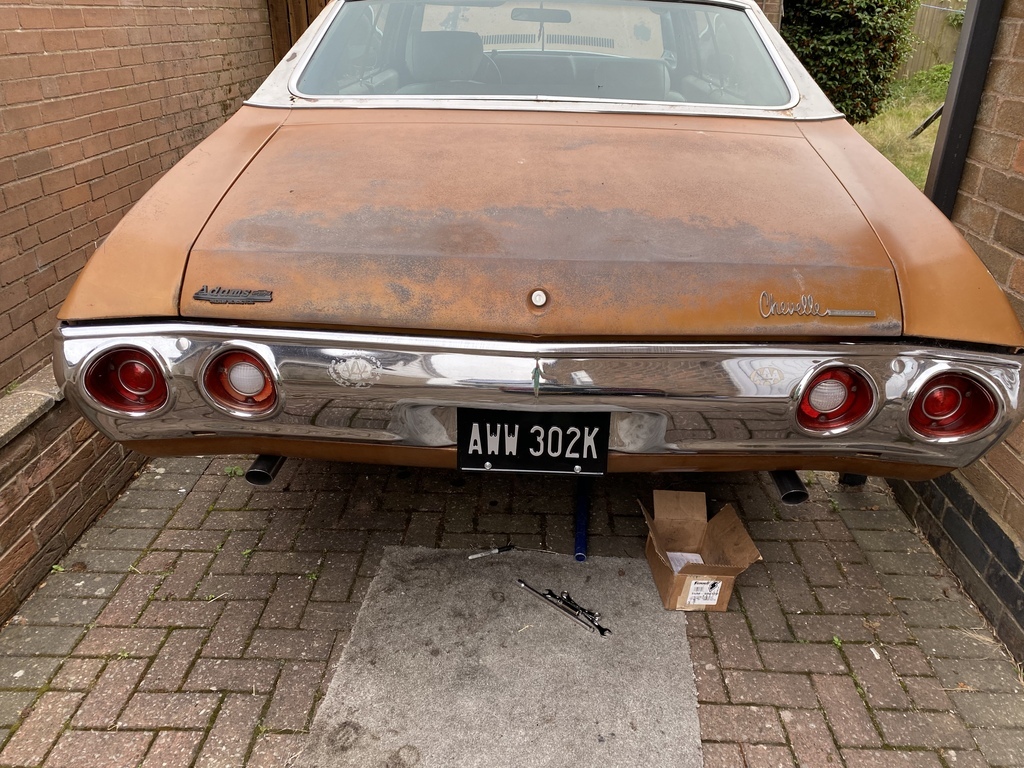 Overall a pretty well fitting exhaust, I think every pipe needed a little bit trimming off to get it all to sit nicely and tuck up under the car properly. I’ve seen a few cars where this clearly hasn’t been done and the exhaust looks a bit of a mess, but with a bit of care I think it looks pretty good! 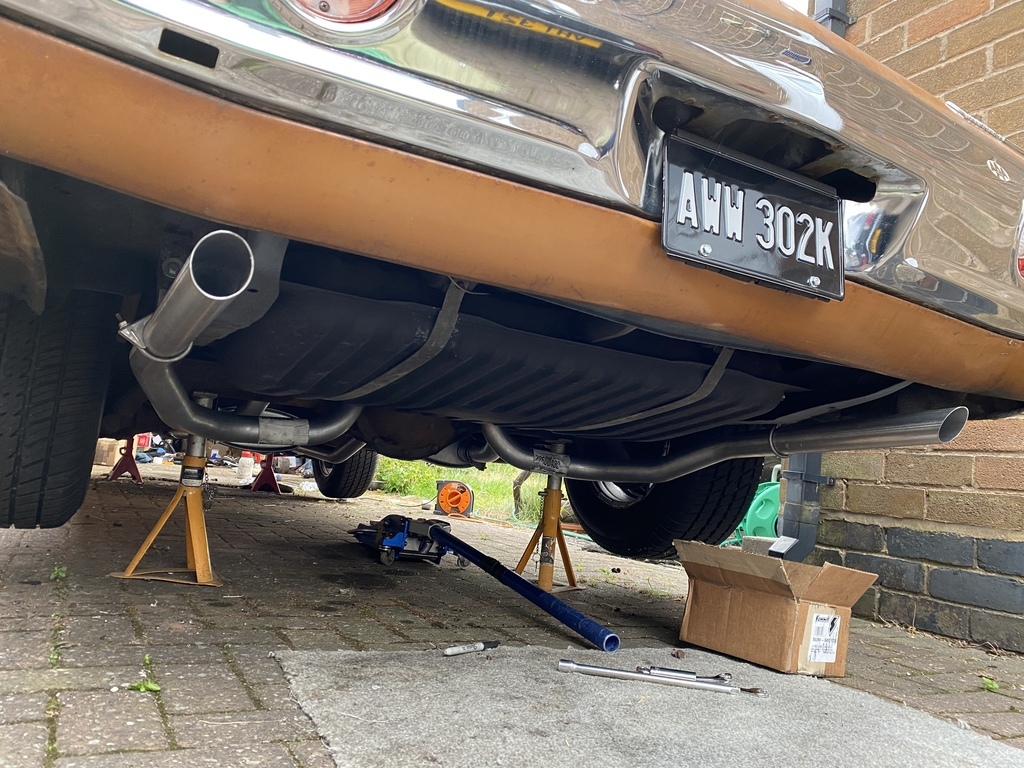 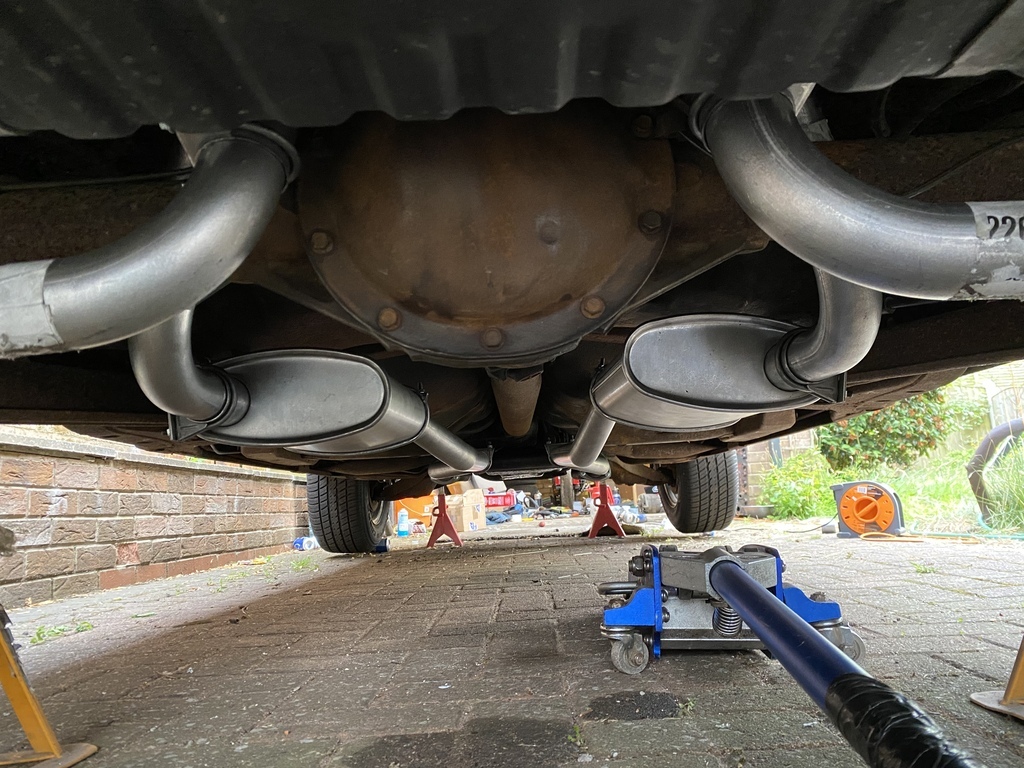 I’ll try and get a video uploaded tomorrow  |
| |
|
|
|
|
|
Aug 13, 2021 10:23:32 GMT
|
Good work Sir! Not wanting to teach you to suck eggs etc but did you remember to put thread sealer on the head bolts? As they screw into the water jacket you will find another area of water loss if you have forgotten to do this. As for the cowl I have seen a number of people (admittedly in the USA) use Aluminium baking trays as the basis for the fan shroud. Or just bend up a bit of ally.... P. The head bolts I used came with patch lock on the threads already, but that is a good tip for new players. I like the baking tray idea, but to be honest I think Ali sheet would be cheaper! |
| |
|
|
|
|
|
|
|
It looks like you have enough space to knock up an Ali cowl that the fans mount to. Then you just have to mount the cowl. I did similar on my Cressida if you felt like trawling through that thread, but I'm sure you get the idea. Just had a look through your thread, you’ve had quite an adventure with that car!! Fair play for sticking with it The original cowl clipped in to the bottom rad support and bolted to the top one, so I think I’ll do something similar but with Ali sheet - as you say there’s plenty of room in there |
| |
|
|
|
|
|
Aug 11, 2021 19:20:00 GMT
|
Right,best take the rad back out and make proper brackets for those fans. Those zip tie fixings will saw through the rad in short order with road vibration and ruin the rad. You need to fix them with a frame that mounts on the sides of the rad. I’ve always mounted them this way in the past without issue, but I take your point, it is not the best way of mounting rad fans. For the record these are regular cable ties threaded around 3 rows of tubes, rather than the serrated zip tie type fixings that come with the fans. I’ll look into fixing them to the top and bottom rad mounts - there’s not really anywhere to fix them to the rad itself. I think I’ll also check my other car with its fan mounted like this; I’ll be honest I’d not really considered that as a failure mode |
| |
|
|
|
|
|
Aug 11, 2021 15:42:12 GMT
|
After begrudgingly stripping the intake manifold again, I did actually find the culprit of the leak - it looks like this head has been severely dropped at some point, and the bruises were preventing the intake gasket from being properly compressed. 5 mins with a needle file (while crouched inside the engine bay like Gollum) had it sorted. An easy fix, just annoying I didn’t spot it earlier!  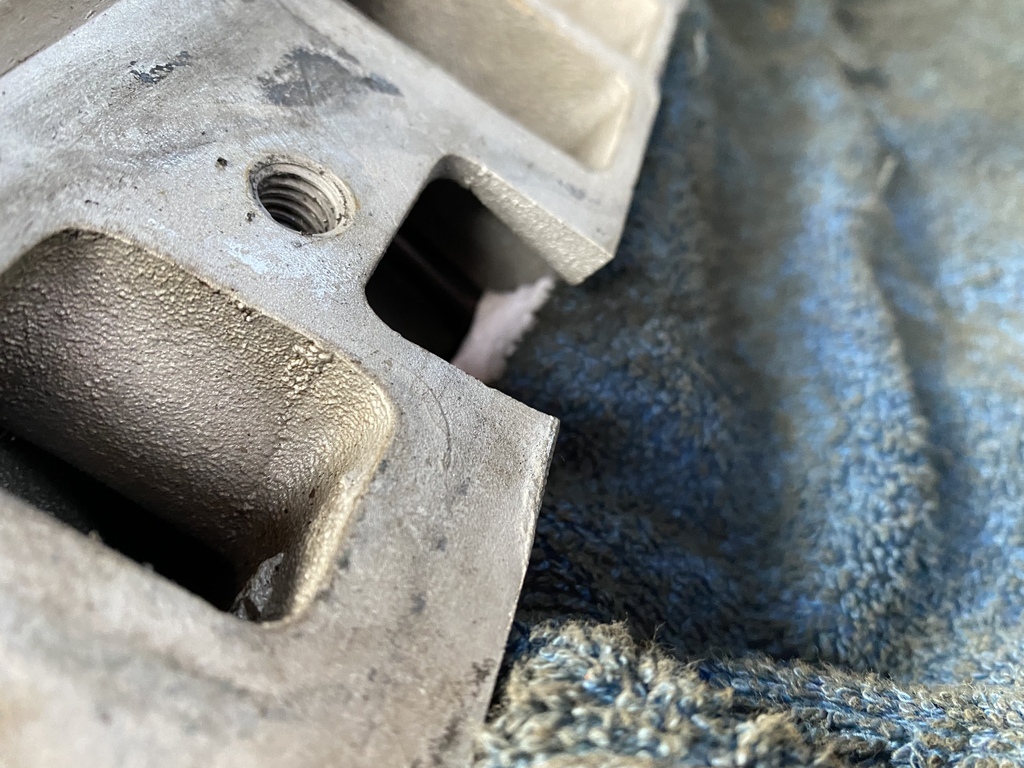 Since I’d have to take the radiator out again, I figured I’d upgrade at the same time. The original looked okay, but the car has always struggled with climbing temps in traffic - I even sat out some of the autosolo at goodwood because of this. I went for an all aluminium one from eBay, which was cheapest by virtue of being the only one available in Europe 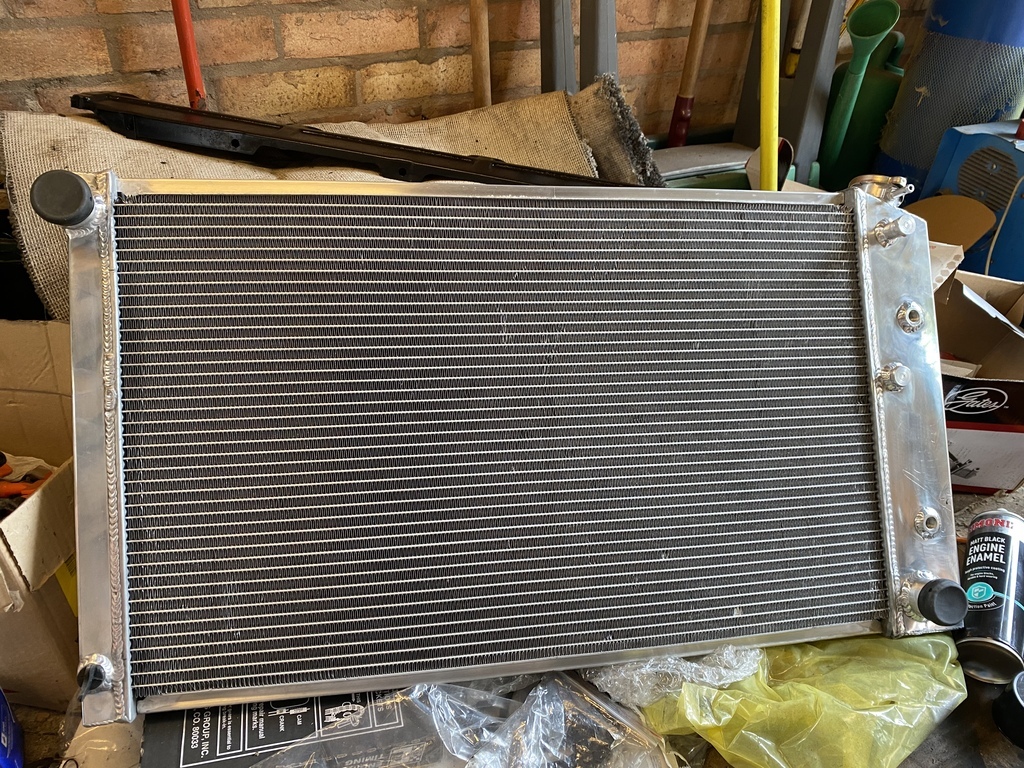 I also decided to switch to electric fans. There is a lot of debate on the chevelle forums about electric vs mechanical cooling fans, but let’s be real, electric ones are just better And the fan on this car kept contacting the cowl, slowing it down. The fact that I already had these fans lying around had nothing to do with it 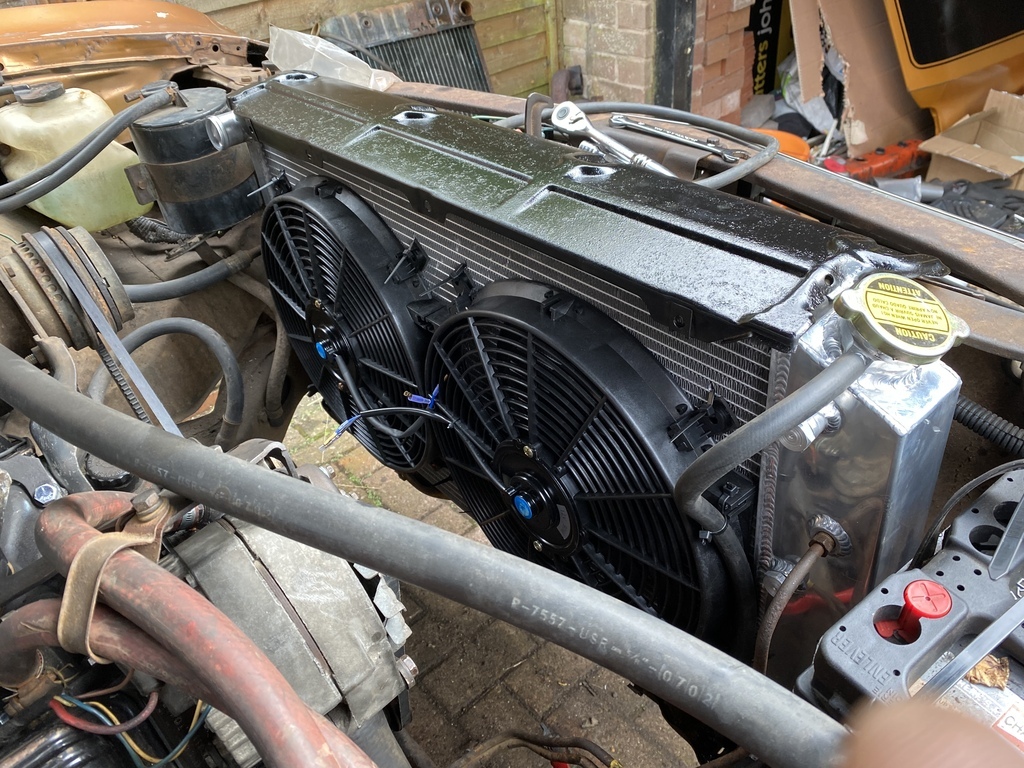 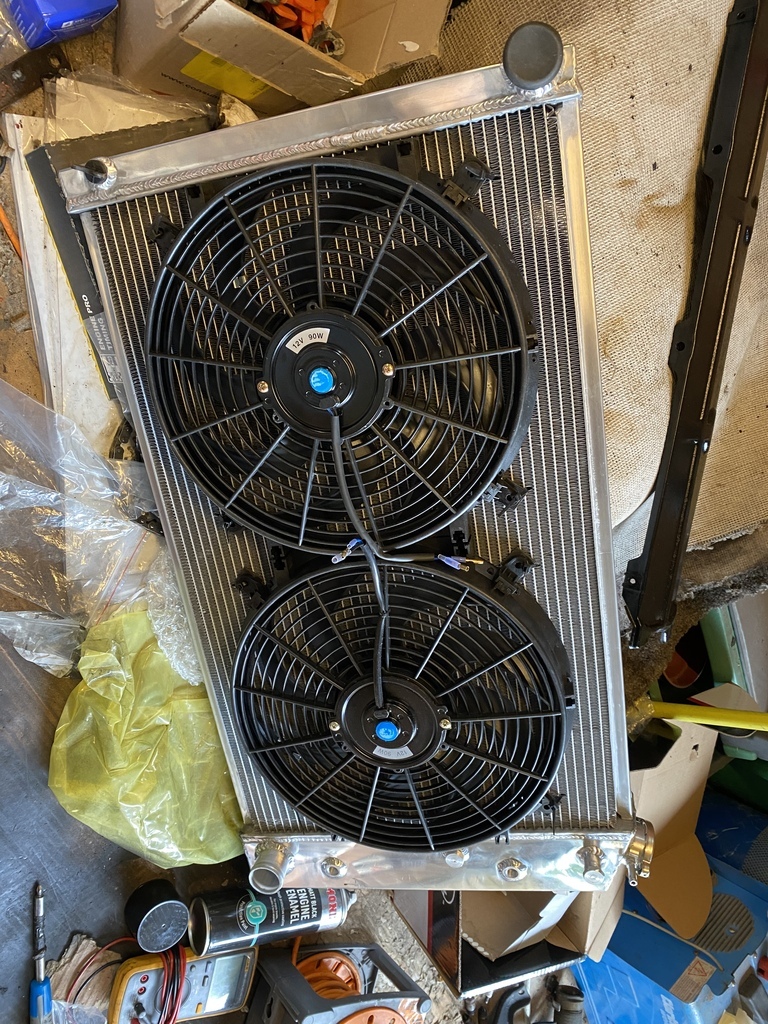 They’re wired in to come on at 91 deg top hose, and I’ve also wired them in to the A/C compressor - I do plan to refurb the A/C on this car, but in the meantime it means I can just switch the fans on permanently  Next up, the exhaust! |
| |
|
|
|
|
|
Aug 11, 2021 14:22:16 GMT
|
Well it’s been a while, but I have actually been making progress on the chevelle! Until recently I’d been enjoying the chevelle to much to start tearing it apart again, but then we had to self isolate for 2 weeks. Since I wasn’t allowed to go anywhere I figured it was the perfect time to start on the engine upgrades! First step: strip off all the old grimy stuff 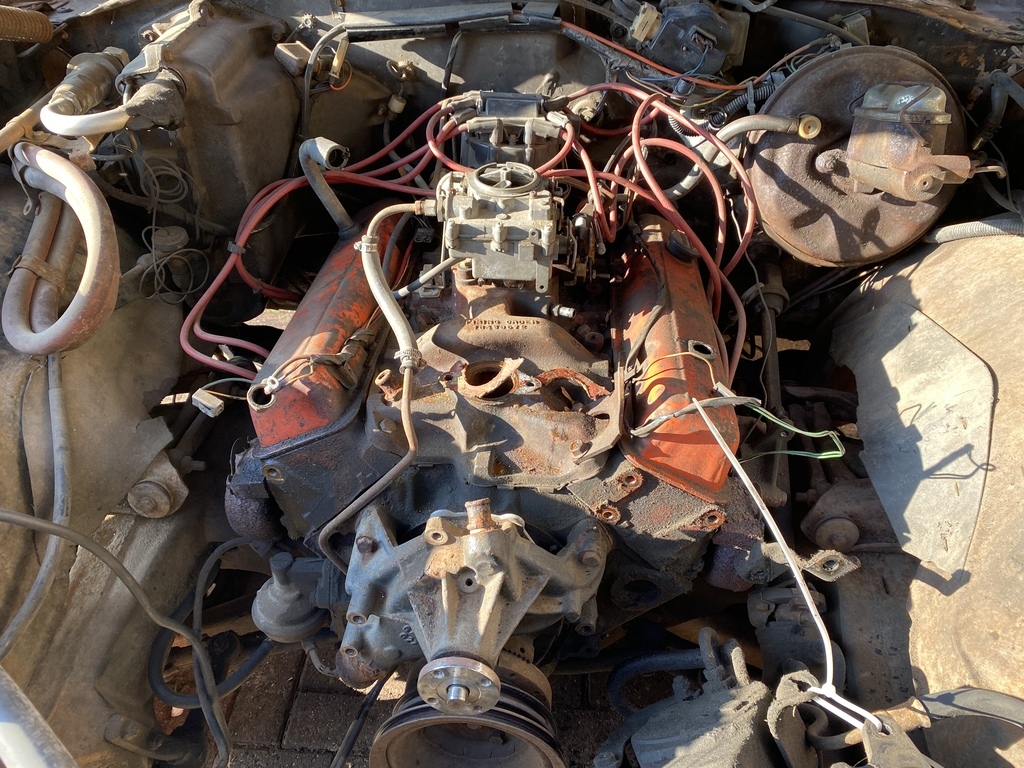 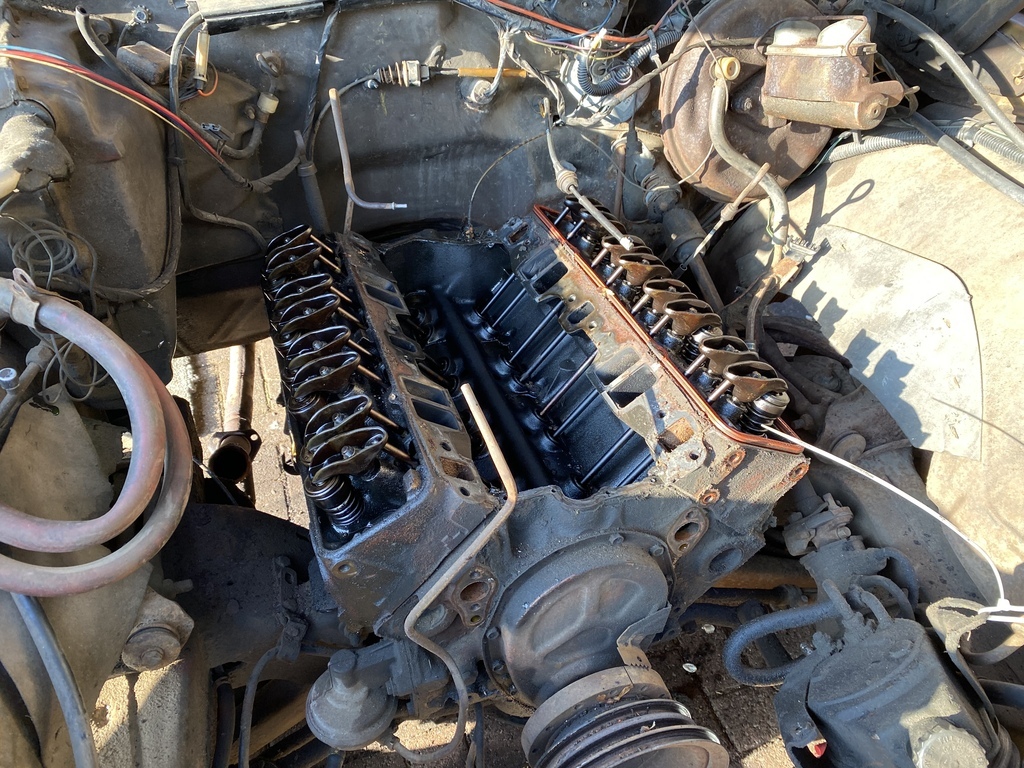 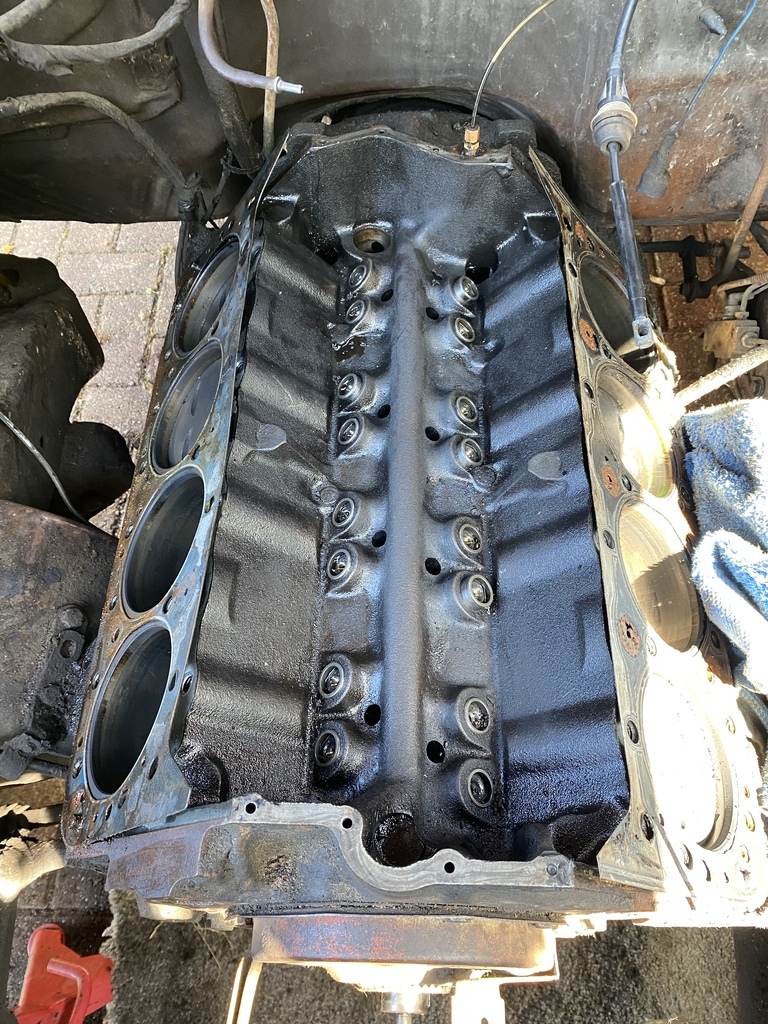 Always good to see mis matched head gaskets  Then clean everything up and start fitting shiny bits, starting with the heads. I also trial fitted the headers before bolting the heads down but thankfully they fitted with plenty of room - left them hanging loosely in place as it seems impossible to fit them with heads in place… 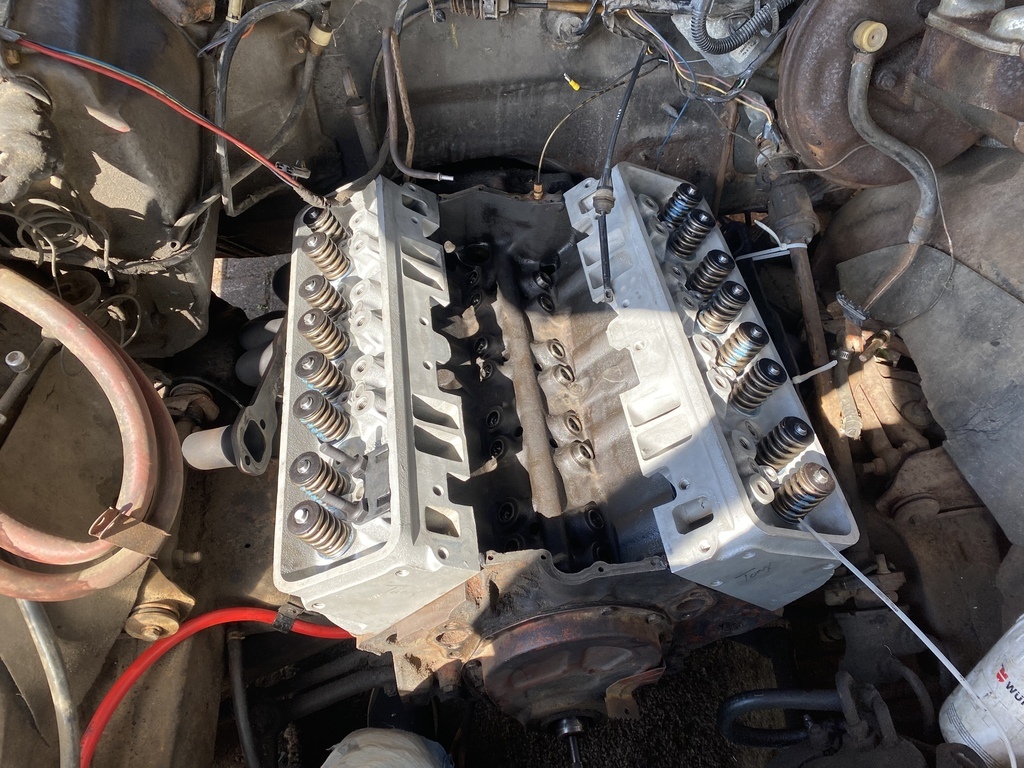 Then the new cam, cam chain kit and lifters 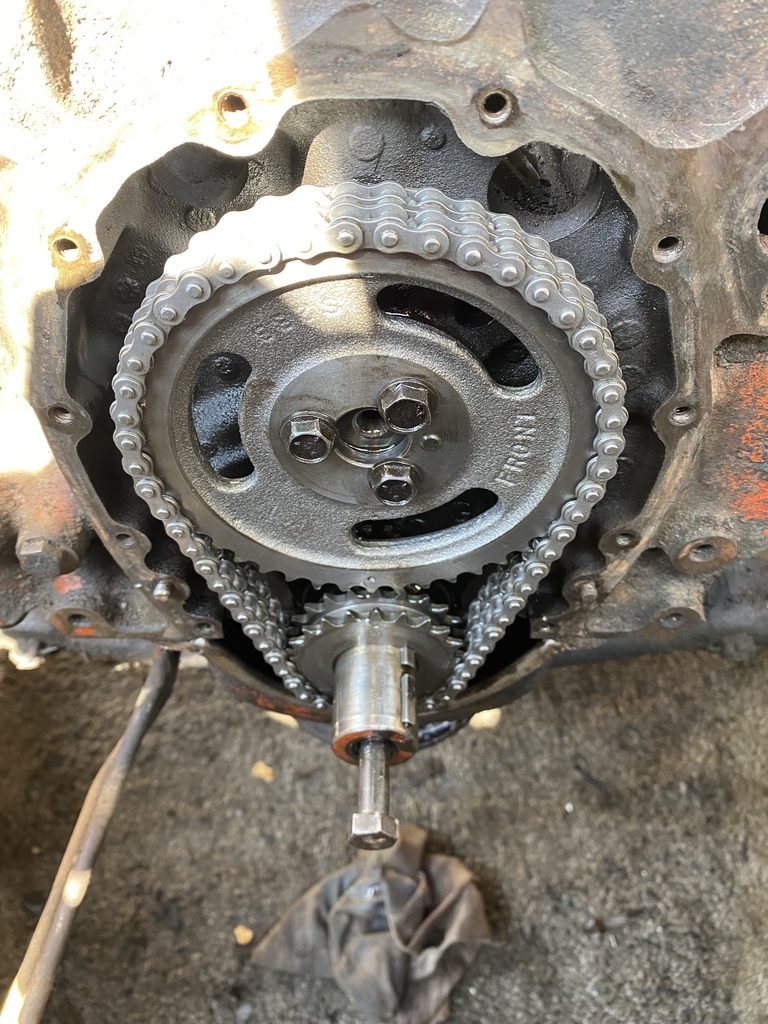 Then I cleaned up, ported and painted the intake manifold. The manifold is meant for a quadrajet carb (tiny primaries and massive secondaries) whereas I’m using an edelbrock which is square bore (almost the same size primaries and secondaries). I also had to oval the bolt holes as apparently the heads have been skimmed significantly… the correct thing to do would be have the manifold skimmed to match, but I didn’t know this until I came to fit the manifold… Which of course meant I had to clean and repaint the manifold once I’d got it to fit properly  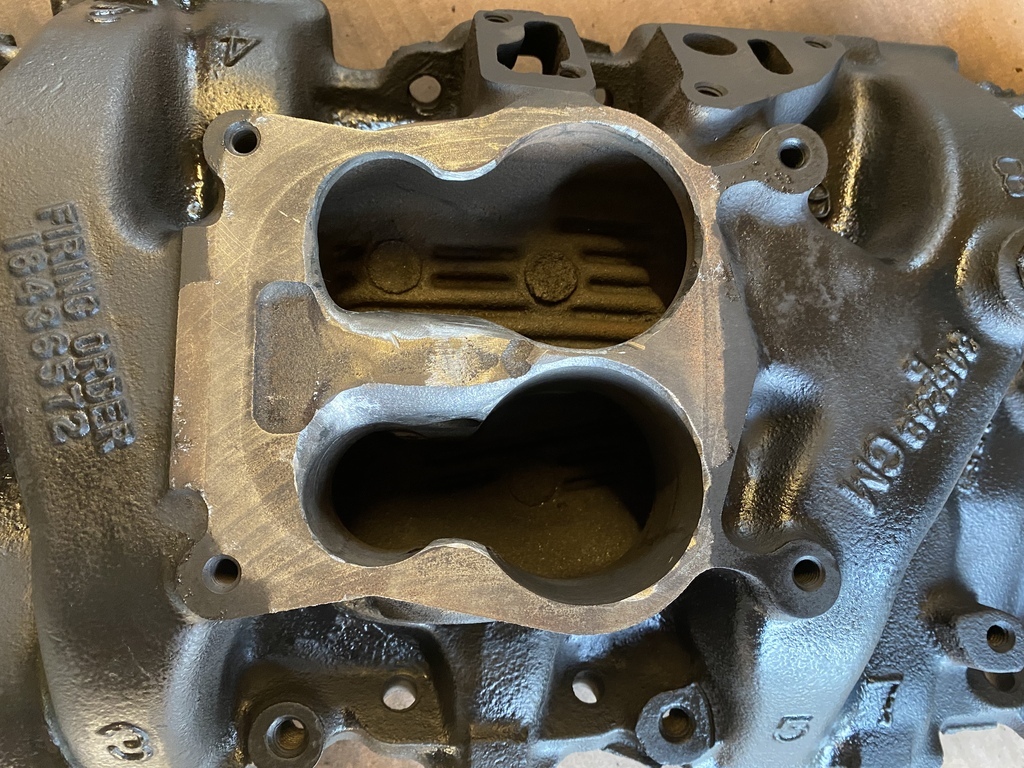 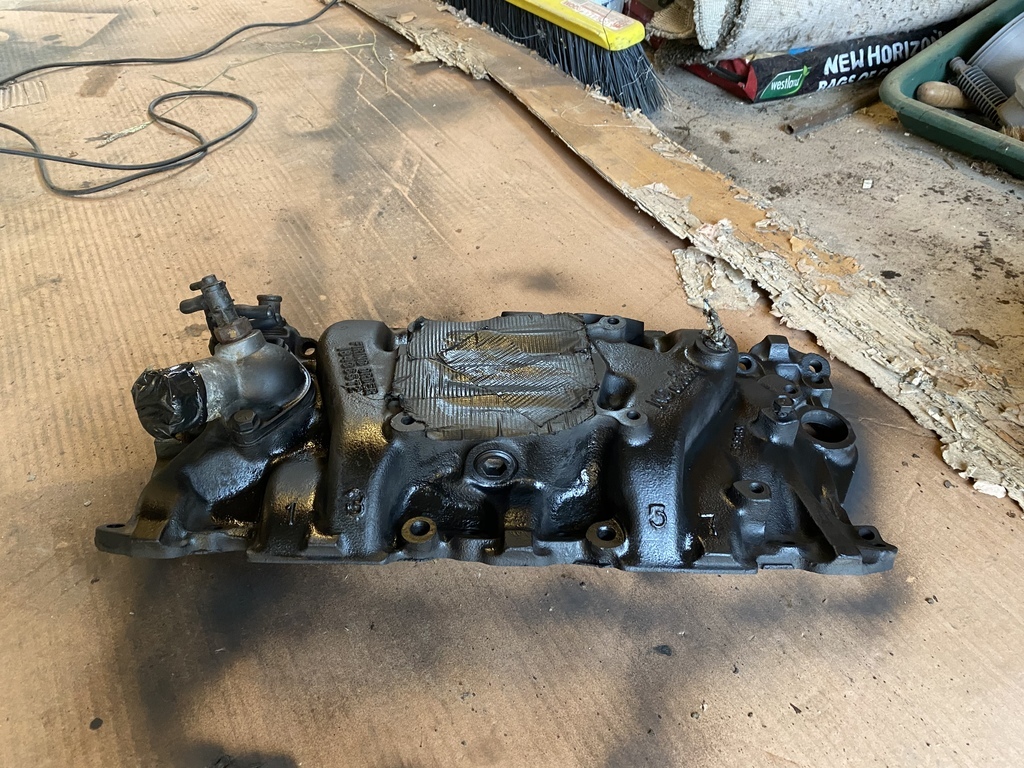 Then all the other stuff went on; distributor, headers, carb, etc 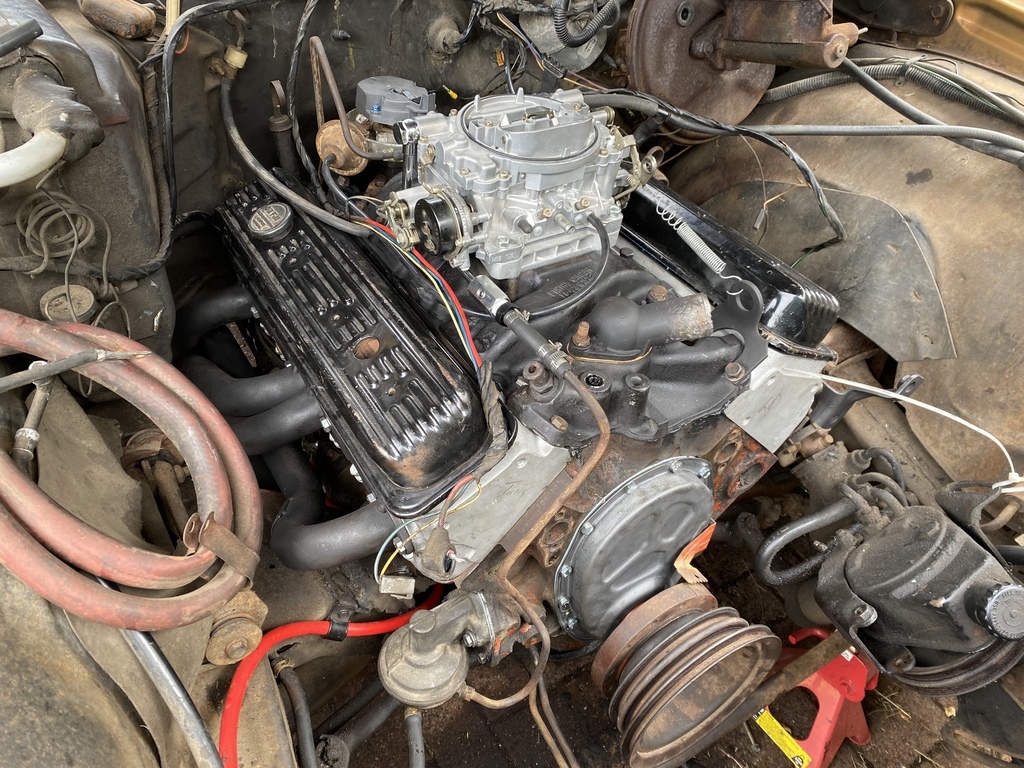 About this time I modified and cleaned up the wiring harness. The original harness had basically disintegrated and I needed to wire in the electric choke and the HEI properly (it was previously just a wire from the fuse board through the firewall) 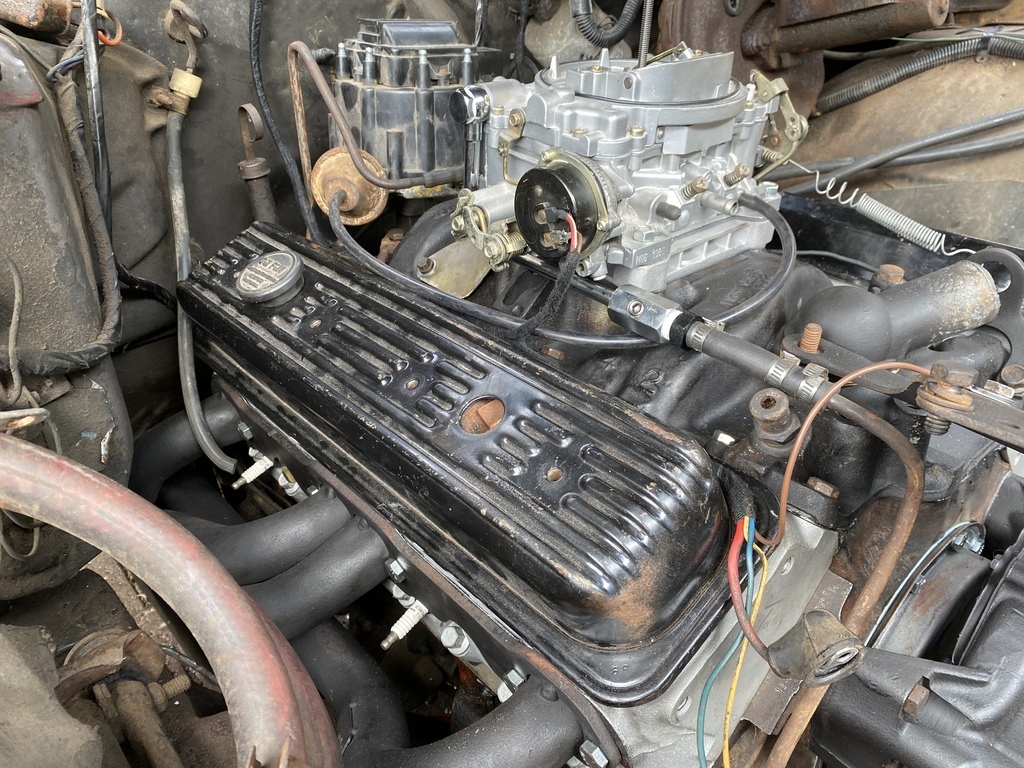 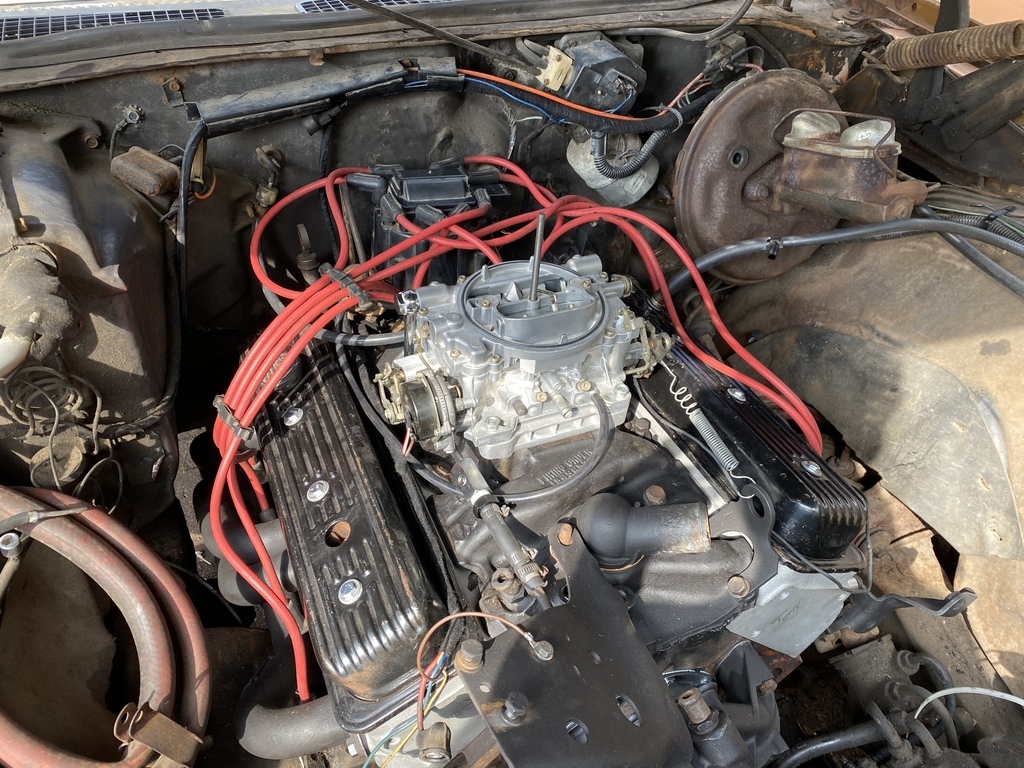 Finally all the boring stuff - accessories and radiators etc… 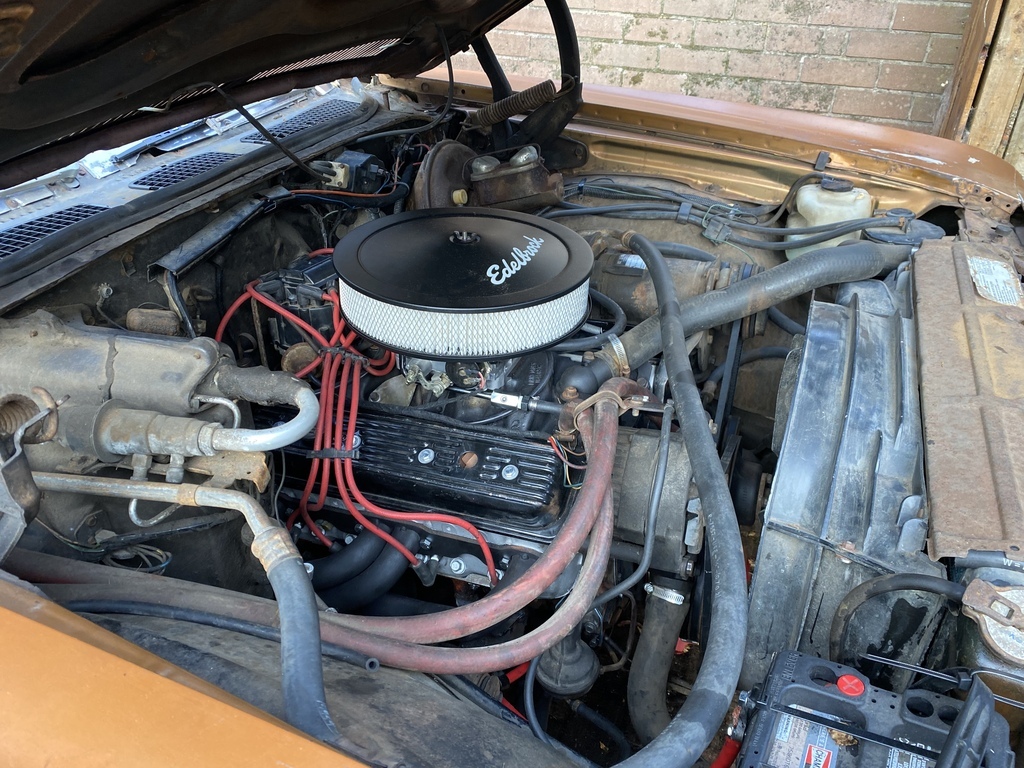 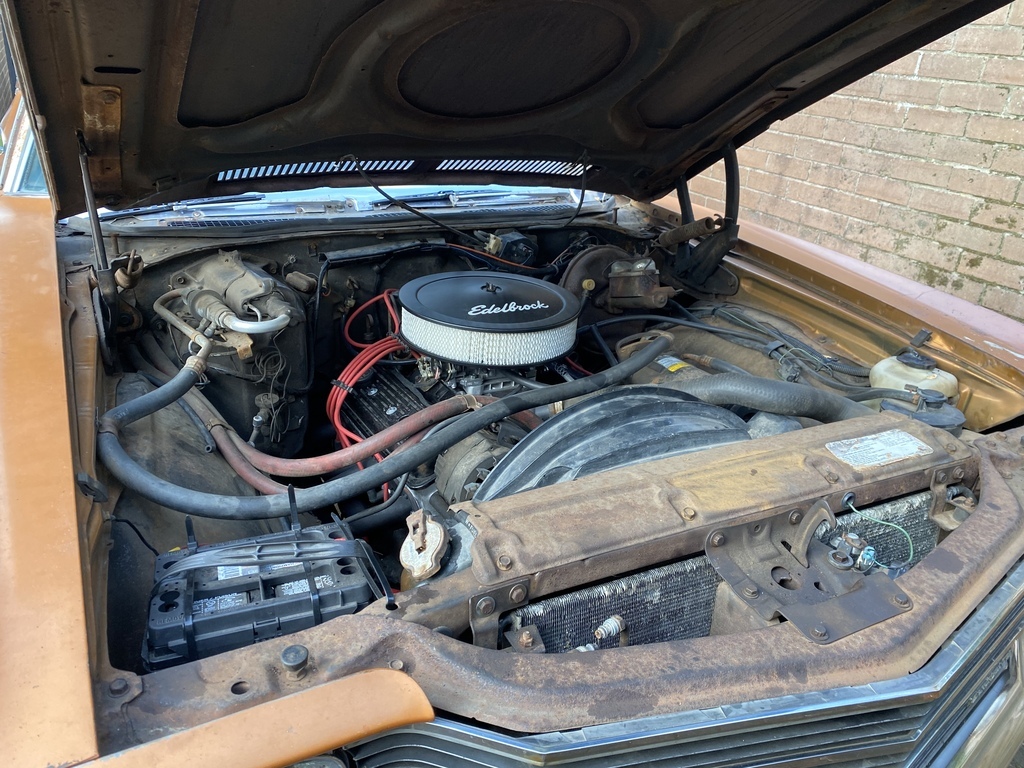 Then fill it up with coolant and try and start it! …. Or not, as coolant started curse word out of everywhere… Closer inspection showed it was coming from a heater hose (easy enough to fix) and the right hand cylinder head - intake manifold joint (not so easy to fix). Well, I guess take it all apart again and see what’s going on… |
| |
|
|
|
|
|
|
|
Jun 15, 2021 22:49:09 GMT
|
|
|
| |
|
|
|
|
|
May 26, 2021 22:03:52 GMT
|
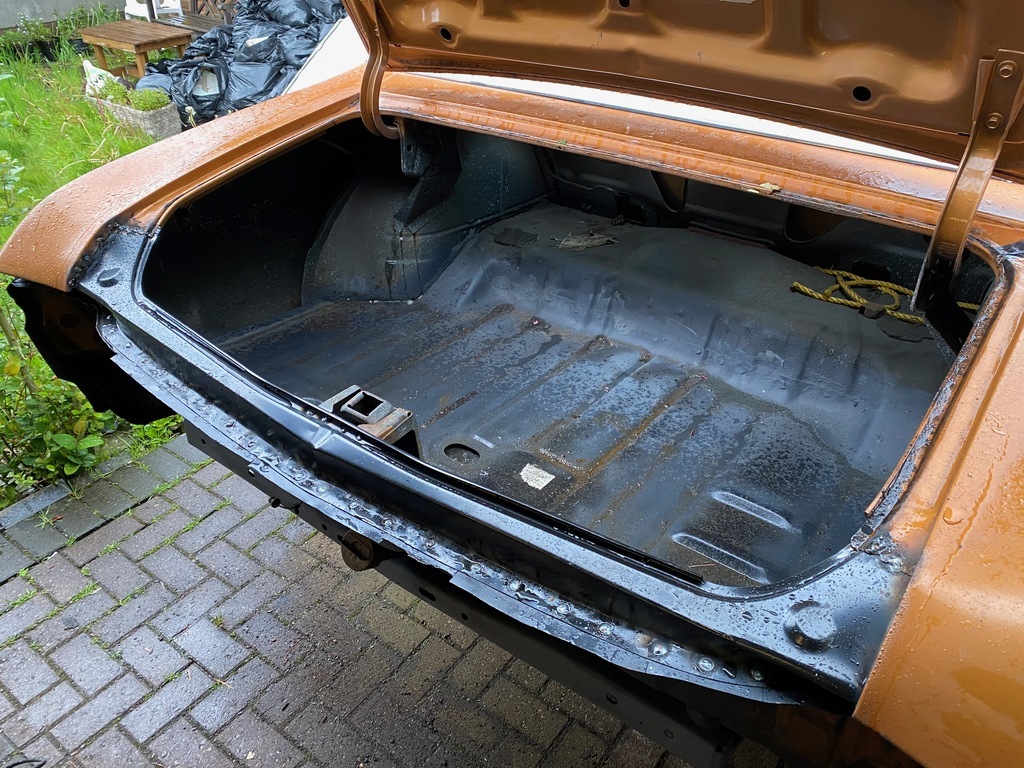
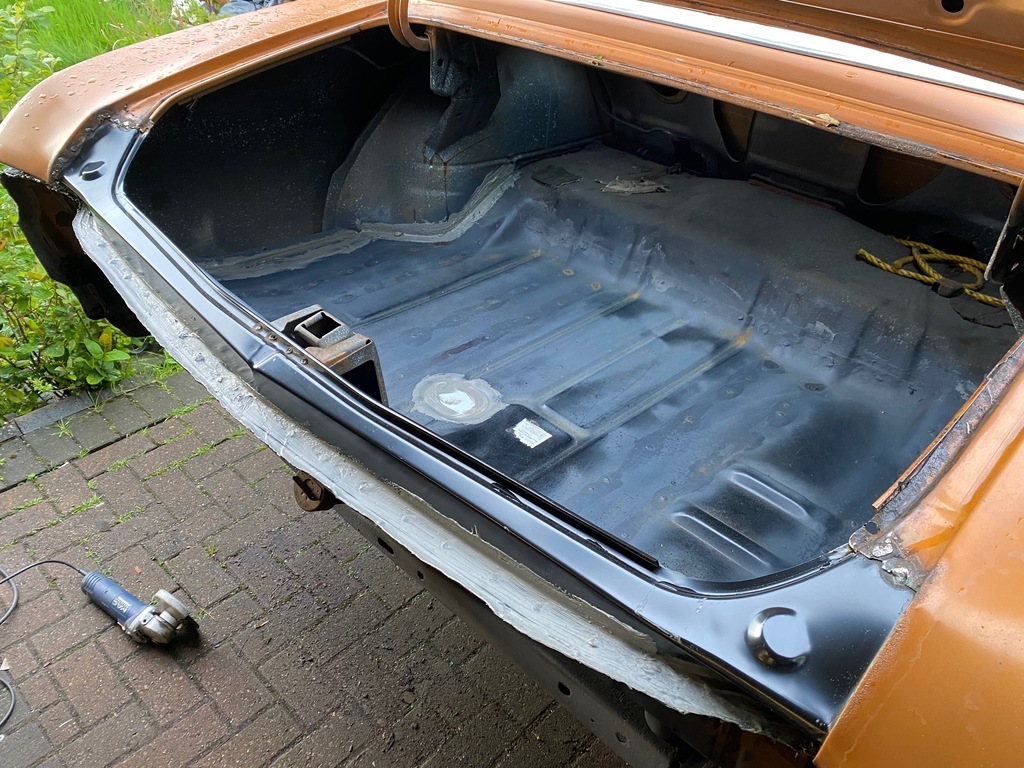
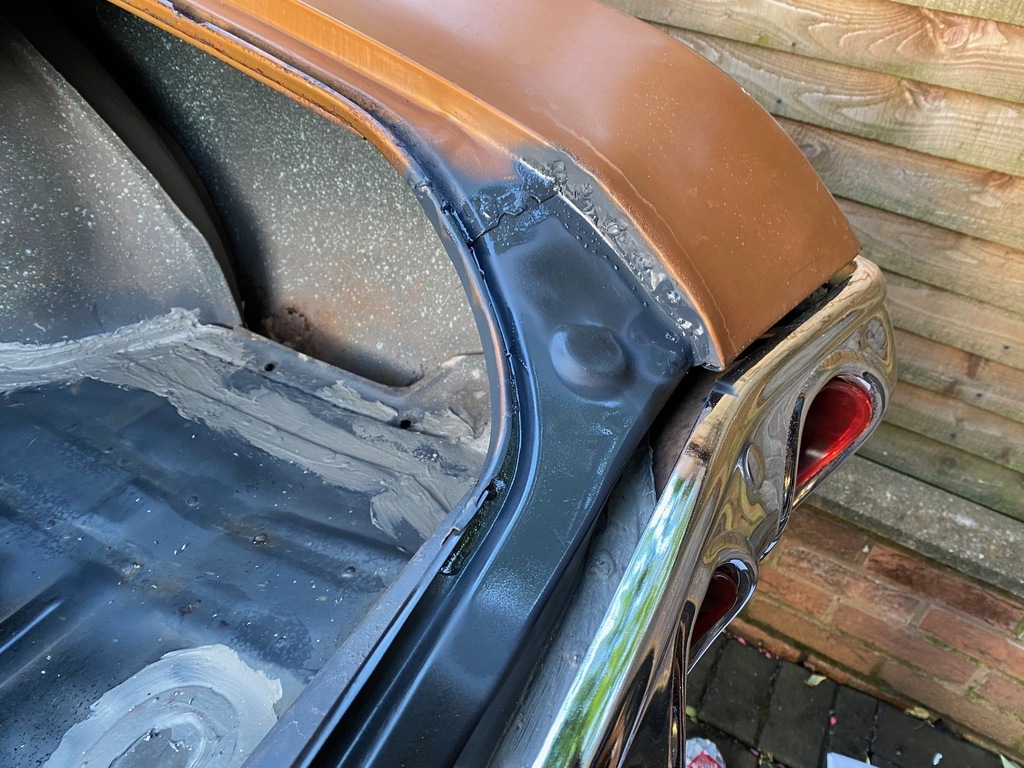
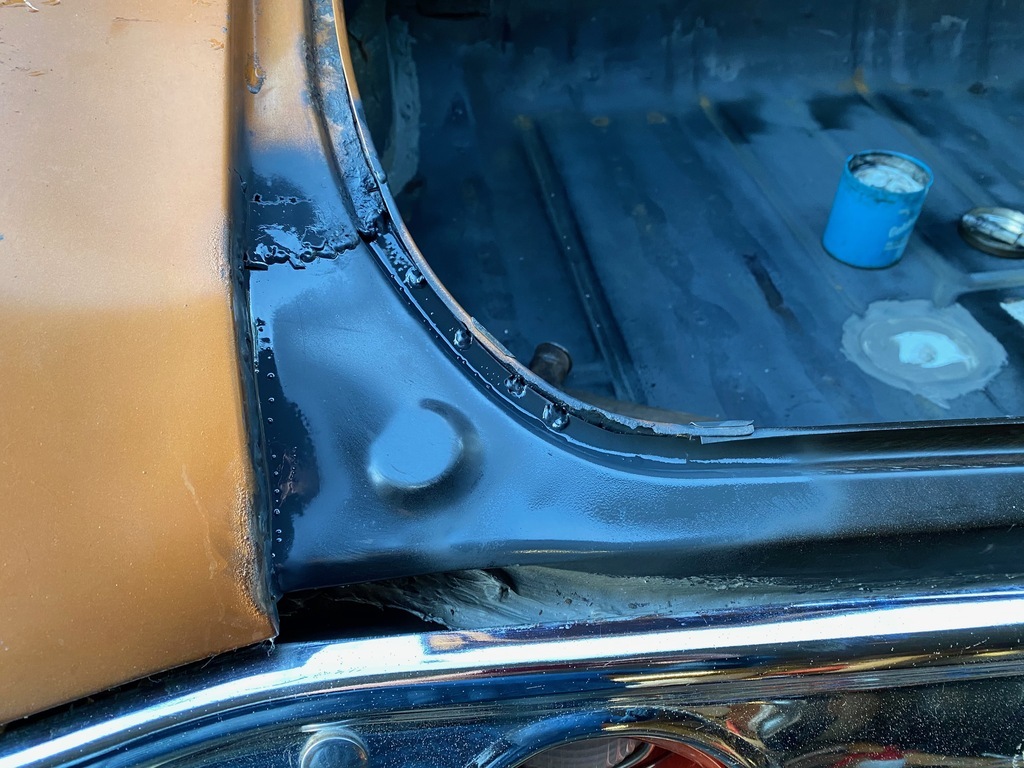
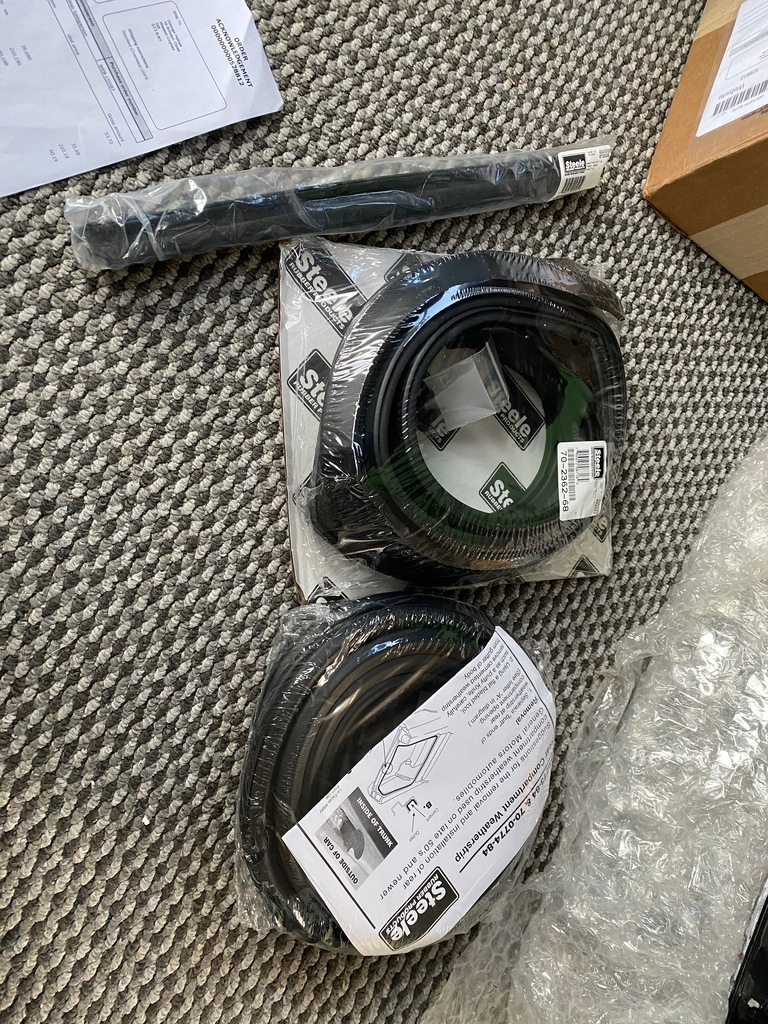
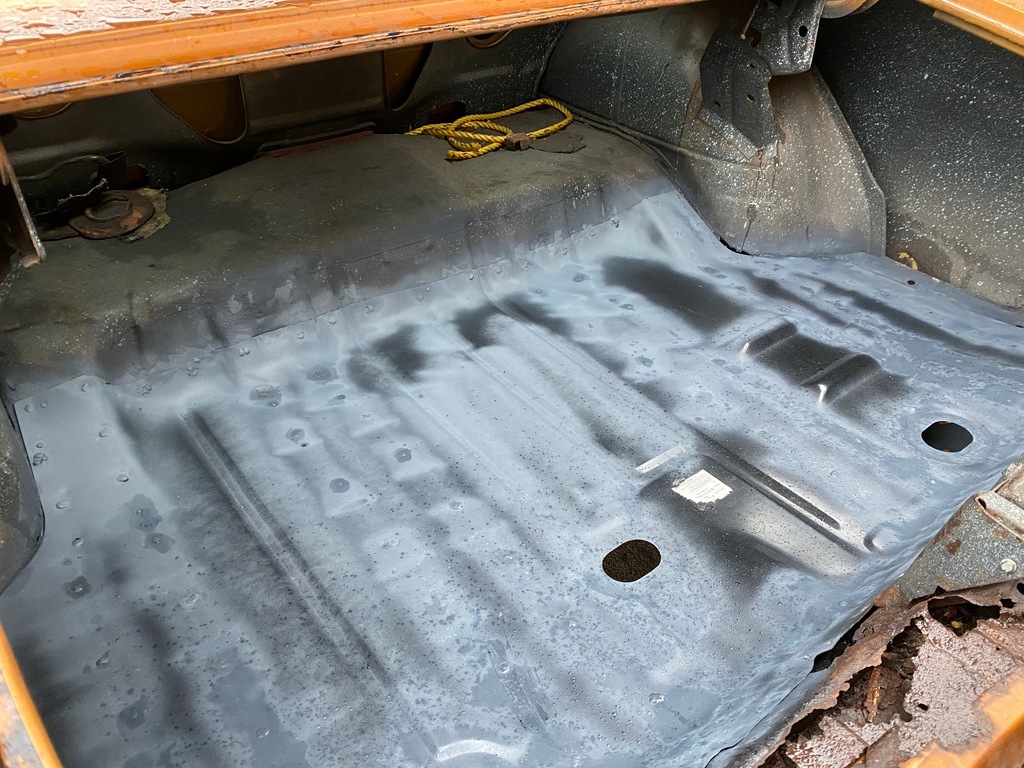
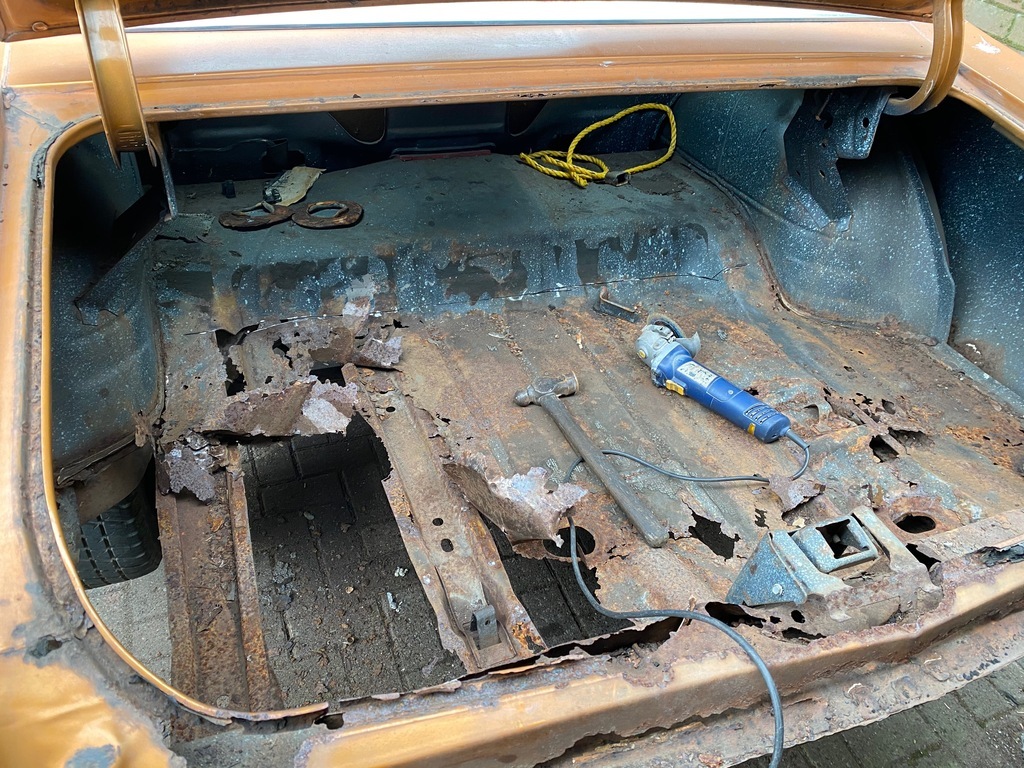
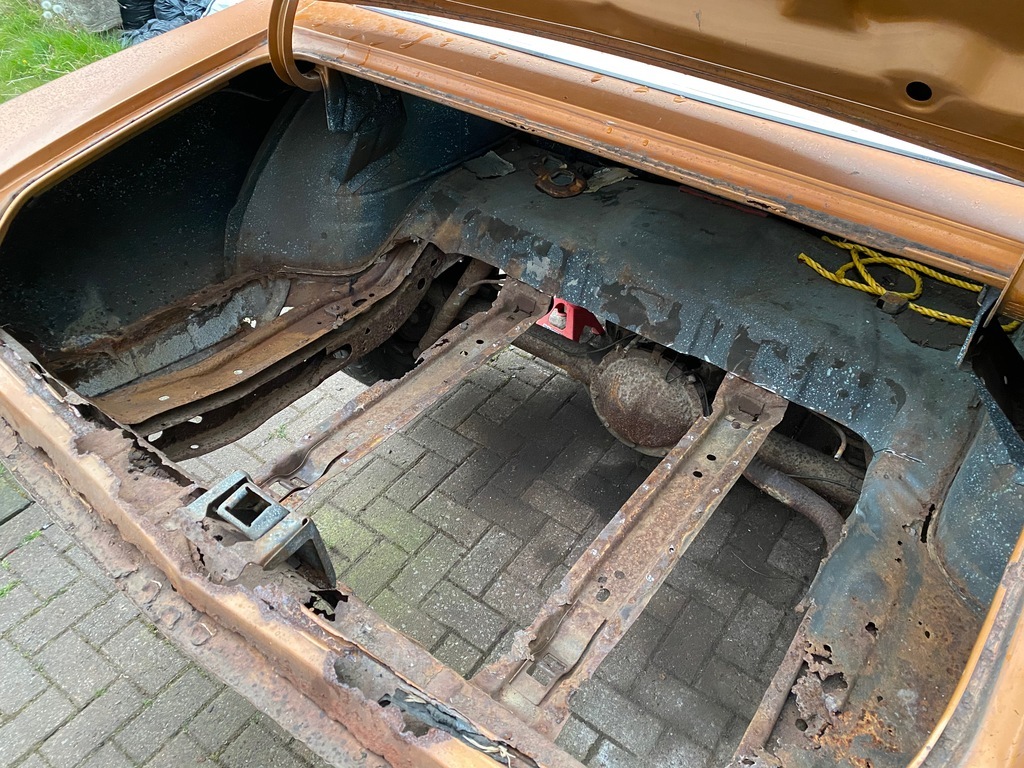
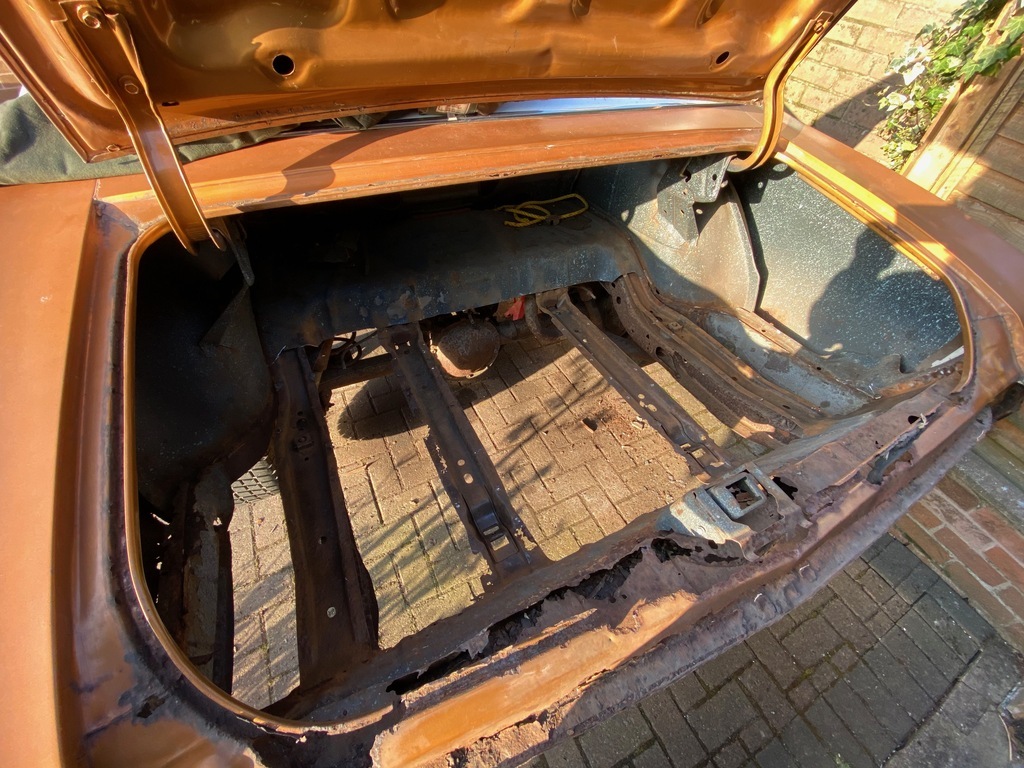
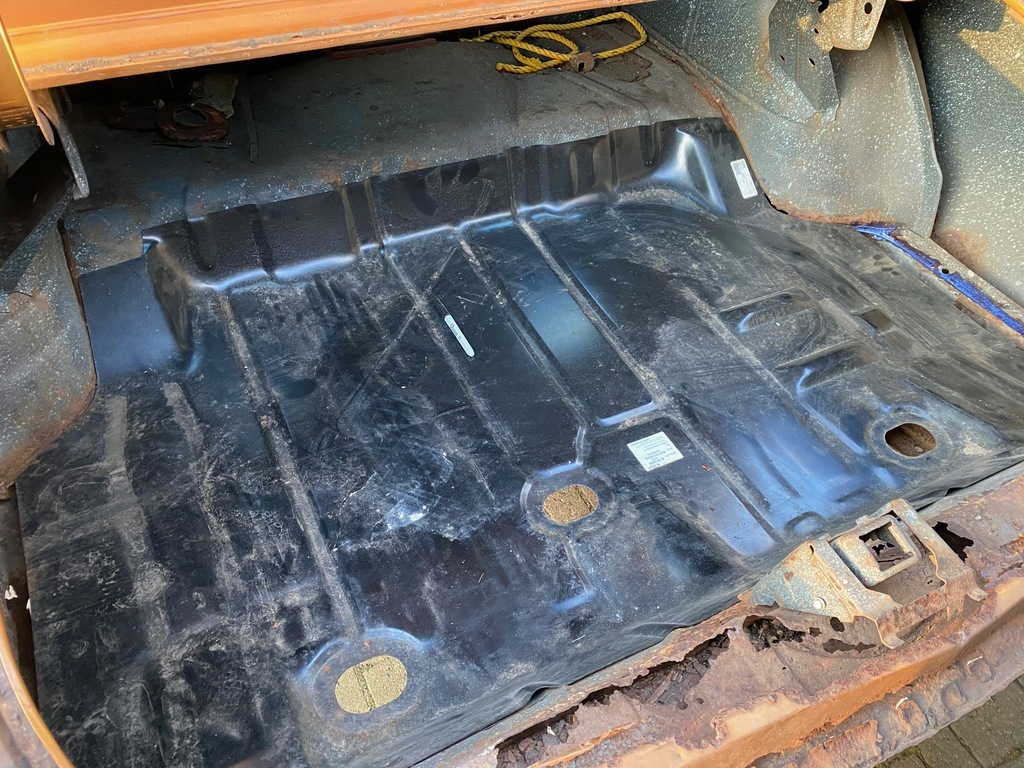
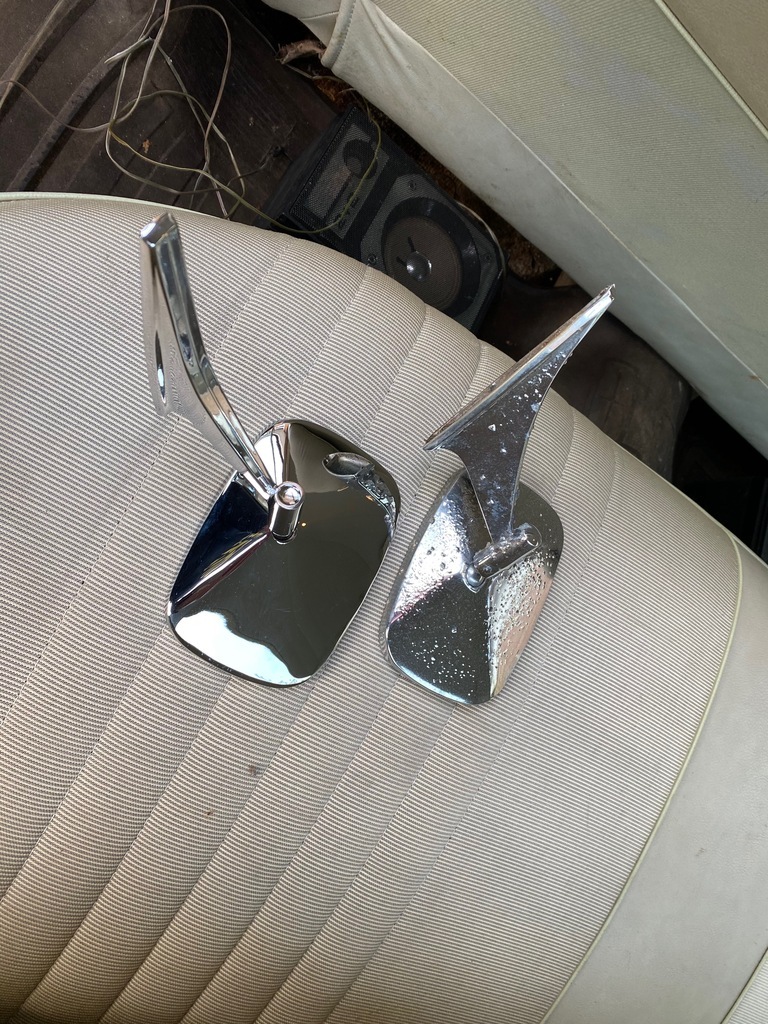
Been finishing things off slowly in the countdown to the weekender. We actually had some sun the other day, so I took the oppourtunity to paint the boot floor and tail panel 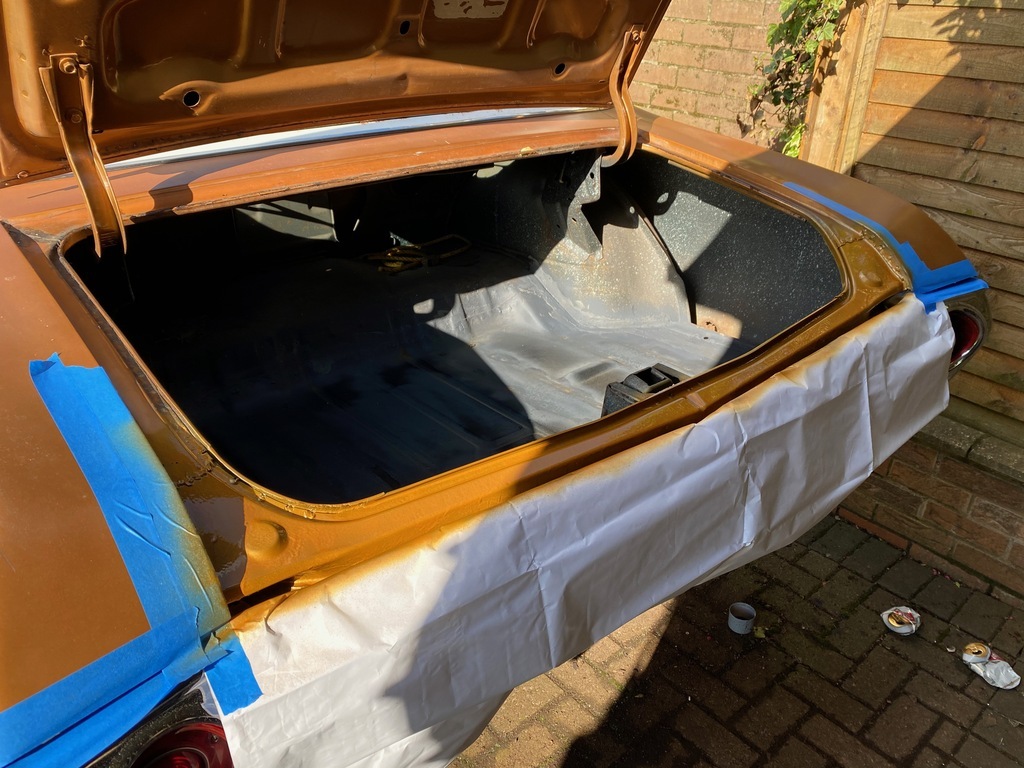 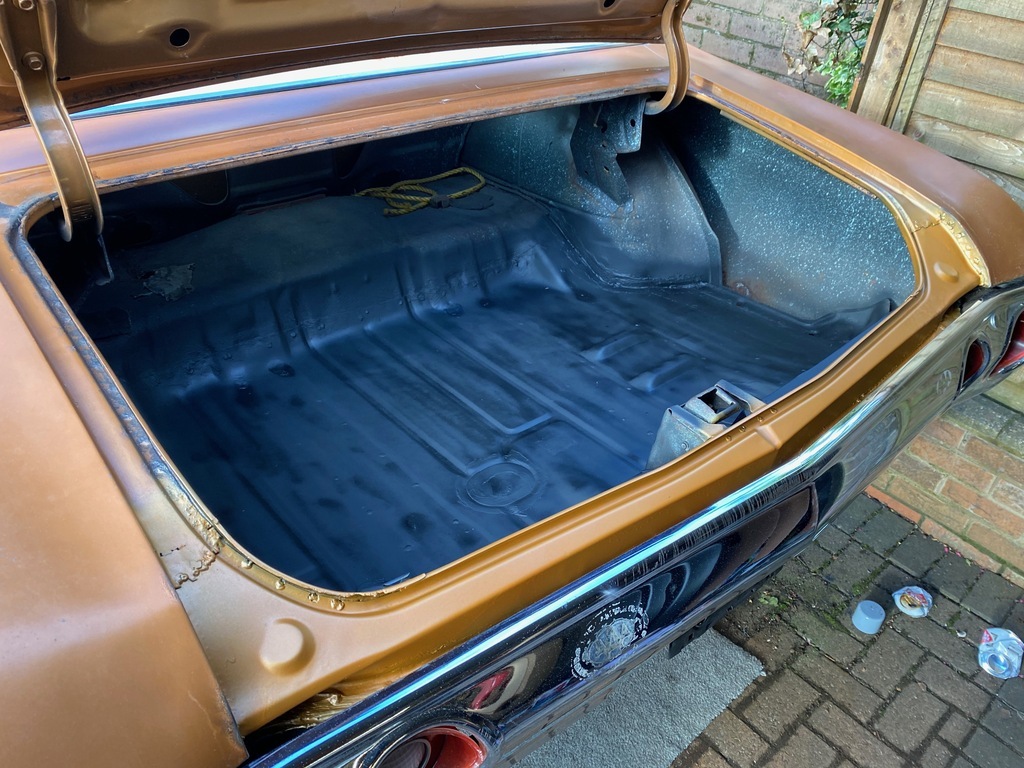 While that was drying I changed the diff oil - the old stuff was like tar  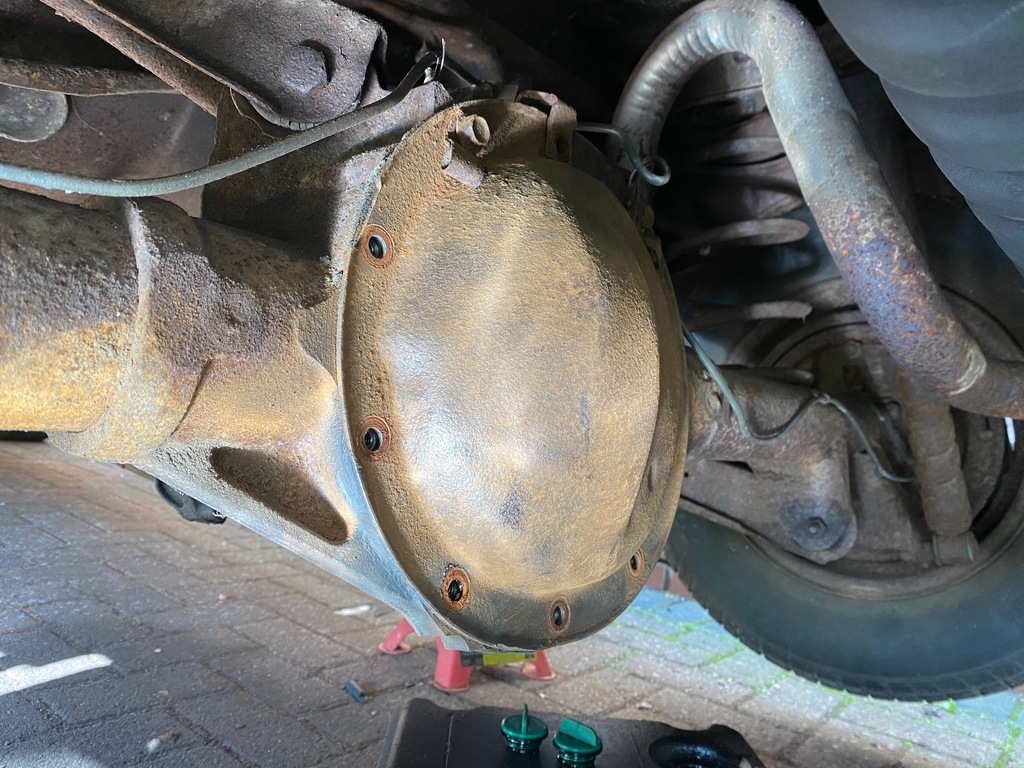 Also got some mirrors fitted - fairly important when driving on the wrong side of the car 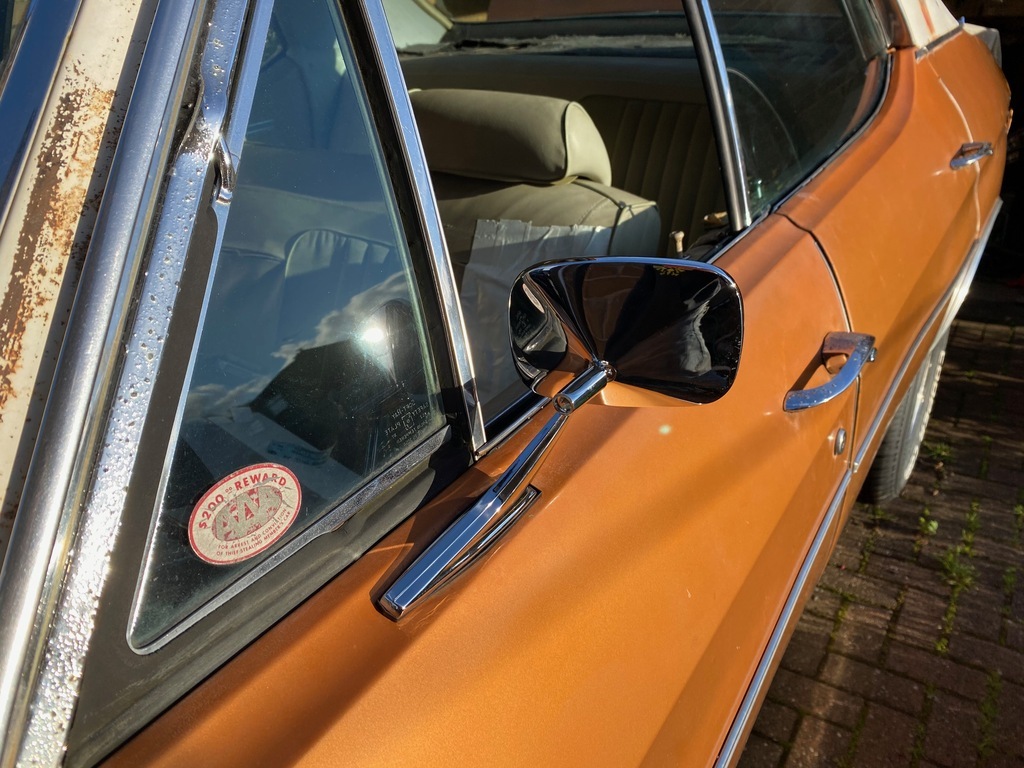 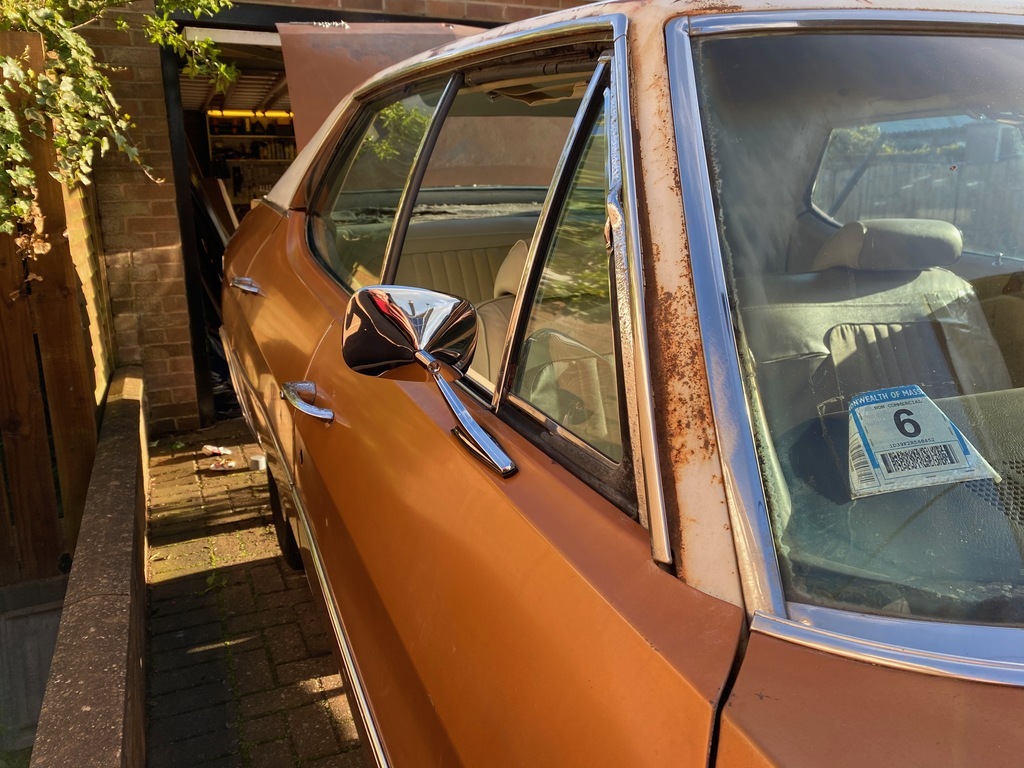 And finally got the new weather stripping installed. It may have been pricey, but fair play every piece was a perfect fit and made from much better materials than the originals. 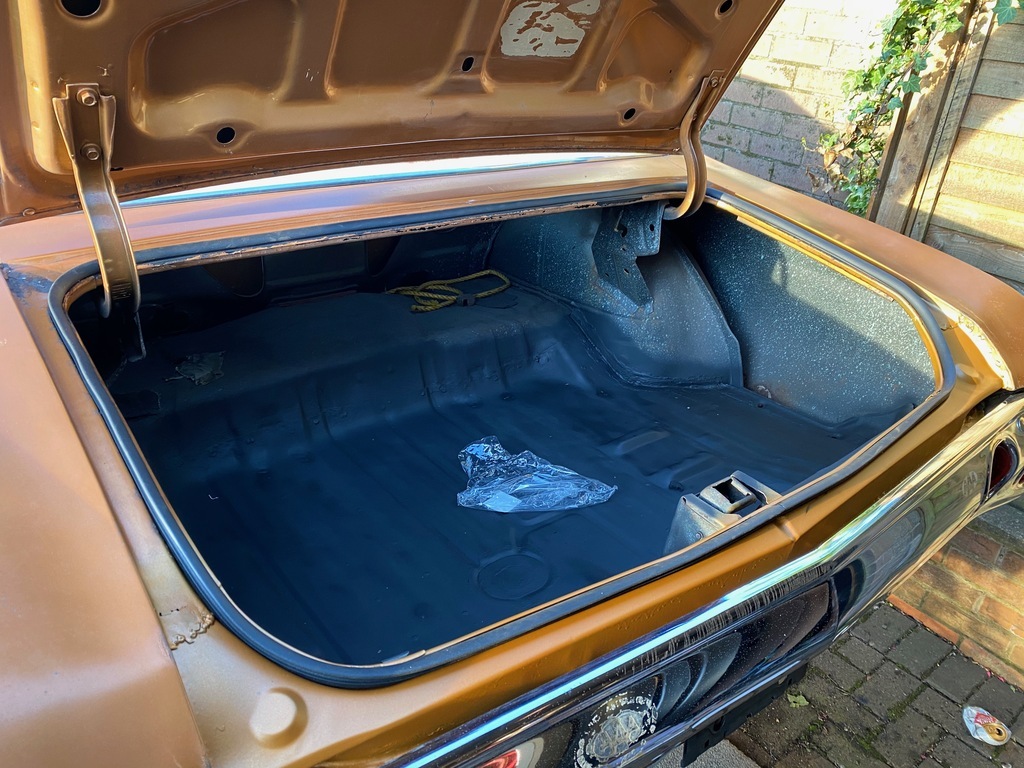 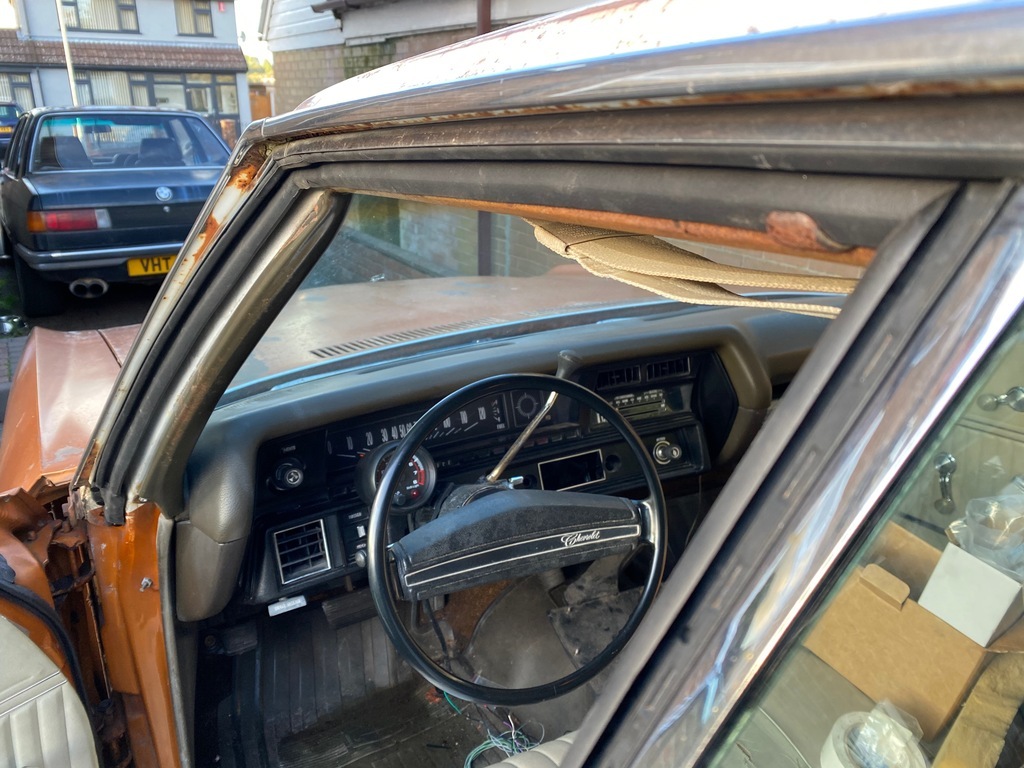 And then, to top it all off, the logbook arrived today! Doesnt seem like the most fitting numberplate for a massive american car but could be worse i suppose.  So I guess i'll see you all at goodwood, provided I can get some number plates made up before then oh and get the front wheel bearings changed and the oil... and the belts... and maybe get some kind of stereo working?... |
| |
|
|
|
|
|
May 25, 2021 12:03:24 GMT
|
Less than a week till the weekender and still no sign of the logbook... starting to get a little concerned Squeeky bum time! Great progress though, excellent work Just got off the phone with DVLA and it was processed a couple of days ago, so sounds like we might be okay! |
| |
|
|
|
|
|
May 24, 2021 22:06:34 GMT
|
|
|
| |
|
|
|
|
|
May 18, 2021 21:27:10 GMT
|
|
|
| |
|
|
|
|
|
|
|
|
|
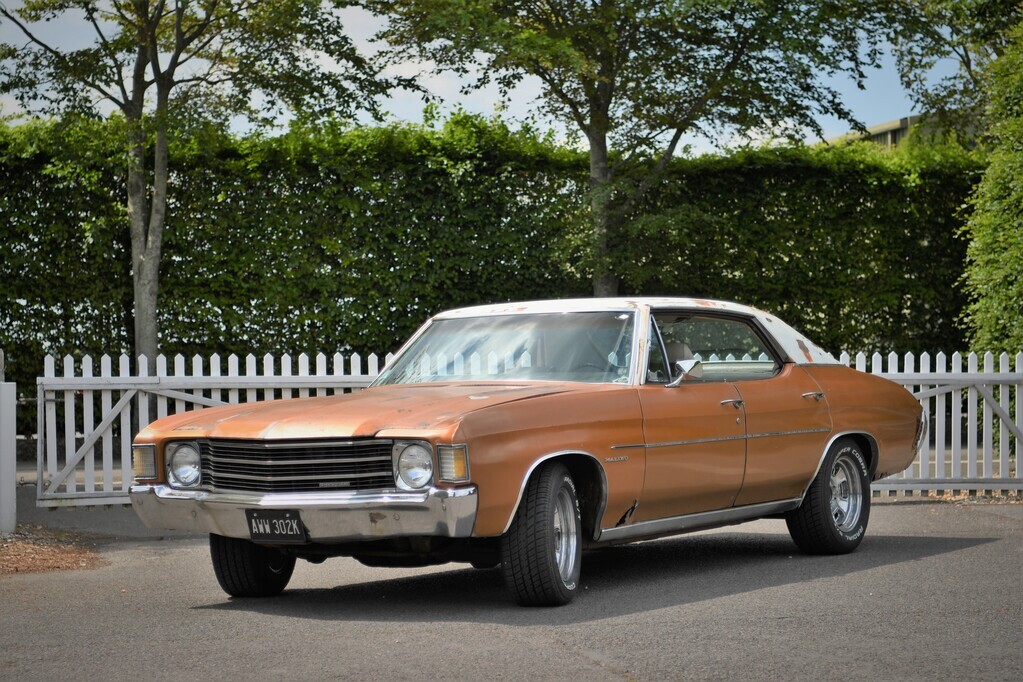
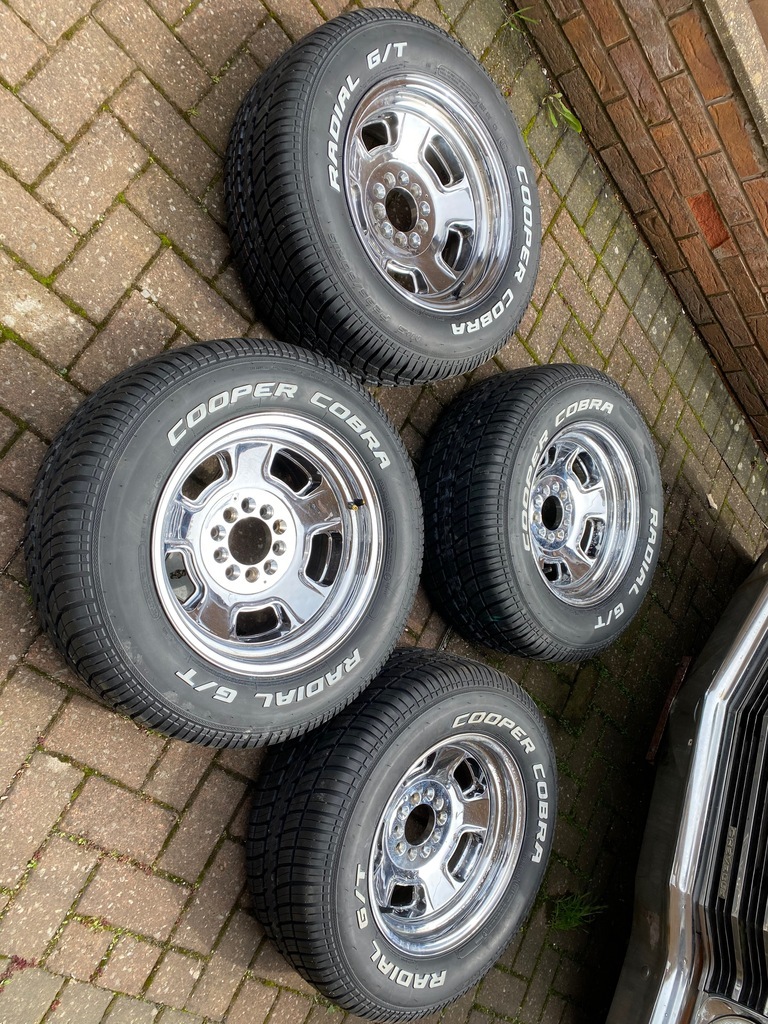
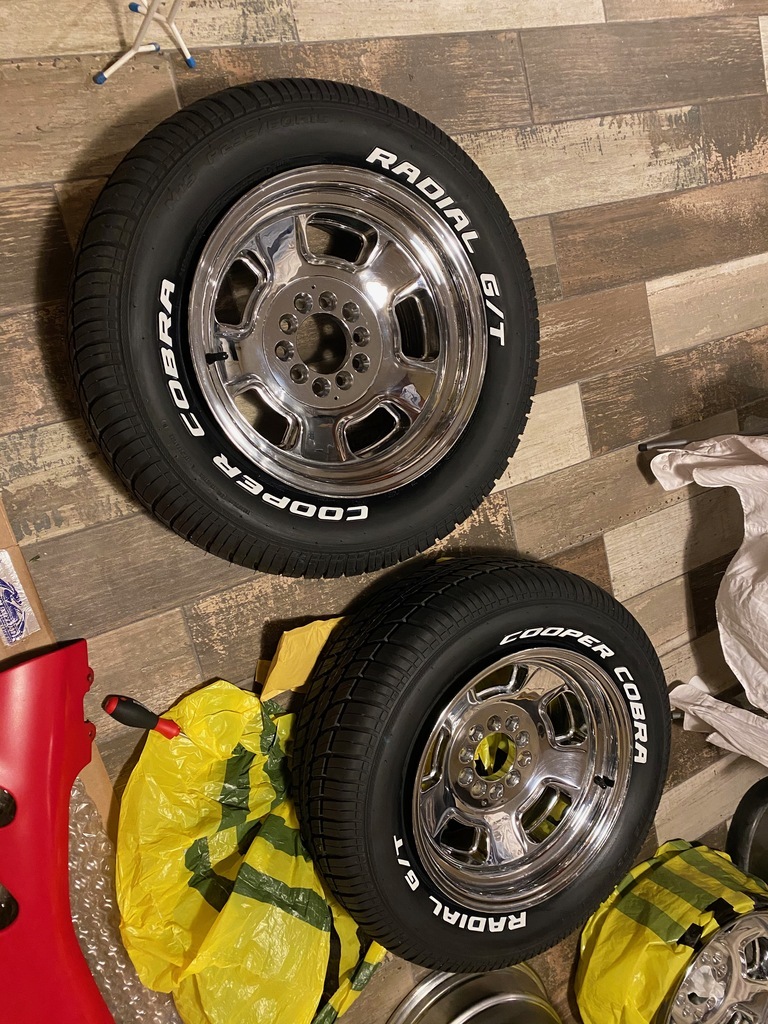
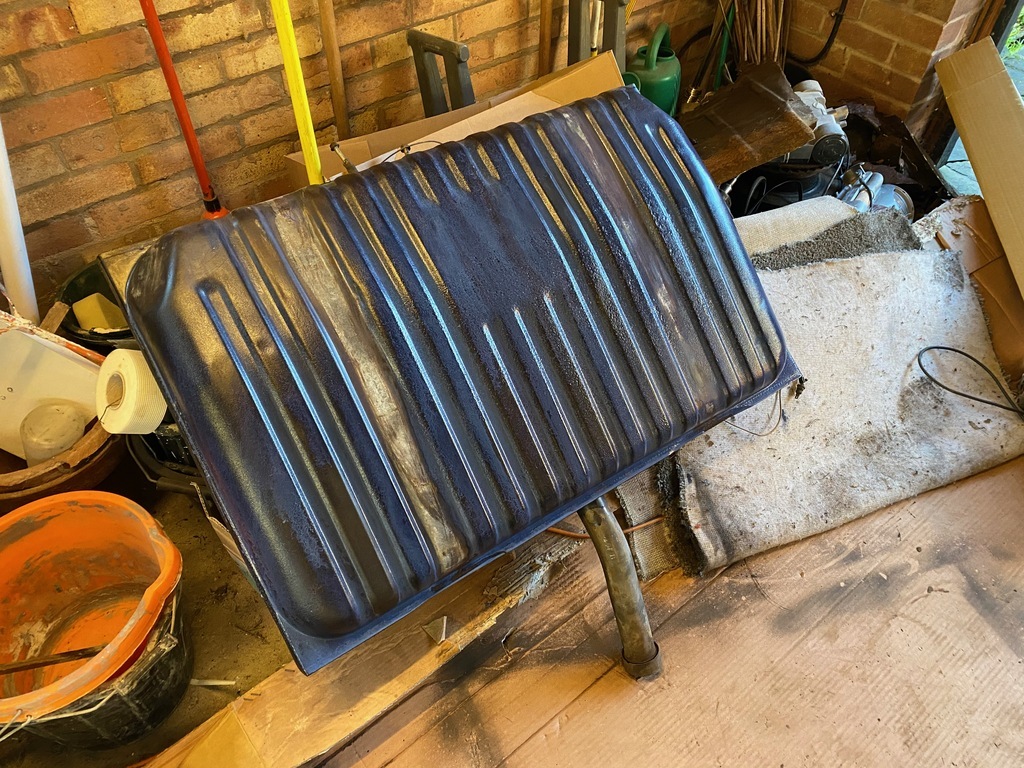
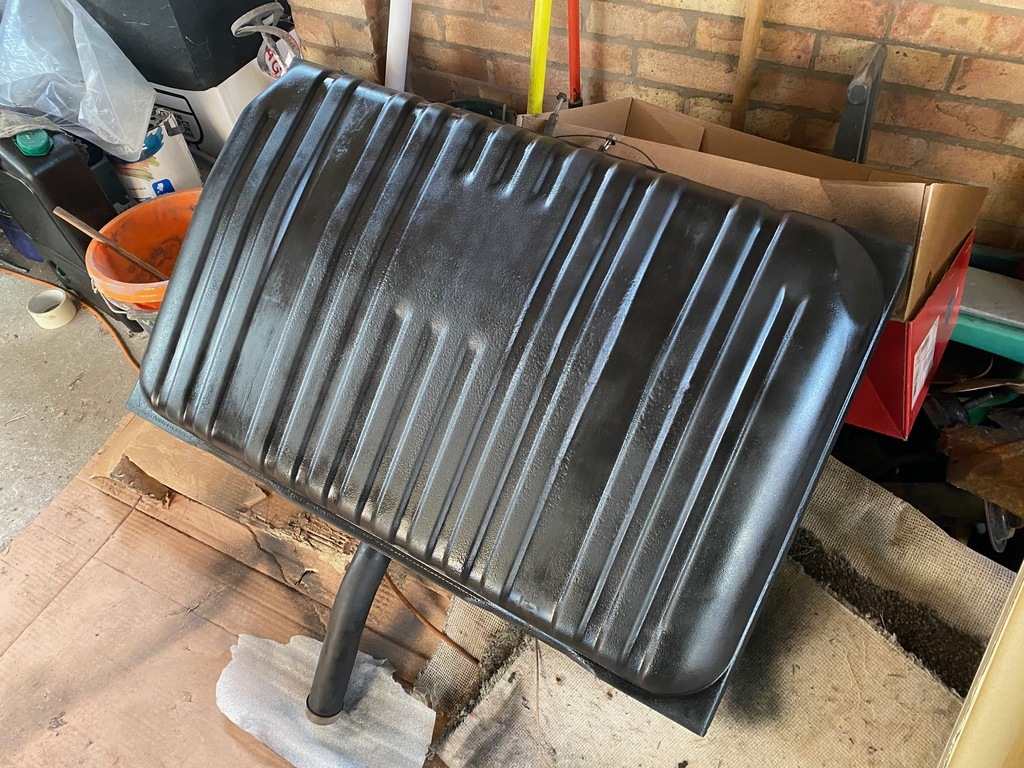
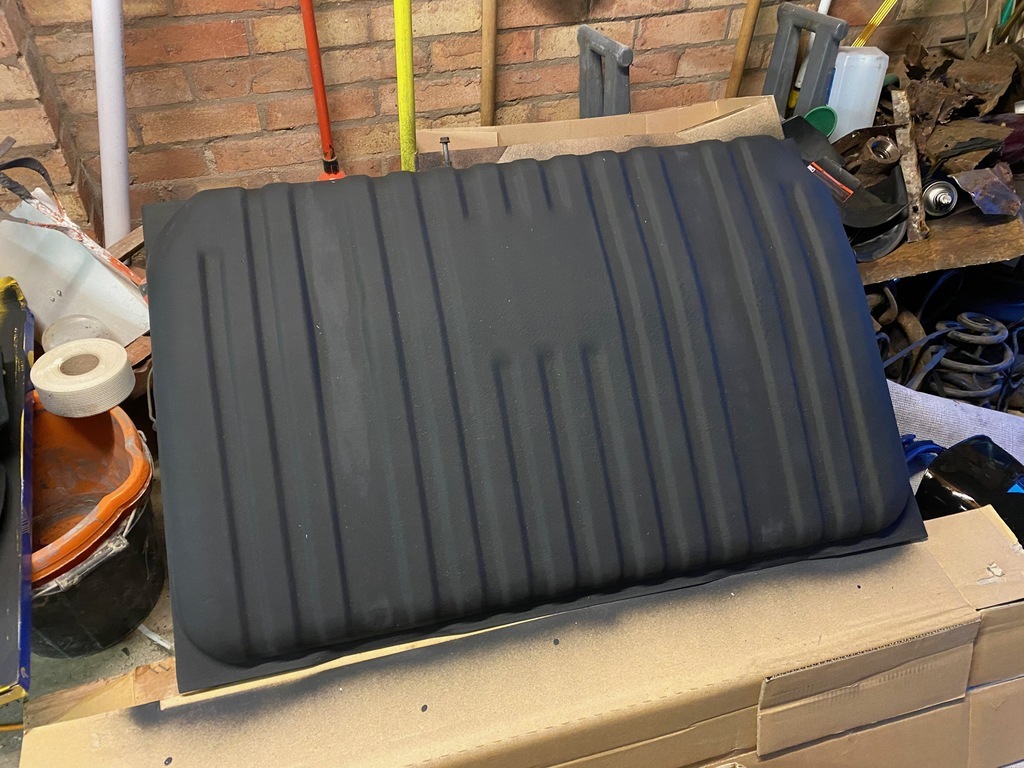
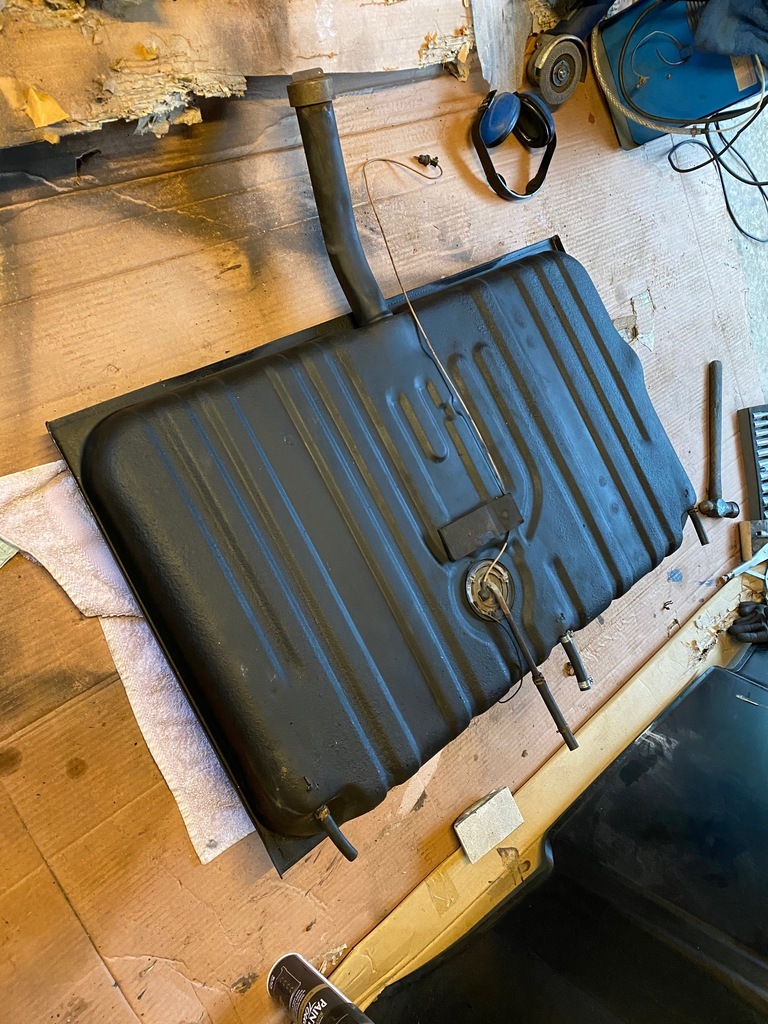
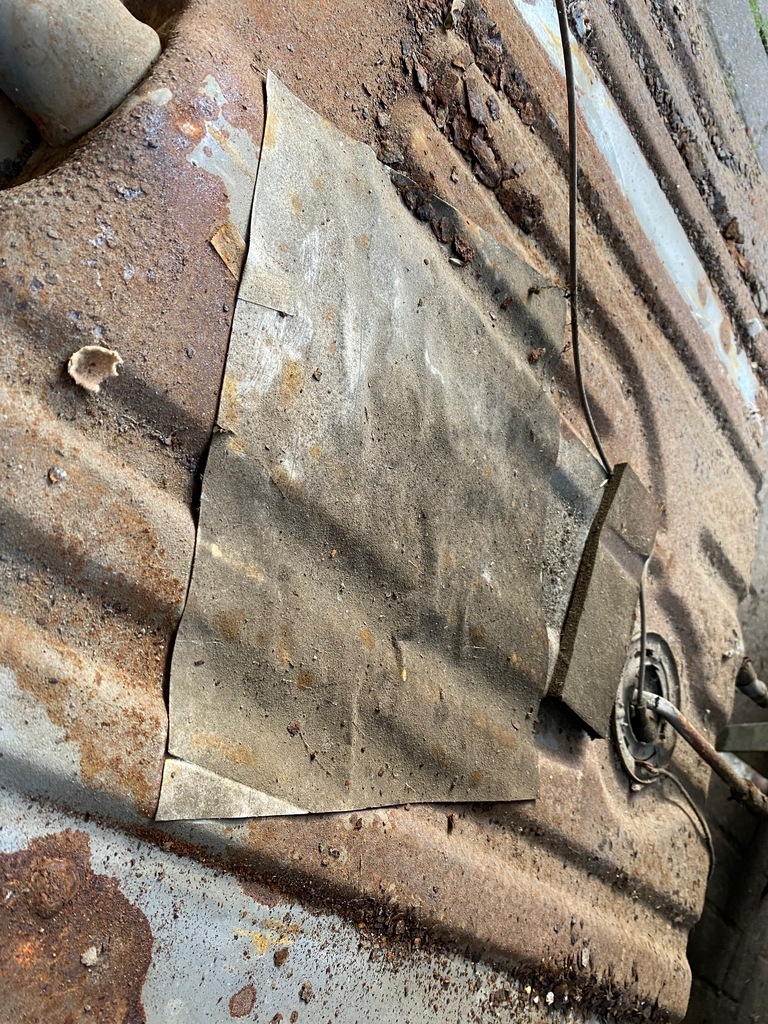
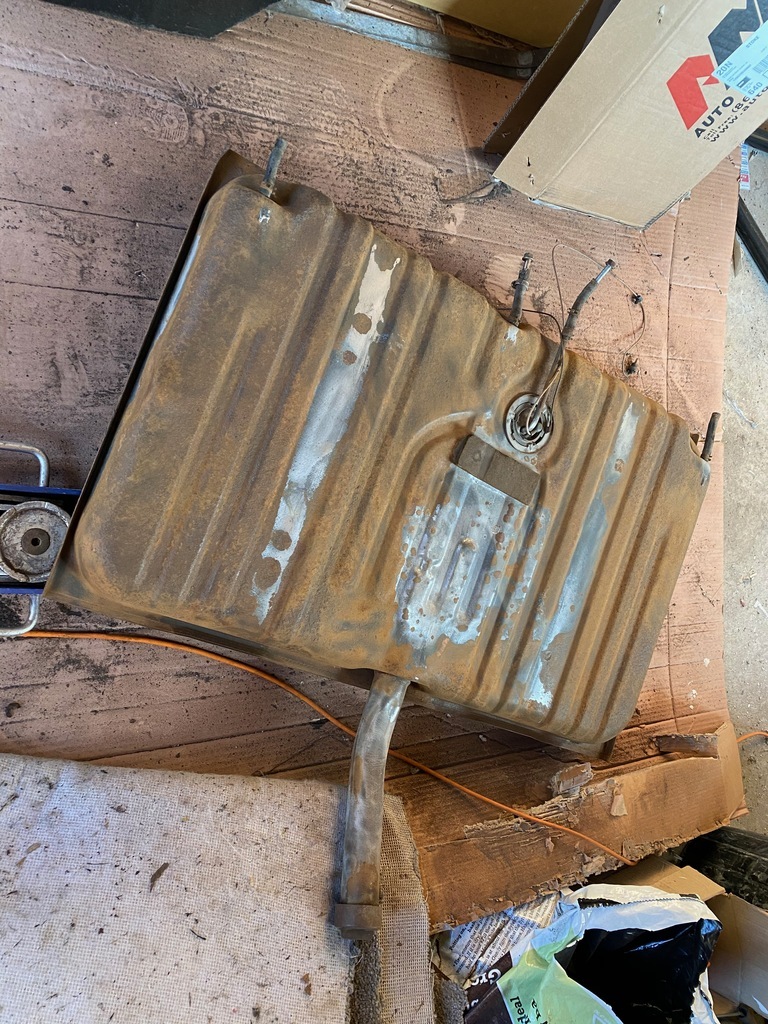
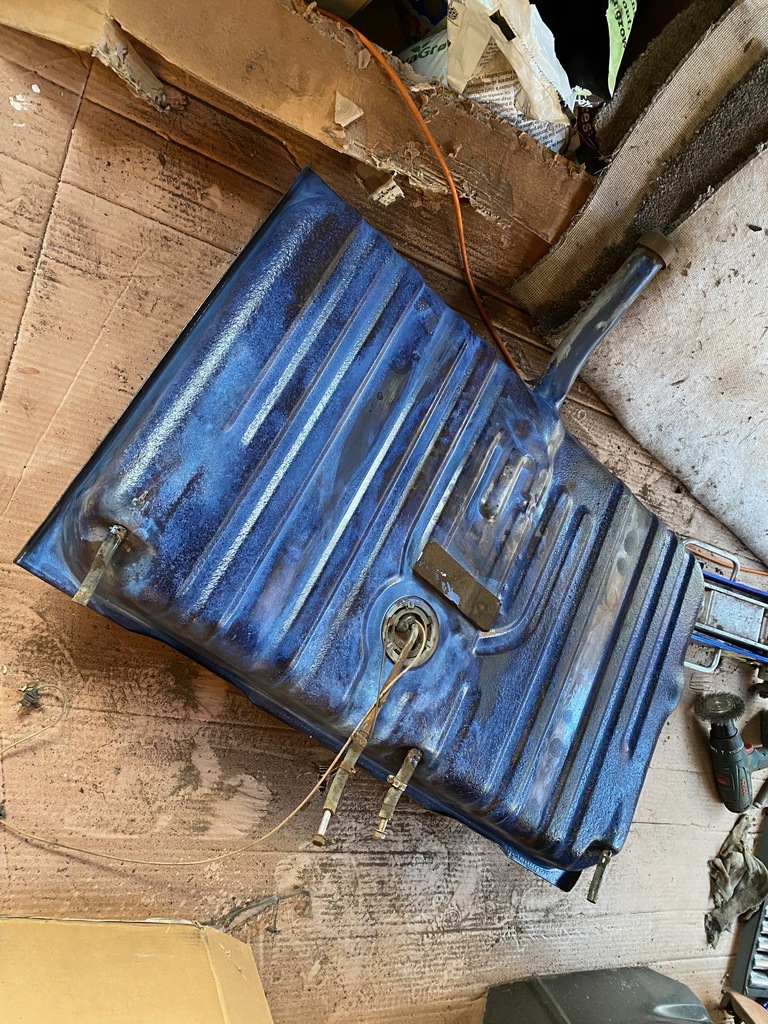
Hey, an A body buddy! Always fancied a Chevelle but have only had the Pontiac and Olds flavours so far. My LeMans is elsewhere in the build threads, although I’m just pottering on with it at the moment. Great to see a moredoor getting some love - they’re a good looking car, especially the hard tops. Out of curiosity, does yours need any work around the rear screen and parcel shelf? My boot floor had heavy surface rust and a few pinholes, leaks like a seive around the rear screen (not bonded in particularly well) and one side of the shelf needs remedial work. This one’s most definitely bookmarked! Funnily enough i was really looking for a LeMans or a Cutlass, but ended up with this one instead. I'll definitely have one of the Pontiac or Olds offerings in the future. The rear screen and parcel shelf seems pretty good on mine, but I think the windscreen will need re-bonding, and theres a small hole either side of the scuttle. Not made much progress this week, the weather has turned and it's getting too cold in the evenings again. I did get the fuel tank painted however, and i've bought a set of wheels! 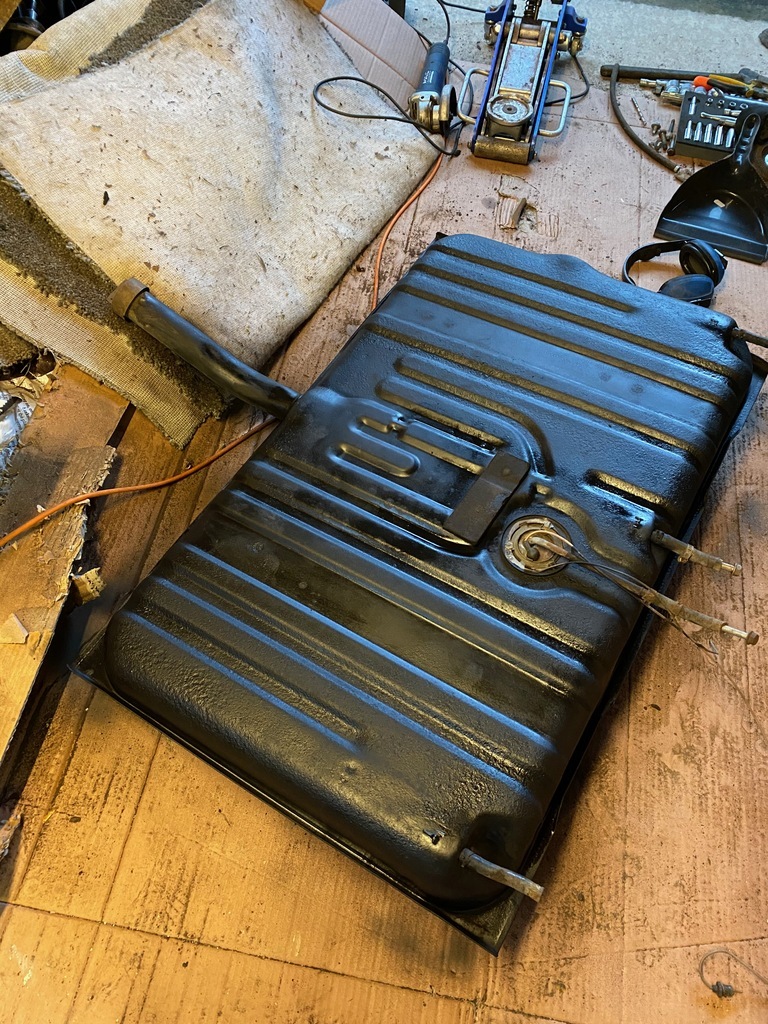 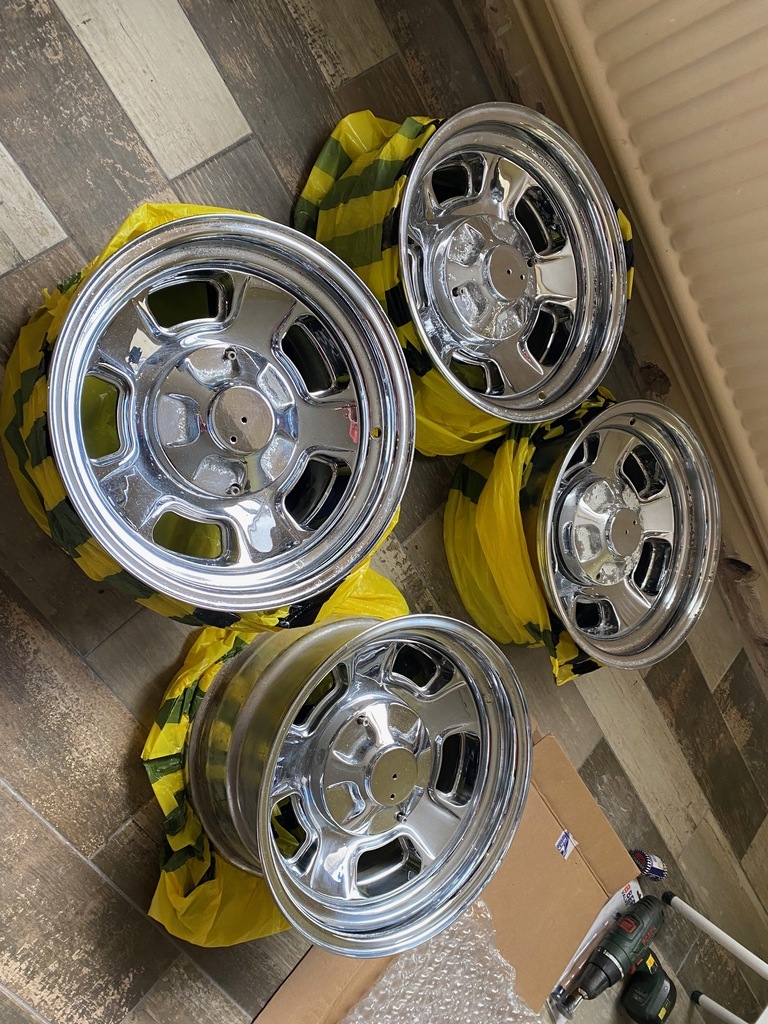 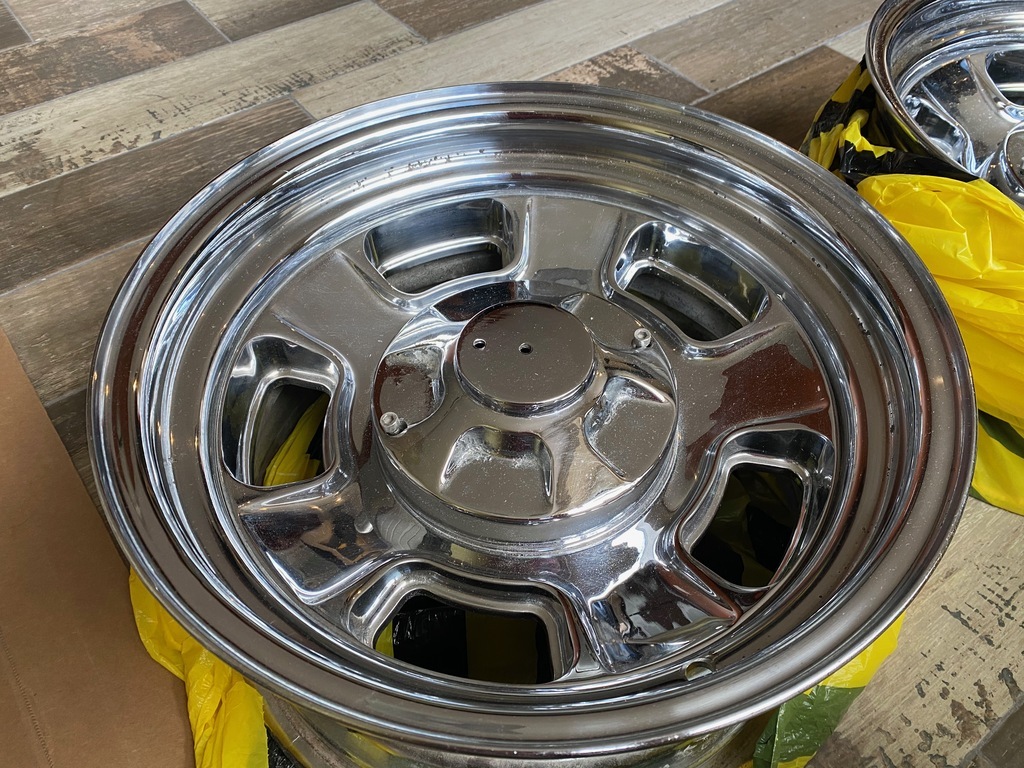 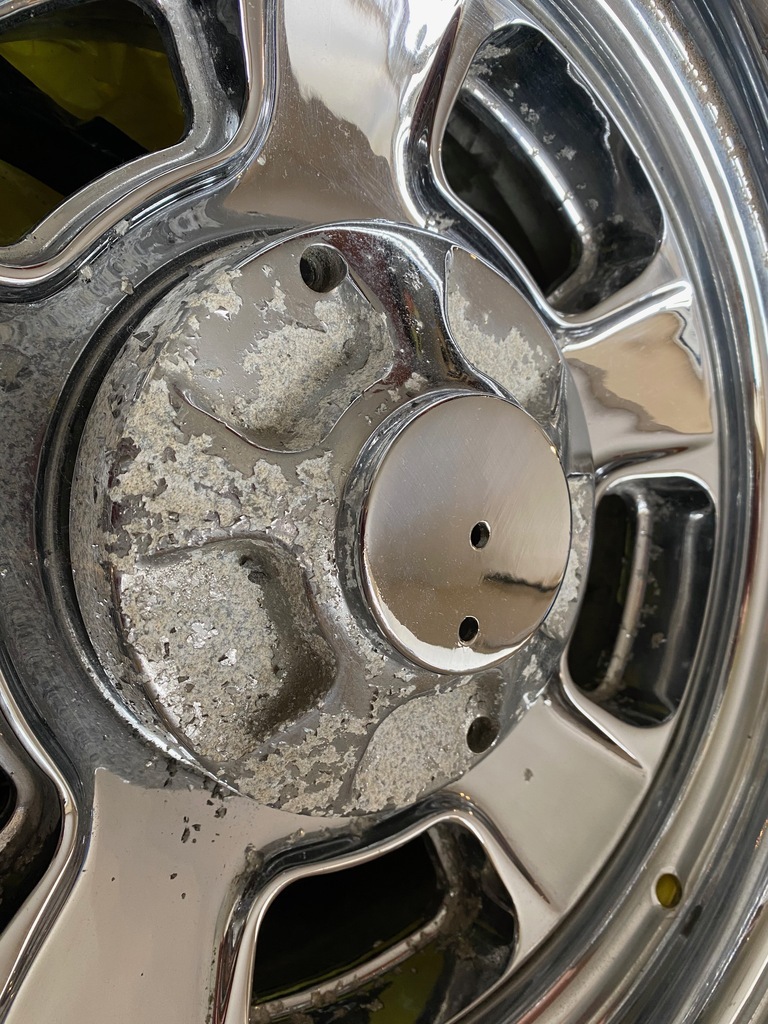 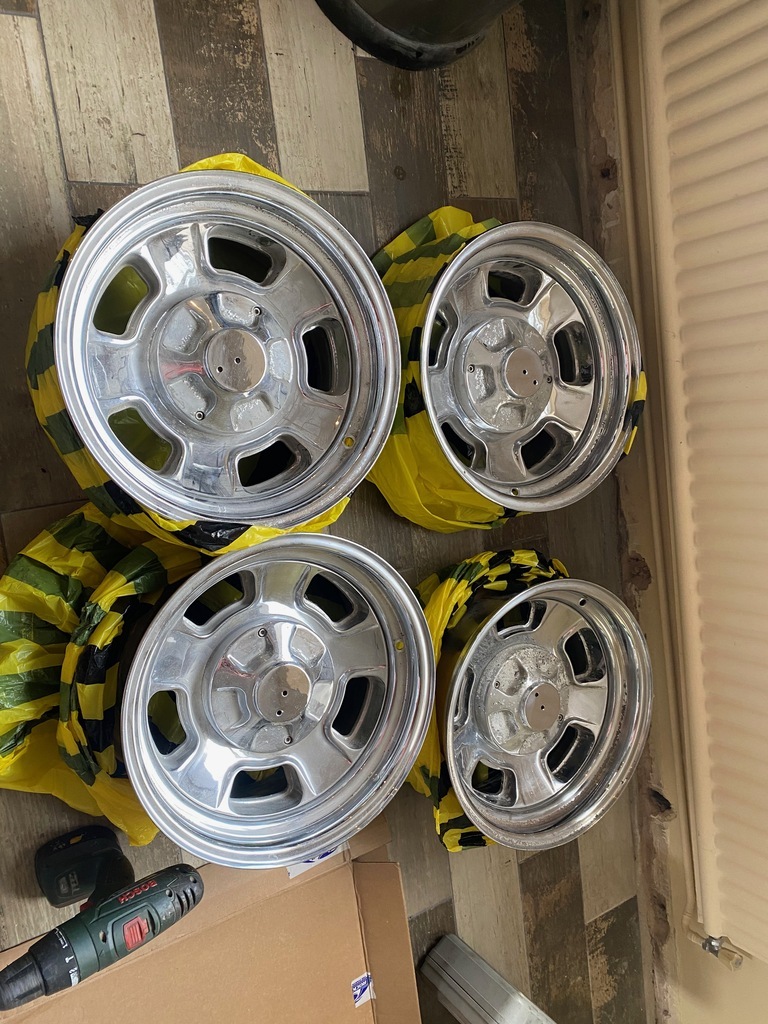 They're Cragar 390s (i think) and don't look like theybe been used much, but have been in storage for a long time and there is some corrosion on the aluminium and the chrome is starting to peel. So they will need some sort of re-finishing, but for the most part theyve cleaned up okay and for £250 i'm not complaining! |
| |
|
|
|
|
|
Apr 28, 2021 21:28:24 GMT
|
Not quite - they're C4 corvette heads, so the last of the Gen 1 small block design before the Vortec came in. They take the centrebolt valve covers, but still use the same intake manifold bolt pattern as Gen 1 small blocks. And they've been cleaned and skimmed and most importantly have 58cc combustion chambers, so should bump up compression signifigantly 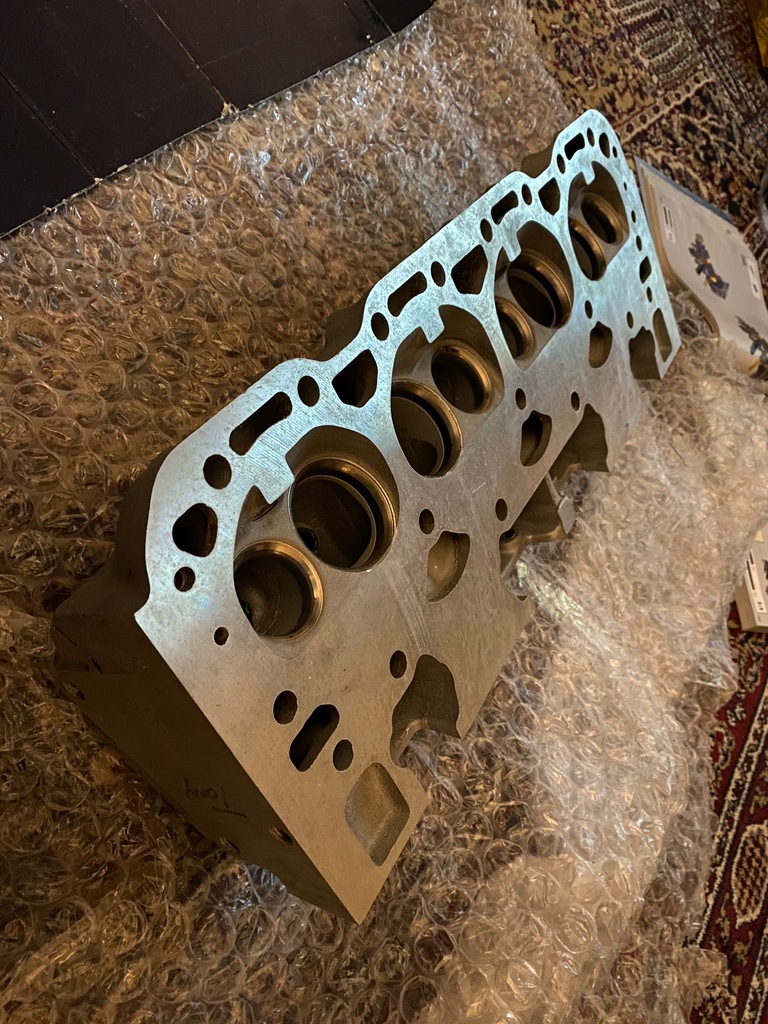 |
| |
|
|
|
|
|
Apr 28, 2021 20:31:31 GMT
|
|
|
| |
|
|
|
|
|
Apr 28, 2021 12:36:35 GMT
|
I've been hankering after an 70s/80s/90s American pickup for a while but prices in the UK are stupid for what are basically scrappers. Consequently, I have also been thinking about buying and importing myself. Can I ask where you found this car advertised and how much it cost to ship? I actually bought this from Ebay.com, but was looking on craigslist and facebook marketplace as well. Facebook definitely seems more popular for selling cars over there compared to ebay or even craigslist, but really you need a contact to go view and make the sale on your behalf. I found very few people willing to deal with an overseas buyer directly, one guy even thought i was trying to scam him! For shipping I used CFR Rinkens, but it turns out ShipMyCar are their UK agent. I found both companies very easy to deal with and would happily use them again. For this car from Massechusetts to New Jersey to Milton Keynes shipping was roughly £1650. From the west coast you'd probably add another £500 to that price. And bear in mind that shipping the car from its location to the US port can add up quite quickly, so shopping for cars realively near a shipping port can save some money. |
| |
|
|
|
|