|
|
|
|
|
Yesterday, I did nothing on the Escort. I went birthday shopping in the morning with The Younger, for Mrs Jonsey. Whilst out, the sun was in the sky! This mad me realise the AC in the Rav4 was not working. After shopping, I mowed the grass, and after went to my younger brother’s garage to regas the AC. Whilst there, he was mucking about making new front suspension for his Gilbern rally car so I stopped and gave him a hand. When I got home I had ham, egg and chips. It was spectacular as I’ve been on a diet for the last couple of months. Today I tackled the throttle pedal. This is a standard Escort item. 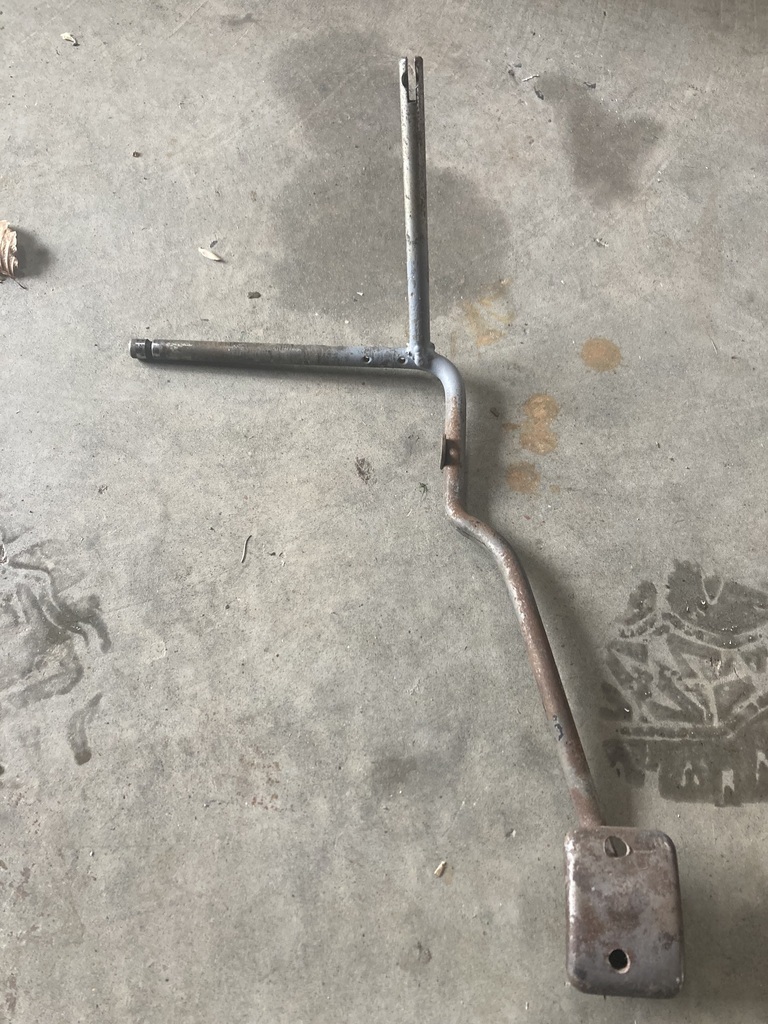 I needed to extend the amount of pull to get full throttle at the bodies. This is a group 4 throttle pedal that are on rally cars 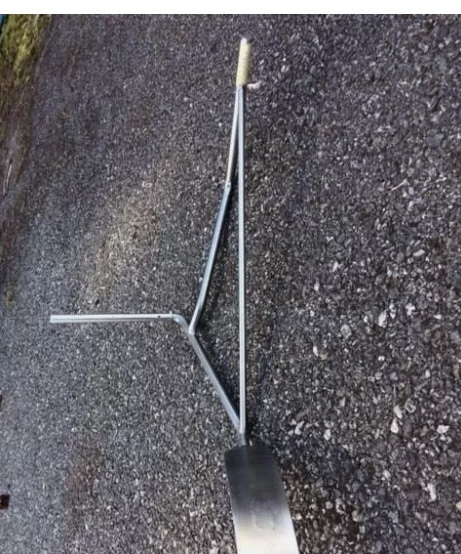 It’s the best part of £70 by the time it’s in my hand. This is a group 4 throttle pedal in kit form 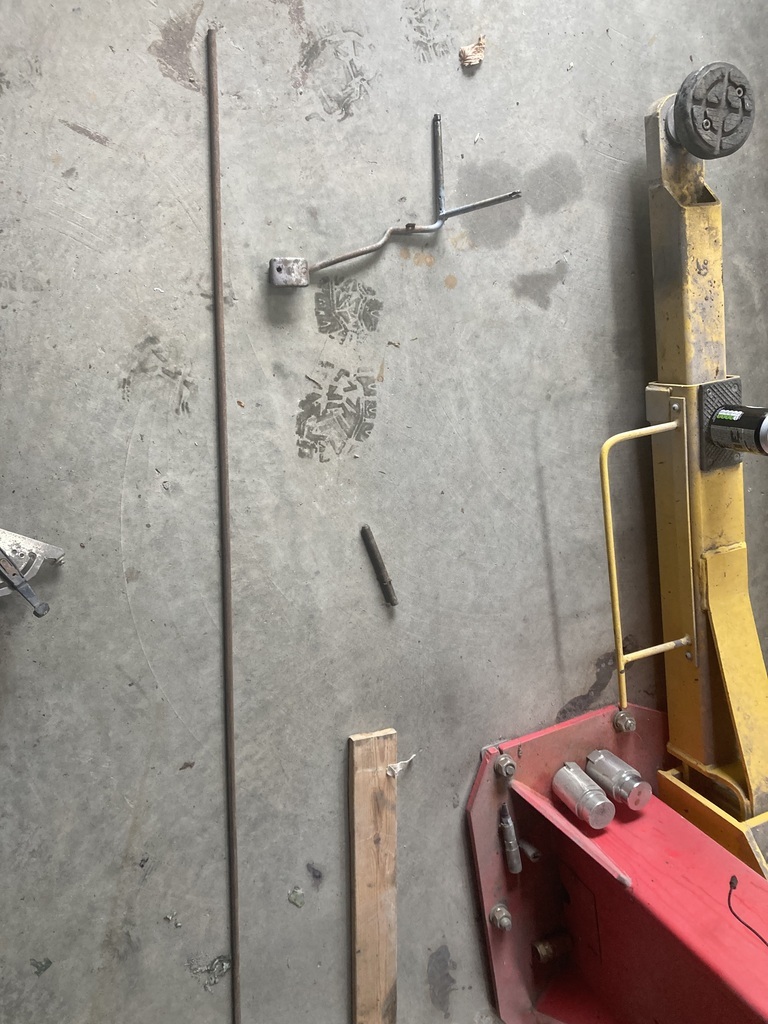 I cut off the cable pull part of the pedal and extended it the same as the group 4 item. When fitted it gave me a pull of 4.5”. That seemed too much. So I pulled the throttle cable until the bodies were wide open throttle and I only needed 2” pull. So I shortened it until I had to 2” pull and welded the original cable end to the top. I then welded a strengthening rod to it . That gave me this 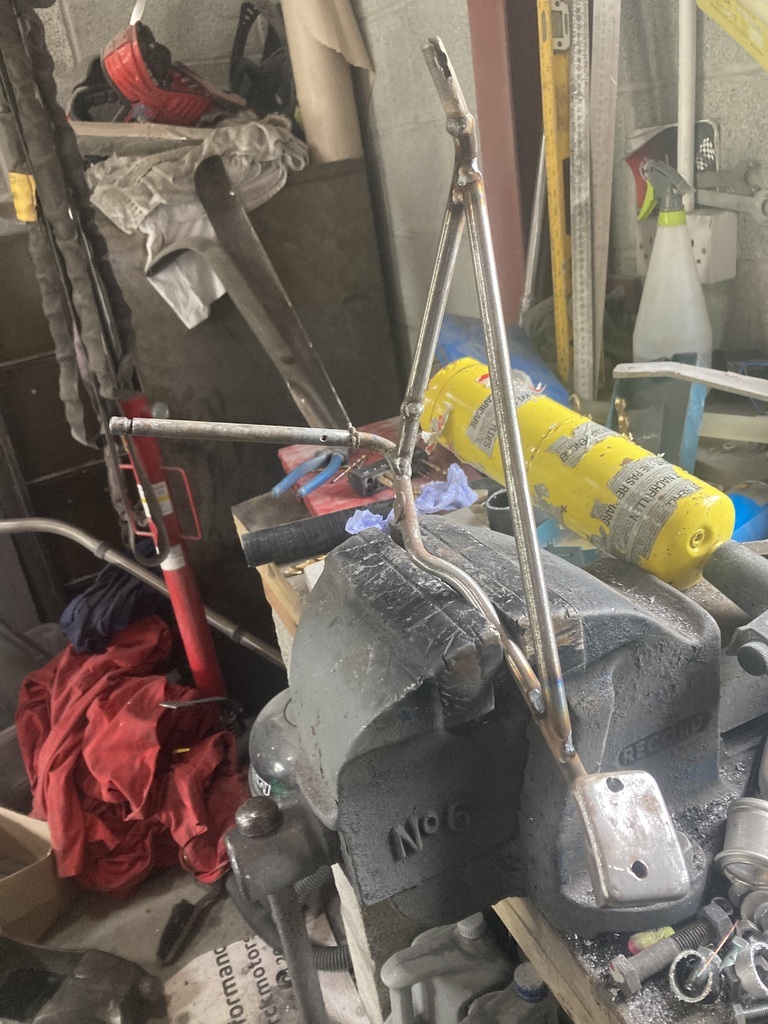 Years ago whilst competing, it was very cold, so I was wearing my walking boots (not suitable,I know). I had an aluminum grip on the throttle pedal and whilst braking, I hit the brake and throttle at the same time. This launched me over a grass bank and into the air. So I took the grip off to continue the rest of the day. I wanted to refit the grip, but cut it down a bit 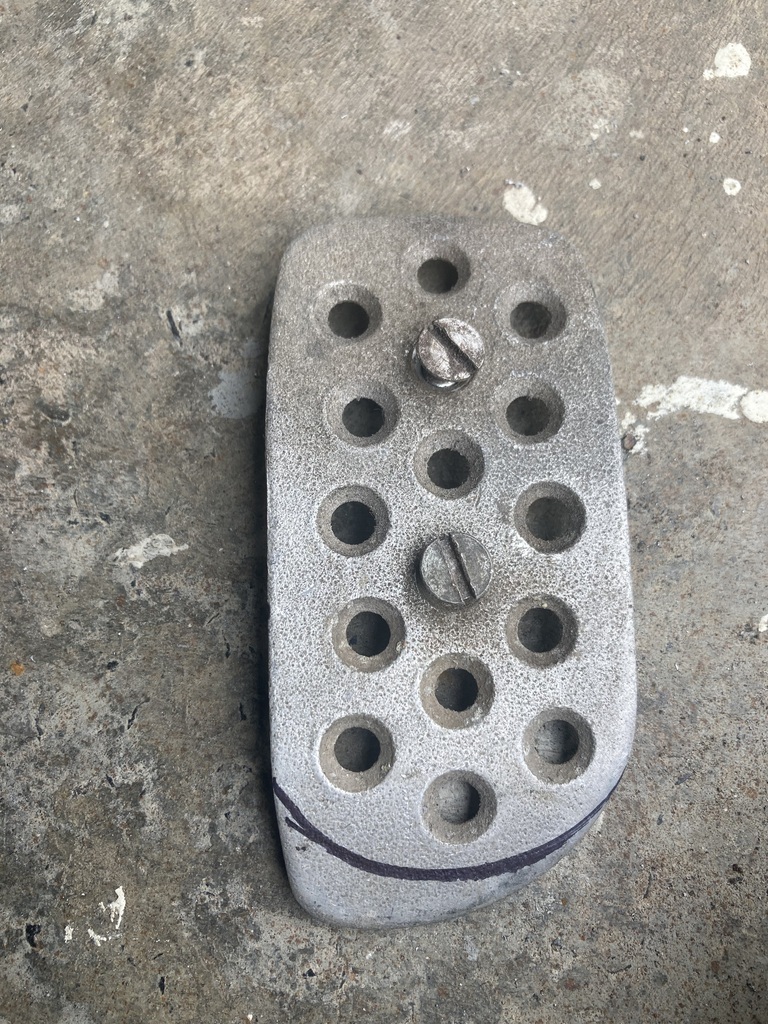 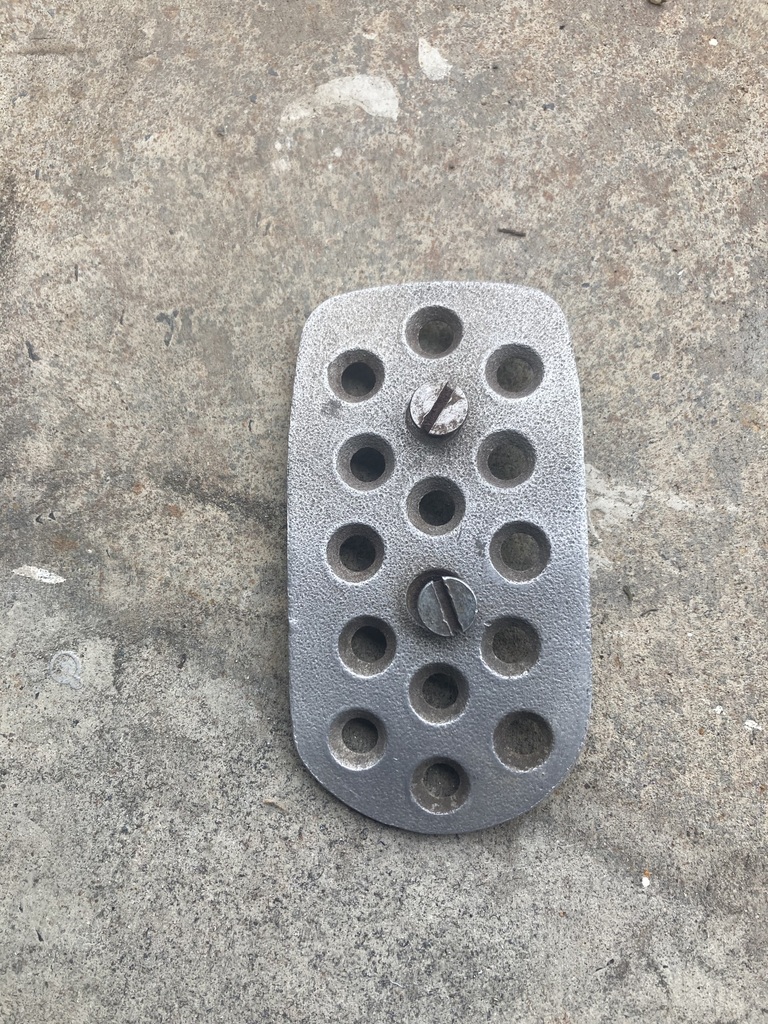 The pedal was originally zinc coated so I should have painted it silver, but I’ve not got any. I didn’t want to paint it black so I primered it and then clear coated it 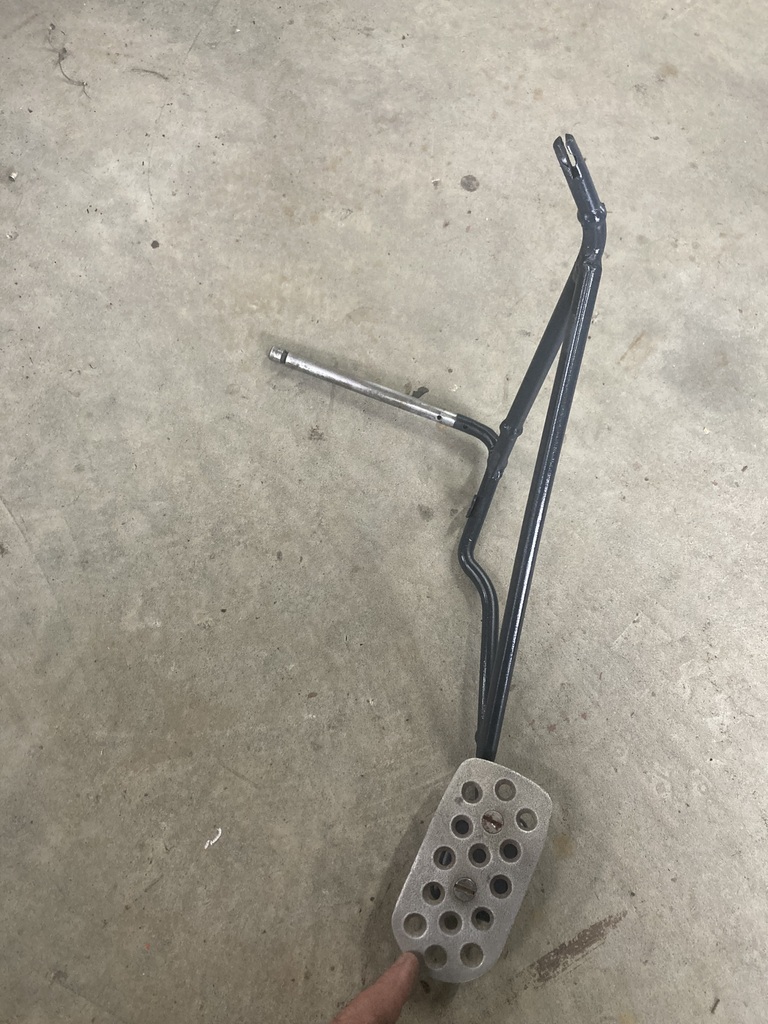 And fitted 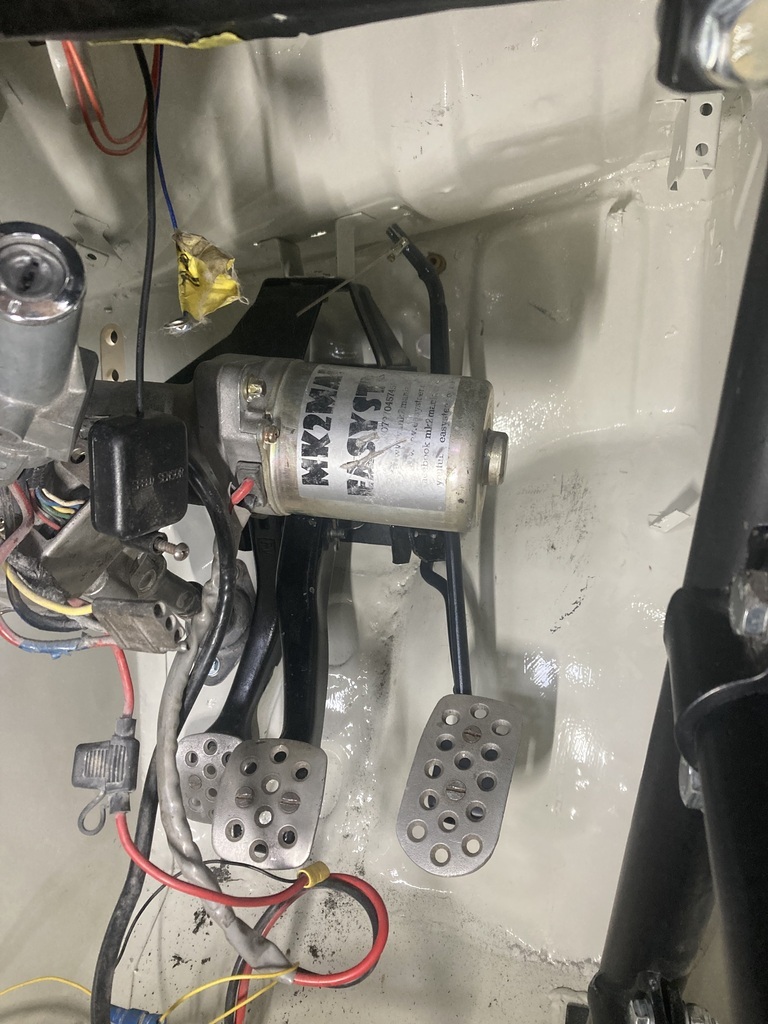 I’ve now got full throttle. 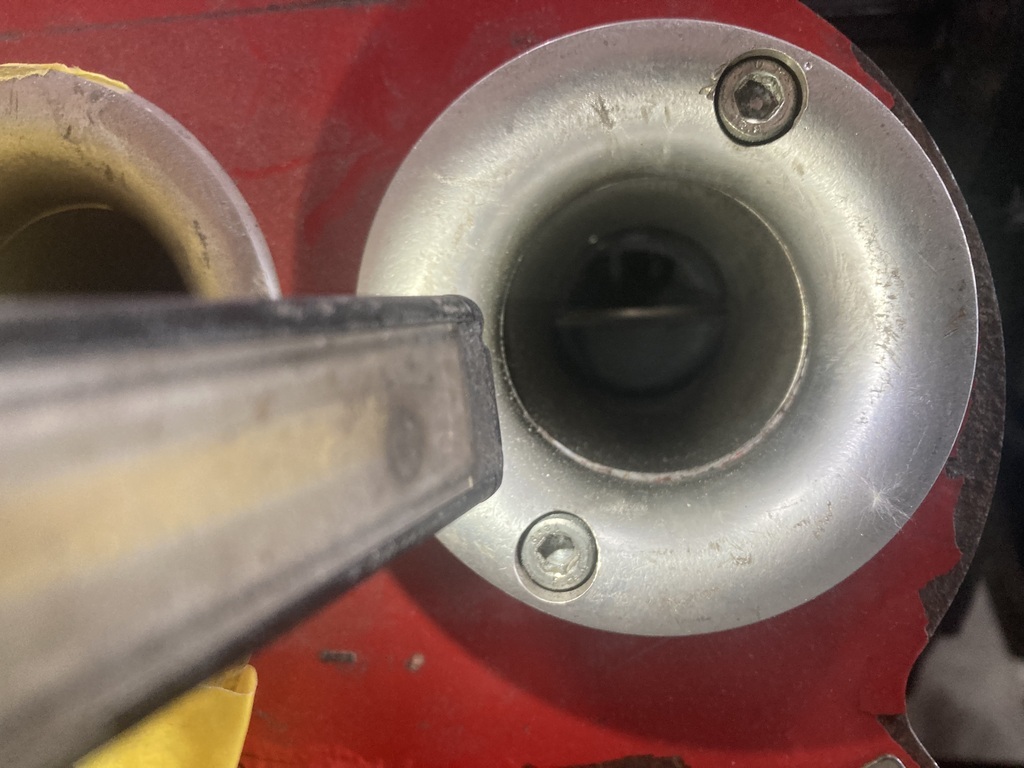 I had to drill a new hole for the cable above the old .  And cable fitted 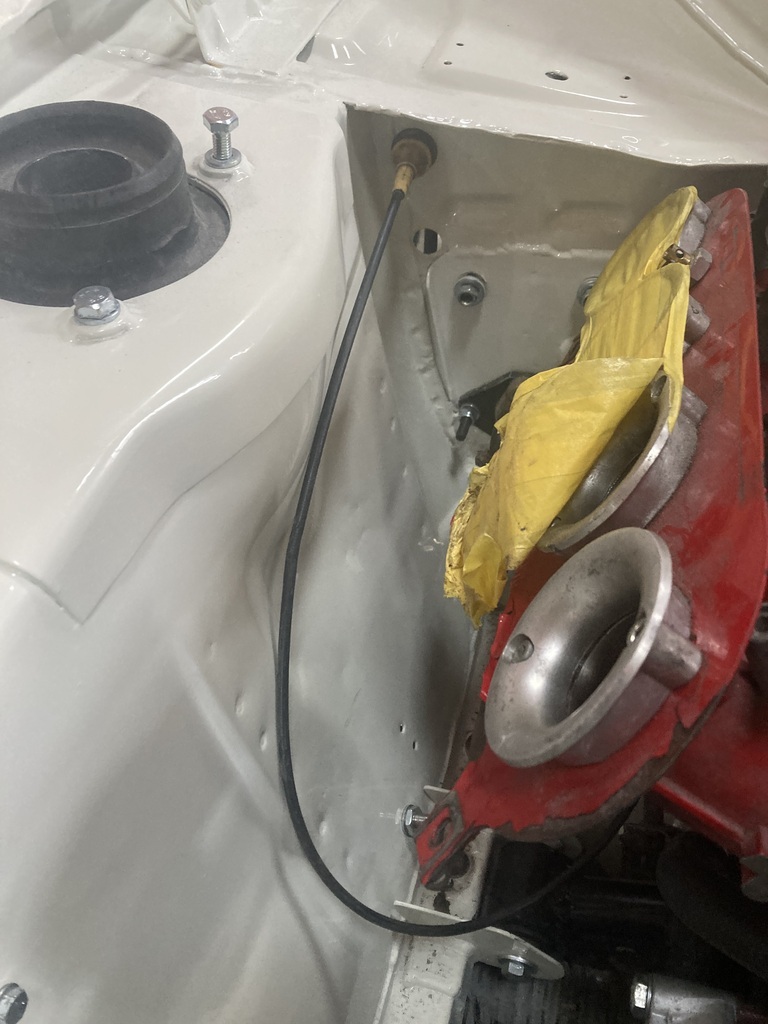 I then started plumbing the fuel system 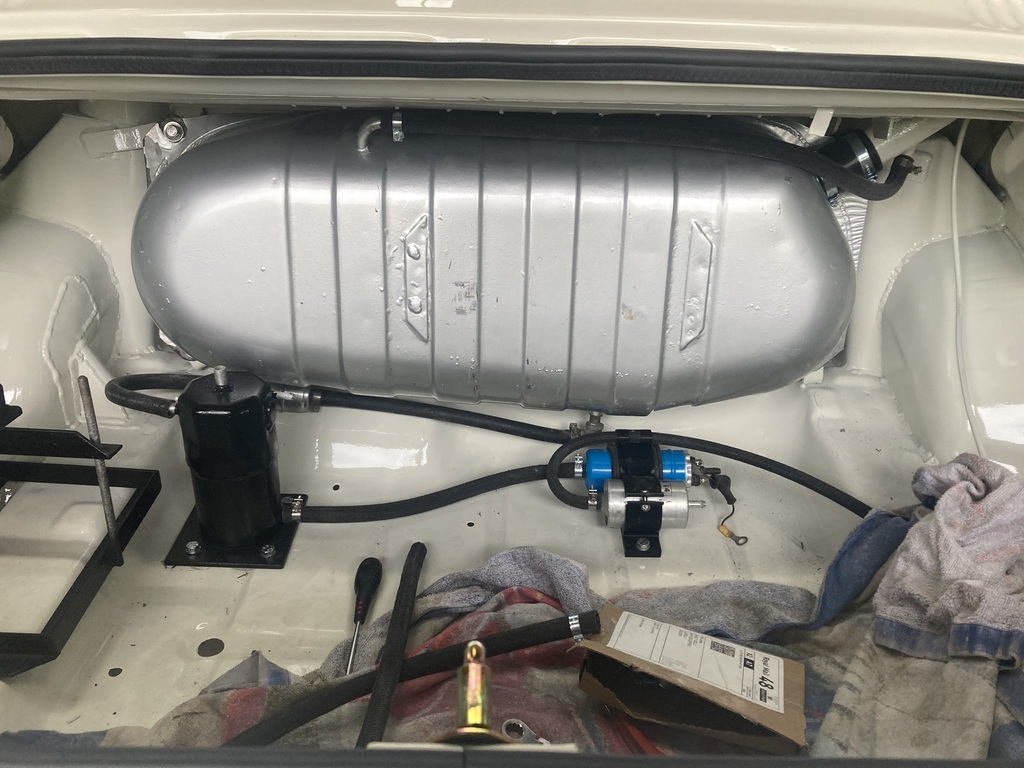 ’m hoping to go to the Singleton Classic Car Show tomorrow but the weather might not be up to muster, so I may have to give it a miss |
| |
|
|
|
|
|
|
|
|
|
|
Can you fit a smaller flywheel or machine the Honda one to the same size as the Fiat item? My brother has recently fitted a J series Honda V6 into his Gilbern. I believe the starter originally went on the gearbox.He cut a big hole in the sump and fitted the starter motor there, and I welded the sump around it and made a bellhousing out of ford item. Looked pretty horrendous but works a treat. He now has 290bhp for £900.
Looking forward to your next move as love a weldathon and an engine swap so this thread is getting better and better
|
| |
|
|
|
|
|
|
|
Call? Yep. A couple of hours in the garage? Of course. But it nearly wasn’t as it was raining, windy and cold so I did think about giving it a miss. None of you would have known. But I have to keep chipping away. The top quality Chinese m22 tap turned up 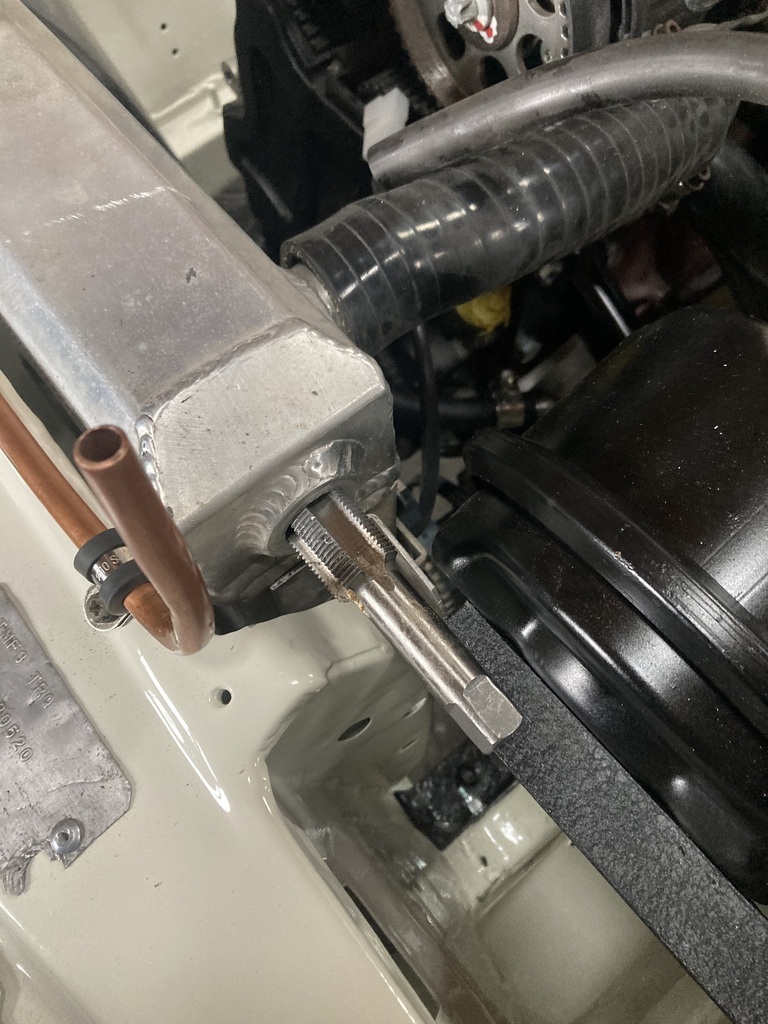 It did the trick 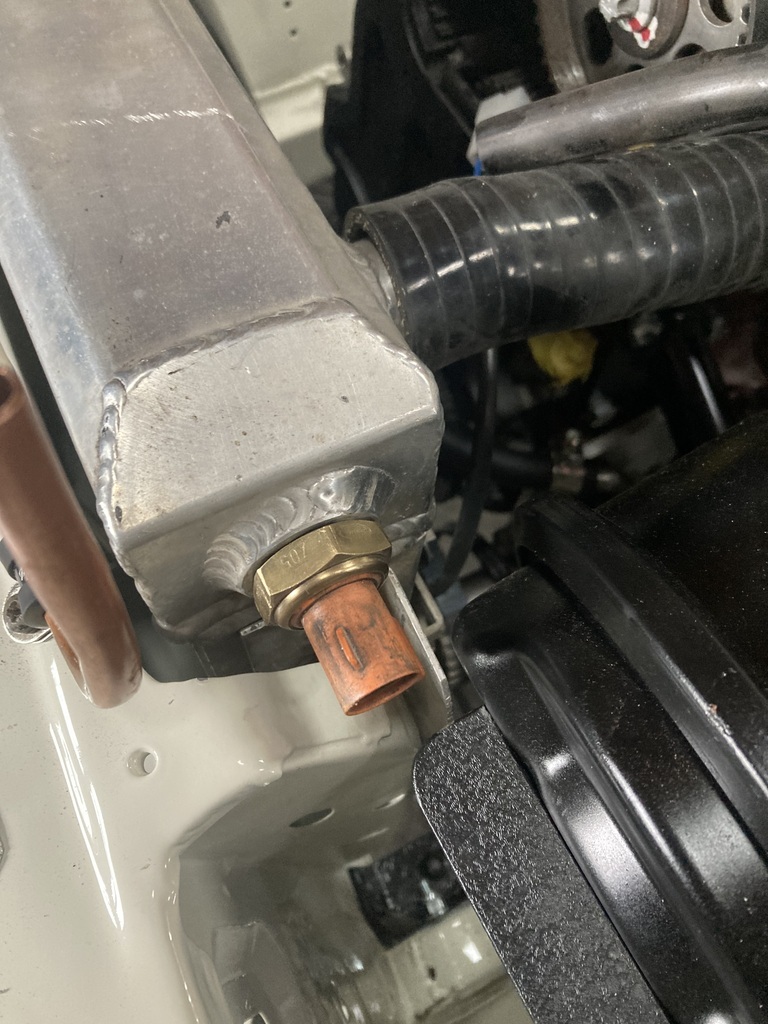 Anyone know of fan switch that kicks in around 80° or less? I bought a bypass hose from eBay. Can’t remember what car it’s from (could be Audi) but I just looked for a 24mm hose that had a bend in it so it misses the water pump (no pic) I welded a 24mm stub to the bottom hose bend 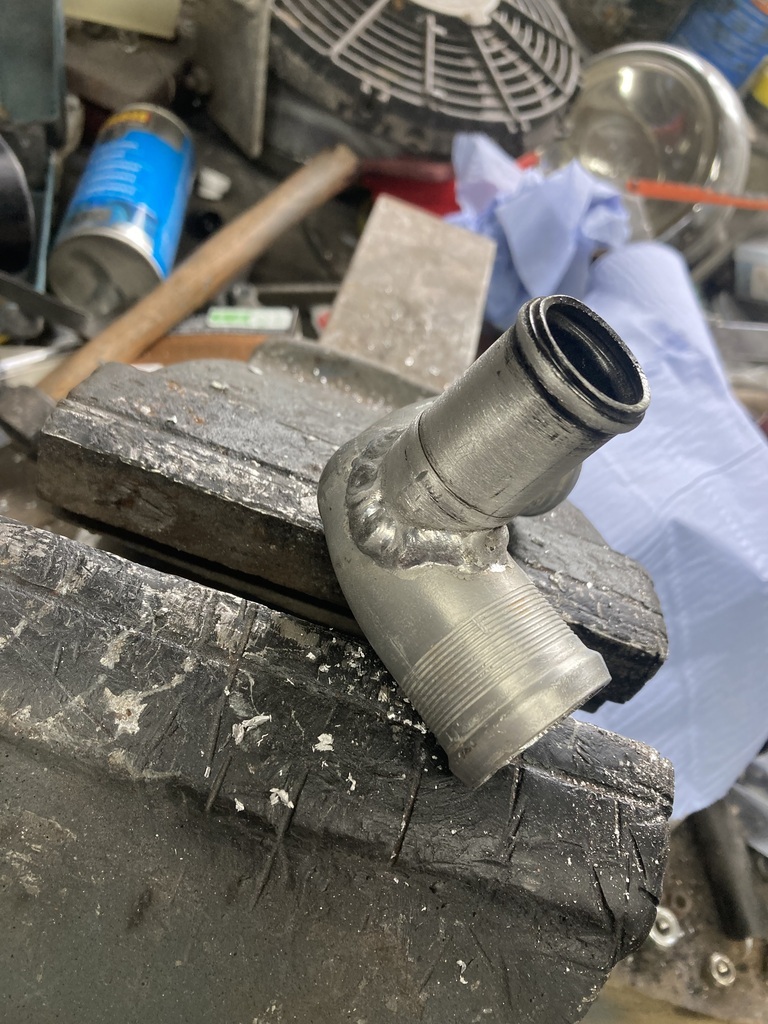 All fitted 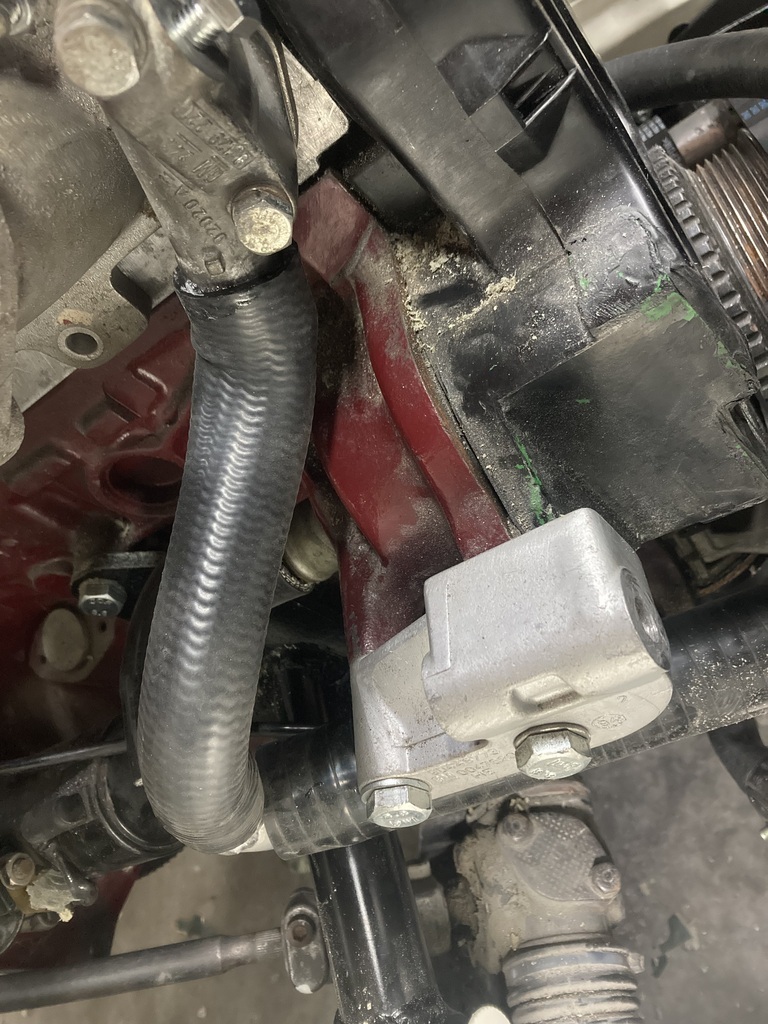 I also refitted the alternator to make sure it clears and all’s good 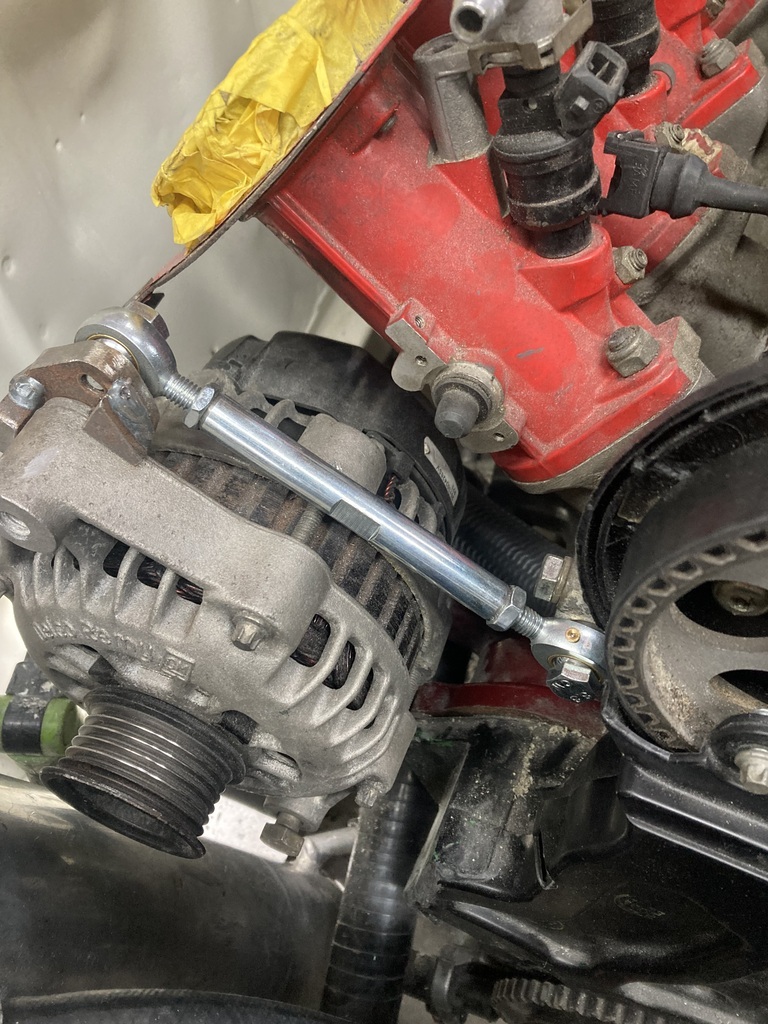 I cut the RS2000 throttle cable and machined the end to locate in the bracket I made earlier this week 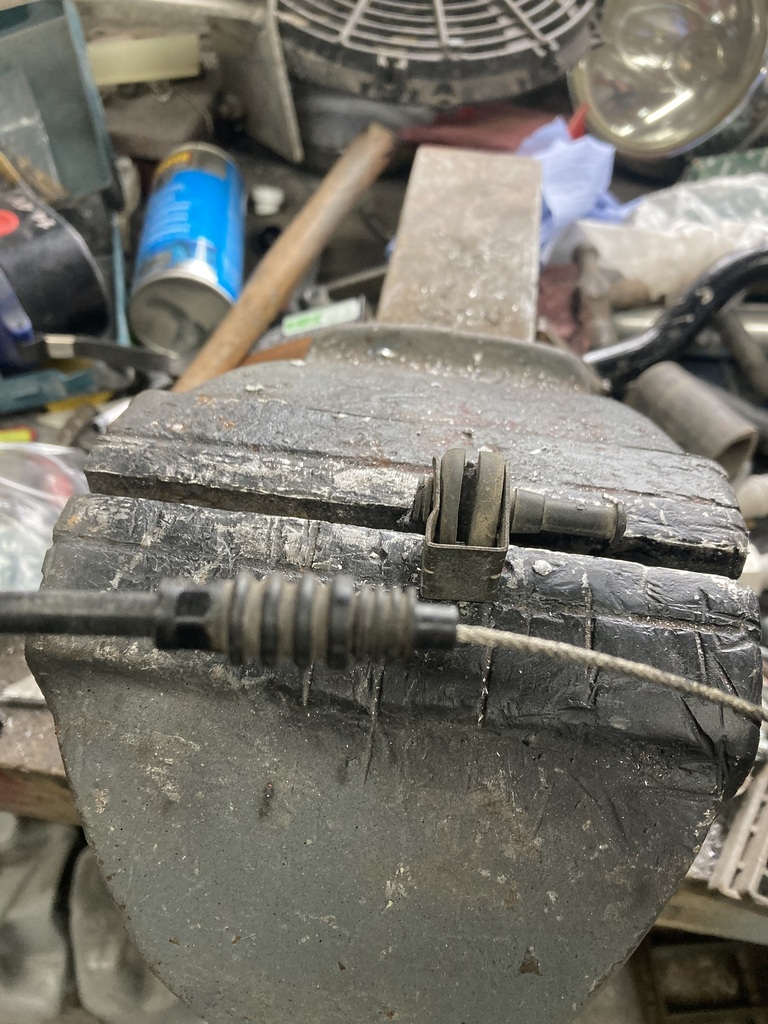 All fitted 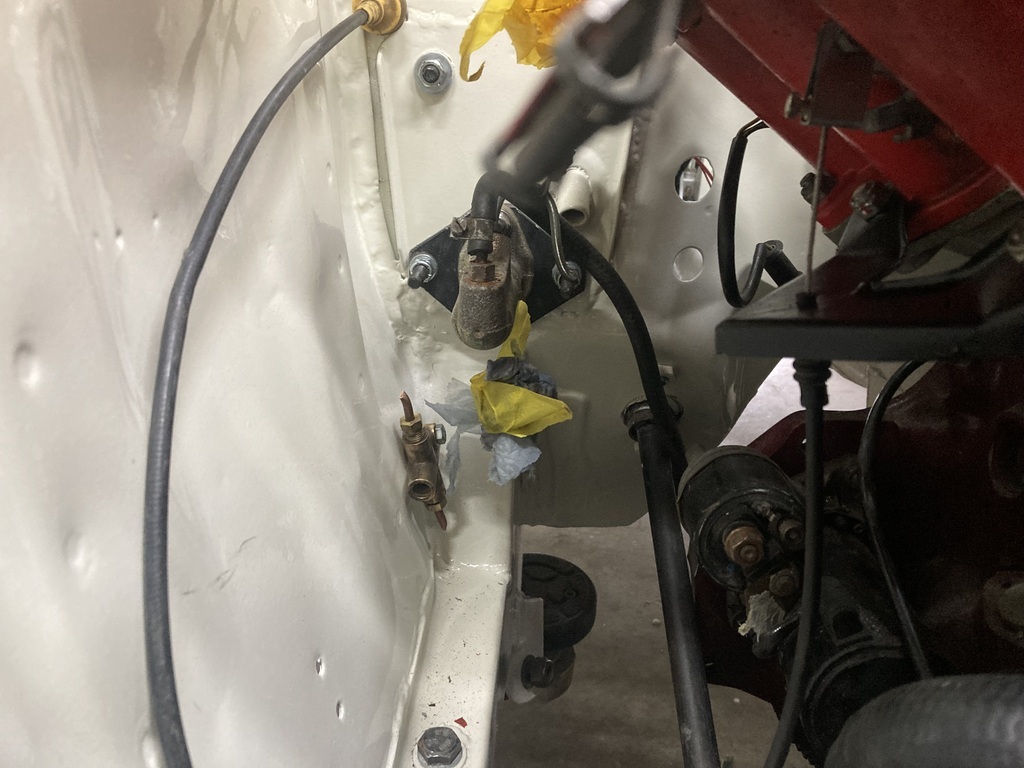 But the throttle flaps only opens 3/4, not fully. 😩 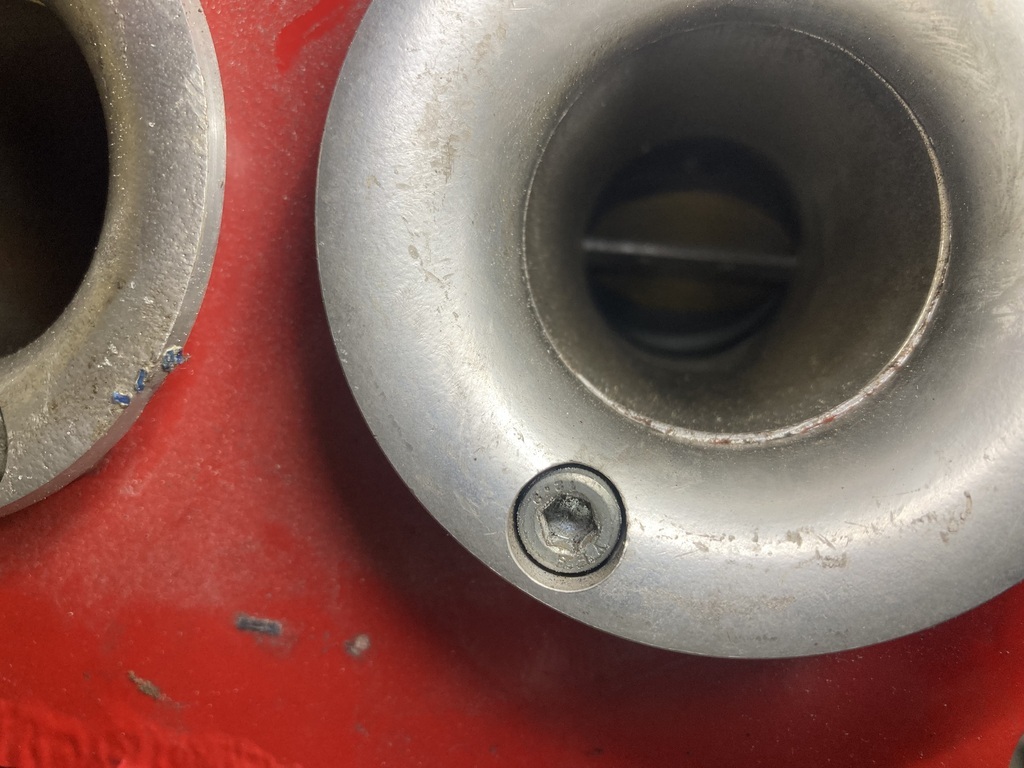 I’ll check the pedal ratio on the single seater tomorrow. An extension may be required. |
| |
|
|
|
|
|
Apr 30, 2024 17:01:27 GMT
|
|
Nice work Jim. You should get a few mot plates cut an put the on eBay once they are proven.
|
| |
|
|
|
|
|
Apr 29, 2024 18:08:38 GMT
|
Thanks Ian. The bit onto the water pump on that hose what have been handy but I think the radiator end would try to occupy the same space as the crank sensor. The 90° silicon bend was only £13 and I had the straight hose left over from the top hose. I also needed to stop hemorrhaging money 😩 |
| |
|
|
|
|
|
Apr 29, 2024 11:09:46 GMT
|
On call again, so another couple of hours done. I made a start on the bottom hose. I used to work developing vehicle heat exchangers and at some point I’d salvaged a couple of bent stub pipes off an aluminum brazed radiator. No before pic, but I welded them together at the angle I needed 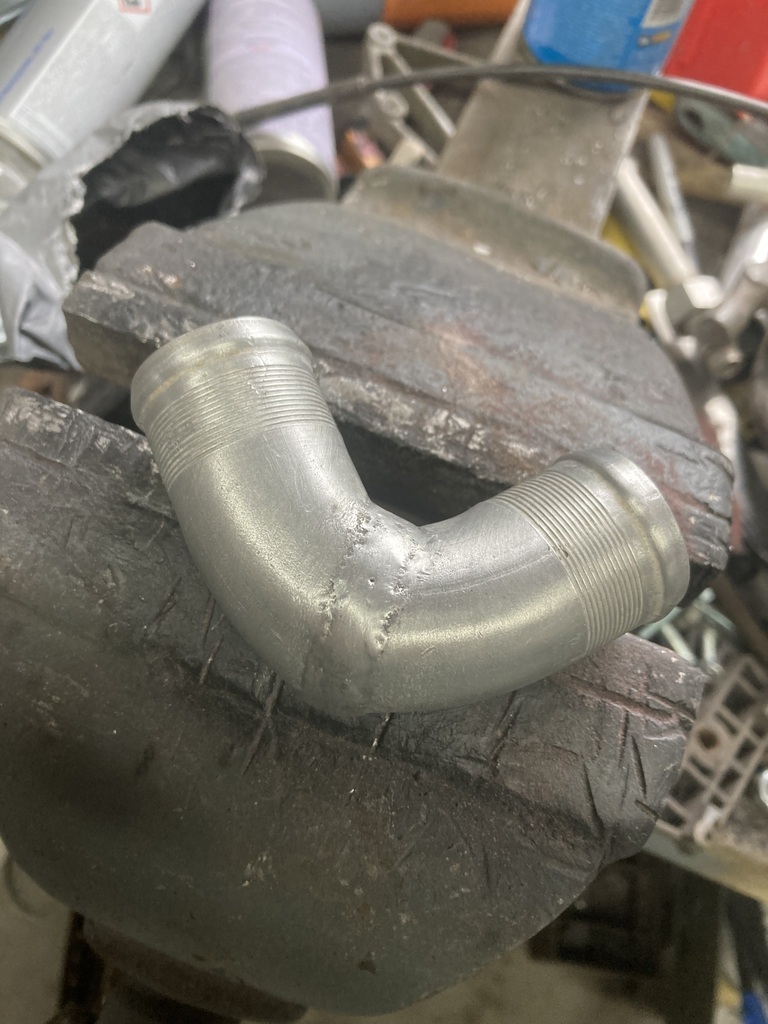 And fitted it between the bottom hose and water pump inlet. 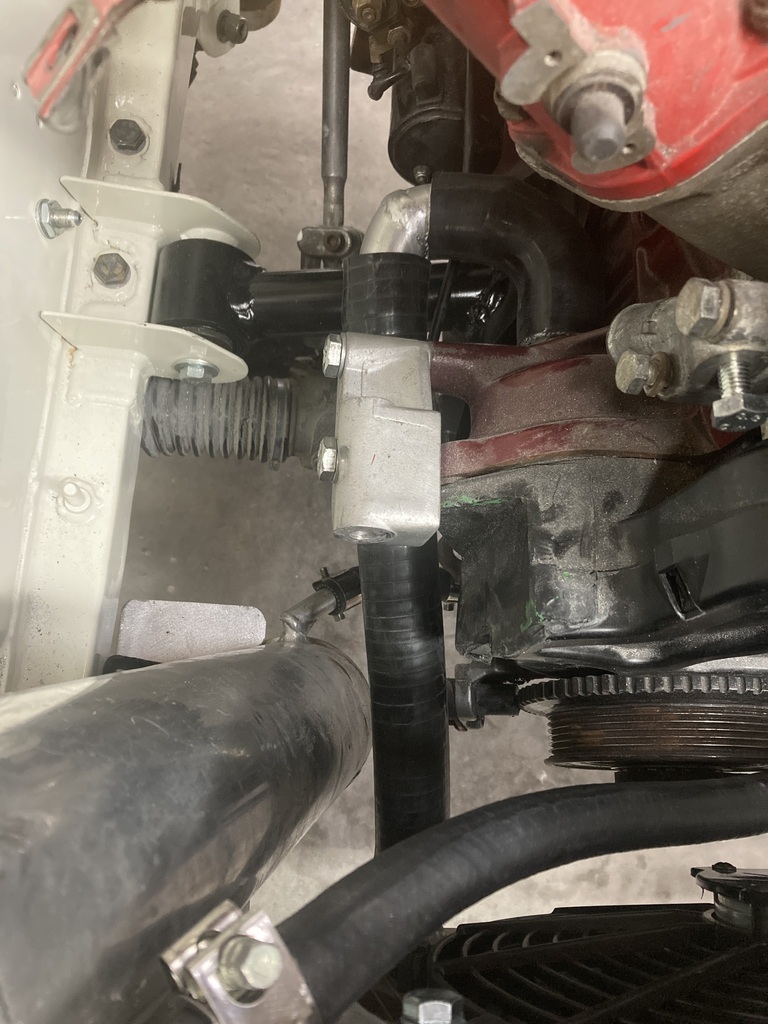 This isn’t finished yet as I have to add a stub for a heater pipe and the bypass hose from the inlet manifold, but I haven’t got the hoses yet to work out where I want them So I moved on to the throttle cable. I’m going to use the old cable but the throttle bodies don’t have anywhere to hold the cable outer. On the single seater, this was just a bracket on the chassis, so I needed a bracket. So I took the inlet manifold off 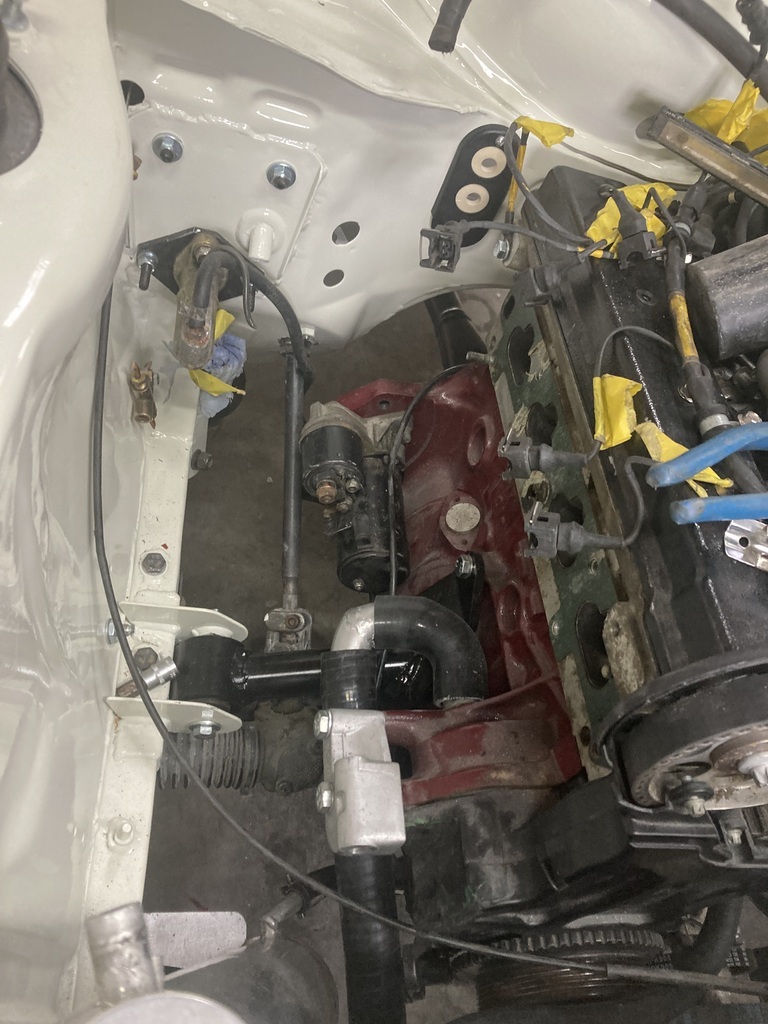 Made this 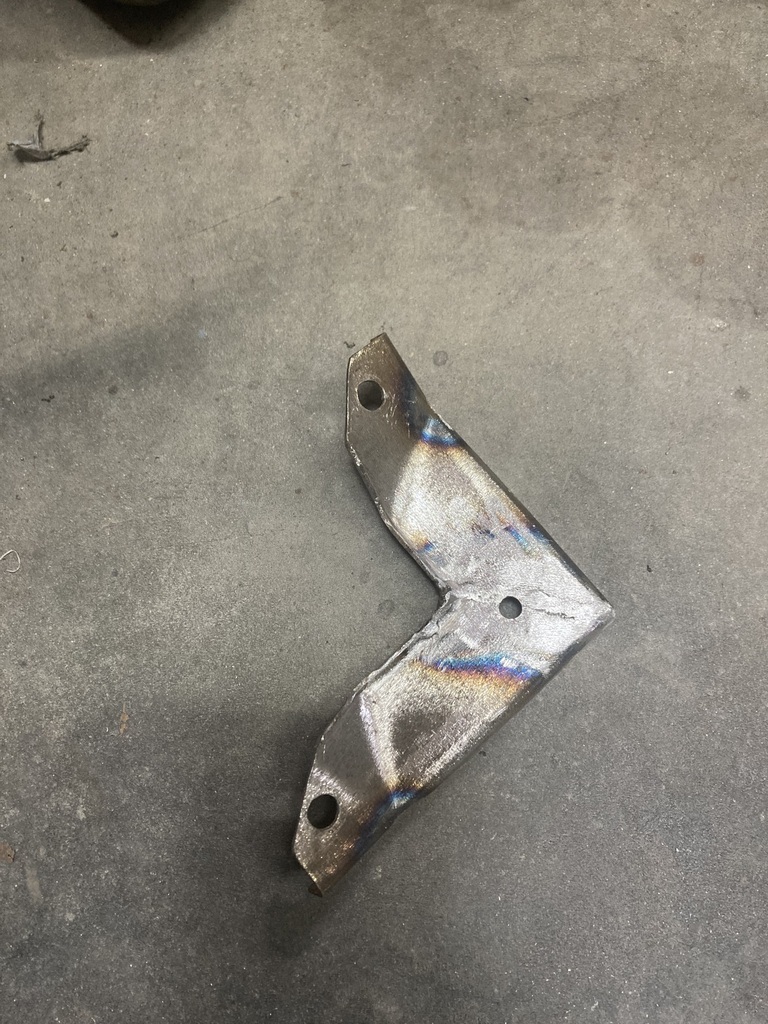 That bolts here 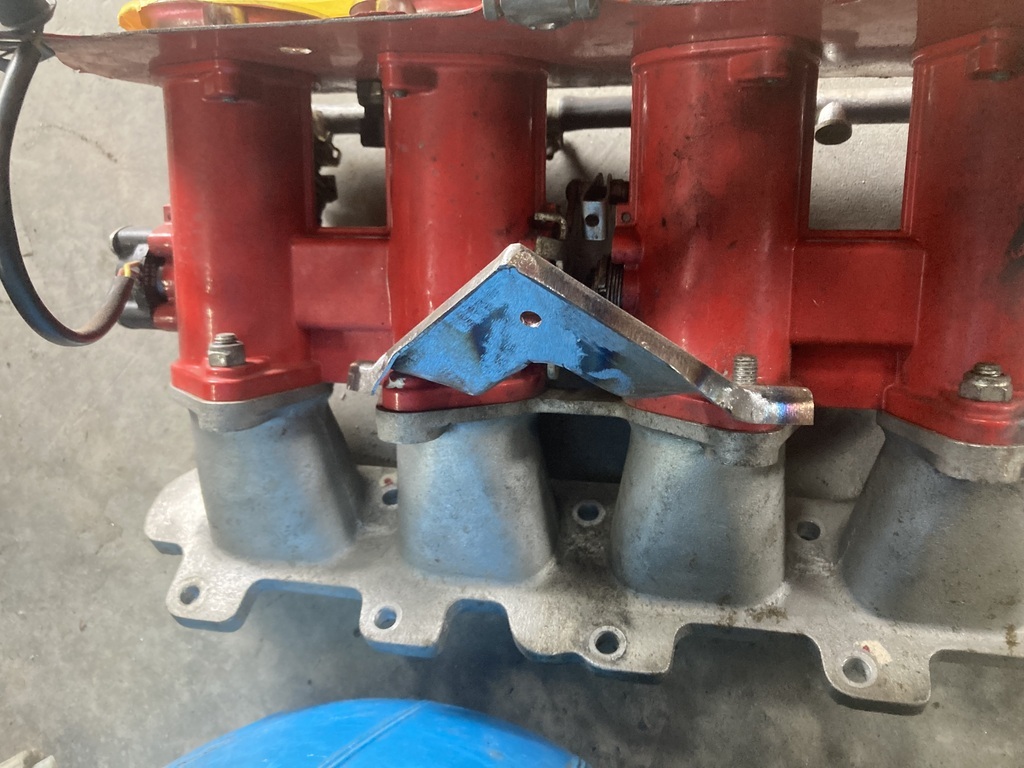 And painted it black 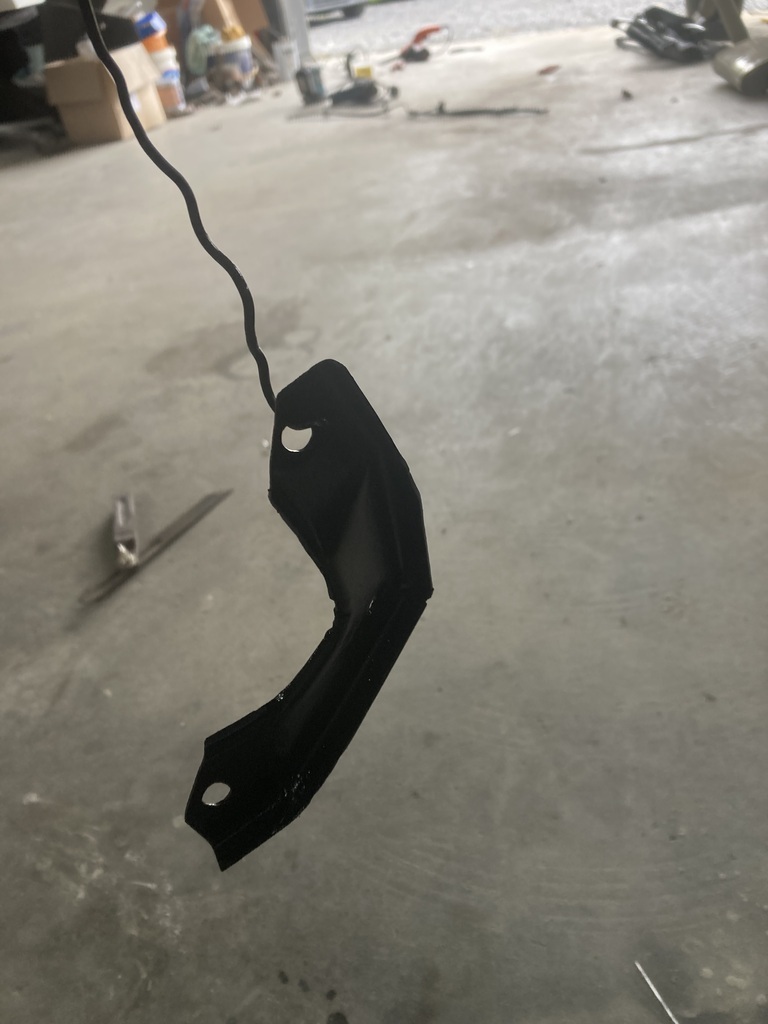 And then it was time to get some food in me before work. |
| |
|
|
|
|
|
Apr 29, 2024 10:51:31 GMT
|
As much as I enjoy the work on the Escort, it's great to see the Cortina in the sunshine The Escort has taken over my life the last 2.5 years, so everything else has been neglected. It was good to get it out again, giving it a blast down some country roads. I would love to do a rack conversion, but that is for future me. |
| |
|
|
|
|
|
Apr 28, 2024 15:14:27 GMT
|
BARN FIND EDITION, 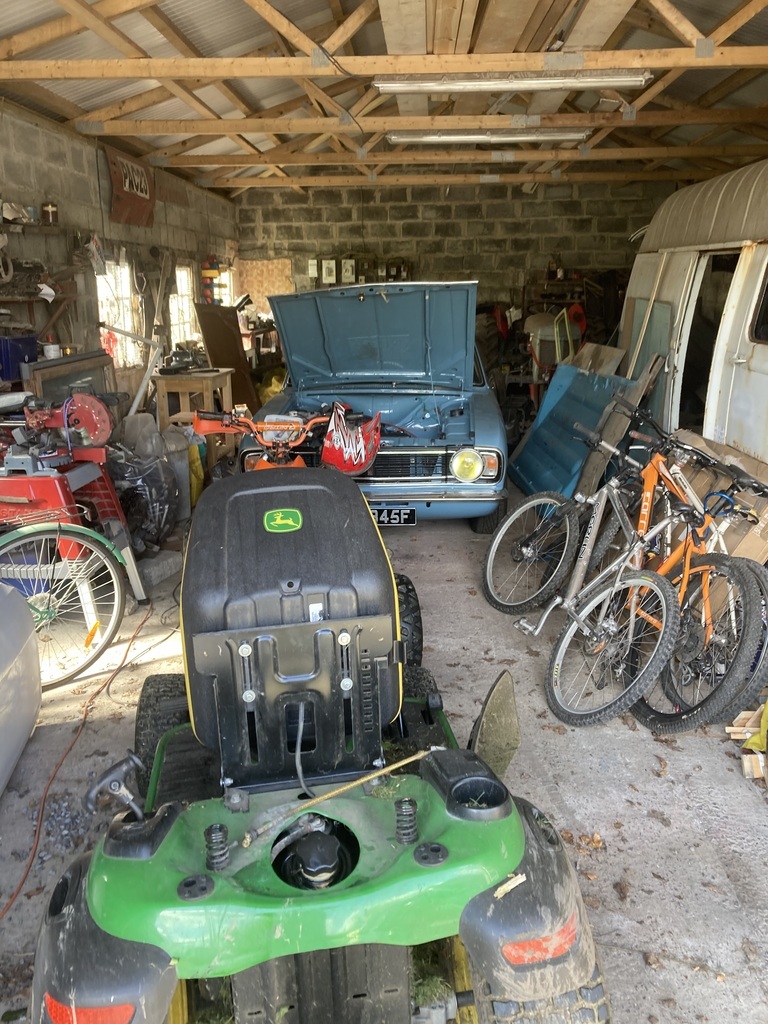 No work done on the Escort today. I decided to dig the Cortina out instead. I didn’t think there was much petrol in it so first off Jones Junior (the younger) and myself went to the petrol station in the Trafic to get a Jerry can full of 99RON. Whilst there I gave the van a jet wash as it was so green (we’re surrounded by trees), I could only see out of the screen where the wipers have been. When back home, the mower got a top up as it had run out of fuel last weekend (The Younger driving aimlessly round the field). As did The Younger’s quad, because he’d ran that dry last weekend too. But that would only idle and not take any throttle. Carb off, float bowl off, jets out, blown through, back together, sorted. It took a while to get fuel up to carbs on the Cortina as it always drains back. But once running, I drove it onto the field to see Mrs Jonsey, where it promptly ran out of fuel as in my excitement, and forgotten to add some 99RON. That sorted, The Younger and I went for a spin and thoroughly enjoyed. When back I decided to get the single seater out of the new garage and put it in the old. I wheeled it like a barrow as it doesn’t weigh much. I then cleaned that side of the garage bit  Still need to sort all this too  The Cortina now fits here 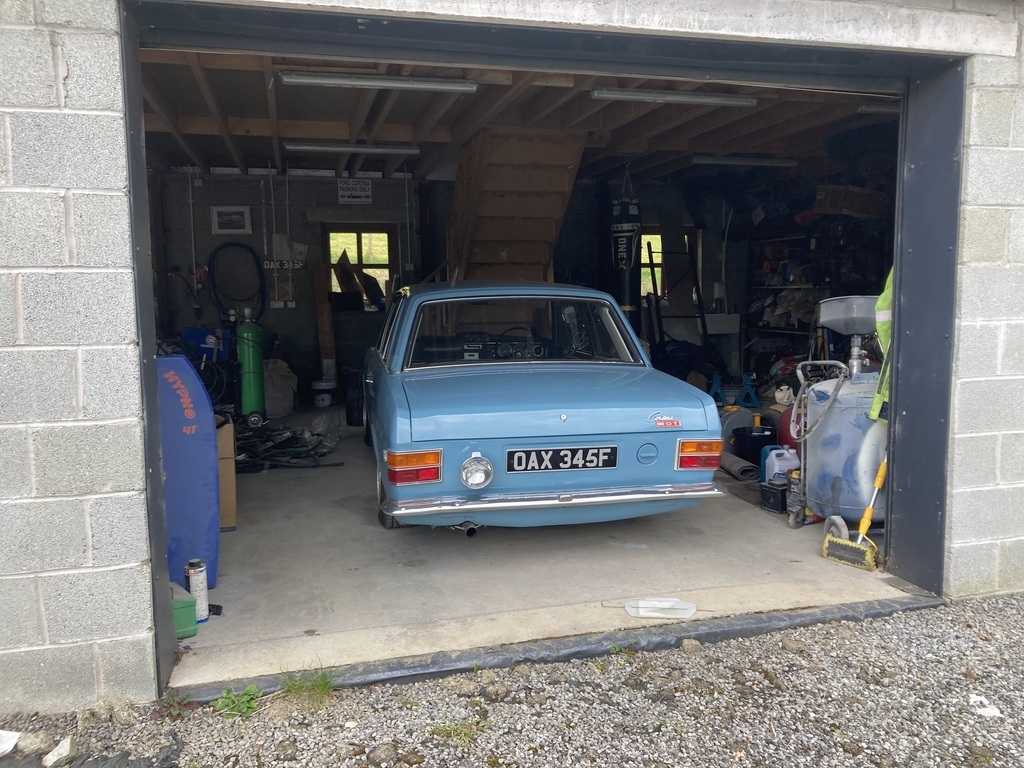 I’ll finish with a pic of the Cortina being jump started off the mower as the battery didn’t have enough go in it to suck the fuel through for a second time. 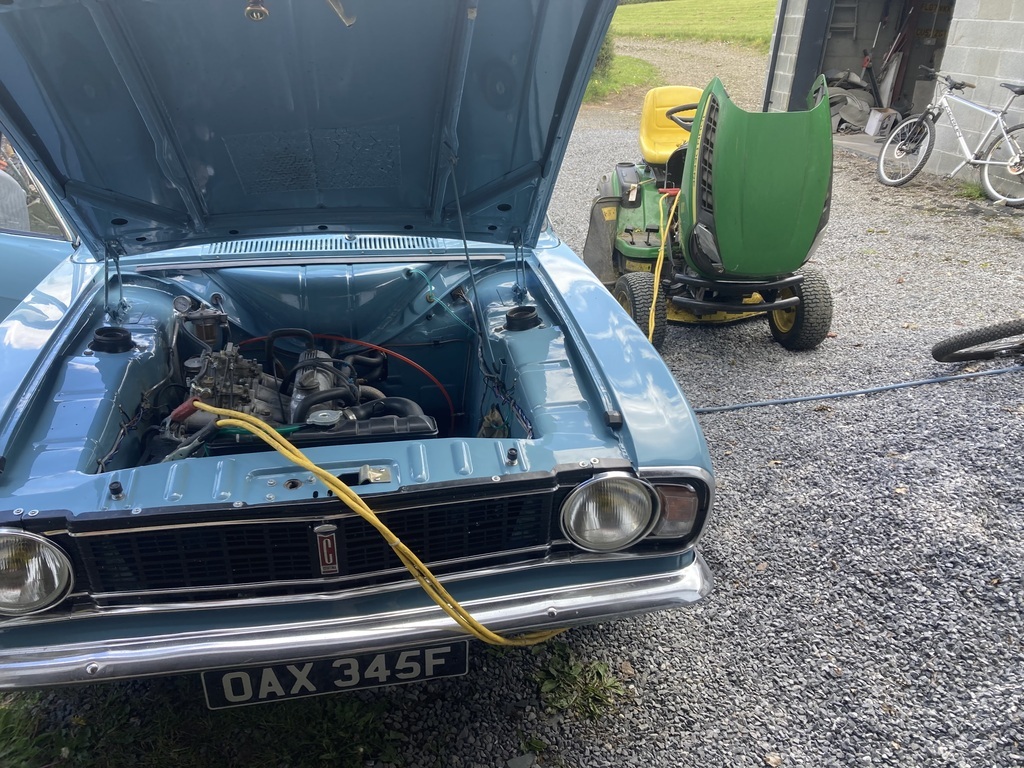 |
| |
|
|
|
|
|
Apr 27, 2024 17:14:19 GMT
|
No work this weekend, so after food shopping with Mrs Jonsey and a visit to some of her family, it was garage time. The half inch oil pipe and all the clips turned up so I fitted those. This took an unexpected bit of time, as once you’ve put the pipes on the barbs, they really don’t want to come off.   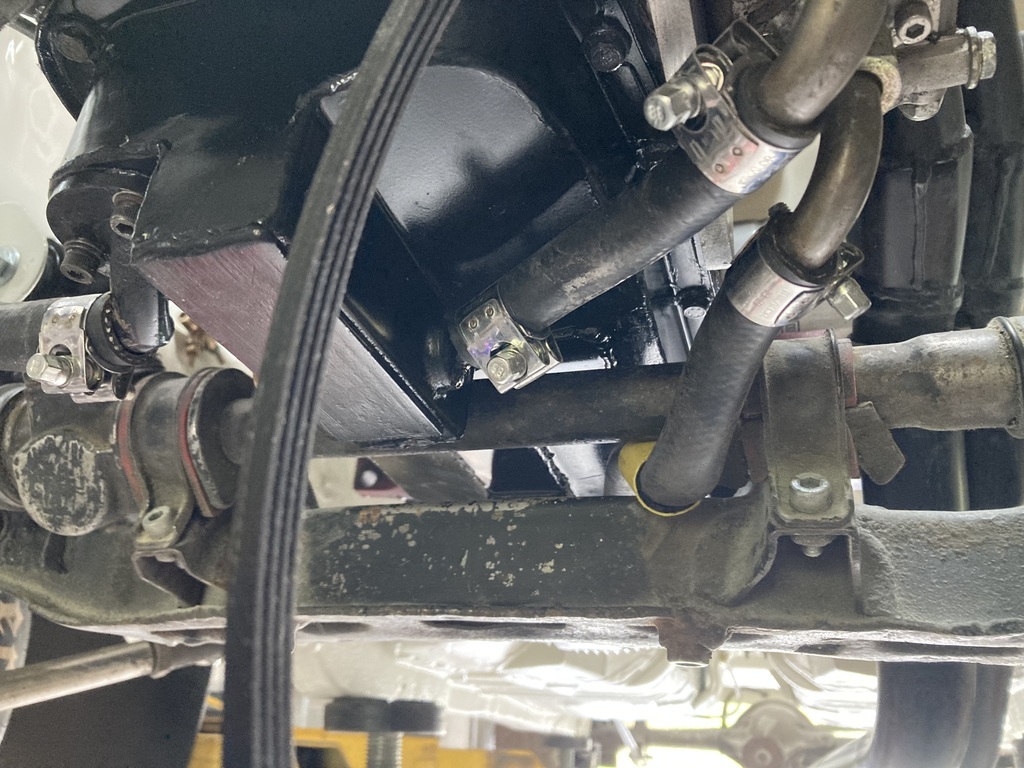 One of the scavenge pipes has had to go above the crossmember but below the steering rack so I’ve slipped a bit of yellow PE gas pipe over it to stop it rubbing. That’s the oil circuit complete except for the breather circuit. Radiator next. If you remember from last week, the bottom hose run wants to go straight through the crank sensor. So I cut the stub nearly off and bent it up 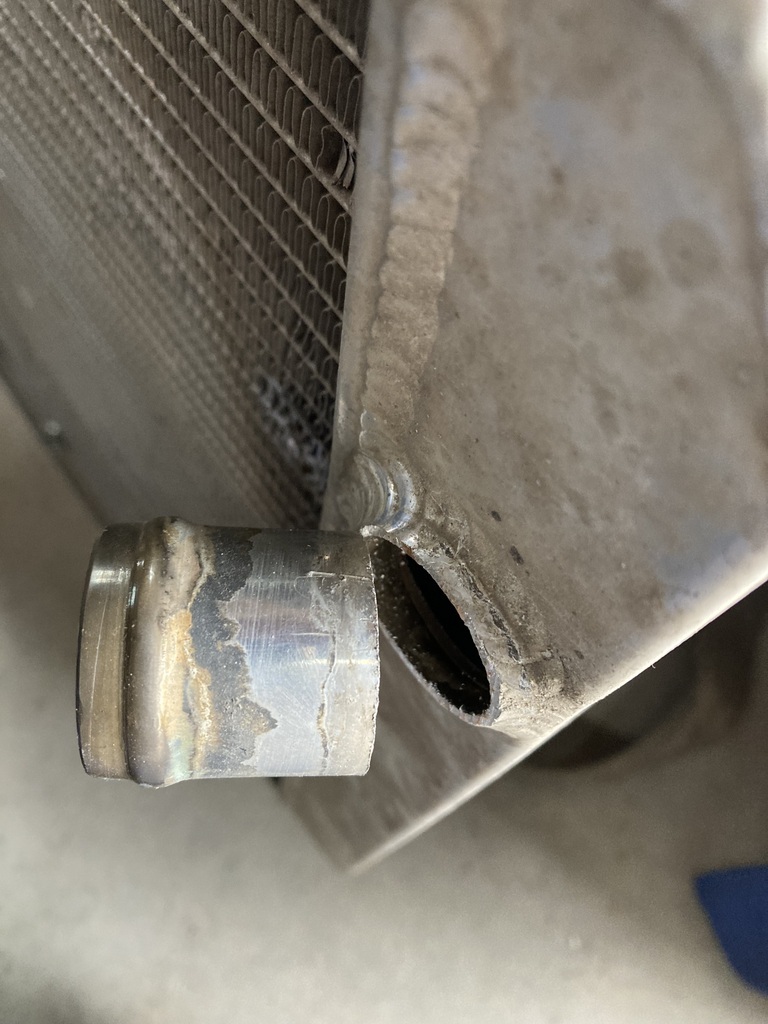 Then cut a wedge 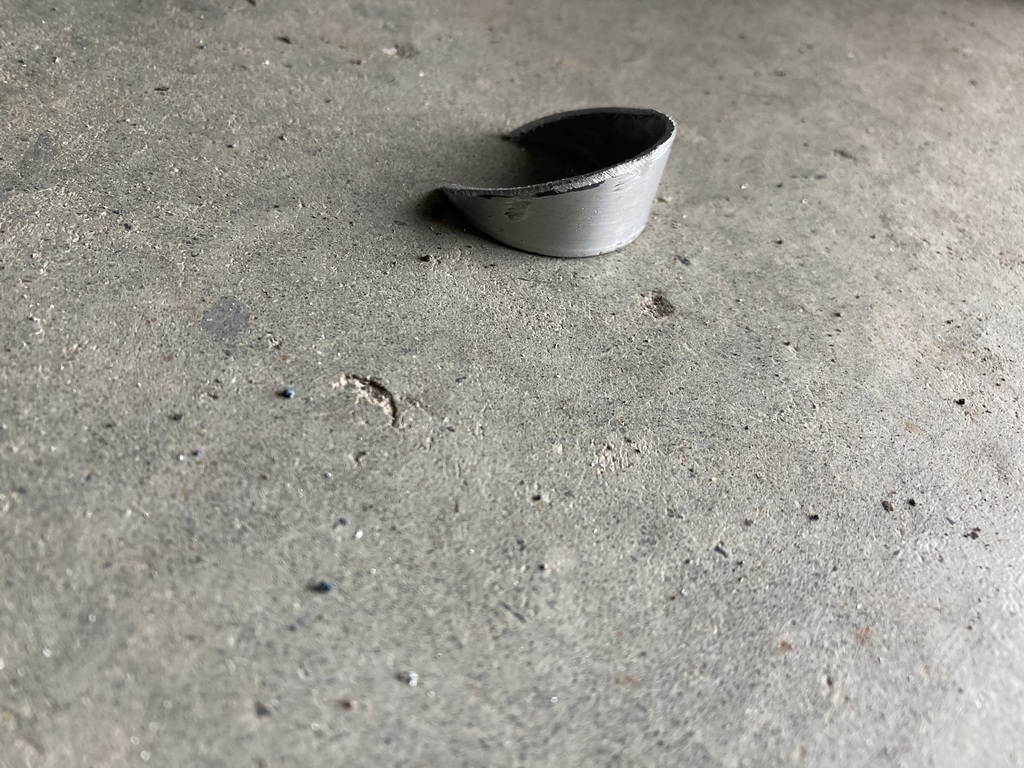 That’s not the actual wedge as after I’d taken the photo I realised the angle was wrong, so I cut another. This was welded to the radiator (badly) 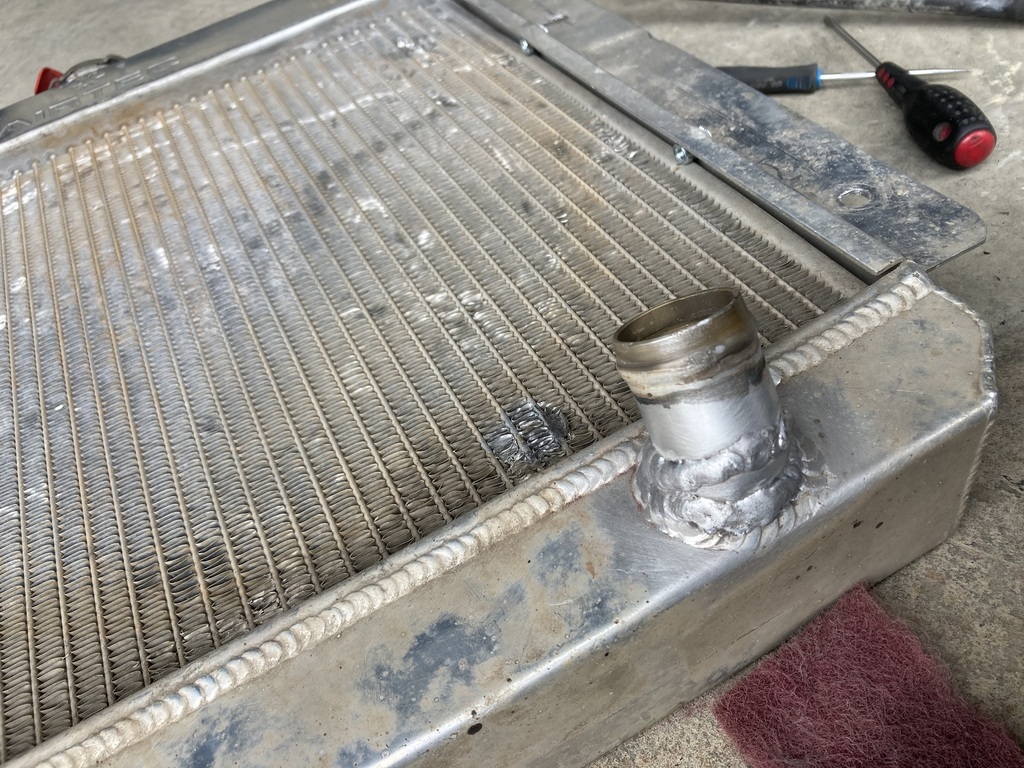 And a pic of the fan, rad and modified stub in place  If I get a chance tomorrow I’ll try and connect the modified stub to the water pump inlet  |
| |
|
|
|
|
|
Apr 26, 2024 20:56:45 GMT
|
|
That is brilliant. Retro power recently made some wheel arches in a similar way for a couple of mk1 Escorts. I bet they cost a bit than £40 each though.
|
| |
|
|
|
|
|
|
|
Apr 26, 2024 20:40:04 GMT
|
So, what I’ve been up to before work this week? I can’t really remember, so I’ll just use the few photos I’d taken, and explain those. The copper pipe I’ve used to plumb the brake servo vacuum pipe over to the inlet manifold was cleaned, lacquered and fitted  I also fitted new posts for the bonnet pins  As can be seen in the above photo, I have also tried to screw a fan switch into the radiator top tank. These are usually 22x1.5 thread, but it won’t go in. The pitch matches up, but when I measured the bung that I removed, it only measured 21mm. I’ve ordered a tap from China (I’m expecting great things) to re tap it. If it doesn’t work, I’ll weld a new boss on. I made some nylon bosses up on the lathe to space the coil pack up off the bulkhead. 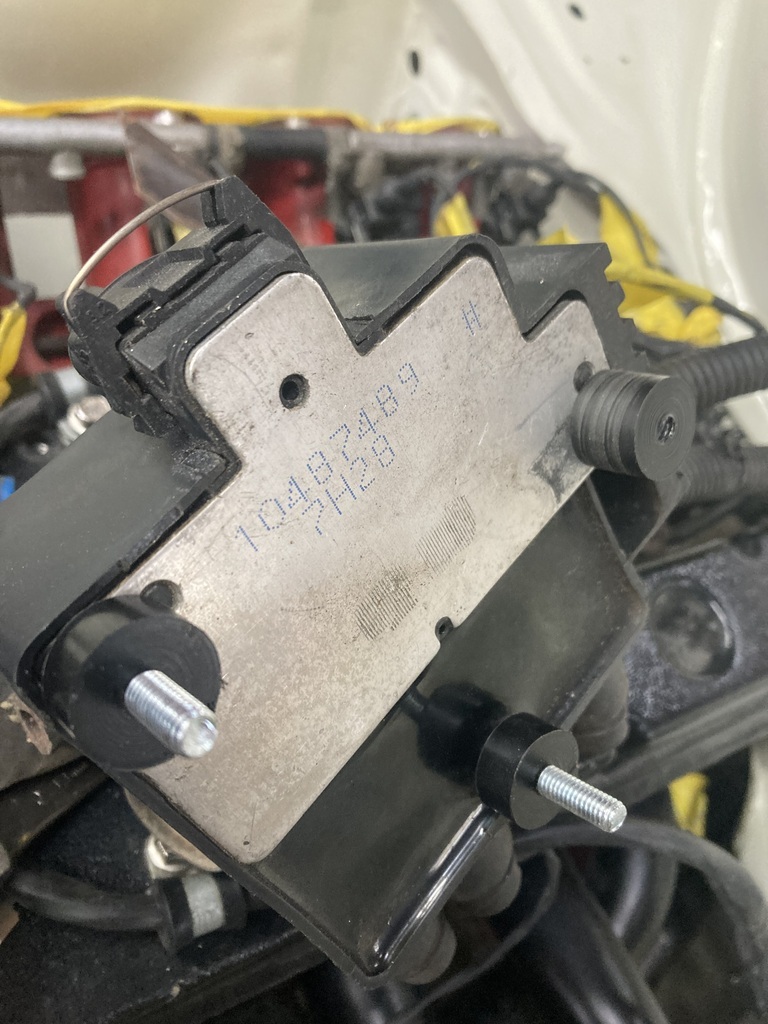 And drilled some holes  I only drilled the 2 as the 3rd is in the drain trough, so it’s just a spacer. It’s nice and solid though. 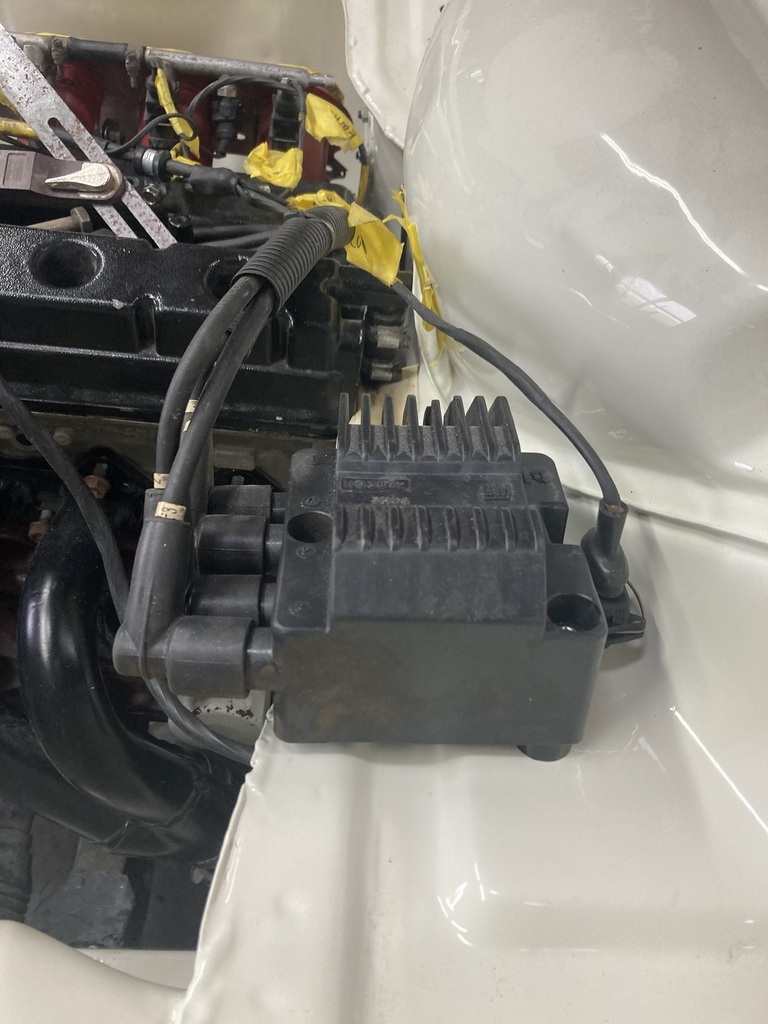 I removed the rear wheels, revealing my wheel spacers.  Don’t panic, I’ve got prober spacers and new longer studs, but need to remove the half shafts to fit Rear calipers were fitted to make sure the handbrake cables cleared the rear coilovers. They do ( luckily as I hadn’t checked)  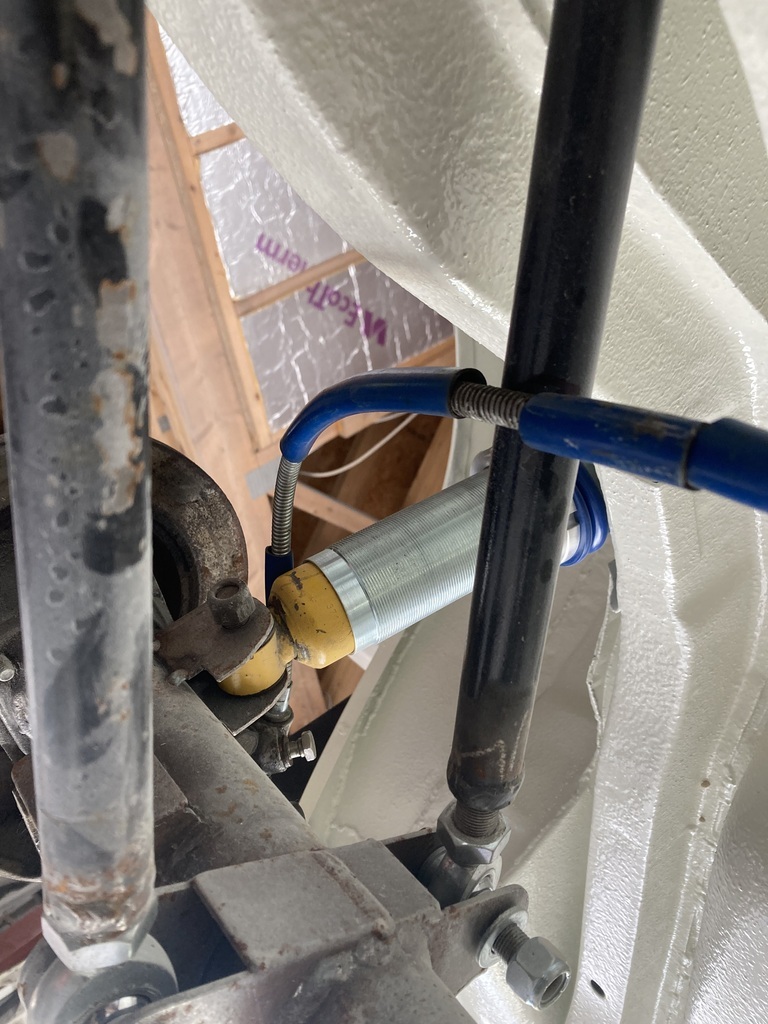 Made some bracelets to mount the cables and tacked to the top link bars 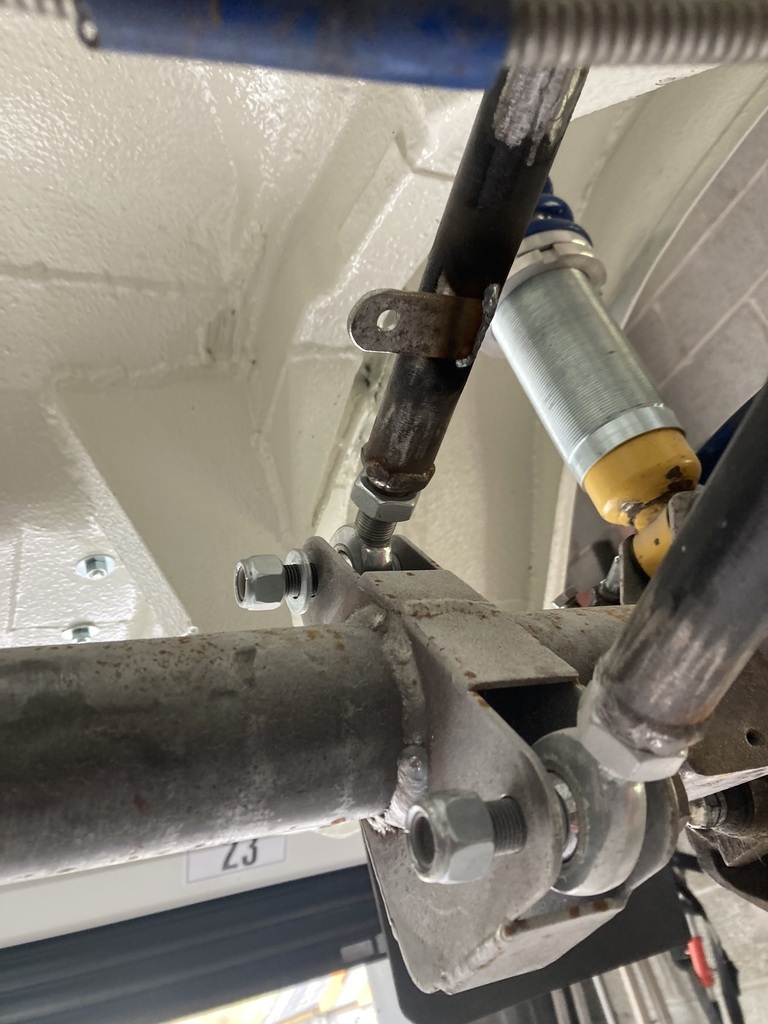 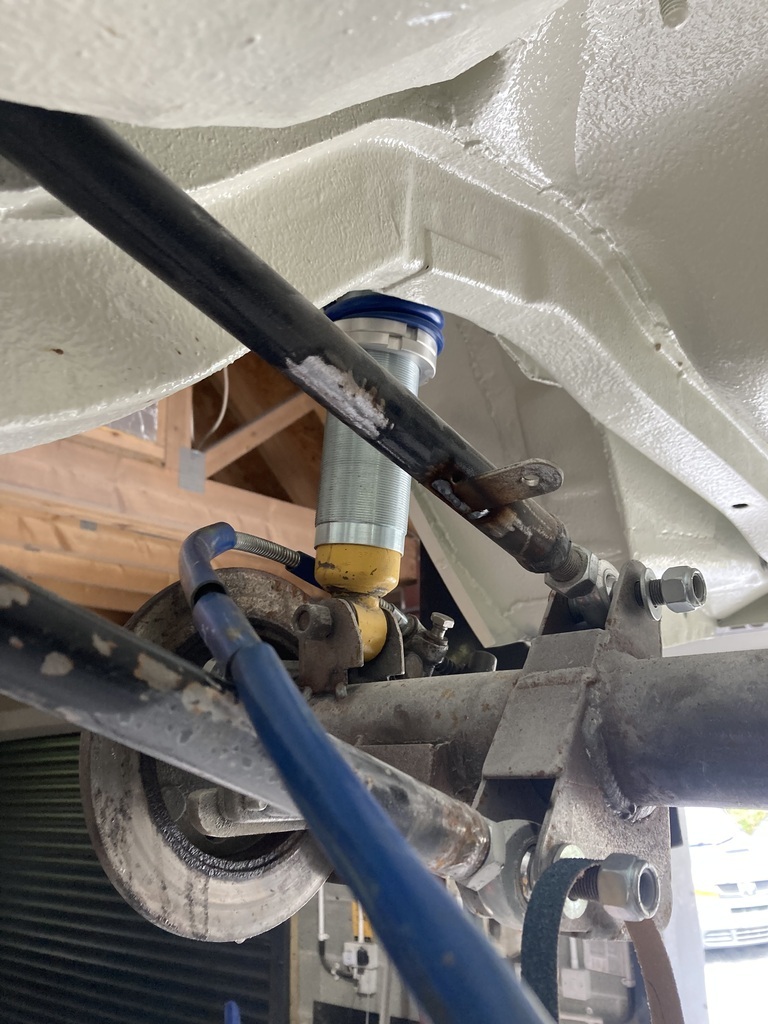 All welded and P clipped on 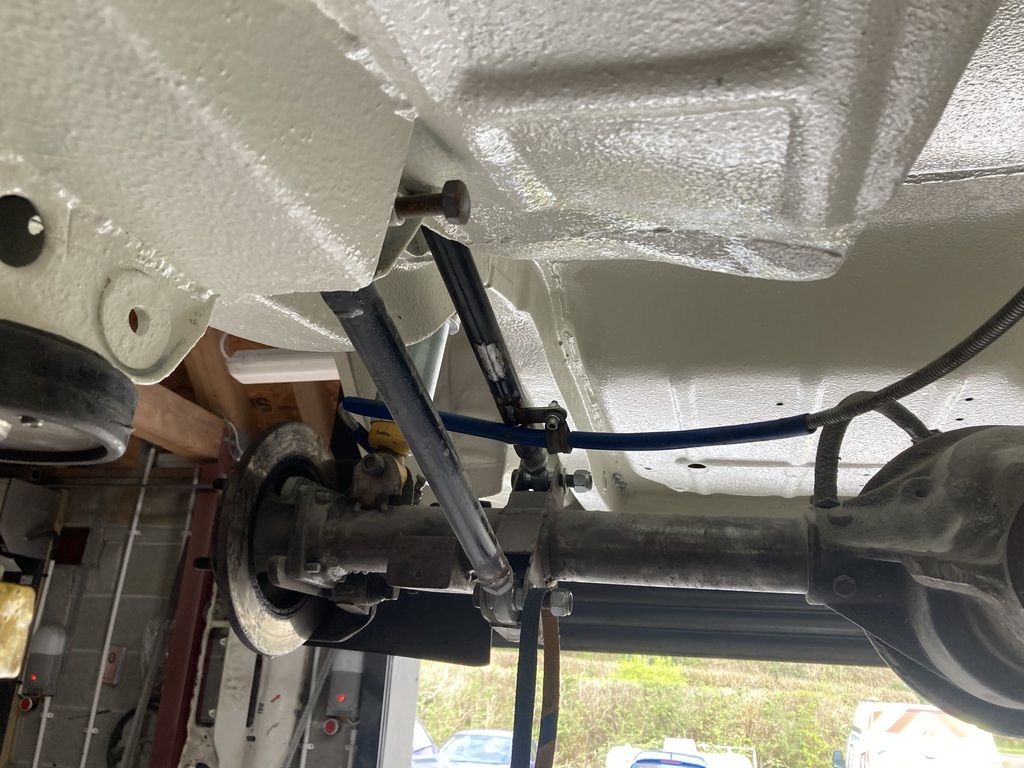 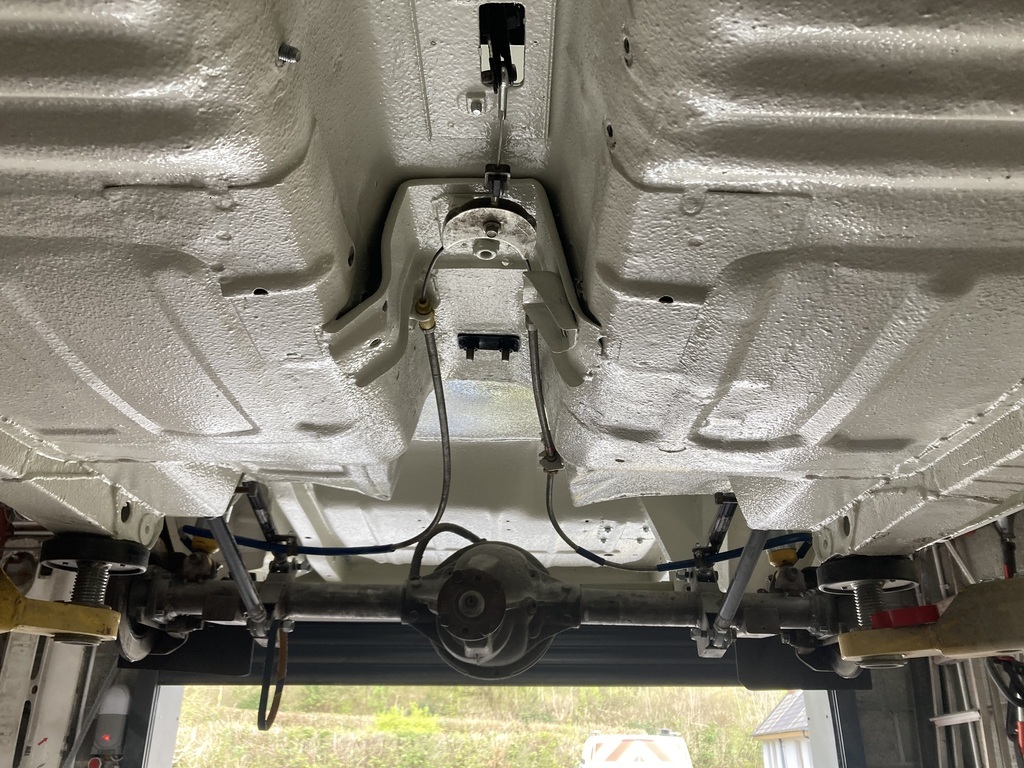 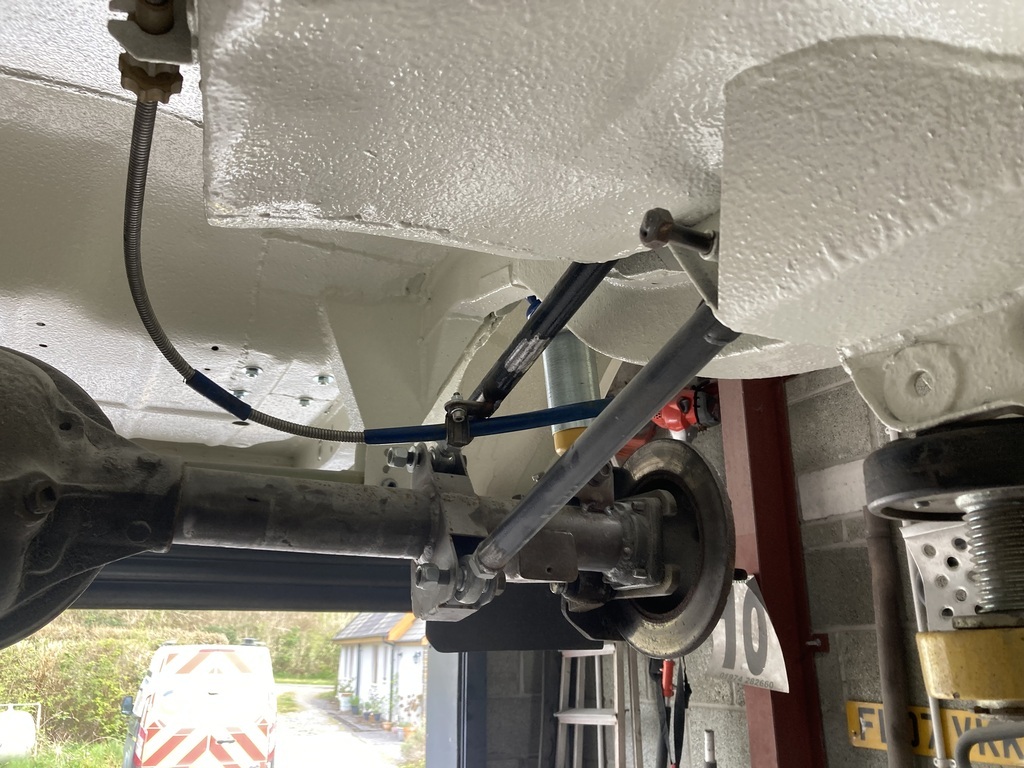 Cables even clear the wheels too 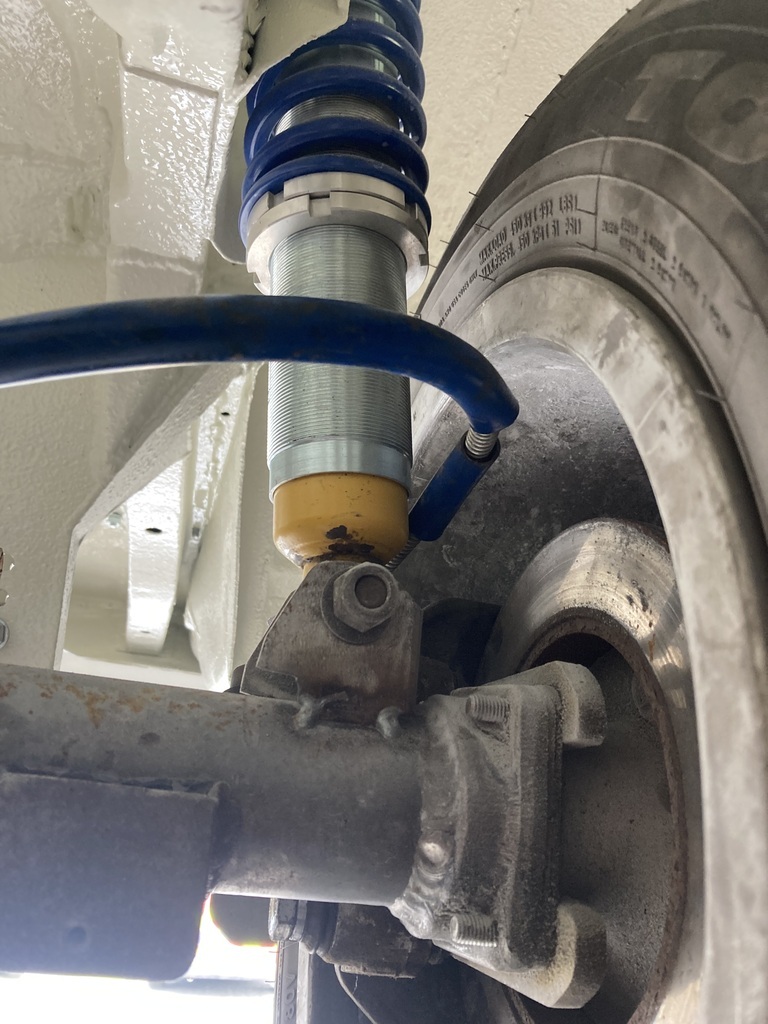 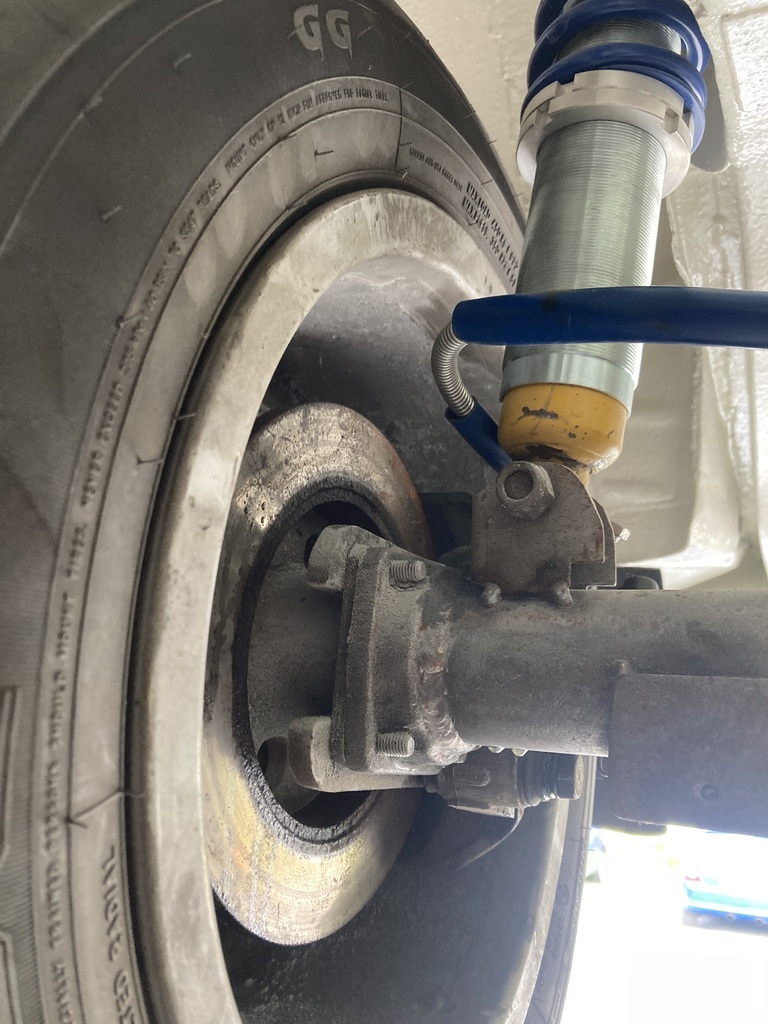 Some horses cam to see me when I was parked up in work  The new fan feet mounts turned up 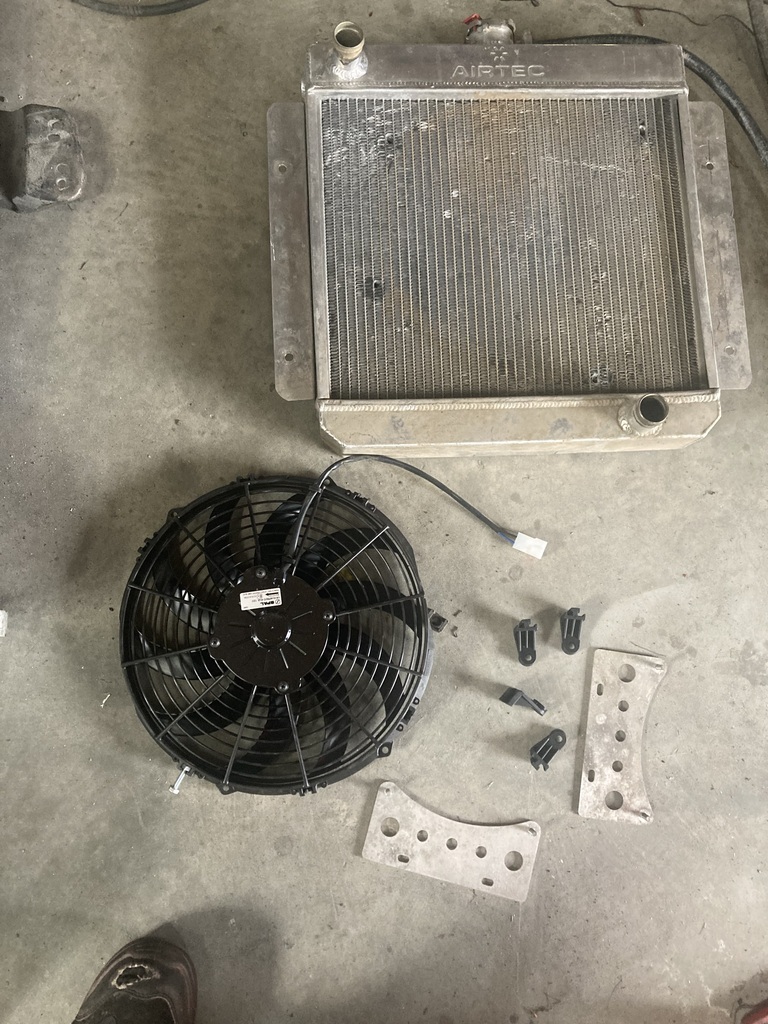 Luckily they did fit upside down. The brackets that came with the radiator had the studs removed, drilled out, bent up and cut down 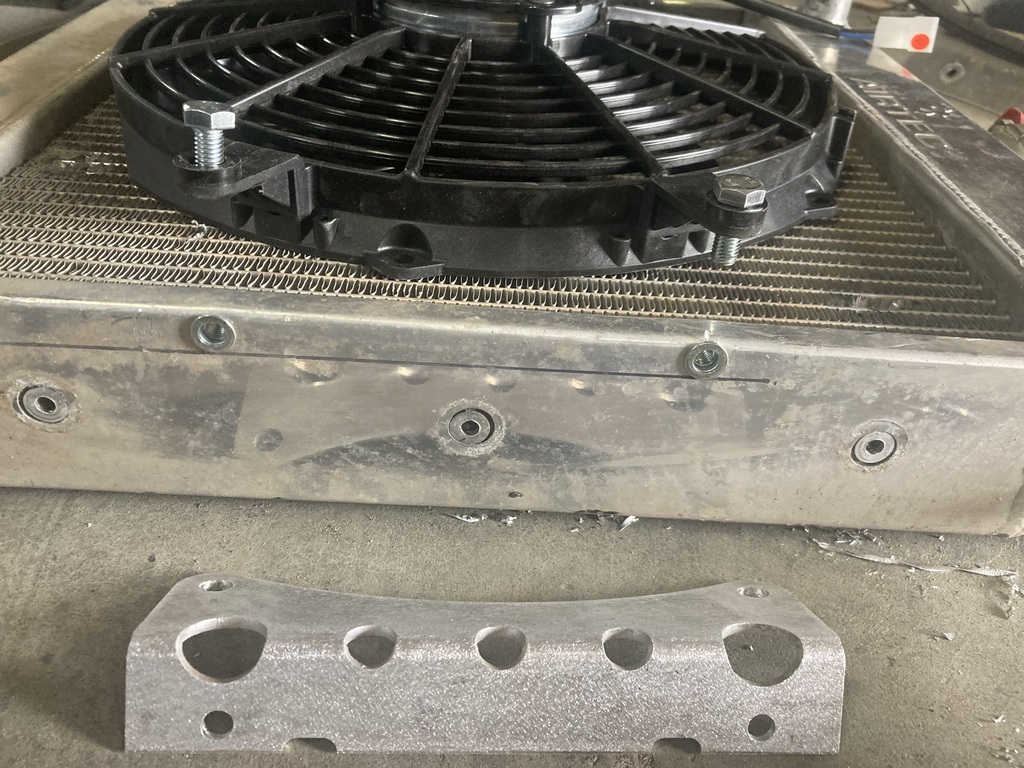 And all fitted up 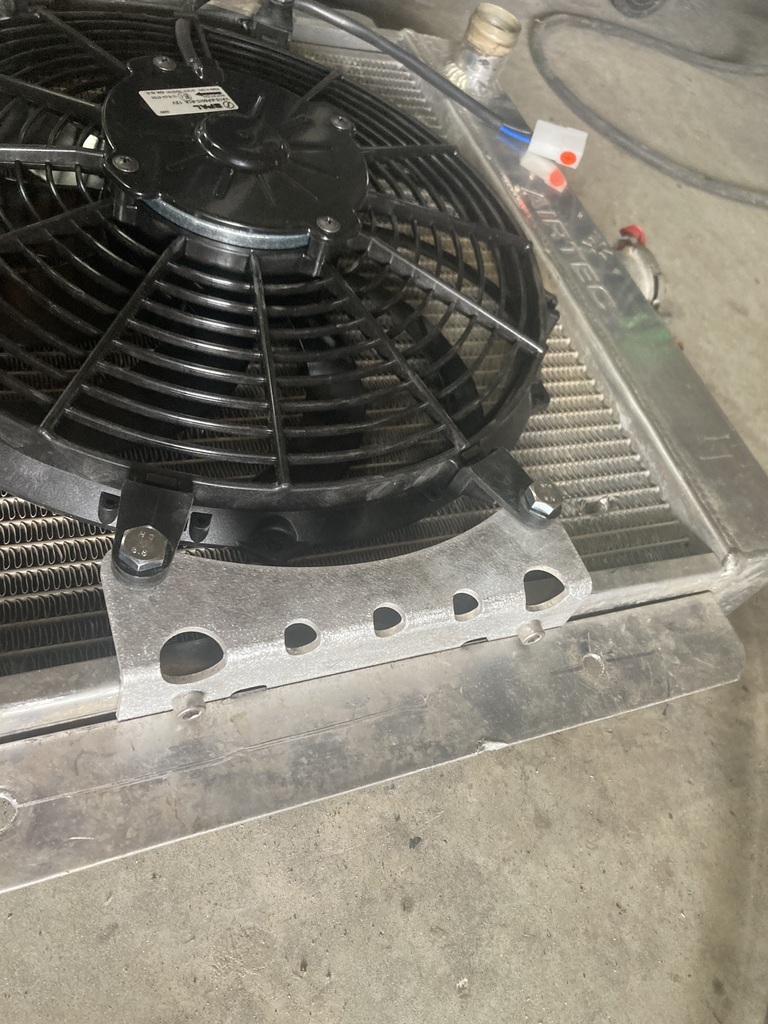 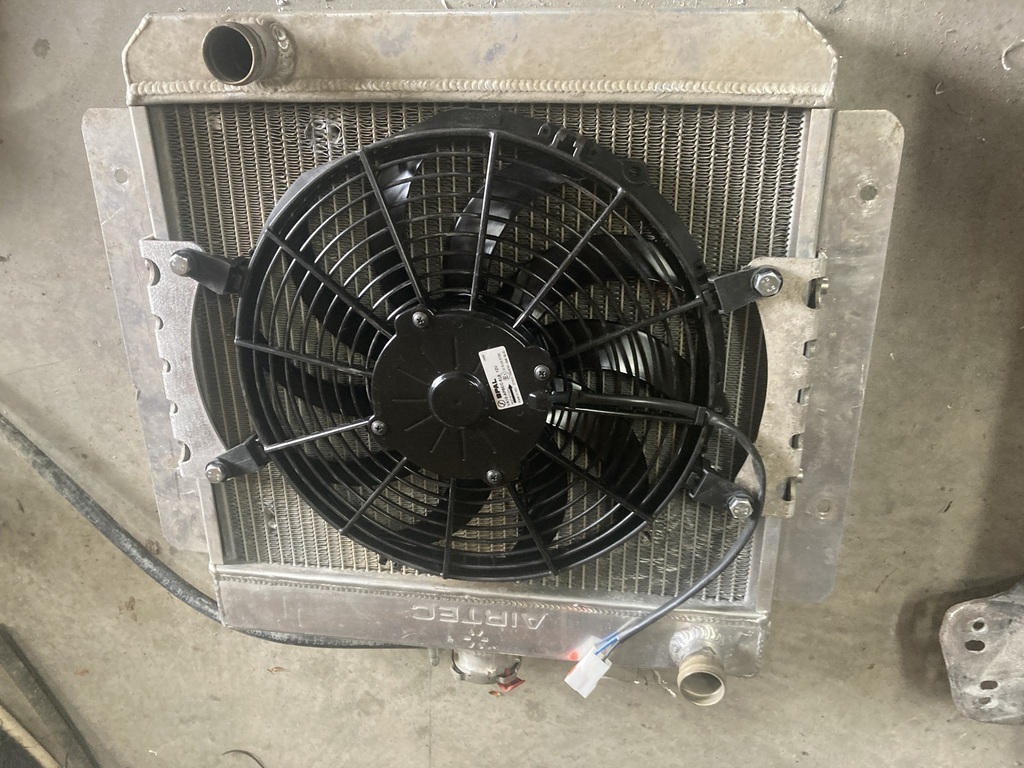 And that was it, I was back on a day shift today as a colleague wanted to do my late shift. This has allowed me to drink wine. |
| |
|
|
|
|
|
Apr 24, 2024 10:05:50 GMT
|
It's definitely starting to look something like now, Phil. I've just caught up with a few of your posts because, for some reason, I haven't been getting any notifications for them. I thought that you had gone deep undercover. Cheers Mr T. Not hiding, but still plodding on. In fact, I’m not starting work until 10:45 this week, so I’ve been out the garage by 09:00 to get a bit of work done. Unfortunately this hasn’t left me with any time to update so I planned to do it at the end of the week- if I remember what the heck I did. Not lots done, but it all adds up |
| |
|
|
|
|
|
Apr 24, 2024 10:01:34 GMT
|
Good progress so far,it won’t be long before you’re on your first event,because it’s a rally car it may be prudent to lockwire the sump plugs.Looking forward to more updates and less callouts😉 Cheers Mr Price. Probably a good shout. I’ll have to check if it’s possible as they are counter drilled, but not sure how deep. |
| |
|
|
|
|
|
Apr 22, 2024 19:04:11 GMT
|
|
Love this. I’d love to build one myself, but funds would not allow. Keep the updates coming. I’m sure I saw a video about a guy in Europe who makes a lot of the components to build them including chassis sections, suspension and body kit
|
| |
|
|
|
|
|
Apr 21, 2024 18:40:28 GMT
|
Everything conspired against me today, so didn’t get a lot done. I bolted the servo in place, just to avoid it getting scratched on the bench. 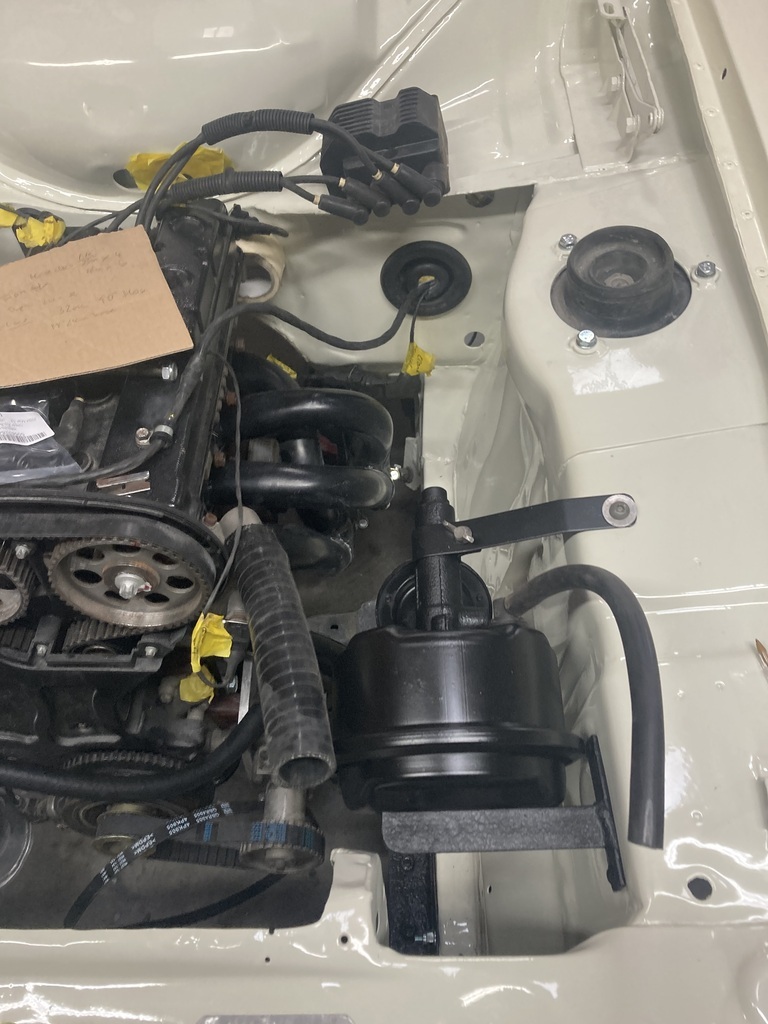 I need to mount the new fan to the radiator. It has mounting holes, but they are flush with the face of the fan so no good. You can buy these mounting feet 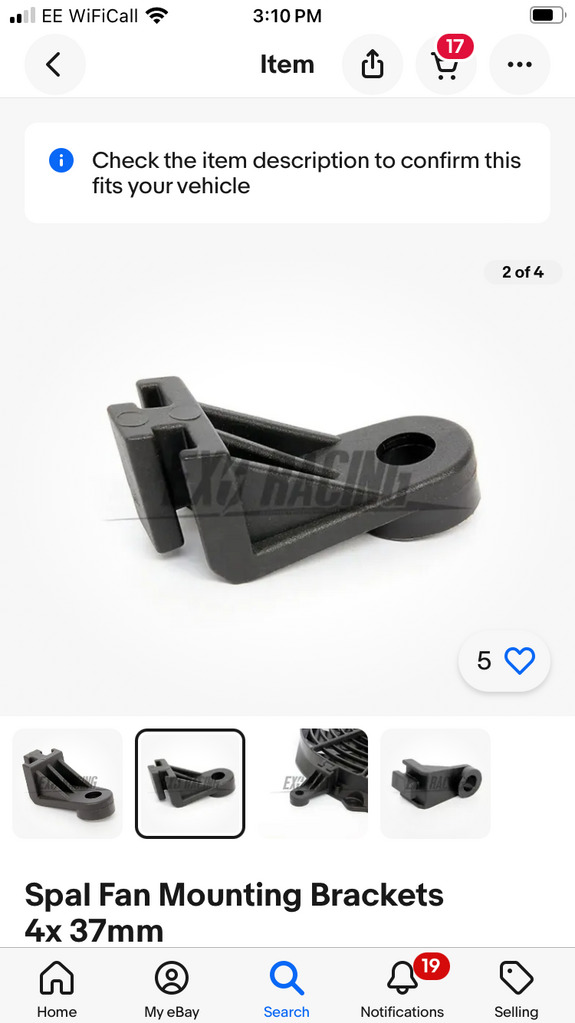 But they also mount flush with the fan face. But I think if I turn them upside, I could use them. If not, it’s a waste of £6! I will then need something to go between the mounts and radiator case. These came with the rad  They don’t fit the SPAL fan, but I reckon they can be welded off bolted to the side casing and I can get it to work something like this 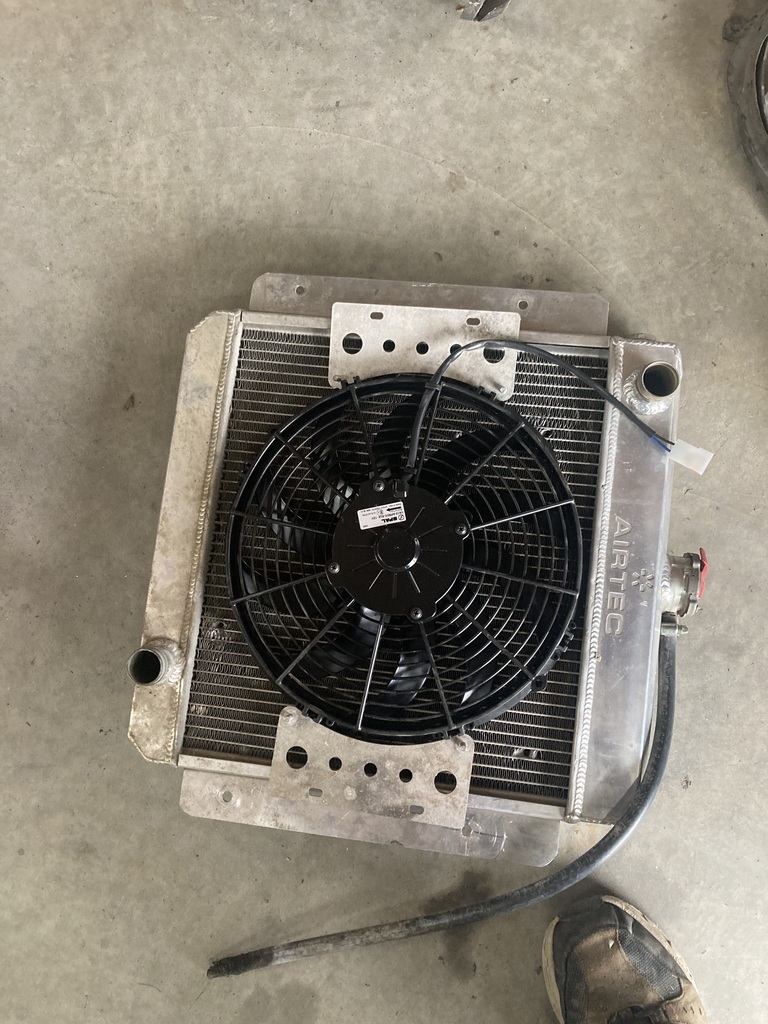 I did have a rummage through all my coolant pipe fittings to start making a bottom hose, but nothing worthy of a photo yet. It looks like it’s going to be a pain as the crank sensor is in the way. I may have to cut the stub off the radiator and angle it up to get a clear shot at it. |
| |
|
|
|
|
|
Apr 20, 2024 18:58:45 GMT
|
|
That looks spot on Mr T
|
| |
|
|
|
|
|
Apr 20, 2024 18:05:44 GMT
|
I’m on call today. I managed to get about 1/2 an hour in the garage before work, but I got called out early so that ended play. My radiator hose turned up, so I cut a length for the top hose 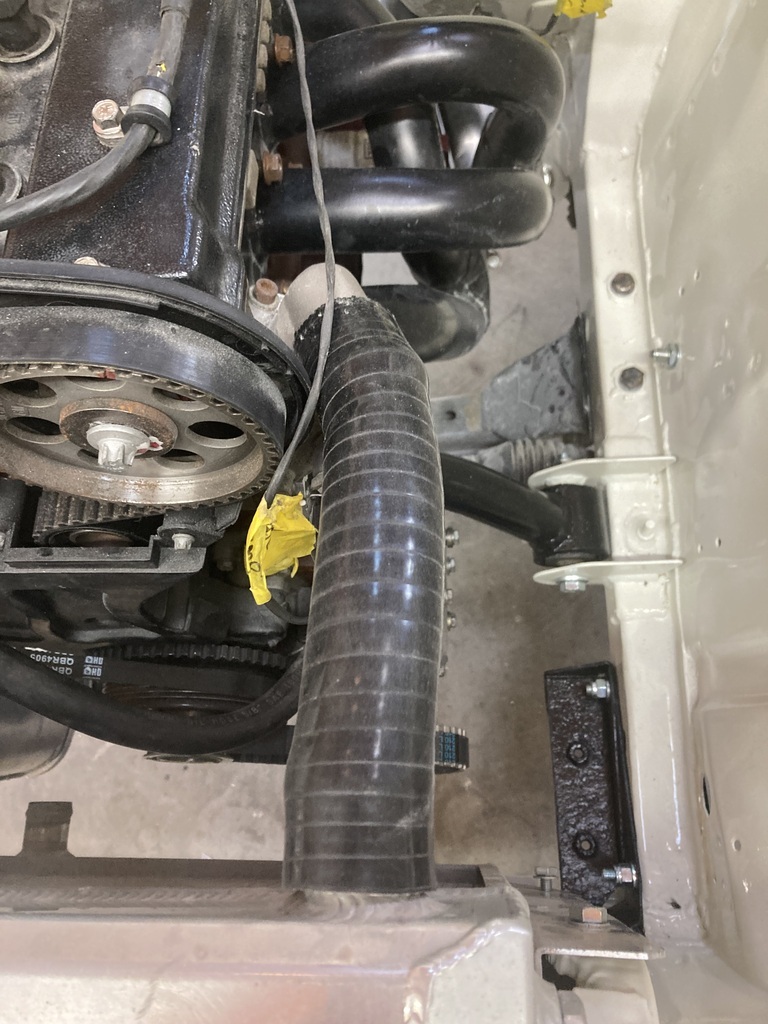 My 5/8” oil pipe also arrived. I cut a length for the return from the pump to the oil tank 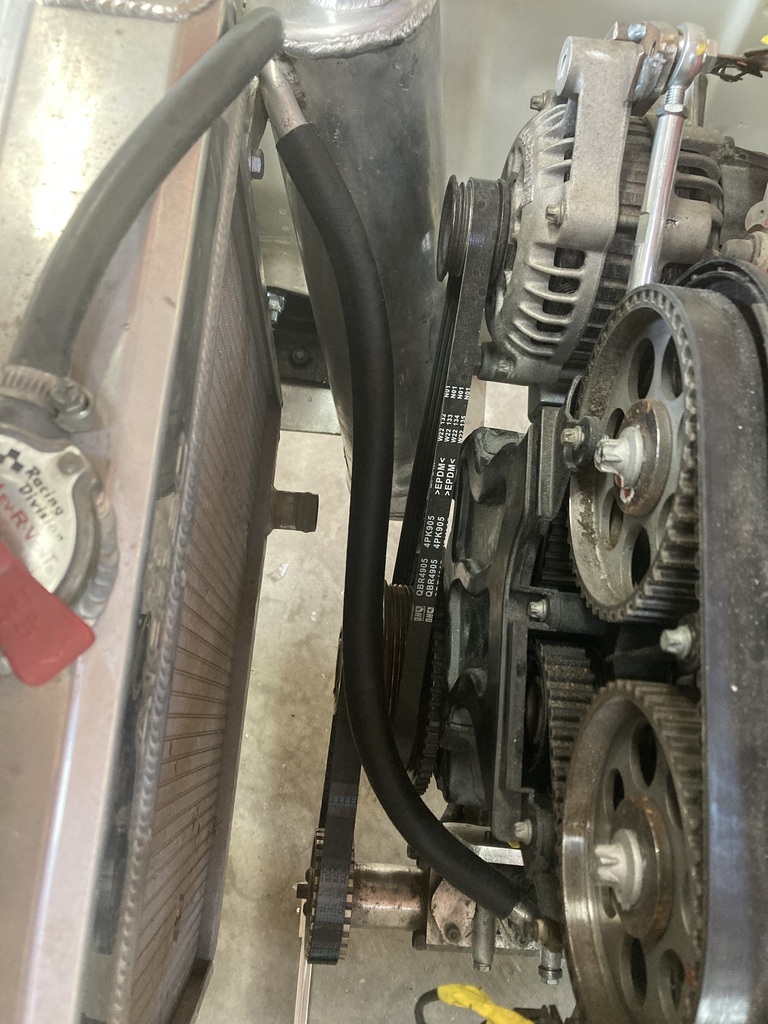 I then went to fit some to the two scavenge outlets on the sump to the pump. But as I’m an idiot, I didn’t measure the diameter of the barbs and they are 1/2” not 5/8”. I now have to buy some more expensive pipe. The original fan won’t fit with the oil pump moved forward so I have bought a slimline, 14” Spal fan to replace it. 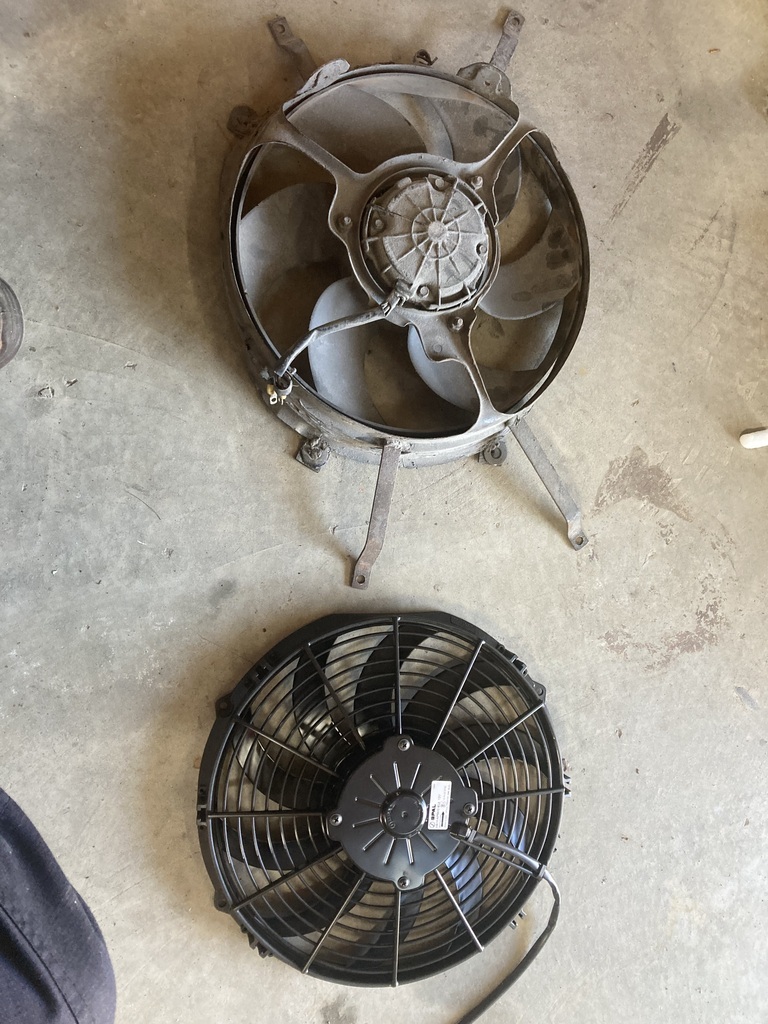 It fits with plenty of room, but I’ll need to sort some mounting brackets. 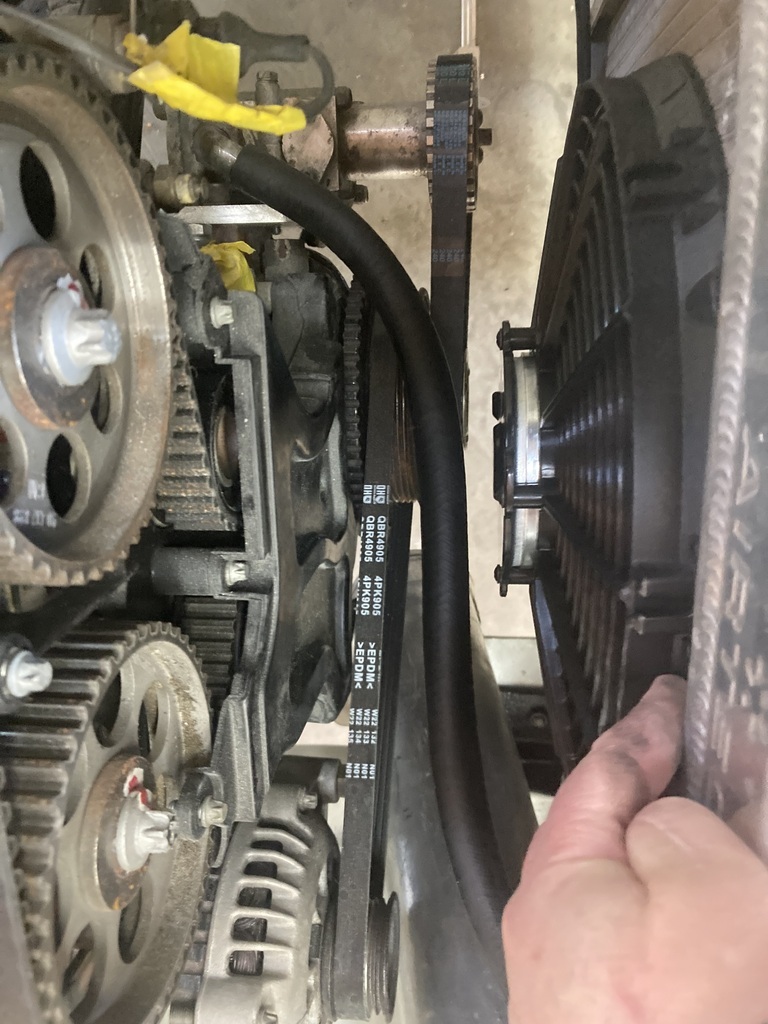 My nephew has also made me another fuel pump and filter as the last was just a proof of concept. 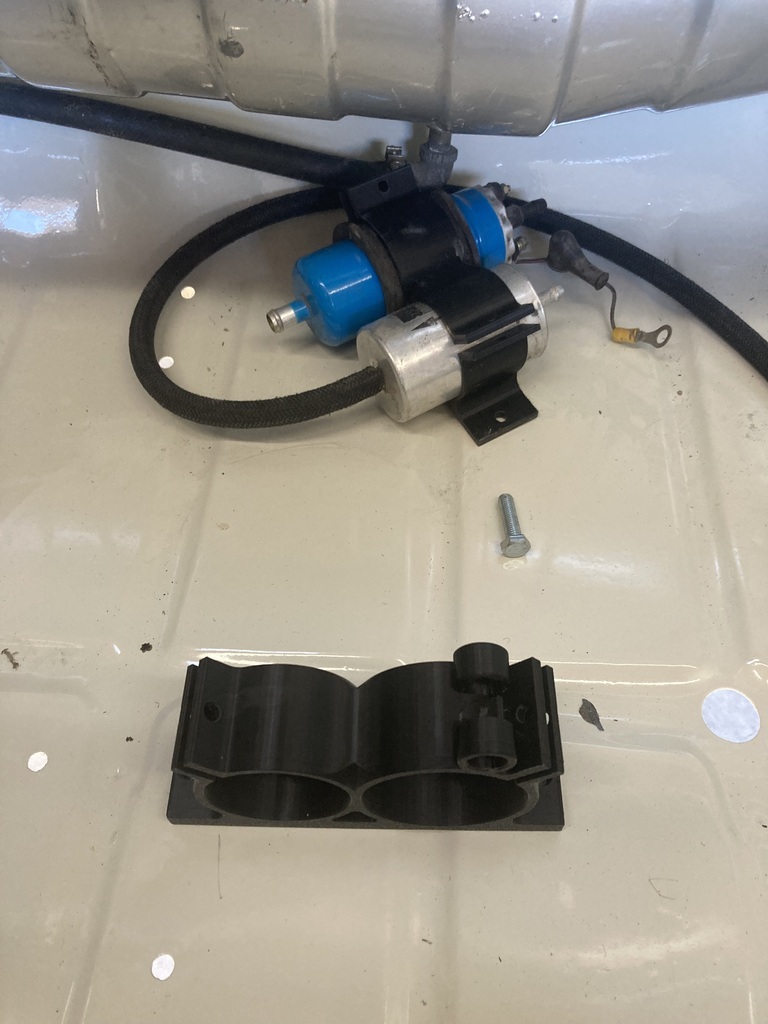 He has also made me an ECU mount. The lid will be changed so that it clamps the harness plug in position as the ECU has none. It was held on with cable ties on the single seater. 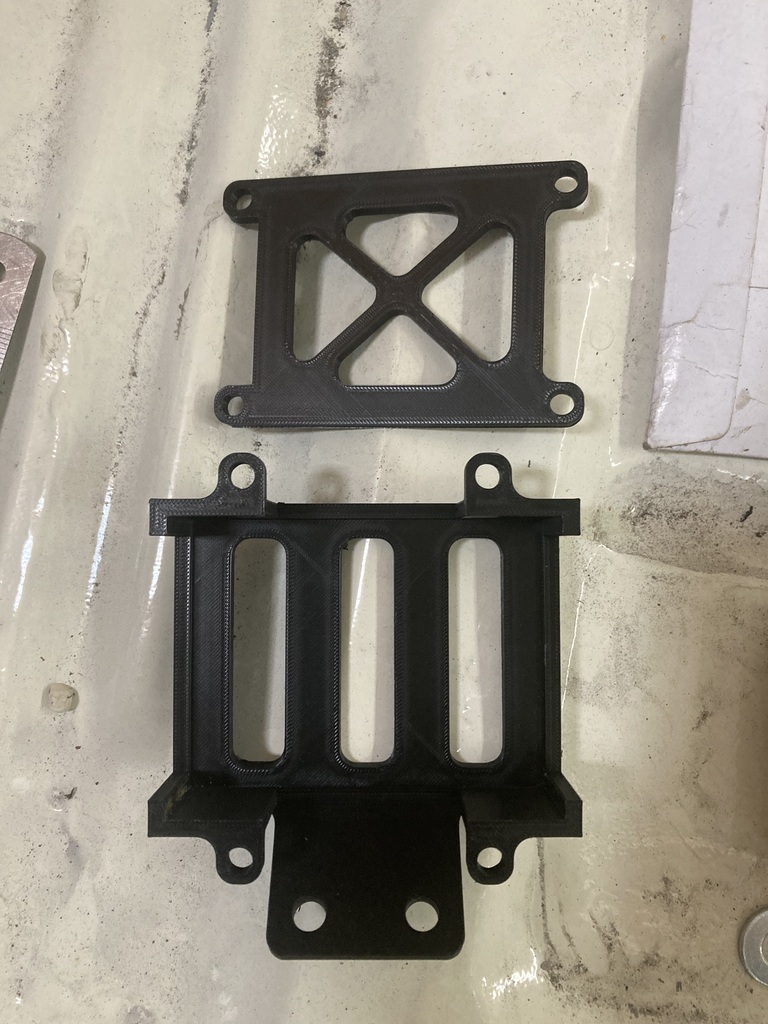 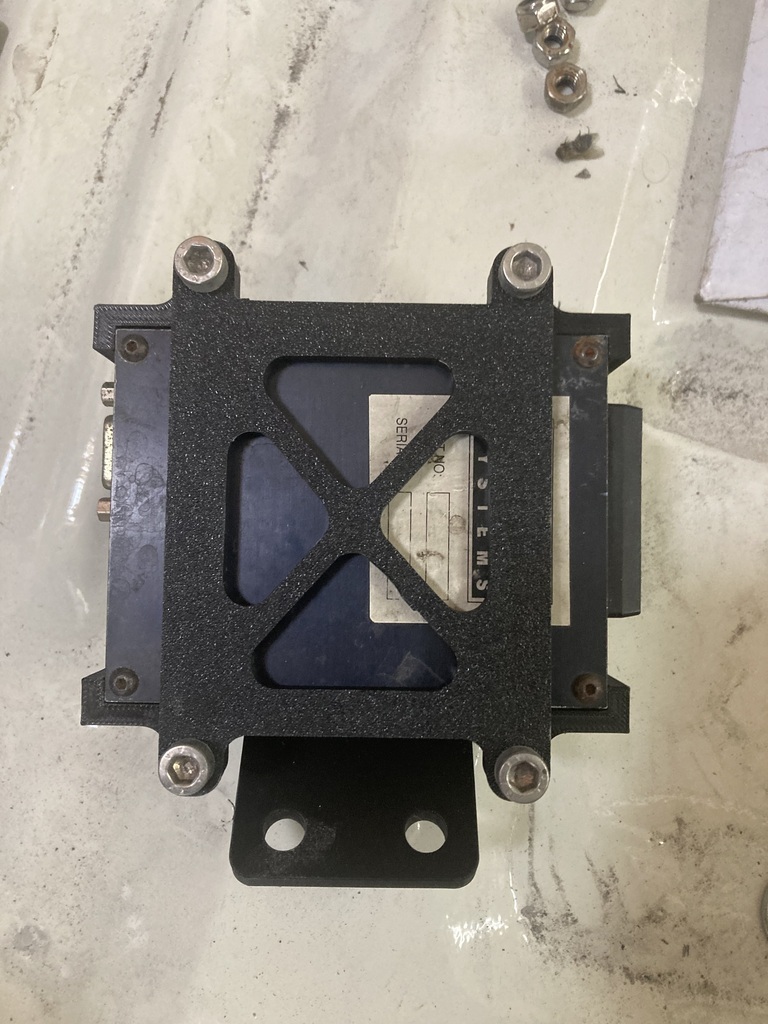 If I'm lucky, I’ll get something done tomorrow |
| |
|
|
|
|
|
Apr 16, 2024 10:59:46 GMT
|
I’m on call again, so I got another little hour in the garage before work. This is the washer bottle.  It’s a mk2 Escort item that usually lives in the engine bay. To save space years ago , I bolted under the driver front wing and drilled a hole through the inner wing to fill it I soaked it in bleach overnight and it now looks like this 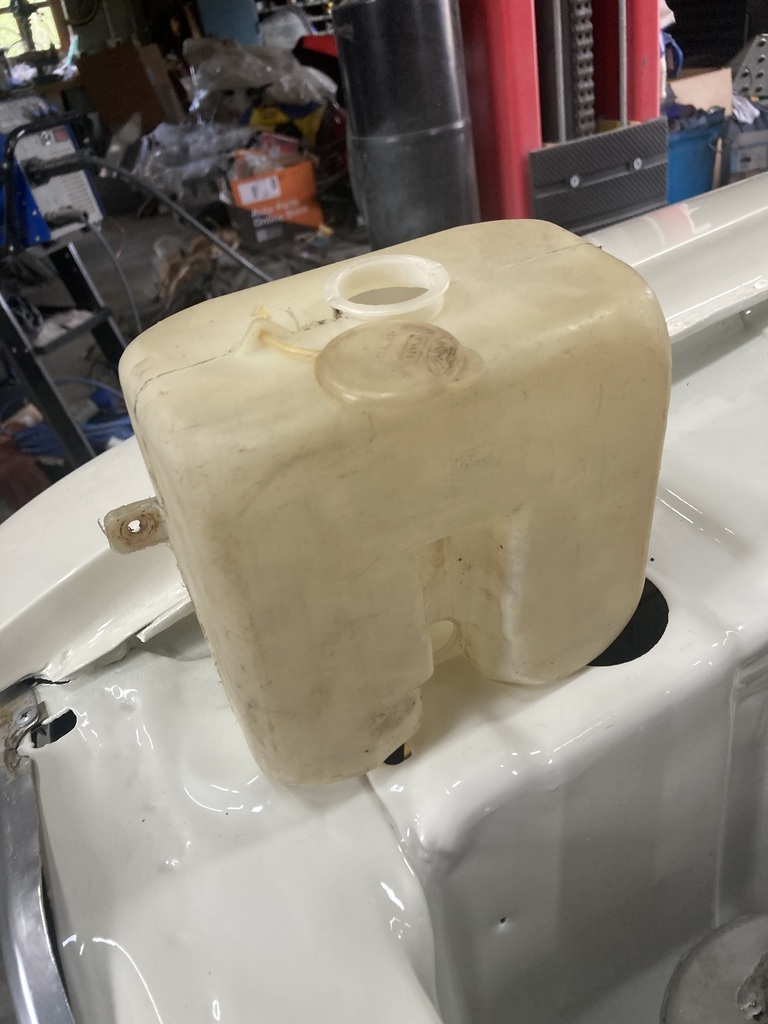 The built in pump stopped working years ago so I’d just fitted an inline pump, but now you can buy a new pump for the tank. 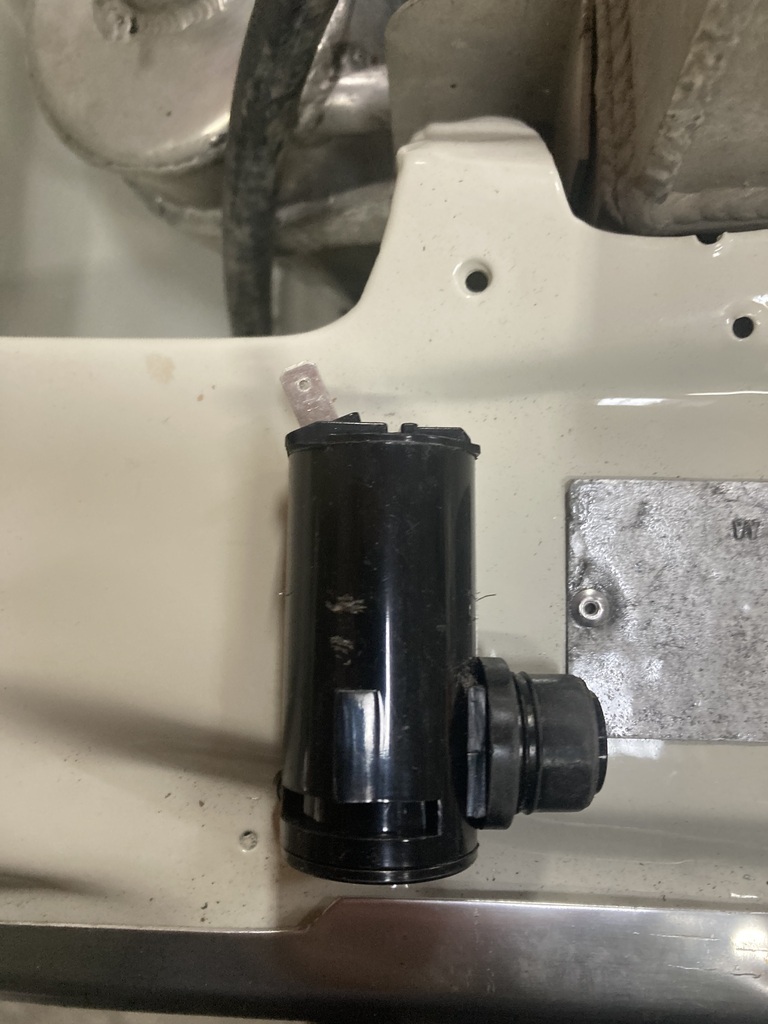 So that got fitted with its new rubber seal 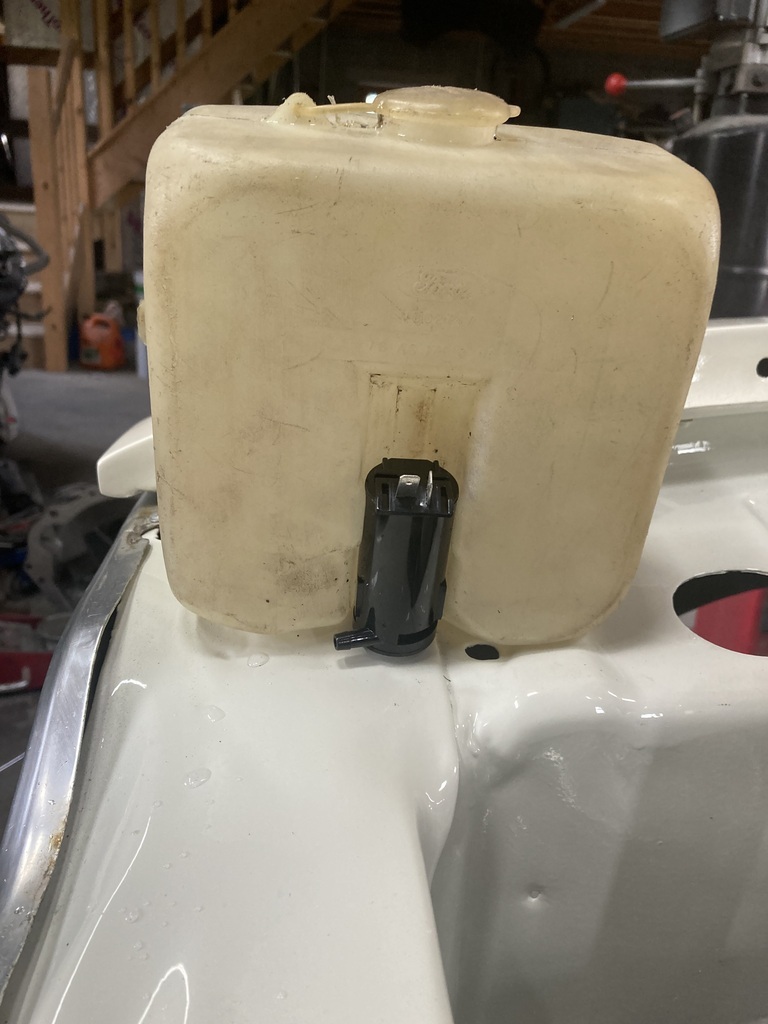 Which fitted like a c—k in a shirt sleeve. Luckily the original seal was still serviceable so I used that and fitted it under the wing 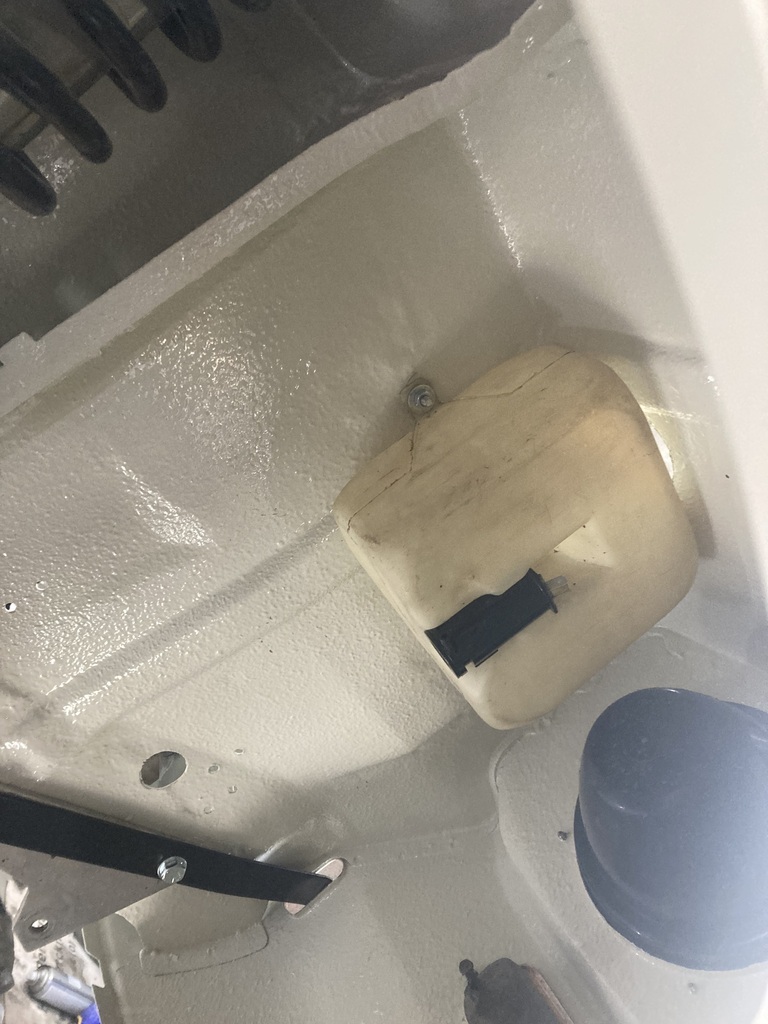 I also cleaned and painted the brake servo and it’s mounts, ready for fitting next time 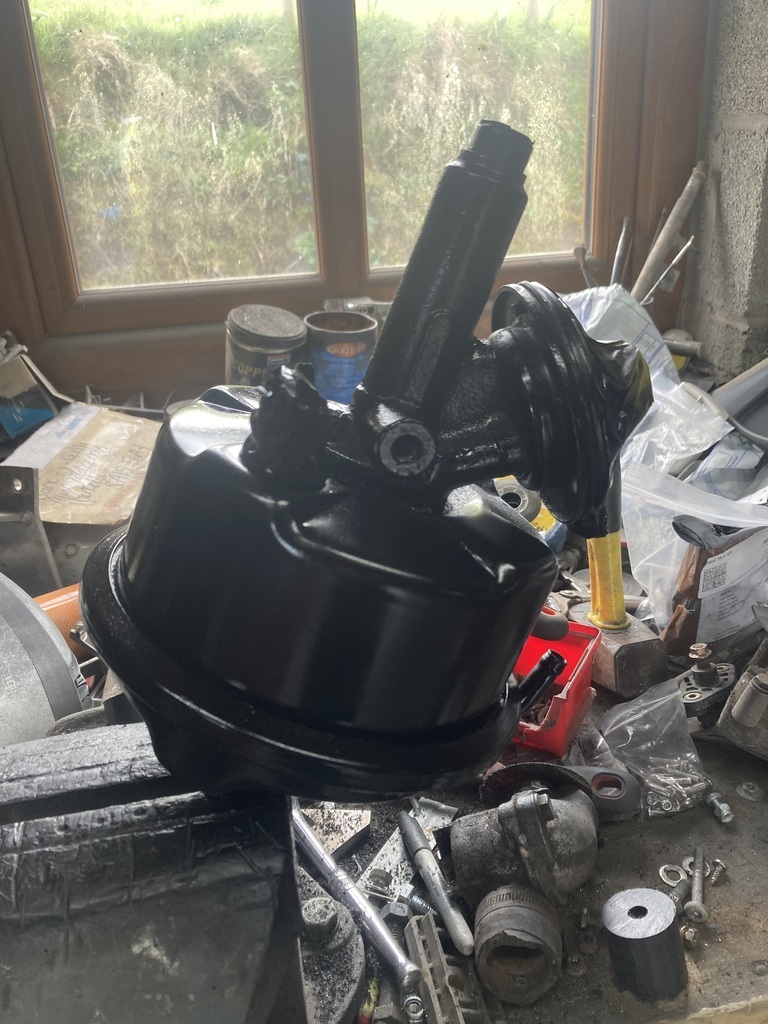 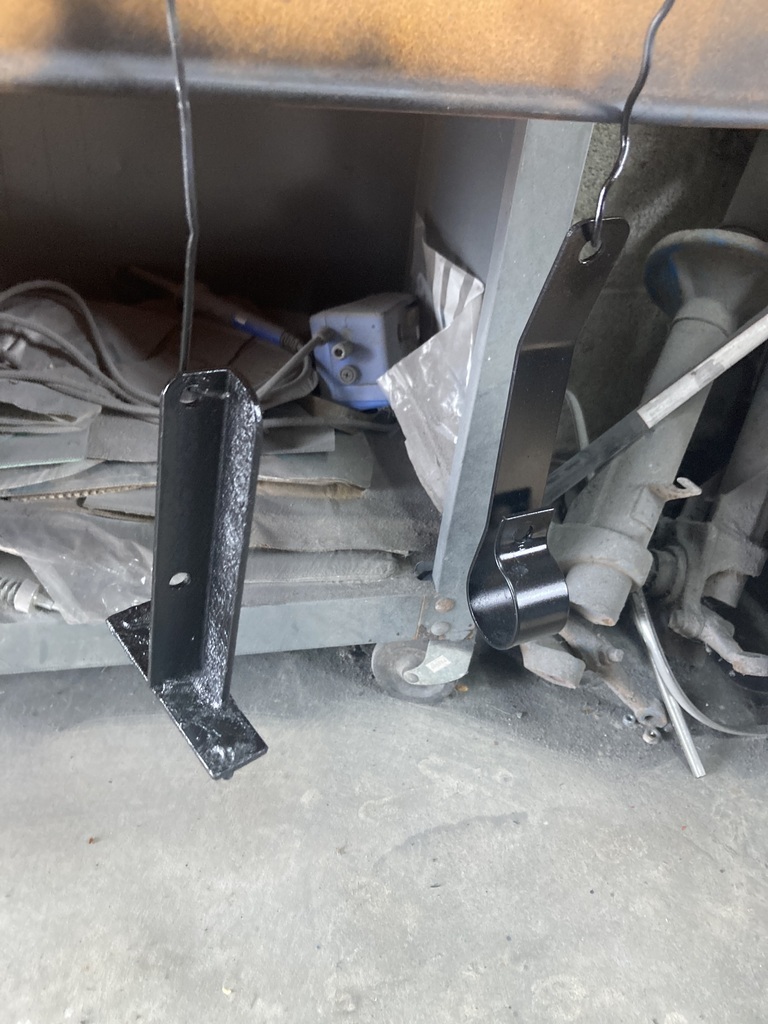 |
| |
|
|
|
|
|
Apr 15, 2024 17:56:26 GMT
|
I had a day off work today 😁, as I’m working next Saturday 😩. I thought I would go to the local hydraulic company and buy new dowty seals for the sump plugs and a length of hose to plumb it all up. I got the new dowty seals 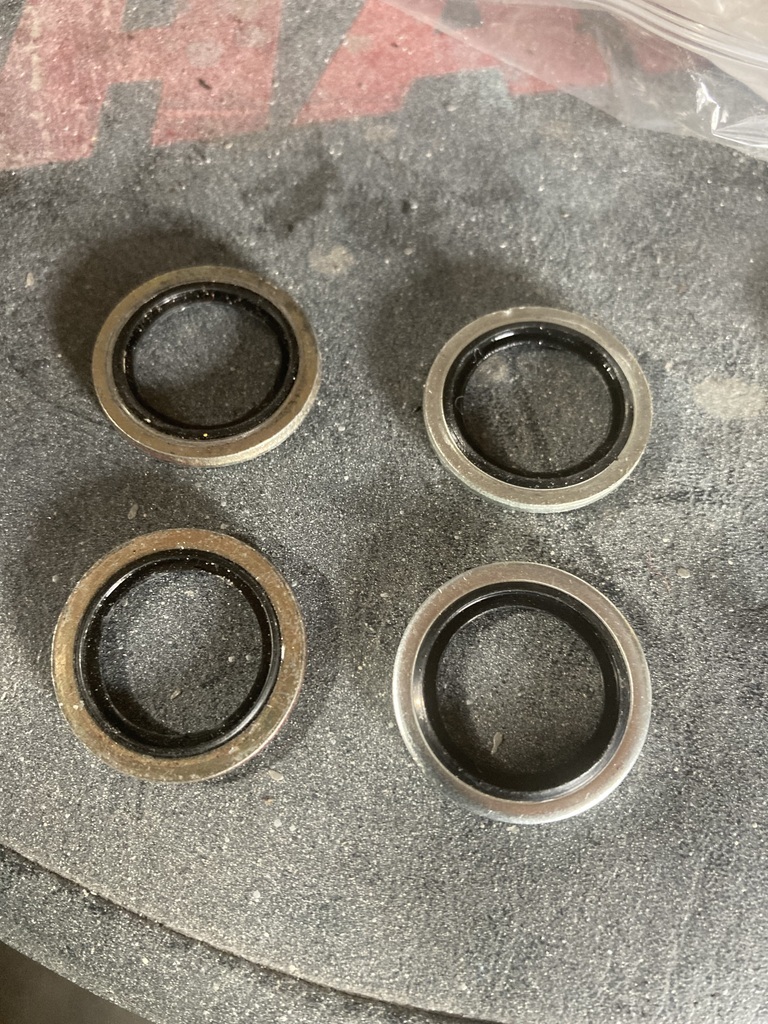 But they did not have the correct spec oil hose. Theirs only went to 80°C where the Mocal brand SAE 100R6 goes to 140°C (apparently), so I‘ve ordered some from Rally Nuts on the internet. Dowty seals on 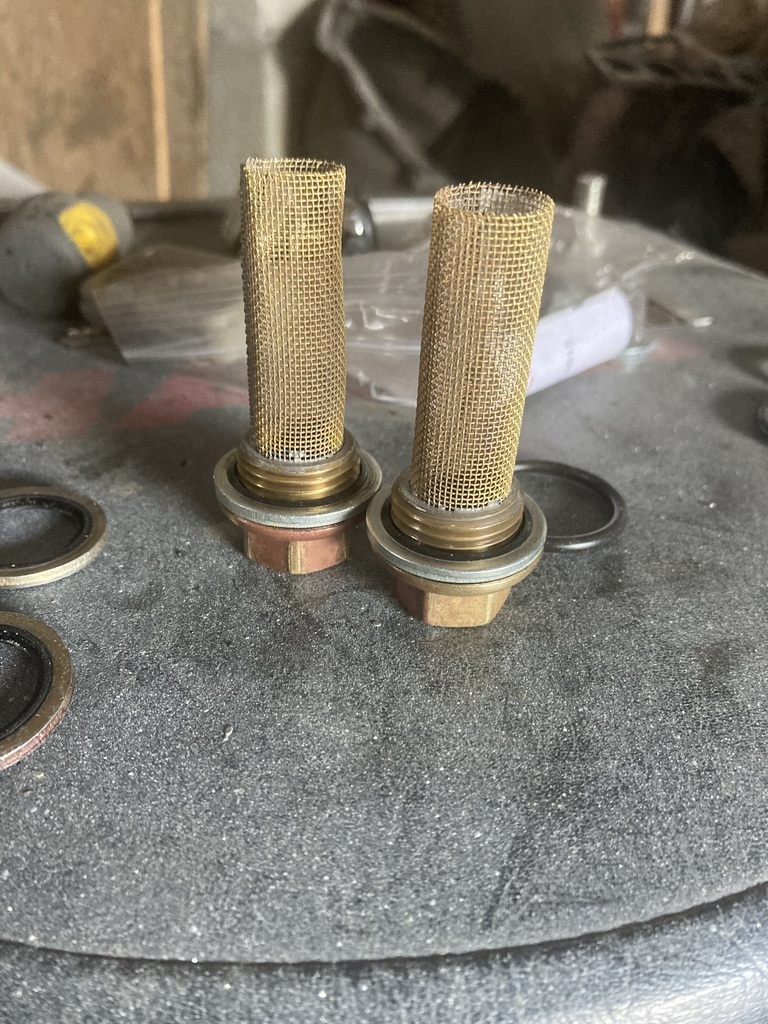 And plugs fitted 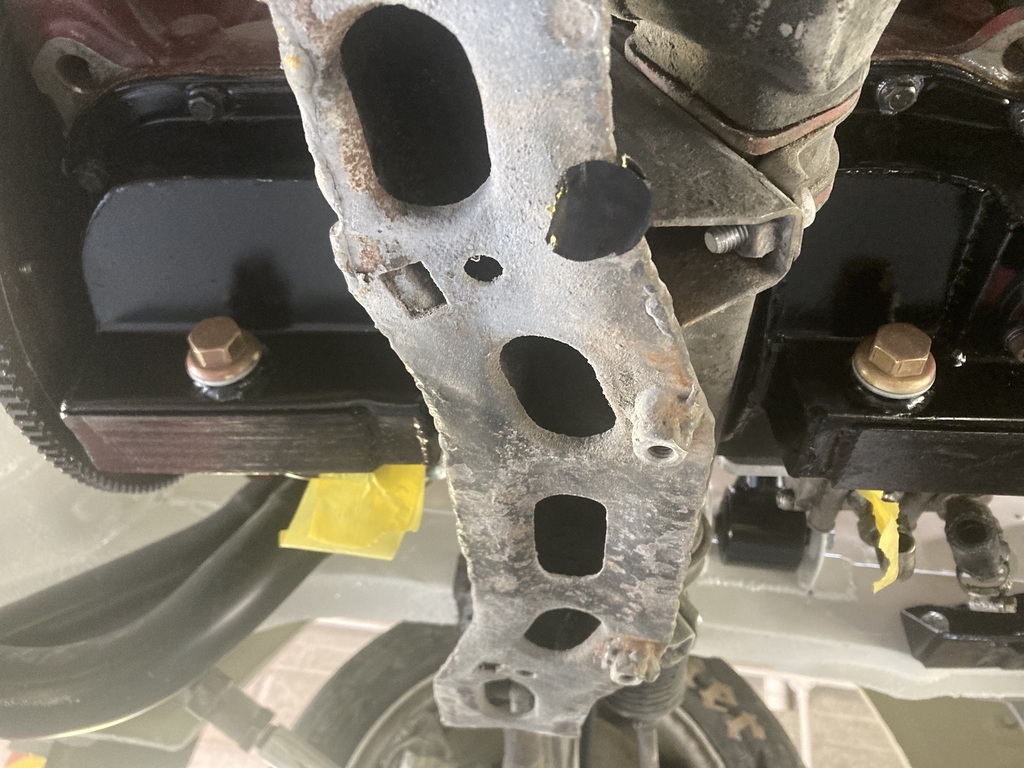 So I thought I would mount the oil tank ready for when some hose turns up. I decided to mount it off the redundant anti roll bar bracket using 5mm aluminum. I cut some plates and made a support bracket to carry the whole weight of the tank and oil. Tacked in place 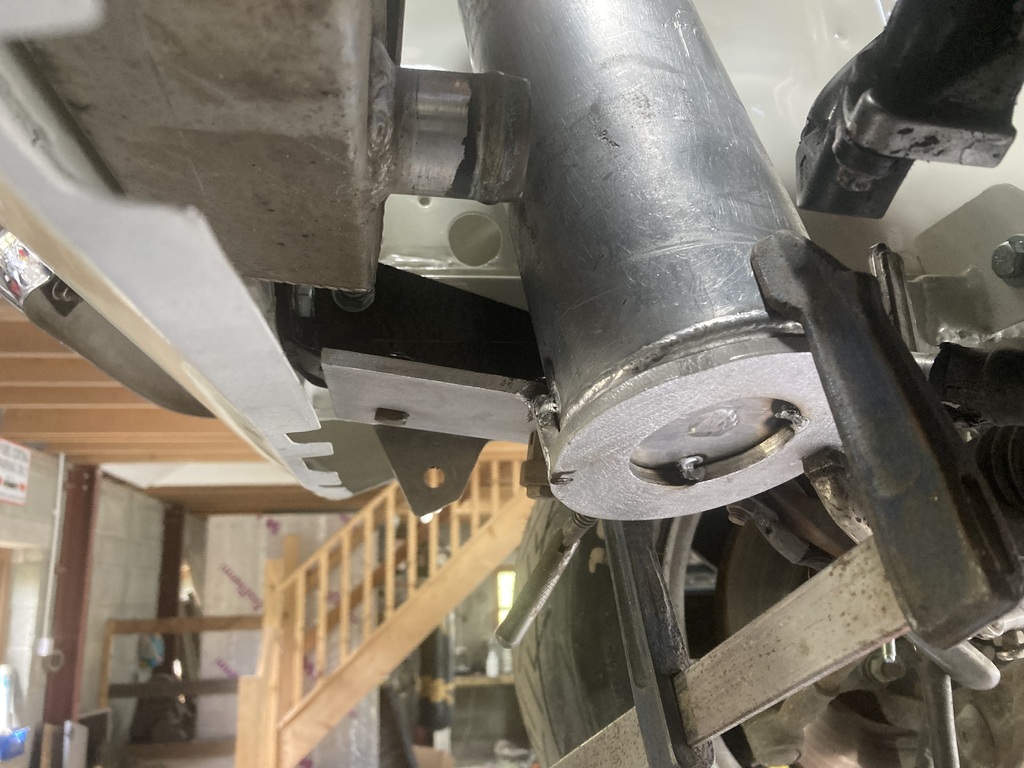 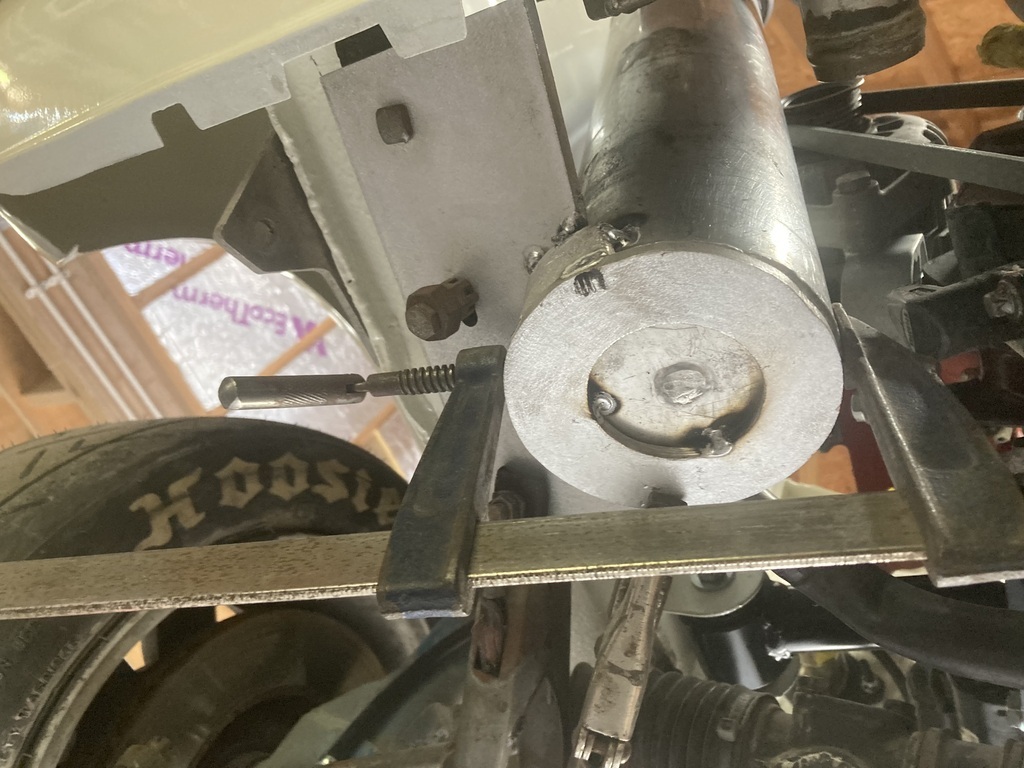 The tank was only held to the engine in the single seater by 2 Jubilee clips, however I don’t think that will cut it on a rally car so I went a bit beefier. And welded up 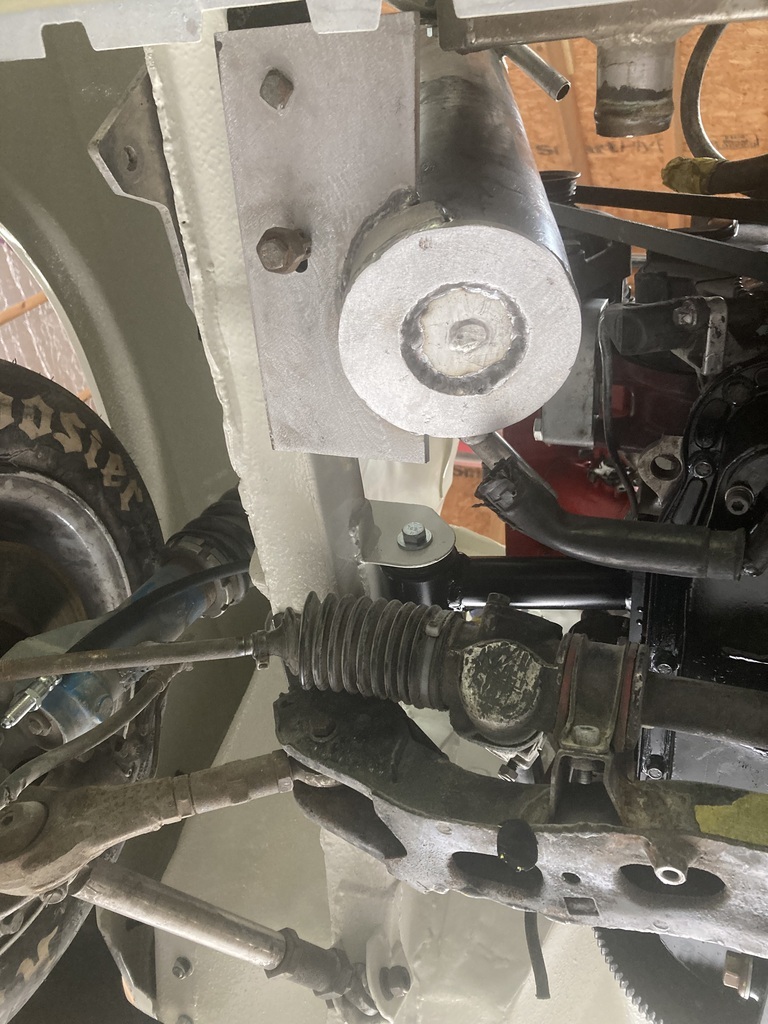 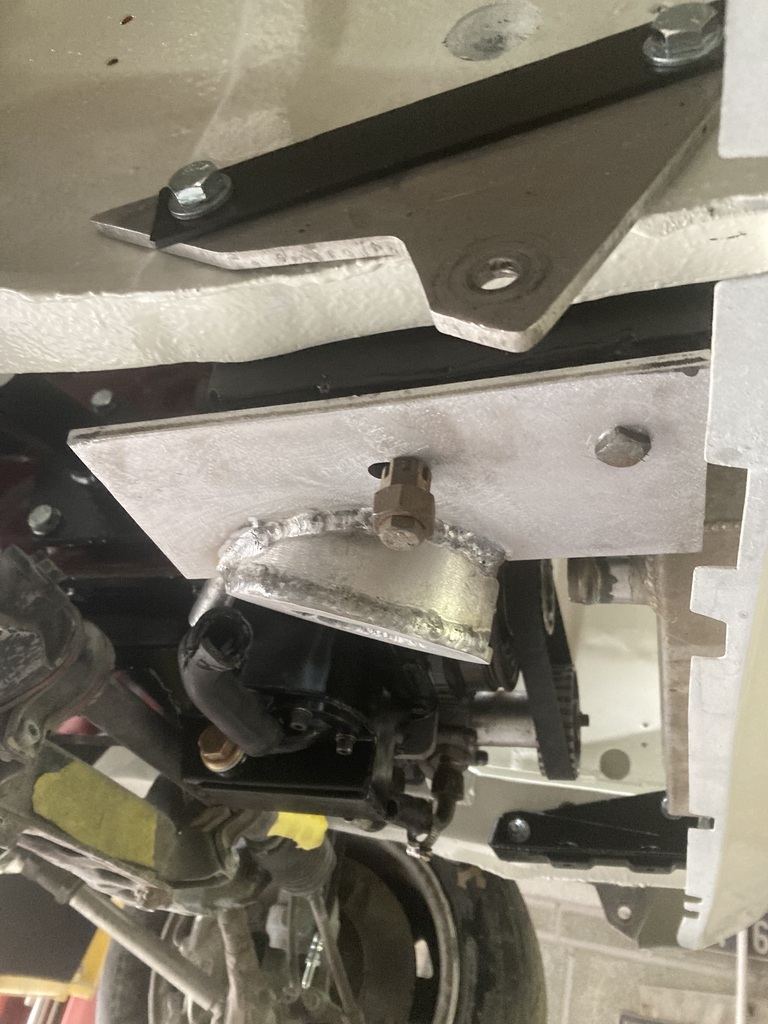 This has just reminded me to buy some longer bolts. A bracket for the top that bolts to the radiator panel was welded on 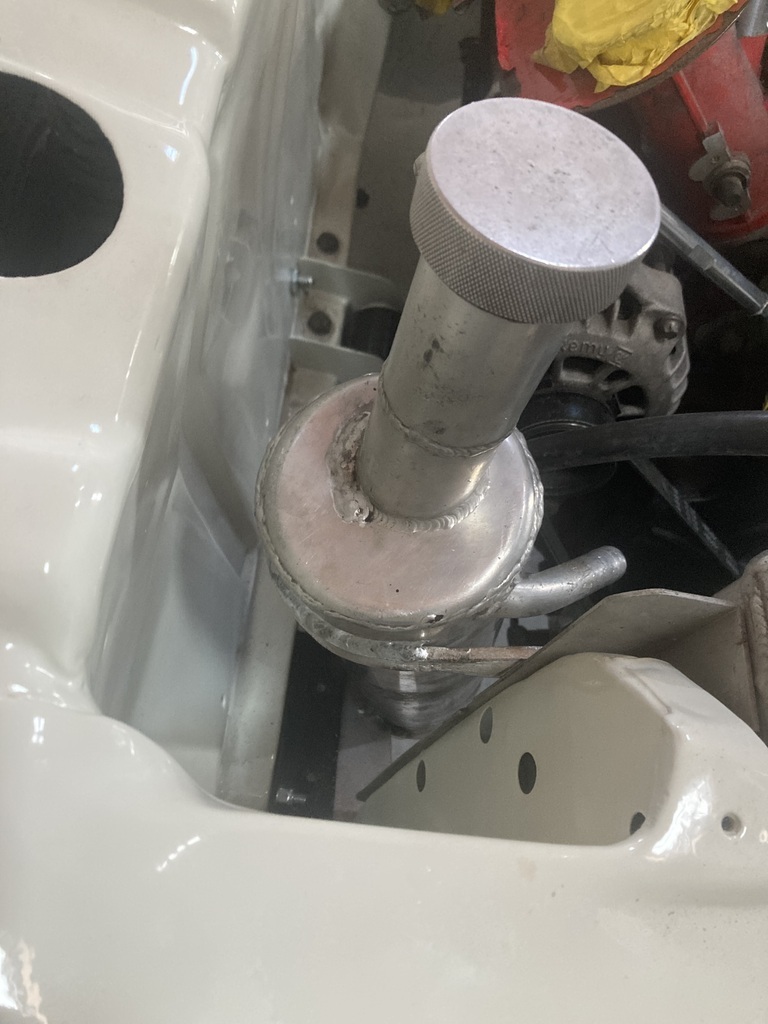 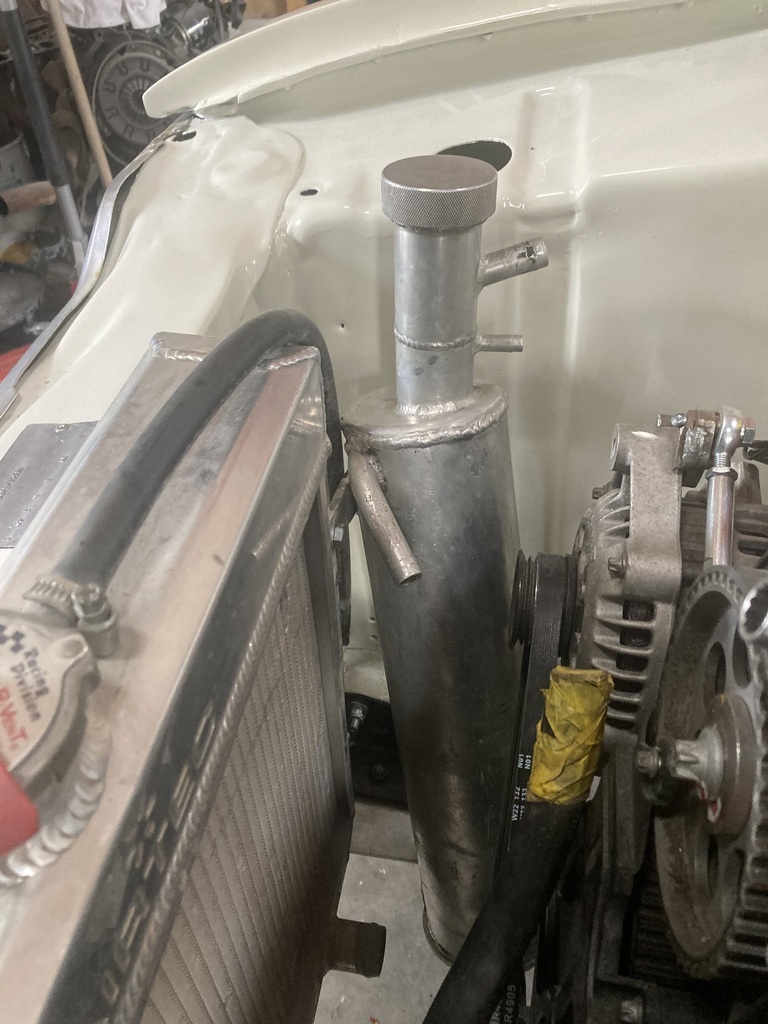 Job done. Just need the hose now I bought a second hand door lock for the passenger door so that was fitted 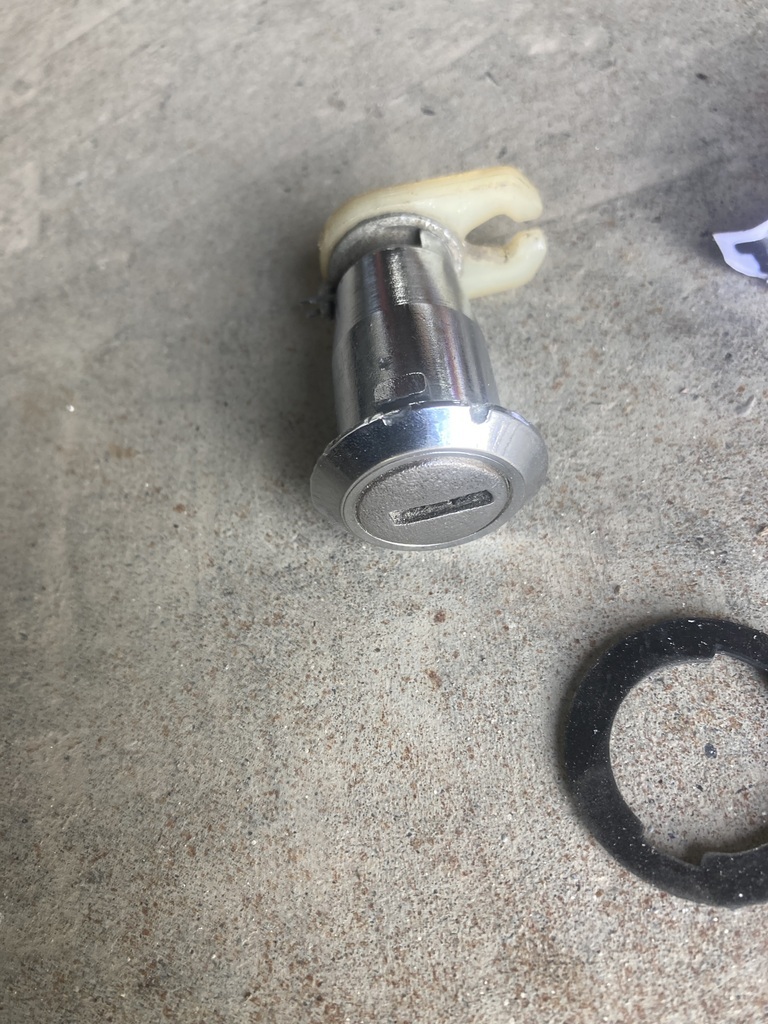 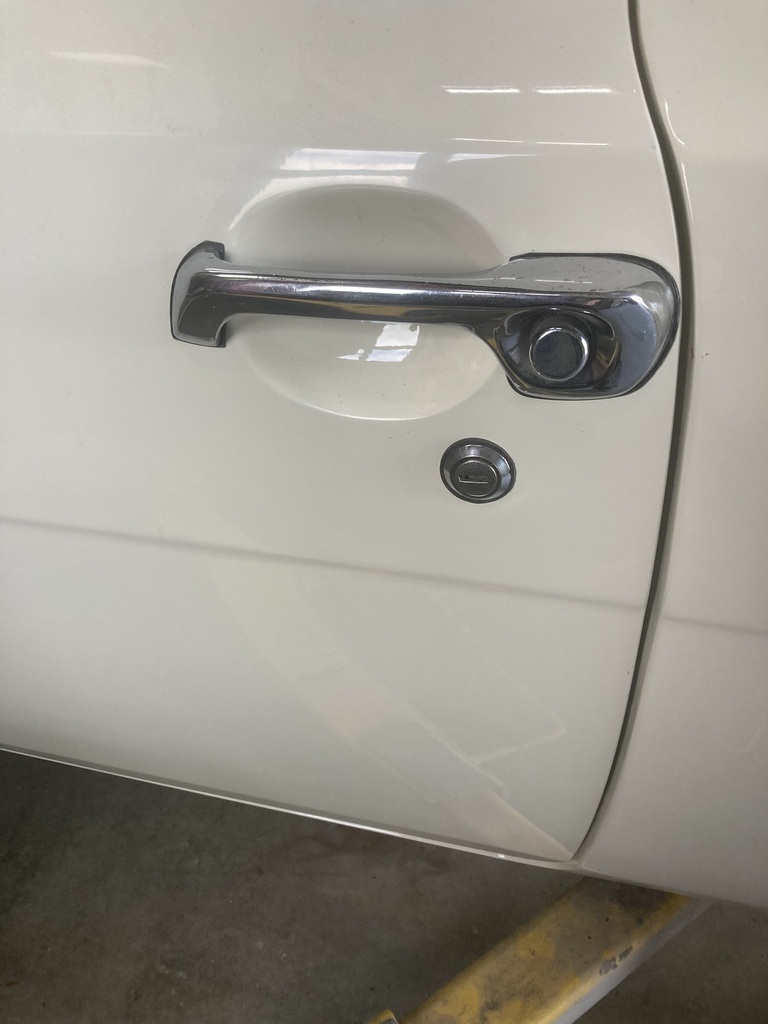 I’ve not got a key for it, but it only needs to fill the hole. I also put the gromet from the old engine bay loom onto the new loom. I had to cut it to get it off but will glue it back together 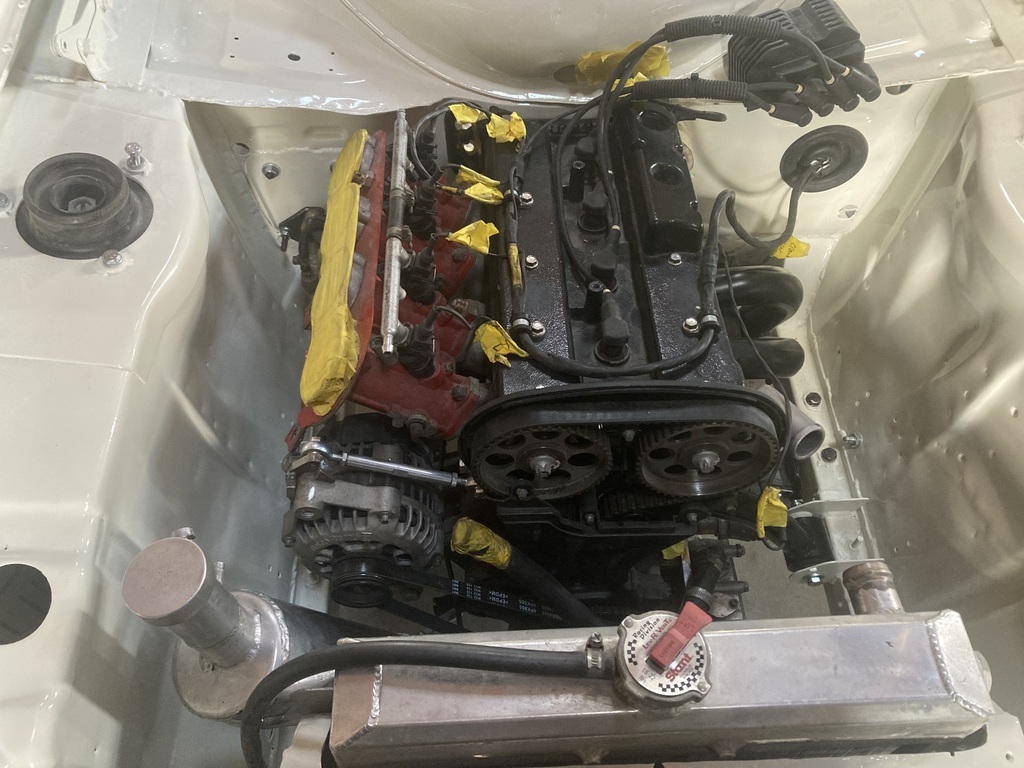 |
| |
Last Edit: Apr 15, 2024 18:17:59 GMT by jonsey
|
|
|
|
|
Apr 15, 2024 16:47:54 GMT
|
So now you have got a free torch and you can see when it gets dark are you going to be working late into the evenings to get the escort finished!  I won’t be working late in the evening, Mr Viva. Perhaps when it warms up a bit |
| |
|
|