|
|
|
Sept 21, 2021 13:32:59 GMT
|
|
It seems that other than an air fed mask, I have accidently set up everything I need to paint 2k.
That made me think about getting a mask, not for any job now, but so I have it if I want to paint anything (No cars, just motorbikes etc).
There doesn't seem to be alot of choice though.
It also seems they discontinue them at will and then stop supplying filters.
I don't have a carbon filter, I was going to rely on the one in the mask, but if I only use it a couple of times a year, and whatever I've got has been discontinued, ill need a new mask!
I could get a carbon 3rd stage instead and not worry about a belt filter, but they discontinue those things as well!
So, basically, any recomendations?
I see alot of cheap devilbiss mpg but you can't buy filters. I see new wilson/honeywell, same as the devilbiss, but can't find filters for those either.
3m's offering is £1000 or something stupid.
The new devilbiss is about £400? But if they stop selling filters that £400 may only get 2 hours use!
|
| |
|
|
|
|
|
|
|
Sept 20, 2021 12:27:47 GMT
|
It's a needle gun for descaling. No idea about the spring though, bit yes, I imagine it will need alot of air. I downloaded a copy of the manual from the Clarke web site. The spring isn't used with the needles, it seems to only be needed for the chisel attachments which I don't have. It's rated at 4cfm. Less than I expected. 4cfm at what psi? |
| |
|
|
|
|
|
Sept 19, 2021 18:08:26 GMT
|
A bit of stuff, most of which I don't need. Two more clamps (this time with stands) for a fiver. The rest of it was £3 from the "three items for a pound" (and yes, he counted the packet of five sockets as one item), and 50p for the Clarke air thing that may or may not work. A pack of arc welder sticks (my Dad had an arc welder somewhere, I recall it blowing holes when he was trying to weld new sills on the 1300), an ammeter, five imperial sockets (I'm trying to build up a second toolkit to stay in the Sportshatch to save swapping them from car to car*), a pack of 2.8mm HSS drill bits, an adjustable spanner, two extensions, a universal joint and a handle, all 1/2" drive. Can't have enough extensions. 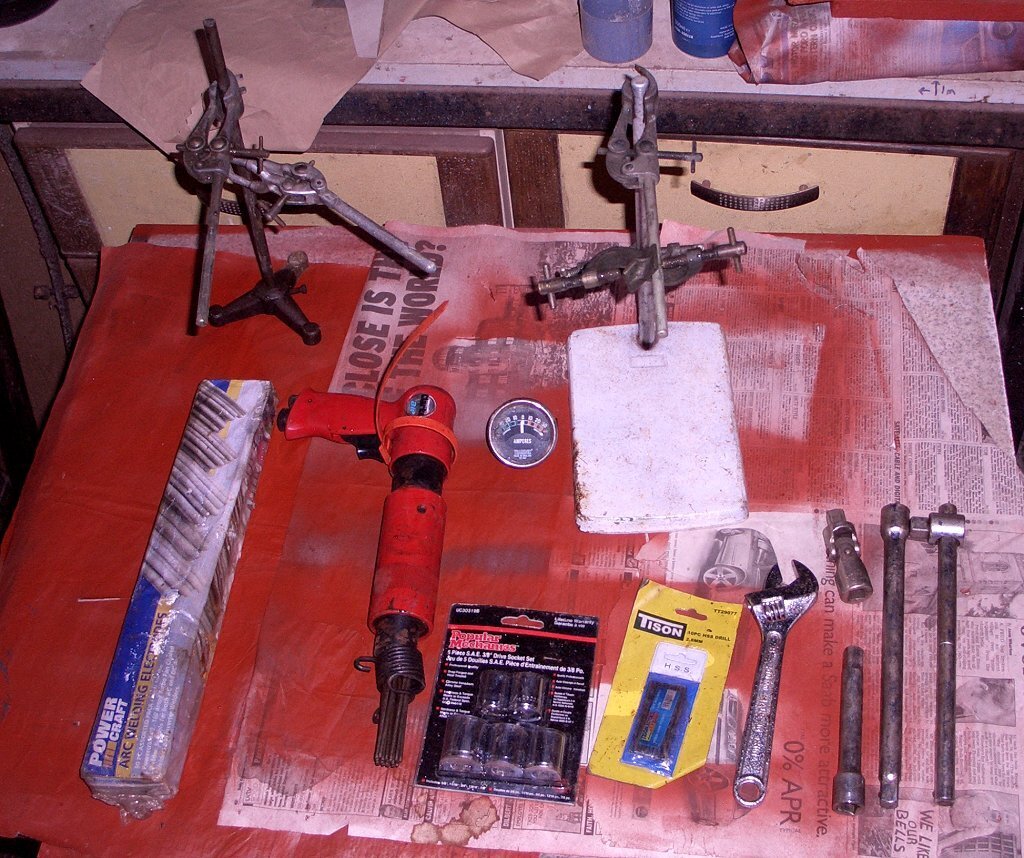 On the Clarke thing, I suspect that spring should be fixed onto the collar somehow. I'll look up some pictures on line. They might also tell me what it is. I doubt it works, if it does I suspect my little compressor won't be interested in running it. Not a very big sale this week because of a couple of quite heavy showers around 6am, and the other one has stopped for the year now. ( * turns out the toolkit I have already started building under the rear seat of the hatch already has a set of sockets in it, so I wasted 33.3p on these.) It's a needle gun for descaling. No idea about the spring though, bit yes, I imagine it will need alot of air. |
| |
|
|
|
|
|
Sept 19, 2021 15:30:40 GMT
|
∆∆∆ think I've still got that Henry hirise street machine mag in the loft😄 Great car. It's local to me. I saw it parked on the road a couple of years back and had a chat with the owner. |
| |
|
|
|
|
|
Sept 19, 2021 14:42:50 GMT
|
Well that answered the modular question 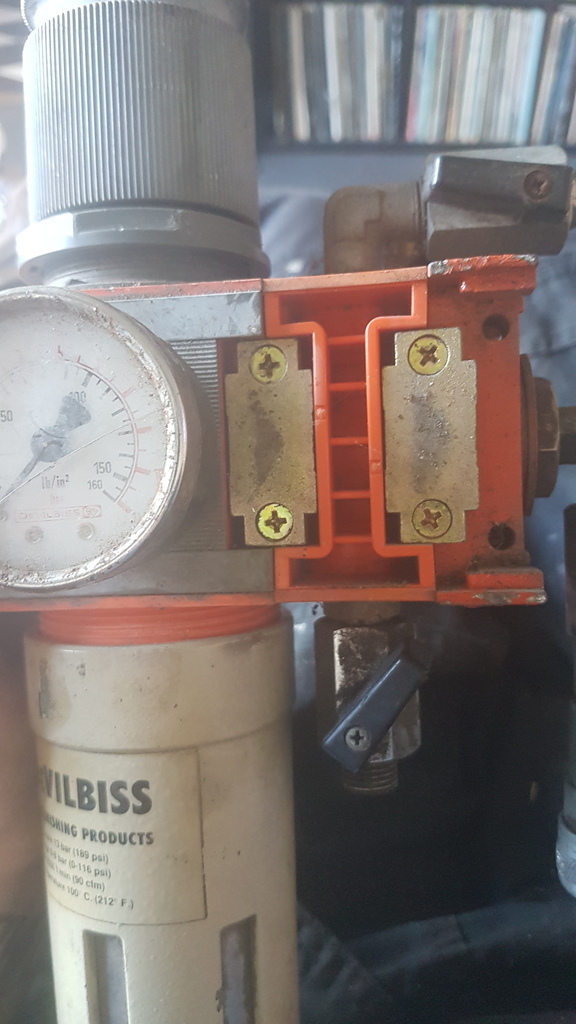 |
| |
|
|
|
|
|
Sept 19, 2021 13:46:11 GMT
|
Couple of bargains today Complete first year of street machine in binder. He wanted £2, I gave him £3 as I felt bad. 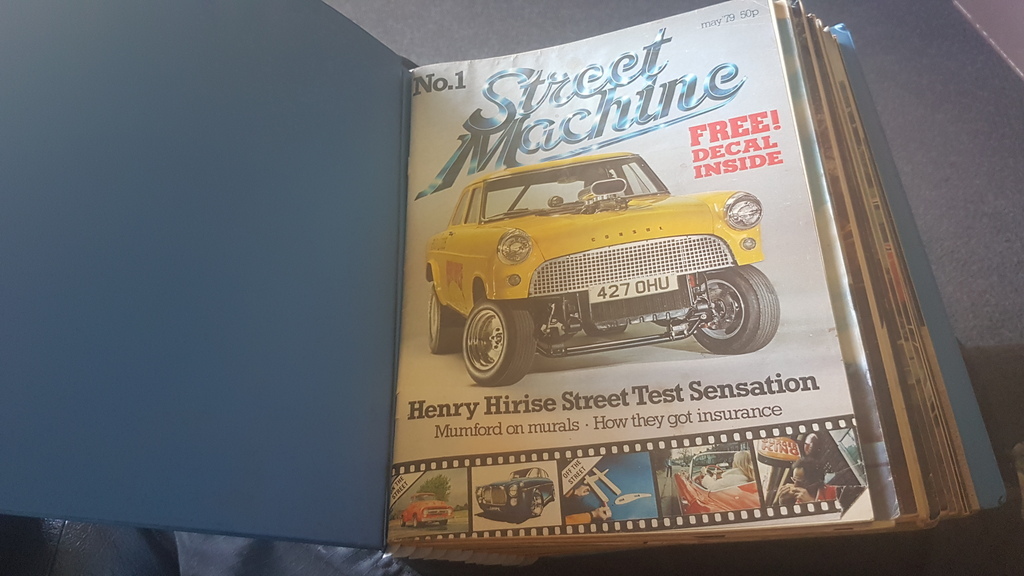 I needed a water trap regulator, bought the Clarke one (well, it looks the same as the Clarke ones) for £5, then later bought the box of stuff just for all the 1/2 fittings. This box included 3 devilbiss reg/filters. I assume they were all set up as first stage. One has a first stage element, one had a broken first stage element, the third I can't open yet untill I can be bothered to take it to the vice. I want a second stage coalescing filter too, bit elements for these are more expensive than a new Clarke one. It looks like the housings should be modular, can you add and remove sections? If so, how! 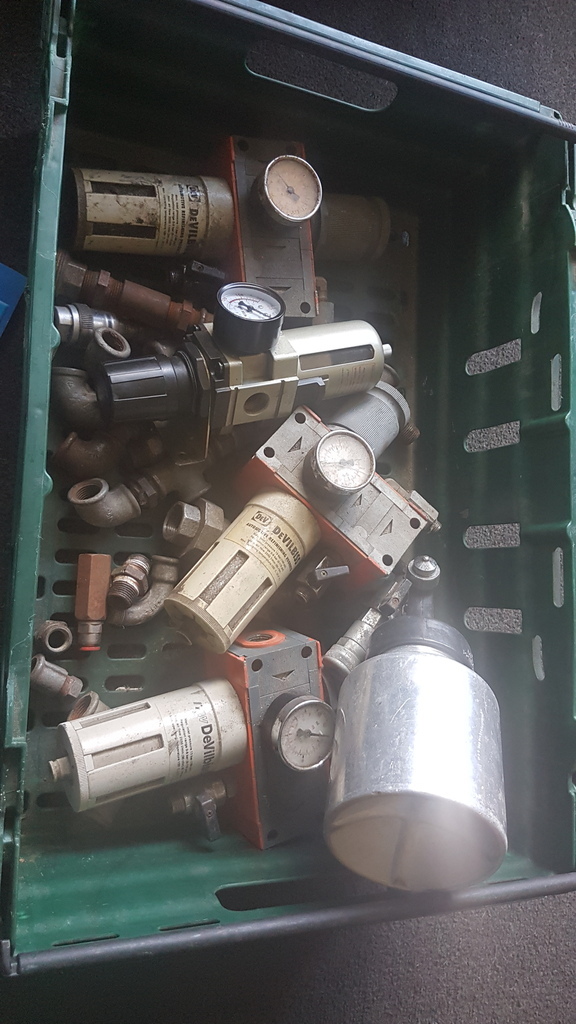 The complete box of stuff was £10. Seems I'm over run with first stage filters now! Edit, got it open. One of the devilbiss ones has what looks like a new first stage filter, the other two ha s remnants of broken first stage filters. I assume could just leave the regs wide open on those and fit second, and even third, stage filters in them. Expensive though! Would be nice to get them in one block like a proper 3 stage, that's assuming they do coke apart like I assume they do. |
| |
Last Edit: Sept 19, 2021 14:08:51 GMT by VW
|
|
|
|
|
Sept 17, 2021 21:45:03 GMT
|
|
Play with tyre pressures too. On the scirocco with cheap coilovers there was a small window of tyre pressure where the tyre wasn't softer than the suspension but also gave a little cushioning. Getting the tyre pressure to work with the suspension rather than against it really helped (well, in a cheap coilovers way still, but got it livable with)
|
| |
|
|
|
|
|
Sept 17, 2021 19:59:13 GMT
|
Needs everything else photoshopping out!  |
| |
|
|
|
|
|
Sept 16, 2021 17:11:03 GMT
|
|
Just thought, as this was run at 50psi, I doubt the lack of unloaded was a problem.
I'll add a one way and an unloader I think.
|
| |
Last Edit: Sept 17, 2021 19:51:08 GMT by VW
|
|
|
|
|
Sept 16, 2021 16:54:37 GMT
|
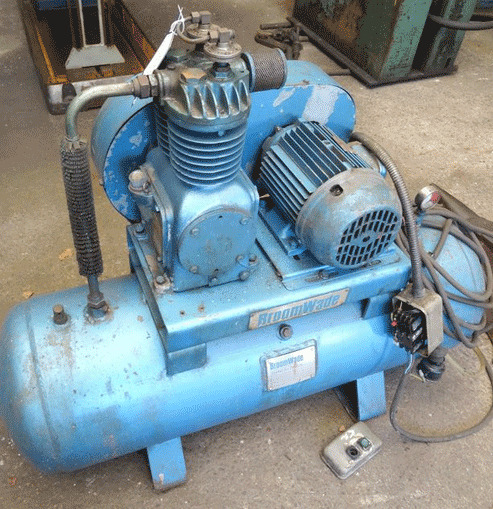
I've had a look at the valve block and spoke to the previous owner. The link pipe went straight into the block on the left. I was hoping this block had some kind of funky one way valve/unloaded set up, but it hasn't. Its just a distribution block. Has a cap in the front, the gauge, a 160psi safety valve and the valve at the back is a fusable plug, designed to release pressure if there is combustion heat in the receiver. 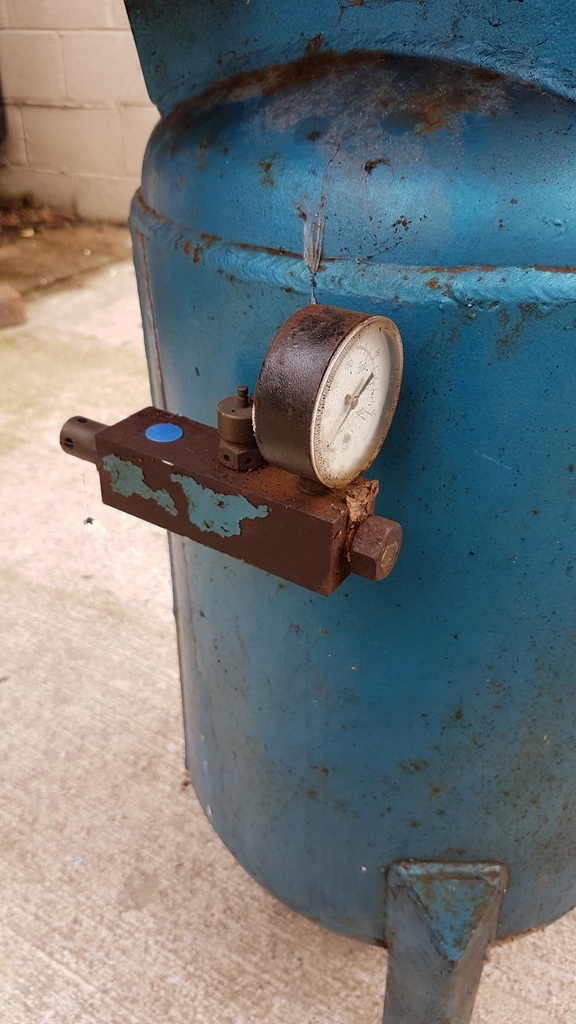 Oddly, the inlet is very restricted by the fusable valve. 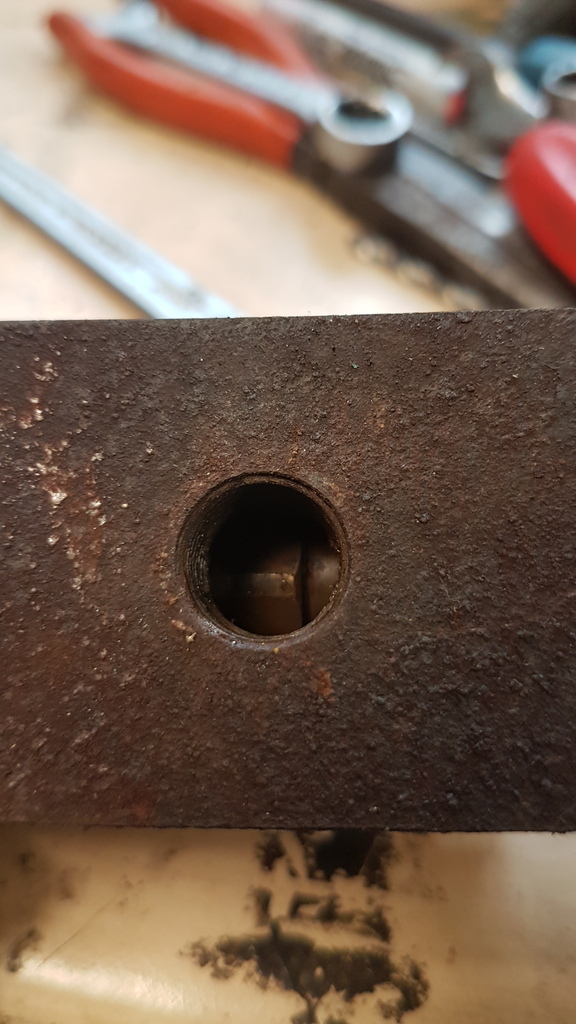 Why the air inlet isn't in the capped off 3/8 hole I've no idea! Seems this ran with no one way valve and no unloaded valve. I guess without an unloaded you don't really need the one way valve? It must have worked ok but is it acceptable to have it set up like this? I could add a one way valve but unless I can find an unloaded that isn't mechanically triggered by the pressure cut of switch then I'd need to replace the switch too. Don't really want to do that as the honeywell switch it came with is very adjustable. Without a one way switch it's very much relying on the pump valves not to drain down. I guess I could run a one way and no unloaded but won't that strain the pump and motor? Maybe I should talk to my local compressor shop. |
| |
|
|
|
|
|
|
|
Sept 16, 2021 14:35:52 GMT
|
Looking at pics online it seems the hole in the head is just a mounting hole, goes nowhere. If there was an external unloaded valve it would have been connected on the head by the outlet. Seems this either doesn't have an unloaded, or it's built into the valve block. I'm sure it will make sense when I take the valve block apart. So, I decided to stop worrying about how it was set up before. I know what it SHOULD have, so I'll set it up how I want. The valve block needs cleaning and inspecting, the receiver I'm sure is fine but needs cleaning and checking properly. The pressure switch needs checking too. I can mix and match parts with my other compressors to test individual items. All pointless if the pumps no good though, so I had a peek. 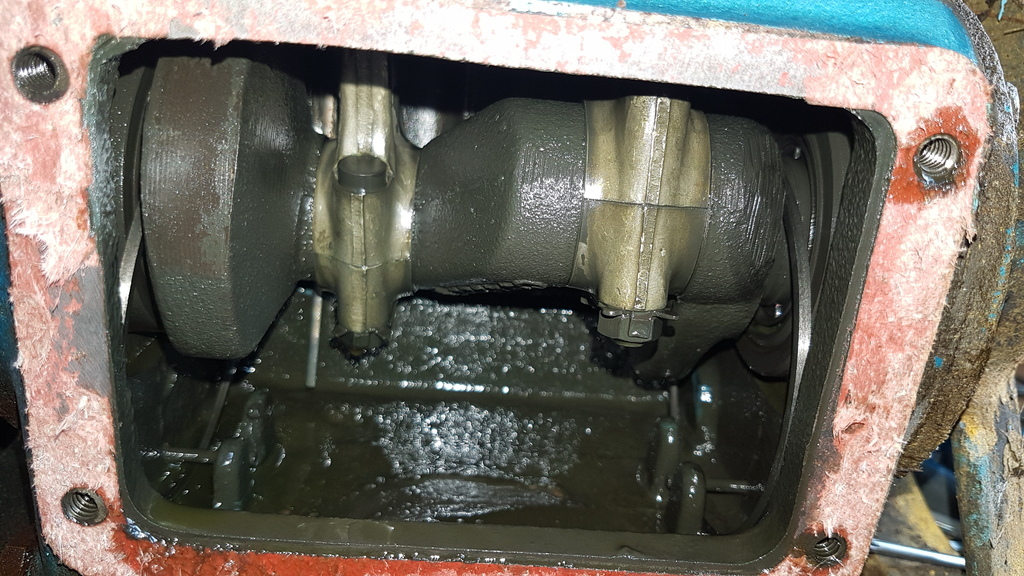 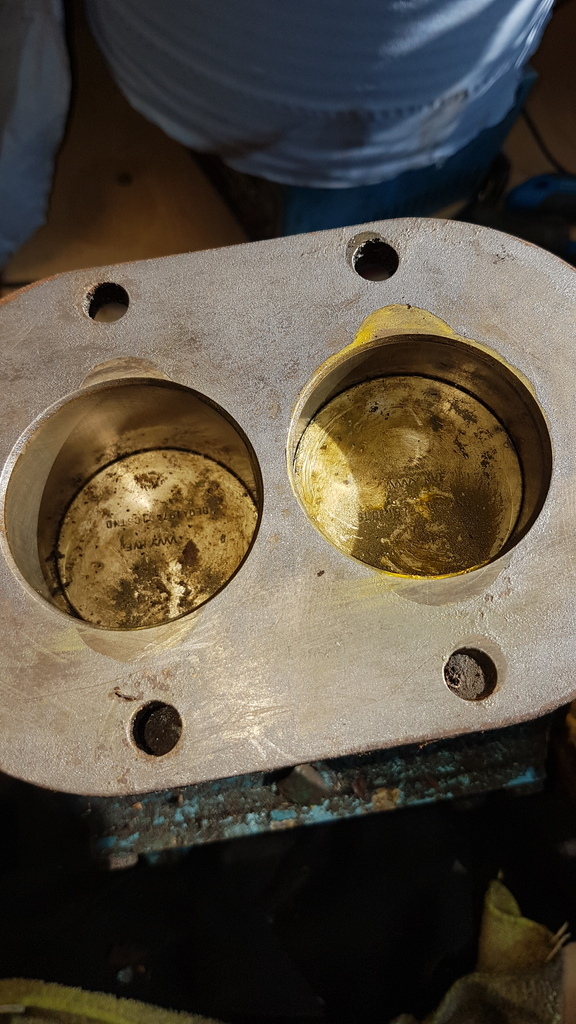 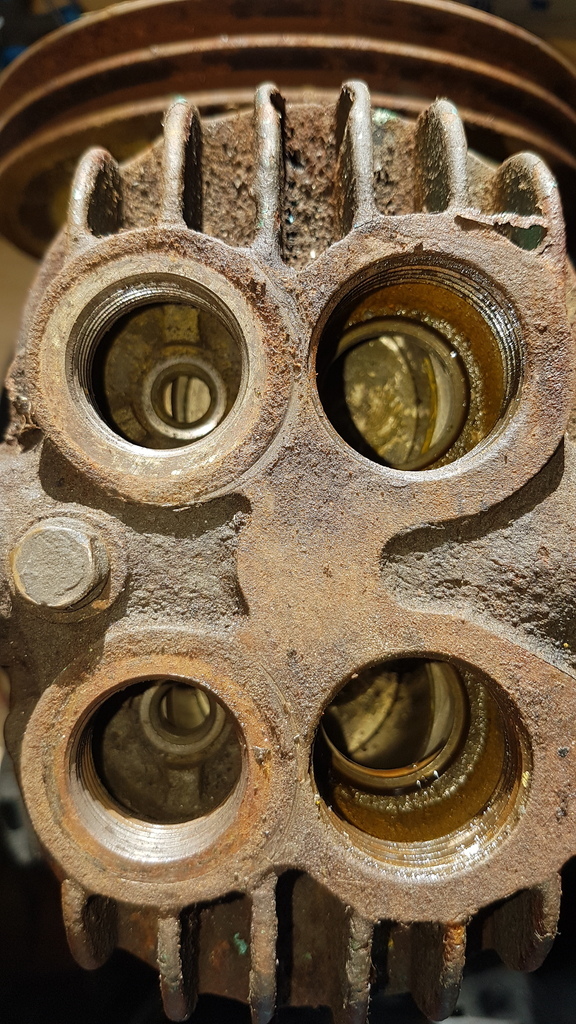 The valves look really good, few bits of dirt in the head but that's to be expected. Pistons look great, bores look great. Oil was a little dirty but nothing in it. Nothing in the bottom of the crankcase. Crank end float feels spot on. I was going to take the pistons out and check the rings and ring gaps etc but I really don't think there is much need. It all looks as good as new really. Seems the note implying it's not done much work is right. Looks like the last car painted was yellow 😂 I don't think it's worth disturbing the big end bearings in order to get the pistons out so I'll just put it back together and clean everything. The paint keeps flaking off which is a shame, looks like it may get painted, but I'll get it up and running first. |
| |
|
|
|
|
|
Sept 15, 2021 21:58:19 GMT
|
Pro shops seem to use steamers to shrink/stretch the leather to fit properly - a bit of ingenuity with a kettle or similar should help. Watch some youtube videos of Gabe's custom shop - he shows how its done quite well. I recently used a heat gun to shrink the creases out of my old motorcycle boots. It's amazing what a bit of heat will do to old, creased, leather. Seems they are also used by upholstery folk as is shrinks stretched or creased leather like seats that have gone baggy etc. I think, but may be wrong, steam is used when trying to get leather to conform to a shape and dry heat to make it shrink. I know very little about this though, was just experimenting a couple of weeks ago. |
| |
|
|
|
|
|
Sept 13, 2021 21:32:30 GMT
|
So this tells me the link pipes on top, if it has them, are something to Do with the air governor. Or, like mine, it can have a pressure switch. It also suggests only ac35 and ac41 can have unloading valves. Doesn't mean there can't be one added to the tank connection though I guess 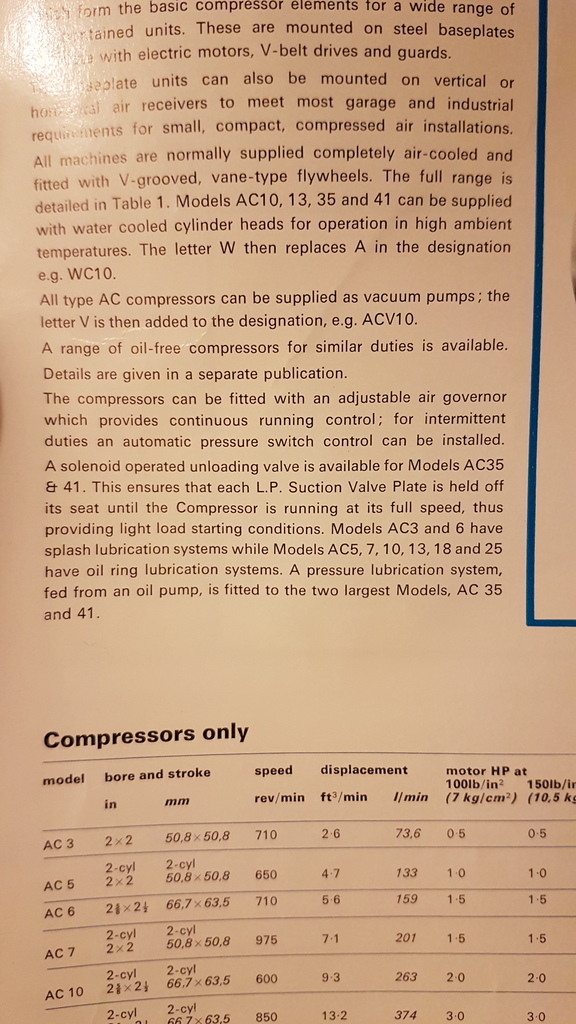 This pic has the valve block. It's a different compressor though. Shows the connection from pump to valve may well be 1/4. Shows a connection to the pressure switch too and the pipe to the head. This pressure switch has a built in relieve valve by the looks of it, mine doesn't. 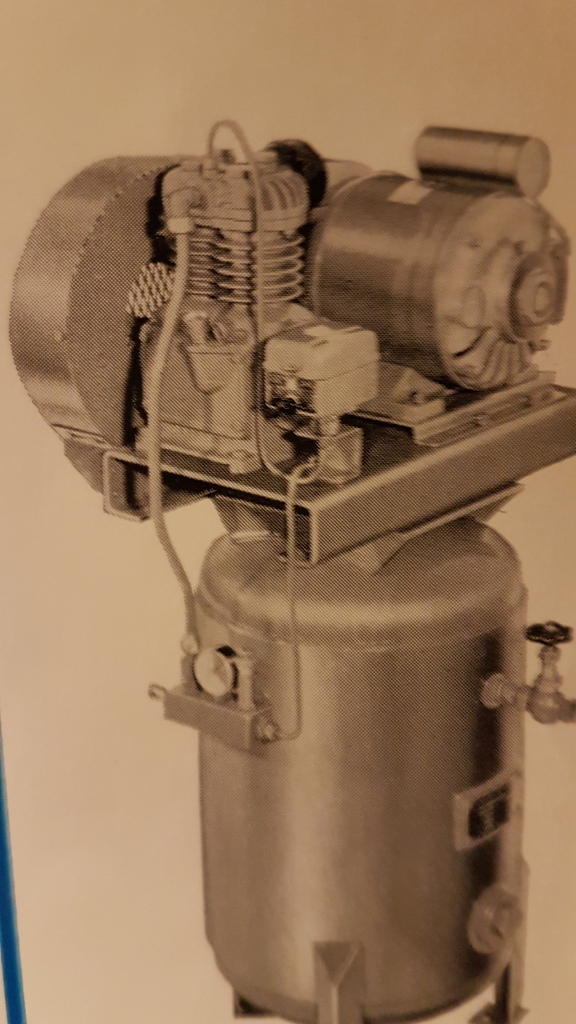 |
| |
|
|
|
|
|
Sept 13, 2021 21:17:32 GMT
|
|
Replying as I think of things.
It couldn't take the pressure switch feed from the head as there would be a relief valve to release pump pressure for easy starting. The pressure switch needs to read receiver pressure.
The more I think about this the more I think It may have been swapped around to fullfill one specific task.
Either that, or I'm confusing myself as I don't 100% know what port is for what yet.
|
| |
Last Edit: Sept 13, 2021 21:18:21 GMT by VW
|
|
|
|
|
Sept 13, 2021 21:13:26 GMT
|
|
|
| |
|
|
|
|
|
Sept 13, 2021 21:12:21 GMT
|
First thing to do is remove the large bungs in the side of the receiver, so you can inspect the inside for rust. The valve at the bottom is for draining moisture from the receiver. The line from compressor to receiver would probably have fins to cool the air. Often industrial compressors are set up with multiple outlets to serve different needs Ttfn Glenn Found this pic, same pump, different receiver. Has pipes on top that mine doesn't have too, but shows the finned pipe you were talking about. Same size fittings both sides too. I wonder if the valve block was originaly where the tap is on the right. Maybe the pressure switch mounts to the 1/4 fitting and the pump went directly into the receiver. Would leave no one way valve though, assuming that block has one inside. |
| |
|
|
|
|
|
Sept 13, 2021 21:07:16 GMT
|
|
Thought I'd mention too, I'm pretty certain the valve block is original as it has exactly the same blue paint on it as all the rest.
I'm assuming the blue paint is original due to the stencils. There also doesn't seem to be any other colour where this blue has flaked.
|
| |
|
|
|
|
|
Sept 13, 2021 20:33:09 GMT
|
Outlet from pump looks like a compression fitting, something seems off, since would be strange to strangle the compressor with a 1/4 feed into the tank, wonder if there is something like a non return fitting missing, also likely that the supply pipe would have compression fittings on both ends Ttfn Glenn I did think it a little odd as even my little sip has 3/8 fitting into the tank. The guy I bought it off is still trying to find the link pipe, would really help if he could! Edit to say, this may have had a few different set ups in its life. The pressure switch is set to 10psi differential and 50psi max so the 1/4 fitting may not have mattered. If you look at the front of the valve block, under the gauge, there is a large blanking plug. I guess that could have been the original inlet. I'll take the valve block off and work out what does what. |
| |
Last Edit: Sept 13, 2021 20:37:05 GMT by VW
|
|
|
|
|
Sept 13, 2021 19:09:42 GMT
|
|
Quick look tells me the connector is pcl 100 series and they are expensive!
Good job I don't need them, guess I'll swap it out for a normal size one.
|
| |
|
|
|
|
|
Sept 13, 2021 19:07:24 GMT
|
|
I have been poking and proding this. Washed the majority of the loose stuff off and dragged it into the workshop.
Took the bungs out the tank. It's a bit surface rusty, apart from the bottom, which was a bit wet with some accumulated flakeyness. Hovered it out and I'm pretty sure the wetness is oily.
It looks about how I'd expect the inside to look to be honest.
I scraped the tank wall in an area i could see and the surface rust doesnt seem to have pitted anything.
I think I'll get it down to a bare receiver, seal off all the holes, and swill it out with water based degreaser.
I might then put some chain in in and roll it round the garden for a few hours (wish I hadn't sold my cement mixer!).
See if that cleans it well enough to inspect more thoroughly.
I didn't see anything that looks concerning though.
I took the belts off. Pump turns over freely and makes pumpy noises.
Motor runs nicely.
I'll test the pressure switch on my other compressor because that won't care if it doesn't shut it off.
Other things I've discovered...
The inlet into the non return valve is 1/4 bsp, which is nice.
The outlet from the pump is bigger than 3/8.
The outlet from the head is smaller than 1/4.
The pcl snap connector on the front is bigger than normal.
Once I've cleaned the tank a bit ill post some pics of the inside.
Once I've cleared the bench I'll take the pump apart and see what it's like inside. The manual has all the clearance specs etc.
Then, if that all checks out I guess I'll be down my local air accessories again looking for some suitable connectors to join it all up.
|
| |
|
|
|
|