|
|
|
|
|
|
That was my other thought, if i ventilate it then i really do need to make sure its all sealed.
25mm gap all along is 100% not going to happen. I have 2" of timber, 2" gap, then 3/4 of facia that any ventilation needs to go through.
I'll sort something.
|
| |
|
|
|
|
|
|
|
Oct 27, 2020 23:30:03 GMT
|
|
Yes, it's a cold roof.
Venting is going to be tricky, but is doable, will mean removing shuttering, facias etc.
Just wondering how important it will be in a room that doesn't really have any moisture.
|
| |
|
|
|
|
|
Oct 27, 2020 16:39:23 GMT
|
|
If I really must ventilated that space will a 30mm hole at each end do?
I don't plan on overboarding this. I might tape the joints between the insulation and the joists, but I'm going to just leave it as it is.
Roof is 100% water tight, I don't create any moisture inside apart from breath. No wet vehicles go in here either.
I'm tempted to just tape everything up and leave it as is.
|
| |
|
|
|
|
|
Oct 27, 2020 16:36:19 GMT
|
This is a pic from when I built the roof 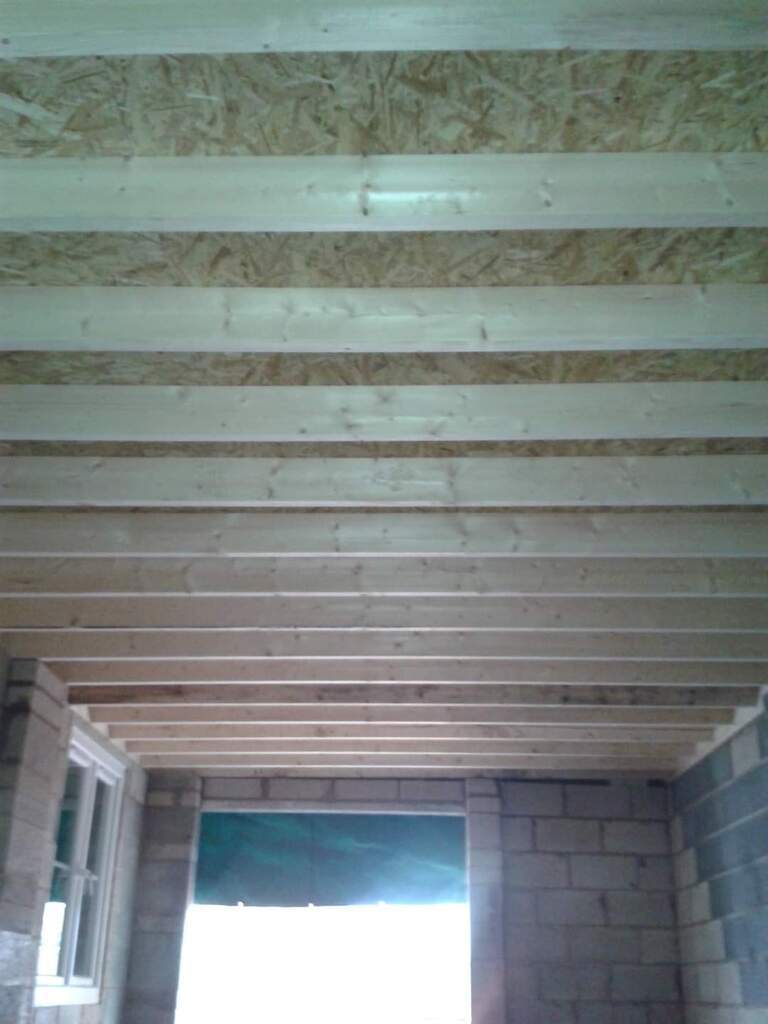 And this is what's gone in today 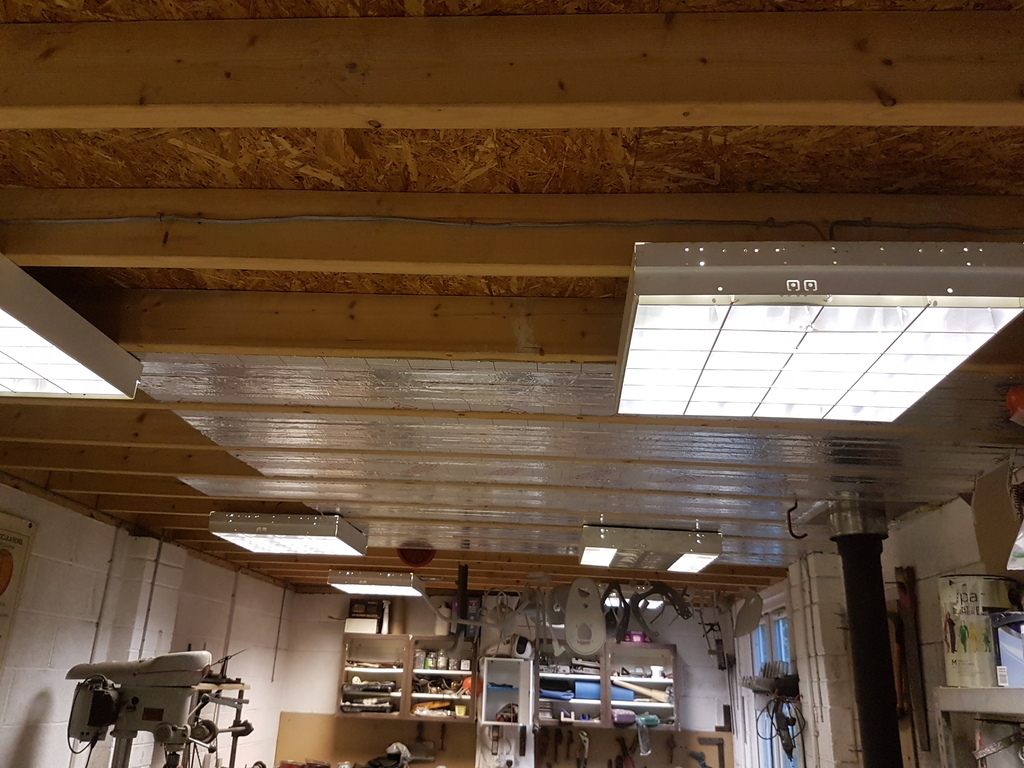 |
| |
|
|
|
|
|
Oct 27, 2020 16:34:22 GMT
|
|
Been thinking about doing this for some time, finally decided today to make an effort to get suitable offcuts.
Picked up some 100mm today and some foil tape. I used this to do the area above the wood burner figuring thicker is better here. I'm keep my eyes open for more to do the rest, as long as it's over 50mm.
I'm wondering about the air gap though. I have about 50mm gap above what I've just fitted.
Do I REALLY need to ventilated that air gap? The roof is completely sealed from the outside world and I don't have any damp issues at all in this building.
The roof joists sit on the walls and no then put noggins between the joists that sit flush with the inside of the wall. The joists end at the outside wall face and the facias are fixed to the ends. If i was to ventilated the roof space I'd have to make holes in the noggins and then either put holes in the facial, or remove it and space it off the joists.
I guess how I did the roof isn't typical.
|
| |
|
|
|
|
|
|
|
TBH i wouldn't bother , you can buy one for £65 at the first place i looked . The time and effort polishing and forming and then mig weldeing it which will look nasty . It will never look as good as a bought one unless you have a lot of time to spend. Problem with that is the ones I can buy won't fit my bike. It's not going on a triumph. No reason for the mig welds to look nasty, I'll blend it all together with a file before sanding/polishing. |
| |
Last Edit: Oct 29, 2020 12:02:14 GMT by VW
|
|
|
|
|
Oct 26, 2020 20:50:32 GMT
|
In the past when, or if the job needed the welds to be visible/not ground back I used picking paste.Used to be called Metinox, now is Antox. example here: www.weldingandwelder.com/product/antox-np-neutralising-paste-2kg/?gclid=EAIaIQobChMIxqS_2ofT7AIV1u3tCh1yeARvEAQYASABEgJ5wvD_BwEObvs the cost is prohibitive on your particular need , but I have posted it in case someone offers you the use of. No, I don't have any. After pickling, i used "Scotch" pads to polish the job. Mostly brushed dairy pipe. The usual polishing methods (Autosolv etc) will give great results. Be mindful not to use steel wire wool or steel wire brushes. It will impregnate the stainless and that is why sometimes you see rust on stainless steel. Poor quality stainless is another. Thanks, I'll see if I can source any. This is already going to cost more than it's worth. That's custom parts for you though! |
| |
|
|
|
|
|
Oct 26, 2020 20:43:28 GMT
|
I take it your Tig welding ? Most of the discolouration will come off with a stiff wire brushing . I would try to polish the bar before you make it as it will be much more difficult when its made . I take it you have a polishing wheel to use ? Try not to do any grinding because then you have to use various grades of scotchbrite to get that out before the different polishing steps. I wish! Will be mig welded. Good tip on polishing the bars first, thanks. |
| |
|
|
|
|
|
Oct 26, 2020 19:41:23 GMT
|
Any form of abrasive will remove the discolouration So it's only really surface then? See loads of high tech discolouration removal techniques on the internet but didn't know if they were just quick and fancy, or essential. |
| |
|
|
|
|
|
Oct 26, 2020 19:40:10 GMT
|
Is that a boot rack and is it made of tube [ most likely if a boot rack ] or is it something smaller made of tube ? Motorcycle tank rack so only maybe 8"x 10" and bar, but similar kind of thing. |
| |
|
|
|
|
|
|
|
Oct 26, 2020 18:53:10 GMT
|
I need to make one of these, in stainless. 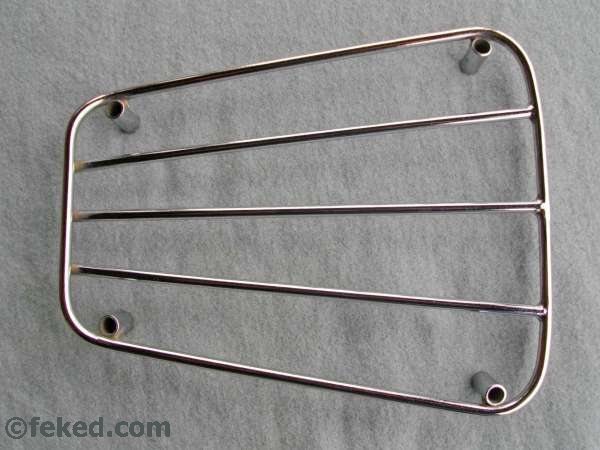 Not really got a problem with making it, although I've not welded stainless before. I'm just wondering what to expect when it comes to finishing it up. I'll no doubt have to grind my welds up a bit after. My plan then is to file, sand, then polish. All the stainless welding I've seen causes localised discolouration. Will this be naturally removed during the finishing and polishing stages? I have argon and will obviously by stainless wire. No idea what stainless grade I'll be using, will just be cheap eBay bar stock. Any tips on stainless work? I know I can't use anything that's been used on mild steel, and use a fresh stainless wire brush. Thanks. |
| |
|
|
|
|
|
Oct 26, 2020 17:05:35 GMT
|
|
Lots been happening, haven't been updating! So, quick catch up.
I removed all the rust with citric acid, which worked better than I thought!
Had to weld some seams on the fuel tank.
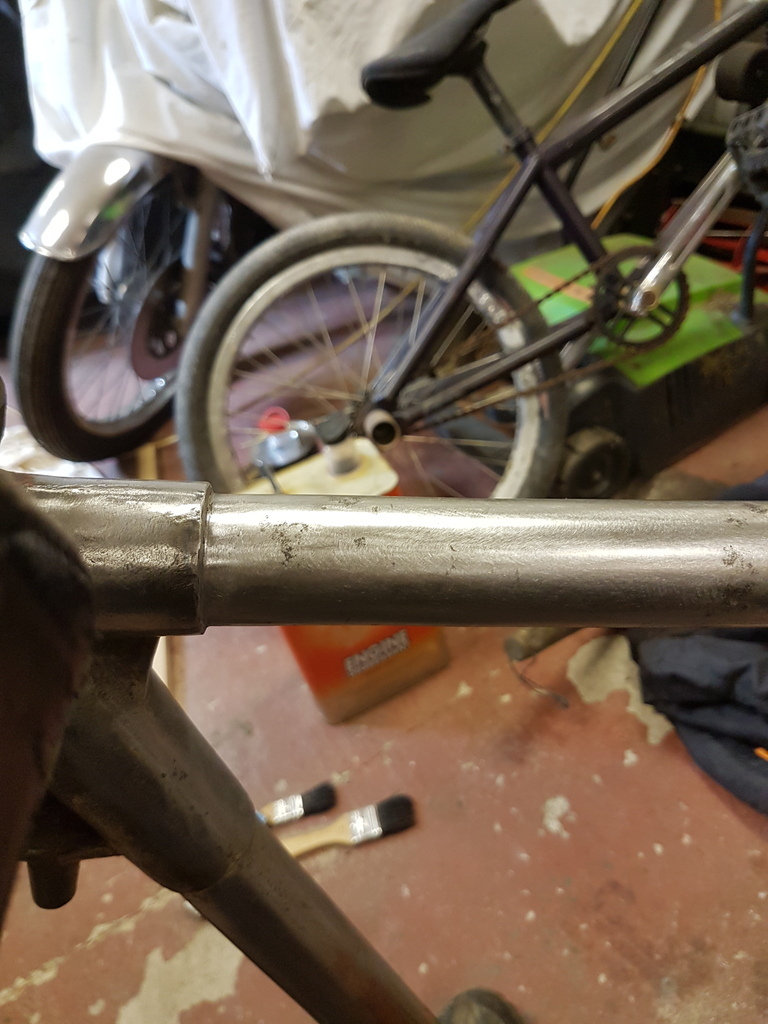
Frame had a badly repaired snapped top tube so I cut it out, sleeved the join internally and had a coded welder friend weld it all back up.
Carb was worn so I have bored it out on the lathe and am part way through making an oversize slide.
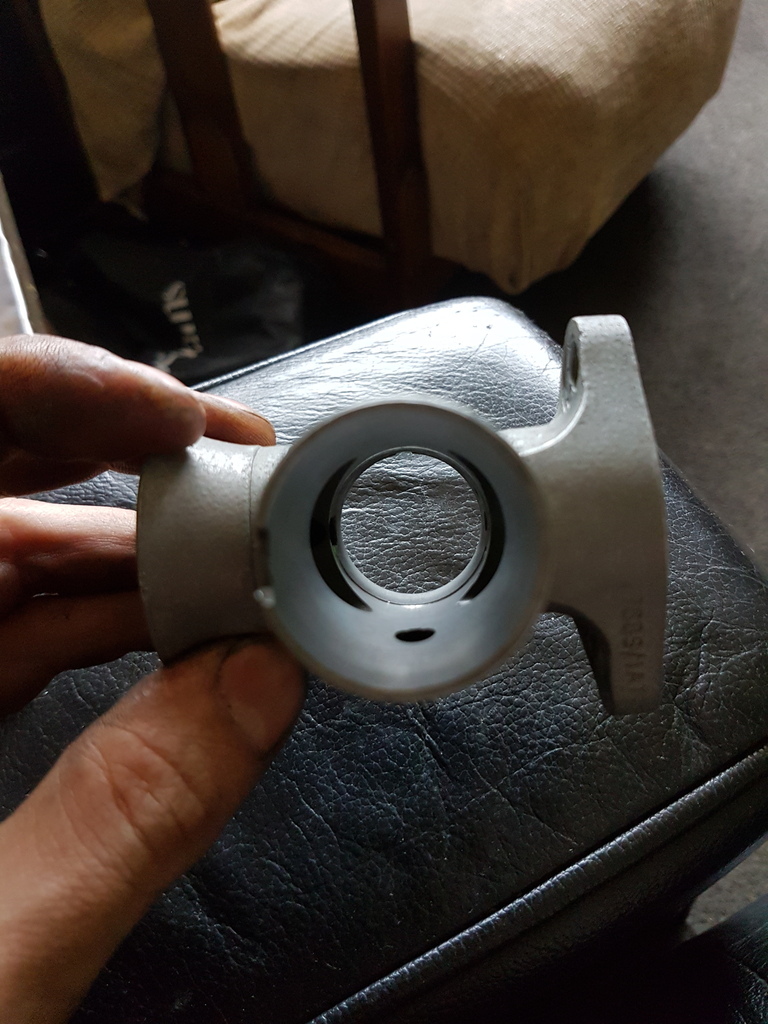
Had to make a side stand lug as the original had been removed.
Found out the rockers and rocker box were ruined, but have found replacements.
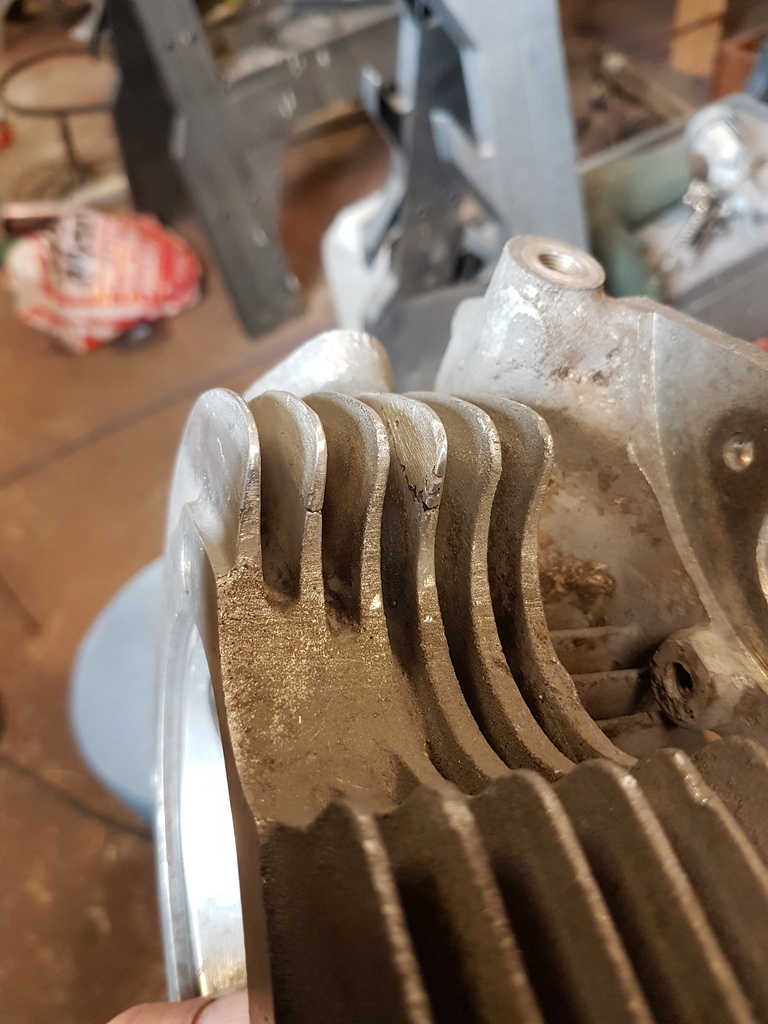
Had new guides put in the head and then noticed it has 3 broken fins. Decided to have a try at welding aluminium. Seems to have gone ok, built up the missing fin areas today.
Everything is now in primer, next stage is alot of surface prep!
|
| |
|
|
|
|
|
Oct 26, 2020 17:01:46 GMT
|
|
|
| |
|
|
|
|
|
Oct 22, 2020 16:40:57 GMT
|
If it's the Mipa Grundierfiller (Think I've spelt that right), 1k Waterbased stuff you can use it straight out of the tin without thinning. If you think it from memory it's 0-5%, so only a tiny bit of thinners, I wouldn't use screenwash, I'd just use distilled water you can buy from Asda, or boil water and let it cool as an alternative. Waterbased needs air movement as well as heat, so put a coat on and then use a hair dryer on low or medium heat to flash it off. It drys much quicker with air movement than just heat on its own. Yeah, that's the one. Only tried screencast as it's what folk use with water based paints when airbrushing models. The little bit of alcohol in it helps it flow. I have distilled water too though. Yeah, I thinned it way more than that! Keep thinking it's celly 😂 I'll fire up the log burner, get the fan out the loft and keep the hot air gun to hand. I have lots of small parts to paint! I'll try it neat too but it did seem a little thick, but again, I'm comparing it to cellulose! |
| |
|
|
|
|
|
Oct 22, 2020 15:43:56 GMT
|
|
Mixed a little with some screen wash and sprayed a couple of test pieces.
Seems to work just fine, I'll see how it sets up.
Never used water based before. I over thinned it a little. Also can't lay it on like you would solvent based (2 coats in quick succession seems to have created some runs).
Also seems heat will be my friend with this as it's obviously going to take a while to dry.
But, other than that, it's nice not having the fumes! It also seems to do the high build part of its job well. Clean up is super easy too.
So, less thinning, warm parts, no wet on wet coats and all should be good.
|
| |
|
|
|
|
|
|
|
|
I have 1l of Mipa water based primer filler. I don't have the mipa thinners though.
I use water based paints in my airbrush and the thinners is basically water and alcohol (can often use screen wash!).
Think that will work?
I have decent cellulose thinners too.
I've not used water based primer before. Had a look online but can't find the right thinners, or any details on what kind of thinners it is.
Any painters know what I can use with this? It's basically being used to fill pits left after rust removal. Will be top coated with coach enamel.
|
| |
Last Edit: Oct 22, 2020 7:34:24 GMT by VW
|
|
|
|
|
Oct 12, 2020 11:53:44 GMT
|
|
I've been thinking about trying one of these.
What was the hardest part?
|
| |
|
|
|
|
|
|
|
When i've used various rust removal methods I've had flash rusting. First I thought that drying quickly with heat might help, but it made it worse. Then I tried compressed air, that helped a lot, then of course keep them somewhere dry like in the house until you paint. I had been using heat, I'll try air instead. Thanks. |
| |
|
|
|
|
|
Oct 10, 2020 10:33:57 GMT
|
|
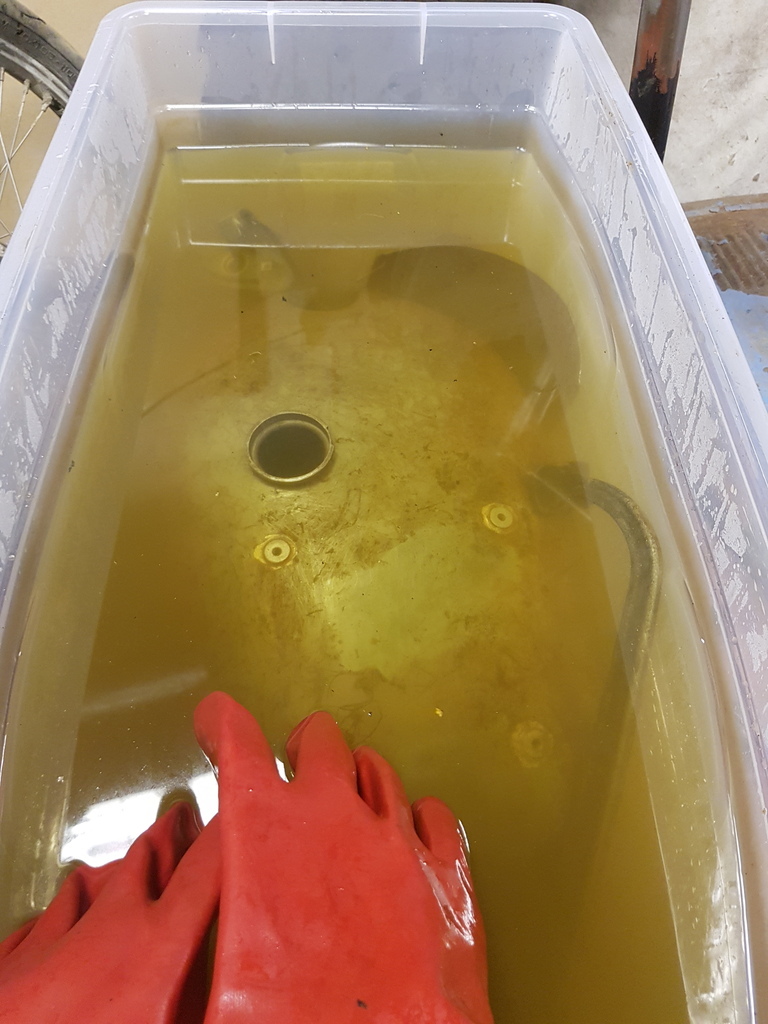
I've set up a tank of citric acid for rust removal. I'm impressed so far, seems to be working well. First test pieces however are suffering a bit from flash rusting after.
I'm just thoroughly rinsing with clean water.
The plan is to epoxy prime after so I want to get a few bits done ready.
What's the best way to deal with the flash rusting? Is it worth setting up a bicarb tank to neutralise? Or is there anything I can spray on them after rinsing that won't be a pain when I come to prime?
Or, doninjust have to live with it and manually remove the flash rust before priming?
Thanks.
|
| |
|
|
|
|
|
|
|
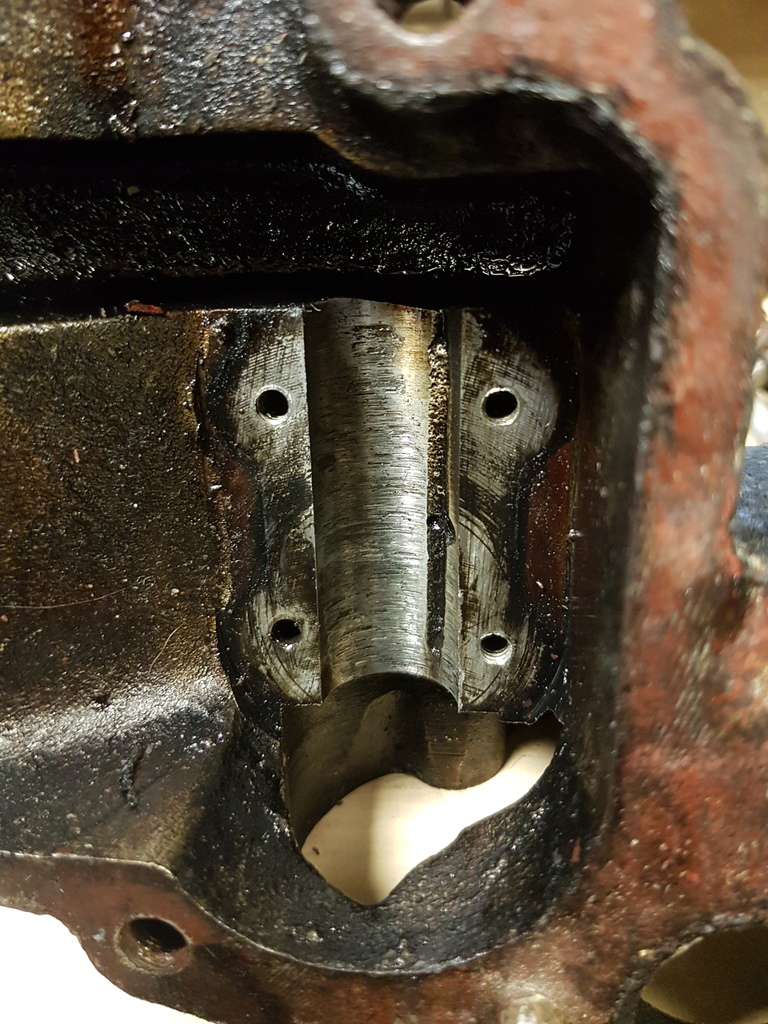
If its the crack that needs welding - that's a bracket not an oil tank and if mine would have been welded and back on the car the same morning - no need to clean anything out to weld that. It is very close to an opening at the bottom of the tank (1 inch away from a 2 inch diameter hole), and it had a good layer of sludge inside before hand. It was getting cleaned anyway. I'll weld it up then 😂 |
| |
|
|