teaboy
Posted a lot
   Make tea, not war.
Posts: 2,125
|
|
Jul 17, 2023 20:41:37 GMT
|
Speaking of crappy old beetle engines and seeing as you like an air cooled Porsche, you might like this. I visited an engine builder son of a friend yesterday who had just completed one of these 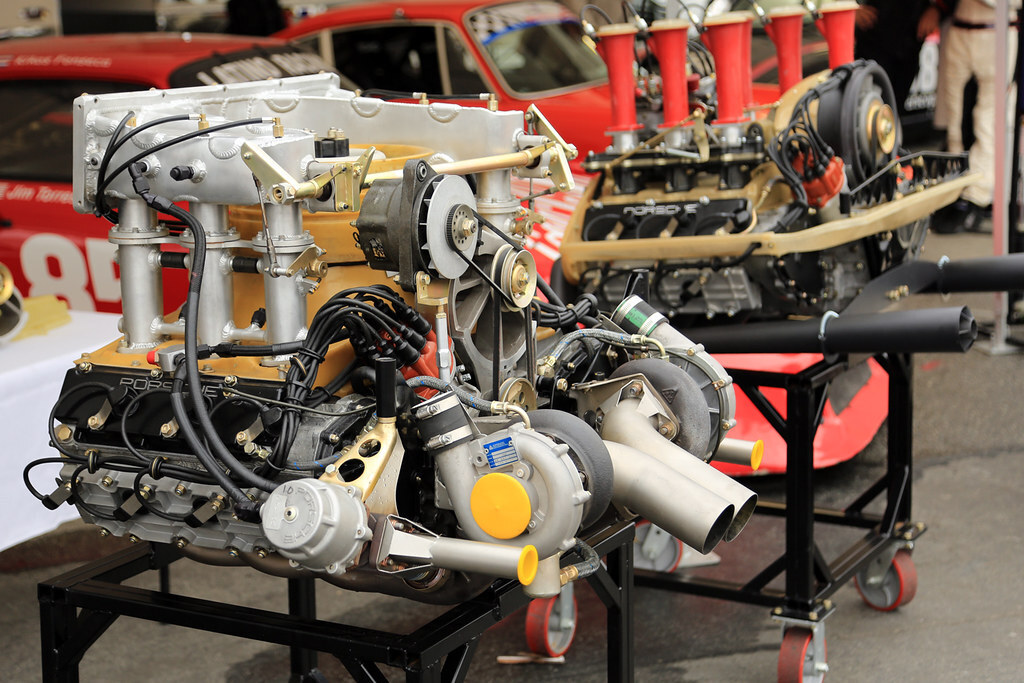 I would love one of those 'flat fans' on my engine. I think Jim Torres in the US reproduces the whole setup, they are only about fifteen grand... Sorry for the derail Teaboy No need to apologise for posting a JLP Racing 935.  On Saturday night when I checked the weather forecast for Sunday it was going to wazz it down all day. This prompted me to have a bit of a lie in. When I did get up the sun was beating down and it was glorious. The Doc said it was going to rain at midday so I ought to do some gardening whilst I had chance. As you may, or may not know, I loathe gardening but to keep the Doc happy Plenty of mowing and strimming ensued until all three of our garden waste bins were full. The sun was still out at 2pm when we went for something to eat but when we came out it was bucketing down. The Doc suggested that as I wouldn't be going out into the tent in the monsoon I might like to clean up the old brass fender she had for the fireplace. It was in a terrible state and I spent five hours scrubbing it by hand and it still isn't brilliant but the Doc thinks it is, so she is even happier with me.  Tonight she is painting the bathroom and I don't do painting so I went into the shed. I have possibly got a place to take my stuff for zinc plating which I will be up near on Thursday so I want to get everything ready for that. Ages ago when I took the car to bits one of the things on the fuel breather stuff in the back wheelarch looked like this. 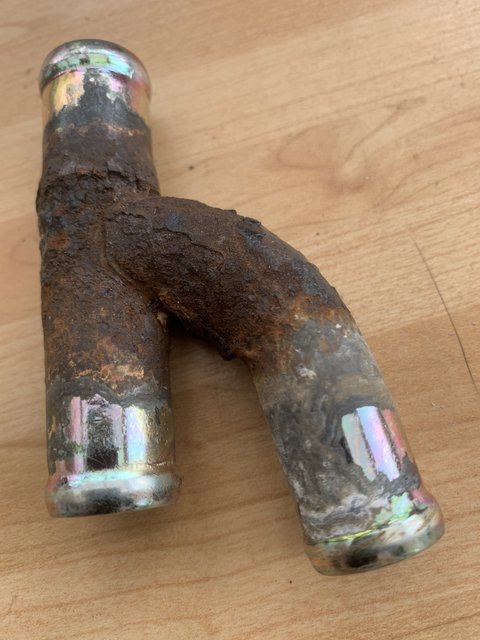 I cleaned it up.  It went in with my last batch of plating with yer man who subsequently fell down the stairs and isn't working at the moment.  Trouble is it looks terrible but I wasn't too bothered because it won't be seen unless you take the wheel off to look for it. But the other day a pal of mine gave me a better one.  So I spent an hour cleaning that up with wet and dry.  Hopefully it will plate up nicer than the last one and look lovely in that spot where nobody is ever going to see it... Anyway, back to those metal lumpy things and the steel boxy stuff. The remaining two lumpy things which fit into the trailing arm brackets.  I am going to weld them in so I needed to clean up the trailing arm brackety things first.  I went at it with the wire wheely thing on the grinder, as you can probably see. They started to look a bit less scabby.   This is what they look like now.  I was about to set up my de-rusting tank with citric acid when I decided to get a grip and not bother because they are not actually going to go on the car, just on that boxy thingmy that I have been welding up.  Part way through the wire wheeling job one of the bristles flew off at warp factor eight and hit me in the cheek, which is now covered in blood. I look like the runner up in a razor fight in the Gorbals. The lovely Doctor got this out for me but she said she was too busy to offer first aid and I would have to sort myself out.  I sometimes have to stop to remind myself how much fun I am having fixing up this old banger. Cheers. |
| |
Last Edit: Jul 17, 2023 20:47:45 GMT by teaboy
|
|
|
|
Darkspeed
Club Retro Rides Member
Posts: 4,882
Club RR Member Number: 39
|
|
Jul 17, 2023 21:22:22 GMT
|
A couple of those flat things that were in the unit a few doors up from a place I used to work. Wall art belonged to some ZA farmer bloke who sells cheese and icecream dan sarf who could pedal a bit. 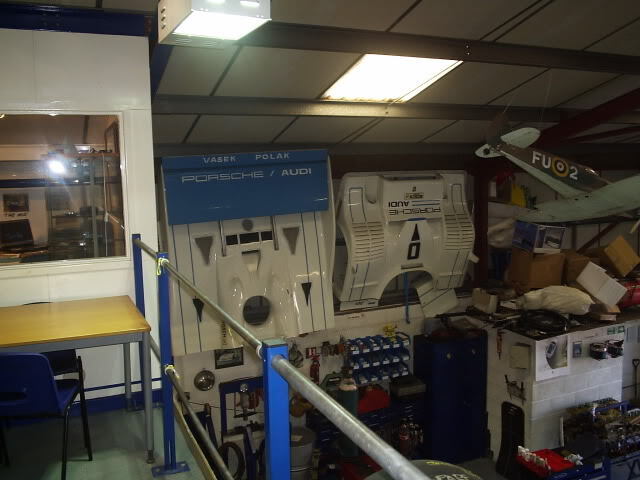 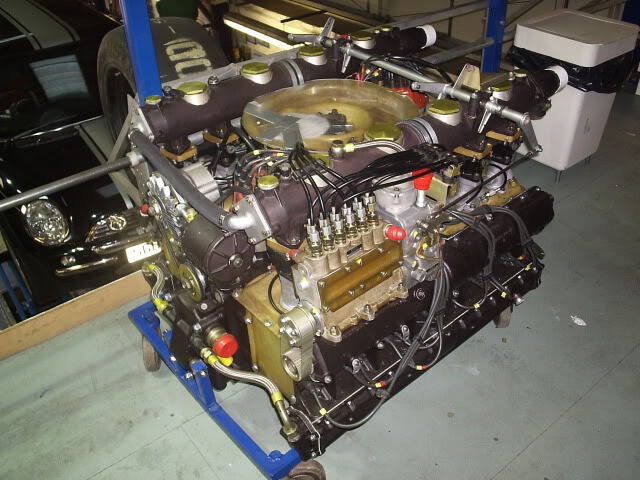 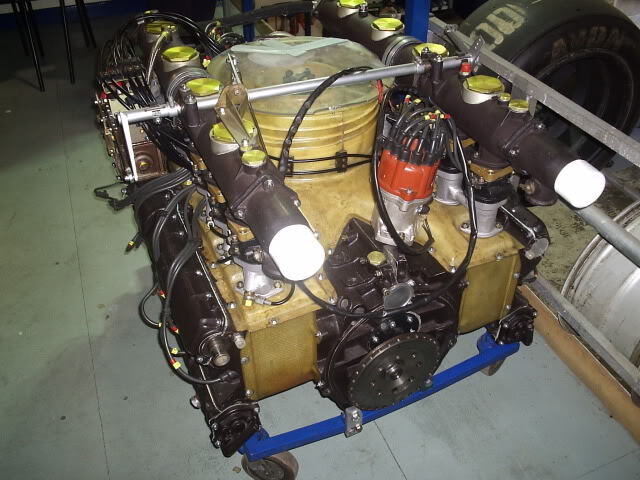 Yep - that's what's under the skin of that 1500HP projectile covered in some flimsy GF 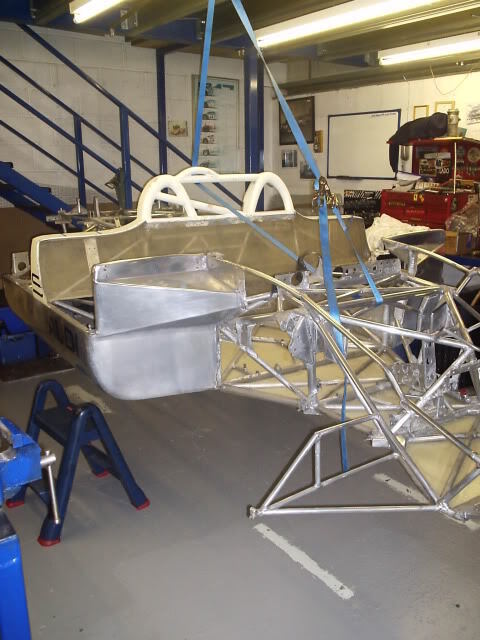 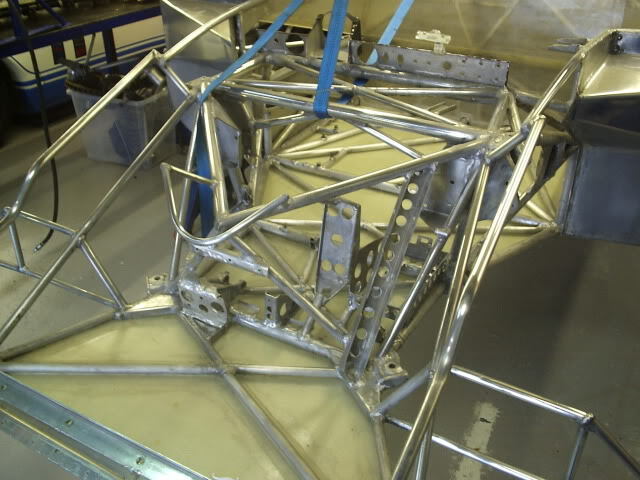 I miss dropping in there at lunchtime with me mug of soup...... ETA Keep up the good work  Oh and for BMW content - I am still fighting the urge not to sell my 308 GT* and buy a Z4M
* Peugeot |
| |
Last Edit: Jul 17, 2023 21:27:29 GMT by Darkspeed
|
|
teaboy
Posted a lot
   Make tea, not war.
Posts: 2,125
|
|
Jul 18, 2023 20:41:48 GMT
|
Some serious kit there, DS. Those 917 chassis were really flimsy and I think that the Driver formed the crumple zone. You're right about Jody, he could drive. I was a bit late home tonight and the weather was poop so I went into the shed to continue cleaning up stuff for the zinc platers. Nuts and bolts and other boring stuff. Yesterday I did that pipe 'Y' piece and I showed the pic of the old pitted one.  You might notice that also in that picture is a little brackety thing which is also pitted. This fits on the end of the carbon cannister under the boot floor and is also an item which will never be seen. Amongst the bits my pal gave me along with the new(er) Y piece was another one of those little brackety things. I obviously decided that I must clean it up and see if it comes out better than the original. I was giving it a good going over with the wire wheel on the grinder when the wheel grabbed hold of it and launched it out of the shed door and through the hedge. It has vanished into the ether so I guess I'll never know if it would have been better... In other news, I picked up a few more bits that I'm going to need at some point.  Some time ago I got a full set of exhaust heat shields but it wasn't quite a full set because I forgot the front one near the cats.  There is also a heatshield on the rear subframe around the mounting bush. Mine has gone around the mounting holes, as they do.  There are lots of other clips, brake pipe holders and other boring but essential stuff. I spent ages making a list and finding the part numbers which I had written down. To avoid making a mistake in typing the list out to email them I sent a photo of my list. Two weeks later they got back to me with the prices except one of the part numbers was incorrect. I went back through the parts list and found my mistake so I sent him a screenshot of the parts list with the item highlighted. I needed nine of them by the way. He was happy that the number was good so I ordered all the bits. It took another two weeks for them to arrive and when they did he had forgotten to order the nine bits that we had had the stewards enquiry over. It's a good job I'm not in a rush for them. Cheers. |
| |
|
|
eurogranada
Europe
To tinker or not to tinker, that is the question...
Posts: 2,556
|
|
Jul 19, 2023 12:19:20 GMT
|
|
A no expense spared restoration in every way!
Continues to be a great read!
I might have missed it but, what is the deal with the newly made supports. I thought you were taking out a huge panel (axle carrier?) to replace with the same panel only new?
|
| |
|
|
teaboy
Posted a lot
   Make tea, not war.
Posts: 2,125
|
|
Jul 19, 2023 18:35:11 GMT
|
A no expense spared restoration in every way! Continues to be a great read! I might have missed it but, what is the deal with the newly made supports. I thought you were taking out a huge panel (axle carrier?) to replace with the same panel only new? Thanks Alex. Yes you are right, I am going to replace the rear axle carrier panel with this.  I haven't said what the support thingmy is yet, people were guessing as to what it is for... I wasn't going to post anything tonight because not much to report but as I'm here... I think I mentioned that I have been lumbered with mending this.  It belongs to the Doc's best friend and she lost an argument with a truck on a roundabout. Anyway, it looks like she is bringing it this weekend so I need to get prepped. I got hold of a replacement wing for it a while ago but the arch lip was a bit rippled as was the mounting flange so I tapped them back into shape. There was a bit of flaky paint on the lip so I cleaned it up and put some rust converter spooge on it.  I had a drop of spooge left over so I stuck it on those trailing arm brackets.  I will stick a bit of epoxy on it tomorrow. Right, next job is to cut a few more boxy bits for this thingmy.  I was just getting set up for that when it decided to start throwing down. Brilliant... Cheers. |
| |
|
|
teaboy
Posted a lot
   Make tea, not war.
Posts: 2,125
|
|
Jul 24, 2023 20:30:03 GMT
|
I can't believe that I got home from work tonight and it wasn't raining, I can only assume that the sky is now empty. Just had a long weekend away in York with my family for my youngest daughter's graduation. She is now the third cleverest in the family, after the Doc and her sister though this is subject to change because she is going on to do a Masters. Anyway, that means that I haven't done anything on the car for a few days. I did drop my batch of stuff off at the zinc platers last Thursday so we'll see how that turns out. The Doc's friend who was house sitting and looking after Fat Al whilst we were away also happens to be the owner of this.  So Friday morning before we set off I swapped the wing for her.  It isn't going to win the concours at Pebble Beach but it is a bit better than it was. She was delighted with it so that's good. Last time in the tent I was going to make some more boxy things to go on this.  But rain stopped play. I want to bolt on the (upside down) trailing arm brackets.  The plan is to join up the bit that is already made with the trailing arm brackets. I was going to do that tonight until I realised that I don't have anything to bolt the brackets on with because all that stuff is at the zinc platers. So as a fill in job I thought I might look at the studs where the rear silencer mounts under the boot floor. There are four of them along the left hand edge.  They are fixed to a couple of brackets which are spot welded to the boot floor. This one at the back.  Once that black thing is removed you can see that the front two studs are mounted to a much larger bracket which said black thing also bolts to. 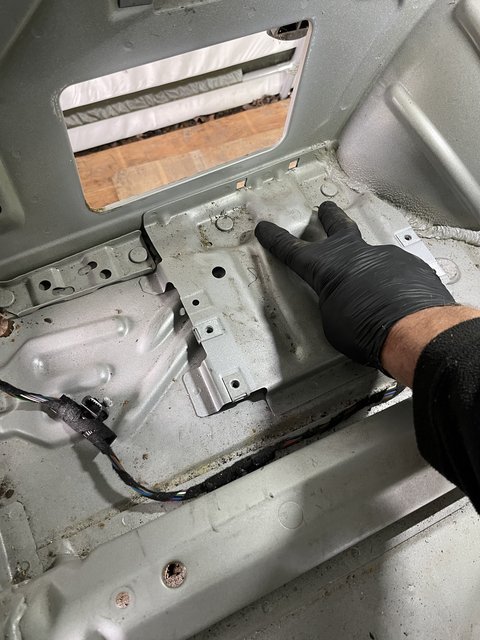 I did think about removing the brackets to fit the new studs on first, then weld them back in but there are far too many spot welds to contend with so I just ground off the heads of the studs in situ.  This was remarkably awkward in the limited space and was a power file and Dremel job. I had to be careful not to damage the surrounding bits. I could probably have saved one, if not two of the studs.  But as I have replacements already I'm just going to swap all four. whilst they were out of the way I could get at this flange which was a bit rusty.  It got a wire wheeling and some phosphoric acid for now, I'll look a bit closer later to see if it needs to be cut out and replaced. That was as far as I got tonight, two and a half hours to pull four studs out... Cheers. |
| |
|
|
teaboy
Posted a lot
   Make tea, not war.
Posts: 2,125
|
|
Jul 26, 2023 18:04:55 GMT
|
I was quite late home last night, not because I was working late but because I went to pick up a couple of bits my mate had had powder coated for me.  Those are the rear springs and a replacement push rod thing to replace my original which was cracked. Even if I hadn't been late I doubt I would have done much because it was tipping down. Still, it's more car stuff without me actually having to do any car stuff... Speaking of getting home, tonight this was waiting on the doorstep.  No idea what it is, it's not for me. I don't like having things left on my doorstep, particularly in the rainy season so this is on the back door, just above where the parcel was.  Do you think that I have made the instructions too complicated? Anyway, tonight is quiz night so I don't have too long. When I was pulling out the exhaust mounting studs the other day I noticed one of my favorite things, a grommet hole. It also had a bit of rust starting next to it which was hardly a surprise.  As I hate rusty grommet holes it has to be removed.  A little round bit stuck in with masking tape.  It was very awkward to get at because it is in the back corner and the shroud on the welding torch obscured my view. I tacked it in from the top then welded it from underneath.   It isn't totally fabulous but luckily it is in a position where it will never be seen. Right, I'm going to get into character. Cheers. |
| |
|
|
jamesd1972
Club Retro Rides Member
Posts: 2,921  Club RR Member Number: 40
|
|
Jul 26, 2023 19:01:34 GMT
|
|
Am I correct in the assumption that the big metal blocks are a home brew lifting kit ?
Should give some nice rake, take us all back to lifting shackles on Capris.
Nice progress.
James
|
| |
|
|
glenanderson
Club Retro Rides Member
Posts: 4,357
Club RR Member Number: 64
|
|
Jul 26, 2023 19:27:08 GMT
|
|
I think your instructions are too complicated.
I have a little sign that says “Please Ring The Bell”, with an arrow pointing to the doorbell button. Couriers still hammer on the glass panel in the front door though. One day someone will put their hand through the glass.
|
| |
My worst worry about dying is my wife selling my stuff for what I told her it cost...
|
|
|
|
|
Jul 26, 2023 21:43:21 GMT
|
|
Not being totally fabulous really is good enough. I think the internet is starting to ruin ownership of classic cars by thinking everything needs to be perfect. Loving your work.
|
| |
|
|
|
|
|
|
|
I think your instructions are too complicated. I have a little sign that says “Please Ring The Bell”, with an arrow pointing to the doorbell button. Couriers still hammer on the glass panel in the front door though. One day someone will put their hand through the glass. That's what the Courier SOP says to do !  We have one, nice chap very polite always speaks etc but always bangs the glass ! |
| |
Last Edit: Jul 27, 2023 8:32:34 GMT by westbay
|
|
|
|
|
|
|
I think your instructions are too complicated. I have a little sign that says “Please Ring The Bell”, with an arrow pointing to the doorbell button. Couriers still hammer on the glass panel in the front door though. One day someone will put their hand through the glass. That's what the Courier SOP says to do !  We have one, nice chap very polite always speaks etc but always bangs the glass ! That's still better than the Royal Mail KnockTm that is the majority of Parcelfarce training. Here's a brief description of what they're aiming for: imagine the sound a small and timid mouse would make if it gently tapped a thick piece of soft foam laid on a feather matress. Once you've learnt that, the next thing is to run back to your van in a manner that would win an interview to star in The Flash. |
| |
|
|
|
|
|
Jul 27, 2023 16:33:56 GMT
|
|
I'm with you on hating a rusty grommet hole! I once ignored the rust around a large grommet in the spare wheel well on my lexus LS400. A few years later, the grommet and the surrounding rusty area parted company with the rest of the car somewhere between Bournemouth and Folkestone. The hole it left was twice the size of the grommet! The fact the lexus had the common boot seal leak probably didn't help the cause.
|
| |
Opel Commodore A Coupe
Opel Rekord C Coupe
Opel Rekord C Saloon
Vauxhall Magnum Coupe V8 (Magnumania)
Mk1 Scirocco GLS
Mk1 Scirocco GLS (early chrome bumper)
Corrado G60
Mk1 Cortina 2 door Pre Airflow
Mk2 Escort 1300 2 Door
VW LT35 Tipper Truck
BMW 320D E91 Tourer
|
|
teaboy
Posted a lot
   Make tea, not war.
Posts: 2,125
|
|
|
|
It seems that the parcel people don't just save their 'special' treatment for me so I shouldn't feel singled out. There was a massive box of cat food on the doorstep tonight, blocking the cat flap as it happens... I haven't touched the car again for a few days. Not always because I couldn't be bothered but there was a little bit of that. I'm still waiting on the zinc platers which has halted my main focus for the moment. I felt that I really should do something tonight but I didn't want to open up a second front and overwhelm myself so I had a look at this.  That thing is the mounting jobbie for the carbon cannister which goes under the boot floor where any sensible car would have its spare wheel well. The main jobbie is in reasonable condition but there is that bracket on there which isn't. I wasn't sure what it should look like but luckily I managed to borrow one to copy.  First up, clean the flakes of rust off to find the spot welds. 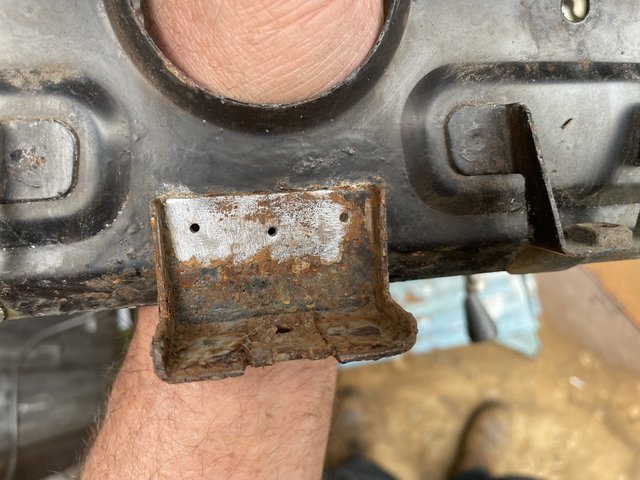 Then I drilled a pilot hole through them.  This gave me a target on the other side for the spot weld drill.  It was a bit rusty under the bracket.  I had a root through the scrap bin to find something to use, I came up with a bit of box section.  It is a bit thicker material than the original but should work ok. I chopped two sides off to give me the piece I need, making sure I didn't end up with the bit with the weld joint in it.  I had it clamped in the vice to fold the edges over and I needed heat to shrink the corner of the fold and, because it was so thick, I needed the heat to fold the edges too. I tried to do it with a Mapp gas torch which would work on normal 1mm stuff but it didn't work on this. The vice was also acting as a large heat sink too so I had to resort to the oxy acetylene. I didn't take any pictures of that process because I had a hammer in one hand and a welding flame in the other. Anyway, after a bit of fettling it looks like this.   It isn't welded on yet because I have treated it with phosphoric acid. That was enough for tonight. Cheers. |
| |
|
|
eurogranada
Europe
To tinker or not to tinker, that is the question...
Posts: 2,556
|
|
|
|
|
I continue to be impressed!
|
| |
|
|
teaboy
Posted a lot
   Make tea, not war.
Posts: 2,125
|
|
|
|
I continue to be impressed! Thanks Alex. Went out with the Doc and my youngest daughter last night so no car stuff. Tonight the Lovely Doctor is working late, so in theory I can just go and mess about in the tent to my heart's content but... The Doc expects me to be putting the freshly decorated (by her) bathroom back together. With this in mind, the first thing I did when I got home was to get some weld through primer on that brackety thing I did the other night.  Whilst that was drying I had a quick look at that bit under the car that I had treated with phosphoric acid.  I didn't like the look of it but I don't want to replace it unless I have to, so I sanded it back down and re-treated it.  I'll have to see how that goes. By this time the paint had dried so I got it clamped up.  Obviously I had to clean the paint where I was going to weld it.  I welded it up and started to clean it up before I remembered to get a picture.  Then I did clean it up.  Hopefully it will do the job.  It is a thick bit welded to a thinner bit but hopefully it has stuck.  I haven't decided if I am going to paint it or have it powder coated so I just stuck a bit of the usual spooge on it for now.  After that I fitted three mirrors of various types, a towel rail and a toilet roll holder all before the lovely Doctor got home. As long as she doesn't see this she won't know that I haven't been toiling away in the bathroom all evening. Cheers. |
| |
Last Edit: Aug 3, 2023 20:28:39 GMT by teaboy
|
|
|
|
|
|
|
|
It’s all smoke and mirrors Mr T.
|
| |
|
|
teaboy
Posted a lot
   Make tea, not war.
Posts: 2,125
|
|
|
|
It’s all smoke and mirrors Mr T. The smoke and mirrors was the easy bit... This weekend was a bit up and down. My old pal Keith came over on Saturday morning for breakfast at Ten Acres which was very nice. After that it was back to reality which for me was fitting a new sink in the bathroom. It ended up being a colossal pain in the behind for various reasons I don't wish to relive. The weather was very average too, so I probably wouldn't have got that much car stuff done even if I had the chance. Do you remember the old Fiesta that I fixed up for my daughter?  Well she went 'darn sarf' in it to see her sister and she had a lovely time up until the brakes failed on the way home. Luckily she had made it most of the way before it happened so we managed to recover the car back to base. I decided to fix that on Monday after work. We had brake fluid in the driver's side wheel well so I pulled the liner out to get at the pipes. When I removed it this dropped on my head.  Fantastic, I thought... I also took this out.  The bad bit was behind the arch liner so I can't really blame the MOT tester for not spotting it. Have you seen those contraptions that you can get for straightening brake pipe? I don't have one of those so I improvised.  Roll it on a big piece of wood using a smaller piece of wood, it did the trick. I was very pleased that Henry had put a joint in the pipe right there in the wheel well, it made the job so much easier because you can barely see the master cylinder.  I had to try not to look at the rusty patches... As I had a loop of coil spring sticking out of my head I thought I should drop the strut out to have a look.  I should have done that before I faffed about threading the brake pipe behind it. Anyway, the strut. 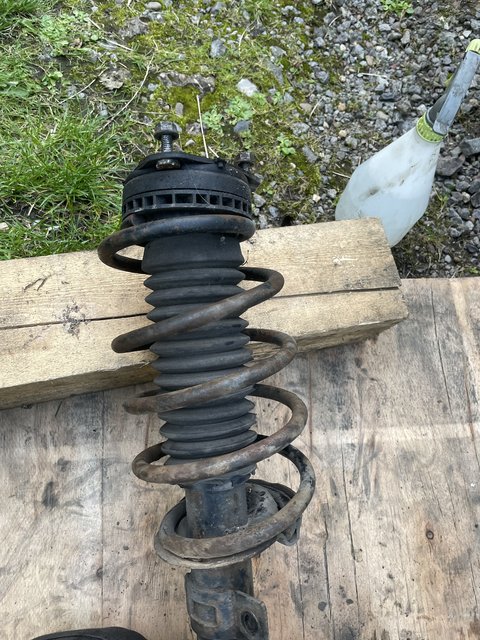 When I got it out, the spring wasn't broken. Who changes a spring and leaves part of the old one wedged in the wheel well FFS! Tonight I stuck the strut back on and decided that I really should look at the brake pipe on the other side, because that's what dads do. 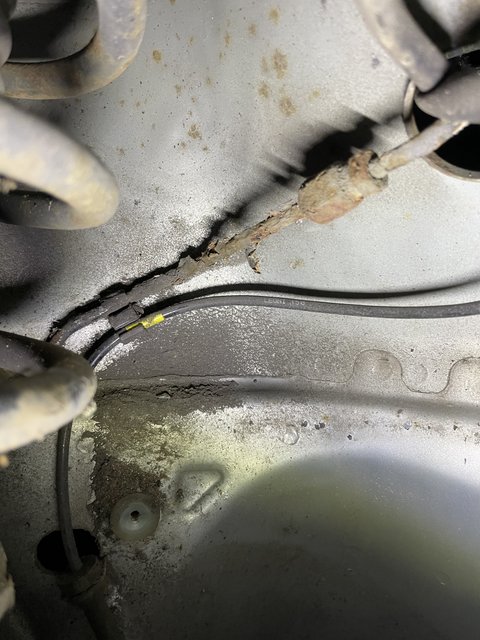 It isn't as bad as the other side but it isn't fabulous either, so I replaced it.  I haven't bled it up because the Doc is not here to assist. Anyway, that is all keeping me from the banger in the tent. The zinc platers have yet to come up with the goods so I have been looking at other little things that need doing like that carbon cannister bracket that I did last week. The next bit is the battery carrier. The 'feet' on it had rusted when the bottom of the battery box failed.  I can't just clean it up because it is very thin from the rust. It would be easy to make some new feet except for this stiffening rib in there.  These kind of reverse pressings are commonly used to stiffen up a fold but normally it is just a single groove pressed at 45% to the fold. This one is a bit more complicated to reproduce. I have been pondering the best way to do it. I could possibly shape up a tool to hammer it over, maybe... Then, in a moment of clarity, the answer came to me.  I bought a new one. I would have spent hours fixing it then it would need powder coating, it just wasn't worth it. Cheers. |
| |
Last Edit: Aug 8, 2023 21:27:21 GMT by teaboy
|
|
glenanderson
Club Retro Rides Member
Posts: 4,357
Club RR Member Number: 64
|
|
|
|
|
While I can easily spend an inordinate amount of time and effort in repairing something that most people would simply throw away, sometimes the answer really is to throw something away and buy a new one. 👍👍
|
| |
My worst worry about dying is my wife selling my stuff for what I told her it cost...
|
|
teaboy
Posted a lot
   Make tea, not war.
Posts: 2,125
|
|
Aug 10, 2023 21:27:45 GMT
|
While I can easily spend an inordinate amount of time and effort in repairing something that most people would simply throw away, sometimes the answer really is to throw something away and buy a new one. 👍👍 It is not always easy to throw something away when you know you can fix it but I am starting to factor in the time and effort required in to the equation. Last night was quiz night but, for the third time in a row, some of my team were unable to make it and the rest of them pulled out in sympathy. At this rate we will lose our seats in the pub. To be honest, I was just about done in after a grueler of a day at work so I wasn't that bothered. I did get the Doc to help me bleed the brakes on the nipper's car and took it for a spin to make sure it was ok. 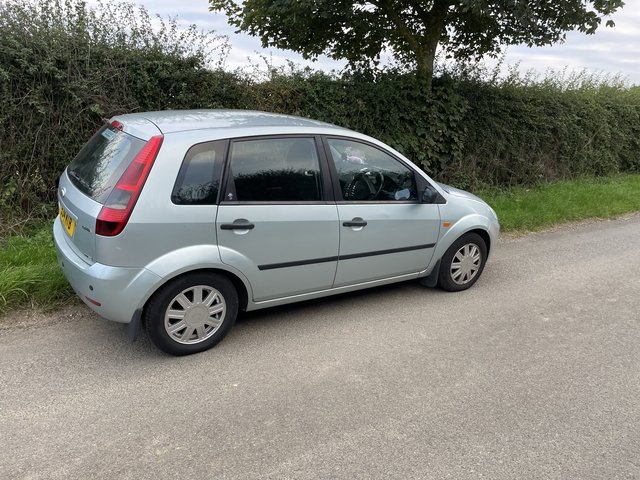 Luckily, it was so that's one job out of the way. Today I got a call from the zinc platers to say my stuff was ready, yay! But the platers are in Hull and I was in Rotherham at the time, boo! They are closed tomorrow so I won't have it for the weekend either. With this in mind, I thought I should have a look at something I might be able to work on in the meantime. The driver's side rear wheel arch. This is the trailing edge of it. 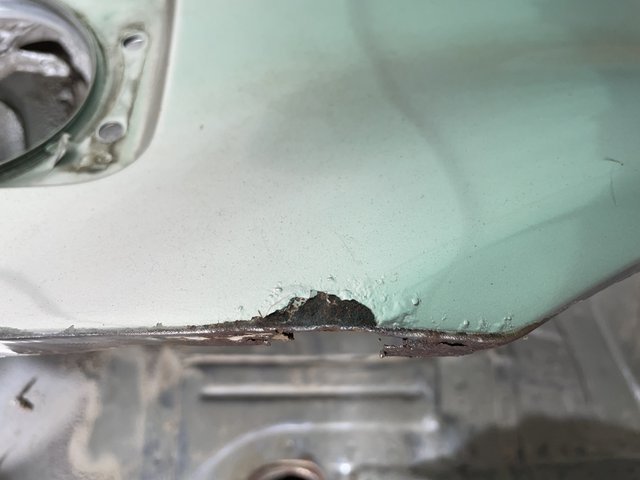 There was nothing there when I bought the car but after about two months a really small bubble appeared in the paint. This is what the underside looks like.  Not really ideal. I picked at the paint a bit.  I didn't want to look at that any more so I sanded it back and covered it in spooge for now.  If the outside has rust, the inner arch must have some too.  Oh yes, it certainly does. You can actually get the panel to replace this from BMW but it comes attached to a complete inner quarter panel and costs hundreds and hundreds of pounds. To me it just seems absurd to spend that much money to throw 95% of the part away but plenty of people have done just that. I was fully prepared to set to and make a new bit for there but before I got to that point Lance at LBL Panels started making them. 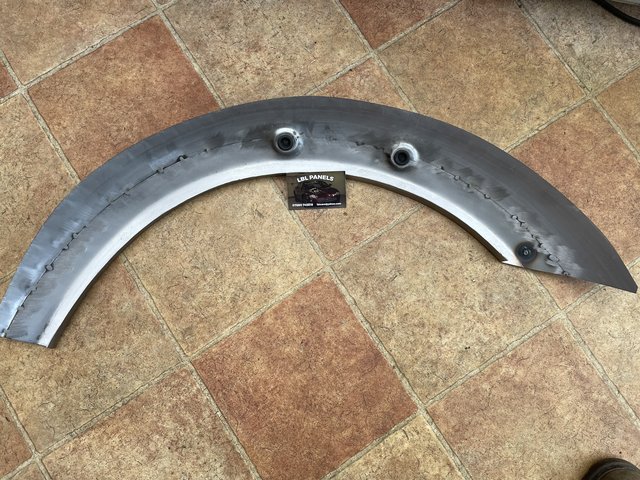 These are a part completed panel but they do get you into the ballpark. I offered it up to see what it was like. 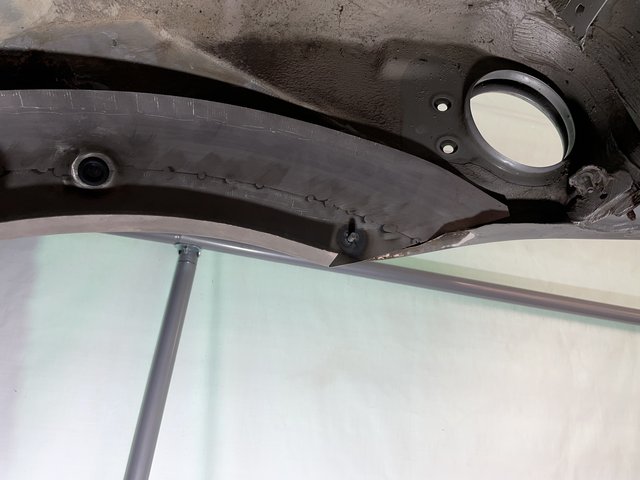 I couldn't get it in place because the front part of it is oversized and hits the wheel well.  I don't need all of that at the front so I can cut it down and then do any final shaping. I was lacking in energy at this point so I didn't want to start cutting tonight in case I made a balls of it. It can wait until next time. The current plan is to get this all prepped and cut in then to tackle the outer bit before I weld the inner piece in. This will give me access to the inside of the outer skin for fettling the repair. I can also sort out the rust which is just starting to show on the inner side of the outer wing, which you might be able to see through this massive hole.  Hopefully I can make a start on it tomorrow but I have a very big job on in Bradford tomorrow so we will have to see if I have any enthusiasm left after that. Cheers. |
| |
|
|


