teaboy
Posted a lot
   Make tea, not war.
Posts: 2,126
|
|
May 29, 2023 19:26:53 GMT
|
After we went on holiday by mistake I had to make a start on the pergola that the Doc wants for her new patio area. 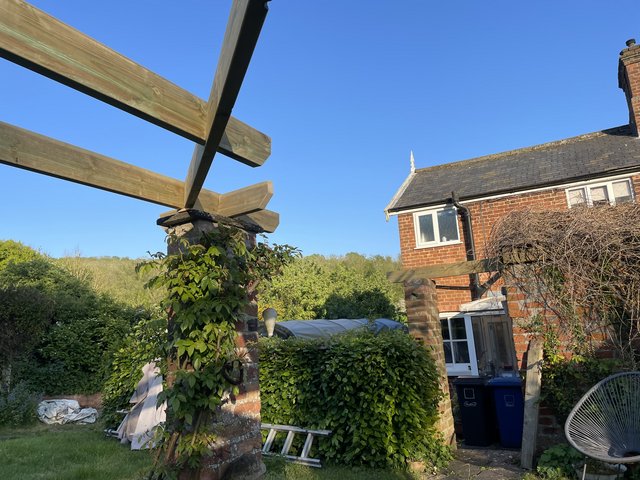 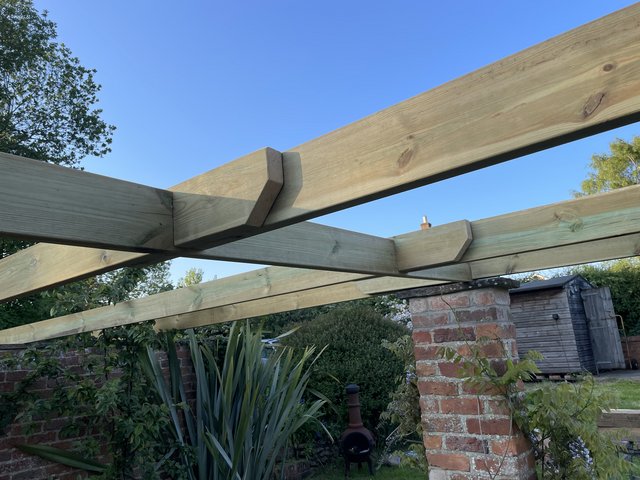 This made the Lovely Doctor happy. Happy enough for her to take me out to our emergency backup cafe for a fry up and lots of tea.  She has also taken the bull by the horns and hired a man to lay the patio slab things because my back is just not up to it. In fact, it is not just my back at present. I have been feeling pretty rubbish in general and totally lacking in energy. This has had an impact upon my tent work. I decided to at least try to do something that was not too strenuous so I decided to clean some stuff up to get a batch of bits ready to send to the zinc platers. The rear silencer is about half a tonne and is hung from three rubber mounts. These are they. 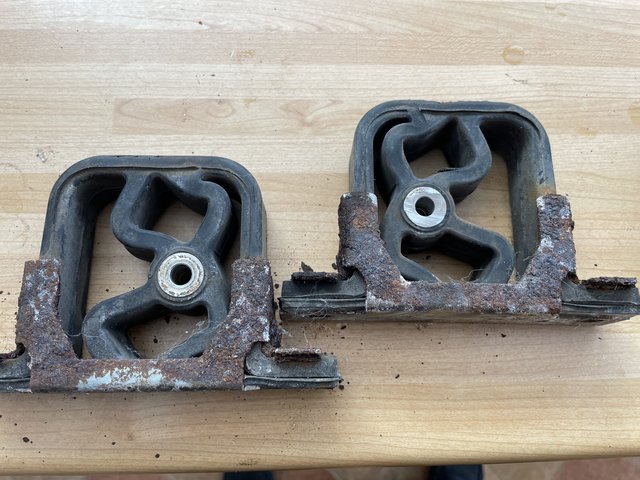 I bought a new set of rubbers, they are about fifty quid each which is plenty for an exhaust rubber but the scabby steel brackety thing that they are stuck into are separate parts which are also about fifty quid each. I pulled the metal bits off but they didn't all survive. 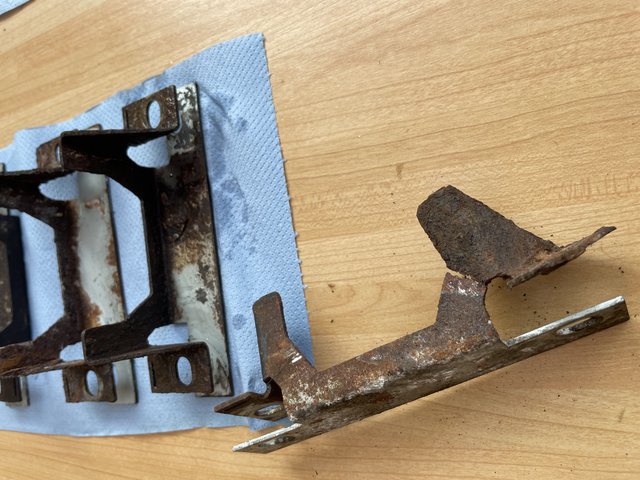 luckily a pal of mine had given me some of his spare ones so I managed to find enough solid ones to make a set. I bead blasted them along with some rear axle bolts that he also gave me. 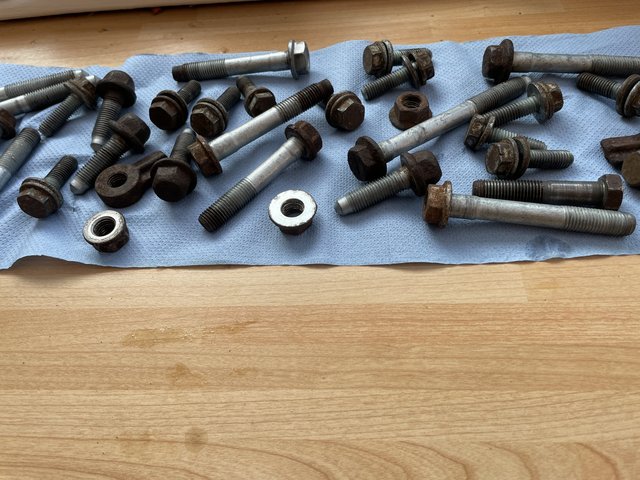 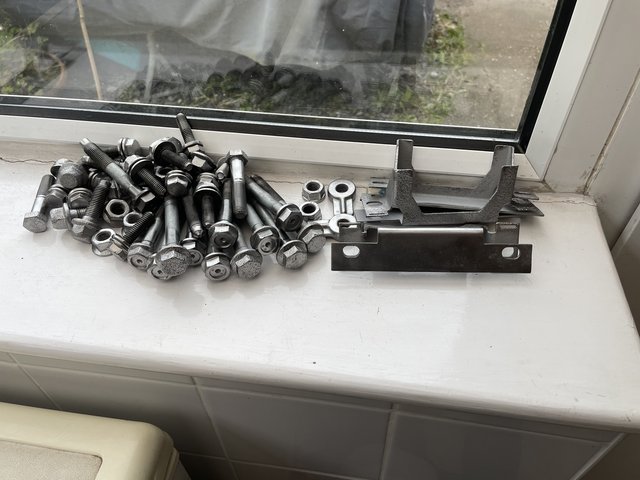 The axle bolts are going to be used for something soon-ish. I know that looks like a pathetic amount of work but I actually spent seven hours of my already depleted life doing that. Anyway, that's all boring stuff so today when I eventually managed to get my aching self moving I decided it was time for this. 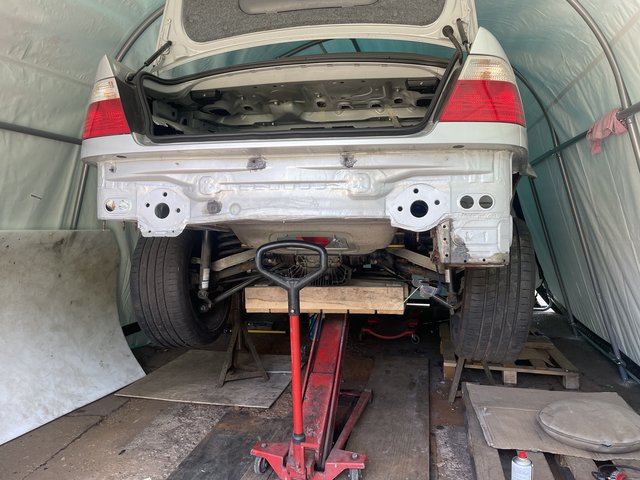 I was going to make some kind of cradle which would slot into the top of the jack instead of the saddle but I really didn't feel like it so I strapped an upside down pallet on there instead. 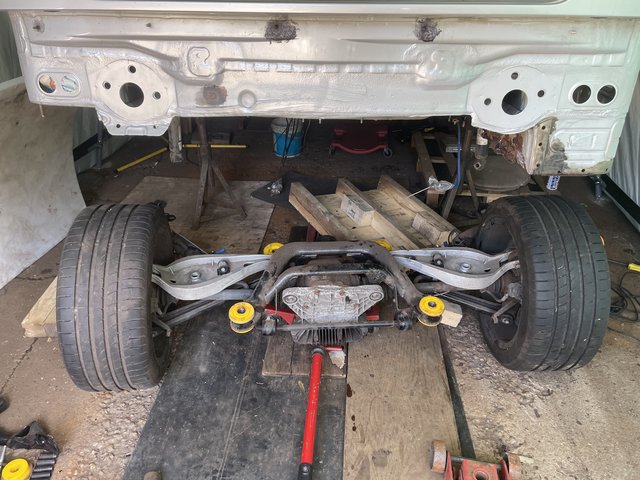 It sort of worked but it was a bit precarious and it became a total faff and I ended up with three trolley jacks on the job. Obviously I didn't photograph this because it was a bit of a dodgy procedure and I just wanted to get it on the deck. 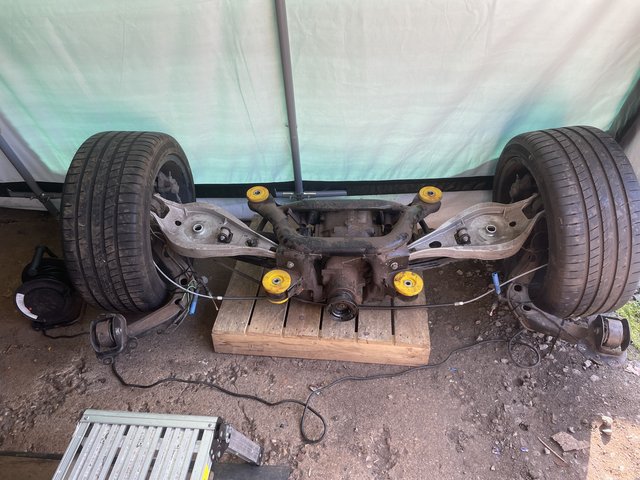 Now I can have a quick look at what we've got. This is the axle carrier panel. 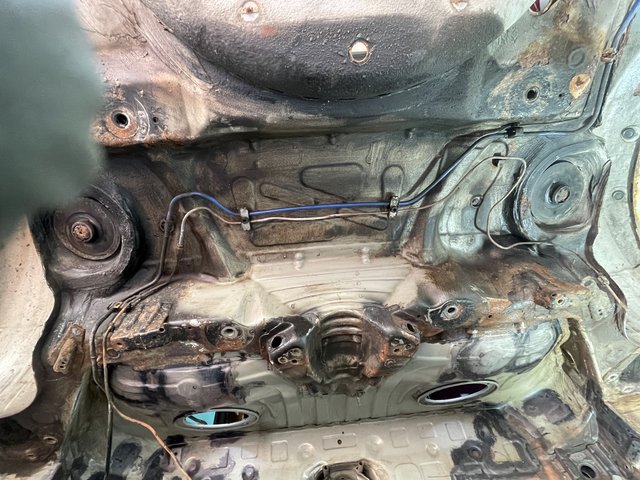 It is as scabby as you like and I will be pleased to be rid of it. This is a spring perch, it had been painted but painting over rust is not a fabulous idea. 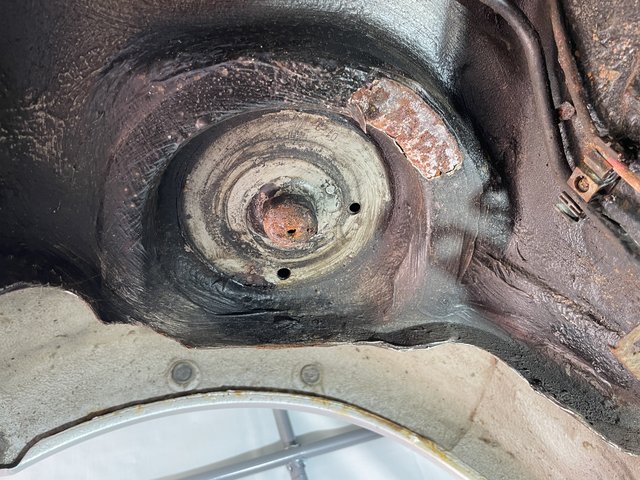 This is the passenger side rear wheel arch, it is not too bad. 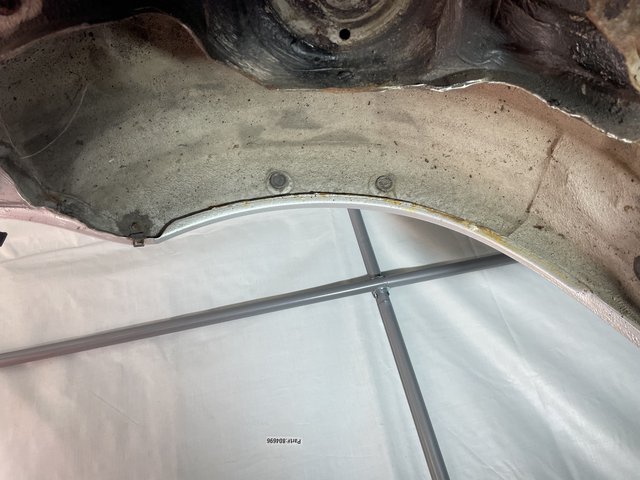 The driver side, on the other hand, looks a little bit the worse for wear. 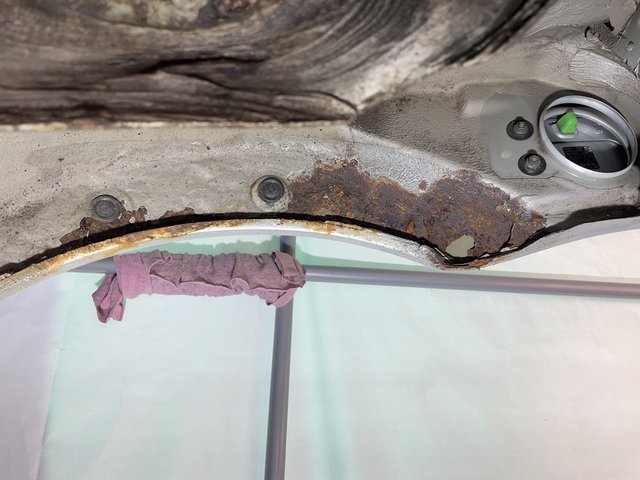 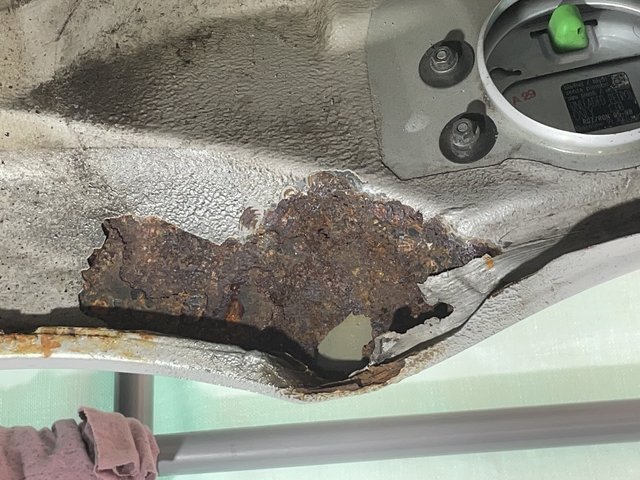 Well that's pretty bad... This part is available from BMW but only if you buy the complete inner rear quarter panel at vast expense and then throw 95% of it away. There is absolutely no way I would do that, I was psyching myself up to make one but then I found out about a chap called Lance at LBL panels who makes repair panels. 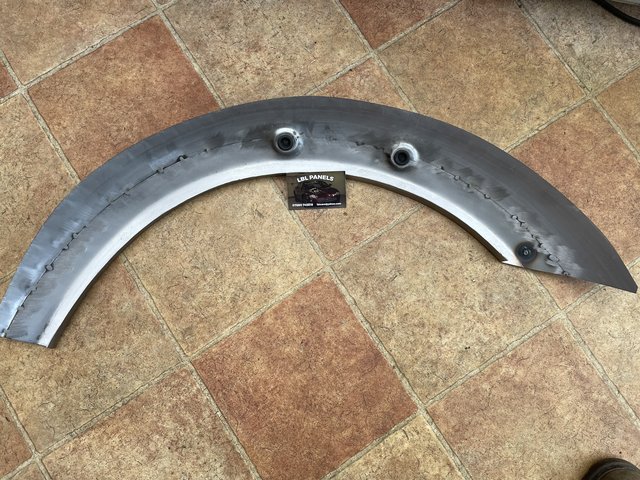 Hopefully it will cover up the old mess. 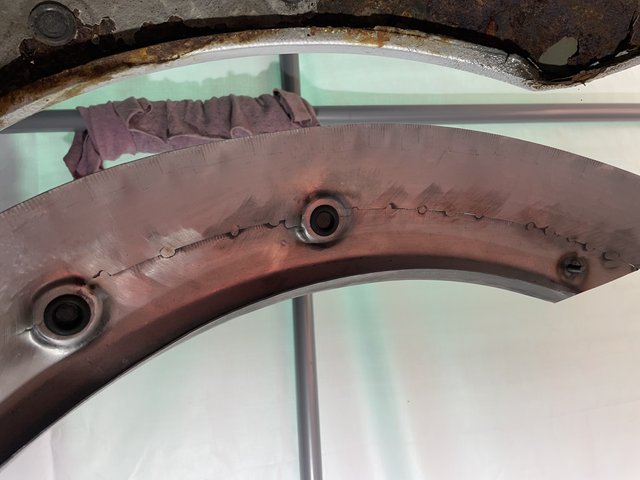 Next job is to start cleaning up around the axle carrier panel to find all the spot welds. Cheers. |
| |
|
|
|
|
teaboy
Posted a lot
   Make tea, not war.
Posts: 2,126
|
|
May 30, 2023 20:20:33 GMT
|
Last time said that I was going to start cleaning up around the edges of the axle carrier panel to locate the spot welds. I started round the spare wheel well* underneath but the old brake and fuel pipes which I haven't removed yet kept getting in the way so I moved on to the driver side rear arch area. * It isn't really a spare wheel well just the front half of one, the back half of it is missing because the rear silencer takes up that space. There are spot welds around the bottom edge so I started at the back and worked around to the front and I came to this which was totally concealed by original underbody stuff. 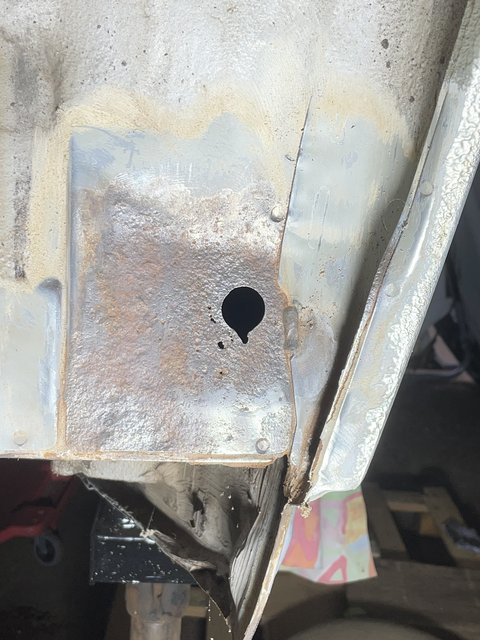 Excellent, I was starting to think that there wasn't that much rust left to deal with but luckily I now have this bit to go at... When I was under there the area where the rear shocker mounts at the top had been painted black which from past experience suggests that there will be rust underneath it. There was but it wasn't too serious so it cleaned up ok. 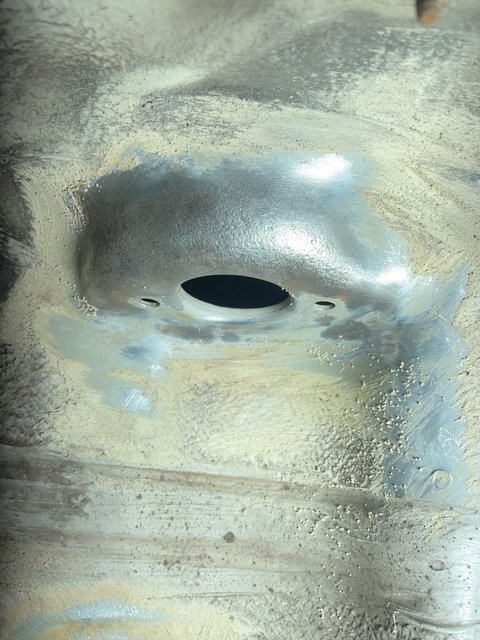 As I was under the rear arch curiosity forced me to look at the bubbling bit on the underside of the back end of the arch lip. This car was repainted about a decade ago by BMW under the ten year body warranty thing. As soon as the wire wheely thing hit it I could smell the unmistakable whiff of filler dust. 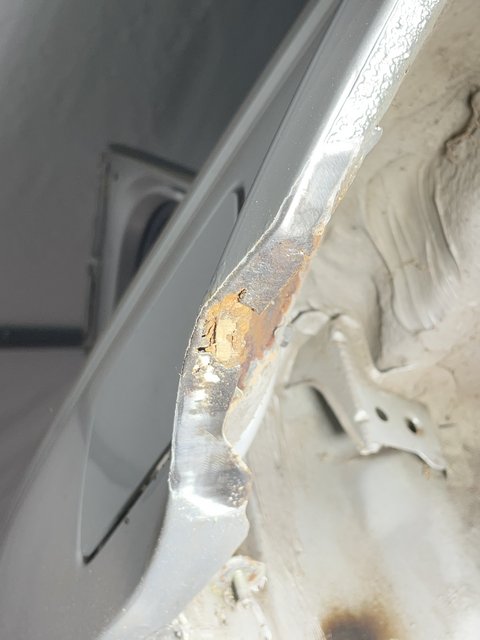 Now, I don't know if it has been painted since, but bogging up rusty bits is pretty poor work. When I replaced the number plates a while ago I noticed that they had painted over the adhesive tape on the boot lid so whomever did the work was just lazy. Anyway, as I was on that part of the arch I kept going a bit further round.  That looks excellent, doesn't it... Cheers. |
| |
|
|
bstardchild
Club Retro Rides Member
Posts: 14,975
Club RR Member Number: 71
|
|
May 30, 2023 21:18:38 GMT
|
That looks excellent, doesn't it... No - not really  Needy fuckers these BMW's |
| |
|
|
eurogranada
Europe
To tinker or not to tinker, that is the question...
Posts: 2,556
|
|
|
|
|
The good news is there will be no shortage of updates for your dedicated followers!
You've gone this far, what's a little more, right? Good luck and hopefully the end is in sight. I keep being amazed at your fabrication skills.
|
| |
|
|
teaboy
Posted a lot
   Make tea, not war.
Posts: 2,126
|
|
|
|
Last night was quiz night, we performed very poorly indeed. I did win second prize in the raffle though, the prize for which was a family bag of Quality Street. Just because it is a family bag doesn't mean that I'm about to share them with mine or anyone else's family... Tonight I had a couple of hours on the least enjoyable part of the job, wire wheeling the old textured underbody coating off. It takes quite a bit of doing to get it off, which is a good thing really because when it comes off easily it means there is a load of rust underneath it. After two hours all this stuff on the floor... 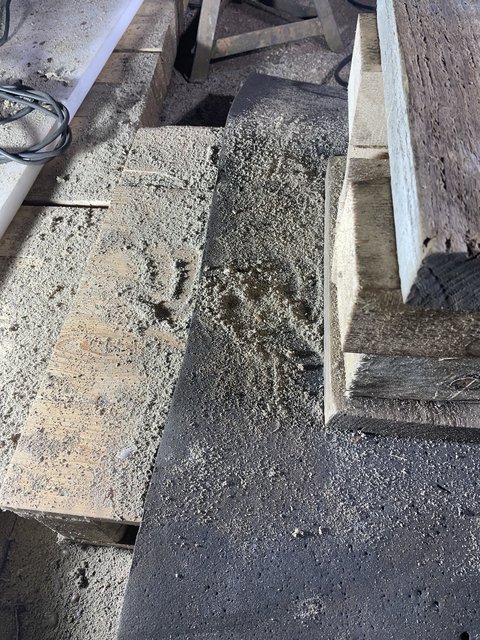 Was also all over me. 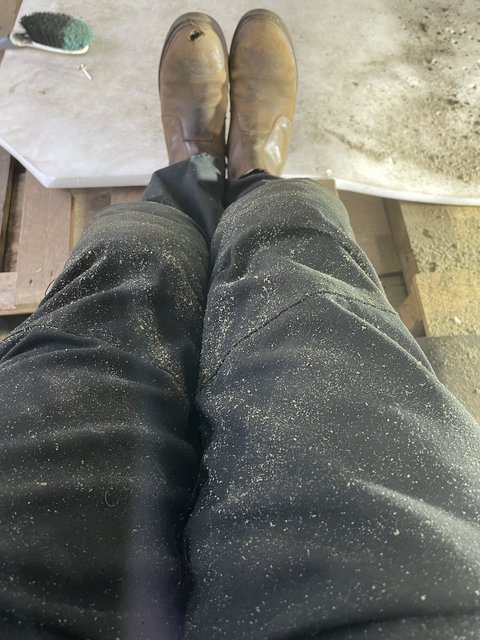 I did some of the underside but when my arms got tired I switched to the wheel well because I didn't fancy dropping a wire wheel doing 15,000 rpm in my face. This is what the wheel well is looking like. 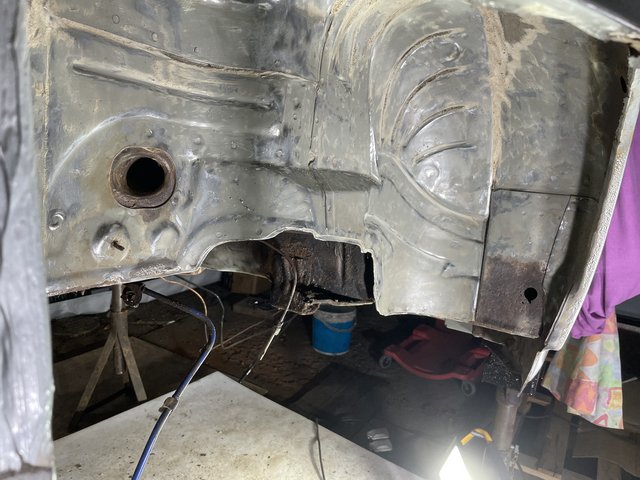 It isn't anywhere near done yet but my fingers had gone weird from the vibrations by then. That rusty black hole thing in there is a tube where the fuel filler pipe goes but luckily that piece comes with the new axle carrier panel that I have got. I didn't take any pictures of what I did underneath because I couldn't be bothered to crawl back under in all that horrible dusty stuff to take any. Probably more of the same tomorrow night, unless I can think of an excuse not to do it... Cheers. |
| |
Last Edit: Jun 1, 2023 21:57:24 GMT by teaboy
|
|
jamesd1972
Club Retro Rides Member
Posts: 2,921  Club RR Member Number: 40
Member is Online
|
|
|
|
|
Watch the toffee’s, pretty sure they are sponsored by dentists for replacement fillings.
Have to mention that your avoidance of anything Stuttgart related is a true inspiration to all those procrastinators out there !
Onwards
James
|
| |
|
|
jmsheahan
Club Retro Rides Member
Posts: 689
Club RR Member Number: 121
|
|
|
|
|
Relatable with the sealer removal. Amazing how one or two pictures sum up hours of miserable work huh. It'll be worth it though.
Looking great, keep the updates coming!
|
| |
|
|
|
|
|
|
|
a true inspiration to all those procrastinators out there ! Onwards James He is a true master of avoidance. |
| |
|
|
teaboy
Posted a lot
   Make tea, not war.
Posts: 2,126
|
|
|
|
He is a true master of avoidance. That is my speciality. I have had a few days where I have been otherwise engaged so not much has happened in the tent. When anything does happen it is totally boring grinding off underbody sealer anyway. I had a couple of hours tonight working on getting vibration white finger. I'm going round the edges of the axle carrier panel and beyond when I get carried away. 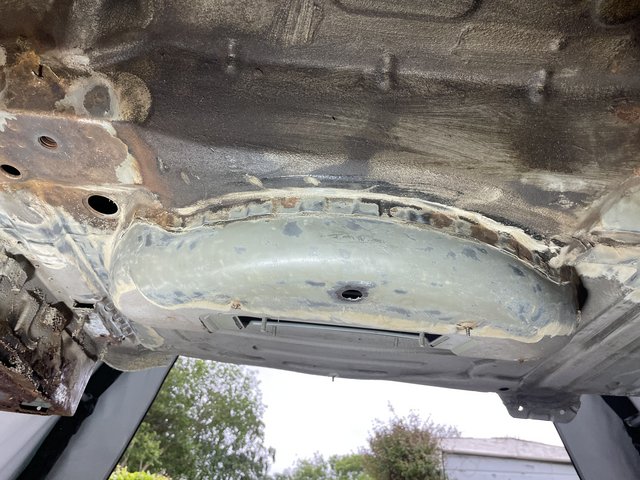 I also started cleaning around where the battery box is joined on. I have drilled out some of the spot welds on it too. 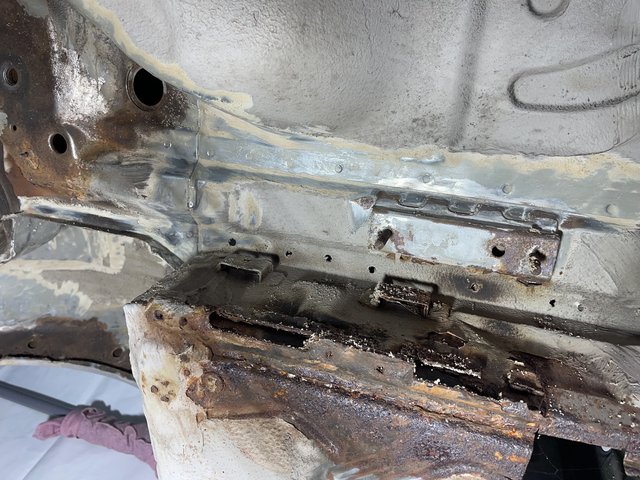 It looks like the front end of the battery box where it extends into the boot floor is lapped onto the back end of the axle carrier panel. 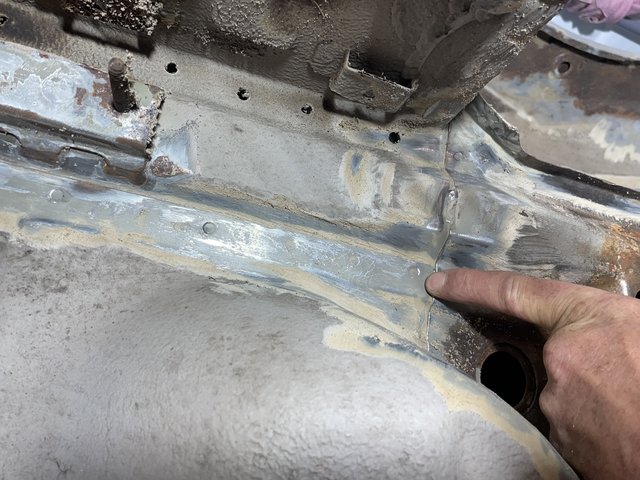 That scabby bit under my hand is the axle carrier and the spot weld I'm pointing to is the inner edge of where the battery box joins the floor. I think I will be tackling the battery box and the axle carrier panel replacement at the same time. I said it was all boring stuff at the moment... Cheers. |
| |
|
|
|
|
|
|
|
|
Serious question: circa how many spot welds holding the assembly (what you’ll need to drill out)? Is it only spot welds you’ll need to deal with or did the blokes at the factory also run any MIG beads?
We’re all rooting for you by the way.
John
|
| |
|
|
Nath
Part of things
  Memory is blank
Posts: 311 
|
|
|
|
I'm starting from the very start here teaboy so please excuse any new likes on the earlier posts that you've made only up to page 3 and impressed already. You've got big cahonas to chop anything off a car like this never mind a sunroof. Well, I am looking forward to the next 72 pages that i need to read and cannot wait for what awaits me! |
| |
Loves anything Retro - Hates Toyotas.
|
|
misteralz
Posted a lot
   I may drive a Volkswagen, but I'm scene tax exempt!
Posts: 2,497
|
|
|
|
|
The completed oil tank is genuinely magical and well worth the wait.
|
| |
|
|
teaboy
Posted a lot
   Make tea, not war.
Posts: 2,126
|
|
|
|
I'm starting from the very start here teaboy only up to page 3 and impressed already. Thanks dude. When I was a young lad I used to be impressed by page three when it used to have pictures of ladies who had forgotten to put their vests on... The completed oil tank is genuinely magical and well worth the wait. The completed oil tank is more mythical than magical... Anyway, I did some more wire wheely cleaning stuff this evening, it was just as unexciting as yesterday. It did start to get a bit chilly in the tent which wasn't very nice but I thought that I should push on for a bit. I kept going until one of the bristles from the wire wheely thing flew off and stuck in my face, then I packed up and went in for tea. I didn't take any pictures because there isn't anything to take pictures of at this stage. I especially didn't want to take any pictures of bits of wire stuck in my face because you probably wouldn't even see it. This is because I haven't bothered to shave for days because the Lovely Doctor is away on a secret mission in Madagascar so I can slob around to my heart's content. To try to make up for it I will show you these things instead. 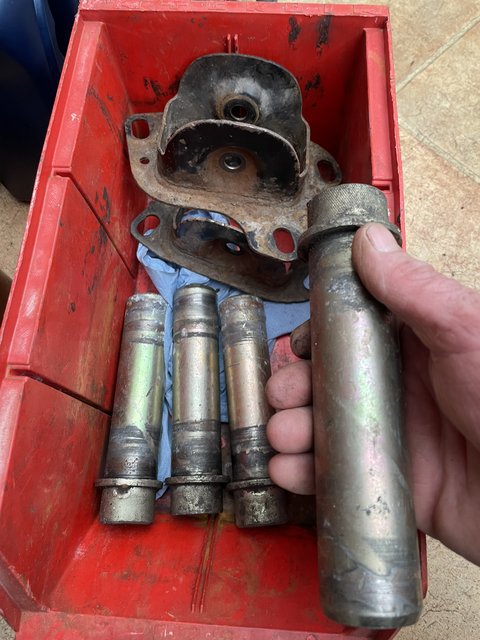 These are going to be absolutely critical to the repairs I have to do but I need to do some things with them first. It's all classified at the moment because I don't want to look like a right tit if it doesn't work so pretend I never mentioned it, ok? Cheers. |
| |
Last Edit: Jun 7, 2023 21:58:44 GMT by teaboy
|
|
427za
Part of things
 
Posts: 32
|
|
|
|
|
Mounting bracket and pipe work for an oil tank?
No?
Damn!
|
| |
|
|
|
|
|
|
|
Distinct lack of confectionery of late ... Nice work on the floor (underside?) though.  |
| |
Last Edit: Jun 8, 2023 11:24:17 GMT by westbay
|
|
teaboy
Posted a lot
   Make tea, not war.
Posts: 2,126
|
|
|
|
Distinct lack of confectionery of late ... Yes, I'm upset about that too.  I had a very tiring day at work today so I didn't have the energy to do any overhead grinding shenanigans. I decided that I would remove the old battery box instead. I had already drilled out the spot welds on the outside edge so I split that away. 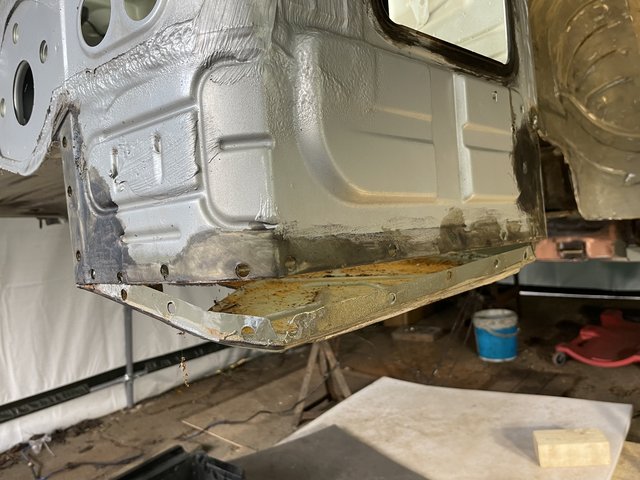 I drilled out the spots inside the wheel well which I couldn't get at before I put it on axle stands. This just left the ones inside the boot, easy peasy... Well, the panel goes under this box section. 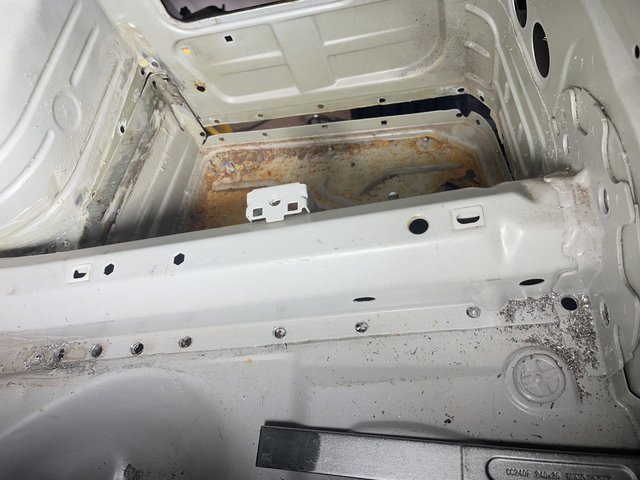 It is sandwiched between that box section and the boot floor, you can just about see it here. 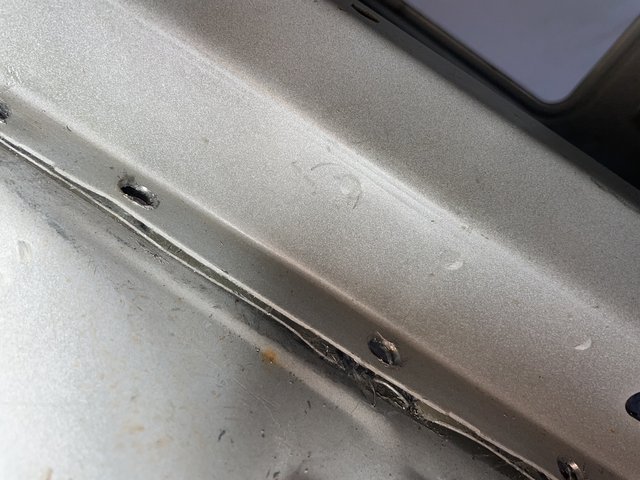 I tried to just drill out the top two layers with the spot weld drill but I still couldn't separate them so I ended up going right through with a 10mm drill (the spot drill is 8mm). Some of them are still not coming apart, I think I might go at the holes with a die grinder next time. I didn't want to go too mad with the chisel and end up making a mess of the boot floor. I probably could have been a bit more brutal with it and just tidied the panel up afterwards but I am trying to avoid that, if possible. I did dig the new battery box out of the shed to compare with the old one to make sure I was drilling out the correct welds. 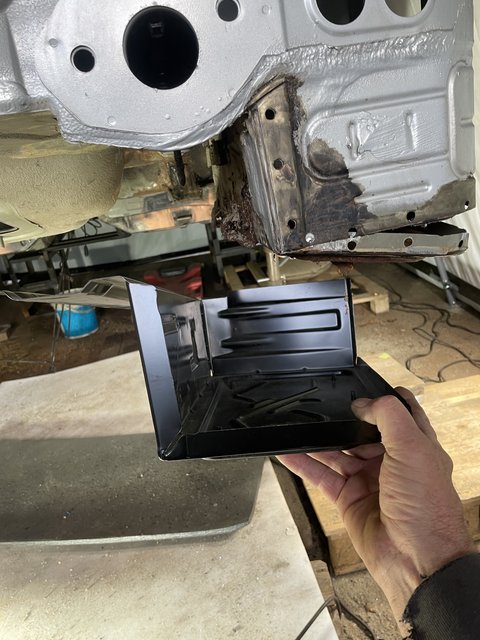 Oh, on the way home I dropped these bits off.  My mate Nige is going to do some lathe work on the round bits for me. In other news, my old pal Shultz got me this. 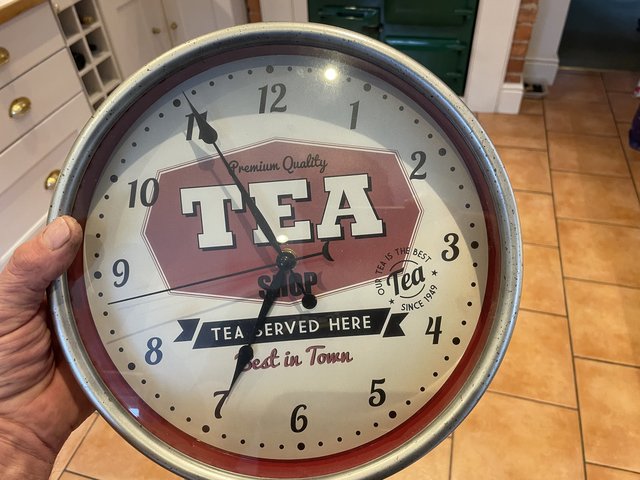 He is well aware of my reputation... Cheers. |
| |
|
|
teaboy
Posted a lot
   Make tea, not war.
Posts: 2,126
|
|
|
|
I have to admit that I did make a meal of it but the battery box is finally out. 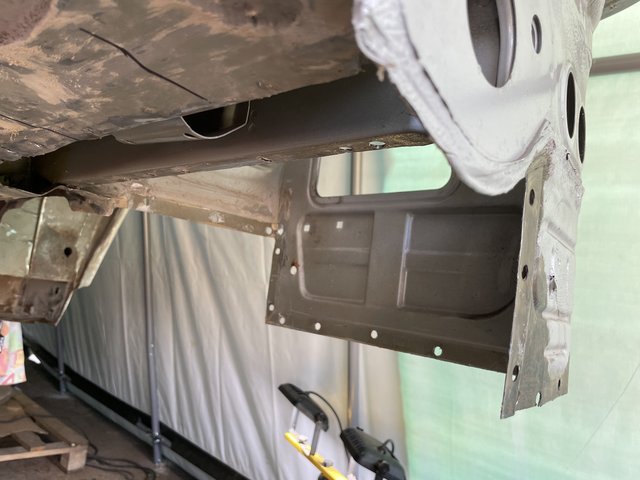 It is a little bit the worse for wear. 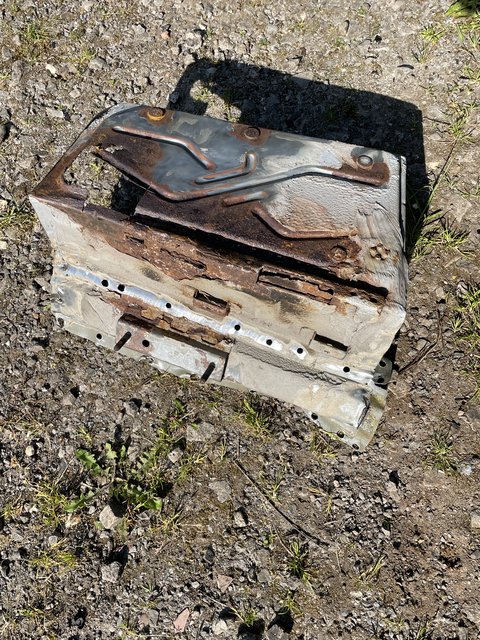 It is very bad and seems to have turned into some kind of doily. 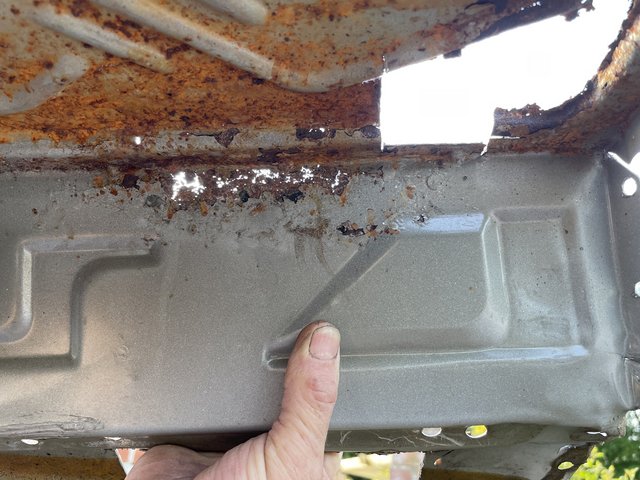 The new box didn't come with an exhaust silencer mount fitted to it. This bit with the two studs on it. 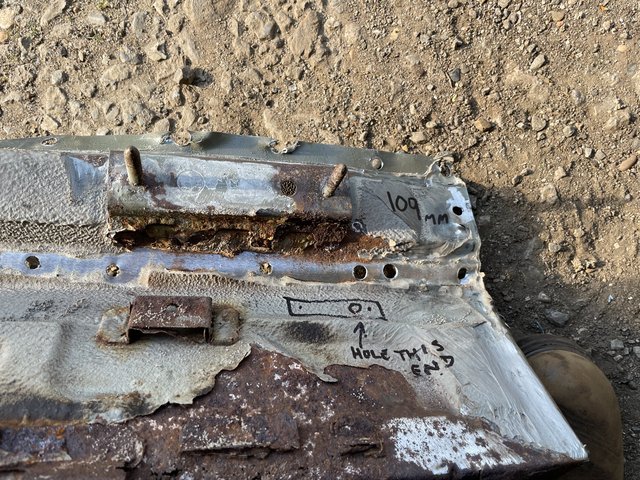 I have chopped it off to have a look. 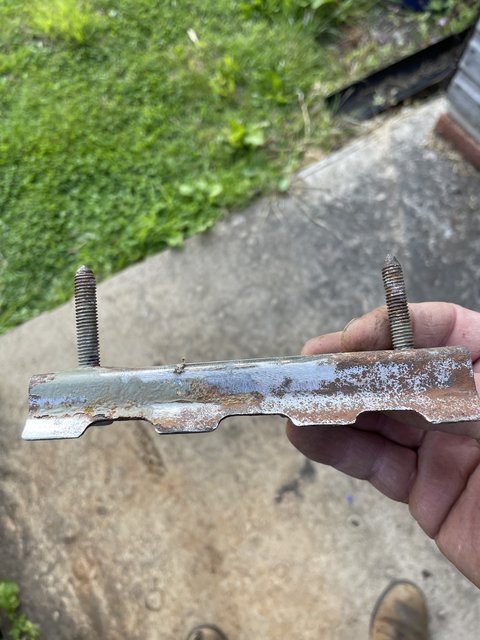 It is a bit grotty. 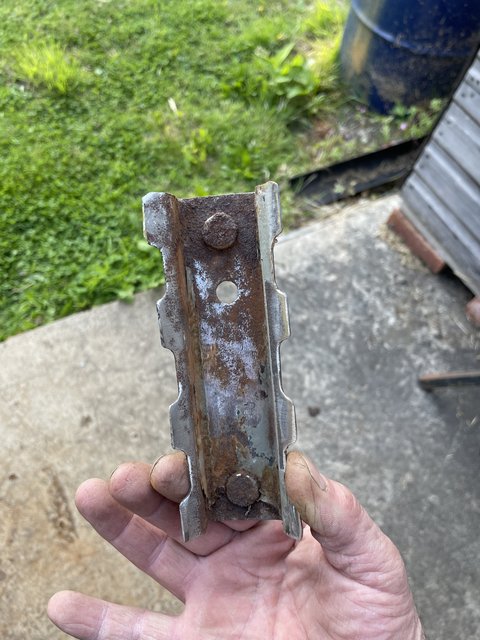 It is very solid though. I don't know what I am going to do with it yet. I would need to blast it, replace the studs because they were damaged from when I had to cut off the exhaust mounts as the nuts were so rusty. I would also want to get it zinc plated to give it a bit more protection before it gets welded on here. 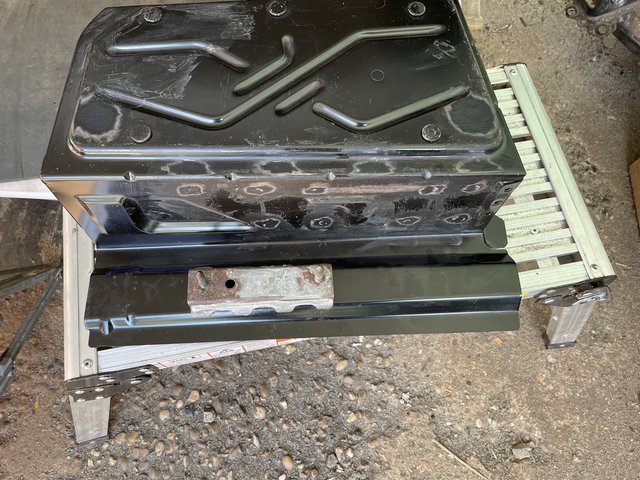 This is going to be a bit of a faff. I could just buy a new one and weld that on instead, I think I will price it up and see if it is worth the effort to repair or not. Anyway, the Doc has got home from Madagascar so I might take her out for a meal. I think she prefers Burger King to McDonalds... Cheers. |
| |
|
|
bstardchild
Club Retro Rides Member
Posts: 14,975
Club RR Member Number: 71
|
|
|
|
Just went back quite a few pages to remind myself (Pics and link are dead but......) To cut a very long and boring story short I kept looking at this. After quite a search, as there are some rough old dogs about, I ended up with this. Well, it is still German... I just wonder how bad the dogs would have been!!!!! |
| |
|
|
teaboy
Posted a lot
   Make tea, not war.
Posts: 2,126
|
|
Jun 10, 2023 16:22:02 GMT
|
Just went back quite a few pages to remind myself (Pics and link are dead but......) I had a quick look last night and, as you say, there were no pics. When I looked now, they seem to be back. Can you see them now? After quite a search, as there are some rough old dogs about, I ended up with this. I just wonder how bad the dogs would have been!!!!! This is a valid point that you make. I looked at some and the rust was rife, sills jack points and floors hanging off, rear arches falling apart. Mine whilst it is a total dog is not anywhere near as bad as some were. What mine was very good at was hiding its problems. Lots of the underside is covered in plastic for a start and the textured underbody sealant did a fantastic job of covering up most of the grot. The only bits that were visible were a little bit around the two grommets in the rear floor which looked like a bit of a clean up and paint would sort. Perhaps I was a little bit optimistic in my assessment of it. Glass half full, floor half solid... Anyway, as my mother would say, 'you've made your bed...'. I haven't done a thing on it today, been out doing stuff with the Lovely Doctor, she is only home for a few days before she flies off on another secret mission. We did get the chance to call at the creamy bun cake shop on the way so I'm having a creamy donut whilst I type this. 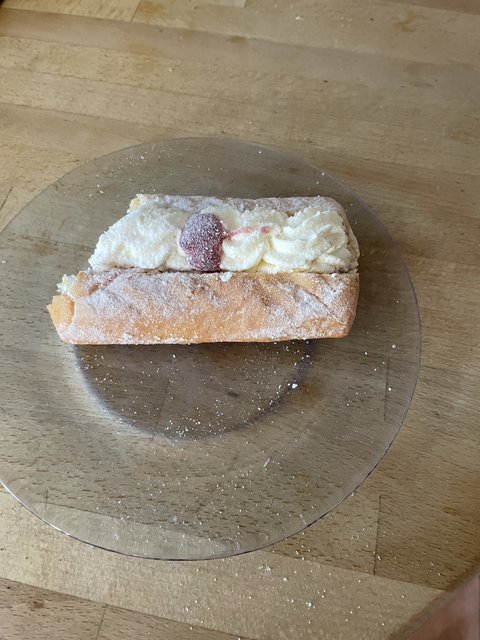 I couldn't resist having a bite before I took a picture of it. Cheers. |
| |
|
|
braaap
Posted a lot
  
Posts: 2,750
|
|
Jun 10, 2023 16:28:04 GMT
|
Perhaps I was a little bit optimistic in my assessment of it. Perhaps. A little bit. A-ha. LMAO |
| |
|
|


