BiAS
Club Retro Rides Member
 Insert witty comment here
Posts: 2,231
Club RR Member Number: 147
|
1991 Bike carbed CG13 K10 MicraBiAS
@cheeqi
Club Retro Rides Member 147
|
Oct 14, 2009 23:42:28 GMT
|
onefiftyay - I certainly hope so, I'd like this one to last a while dave - cheers dude, can't wait to see if it runs PrOgReSs!!! Last night I cracked into the rear engine mount as soon as I got back from work, K10 rear section spliced into a chunk of the K11 crossmember...... 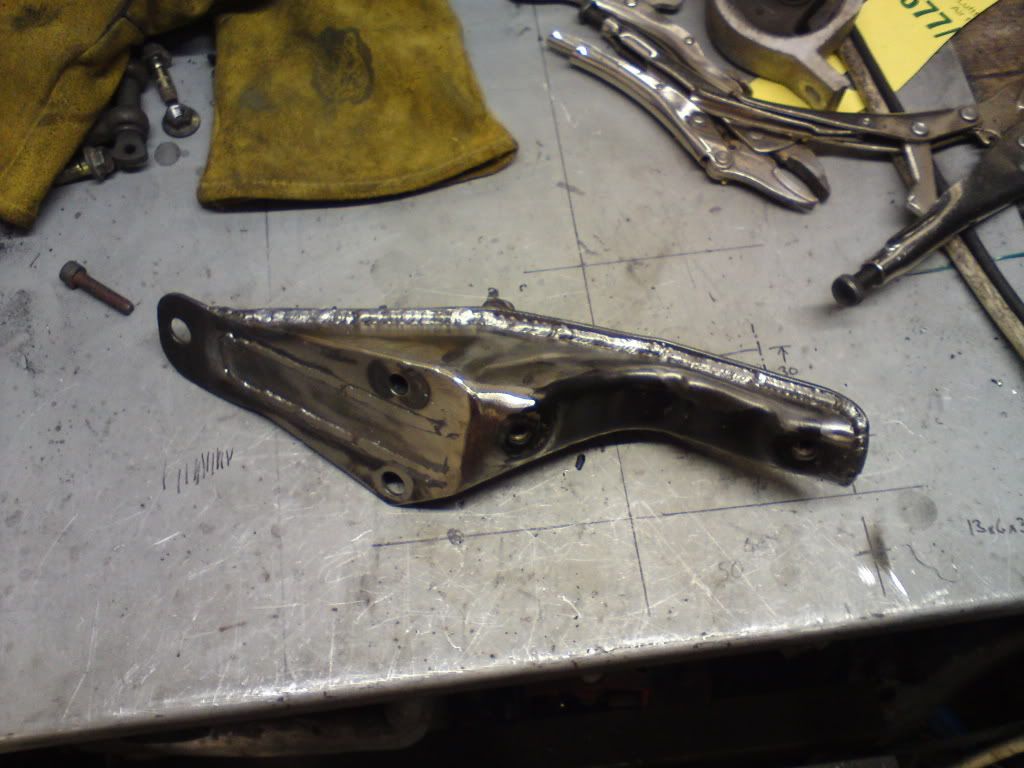 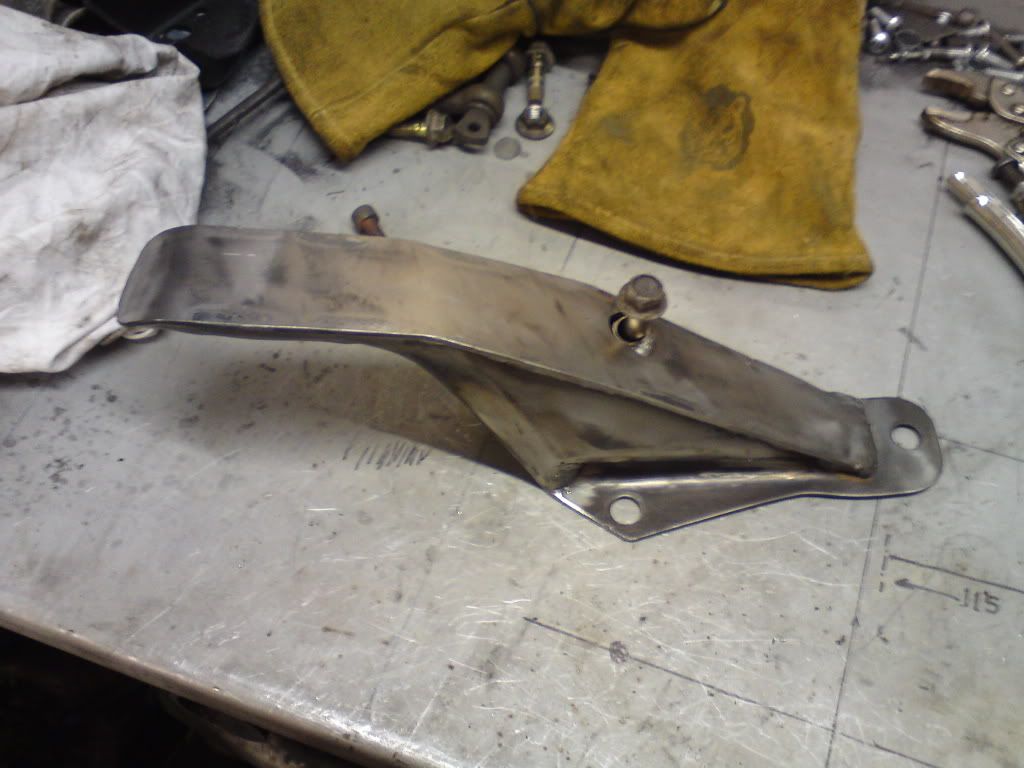 ........and fitted  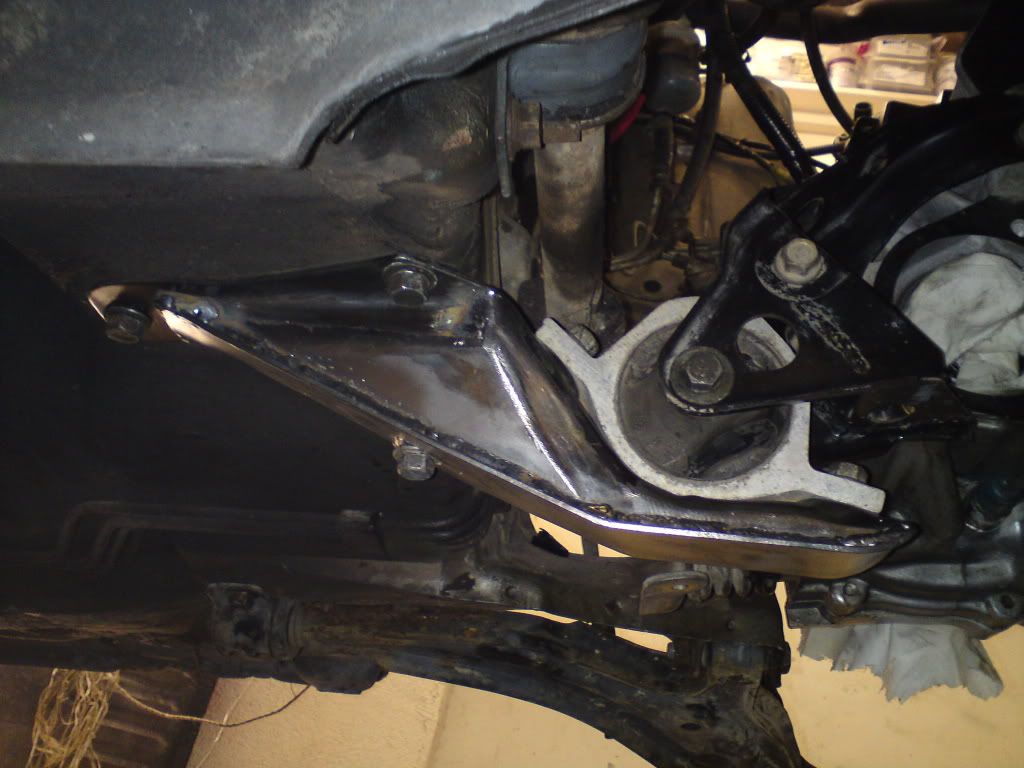 K11 Gear linkage steady bar chopped...................... 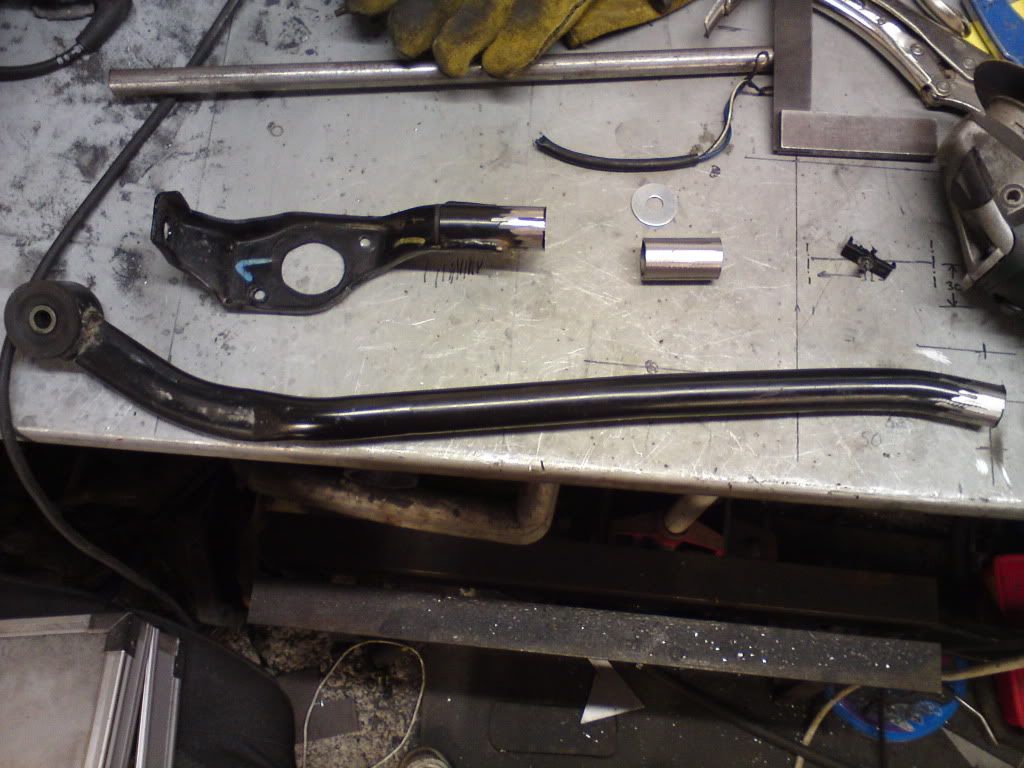 .....and welded (twice 'cos I got the measurements wrong  ) 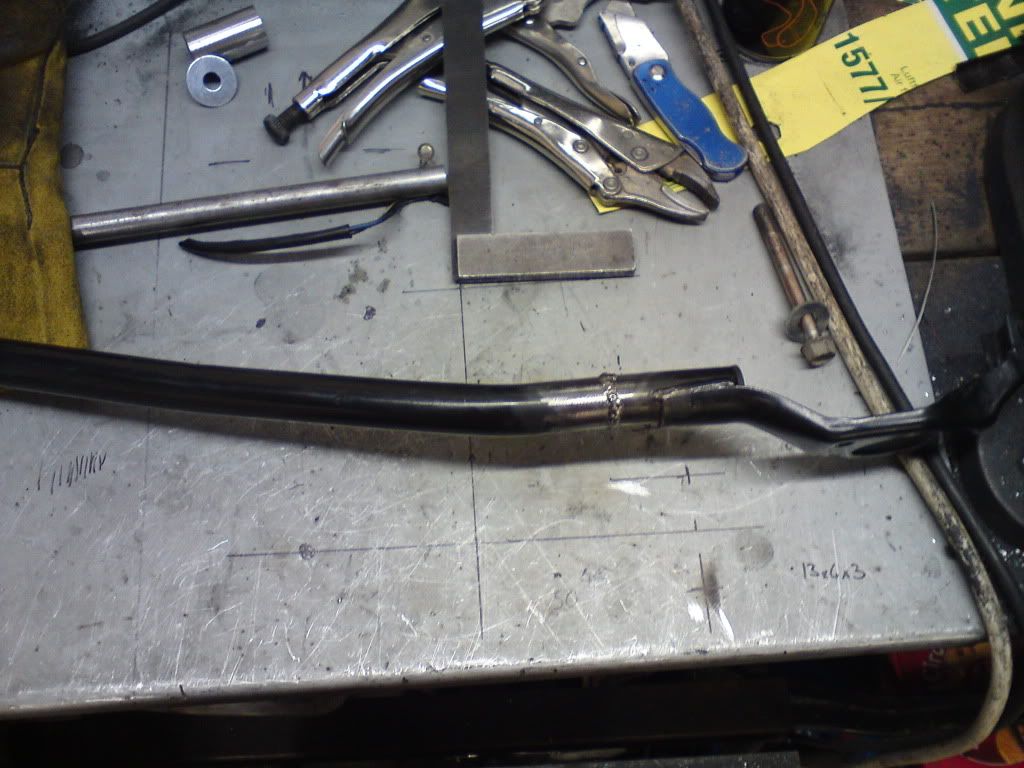 I also modified the rear where the mount attaches and drilled the floor to take the K11 mount. When it got too late for noisy stuff I tried the driveshafts, because I've shifted the engine and box over I only need to cut and shut the short shaft, the long shaft fits!  I also measured the exhaust and the driveshaft so that today at work I could order the bits and pieces to do the exhaust and get hold of the the old boy that did the distributor adaptor to knock me up a collar for the driveshaft. This evening straight after work 24vster and I went down to South Brent with one of the chopper guys from work to borrow his carb balancer, ready for when we get it running  Once home it was straight out into the garage again, first job was to do the selector rod for the gear linkage (again twice due to my inability to work a tape measure properly  ) 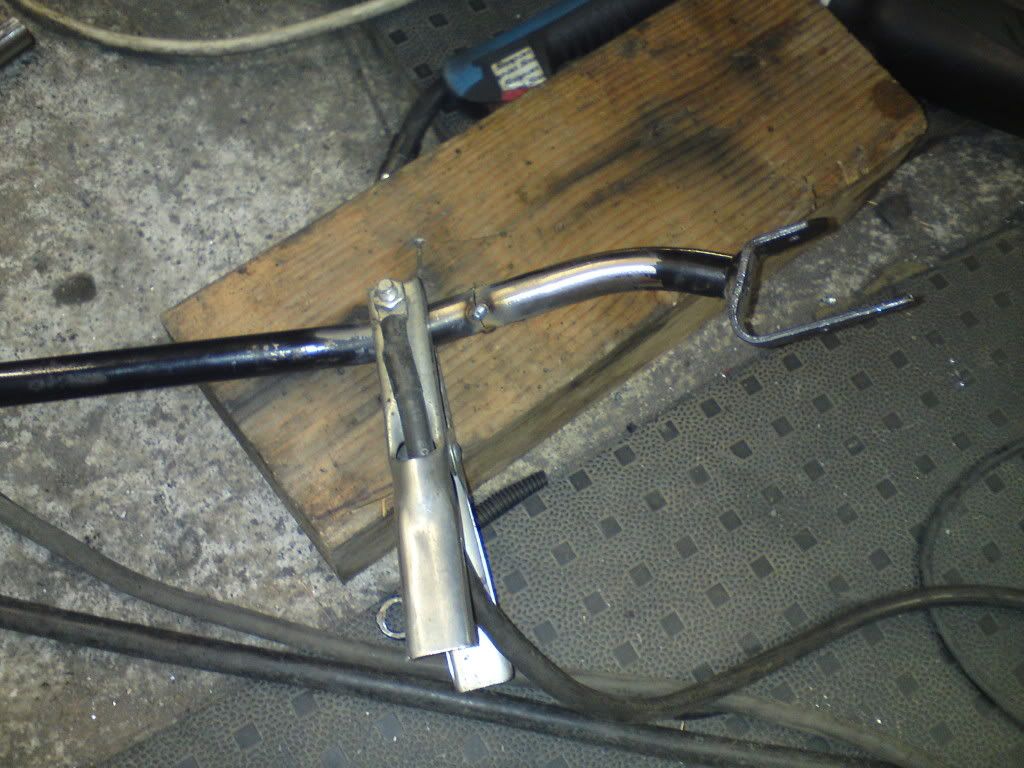 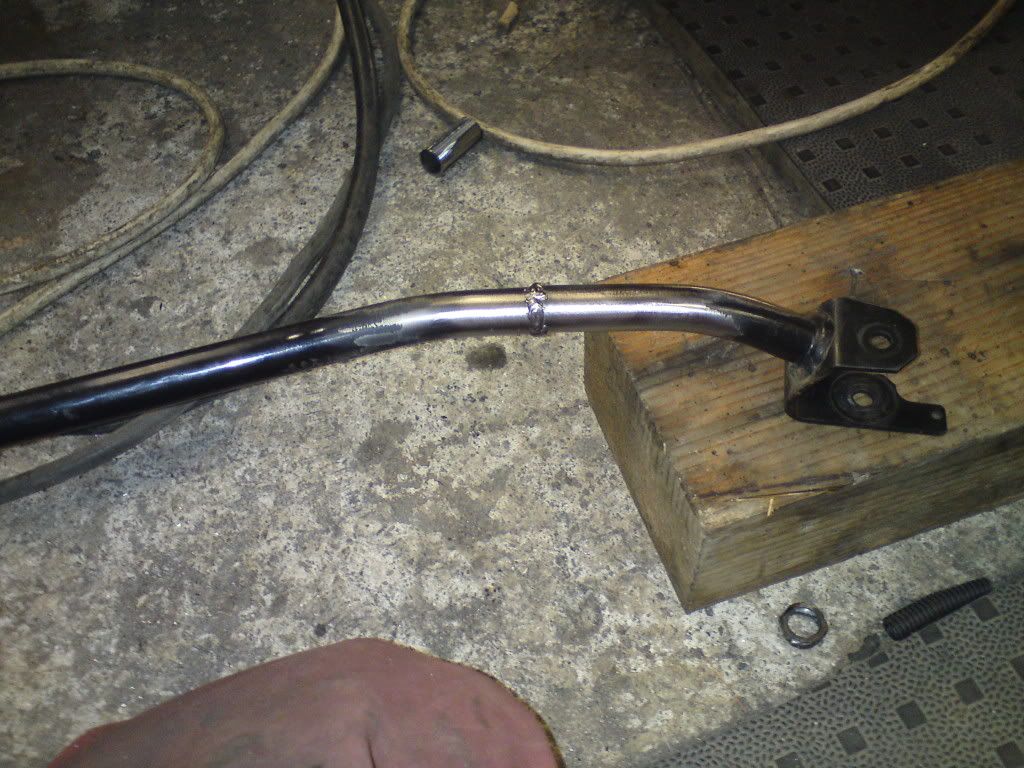 I now have gears!  Had a bit of a play with the exhaust and then tried the radiator, this was when we discovered that the freshly modified front mount now occupied the space where the bottom hose outlet sits. Off it comes to have the offset moved into the bar, giving the bottom hose room to fit once more............ 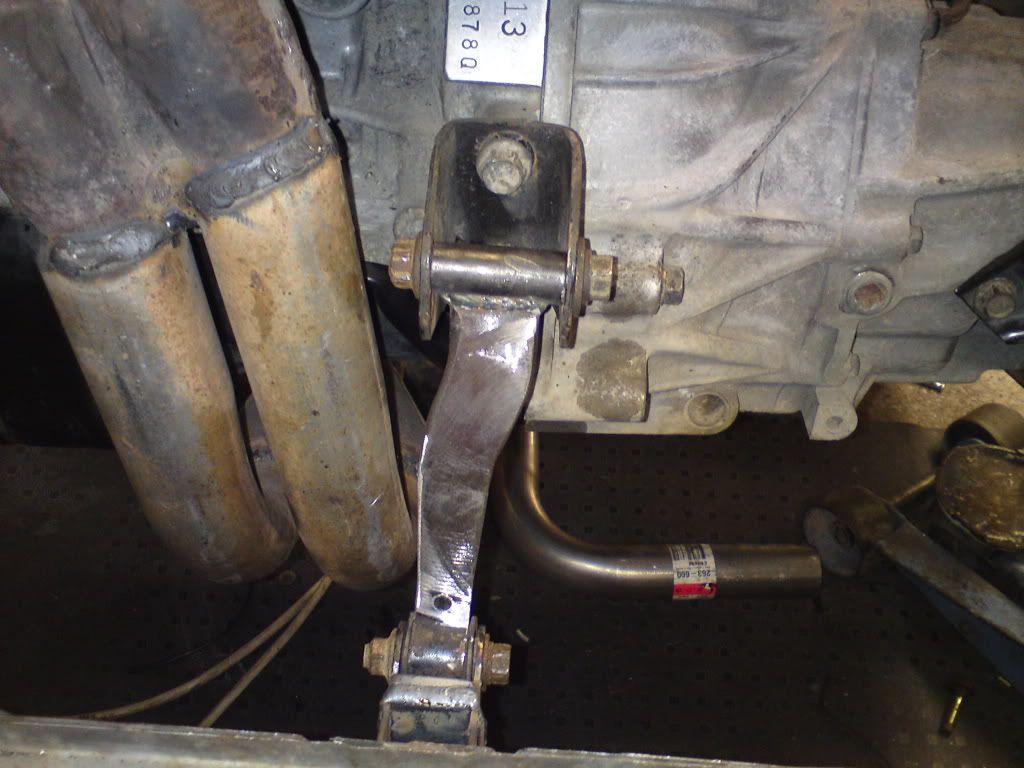 ............however upon refitting the radiator it became apparent that there is insufficient space between the engine side of the mount and the blades of the fan........ 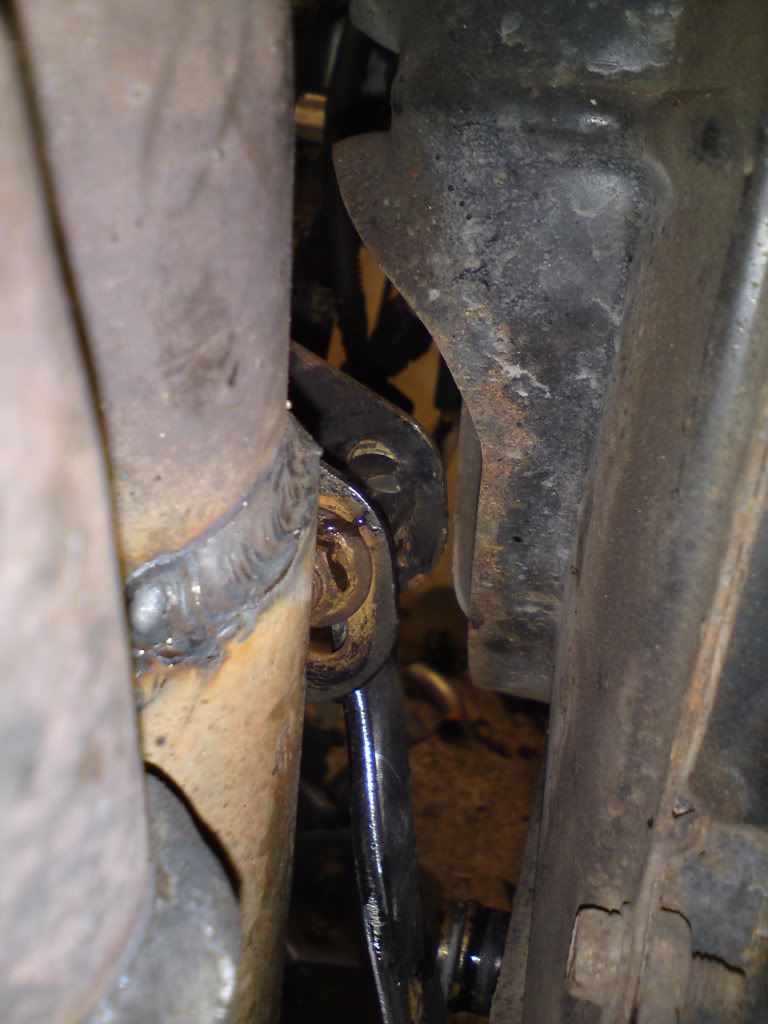 .........Nevermind, that'll be a job for tomorrow evening. Once it had got too late for noise we got the driveshaft stripped down ready for the cut and played around with the hoses. More soon! |
| |
Last Edit: Oct 14, 2009 23:52:40 GMT by BiAS
(car+wheels)-rideheight=WIN
|
|
|
|
stealthstylz
Club Retro Rides Member
Posts: 14,962
Club RR Member Number: 174
|
|
|
|
|
This is gonna be ace - the wheels still look a million times better in the metal than in pics.
Matt
|
| |
|
|
|
|
qwerty
Club Retro Rides Member
Posts: 2,421
Club RR Member Number: 52
|
|
|
|
|
I love this little car! Sits perfectly and nice choice of engine, married to some top fabrication work! Love it!
|
| |
|
|
Seth
South East
MorrisOxford TriumphMirald HillmanMinx BorgwardIsabellaCombi
Posts: 15,543
|
|
Oct 15, 2009 10:36:14 GMT
|
Really nice work going on here!  |
| |

Follow your dreams or you might as well be a vegetable. |
|
BiAS
Club Retro Rides Member
 Insert witty comment here
Posts: 2,231
Club RR Member Number: 147
|
1991 Bike carbed CG13 K10 MicraBiAS
@cheeqi
Club Retro Rides Member 147
|
Oct 15, 2009 23:32:37 GMT
|
stealthstylz - I hope so, gonna try and find out this weekend! ukmercman, Qwertina and Seth - Cheers guys  Thursday night progress then First thing on the agenda was to sort out the front mount that fouled on the fan, sorted  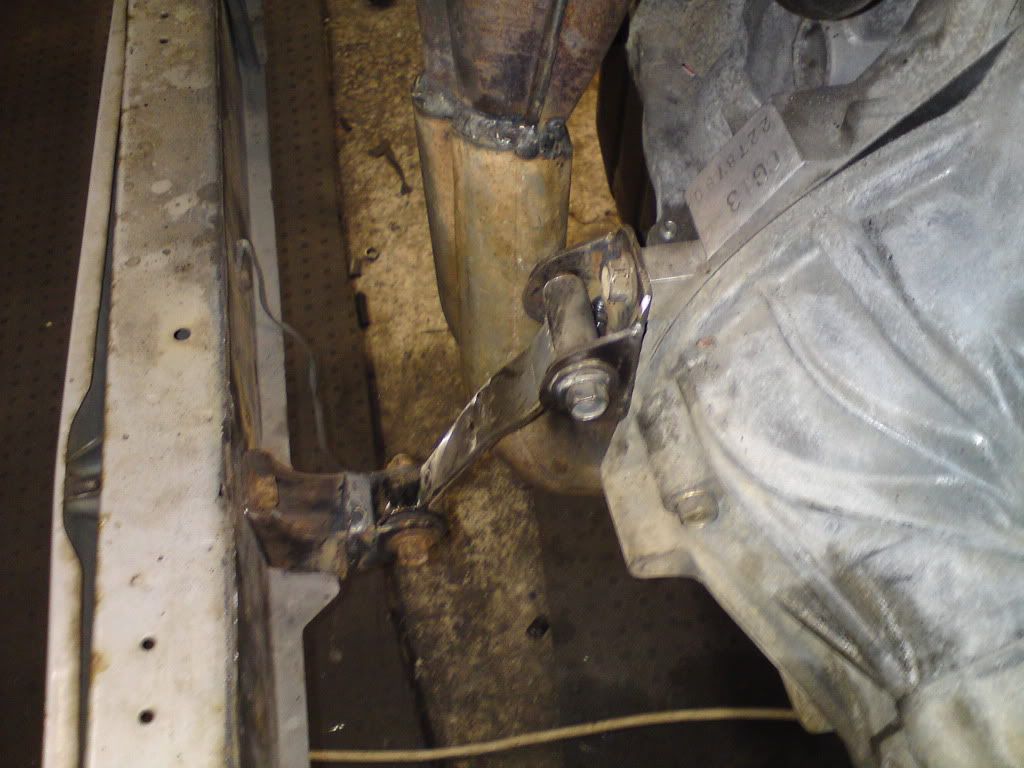 Exhaust done, probably not the ideal set up but I don't want it to drown out the carb noise and I can't afford to build a new rear section from scratch. Probably best to give it a bit of back pressure too. 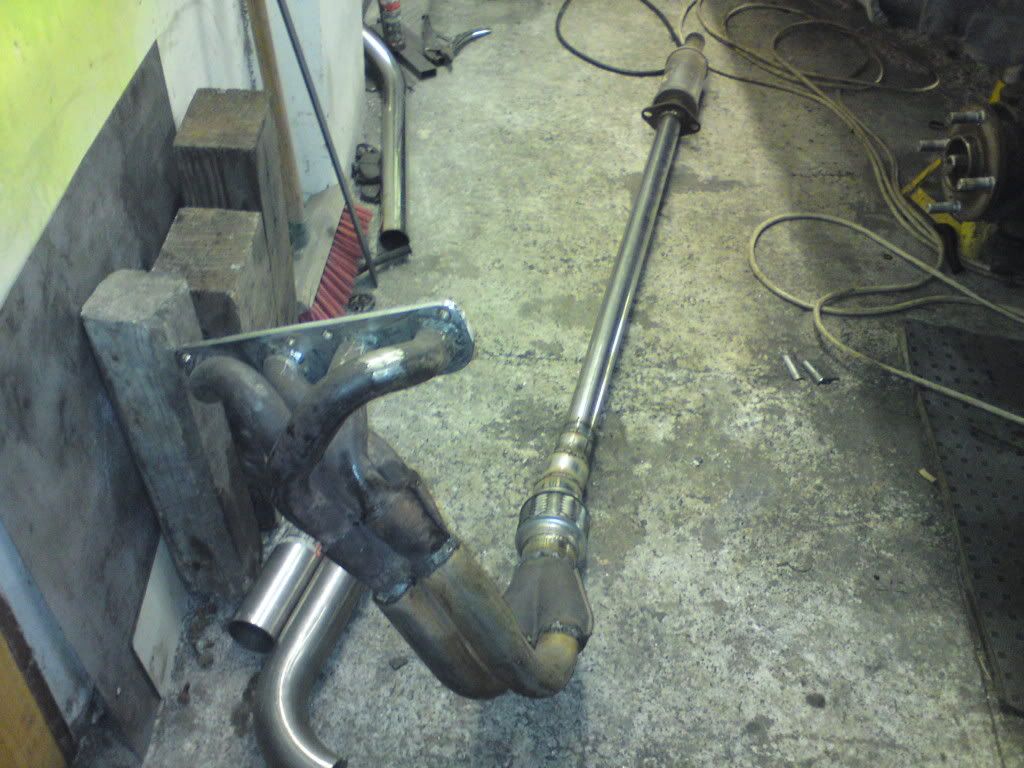 ............and fitted 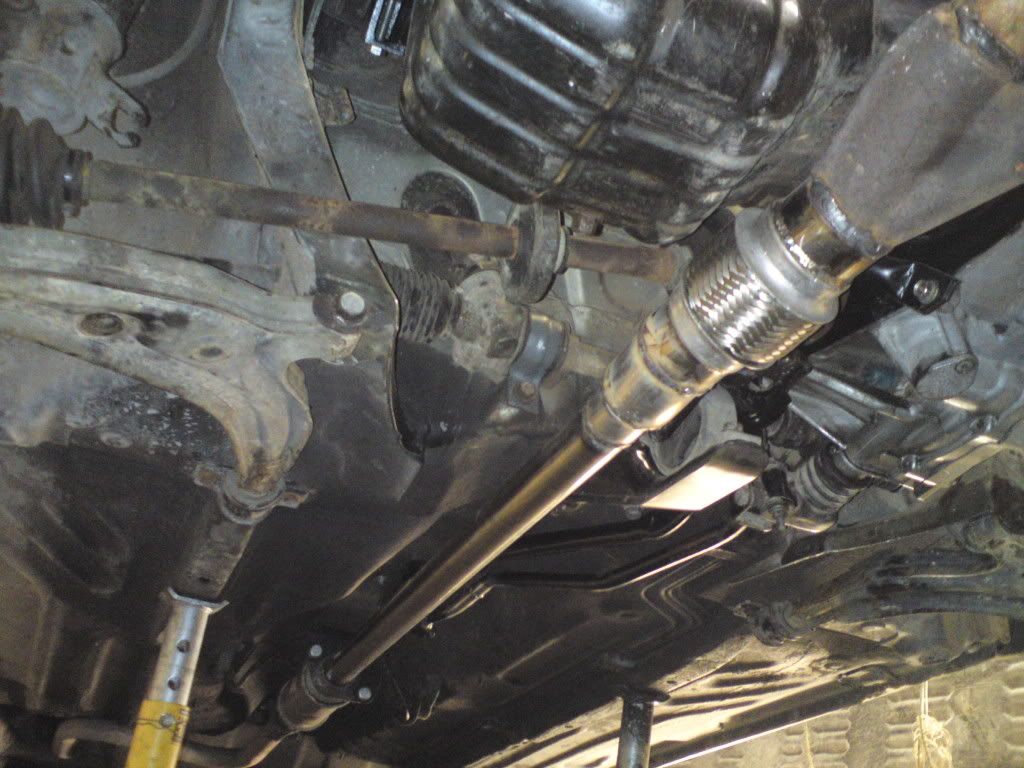 Pictures of the descaling and painting job 24vster very kindly did on the K11 calipers for me last night, cheers mate  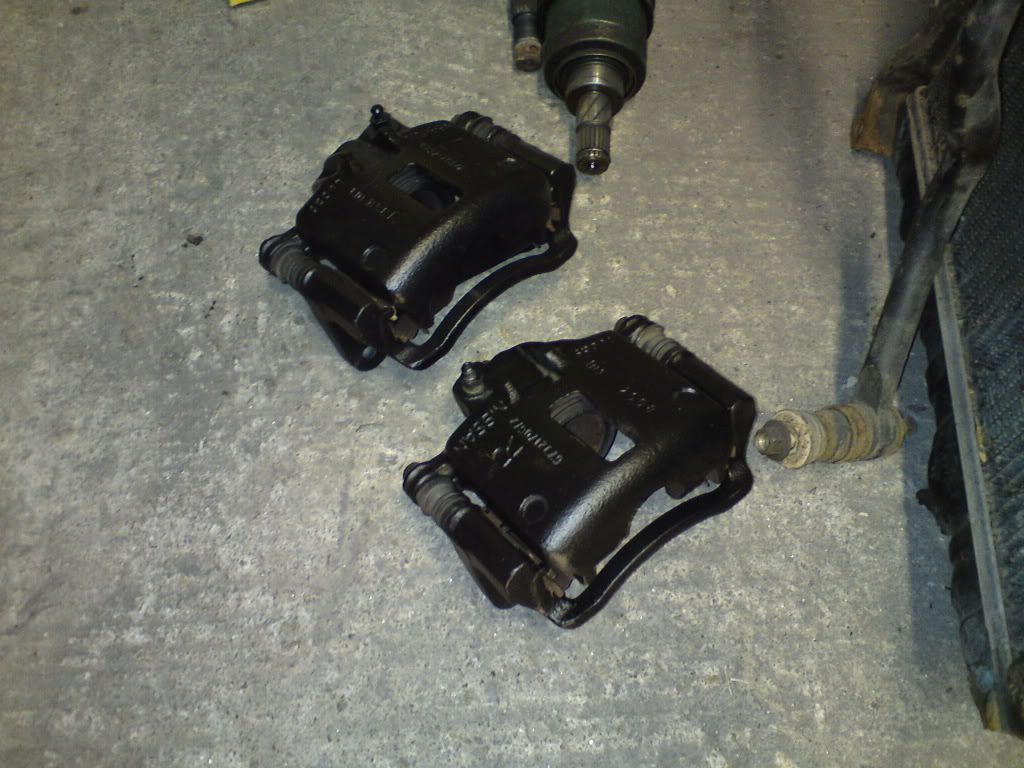 When it got too late for noise again I knocked up the throttle cable using the K10 one and a Merc Vito rear door catch cable, just got to modify the bracket on the carbs to take the adjuster and it can be adjusted to suit. 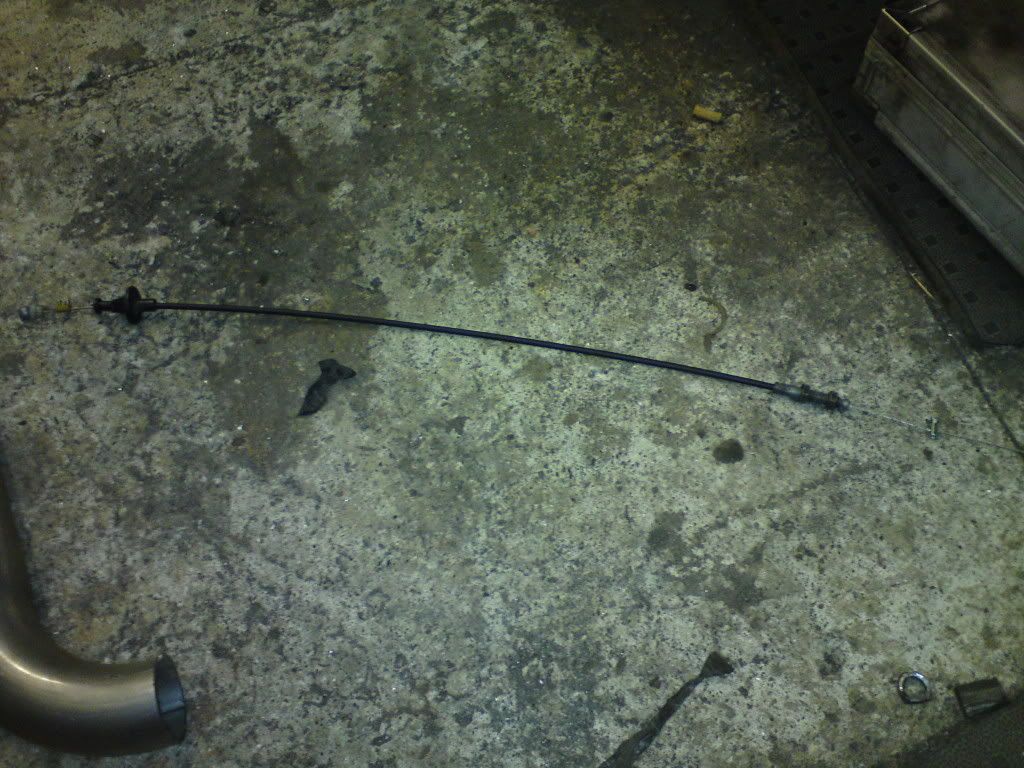 Still got to get a choke cable and plumb up the fuel and water. More soon! |
| |
(car+wheels)-rideheight=WIN
|
|
BiAS
Club Retro Rides Member
 Insert witty comment here
Posts: 2,231
Club RR Member Number: 147
|
1991 Bike carbed CG13 K10 MicraBiAS
@cheeqi
Club Retro Rides Member 147
|
Oct 15, 2009 23:38:32 GMT
|
p.s. got the collar back off the machinist today too, shaft's cut and going to work with me to buzz up  |
| |
(car+wheels)-rideheight=WIN
|
|
davej
Part of things
 
Posts: 314
|
|
Oct 16, 2009 17:38:00 GMT
|
Excellent work as usual! Looks like it should be fun when its done!  |
| |
 + 2007 Octavia Vrs estate, 1971 Beetle project, 2004 Shogun Sport |
|
BiAS
Club Retro Rides Member
 Insert witty comment here
Posts: 2,231
Club RR Member Number: 147
|
1991 Bike carbed CG13 K10 MicraBiAS
@cheeqi
Club Retro Rides Member 147
|
|
|
Went out last night so no work got done last night, today however has been very productive! Reassembled the front suspension and brakes, here's the nearside in all it's glory, this combination is a cut'n'shut K11 driveshaft, hub carrier, hub, brakes and bottom arms on a K10. And best of all? It works!  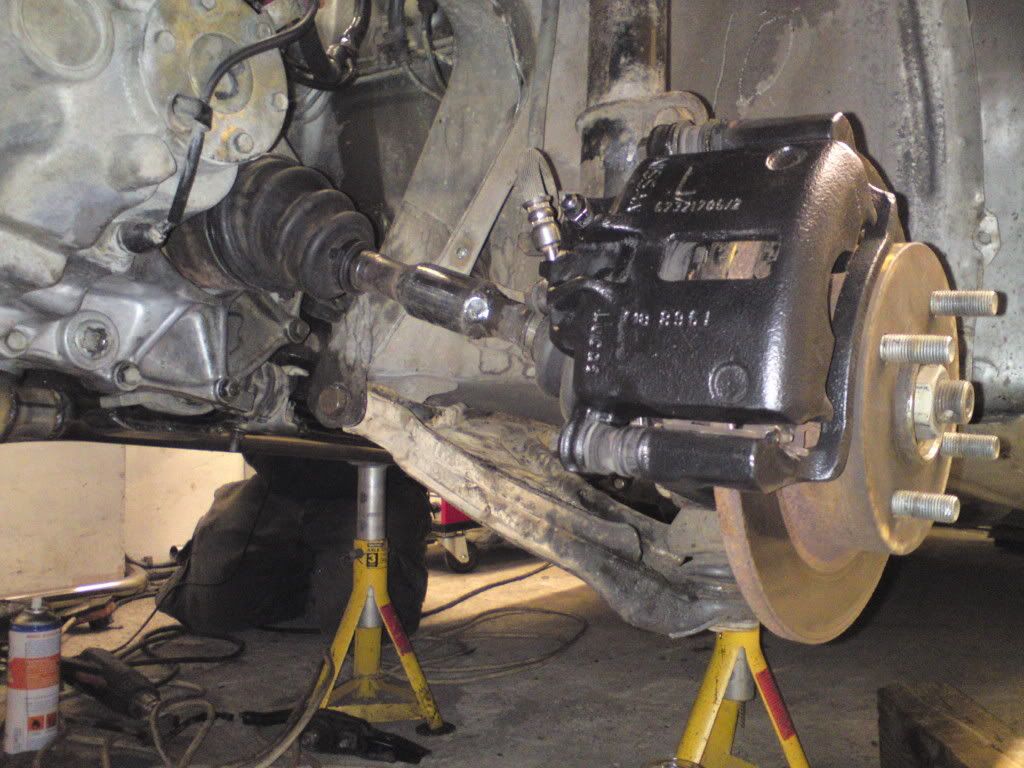 Moved onto the plumbing next, after playing about with the hoses the time came to fill it back up with water.............and it leaked like a sieve from the back of the thermostat housing  Further investigation revealed that the area that the bottom bolt goes into had broken off from the rest of the housing. Various expletives were swung immediately into action but when that approach seemed unlikely to solve the problem we resorted to plan b: Go down to the factors and purchase some jbweld (had to go down there to get a choke cable anyway so 2 birds one stone and all that) On my return I got busy sticking the piece back in. Although the 'kwik' version of jbweld sets in 4 minutes, it takes somewhat longer to reach the concrete like consistency needed. With every ounce of self control I have I busied myself sorting out the fuel side of the plumbing whilst 24vster and the captain fitted the new (preowned) speedo cable, fuel pump relay and wiring. By the time that had been done the jbweld had gone off enough to allow reassembly, and after much crossing of fingers the cooling system was refilled. Success again! No water leak! The fuel pump was temporarily cable tied into the corner of the 'bay (it'll be fitted properly when the running gear comes back out for painting and prettying) and the battery tray and battery were put back in. Ready to go  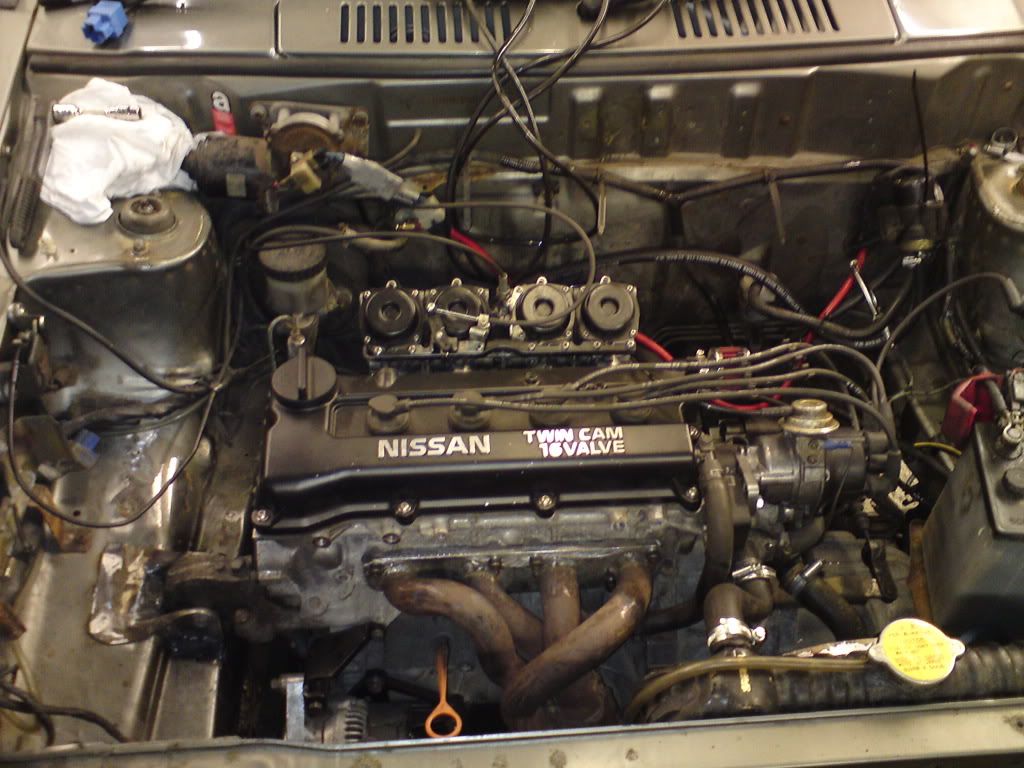 Then came the moment of truth, would it start? No, because in a moment of retardedness I put the supply and feed pipes onto the fuel pump the wrong way round  Once this had been identified, and I had been suitably pilloried for doing it we had another go................................... And it started! ;D ;D ;D ;D ;D Whilst setting the timing it became apparent that the fuel was leaking out of the seals were the fuel pipe joins to the carbs, but it ran! Off came the carbs again for some more dismantling, a further trip to Halfrauds for a box of assorted o-rings and some refitting saw it running again. Whilst balancing the carbs we noticed that at tickover the fuel pressure was too high for the float valves to stay shut meaning that we were again losing fuel, except this time out of the overflows. Not having a fuel pressure regulator to hand meant resorting to the ghetto 'mole grips on the fuel pipe' method of fuel pressure regulation. Got a video! ;D  Got it running somewhere near right and got on with bleeding the brakes up, putting oil in the gearbox, refitting wheels, bumper and bonnet, moved the Datsun out of the way and took it out for a test drive.   It needs some more work doing on the carbs to get it to run right but it feels loads perkier than it did before and nothing knocks or rattles. I just can't explain how over the moon I am that it actually runs! So stoked ;D ;D More soon! |
| |
(car+wheels)-rideheight=WIN
|
|
|
|
|
|
|
|
Great stuff Ian, well done.
Mole grip regulator ftw, ha love it! ;D
|
| |
|
|
|
|
will
Posted a lot
  
Posts: 4,023
|
|
|
|
|
Top stuff fella ;D have urself a pat on the back.
|
| |
|
|
|
|
|
|
|
|
amazing - wish I could wade through my projects so fast!!
my dad was a driving instructor when I was growing up and used this type of micra for years so i have a bit of a soft spot for them anyway....win all round!
|
| |
Last Edit: Oct 18, 2009 10:00:08 GMT by ukmercman
|
|
rtlkyuubi
Posted a lot
   Low and Slow
Posts: 2,922
|
|
Oct 18, 2009 10:38:49 GMT
|
|
bike carb'd lovley-ness! Top work Ian!
|
| |
|
|
|
|
|
Oct 18, 2009 10:41:42 GMT
|
Top bombing squire.I have just sat and read all 9 pages but didnt look at the post dates until you said "ive only had it 6 months"  .Looking forward to seeing it all set up and on the round.Hopefully we will get some rolling video. Keep up the good work mate and ill check in again next week for some more. |
| |
|
|
DutyFreeSaviour
Europe
Back For More heartbreak and disappointment.....
Posts: 2,944
|
|
Oct 18, 2009 11:18:33 GMT
|
|
Quality stuff Ian.
Needed something special to stop my head exploding working on this soddin' code........ excellent time out material.
Really chuffed for you mate - can't wait to see this and hopefully get in the passenger seat.
How you setting up? You got equipment? By ear? Rolin road?
John
|
| |
Back from the dead..... kind of
|
|
luckygti
Posted a lot
   I need to try harder!
Posts: 4,912
|
|
Oct 18, 2009 19:58:12 GMT
|
Brilliant, love the evolution this car has gone through. Makes me want a Micra.....  What's next on the agenda? (After the engine bay is all shiny?) |
| |
|
|
|
|
|
Oct 19, 2009 22:31:14 GMT
|
|
Allllllllllllllllllright! Can't wait to hear it in the metal ;D I'm sure it'll go well too!
|
| |
Sierra - here we go again! He has an illness, it's not his fault.
|
|
stealthstylz
Club Retro Rides Member
Posts: 14,962
Club RR Member Number: 174
|
|
Oct 19, 2009 23:07:29 GMT
|
|
Good work, wonder what power it will make? They're about 80bhp standard aint they?
Matt
|
| |
|
|
rtlkyuubi
Posted a lot
   Low and Slow
Posts: 2,922
|
|
Oct 19, 2009 23:30:44 GMT
|
|
the original 1.2 8v has about 60bhp standard iirc.
|
| |
|
|
BiAS
Club Retro Rides Member
 Insert witty comment here
Posts: 2,231
Club RR Member Number: 147
|
1991 Bike carbed CG13 K10 MicraBiAS
@cheeqi
Club Retro Rides Member 147
|
|
|
oldbus - cheers Dave, surely mole grips are the obvious choice ;D family banger - cheers dude, I went to sleep on Saturday evening with a huge grin and still had it on Sunday morning! ukmercman - cheers dude, I have to get on with it while the mojo's there rtlkyuubi - cheers Ryan, my first go at bike carbs and I like them so far dazgtti - cheers dude gtvsaviour - cheers John, got you a seat reserved at RRG10. Balancing them with a set of gauges and doing the fuelling by feel/sound. luckygti - cheers dude, once the bay's shiny and lovely a bit of reassembly, then it's back on daily duties with maybe a cheeky rolling road session just to see what it's putting out. robinxr4i - cheers Robin, I'll swing by when it's back together  stealthstylz - cheers Matt, I'm hoping for about 100bhp, the MA12 that came out left the factory with 60bhp and I'm sure some of those had fallen out over the years! The CG13 comes with 79bhp when fitted with 2 cats and a restrictive manifold so here's hoping. More progress! Last instalment left off on Saturday night, it was running but felt starved at over 3k. So back at HQ we downloaded the CBR600 HBOL and sussed out what size jets were in the other set of carbs that I bought first. Sorry John, they're not gonna be of any use anymore! The ones on the car had 105 main jets in, the others had 120s in, along with larger slow running jets and emulsion tubes. These were removed and cleaned ready for Sundays escapades. Sundays first job was to remove the carbs and swap the jets and emulsion tubes. This done they were refitted, balanced and a series of test drives were done ;D Vast improvement! Starved feeling moved to 5.5 to 6K. More power at the bottom too, still feels torquey and pulls from low revs in top gear ;D I've ordered a couple of drills to take the old jets out to 130 and 140 to see what effect this will have on the power. This done and with the car still sat out on the road I cleared up the garage in readiness for the pretty up. By 11pm Sunday evening the engine bay looks like this: 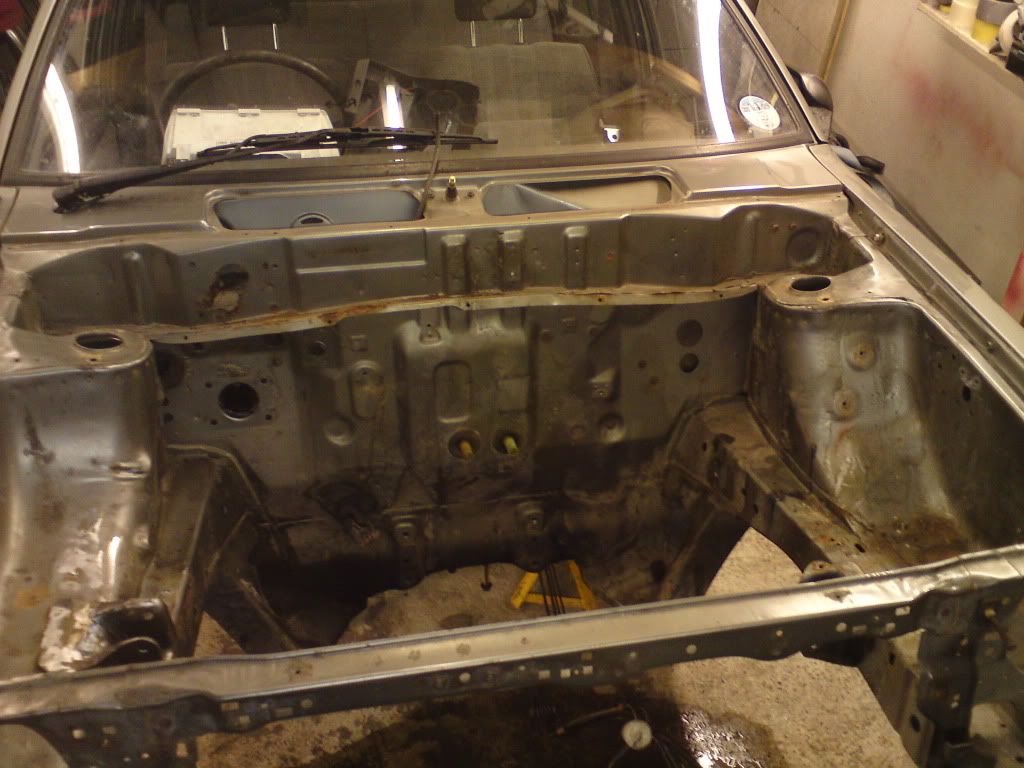 Today I started welding up the area behind the wiper motor...... 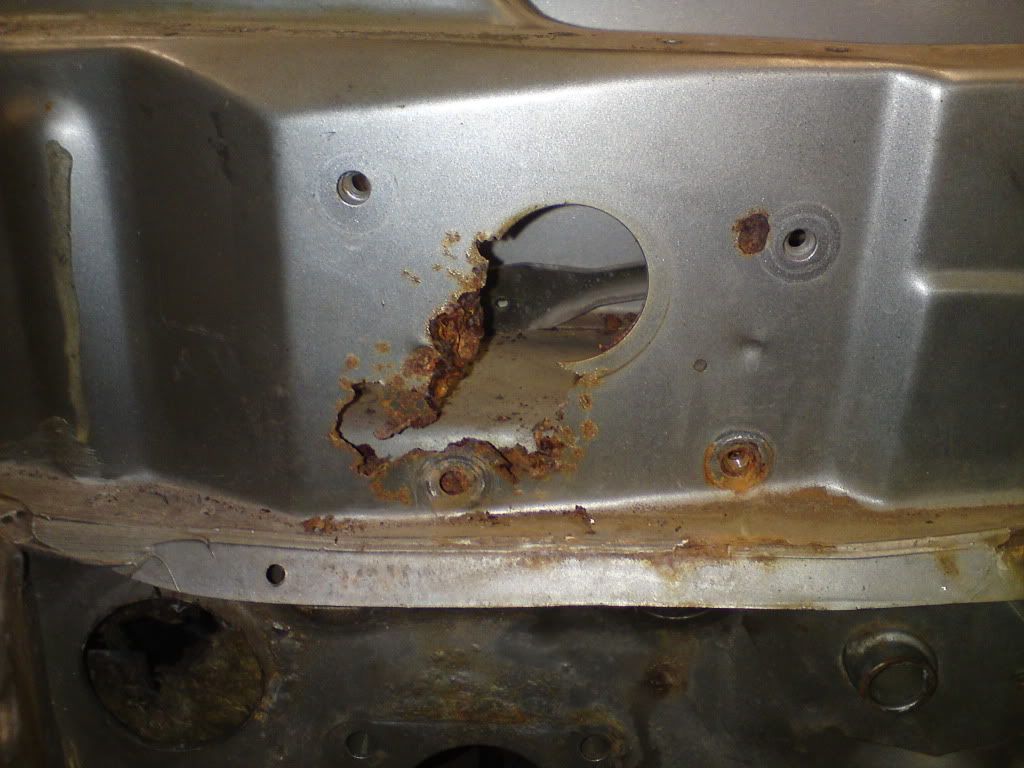 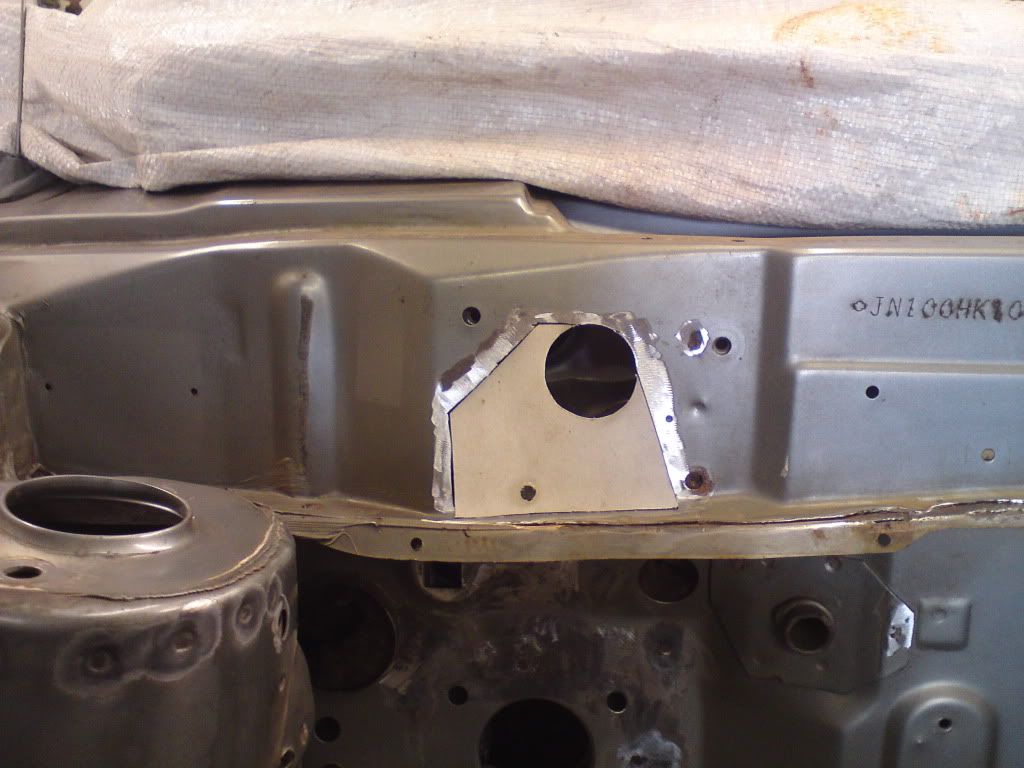 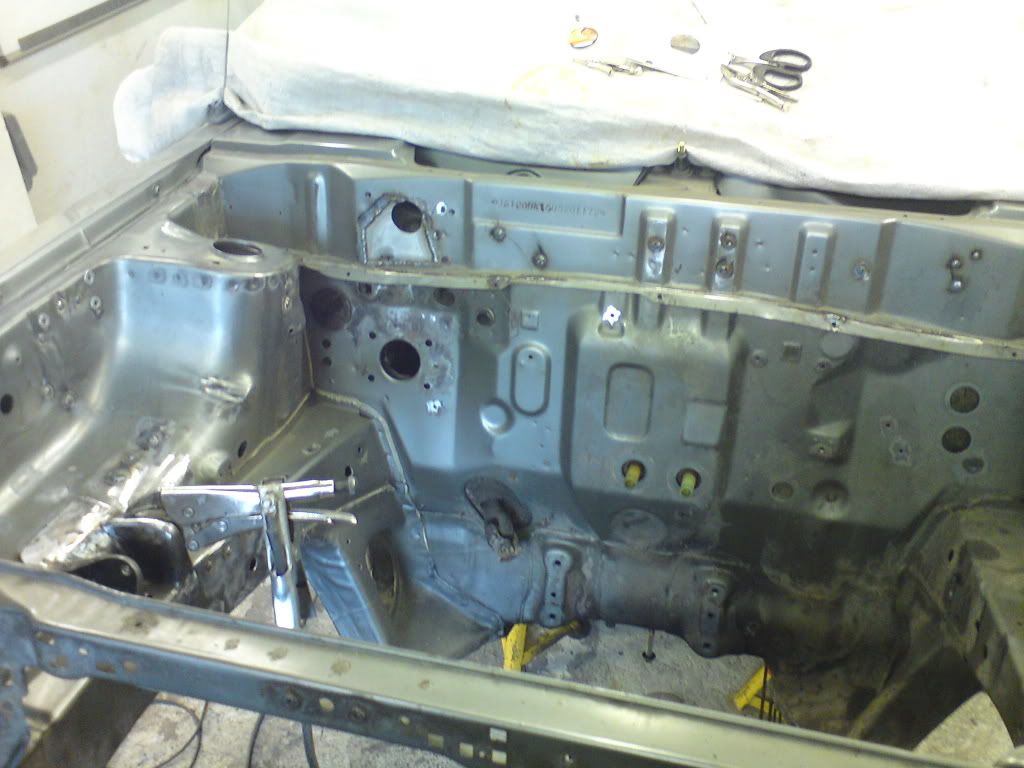 .........and started welding up the excess holes in the inner wings and chassis legs.......... 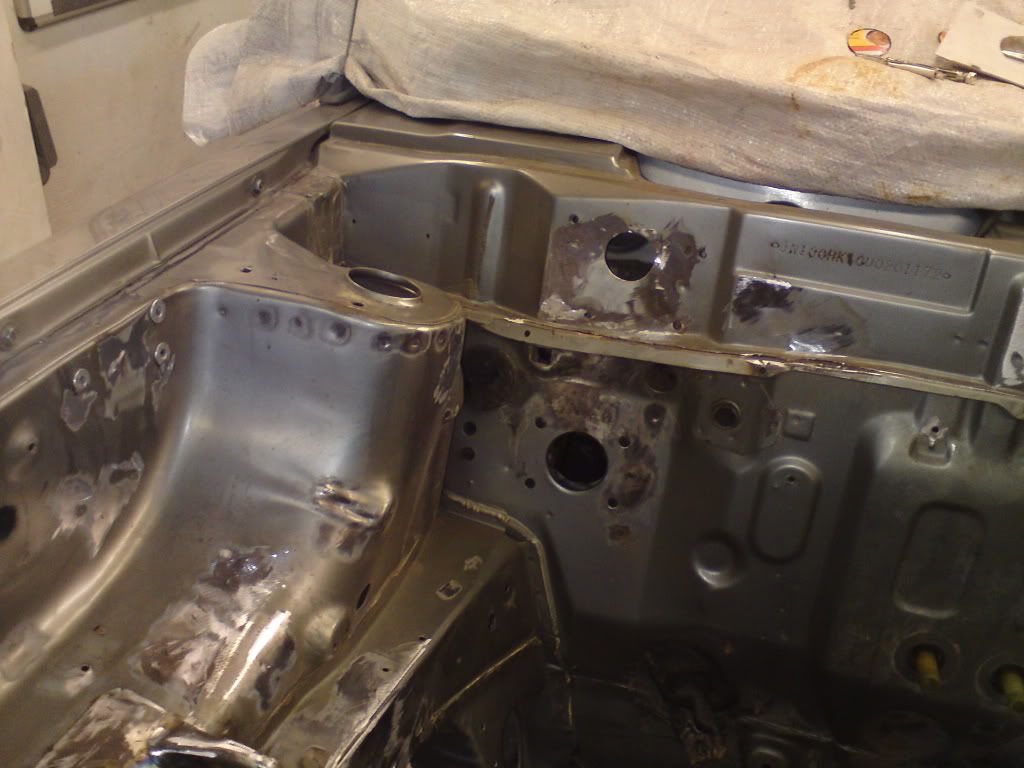 After dinner SWMBO got kitted out in an old pair of my overalls and got busy cleaning and degreasing the engine bay  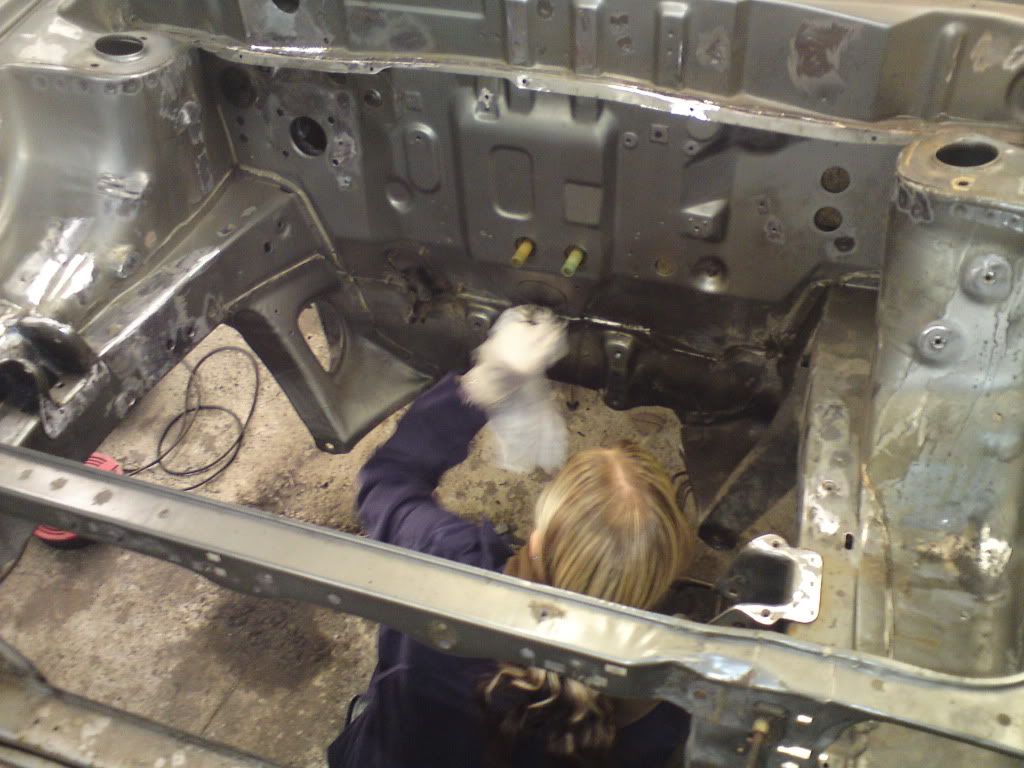 .........whilst I got on with stripping and cleaning all the bits I'd taken off, taking a few reference pics along the way to aid reassembly 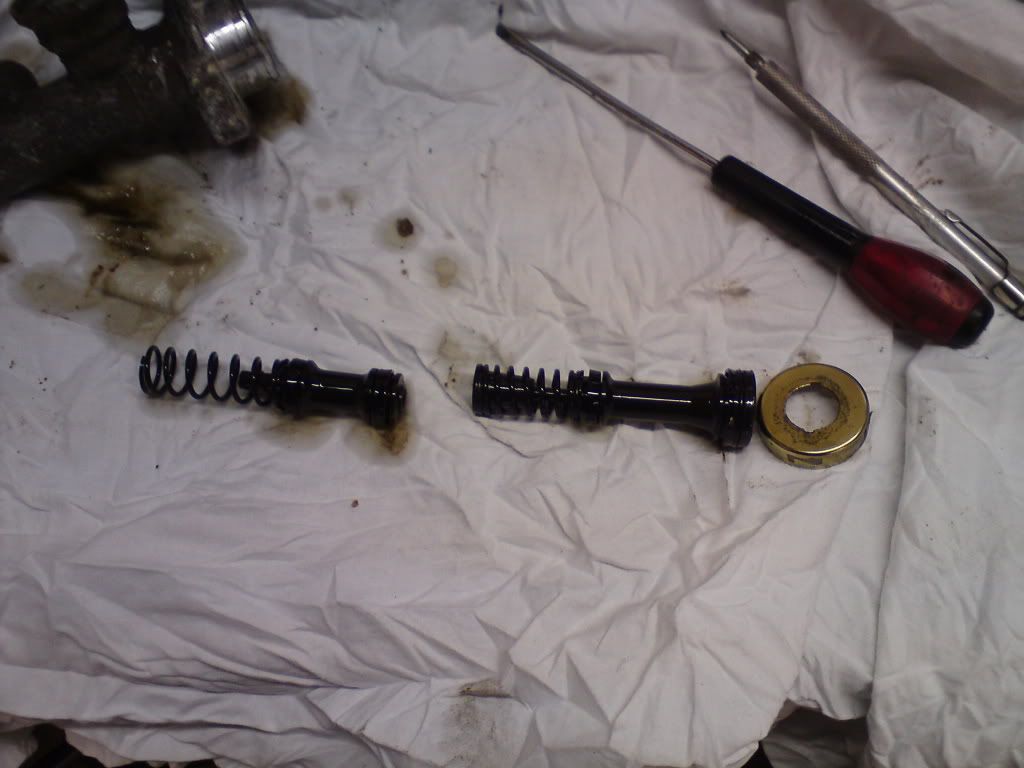 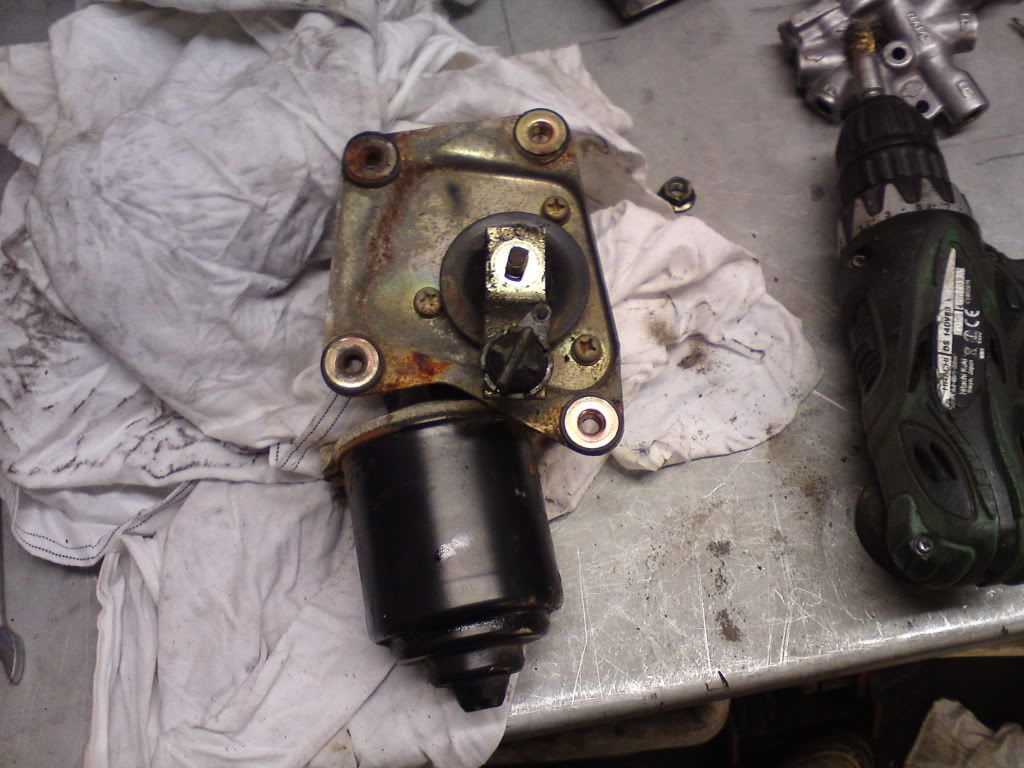 SWMBO had finished the engine bay.............. 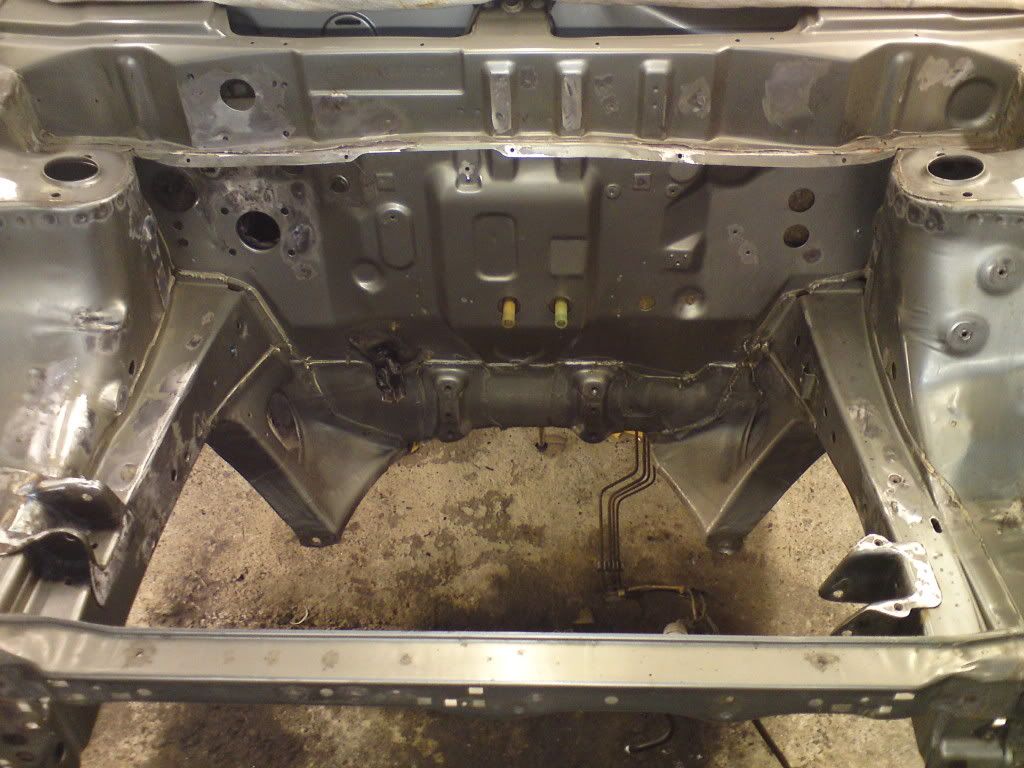 ............and got stuck in cleaning bits with me  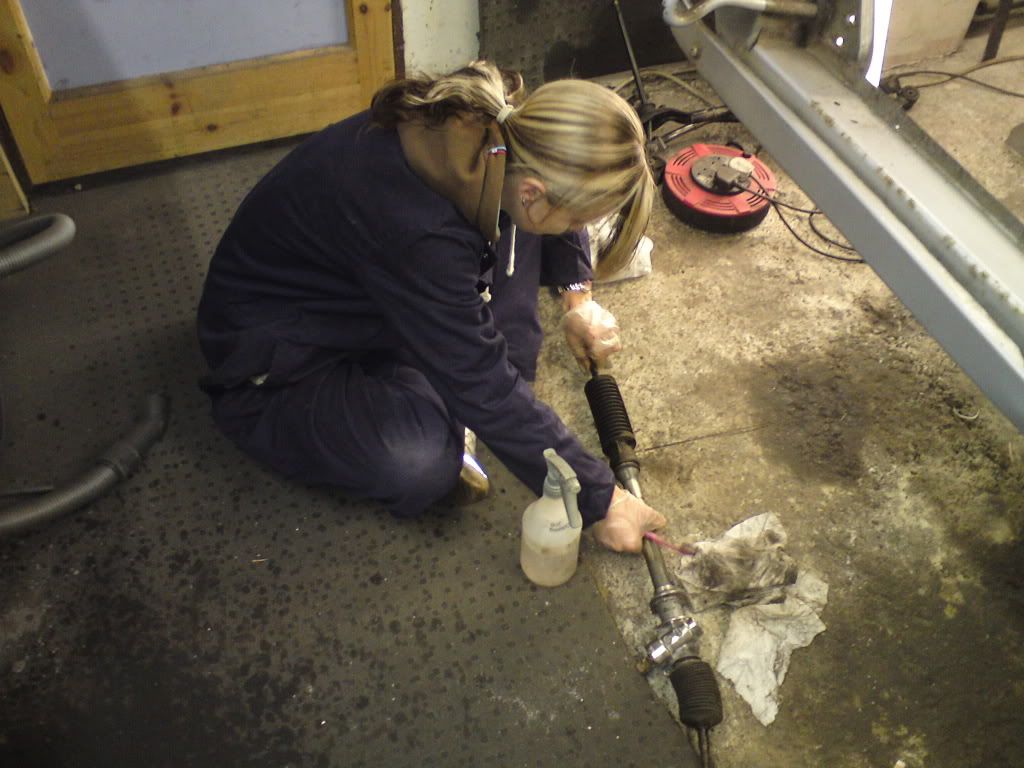 Meaning that by close of play this evening we had this pile of bits ready to paint/fit  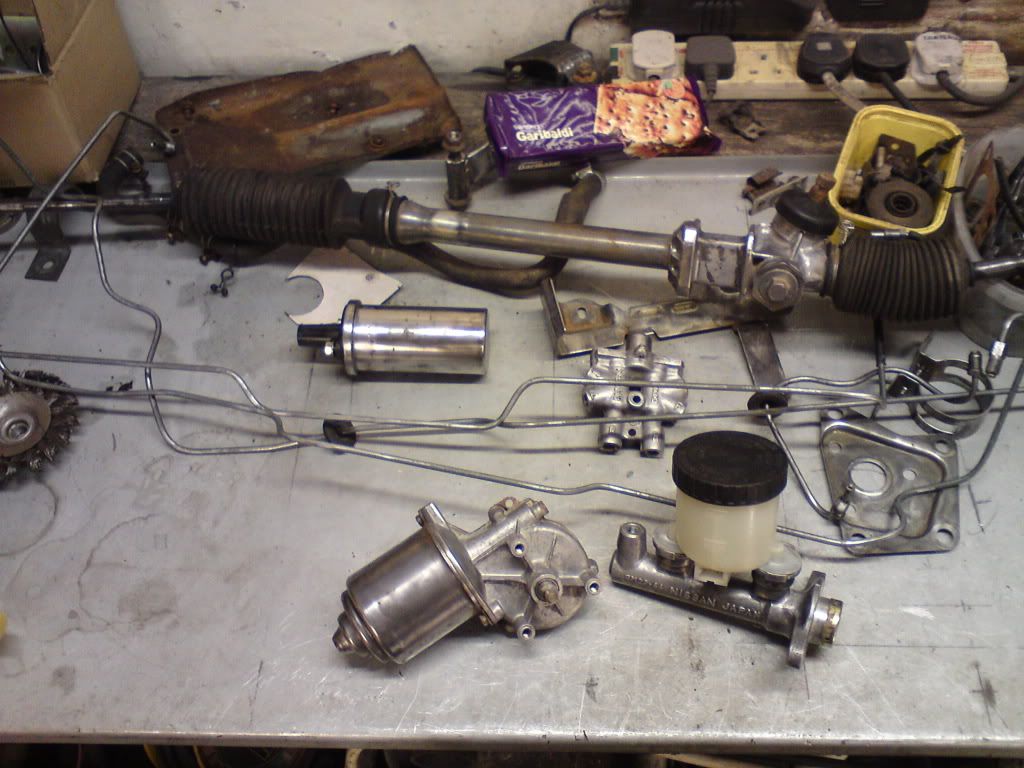 More soon! |
| |
(car+wheels)-rideheight=WIN
|
|
|
|


 )
)


 )
)


 )
)


 )
)


 + 2007 Octavia Vrs estate, 1971 Beetle project, 2004 Shogun Sport
 Further investigation revealed that the area that the bottom bolt goes into had broken off from the rest of the housing. Various expletives were swung immediately into action but when that approach seemed unlikely to solve the problem we resorted to plan b: Go down to the factors and purchase some jbweld (had to go down there to get a choke cable anyway so 2 birds one stone and all that)


 .Looking forward to seeing it all set up and on the round.Hopefully we will get some rolling video.
 What's next on the agenda? (After the engine bay is all shiny?)


