Seth
South East
MorrisOxford TriumphMirald HillmanMinx BorgwardIsabellaCombi
Posts: 15,543
|
|
|
|
What with the amount of car work I've currently got lined up I'm trying to get down to the dungeon as often as possible. Twice in the last seven days though the first time was mostly spent faffing about and getting my head round things after a holiday where I forgot it all. I removed the steering column and box as I need it out of the way for access and I can clean it up/paint etc at home. Made some more progress last night even if some of it was just chopping out. I've not been looking forward to the other top corner of the bulkhead but it won't get done if I keep avoiding it.  I also reshaped the old battery/steering box support as one of those functions will no longer be required  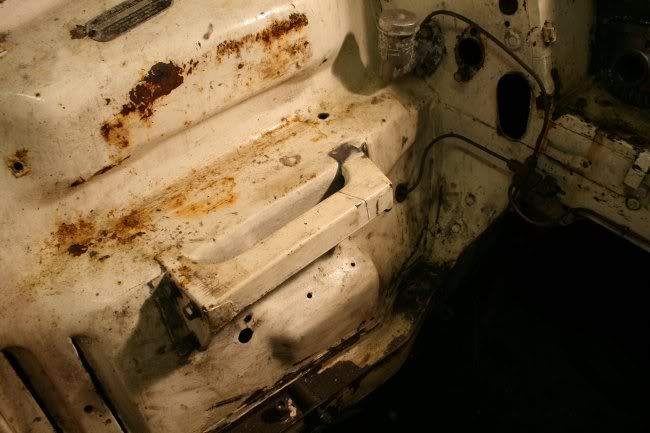 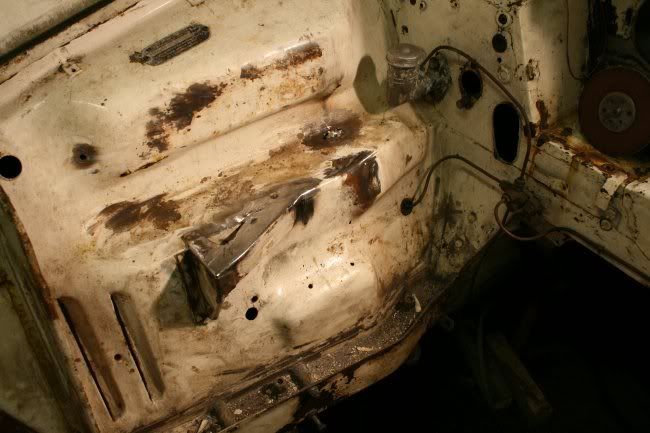 I've also started to put some bits together. The crossmember is primed and stonechipped where necessary and is getting in the way in the shed. So I cleaned the threads out... 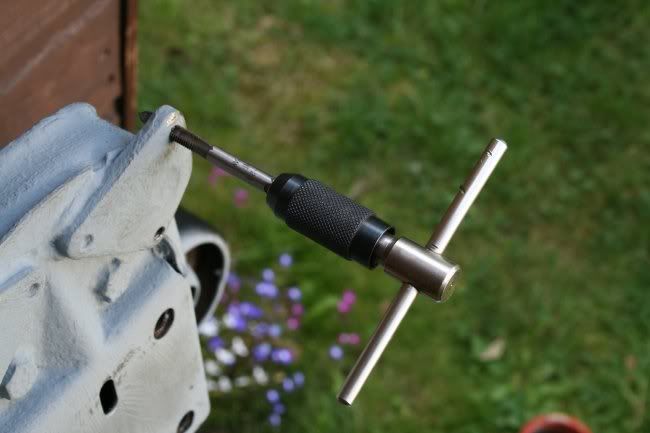 ...and fitted the wishbone pins. 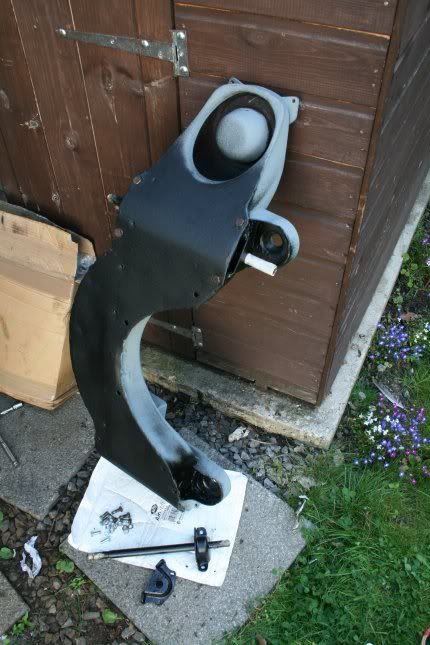 |
| |

Follow your dreams or you might as well be a vegetable. |
|
|
|
|
|
|
Aug 24, 2009 11:17:22 GMT
|
|
Looking good! Seeing the crossmember work reminds me that I need to do the same to the Amazon's front suspension.....
|
| |
|
|
|
|
|
Aug 26, 2009 17:48:04 GMT
|
Stick at it Seth, you'll get there in the end  |
| |
|
|
Seth
South East
MorrisOxford TriumphMirald HillmanMinx BorgwardIsabellaCombi
Posts: 15,543
|
|
Sept 5, 2009 22:57:27 GMT
|
Stick at it Seth, you'll get there in the end  Err, yeah. One day.... With the steering gear at home I wanted to give it a going over as I don't think it had ever been out of the car. First job was to remove the steering arm from the box. I cut a small nick into the end of the shaft, in line with the flat on the arm so I can put it back together in the same position. 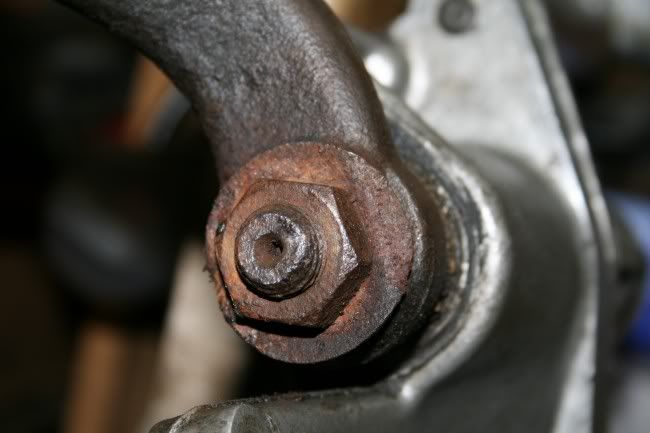 The manual says "...pull the side lever off its splines." It took me over a week of struggling that involved repeated doses of releasing fluid, heat, soft hammering, hard hammering, two legged pulling, three legged pulling, re-profiling the pulling legs and eventually lots and lots of heat and pulling. The rest of the strip-down was pretty simple. 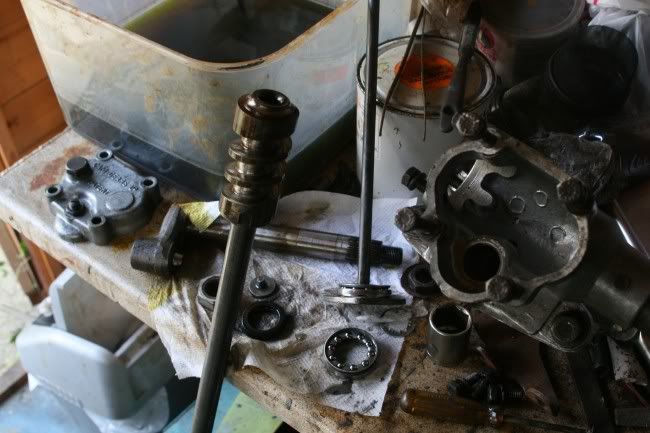 The splines are actually tapered and having a nut done up 40 years ago at 85lbsft obviously stuck them to the shaft quite well. 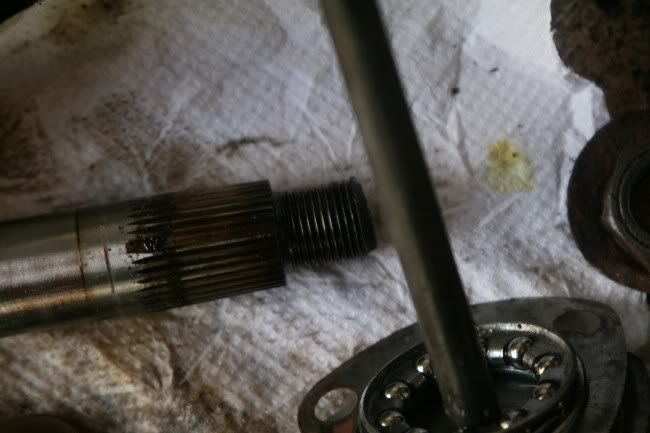 The twirly cam bit is supported on caged ball bearings like a bicycle headstock. The upper one has got somewhat worn over the years thanks to dirt getting in from a couple of drilled holes further up the outer column. 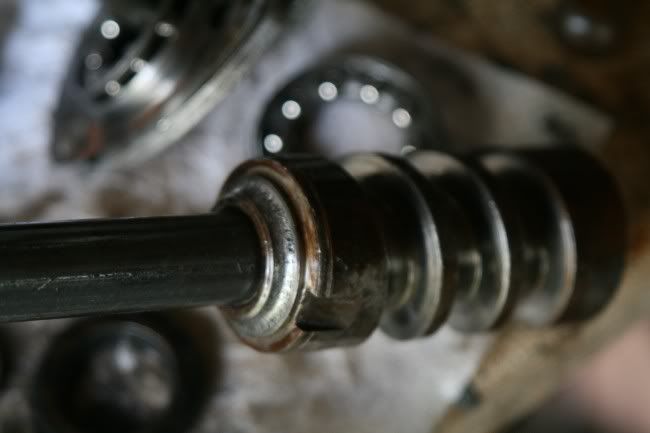 This is an assembly with the inner column that I don't think can be separated. I picked up a spare partially stripped box/column from a low miler years ago so dragged it out to have a look. The top bearing race is much better and the cam itself looks less worn but someone has mullered the threads at the top tryig to get the steering wheel off. 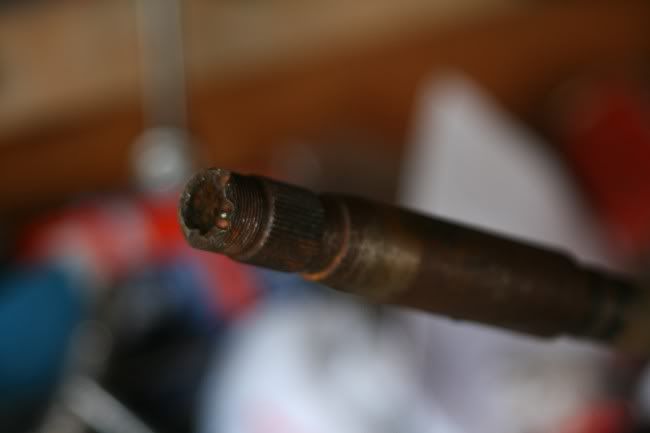 So not sure what to do. I can't swap the ends over so will see if I can get away with removing the damaged threads from the end of the spare column while leaving sufficient to hold the steering wheel on OK. If I do swap the inner columns I'll swap the cam follower too so it is with its matching part. Just need to order a couple of gaskets, the oil seal and a flat disc spring that was probably broken by my hammering... |
| |

Follow your dreams or you might as well be a vegetable. |
|
93fxdl
Posted a lot
   Enter your message here...
Posts: 2,019
|
|
Sept 5, 2009 23:20:04 GMT
|
|
could you try a thread file to rescue the threads or maybe tap a thread down the centre of the column and use a bolt to secure the wheel
ttfn glenn
|
| |
|
|
|
|
|
|
|
nice to see it still progressing dude! I take it you don't have the correct size die for the column? I'd take it to an engineer and get him to run a die down it. We've saved worse than that in the past  |
| |
Last Edit: Sept 6, 2009 9:35:48 GMT by Keefy
|
|
|
|
|
Sept 6, 2009 14:52:29 GMT
|
|
Just a small question, how does one remove the column on those in a proper way (without angle grinder)? I remember that the column lock was somewhat hard to figure out when I did that on my old A60... Since it was going to be parted out, however, I used the angle grinder anyway... ;D
|
| |
194? Willys Jeep MB 1965 Volvo 544 Special 1968 Opel Rekord 1975 Opel Kadett Estate 1985 Mercedes-Benz 230E 1985 Datsun 720 King Cab 4x4 diesel 1997 Volvo S70 2.5SE (ex. "Volvo544special65" - changed to more reader friendly username.  ) |
|
Seth
South East
MorrisOxford TriumphMirald HillmanMinx BorgwardIsabellaCombi
Posts: 15,543
|
|
Sept 7, 2009 15:53:08 GMT
|
Volvo, not sure what you mean. There's no lock on this column. I think maybe some very late (into '71) cars might have had them - my pre farina shape Sun-tor did for example. Once I'd pulled the steering arm off it was all just nuts and bolts. Here's a better photo of the thread damage. As you can see the end couple of threads are totally squashed so there'd be little chance of getting a die on it to match the rest. I think turning off those top couple of threads would be the only way. 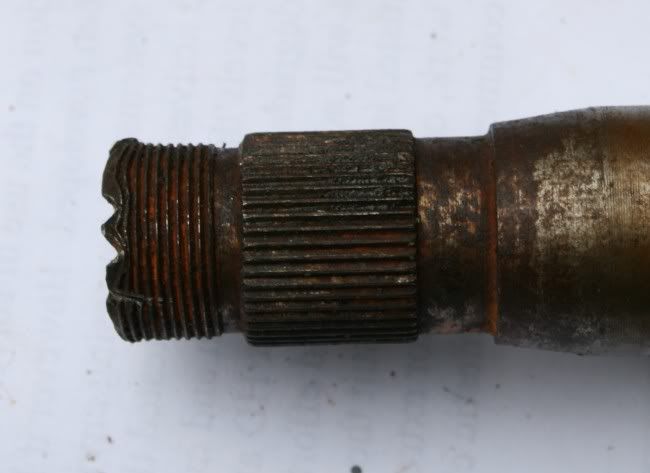 Anyhow its academic now as I've decided to stick with the original parts. The looseness of the other cam on the steering shaft concerns me a bit as I think they should be quite securely fitted together and there'd be vertical freedom in the inner column that shouldn't be there. I've spun the original shaft in the lathe and manually used a small grind stone to remove the worst of the pitting. Not an ideal situation I know - removed as little material as possible as I imagine its case hardened. Spinning it in my hands, the bearing feels much smoother than before and I think it should last many miles. Maybe in the future I'll make use of the other column parts or even pick up another whole unit but for now this will do. |
| |

Follow your dreams or you might as well be a vegetable. |
|
|
|
|
Sept 7, 2009 16:16:25 GMT
|
|
Nah, mine was an earlier example, 1962 I think... And my grandfather once had an even earlier example than that, with a lockable steering column... Well well... :/ Thanks anyway...
|
| |
194? Willys Jeep MB 1965 Volvo 544 Special 1968 Opel Rekord 1975 Opel Kadett Estate 1985 Mercedes-Benz 230E 1985 Datsun 720 King Cab 4x4 diesel 1997 Volvo S70 2.5SE (ex. "Volvo544special65" - changed to more reader friendly username.  ) |
|
|
|
|
Sept 7, 2009 16:53:37 GMT
|
|
That bearing is probably heated right up if you can't get it off. Might be worth getting an engineering firm to replace it if it's going to make a difference. As for someone who is able to do this... no idea.
|
| |
|
|
|
|
93fxdl
Posted a lot
   Enter your message here...
Posts: 2,019
|
|
Sept 7, 2009 22:56:50 GMT
|
|
the usual (bodge) way of removing a bearing race is to grind most of the way through it then a good whack with a hammer and chisel to split it which stops it gripping the shaft and it can be slid off
ttfn glenn
|
| |
|
|
Seth
South East
MorrisOxford TriumphMirald HillmanMinx BorgwardIsabellaCombi
Posts: 15,543
|
|
Sept 8, 2009 22:57:33 GMT
|
That bearing race is part of the same bit of metal as the twirly cam so wouldn't come off separately. I don't think it was ever intended to be removed from the shaft. I'll prefer to have maybe slightly rough steering in one direction than mess about with parts not designed to be removed and risk a potentially more dangerous sudden failure  Anyhow, seal, gasket and disc spring ordered from Earlpart today so hopefully I can get it all back together soon. |
| |

Follow your dreams or you might as well be a vegetable. |
|
Seth
South East
MorrisOxford TriumphMirald HillmanMinx BorgwardIsabellaCombi
Posts: 15,543
|
|
Sept 14, 2009 14:06:23 GMT
|
The bits I'd ordered at the start of last week finally turned up at the weekend (dodgy post...) so I've been able to put the box back together after a bit of painting etc. Must note to check date stamps should I ever judge a concourse car  (My car was built mid May '70) 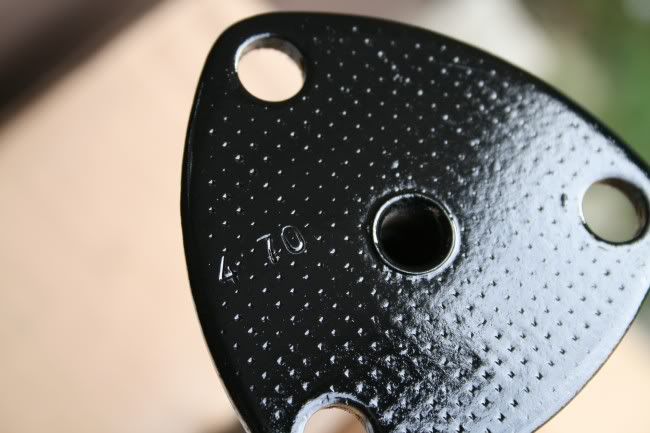 I made a nylon bush for the top of the column to replace the standard felt one. 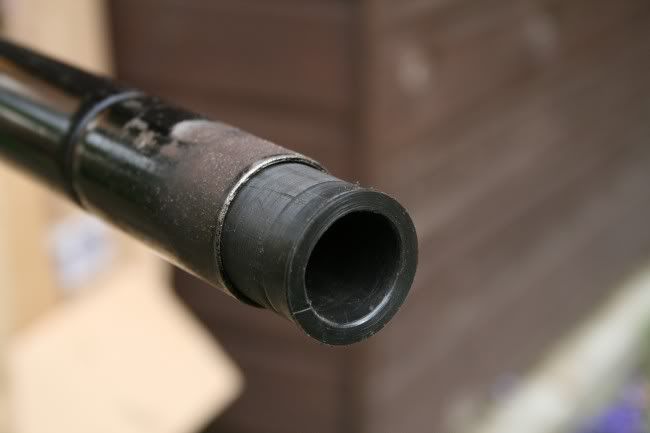 Haven't painted the main tube yet as I'm waiting for some other tube to turn up and will be welding a tab on to it once i know sizes... 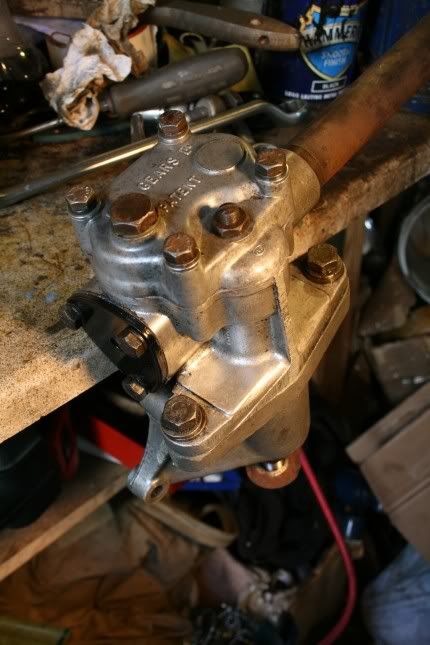 I never liked the way that the two top holes on the bracket that goes to the battery try were open ended so I've welded a piece across the top 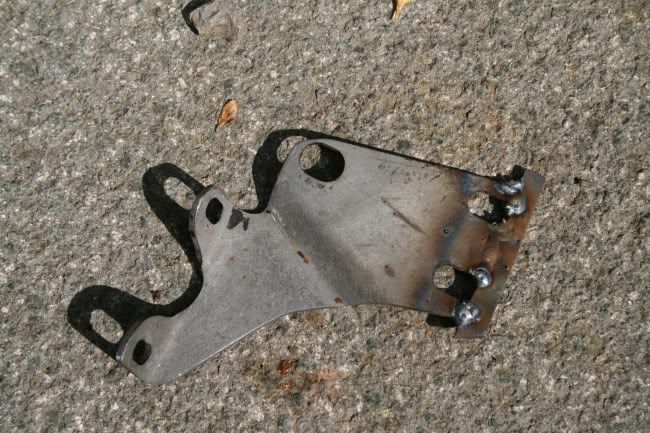 Now painted silver as I thought black would stand out too much against the now bare ally box. 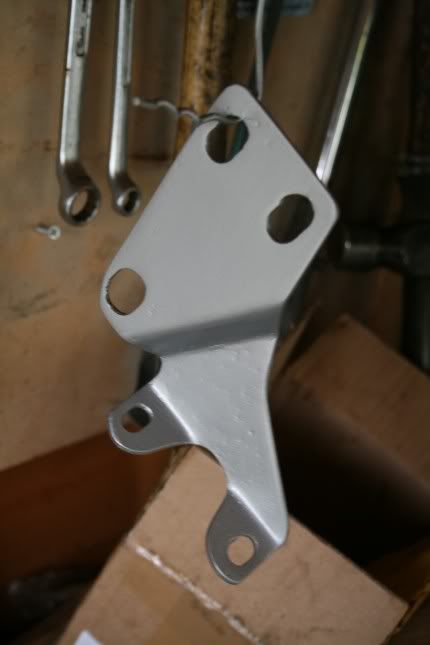 And so the cycle of cleaning/painting things continues so I can assemble nice shiny bits once the shell is ready. 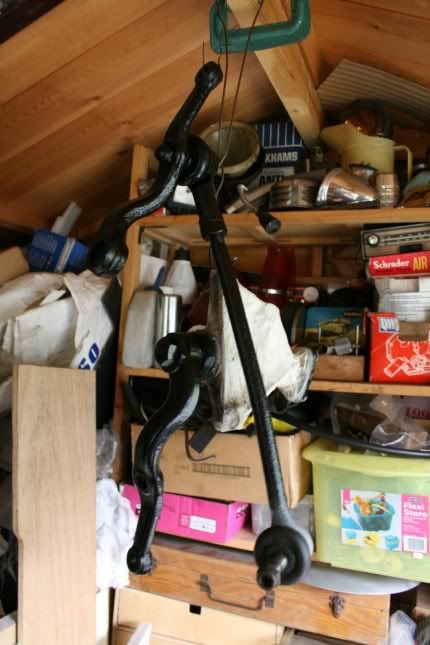 |
| |

Follow your dreams or you might as well be a vegetable. |
|
MrT
Posted a lot
   Just who did Mr Hitler REALLY think he was kidding?
Posts: 1,773
|
|
Sept 14, 2009 15:20:16 GMT
|
|
Nice work Seth.
As a matter of interest, what black and silver paints are you using for the oily bits?
Dale
|
| |
|
|
Seth
South East
MorrisOxford TriumphMirald HillmanMinx BorgwardIsabellaCombi
Posts: 15,543
|
|
Sept 14, 2009 17:51:13 GMT
|
|
Thanks Dale,
I'm using Bilt Hamber Electrox primer (brushed on) which is pretty much full of zinc as the main barrier. It seems to be pretty good stuff.
Over the top of that is basically going whatever gloss/satin black spray cans I have dug up at home. Need some more and will buy some bargain multipack at the Stoneleigh resto show in a few weeks. The silver is an old can of "wheel silver" with a couple of coats of clear over the top.
When I last painted some of this stuff I used Hammerite and so its mostly flaked of and disappeared by now. A couple of parts I've painted using teh Electrox and cheap black have received sharp knocks - the black has chipped but the primer is untouched.
I am not exactly going to be spending every weekend under this car cleaning stuff once its back on the road. I'd like it clean and shiny when I put it back together and it will be interesting to see how long my various treatments last.
|
| |

Follow your dreams or you might as well be a vegetable. |
|
|
|
|
Sept 14, 2009 18:07:27 GMT
|
Looking really good!  |
| |
|
|
kilroy
Part of things
  Suit you sir...
Posts: 251
|
|
Sept 15, 2009 5:36:21 GMT
|
So nice to see a 'real' car on here..  I cut my mechanical teeth on these beasties, and still have a soft spot for them. Rapidly hardening in this case... Don't recall having ever had to go near the steering box on either the Wols 16/60's or the Magnette I owned - guess the bearing setup is a very durable design. Studied the front suspension many times with a view to fitting telescopic shocks - but never got to grips with it. Nor did I liberate enough horsepower to warrant it - but I'm sure someone will have done both. Love this car. Go Seth... |
| |
|
|
Seth
South East
MorrisOxford TriumphMirald HillmanMinx BorgwardIsabellaCombi
Posts: 15,543
|
|
Sept 21, 2009 23:01:13 GMT
|
Cheers Paul, Kilroy. Hope the down-under Marina fleet is going well! Had a couple of deliveries. 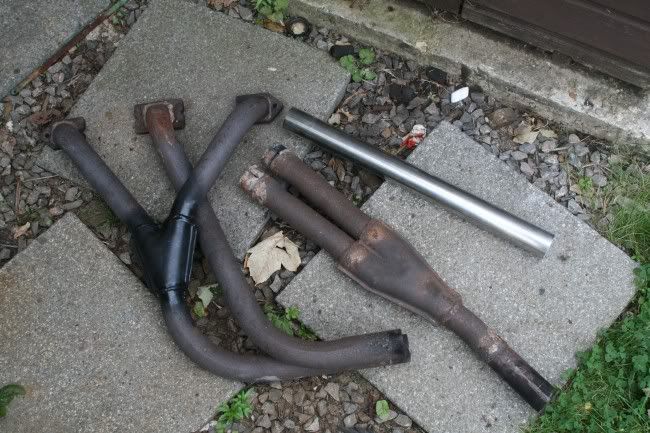 I've been keeping an eye out for a cheap three branch for ages and finally one came up. The stainless exhaust tube is not for the exhaust... Some careful squashing in the vice using wood to prevent damagae made the pipe nice and oval so I could do this. 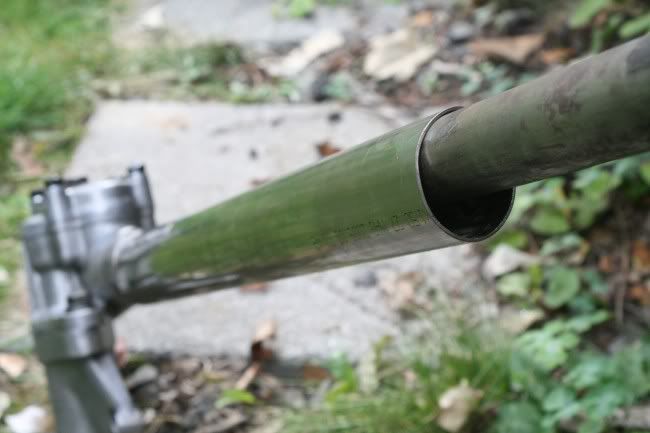 A canceled evening appointment meant I blagged a couple of hours in the dungeon instead. I took the column back down and tried it out for size. 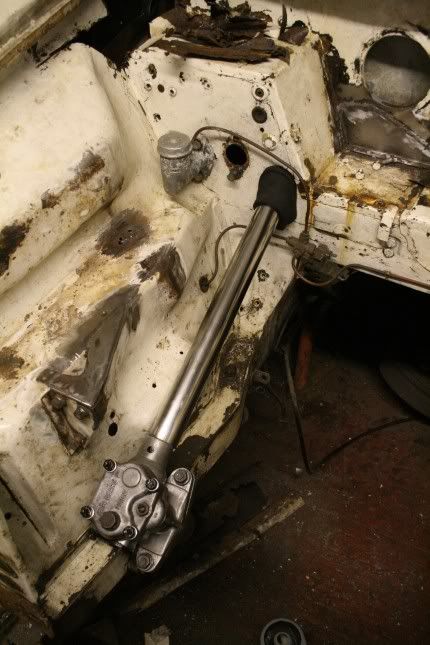 Looks quite spangly.  In case you hadn't worked it out, the oval tube is going to hide all the engine & front end wiring instead of it running along the top of an inner wing.  I also finally manged to get the drivers door off - I'd been struggling with one of the hinge bolts for the last few visits down there but it gave way to the impact driver at last. That meant I could get the top bit of wing off as per the other side and expose the bulkhead areas I need to do. 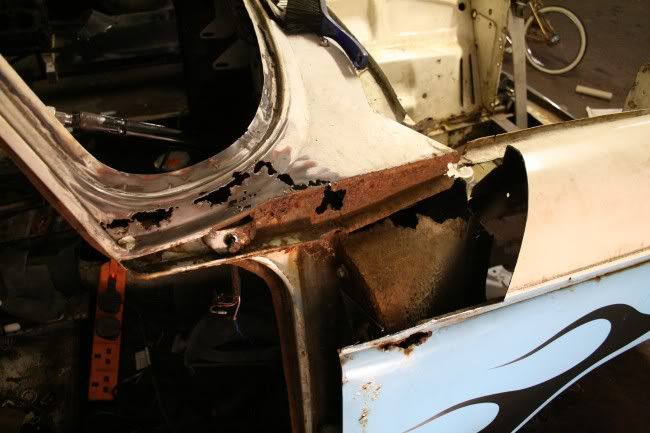 Next time I can crack on with that little lot at last. |
| |

Follow your dreams or you might as well be a vegetable. |
|
|
|
|
Sept 22, 2009 6:20:06 GMT
|
great stuff mate, keep at it, its all coming along rather nicely  |
| |
|
|
les509
Part of things
  Compulsive collector
Posts: 526
|
|
Oct 18, 2009 23:36:24 GMT
|
|
V quiet Seth - any progress???
|
| |
61 Jaguar Mk 10
67 Austin A60 Countryman
69 Morris 1300GT
77 Triumph 2500S
84 Mk2 Granada Ghia Est
86 BMW 635 CSi
87 BMW 635 CSi
|
|
|
|


 )
)


 In case you hadn't worked it out, the oval tube is going to hide all the engine & front end wiring instead of it running along the top of an inner wing.