|
|
|
|
|
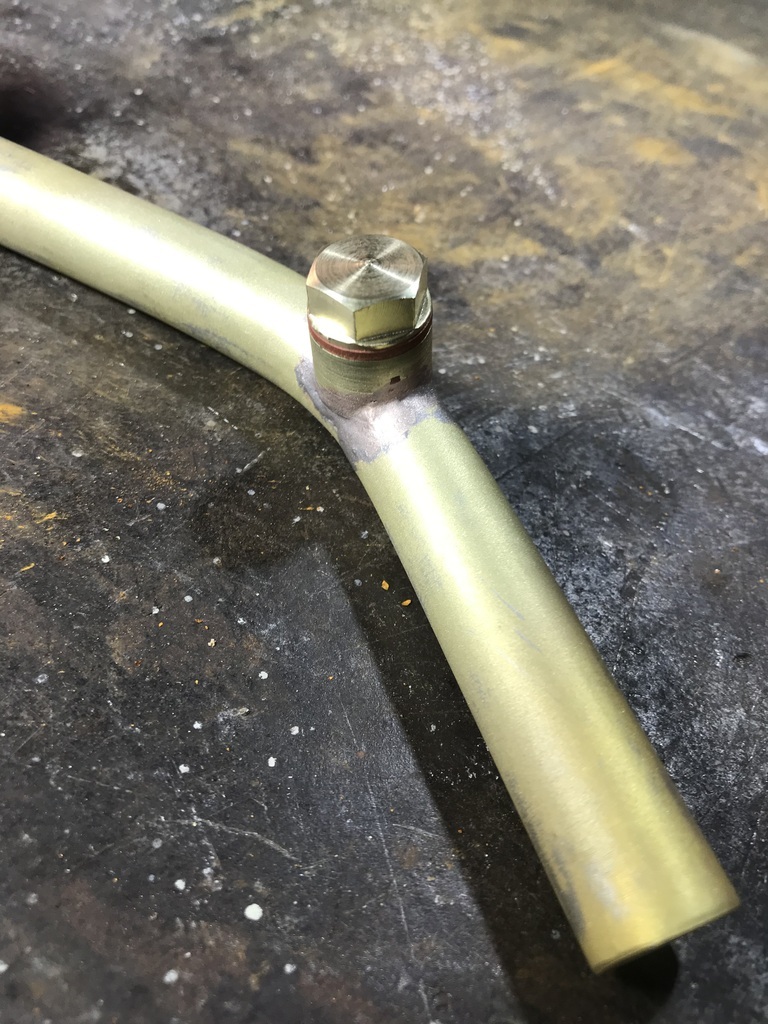
That first drive must have felt like a a proper victory on 70's BL build quality! Did you put any kind of lip on the end of the tubes, or just left them straight? I'm making coolant pipes too and the internet tells me that without a lip the hose might blow off when the system pressurizes. |
| |
|
|
|
|
gazzam
Part of things
 
Posts: 740 
|
|
|
|
|
Just left them straight. They went in about 40mm and are pretty much pushing against each other.
|
| |
|
|
|
|
|
|
|
|
if you are worried you can always solder a couple of olives on the ends.
|
| |
|
|
foxy99
Posted a lot
  
Posts: 1,454
|
|
|
|
|
I was looking a tube-beading tools a long time ago (when doing the metal fuel lines on my DD6) and they are pretty expensive. I ended up putting a (compressed) olive on the end
|
| |
1974 Daimler Double-Six VDP
1965/67 Hillman Imp pick-up
1984 VW Polo breadvan
1970s Yamaha Twins (4)
1976 Honda SS50ZK1
|
|
nze12
Part of things
 
Posts: 193
|
|
|
|
Great work! You may/may not have seen this, and yes it is about the XJS however there are a number of interesting tips around the V12 in general. Link: Help for the Jaguar XJ-S Owner |
| |
Last Edit: Aug 5, 2023 23:25:29 GMT by nze12
1986 BMW E30 refreshed to original spec
1973 BMW E12 520 converting to Motorsport 530
1982 XJS V12 converting to 5 speed manual
Many landscaping projects overriding above!
Cogito cogito ergo cogito sum!
|
|
gazzam
Part of things
 
Posts: 740 
|
|
|
|
|
Thanks, much appreciated.
|
| |
|
|
gazzam
Part of things
 
Posts: 740 
|
|
|
|
Removed all the seats so I could clean the floors and treat any rust. This is the driver’s side rear floor. It’s similar to both front and back on the lhs. Most of the brown you can see is glue. I think it’s in great condition for one of these cars, they do have a certain reputation… 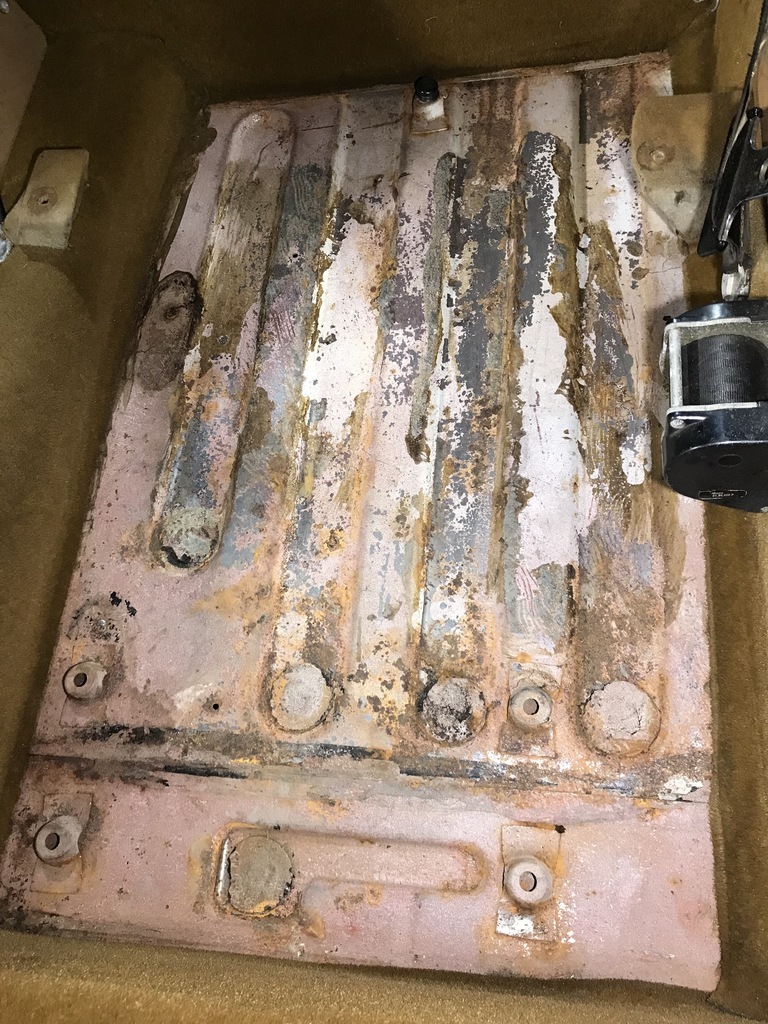 And the whole car part way through treatment with a rust converter. 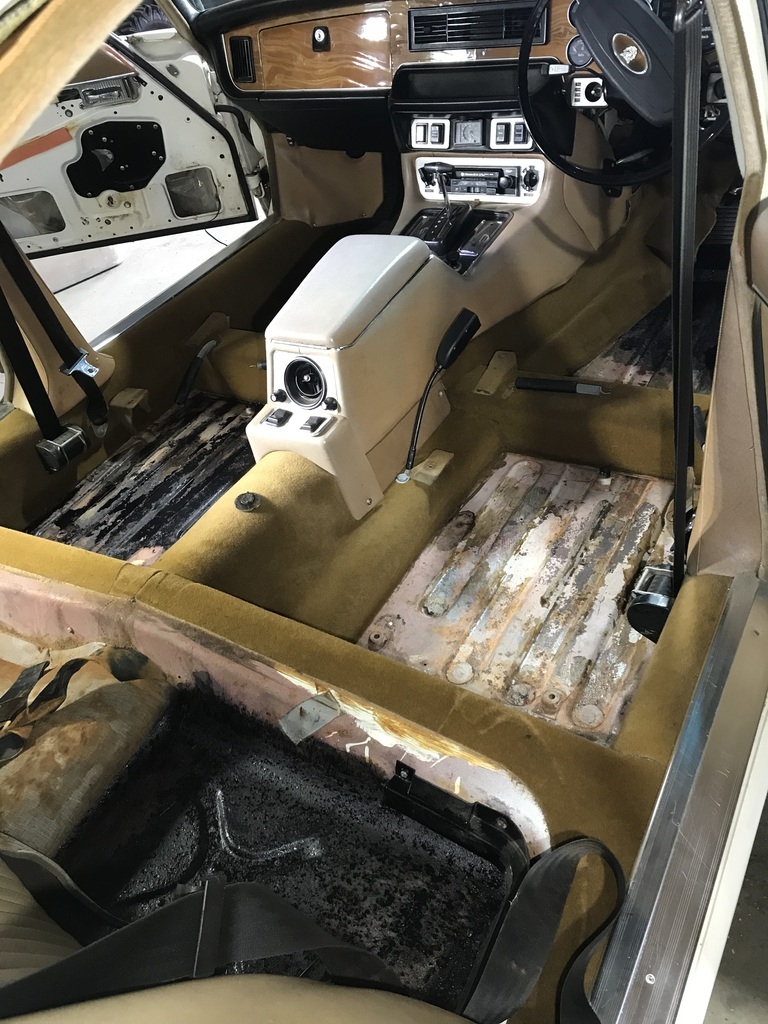 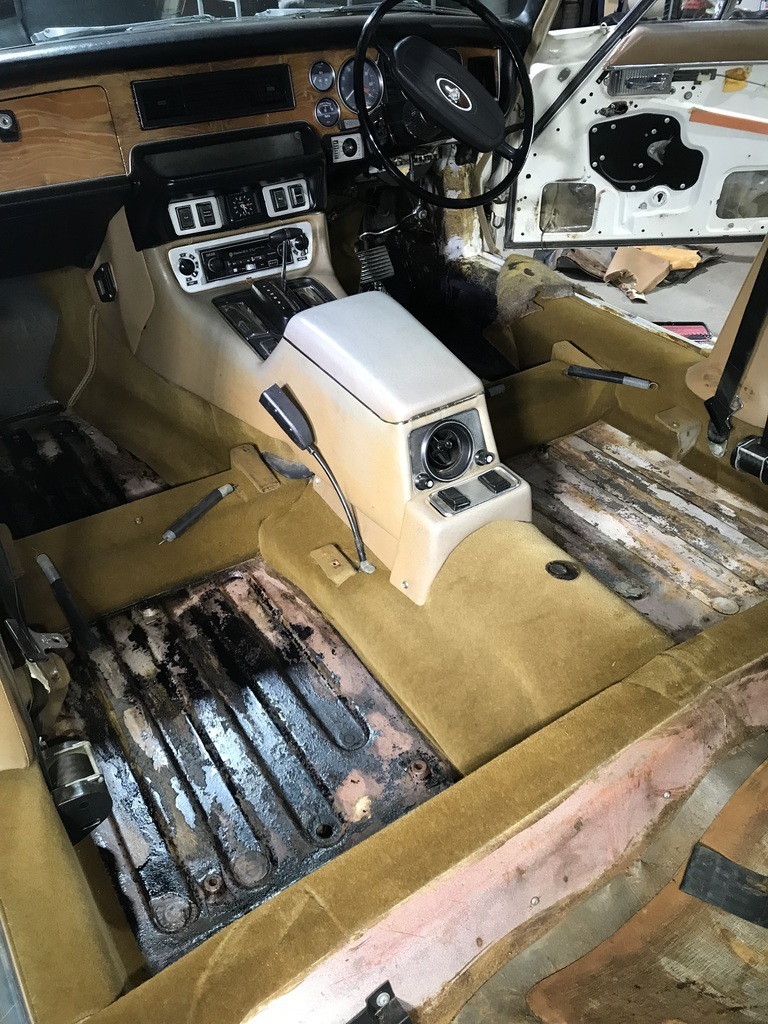 After the very front area on the rh side, the worst area was under the rear seat on the same side. I wonder how it got wet? The springs in the seat base are also rusted on that side. I know the front is getting wet from the engine bay. Not sure where yet, but yesterday I washed off some spilt brake fluid under the reservoir and there was water on the driver’s floor. I haven’t wet the outside of this car at all - just cleaned it with T-Cut, so I’m confident the driver’s floor got wet from me washing the engine. Nothing close to perforation though. Thanks. |
| |
|
|
|
|
|
|
|
Was this some BL engineers way of having a secret laugh into eternity? 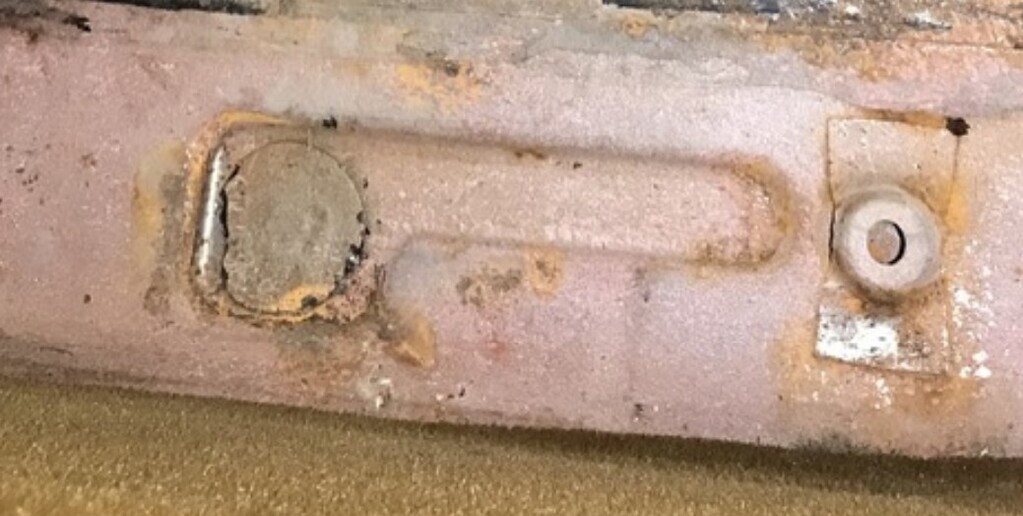 No? Just me then?  |
| |
|
|
gazzam
Part of things
 
Posts: 740 
|
|
|
|
|
Brilliant!
|
| |
|
|
foxy99
Posted a lot
  
Posts: 1,454
|
|
|
|
Without consulting the Parts list this p[ic reminds me of the quite detailed and complex interior colour options there were on the series 2 The books have a table covering everything from the carpets to the cant-rails and obviously the seats themselves My seats are Tuscan and I thing the carpets are Biscuit Your carpets look same but seats etc are a lot lighter than mine |
| |
1974 Daimler Double-Six VDP
1965/67 Hillman Imp pick-up
1984 VW Polo breadvan
1970s Yamaha Twins (4)
1976 Honda SS50ZK1
|
|
|
|
gazzam
Part of things
 
Posts: 740 
|
|
|
|
Talking of seats, this is the back of mine. 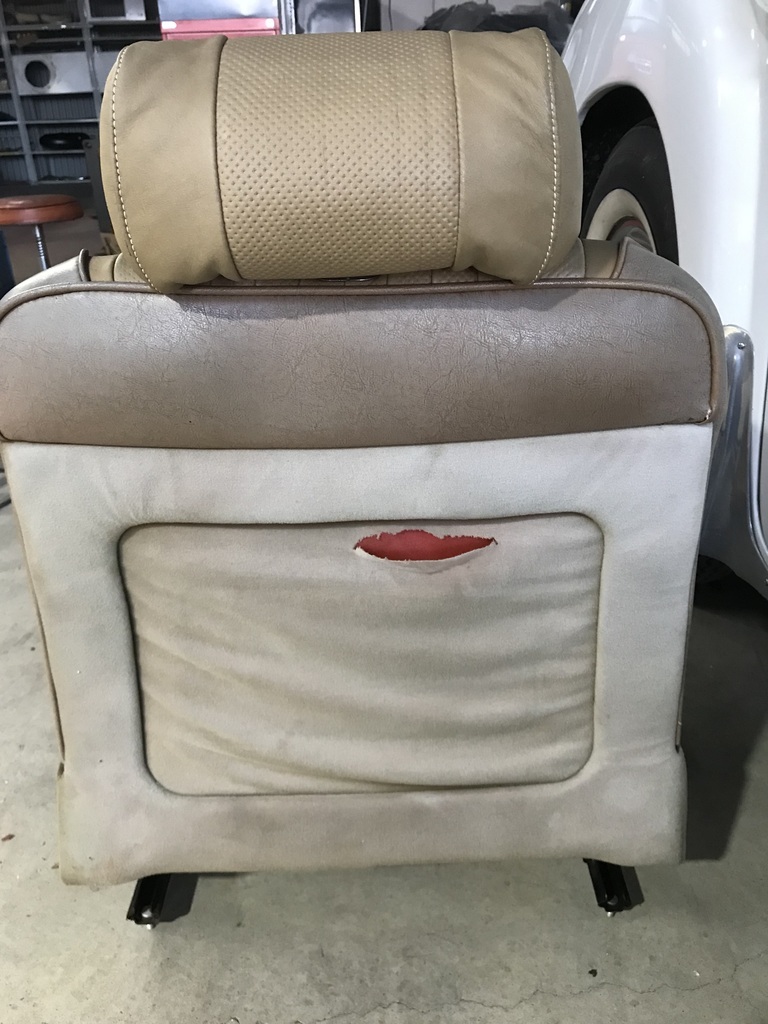 But I want to change them to something like this. 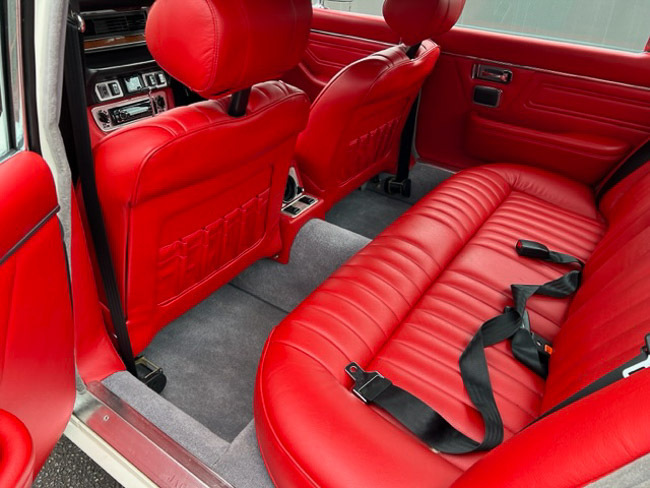 Are yours similar? I thought they might be the Daimler version. Thanks. |
| |
|
|
foxy99
Posted a lot
  
Posts: 1,454
|
|
|
|
From memory there were 3 basic styles of seats.... - Jags had perforated leather with thin pleats
- Daimlers had wide pleats (not perforated)
- VDP had boxed-in wide pleats
In later years things changed but for series 2 am sure this was the case. My VDP is only leather-faced. The backs are vinyl where yours are cloth  the dark days the dark days leather came up great with some £3 leather cleaner leather came up great with some £3 leather cleaner |
| |
1974 Daimler Double-Six VDP
1965/67 Hillman Imp pick-up
1984 VW Polo breadvan
1970s Yamaha Twins (4)
1976 Honda SS50ZK1
|
|
gazzam
Part of things
 
Posts: 740 
|
|
|
|
|
They look as new.
I want to do the backs the same as the red one. It looks like they have a pocket on the back?
I’m looking for some close up shots of the back so I can copy it.
|
| |
|
|
foxy99
Posted a lot
  
Posts: 1,454
|
|
|
|
They look as new. I want to do the backs the same as the red one. It looks like they have a pocket on the back? I’m looking for some close up shots of the back so I can copy it. Today I found the stuff I used. It was Turtle Wax leather cleaner & restorer. My seats have a pocket on the back iirc but it's nothing fancy like the red ones. I think they are a custom retrim. I have a book on the XJ range which has loads of interior pics. Will check in there |
| |
1974 Daimler Double-Six VDP
1965/67 Hillman Imp pick-up
1984 VW Polo breadvan
1970s Yamaha Twins (4)
1976 Honda SS50ZK1
|
|
gazzam
Part of things
 
Posts: 740 
|
|
|
|
Had a couple of days off from the Jag, helping the bride build a small pond in the house yard. Started putting the seats and carpet back in and realised I had a hole in the inner sill to repair. So I cut a piece of about 20# and once I had it fitting nicely in the hole, decided to make the hole bigger. I hadn’t gone far enough to get back to full thickness metal. And I wanted to be sure that the area of the sill where the A pillar attaches was ok. I cut a small piece of the bottom of the A pillar away and it’s all good under there. There’s surface rust, but nice and crust free. I find it really strange that this vertical section is rusted through, obviously from the passenger compartment side and all the rest is so good. 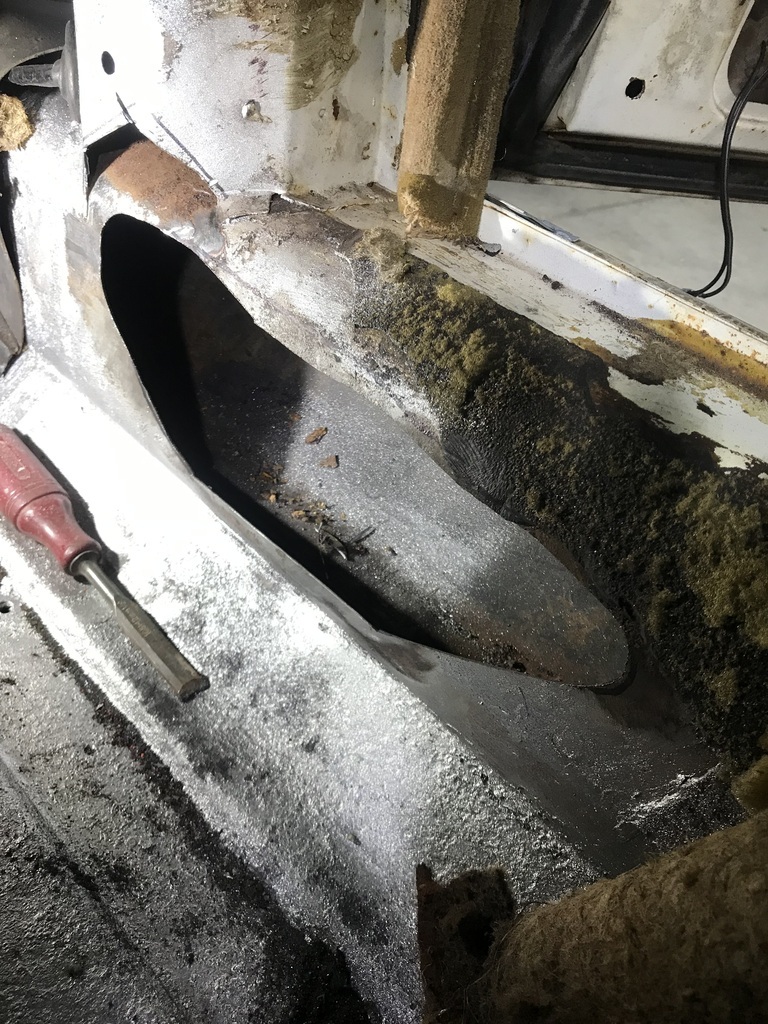 Made a template with the paper and dirty finger technique. Cut it out and taped it to some sheet metal. 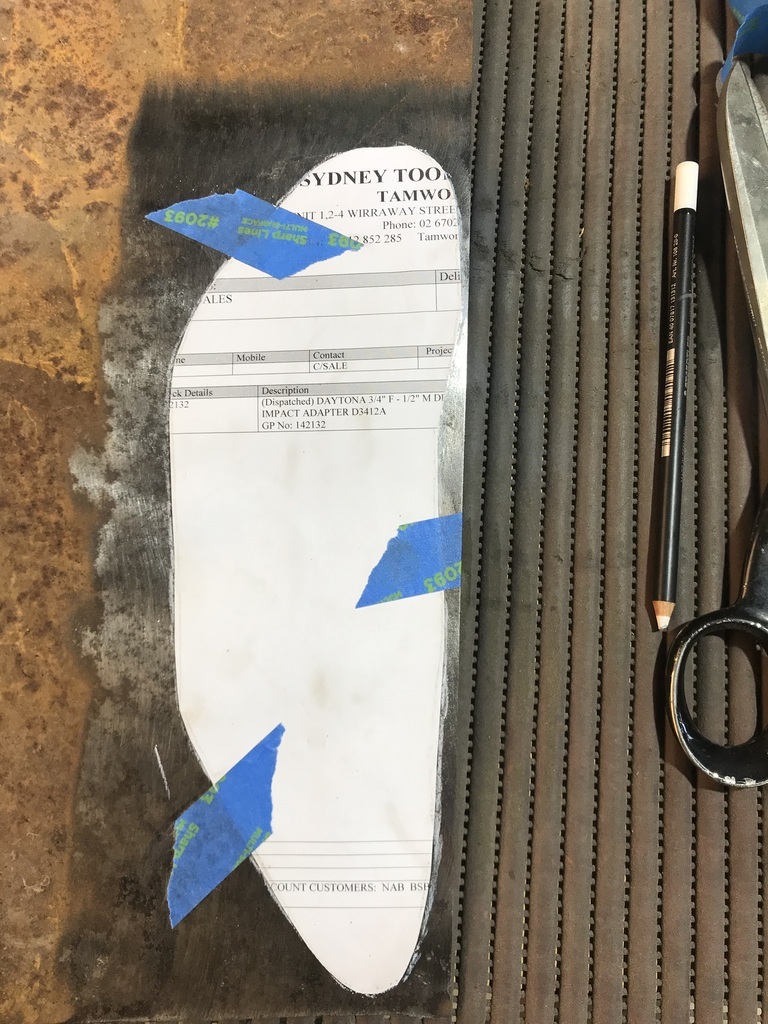 Cut this out with the bandsaw and after quite a bit of fettling, got it to fit reasonably in the hole. 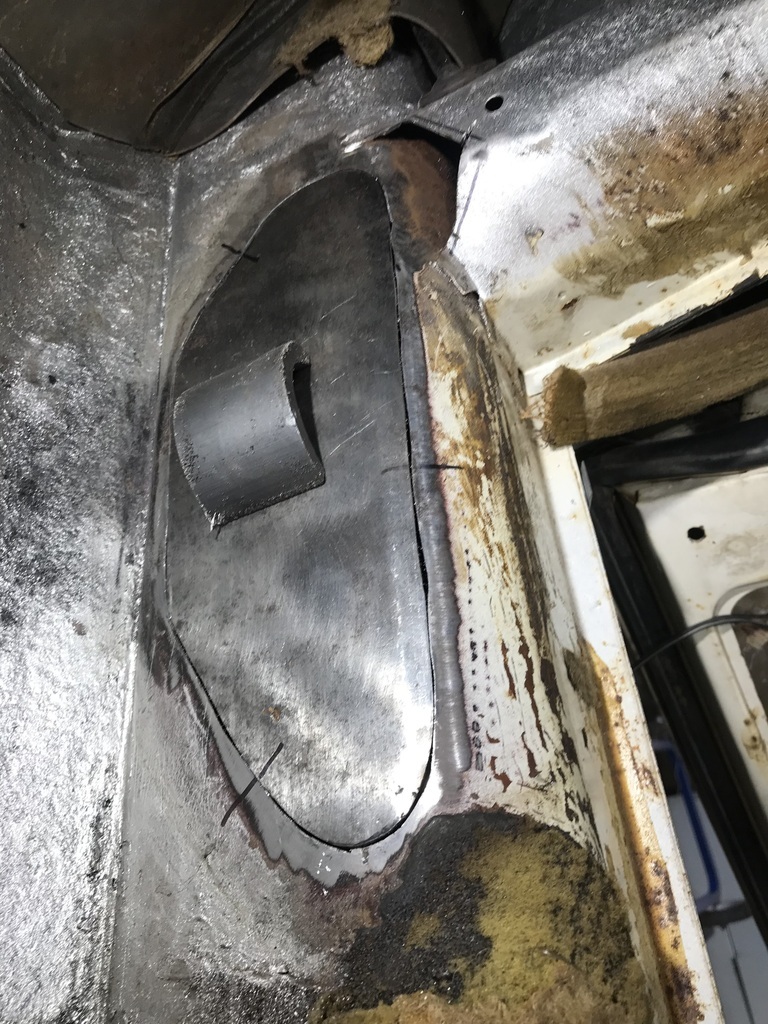 Will weld it in tomorrow. Thanks |
| |
|
|
gazzam
Part of things
 
Posts: 740 
|
|
|
|
Ran a hose over the windscreen seal to see if there were any water leaks. All good so I sprayed some cavity wax into the sill and the A pillar. Gave it several coats as the improvised spray gun I used will only put out a fine mist. But with the aid of a mirror and a torch, I could see that it was well covered. Out with the TIG then. This was not fun at all. Kneeling over the sill, operating the foot pedal with my knee and both hands full. By the time I got to the run along the bottom of the patch panel, I’d had enough of the TIG and got out my faithful MIG. Took mere minutes to finish. Forgot to take any photos, until it was cleaned up. 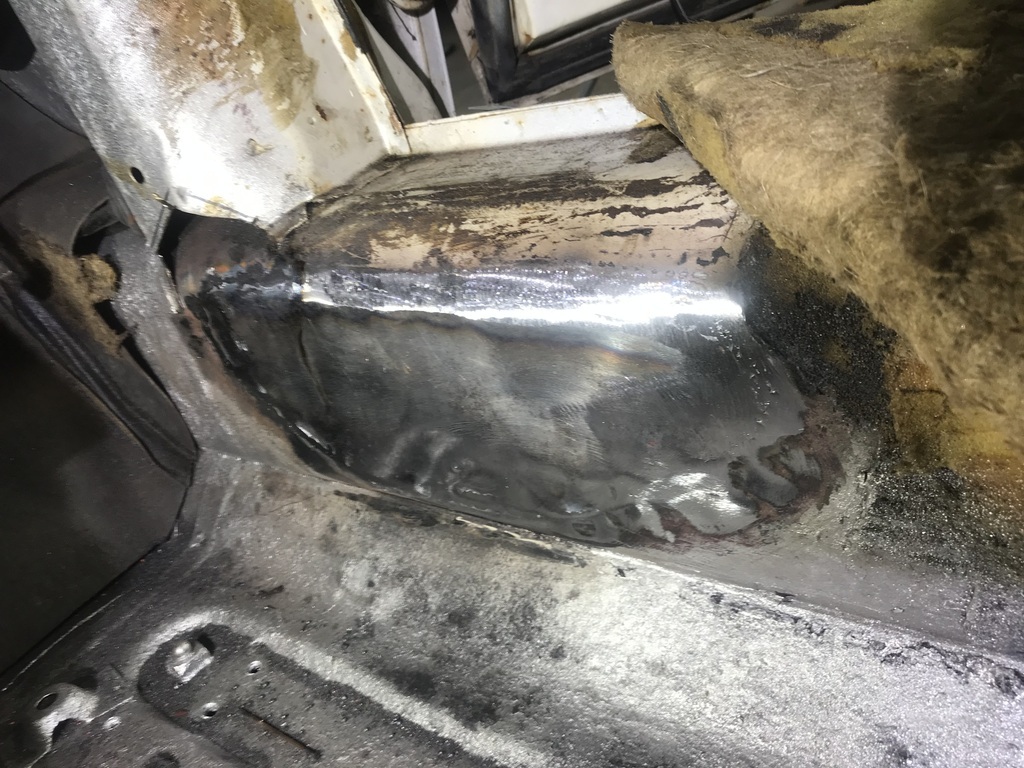 Then made a small piece to close off the bottom of the a pillar. 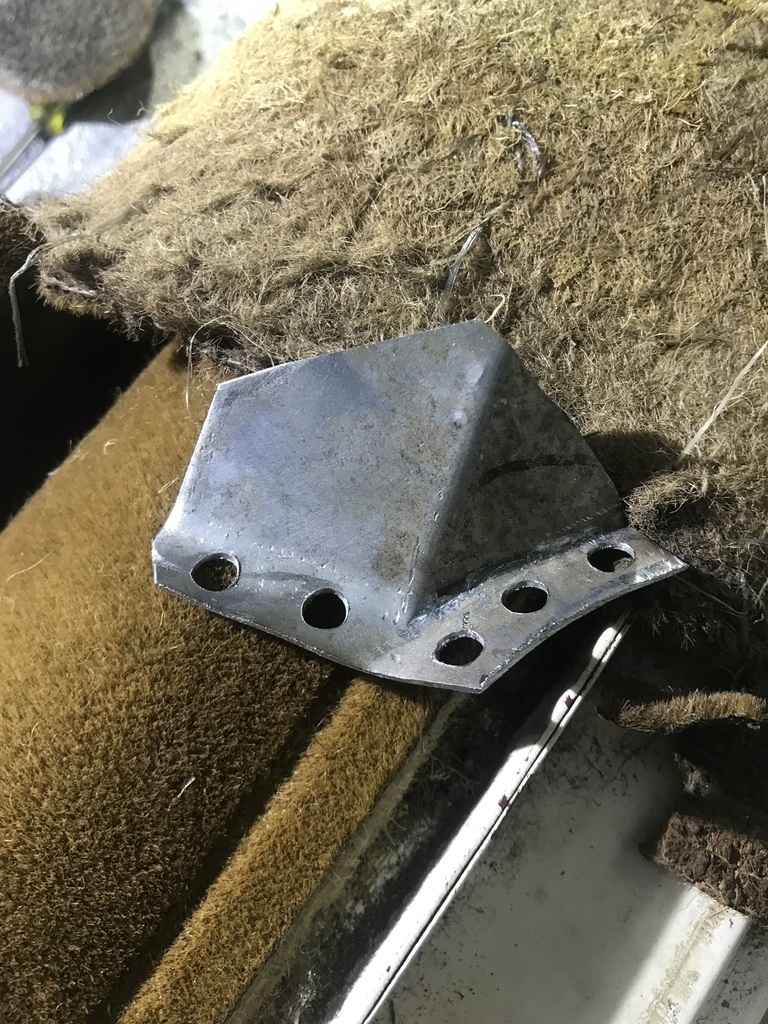 Tacked it in place, after protecting the harness that runs up the A pillar, with a piece of folded up scrap metal. Held by the pliers in this shot. 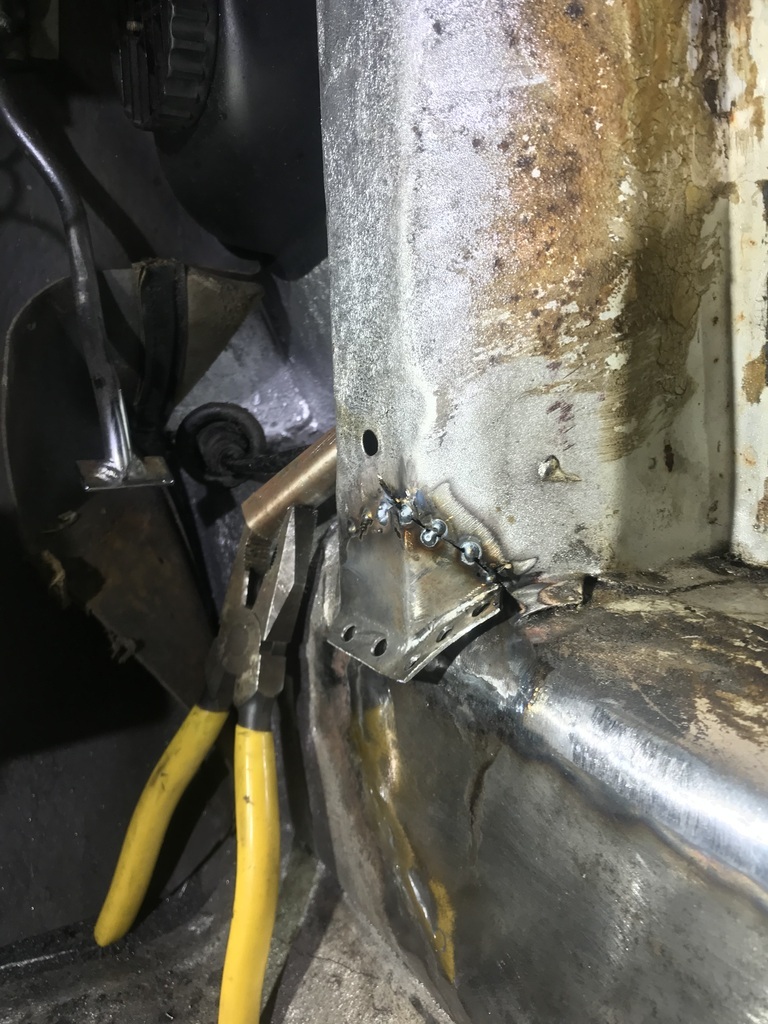 Tapped the flanges into place after I got some weld on it. 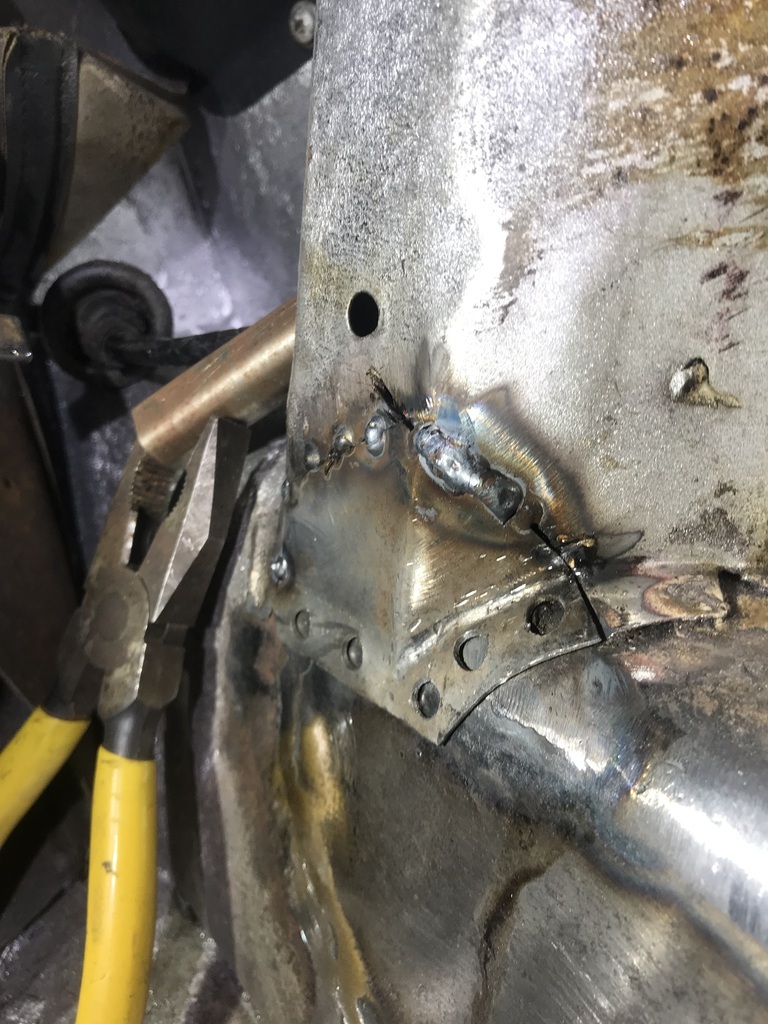 Tidied up ready for some primer. 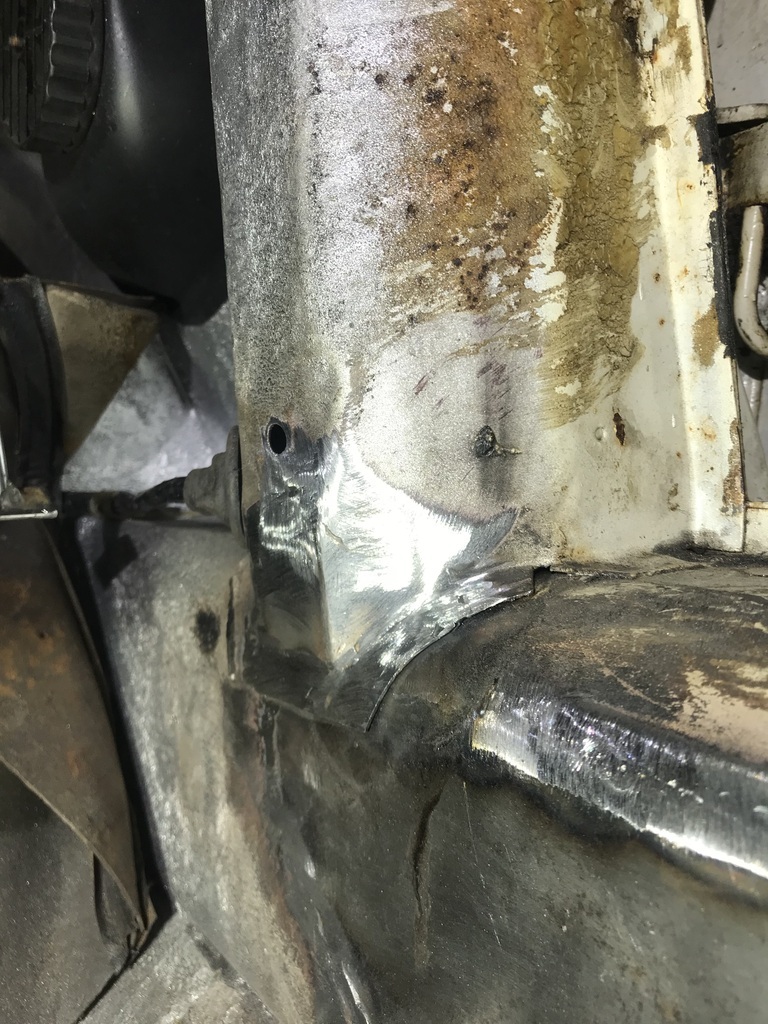 Thanks |
| |
|
|
oto67
Part of things
 
Posts: 70
|
|
|
|
|
Nice work bud, shes coming along nicely
|
| |
|
|
gazzam
Part of things
 
Posts: 740 
|
|
Aug 11, 2023 10:24:26 GMT
|
Thanks oto. Wasn’t going to bother posting today. A case of not much to report… Got the carpets, seats all back in place. Had to make a substitute for the millboard in the A pillar trim. Laid the manky original on a piece of my favourite signboard material to trace an outline. 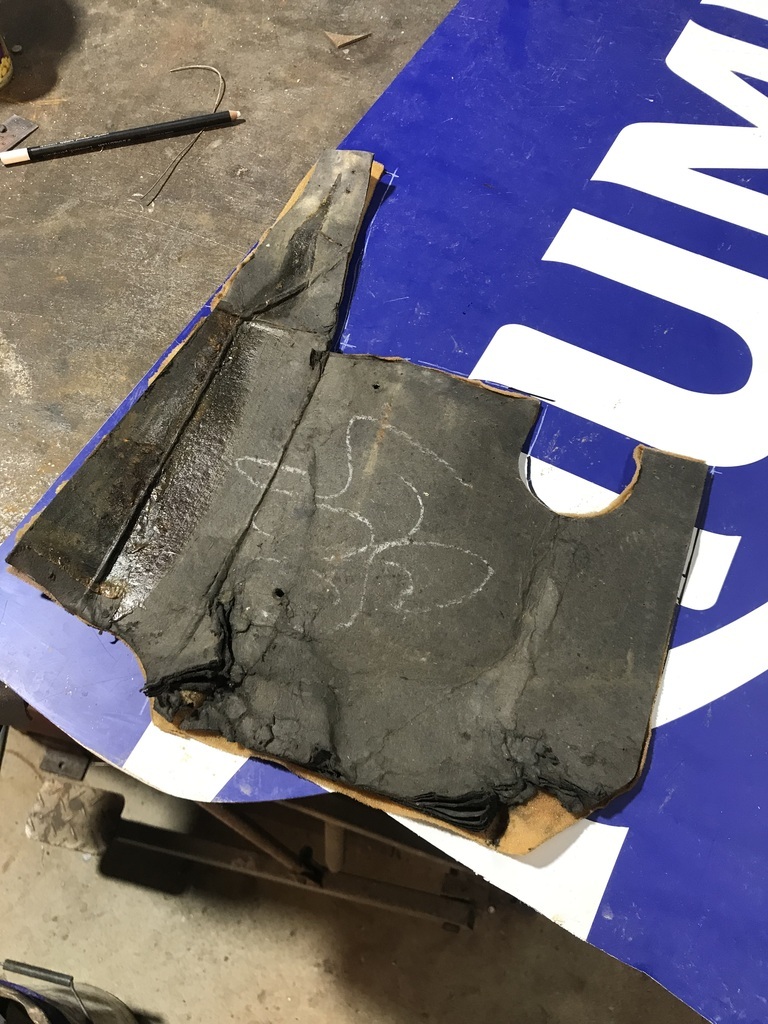 Cut it out with the bandsaw and smoothed out the edges. Then used spray contact to glue the vinyl to it. 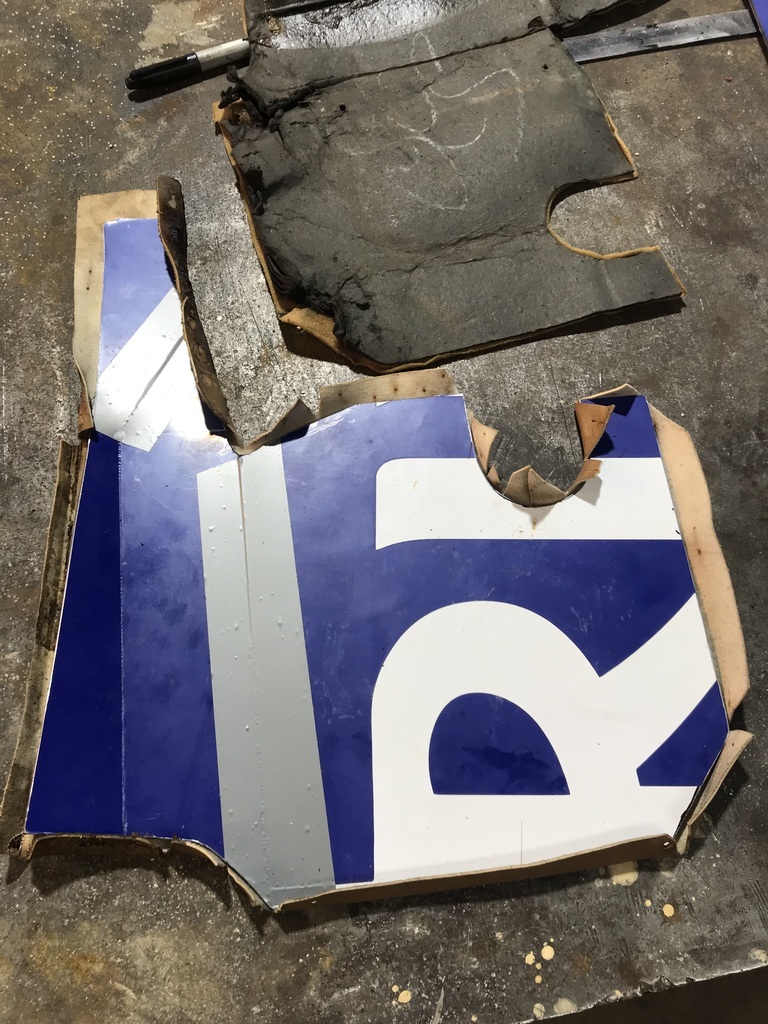 And here it is in place. Must have got the shape pretty right as the forward self tapper lined up with the existing hole in the sill. Then I just had to drill through the hole in the vinyl into the new metal for the second screw. Easy. 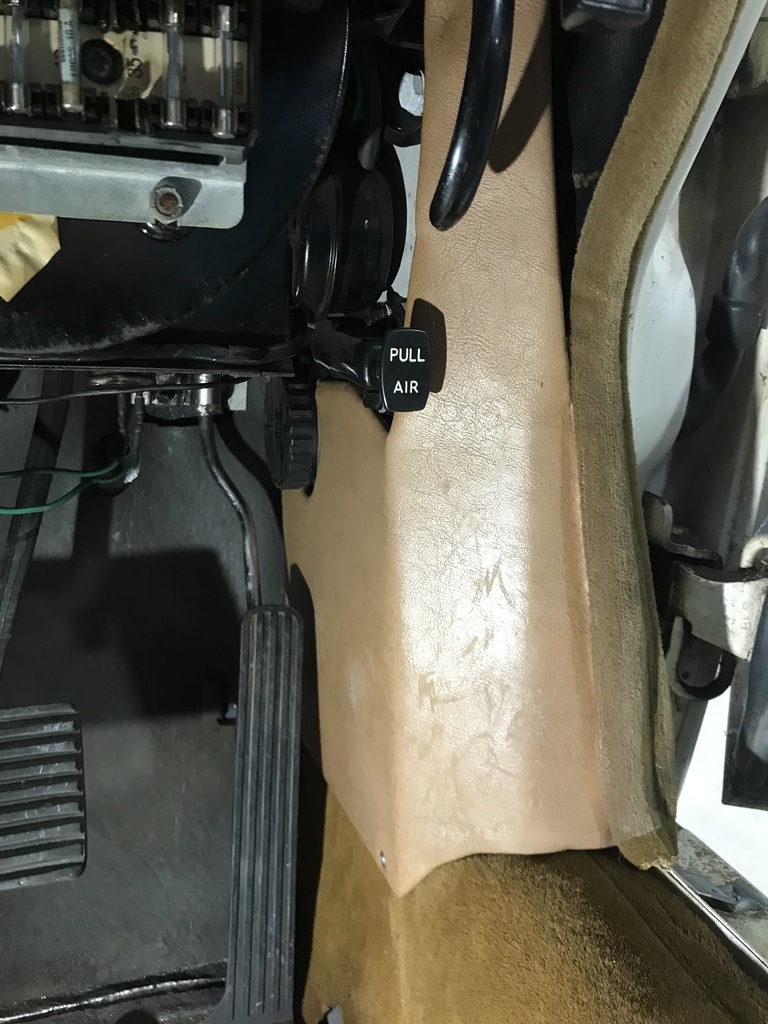 Once that was in place I could reinstall the panel under the steering column and the sill trim. The sill trim. What a fantastic piece of design that is. Trying to find the holes for the four self tappers, each into a screwed on tab that can, and will, move. So the best part of an hour later, got that done and noticed that the (driver’s) door is hanging a bit low. I haven’t touched the hinges at all, but this is the first time I’ve spotted that it’s binding on the latch. Needs to go up. So I loosen off the two visible bolts on the top hinge, but can’t move the door. It, however, seems to have moved down. Wants to hit the body now. But I can’t move it up at all. WTF? So I look in the manual and there are bolts behind the guard. Not sure how much has to come off to get at them. Another fantastic piece of design. Not quite the high water mark that they achieved with the hinges on the XK120. They’re at 45 degrees. So you can’t move the door in one plane without affecting the other. Brilliant. But hidden bolts get an honourable mention. Just needed to get that off my chest. Don’t get me wrong - I’m a fan. I own 3 Jags, 4 if you count the replica. But they should get some advice when they’re designing a door hinge. Thanks. |
| |
|
|
foxy99
Posted a lot
  
Posts: 1,454
|
|
|
|
Was going to say 'was the car on 4 wheels or on jacks when you had the door-closing issue?' After welding new sills onto mine (doors were removed) I was horrified to find none of the doors would close and thought I'd warped the shell (despite heavy bracing). I got it back on the ground and things were better then found there was a lot of scope for adjustment on the hinges but what really put my mind at rest was that refitting the sill trims (to those moveable tags you mention) I could see they landed back exactly where they'd rubbed on the paint before all the work began  Anyway great work on the interior trim etc. I like this type of resto where the original car is being repaired rather than a replica being made |
| |
Last Edit: Aug 12, 2023 0:45:41 GMT by foxy99
1974 Daimler Double-Six VDP
1965/67 Hillman Imp pick-up
1984 VW Polo breadvan
1970s Yamaha Twins (4)
1976 Honda SS50ZK1
|
|
gazzam
Part of things
 
Posts: 740 
|
|
|
|
I have to admit there is an advantage to the hidden bolts on the door hinges. It means you can get the door into position and then tighten two of the hinge bolts without moving the door. Not sure if that gain is enough to make up for the difficulty in getting at the bolts, but silver linings and all that… Took me two goes to get the door to where I was happy with it. The first time I didn’t loosen the bottom hinge and it just didn’t work out. The bolts for the bottom hinges were covered in underseal and after chipping at it for ages, I had the idea of heating an old ring spanner and melting it off. Worked a treat. Once I’d finished with door adjustment, I put the trim back together and put it back onto the door. I’m really pleased with how they turned out with the pva glue/flattening fix. It makes them look so much better when they are flat rather than wavy. The plan is to recover the capping and the armrest, and recolour the flat part. This means the embossed detail will remain and it will keep the factory look. The caps and armrests are damaged, so have to be recovered. 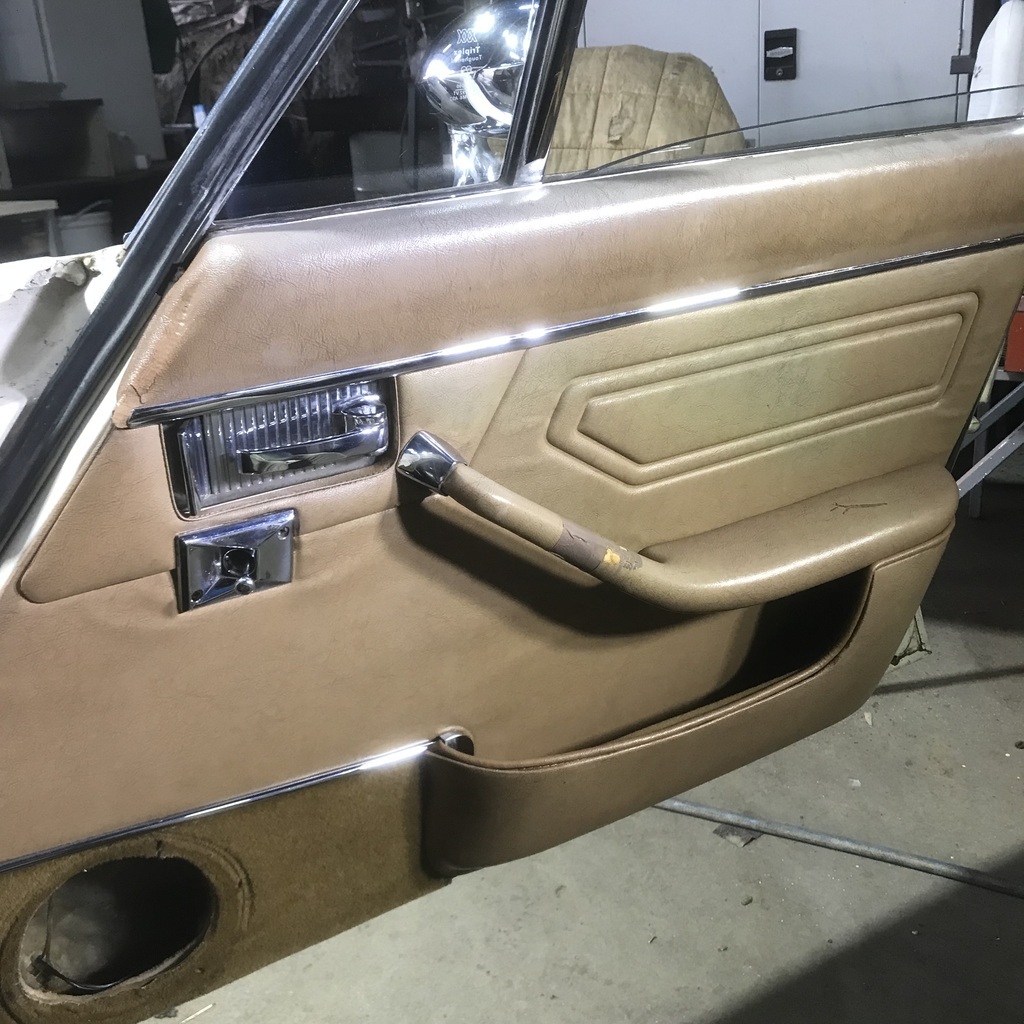 The front passenger door card is still undergoing the flattening, so will be a couple of days before it can be remounted. That will finish the trim for the moment. The plastic that’s meant to keep the door cards dry is strangely inside the door. 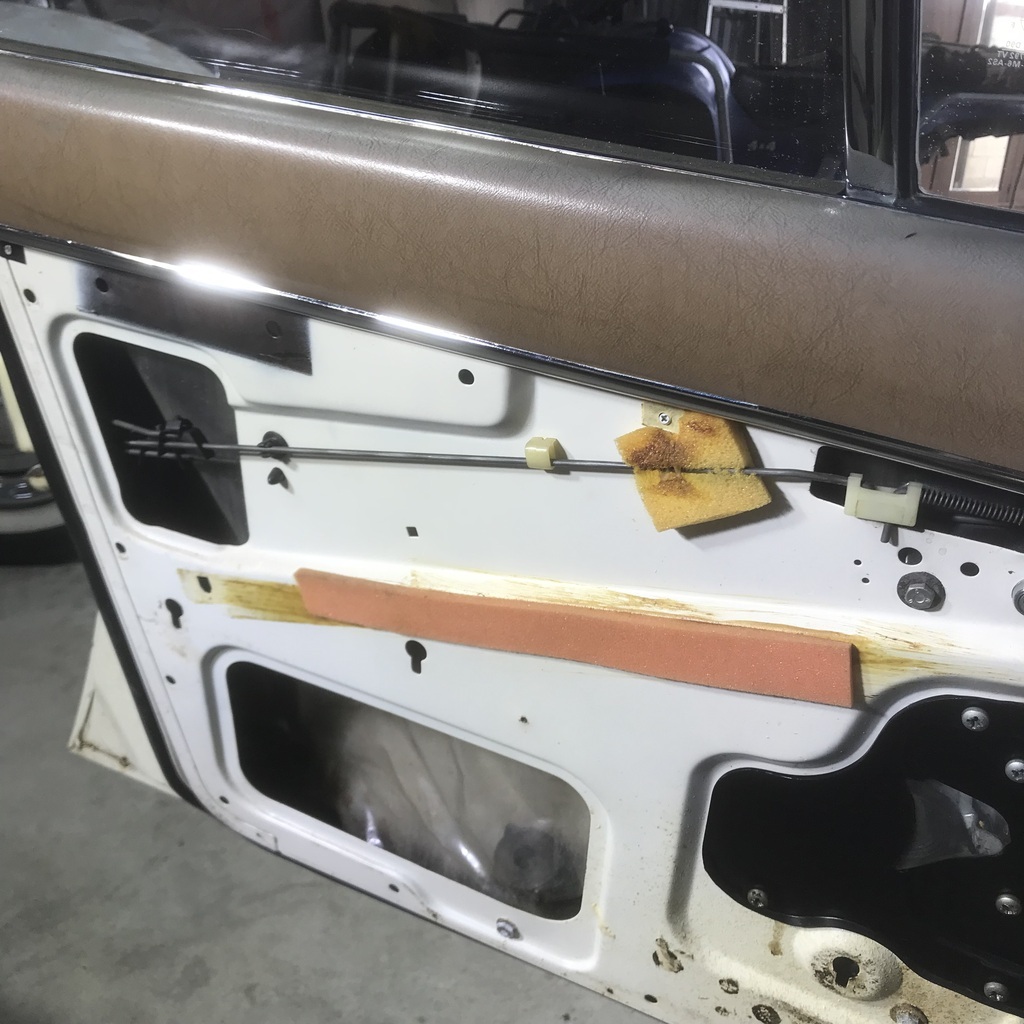 All four doors are the same, with no sign of any other plastic over the holes as is usual. This car is highly unlikely ever to see water, certainly in my ownership, so I will leave this as is. Also found a piece of hose to connect the diaphragm vents on each pair of carbs. I made some small holes about midway along the hose before putting them on. Should work I think. Thanks. |
| |
|
|
|
|


