|
|
|
|
|
It all started innocently enough, 7 years ago on this very forum. As a long-time lurker here, I saw these threads: Richw82's 1973 XJ6Janm's 1970 XJ6 SuperchargedThey made me realize that Series 1 XJs are pretty cool cars. Until then I’d had a ‘71 DAF 55 coupe that I’d swapped a hotter engine into and did some handling upgrades to. 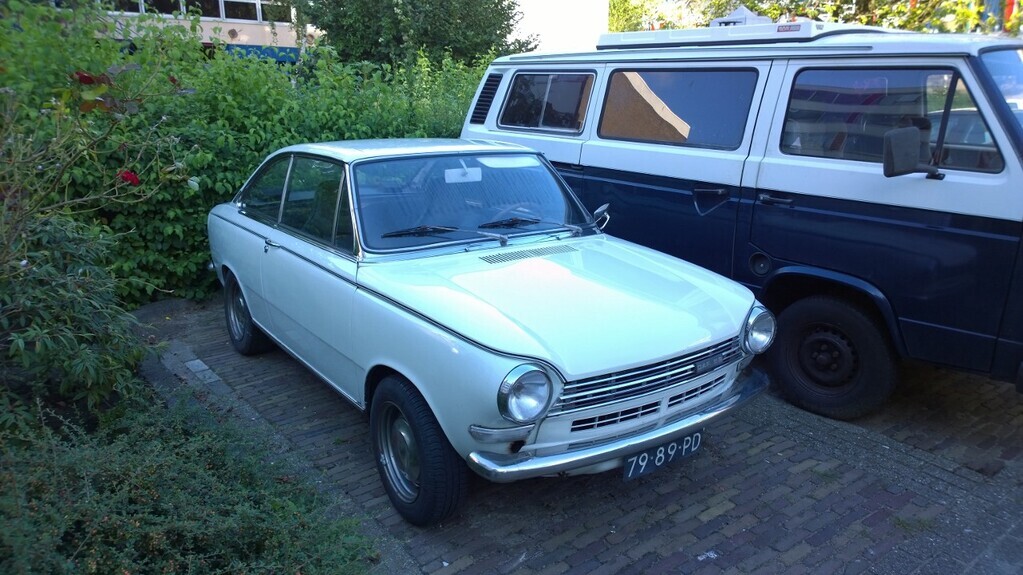 However, it was the ‘64 Fintail Mercedes 220SE I had that opened my eyes to the joys of big barges. 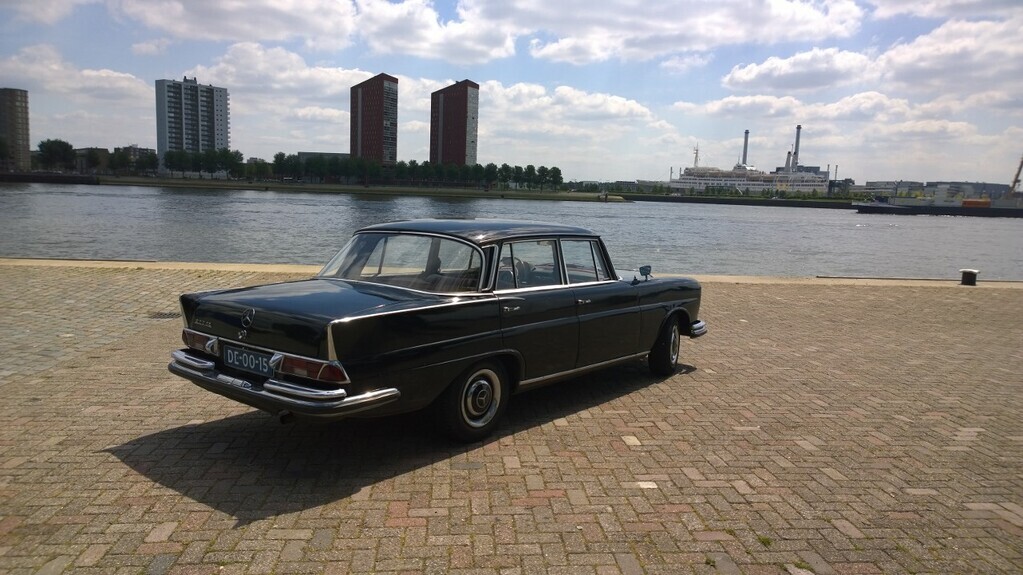 So a Jag would be a great idea, right? Looking at the different ones the Series 1 was the way to go – I preferred the deeper grille and less plasticky interior to that of later cars. What really convinced me is doing some Photoshopping to tweak the standard XJ into something a bit more special. 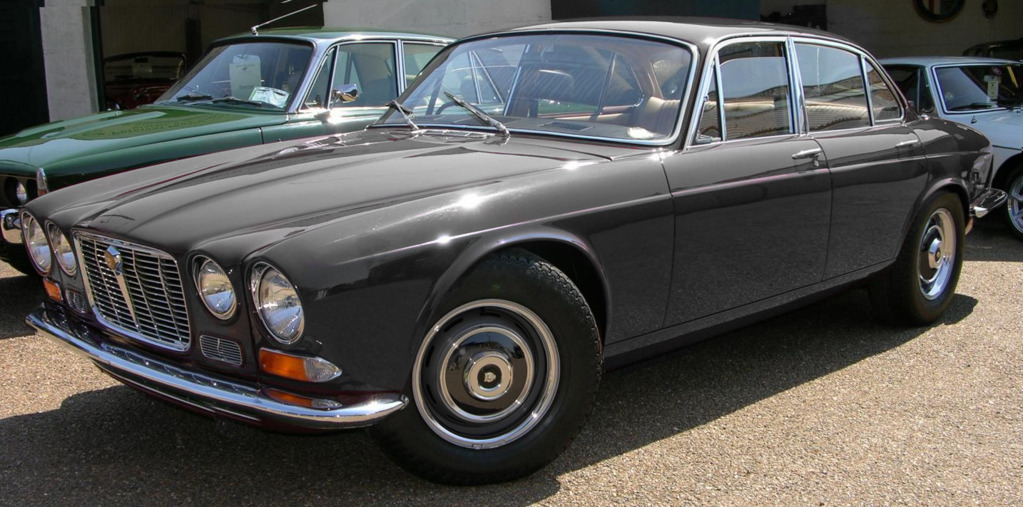 Not bad at all - the search was on. As enthousiasts always tell you: buy the best example you can afford. So I snagged the cheapest one I could find: a ‘71 XJ6 at the very fair price of a Euro per kilo. Here’s the original pic from the listing. 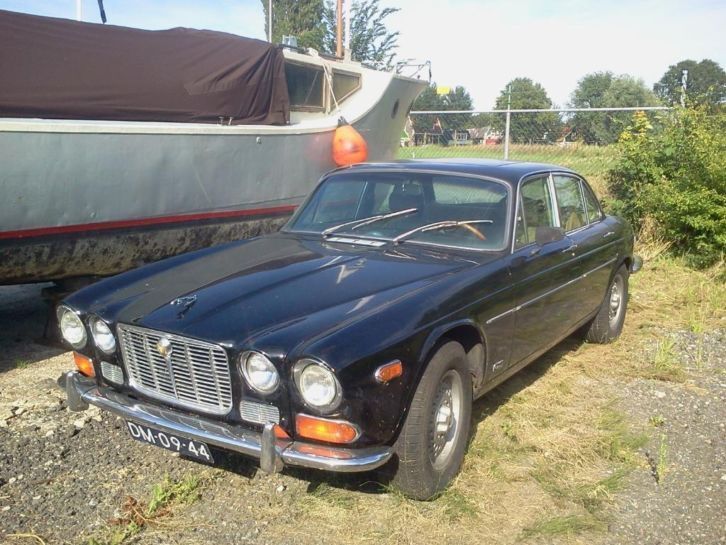 It didn’t run of course, mainly because the carbs were in a box in the trunk. This was of course just a minor inconvenience and would be about two hours work*. It was delivered to me a week later, resting in its natural habitat: 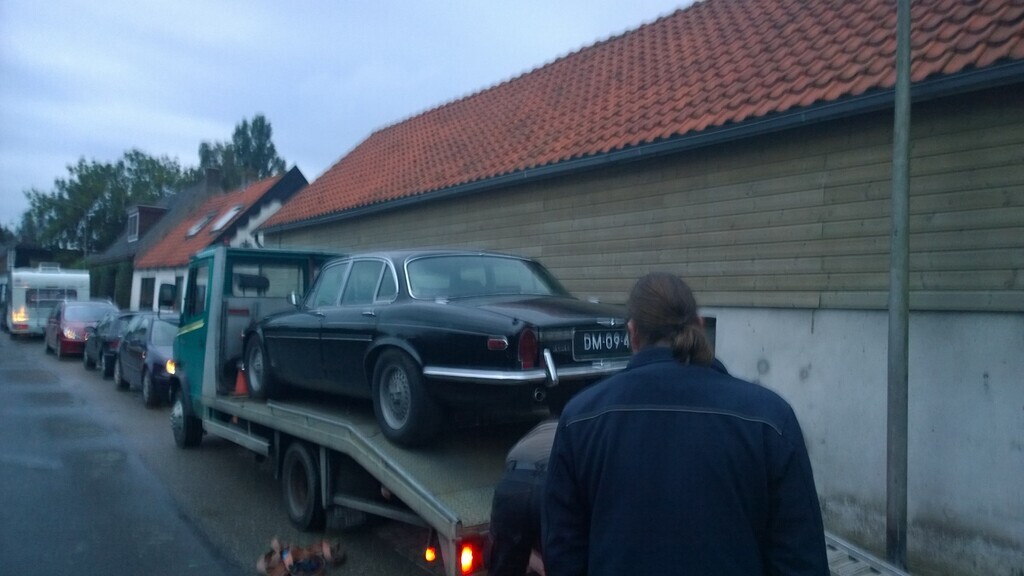 Spending its youth in sun-laden California meant that it was equipped with most available options (air conditioning, power sunroof, tinted power windows, Nardi steering wheel), but also with some less-desirable details like the side moldings, side markers, Stromberg emission carburetors, and the smaller sealed beam headlights. Most importantly, it had a relatively rust-free body. After being imported to Holland it had received an LPG installation to take the sting out of the 4.2’s thirst. Getting it running and MOTed was a matter of a full service (oil, filters, rotor/cap/leads/plugs), a new steering rack and ball joints, a new alternator, and some fresh tires. The first drive put a smile on my face. The engine was smooth, didn’t smoke and sounded lovely. It was as comfy as I’d hoped, yet surprisingly cramped – especially with the sunroof taking away precious headroom. You could tell that it had been run on the cheap for a long time. The electrics looked to have been done by Stevie Wonder and were mostly inoperable. The interior looked and smelled like a bear with Crohn’s disease had lived in it, due to the water let in by the UV-hardened window seals and sunroof. Still, sitting in it you’re surrounded by chrome dials, peeling veneer, and crackled leather, and even in its sorry state it felt like a special place to be. 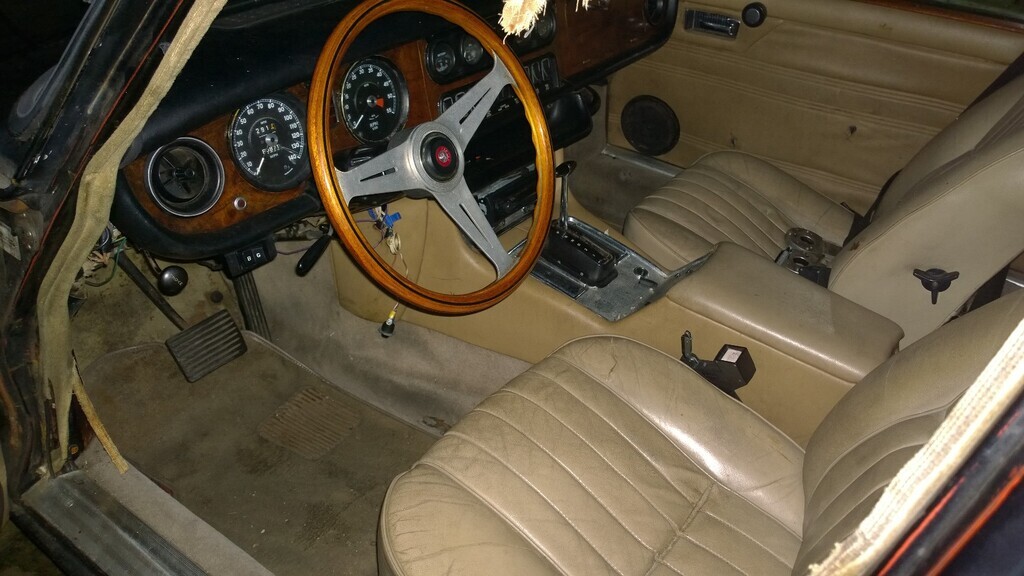 So I decided to crack on with it. Over the coming few posts I’ll be sharing my progress over the years. |
| |
Last Edit: Oct 18, 2024 18:34:34 GMT by mkickert
|
|
|
|
|
|
|
|
|
|
I will be following along. Beautiful, beautiful cars.
Best of luck to you, John
|
| |
|
|
|
|
|
|
|
|
I will be following along. Beautiful, beautiful cars.
Best of luck to you, John
|
| |
|
|
brachunky
Scotland
Posts: 1,339  Club RR Member Number: 72
|
|
|
|
Definitely following! At the wet behind the ears age of 22, I owned a 1971 XJ6 in a manual & overdrive configuration. Loved it immensely  Besides the running costs the only negative (read ego) experience was a copper pulling me over for speeding and asking moi whether the car belonged to my father  Really? With chrome wire spokes, stainless cill covers and a cb radio?  |
| |
|
|
|
|
|
|
|
Having passed the MOT I celebrated its graduation from paperweight to rolling restoration by getting rid of the Pepperpots and giving it a polish. 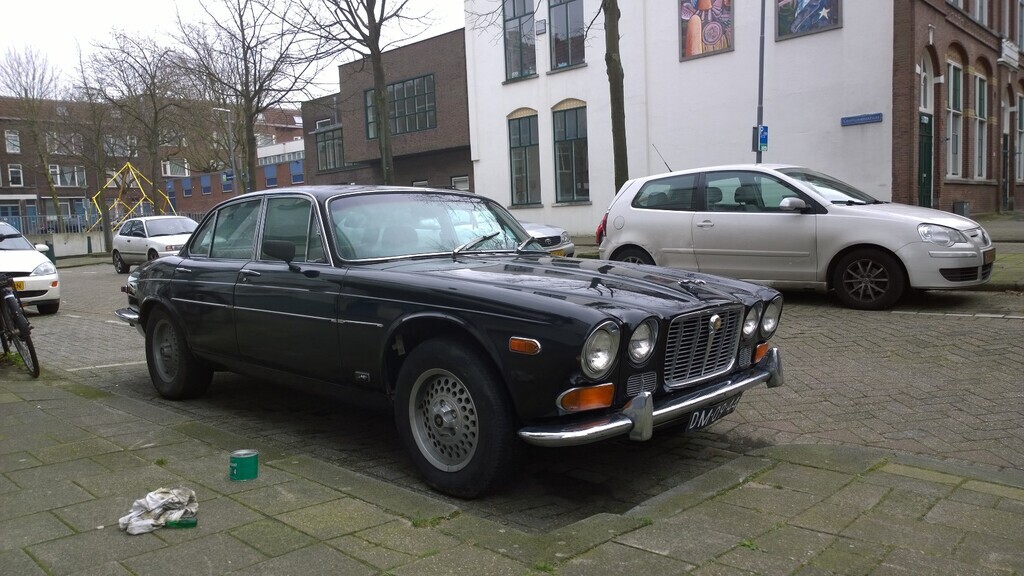 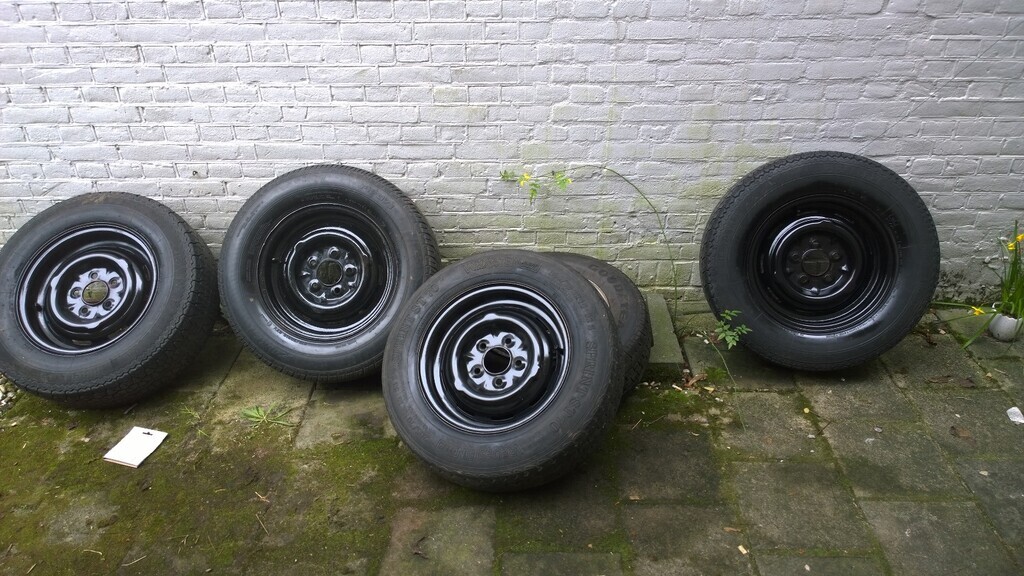 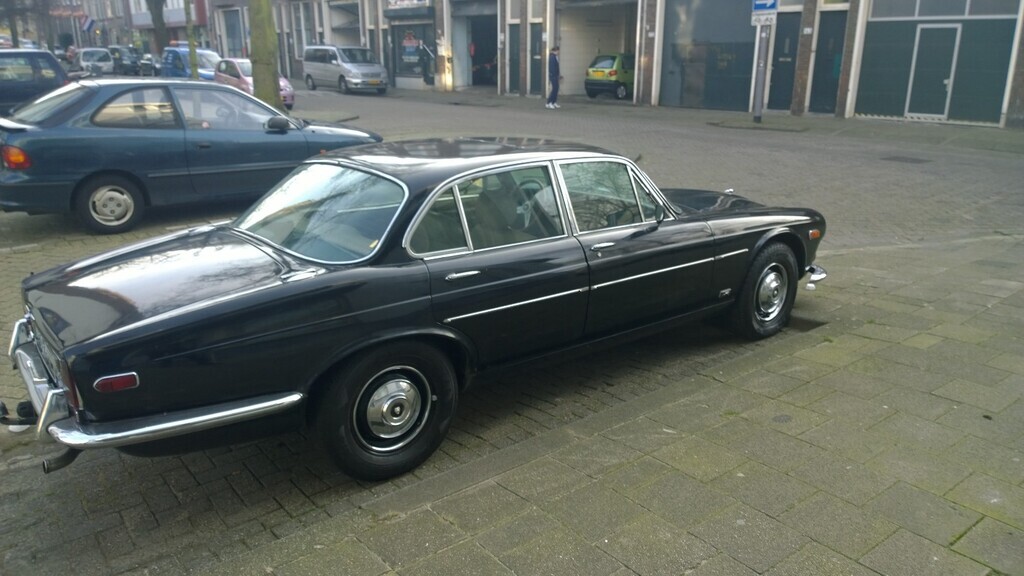 Over here the Series Jags are still very popular with banger races, which has proved to be a valuable source of otherwise hard to find parts for an excellent price – including this set of the original Series 1 steel wheels with trim rings and caps, which I painted black to suit the body. I also sourced some missing interior bits and redid the Furflex along the cantrails. 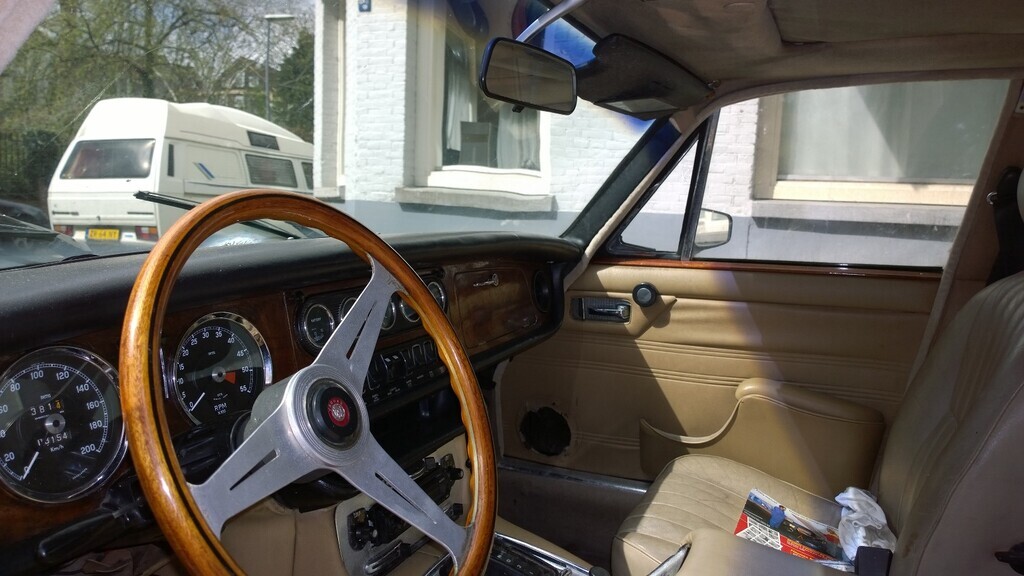 It was put into regular use after that. I straightened up the bent front bumper and fitted the smaller US style plate. 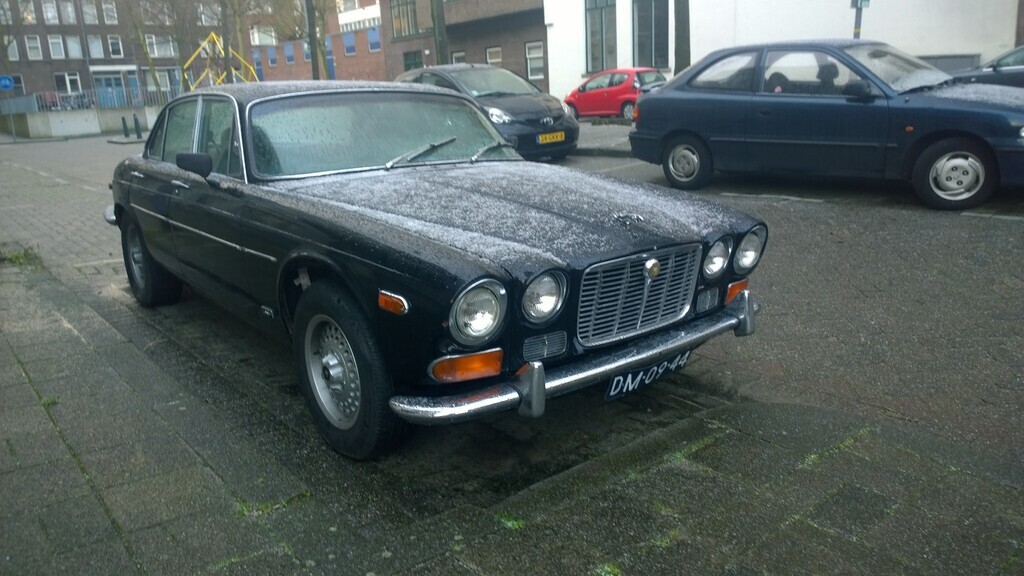 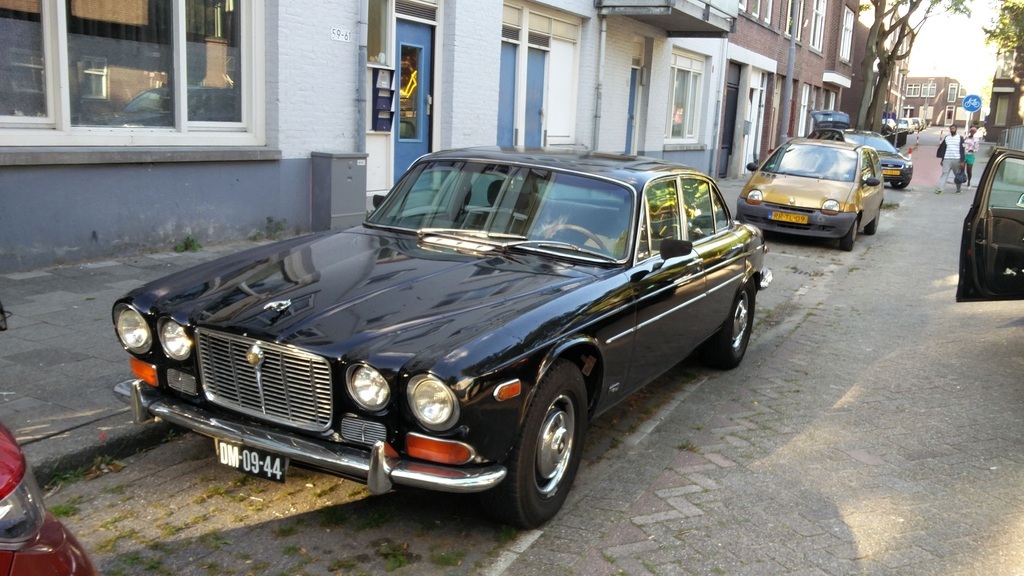 The sagging gearbox mounting spring shown here was replaced, mostly solving some driveline vibrations. 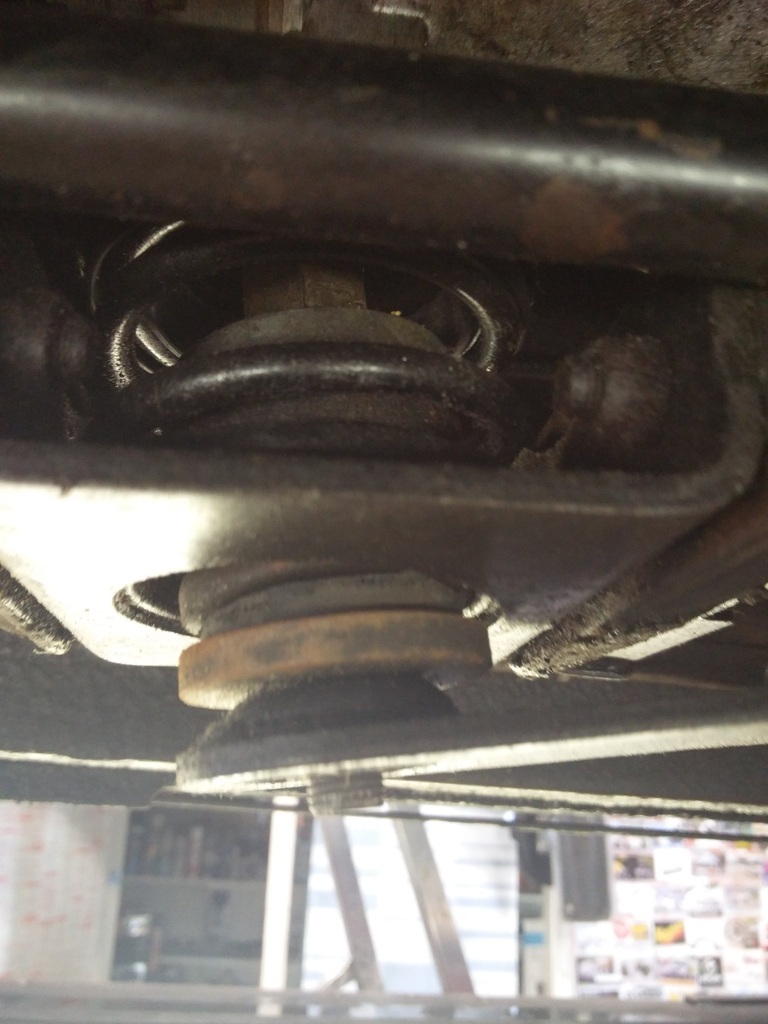 Some longer runs showed that the Jag was a capable car, but that there were some niggles that made it less usable. 1. The steering did not inspire confidence. 2. The three speed BW66 gave the combination of sluggish shifts and high motorway RPMs. 3. A top speed run revealed that a considerable part of its 170 emission-controlled ponies had gone off to pasture over the years. To solve the vague steering I took a better look at the front suspension. The original anti-roll bar bushings had turned into crumbly lumps of coal, so replacing them with new polyurethane returned some feel. 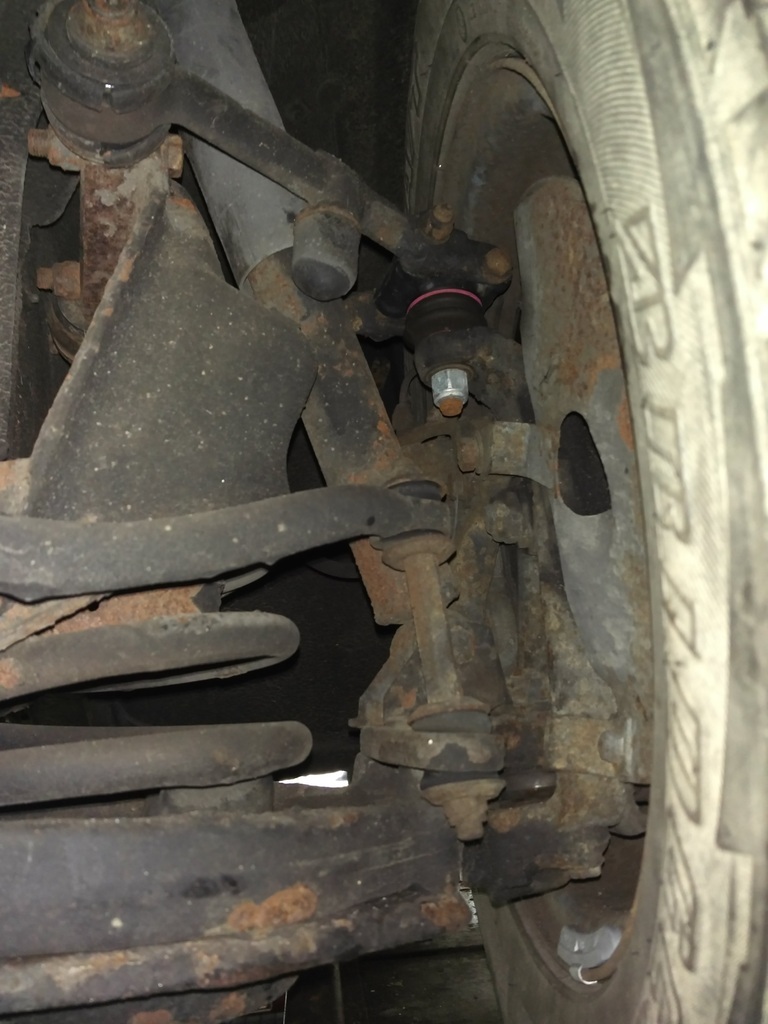 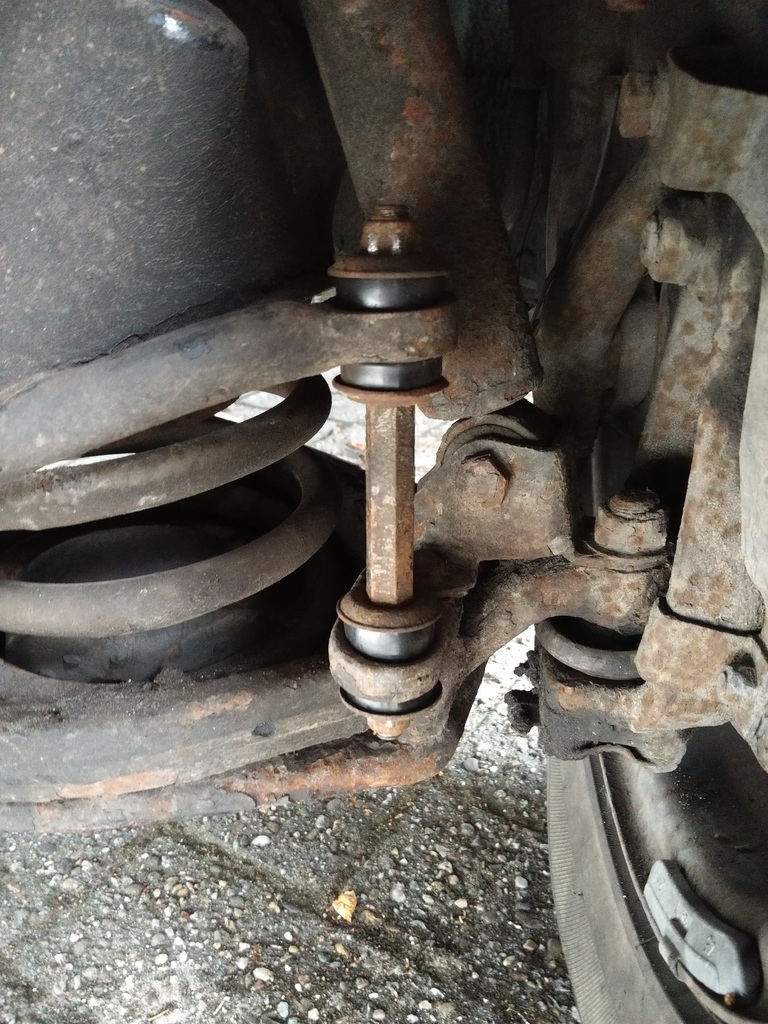 Whilst I was down there I’d found that the upper wishbone bushings were equally rotten, and the rebound bump stops missing entirely. Replacing them with Superpro PU made all the difference, and it really does feel quite tight around corners now – especially considering its age. 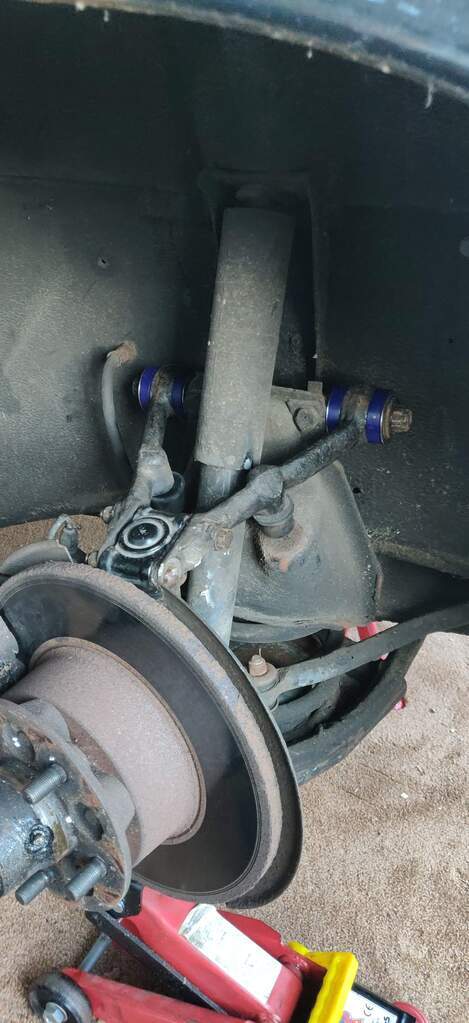 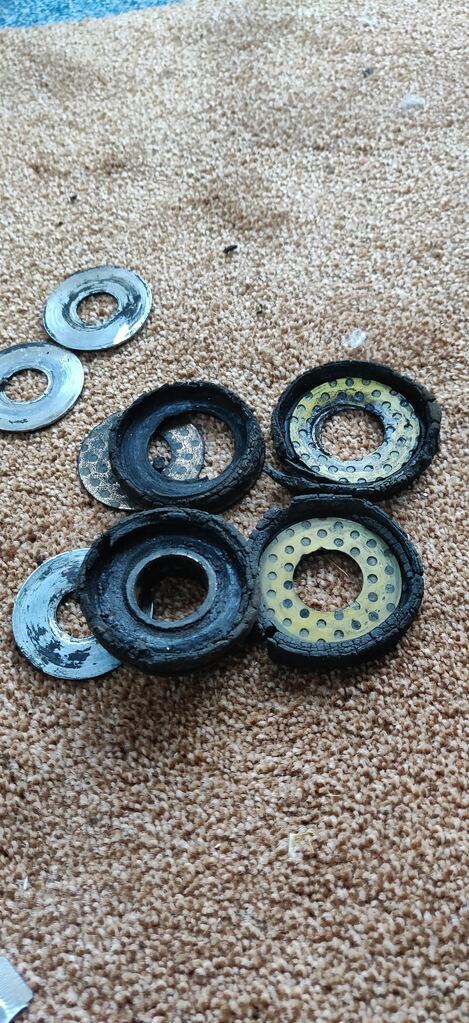 Whilst I was there, I decided to replace the original 3-pot calipers with solid disks for a later XJS set-up with ventilated disks and 4 pot calipers. This also requires the complete uprights of the XJS to be used, including steering arms, spindles, and hubs. A new set of disks, braided hoses, pads, and calipers ensured that the 1680 kilo Jag stops on a dime with excellent feel. 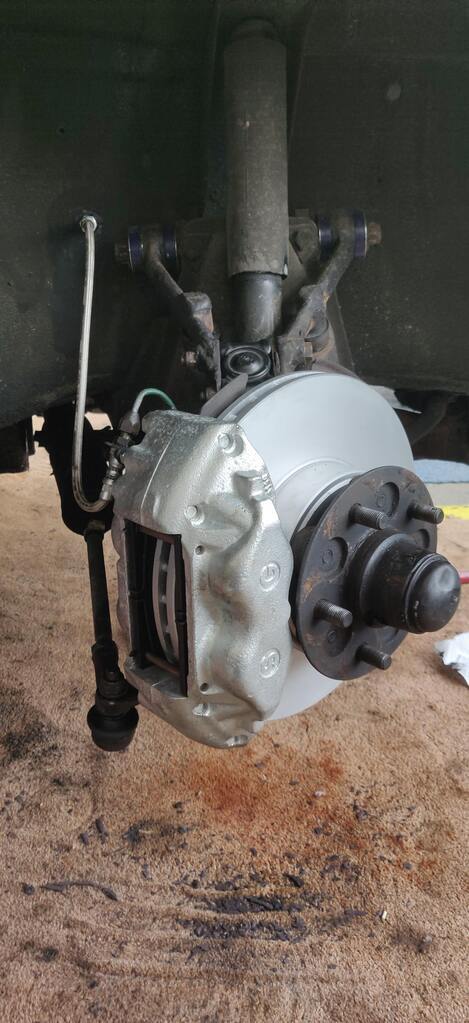 The noisy motorway cruising was a matter of gearing mostly. I’d considered swapping to a manual 4 speed + overdrive box, but after test driving a manual 4.2 I found these boxes to be too expensive to live with the agricultural gearchange. So I turned my eyes to the rear suspension, finding it just as tired as the front. I used this opportunity to switch out the original 3.54 open diff IRS for a complete 3.31 LSD axle from a Series 2 XJ12, which I rebuilt with new disks, pads, rubbers, and control arms. This improved the car quite a bit, although it didn’t quite make it the effortless cruiser I’d wanted it to be. 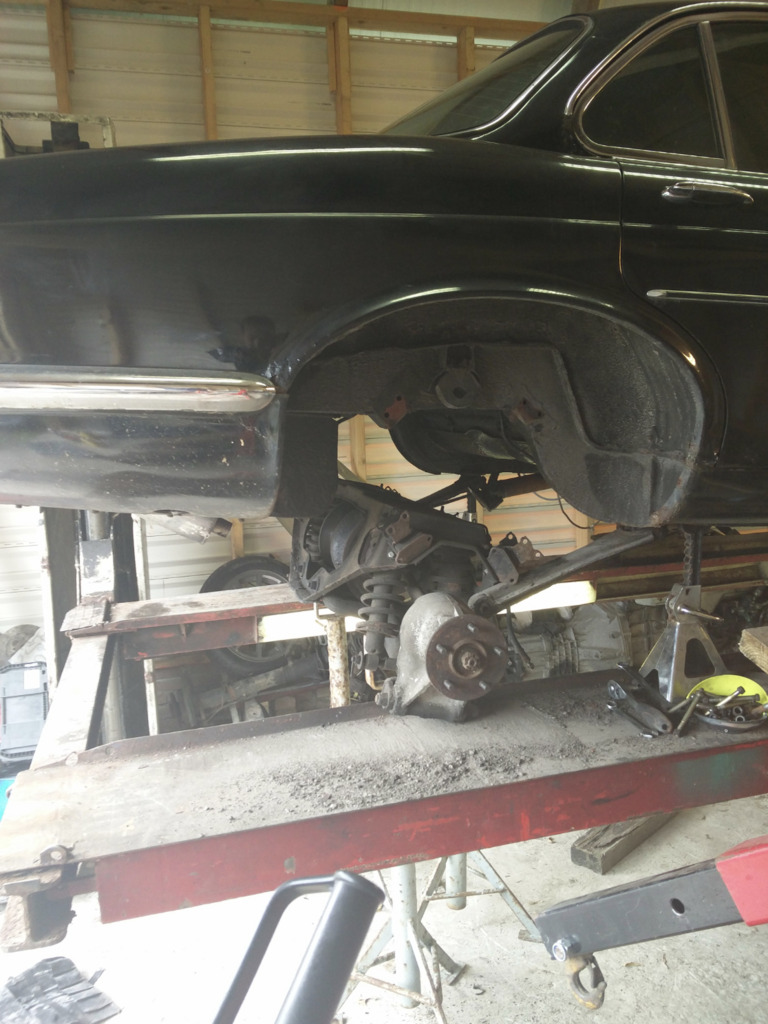 It was however a perfectly working and usable car. Parked in front of my house I could never resist looking back as I went off to work. It surprised me how much attention it got, from being photographed on the street for bystanders’ Instagram. 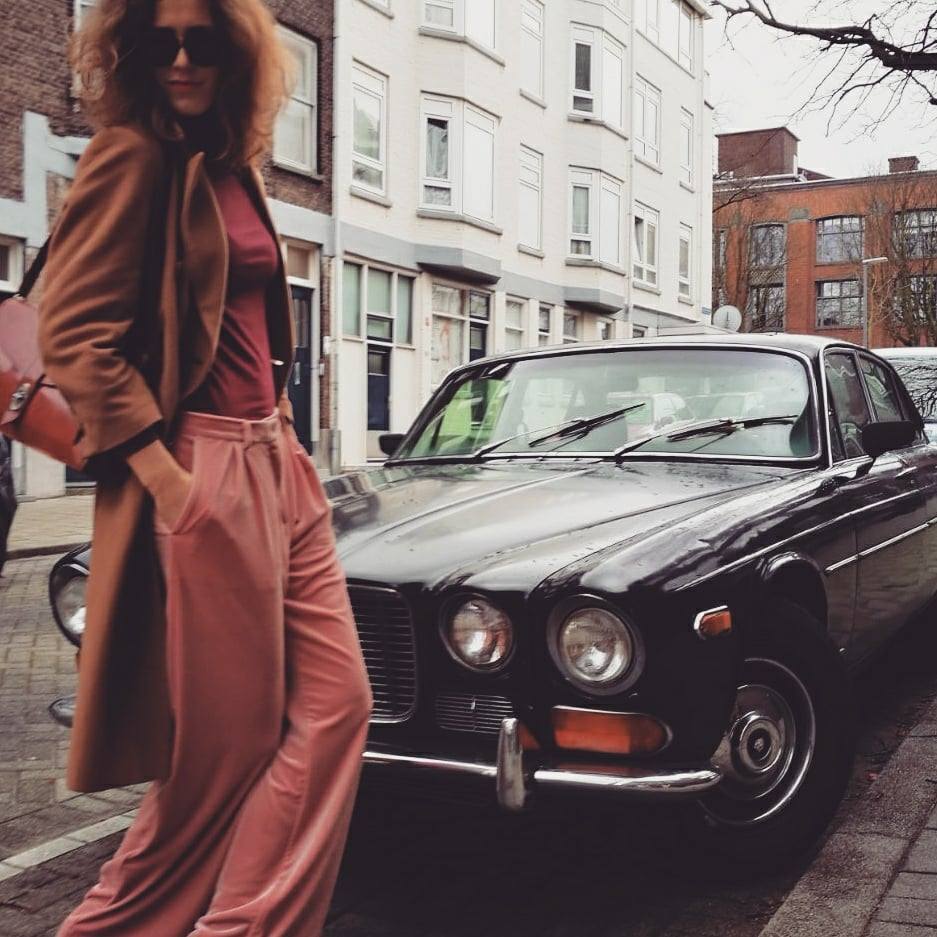 To having a young couple I didn’t know ringing my doorbell to ask if they could borrow it for their wedding. Instead of lending it out I took a day off and drove them myself – a very special memory indeed. 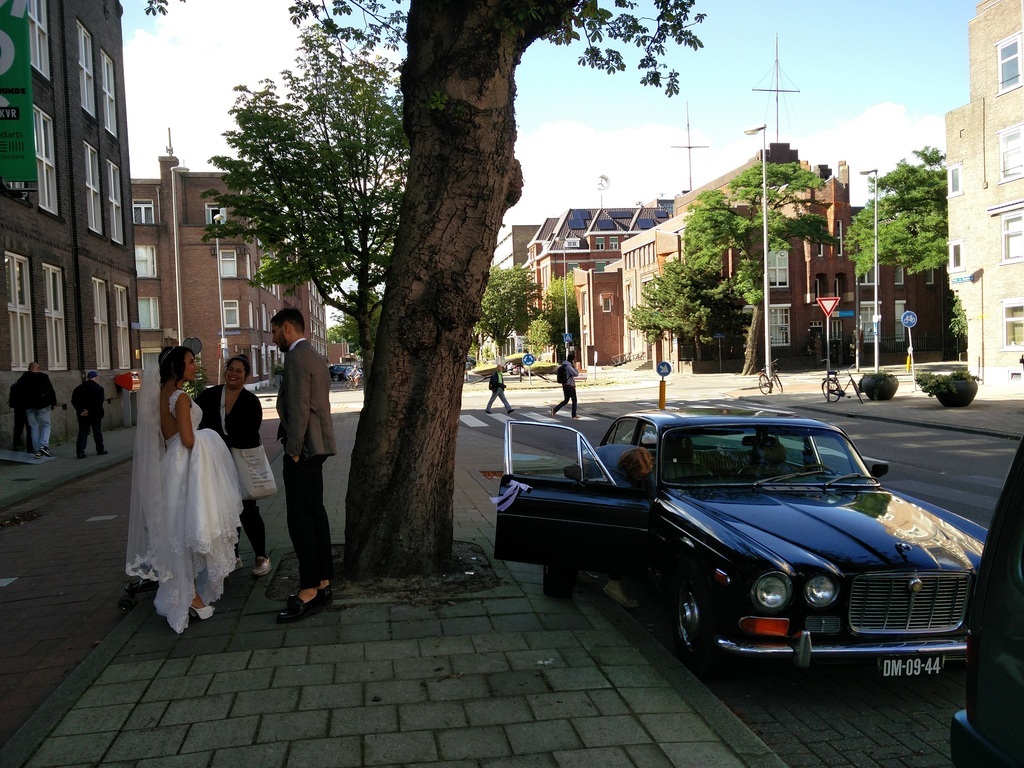 And then I decided to poke it with a screwdriver… |
| |
Last Edit: Nov 13, 2023 10:57:29 GMT by mkickert
|
|
|
|
|
|
|
|
no not the screwdriver
always a bad idea !!!
|
| |
|
|
eurogranada
Europe
To tinker or not to tinker, that is the question...
Posts: 2,556
Member is Online
|
|
|
|
|
What region are you from if I may ask?
I have some fond memories of helping someone on their XJ Jag and the series one is a car I have and will always love!
|
| |
|
|
|
|
|
|
|
What region are you from if I may ask? I have some fond memories of helping someone on their XJ Jag and the series one is a car I have and will always love! Thanks, I love your cokebottle Granada too! The series XJs are wonderful cars and surprisingly easy to own. After the DAF (for which you can buy pretty much any part new for a good price), and the 220SE (for which most things were unfindable and very expensive) I specifically sought out a car with a strong aftermarket. Nearly everything is available, although some reproduction parts can vary in quality. So I say go for it! I'm from Rotterdam by the way. |
| |
|
|
|
|
|
|
|
The car had always been leaky, which I’d always put down to British charm. I knew it was leaking from the front and rear screen surrounds, so being inspired by the great bodywork threads here, a recently acquired workshop space, and a MIG welder I decided to take out the screens. Easy job, right? Buzz up any holes you find, fit some new rubbers, done in a weekend. This of course was the start of two years of welding. Because what is a Jag restoration without a weldathon? The screen surrounds were easy enough, after attacking it with the wire wheel of death I could spot the holes and simply remove the offending bits. 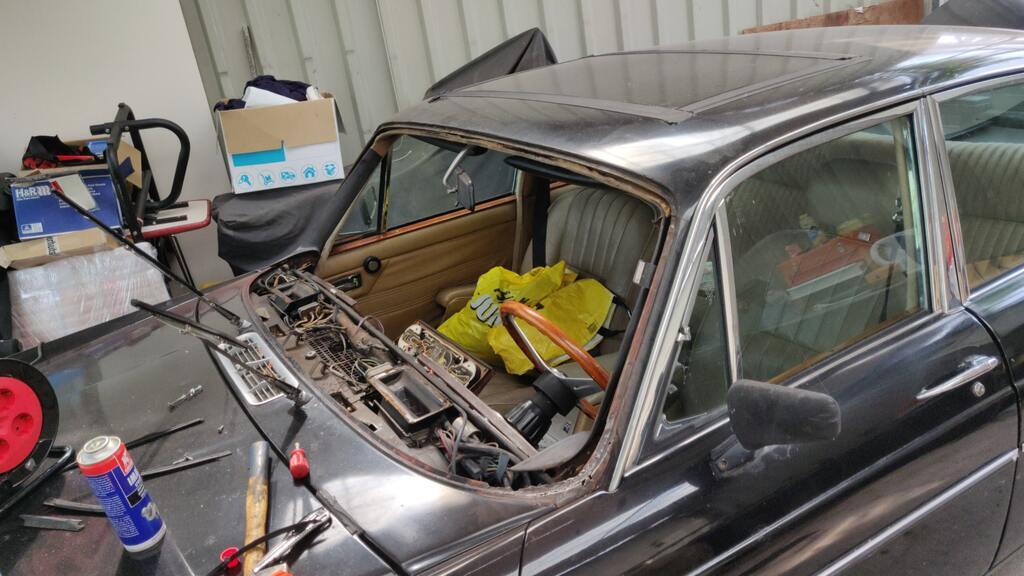 Clean out the holes they left and rustproof everything. 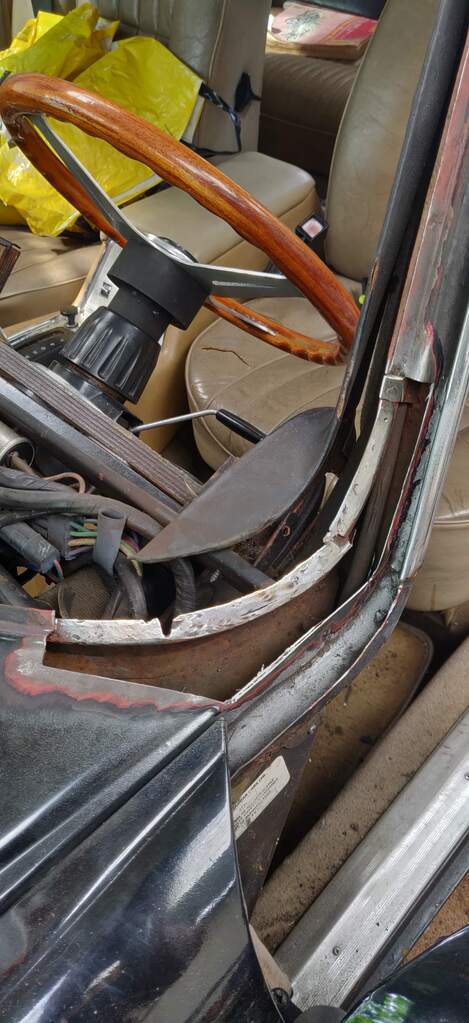 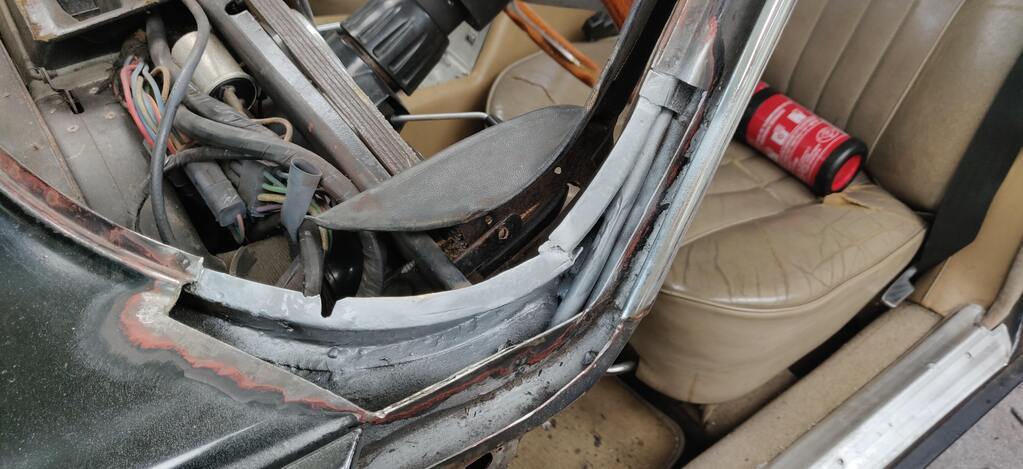 And replace the metal with some pieces I’d cut out of a donor. Some expert grinding action to hide beginner level welds and it's good to go. 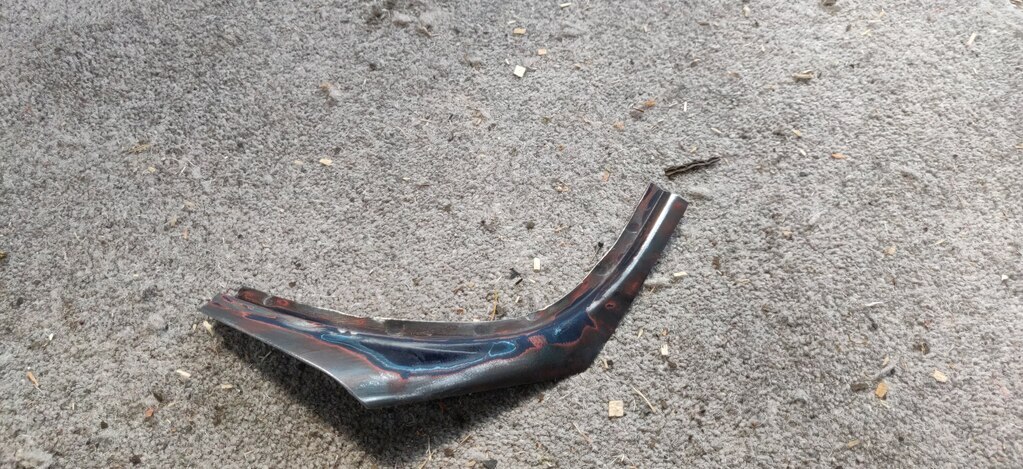 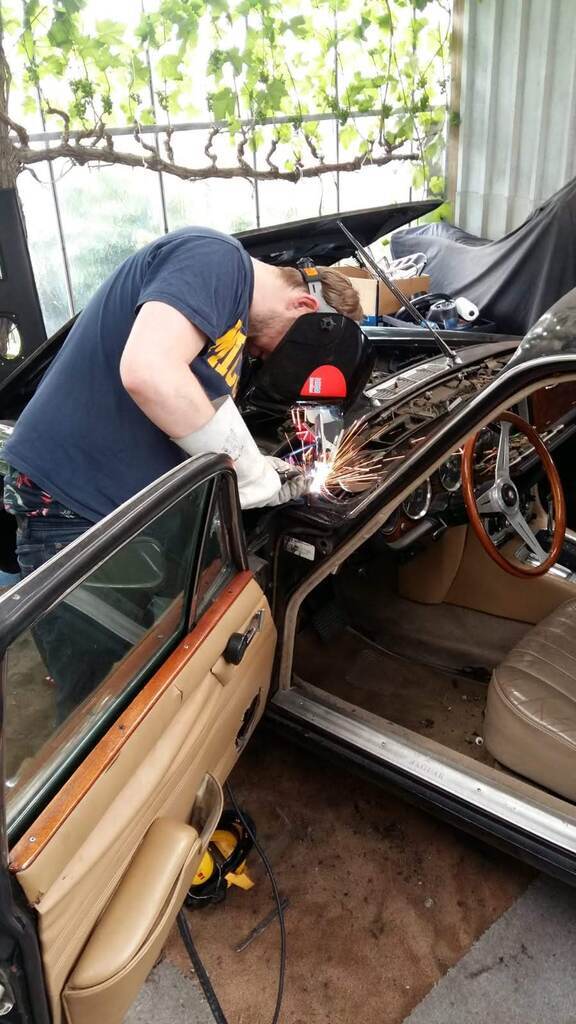 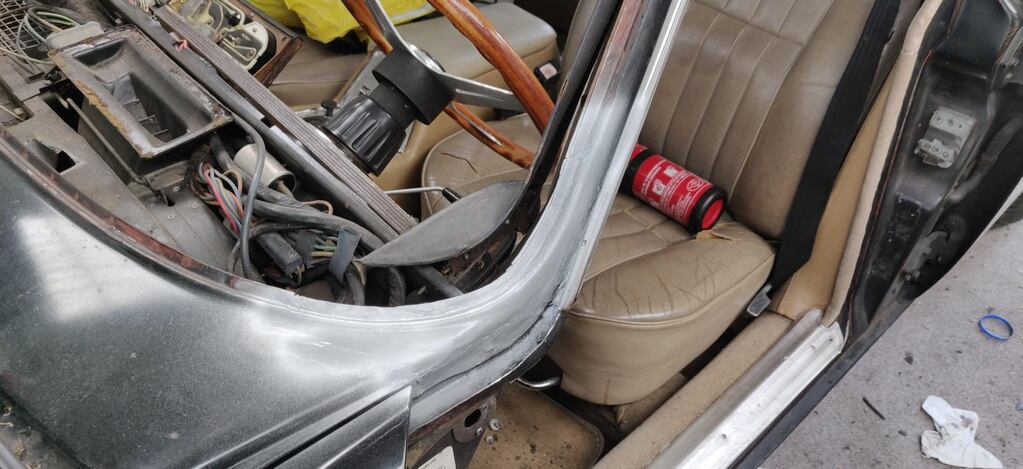 Some little holes at the window edge of the C-post were dealt with in a similar manner, being made more challenging by the 5mm of factory lead-loading on it. 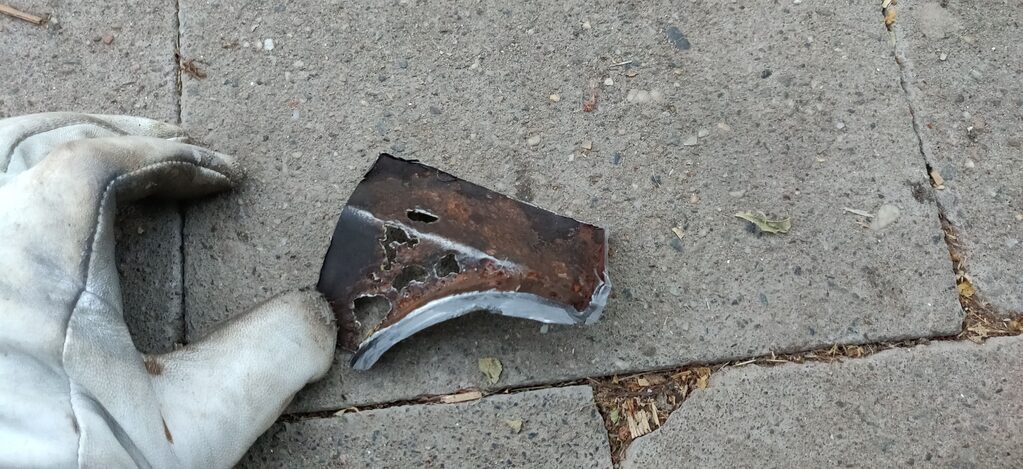 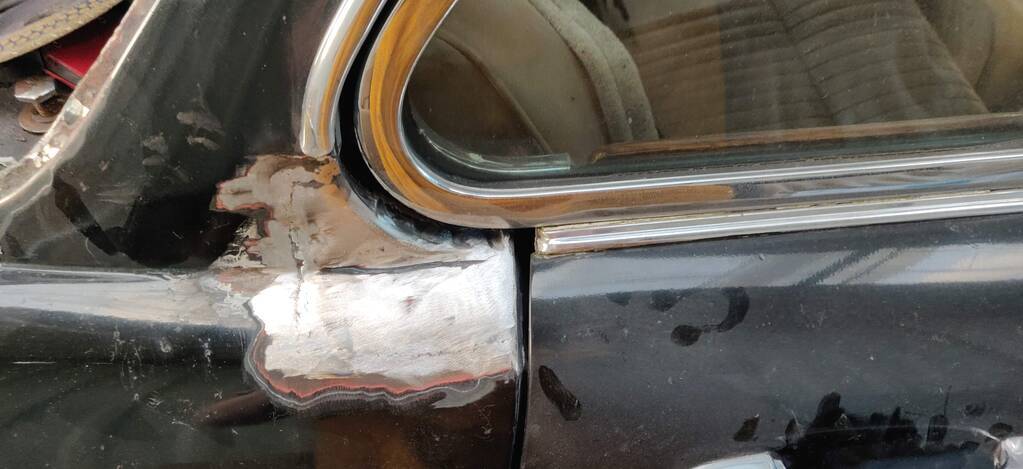 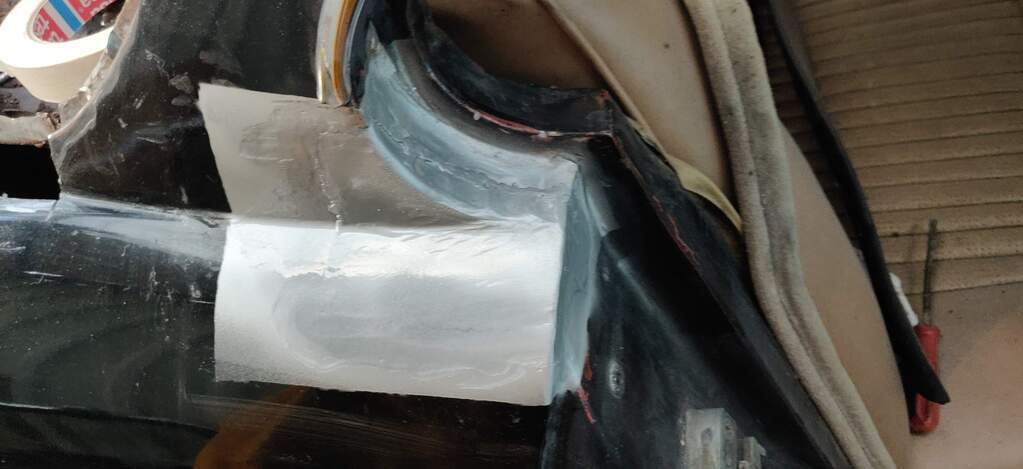 Then I decided to attack some little rust spots around the rear window channel and filler cap. Until suddenly the wire wheel erupted in a scirocco of white dust that would make Escobar jealous, leaving this: 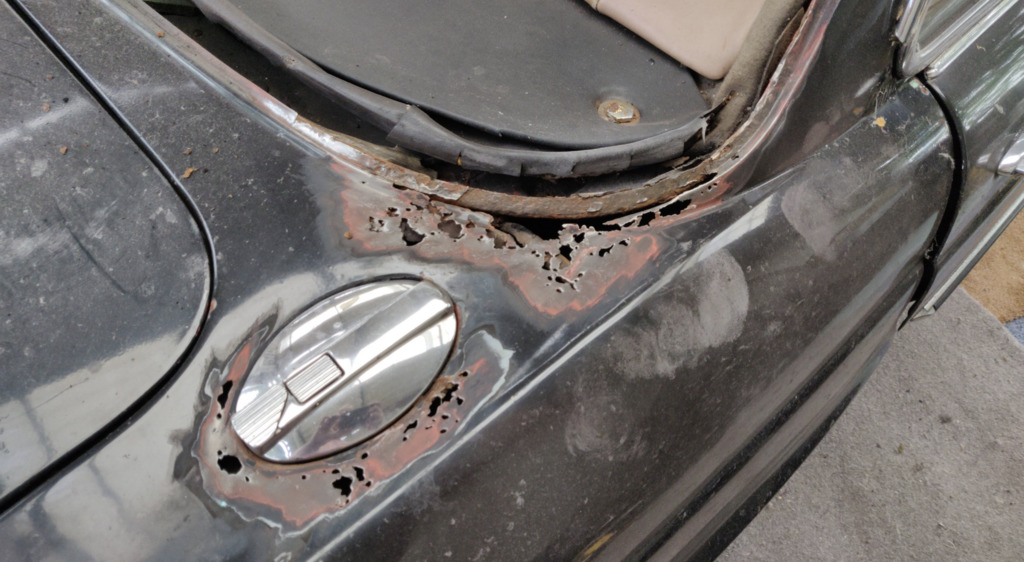 Oh dear. No problem. I’ll just have to remove the rear bumper, remove the tank pans, and remove the tanks themselves to make a nice hole. 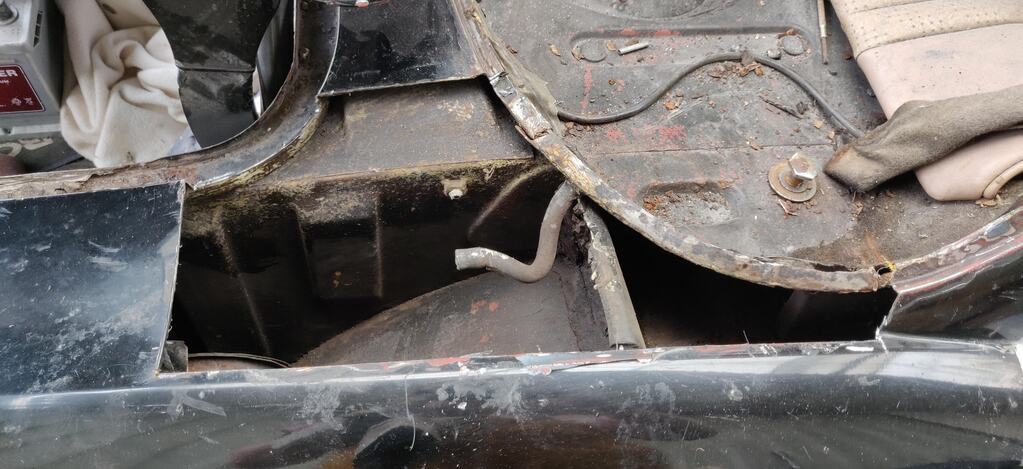 Which could then be filled with a donor piece. I specifically cut this so the weld would either be hidden inside the boot aperture or straight and away from feature lines. 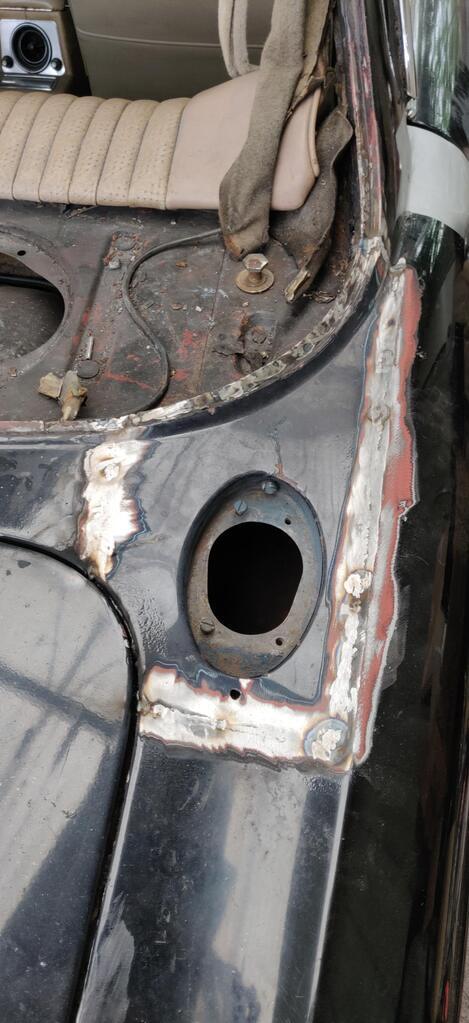 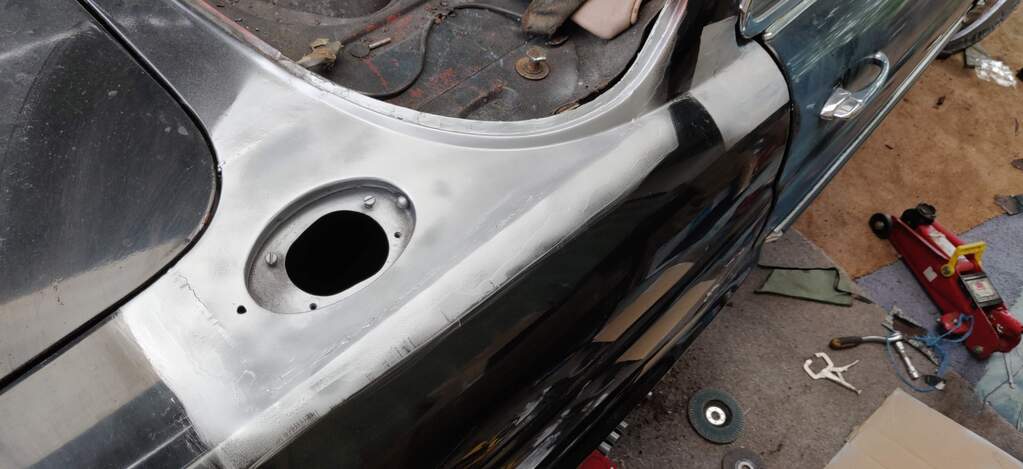 The right-side rain channel around the bootlid was equally holed, making me suspect a poorly rustproofed previous panel replacement – the left side was completely rust free. This was all replaced with new metal of course. 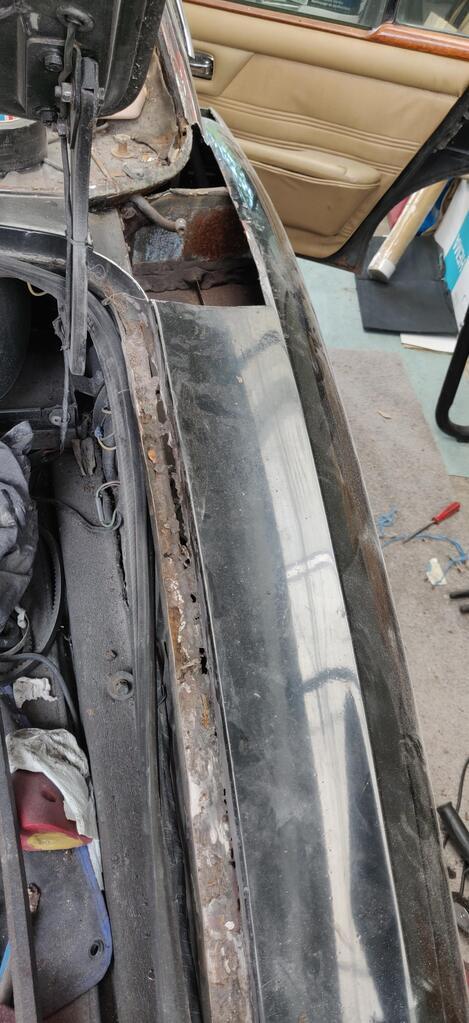 A similar thing happened when I decided to take the front of the right rear arch back to bare metal, a piece which had looked perfectly factory original. 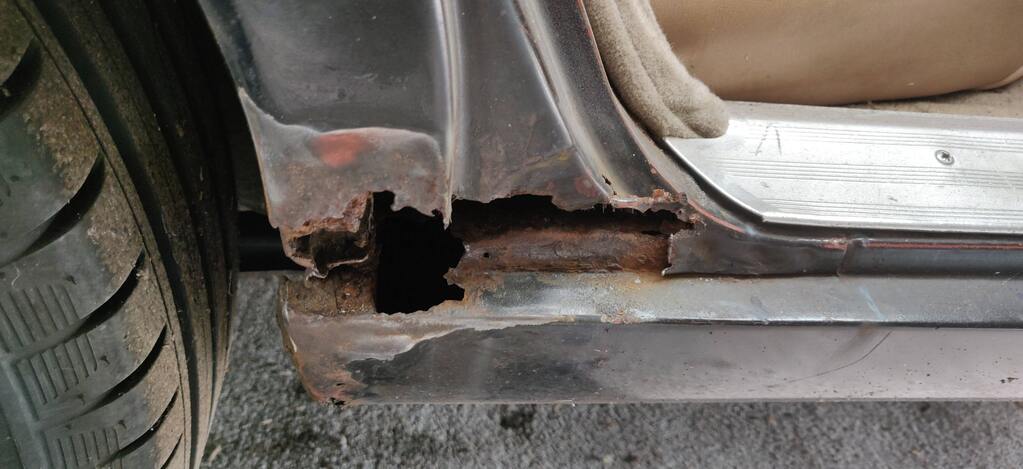 Now by this time I suspected the previous owner wasn’t Stevie Wonder (as I originally thought, deduced from the eclectic wiring) but might have actually been Michelangelo. Who else could have made such beautifully sculpted bodges out of filler and mesh? Whilst I respect his talent I’m personally a sucker for structural rigidity, so out with the rot: 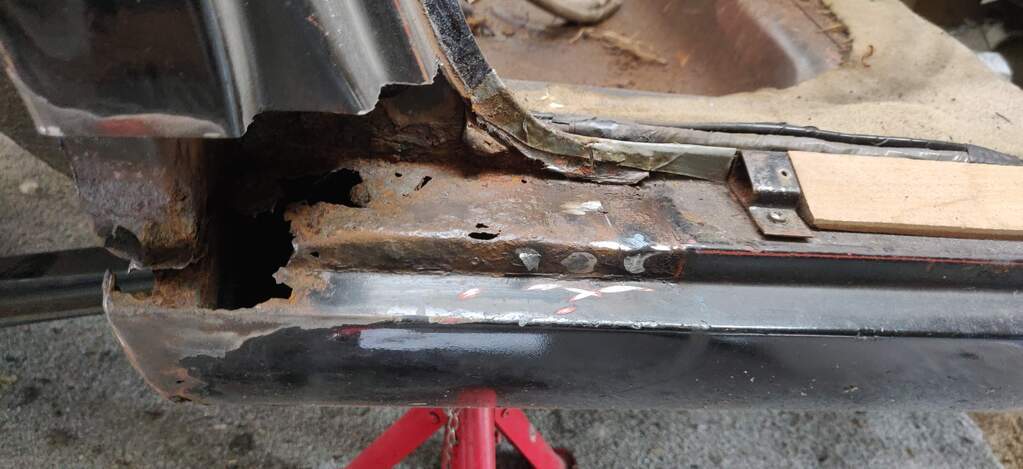 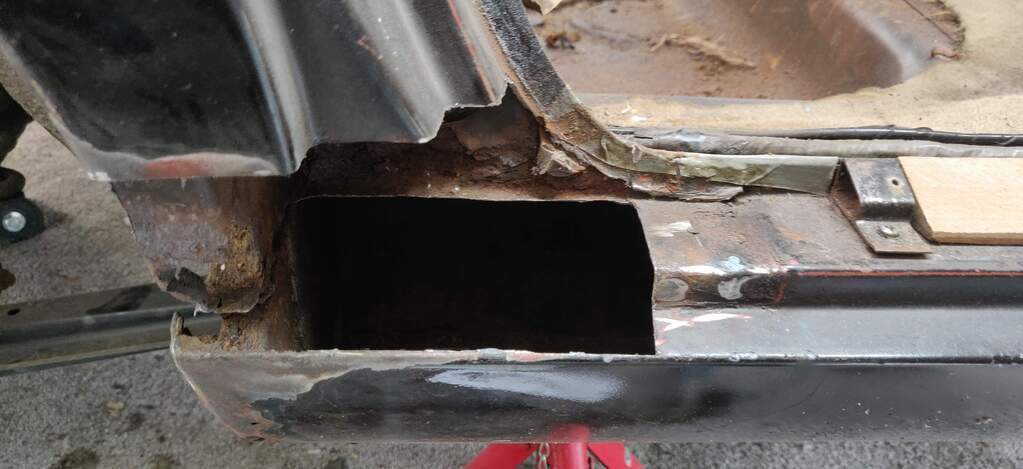 And in with some lovely new pieces of zinc plated steel. The sill end was holed as well, although the rest of the sill was rust free luckily. 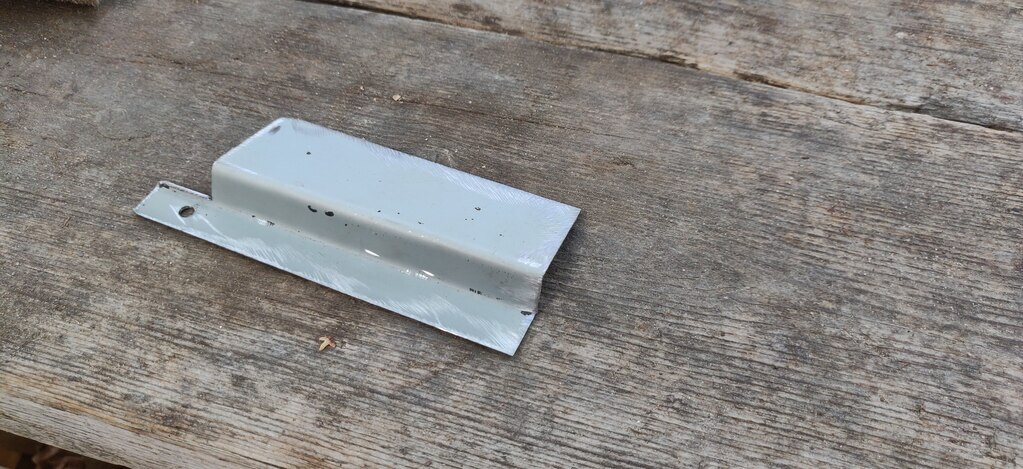 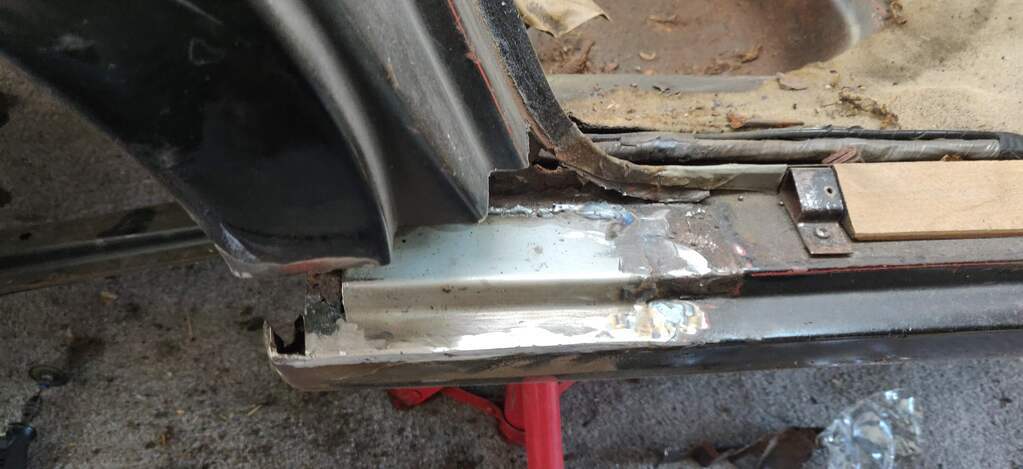 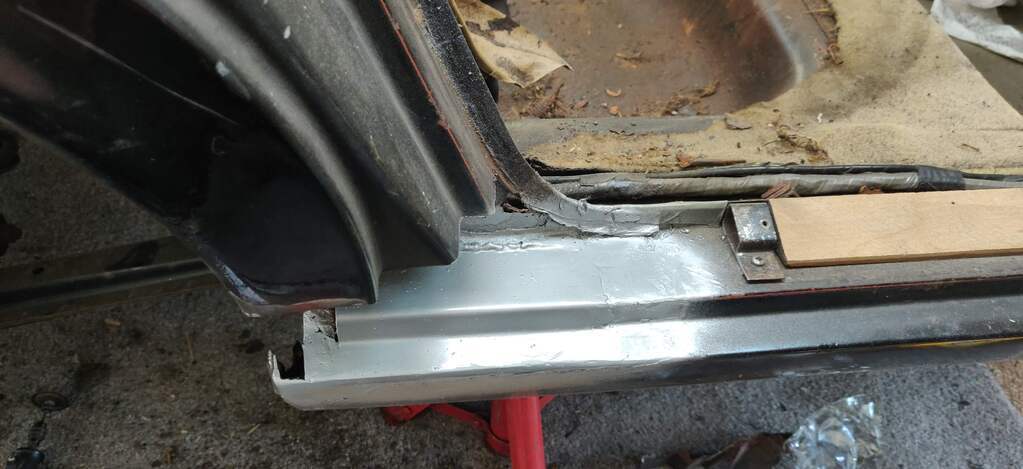 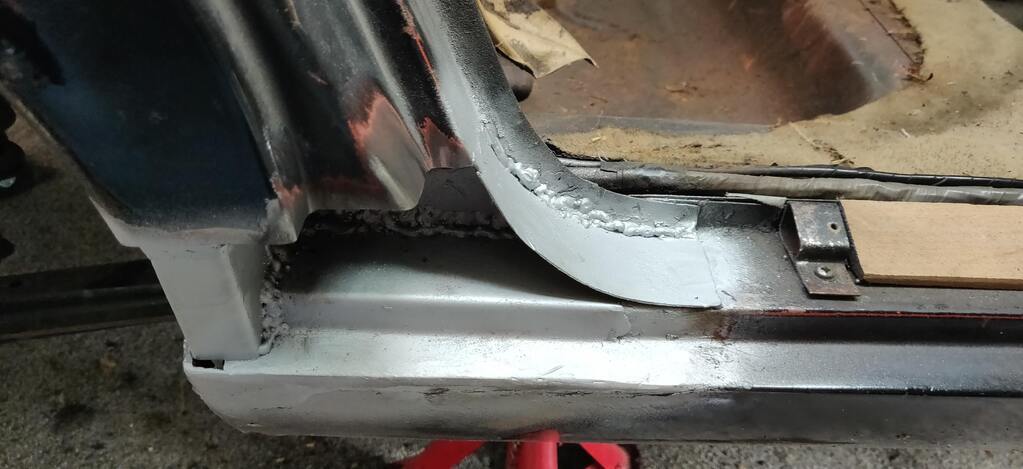 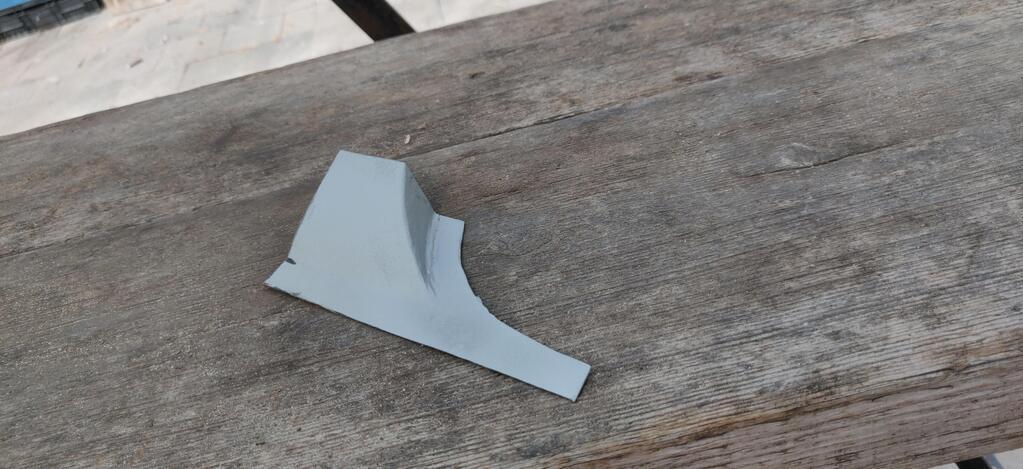 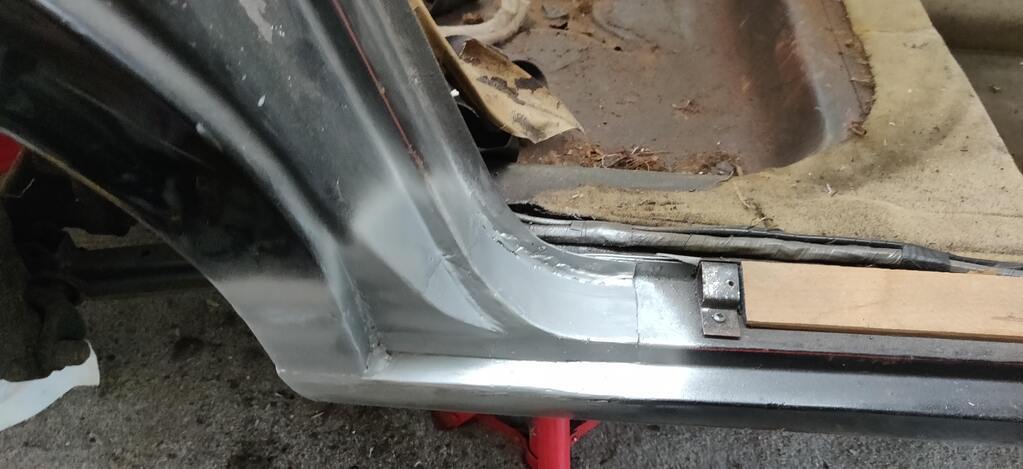 All solid again, shown here before the final cleaning up of the welds. I inspected a bit of cracked filler below the left taillight and found the master at work again. 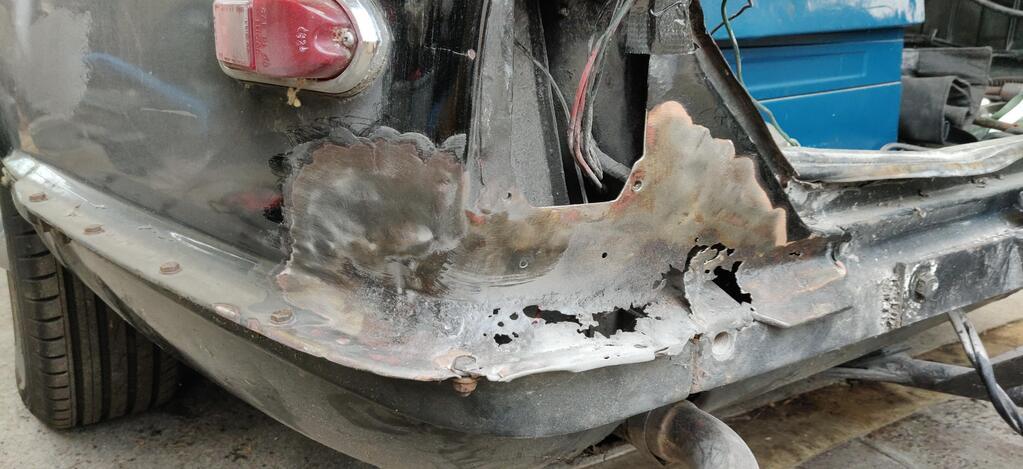 A small dent that had 10mm of filler sculpted over to serve as a sponge, rotting out everything beneath it. The bit was removed, a donor piece let in, and welded up again. I took the chance to also remove the holes for the antenna and sidemarkers. 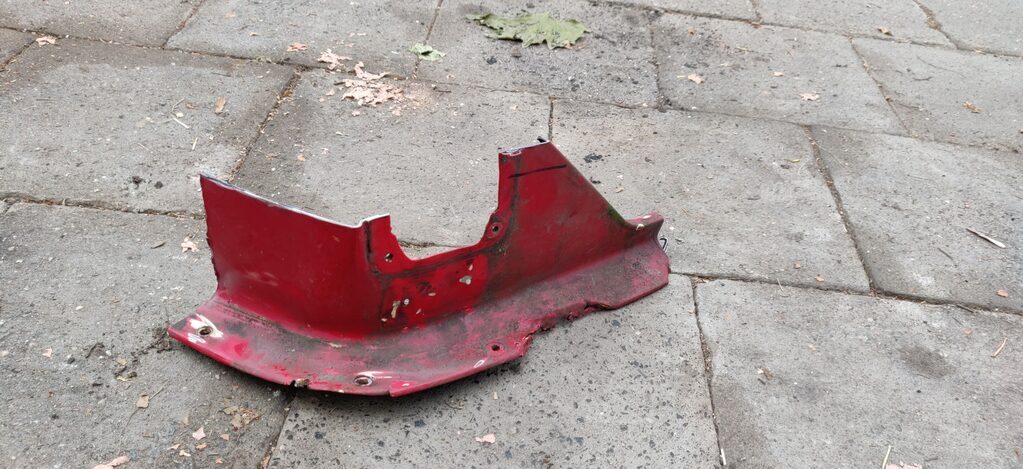 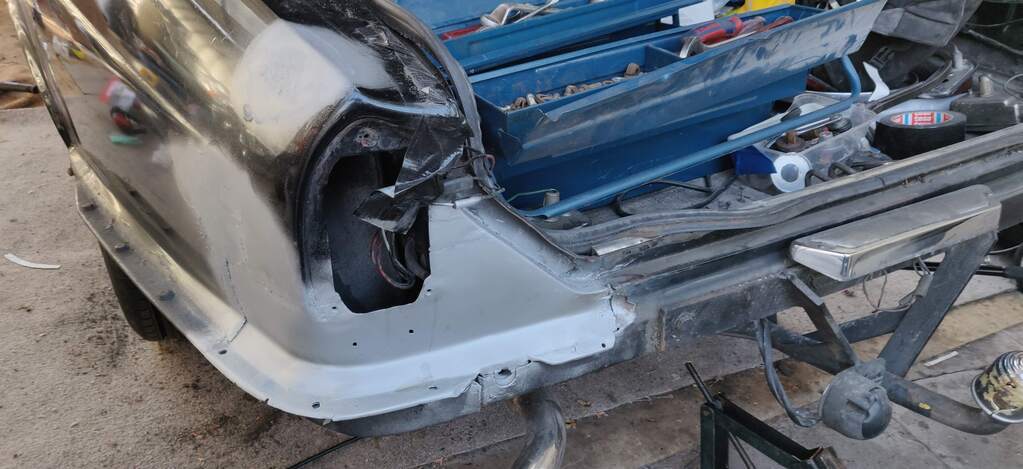 Next up was the lower rear panel, which posed a number of problems. Firstly it housed the LPG filler under the bumper, which required me to twerk to the ground each time I wanted to fill up this thirsty car. Secondly it was adorned with a towbar which due the rest of the panel rotting away had become structural over the years . A bit of aluminium pop-rivetted over it finished this stunning display of craftsmanship. 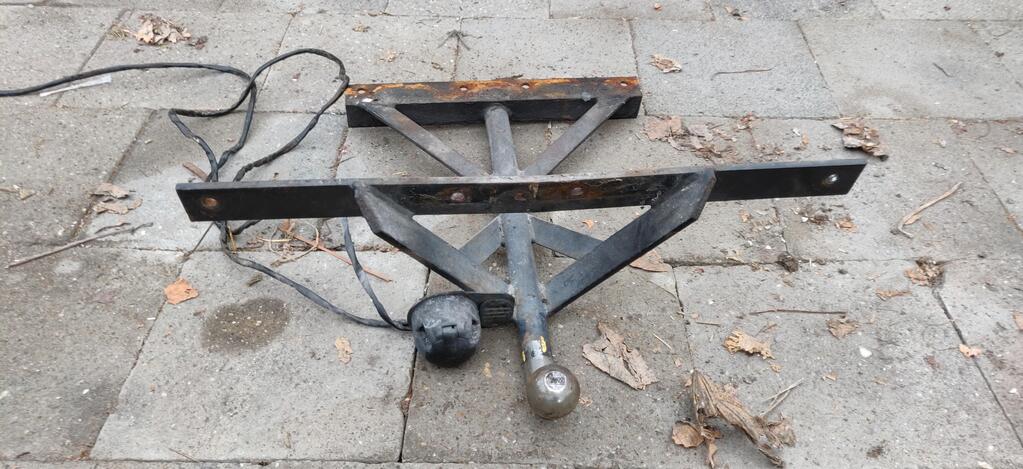 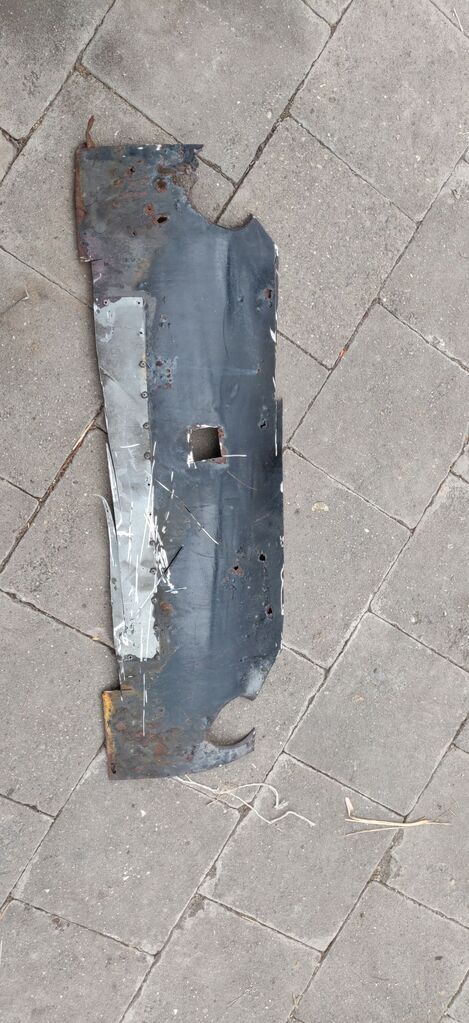 Removing this panel and tow hitch revealed the inner panel. This received some minor repairs and rustproofing, after which a new panel (sourced from SNG Barratt) was let in. 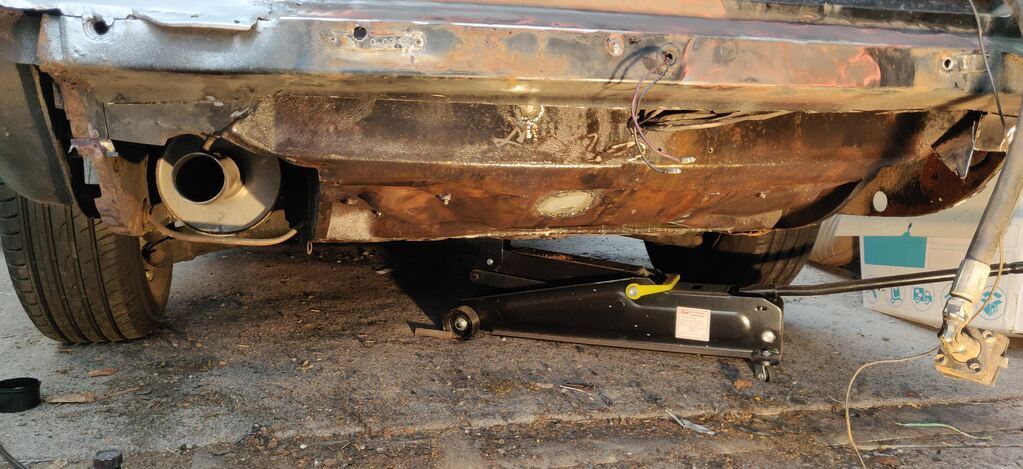 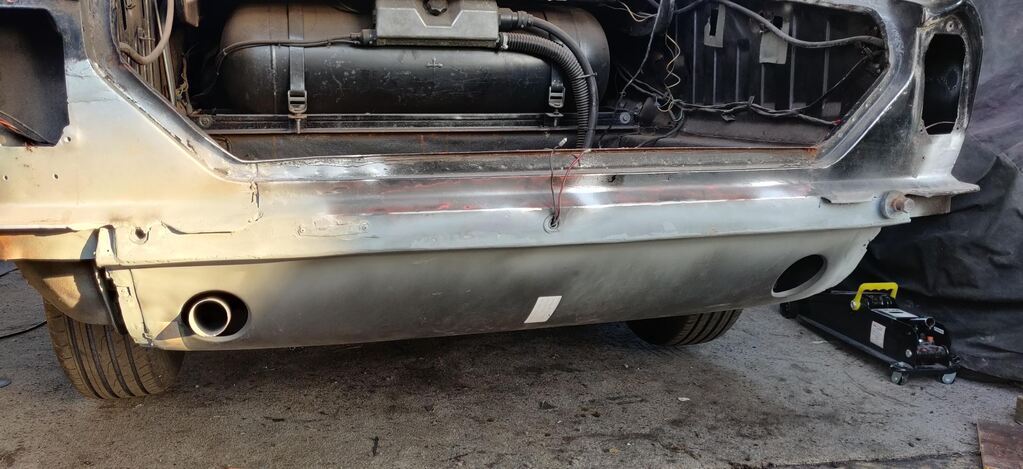 Now this left me without an LPG filler on a car which uses a lot of fuel. I wasn't going to remount the filler in my fancy new rear panel, so I decided to modify the left filler cap to house the LPG filler. To do so I modified the filler itself, merging it with the LPG filler for a hidden look. 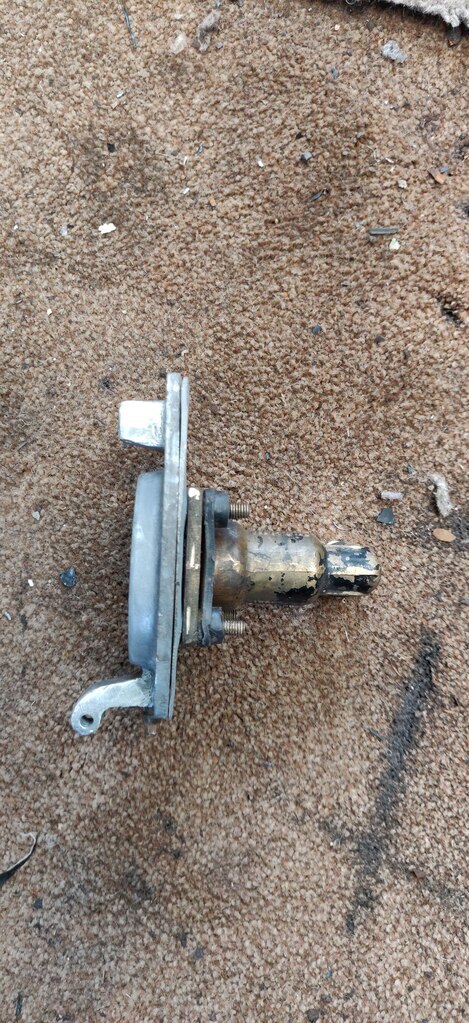 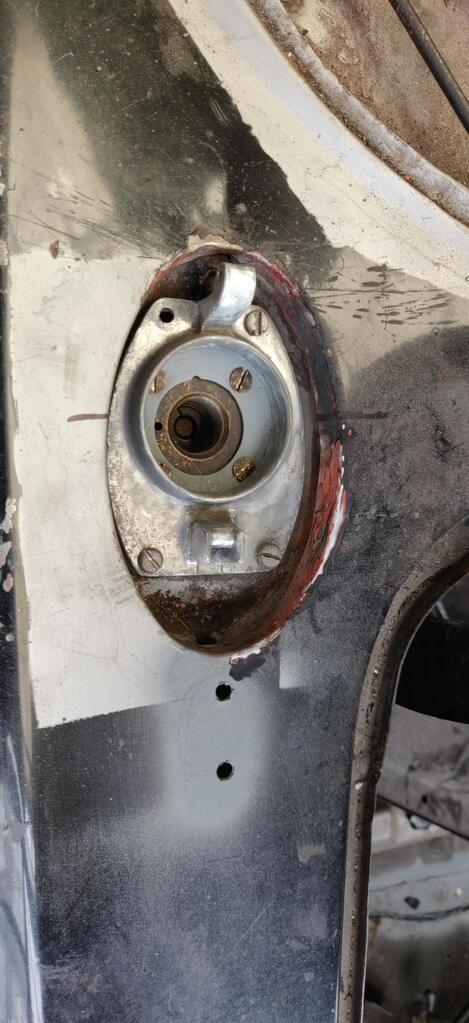 The LPG filler hose was routed through the boot panel, which required a modification of the left boot hinge. Some thicker metal was used to keep the hinge rigid. 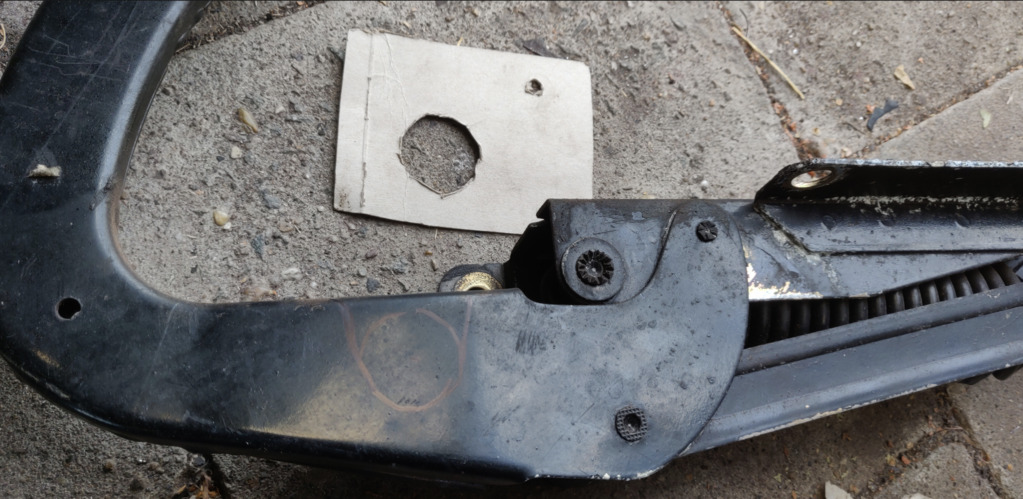 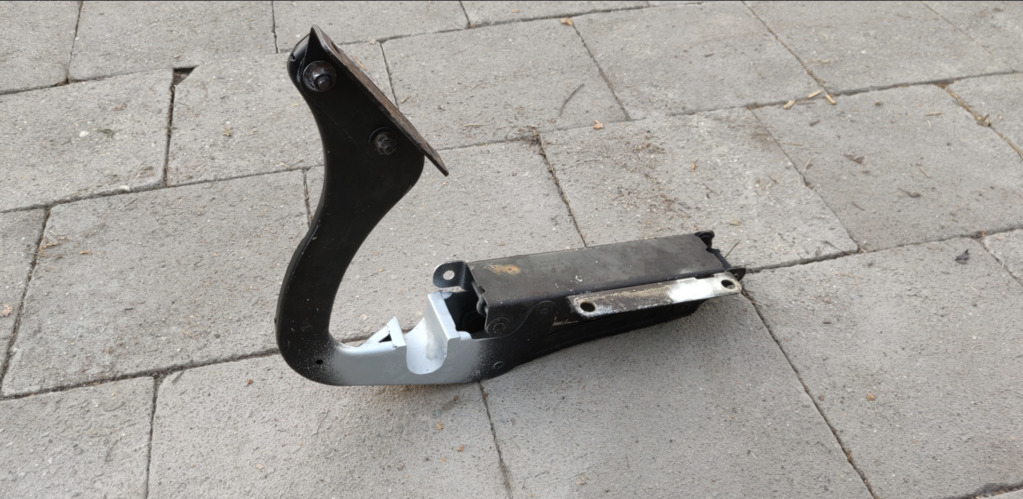 I then soldered up a new sender for the tank so the LPG level could be displayed on the original fuel gauge, following the original resistance curve of the Jag fuel sender. 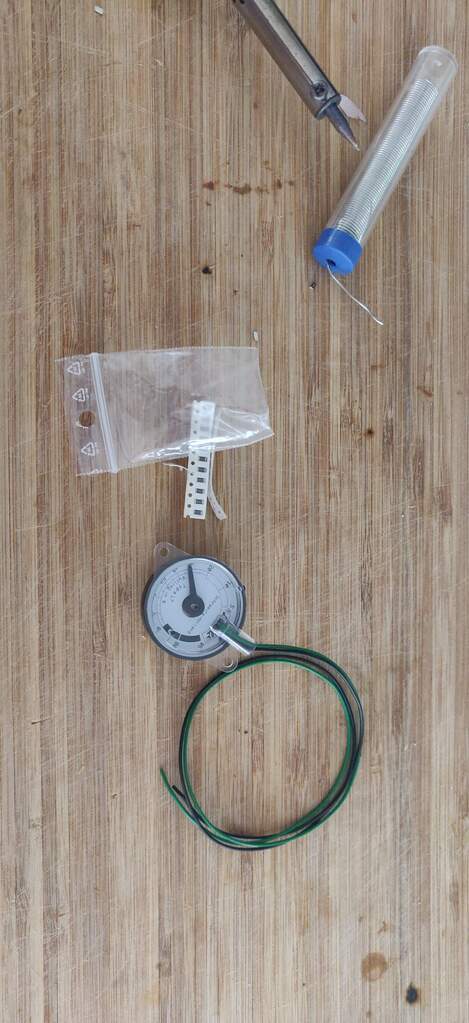 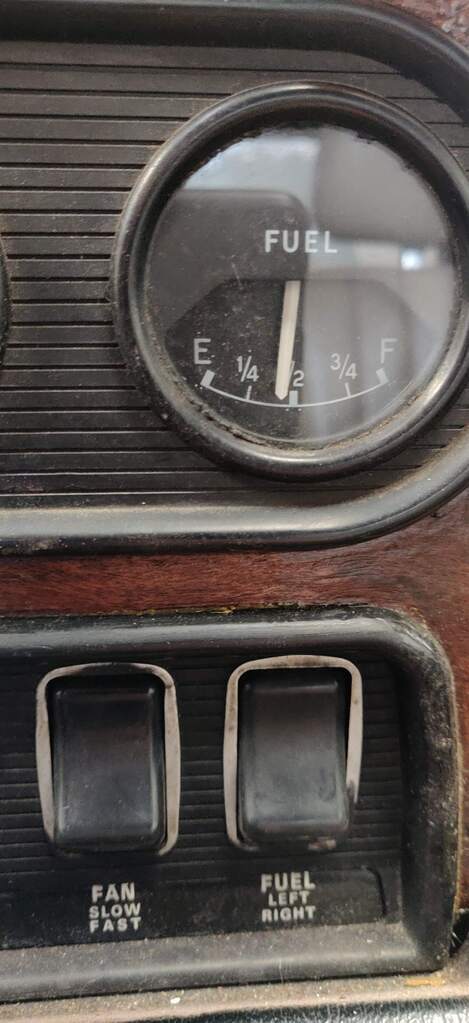 Then it was just a matter of tending to a few rust bubbles on the front of the car, which should of course prove no trouble at all*. |
| |
Last Edit: Nov 13, 2023 11:04:17 GMT by mkickert
|
|
|
|
|
|
|
|
|
|
|
|
Love how you got the original fuel gauge to work for the lpg.
|
| |
|
|
|
|
|
|
|
The rust bubbles proved trouble. Considerable trouble. After being surprised by filler quite a bit I decided to take any suspect or rust prone areas back to bare metal, to ensure I'd end up with a fully rustfree shell. The car had obviously been repainted before, resulting in very thick paint. On the front of the car removing the paint also removed four pounds of filler, unearthing signs of minor accident damage on the front. The left front wing was badly dented and rusted, and slightly creased. It had been poorly repaired before obviously. 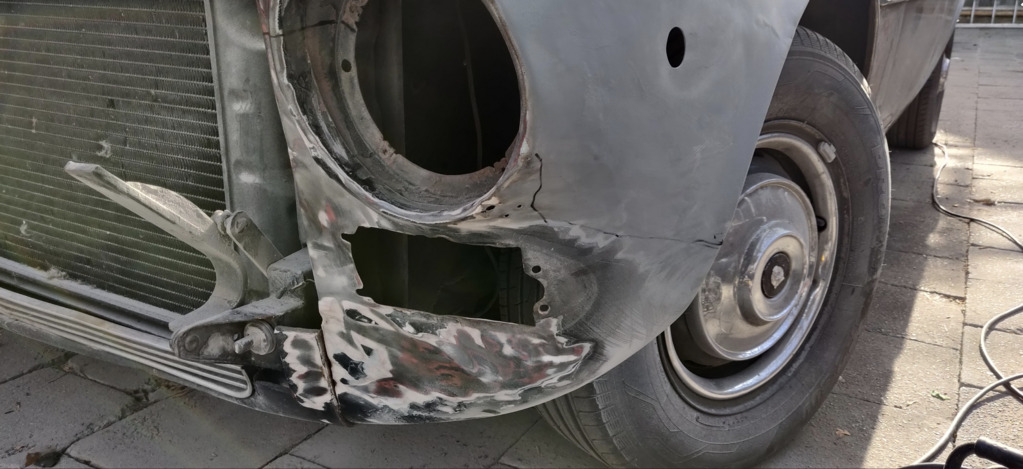 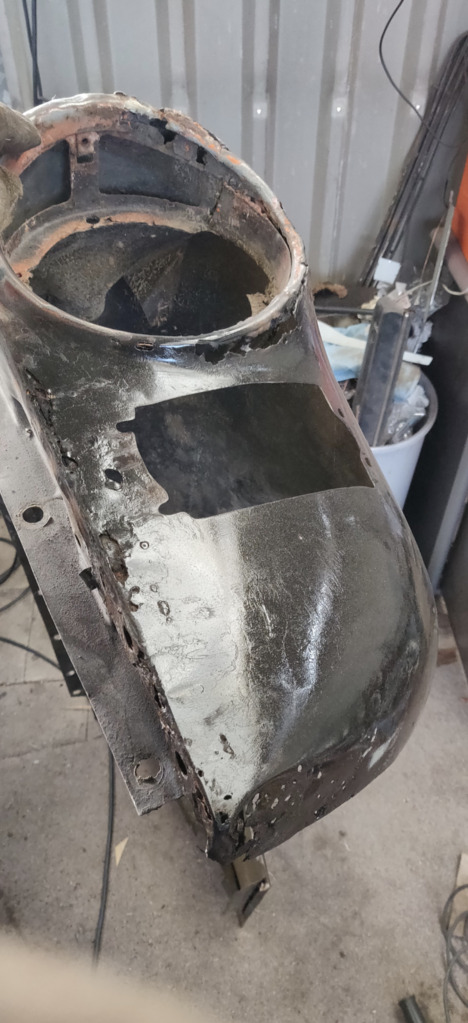 New metal was let in from a donor wing, paying special care to keep the wing straight and true. This was quite a fiddly process but worked out very well in the end. 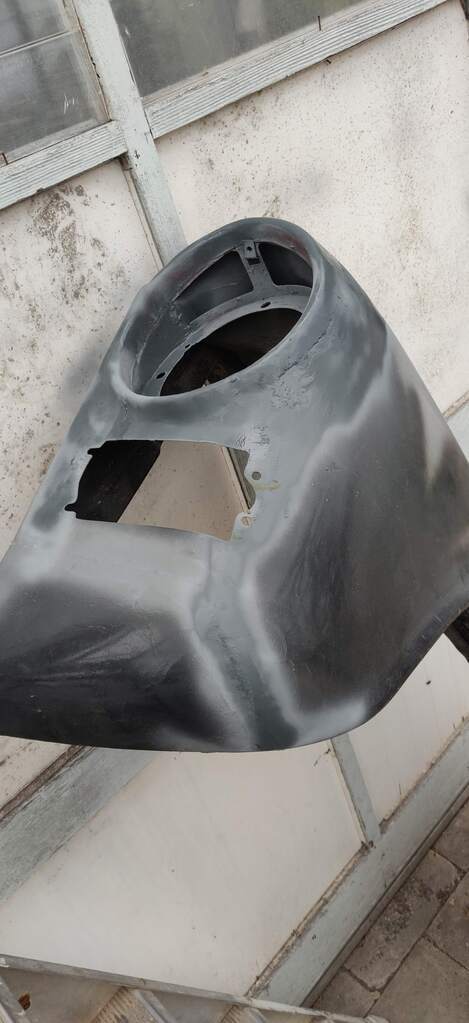 This process was repeated for the much less affected right wing. It only needed simple localized repairs which made life a bit easier. Simply cut out the rust in small patches to keep the profile, and then let new metal in. A slow but steady process. 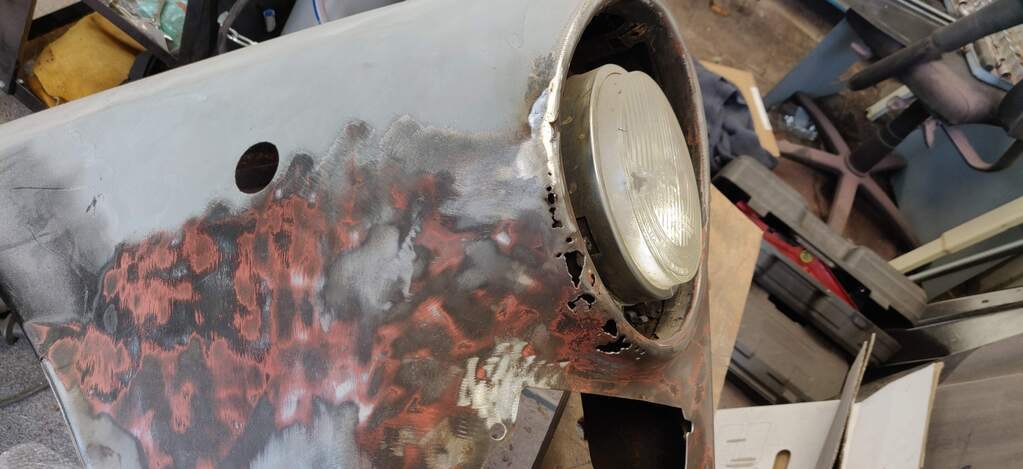 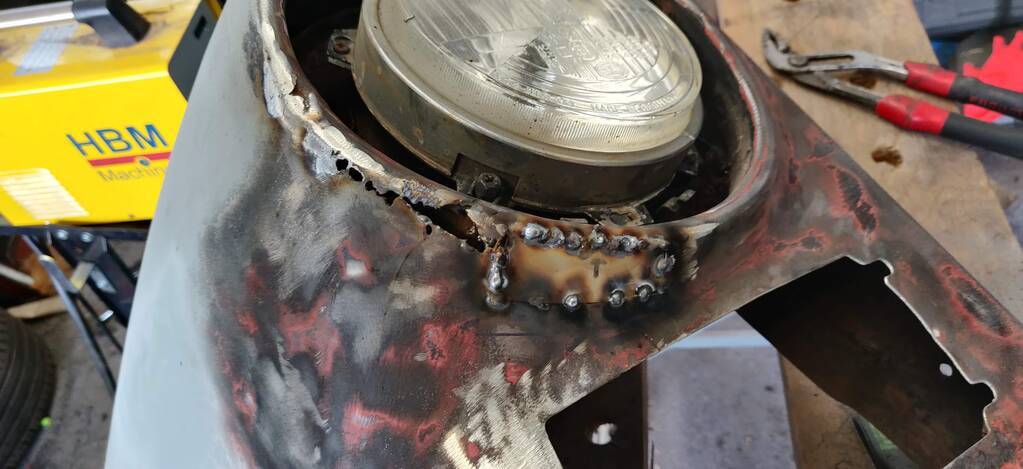 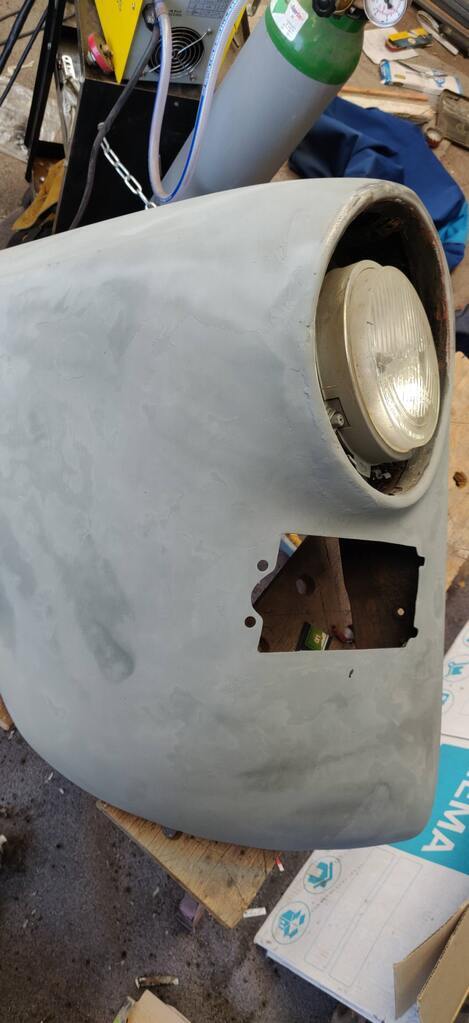 The area at the rear end of the front wheel arch has a rubber seal which traps road dirt resulting in some nice speed holes. I beat some repair pieces for both wings. As you can see I welded up the side marker holes in both wings as well as the mounting holes for the badging behind the front wheels. 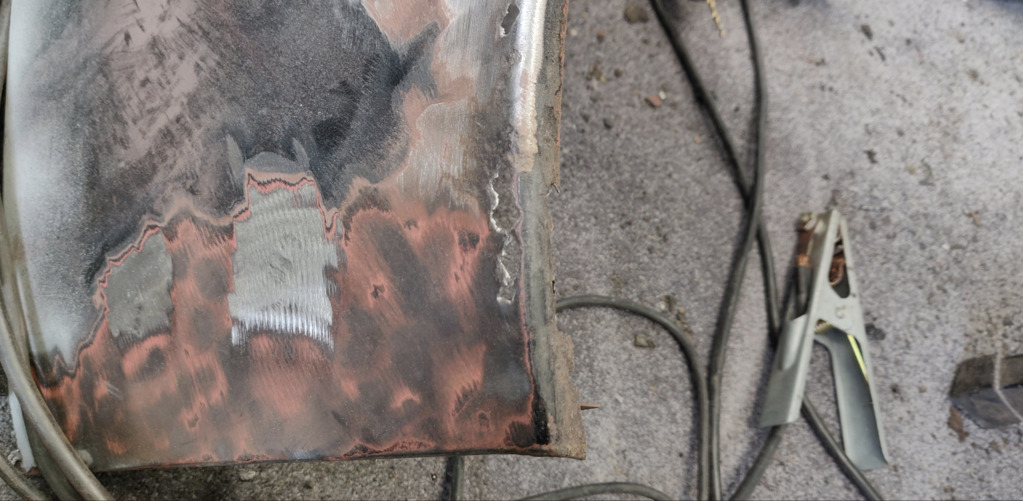 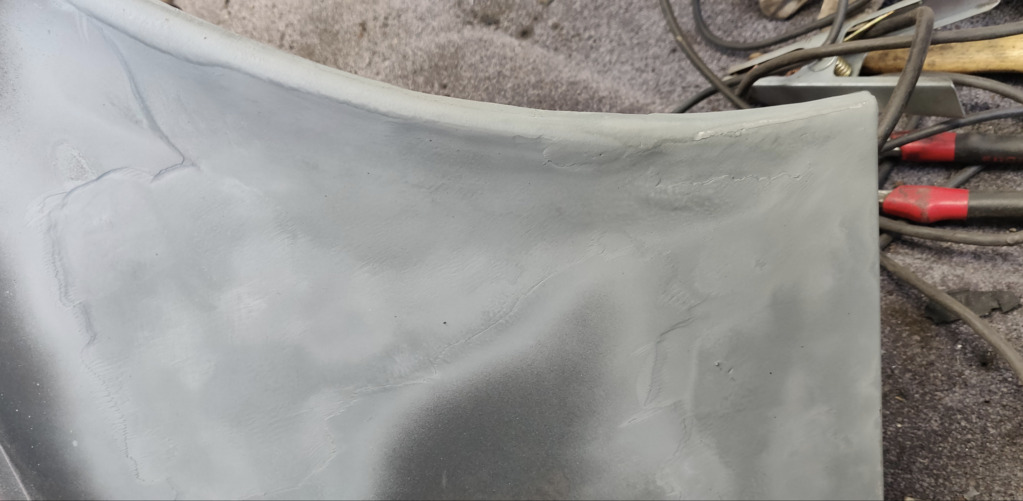 The bonnet was similarly rusted at the bottom edge, where it would rub up against the bent front bumper. There was also a few mm of filler on it. This lead me to decide to replace this with a better example which required only minor repair. 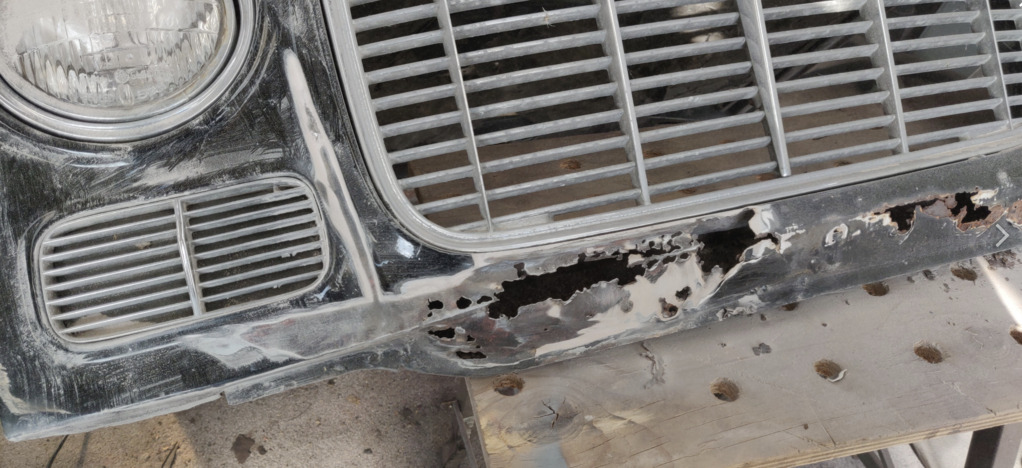 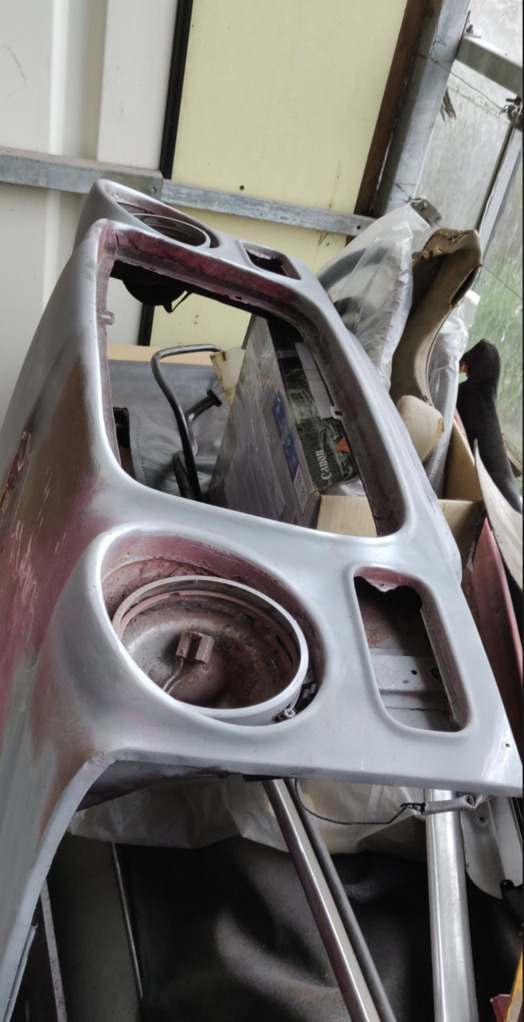 The bonnet hinges also had a slight fold in them from the apparent impact (hard to see in this pic), these were replaced. I made sure to check the chassis rails for deformation, which were luckily fine. 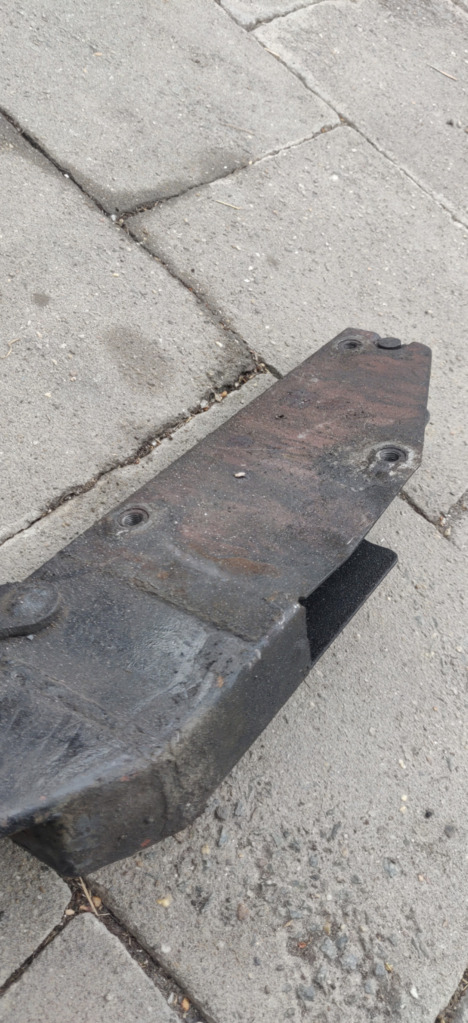 Whilst the wings were off it was obvious the left front sill end required some love as well. 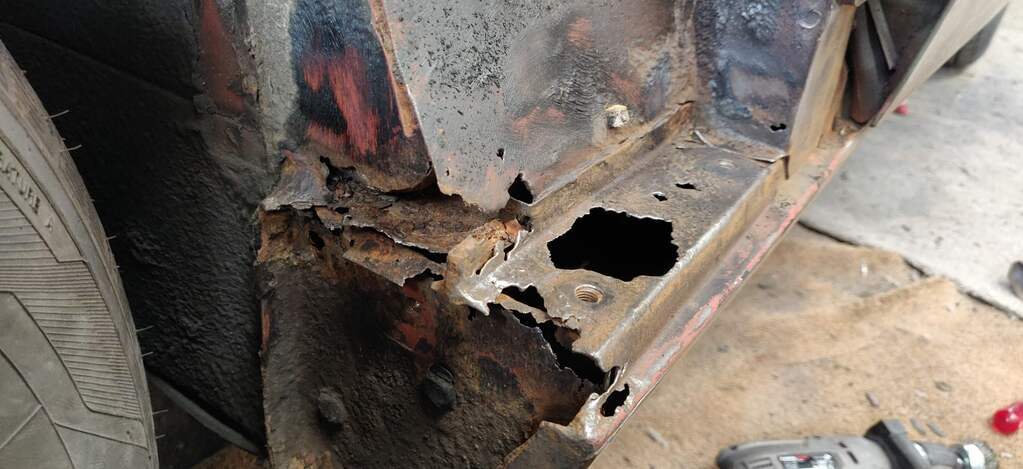 Cut the holes out, make new pieces, weld them in and rustproof. Rinse, wash, repeat. The challenge here was making sure the captive nuts for the front wing still aligned properly. As this was hidden I didn't grind my welds back as much, keeping as much strength in the join as possible. 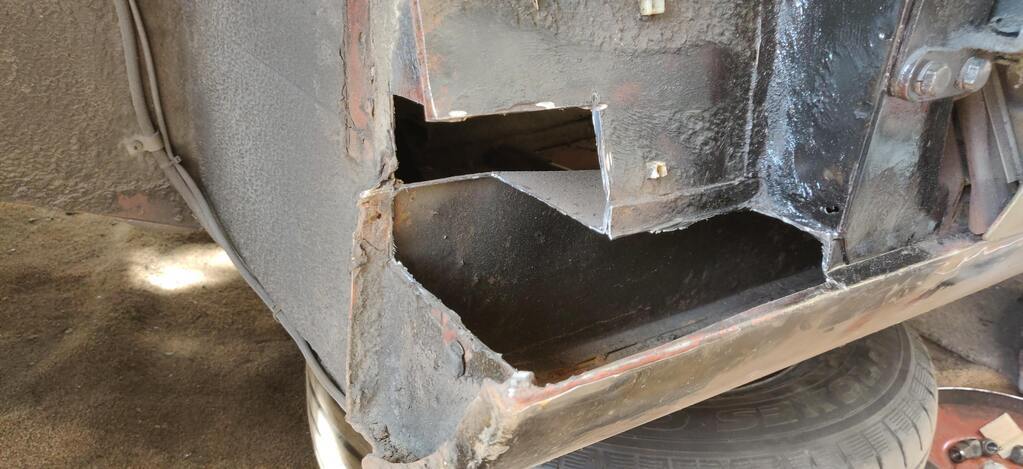 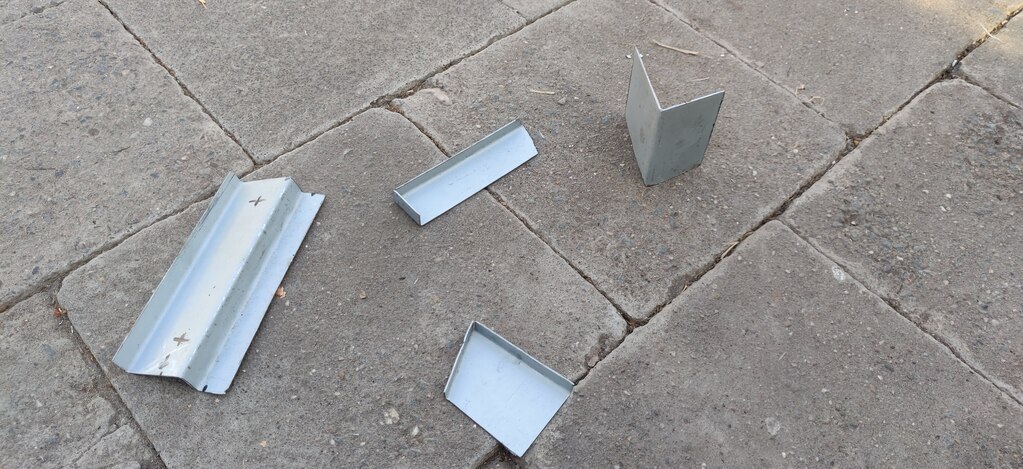 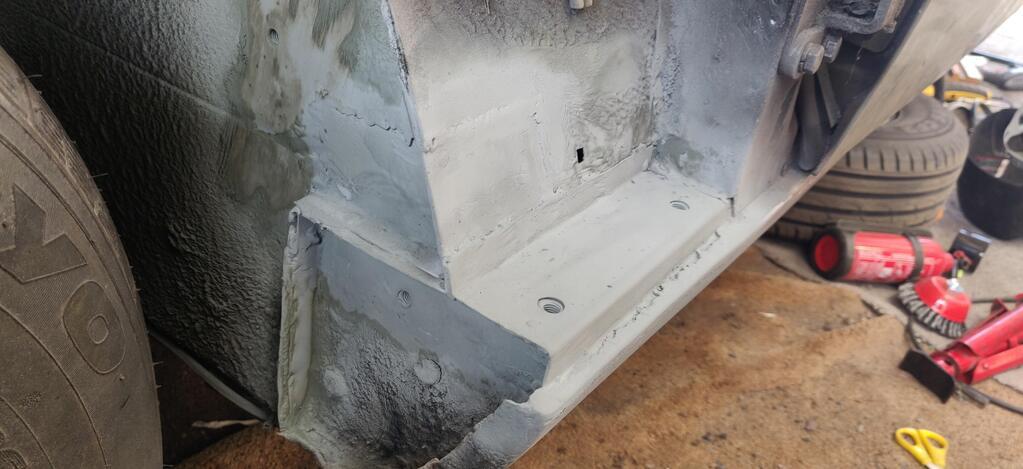 The right sill end was in a better state but still needed welding. I used a sill end repair panel for this. 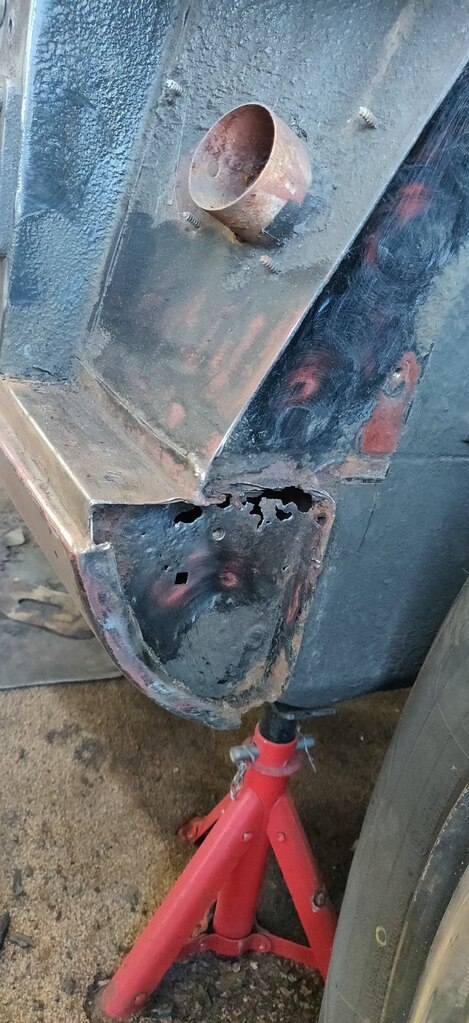 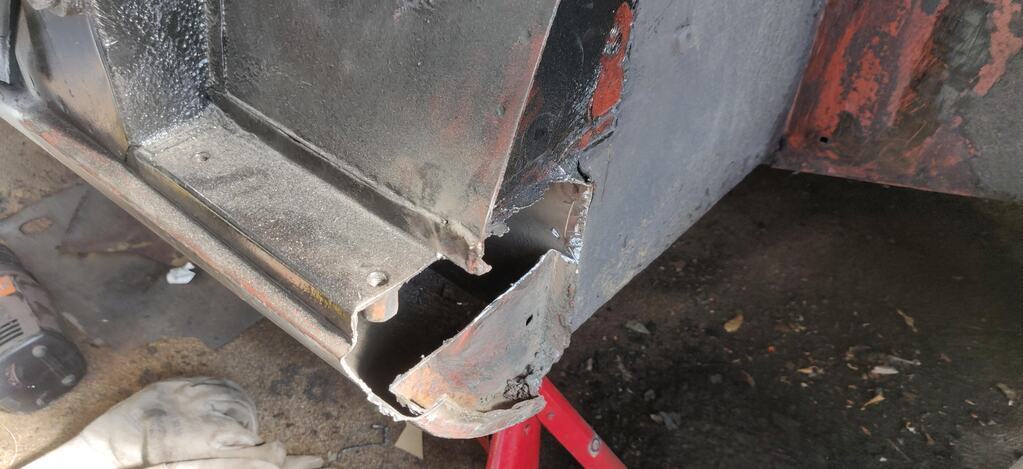 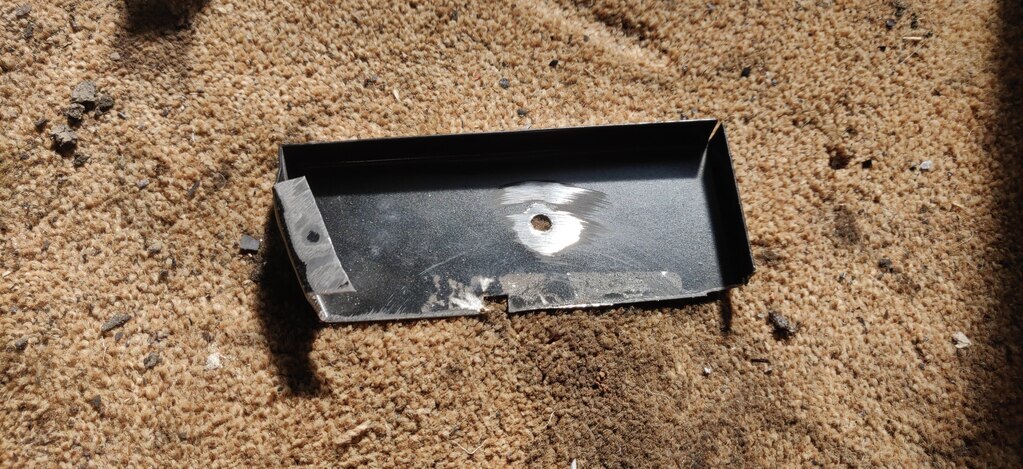 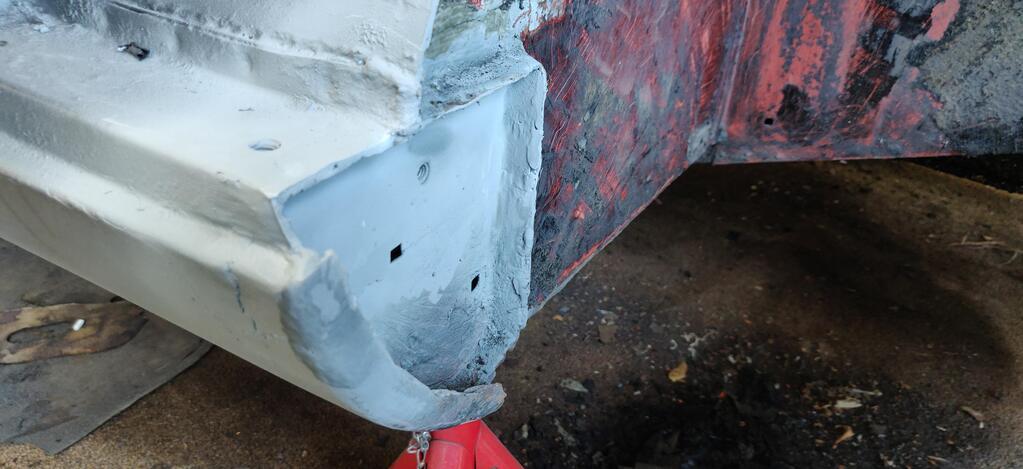 I had to change the battery tray due to rust from leaking acid. The Jag uses only one stamping for both LHD and RHD cars, with the holes where the opposite side pedal box would go being filled being covered by the battery (so an LHD car has the battery on the right, RHD has it on the left). As standard the holes for the pedal box are simply covered with a sheet of rubber and then the battery box on top. I decided to fill them with metal for neatness and to prevent leaks. 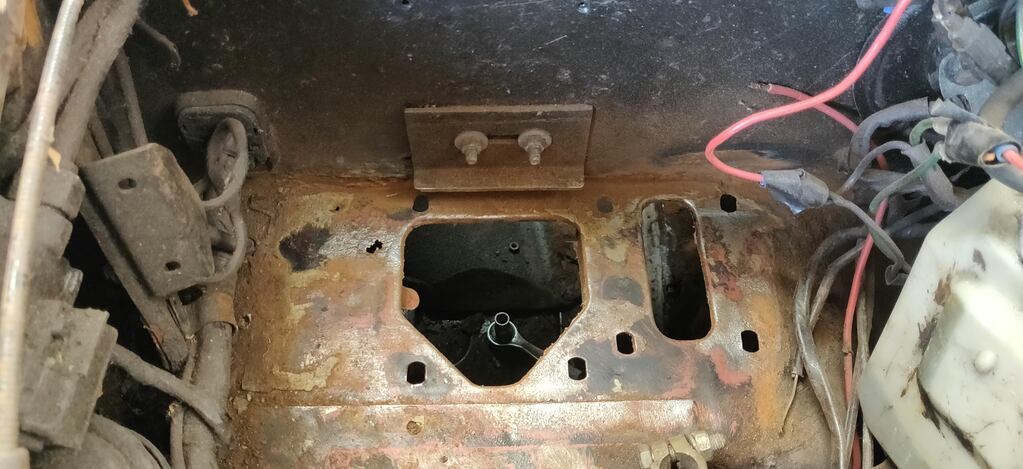 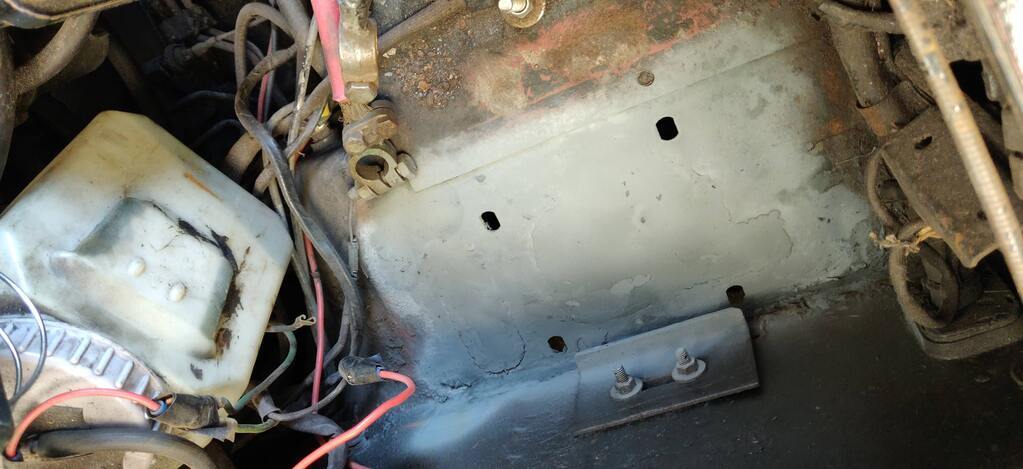 Years of leaking window had rusted out the floor pans as well, becoming a part of Jaguar’s full flow ventilation. A new floorpan was let in. 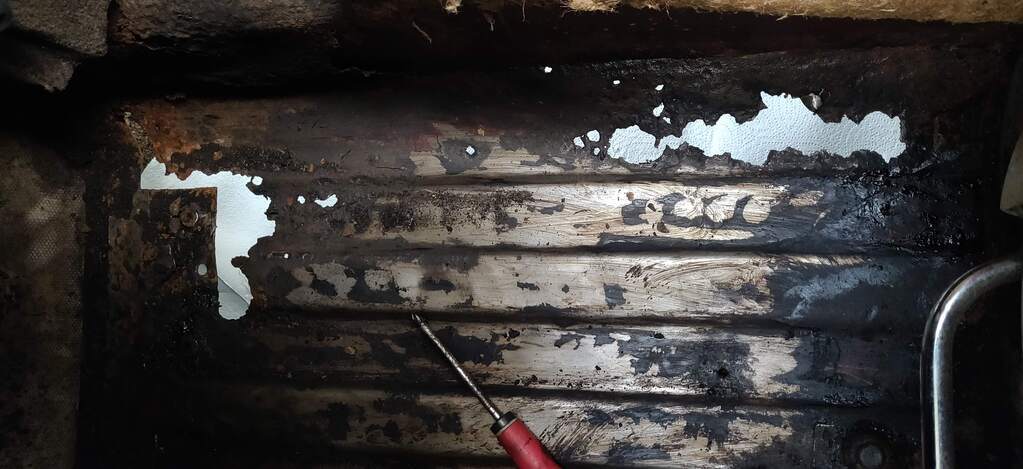 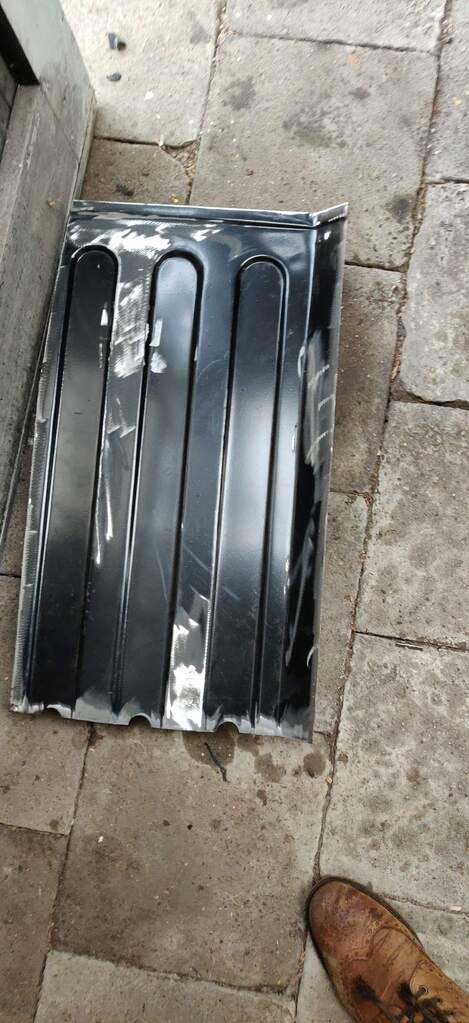 The doors were mostly fine. I just welded up the trim holes. The left front door was holed in the bottom, which was fixable, but I already had a better one that only needed some new metal in one corner, for which I beat a nicely fitting patch - including drain hole of course. 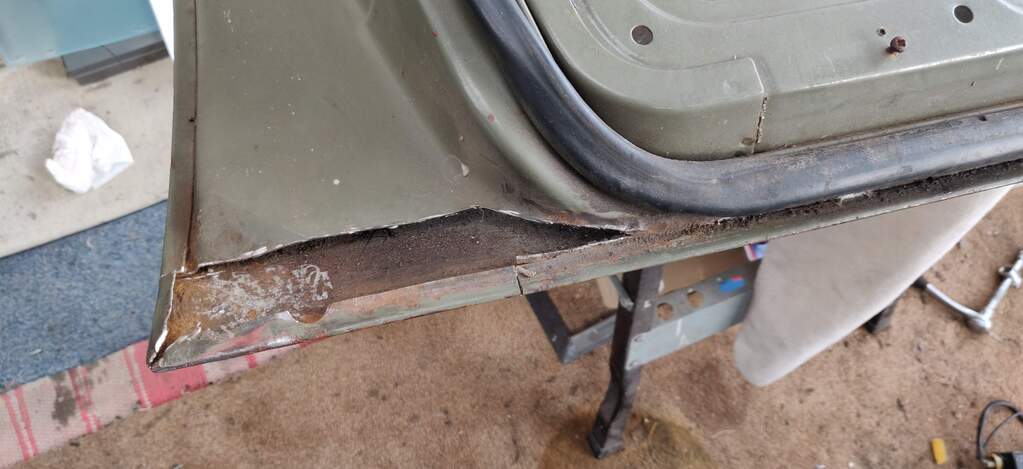 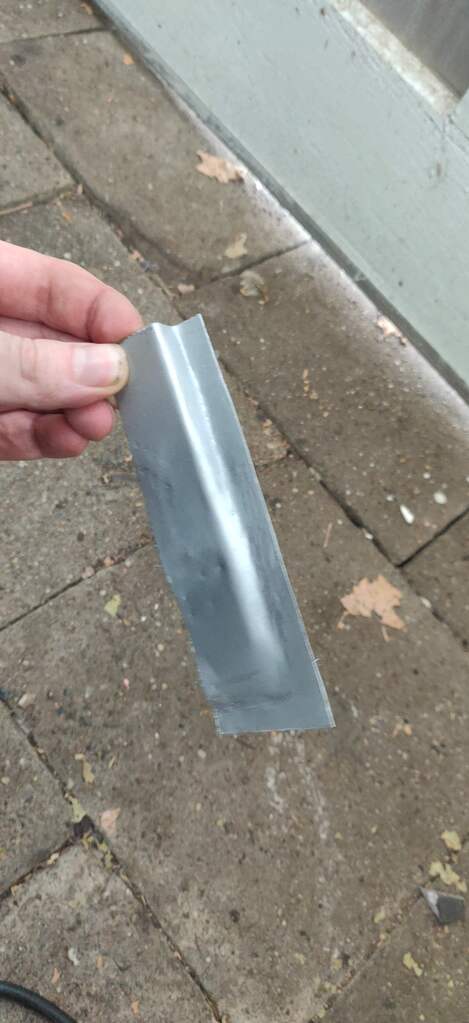 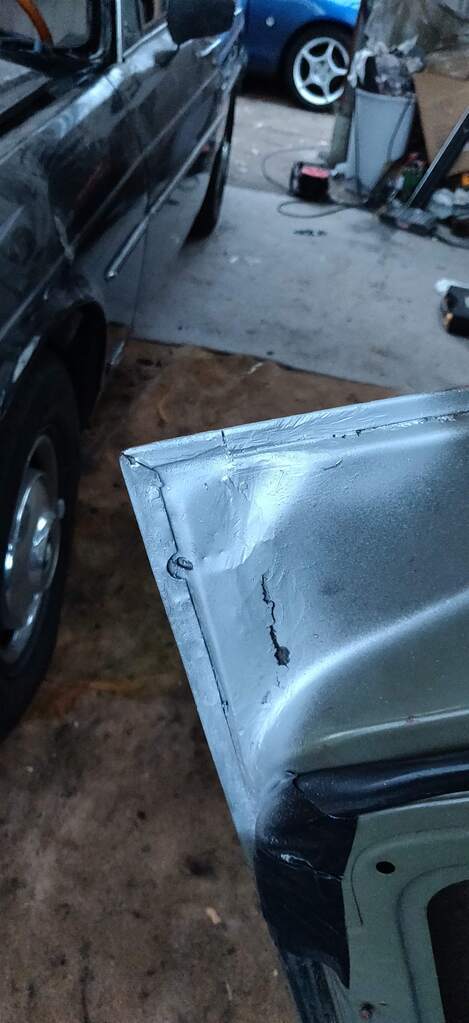 What I didn’t realize when buying this door was that the late (post ’72) Series 1 uses different door locks, so I had to transfer the bolt pattern for the earlier lock. 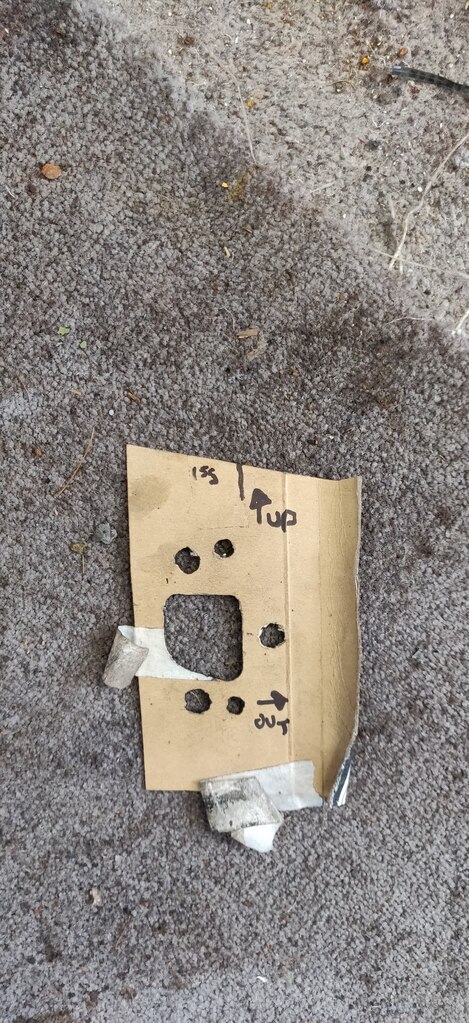 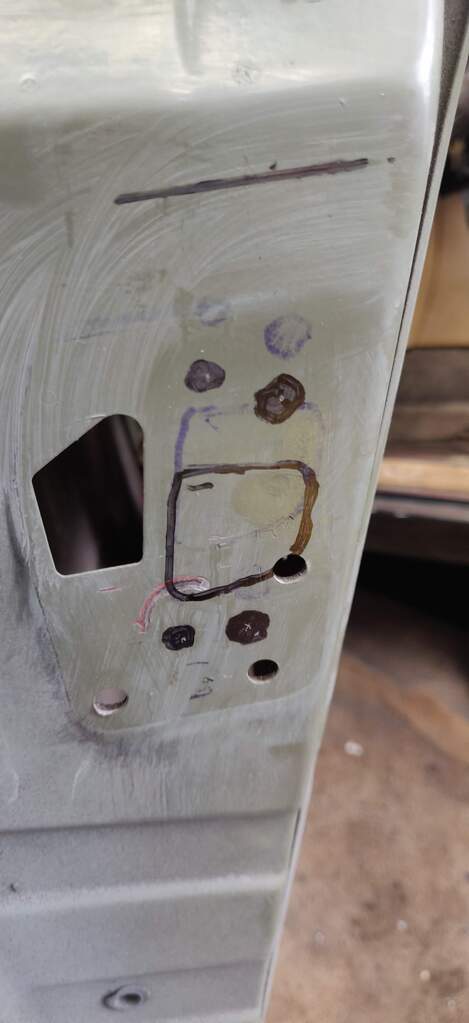 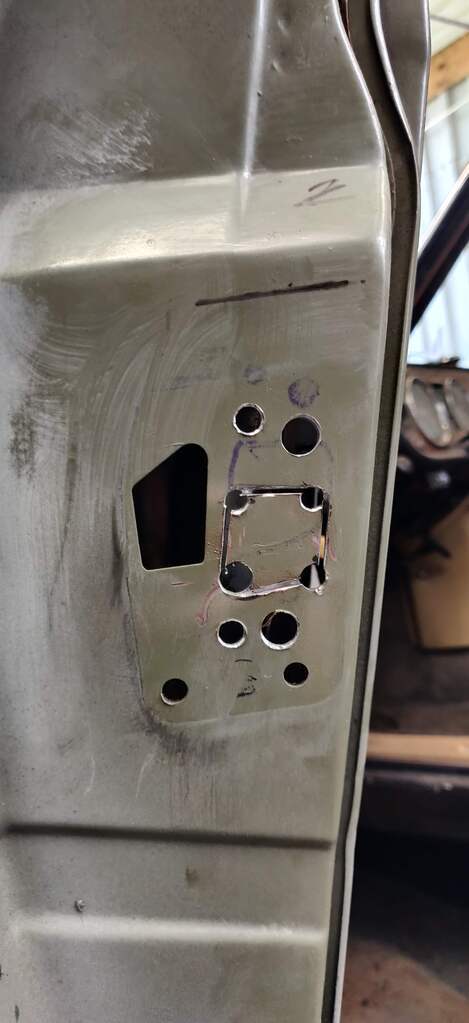 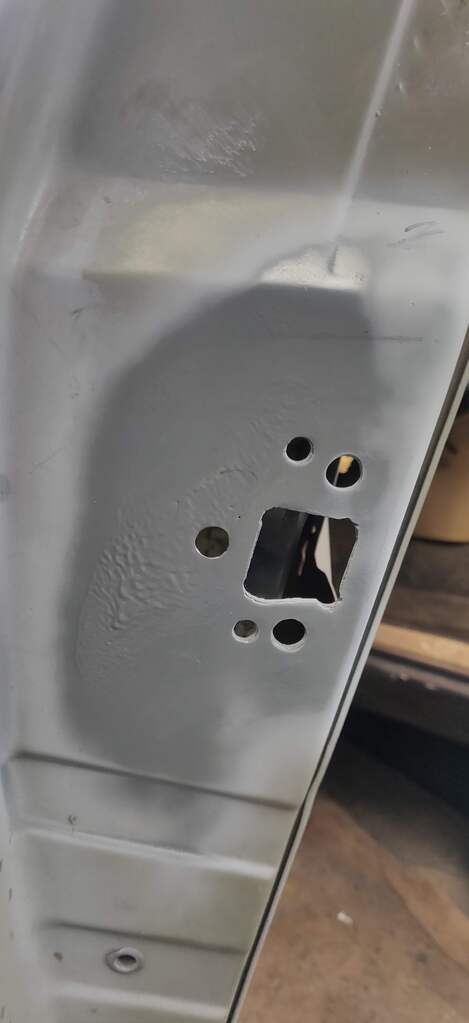 Lastly I bit the bullet and decided to remove the sunroof. Even though it worked well it also leaked and took up too much headroom, so it had to go. It's a dealer fit roof, so the mounting and finishing was pretty bodged overall. Removing the sunroof cassette left a great big hole. 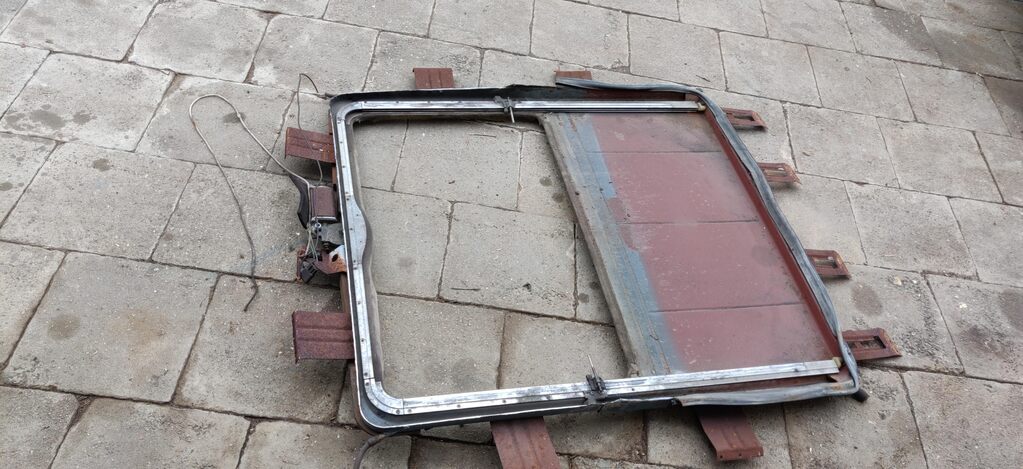 For which I got a cut-out from a donor car. 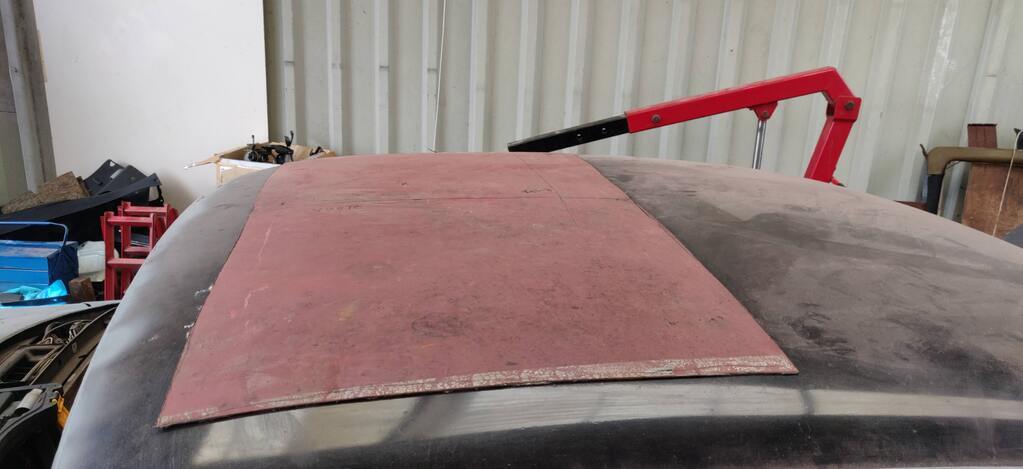 This finally ended the weldathon. 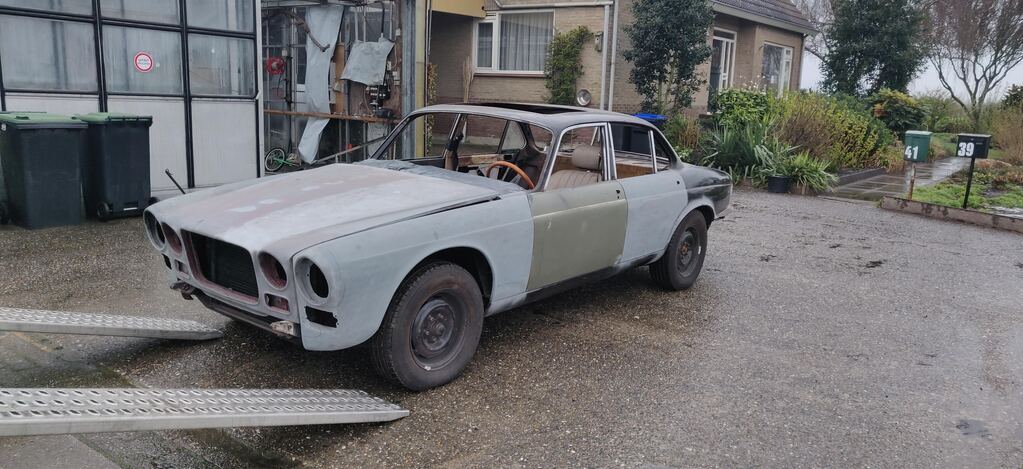 The eagle eyed among you spotted I hadn’t welded the roof panel and rear arches yet. I was worried my primitive welding would warp these delicate panels, so by this time I’d found a good bodyworker and painter who I trusted with these jobs. 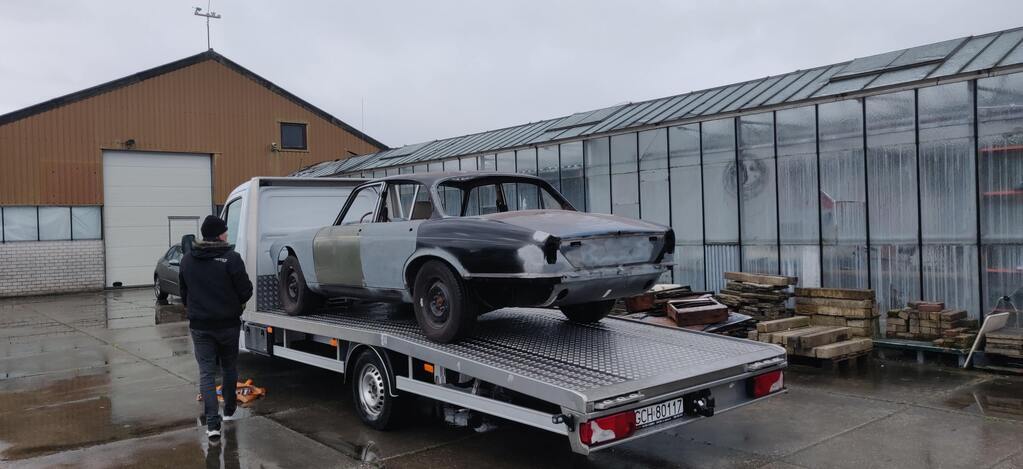 Off it goes - in exactly the same position it came into my life! |
| |
Last Edit: Nov 13, 2023 11:08:41 GMT by mkickert
|
|
|
|
|
|
|
|
This is amazing. You are SO casual about the work done here. I'm not fooled though, :-)
A Gentlemans express saved, great job. Now hurry up with page 2.
|
| |
|
|
|
|
|
Jun 12, 2023 20:44:37 GMT
|
This is amazing. You are SO casual about the work done here. I'm not fooled though, :-) A Gentlemans express saved, great job. Now hurry up with page 2. It looks deceptively easy when I type it out, but rest assured this is a recap of hundreds of hours of work with quite a few setbacks and a considerable amount of swearing. I love cars but they can be spiteful things  |
| |
Last Edit: Jun 12, 2023 22:55:32 GMT by mkickert
|
|
|
|
|
Jun 14, 2023 20:46:11 GMT
|
The painter did an extremely thorough job and essentially bare-metaled the entire outside, taking care of smaller spots I missed, and sending a lot of pictures along the way. 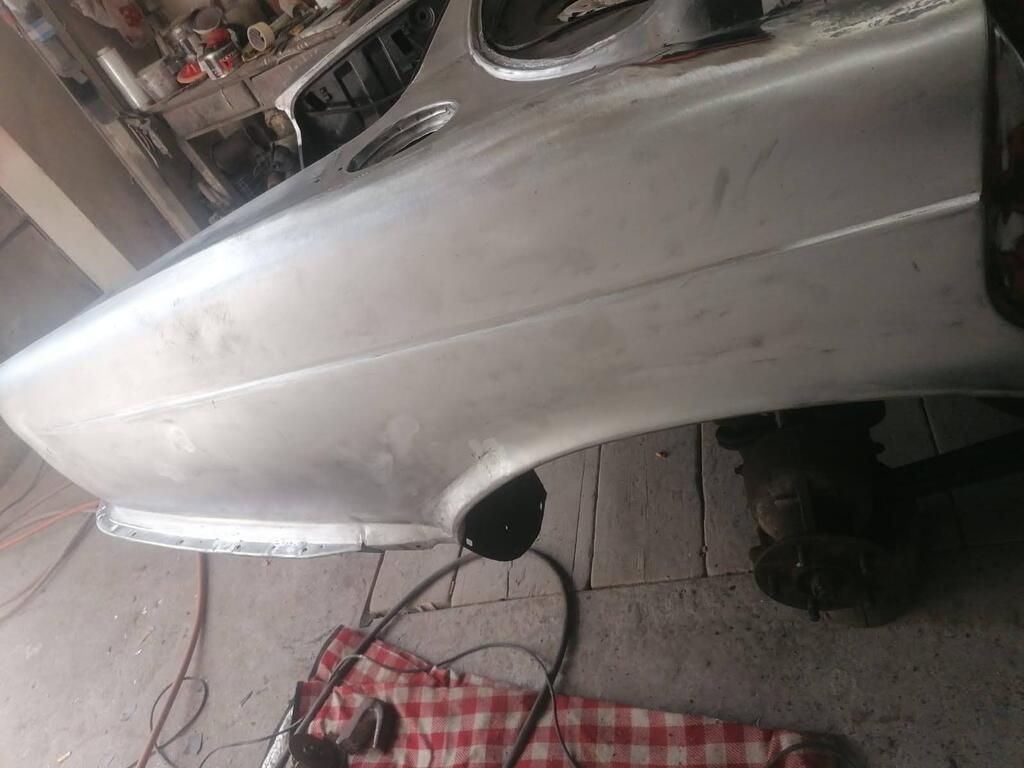 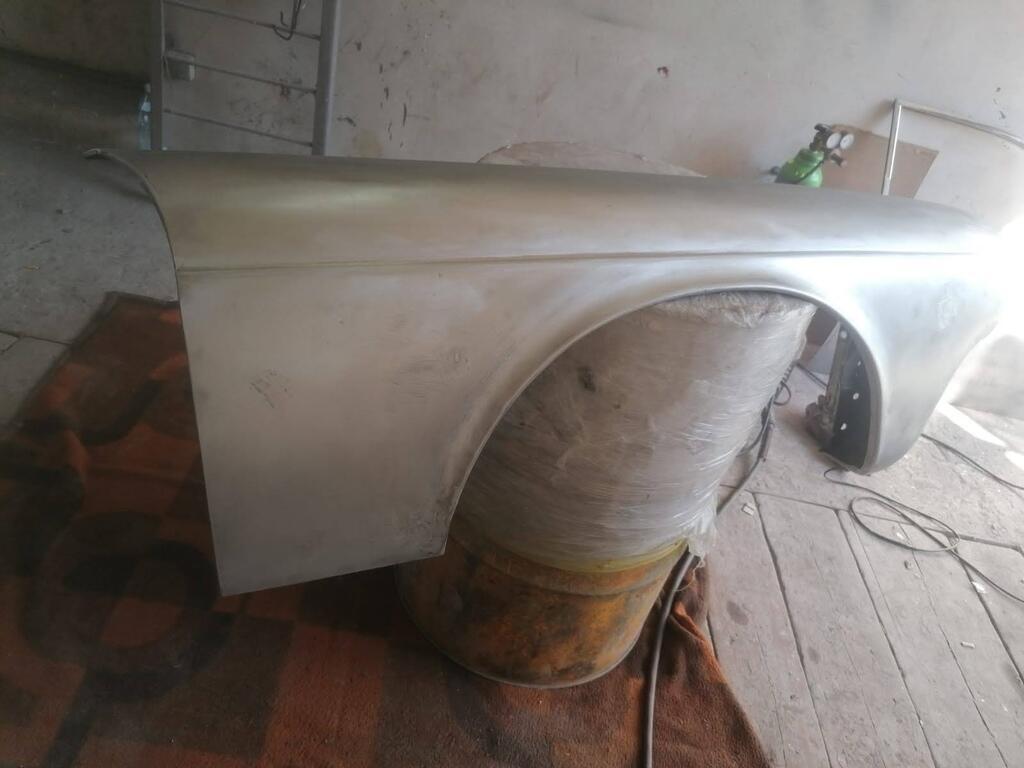 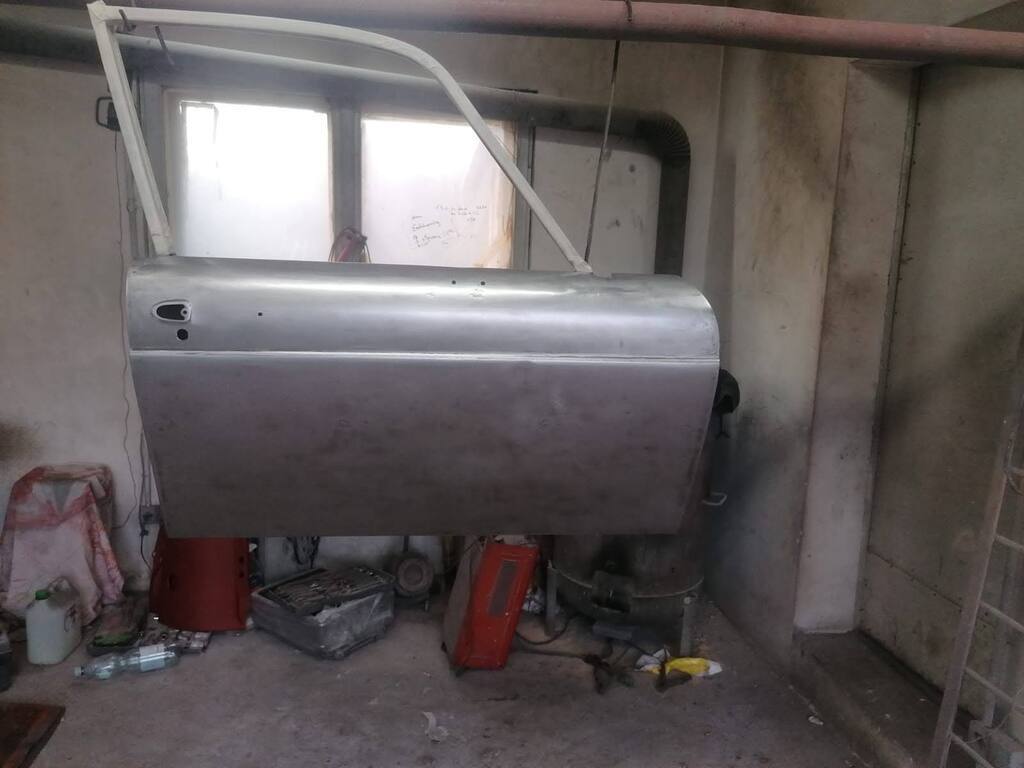 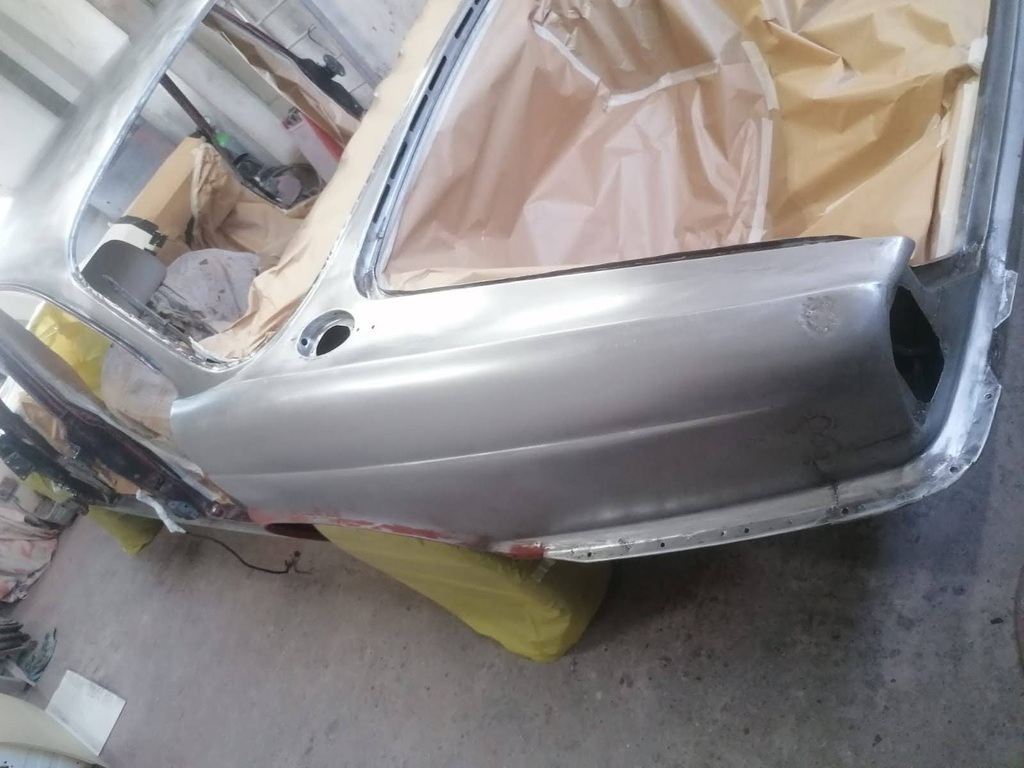 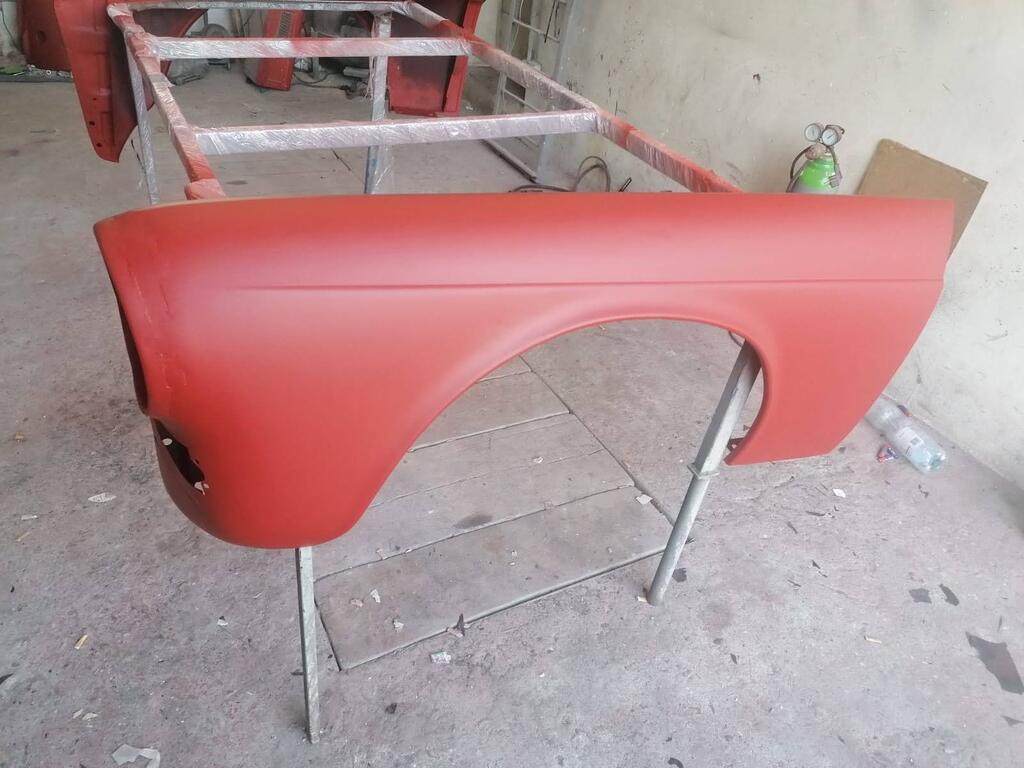 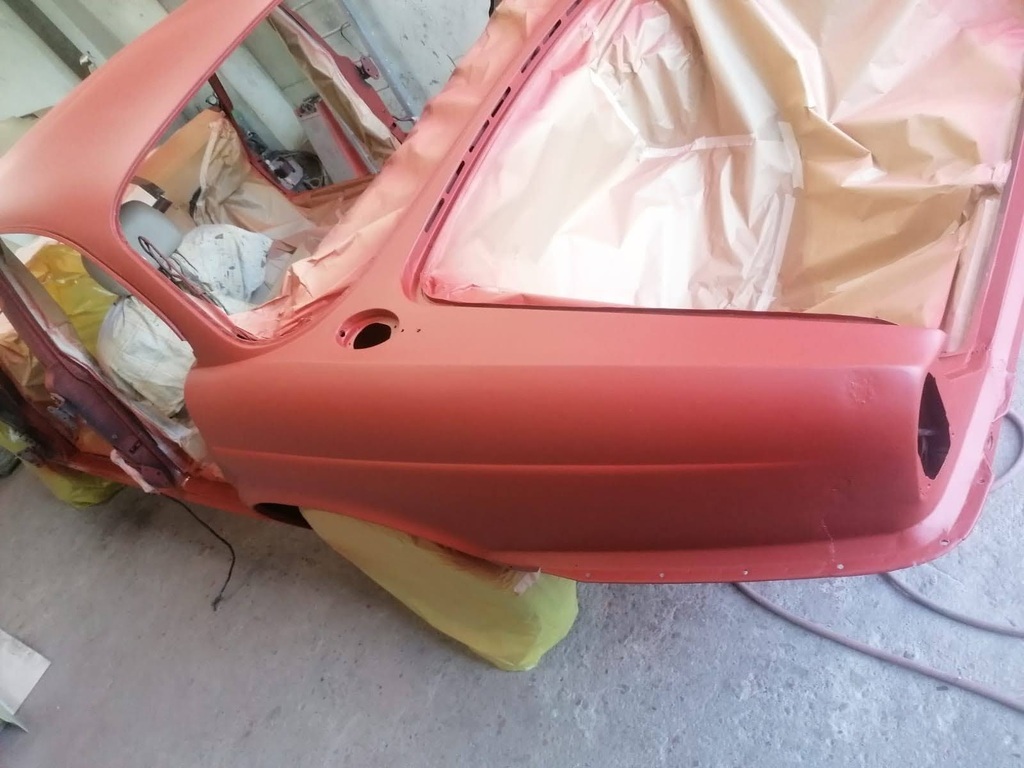 Including the tidy job he did welding up the sunroof: 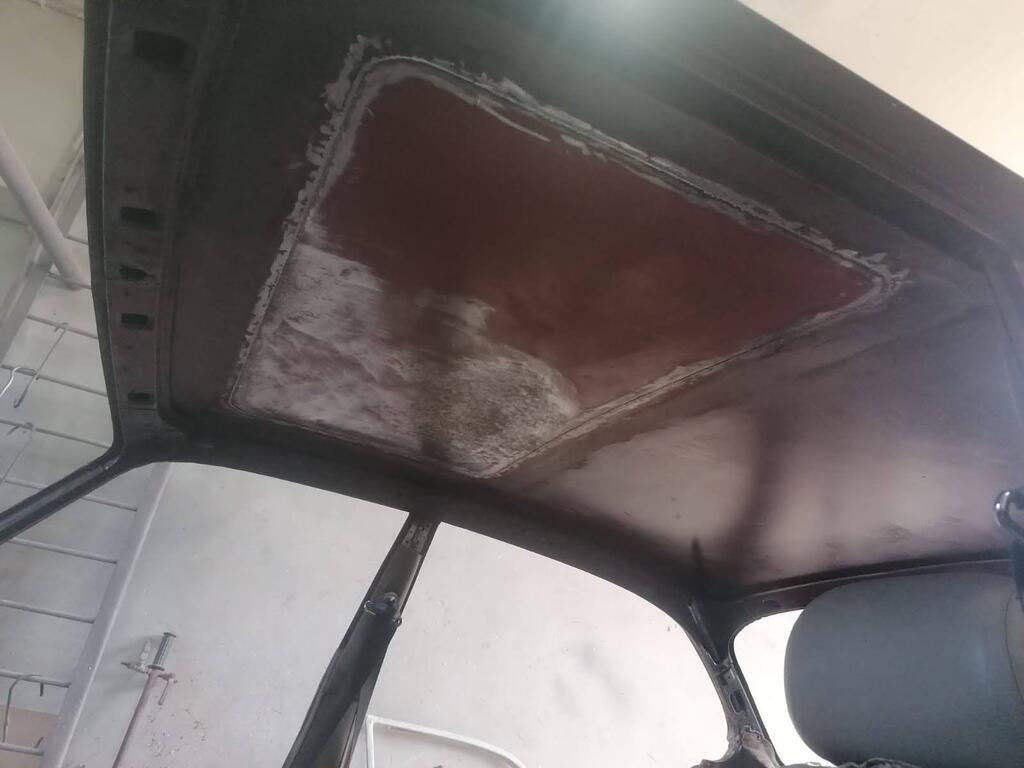 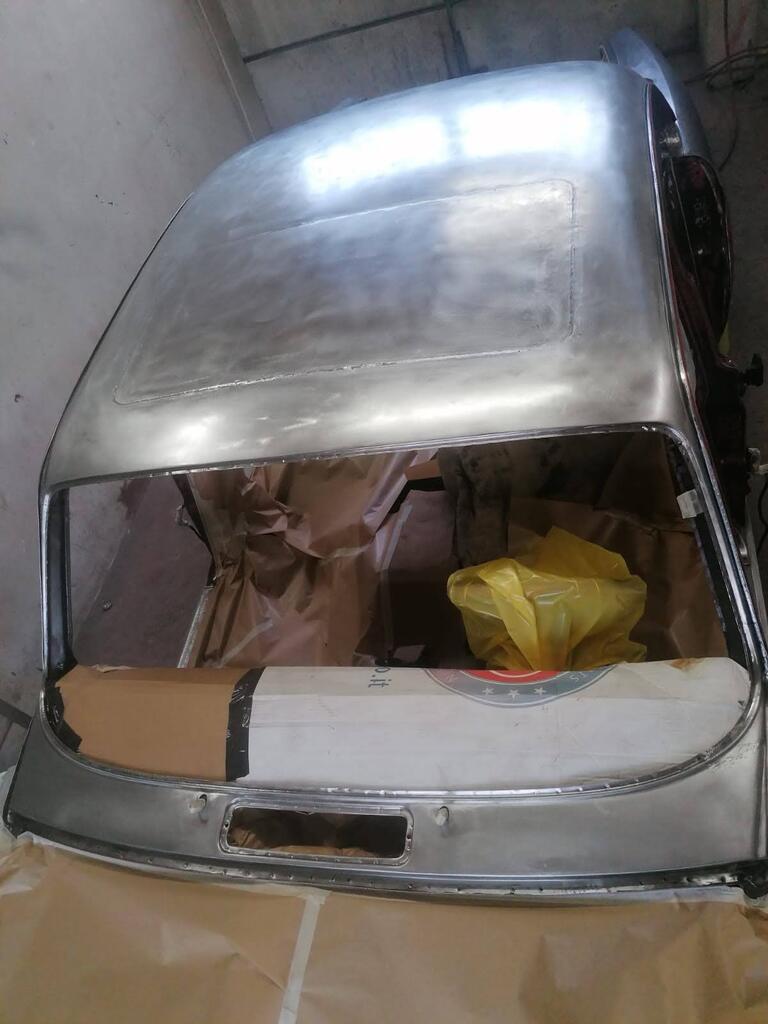 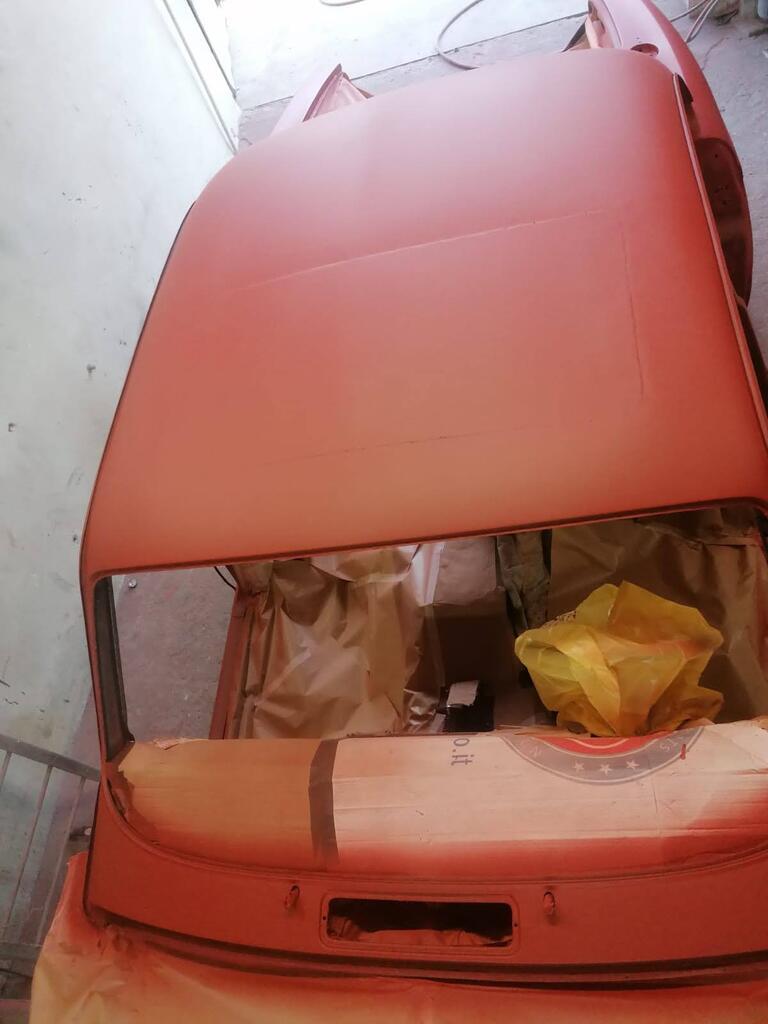 Now you might wonder which colour it would be. After all I could pick any colour I wanted, being especially partial to the Jaguar Light Blue shown here on someone else’s car: 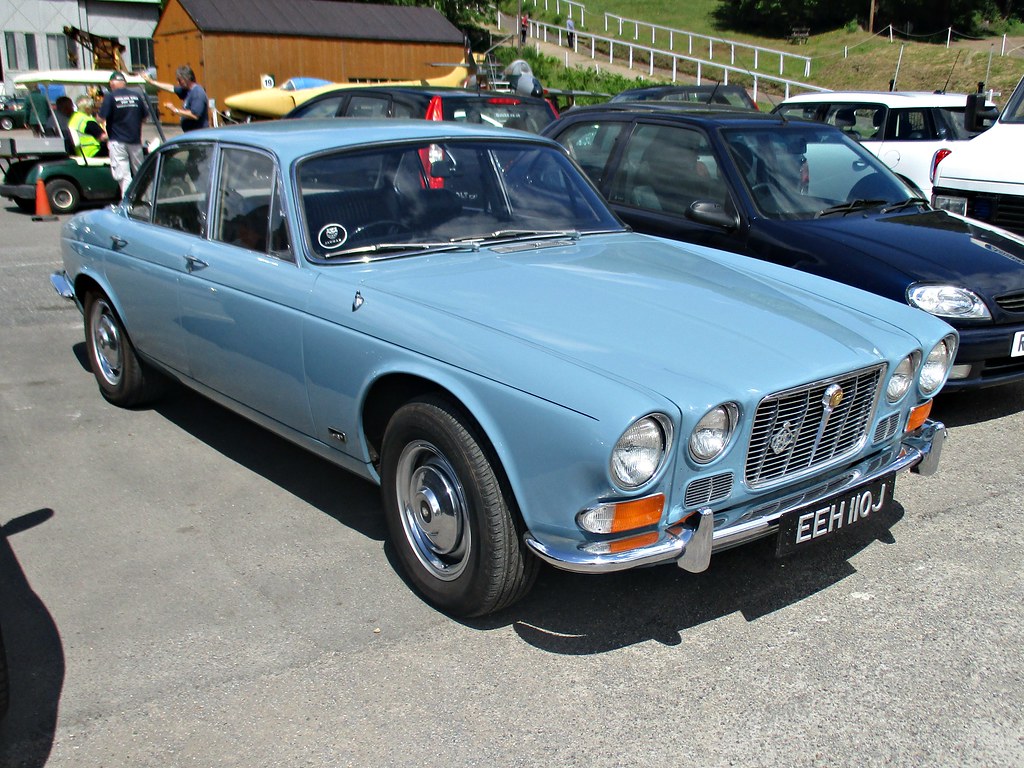 But.. 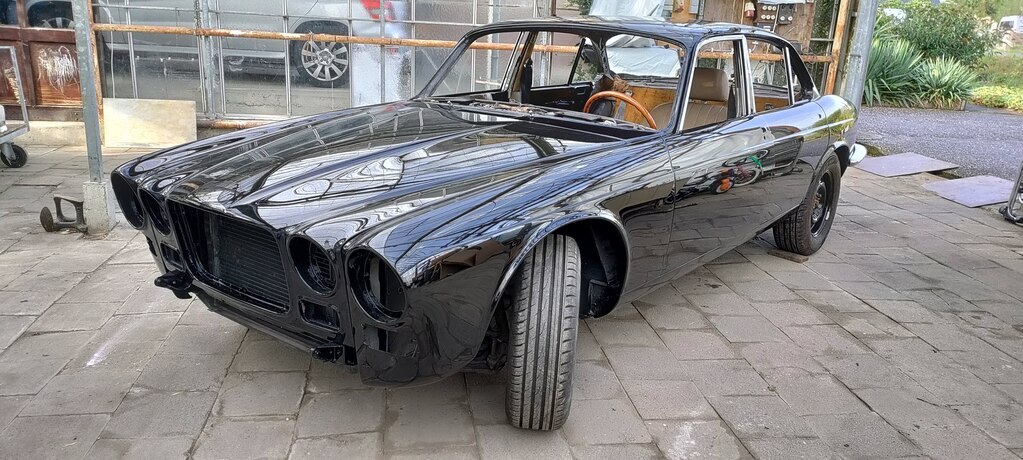 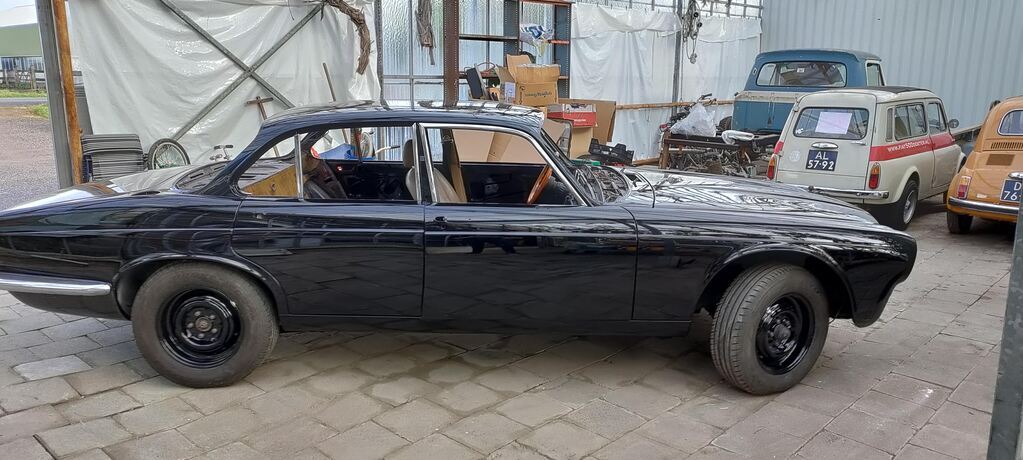 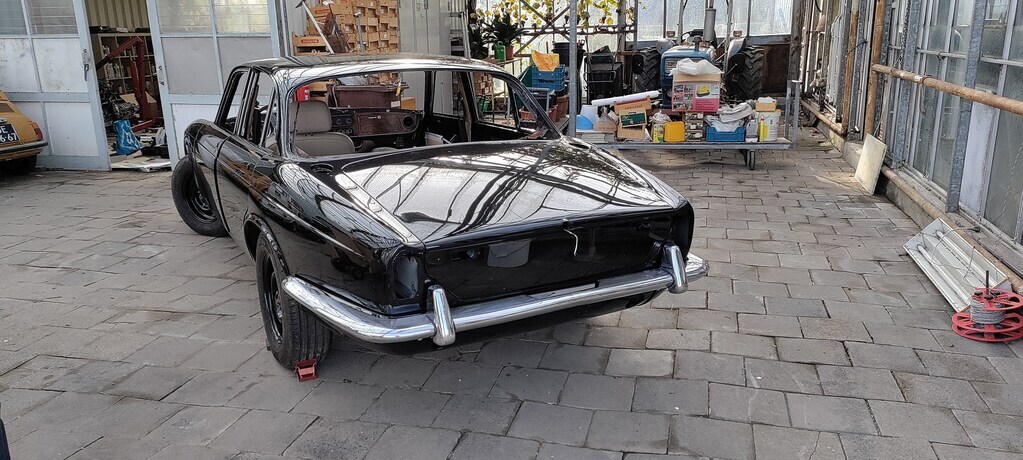 I went for the original black. It was originally a black car, which was a rare colour back then despite black being very common on new cars. And doesn’t it just look lush? After that it was building the car up again. I won’t bore you with details of fighting with ill-fitting new rubbers and overall alignment woes – there were plenty. Especially the door and window rubbers were absolute pains. It’s such a deeply fulfilling process though, building up a freshly painted car. It also really showed off the minor custom touches I made to clean up the shape. At the back I’ve deleted the side markers, antenna, some badging and the reflectors below the taillight, plus I fitted the all-red US taillight lenses. 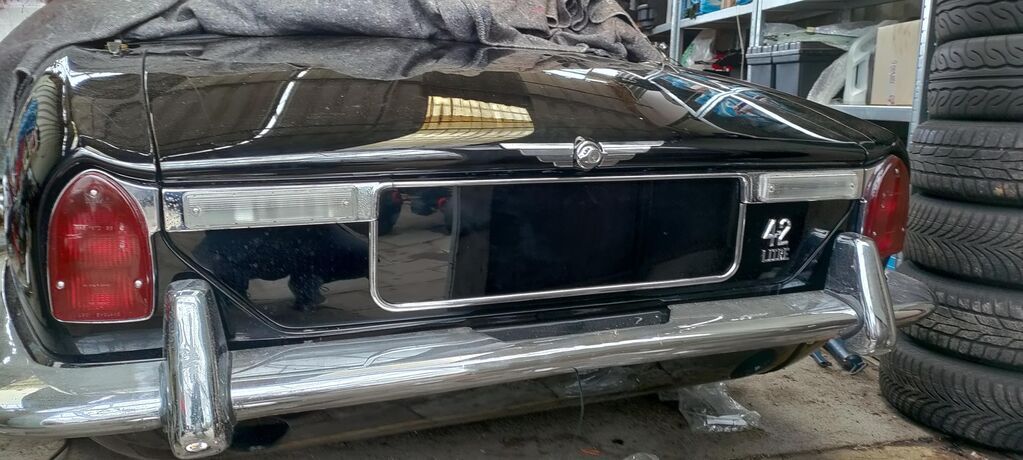 I also added some early straight exhaust tips instead of the original later swan neck tips. These were introduced when Jaguar found out the earlier straight tips could suck exhaust fumes back into the cabin at certain speeds. I’ve driven the car plenty after fitting them and haven’t died once so far, and they look much better so they’re staying for now. 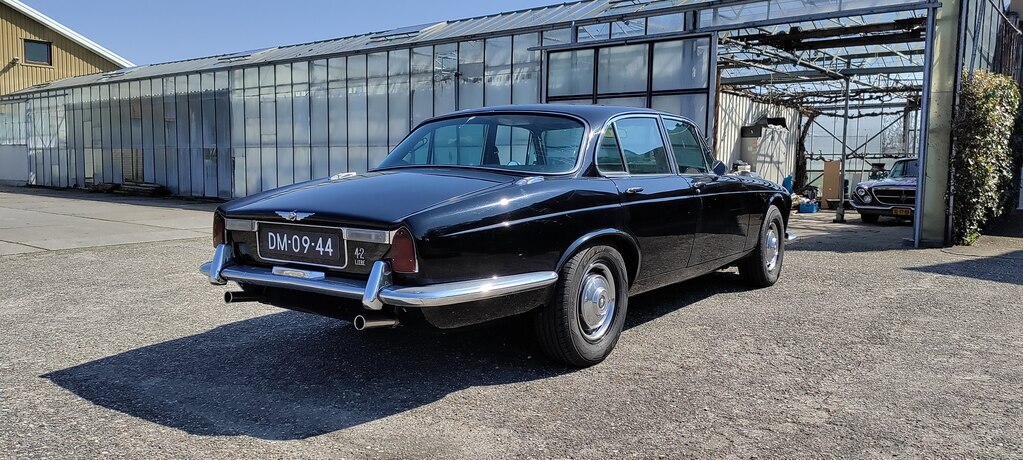 At the front I’ve deleted the sidemarkers as well, removed the aftermarket leaper from the bonnet, removed the side emblems, and switched to Euro-spec headlights and indicator lenses. I added some regrettably cheap bullet mirrors which are mostly useless and already rusting out after a few months. 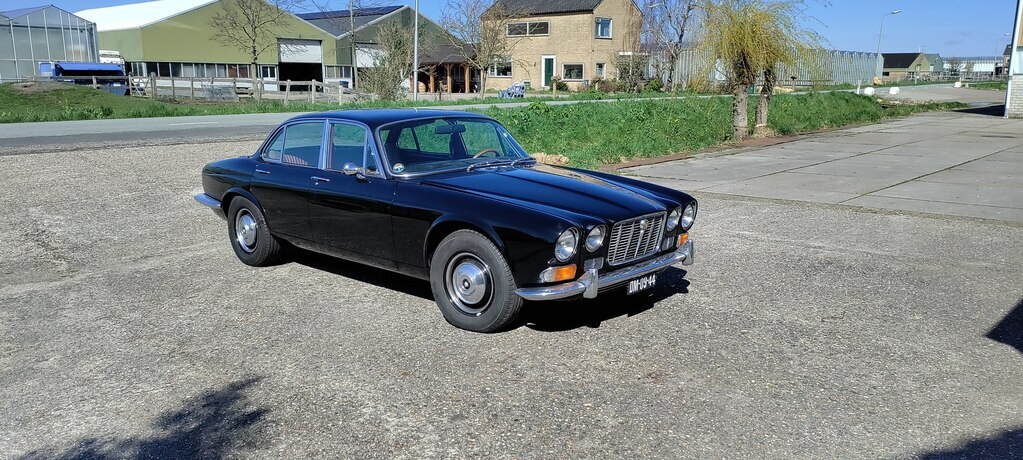 Later on, I also changed the hub caps from the original full chrome to a set I painted in matching black. I’m happy with how it tones down the big slabs of chrome on the wheels for a more classic look. 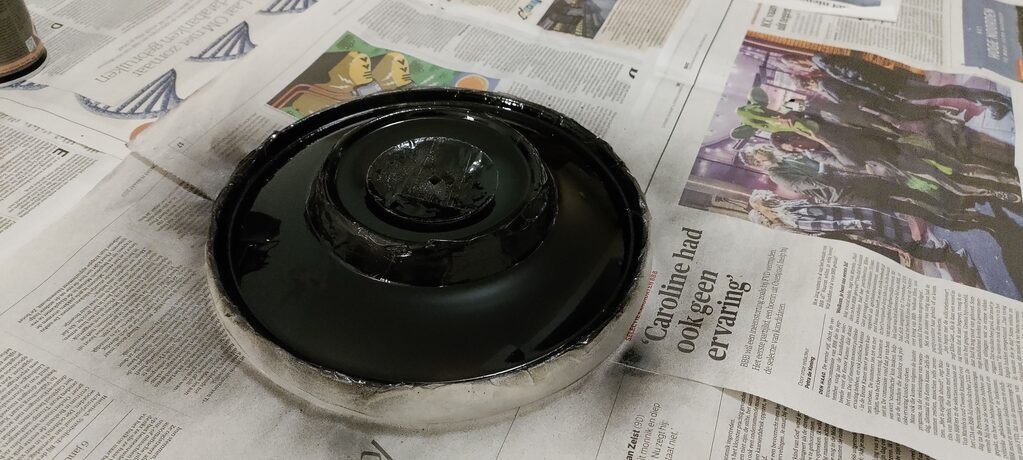 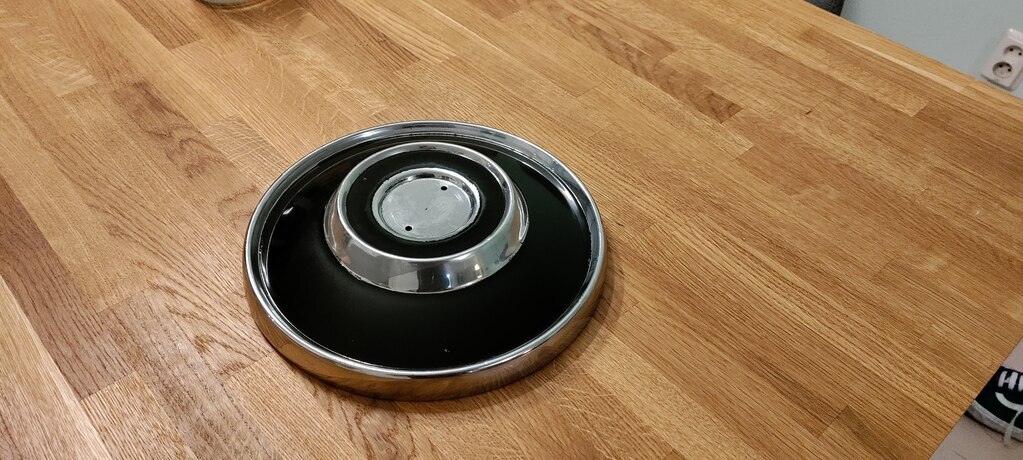 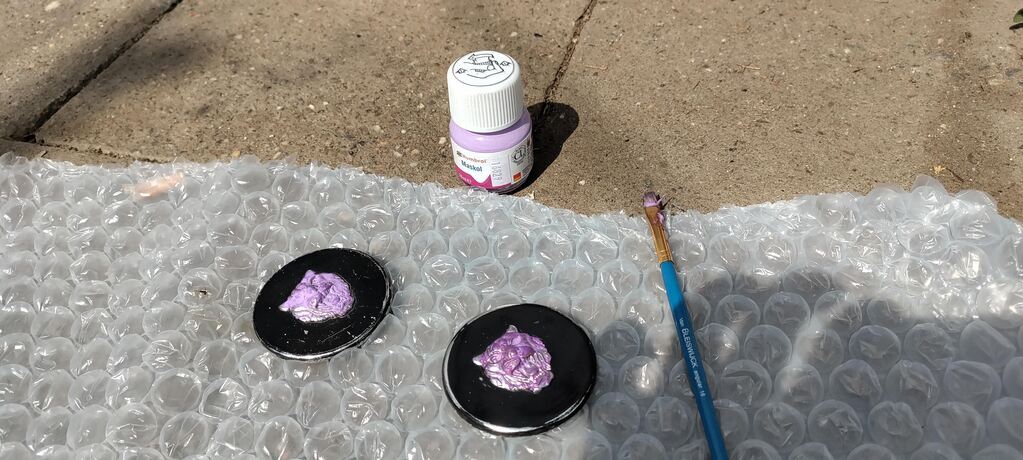 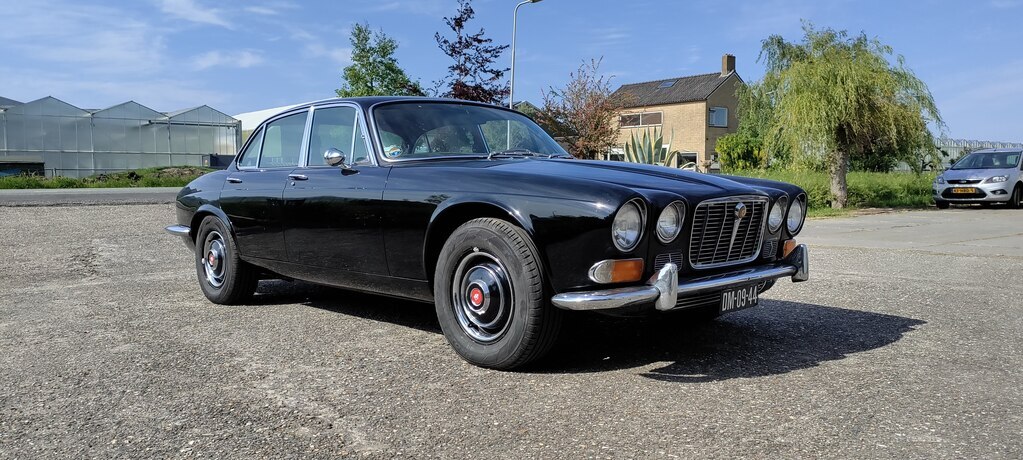 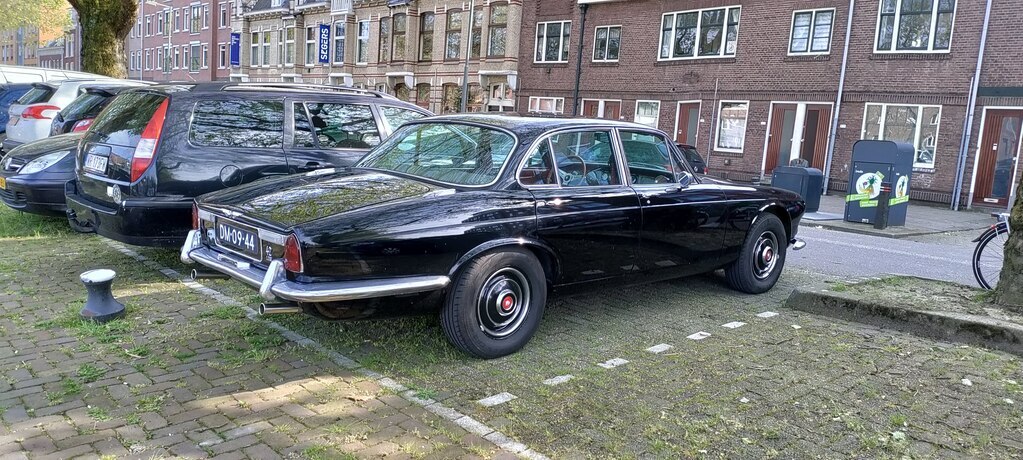 Now that’s just the exterior of course. Building up the interior was a whole new adventure, so stay tuned! |
| |
Last Edit: Jun 14, 2023 20:49:39 GMT by mkickert
|
|
eurogranada
Europe
To tinker or not to tinker, that is the question...
Posts: 2,556
Member is Online
|
|
|
|
|
Lovely work! It looks great in black (but for me my favorite color is the light blue shown as well)!
I like what you've done with the wheels although I'm not sure if this looks more or less classic than the full chrome look. But I happen to like custom touches as my Granada build clearly shows...
|
| |
|
|
maf260
Part of things
 
Posts: 533
|
|
Jun 15, 2023 13:29:50 GMT
|
|
That's some very impressive work with an outstanding outcome. I'm not a fan of what you did with the hub caps, but it's not my car!
|
| |
|
|
|
|
|
Jun 15, 2023 21:16:30 GMT
|
|
That looks mean as hell in black.
I don't dislike the hubcaps in black and although I'm not sure I'd say they look better, they certainly don't look worse. Would be interesting so see them in a graphite grey maybe? Or with a pinstripe around the caps. Just a thought.
I notice you stopped short of deleting the overriders, like your photoshop at the start.
Such an improvement with the extra badges gone and those disgusting US side reflectors. Are you legally ok without rear reflectors?
|
| |
|
|
|
|
|
Jun 15, 2023 22:28:53 GMT
|
Thanks all for the great responses! That looks mean as hell in black. I don't dislike the hubcaps in black and although I'm not sure I'd say they look better, they certainly don't look worse. Would be interesting so see them in a graphite grey maybe? Or with a pinstripe around the caps. Just a thought. I notice you stopped short of deleting the overriders, like your photoshop at the start. Such an improvement with the extra badges gone and those disgusting US side reflectors. Are you legally ok without rear reflectors? I haven't quite made my mind up on the hubcaps either so there might be some further experimenting. Losing the rear reflectors is legal, although visibility wise not optimal of course. I know what you mean with the overriders, I've pondered about them quite a bit. The front do a great jobs hiding the hood hinges, and the underlying bumper has substantial holes for said overriders. I've seen people without them and I do like how clean it looks, but they most likely modded and rechromed their bumper. Plus the rear doesn't look good without the overriders (did some photoshop explorations), so having them on one end but not the other felt a bit off. Choices, choices.. |
| |
|
|
79cord
Posted a lot
  
Posts: 2,617
|
|
Jun 16, 2023 11:10:10 GMT
|
Certainly looks much nicer with the simpler all-red rear lights & without the USA side-markers & ill-fitting original reflectors, shame they weren't made to fit properly as the reflectors didn't look too bad otherwise. I wasn't sure about the painted hubcaps as I like the more obviously shaped s2 hubcaps, but they do look good & the red detailing gives them a great character. They made me think of the earlier XK120 & mk2 hubcaps, even though I think it's the fake 'knock-off' ears in chrome that makes them special. 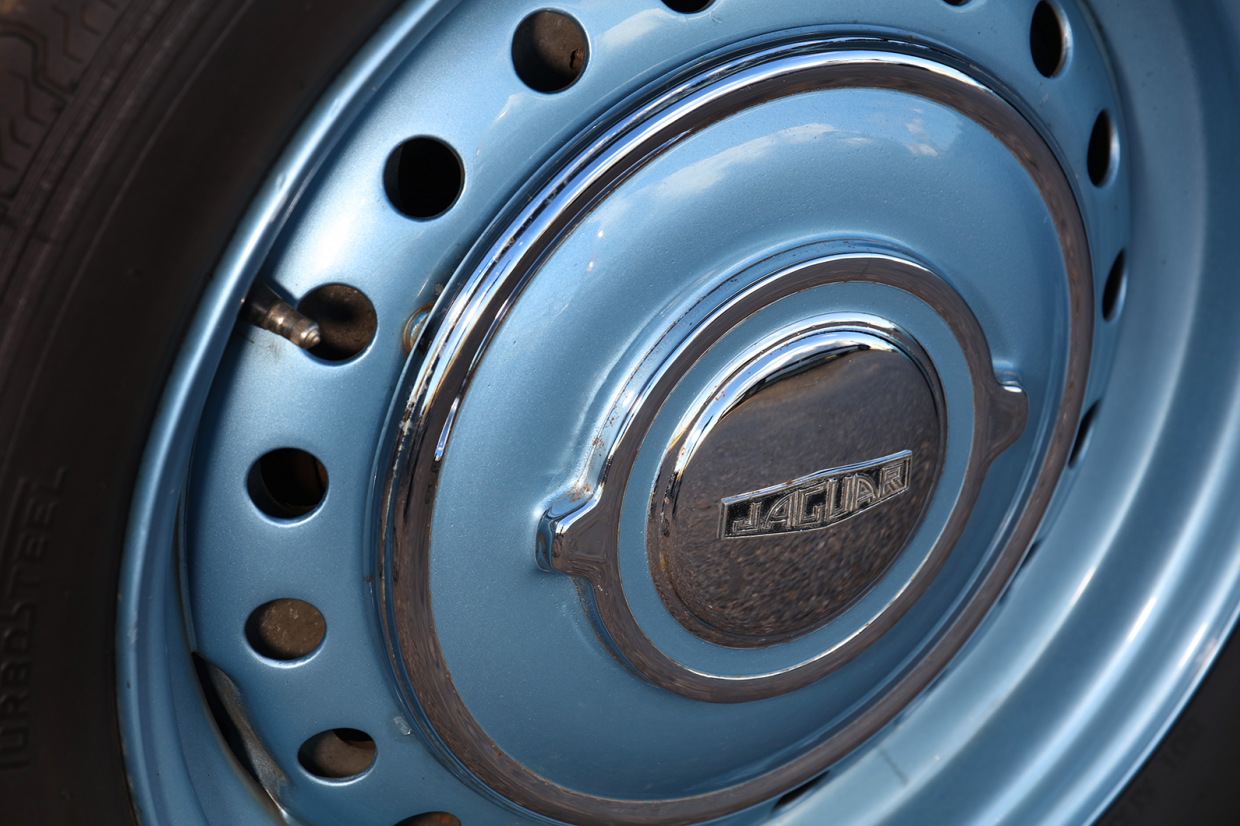 |
| |
Last Edit: Jun 16, 2023 11:16:26 GMT by 79cord
|
|
|
|


 Besides the running costs the only negative (read ego) experience was a copper pulling me over for speeding and asking moi whether the car belonged to my father
  Really? With chrome wire spokes, stainless cill covers and a cb radio?


