|
|
|
Dec 11, 2023 18:57:45 GMT
|
Cooling system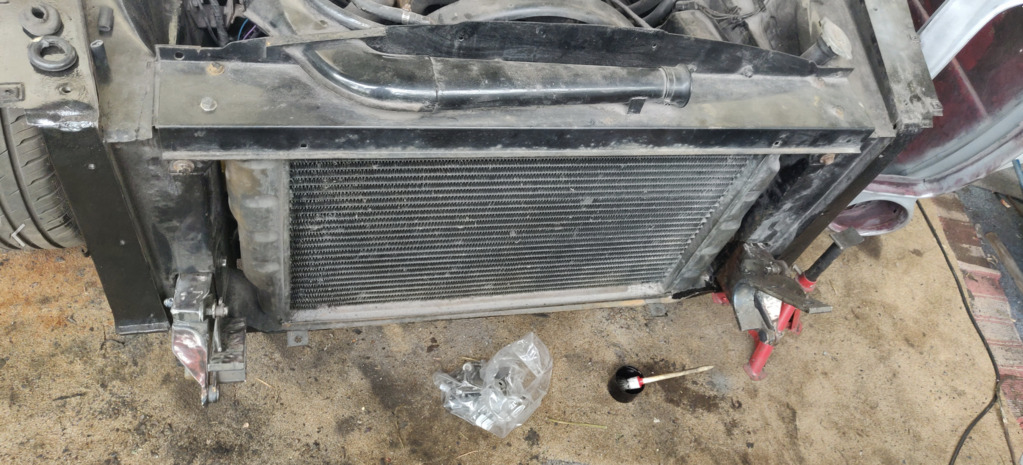 The original radiator from the car was in good shape, and even had the outlets in the right place for the AJ6 engine. If I was building a manual car I’d have just used that and be done with it all. But my car is an automatic, so I need a way to cool the gearbox. With the 4.2 XK this would be done via a separate ATF cooler between the radiator and the engine, which is basically a sleeve containing ATF around a main coolant pipe. Using this would require me to adapt the ATF hoses from the ZF4HP22, which I didn’t love. I decided to use the XJ40 radiator that came with the AJ6, which has an integrated transmission cooler. Plus it’s a nice, light, and modern design to which all coolant and ATF lines would simply hook up correctly. The only issue is size. This AJ6 radiator is about 15mm higher than the original (because it’s an early version, late XJ40/X300 rads are higher still) so it would require some modification to fit. The car’s bottom radiator support is a welded box profile which adds quite a bit of rigidity to the front end, so I wanted to keep that intact as much as possible. Unlike the owner of the XJC that the AJ6 came out, who appears to have cut the mounting holes with an axe. 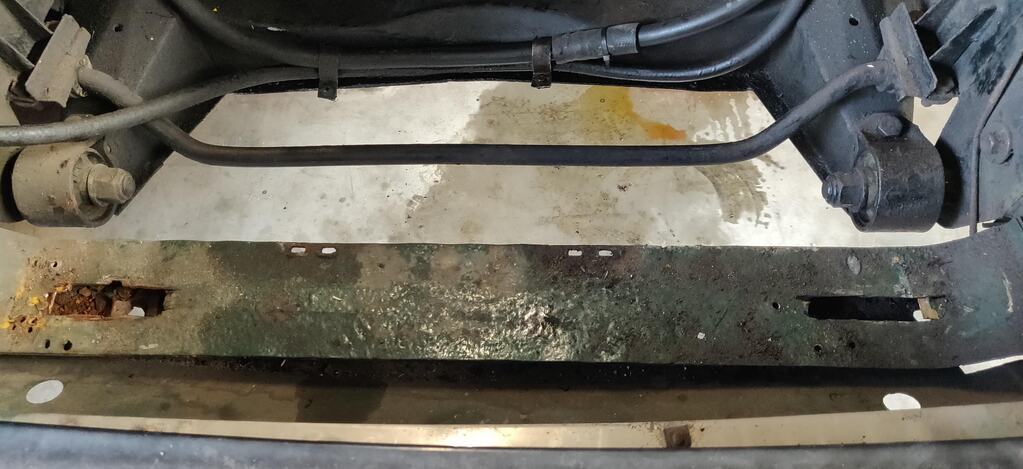 So I modified the top radiator support, which simply bolts in but still adds rigidity. 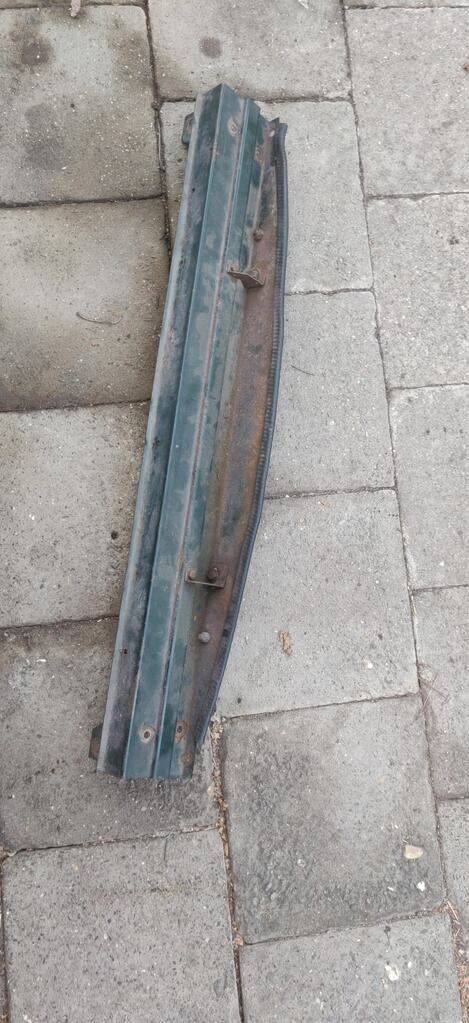 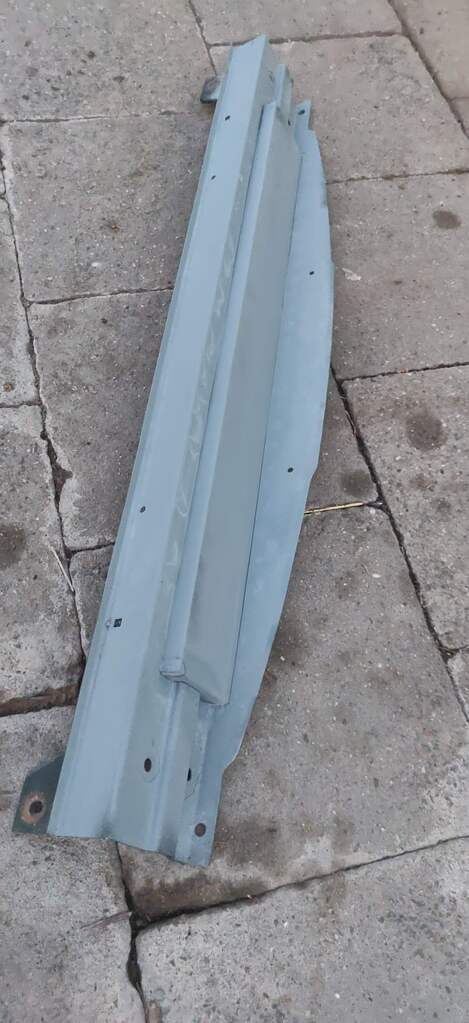 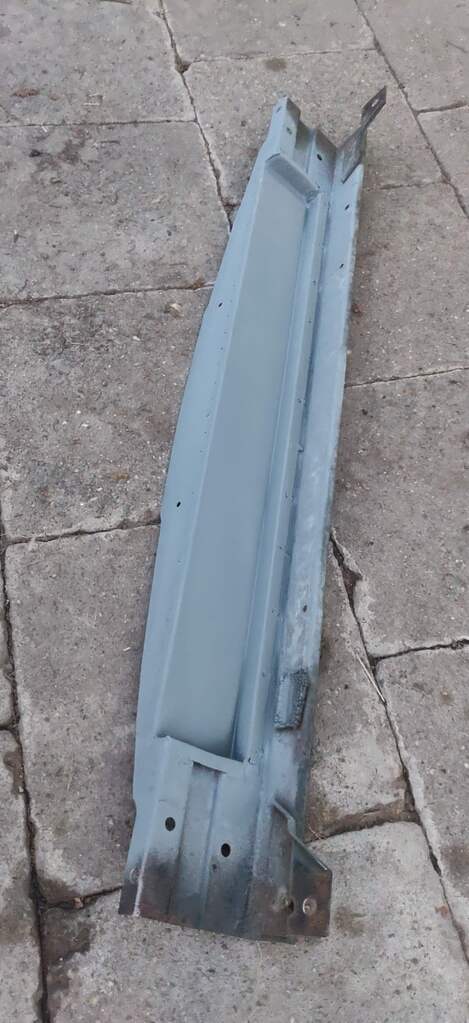 I wanted a factory look, so I decided to modify an early 2.8 version by welding in a folded steel box to allow for the bigger radiator. Incidentally the modification added quite a bit of strength to the panel. 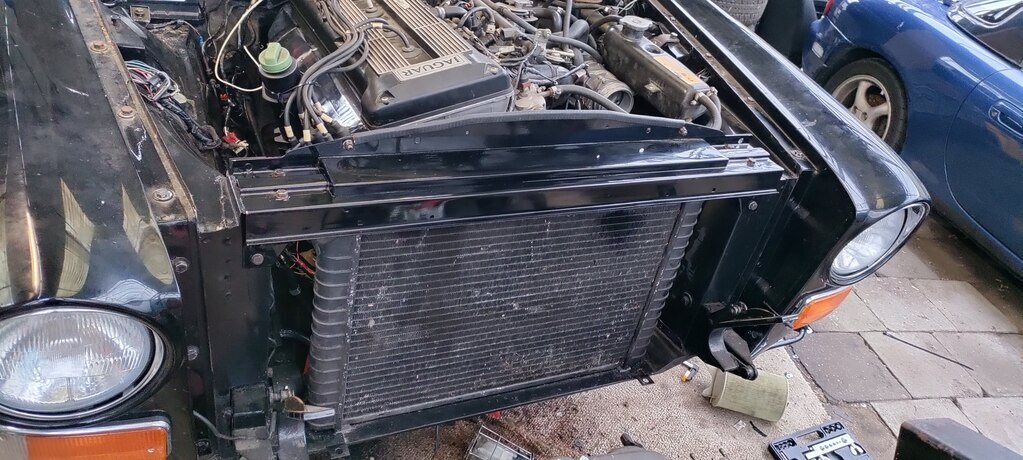 And here it is all painted and mounted up. You can see the AJ6 radiator is less wide than the XK one, so I’ll probably fill the voids on either side to direct the airflow and aid in cooling. I’m also using the XJ40 expansion tank for now. 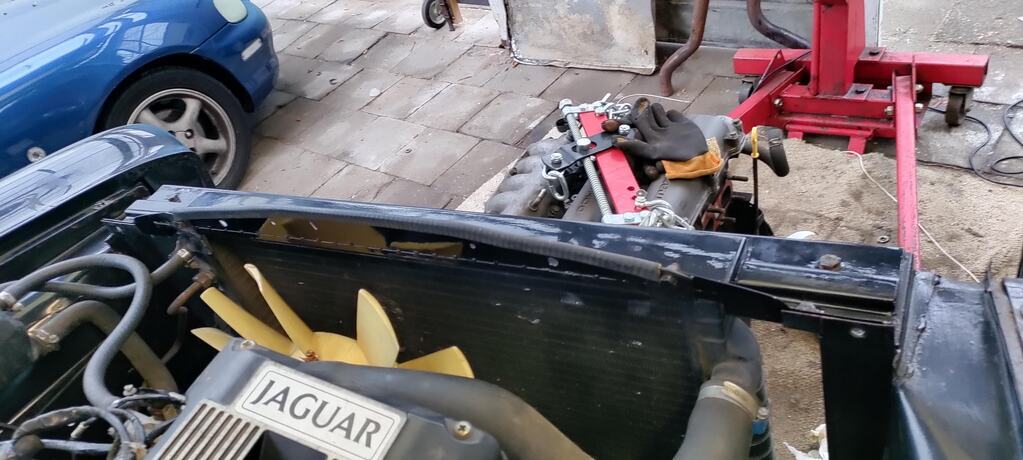 From the rear you can see how much slimmer the new radiator is. I used the original mounting tabs with some sound insulation foam to keep everything in place and rattle free. 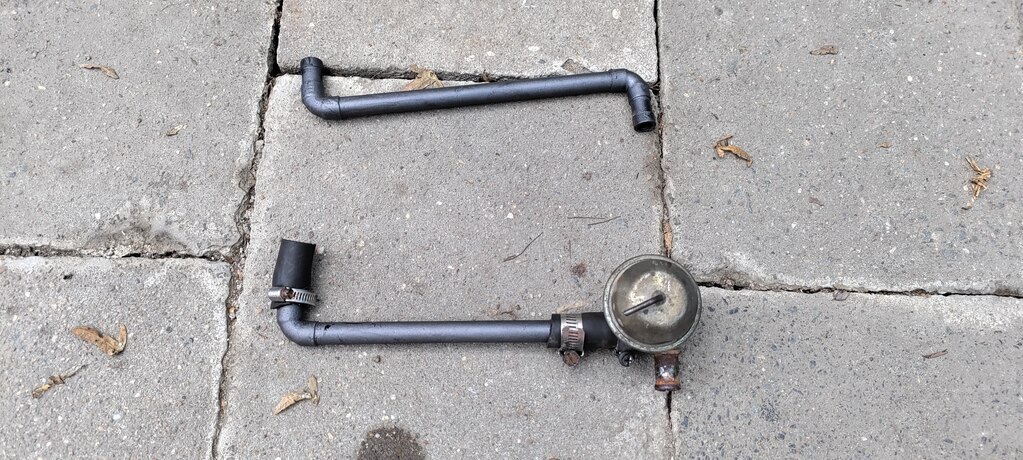 To finish off the cooling system I had to find a solution for the heater. The Series 1 XJ has the heater core connection right in the centerline of the car, whereas the AJ6 has the heater hoses offset to the left. I soldered up copper link pipes to make up the difference and painted them with heat resistant paint. I wasn’t 100% sure about the ability of a soldered joint to work in the heat of an engine bay, but since hot rodders have been using this solution for decades I’m willing to take the chance.
|
| |
|
|
|
|
|
|
|
Dec 30, 2023 13:43:55 GMT
|
I had some time around the holidays, so I decided to make the step to evolve the new engine from decorative (it’s a pretty thing after all) to functional. To do so I needed to finish off all the remaining jobs under the car: fuel system, rear ARB, and exhaust. Fuel systemI wanted to run the AJ6 on petrol first before adapting it to LPG, but as my car had never run on petrol with the original engine in all the years I had it I knew this would be a challenge. Removing the original fuel feed line showed that it was completely gummed up and holed in a few places. At this point I decided to redo the entire fuel system. 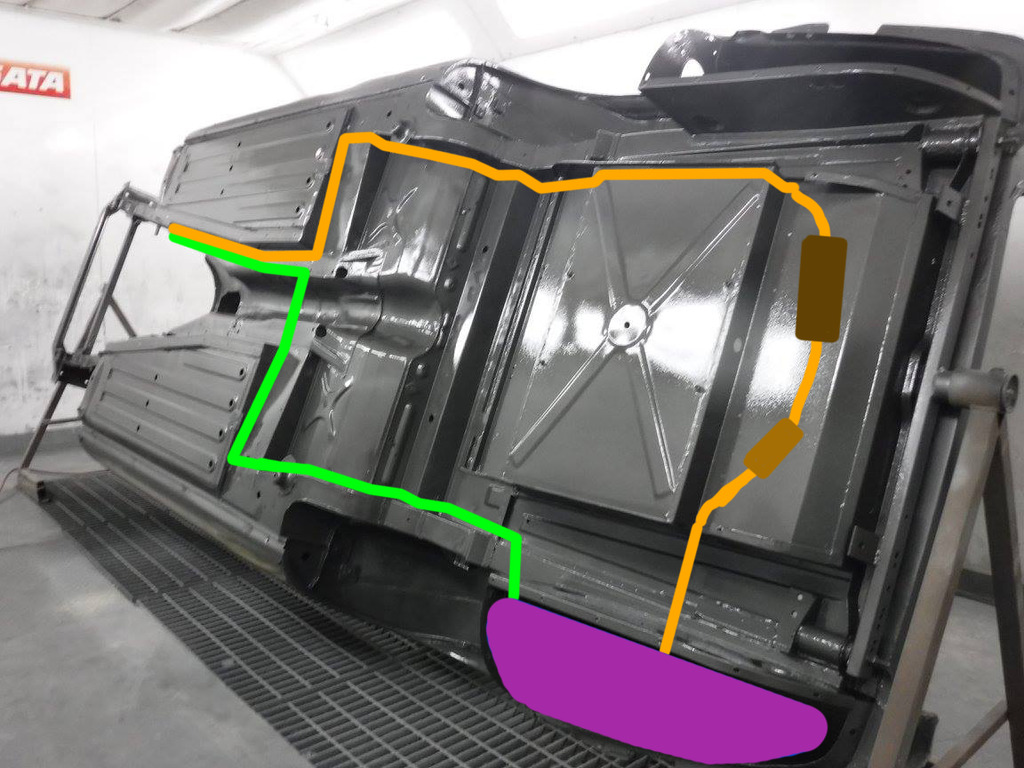 Here's a little schematic I made based on someone else's picture (not the exact same boot floor but you get the idea). I used the external pump and filter (brown in the picture) from the donor in the boot, right where the original ones would have been. I routed the feed line (orange in the picture) across the boot to the left hand side of the car, and the return (green in the picture) on the RHS. I made sure to run both lines along the cold side of the transmission tunnel to avoid exhaust heat. I chose to run only the right fuel tank (pink in the picture), as my LPG filler blocks the left filler opening anyway. I chose to use an early Series 3 tank, which has connections for the fuel return, but still uses an external pump. This tank came out of a scrap car, and whilst leak free turned out to not be in great shape internally. As a new tank costs 400€ I decided to renovate what I had. I removed all the tarred up gummy deposits from the bottom of the tank with a scraper and a few liters of isopropyl alcohol. After which I filled the tank with 50% phosphoric acid, which removed any rust and created a nice protective layer to prevent flash rusting afterwards. I repeated this process until the entire tank was clean and no more residue would come out. No pictures of this I’m afraid as it was a pretty messy process that took a few days. 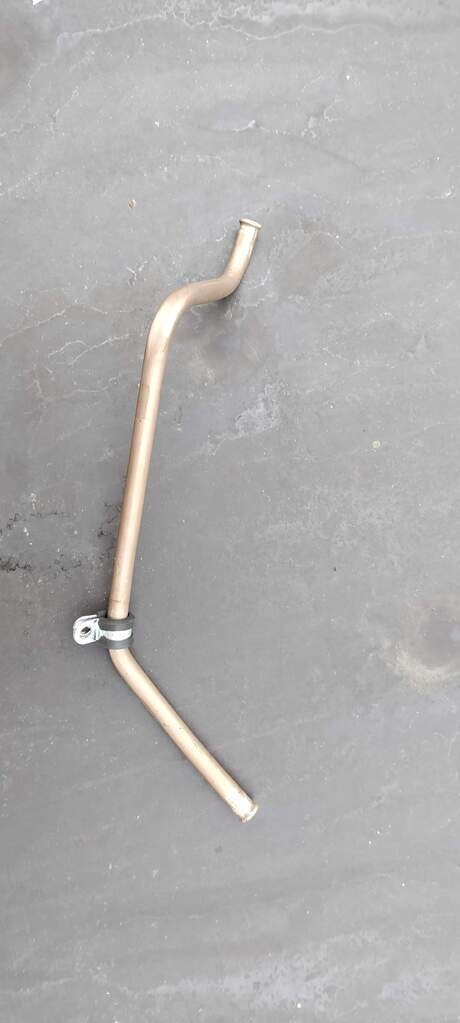 I then got busy with the pipe bender to make new feed and return hardlines out of 3/8” copper nickel tubing, which I made some nice flares to keep the hoses in place. I joined the hardlines with some ethanol proof high pressure fuel hose. Rear anti-roll barWhilst I was there I decided to also change my original 5/8" sway bar for the thicker 7/8" one off a V12 XJ-S, here seen together. My goal for this isn’t to pull 3G on the skidpad, but just to reduce body roll a bit for spirited driving. Later on I’ll also fit the rear sway bar off the same donor car to balance it out again. 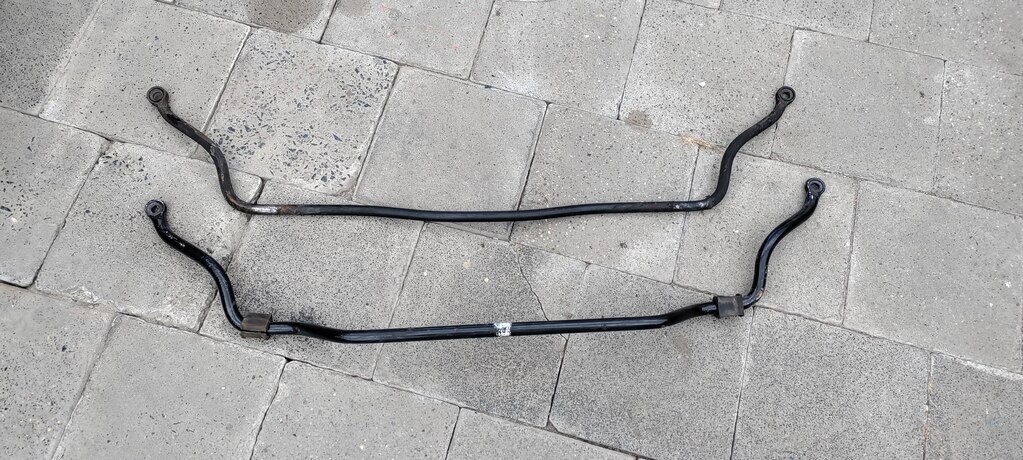 Remember I said this? I was under the car anyway so decided to tackle this. There’s no factory mounts on any of the Series XJs, but quite a few others have converted their cars to run a rear ARB. 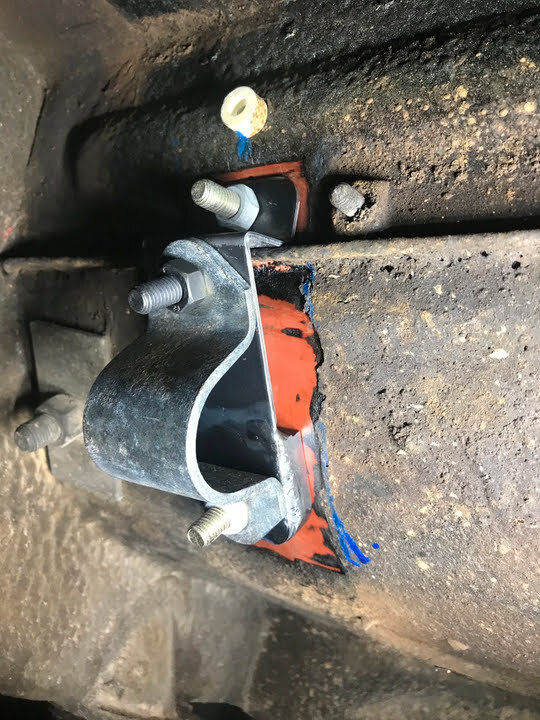 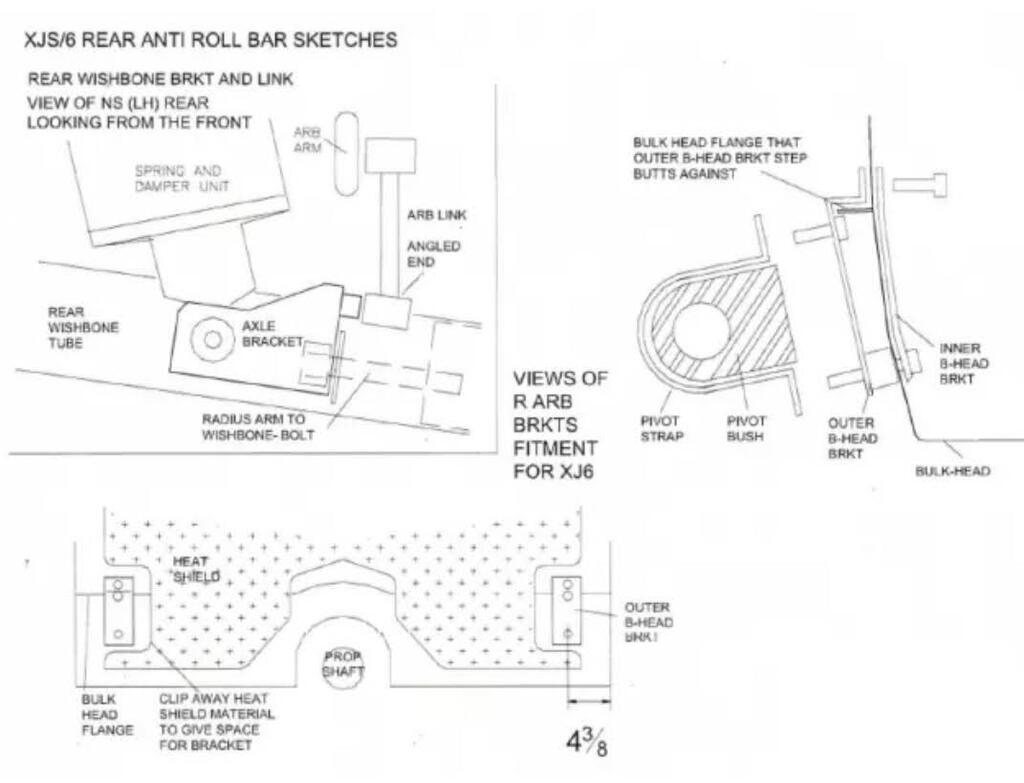 People typically fold a thick bracket which is bolted to the underseat area. This didn’t look very structurally sound to me, so I decided to make my own mounts out of box section. 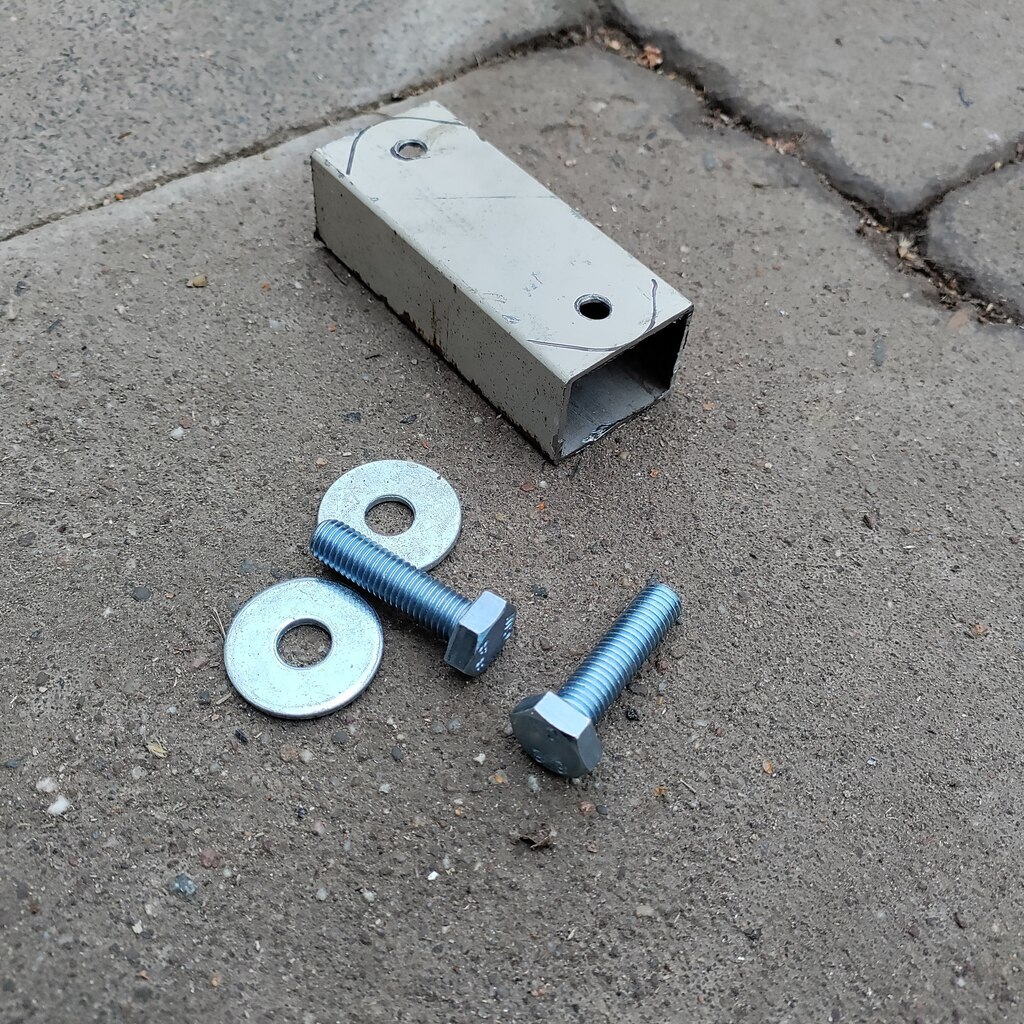 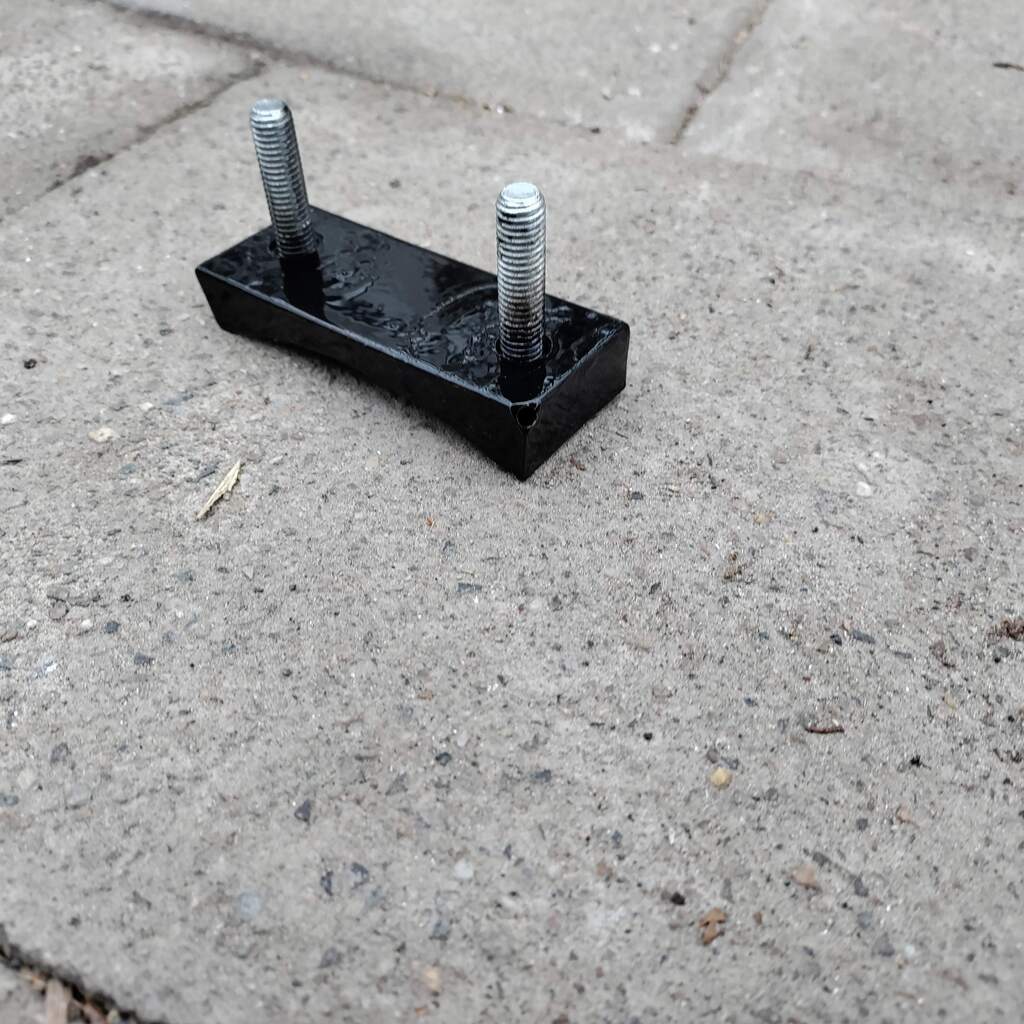 I used large washers to spread the load from the bolts and then welded everything up, measuring carefully to keep the angles of the ARB correct. A splash of paint finishes it all off nicely. 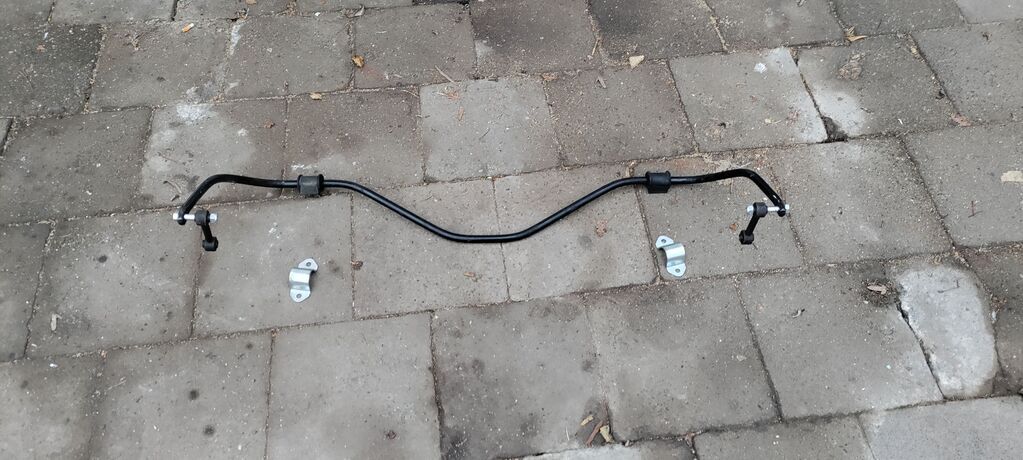 My XJS rear ARB matches the front one, so to prepare it I put new rubbers in the body mountings and the dogbone drop links. I then welded my brackets to the body (upside-down welding whilst laying on your back is always a joy) and mounted the bar. 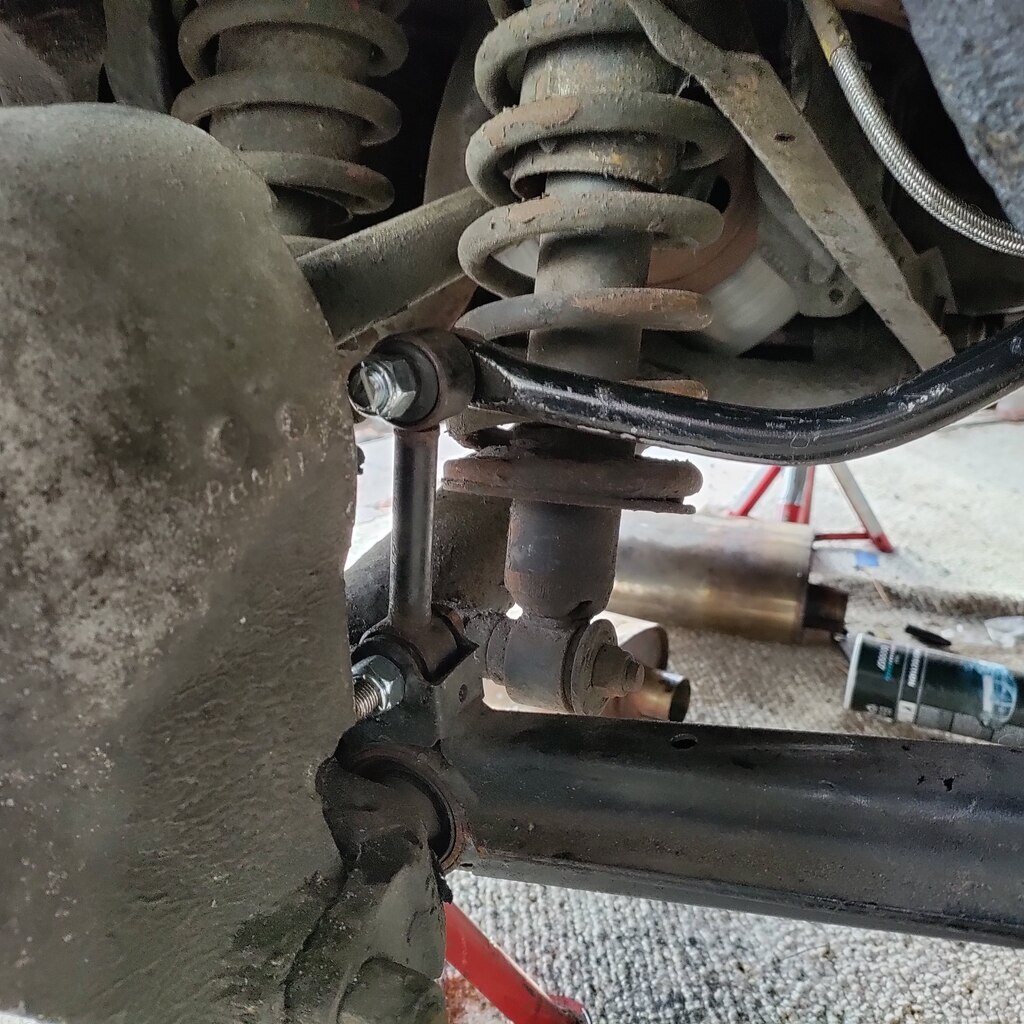 I’d already mounted the correct radius arms that have the mounting for an ARB, so everything just bolted up. 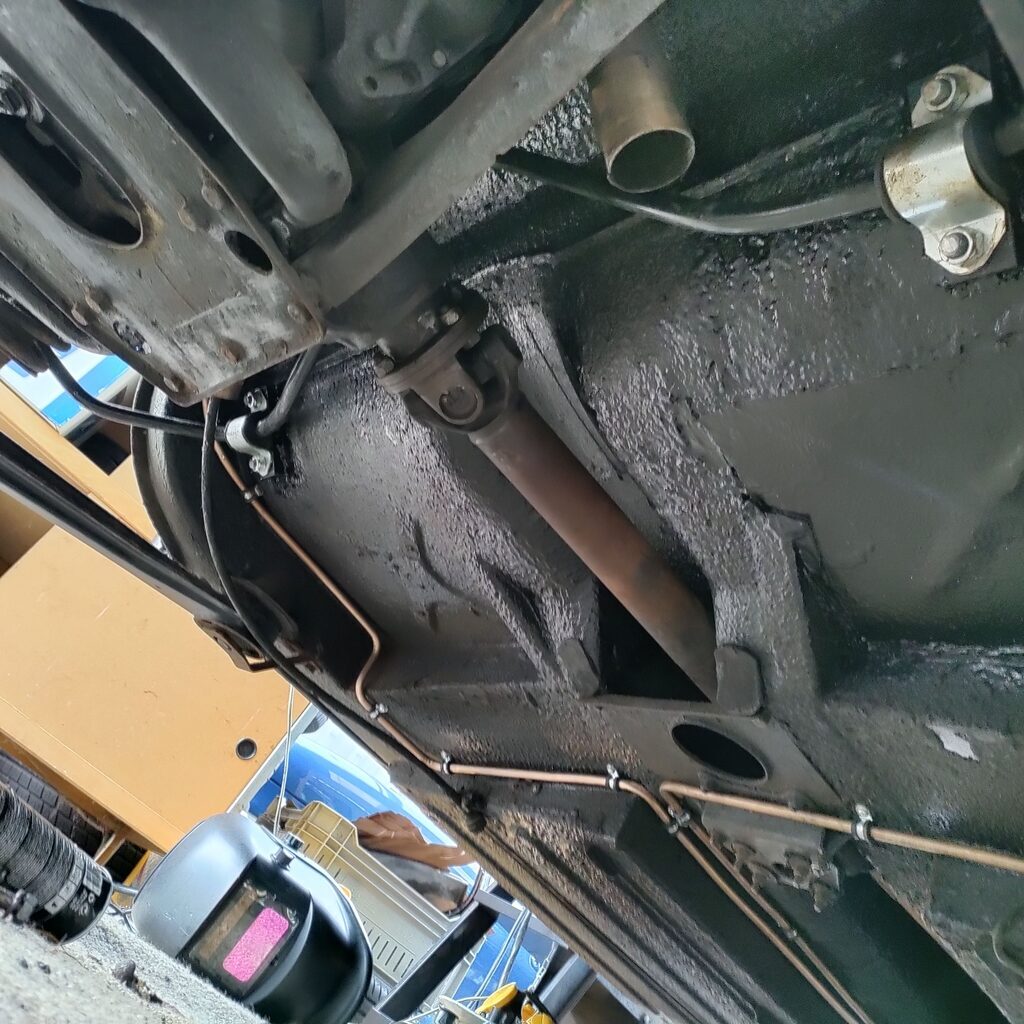 Here it is all mounted up, you can also see my shiny new fuel lines. The driveshaft is just my original Series 1 example, it fits perfectly lengthwise with the new drivetrain and bolts right up to the ZF 4HP22. Exhaust
My original Series 1 exhaust had two downpipes coming into an X-pipe and then moving out to a full dual system. 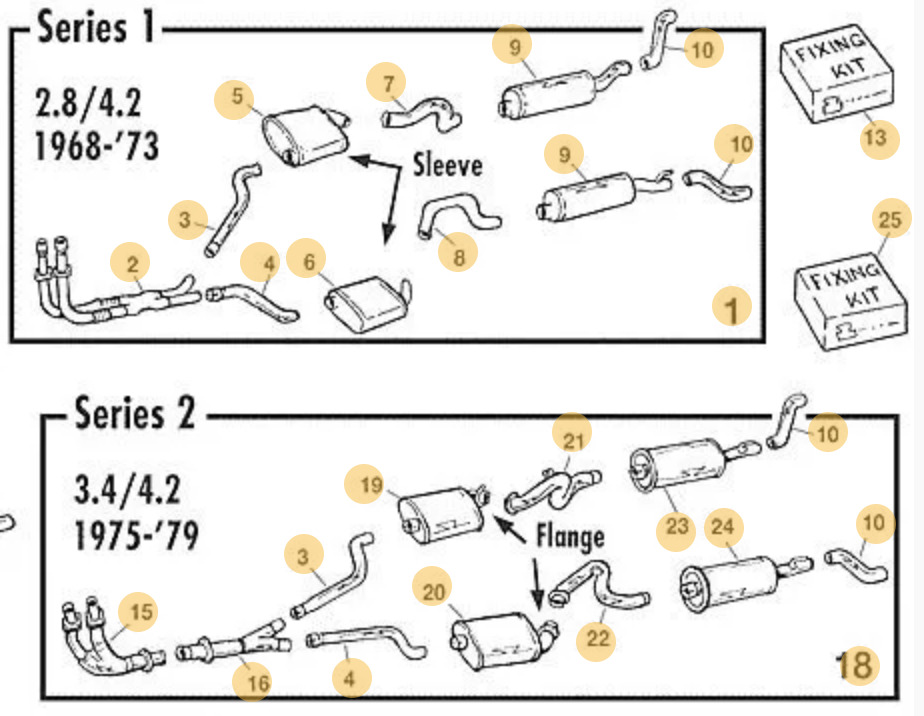 As the AJ6 downpipe is a single pipe I switched to a later S2/S3 Y-pipe, which I shortened and welded to the stub of the AJ6 downpipe. I made sure to route it properly so it doesn’t hit the tunnel and gives a good gap around the transmission sump. 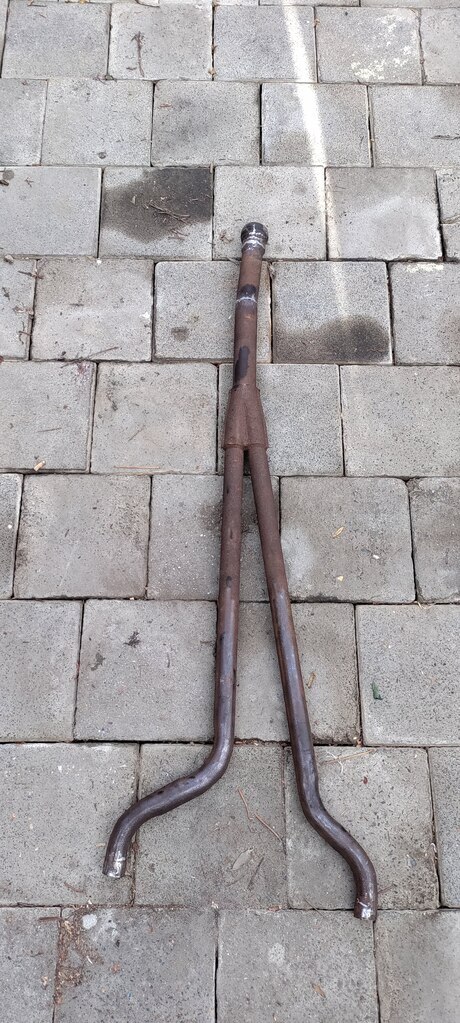 I made it out of a used pipe just to make sure it all works, as the rest of my exhaust is stainless (I’m keeping the original mufflers as they’re in great condition and nice and silent) I can always have a stainless version of the Y pipe made up in the future. The moment of truthAll of this meant that I could start putting fuel, oil, ATF, and coolant in their appropriate places. I started the car without the ignition lead on first to build oil pressure. It also built fuel pressure just fine and didn’t leak anywhere, so all that was left to do is to start it up! It works! Plenty of things to sort through, including tidying up the mess of original wiring which I didn’t touch until I was certain the new engine ran. It’s also hunting a bit at idle still which needs a good looking at, plus the AJ6 seems to greatly confuse my Series 1 tach (it reads about double what it should). Minor things of course - hearing the new engine run well put a big smile on my face! |
| |
|
|
brachunky
Scotland
Posts: 1,339  Club RR Member Number: 72
|
|
Dec 30, 2023 15:00:37 GMT
|
|
You have done some great work so far! Really enjoying following this build especially now the motors in.
|
| |
|
|
gazzam
Part of things
 
Posts: 740 
|
|
|
|
|
You’ve built a very nice car here, you should be bl00dy proud!
|
| |
|
|
|
|
|
Jul 23, 2024 12:34:44 GMT
|
It's been a while since I updated you all. I'd love to say that this has been due to me constantly driving the car but for quite a bit it's been broken. After a few test drives the Jag suddenly died, and wouldn't restart again. After multiple starting attempts it badly flooded the engine due to the injectors constantly being open. This prompted the replacement of a few items to rule out faults (crank sensor, ignitor, fuel pressure regulator, professionally cleaned injectors) but to no avail. 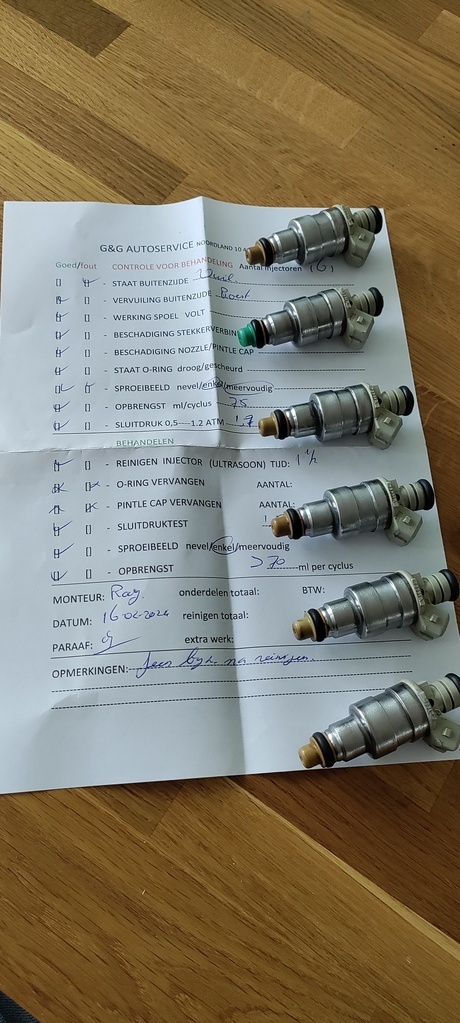 It took some late night diagnosis to finally find the fault: the engine wiring loom had chafed against the firewall and shorted out the injector circuit. In the dim evening light I could see the tiny spark erupt from behind the engine. Sadly this also fried my ECU, which was surprisingly hard to find a replacement for. After two tries I finally got a correctly working one, and the engine lived again, settling into a smooth idle straight away. In the process I'd also found that whoever originally thinned out the XJ40 loom had done some quite poor work with some shoddy soldering. I decided to go through everything, check all connections, resolder and rewrap it all. Here's a half-way image: 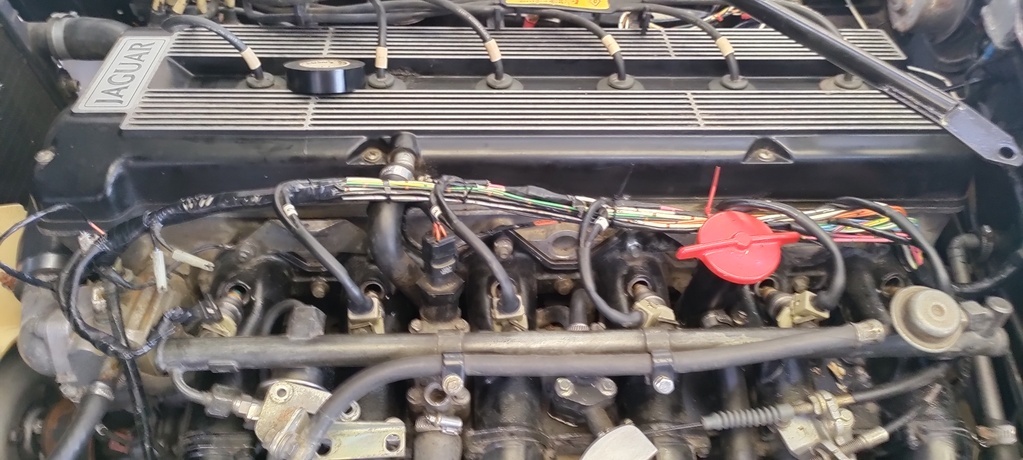 And here it is all buttoned up: 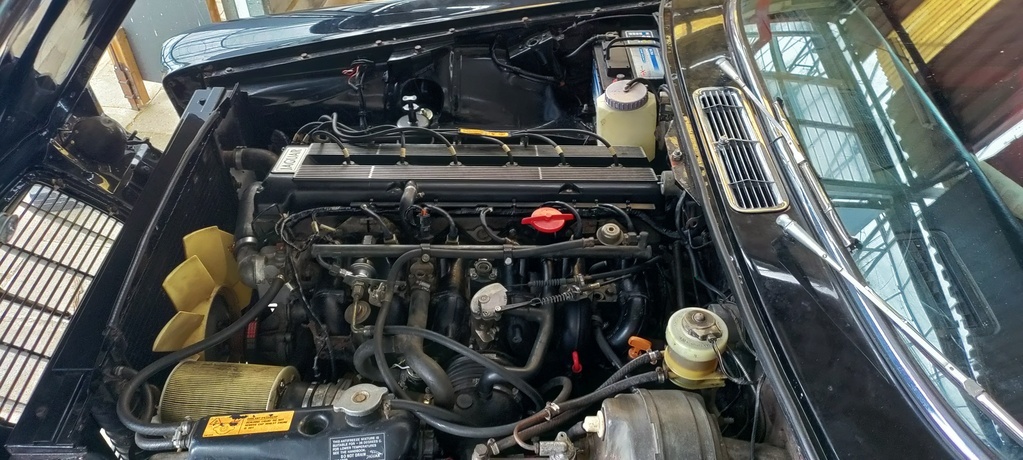 In doing so I also cleaned out the original car's spaghetti-like wiring, and moved all relais for the engine wiring loom from near the hot AJ6 exhaust to a more sheltered position in the passenger footwell. I routed this through the hole in the firewall where the steering column of and RHD car would be, using a CV gaiter to get it airtight. This turned the right inner wing from this: 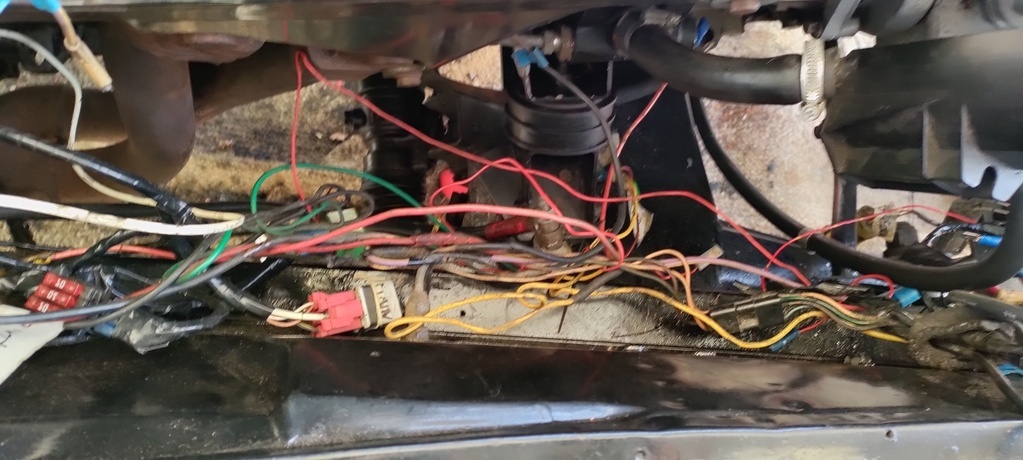 To this: 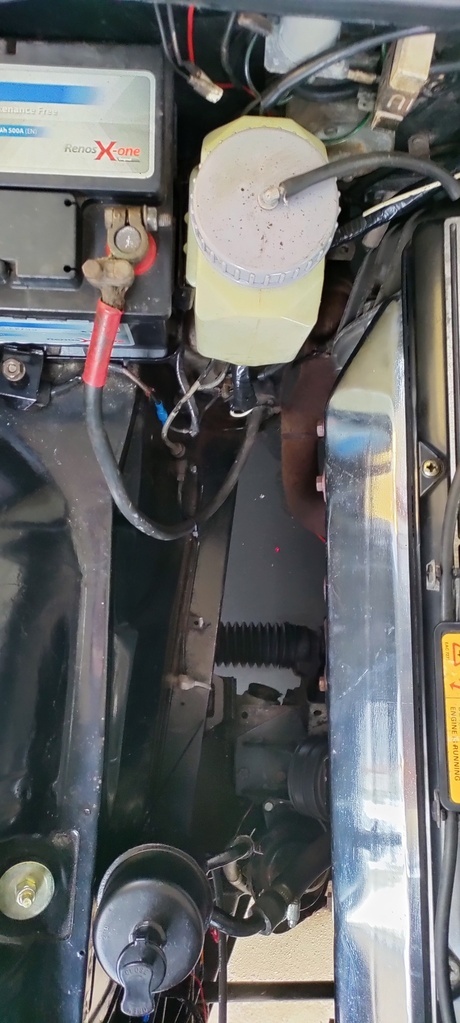 Bonus points to the person that can guess what car the new power steering reservoir I modified is originally from by the way! This full review of the wiring loom has me currently running the following schematic: 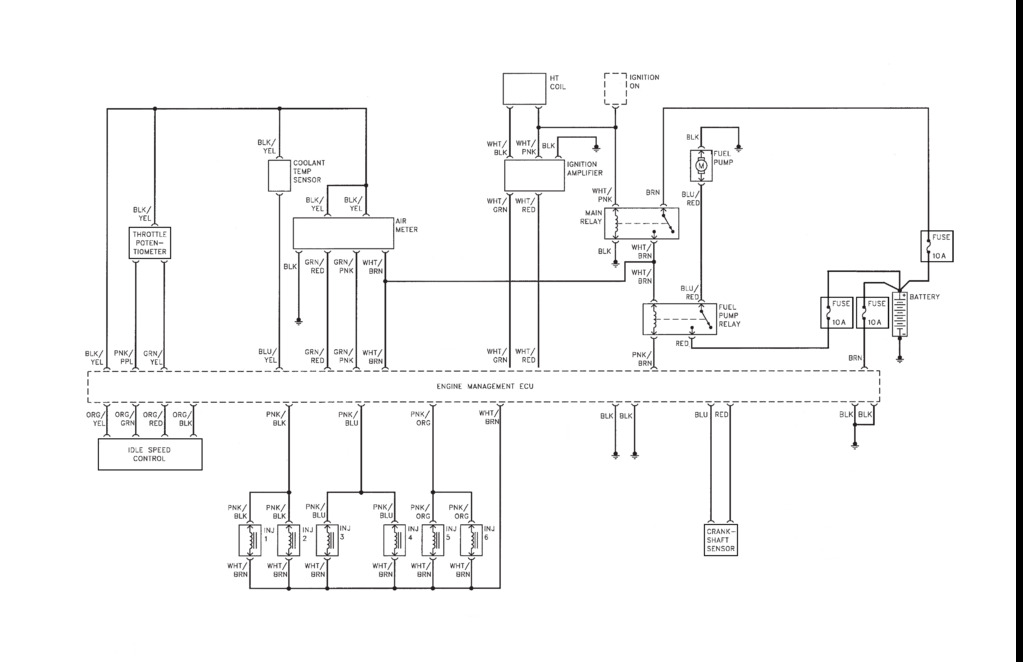 I fixed a leaky downpipe with new sealing rings, as you can tell the right one leaked quite badly: 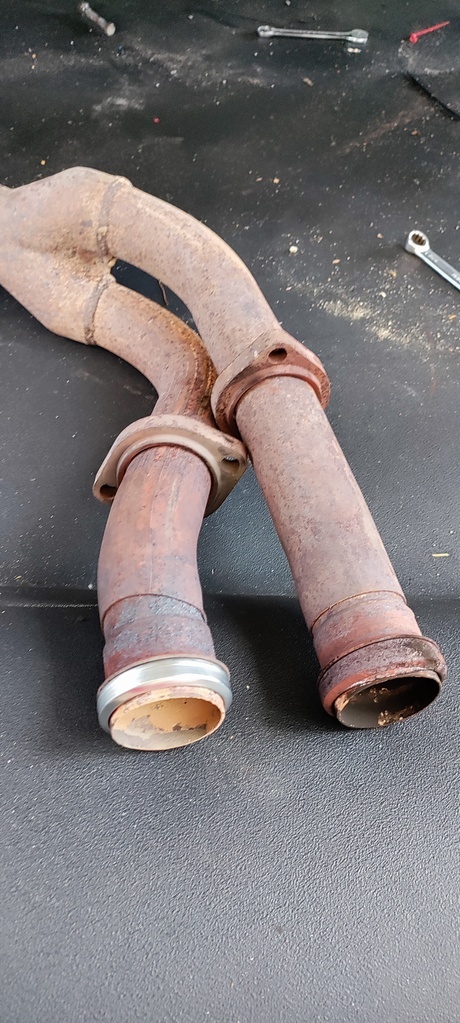 After which it was a matter of getting the car aligned (because I changed the lower wishbones) 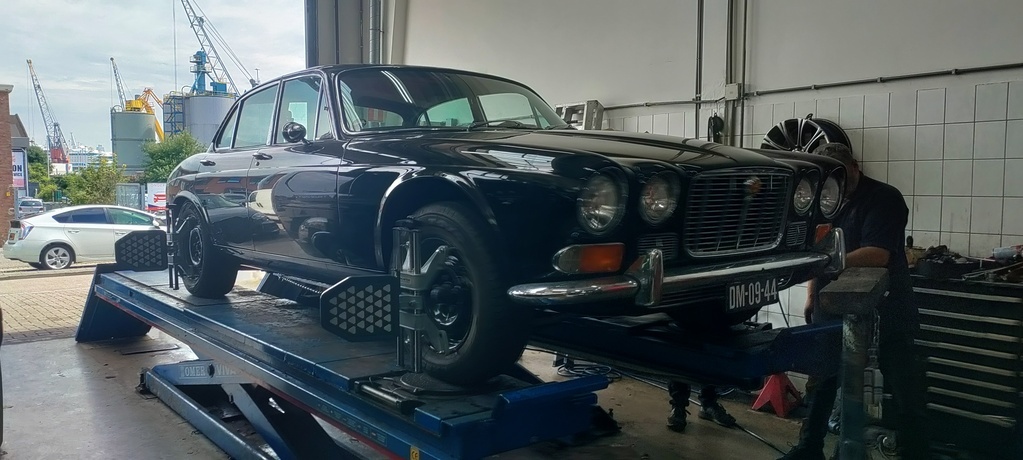 A nice wash 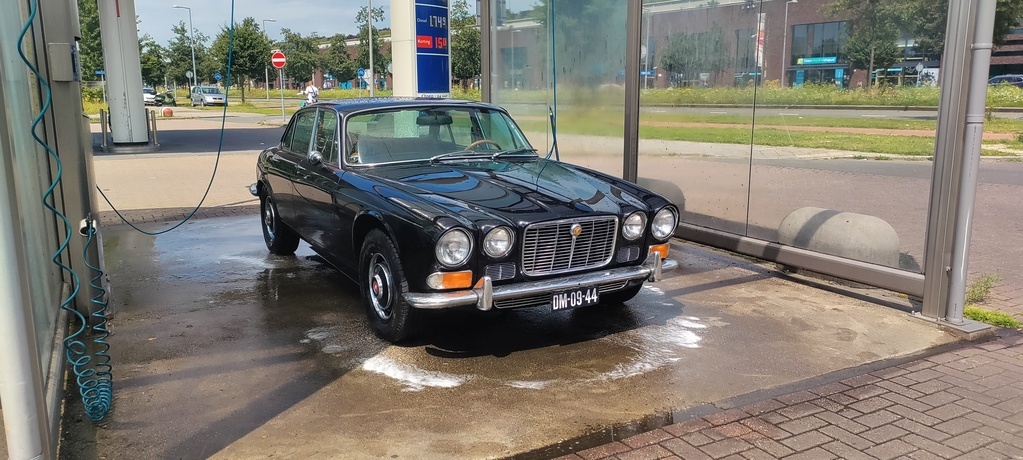 And then driving it to get everything going again. 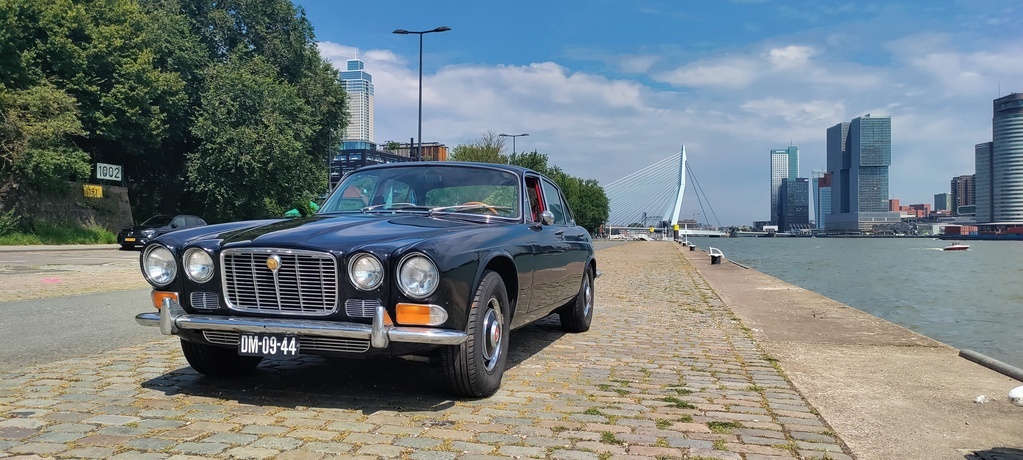 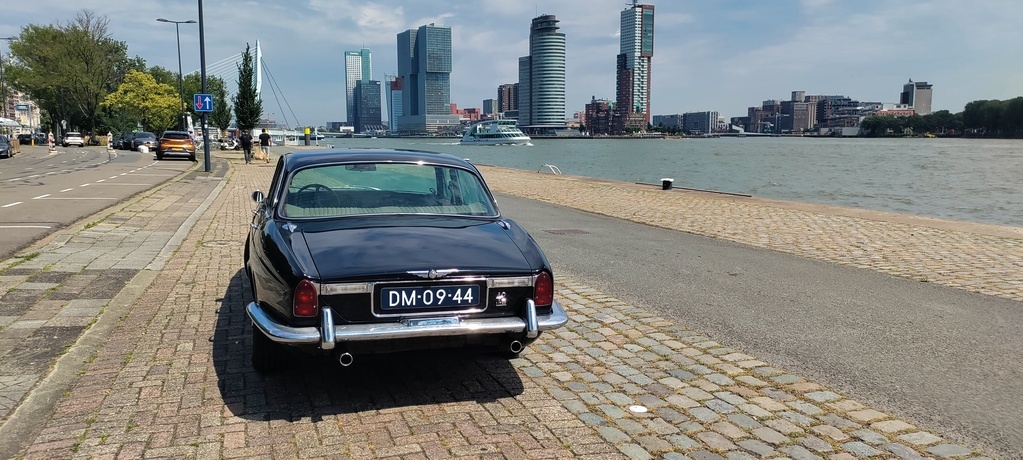 The longest of these was a 1,5 hour motorway journey in which the car performed really well. The engine was smooth and powerful and didn't miss beat - it was even somewhat economical! Plenty of bugs still to work out but I'm very happy to be putting the car into regular use now. |
| |
Last Edit: Jul 23, 2024 12:44:48 GMT by mkickert
|
|
|
|
|
Jul 23, 2024 18:28:33 GMT
|
|
good to see it up and running, shame about the wiring issues but at least you know its all OK now. Steering reservoir looks like MX5 to me.
|
| |
|
|
|
|
|
Jul 23, 2024 20:10:35 GMT
|
|
Its lovely to see your car come together, some very nice work.
Its also cool for me, in that the spirit of my old XJ 'Ropey' lives on in all the converaions that follow.
Rich
|
| |
"You're about as likely to come across a fully functioning old Jag, as you are a taxicab that smells agreeable." - James May
|
|
|
|
|
Jul 23, 2024 21:07:25 GMT
|
good to see it up and running, shame about the wiring issues but at least you know its all OK now. Steering reservoir looks like MX5 to me. Winner winner chicken dinner! It's an MX5 reservoir indeed, my friend whom I share my workshop space with has an NB and the reservoir looked perfect to replace the manky plastic one that came ziptied to the engine (shown here with a green cap, next to the distributor). 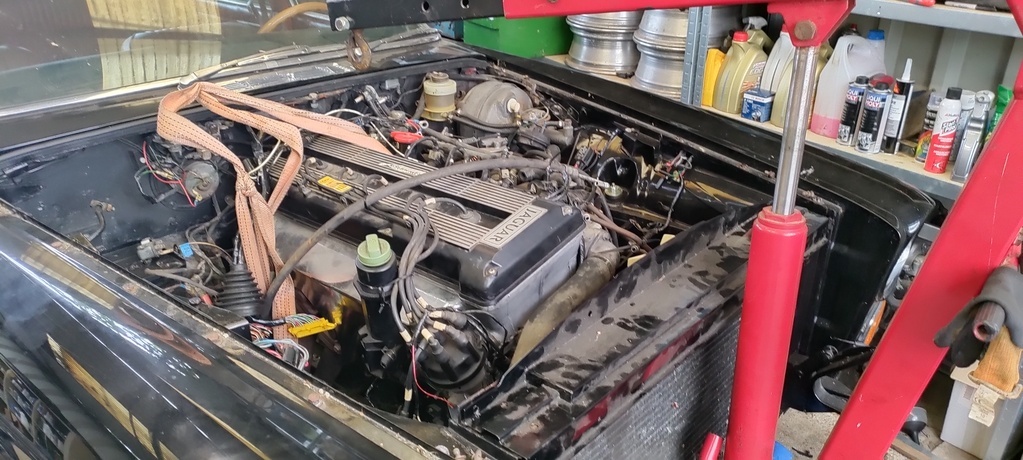 I rewelded the outlets of the NB reservoir to point the right way and made a mounting bracket for the inner wing. Looks a bit more factory now I feel. 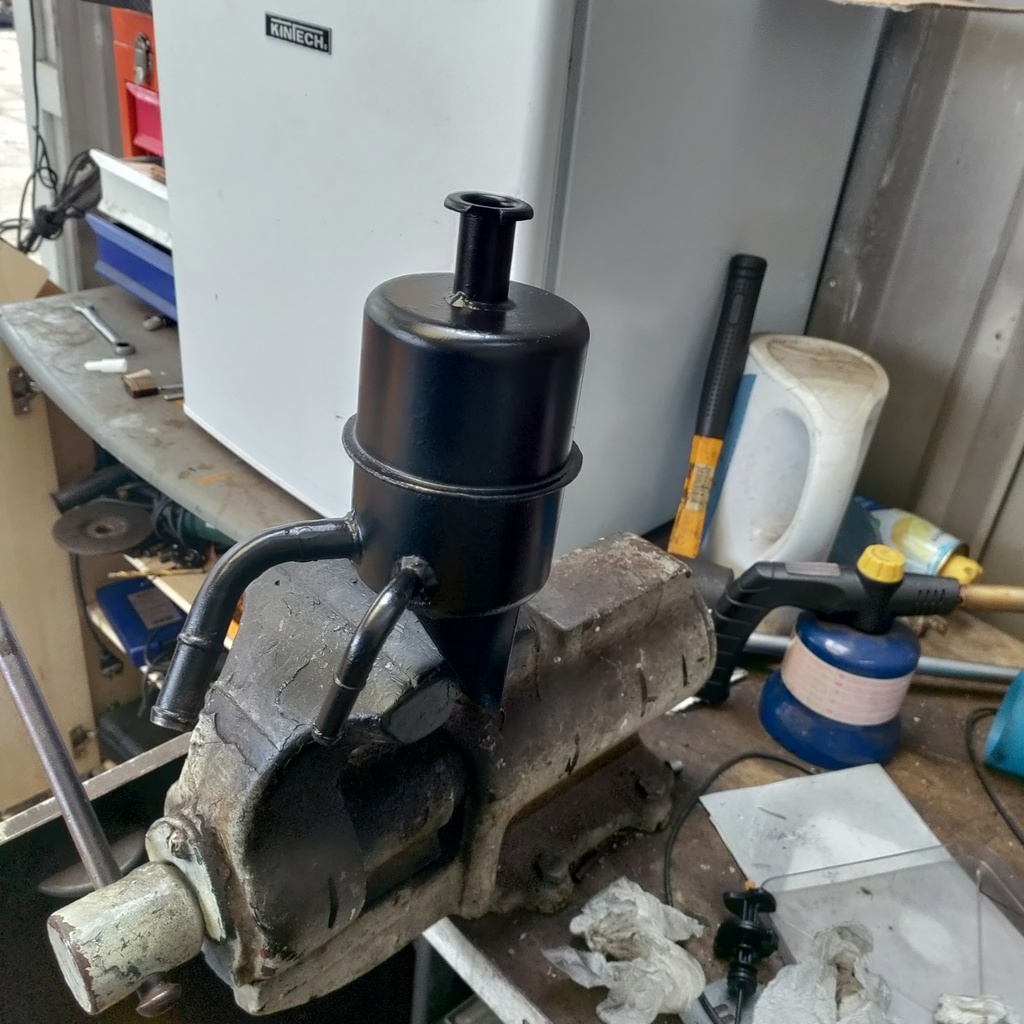 |
| |
|
|
|
|
|
Jul 24, 2024 10:39:20 GMT
|
|
Excellent work! I really do like these old AJ6 engines. The one in my '40 did great duty until it blew a headgasket (my fault in not spotting a leaking heater core pipe). Mine was a 4.0, but donning my anorak it looks like yours is a 3.6 judging by the valve cover. The 4.0 was nice, but for the similar power I'd take a revvier 3.6.
If you're looking for some future modifications there's something called an 'Andy Bracket' for these (named after the guy who made it). It advances the ignition timing by a couple of degrees by shifting the position of the crank sensor as the factory setting for these was rather conservative (a safeguard against poor quality fuels that don't really exist in Europe these days). Simple bolt-on that both perks up the engine a little and even helps the MPG a tick or two!
|
| |
|
|
|
|
|
Jul 29, 2024 16:09:06 GMT
|
The cockpit is a big part of the appeal of this kind of car to me. Mine was fine, but if you looked closer it let the car down. Especially the wood on the dash looked bad, as this picture without gauges shows: 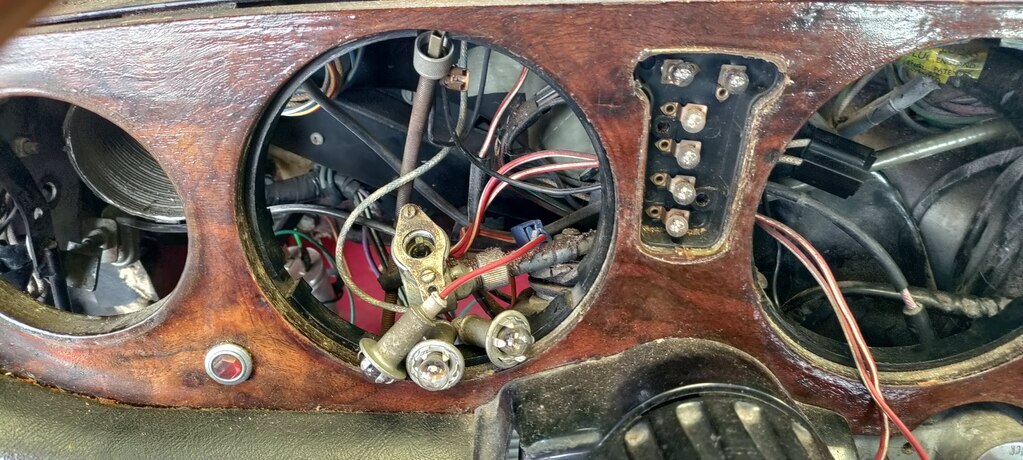 The wood had been refinished poorly by a previous owner, plus the veneer was sanded through in a few points. So last winter I bought a second dash to redo. Because the dashboard is all simple flat wood, redoing it was relatively simple but laborious. For all three separate pieces I took the following steps: - Remove old veneer
- Flatten new walnut veneer, by wettening it and clamping it between two boards to take the waves out that naturally occur in the material
- Glue to the original dashboard
- Sand flat and fill any cracks with colourmatched paint
- 4 coats of UV resistant yacht lacquer
- Sand flat with a mirror
- Polish to a mirror shine
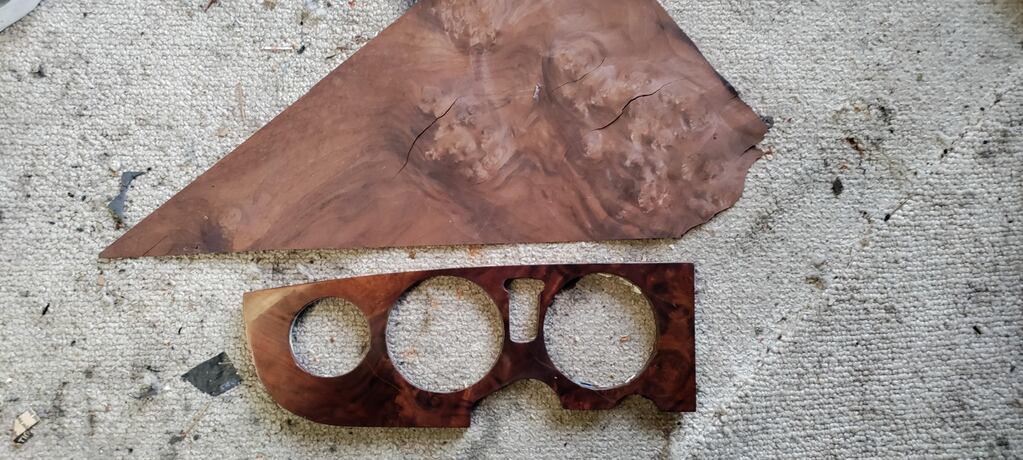
Here you can see the refinished driver's side dash with a sheet of the bare veneer used
 The mirror finish on the lacquer gives the burls in the walnut a really nice depth that looks beautiful when it's in the sun 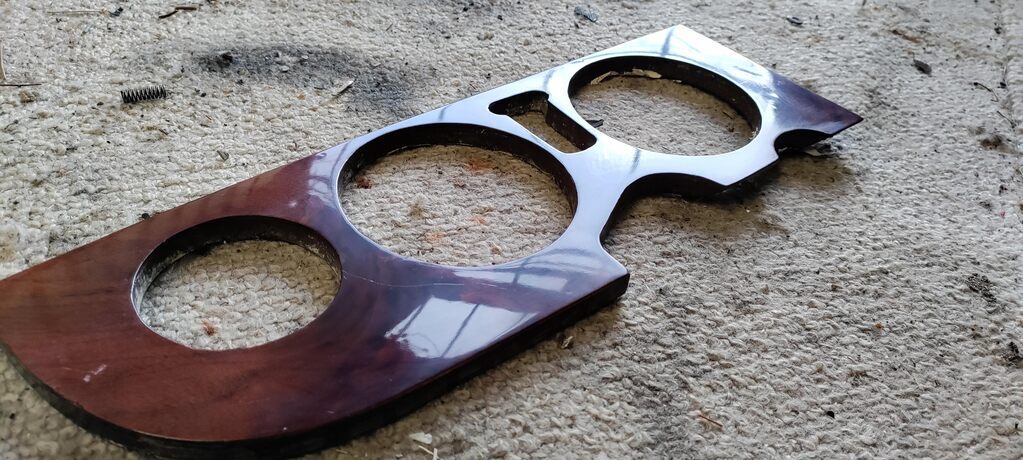 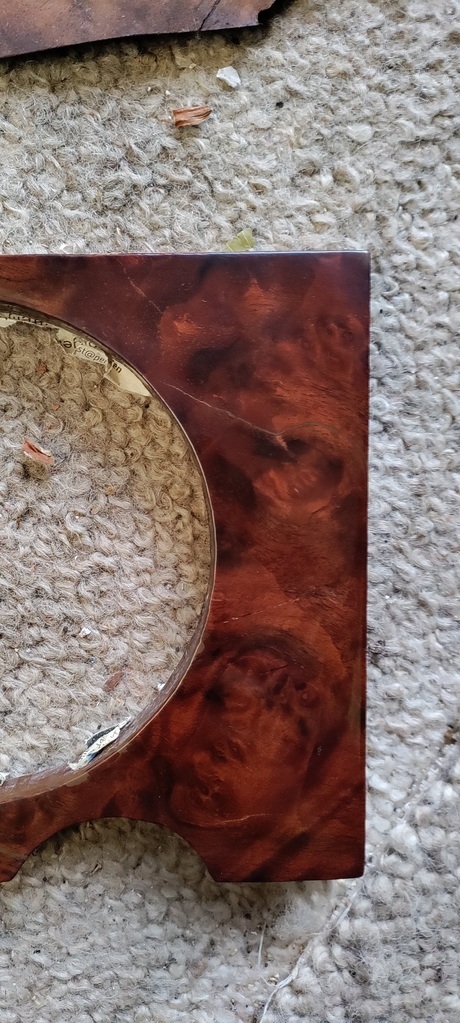 They layed on the shelf for a while until I recently exchanging the old pieces for the new ones 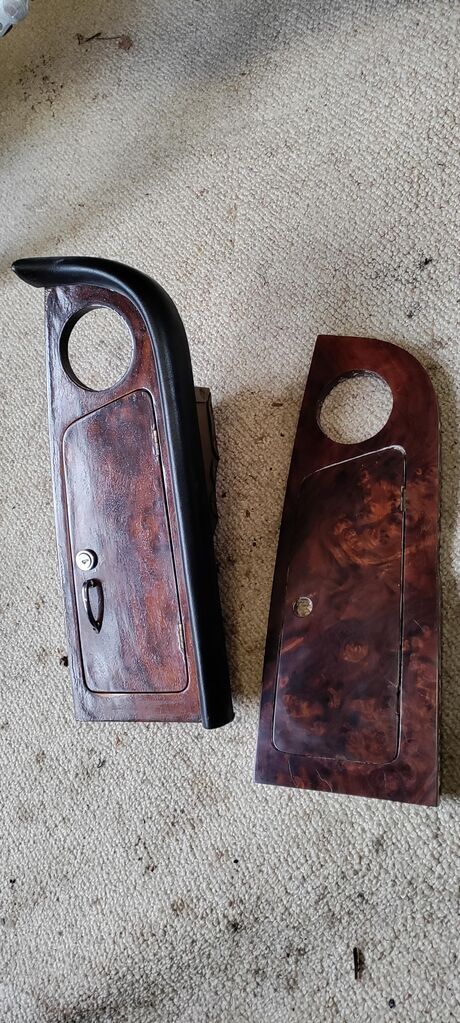 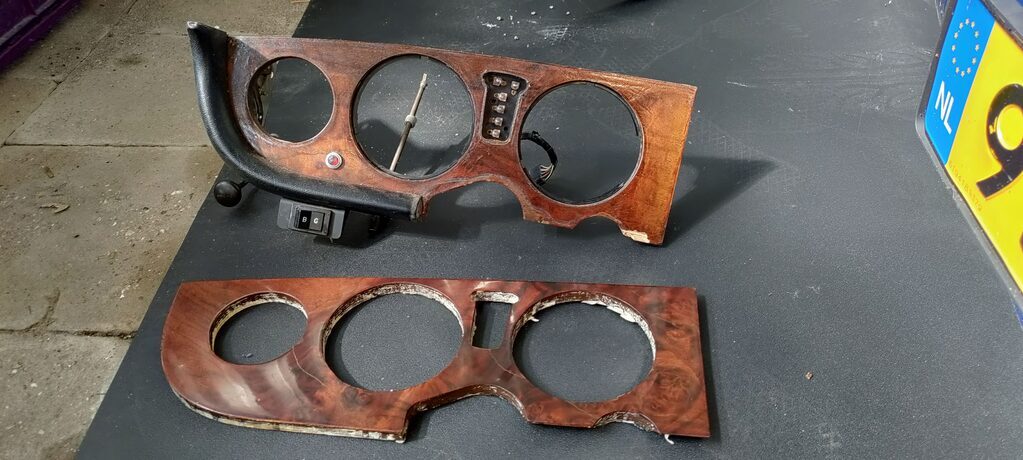 The result looks pretty good I feel! It's obviously not as good as a professionally refinished dash but it feels good knowing I did it all myself. 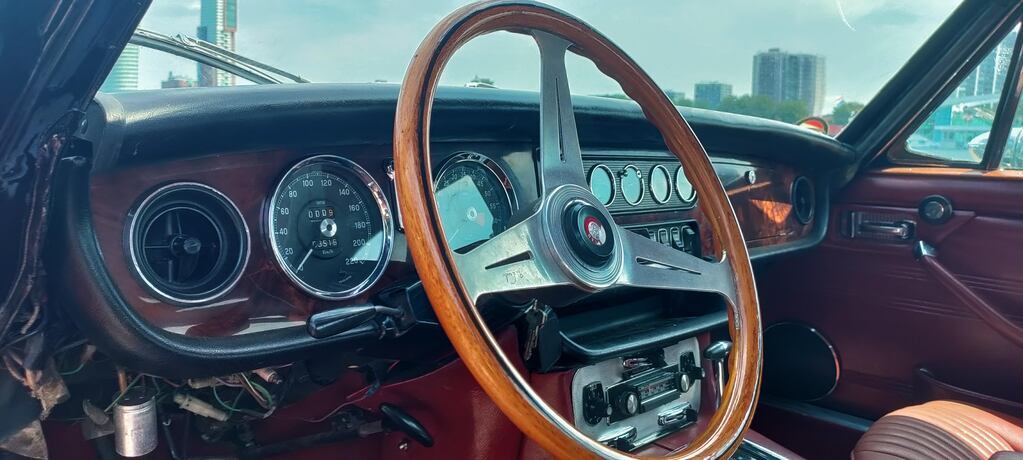 Gauges GaugesBecause I fitted the AJ6 I needed to adapt a few gauges to work correctly with the new engine. This is what had to be adapted: Fuel - No change needed Volts - No change needed Clock - No change needed (they're always broken anyway) Coolant - Remove the AJ6 sensor and thread in the original Series 1 XK sender into the AJ6 head, a simple like-for-like replacement Oil Pressure - I just connected the AJ6 sensor and it appears to works just fine with my gauge Rev counter - My original rev counter was an RVI type and as such didn't work well with the signal from the AJ6 coil. The current that feeds the coil actually passes through the rev counter, so some handywork was needed. I gave the coil its own switched live, and took my rev counter apart to change it from RVI to RVC with a set from Spiyda, this one to be exact. The Spiyda set is nicely made with a simple module that replaces the old rev counter innards, and a cable to calibrate it to suit your needs. 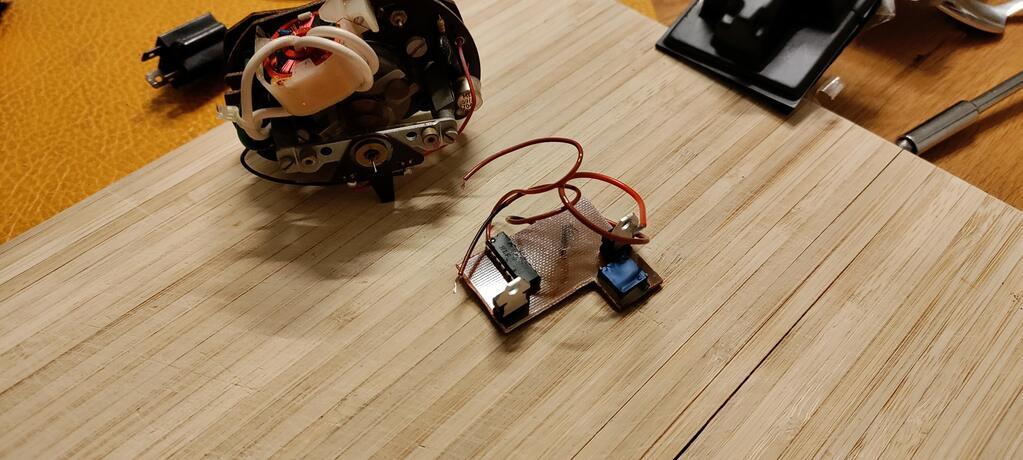 My original 4.2 rev counter had the redline at 5000 rpm, and the scale ended at 5500. As the AJ6 can rev much more I got a 2.8 rev counter (redline 6000, scale goes to 6500) and resprayed the redline area to the correct 5700 rpm for a factory look. 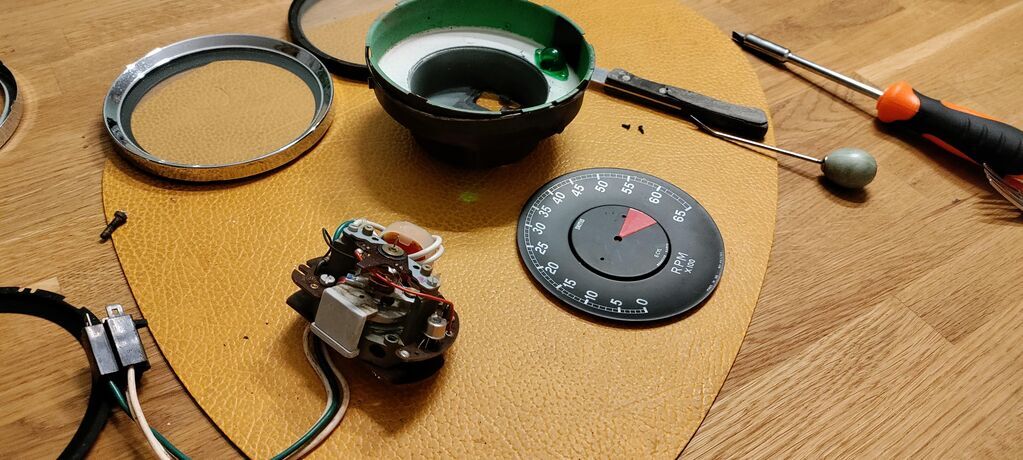 The only big thing left in the dash is the speedo - there's no cable drive in the ZF gearbox so I aim to adapt it to use a GPS signal. |
| |
|
|
|
|
eurogranada
Europe
To tinker or not to tinker, that is the question...
Posts: 2,556
|
|
Jul 29, 2024 18:19:17 GMT
|
|
I love this car, if mine was behaving better I'd look you up!
|
| |
|
|
|
|
|
|
|
|
Hey, great build. My XJ6 is awaiting the same treatment. I know someone who casts and machines special tailpieces for the ZF gearboxes with a mount for the speedo cable. But you can only buy it iff he mounts them himself... Let me know if you want to come in contact with him. He's Dutch and lives just across the border in Germany
|
| |
|
|
|
|
|
|
|
|
Excellent work on the dash and gauges. Useful to know about the RVI to RVC conversion kits. I bet they'll come in handy in the future!
|
| |
|
|
|
|
|
|
|
Hey, great build. My XJ6 is awaiting the same treatment. I know someone who casts and machines special tailpieces for the ZF gearboxes with a mount for the speedo cable. But you can only buy it iff he mounts them himself... Let me know if you want to come in contact with him. He's Dutch and lives just across the border in Germany Thanks for the offer! I already got myself a Speedhut Speedbox to drive my original speedometer, so that should keep things a bit more simple. I'm happy to help of course when you get your engine conversion started! |
| |
|
|
|
|
|
|
|
Excellent work on the dash and gauges. Useful to know about the RVI to RVC conversion kits. I bet they'll come in handy in the future! Happy to share! I can imagine you'll be going through a lot of the same woes I did with your Triumph, I assume Smiths gauges are similar in their various applications. The engine was originally advertised as a 4.0, but I measured the stroke and it is definitely a 3.6. It is indeed a very nice and revvy engine, especially compared to my original 4.2 XK. I've found that with the 4 speed and my 3.31 diff ratio in sedate cruising the engine rarely goes over 2000 rpm (which is 100 km/h in top), but when you push the pedal to the floor there's an impressive surge of speed. Good tip about the Andy bracket, I'll see if I can get hold of one if the price is right. If not it seems easy enough to replicate myself. |
| |
Last Edit: Jul 30, 2024 9:23:21 GMT by mkickert
|
|
|
|
|
Jul 30, 2024 12:53:15 GMT
|
Thanks for the offer! I already got myself a Speedhut Speedbox to drive my original speedometer, so that should keep things a bit more simple. I'm happy to help of course when you get your engine conversion started! That's another way that works, the speedometer. Though personally I like the elegance of the custom tailpiece... I have already read the thread twice, and you have covered many details I was thinking about. Years ago I already bought a 3.6 XJ40, just for the tires. But then the idea of an engine transplant came up, especially since I saw it done on a visit to a classic car garage in New Zealand. This week I started with getting the XJ out of storage and giving it a wash... the original motor is already removed. The 3.6 too is ready, but I am am keeping the ZF autobox, although my XJ6 was a 4 speed manual with o/d. It just fits the character of the Jag ride imo. Also I ordered the engine mounts of an XJ-S 3.6... Are you still running your XJ 3.6 on LPG? (G3?) |
| |
|
|
|
|
|
Jul 30, 2024 17:39:43 GMT
|
That's another way that works, the speedometer. Though personally I like the elegance of the custom tailpiece... I have already read the thread twice, and you have covered many details I was thinking about. Years ago I already bought a 3.6 XJ40, just for the tires. But then the idea of an engine transplant came up, especially since I saw it done on a visit to a classic car garage in New Zealand. This week I started with getting the XJ out of storage and giving it a wash... the original motor is already removed. The 3.6 too is ready, but I am am keeping the ZF autobox, although my XJ6 was a 4 speed manual with o/d. It just fits the character of the Jag ride imo. Also I ordered the engine mounts of an XJ-S 3.6... Are you still running your XJ 3.6 on LPG? (G3?) It's luckily a common conversion and for good reason. The difference between the AJ6+ZF 4 speed and XK+BW 3 speed is much bigger than the figures show, both in terms of output and driveability - you won't regret it! All the LPG system is still in there (minus the mixer and evaporator) but not hooked up, I want to have a proper shakedown on petrol before converting it to LPG. I still have an XJS 3.6 gearbox mount somewhere should you need it btw. |
| |
Last Edit: Jul 30, 2024 17:40:07 GMT by mkickert
|
|
|
|
|
Jul 30, 2024 22:05:49 GMT
|
The engine was originally advertised as a 4.0, but I measured the stroke and it is definitely a 3.6. It is indeed a very nice and revvy engine, especially compared to my original 4.2 XK. I get the impression the 3.6 is the engine to have really. Revvier, and pretty much the same power as the 4.0. Plenty torquey enough as you say! Though I gather people don't quite compare apples to apples with the 3.6 and 4.0. Most 3.6s were uncatalysed, whereas most 4.0s were catalysed. Comparing those two gives you two engines at ~220hp. However, the non-cat 4.0s were 240hp-ish so did make a fair chunk more power in a like-for-like configuration. |
| |
|
|
|
|
|
|
|
I have had both... had an XJ40 4.0 as a daily driver for a few years, and a driveable but completely rotten 3.6 for parts (bought it because it cost less then half of the new set of tires on it). I'd say the 3.6 had more punch and felt more lively in reaction to the throttle. That might be because the 4.0 had a cat. But my main reason to choose the 3,6 for the conversion is availability (I had it already as a parts car) and simplicity: only one ECU... It also had enough torque to do burnouts in my backyard with the automatic gear box, and I have the videos to prove it  I can't wait to see how this combo will perform in the lower weight, swb XJ S1.. |
| |
|
|
|
|
|
|
|
I still have an XJS 3.6 gearbox mount somewhere should you need it btw. I'd be very much interested, can you dm me here? |
| |
|
|
|
|


