|
|
|
Sept 25, 2023 6:45:14 GMT
|
I missed a few entries. I am a non sunroof guy, (Legacy of hearing horror stories of DIY sunroof’s leaking years ago) BUT…. Having had a full length on the Berlingo known as Prozac, I also totally get them. I also ordered a GTi from the factory with sunroof when I came here in 2002 and rarely used it, but liked it when I did. On your car the idea of making it personal, as mentioned, makes me like it more. Your standard of work, local weather and the fact it will be kinda camouflaged, makes for a big yet |
| |
|
|
|
|
|
|
|
Sept 25, 2023 17:25:15 GMT
|
Thanks grizz. Keeping the weather out is important, but less so here in the desert than where you're at. What worries me most is wind noise. I didn't really push it when I bought the roof, because I didn't figure I'd get a straight answer. If it has roaring windnoise right above my head, that would really kill the enjoyment of driving it. Fingers crossed, I guess...  |
| |
|
|
|
|
|
Sept 25, 2023 18:59:41 GMT
|
|
My experience with the VW GOlde ragtop sunroofs has been very good. They seal well and aren't noisy at all. I think it mostly depends on how taught you can get the canvas when you crank it shut.
|
| |
|
|
stealthstylz
Club Retro Rides Member
Posts: 14,924
Club RR Member Number: 174
|
1932 Ford 5W Coupe.stealthstylz
@stealthstylz
Club Retro Rides Member 174
|
Sept 25, 2023 19:22:03 GMT
|
|
I think a sunroof will be great. I find they feel quite small and dark inside when they're chopped, and I'm not even tall.
|
| |
|
|
|
|
|
Sept 26, 2023 1:13:37 GMT
|
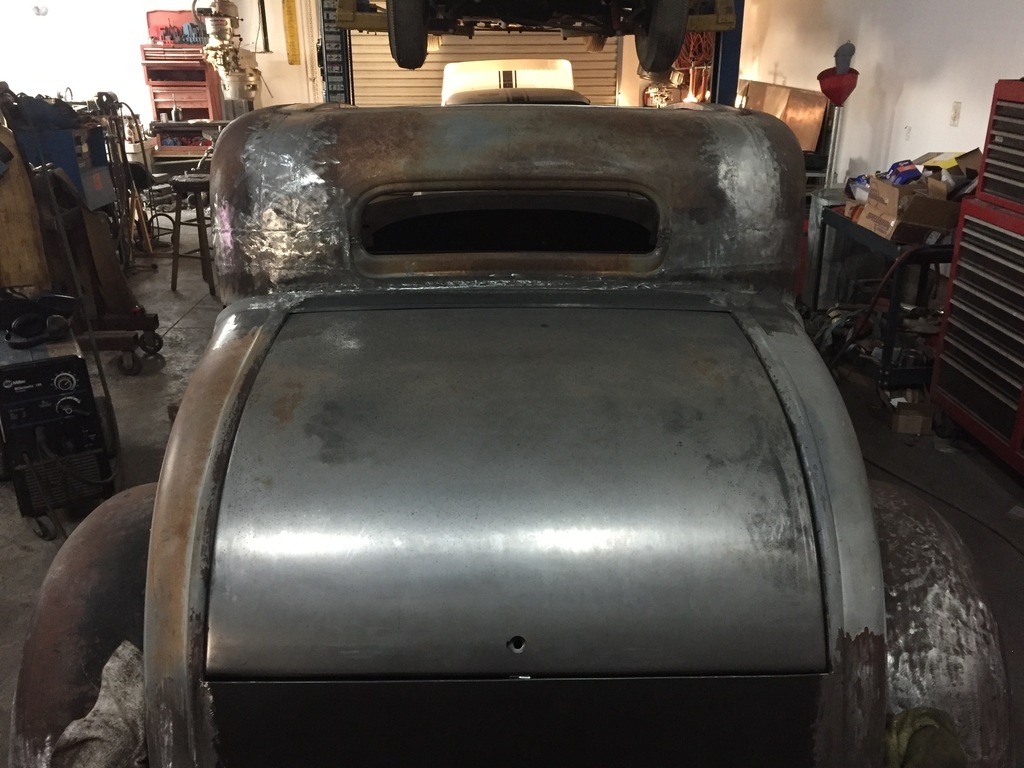
Thanks guys. First testfit.  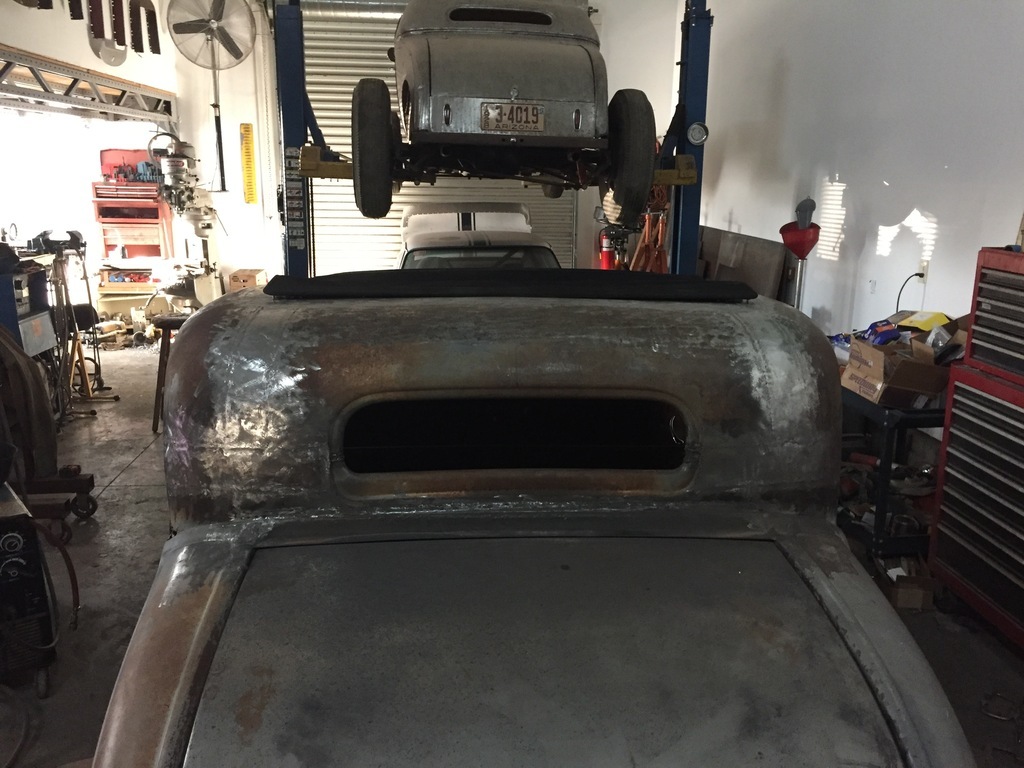 And open 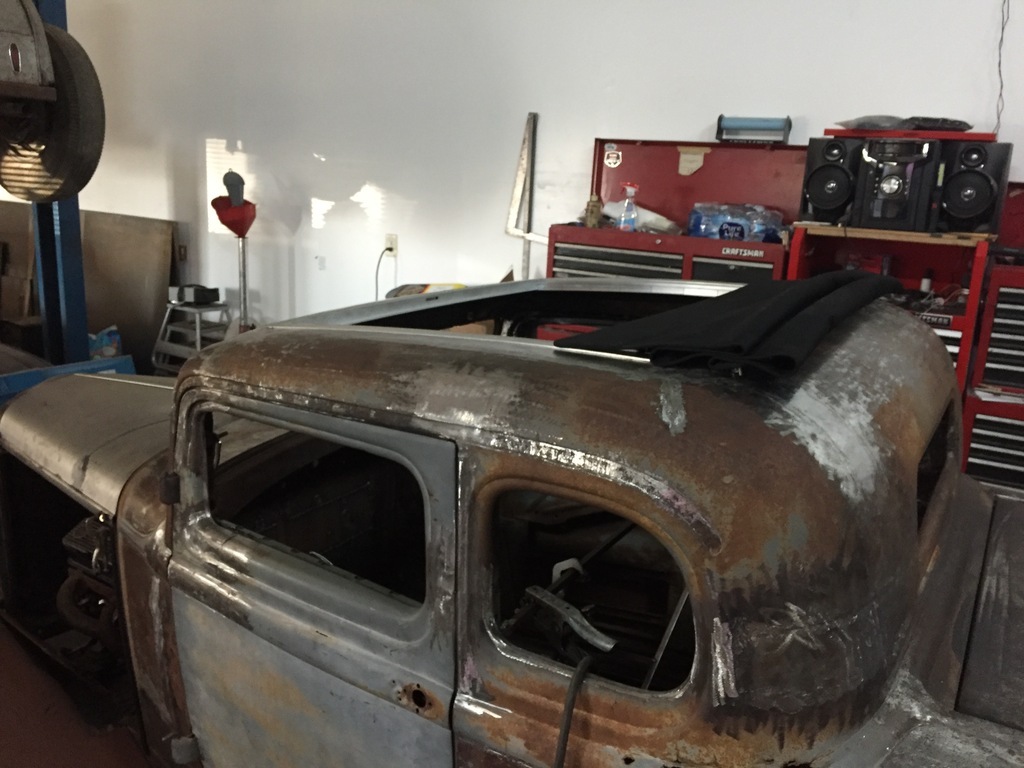 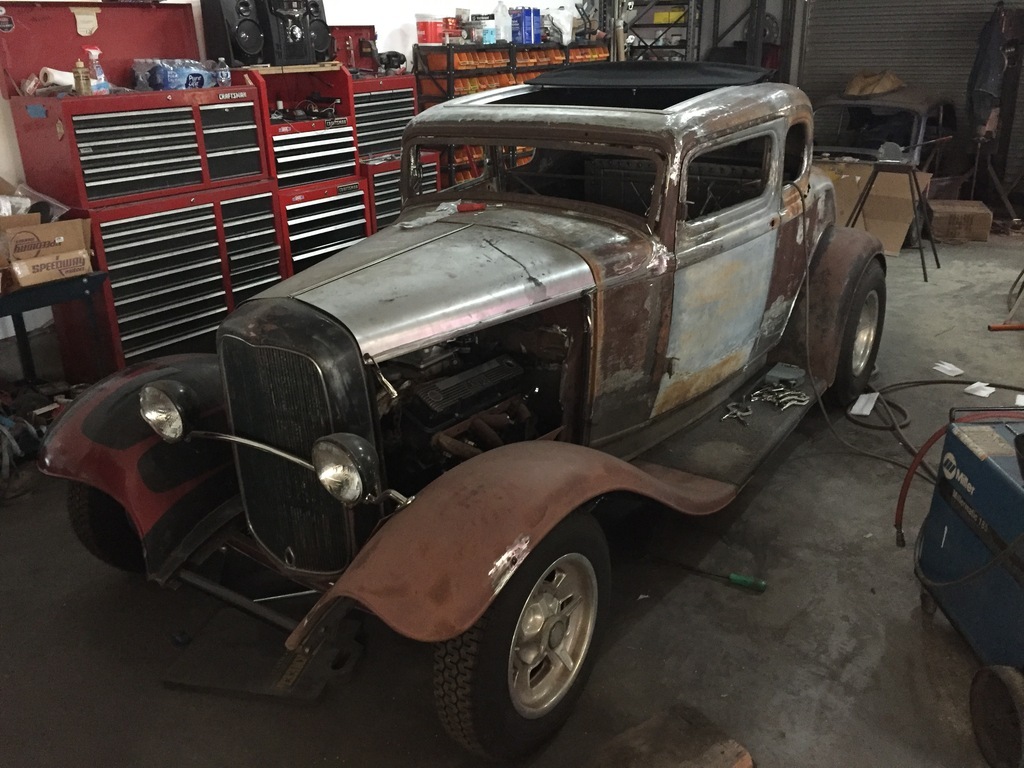 |
| |
|
|
jamesd1972
Club Retro Rides Member
Posts: 2,906  Club RR Member Number: 40
|
1932 Ford 5W Coupe.jamesd1972
@jamesd1972
Club Retro Rides Member 40
|
Sept 26, 2023 14:48:29 GMT
|
|
Looks great, be interesting to find out what the reaction is at a USA show if when you take it somewhere.
James
|
| |
|
|
|
|
|
Sept 26, 2023 18:35:31 GMT
|
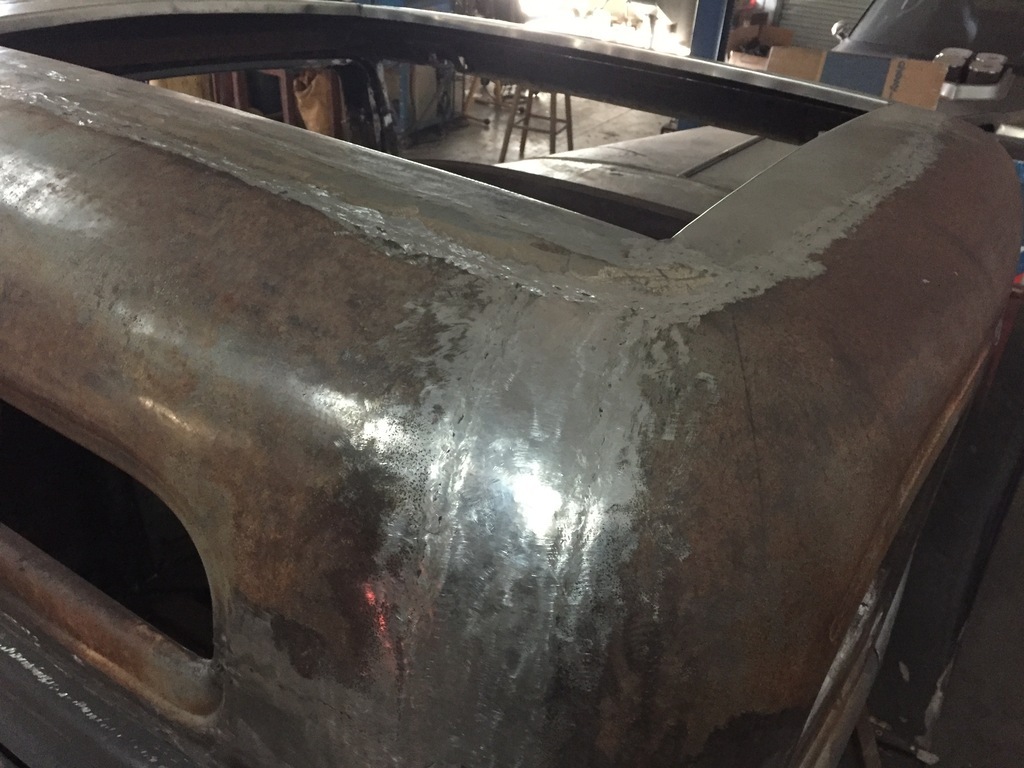
Yeah, that will be interesting... On the roof itself, and the fit, its not even close to what I want yet. The main problem is that the frame is made out of 4 pieces of extruded aluminum that are not bent to to match the dome of the roof. On the side pieces, they made relief cuts which are supposed to weaken them enough to where they will match the natural curve of the roof when you tighten the mounting screws down. They sort of do, but not enough. ( if that was the only problem, I could live with it, but it isn't) The real problem is with the front and the rear pieces of the frame. They are perfectly straight, and of course, the roof is not. The manufacturers instillation instruction vids show they have a machine that can roll a radius ( or bend) in them. So I got in touch with them to send those pieces back, with measurements of the amount of bend I need, so they can run them trough their machine. The guy was really nice about it, but flat out refused. "when you tighten it down, the roofskin will take care of that" Which is complete nonsense. A single layer unsupported edge of sheetmetal is not going to be a match for a stout piece of extruded aluminum with 2 90deg flanges on it. This is the reason I put a 90 deg flange all the way around the hole in the roof. Hoping that would have enough strength to get the job done. It doesnt... The frame still flattens the dome of the roof too much, which makes it look like a amateurish installation, in my opinion. OK, fine. I'll just have to make my own damn tool to bend those pieces. More later... |
| |
|
|
braaap
Posted a lot

Posts: 2,678
|
|
Sept 26, 2023 19:20:53 GMT
|
|
How about some wood, curved above to follow the roof curve and flat at the bottom to have the alloy frame sit flat on it?
|
| |
|
|
|
|
|
Sept 26, 2023 23:49:01 GMT
|
How about some wood, curved above to follow the roof curve and flat at the bottom to have the alloy frame sit flat on it? That would work, but I really don't like all these conflicting arcs fighting each other. So I made a tool. The extruded aluminum looks like this. 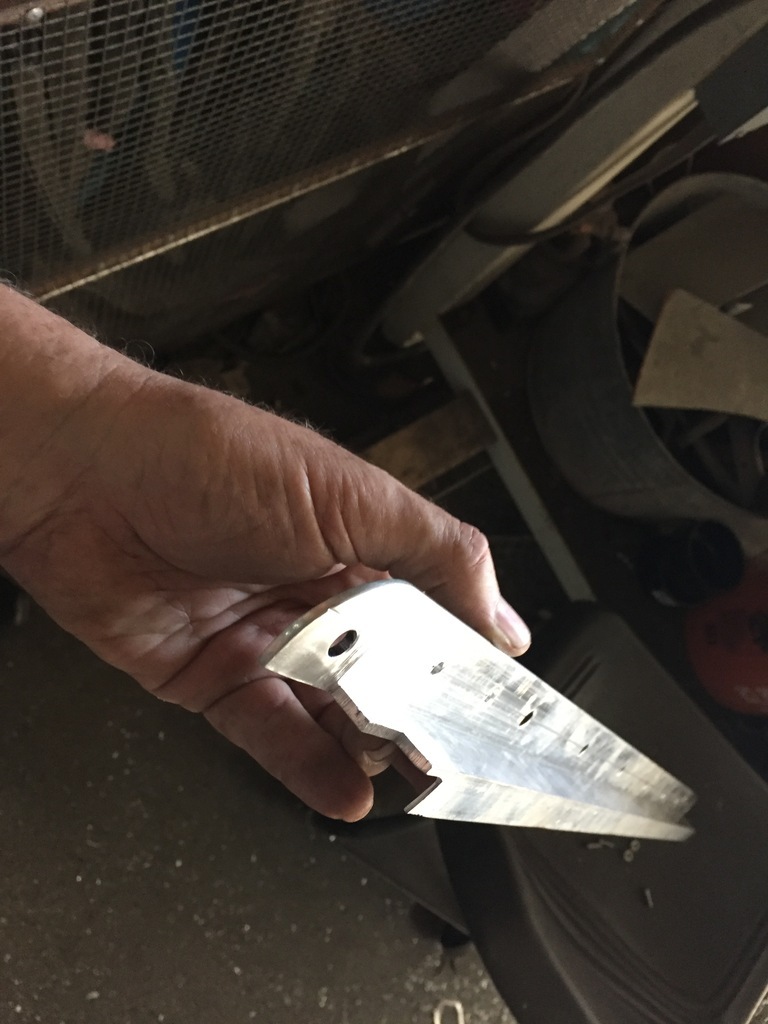 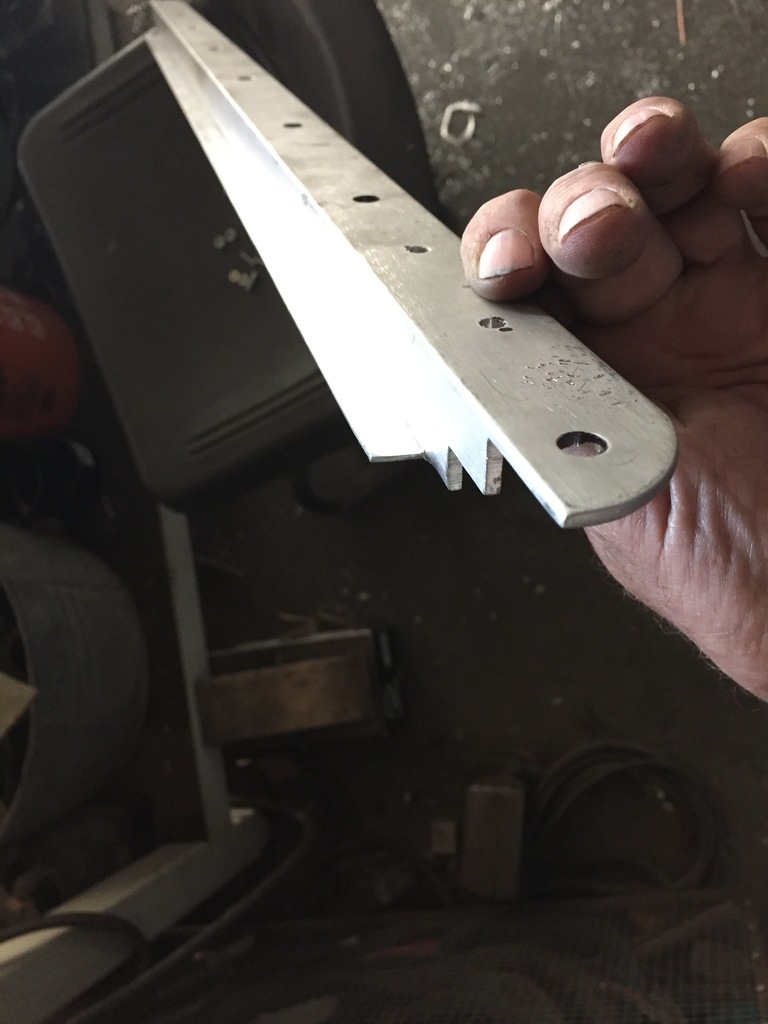 I started with a piece of aluminum, and turned it down on my lathe so it fits accurately against all 3 of its surfaces on the inside of the strip. ( the side that will be the inside of the arc). And mounted it to a piece of cold rolled steel. 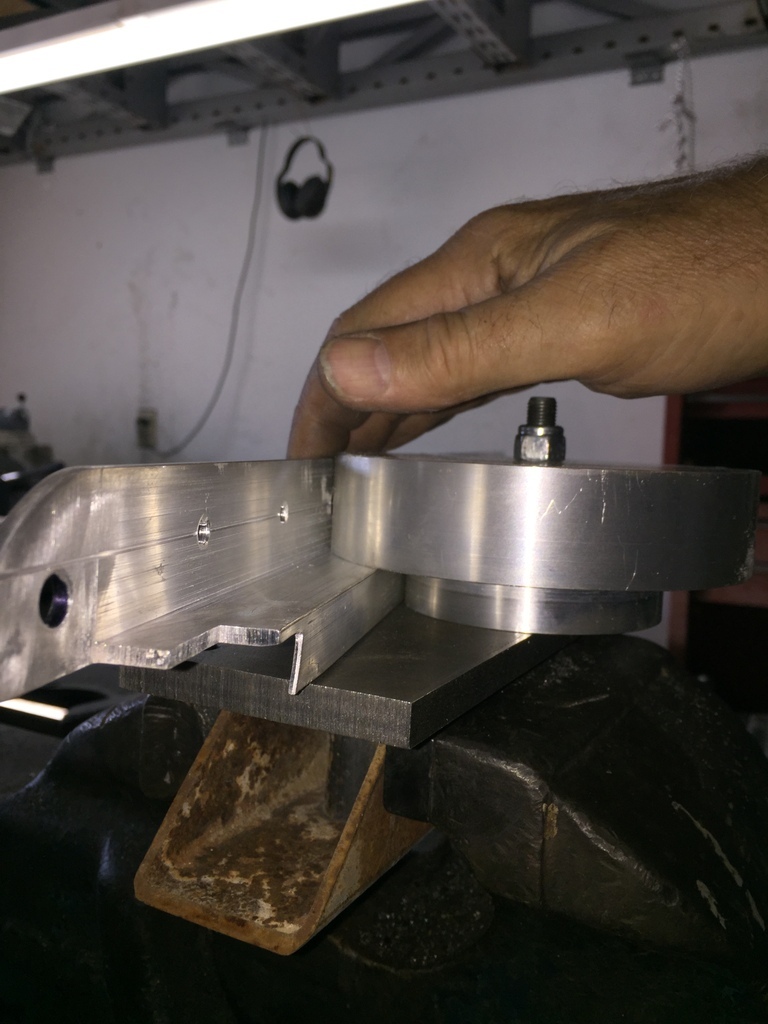 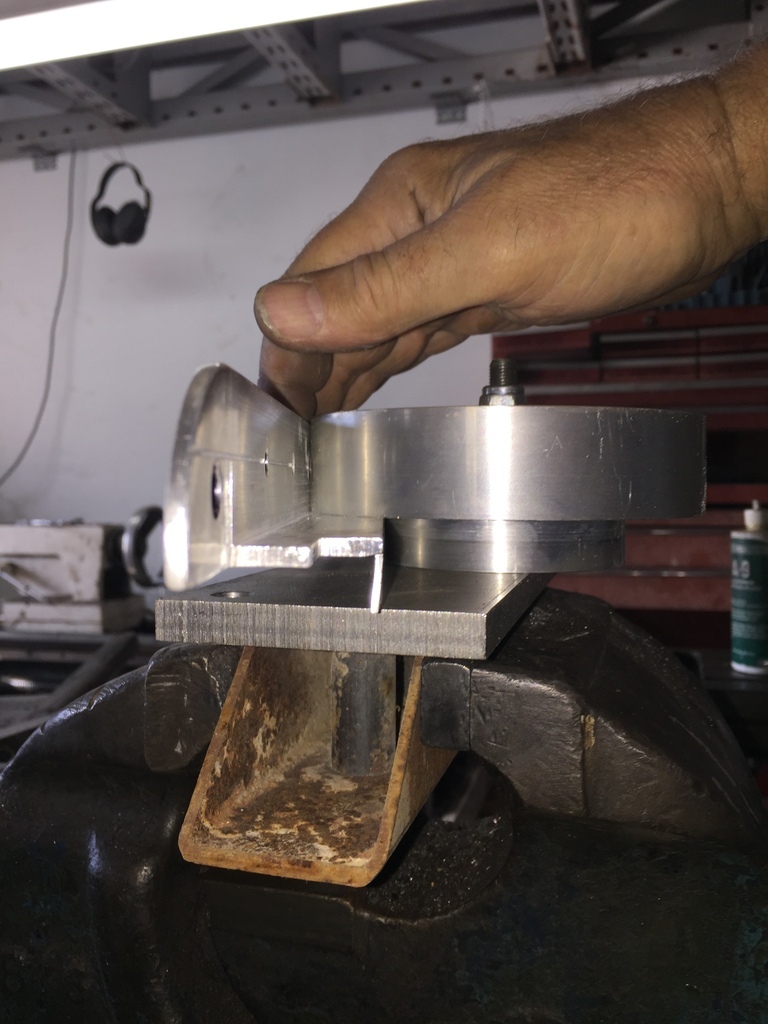 I then made a piece of aluminum that accurately fits the outside of the strip ( again all 3 surfaces). This can be straight, without an arc in it. But it does need to be able to turn a bit on its mounting point. So it will lay flat against the strip. 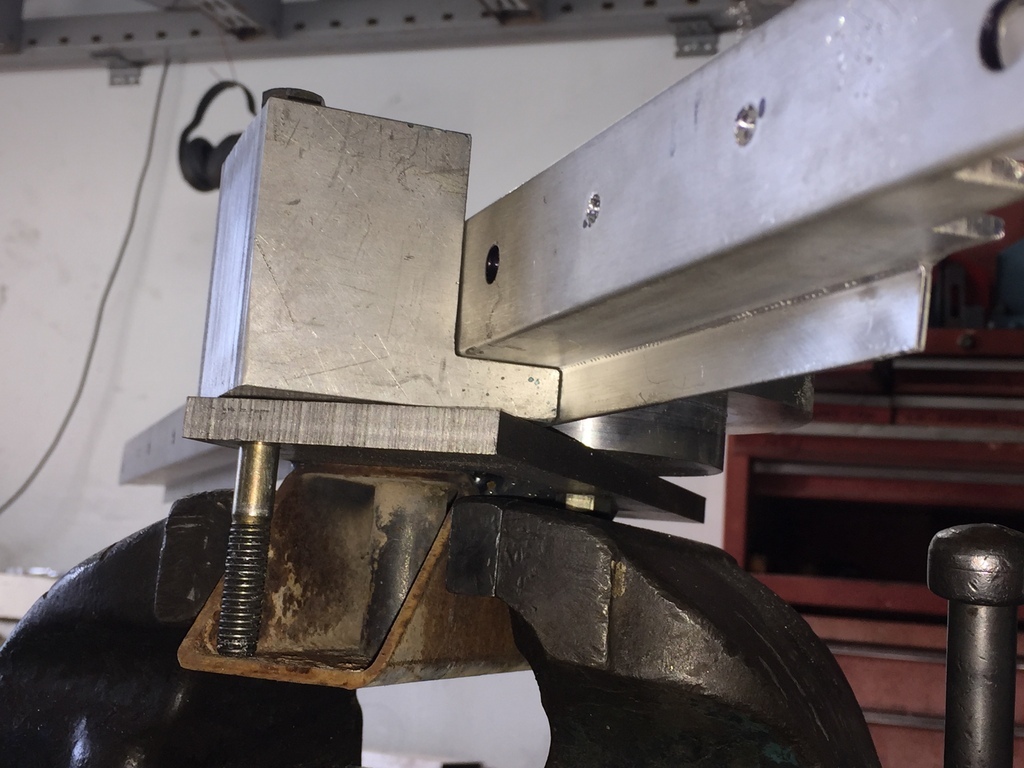 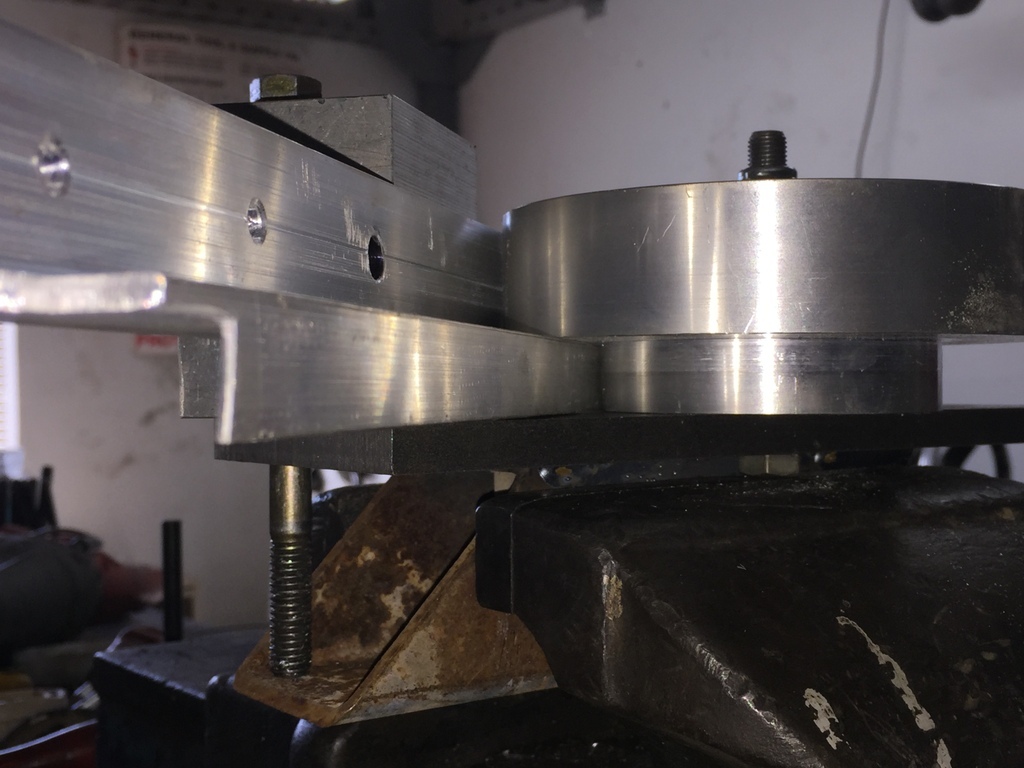 With this tool its now really easy to bump the strip by hand, until the arc is correct. Checking it here against the template. 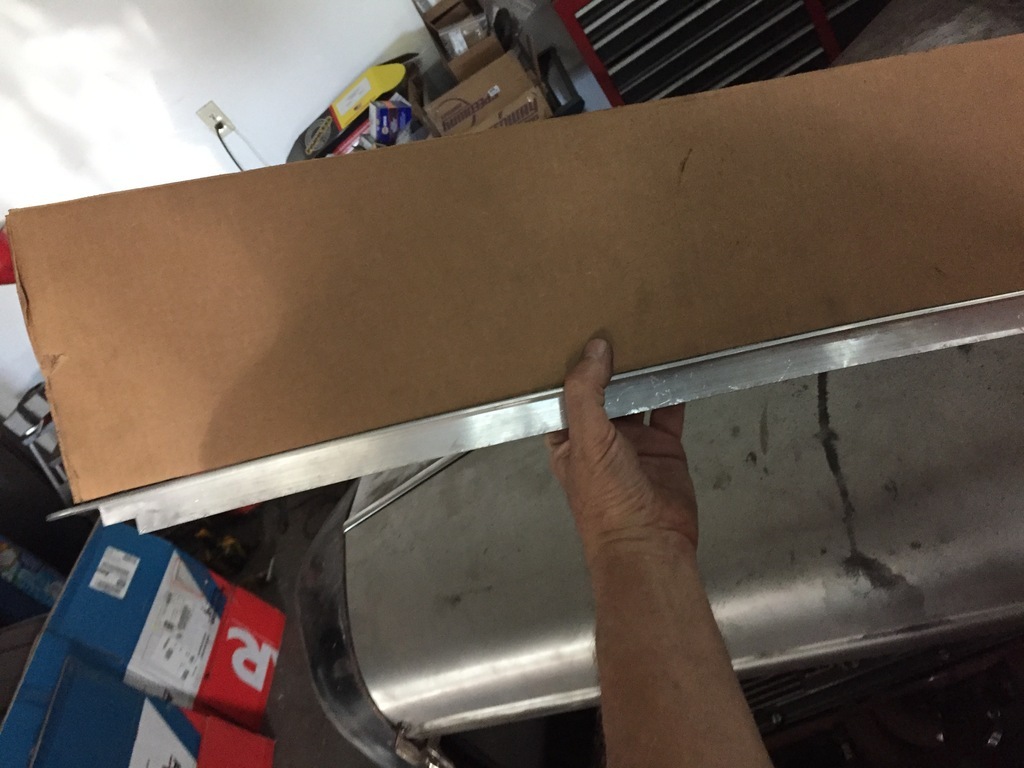 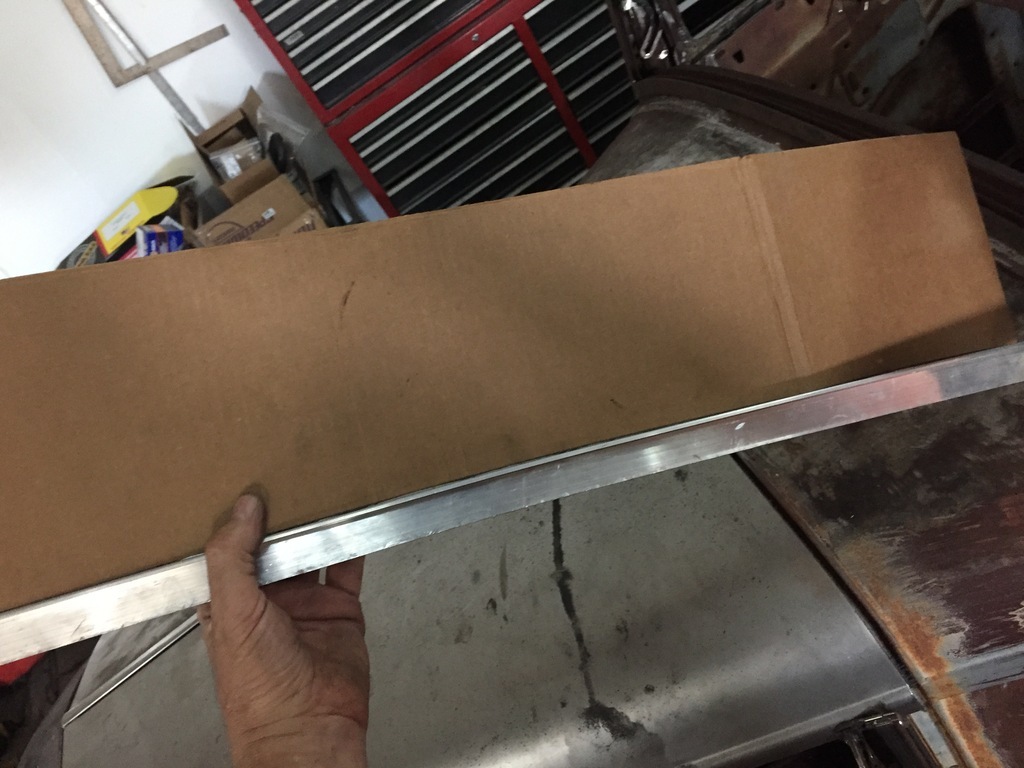 And here it is on the roof. Its just laying loose on top of the roof, no fasteners at all. And there is very little difference between it and the roofskin. 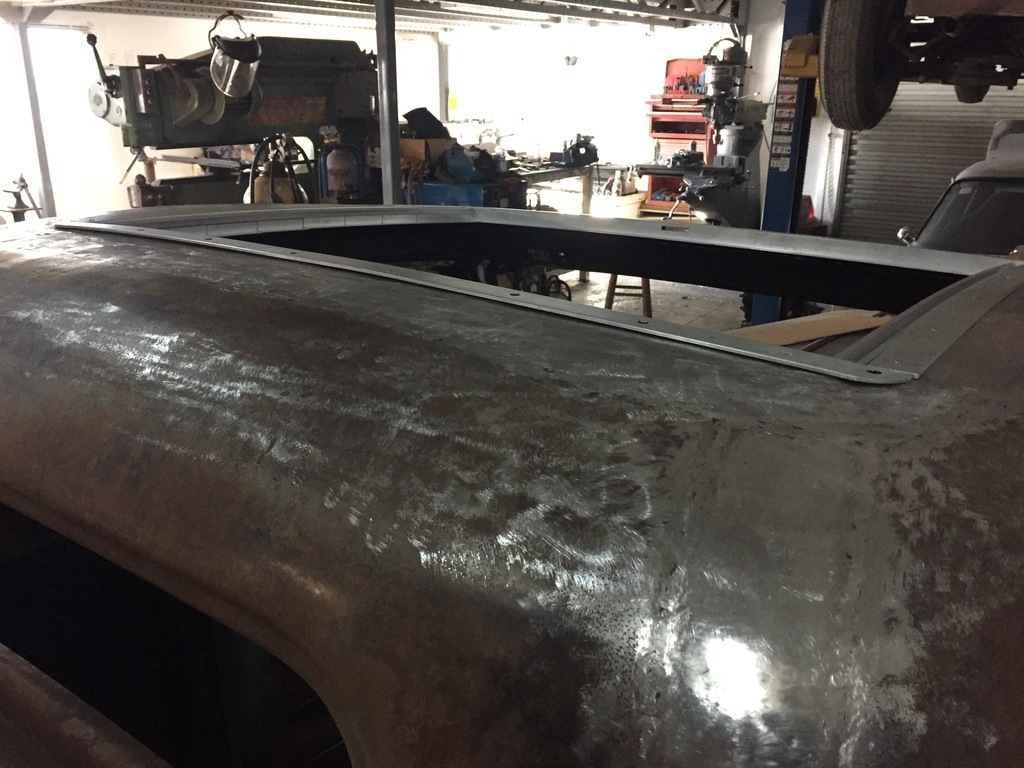 Making the tool took a bit of work. But once I had that, the actual bending of the aluminum strip took a couple of minutes... |
| |
|
|
jimi
Club Retro Rides Member
Posts: 2,075
Member is Online
|
|
Sept 26, 2023 23:57:26 GMT
|
Making the tool took a bit of work.  Bit of an understatement I think  not to mention designing the tool in the first place. Very nice work, looks great  |
| |
Last Edit: Sept 26, 2023 23:57:50 GMT by jimi
Black is not a colour ! .... Its the absence of colour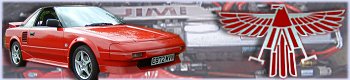
|
|
|
|
|
|
|
Sept 27, 2023 0:02:14 GMT
|
|
|
| |
|
|
|
|
|
Sept 27, 2023 7:24:15 GMT
|
|
Lovely work as usual. I was trying to work out how you were going to it and still didn’t get it right: I had gone from bend over knee -> bend over tree trunk-> pipe bender -> new tool in English Wheel.
|
| |
|
|
|
|
|
|
|
This is turning into one of those "by the time its done, I'll know how to do it" deals... I bent the front and rear aluminum strips, and they came out so nice I wanted to do the sides as well. But those had relief cuts in them to allow them to bend. 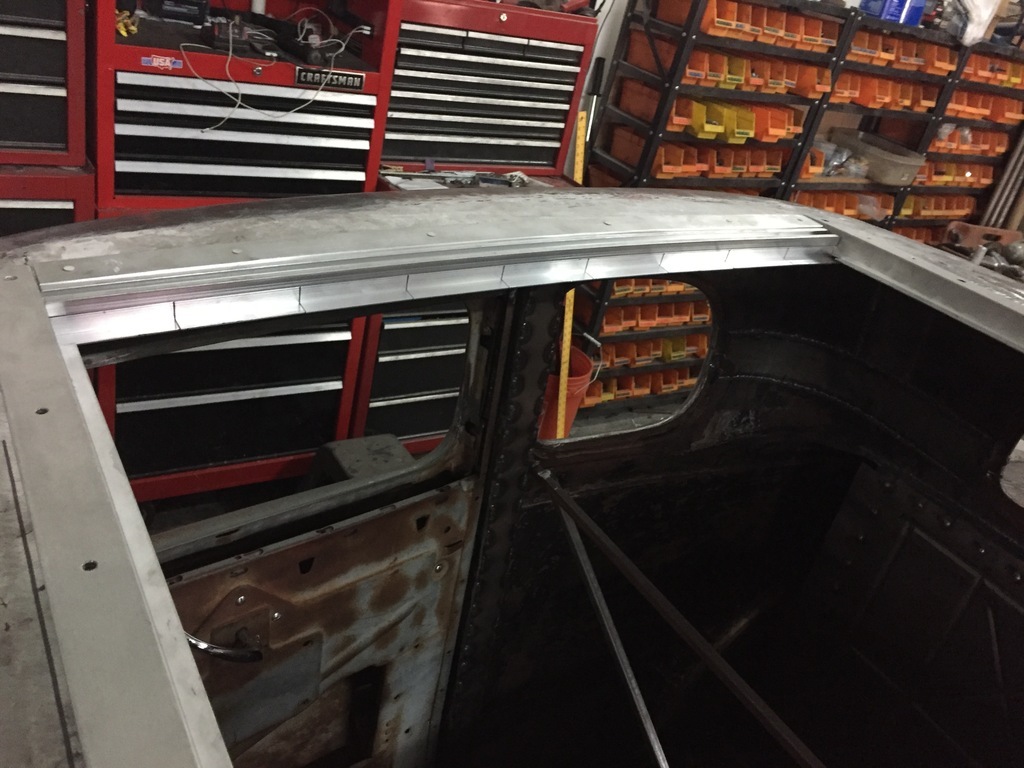 ( but they didnt, I later figured out why...) The sides put a lot of tension on the roofskin, flattening it out. In this pic you can see the result of that, the aluminum is lower than the curved sheetmetal coming up from the sides. ( you can also see there is a gap between the front strip and the roof, but that is because its just laying there not bolted down). 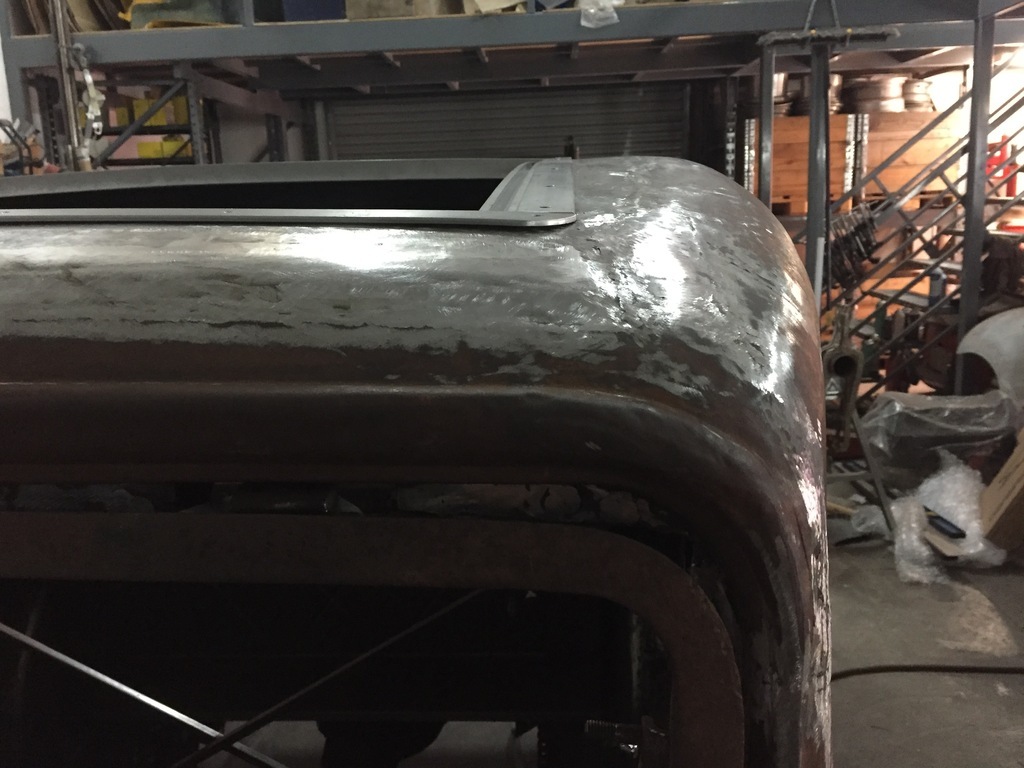 So this needed to be fixed. Welding the relief cuts up would take a lot of time, and it would mess up the heat treat. So ideally I'd start over with new pieces of aluminum. I sent the company I'd gotten the roof from a message, asking them to sell me those pieces ( but slightly oversize, undrilled, and not cut with relief cuts). A couple of minutes later my phone rings "I'll just send you those pieces, no charge, just pay for the shipping". Next day they were here. Which really impressed me... 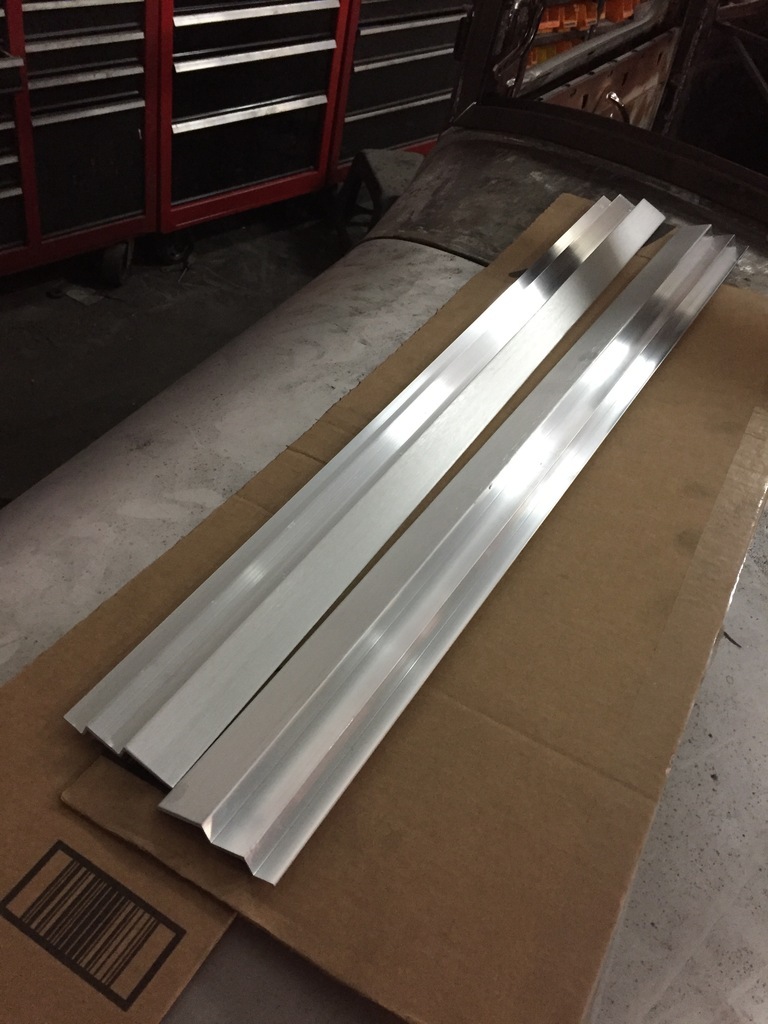 |
| |
|
|
|
|
|
|
|
The side strips have a different profile than the front & rear ones, so I had to modify my bending tool. 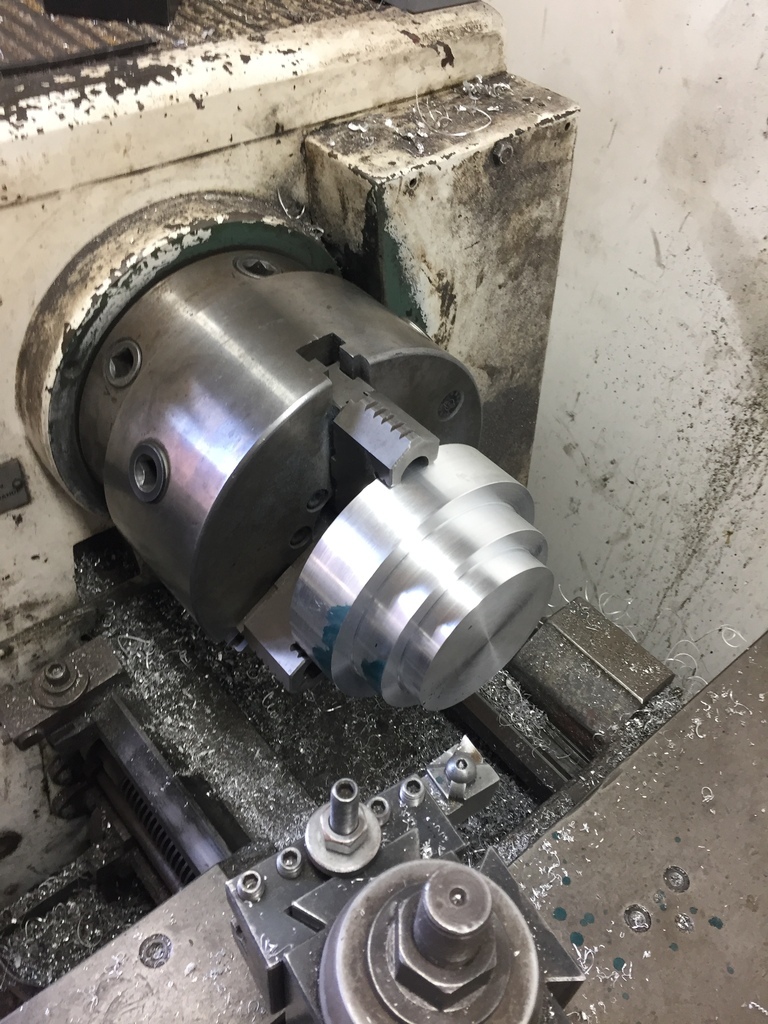 Checking the fit. 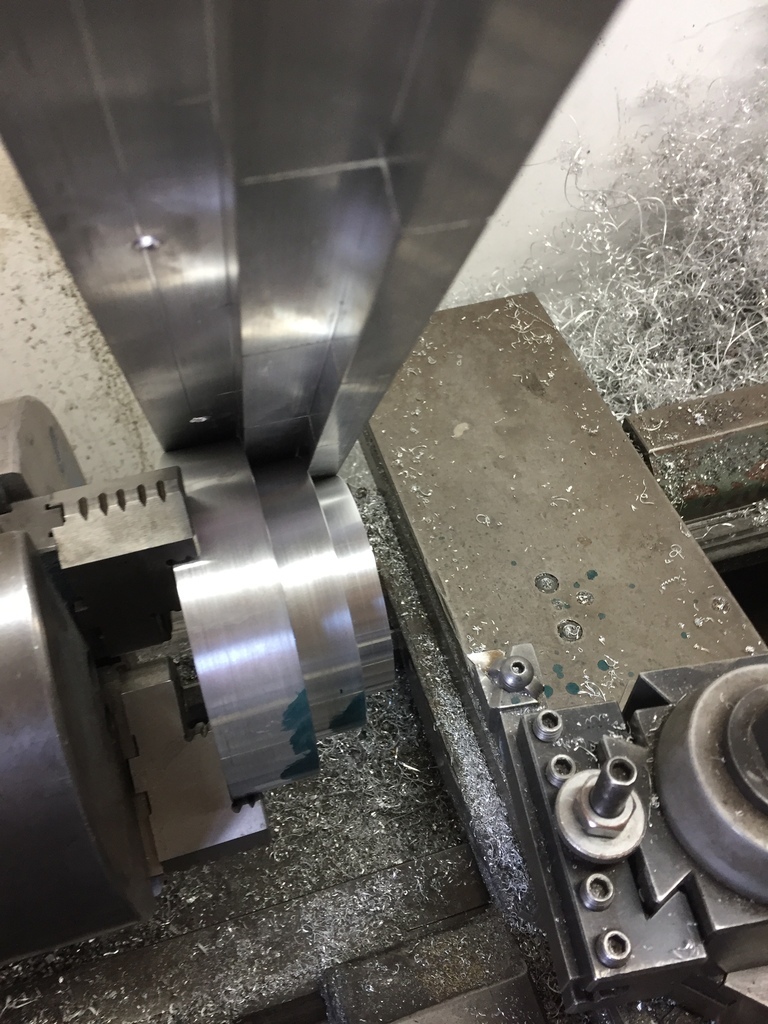 I modified the block that locks the strip, and put it all together. 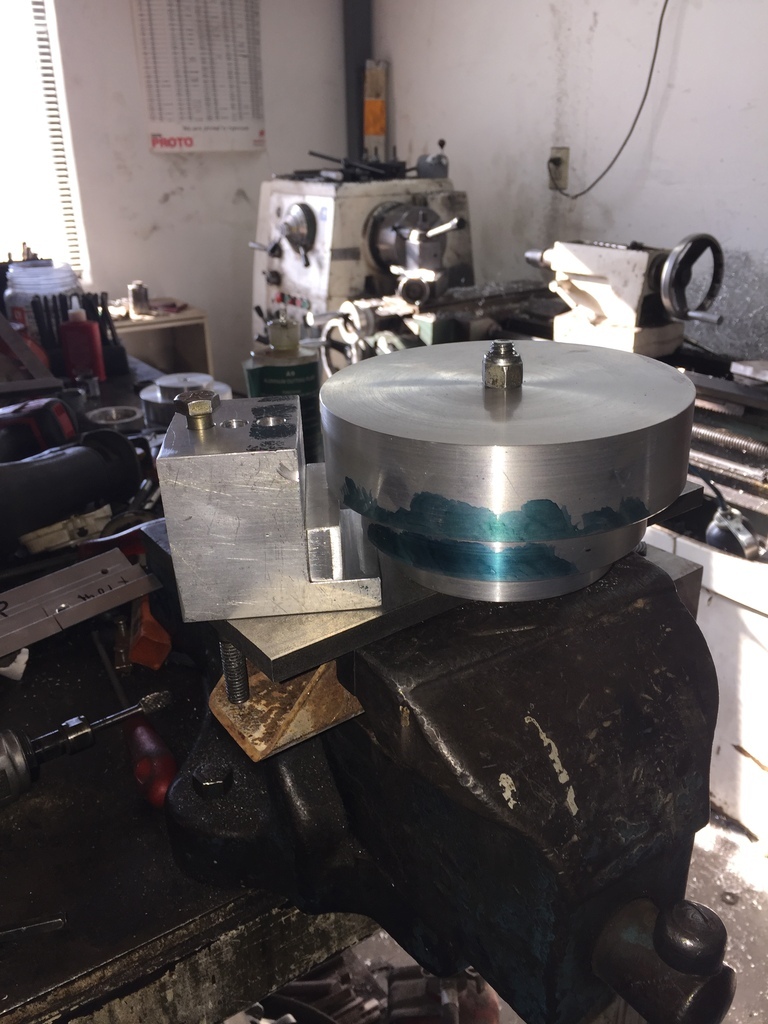 Checking the fit on the original strip. 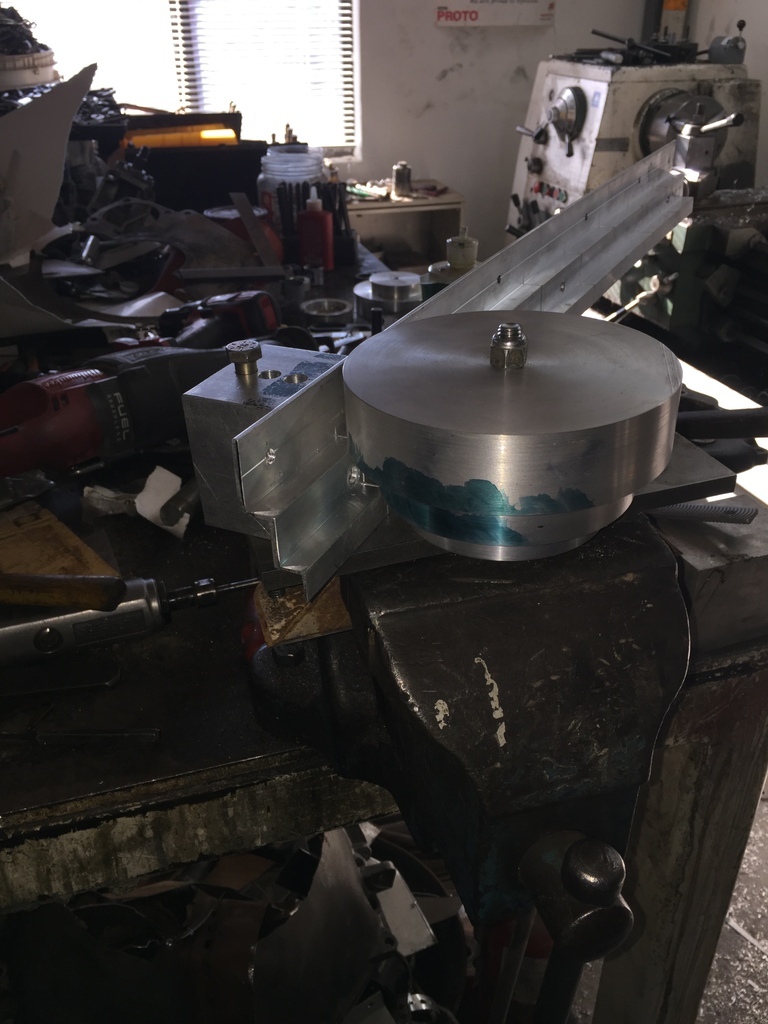 And then I could start with the bending. 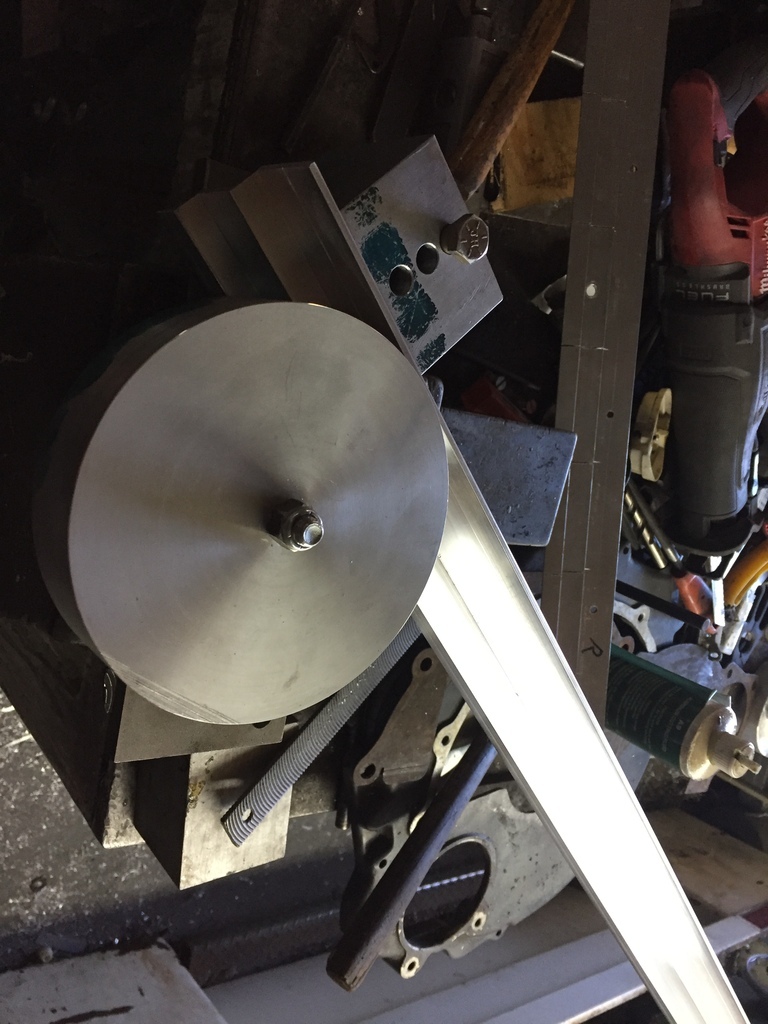 |
| |
|
|
|
|
|
|
|
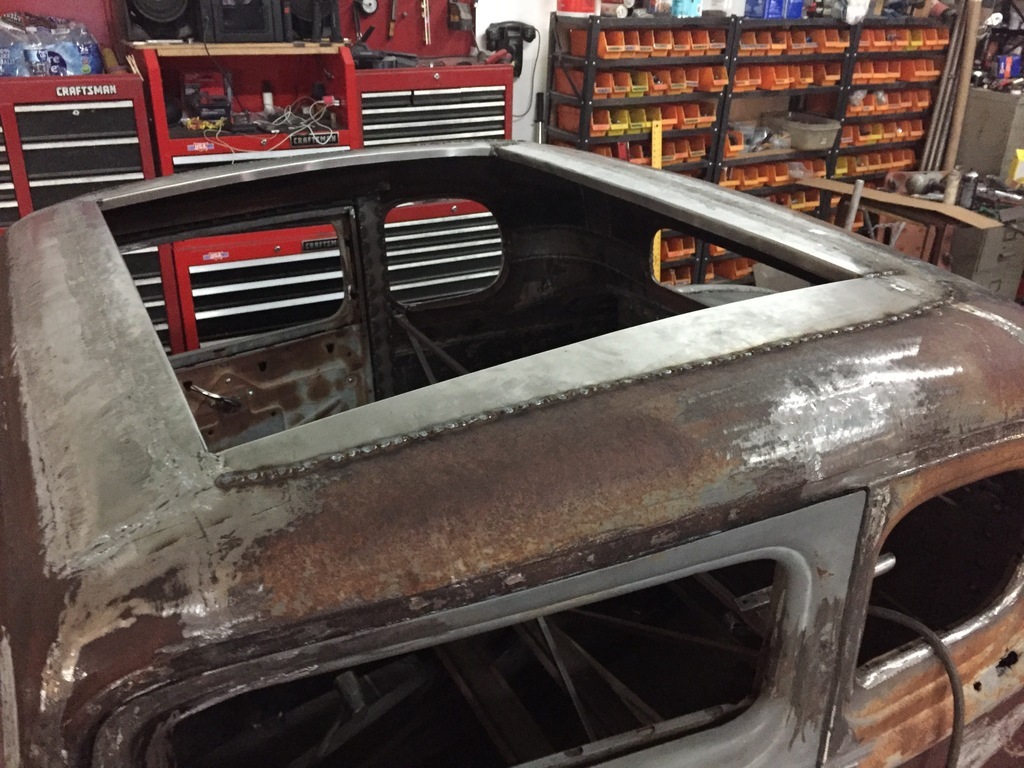
Turns out the side profiles are much harder to bend than the front & rear ones, because they also deflect sideways. So it took a lot longer, carefully bumping it one way, correcting the sideways deflection, which then affected the arc, so I'd have to go back to that one, which then gave some more sideways deflection, etc. But I got there in the end. So what was the problem with the original sidepieces? Turns out that was all my own doing... I had seen in pics that some of the installations looked like the aluminum pieces did not bend enough. So it flattened out the dome of the roof, and made the corners of the frame too high. I didn't like that. I put a 90deg flange all the way around the hole, hoping that would give the roofskin enough rigidity to pull the aluminum in place. It didnt. In fact, because the relief cuts on the sides are about 3" apart it made things worse. ( if I'd left the sides alone, the roofsin could have followed the aluminum into a series of sharp bends where the relief cuts are. Because the sides of the roofskin were now too rigid to do that, the resulting ark became as bad as it was). Now that it is done, I'm happy with it. It took a lot of extra work. But I now have the 90deg flange, as well as the aluminum in the right shape ( without any relief cuts in them). So I imagine the end result is a lot stronger and ( to me anyway) nicer to look at. I still have to refine the edges of the roofskin ( turns out cutting a great big hole in a roof with accurate 90deg corners will really shows of any flaws it has... ) So I'm still working on that. And in these pics I'm checking that all 4 corners line up ( I need to do a little correcting there too). 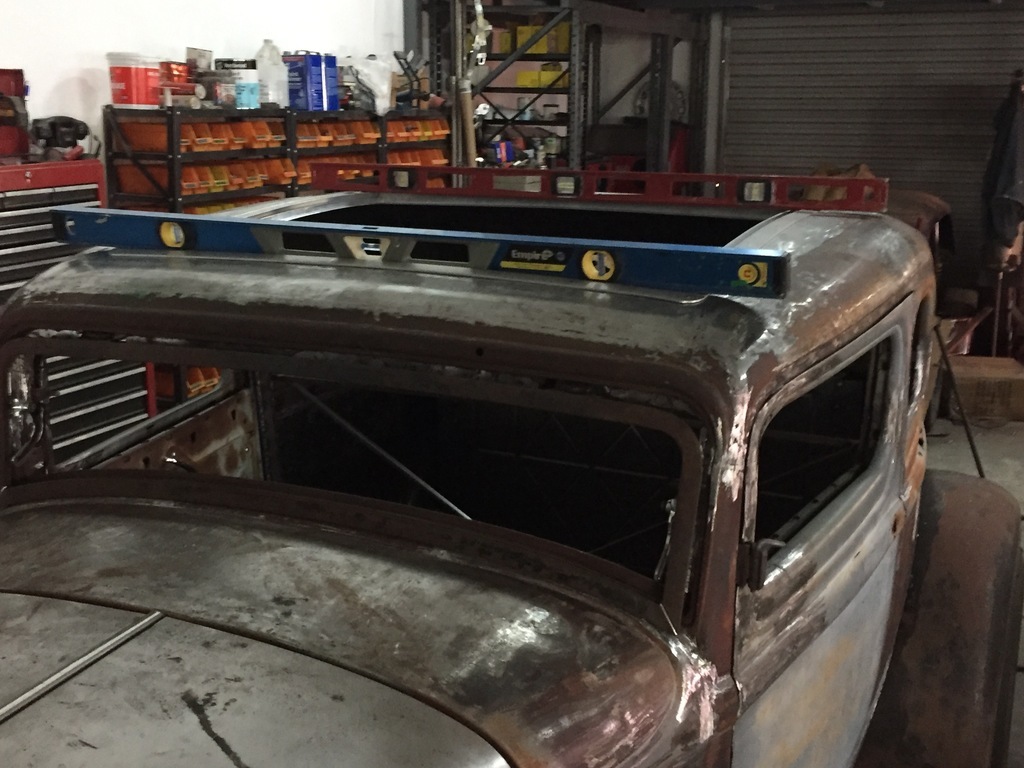 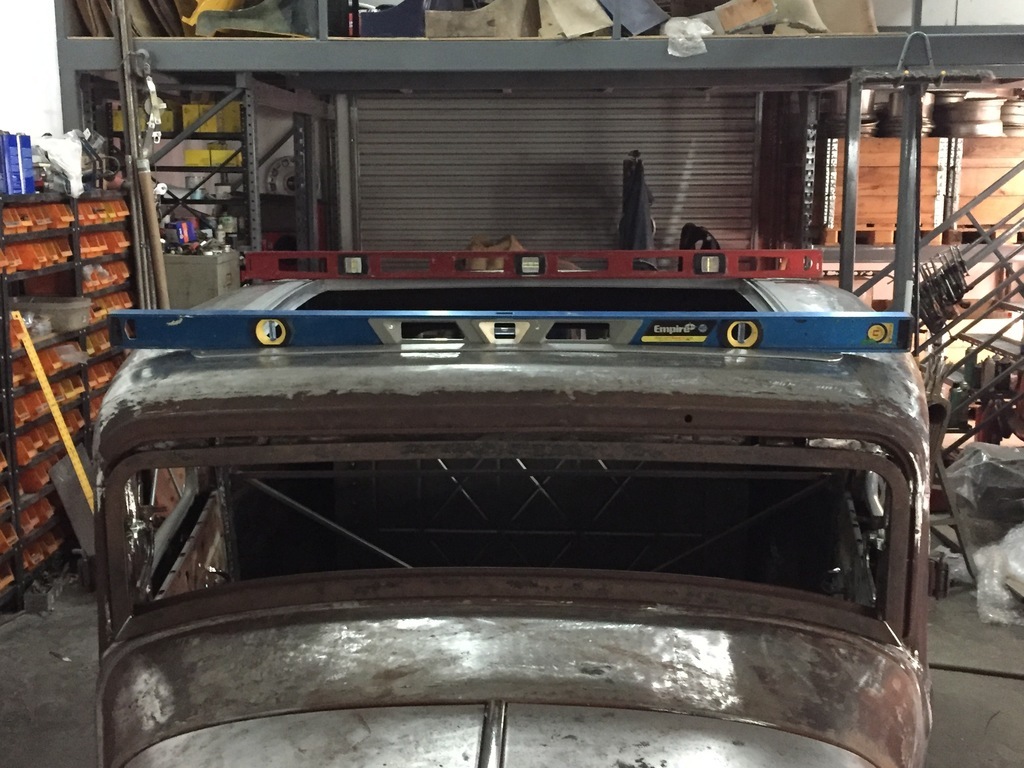 All in all, I think it was worth the extra effort... |
| |
|
|
|
|
|
|
|
|
Metal, I’ve always liked cloth sunroofs; my Dad’s Isetta had one (escape hatch) as did my Mum’s Fiat 126 “DeVille”. I’ve looked at remains of Webasto’s in rotten sports cars in scrapyards (years ago). I can see the need to four all four edges - the aluminum sections - to match your roof’s contours; your tooling fix would have been way beyond me. I’m impressed you could add the arcs without having to use heat to avoid tearing the aluminum. How will they be attached to the steel roof, panel bond and flush rivets?
Brave and highly competent work as always.
John
|
| |
|
|
|
|
|
|
|
|
Thanks John.
They are really cool flush mounted threaded studs.
The flush mounted head has little ribs on the inside that bite into the slightly undersize hole in the aluminum.
On the business end (underside/ inside of the roof) the studs get small ( 8-32 ?) nuts with a 3/8" hex.
For the final installation I'll put something between the roof and the aluminum.
Haven't decided what yet, maybe silicone or some other sealant.
|
| |
|
|
braaap
Posted a lot
Posts: 2,678
|
|
|
|
|
Wow! (once again)
And there was me being proud this summer after putting a renault twingo sunroof into my suzuki (with the help of my mate Michael who has done that before), which is basically just cutting one big and plenty of small holes into the roof skin. Certainly no comparison to Your fabrication work here.
|
| |
|
|
|
|
|
|
|
|
|
|
That looks terrific. Pretty stout aluminum to just expect it will bend into place. Regarding "On the side pieces, they made relief cuts which are supposed to weaken them enough to where they will match the natural curve of the roof when you tighten the mounting screws down..." will you leave the relief cuts as-is, or fill them in to further strengthen it and keep it from moving/relaxing more over time?
You would think that if someone comes back to them with the level of thought and concern over the curvature of the extruded pieces that they would have been willing to work with you on those. Great job on making the tool. Too bad its application is likely so limited.
|
| |
Last Edit: Oct 3, 2023 5:45:30 GMT by cttoaz
|
|
|
|


 not to mention designing the tool in the first place.
