goldnrust
West Midlands
Minimalist
Posts: 1,887
|
|
Nov 15, 2021 22:33:17 GMT
|
Well, somehow in the few months since I last had bodywork to repair my brain had glossed over the the trauma of days getting showered in hot sparks, burned by weld spatter and covered in filler dust, and so it decided it was time for a new project. I have quite fancied the idea of a 'real' Fiat 500 ever since I first really became aware of them properly and learnt a bit about what makes them special, probably 5-6 years ago. It's a car very ingrained in culture, and while having a car that's an icon is one thing, that side of it doesn't really cover the side of it I find fascinating. It's the pure bare bones motoring experience, and the beautiful simplicity of it's (cost saving) minimalistic design that really appeals to me. Until fairly recently it seemed you could still pick projects up very cheaply, and there was a constant stream of Italian imported projects on the usual sites. Since Brexit/Covid that seems to have dried up, projects seem much fewer and far between and the price of both projects and finished cars is definitely rising, so having sold my Mx5 to a friend and finding myself with a bit of space on the drive and some money I the pocket I decided it was time to get one before they ended up out of my reach. A couple of months later I had this small vehicle in my possession! 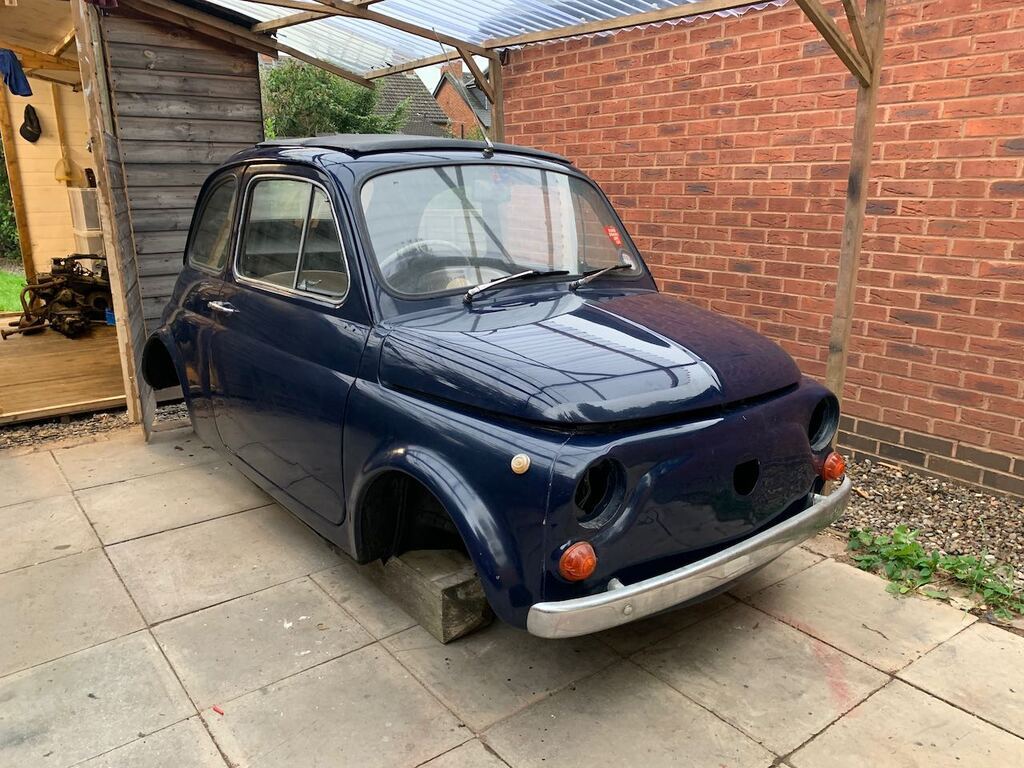 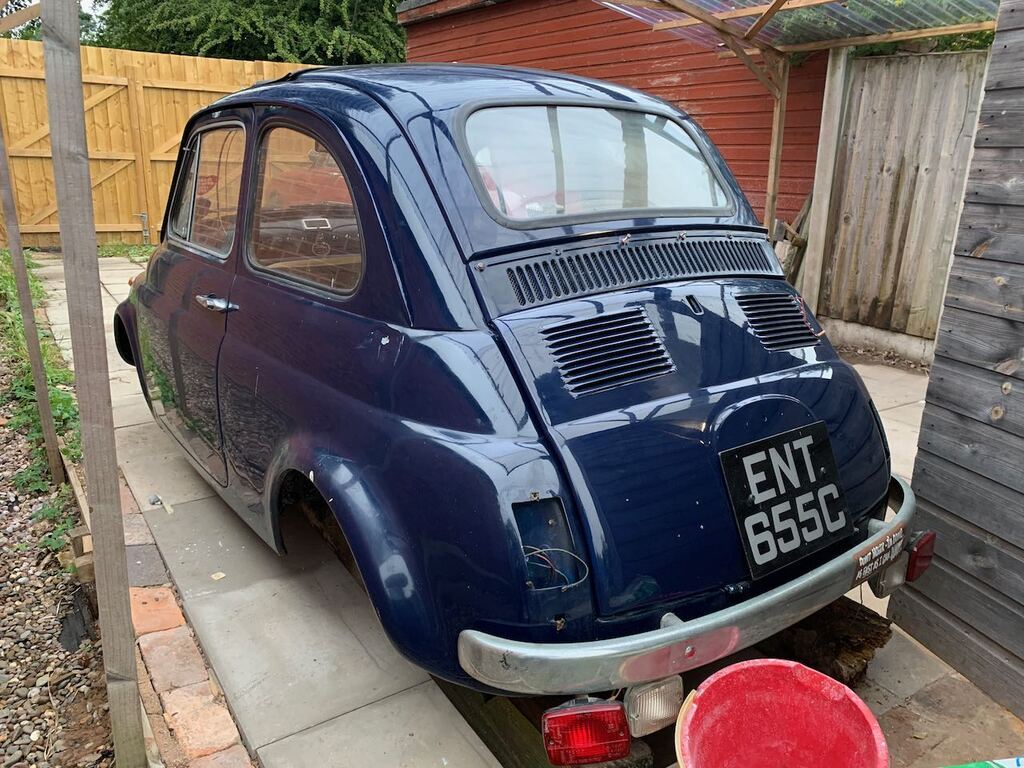 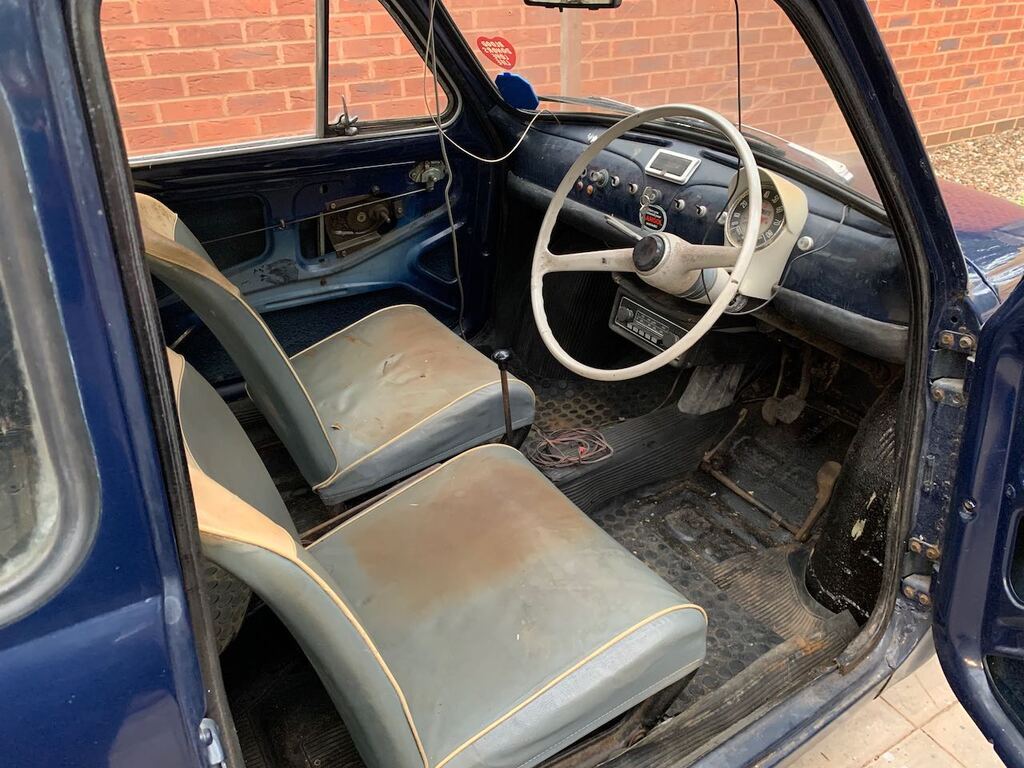 Trust me, it looks much better than it is, the shiny paint is hiding many horrors! She's a 1965 Fiat 500F, a RHD Uk car that's been off the road since the mid 80s. It's a 'more desirable' car than I had started my hunt looking for. I was perfectly happy with the idea of LHD version of the later 'L' spec car, probably the least desirable/valuable 500, but this was the right car at the right time and I'm really placed to have an 'F' as to me the round speedo and painted metal dashboard (replaced by a perfectly pleasant black plastic dashboard and oblong speedo in the L model) is part of the iconic design. In theory it makes a widow making 17hp from its 500cc air cooled parallel twin OHV engine. That wild race car engine is mated to a 4 speed 'crash' gearbox (so better be double clutching not granny shifting). Braking is by unassisted 4 wheel drums. So it's going to be quite the experience to drive! It arrived to me already partially dismantled, which I knew was a risk as you can't be sure all the bits are there! The previous owner was a trader who I imagine had bought it with the intention to wake it up from it's long sleep, give it a quick mechanical once over and get it sold for a profit, but soon realised more major work is necessary. Having done my Daimler project from a similar starting point, I like to think I know what I've got to await me! Thankfully parts are cheap and available, and there's very few jobs that I won't be able to tackle myself. So it's just going to be a case of time and effort. The plan is to do a straight forward restoration on this one. After that I can always look at mods but, unlike the Daimler that's getting some more modern influences in the pursuit of performance, anything I do I will be keeping very much 'period correct'. There are plenty of engine mods out there if(!) I feel it needs a bit more! |
| |
Last Edit: Jul 9, 2024 22:33:56 GMT by goldnrust
|
|
|
|
goldnrust
West Midlands
Minimalist
Posts: 1,887
|
|
Nov 15, 2021 22:42:12 GMT
|
The first order of the day was to improve upon my weather projection as the season is closing in on us. 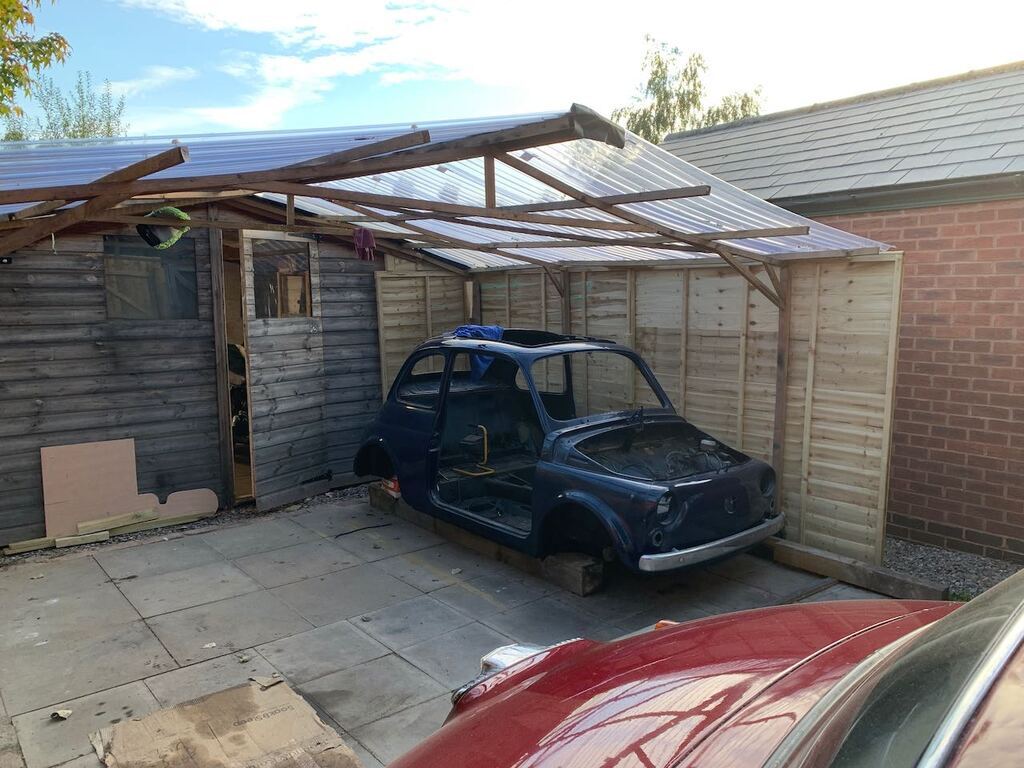 With some old gazebo sides covering the open end of the car port I could now keep the car properly out of the wind and rain and (hopefully) not be stopped from working on it by the weather. As the car was already partially dismantled it seemed sensible to finish the job properly and then once I had a bare shell I could see what I was working with. Now I can see it, I'm not sure that was a good idea, patches on patches soon becoming visible.  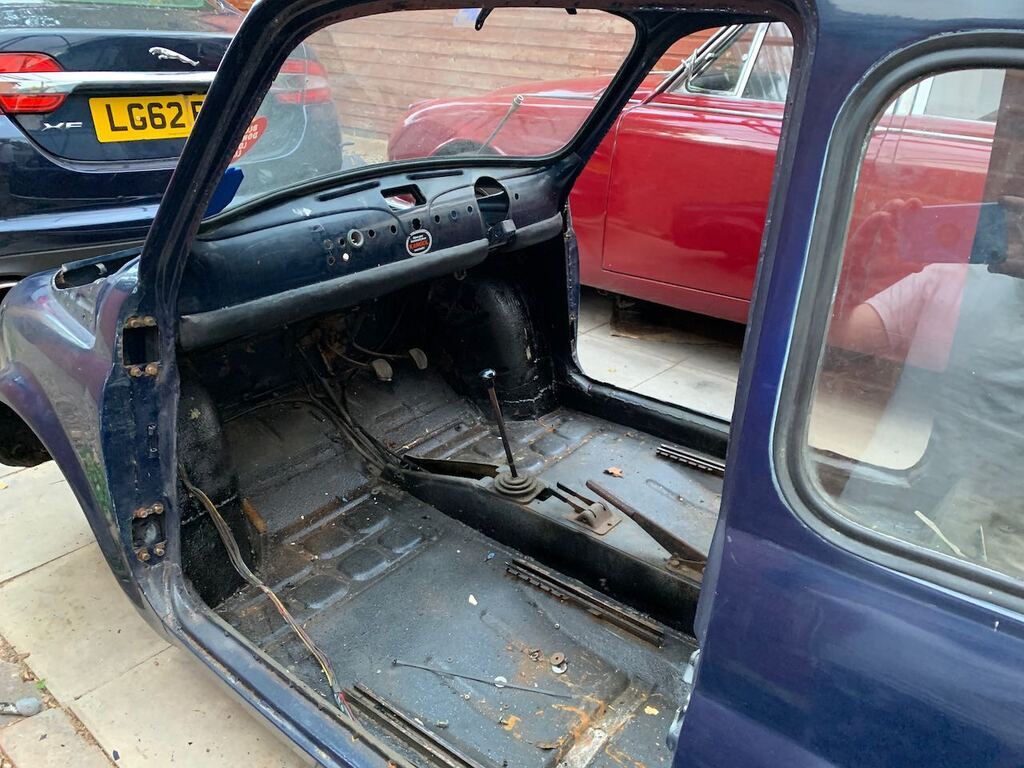 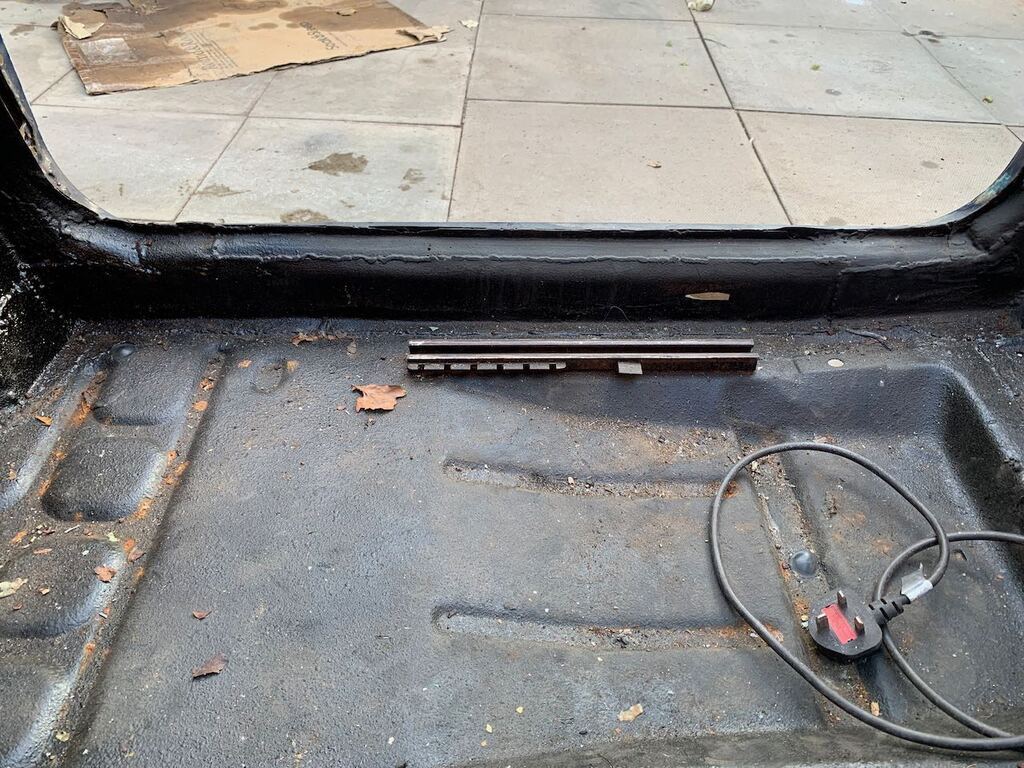 I've worked on enough rusty old cars in the past decade to know that it always turns out to be worse than I thought it would be and this one is no different, but there is good news too. The front panel, and the bulkhead behind it are made of a wonderful combination of rust, fibreglass, pop rivets and seam sealer. This I was aware of, so clearly they'll need to get replaced in their entirety. There are rust holes in the rear spring mounts. All 4 inner wheel arches have been patched, to a varying standard. The front right inner arch is especially bad and has large holes fibreglassed over. There is also a big ugly patch under the front edge of the floor, and the inner sills appear to be a pure patchwork construction. I'm sure the condition of the middle sill will be terrible. New front wings and rear wheel arch repair sections have clearly been fitted (and been treated to shiny paint), but not welded to the inner arches. Instead someone has just fibreglassed over the gap between the new wings and the old rusty remains of inner arches. 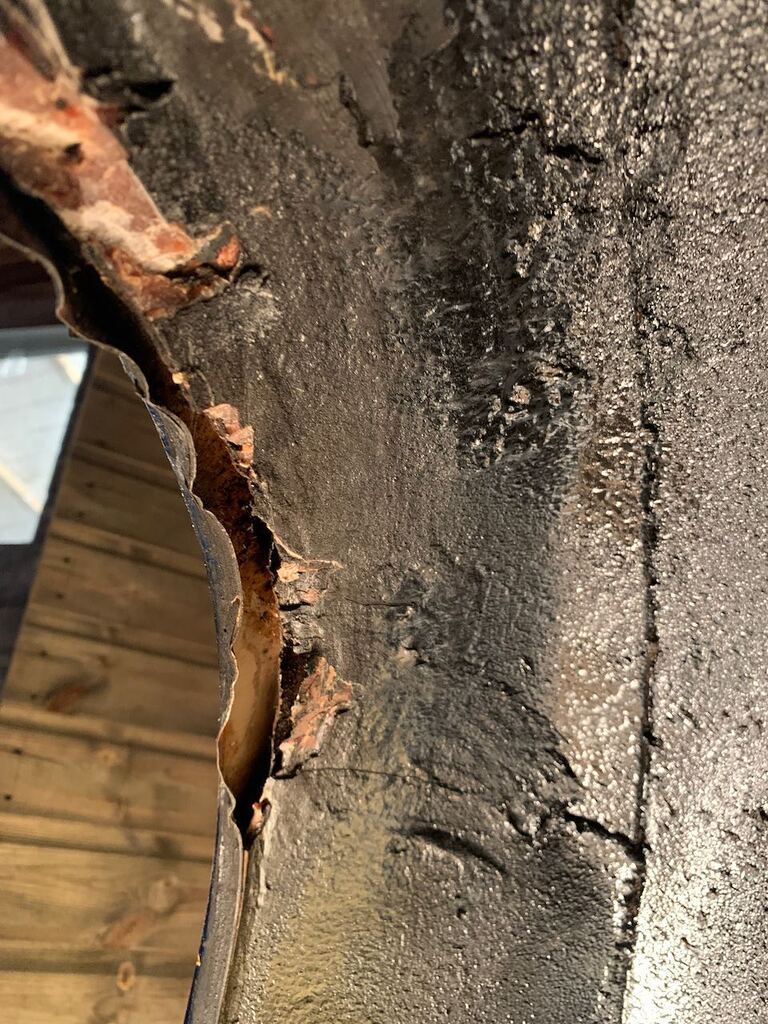 I had felt the fibreglass in the arch lips when viewing the car, so knew something fishy was going on, but I have to admit I didn't expect it to be quite this much of a bodge! Fixing it properly will mean removing the outer panels and messing up that shiny paint. So what about the good I hear you say? Well the floors have clearly been replaced and, though the welds are ugly, are solid. The bonnet, engine lid and doors are all in surprisingly good condition. The window apertures appear to be all original and rust free, likewise the pillars and roof structure also all appear in good condition with no signs of previous repair. Very much a mixed bag, but I knew that would be the case and now I knew what I was working with, I could make a start  |
| |
|
|
|
|
|
Nov 15, 2021 22:42:56 GMT
|
|
i have a full front inner front panel £60 plus post i replACED EVERY PANEL IN MINE IN 4 DAYS
|
| |
|
|
|
|
|
Nov 15, 2021 22:44:43 GMT
|
|
|
| |
|
|
goldnrust
West Midlands
Minimalist
Posts: 1,887
|
|
Nov 15, 2021 22:44:52 GMT
|
I decided to start underneath the car, to build on the strength in the floors, before starting to take larger sections the shell apart. After the Daimler I swore that I didn't want to do another major restoration lying on my back under the car. So when I bought this project I had a mind to buy / build a rotisserie... But while reading about 500s I saw several builds where instead the shell was just flopped on to a mattress. It seems kinda crazy, but when I felt how light the bare shell was it seemed worth a shot. As it happens I had a spare old mattress waiting to go to the tip, so I had nothing to loose! It was easy enough to roll over on my own and I've got great access to the underside now. 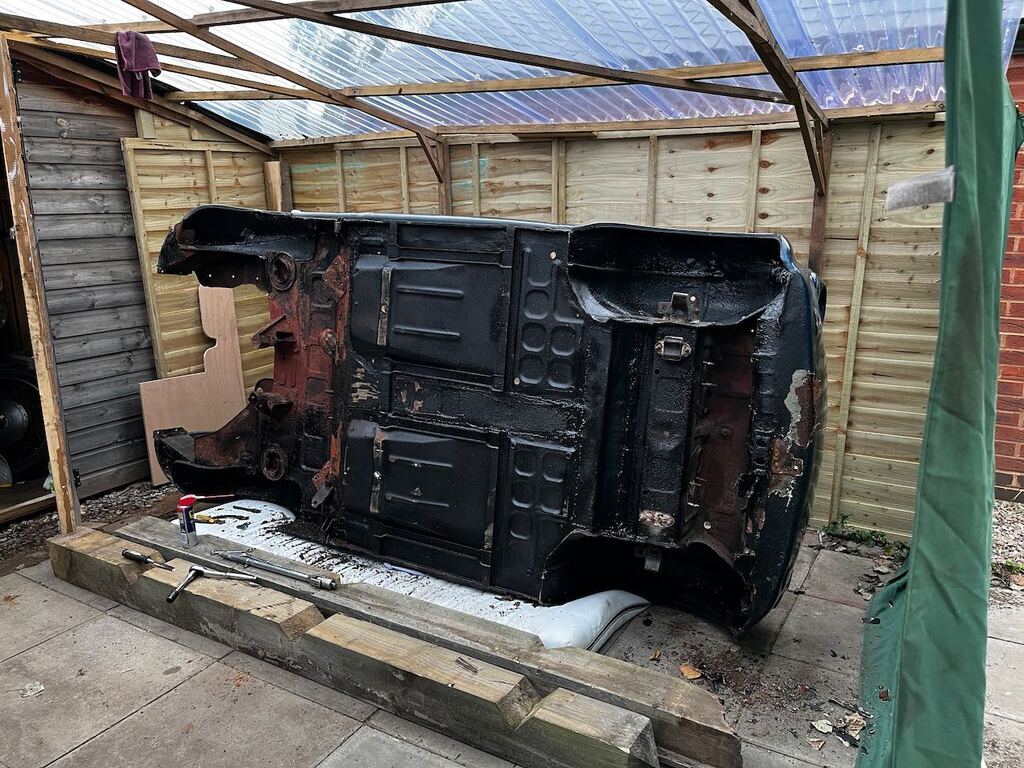 I started by investigating the large ugly patch at the front edge of the floor. As expected, when I cut the patch off the rotten original floor was still there. It is typical of the patch repairs on this car, where there should have been two layers of metal welded together in several points to create a box section giving the front of the floor some strength, instead there were 4 layers overlapping each other and not joined at the critical stress points. 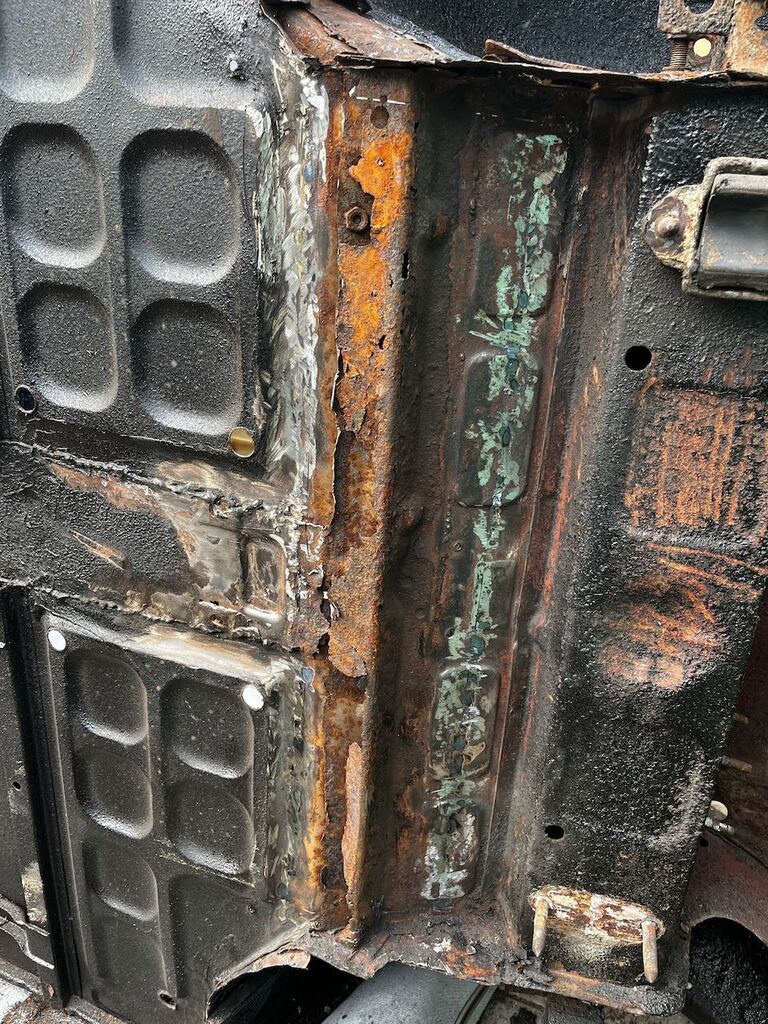 So I removed the two original rusty layres, exposing the underside of the new floor and leaving it ready to make a patch to the toe board / bottom edge of the front bulkhead / whatever you want to call it! At the same time I started the laborious task of scraping away all the old underseal. I'm using a sharp chisel to scrap the worst of it off then running over it with a wire wheel to finish and giving it a quick coat of primer to stop any corrosion starting. I've got about 1/2 the floor done and will keep chipping away it as and when I've got a few minutes. 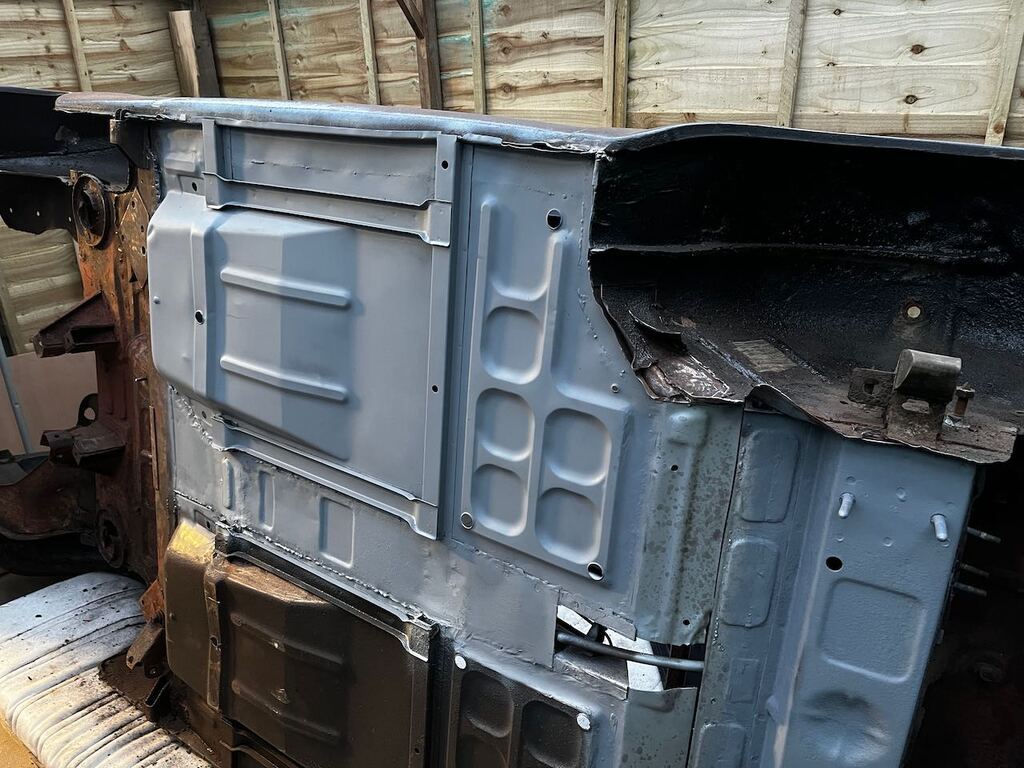 |
| |
|
|
goldnrust
West Midlands
Minimalist
Posts: 1,887
|
|
Nov 15, 2021 22:54:52 GMT
|
After several more hours of scraping I had all of the main floor pan cleaned off and I could start on some of the repairs. 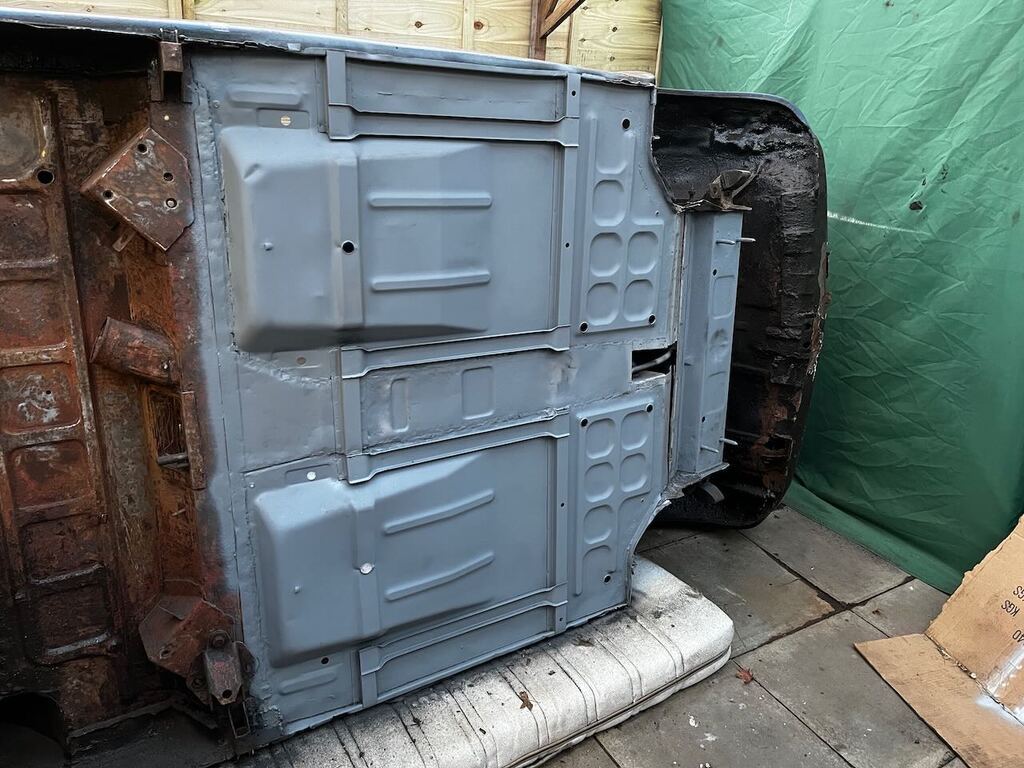 I made up the first of many cardboard templates. This one for the missing brace to go across the centre of the floor. Whoever replaced the floors on this car only did half a job and several of the re-enforcement sections were missing as were the seatbelt anchors. Once I was happy with the card template I transferred it into steel and then welded it in place. 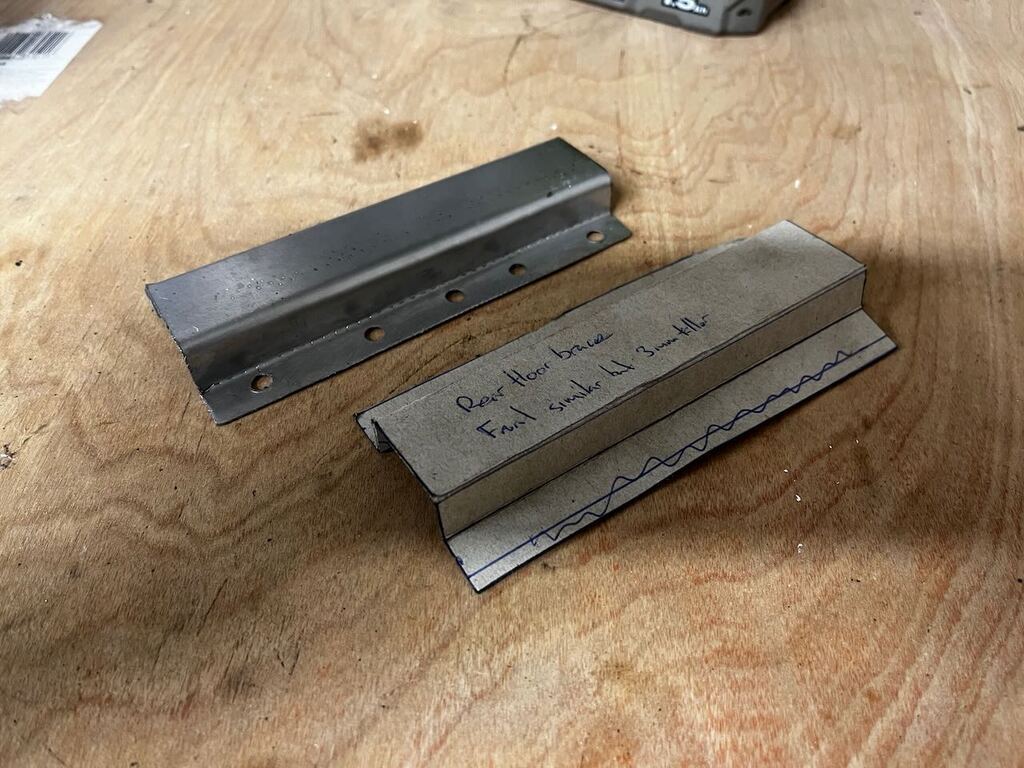 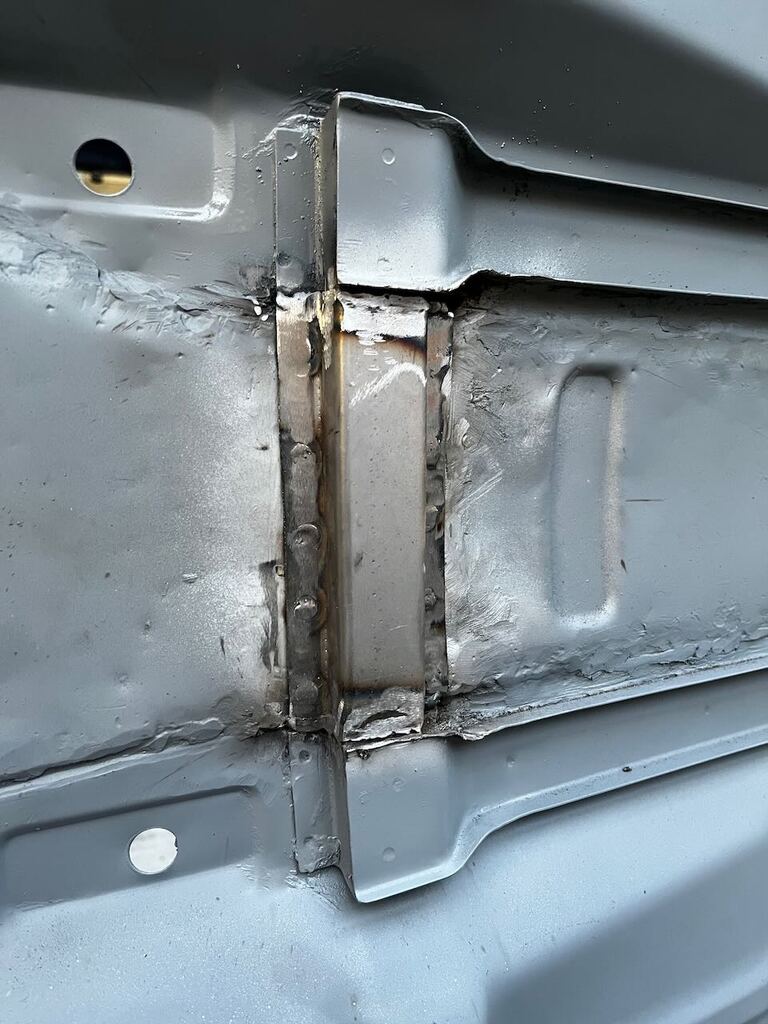 It's always a nice feeling to start building back up rather than just tearing down.  The next bit of new metal to go in is a small patch to the centre of the front of the floor. Trying to keep moving the metal work I'm doing with each new car, I wanted to try and replicate the factory pressing for this. I tried cutting out a little plywood form and using my press, but it wasn't really strong enough, you can see in the picture of the bit of original floor and my test piece that the edges are much too soft. Still the shape was roughly right, and with some clean up with a hammer and blunt chisel, the final patch came out nicely. 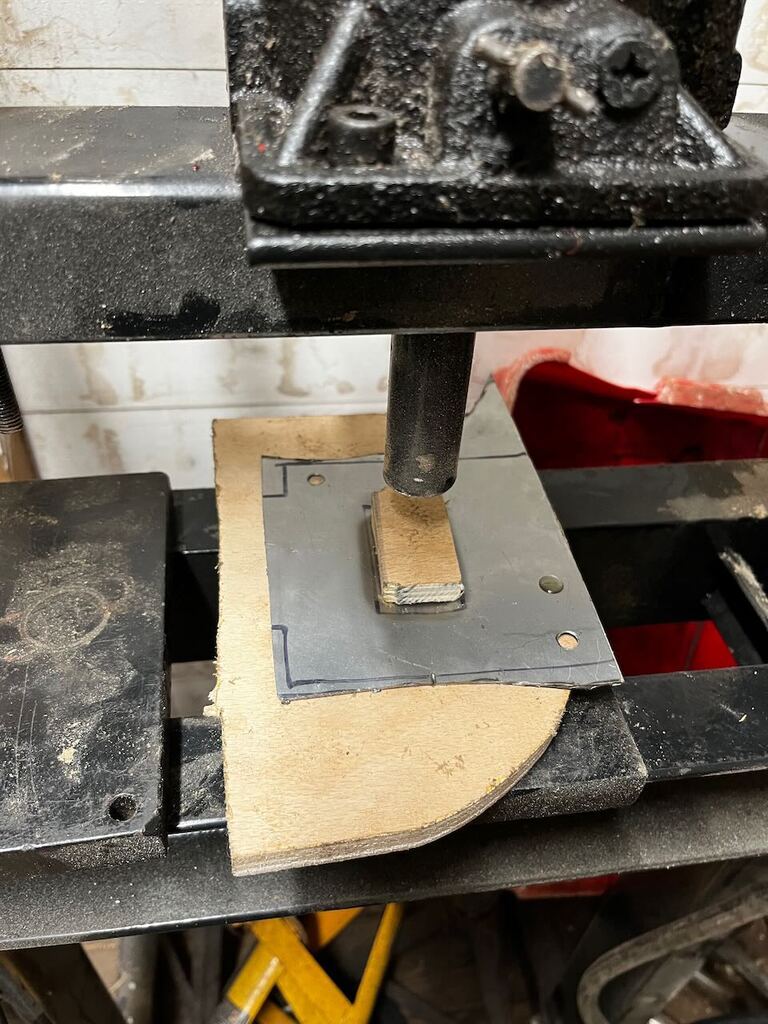 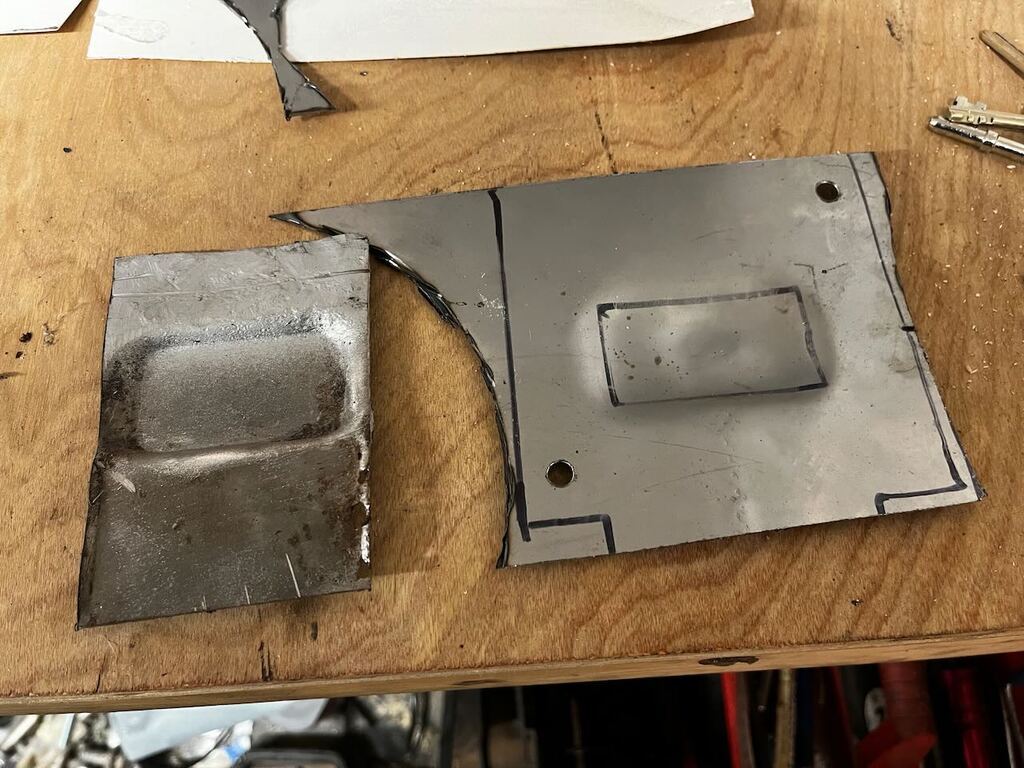 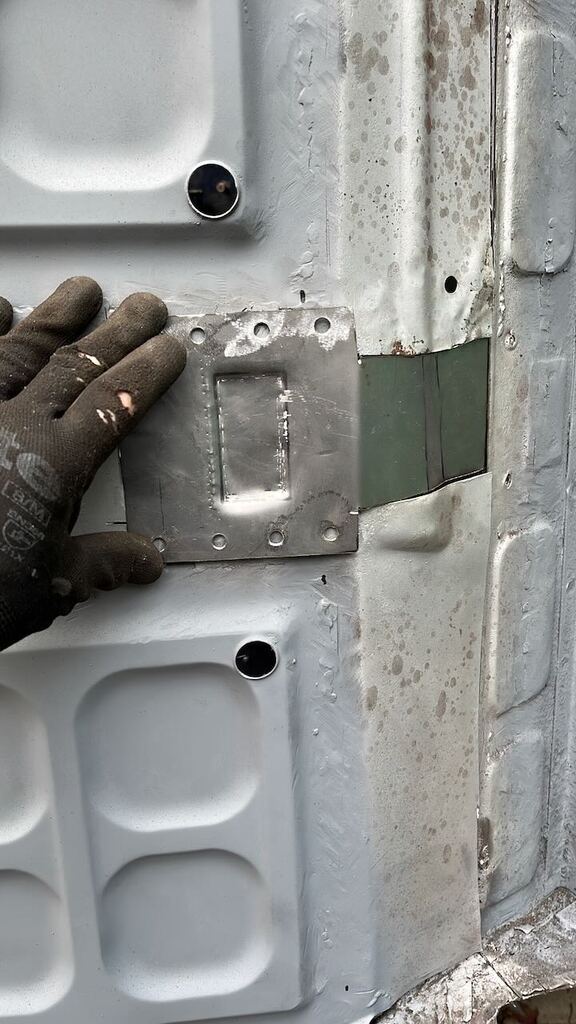 With that patch welded in, I could now rebuild the bottom of the kick panel. Sadly it was just a couple of inches too wide for my little metal folder, so I had to make it up in two halves. Still it came out fairly well and is a massive improvement over the previous repair. 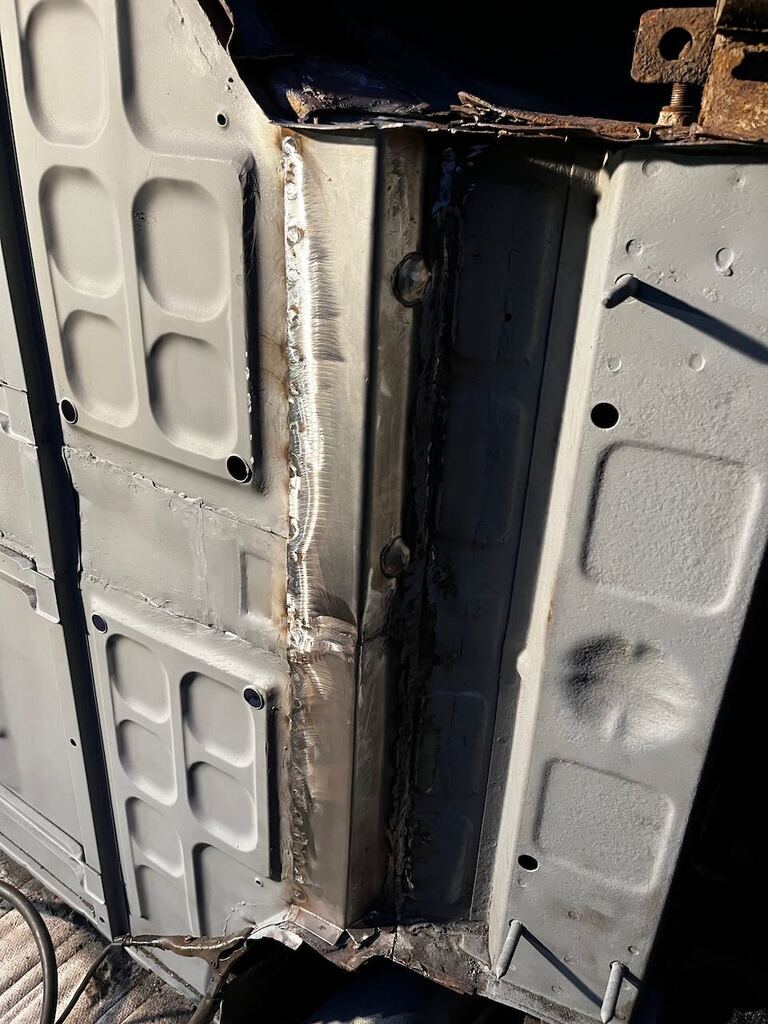 Finally for this update, I also ordered the first batch of repair panels for the car this week. So while working on the floor, I welded on the two new front floor supports and the 4 seat belt anchors / spreader plates. 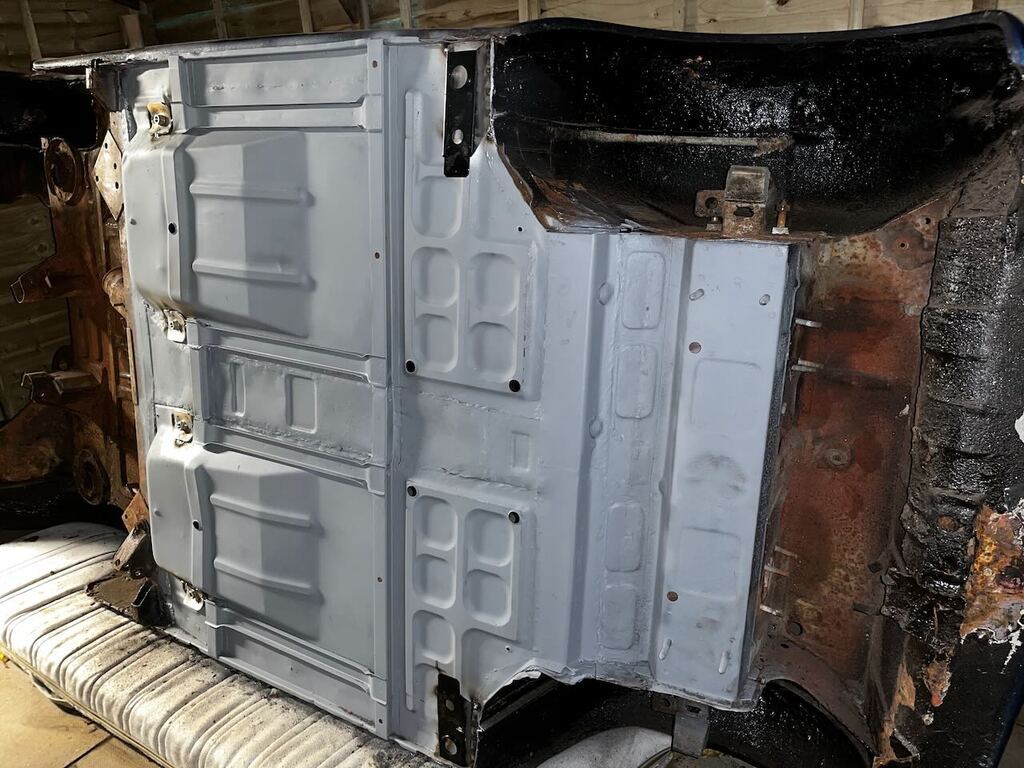 That brings us up to date and the end of the quick fire updates! |
| |
|
|
goldnrust
West Midlands
Minimalist
Posts: 1,887
|
|
Nov 15, 2021 23:05:46 GMT
|
I remember reading your thread shielsy68, 4 days is quick work, even with lots of off the shelf panels! I think mine is going to take a lot longer than that, haha. Thank you for the offer of the front inner panel. Presuming we're talking about the same section, I hate to say it but I had a quick look and they're £50 new from various suppliers currently? Anyway, I'm a way off being ready for front end panels yet I think! I've got to pace myself with spending on this one a bit, and so I'm starting with the underside and then moving on the rear, just buying bits and and when I need them. I will tackle the front last I think. |
| |
|
|
glenanderson
Club Retro Rides Member
Posts: 4,353
Club RR Member Number: 64
|
|
|
|
|
Ok. I’m in.
A mate of mine had a K reg one of these in the mid/late 80s. It was horribly rotten even then. When it had finally deteriorated to the point that the teenage bodgers we were back then could no longer even get it through a “friendly” MoT I bought it off him for £20 and swapped it with another friend for a Beetle gearbox. At the time, I was pretty pleased with myself at my wheeling and dealing. If I’m honest, it was probably in about the same condition as yours is now, so quite salvageable given the time, skills and funds.
Be really interesting to follow your progress. Like you I have a weakness for tiny economy “peoples’ cars”.
|
| |
My worst worry about dying is my wife selling my stuff for what I told her it cost...
|
|
|
|
|
|
|
|
Great project. There’s much to be said for compact cars when it comes to restoration; probably just as much work and expense as a bigger car, but at least you don’t need a warehouse in which to work.👍🏻
|
| |
|
|
|
|
|
|
|
Cool! A '65, so that makes it a very early F. I've been following your posts, great to see this car went to somebody who will do right by it.  don't worry about it being partially disassembled. Everything is really straight forward, and parts availability is excellent. Get a Haynes manual for it, and that will tell you everything you need to know. And/or P/M me if you need to ( I've had a few...  ) |
| |
|
|
|
|
|
|
|
|
|
|
I do love a good resto,
In for the long haul,
Nigel
|
| |
BMW E39 525i Sport
BMW E46 320d Sport Touring (now sold on.)
BMW E30 325 Touring (now sold on.)
BMW E30 320 Cabriolet (Project car - currently for sale.)
|
|
|
|
|
|
|
Great choice and hello from 'cross the pond (the little pond to your east ;-)) 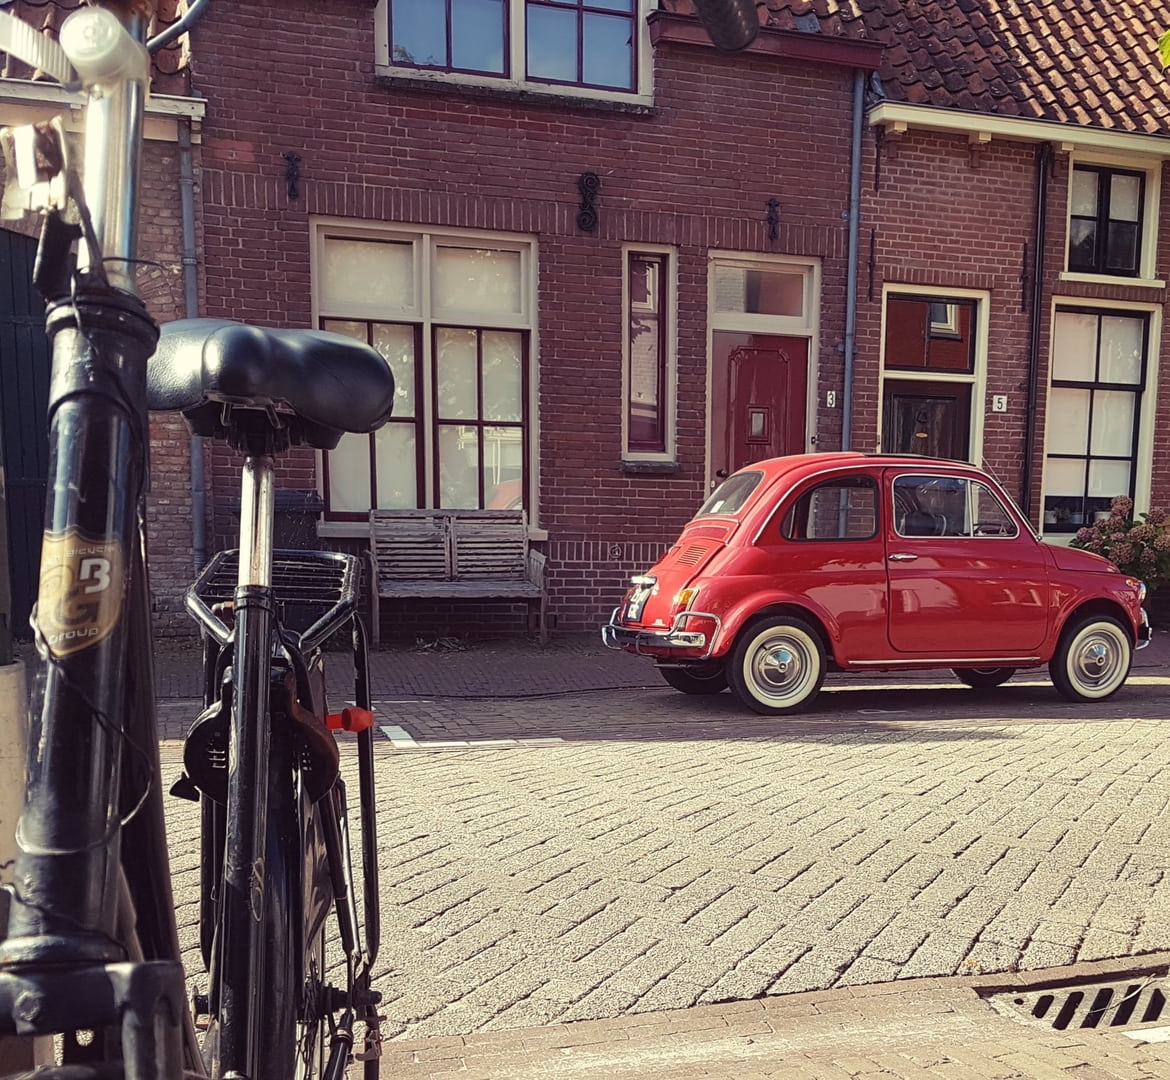 Very versatile cars!  |
| |
|
|
tofufi
South West
Posts: 1,462
|
|
|
|
Great stuff. I have always loved these after doing a bit of welding to a neighbour's one more than 15 years ago - same colour as yours, and a lovely thing to drive. Bookmarked  |
| |
|
|
|
|
|
Nov 16, 2021 18:41:37 GMT
|
|
Not to sway you into tuning it or anything, but this is well worth your time. There are subtitles on it, so you don't have to know Italian....
|
| |
|
|
goldnrust
West Midlands
Minimalist
Posts: 1,887
|
|
Nov 16, 2021 22:54:20 GMT
|
Like all cars of a certain age, I'm sure many that were much better than this one were scrapped glenanderson. Nowadays the availability of panels, and their affordability, means that much worse examples than mine get saved. You could pretty much build a shell from scratch with the panels available if you wanted! After the years of working on the Daimler, how small and light all the parts are for this is certainly an added bonus etypephil! But you're right that there's going to be nearly as much work in this. I'm not even going to save on time sanding bodywork, as although the outside is much smaller than the Daimler, I've got to paint a lot of the inside of this car also as it's exposed metal! It is indeed one of the earliest Fs metalshapes, it's got the 8 bolt doors which signify it as the first production run. It came with a well thumbed Haynes manual, and I have been reading online about these for years so I've a fair idea of what I'm looking at. I'm sure there will be questions though as time goes by, so I may well end up dropping you a message or two  I think long haul is probably her right phrase Alpina99. I'm a little more time poor than I once was. Things will move in fits and starts, but overall I'm not expecting it to run at the same pace as the Daimler build did. That's a lovely looking example sebastiaan. I'm do hear they're meant to be a lot of fun to drive tofufi. I've had a passenger ride in one, but never actually driven one. My first experience of it will be when this one is back on the road! It won't take much to sway me into tuning horrido, but to start with I'd like to feel how it was meant to be when it was new, then we'll go from there... I've already watched that Davide Cirone clip, it was a good watch. It shows the wealth of modifications that are available for these little cars, the car he ends up with is a world away from the standard 500 but also still keeps the spirit I think. I think it's fair to say there's very little Fiat 500 content on YouTube that I haven't watched sometime in the last few years of thinking 'maybe one day I'll get a 500'.  |
| |
Last Edit: Nov 16, 2021 22:56:32 GMT by goldnrust
|
|
Mark
Club Retro Rides Member
Posts: 2,097
|
|
Nov 16, 2021 23:02:05 GMT
|
|
Cool project, really like 500s - excited to see how you get on!
|
| |
|
|
|
|
|
Nov 17, 2021 20:27:48 GMT
|
|
Won't the mattress be a fire risk when welding or become saturated in the winter weather? I am planning to use old tyres when I roll my Standard Ten.
|
| |
|
|
|
|
|
Nov 18, 2021 20:37:49 GMT
|
|
Nice one Goldnrust, I love these cars. I'll be watching with interest. Shame the British winter is drawing closer, but hopefully there are lots of inside jobs to be done too.
|
| |
|
|
goldnrust
West Midlands
Minimalist
Posts: 1,887
|
|
Nov 18, 2021 21:30:26 GMT
|
Thanks Mark. I think it's fair to say I've thoroughly tested the fire retardancy of the mattress daddyshortlegs  So far it seems its like its doing a good job! There are plenty of inside jobs to be doing when the weather gets really bad, voucherboy, but to be honest I'd rather be doing the metalwork in the cold than in the summer. Being wrapped up in overalls and PPE on a hot day is not pleasant! My extended carport/shelter seems to be doing a good job, and is keeping me out of the rain/wind while working so thats great. I have been making some more progress in the past few days. While the car is on it's side the next problem area to deal with is the rear spring mounts. 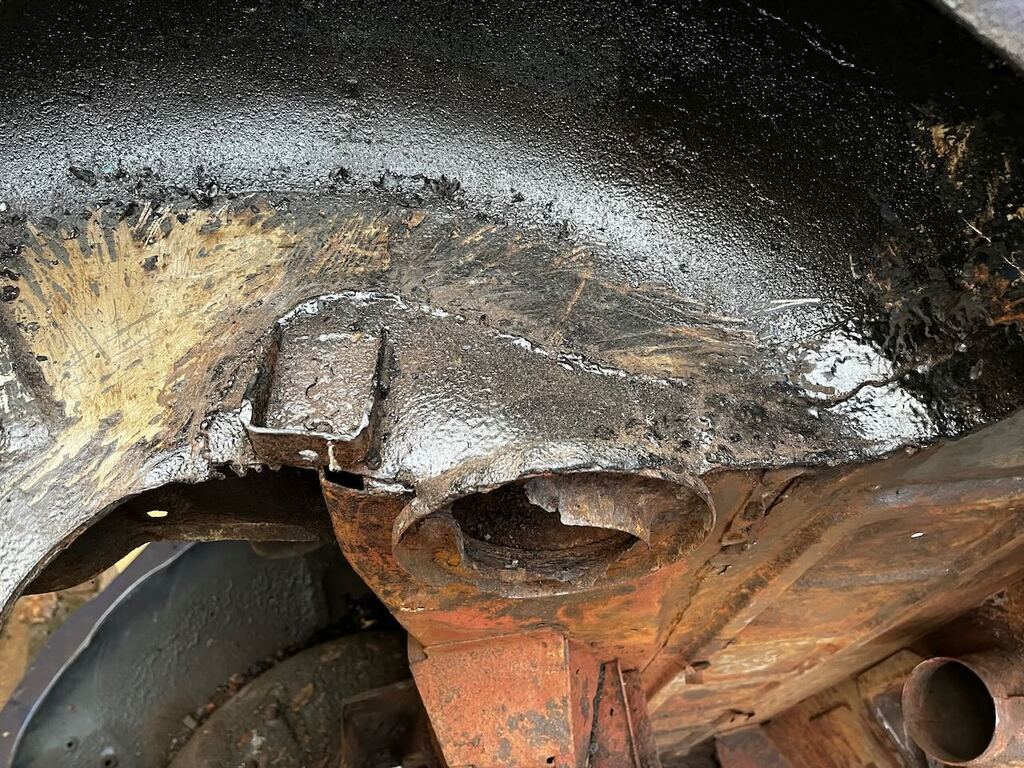 As you can see there's a nice ugly MOT patch over the top (not very well welded as large chunks of the weld just peeled back when I went at it with a chisel), the bump stop bracket appears to be a couple of inches away from where it should be and the actual spring platform itself is rotten through. So out with the grinder! 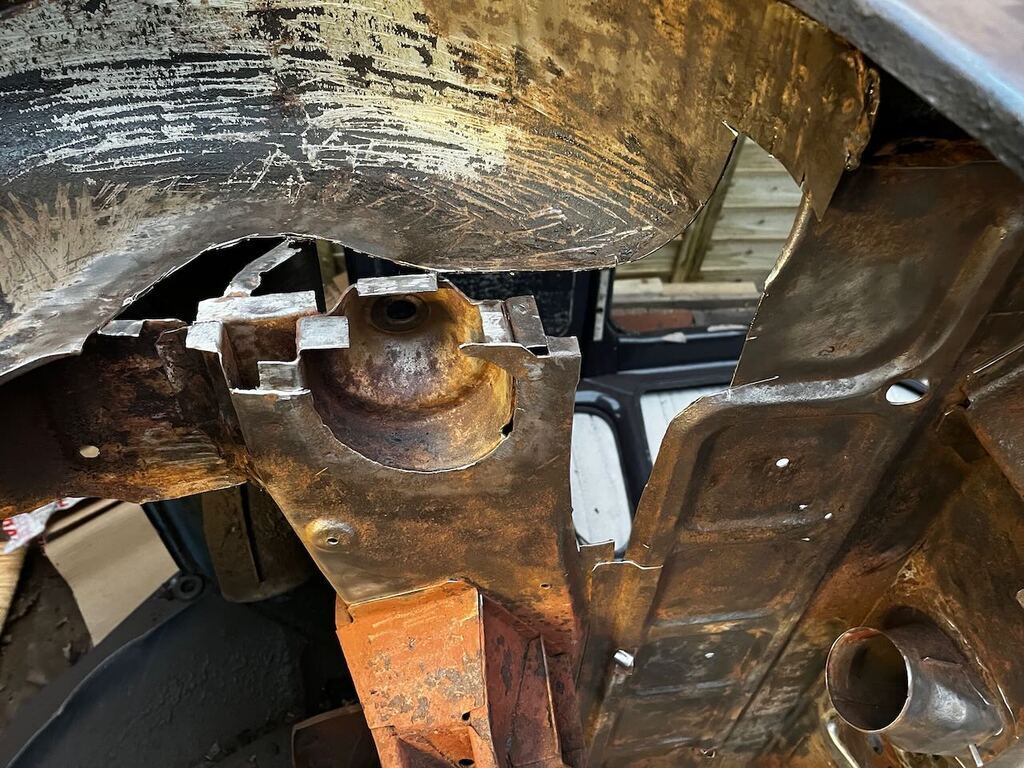 I ended up chasing more of the rear seat pan back than expected, but its a simple enough repair. You can now also see another reason why the original patch was poor, there's lots of layers of the inner structure of that rear crossmember that should be welded to the wheel arch, but were in fact just welded to the rusty remains of the original arch under the patch and as such were adding no strength. Now I could see what I needed to rebuild, lots of cardboard templates was the next stage. 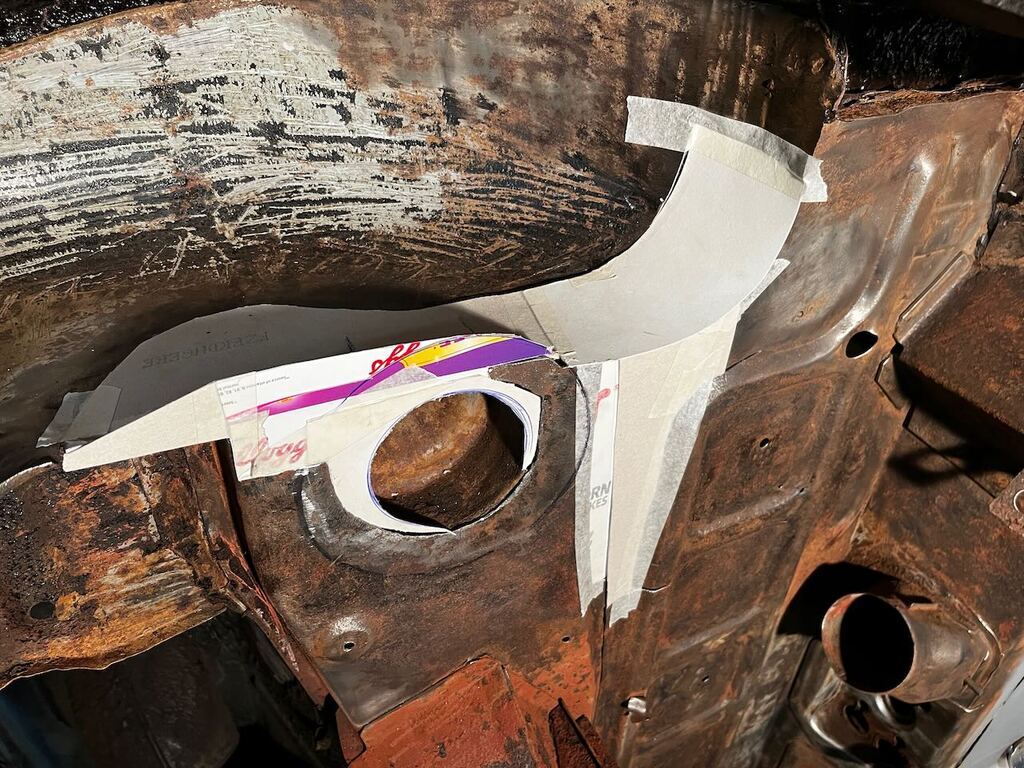 The old bump stop bracket wasn't salvageable, and given that it's a pretty simple construction, I decided to just fold up some replacements. Was a nice bit of Binky style bracketry distraction for a bit! 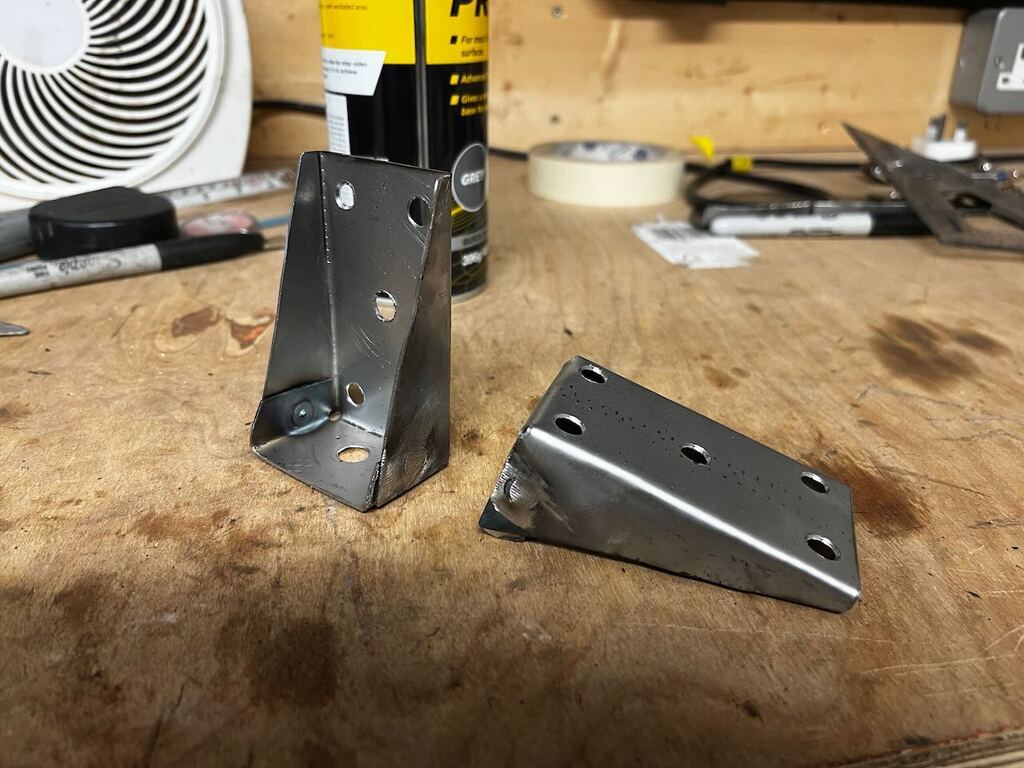 I then got all of the card templates transferred to steel, cut out, drilled for plug welds and given a coat of weld through primer. You can see just how many plug weld points there are in that wheel arch patch! Should be back to full factory strength in that corner. 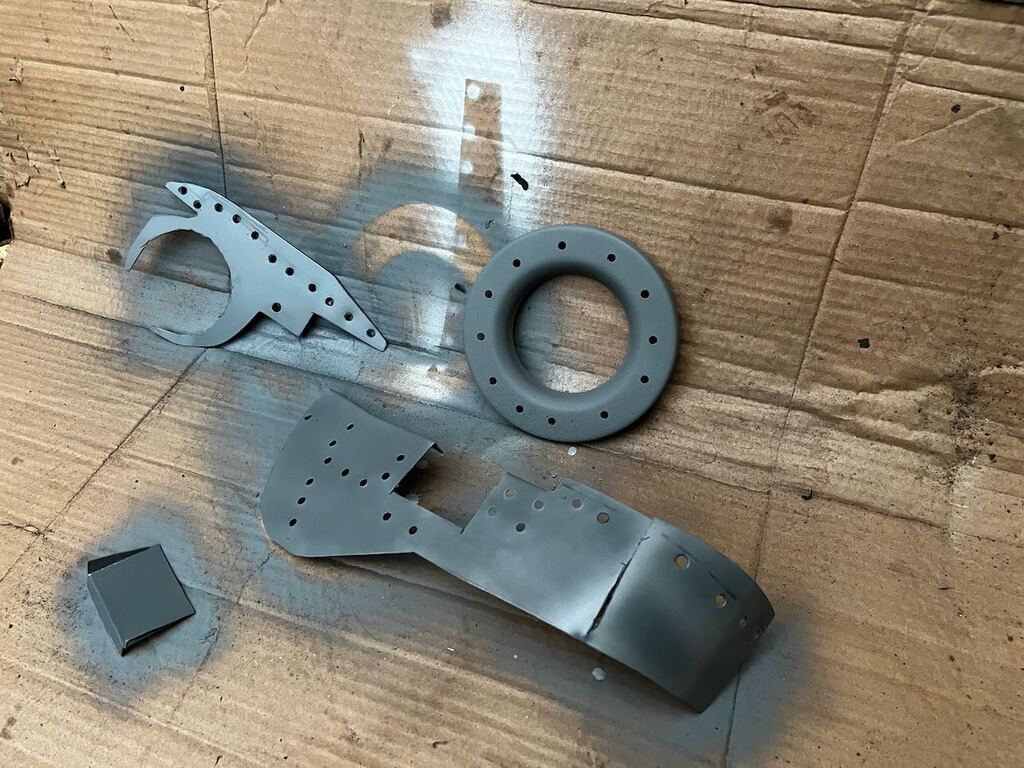 Lots of welding later, and thats another good chunk of the underbody welding ticked off. 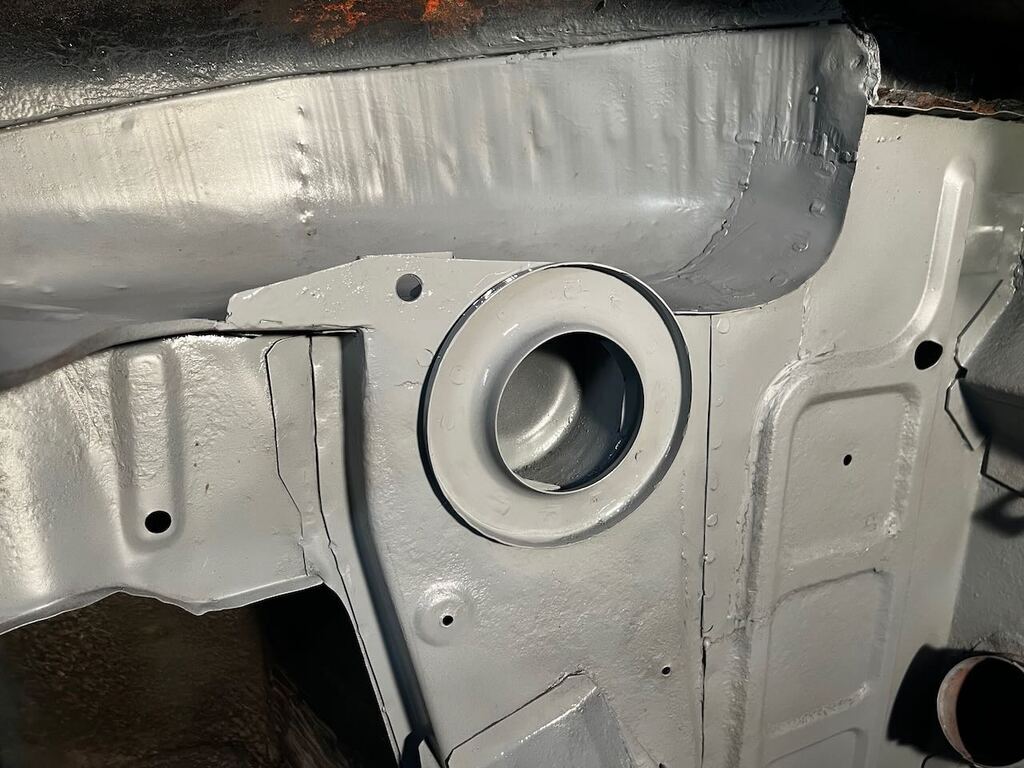 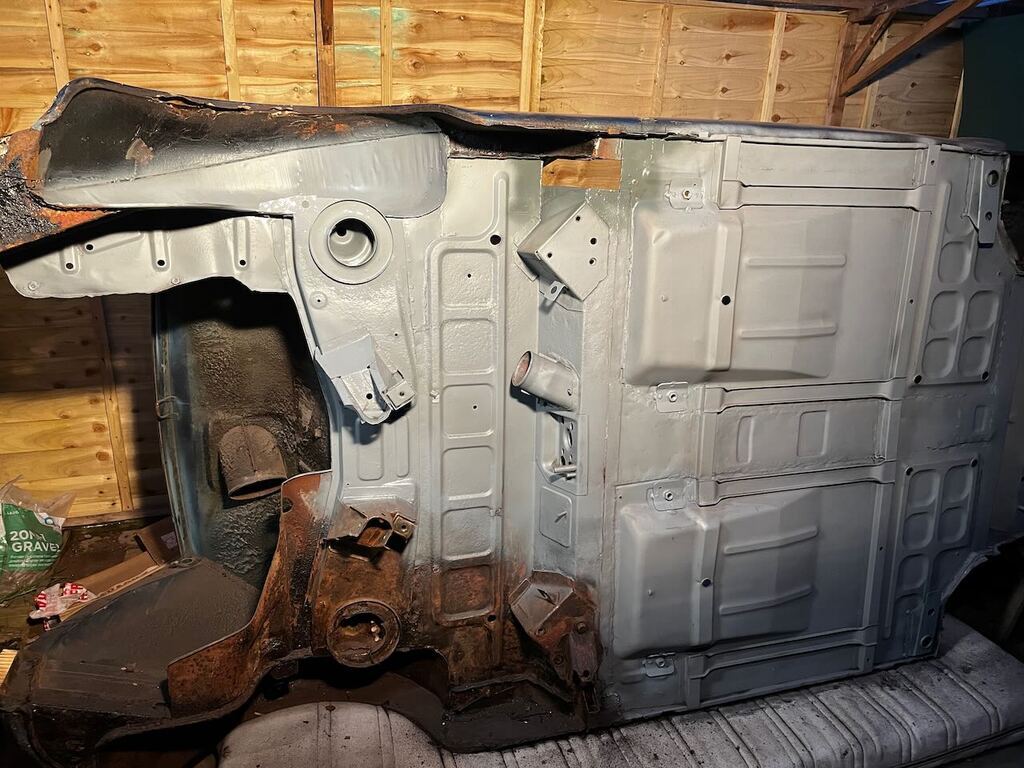 In the last photo you can see I've started cutting out for the jacking point repair, which is the last bit of underfloor work on this side of the car. The passengers side rear spring mount and jacking point needs all the same work, but I think I need to roll the car on to the other side to get better access to it. I've also got some repairs to do in the front wheel arches near the spring mount/cross member, I'm trying to work out if I'm best tackling them with the car on it's side still, or better waiting till its the right way up and doing them when I deal with the rest of the front end metal work. |
| |
Last Edit: Nov 18, 2021 21:35:51 GMT by goldnrust
|
|
|
|
|
|
|
|
Nice work, and quite speedy too.
|
| |
|
|
|
|


