|
|
|
Jan 27, 2022 11:49:52 GMT
|
I see the ZF 4hp22 is a popular conversion. Obviously the overdrive is good, but what else would it have that means it 'transforms' the car like people say? Is it the shift points and part throttle downshifts? Is the BW35 efficient enough apart from that? I'm watching your supercharger conversion with baited breath - I plan to keep mine as original as possible, but I've got the angel and devil hovering around my ears and the devil will have a pretty convincing argument if yours' works out I converted 2 Rpver P5B from BW35 to 4ZF HP22 and its a nice mod. With the BW35, the Rover did almost 4000 rev at 120kmhr which does not feel good and with the 4ZF this was reduced to 2500 which is nice. Shifts are also better on a 4ZF box. There are few ZF boxes with a mechanical speedo. It is a lot of work, also the gear shift mechanism as i used the P5B shifter and you need to adjust the kick down cable as the strokes are different. I also fitted a seperate oil cooler. In the end it is a nice conversion but not cheap. I reckon in parts its Euro 2500,- - 3000Peter |
| |
Last Edit: Jan 27, 2022 11:51:31 GMT by petervdv
|
|
|
|
|
|
|
Jan 27, 2022 22:52:18 GMT
|
Your build thread has been a source of inspiration, really nice work and is a bit of peer pressure to keep standards high! Were they originally body colour underneath? Also, while you're here, I'm a bit puzzled about how to weld on the baffles - are they just tacked every inch or so and seam sealed? How did you do yours? My heart sank when I saw the complicated 3D shape of them, but amazingly they fit like a glove. Mine came in the boot of the car in amongst the spares, still with the Martin Robey stickers, I've just checked the price and am feeling like I've dodged a bullet! I believe they were originally undersealed but i'm not entirely sure. The engine compartment on both of mine was some form of stone chip painted over. At the end of the day you should do what suits what you want and good coat of a modern underseal type product would be fine, its the top thats important :-)
The baffles just weld along the seam to the car and to the lip on the wing, the curves section that touches the curve of the wing should have a slight gap and then just be seam sealed with a flexible product. The baffles are only to keep the crud out so weld spacing doesn't need to be to the same spacings as the structural part of the cars, every 2-3" would be more than enough.
One tip is that an electric power file with the zirconia belts is great for getting into the corners. I use a black and decker KA900E with belts from e-bay and its brilliant for things like grinding the welds on the baffles.
|
| |
|
|
|
|
|
Jan 30, 2022 20:53:12 GMT
|
I've always thought of a luxury car as having 'effortless' performance and so I'm keen to have the Daimler running strong at normal cruising rpm. I see the ZF 4hp22 is a popular conversion. Obviously the overdrive is good, but what else would it have that means it 'transforms' the car like people say? Is it the shift points and part throttle downshifts? Is the BW35 efficient enough apart from that? In standard form the Daimler definitely does the effortless driving thing, it’s very much part the charm of the car, but it’s just at a noticeably slower speed than a more modern car would be. It took me some time to understand that, and ultimately I was a little disappointed to begin with till I understood the car and viewed it with perspective as a 1960s luxury car, rather than comparing it to 90s luxury cars I was more used to. ... Like how with an old car you have to learn how to get the best out of the engine, whereas a more modern one ‘just works’ and won’t grumble if you give it too much throttle at low revs or from cold etc, I feel the same can be said for the BW35. I feel like I’ve learnt to drive in a way that makes it shift when and where I want it to, and that’s part of the classic car experience. I must caveat this by saying that my own BW35 has been modified with the D-2-1 valve body, so I can’t guarantee some of my issues aren’t as a result of changes to the valving made as part of that. Thanks for this - I think part of my anxiety came from your luke-warm review of yours once you had it up and running. My expectations of straight line speed are low - the old autos always flop unhappily between gears and desperately need overdrive, so if it's just a case of learning to drive the machine, and it having leisurely performance then that's fine, as you say, it's all part of the charm. I found this contemporary review which gives me some hope, its not glowing but seems fair. The only problem is that the author is comparing it to his editorial Morris 1000, not an x300 Jag or 600nm Land Rover! www.motorsportmagazine.com/archive/article/july-1964/9/two-jaguar-productswww.motorsportmagazine.com/archive/article/july-1964/9/two-jaguar-products |
| |
1964 Daimler 2.5 V8 (project)
2015 Disco 4 SDV6
|
|
|
|
|
|
|
for the cavity wax, yes dinatrol or something similar. I have a 4HP22 in my range rover, it is great, I usually hate autos but it works far better than most of the ones I have driven in the past, especially in something that is more of a cruiser than sports car. I wonder what you could get with some better inlet manifolds and fuel injection, many modern V8's have long tracts with log pleniums to improve low to middle range torque. I haven't had a decent look at it yet but I think I remember reading that the inlet manifold was one of the main restrictions on a stock 2.5 V8. When I was playing with that small block chev all those years ago I tried different manifolds (Single plane vs Dual Plane) and it was amazing how much they could change the character of the engine, and so depending how I go with it, a manifold change might be just the thing to fatten up the torque curve, especially with an EFI system. |
| |
1964 Daimler 2.5 V8 (project)
2015 Disco 4 SDV6
|
|
|
|
|
|
|
I see the ZF 4hp22 is a popular conversion. Obviously the overdrive is good, but what else would it have that means it 'transforms' the car like people say? Is it the shift points and part throttle downshifts? Is the BW35 efficient enough apart from that? I'm watching your supercharger conversion with baited breath - I plan to keep mine as original as possible, but I've got the angel and devil hovering around my ears and the devil will have a pretty convincing argument if yours' works out I converted 2 Rpver P5B from BW35 to 4ZF HP22 and its a nice mod. With the BW35, the Rover did almost 4000 rev at 120kmhr which does not feel good and with the 4ZF this was reduced to 2500 which is nice. Shifts are also better on a 4ZF box. There are few ZF boxes with a mechanical speedo. It is a lot of work, also the gear shift mechanism as i used the P5B shifter and you need to adjust the kick down cable as the strokes are different. I also fitted a seperate oil cooler. In the end it is a nice conversion but not cheap. I reckon in parts its Euro 2500,- - 3000Peter Thanks for this, really good to get the feedback that it's worthwhile. They weren't a common box down here in NZ and so it'll take a bit more effort to find one, but I'll keep my eye out and hopefully something will come up which I can stash away in case it's needed. |
| |
1964 Daimler 2.5 V8 (project)
2015 Disco 4 SDV6
|
|
|
|
|
|
|
I had a rare few minutes spare today so took the opportunity to try to make some progress on the Daimler. I'd noticed some corrosion underneath the side light pods, so attacked them with the wire wheel on the grinder to see a bit more what I was dealing with. 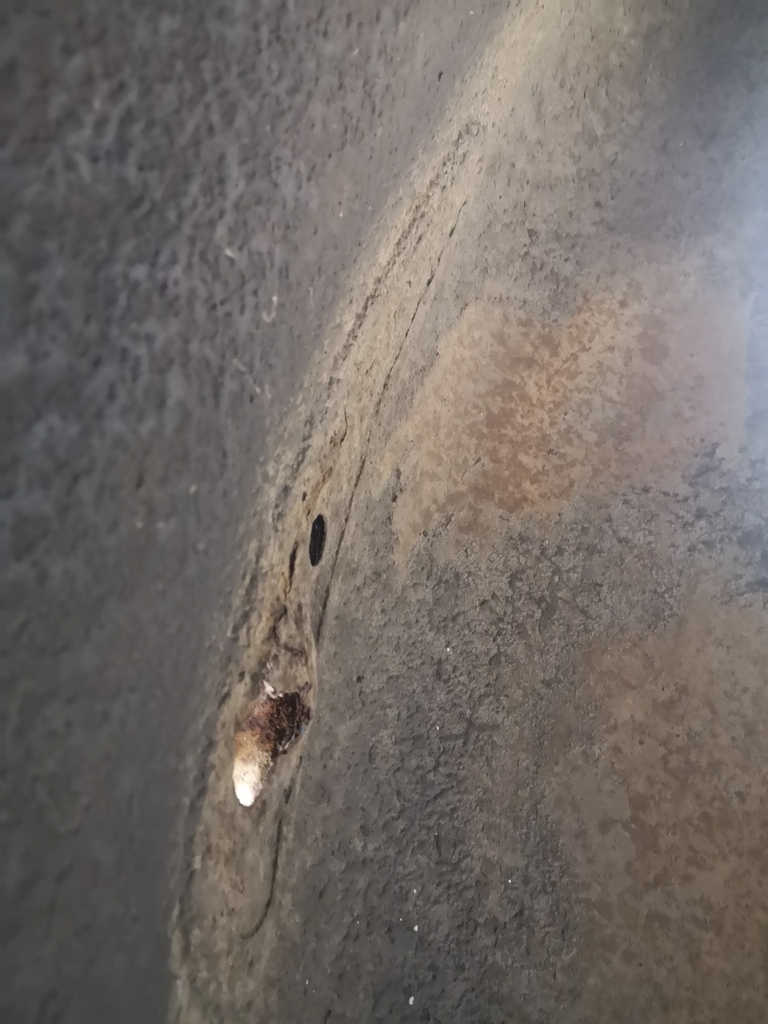 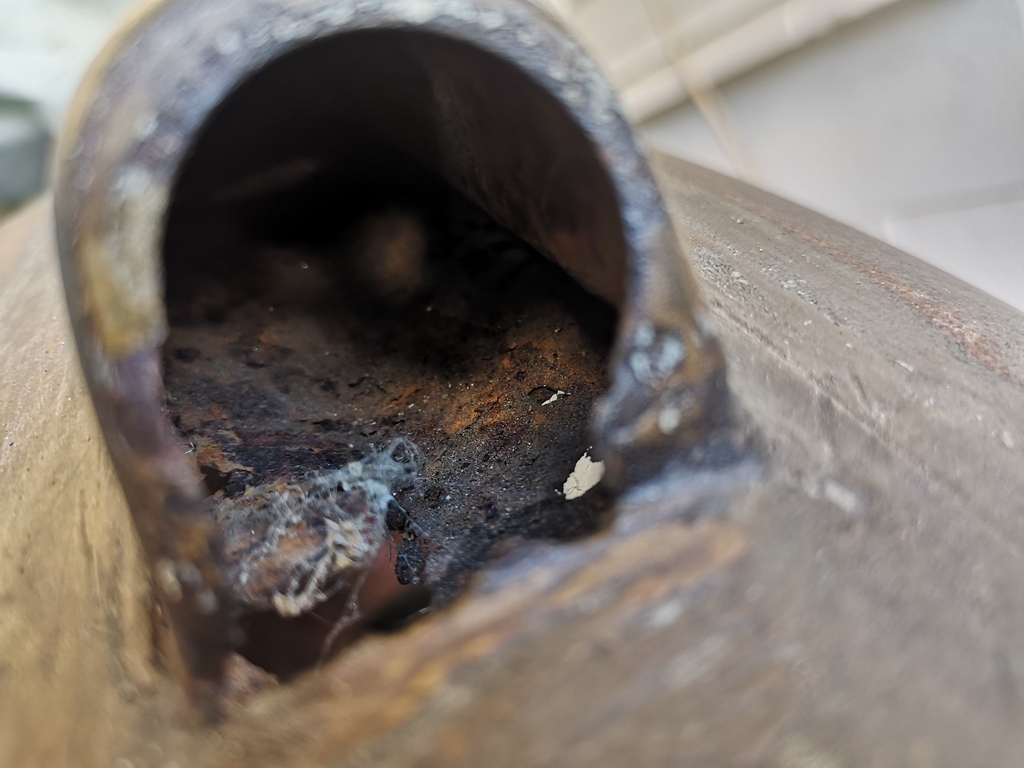 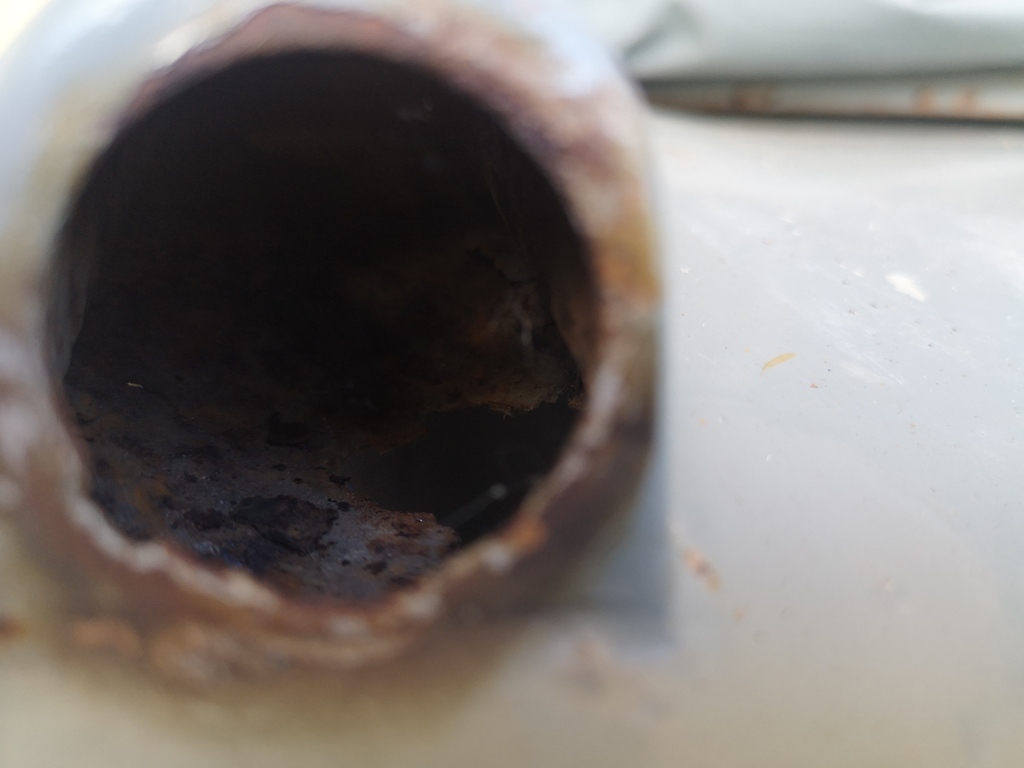 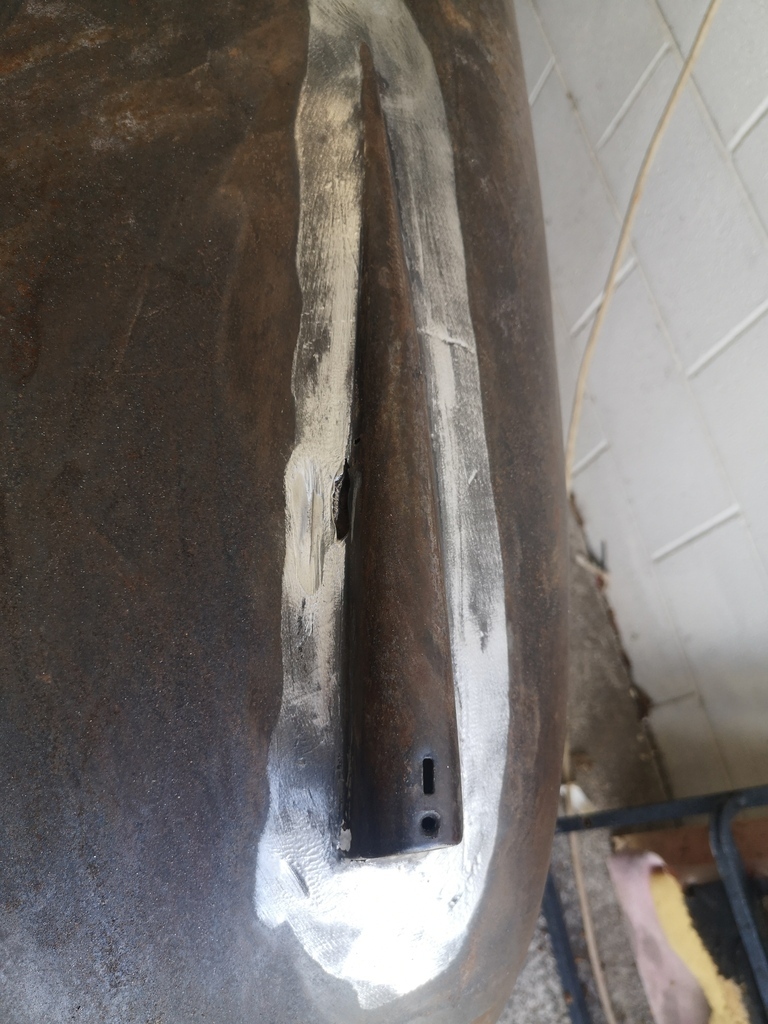 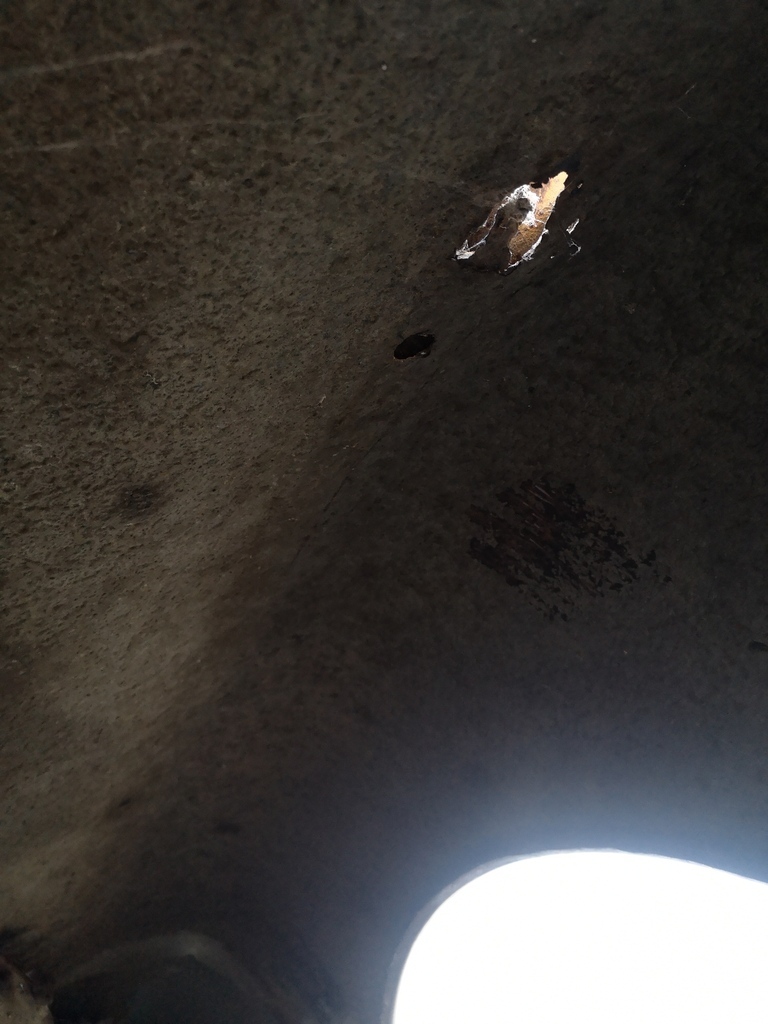 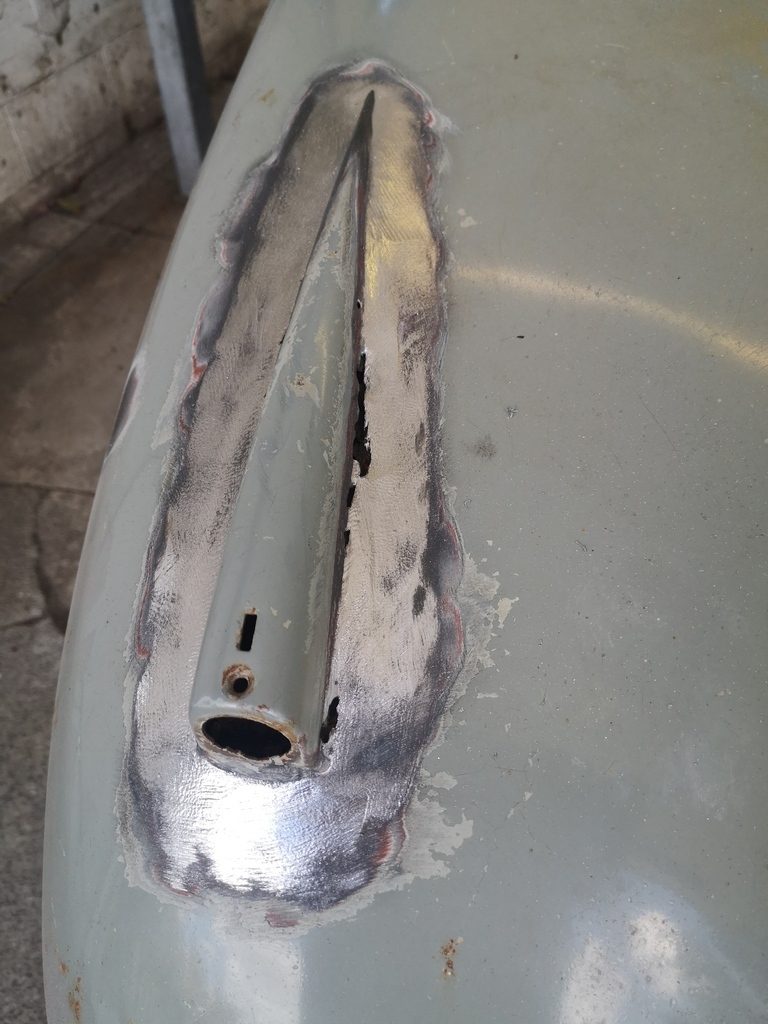 Can't put a paint job on top of that! And I don't think I'll get away without removing the pods. My plan is to dig out the lead, carefully unpick the pods (hopefully!), tidy them up with some fresh steel and then puddle weld them back in through the spot weld holes. I'm concerned about preventing them from rusting again, so plenty of weld through primer, seam sealer and cavity wax will be the go. Any tips on lead loading them afterwards? I can imagine the weld through primer sweating out of the seam and upsetting the lead - and I'm also a bit paranoid about the flux causing future corrosion problems. I believe this was a common repair, but I'm not finding a lot of info and want to tread carefully - any input greatly appreciated |
| |
1964 Daimler 2.5 V8 (project)
2015 Disco 4 SDV6
|
|
|
|
|
|
|
|
Could you bond them in, modern 2 part panel adhesives would be more than capable for something unstressed like that with the added advantage of no flux and burnt paint to deal with.
|
| |
|
|
|
|
|
|
|
|
Or use Upol Fibre Fill, perhaps...
|
| |
|
|
|
|
|
|
|
|
Personally, I'd delete them and convert it to look like a Mk1 Jag.
|
| |
|
|
goldnrust
West Midlands
Minimalist
Posts: 1,887
|
|
|
|
|
As far as I understand it, the lead was just an old fashioned approach to filler. So if it was me, I’d just use normal filler. It need only be 1mm thick ( or as thick as the steel sheet that the light unit is formed from).
|
| |
|
|
|
|
|
|
|
|
|
|
I removed these on both my MK2's and they are easy to remove, just melt the lead out and then drill out the spotwelds. Once removed you can then repair the pods as necessary, clean out the rust and weld them back in.
On the first on I did I used body filler and I found that water got in and I have some cracking along the side of one to deal with, on the latest one I used lead which was really easy to do and i'm hoping will last a lot longer.
|
| |
|
|
|
|
|
|
|
Could you bond them in, modern 2 part panel adhesives would be more than capable for something unstressed like that with the added advantage of no flux and burnt paint to deal with. That's an excellent idea - can coat the metal properly and not burn half of it off with the welding. Any idea if the Panelbond flexes at all? Just thinking about the filler coping with any possible movement. I'm keen to keep it as original as possible, with period techniques etc, but I'm not going to have it assembled by a surly 1960s British workforce, or lovingly re-create the oem rust traps, and so this adhesive might end up being just the thing. Thanks again! |
| |
1964 Daimler 2.5 V8 (project)
2015 Disco 4 SDV6
|
|
|
|
|
|
|
|
You would need one of the 2 part structural adhesives which dry rigid, they used to be epoxy based but I believe most are acrylic now.
I try to eliminate rust traps, I'm quite happy to replace a spot welded seam in a with a seam weld or a double skinned area with a single layer of thicker steel etc, at the end of the day spot welds and double skinning are only a compromise to make cars cheap to manufacture.
|
| |
|
|
|
|
|
|
|
I found myself with a bit of unexpected spare time today so got cracking and removed the lead loading from the worst of the pods. I couldn't see how the pods were constructed, there seemed to be two skins which isn't what I'd expected, and was a bit wary of just attacking them without knowing how they fitted together. I had another search for info and eventually came across some helpful pics by none other than homersimpson in his build thread which showed the Pod and the base as two separate items, which explained the extra skin I was seeing. 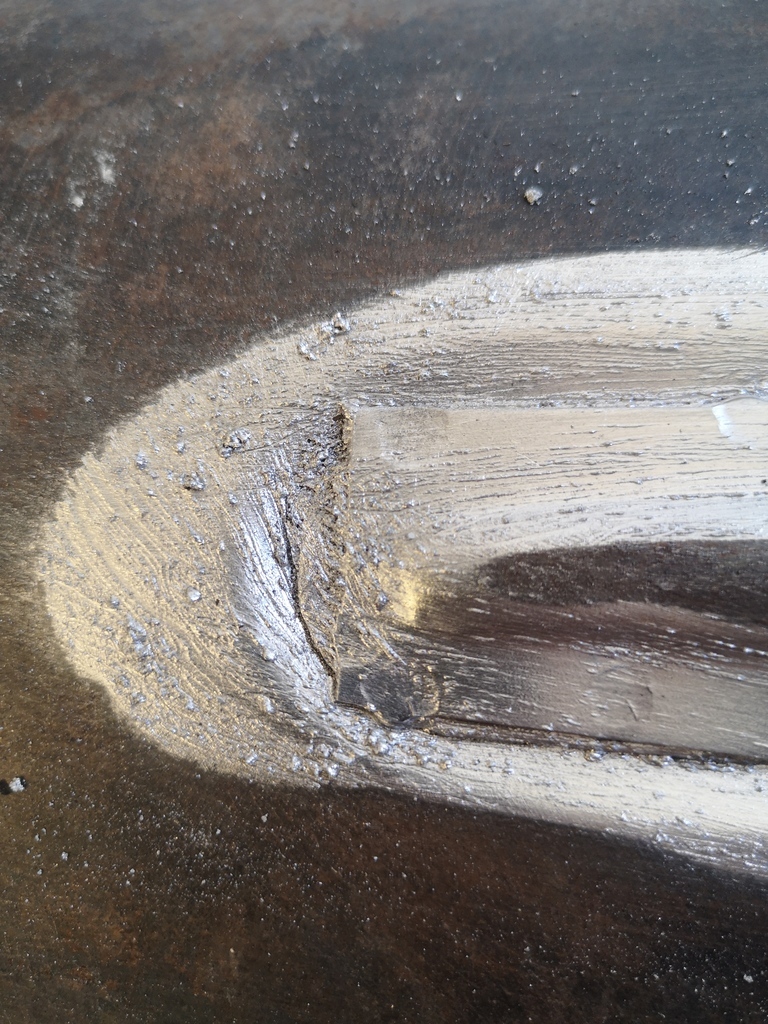 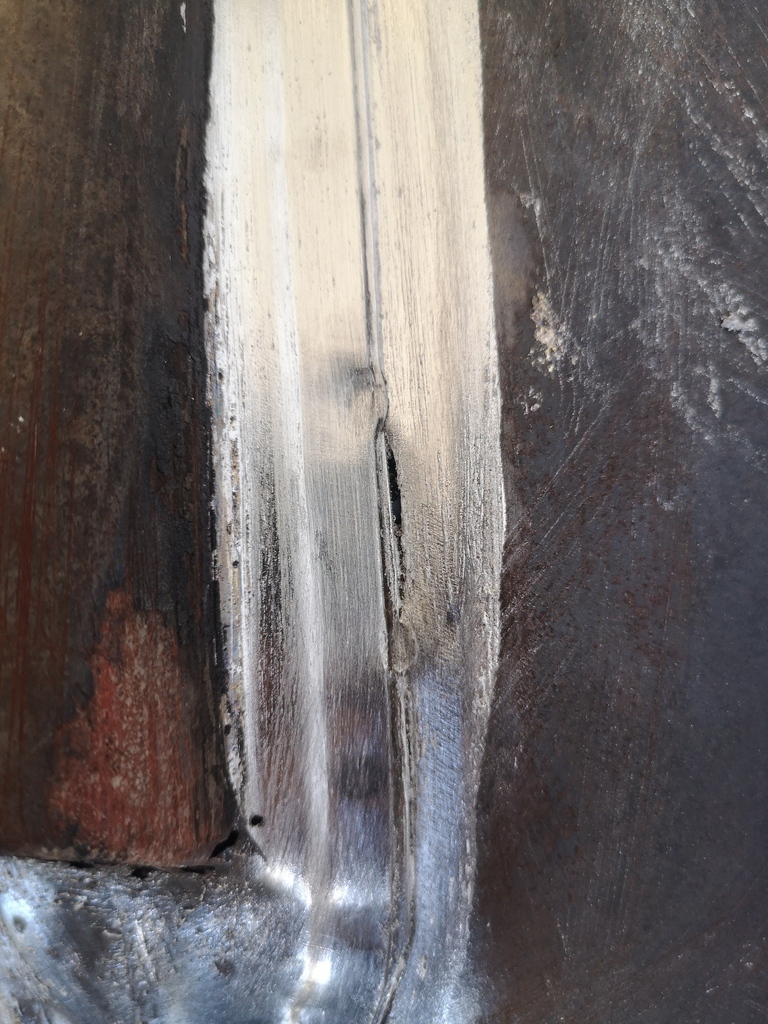 Emboldened by this info, I broke out the spot weld drill and carefully removed the Pod and base. As soon as I drilled the first spot weld and saw the rust between the layers I knew I had made the right choice to pull it off. 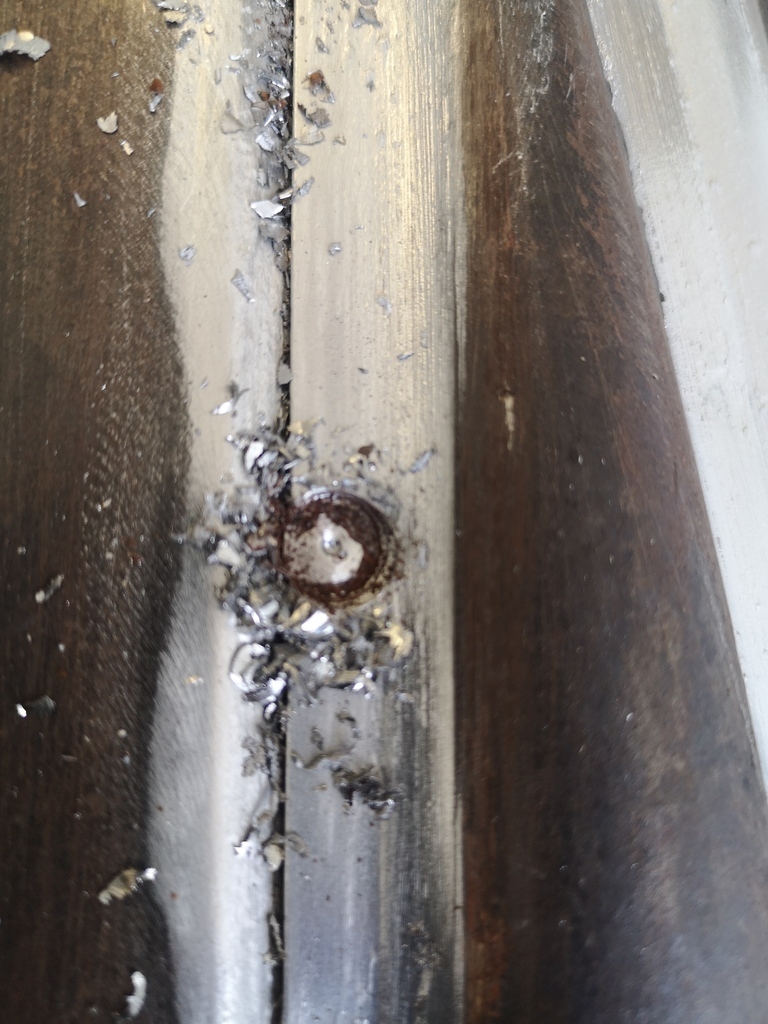 The good news is that it came apart nicely and the wing is in excellent shape, with only two over-drilled spot welds to tidy up. 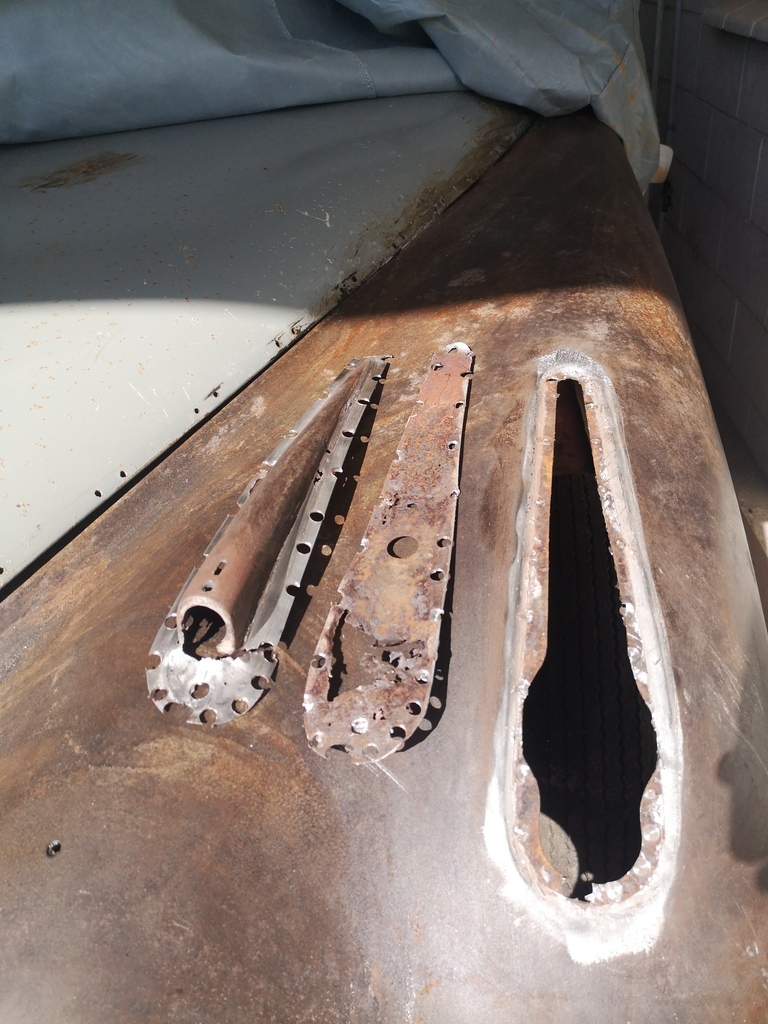 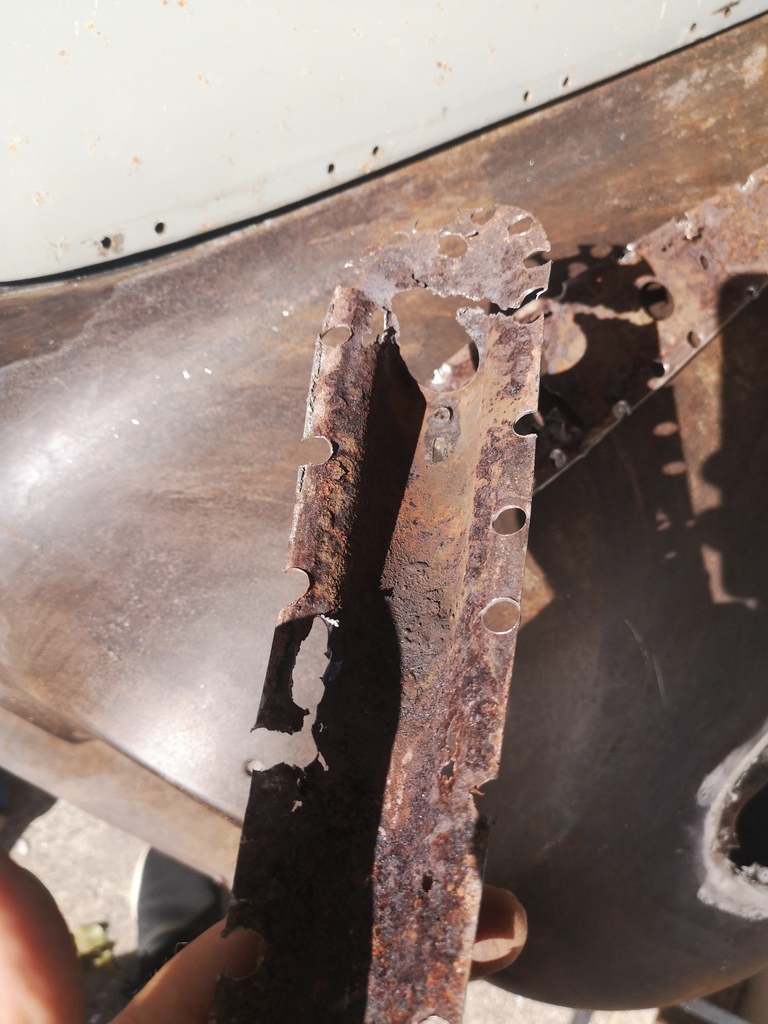 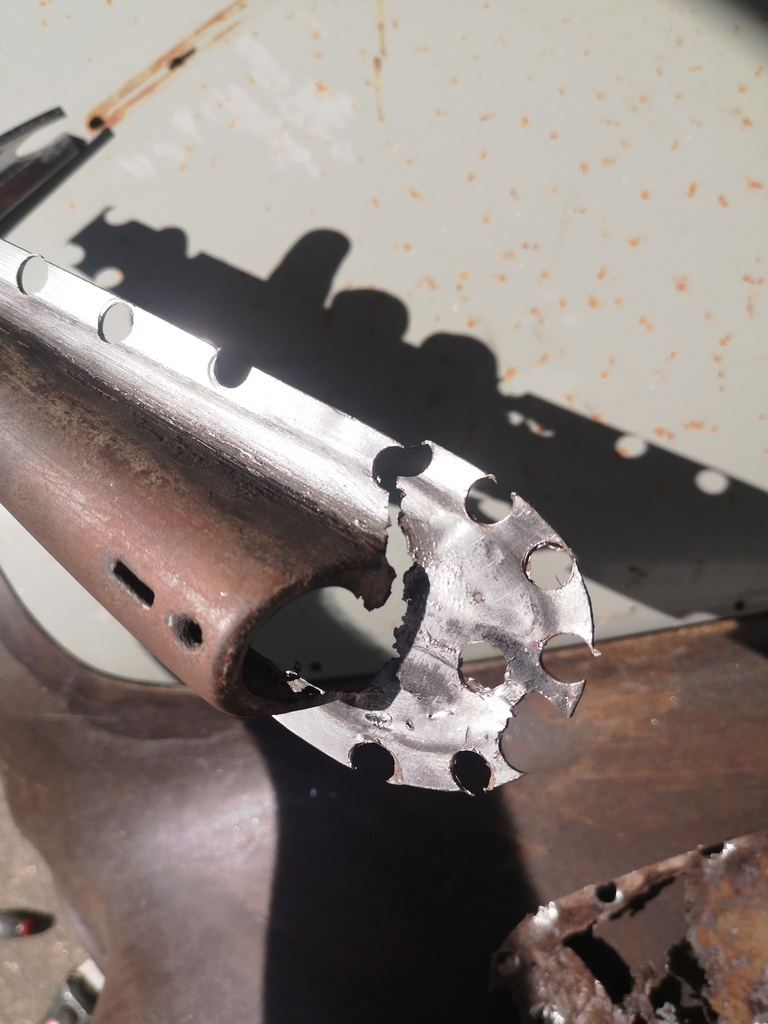 The bad news is that the Pod itself isn't looking too good, and I'm not sure that I can save it. Fingers crossed that 'Tetanus' (my parts car!) comes through with a usable one, otherwise I'll be looking at spending some more pennies with Martin Robey. Anyone know if the Martin Robey Pods fit well? and are a good match for the original ones? |
| |
1964 Daimler 2.5 V8 (project)
2015 Disco 4 SDV6
|
|
|
|
|
|
|
|
The pod looks savable to me, I repaired one on my first MK2 by removing the semicircular piece at the bottom and then grinding the face of the pod (where the light fits) so it was open.
I then got a piece of metal with a hole drilled in it the side of the side light and then cut this to fit before welding it around and grinding the edge up to form a nice 90 degree corner. Then I made a new semi circular piece for the base at the front and that was it.
Make sure you test the light in the hole before finishing to make sure it will all fit nicely at the end, I think there is a notch at the bottom that you will have to replicate with a small file.
The sandwich piece can be replaced with a flat piece but you need to beat a dish in it so that the sidelight can go in, I used a big socket for this and moved it around to create and oval while hitting it with a ball pein hammer.
It doesn't have to be perfect as you don't see one side and the other is under the wing anyway so functional is the order of the day (unless going for concourse!).
|
| |
|
|
|
|
|
Mar 10, 2022 13:27:10 GMT
|
|
I'd be tempted to bond them on with Sikaflex - it's flexible & can be painted over and will definitely make it waterproof.
|
| |
|
|
|
|
|
|
|
I removed these on both my MK2's and they are easy to remove, just melt the lead out and then drill out the spotwelds. Once removed you can then repair the pods as necessary, clean out the rust and weld them back in. On the first on I did I used body filler and I found that water got in and I have some cracking along the side of one to deal with, on the latest one I used lead which was really easy to do and i'm hoping will last a lot longer. I've spent too much time looking at this and am over-thinking it now. I am also a bit paranoid about the rust coming back. I don't know why I'm worried, it has done 60 years as is and could've gotten away leaving it a few more! On the car you did the lead loading, were you able to use weld-thru primer on the flanges of the wing, baseplate and pod? With the cracked filler, any idea what the filler was? The stuff with the fibres in it? or a finishing compound? |
| |
1964 Daimler 2.5 V8 (project)
2015 Disco 4 SDV6
|
|
|
|
|
|
|
The pod looks savable to me, I repaired one on my first MK2 by removing the semicircular piece at the bottom and then grinding the face of the pod (where the light fits) so it was open. I then got a piece of metal with a hole drilled in it the side of the side light and then cut this to fit before welding it around and grinding the edge up to form a nice 90 degree corner. Then I made a new semi circular piece for the base at the front and that was it. Make sure you test the light in the hole before finishing to make sure it will all fit nicely at the end, I think there is a notch at the bottom that you will have to replicate with a small file. The sandwich piece can be replaced with a flat piece but you need to beat a dish in it so that the sidelight can go in, I used a big socket for this and moved it around to create and oval while hitting it with a ball pein hammer. It doesn't have to be perfect as you don't see one side and the other is under the wing anyway so functional is the order of the day (unless going for concourse!). I've just seen what a replacement pod costs, so am suddenly a lot more positive about saving this one! This one needs a fiddly little repair and you did well to rebuild that front face and apron Miraculously both Pods on the parts car look pretty good, so if I can get those off neatly then I should be able to come up with 2 tidy ones out of 4, and hold onto the others as spares. |
| |
1964 Daimler 2.5 V8 (project)
2015 Disco 4 SDV6
|
|
|
|
|
Mar 14, 2022 19:06:53 GMT
|
I removed these on both my MK2's and they are easy to remove, just melt the lead out and then drill out the spotwelds. Once removed you can then repair the pods as necessary, clean out the rust and weld them back in. On the first on I did I used body filler and I found that water got in and I have some cracking along the side of one to deal with, on the latest one I used lead which was really easy to do and i'm hoping will last a lot longer. I've spent too much time looking at this and am over-thinking it now. I am also a bit paranoid about the rust coming back. I don't know why I'm worried, it has done 60 years as is and could've gotten away leaving it a few more! On the car you did the lead loading, were you able to use weld-thru primer on the flanges of the wing, baseplate and pod? With the cracked filler, any idea what the filler was? The stuff with the fibres in it? or a finishing compound? I used weld through primer on both cars and didn't have any issues with it, the filler I used was Upol Big Smooth Easy and I think its probably cracked because water got in when it lived outside for 12 months. I think Lead would have melted into any gaps in the seam and sealed it better, thats what i'm hoping anyway!
Just make sure the drain hole in the base plate is large enough, I think mine was too small and got clogged.
|
| |
|
|
|
|
|
|
|
There are a million jobs that need doing on this project and no obvious place to start, but I've got some welding coming up with those side pods and so thought I'd better wheel out the mig and get it sizzling nicely on some side projects before using it to attack the car. So I ordered some steel and made some noise with the chop saw, cutting out bits for a Rollover Jig (Rotisserie) and for a tonybmw home made bender. 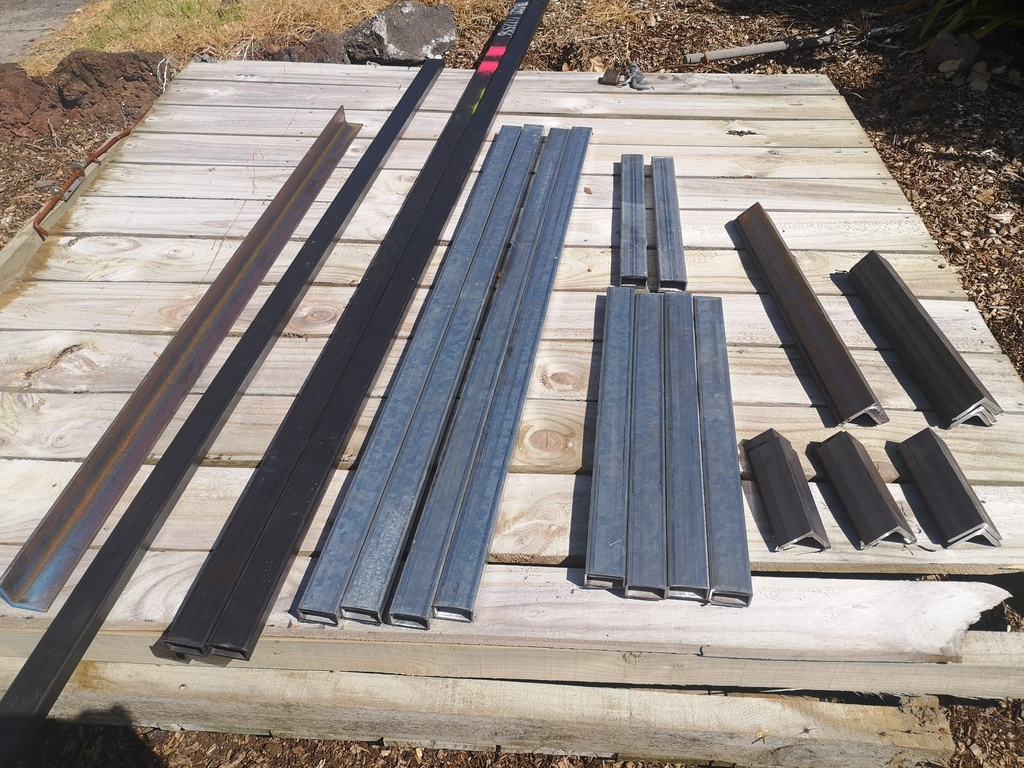 It's been a while since I did any welding and as it turns out, it's lucky I did start with these and not the car, as during the first few runs I had some teething issues to sort - the trigger was a bit glitchy so I dismantled the mig gun and removed a spider web from the contactor (really!), and had to replace the regulator which had a split diaphragm and was leaking all my expensive argosheild and messing with the flow rate. I also got a much needed slap from the welding gods for trying to cut corners, welding pre-galv steel in the wind and the dark and with it balanced on my knee, thinking I was a special case and would get away with it - I didn't, and got a couple of porous, wobbly looking welds to show for it, and so am glad I learned my lesson somewhere that wasn't the Daimler. Not that I haven't learned this lesson plenty of times before, but evidently needed a refresher  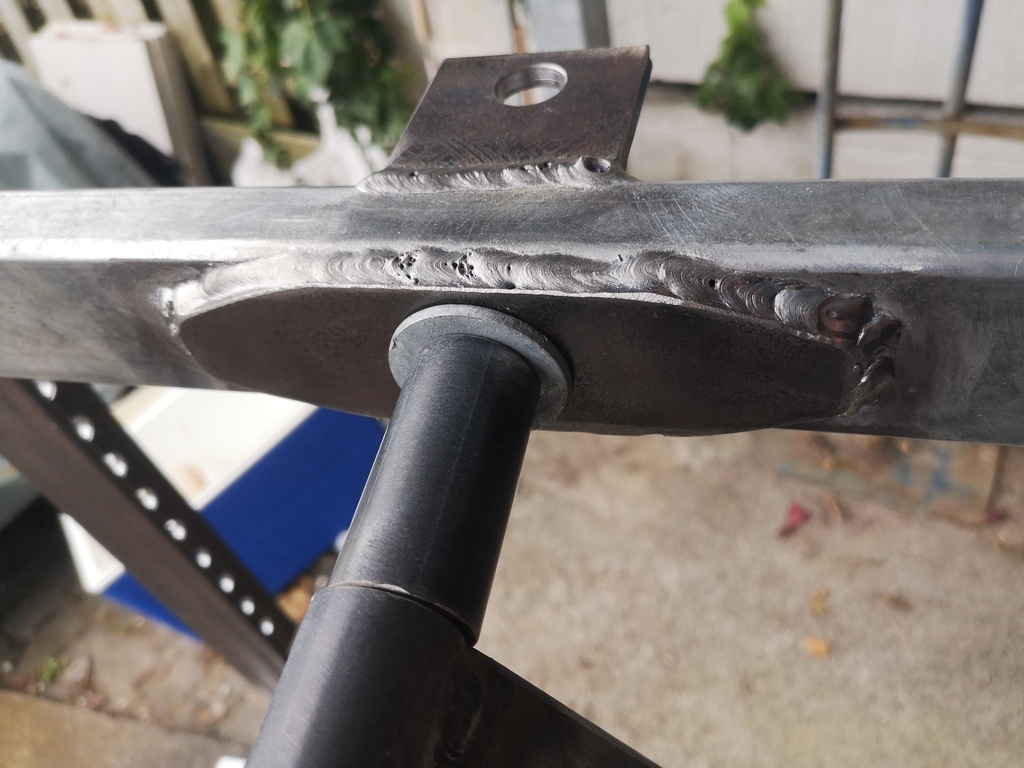 So now I've got my rollover jig all ready to go (thanks again homersimpson for the measurements), next step is to empty the car out (currently stacked full of spares), get it on the jig and then take a look underneath. 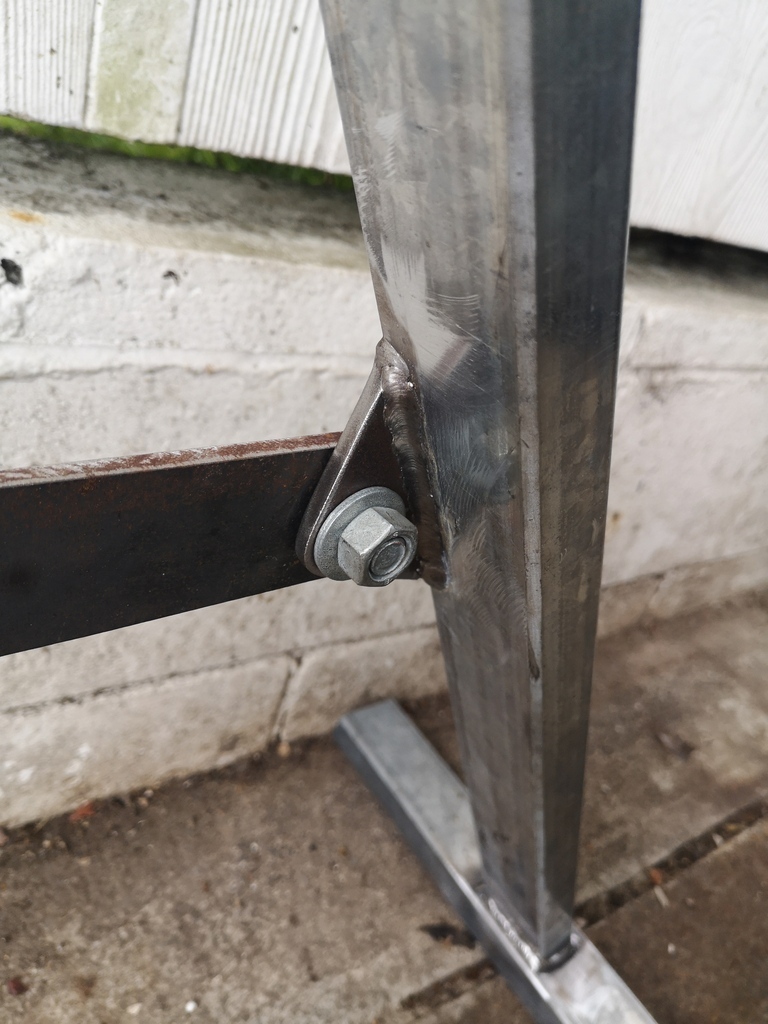 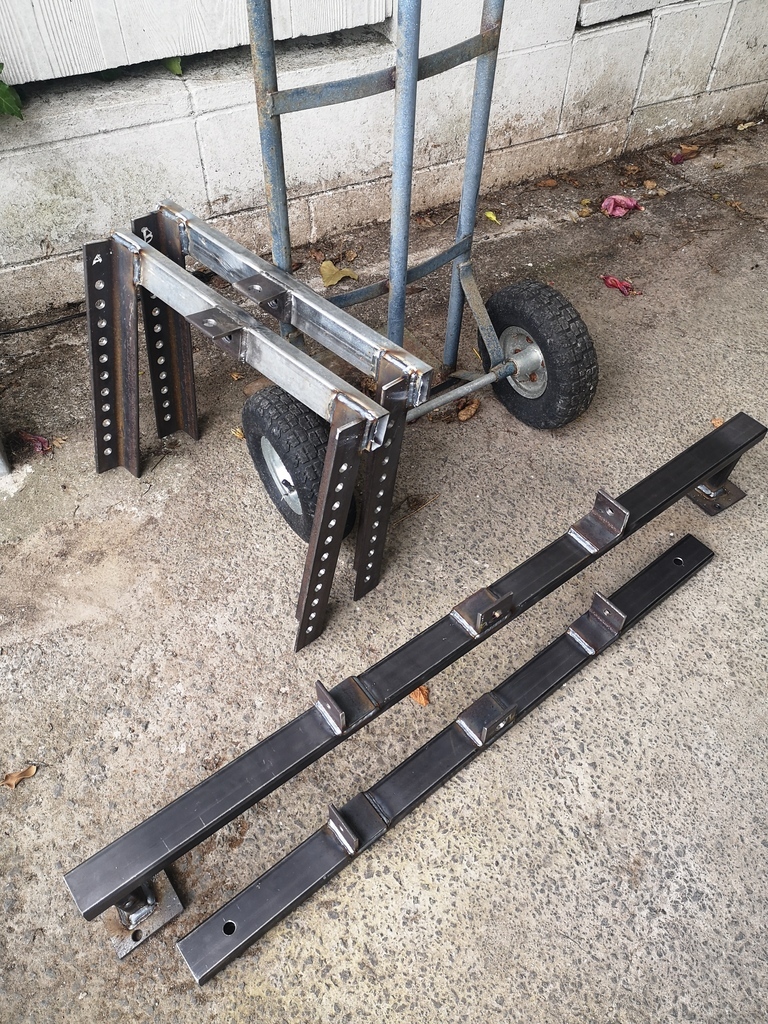 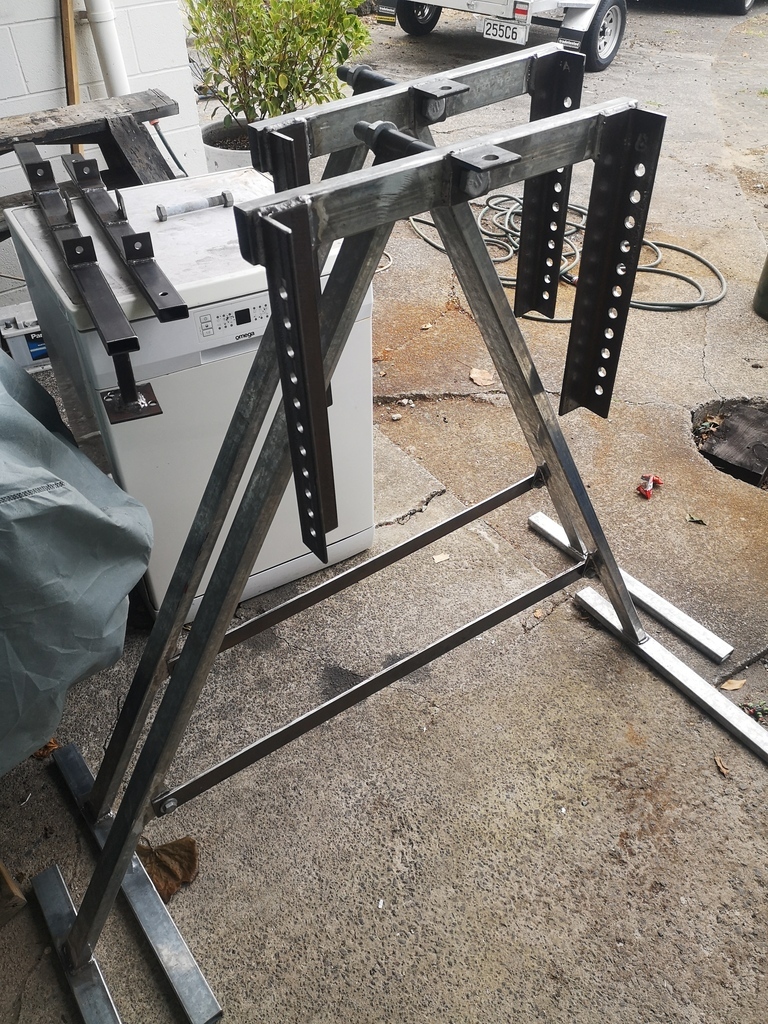 |
| |
1964 Daimler 2.5 V8 (project)
2015 Disco 4 SDV6
|
|
|
|


