|
|
|
|
|
I teach Design & Technology, and during Lockdown 1, I was having to run all my usual lessons via Zoom. Not only was this very tedious as with no workshops, it was essentially all theory / classroom type stuff but the only spare chair in the house that I could use when holed up in the box room I was using for Zoom was the was a folding Ikea wooden one. For short periods of time, it was ok, but every day for a term it was downright uncomfortable. However, a few years back , I bought one of these from Ikea. Not technically that exact type, as the one I have appears to have been superceded by that but it basically looks the same. The plan was to fit a really comfortable seat to it, and I just happened to have several really comfortable seats which could be fitted to that base. Having travelled at least 80K miles whilst sitting on one, I reckoned it would be very suitable. Well, I finally got around to doing something about it after my last class today (well, technically yesterday...), taking advantage of the workshops for once being empty of the 6th formers who usually clog them up around this time of year (something to do with A Level coursework???). Whilst I have various woodworking tools of my own, and have designed and made furniture at home, including this bookcase, it's not really set up for metalwork projects. My garage is currently just storage so the actual workspace being the garden with a couple of trestles is not ideal at this time of year. I'd dug out a rough front seat from the garage to use for mocking up, on the basis that I didn't care if it was damaged in the workshop or welding bay, and used this to work out how to attach the seat base. A non negotiable criteria is that the original seat frame is not modified, as I will probably use different seats at various times.
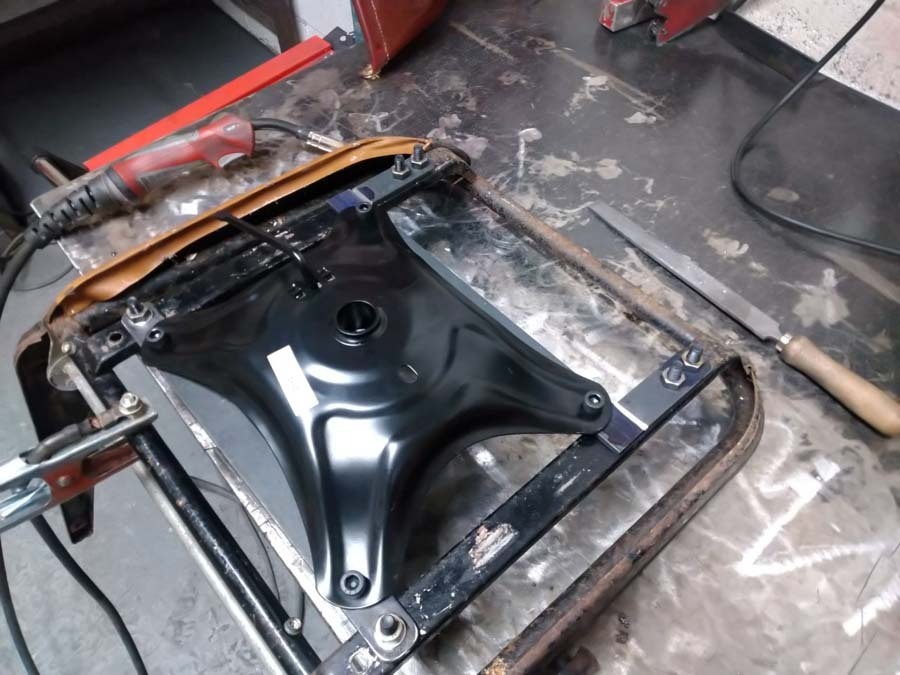
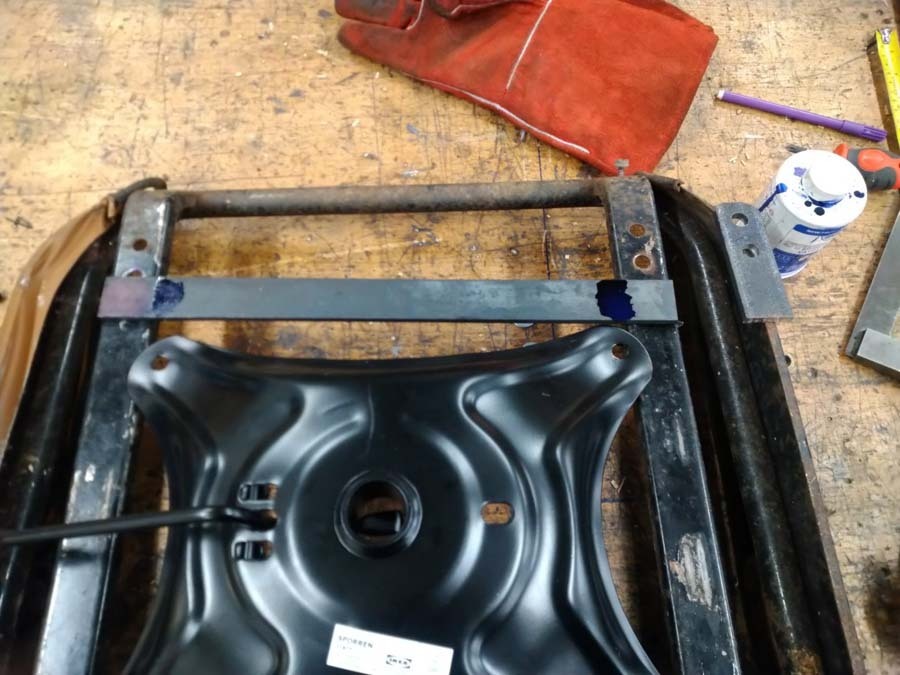
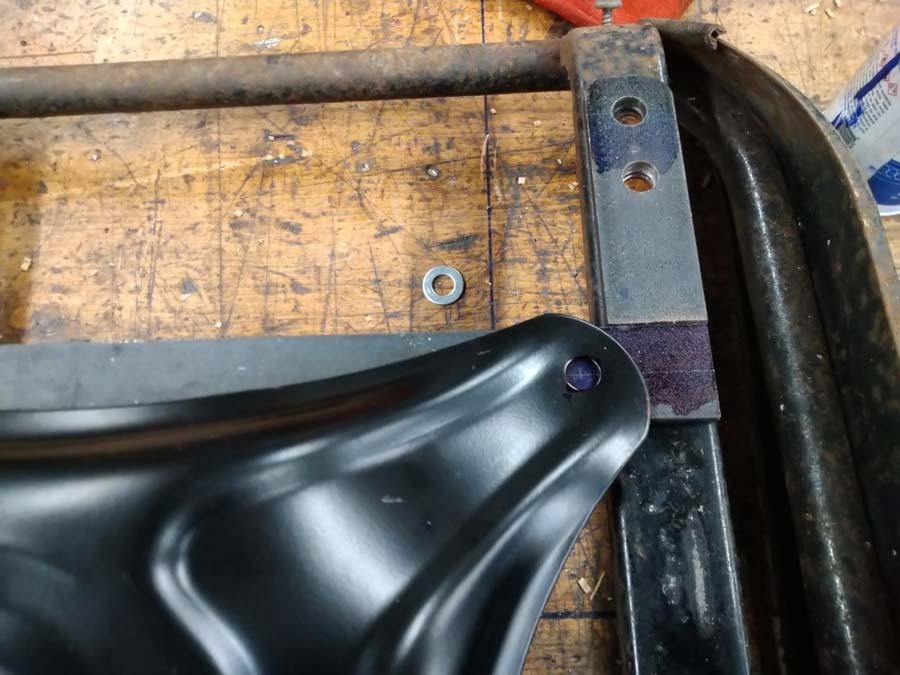
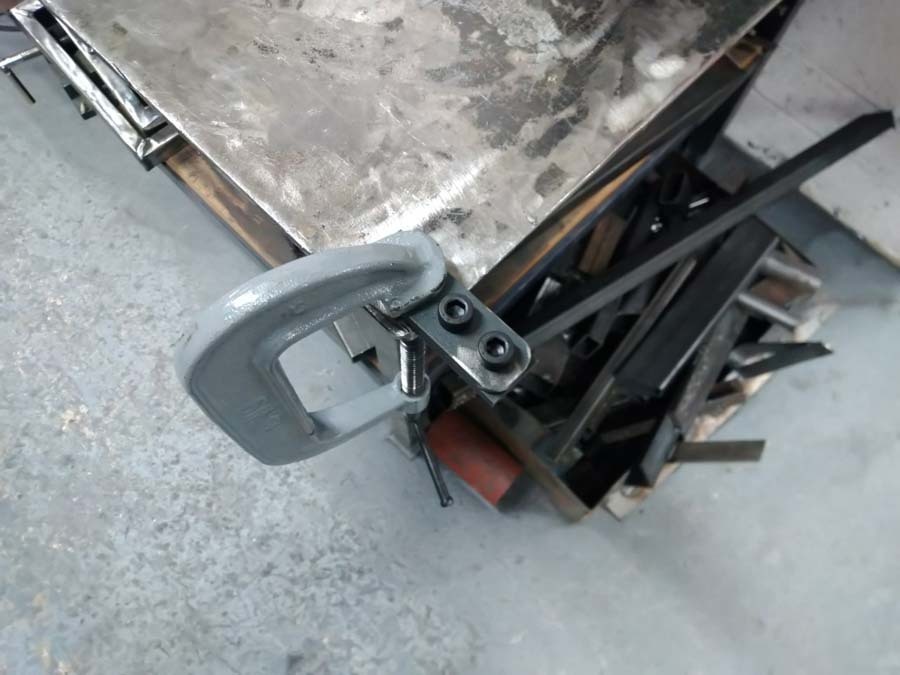
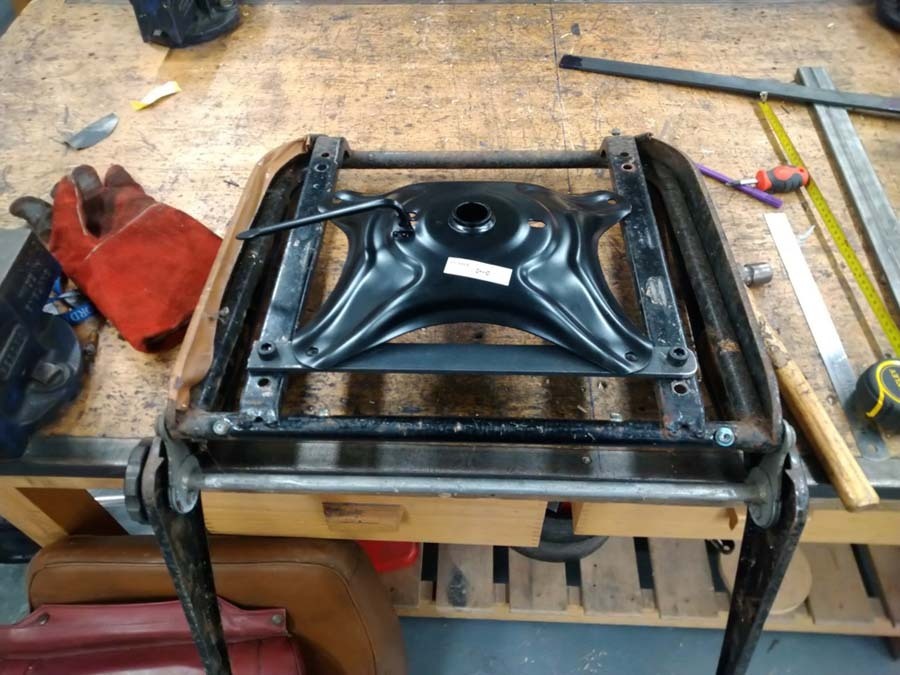 ![]() Starting off, with the first piece of plate cut on the cold saw, and drilled to fit to what are the bolt holes for the seat runners. As can be seen, the forward end will be a bit more in interesting. Whilst what I used is slight overkill, due to the thickness, it was simply what was available from the offcuts bin. 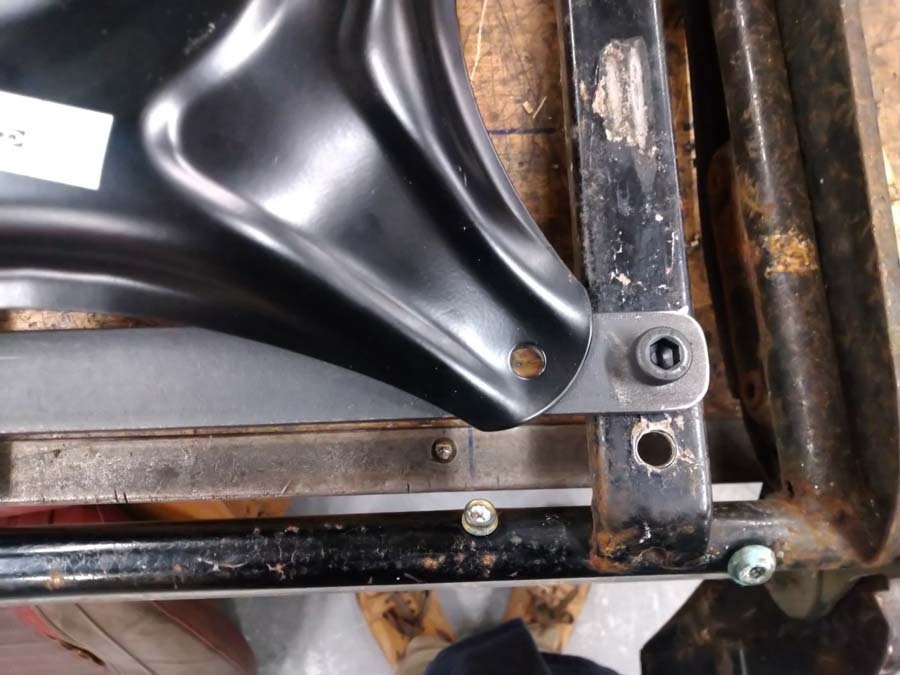 ![]() Holes drilled to mount the adaptor plate to the seat base Marking up the forward section of plate, ready to drill the holes for the base. Shown also with the extensions which will pick up the bolt holes on the seat frame. Radiusing off the corners with the grinder Everything bolted up and in place, ready for welding. Anyhow, I'm off to bed now, so will update the rest tomorrow!
|
| |
Last Edit: Apr 22, 2023 22:10:46 GMT by Paul H
|
|
|
|
|
|
|
Dec 13, 2020 18:15:45 GMT
|
Ah yes - time to wave the magic metal wand... Ironically, despite the fact that we teach our GCSE & A Level students to MIG weld, this was the first time that I actually welded on something I was making for myself  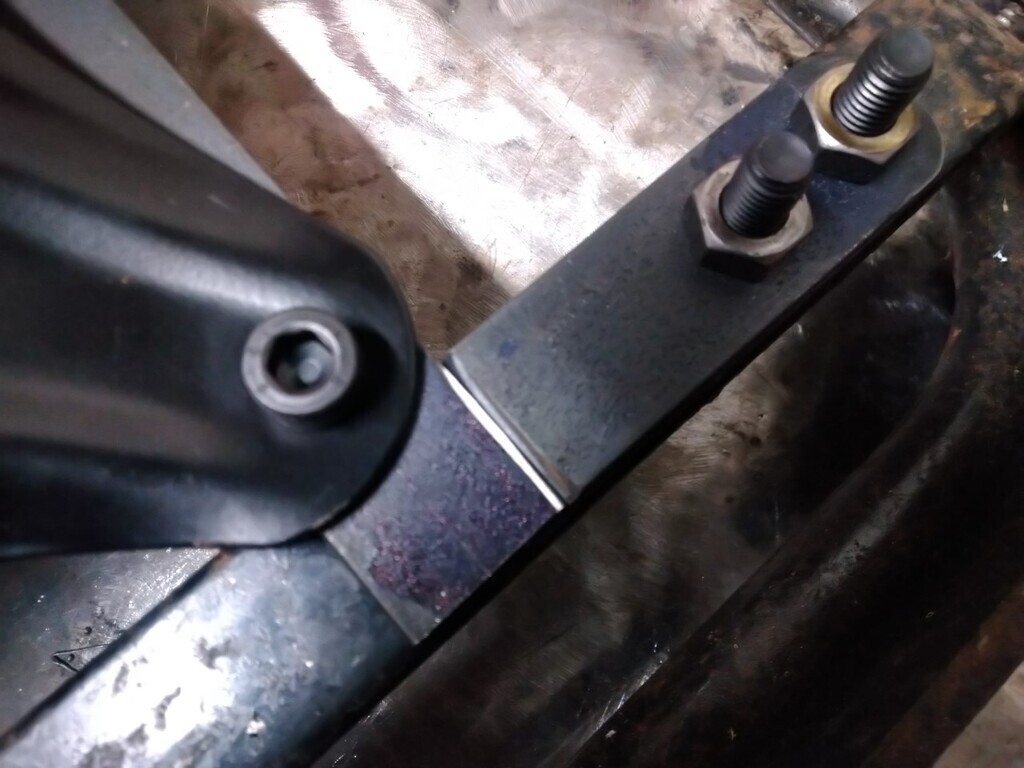 As I was using quite thick plate, I chamfered the edges where the weld would be, and left a small gap to allow for good weld penetration. 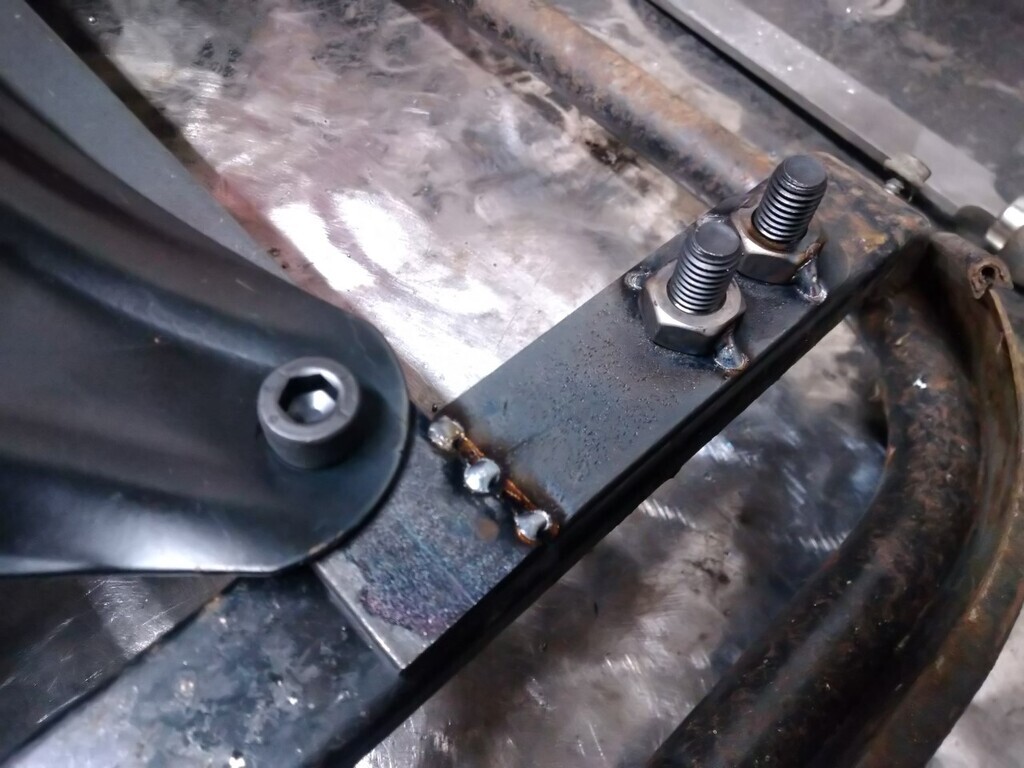 Started with just small tacks, to avoid distortion 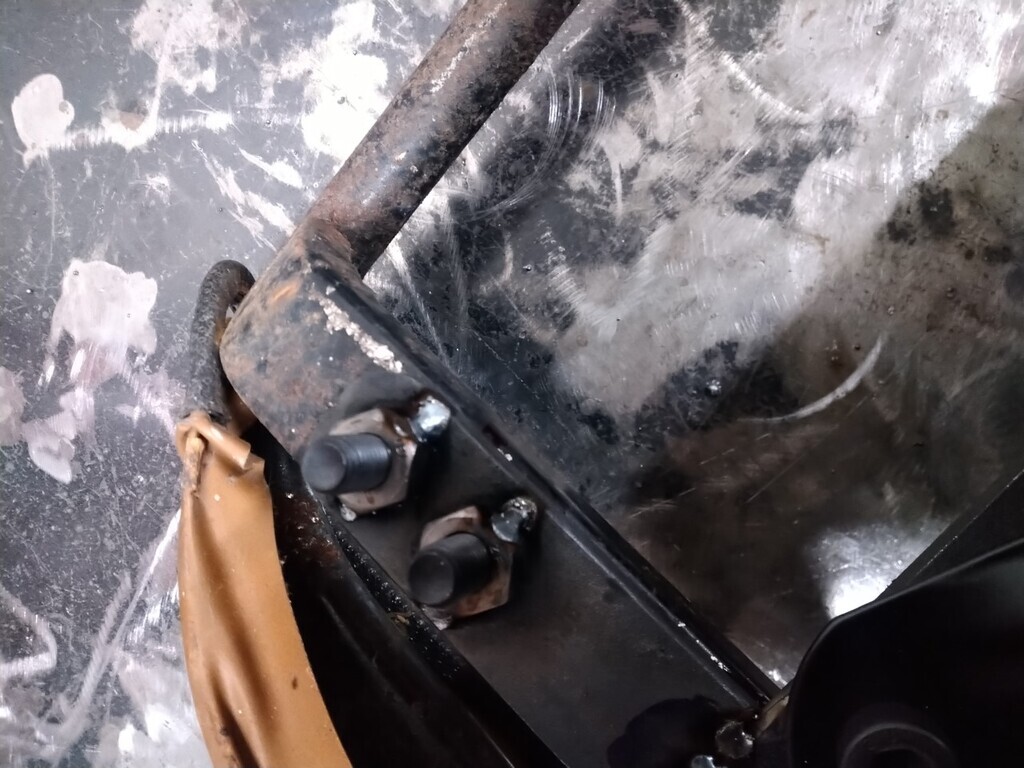 As well as tacking on the M10 nuts (size chosen due to that being the hole size on the seat frame) simply to make it easier to work on later when swapping to a decent seat. 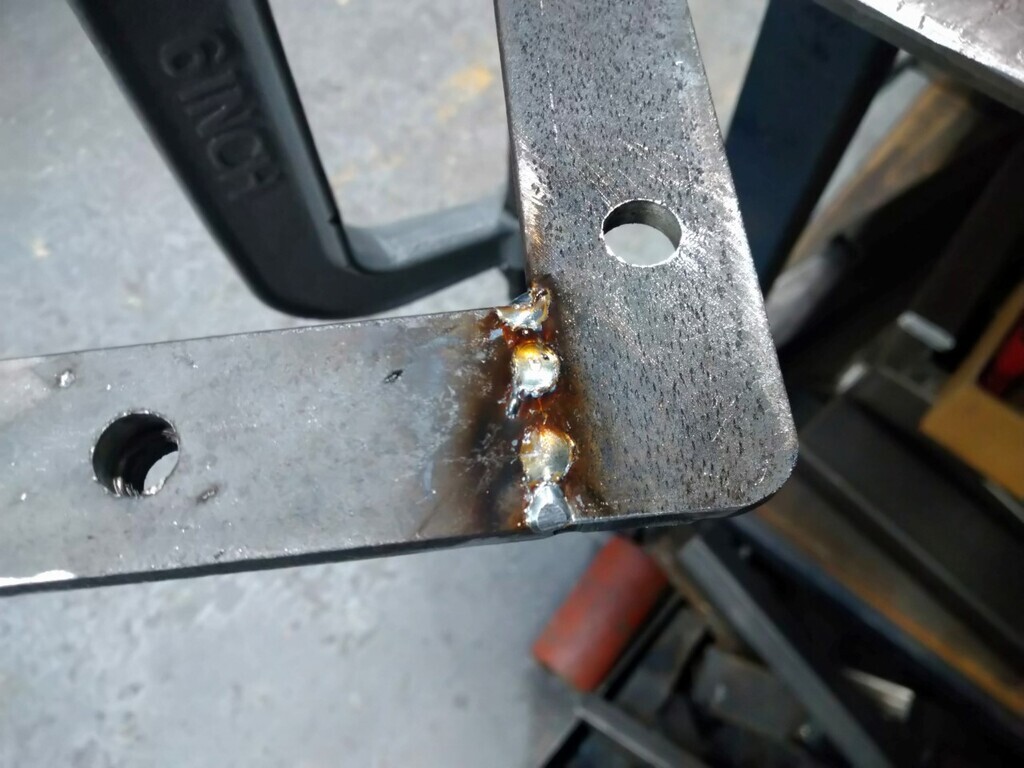 Once tacked on both sides, it was then fully welded. 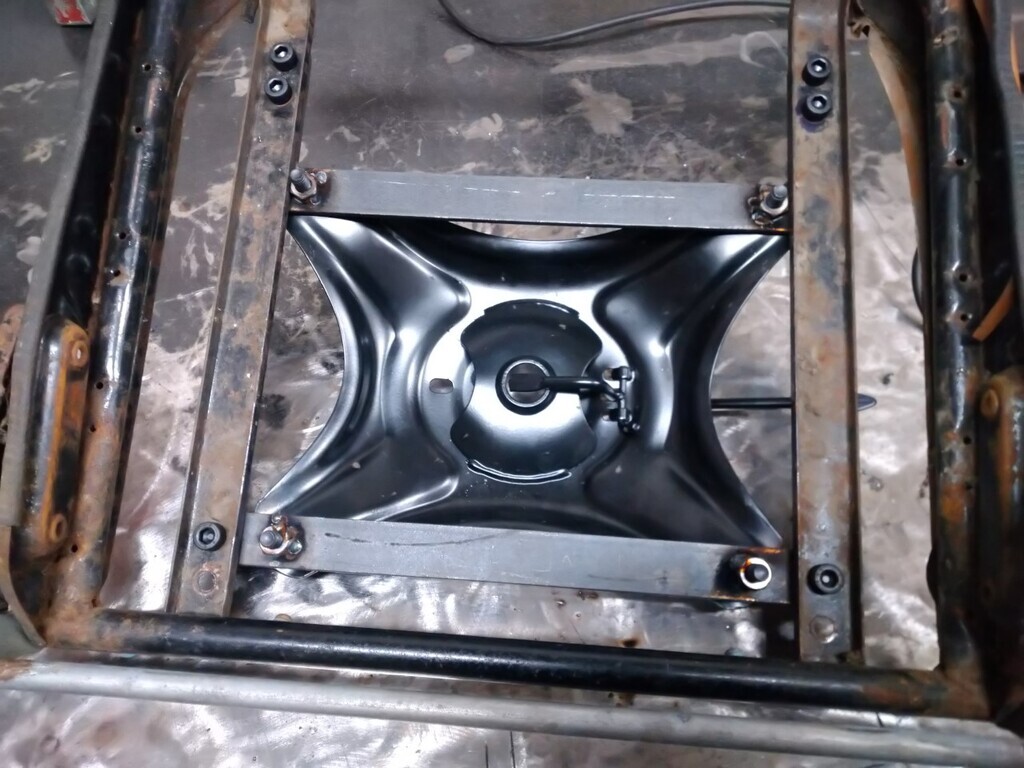 Then reassembled, and turned over so that the inner set of nuts could be tacked in place. 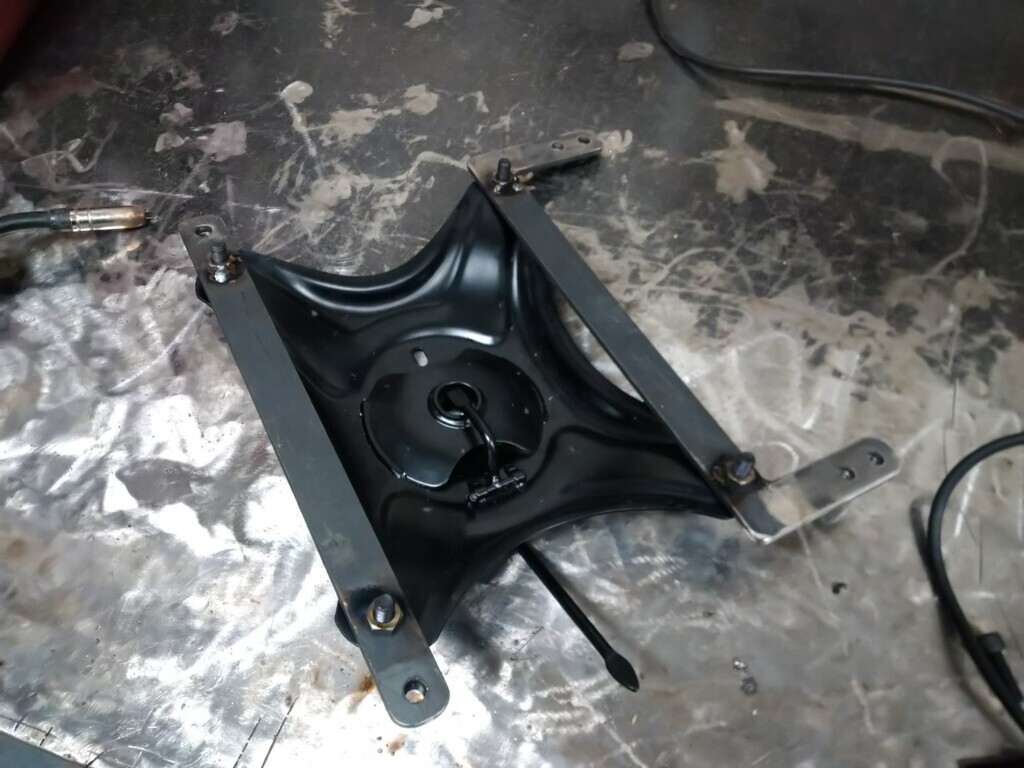 Before being removed, and the rest of the edges on the nuts welded where the seat frame was blocking access. Appropriate edges were all cleaned up. Only the top surface of the welded area was ground down, and even then only a small amount needed, in order to ensure a flush fit. 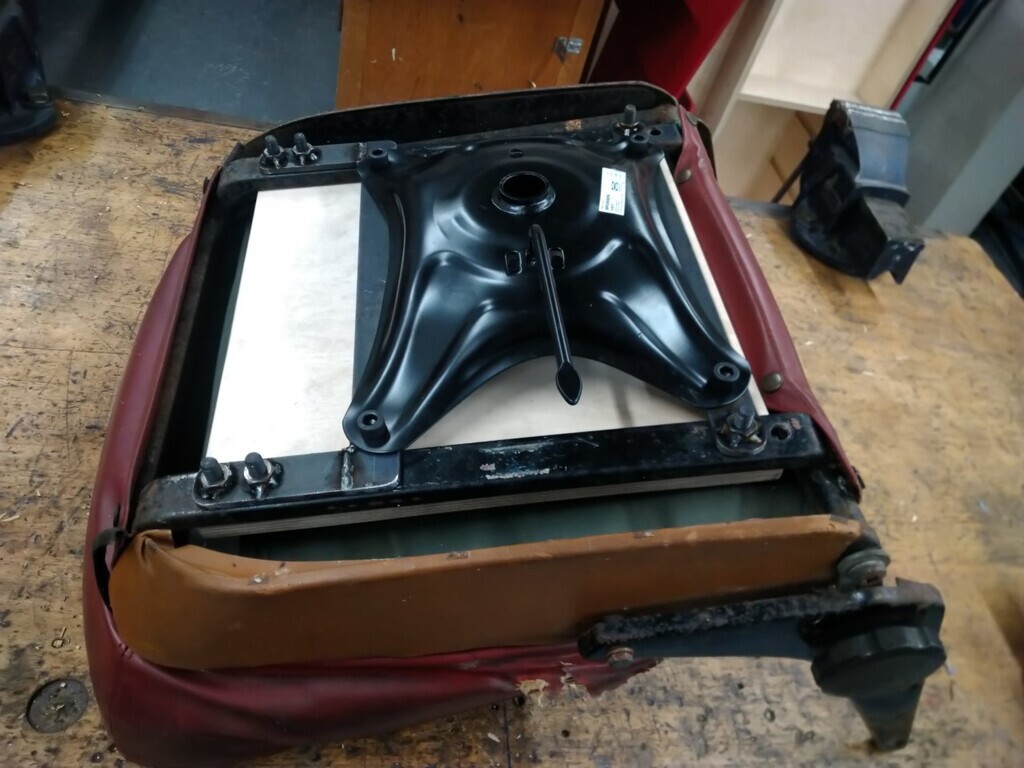 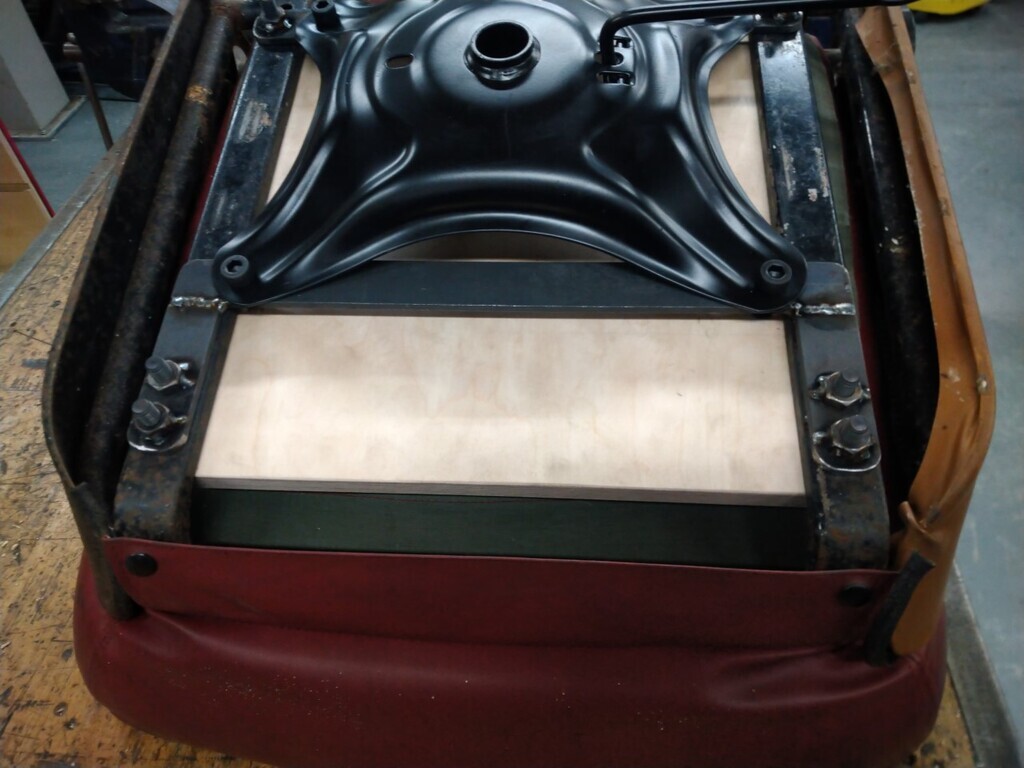 And now bolted up again, and the base squab also fitted. As can be seen, this seat frame and cushion are pretty ropey, but did the job as I didn't want to risk the good ones being damaged. Volvo very thoughtfully designed these seats so that the base squab attaches with six poppers, and the backrest via four machine screws, so no messing about with the actual trim needed.
As the Pirelli webbing was non existant, I used a piece of 18mm ply offcut instead to hold up the base squab, and drilled holes for it to locate onto the slightly overlength inner bolts which attached my adaptors to the chair base. The outer bolts are all below the level of the top of the seat frame U channel
If I get around to it, I may swap the bolts for shorter regular hex head ones, rather than these allen cap head ones. However the central ones actually look quite good, so it might just be the outer ones which get replaced or possibly just shortened. And now the moment of truth... Did I succeed? |
| |
Last Edit: Dec 13, 2020 18:20:24 GMT by Paul H
|
|
|
|
|
Dec 23, 2020 18:35:36 GMT
|
|
Replying because no replies. Ok, and post count.
Didn’t know Ikea did just the bases. Noted. Did you take a pic of the finished item?
|
| |
|
|
|
|
|
Dec 23, 2020 19:24:54 GMT
|
|
I looked through this when you first posted & (skim reading) assumed you had got the base with a seat - no idea you could buy them from Ikea ready to take whatever seat you choose put on.
Whats the end result?
|
| |
|
|
|
|
|
Dec 24, 2020 21:42:25 GMT
|
Replying because no replies. Ok, and post count. Didn’t know Ikea did just the bases. Noted. Did you take a pic of the finished item? I looked through this when you first posted & (skim reading) assumed you had got the base with a seat - no idea you could buy them from Ikea ready to take whatever seat you choose put on. Whats the end result? I think it's more a case that Ikea use the same base for a number of different chairs, and so the various seats are all boxed separately from the bases. However, in typical Ikea style, the base can thus be bought on its own. Ideally, I would have liked a more classic looking chrome plated one, but this satin black one actually matches well with the same finish on the Volvo seat subframe. Also choosing an off the shelf item as opposed to buying a random second hand one (or skip hunting) means that if this base ever breaks, I can easily get a replacement that will bolt straight on. Haven't had the chance to take any pics but will do so after Chrimbo. The adaptor plates are still unpainted, and the current squabs are both vile (torn, slit stitching and different colours) as I haven't had the chance to swap these for the decent set. The seat is a touch high, with the lowest setting being as high as I'd usually have it - I'm a long legged 6' 2" & with this my lower legs need to be straight down for my feet to be flat on the floor. However, it still fits under my desk, and is still as comfortable as I had hoped for. Also the whole seat sits level rather than the front of the seat being higher as it would be in its original location, this combination actually makes for a good posture. |
| |
|
|
|
|
|
|
|
Here's the finished result, or at least, as finished as it will be for the moment... 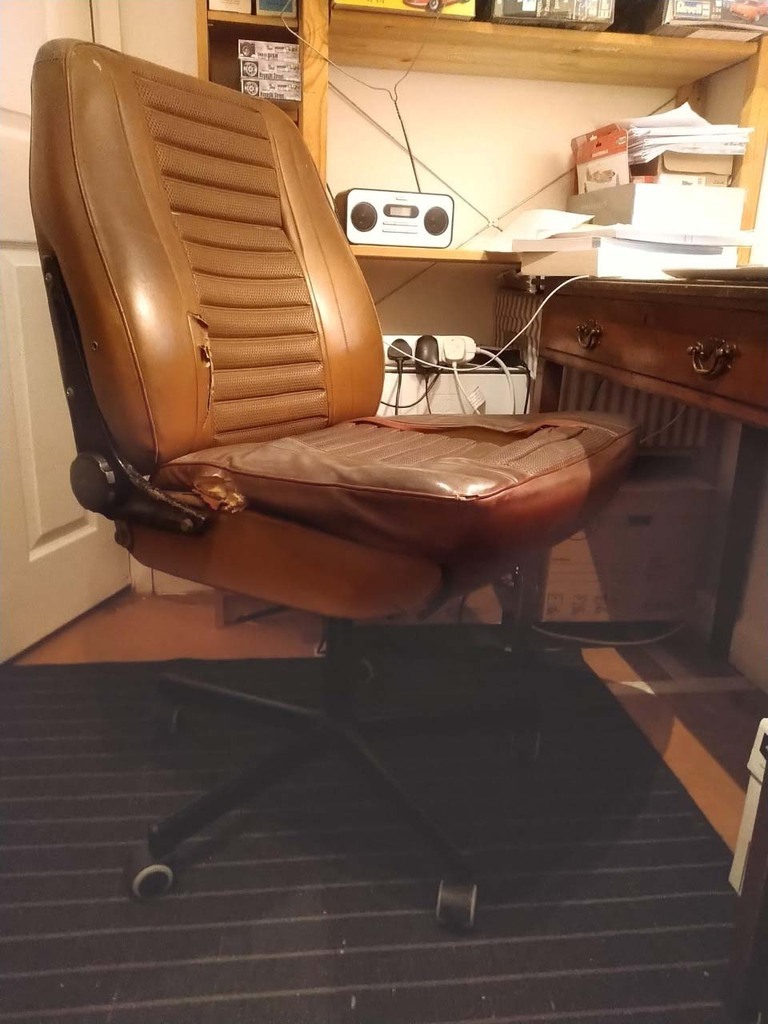 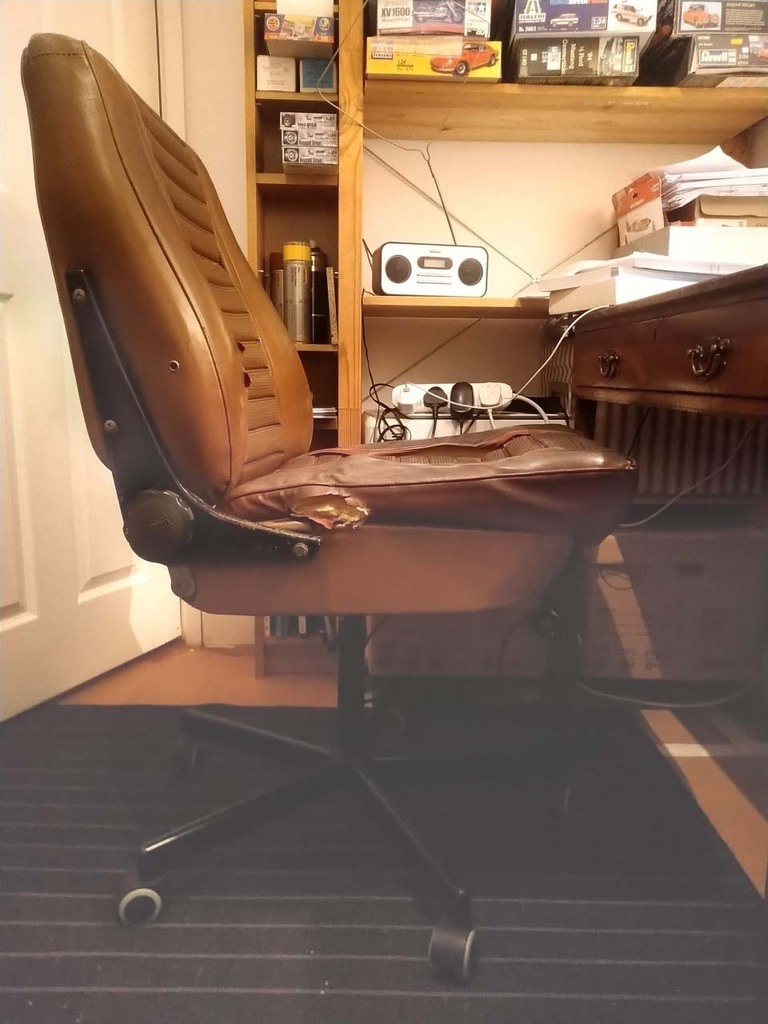 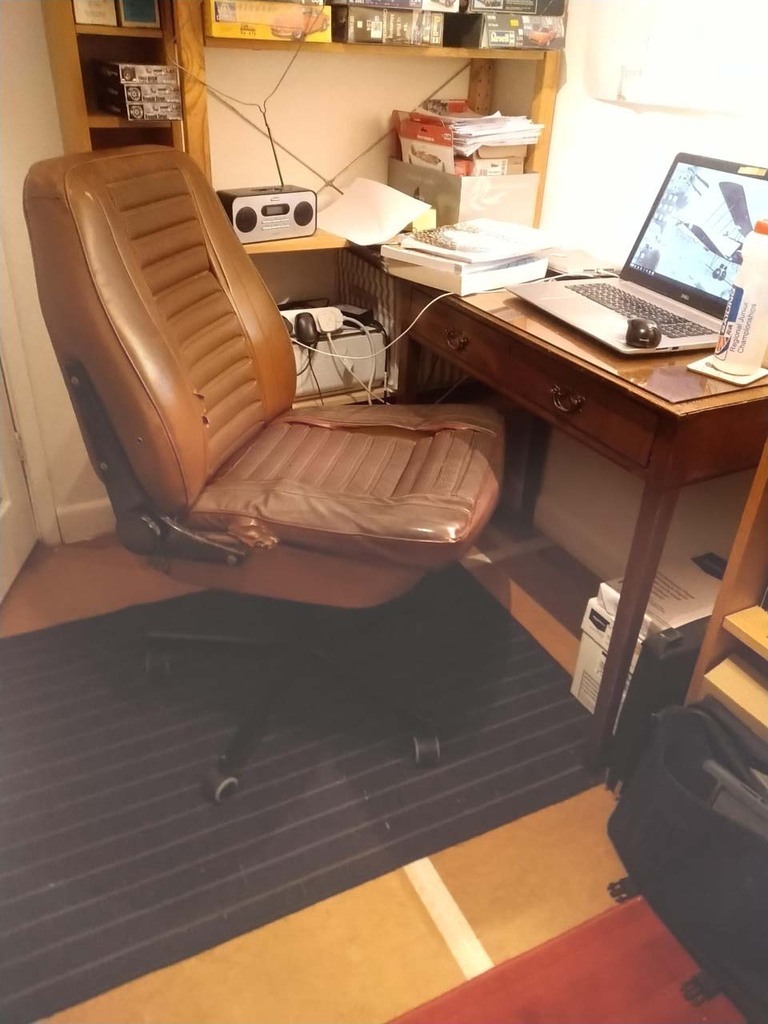 (Apologies for the poor pics - it's a very small room so this is as far back as I could get & I had to tweak the contrast on the lower half to make the base more visible. 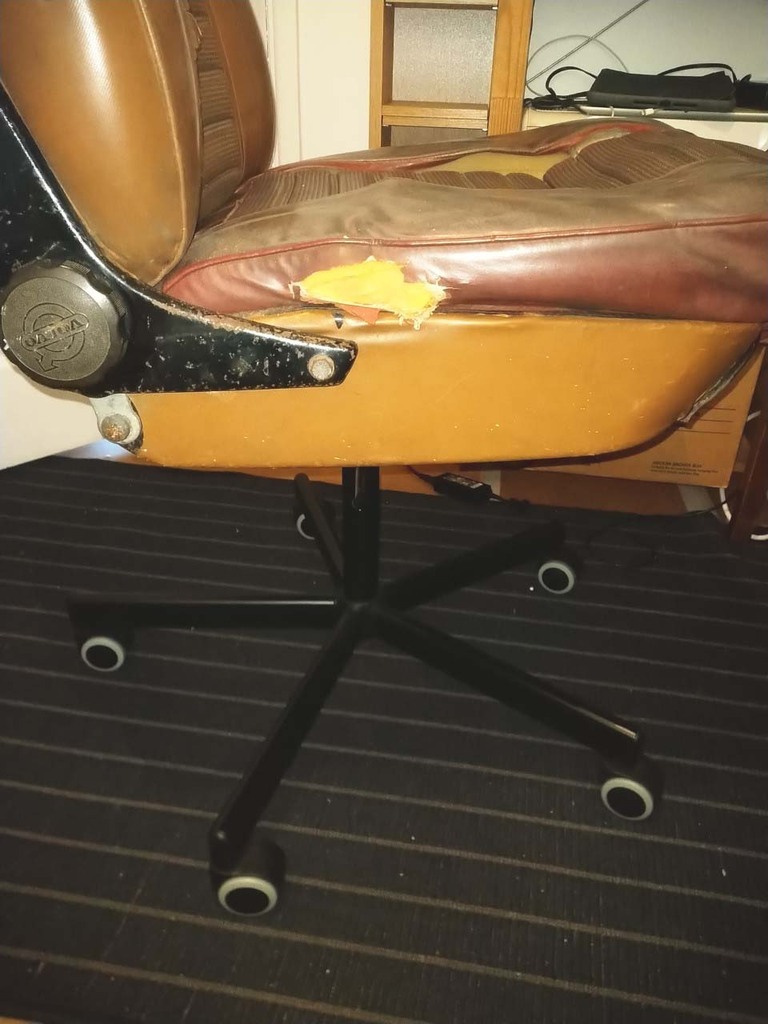 A close up of the assembled base - with repainted seat side brackets, it should match well. The vinyl on the side of the base is only on that side (would be the outside on the car), and may well come off to show the black painted steel on both sides. Not so keen on the colour of the wheels, but not complaining for the price paid! Given schools now being locked down, this is now my current 'classroom'. 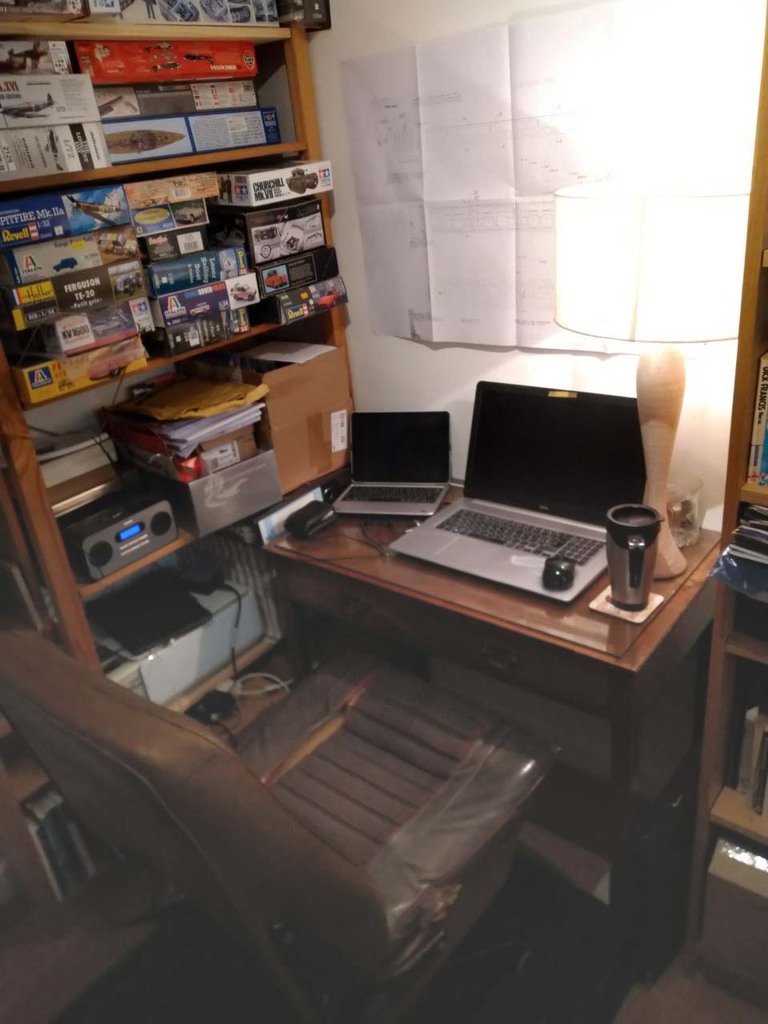 (the drawing on the wall is for some CAD work for a Coventry Climax casting that I need to do for a friend) And this is the seat which might* end up fitted to the base: 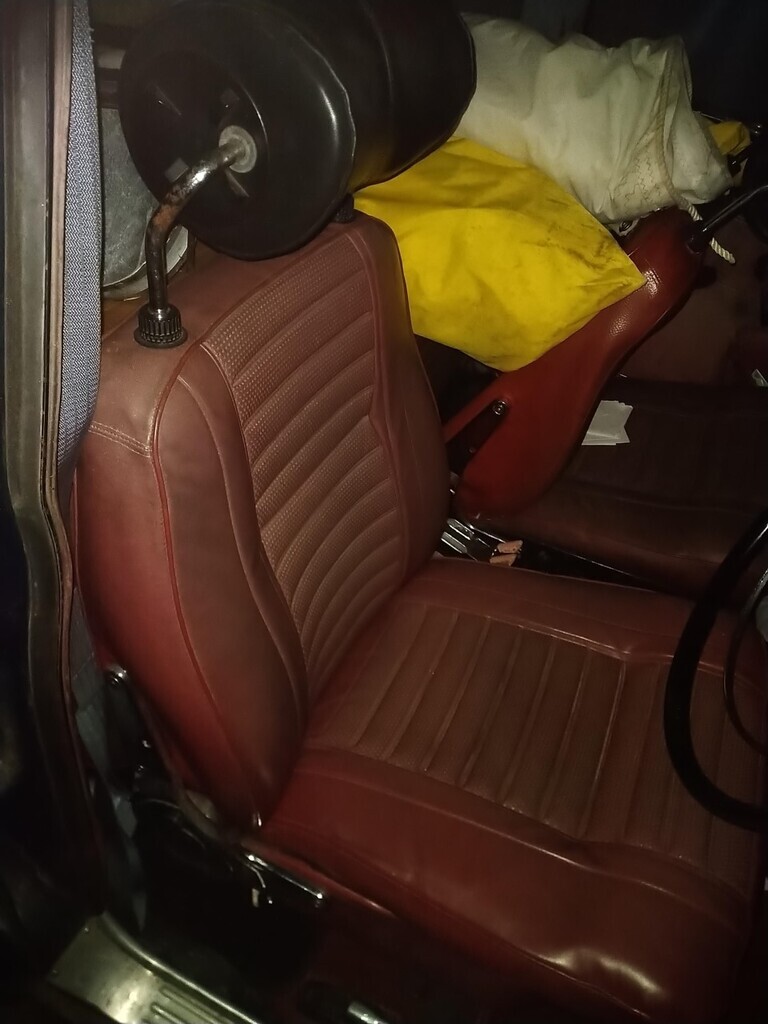 Complete with Recaro recliners 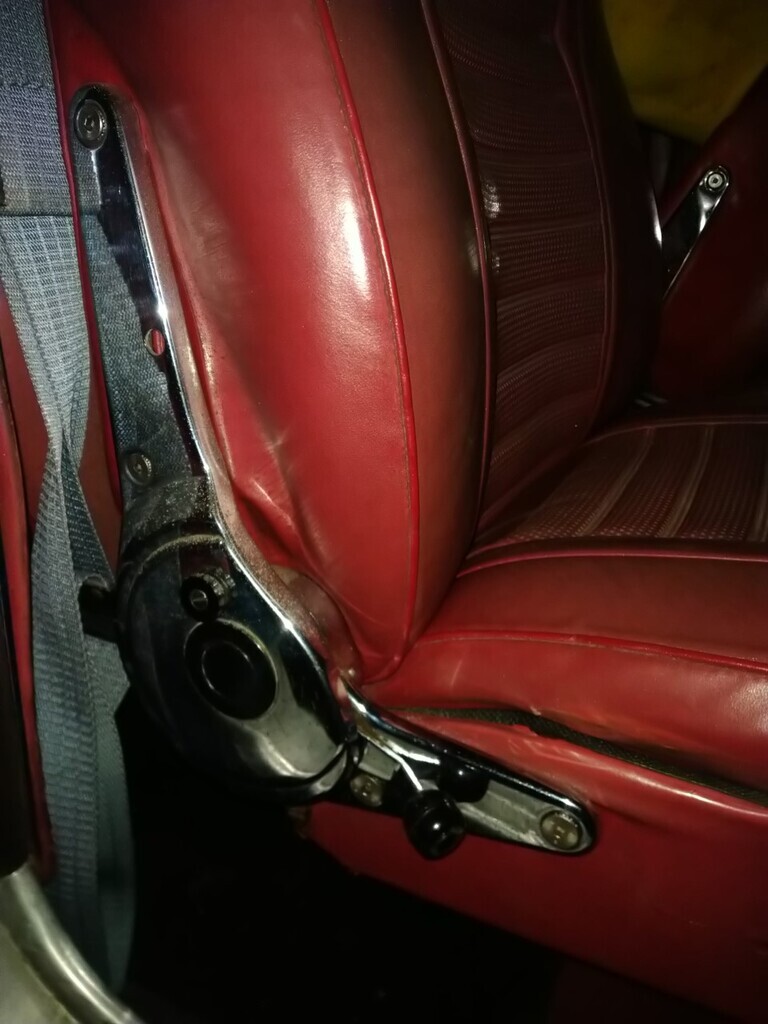 *given the proximity of the door handle and latch to the seat back, I am starting to rethink that idea as I don't want to damage it - a better seat base squab may find its way on though, when I get around to taking it apart again to paint it. |
| |
|
|
|
|
|
Jan 17, 2021 12:14:43 GMT
|
|
Hi, Can you flip the pan over to effectively lower the seat?
Colin
|
| |
|
|
|
|
|
Jan 17, 2021 16:10:22 GMT
|
|
I like this!
I've had similar thoughts many times about doing something similar, but given that it's always the casters that break in my classroom, I've never got around to it. Did make my dad a workshop stool a couple of years ago out of a crank and flywheel with some conrods to support the low backrest!
Interesting that you teach Mig welding to GCSE and A-level kids though - I've only ever done it with one or two A-level students if the project needed it. Do it plenty with y10 and y11 now I'm out of D&T and into special education teaching Level 1 Motor Vehicle!
|
| |
1968 Cal Look Beetle - 2007cc motor - 14.45@93mph in full street trim
1970-ish Karmann Beetle cabriolet - project soon to be re-started.
1986 Scirocco - big plans, one day!
|
|
|
|
|
Jan 18, 2021 16:30:09 GMT
|
Like this too! Lovin the worn look, made me smile a lot! Here's my chair, made from the passenger side from my ZS180 (now a track car) bolted to a 10mm steel plate to the base from the previous seat that died. Doesn't go up and down but was measured to correct height, for me, but does tilt back which is a great help when being bored to death on endless conf calls! 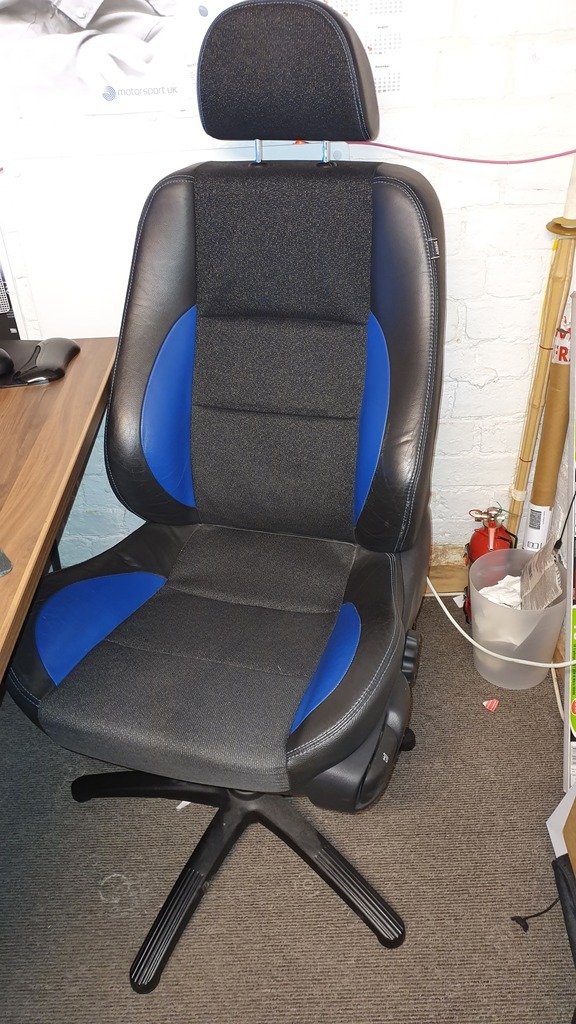 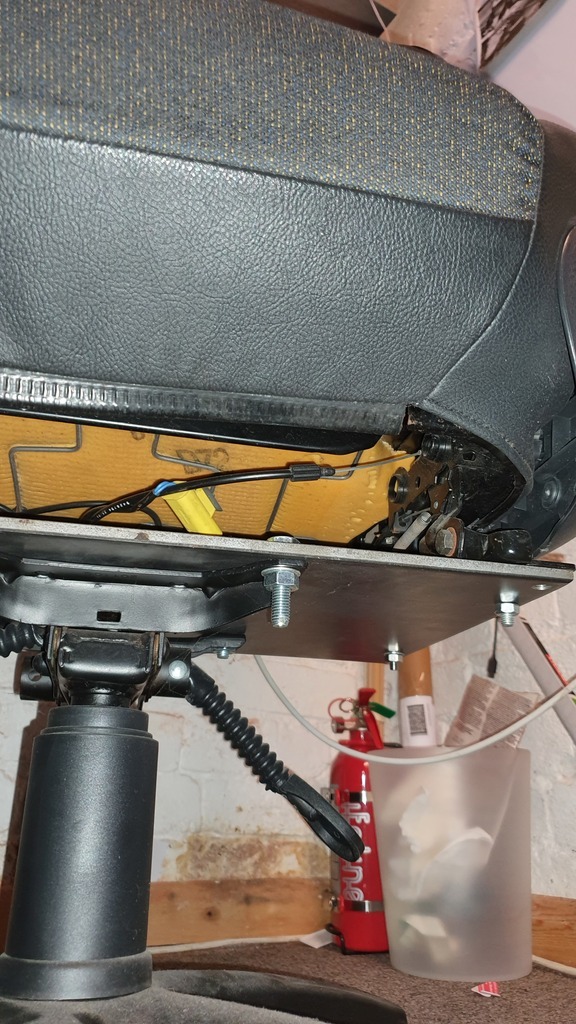 Is very comfy and lumbar support works to for the long reports etc! |
| |
|
|
|
|
|
Apr 22, 2023 22:09:16 GMT
|
The chair has since been claimed by my 10 year old daughter. Her twin sister is miffed that she doesn't get one too... However I do not have another spare set of old seat cushions that I am prepared to donate to their lairs. In other news, I have been continuing to assist a friend (Bill) with various jobs on his 1976 Rolls-Royce Silver Shadow (see also: forum.retro-rides.org/thread/222605/headlights-working-help) and thought that this recent issue would be worth writing up, as it might be useful to someone else too. Last week, it was the turn of the leaking heater control valve to be dealt with. As it is located in the depths of the engine bay, and thus also below the level of the cylinder heads, it was essentially disabling the car, as it was dumping most of its coolant very quickly. As he had already reconditioned the engine a while back (what R-R called sufficient is actually only 214bhp, from 6.75 litres, as he ran it on his dyno before refitting). 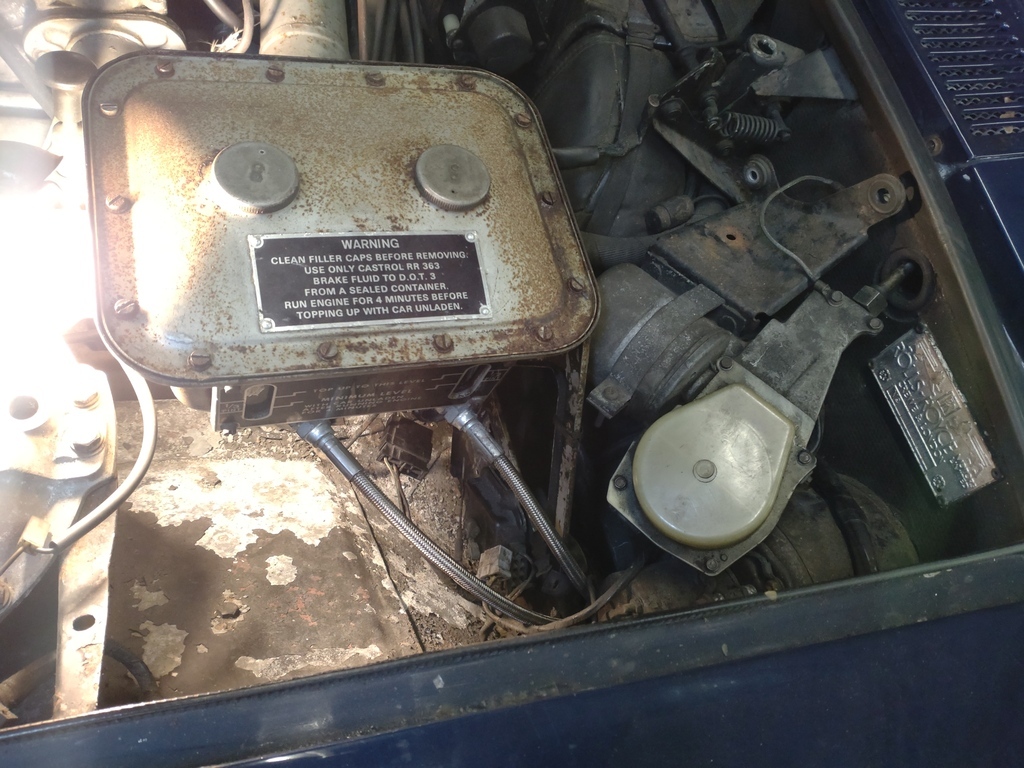 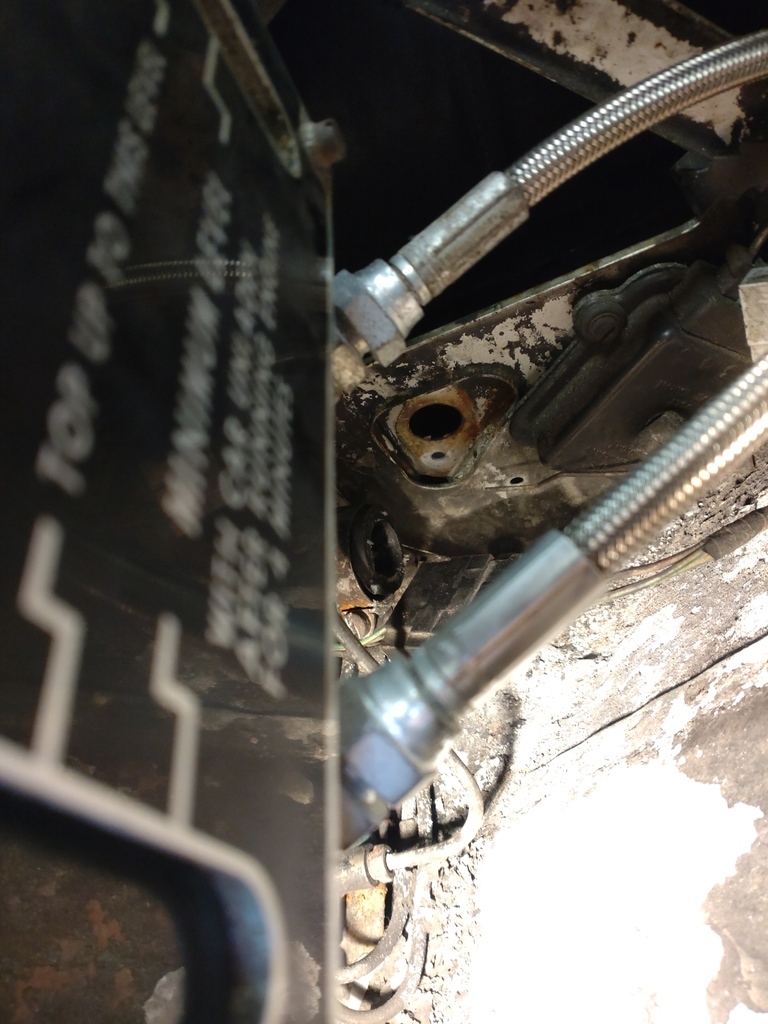 (location shown once removed) I didn't fancy disturbing that large hydraulic fluid reserviour as in addition to the two braided lines visible, there are several hardlines running into the base of it too)so shifted the wiper motor instead). The crimped on cover carefully removed, the cause of the leak was clear - the diaphragm inside the valve was utterly knackered. 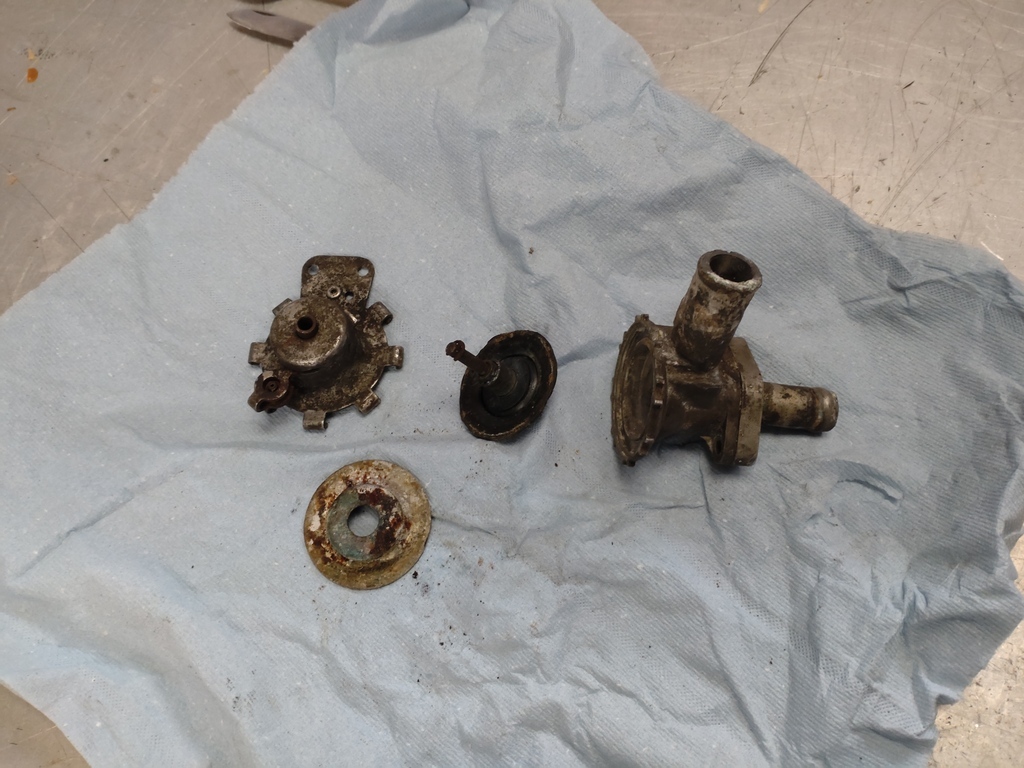 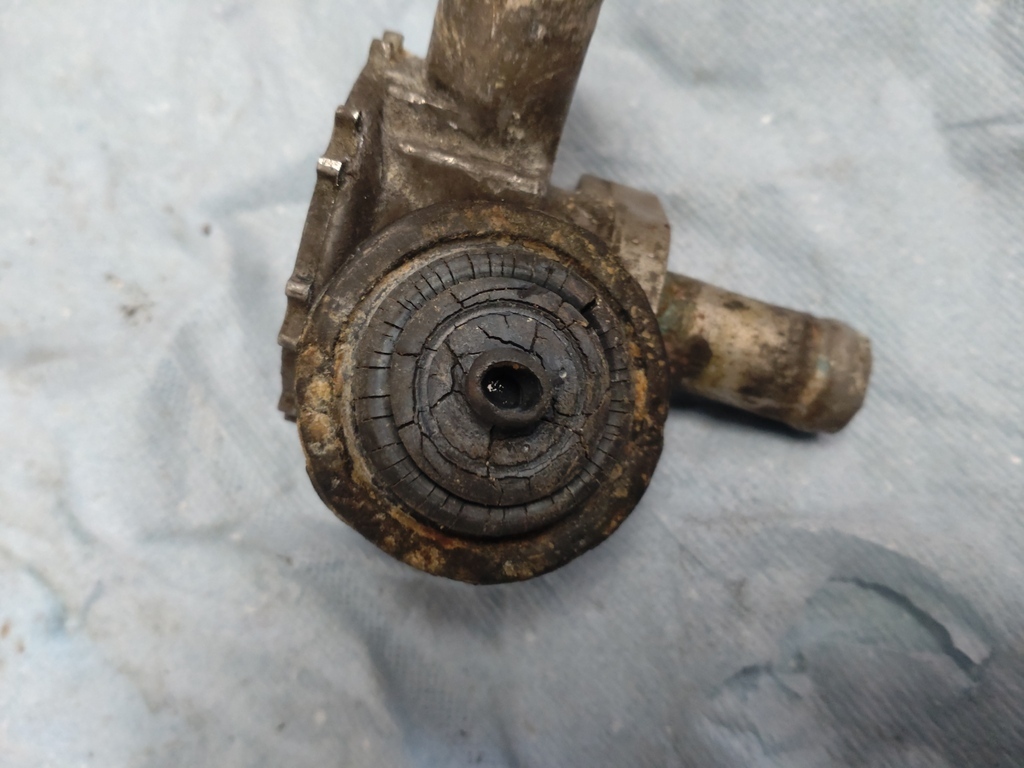 Oh, and given the recent discussion elsewhere on threads, what blinking thread were the nuts & bolts holding it on? Only 2BA... Fortunately Bill has several small 2BA spanners (which I needed previously to remove the rear door interior panels), as otherwise it would have been even more painful to extract due to the limited access. |
| |
Last Edit: Apr 22, 2023 22:10:04 GMT by Paul H
|
|
![]()
![]()
![]()

![]() Starting off, with the first piece of plate cut on the cold saw, and drilled to fit to what are the bolt holes for the seat runners. As can be seen, the forward end will be a bit more in interesting. Whilst what I used is slight overkill, due to the thickness, it was simply what was available from the offcuts bin.
Starting off, with the first piece of plate cut on the cold saw, and drilled to fit to what are the bolt holes for the seat runners. As can be seen, the forward end will be a bit more in interesting. Whilst what I used is slight overkill, due to the thickness, it was simply what was available from the offcuts bin.
![]() Holes drilled to mount the adaptor plate to the seat base
Holes drilled to mount the adaptor plate to the seat base![]()
![]()
![]()
![]()
![]()
![]()
![]()
![]()
