|
|
|
Jan 29, 2021 10:12:34 GMT
|
Ah, I knew I'd forgotten something! I've got a modified set of mole grips like those, but was only planning to do it on the boosted side. I figure the filter side doesn't need as beefy of a seal. ---- It's time for the first 'new' update (or not on my previous thread anyway). 5th December 2020One of the issues I'd discovered as I put the intake pipe together was that the fitting for the thermostat-to-radiator pipe exited into it, so a little dogleg was needed. It's hard to get a picture, but it fouls by about 15mm which can't be flexed around this close to the fitting.  So here's the little dogleg...  ...and the lower radiator pipe.  Ideally I'd have a radiator with swapped sides for inlet and outlet, but alloy radiators for these are big money (the ones I've found anyway). Still need to come up with a fan temp switch solution though as I don't think these have a fitting for that. I also exorcised some rust from underneath the bumper mounts. 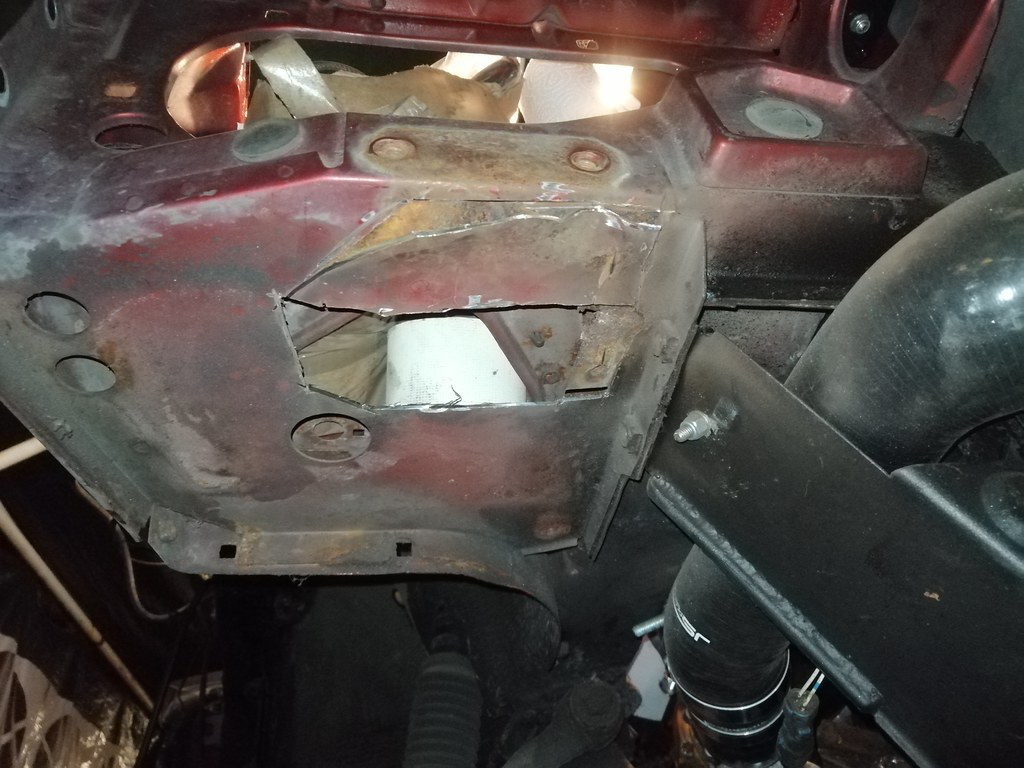    Lastly, I scalloped some bits of the front bumper to clear the intercooler boost pipes and plastic welded them up again. It looks a complete and total mess as I did it with a soldering iron, but I've tried various heat gun-style plastic welders and never really got on with them and a soldering iron gives a strong bond.  Clearance is still quite tight, but I can't really go much more. Will probably add some padding between the two in case the pipes swell too much under boost. 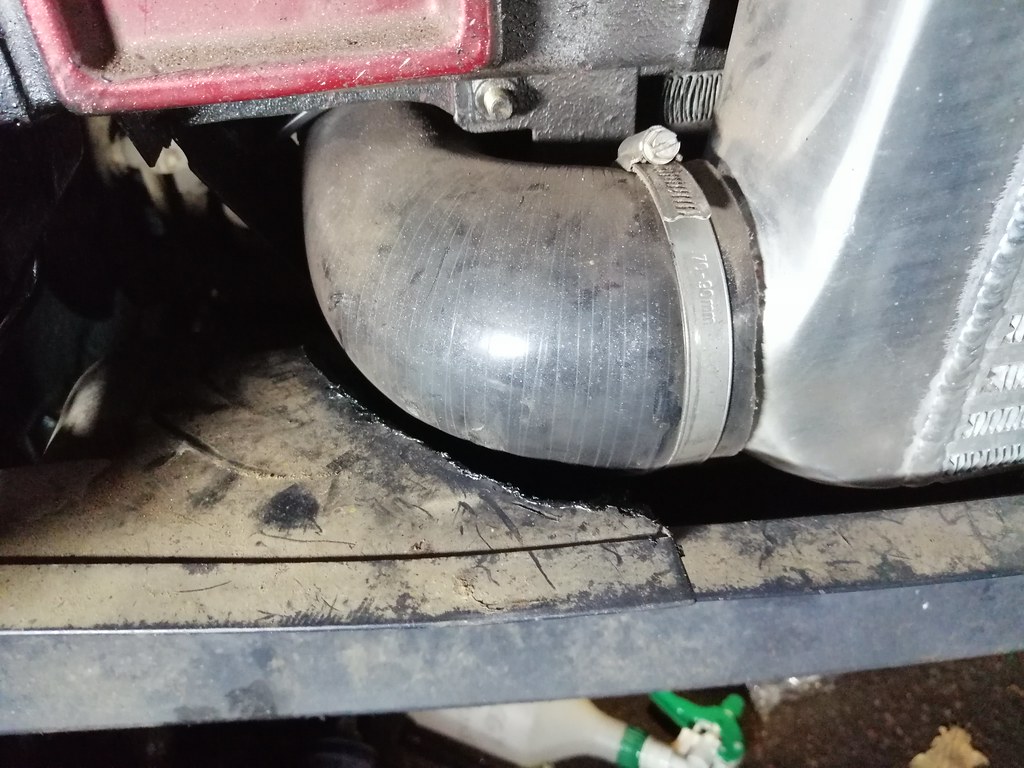  |
| |
Last Edit: Jan 29, 2021 23:44:05 GMT by biturbo228
|
|
|
|
|
|
|
Jan 29, 2021 10:20:59 GMT
|
Just looked through teaboy 's thread and man are those tools nicer than what I've made! Also, can't believe I haven't read that thread yet either. Got some catching up to do! |
| |
|
|
bstardchild
Club Retro Rides Member
Posts: 14,968
Club RR Member Number: 71
|
|
Jan 29, 2021 10:29:53 GMT
|
Just looked through teaboy 's thread and man are those tools nicer than what I've made! Also, can't believe I haven't read that thread yet either. Got some catching up to do! I'm still waiting for him to finish the oil tank  |
| |
|
|
bvdv
Kinda New

Posts: 1
|
|
|
|
Nice progress! I’ve been lurking here for a while now to follow your build in more detail, after you started posting more here and less on Oppo. But as I’d finally found something I could share knowledge on, I finally made an account. It's time for the first 'new' update (or not on my previous thread anyway). 5th December 2020One of the issues I'd discovered as I put the intake pipe together was that the fitting for the thermostat-to-radiator pipe exited into it, so a little dogleg was needed. It's hard to get a picture, but it fouls by about 15mm which can't be flexed around this close to the fitting.  The pipe exiting the thermostat isn’t just a pipe, but seems a lot like a NormaQuick PS3 quick connector to me (hence the spring clip). These are available in many sizes and also various angles, so I suppose going for a 90 degree one would help with this clearance issue in a neat way. |
| |
|
|
|
|
|
|
|
The pipe exiting the thermostat isn’t just a pipe, but seems a lot like a NormaQuick PS3 quick connector to me (hence the spring clip). These are available in many sizes and also various angles, so I suppose going for a 90 degree one would help with this clearance issue in a neat way. Hey man! Good to see you here  How's the renault 17 going? Dead useful info that. There's loads of these all over the car. Found a solution using silicone hose, but will definitely keep those in mind for the rest of the connectors all over it. Can think of at least one that it might help with (the inlet feed from the reservoire exits quite close to the inlet boost pipe, and a 90 to bring it around would be very useful!). ------------------------ Next update! 16th January 2021 - part 1So these next few updates happened over a bit of a longer period, and all mixed up between jobs, but I'll split them up into a couple of updates so it's a bit easier to follow. First thing's first I started putting the wiring loom back together on the driver's side of the engine bay. Luckily the engine pretty much has its own separate loom so I won't need to chop it around too much.  That let me trial-fit the bumper. Turns out it fits without any modification!  Next up was to tidy, clean and strip the interior...     While the seats were out I swapped over some manual seat rails to try and save some weight (12kg combined). I think there's still a motor in the back somewhere to do the reclining (or at least I couldn't work out how the base would also recline. There's a bit of an issue as my '40 has a cost-upgrade interior that was very unlikely to be bought without a package that also included electric seats. Otherwise swapping the whole shebang would have been easier (although this wasn't exactly difficult)   With the a-pillar trims out of the way I could finally sort the last niggling little rust patches around the screen area, and paint them in good 2k primer before filling   |
| |
|
|
|
|
|
|
|
16th January 2021 - part 2Anoher job I sorted over christmas and the first bit of the new year was a battery relocation to the boot. Partially for weight distribution purposes, and also I wanted to make some space under the bonnet to fit an electric power steering pump. First off was the mounts.  Next was the big fat cable running to the front. I estimated about 4m from front to back and came out with a 0 gauge wire (53.5mm2). The one I accidentally bought was an oversize 0 gauge (65mm2, about 00 gauge). This was just as well as my estimate was off by about a metre! Runs up the wing alongside the rest of the boot wiring, with some armouring...  ...out down the back of the seat, where the armouring stops as there isn't space... 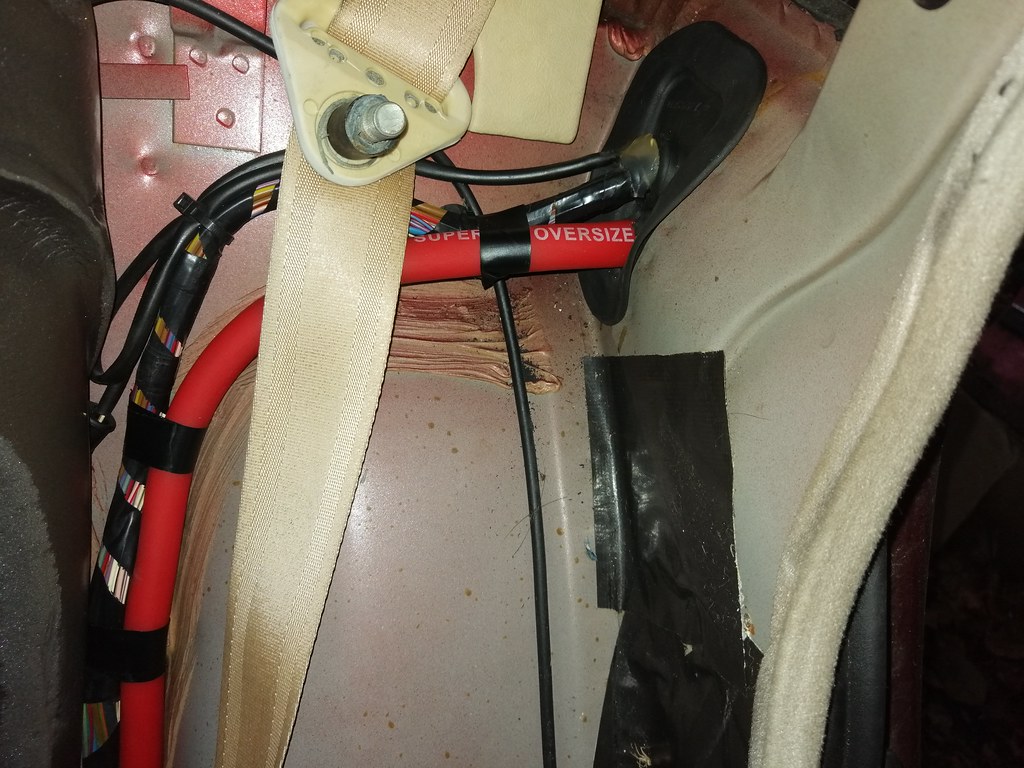 ...down under the seat base where I can armour it again... 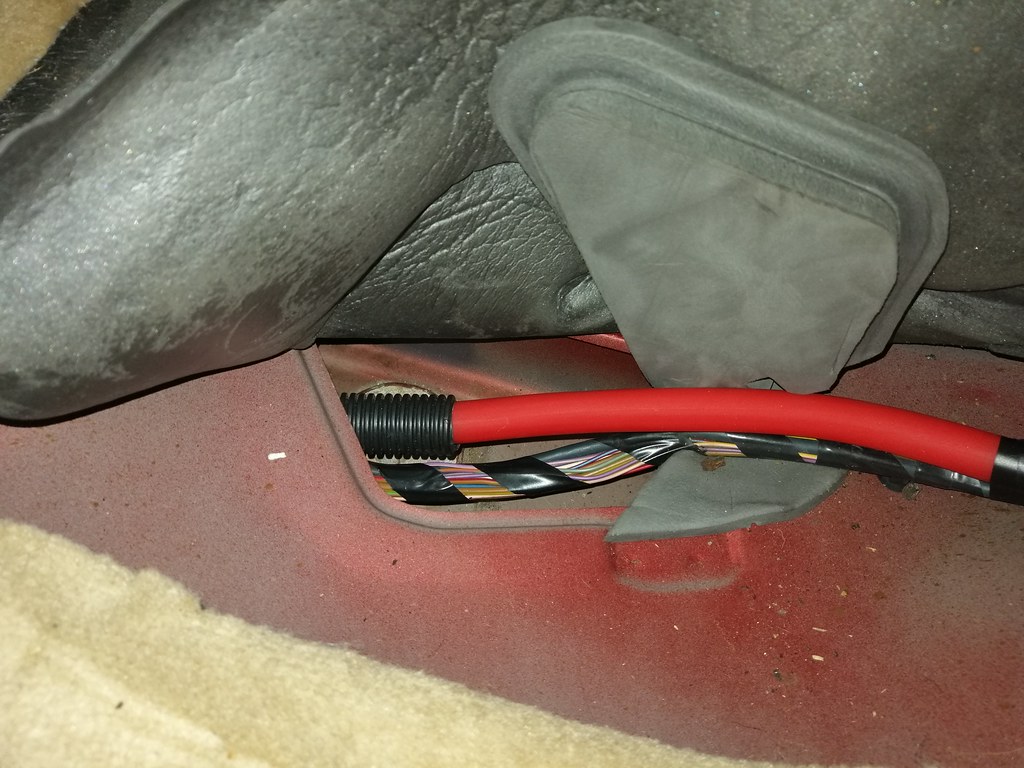 ...along the little channel in the sill where again, no space for armouring... 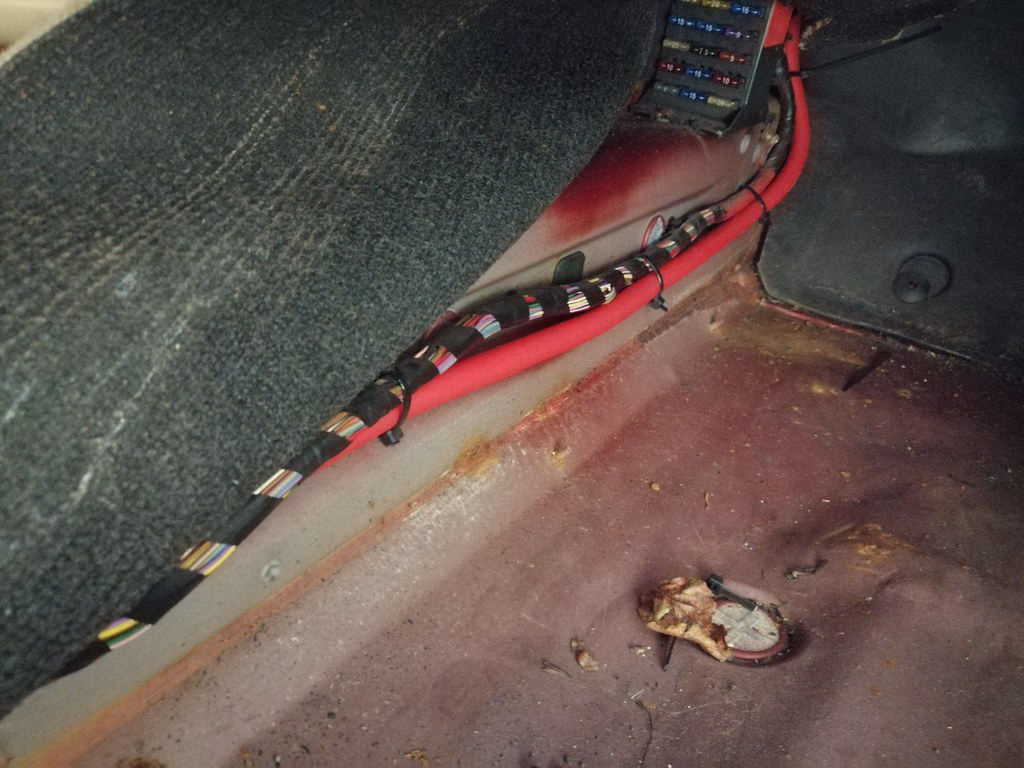 ...and up and out the footwell where the battery used to be.  I'd initially bought a positive post, but I rather liked the BMW one with a little protective cap. It needed a bit of modification to work though as on the BMW it's fitted to a hole in the engine bay and the wires come up the back. If you chop off the tabs at the back and expand the hole underneath though you can bolt the plastic to a panel and have the wiring come up underneath like so:   This puts it about 3" above the positive post through the bulkhead that the standard battery hooks up to to power the car, and unlike on the BMW it puts it on the right side to connect it to the starter. Made up wires for each of those and we're sorted    Oh, and lastly I made up a negative cable   Ony thing left to do is sort a clamp, but that should be pretty straight forward. Whole thing was pretty straight forward TBH, which was a nice break from the other job I was tackling at the time (coming in part 3...) :S
|
| |
|
|
|
|
|
|
|
How far away are we from the big day, engine start-up??  |
| |
|
|
|
|
|
|
|
How far away are we from the big day, engine start-up??  Well, I've had the end of March for having everything sorted (bar paint) in my haed for a while, but as we'll see in this next update I've had a rather trying time with the sunroof which has thrown that off a little. ----------------------- 16th January 2021 - part 3So, this is the job I was procrastinating between by doing all of the other bits and pieces in the previous updates. Basically, I loathe sunrooves. Awful bloody things. Leaving aside the substantial weight right in the wrong place, they're just an unnecessary avenue for rust. This would be forgivable if they actually improved the driving experience, but as far as I can tell all they do is make you cold when it's winter, heat the top of your head when it's summer, and increase the wind noise without any of the benefits of a proper drop-top. So...it's got to go.   Out came the mechanism (20.5kg!). I then made an MDF cover to protect the interior from angle grinding.  ...and cut off the folded lip of the bracing frame.   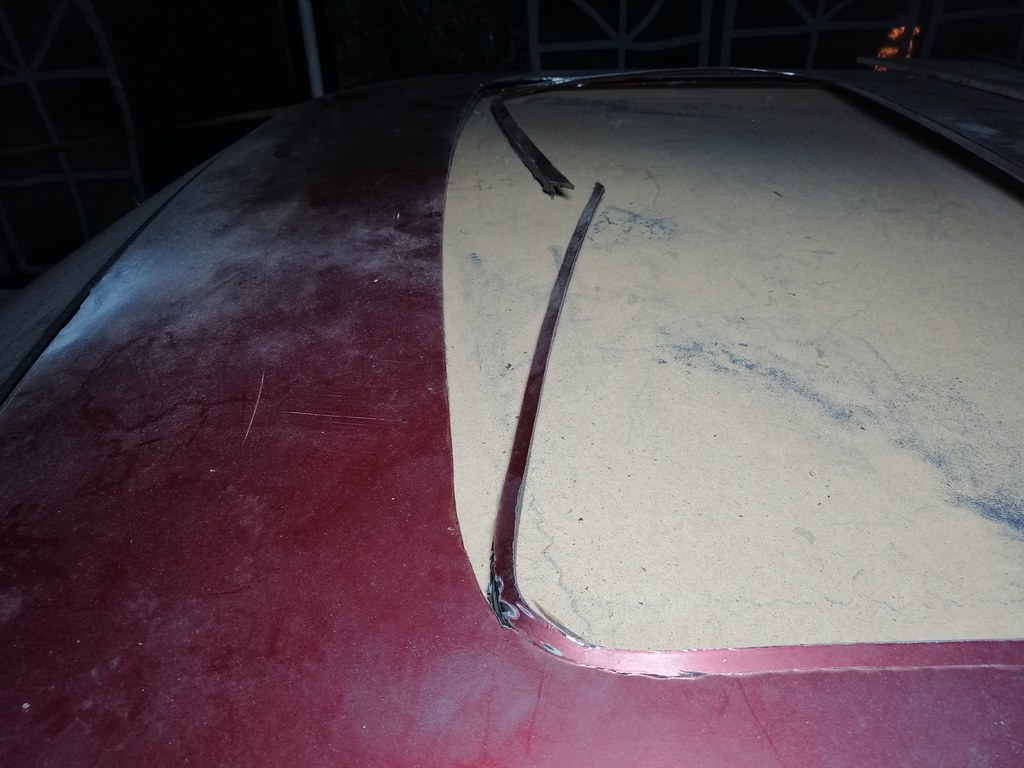  I then made up a panel, spent about an hour straight joggling the edge (wear gloves for this, it gives you blisters), test-fitted it and painted the centre so I wouldn't need to do too much painting in the car.    I then prepped the edge for welding and very, very slowly made my way around the edge, putting a tack every couple of inches and linking them together, making sure that each tack had cooled down to ambient temperature before doing the next one. Worked rather nicely if I do say so myself. Really minimal warping as the frame had in effect clamped the area around it so it kept its shape better than expected.    Then I removed the frame from underneath...  ...and the whole thing went wibble. The thing I hadn't considered is that I was welding a flat panel into a curved one, whcih coupled with the shrinking effect of welding all around the edges had put so much stress into the roof it just contorted as soon as I removed the bracing that was keeping it nearly straight. I had a go at trying to beat it into some sort of shape, but it was clear that wasn't going anywhere so out it came again...  I found an old dolly my dad had and a flat faced hammer and set to work shaping another panel (I ordered a proper panelbeating one, but thanks to Brexit that was stuck in a port in France for a month).   Unfortunately, I was a bit overenthusiastic on the first square foot I did and over-curved it. When I offered it up there was a big gap at the back, and I figured you'd need it to be pretty damn close to the right shape if there was to be any chance of success.  So, I ordered a bumping file and spent ages trawling the web for how to shrink metal. Turns out, if you've overcurved a large panel...you can't really practically fix it. The bumping file works brilliantly for shrinking quite sharp dents, or at least dents you can bridge with the length of the tool, but I beat the snot out of this panel for hours and it did nothing. I tried flipping it over and using the dolly from the other side, but that just introduces a weird s-shape into the panel. I'd got to the point of testing out heat-shrinking with a propane torch (does work, but very hard to get it shrunk in the right area to form the shape you want) when my replacement steel sheet turned up. Oh, and then to make matters worse that was the point that Storm Bella hit which put the final nail in the coffin of my cobbled together gazebo/garage thing (or tabernacle, as the GF had taken to calling it).  Normally I'm unendingly (possibly maniacally) chipper about all the work I need to do on the various projects, but I must admit at this point I wasn't a happy bunny! |
| |
|
|
|
|
|
|
|
|
GAWDAMIGHTY .. big pat on the back , and a hot bath for you ! (at least i hope thats what happened at that point in time )
|
| |
|
|
|
|
|
|
|
GAWDAMIGHTY .. big pat on the back , and a hot bath for you ! (at least i hope thats what happened at that point in time ) Yep! Lots of tea and biscuits from the lovely girlfriend  I'm pleased to say I think I've got it cracked now, but that'll come in the next update once I've sorted the photos. In the meantime, if anyone's considering welding in a sunroof patch panel. Don't! Bond it in using one of the fancy new automotive bonding compounds they've developed for sticking aluminium bodyshells together. There will be a bit of faff trying to clamp them up somehow, but you avoid all sorts of nastyness with warpage and shrinkage and all the other types of -age. That or buy a car without a sunroof to begin with  |
| |
|
|
|
|
|
|
|
|
|
|
or maybe leave the frame in ?
|
| |
|
|
|
|
|
|
|
or maybe leave the frame in ? Yeah I did consider that, but the non-sunroof headlining I'd bought runs far too close to the roof to clear it. I'd considered just using the sunroof headlining, but it's the original MDF-style backing which is notorious for drooping and the new one is a fancy fibreglass jobby (made by a company down in Margate). I could buy another fibreglass one for a sunroof model, but I'd rather put the (it turns out considerable) effort in to do it properly... |
| |
|
|
eternaloptimist
Posted a lot
   Too many projects, not enough time or space...
Posts: 2,578
|
|
|
|
|
I read about someone on here (Teaboy IIRC) who cut a section out of the back of a roof skin and cut that to patch where the sunroof was. The curvature was pretty much the same at the back of the roof as the front.
|
| |
XC70, VW split screen crew cab, Standard Ten
|
|
|
|
|
|
|
I read about someone on here (Teaboy IIRC) who cut a section out of the back of a roof skin and cut that to patch where the sunroof was. The curvature was pretty much the same at the back of the roof as the front. Yeah that would be a smart way to do it! TBH half the reason I persevered was that I want to get the knack of panelbeating, and what better way than to jump in at the deep end?  |
| |
|
|
|
|
|
|
|
24th January 2021So, at this point my wonderful parents came to the rescue and got me a belated christmas present of a slightly more substantial shelter, so down came the other one. 6 months it lasted, which was a little better than the 6 days the previous iteration did!  ...and put up the new tent. Much better construction, although because it's more enclosed it does get more condensation (but less rain, so probably equal). Oh, and because it's white inside it's much brighter with even a little lighting.  So with that sorted, the next step was to remake another panel, being much more methodical and even with the hammer and dolly, and lots of treks back and forth to test-fit. With that done it was another marathon joggling-fest followed by some painting. 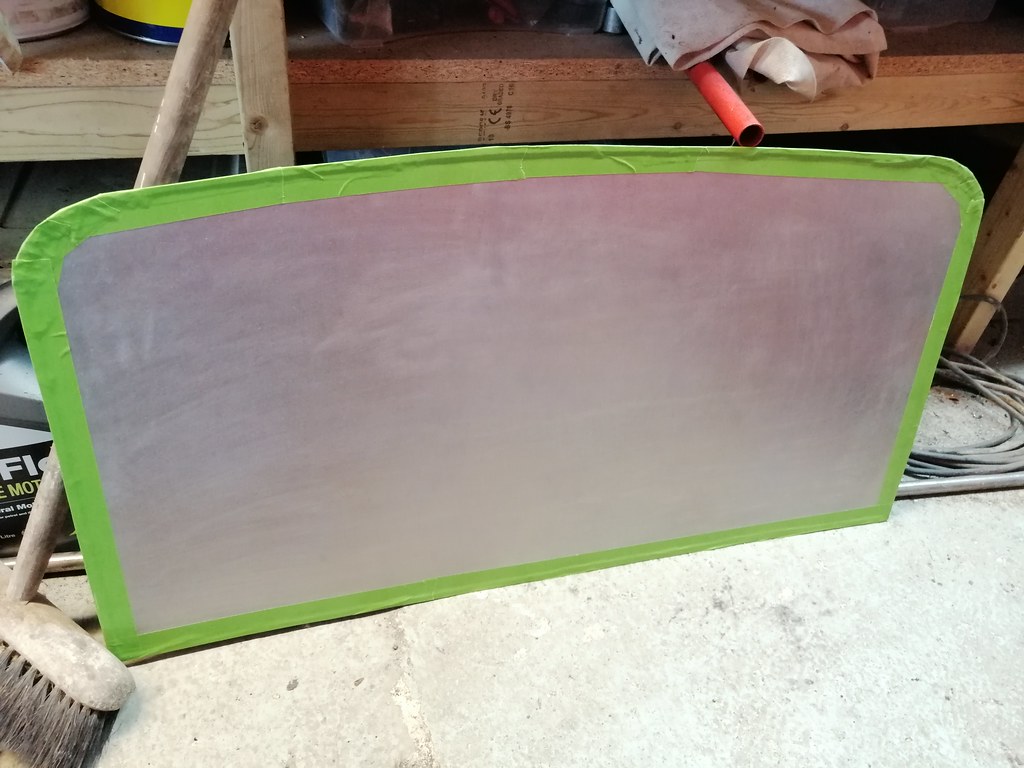  Some more prep on the roof...  ...followed by hunting about for every magnet I own...  ...and some more very careful welding.   By this point I'd read up a fair bit about panelbeating and collected some of the right tools (shrinking disc, proper hammer, couple of dollies etc.). This was just as well as without the frame to support it I'd got significantly more distortion than the first time round. This is some of it after a fair bit of work already (before I'd got the shrinking disc, so using a blowtorch to heat-shrink it).  And after the shrinking disc (which is magic btw, well worth the outlay).  It still needs more of a curve really, but I think with my skill level I'm going more for damage control than accurate panelbeating. At this point I felt this was the point where I should cut my losses and filler the rest, so I painted up and sealed the rest of the underside.   What I should have done, however, is test the headlining before painting. When I did, it turned out there wasn't enough of a gap to make up the dip in the panel the welding had caused as it shrunk the metal. What started out as a nicely shaped panel had been pulled completely flat!  That was it after I'd spent forever mashing the welds with a hammer and dolly to stretch them. Reading teaboy's thread, it seems he made a very tight fitting panel and TIG-welded it in which is a much more sensible suggestion (but would require the purchase of a TIG).
|
| |
|
|
eternaloptimist
Posted a lot
   Too many projects, not enough time or space...
Posts: 2,578
|
|
|
|
|
Sounds like a perfect reason to buy a new tool.
|
| |
XC70, VW split screen crew cab, Standard Ten
|
|
|
|
|
|
|
|
A man can never have too many tools.
|
| |
|
|
|
|
|
|
|
|
I'm not sure a TIG would help with the heat, when I have used them it seems to put more heat in than a tack of mig, the weld is soft though so it can at least be worked afterwards, I think my skill (or lack of it) is the limiting factor not the tools though!
it may seem more drastic but once you have the screens out it's not so difficult to change the whole roof skin on most cars (if you can get one)
|
| |
|
|
|
|
|
|
|
Sounds like a perfect reason to buy a new tool. A man can never have too many tools. I'm not sure a TIG would help with the heat, when I have used them it seems to put more heat in than a tack of mig, the weld is soft though so it can at least be worked afterwards, I think my skill (or lack of it) is the limiting factor not the tools though! it may seem more drastic but once you have the screens out it's not so difficult to change the whole roof skin on most cars (if you can get one) Very true! Funnily enough, I've just remembered I actually have a TIG  it's an incredibly cheap TIGMIG jobby that I hear aren't exactly brilliant, but I picked it up for £56 so even if it packs in after a year it's still useful for practice. Ran out of gas quite a while back and couldn't justify BOC's bottle rental when I barely used it (can't do ally, which is what I bought it for, my own fault as I didn't know about AC settings then). Should probably look for a place that doesn't do rental charges... From what I understood TIG does put more heat into stuff, but perhaps that helps with warping as you don't have such a large heat differential between the weld and the metal around it? Either way it's something that I do want to put together, but is tricky to justify the cost when MIG works well for 95% of jobs, is cheaper, and I'm halfway decent at it. Still, something that I'd happily jump into if a half decent TIG turns up at the right time... Oh, and when I started I was thinking 'surely a patch panel will be less work than an entire roof', but having done it I can see why people go down that route! |
| |
|
|
|
|
|
|
|
So, this next update will bring us bang up to date! At this point, I figured the neighbours would like a break from the colossally noisy work happening on the roof. I was about ready for another distraction as well so it all lined up quite nicely  A while back I'd bought one of China's finest floor mounted shifters for an E36/E46.  In all honesty, I was rather impressed. I'm sure it's not as nicely finished as something 3x its price, but it works, the bearing is smooth, and it will do as a basis for modification. First up was to do a little CAD modelling and cut the base plate to shape:     Next was to clearance the gearbox tunnel a little for the captive nuts and carefully weld the plate in place.   With that sorted, I thought I didn't really like the idea of the bearing just being open to all the road grit and muck chucked around under the car so I should make some seals. This is the idea I came up with for the underside. 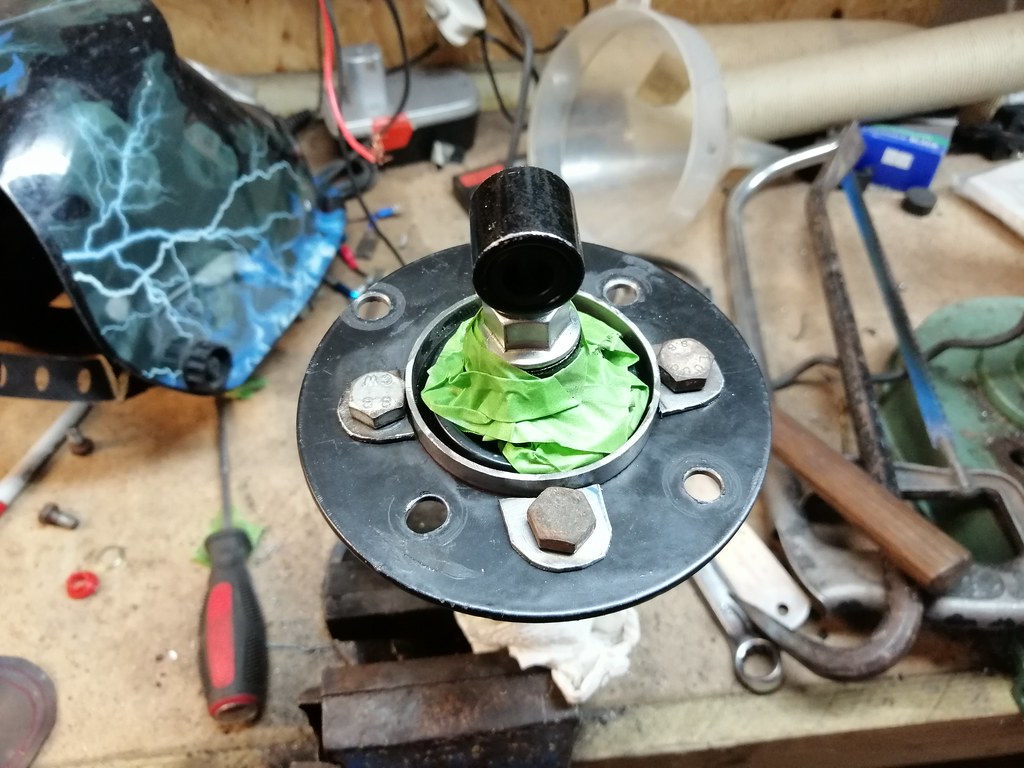 Found a piece of tube that fit neatly around the bearing housing and welded some tabs to it to make a clamp plate. That clamps a piece of rubber sheet that fits snugly over the spacer on the underside.   Pack that full of grease and pop a cable tie around the top to hold that tight and we're good!  Next up was modifying the little linkage that connects the gearstick to the gearbox which was way too long. I'm not sure I've got the offset right even after a couple of attempts, but it's close enough for a test to see if I can get the gears ok (I tihnk the offset affects how much distance there is as you go sideways across the gates).   Oh and it hasn't grown in size, they're different vices!  Lastly I had a bit of a brainwave about an upper dust boot. I'd bought a universal CV boot a while back that never ended up being used, and if I put a lip on the upper side to locate it I could probably make that work there.  And all fitted up!  Really I need to get another boot as I cut the underside a little short so I can't cable tie it on the bottom, but it worked rather neatly. Much more enjoyable job than the roof, and it's good to get something sorted that's a good puzzle but still well within my level of expertise. Helps keep the mojo going in the face of jobs that are a bit beyond my level of expertise like the roof!  |
| |
|
|
|
|


 How's the renault 17 going?


