|
|
|
Feb 16, 2022 12:30:21 GMT
|
Thanks guys! Agreed that it might need at least some little glasspack cherry bombs on the back in place of the resonators. I'll be interested to see if it drones at all considering that my mate's SD1 has an earsplitting drone at 2200rpm-ish. Been looking at helmholtz resonators for that to target the frequency of the drone specifically, which also knocks out that frequency at other rev ranges too so quietens it all down slightly. There's a bit of a balancing act to be done though between diesel clatter up front and exhaust noise. I want at least a bit of a fruity note to drown out the tractor at the front!  Oh, and did I spy a video from you about ITBs vitesseefi ?  As it's my thread I'll happily derail it by asking what the story is with those, and if there's a thread I can read about it!  |
| |
Last Edit: Feb 16, 2022 12:30:44 GMT by biturbo228
|
|
|
|
|
|
|
Feb 16, 2022 19:07:51 GMT
|
There is a thread about the ITBs…. But on the Sideways forum….. here sideways-technologies.co.uk/forums/index.php?/topic/7564-plenum-manifold-to-throttle-bodies/#commentsI’ve yet to drive the car (very salty roads until very recently), so consider it unmapped at this point. I’m looking forward to it though. Rather looking forward to the driving report for the Jag too….. 🙂 On the exhaust sound, the 2.5 V6 TDIs in early 00s Audi A4s and A6s sound superb. Very mellow yowl, unfortunately cut short when you run into the governor about 2k early…. Nick |
| |
Last Edit: Feb 16, 2022 19:11:57 GMT by vitesseefi
1967 Triumph Vitesse convertible (old friend)
1996 Audi A6 2.5 TDI Avant (still durability testing)
1972 GT6 Mk3 (Restored after loong rest & getting the hang of being a car again)
|
|
|
|
|
Feb 23, 2022 11:08:48 GMT
|
Ah squirreled away in the technical pages  I tend to loiter around the project threads page, must venture out every now and again  Yeah the M57 isn't exactly a rev-hungry beast. Haven't really come across a diesel that is apart from the OM606/605, which is part of the reason they make so much power. You can get cams for the M57, but not sure if they do anything for the redline though. Not that the AJ6 revved particularly high either (5500rpm), so the rev gauges are pretty well matched. Actually, just in case it interest anyone, I've been trying to do some research into the internal forces in various engines to see if I can work out what revs different engines can reach by comparison to other similar ones (either of the same type, or different but similar ones). It was all in the effort of trying to get a higher revving AJ6, but as I compulsively collect data it's ended up with most I6s of note, a fair few V6s, and a couple of V8s/I4s. There's some estimation in there (e.g. 2/3rds conrod weight is rotational), but a lot is solid. It's nuts some of the internal forces, and how much these can vary between slightly different engine setups. The critical factors I've found are reciprocating weight at the big end (can be up to 3.5 tons!) and surface speed of the main bearings (typically 8m/s for stuff near the limit, but some Jag V12s can get up to 11m/s!). I was also interested in pin diameter vs piston reciprocating weight, which is similarly nuts (can be up to 2 tons on an 22mm hollow tube!). Here's a link to it if anyone's interested. Getting a clear picture is largely dependent on some kind soul having measured complete pistons and complete conrods separately, so if anyone has any measured that'd be amazingly helpful! One of the key bits missing Triumph-wise is a 2.0l I6 piston weight if you know it Nick. There's lots of info about, but not that! Simon |
| |
Last Edit: Feb 23, 2022 11:19:53 GMT by biturbo228
|
|
|
|
|
Feb 23, 2022 18:53:25 GMT
|
|
The om60x is a indirect injected diesel engine, those rev higher easily then most modern direct injected diesels.
My 2.4 jtd 20v 5 cilinder has the limiter at 5000 but not much use going past 4500 in the current state. I've seen some examples with 400+bhp that raised to 5500. The stock engine has been known to support up to 500bhp/1000nm on stock internals, those are beefy parts..
|
| |
|
|
|
|
|
Feb 26, 2022 12:31:43 GMT
|
|
Darkside Developments extend the rev limiter from 5,000 to 5,200 on the 1.9 and 2.0 TDI PD units. Their BKD Jetta made 343bhp!
|
| |
|
|
village
Part of things
  Always carries a toolbox. Because Volkswagen.......
Posts: 567
|
|
Feb 26, 2022 22:09:15 GMT
|
|
OM605/606 also make good power because the heads flow an absolute intercourse ton!
|
| |
"The White Van is strong with this one...."
Chris "Chesney" Allen 1976-2005 RIP
|
|
|
|
|
|
|
Yeah it's a bit nuts how much power you can get out of oil burners now. One of the reasons I went with the M57! Didn't know that you could get the JTDs up that high though! I knew you could get mid-350s on the newer 20v versions, but 400-500 is pushing as much as people are getting out of M57s with 0.6l more displacement. Loved the 10v version in my dad's 156 when I was borrowing that. Nicest sounding diesel I've every heard. Proper Quattro-esque warble. Latest updates on the Jag  now that the starting conundrum has been solved I can move onto the last of the suspension work. First off is replacing the rear carrier bearings (a set of needle-rollers between the rear suspension lower arms and the rear suspension upright). Didn't get off to a great start as I bought the wrong bearings!  There's a degree of confusion with XJ40 parts as the bits on later cars ('94, and I think '93 for some bits) are interchangeable with later X300 bits but not the earlier cars. Late XJ40s are pretty much X300s under the skin in a lot of respects, including rear suspension. Key differences are the lower wishbone which is a tubular cast thing on X300s, but is a stamped A-arm on most XJ40s. Turns out the bearings are different as well. The difference in height is subtle, but enough that the carrier won't fit back into the wishbone (and the through-bolt is a different diameter too). With the right bearings ordered I repurposed an old crush-tube as a press tool, and used the through-bolt for centreing.    The old bearings races are a royal pain to get out (there's no machined slot in the casting to let you drive them out, and there's only a little lip around 1/3rd of the circumference). It's typical practice to just leave them in if they're not knackered as it's not a high speed bearing surface at all, so that's what I did! Next up was filling the gearbox. There's a recommended mix of 50/50 Redline 75w140 NS/Redline D4 ATF that's supposed to reduce the gear chatter you get at idle on single mass flywheels. Filling it was a challenge, but my mum nd sister came to the rescue with an old rapeseed oil can they had for their horses, complete with pump handle!  Worked an absolute treat  The last big job on the car is a front suspension overhaul, so it was about time to get on with that! In case people are unfamiliar with XJ40s, the front springs can be a bit of a challenge. They're curved at quite an angle, obscured by all sorts of stuff in the way, and are mightily beefy springs under a lot of preload. 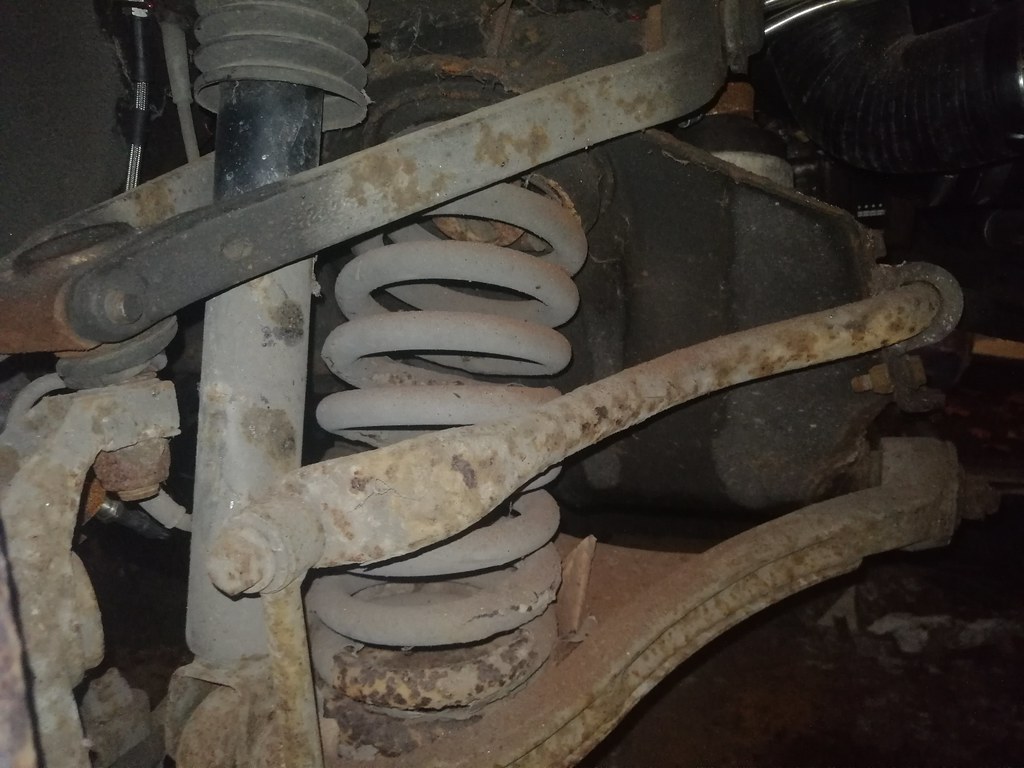 It's not really possible to get traditional spring compressors on in a safe manner, so there's a factory tool for the job (which is extortionately expensive, although a number of XJ40 clubs have them to loan to people). It's basically a sodding great threaded bar that slots up through a hole in the bottom of the spring pan and locks into the subframe above it, allowing you to wind the spring pan down safely.  As there's a possibility of me doing it multiple times as I sort out spring heights I thought it would be a good idea to make one, as a number of others have done before. Here's the one I came up with:    It's an M20 coarse threaded rod with an 8mm pin pressed into the end to do the locking. For the screw section I drilled a 20mm hole through a 50mm steel ball as the spring pan changes orientation as it drops so needs something that allows for that movement. Below that is one of the wrong rear carrier roller bearings to allow it to turn smoothly (others have used a couple of greased washers, but I had the bearings ad they slotted on perfectly). Then a random bearing race I had in the 'press tools' pile that just so happened to fit the outer race of the carrier bearings, and then a washer and nut. That threads up through the spring pan and twists 90 degrees to lock into the subframe thusly:   You have to get the car pretty high to do this, which is no problem if you're a proper garage and have a car lift, but is a little tricky in my tabernacle on sloping tarmac! Took it slowly and carefully though and I managed to get there in the end   Quite the angle! About 4" from the tailpipe to the floor :S I did manage to work out though that a length of 51cm for the M20 rod will still allow the spring pressure to be released, but is about as short as you can reliably go with my bearinged setup. The 8mm needs to be about 30-32mm across to fit in as well. With that setup, I found you need about 34cm vertically below the spring pan, which puts the bottom end of the tool 19cm out from the plane of the hole. At the angle that the tool slots in at, you need 41.5cm between the bottom of the spring pan and the floor. Bit hard to explain without a diagram, but might help someone in the future! Lastly, it's a good idea to pop some M8 threaded rod into the bolt holes for the spring pan to guide it down (and back up again) as it does change orientation quite a lot! Also offers a little bit of safety in case something gives way.  On cars with similar setups like Alfa 105 GTVs you can just wind the spring down using threaded rods in the boltholes like this, but I highly doubt they'd survive it on an XJ40. They'd probably shear and send bits of M8 stud and an enormously preloaded spring rebounding into your crotch (which is roughly where all of this lot is pointing while you're undoing it all) :S Still, all worked very nicely indeed and the springs are now dropped  next up is supporting the engine and steering rack so I can pull it out, give it a wire wheel and a paint, then throw it all together with new bushes and lowered springs  |
| |
|
|
|
|
|
|
|
|
All looks a bit cobbled together, really.
Bosh a cat stamp on the side and you can sell them for squids!
|
| |
|
|
|
|
|
|
|
Haha I think I still have the Leaper from the Jag that got crushed by a tree. Should attach that and call it a 'special edition'  |
| |
|
|
|
|
|
|
|
All looks a bit cobbled together, really. Bosh a cat stamp on the side and you can sell them for squids! Some of the proper Jaguar “special tools” are a bit Heath-Robinson too. |
| |
|
|
|
|
|
|
|
Mar 29, 2022 10:19:13 GMT
|
Not a great deal of progress on the Jag due to various holidays and house stuff, but I have managed to pull the front subframe out ready for de-rusting, painting and re-bushing.  To support the engine I thought I'd make one of those support bar things that sits in the drip channels on the bonnet. Used some 1" box section, a length of ally scaffolding pole, some exhaust u-clamps and some silicone hose to make this:    Forgot to take a picture with it installed, but I've got a couple of ratchet straps to take the load and painted the support brackets. Really must paint more of my home-made tools, makes them look much more professional!  Works well enough, and was worth making one rather than buying it as I made it a couple of inches longer than the ones available commercially and you really need it on an XJ40! Couple of teething problems though. First is that I need to make the little cutouts where the scaffolding bar sits angled slightly as the line of the wings tapers in on most cars. Second is there's not really a good place to support an M57 now that I've moved the engine mounts around. One side is hooked around an engine mount, but I've had to wrap the other around the alternator which I'm not amazingly happy about. So in this instance it's serving mainly as stabilisation for a jack under the sump, but on a less busy engine it should work rather nicely  |
| |
|
|
|
|
|
|
|
Right! Progress has been a little glacial, but some at least has been made  Pressed out the bushes for the front wishbones which helpfully split in half (unlike later X300/X308 ones), and strung them up in the new place ready for painting (first bit of car work done at the new house!).  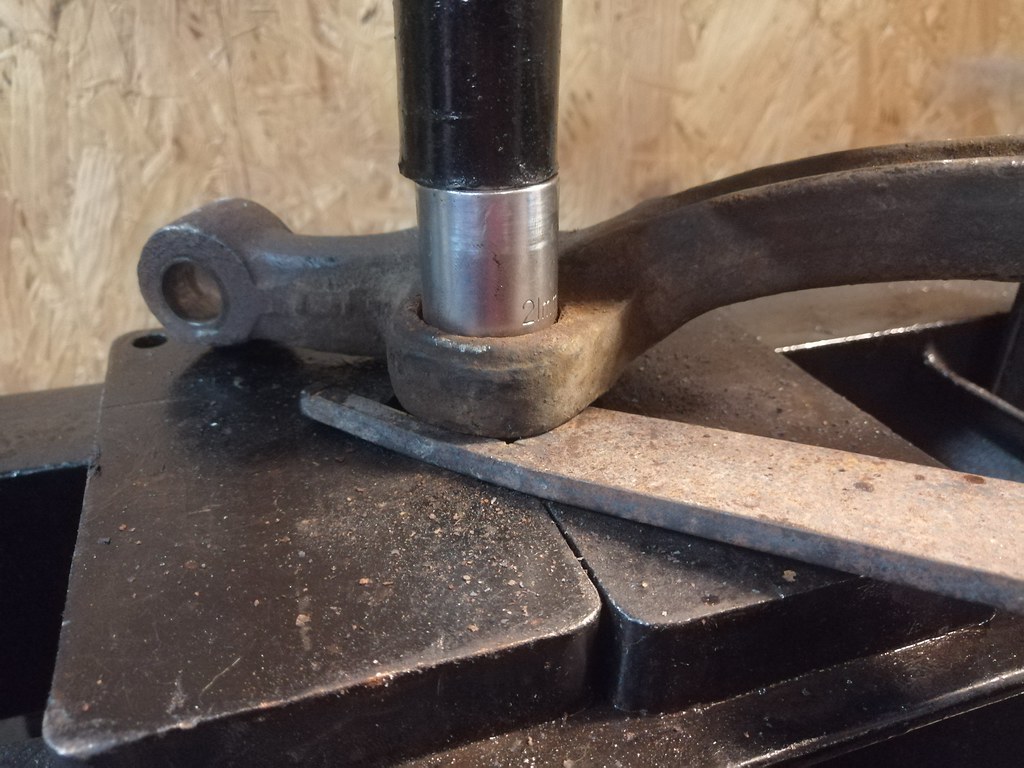  Presses are marvellous things. All went smoothly apart from one on the lower wishbone which has a pronounced top hat section which covers all of one side, meaning you can't get the press to bear on anything. I flap-wheeled off the rubber, carefully slit the 'brim' of the top hat, and prised it up with a screwdriver so I could cut it off with a cutting disc.   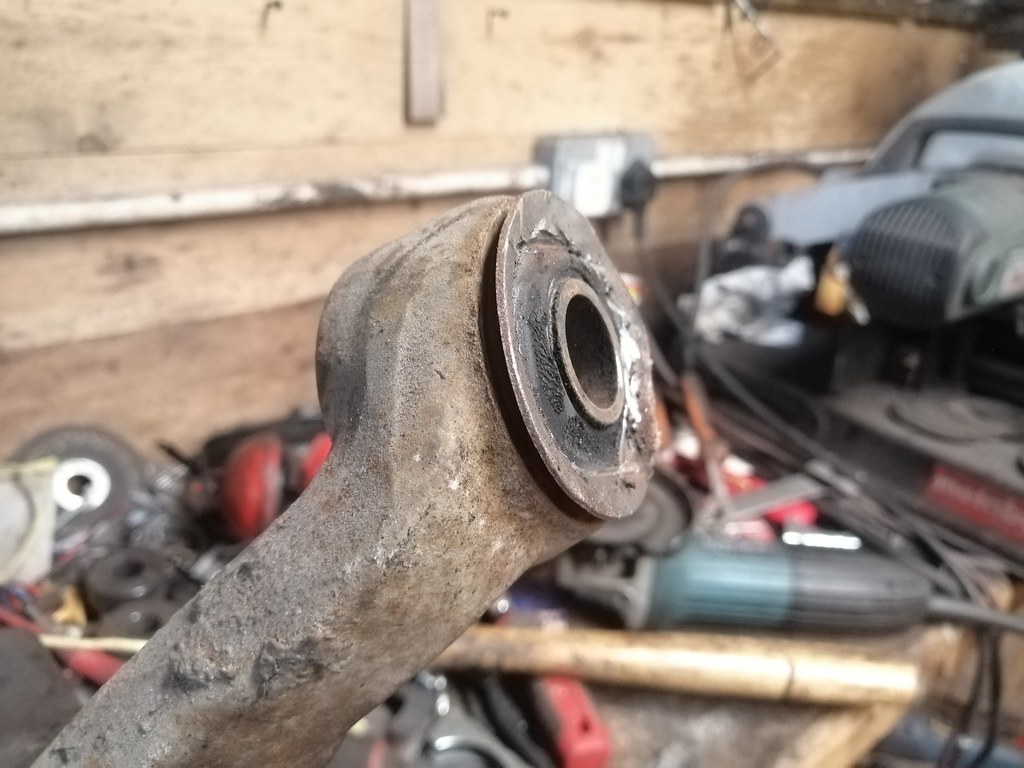 Next up was the rear subframe bushes. It's a sort of voided offset jobby, so I punched a few marks into the outside to show where it needed to line up with the new bush. 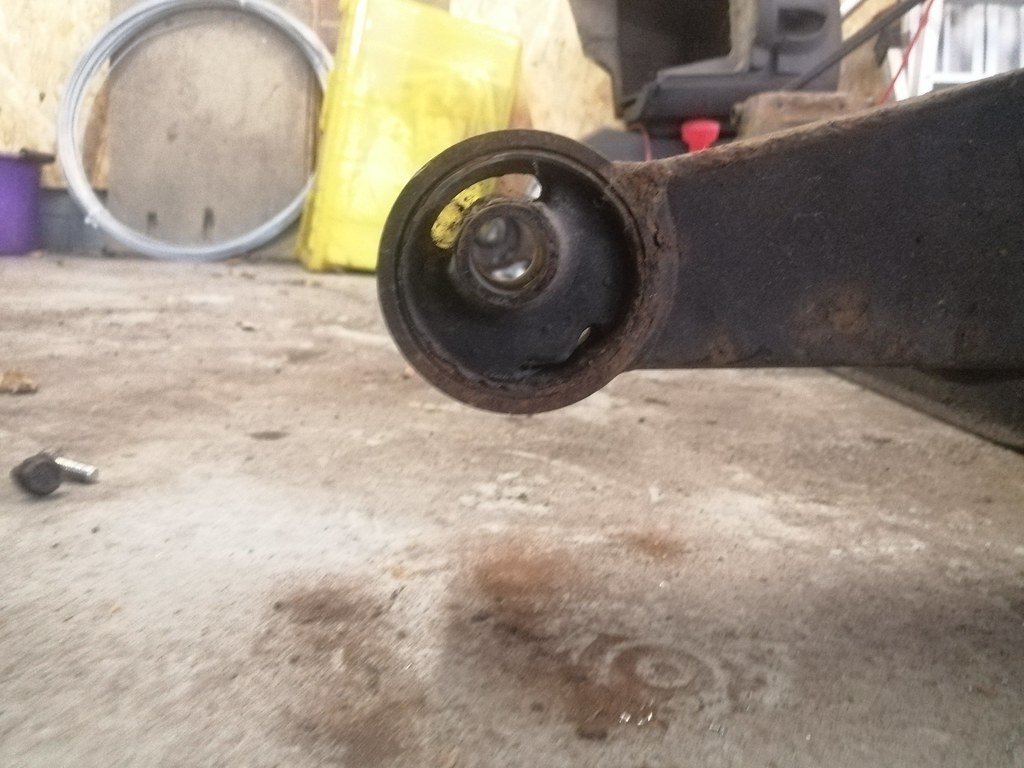 Unfortunately, I couldn't get a socket or random piece of hoarded junk of the right size to press on it squarely, so I ended up drilling out the rubber and cutting through the outer band with a hacksaw. Just as well I decided to do these as they'd mostly delaminated! Next up was stripping the paint off, for which my new monster Record 25 vice came in very handy   Bit of phosphoric acid and a lick of paint and it was looking very shiny!  Pro tip though: if you've got a very heavy rear subframe hung up on home-made hooks, make sure they're bent enough to hold it securely. I hadn't, and it slipped off as I was degreasing it, swung down on the other hook, clouted me in the side and broke my rib! Less than ideal mid kitchen refit  the last few weeks haven't been a great deal of fun, but I'm on the mend now  Ah well, onwards and upwards! These bushes are some of the few that you can't get in poly for these cars, and as the press didn't quite work for me I thought I'd make a little bearing puller tool:  This is a length of inch threaded rod left over from the spring compressor tool, some plates made of 2x 7mm flat bar (doubled up because it's pants quality B&Q steel or something like that), a sodding great inch drive socket and one of the old taper bearings from the rear suspension carriers to help it all turn. It fits together like so:  It was still a bit of a fight to get them in. Because the bush eye is offset it kept pulling it askew, even when it was 5mm from being fully home. I had to pull it in 3mm at a time and then clout it with a big hammer to pull it straight before the next pull. Made a hell of a racket! So much so that I was kicked out of the communal garage by my mates who were also trying to work there and sent back to my tent  got there in the end though, sped up by one of my mates feeling sorry for evicting me and lending me his impact gun  That done, I could start building everything back up again   This is where we're at today. I had hoped to get the subframe fitted, but I've stumbled upon an issue with the lower wishbone fulcrum bolts. The castle nuts are past it so I'd hoped to get it all fitted loose and then pop some new nylocs on the end. Unfortunately Jag's used a very strange thread for these long through bolts. I'd initially spent a lot of time fettling them as I thought they were M14x1.5 and the old castle nuts had just chewed the threads a little on the way out, but they're actually 1/2" 18tpi which is a very weird thread indeed. The only one that corresponds to it is an NPT thread (although I think NPT might be tapered). They're not whitworth as the thread form is too pointy. Either way, it's tricky to get nuts for them. Luckily, you can get whole replacement lower fulcrum bolts with M14x2 threads on the end so I've ordered a set of those. Unfortunately, these are some of the bolts that are really very much easier to replace with the subframe out of the car so it'll have to wait a while (next weekend being kitchen work surface time, so probably the weekend after). It's getting there. Slowly but surely, but it's getting there  |
| |
|
|
75swb
Beta Tester
Posts: 1,052
Club RR Member Number: 181
|
|
May 10, 2022 10:57:07 GMT
|
|
Cracking progress. Sorry to hear of the injury, do hope you're healing up ok!
|
| |
|
|
|
|
|
May 10, 2022 11:48:21 GMT
|
Thanks man  definitely on the mend now. It's interesting as I hadn't really thought I'd done anything for the first few days. Apparently your body lives on adrenaline for a day or two, at which point it decides that you really should stop lifting packs of tiles around and lets you know about it  Was less than ideal as I'd got the subframe in the boot of my Alfa while on the adrenaline high and had to wait a week and a half to get it back out again  |
| |
|
|
|
|
|
May 24, 2022 16:02:45 GMT
|
Little more progress on the Jag. First was a little light duties stuff while I recovered, trying to get a working coolant temp sensor for the Jag gauges. I'd initially bought an in-line takeoff for the radiator hose like this guy, but wasn't amazingly keen on the temp reading coming from the other side of the thermostat. Then, I was scrolling through some of the FB car feeds and spotted someone asking where to take a coolant temp reading on an M57-swapped E34 and someone mentioned the coolant drain plug about halfway up the block. Turns out it's the same M14x1.5 thread as the BMW sensor, which was easy for him but as my Jag sensor is 5/8 UNF I'd have to adapt something. This is what I came up with:   It's a 5/8 UNF female to M14x1.5 male brass adapter jobby, with the bore drilled out ever so slightly to let the Jag sensor fit through. I cut some of the excess threads off the end to let the tip of the Jag sensor poke out a bit, but it'll all probably heatsoak quite effectively anyway (especially as it's right next to the downpipe!). After that were a few more bits and pieces I'd like to do while the subframe's dropped. First up was the oil pressure sender. As standard, M57s have a boggo on/off switch, but as the XJ40 has a gauge I'd like to use it! The BMW switch is on the underside of the oil filter housing here:  I didn't much like how much space there is around it, so I thought I'd try and find a pressure sender that's the same M12x1.5 thread as the BMW one so I could swap their positions on the little brass tee thingy that I had to buy from Poland because no-one else is selling ones that have M12x1.5 all the way around...  It was at this point that I discovered the little note I'd scribbled down saying 'Jag sender, M12x1.5' was, in fact, quite misinformed. It's a bigger thread, although not quite sure what it is yet. Not a major issue as the Jag senders are notorious for dying (apparently the AJ6 oil pumps produce a lot of vibrations along the oil column that kills senders).  After a fair bit of googling and coming across this thread I plumped for this sender with a range of 33-240 ohms. As the Jag gauge reads from 230 ohms at '2' and 75 ohms at '8' I figured it'd be close enough with a resistor in line. That goes together like this:  ...and in place like so:  It'll be a pain to access after the subframe goes on, but hopefully still possible with crows-feet spanners. The BMW sensor is just about short enough that if you can get the new sender off you can rotate the whole thing round to unscrew it which is lucky. Jury's out on clearance to the engine mount though...  The other thing that needed doing before the subframe goes on is sorting some rust by the front mounts. I'd noticed there was quite a bulge in the metal where the mount sits on one side, meaning there was probably quite advanced rust creeping inbetween the layers there. I was not wrong!   It's amazing how much more volume rust has than steel. Maybe 5mm of rust had formed from a 2mm piece of steel. This is how far it went:  Choppy choppy, weldy weldy, grindy grindy: 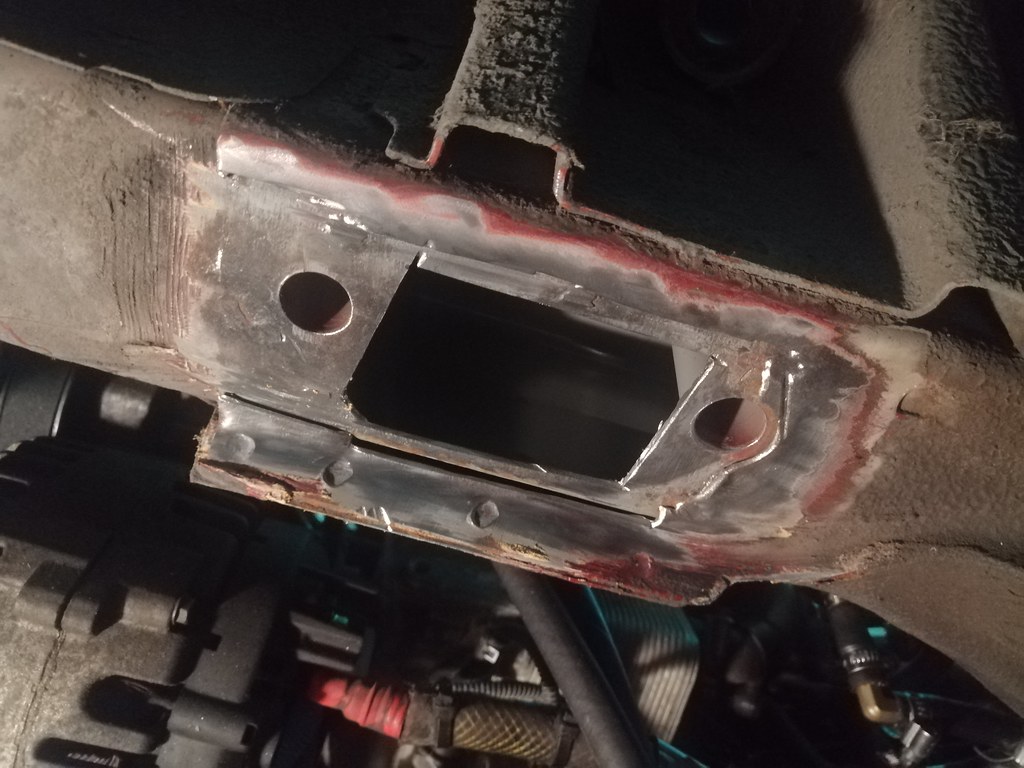   Normally I'm against re-making multi-skinned layers, favouring just stepping up the steel thickness and welding in one plate. However, in this area it was a bit tricky to do that and retain the position of the locating tubes for the subframe so I figured I'd just try and do a good job of rust-proofing between the layers. I've got a pic of the 1.5mm covering plate I cut, but not of the zinc primer between or having welded it one, painted and sealanted it so you'll have to just trust that I did it   Although the other side looked alright I wasn't convinced so I chopped that back too. 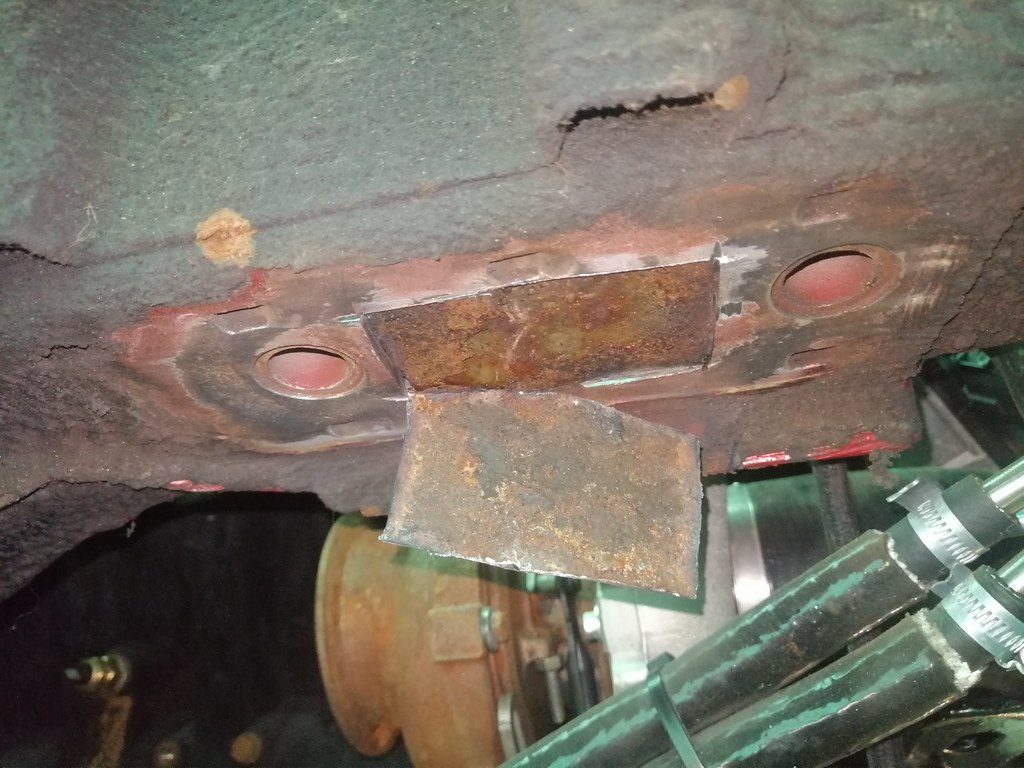 The rust wasn't as advanced under there, but had spread further back so I ended up chopping off more of the second skin. The thicker inner plate cleaned up well enough with a wire wheel and a linishing disc so I just did the outer plate on that one. No pics, but it's all sorted ready for the subframe to go on, barring any further nasty surprises  |
| |
Last Edit: May 24, 2022 16:14:09 GMT by biturbo228
|
|
|
|
|
|
|
Well what a week! I'd originally booked last week off to go to the Isle of Man TT and the other half had booked a walking holiday up in Scotland. In the end me and my mates decided we were too poor for a TT trip this year, but I kept the days off and spent a solid week on the Jag instead. Loads of progress! First up was to manhandle the front subframe back into place. Doable on your own, but not easy. Much better with a helper.   Then it was a case of refitting all of the rest of the suspension, with new balljoints and tie rods all round.   The new front springs are a custom set I bought from Coilsprings.co.uk yonks ago and I've no idea what spec they are. I think they're something like 35mm lower and 20% stiffer, or the other way around. The rears were properly low and needed spacers so these might need to come off again to fit some little nylon discs and raise them up a bit. They were wrapped in newspaper so I could see it was 2016 when I bought them so I don't feel so bad about not remembering what they are  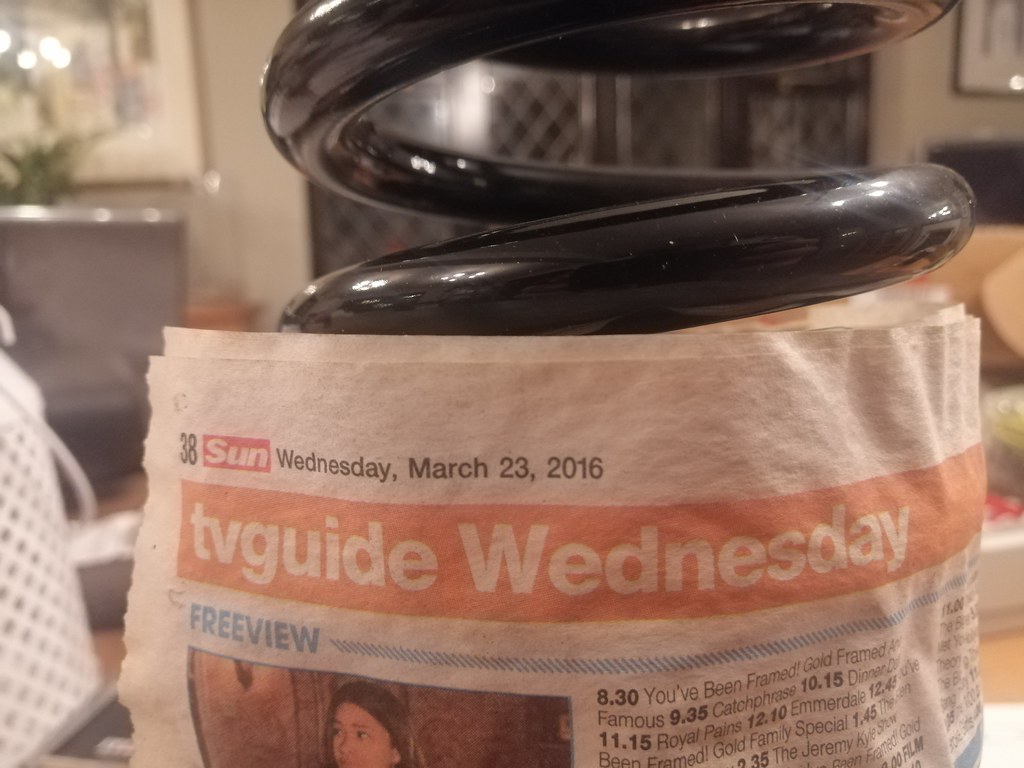 Catchphrase on live TV! Oh, and in case someone's changing their inner tie rods on one of these, there's a little locking ring built into the inner rod which is peened into this little slot on the rack:  It's quite tough to remove them without loosening it! Ask me how I know  Also, the replacement tie rods you can get have a bigger set of flats than the originals (34mm I think vs 32mm) which I didn't have a spanner for so ended up grinding them down a little:  Seemed to work ok  Oh, and there's two different types of steering gaiters for these. My '92 is an early one with the thinner outer gaiter. My bet is they change over in '94 with all the other X300 stuff, so watch out for that. After that my mate was about to give me a hand fitting the tyres to my new wheels! Dead exciting  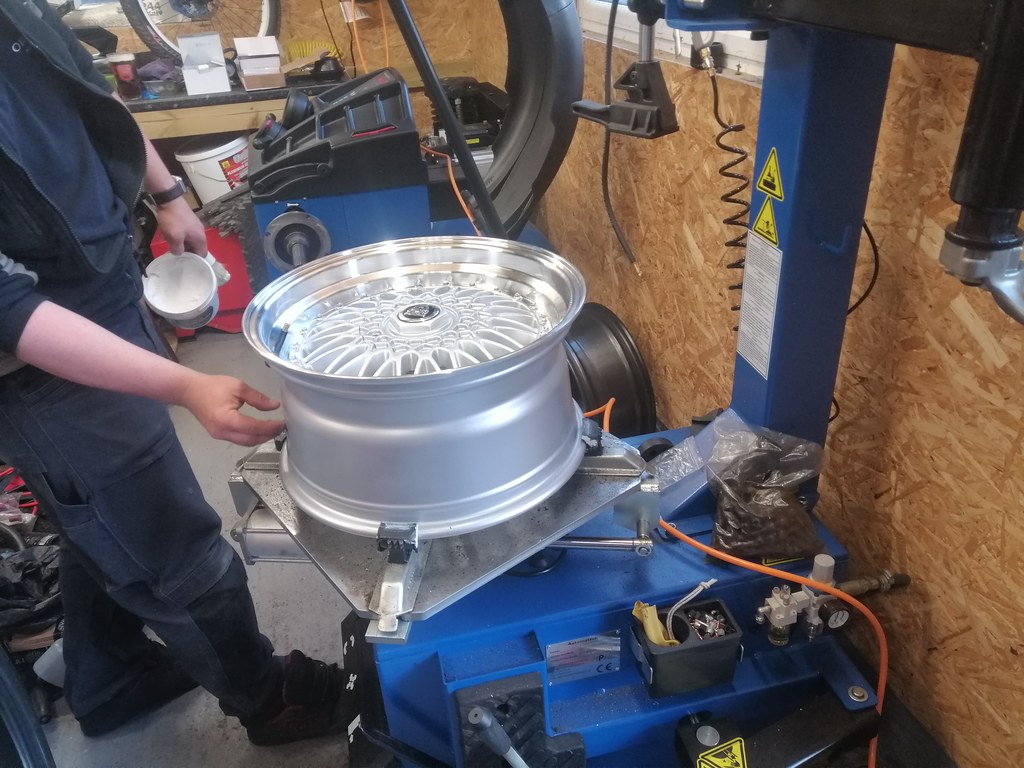 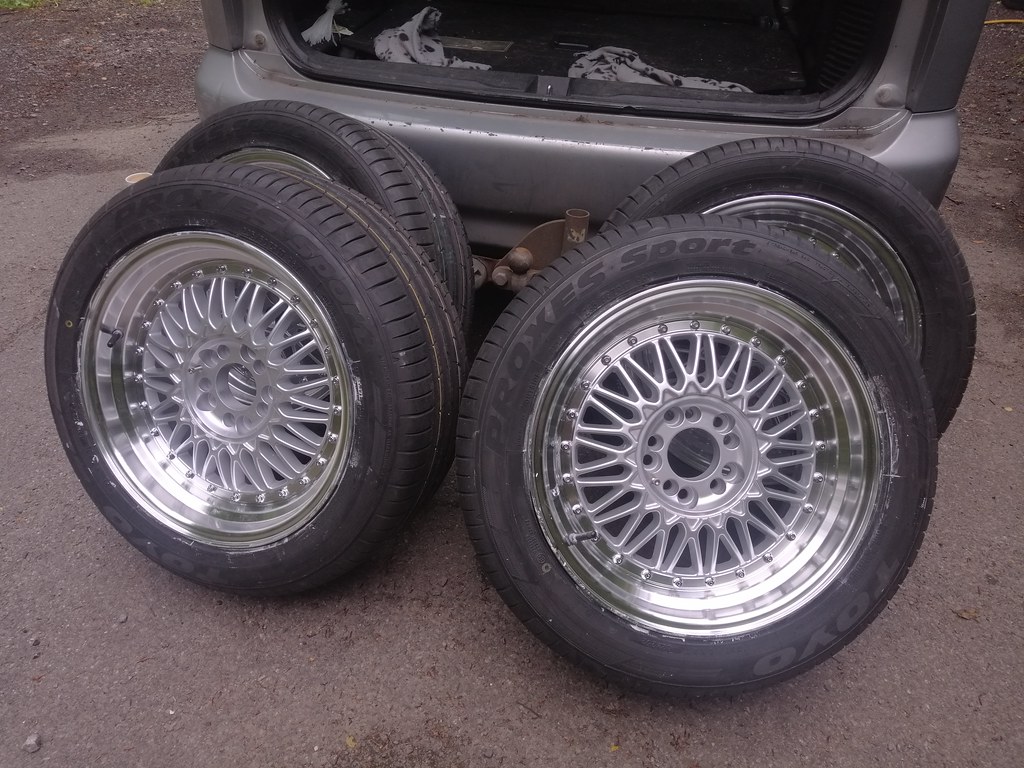 Shiny man! Went for 235/50 17s on the front and 255/45 17s on the rear. Oh and we weren't amazingly impressed by the balance of the wheels as stock. Not really sure what to expect as it's the first set of aftermarket wheels we've balanced, but they needed a fair few weights to even them out. We checked and it's definitely imbalance in the rims rather than the tyres. This is the worst one:  Still, they look phenomenal and the fitment is great  Stock 15s:  Shiny 17s: 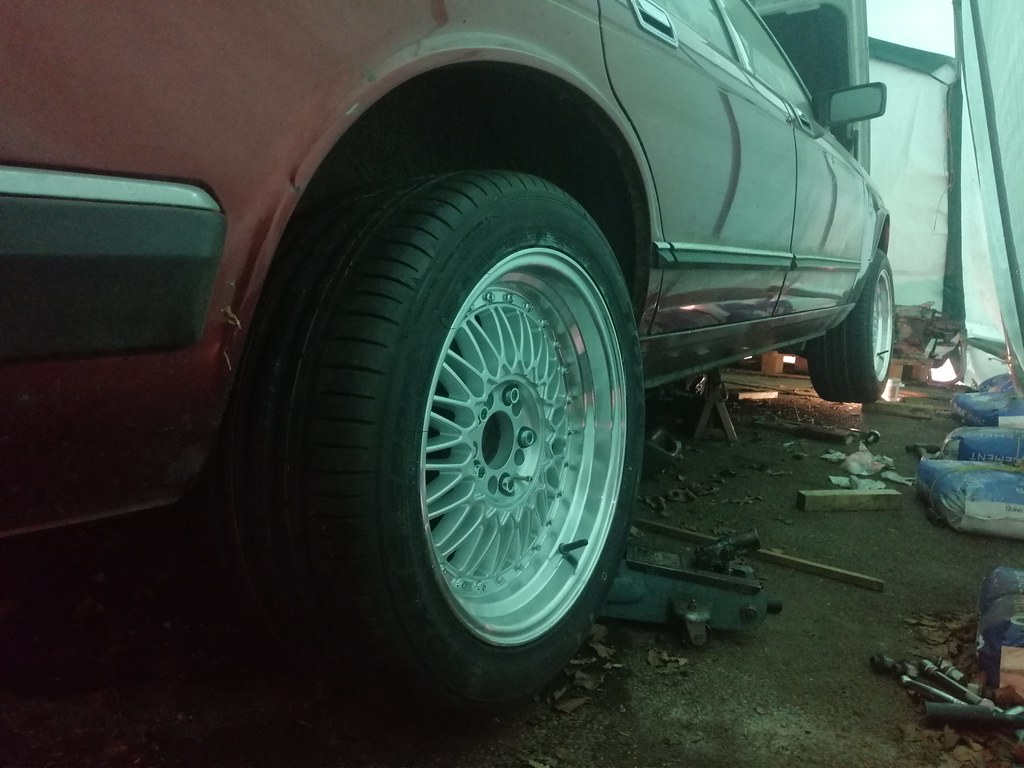  Definitely a fan of 17s on XJ40s. A lot of people fit 18s, and they look good too, but not quite enough sidewall for my liking on an older car. They're Japan Racing JR9s in 8.5J ET20 if people are wondering. 5x120 PCD. That let me drop one side down and whip the propshaft out again. I've decided I don't much like the idea of a 30mm centre bearing with the amount of torque this thing will put out, but have cobbled together an idea that involves a 6-speed Transit propshaft UJ and sliding spline section and the bearing race from the E46 330d as it's 35mm ID but the same OD as the Jag centre bearing so should press into the carrier ok. That's with the propshaft shop in Bexley as we speak! From there it was lots of little finishing things like horns: 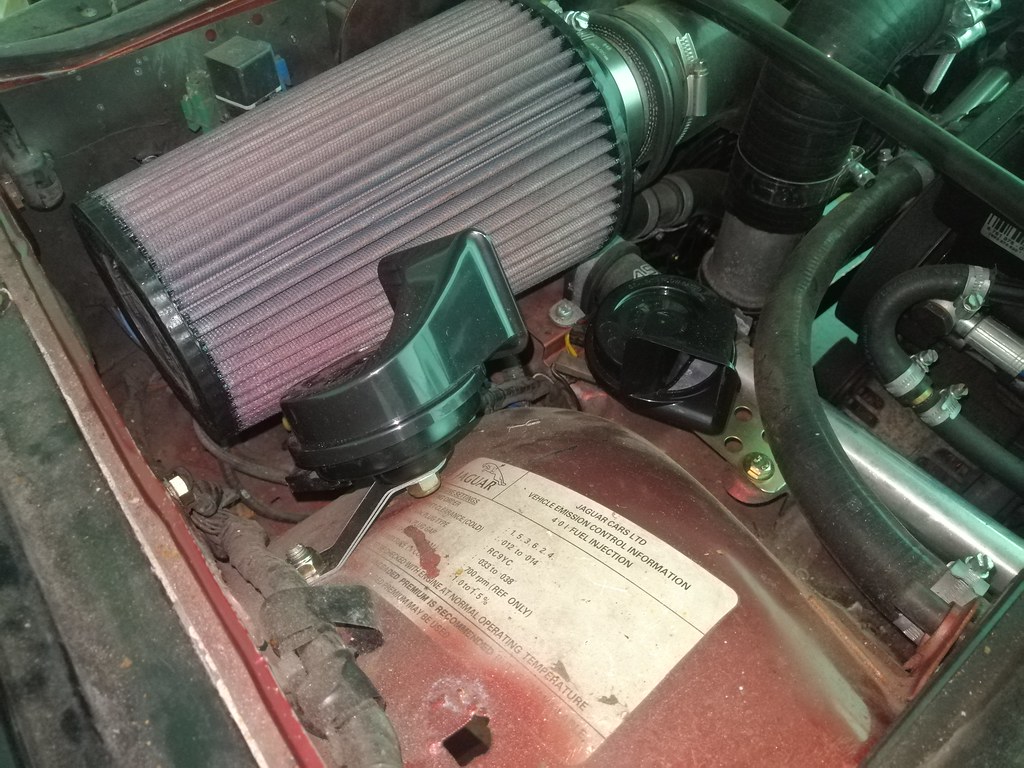 Front bumper:  Fibreglass boot (4kg saved):  ...and a little support bracket for the exhaust heatshield as it was a bit too flappy for my liking:  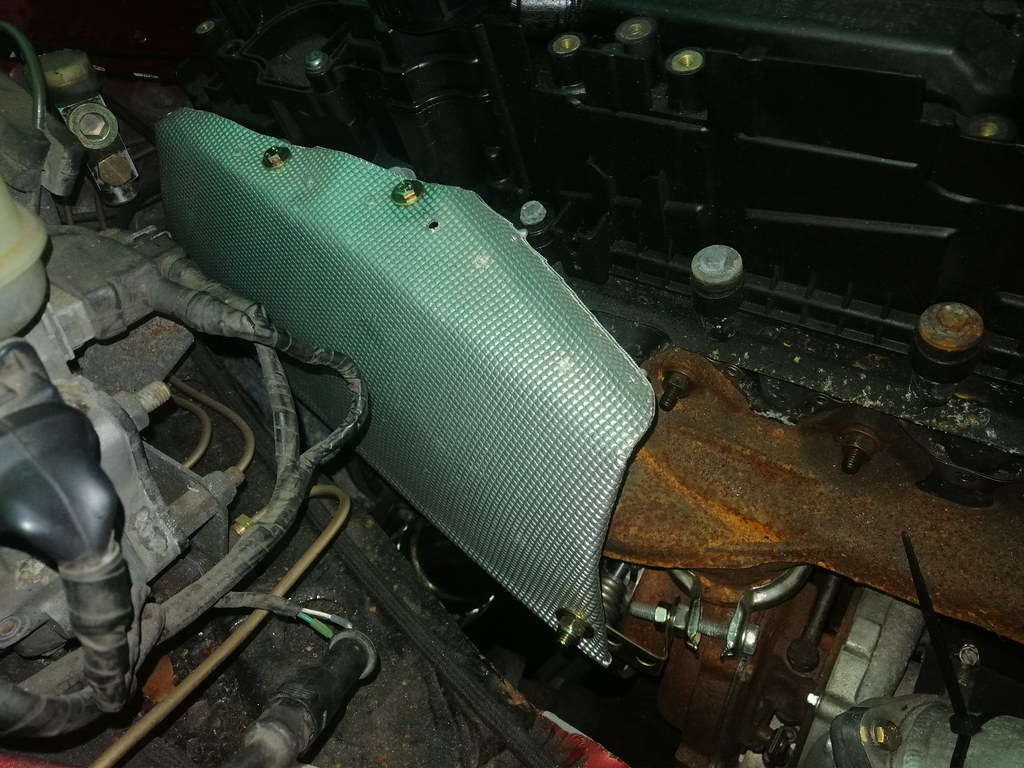 Oh, and as I was filling it up with coolant I think I discovered what killed the old engine all those years ago. Started hearing the telltale 'drip drip drip' of something leaking, and traced it to one of the original heater hoses I'd re-used. Looked fine in situ, but in taking it off this appeared!  That'd do it! No wonder it had run dry of coolant and overheated! Nice to find a definite culprit. So yeah, that's where we're at. A propshaft away from MoT*  *plus all of the finishing stuff like 'paint', but that won't stop me driving it... *plus all of the finishing stuff like 'paint', but that won't stop me driving it... |
| |
|
|
|
|
|
Jun 12, 2022 17:02:29 GMT
|
|
I winced at the bit with the broken rib, be careful as if you do yourself a mischief we will all miss the thread updates 😂
|
| |
|
|
|
|
|
Jun 16, 2022 11:39:03 GMT
|
Thanks man! Definitely will do! I was a little skeptical of the hook I'd made when I looked at it first but figured it would be fine. Always useful to have a reminder to trust those sorts of thoughts  All healed up fine now  |
| |
Last Edit: Jun 16, 2022 11:39:18 GMT by biturbo228
|
|
|
|
|
|
|
Big weekend man! First thing is the propshaft was ready so I trooped up to Bexley to fetch it. Terrible photo, but this is a beefier 35mm centre bearing and a sliding spline section fitted to a Jag centre bearing housing:  If anyone wants to do this in the future then I'm afraid I've no idea what bits they used! I had brought them a 6-speed Transit propshaft to use, but the sliding spline section was too long to fit in the shorter section of prop so they said they'd order in some parts for it. Was too excited and forgot to ask what bits they'd used  The actual bearing itself is from an E46 330d, and presses out neatly from the rubber housing. It's got the right 55mm OD to fit into the Jag carrier which is handy as all the ones I could find for sale with a 35mm ID have a larger OD. Had to buy the whole assembly just for the bearing as no-one would sell be just the bearing itself! That let me throw the exhaust back together and it was finally ready for a shakedown run! Only issue is that there was a sodding great Jag engine and gearbox in the way  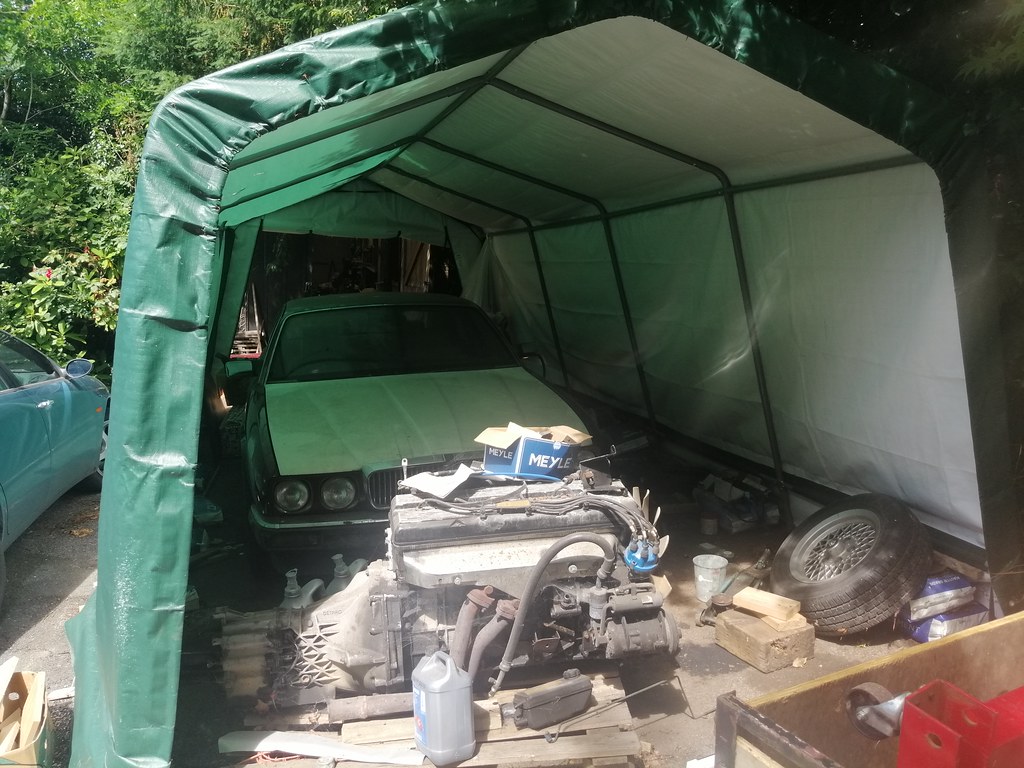 Did give me the opportunity to weigh it though. Complete AJ6 4.0l and getrag 290 in about as heavy of a setup as you can get. 10l oil but no coolant, stock dual mass, 110v alternator, ps pump, air con pump, cast exhaust manifold and downpipe, inlet, dizzy etc. Turned the scales on after the weight of the engine leveller had been taken up so it should be zeroed without it.  324.6kg man!  Jeez that's heavy. I'd had a figure for an AJ6 at 220kg and a Getrag 290 at 49kg so there must have been bits missing from those measurements. Either that or it was a 3.6 AJ6 with its lighter crank and no dual mass...plus some bits missing. Bundled into the trailer I'd just re-boarded, ready for transport East to get shoehorned into a 60s Triumph... 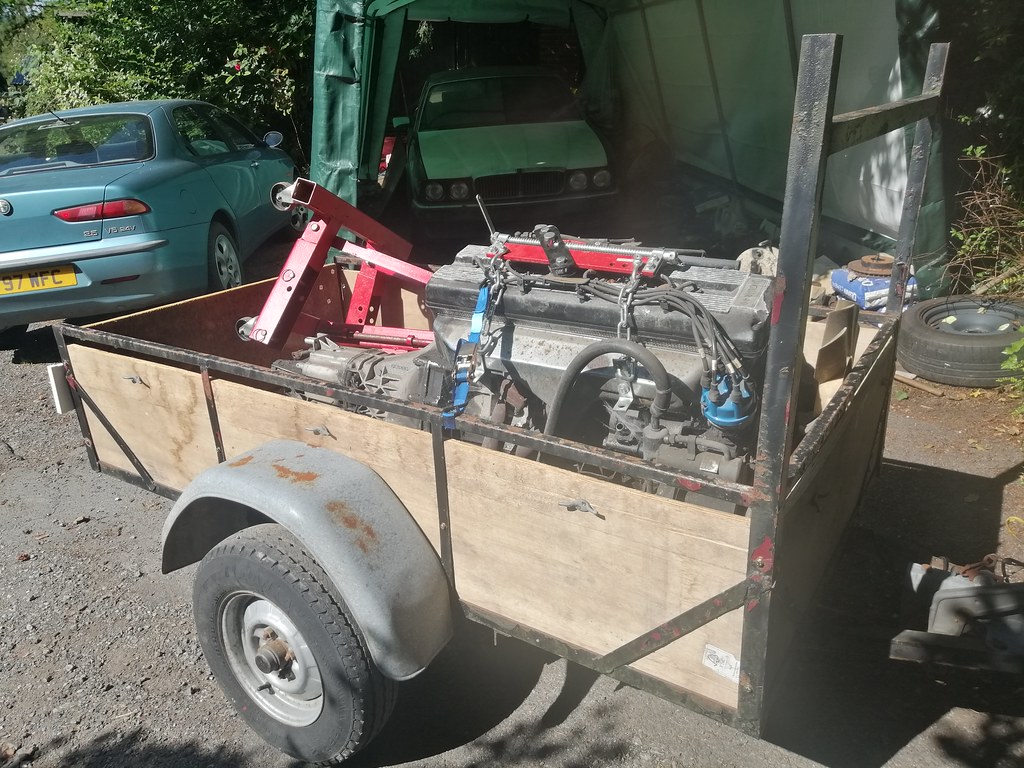 With that out of the way, it could finally turn its wheels for the first time in maybe half a decade... Well it drives! Straight into the garage though as there were a few teething problems to sort   Bigger prop UJ fouling on the crossmember so that had to be clearanced, headlights not working (a bit of corrosion on the terminals...and helps if the earths are connected), washer pump seized and needed freeing off, wired up the oil pressure and coolant temp gauges the wrong way round, and forgot to do up the power steering cooler hoses so it pumped all the fluid out. Oh, and it's low man! Rolled the arches, but it's still catching on the arch liners on full lock. This is on a hill, but it's not a million miles off... 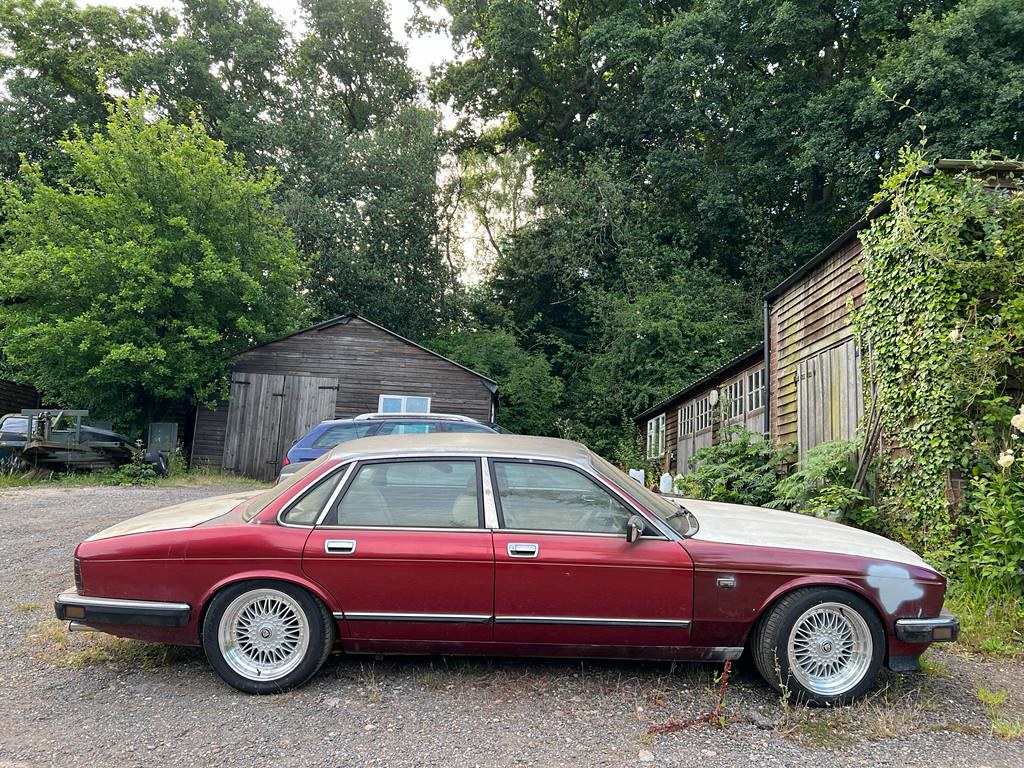  Took it for a quick spin around the block which highlighted a few more teething problems. Expectedly the tracking is horrendous, but also it won't really boost or rev above 3000rpm. It is on a base-map with an unknown hybrid turbo, so perhaps the mapper is keeping it safe until he can get it on a dyno. It's also loud. There's a killer drone around 2400rpm so will be making a little resonator J-pipe to try and cut that down a bit. Oh, and there's a diesel leak from the tank. It's definitely the drain plug which I forgot to check before fitting the tank. I can just about snake an arm up to nip it up with a 17mm deep socket, but that hasn't quite sorted it. Ran out of time to try and nip it up again, but that needs sorting (especially with diesel at £2 a litre!). So yeah. Plenty of teething problems, but none major. Big weekend! |
| |
|
|
Paul Y
Posted a lot
  
Posts: 1,951
|
|
|
|
Out in the daylight the stance is spot on. Good work Sir! P.  |
| |
|
|
|
|


 now that the starting conundrum has been solved I can move onto the last of the suspension work. First off is replacing the rear carrier bearings (a set of needle-rollers between the rear suspension lower arms and the rear suspension upright). Didn't get off to a great start as I bought the wrong bearings!


