|
|
|
Sept 15, 2020 21:35:14 GMT
|
Here we go, first post on this forum, I'm usually just a lurker but I thought I'd give it a shot! This is my '79 Spitfire, 'lightly modified'. It is my first car, so obviously my first classic too. Before I bought it, it was laid up in a barn for 10 years and had suffered some neglect. Since the beginning of my ownership (January 2019), I have attempted to rejuvenate it in a tasteful manner, replacing and upgrading parts as I go. Some of the jobs I have completed are: Completely renewed the cooling system with a wide alloy rad, silicone hoses and an electric fan. Rebuilt and tuned the twin SU HS4 carbs. Completely rebuilt front suspension with added lowering springs and Weller steel wheels. Upgraded the front 2 pot calipers to Princess 4 pot calipers and GT6 discs. The obvious bumper/light conversion you will see in the pictures. Too many stickers. There are plenty more things I have done to it too. Currently Focusing on rust removal and repair, as you do with old British steel, but once I am finished I have some new rear suspension parts to fit (Neg camber swing spring, 1" lowering block, Spax adjustable dampers), also planning on rebuilding the rear drums with new cylinders, braided hoses and consumables too. I have plenty more things planned with this car in the future, as time and budget allows. Let me know if you have any questions and thanks for taking the time to read this.  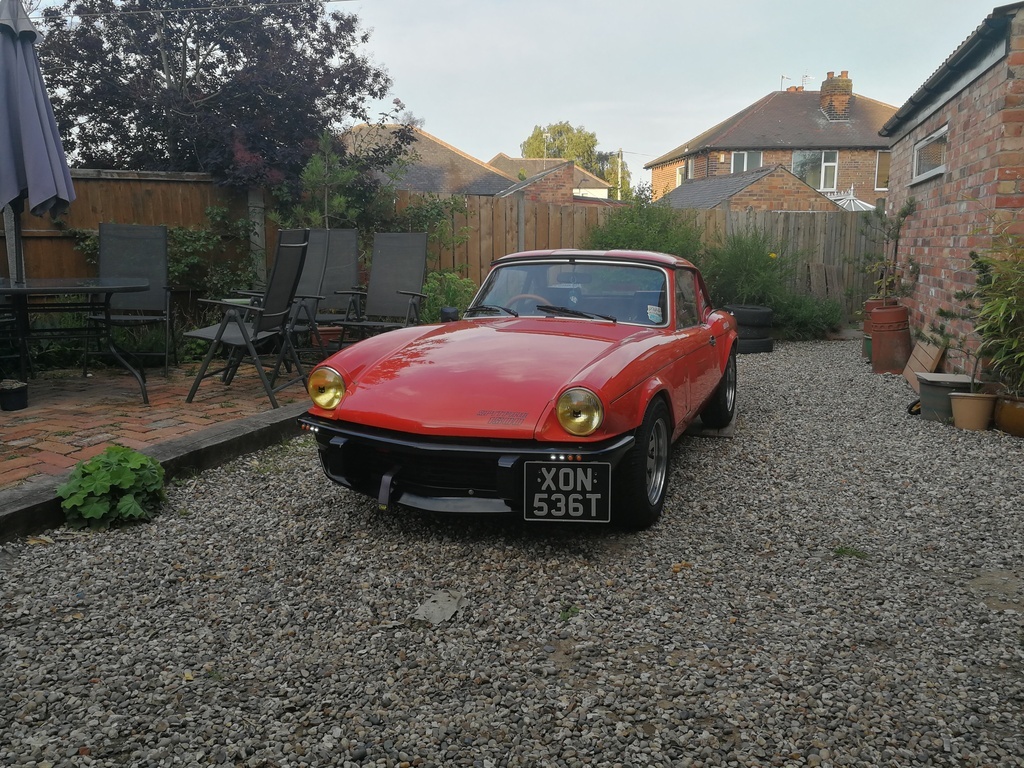 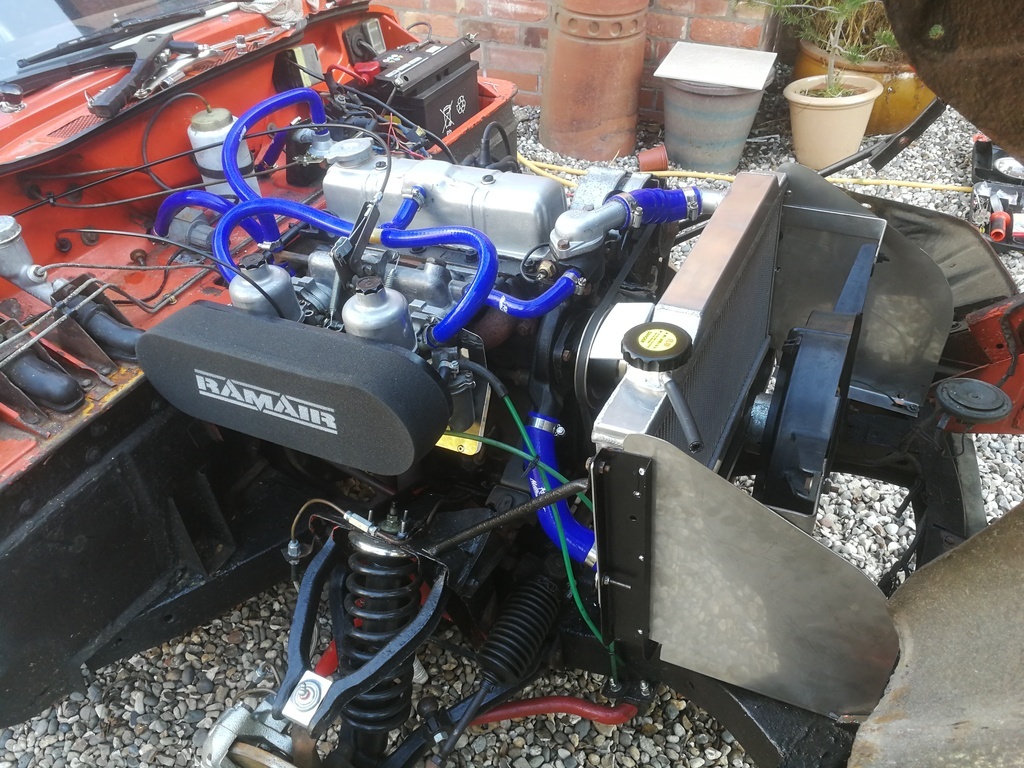 |
| |
|
|
|
|
|
|
|
Sept 16, 2020 8:48:37 GMT
|
Hell yeah  kickass modded Spitfire. What's the plans for future mods? |
| |
|
|
|
|
|
Sept 16, 2020 16:03:59 GMT
|
Hell yeah  kickass modded Spitfire. What's the plans for future mods? Thanks! Got plenty planned for it, current tasks at hand are finishing painting the interior (as I am running the car stripped out), waiting for a set of 4 point harnesses and mounting loops to arrive in the post, and bolting an old Aleybars roll bar in (with some wheelarch strengthening), I have made and welded a harness bar into the roll bar so I can loop 2 points around the cage rather than finding a strong point in the tub. All of this should be done within the next week or so, depending on the weather. 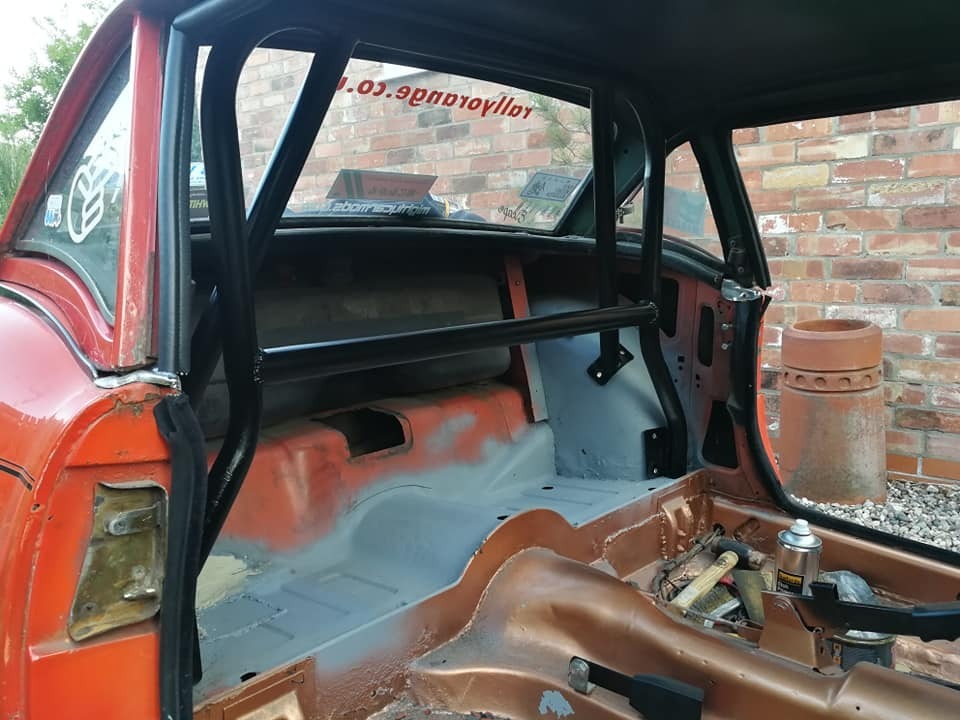 Longer term! Planning on upgrading the exhaust system inc manifold, as you can see from the picture of the engine bay its currently running the standard cast log manifold and mild steel 1.75" down/mid pipe. At the tail end I have a backbox that I found on ebay, I think it is one of the Moss brand sports silencers with the shotgun pipes, however it doesn't do much to actually silence the engine (not complaining  ). So yeah, i'm planning on replacing the whole system with something stainless and a decent manifold, maybe around the 2" diameter mark. 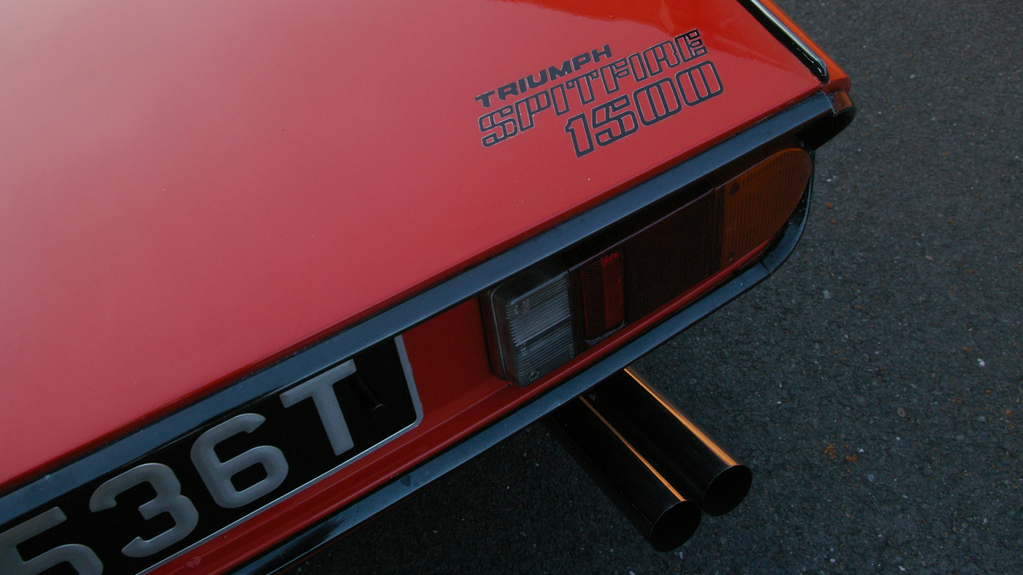 Also was going to start a behind the scenes engine build this year, but because of Rona and lack of work i'm having to push it back a bit, I fancied building a high revving Triumph 1300 engine with the end goal of reaching 100+ NA HP, but then I also had big ideas about forced induction and have been assembling a 1300 draw through carb turbo setup in my imagination with the goal of somewhere in the region of 120-140hp. It'd be a very ghetto build but I think it would be fun to experiment and see where it goes. At some point i would also like to get my rear steels banded from 5.5j to around 6.5j, just so that the fill the arches a bit better. I will see how urgent that is once I have fitted my new suspension and allowed time for it all to settle. Speaking of- once my budget allows it I will be ordering a full set of polybushes to replace the rubber ones that came standard as I have heard time and again that they are definitely worth the money/hassle. Lots more stuff I am planning on doing, it has just all seemed to have slipped my mind just as I write this post... |
| |
|
|
goldnrust
West Midlands
Minimalist
Posts: 1,887
|
|
Sept 16, 2020 16:58:20 GMT
|
|
That looks great, love it.
Plans sounds good too. Have you got new fresh rubber bushes or old rubber bushes? I only ask because new standard rubber bushes throughout my old Spitfire made it feel super tight and handle nicely, didn’t feel poly would have been an improvement really.
Also when you get to the rear suspension, it’s worth spending the time getting the toe set right, was transformational when I just shifted a couple of shims about!
|
| |
Last Edit: Sept 16, 2020 17:00:35 GMT by goldnrust
|
|
|
|
|
Sept 16, 2020 17:46:16 GMT
|
That looks great, love it. Plans sounds good too. Have you got new fresh rubber bushes or old rubber bushes? I only ask because new standard rubber bushes throughout my old Spitfire made it feel super tight and handle nicely, didn’t feel poly would have been an improvement really. Also when you get to the rear suspension, it’s worth spending the time getting the toe set right, was transformational when I just shifted a couple of shims about! Thanks a lot! Currently got fresh rubber bushes in the front, New susp bits for the rear come with fresh bushes too so in a couple of weeks it should all be good. Thanks for the heads up, I'll keep an eye on how it feels and then work out what needs to be done from there. As you say the rubber bushes feel nice and tight I might be able to save a couple hundred quid and stick with them. Definitely gonna have a look at my alignment properly too, at the front I just did a quick toe adjustment by eye, do you know if there are any tried and tested specs for a setup with at least a 1" drop? I agree that a well suited and set up suspension can make all the difference when it comes to performance and drivability. |
| |
|
|
goldnrust
West Midlands
Minimalist
Posts: 1,887
|
|
Sept 16, 2020 18:27:44 GMT
|
|
I wouldn't necessarily call it tried and tested... but the settings I ran were based settings that seem ot work for other small sports cars with similar drivetrain layouts.
Generally that means for the road up front 0 toe, 0.5-1 degrees negative camber and 3-6 degrees of caster. On the rear 1-2 degrees negative camber would be more normal, but with the spitfire swing axle you'd a bit limited so more like 3 degrees negative seems to be the normal. Again a normal setting for rear toe would be a small amount of toe in but the standard spec for rear toe on the spitfire is 1-2.5mm of toe out (so 0.5-1.25mm per wheel). This is based on the idea that as the suspension compressed the design means it toes in and the driving force of the axle also compresses the rubber bushes and causes toe in. With my 3/4" lowering block and fresh bushes I set mine up to be somewhere close to 0 toe, maybe just a fraction of toe out, and it removed the wayward unsettled feeling at the rear end. I could still get the rear end to move when I wanted it to, but bouncing along country lanes the car was staying much straighter and didn't feel as 'loose' at the back.
|
| |
|
|
|
|
|
Sept 16, 2020 20:48:02 GMT
|
|
Good to know, thanks! I'll have a go at replicating that at some point, or at least getting a setup very close at least.
|
| |
|
|
|
|
|
Sept 17, 2020 11:29:31 GMT
|
|
Yep, sounds like a great plan!
Before going to a 2" system I'd do some maths to find out if that would help or hinder. Too big of an exhaust on NA cars can reduce velocity of the gases and hinder flow. My Spit6 2.5l worked out to need a 2.25" system for about 180bhp so a 100hp 1300 would probably be fine with a 1.75" system. The manifold could definitely do with improving though.
If you're going turbo then it's basically reduce backpressure as much as you can and to hell with velocity. 2.25" would probably do the trick!
|
| |
|
|
|
|
|
Sept 17, 2020 20:20:23 GMT
|
Yep, it would be worth working out properly what diameter would be best for an NA build. Tbh, I just threw a number out, I think some of the pre-made "performance" exhausts from the likes of Moss and Rimmers are around the 2" mark, but who knows. It would seem from personal experience that a lot of the stuff that they churn out is just made to look nice and that's about it... Although they do have their uses and I will admit to using them a lot myself  . |
| |
Last Edit: Sept 17, 2020 20:30:27 GMT by bennyb310
|
|
|
|
|
Sept 20, 2020 20:33:16 GMT
|
Here we go, quick update. Received my harnesses, realised I bought the wrong ones, they were subsequently sent back and I have ordered the correct ones (fingers crossed). Got all of the metal required to strengthen my wheel arches, but because of a mixture of work and laziness I just haven't got round to doing it. Yesterday I began some rust repair to my diff tunnel, stripping/emptying the boot and removing the fuel tank. 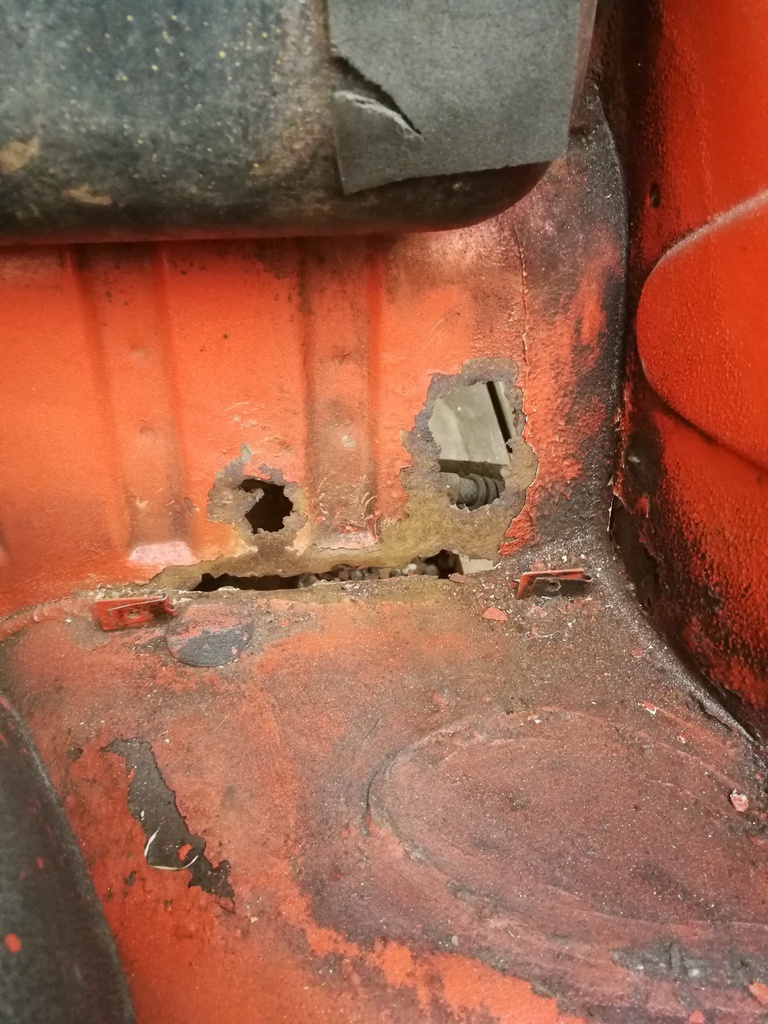 This morning I carried on the prep by wire wheeling all of the paint away from the surrounding area- only to reveal some more holes and bodged repairs from a previous owner. 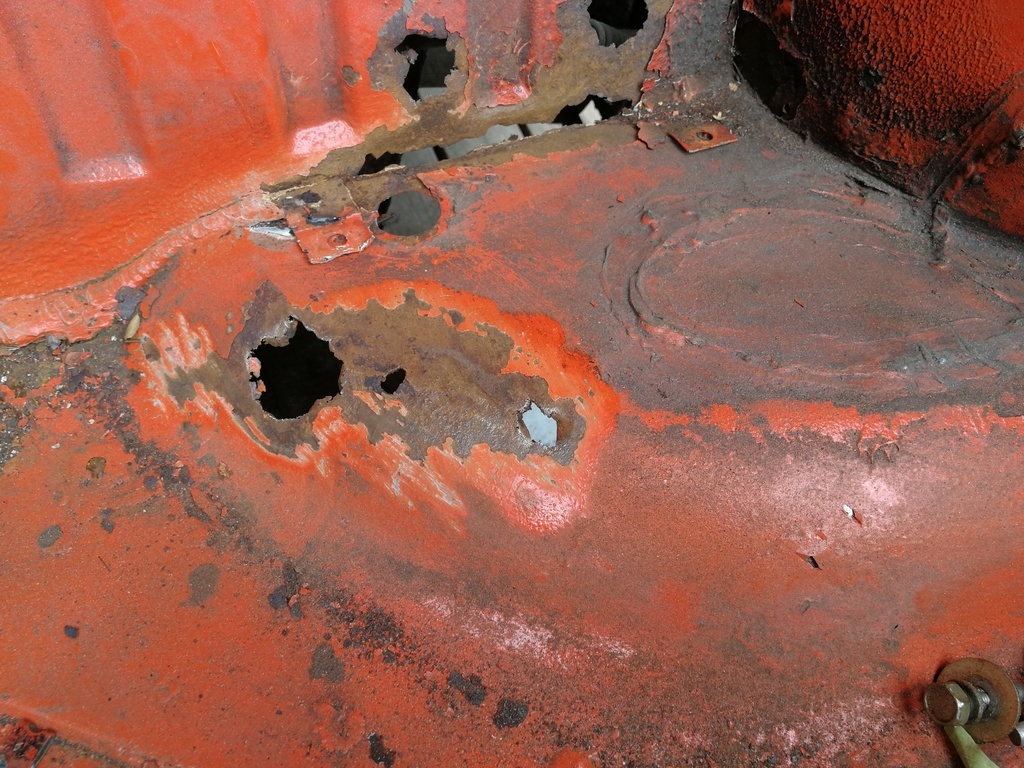 ...So I did the right thing and just cut it all out. I only got as far as cutting a few shapes in some sheet metal to fit together and rebuild the boot floor and tacking in a new panel onto the diff tunnel before it got dark, damn these progressively early nights. 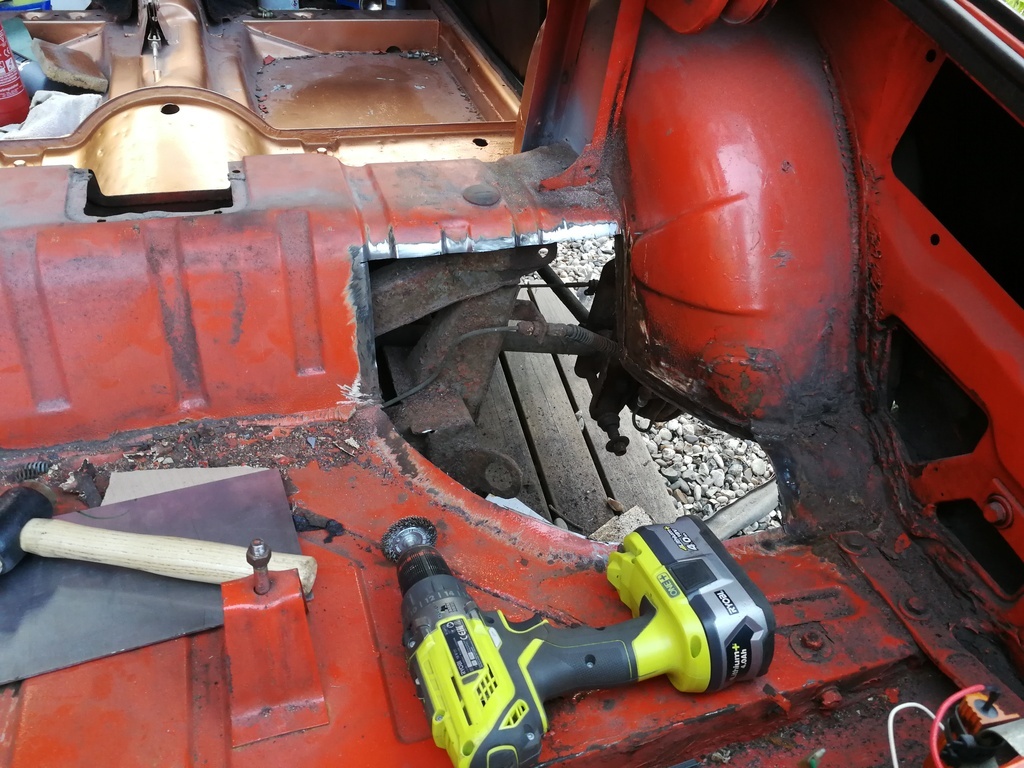 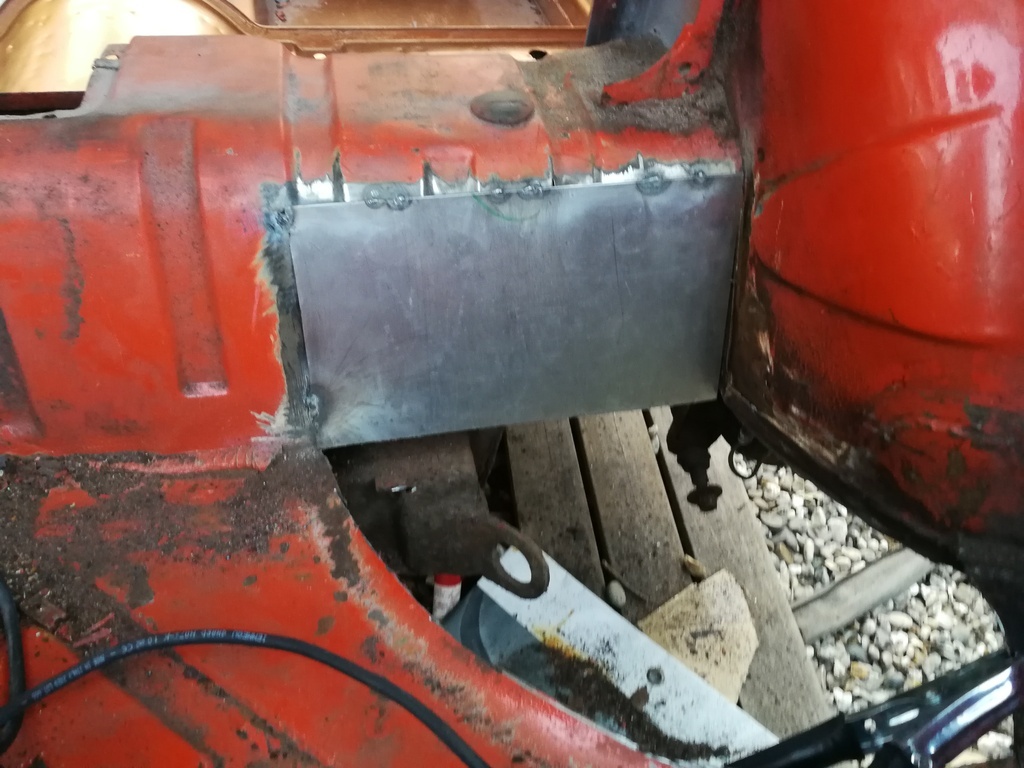 Once that is all complete I should be able to install my new suspension and then see how it sits, hopefully I will be able to see it done in the next couple of weeks, who knows though, I don't. |
| |
|
|
|
|
|
|
|
Sept 22, 2020 21:09:25 GMT
|
Not much to say today, been putting aside half an hour here and there to finish the welding, will put pictures up when its completed. In other news- my new harnesses arrived today! They are a bit of an odd colour choice but it turns out that it works really well (imho). So excited to get them fitted properly along with the rest of the interior and the roll bar. 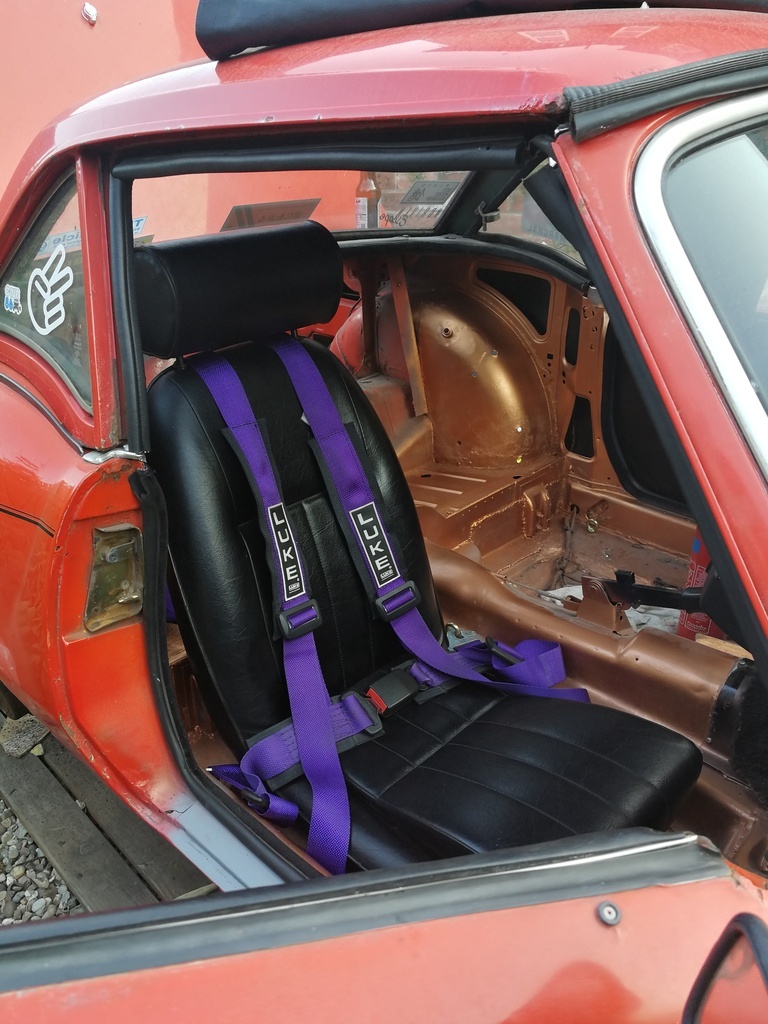 Ideally my next entry will be after finishing my welding, but who knows. |
| |
|
|
smith4
Part of things
 
Posts: 268 
|
|
Sept 24, 2020 11:48:35 GMT
|
|
Hi mate,
Glad to see you found it - welcome to the forum 🙂
Good work going on. What radiator is it?
Good to see you've got the rad shrouding in place, looks like it will direct the air through the grille nicely. I've heard it makes a big difference for the cooling.
|
| |
|
|
|
|
|
Sept 24, 2020 22:20:04 GMT
|
Hi mate, Glad to see you found it - welcome to the forum 🙂 Good work going on. What radiator is it? Good to see you've got the rad shrouding in place, looks like it will direct the air through the grille nicely. I've heard it makes a big difference for the cooling. Hey man, Good to see you here, thanks! As you can probably guess I have already had a look through your GT6 thread. The rad is just a generic full size ally unit, I got it from a Germany based cooling supplier on ebay, I have a feeling a lot of the full sized aluminium radiators you see for these motors are identical, just with slight differences between manufacturers. The shrouding was made by a good friend who runs a trailer making company (https://www.taylors-trailers.com/), I originally had the standard (cardboard?) shrouds and decided it would be better if I could have some nicely made stainless ones, so I pulled in a favour. The whole cooling overhaul was much needed as my old standard sized copper cored rad was ripped to shreds by the belt driven fan after it came loose one day. Along with that, 40 years of bad coolant took its toll on the channels and pretty much any intricate part, gumming it all up. The car wouldn't really run for very long before overheating. Happy to say that after all of the work put into it, I doubt that the cooling system will have any issues ever again, while I haven't taken it out for long drives yet having it running hours or more barely takes the temp gauge past halfway, which I am happy with. along with replacing the rad/hoses/every other part in the cooling system, I wired in an electric fan that was there when I bought the car, just not connected. I did this to replace the belt driven fan and take a tiny amount of strain off the crank pulley, so a minute power gain too  . I am looking forwards to seeing just what the cooling system can do when being driven hard, and I plan on fitting an oil cooler alongside so that I don't mangle the bottom end bearings as is so popular with these 1500 motors. |
| |
|
|
|
|
|
Oct 17, 2020 20:44:22 GMT
|
Update: 3 or so weeks later, I have finally refitted the suspension and fitted the interior. The boot floor welding held me back the most as I was struggling to find days where I wasn't working, and it wasn't raining. The welding is complete now though, I just need to finish smoothing it all off with filler and then I can put some tough paint down. Quite proud of my work, it was my first big fabrication project and it actually turned out ok. 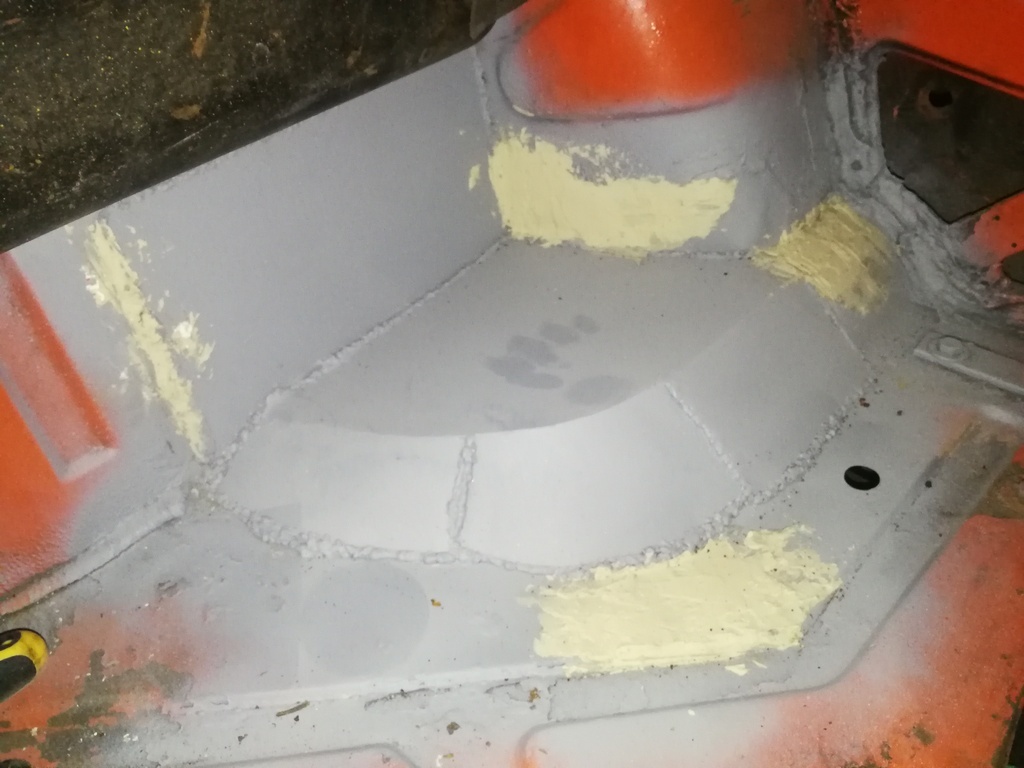 The only other welding I have had to do is welding some 120mm x 120mm x 3mm Plates into the wheel arches to act as spreader plates for the roll bar. I haven't got any pictures of them so you will have to use your imagination. Since welding them in, I have been able to finish painting the interior (carrying on with the copper theme), finishing it off with a few coats of lacquer. 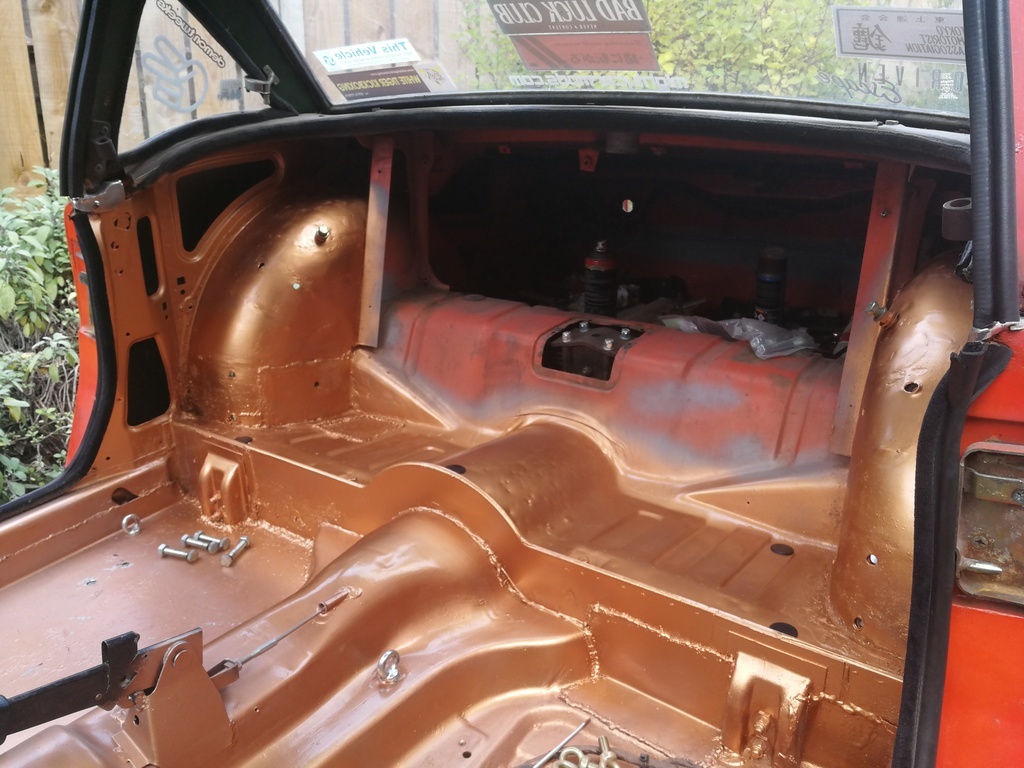 From there I have fitted the new neg camber spring, as well as the 1" lowering block. Then the Spax adjustable dampers. 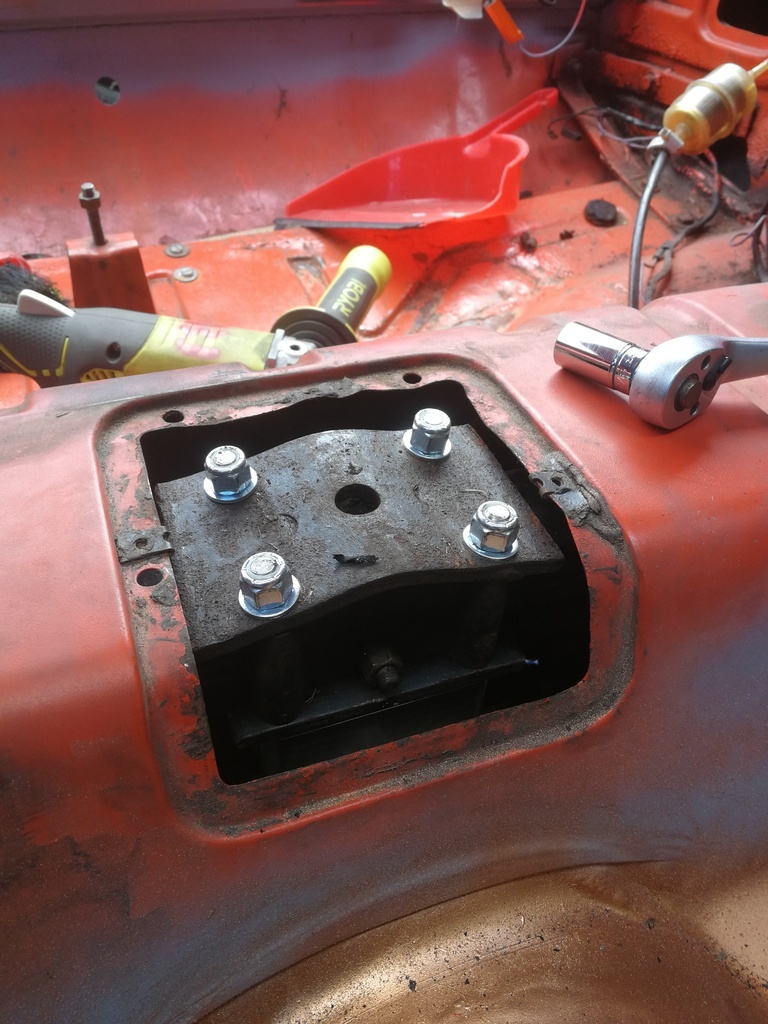 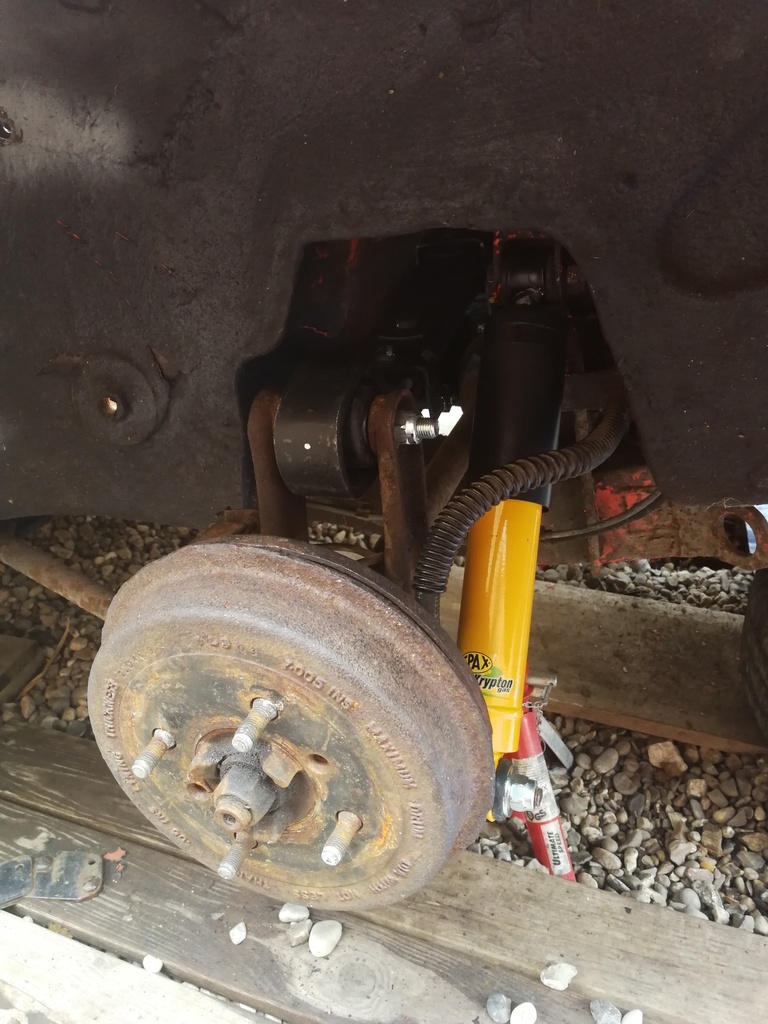 Over the past couple of days I have been putting the interior back in, an easy job as most of the interior has been permanently removed. 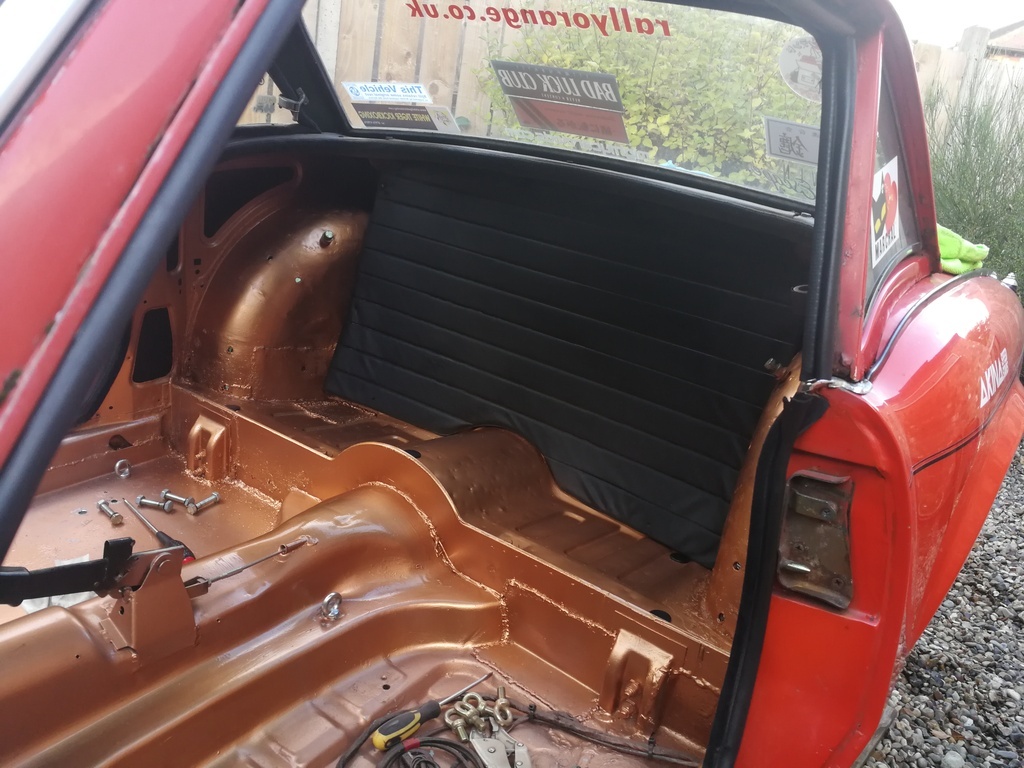 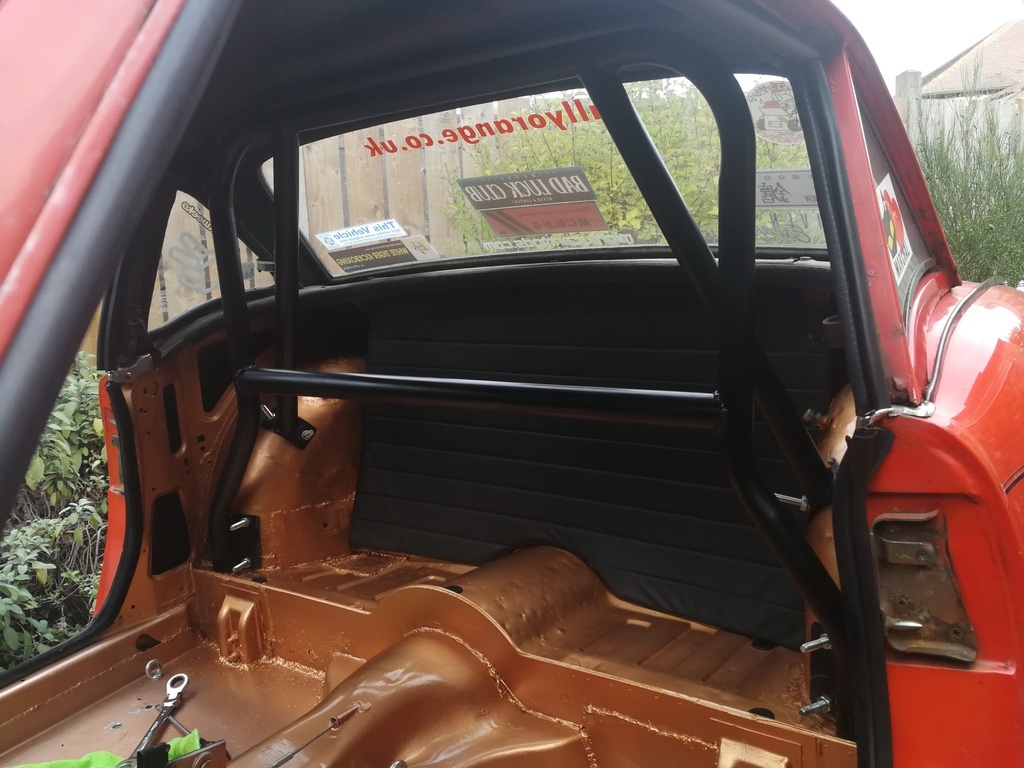 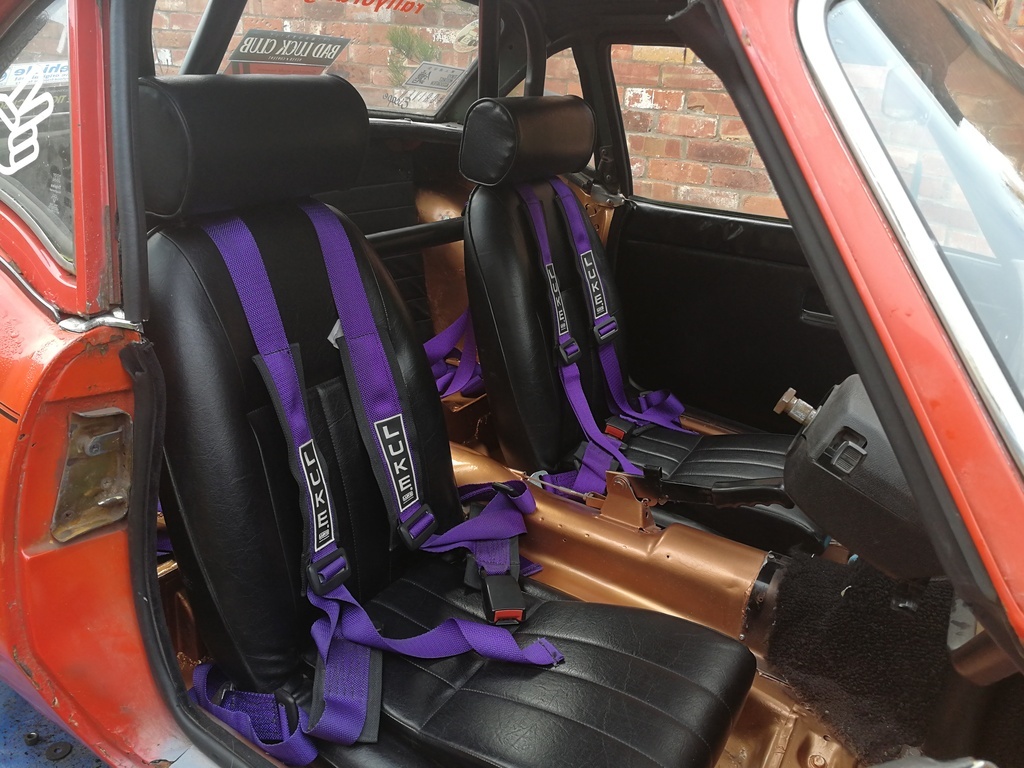 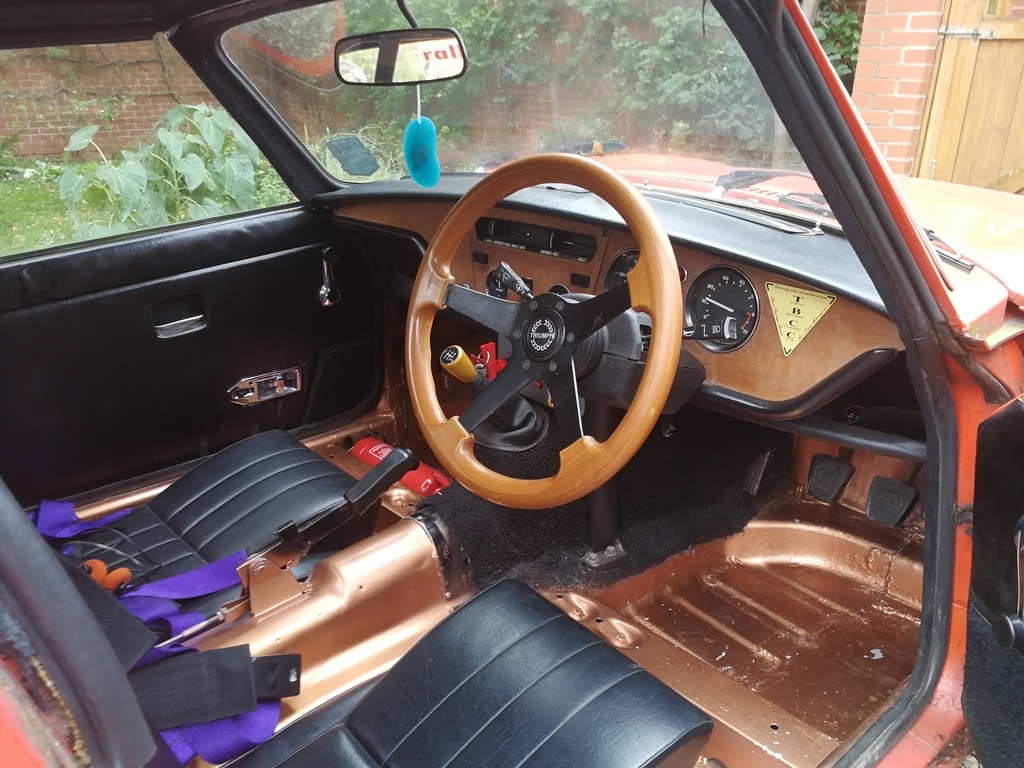 Today I actually managed to get it back on the ground and moving, I have a dragging rear drum so I suspect that it will be back on axle stands as soon as it came off, as is the Triumph life. I'm a little bit of a photographer so I got my DSLR out and took some nice photos that will be going on Facebook, Instagram etc. Might as well put a couple on here too! I am so happy with how its come out, a total transformation, loving how the rear end looks with the new spring. I found that the dampers are way too soft for my liking so I will also be stiffening them up a considerable amount too. 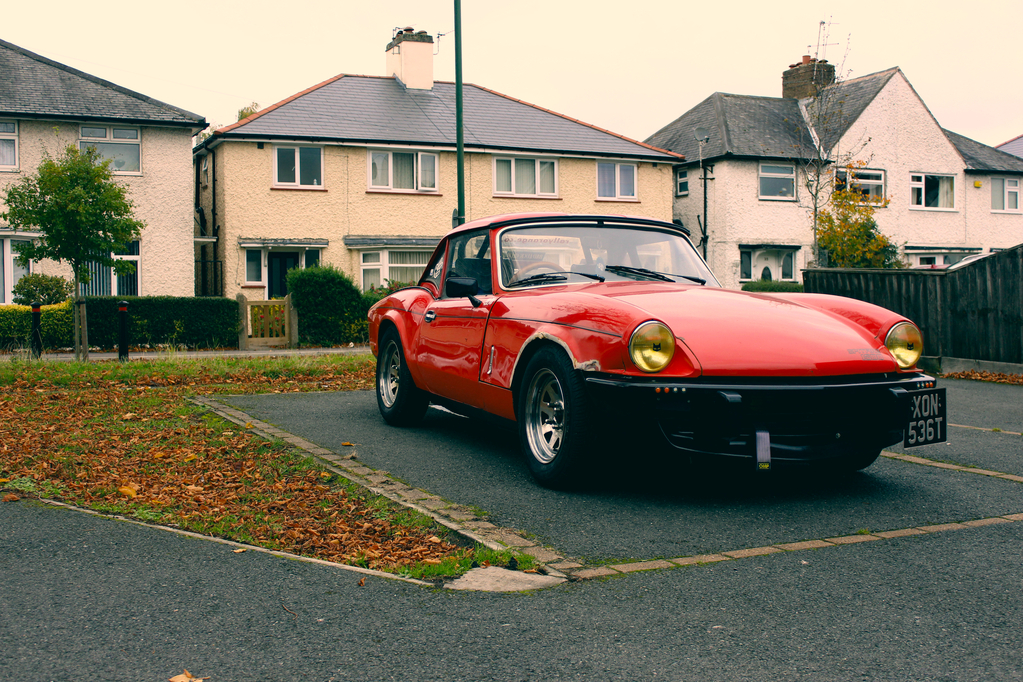 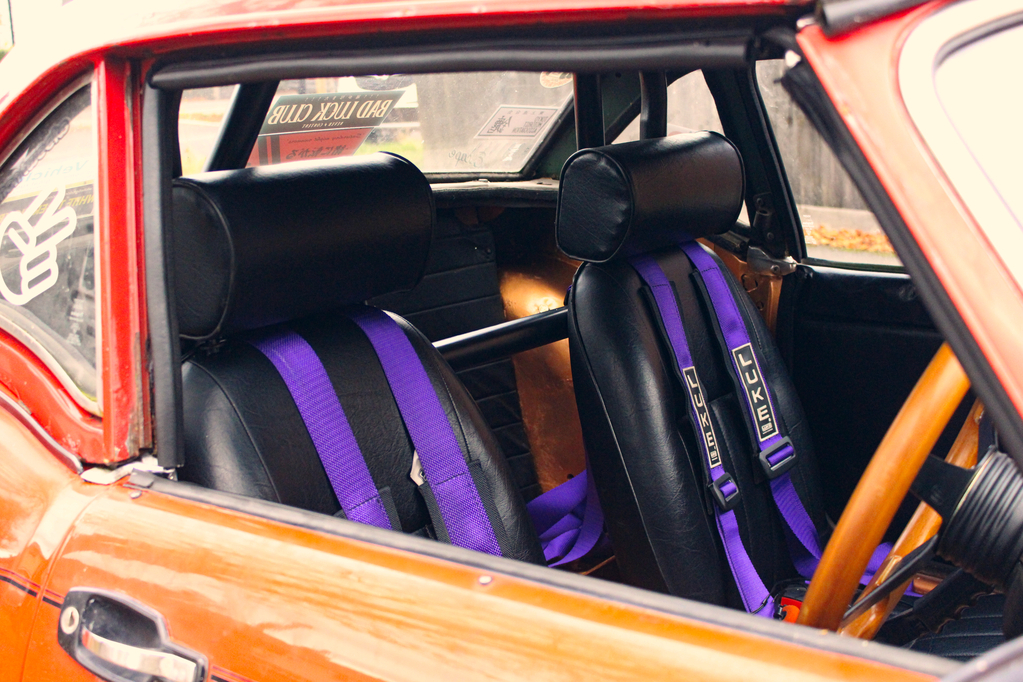 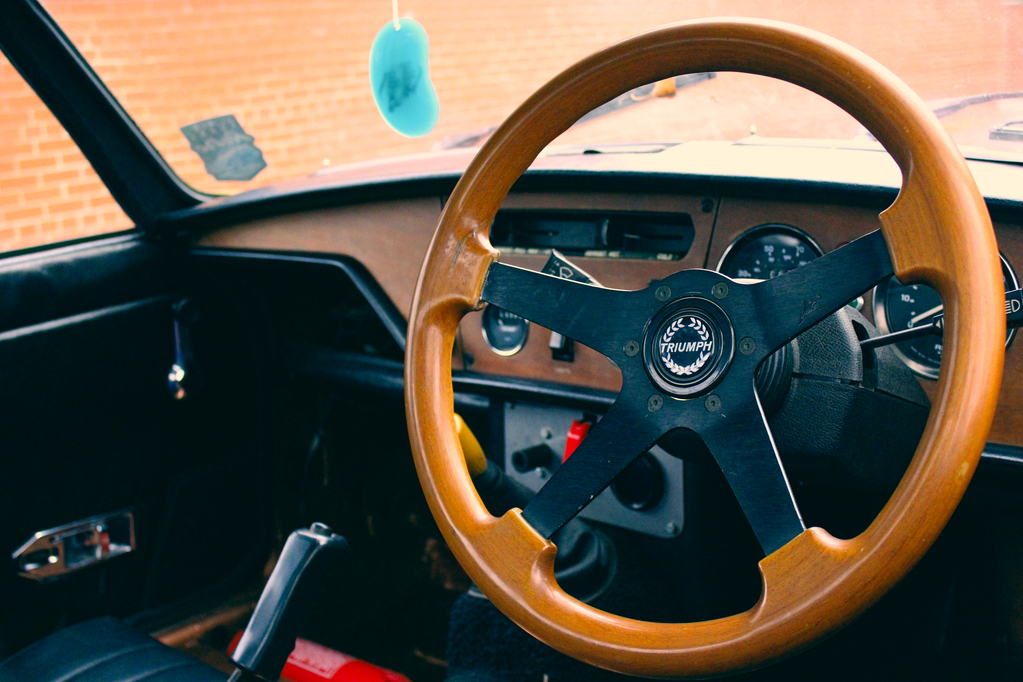 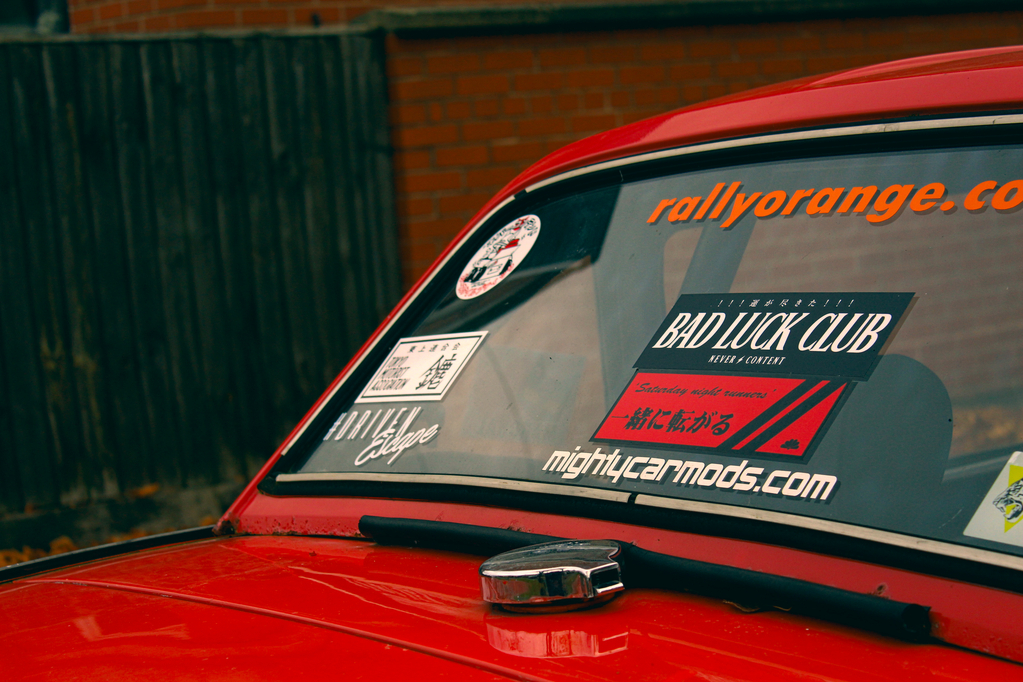 Photo dump over! Plenty more work planned for the Spit so don't go anywhere! |
| |
|
|
|
|
|
Oct 17, 2020 21:13:43 GMT
|
|
Always good to see a Triumph being shown some love.
On the welds in the boot, or anywhere else non-cosmetic I'd strongly suggest not putting filler over them. Instead use a decent brushable seam sealer and work it well in - on both sides. Reason is that MIG welds are prone to the odd pin-hole and porosity, especially where the metal you are tackling has some rust pitting, so there is a risk of moisture getting in. Problem with filler is that it is also porous, so you risk rot recurring under the filler.
Have to say that if you think you can fit 6.5" steels under the rear arches, I wonder if you have the short drive shafts from and earlier car fitted rather than the correct long ones. Or maybe it's just that the wheels you have have less offset that the 5.5" ones I have on my GT6.
Nick
|
| |
1967 Triumph Vitesse convertible (old friend)
1996 Audi A6 2.5 TDI Avant (still durability testing)
1972 GT6 Mk3 (Restored after loong rest & getting the hang of being a car again)
|
|
|
|
|
Oct 17, 2020 22:47:29 GMT
|
Always good to see a Triumph being shown some love. On the welds in the boot, or anywhere else non-cosmetic I'd strongly suggest not putting filler over them. Instead use a decent brushable seam sealer and work it well in - on both sides. Reason is that MIG welds are prone to the odd pin-hole and porosity, especially where the metal you are tackling has some rust pitting, so there is a risk of moisture getting in. Problem with filler is that it is also porous, so you risk rot recurring under the filler. Have to say that if you think you can fit 6.5" steels under the rear arches, I wonder if you have the short drive shafts from and earlier car fitted rather than the correct long ones. Or maybe it's just that the wheels you have have less offset that the 5.5" ones I have on my GT6. Nick Thanks Nick! I will have a go with some seam sealer rather than the filler at some point, thanks for the tip. On the subject of wheels, I'm currently running 5.5s front and back, I just think it'll look better with another inch or so onto the outside barrel on the back. Whether or not that'll fit is another story, however I'm sure I could persuade it to fit somehow. Not 100% on whether to pursue it at all yet anyway, for the time being I'm just going to let the new suspension settle and get used to how it's looking as is. |
| |
|
|
|
|
|
Jan 16, 2021 11:08:18 GMT
|
This is so awesome, what a cool first car. love the blacked out front bumper and gold interior, great work. Makes me miss my previous spitfire that met a sad end against some armco 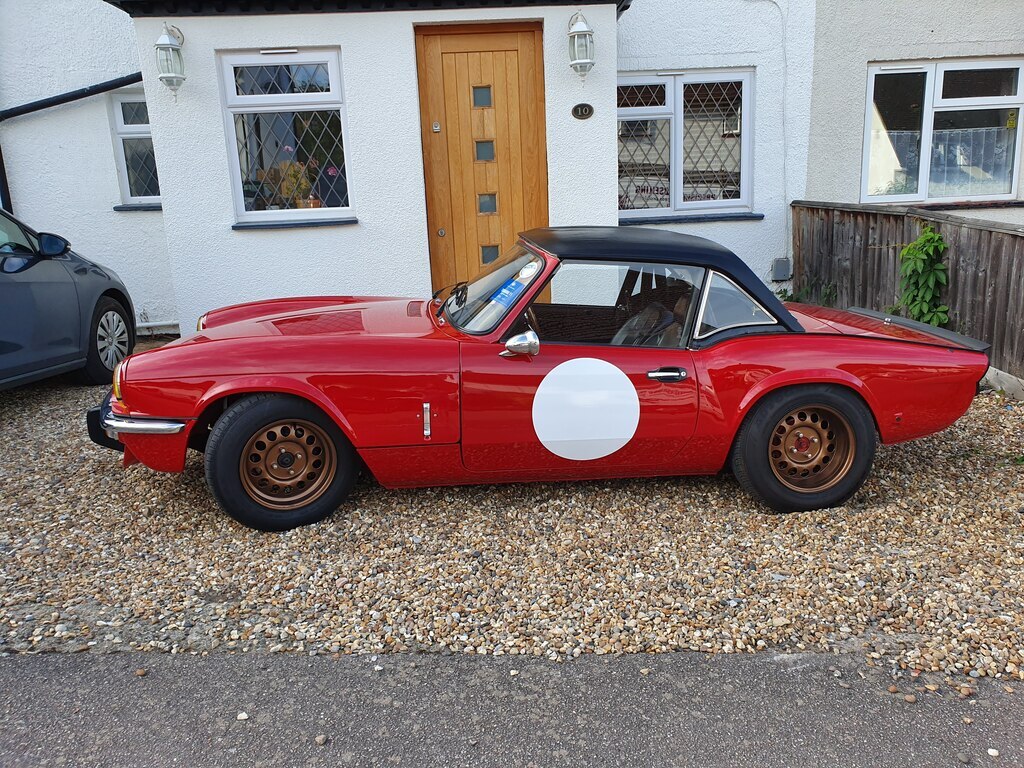 |
| |
|
|
|
|
|
Jan 22, 2021 15:26:23 GMT
|
This is so awesome, what a cool first car. love the blacked out front bumper and gold interior, great work. Makes me miss my previous spitfire that met a sad end against some armco  Nooooo! I never realised that this one was killed off! I remember seeing it on eBay 2-3 years ago and thinking wow, that looks awesome. Then I found the person who bought it on Instagram a few months later. I always loved that little boot spoiler, I really want to make one for my car. Those wheels too! Wide steel wheels should be the norm imo. Thank you very much for the kind words! |
| |
|
|
|
|
|
Jan 22, 2021 17:20:27 GMT
|
This is so awesome, what a cool first car. love the blacked out front bumper and gold interior, great work. Makes me miss my previous spitfire that met a sad end against some armco  Nooooo! I never realised that this one was killed off! I remember seeing it on eBay 2-3 years ago and thinking wow, that looks awesome. Then I found the person who bought it on Instagram a few months later. I always loved that little boot spoiler, I really want to make one for my car. Those wheels too! Wide steel wheels should be the norm imo. Thank you very much for the kind words! I've actually put the wheels and spoiler onto the herald I bought to replace it, so they're not wasted at least (along with lots of other parts from it, I bought it back off insurance company). forum.retro-rides.org/thread/213510/ratty-triumph-herald-13-60Keep up the good work!! |
| |
|
|
|
|
|
Jan 23, 2021 18:16:54 GMT
|
Nooooo! I never realised that this one was killed off! I remember seeing it on eBay 2-3 years ago and thinking wow, that looks awesome. Then I found the person who bought it on Instagram a few months later. I always loved that little boot spoiler, I really want to make one for my car. Those wheels too! Wide steel wheels should be the norm imo. Thank you very much for the kind words! I've actually put the wheels and spoiler onto the herald I bought to replace it, so they're not wasted at least (along with lots of other parts from it, I bought it back off insurance company). forum.retro-rides.org/thread/213510/ratty-triumph-herald-13-60Keep up the good work!! I never put 2+2 together there, I have already bookmarked your thread in the past and noticed the similarities of the wheels to that Spitfire (Staggered fitment bronze Weller steels really aren't that common, especially in the modified Triumph Scene). I'm glad that they live on in another awesome build! I would really like to see some close up photos of the spoiler at some point though, not that I'm a copycat or anything  Love your build! |
| |
|
|
|
|


 ). So yeah, i'm planning on replacing the whole system with something stainless and a decent manifold, maybe around the 2" diameter mark.
 .
.


