glenanderson
Club Retro Rides Member
Posts: 4,352
Club RR Member Number: 64
|
|
Nov 23, 2021 21:54:28 GMT
|
|
Yes, it’s a simple and generally very reliable gearbox. The issues are really just the ratios for modern roads given the lack of power, and those of wear/neglect. In fact, even ones that have done lots of miles seldom need new gears, shafts or bearings provided they’ve not been run low on oil. The mechanical issues with the three speeders only really apply to early D7s where the factory revised the meshing pattern of the layshaft sliding gears on their shafts. Those ones can jump out of second under load, which can be more than a little disconcerting.
The four speed gearbox fits in roughly the same space, but has two sets of sliding gears, so needs a more complicated cam plate selector mechanism and two selectors to move the forks that operate them appropriately. Sadly, you can’t retrofit the four speed gearbox into earlier cases. Not without an impractical amount of welding and machining. The four speed cases are significantly nicer made too, with die casting instead of the earlier sand casting. Hopefully you’ll see what I mean before too much longer.
|
| |
Last Edit: Nov 23, 2021 22:15:05 GMT by glenanderson: Grammar fail.
My worst worry about dying is my wife selling my stuff for what I told her it cost...
|
|
|
|
glenanderson
Club Retro Rides Member
Posts: 4,352
Club RR Member Number: 64
|
|
Nov 23, 2021 23:33:54 GMT
|
Got some more done over the last couple of days. 😀 The last couple of screws arrived, so I could finish fitting the primary chain/clutch cover. These don’t have any locking washers, so I tend to just tighten them down snug to start with then, once the engine has run a couple of times I take them out one at a time and refit them with a dab of loctite. 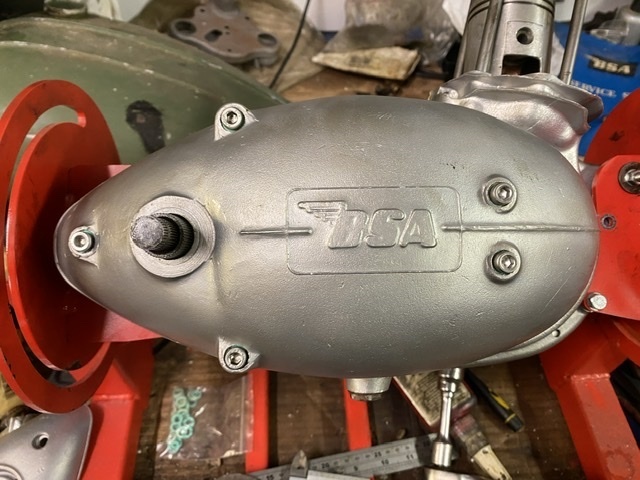 That’s that side of the engine done, so back to the drive side and… Fit the gearbox sprocket. As I touched on earlier, it’s an area prone to leaks. These normally come from along the output shaft splines, so it’s worth putting a wipe of Wellseal on the back of the sprocket and where the lock-washer fits. The locknut is a fine left hand thread, and it’s easy to cross, so take care with it. The lock-washer can be reused no problem using one of the virgin sides. 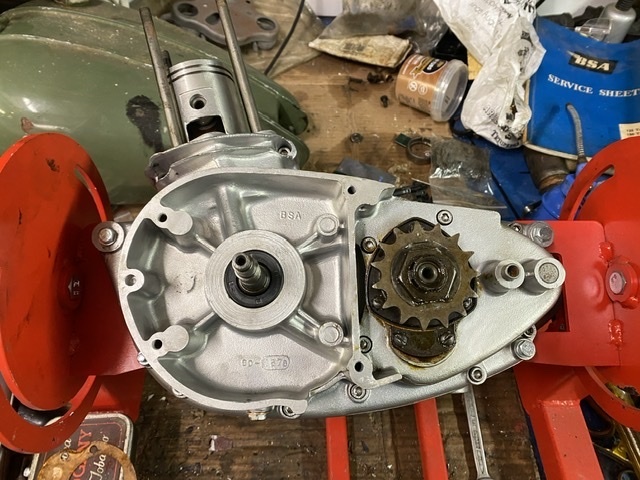 Then the clutch pushrod drops in. It should have a little bit of pipe that acts as a seal. It’s often missing when you take an engine to bits, but it’s quite important to stop muck getting in and making the clutch action very stiff. 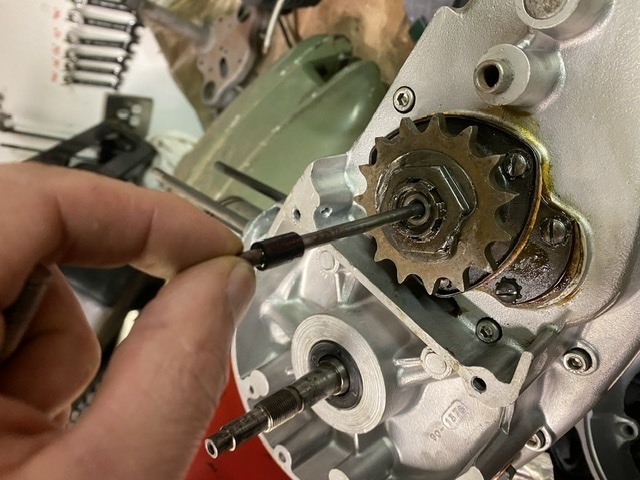 The pushrod should have one flat end that goes in first to contact with the mushroom in the clutch centre, and a dimple in the other for a 1/4” ball bearing. 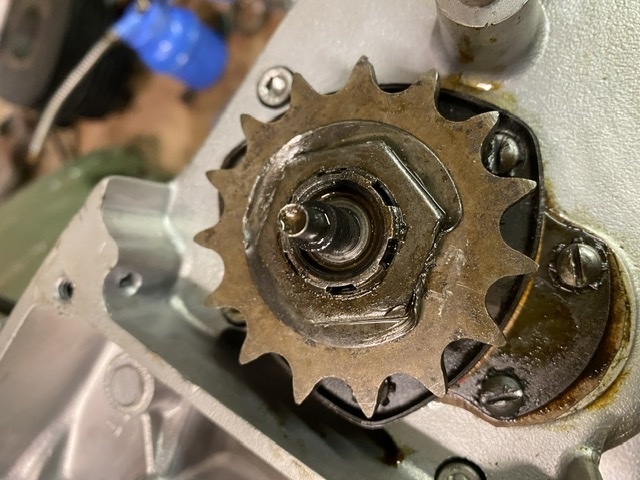 Then the outer cover can go on, which holds the clutch release lever arm. 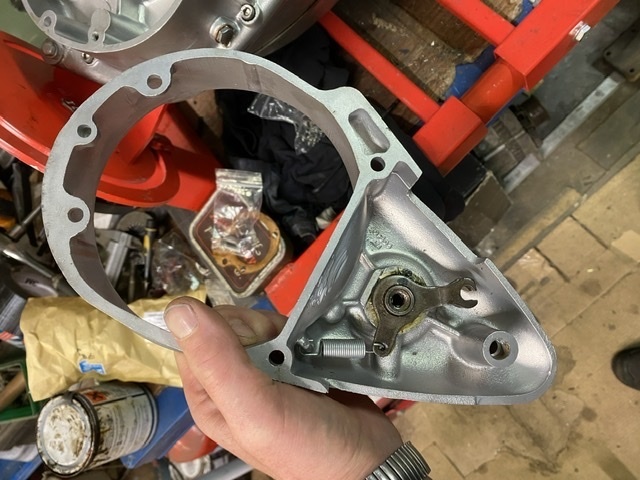 Like so: 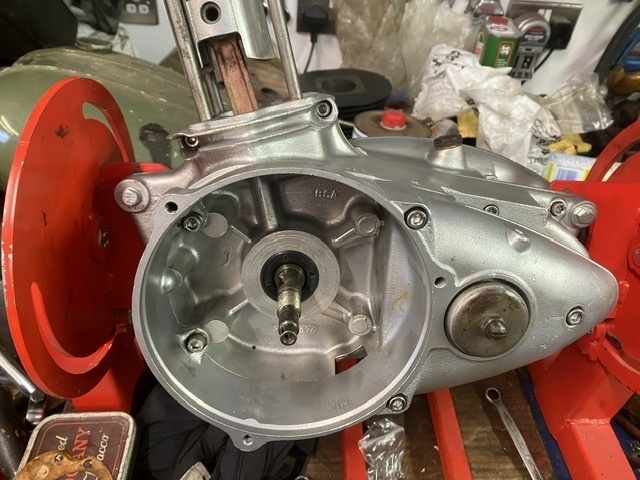 The aforementioned ball bearing drops in the hole through the centre of the release lever, then the adjusting screw/locknut and dust cover. It’s important, when the time comes to adjust this, that you leave some free play on the pushrod, to stop it overheating and either wearing away where it meets the mushroom rod, or damaging the clutch cover. That’s the bottom end done all bar the generator which will get swapped out with the one currently on the bike. Moving up, make sure the gudgeon pin circlips are fitted securely, and that the piston ring pegs are in the right place (to the rear on 125s, to the front on everything else). 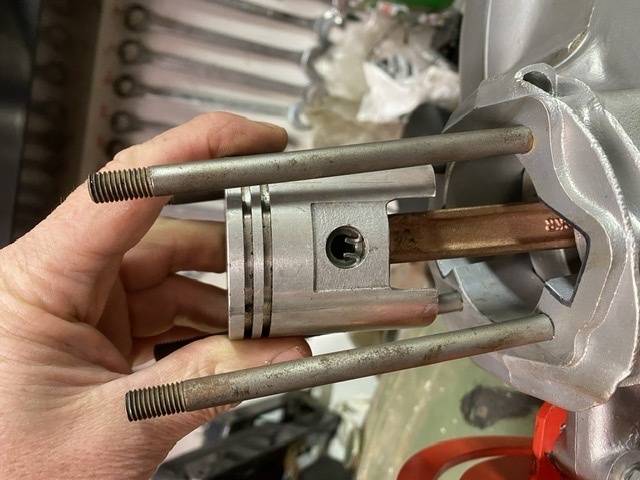 Then, after checking the ring gap in the bore is bigger than the 0.008” minimum, fit them to the piston, then a new base gasket. A jubilee clip as a ring compressor makes sliding the barrel on easy. 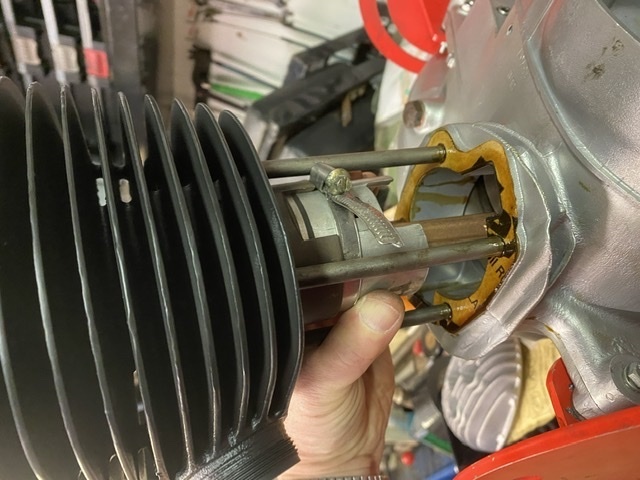 Head gasket next. 125s and 150s never had them originally, as they were only 6:1 compression ratio and not really needed. Only the later bikes with bigger higher compression engines needed them. As I have the “performance” head though, it’s going to be a necessity. I measured the combustion chamber capacity at 17cc following my earlier work reprofiling it, which with the rest of the setup means my compression ratio is going to be 8.75:1 which I think is probably about spot on. On the original heads it’s 27cc and 6:1. So, on goes the head. 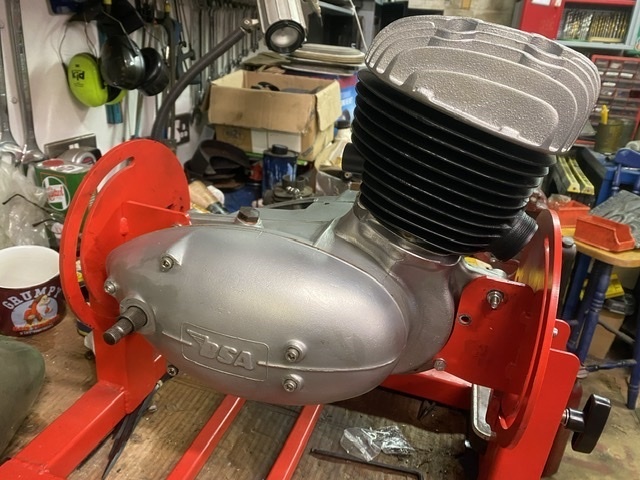 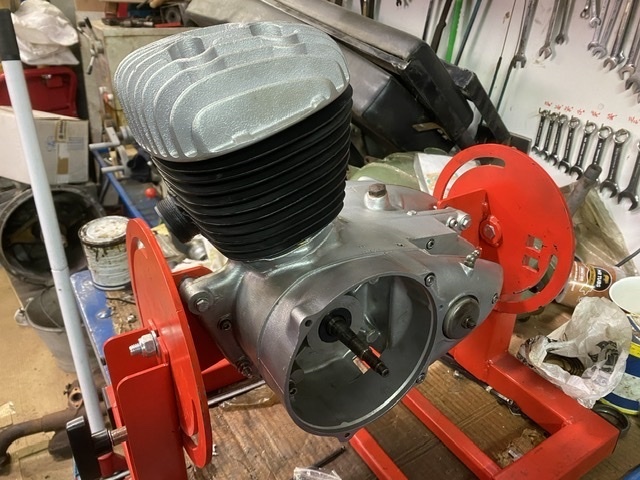 Fill it up with oil (3/4 pint) and that’s us done. 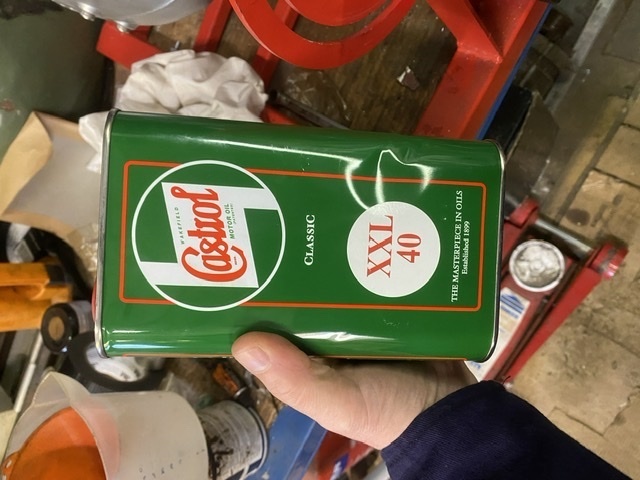 Blimey, it’s only taken a year. 🤣🤣 I spent today tidying up the chaos that is my workbench. I need to get a suitable spark plug tomorrow. Then, I want to refit the original magneto to the 125 engine in the bike and make sure it runs before I pull it out. I have also realised that I had inadvertently fitted the wrong type of brake and clutch levers, which will be contributing to the heavy clutch action on the existing engine, so I really want their replacements to arrive before I try setting up the clutch. I also have a cunning plan for the exhaust system… More as it happens. 👍👍 |
| |
My worst worry about dying is my wife selling my stuff for what I told her it cost...
|
|
93fxdl
Posted a lot
   Enter your message here...
Posts: 2,019
|
|
Nov 24, 2021 17:53:02 GMT
|
|
Very very nice!!!
A quick and dirty way to slightly up the power on a basic 2 smoke.
Thicker base gasket and lap the head directly to the top of the barrel
Ttfn Glenn
|
| |
|
|
|
|
glenanderson
Club Retro Rides Member
Posts: 4,352
Club RR Member Number: 64
|
|
Dec 28, 2021 23:54:44 GMT
|
My mojo has been low recently. The weather, bits dropping off other vehicles, work, the “festive” season and in-laws all combining to make simply walking away from everything a more enticing prospect than going into a freezing cold garage. However, a bit of respite from the relatives over Christmas has lifted my mood a little and I got a couple of hours in today on the bikes. First job, after tidying up a bit, was to start disconnecting everything holding the original engine in. I swapped out the posh modern generator for the original type one, although I didn’t bother trying to start it up. I’m unsure if I will ever actually use this engine again, and if I do then at the very least it will need new bearings and seals. I’m more likely to mothball it to be honest, especially if the 150 engine performs as I hope it will. 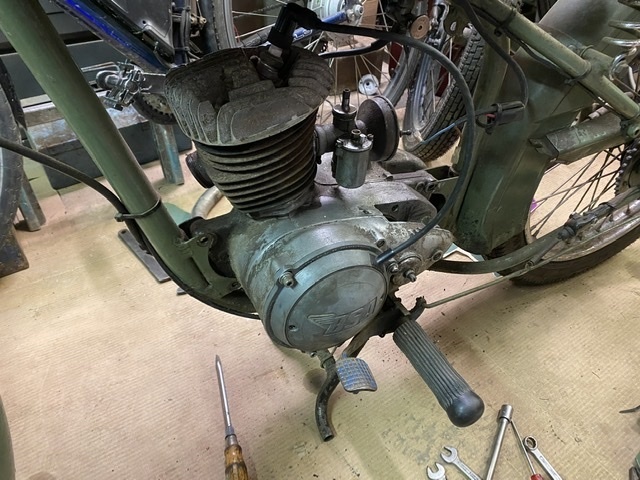 So, chain off, battery and toolbox off, carb disconnected, header pipe off, clutch cable off and four bolts later we’re here. 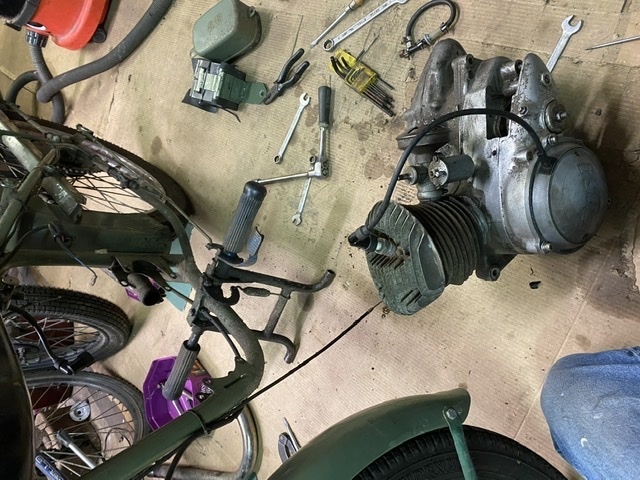 Now the battle with my inner demons begins. I’m fighting the urge to strip out the stand/footrest assembly in order to straighten out and paint the rear brake pedal. I know that once I start on the slippery slope of painting stuff properly I’ll be down the rabbit hole of what colour to paint it again, and where to stop. This bike was (with the exception of the perennially flat battery) entirely rideable this morning, and I already have too many projects in pieces to start dismantling one of the few things I have that actually works. Really, I should have left it alone and concentrated on getting the D3 going before I did anything on it, but now I have done the engine I want that off my bench and in the bike ASAP… … So, I have made the decision to just put the fresh engine in, and leave everything else as-is for the time being. The only additional stuff I’m going to do is make a couple of wiring amendments to incorporate an ignition switch that should hopefully put an end to the flat battery issue, and modify my makeshift battery holder such that it does a better job of holding the battery and looks less of a bodge. The re-bushed forks, which also need paint, can wait for a bit longer. I should be able to have the D1 up and running again in a day or so as long as I don’t get carried away. Then I’ll switch my focus to the D3. I now, finally, have the repaired and vapour blasted engine cases back for that, and I’m really keen to turn the boxes of bits back into a rideable machine. When they’re both up and going, then I want to move my “bike” focus on to the Triumph T25 I bought earlier this year, which is completely dismantled, and definitely warrants a cosmetic as well as mechanical overhaul. Only when all three are runners am I going to revisit the Bantams’ cosmetics. Anyway. More tomorrow. |
| |
My worst worry about dying is my wife selling my stuff for what I told her it cost...
|
|
glenanderson
Club Retro Rides Member
Posts: 4,352
Club RR Member Number: 64
|
|
|
|
So. Brief update. Most of the time I spent today was trying to find some better fasteners to fit the engine with. I have an unhealthy obsession with “appropriate” when it comes to fasteners. Don’t get me wrong, I’m fully multilingual in the many different options out there, and have no issues with metric/imperial/unified/whatever; but I like things to be consistent and where possible original. If I am working on my Honda I will expect to be using metric fasteners and tools. If it’s the Bantams, then they’re a mixture of BSW, BSF and the occasional BSCy, so my Whitworth spanners come to the fore. The Land-Rover is a mixture of British, Unified and Metric, as you’d expect given the modifications, but I try to keep the standard fixings wherever I can. At some point in the past, the original BSF bolts holding the Bantam’s engine in had been replaced with UNF ones. It’s not really an issue, but it’s as good a time as any to put things right. I tracked down a pair of 5/16” bolts for the top mounts, but struck out with some 1/4” ones for the bottom, so I’ll reuse the UNF ones for now and start making a shopping list as I am going to need some more anyway when I start on the D3 shortly. The new engine is now sat loosely in the frame. 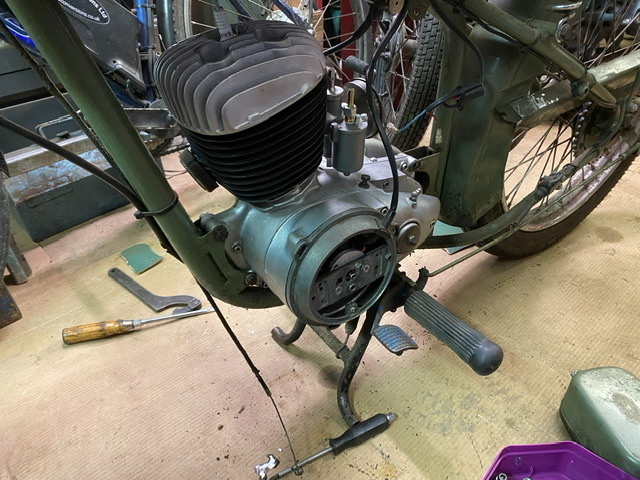 I also did a bit of offering up and head scratching with my exhaust. The stock pipe is just a bit of 1-3/8” tube, because back when these were new, the technology was still developing and even a big manufacturer like BSA didn’t know anything about how well 2-strokes respond to exhaust design. 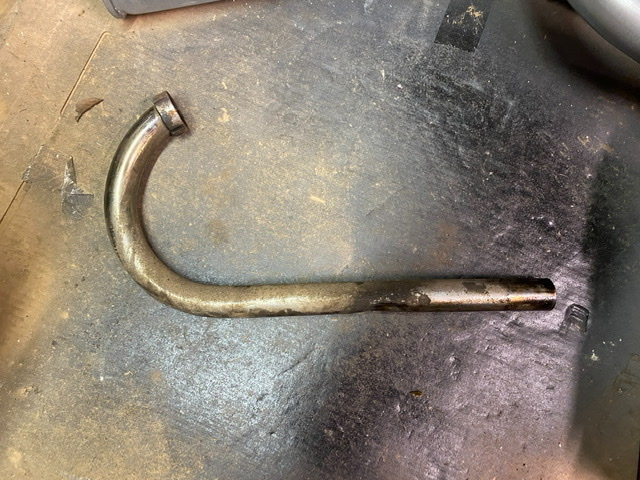 The racing fraternity, however, soon learned that a system that allows the exhaust to expand rapidly after leaving the cylinder made a big difference. The year after my bike was built, 1954, when the 150 engine was first offered, the exhaust was revised with a shorter header pipe and much longer silencer. This improved performance a bit, but is a big visual departure from stock and I’d prefer not to go that route. The next generation of 175cc engines carried on with the small diameter header, but the 67 onward machines went up to a 1-3/4” bore, which made quite a big difference. My plan is to make a custom header using a late big bore front section, spliced into a piece of 1-3/8” tube with a tapered reducer, so I get a bit of an expansion chamber, but keep the original silencer. I’m not sure how well it will work, but it’s a lot more discreet than sticking a later setup on. 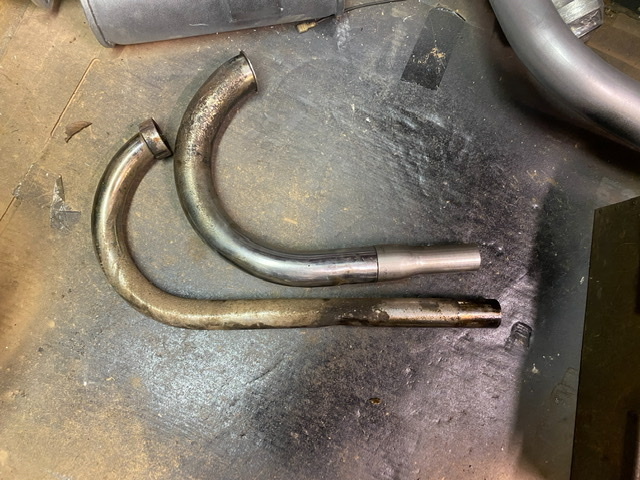 I’ll use the stock pipe to begin with, as I’m still waiting to get myself organised with some TIG rods and a short length of 1-3/8” tube. Using the stock pipe first will also let me see whether the modified header makes a difference or not. |
| |
My worst worry about dying is my wife selling my stuff for what I told her it cost...
|
|
|
|
|
|
|
|
Good to see you getting some quality time in Glen.
|
| |
|
|
jamesd1972
Club Retro Rides Member
Posts: 2,921  Club RR Member Number: 40
|
|
|
|
|
Nice to see some progress, completely hear you on fittings. Went out and bought correct unf nuts and bolts to hold the LR wings on but in retrospect swapping over to metric would have been cheaper and easier to work with long term. I think being consistent is good - its a right arseache when you find stuff that has been mixed and matched.
Not a great time of year anyway I just want to curl up in front of the fire and with all the other curse word going on just avoid going out but its not the best for you. Actually found some mojo myself and changed the oil on the axles yesterday, well overdue and not a stupid big job especially with a big syringe lawnmower oil change kit from screwfix.
Hope this little bike runs well and lifts your spirits as we roll into the new year.
James
|
| |
|
|
glenanderson
Club Retro Rides Member
Posts: 4,352
Club RR Member Number: 64
|
|
Jan 10, 2022 17:36:40 GMT
|
Been slowly chipping away at this. Having decided not to use a battery, and to run with just a capacitor instead, I changed my mind yet again and went back to the idea of running with a battery. This is to give me a steadier light at tickover, and to help prolong the life of the bulbs. It also lets me run an electric horn and indicators in the future if I want to. So the first job was to look at a better way of carrying one than the lashup I threw together years ago, that’s been held together with cable ties and hope for too long. It’s made from the remains of a genuine one, from a later bike that would have had it fitted on the other side, and had fairly typically rotted badly due to old leaky battery fumes. You can just make it out, lying on the floor next to the toolbox in this picture… 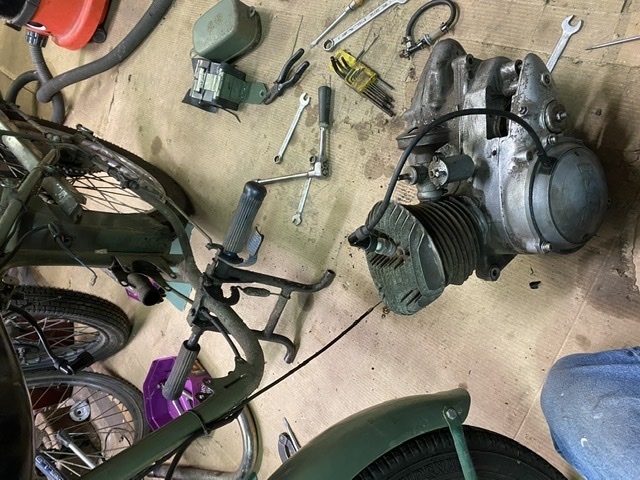 First off, I rumbled in the stores for this: 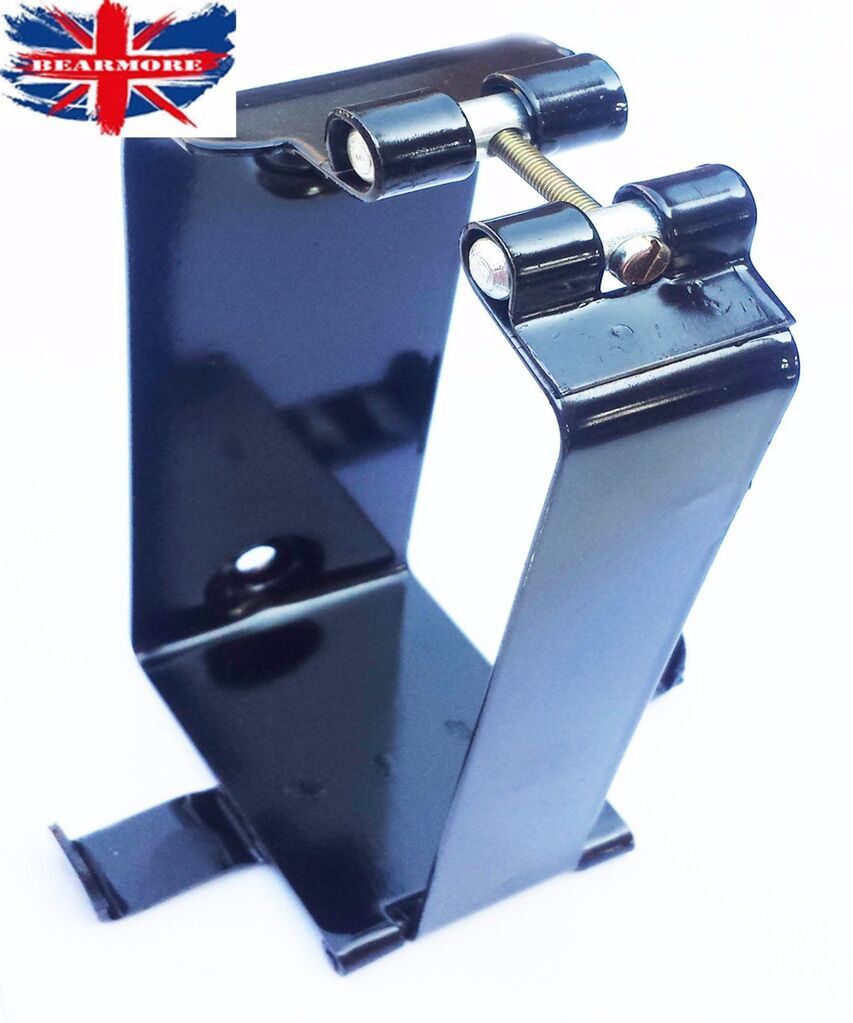 It’s a carrier for an Indian Enfield. Cost me a whopping £8 posted from Delhi and is every bit as shonky as you’d expect from something knocked out in a shed, by hand, and sold with a library picture. I’d bought it on spec, because it was cheap, but it was so poor I’d just laughed and stuck it to one side. However, it did allow me to liberate this bit and saved me a little bit of time. 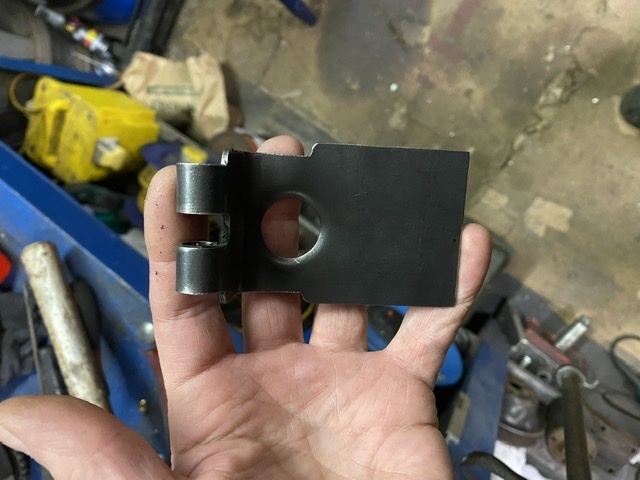 I then added that bit to the tidied up original: 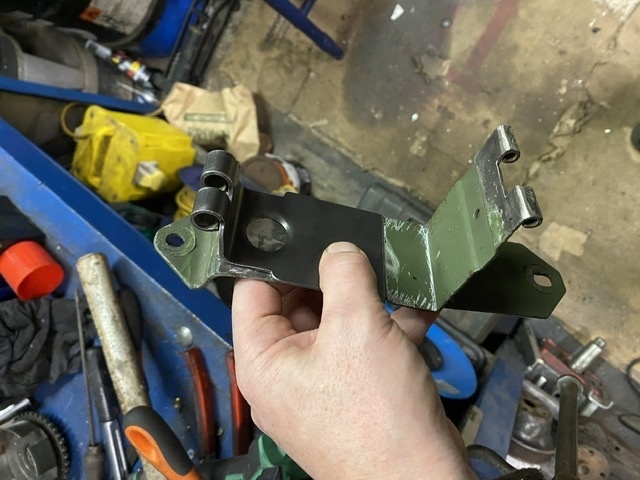 With that done, I wombled a bit of 2mm sheet from my scrap pile, and set to with the sawing, drilling and filing… 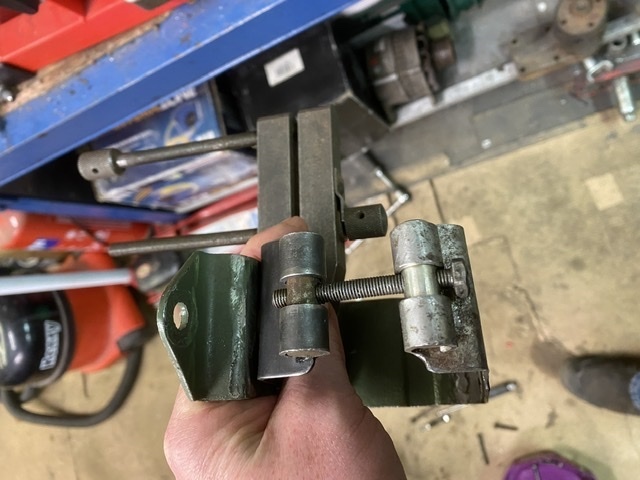 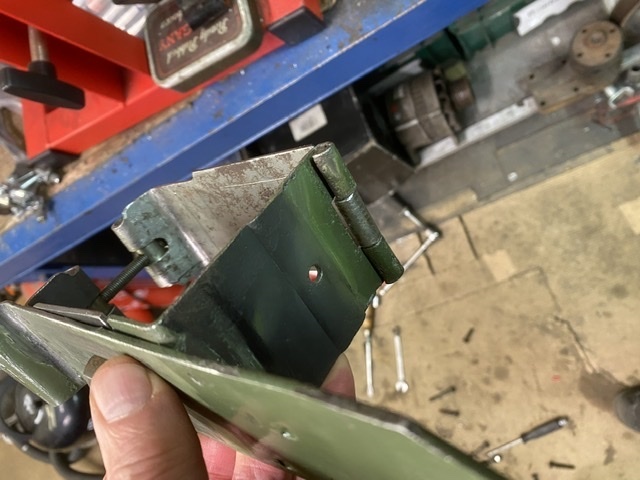 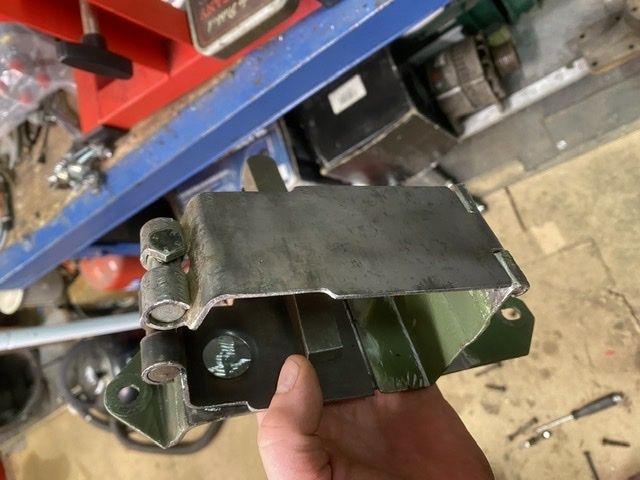 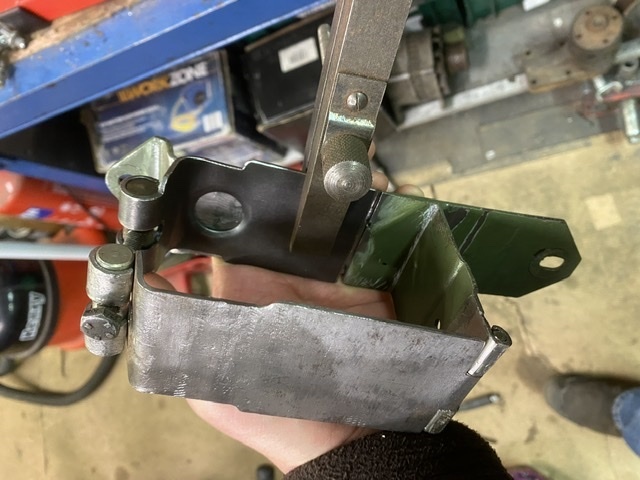 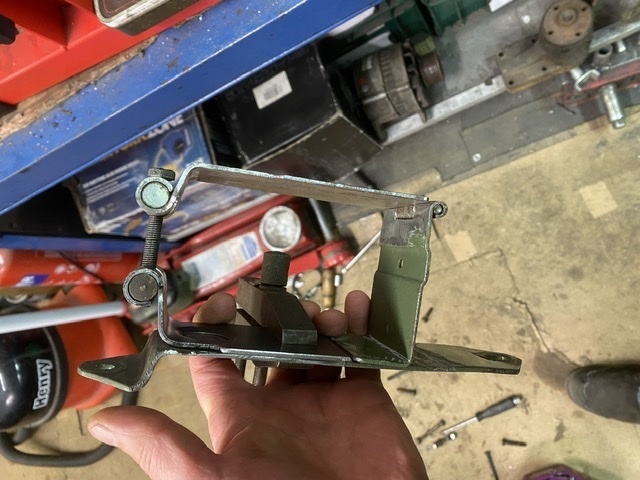 Not too bad. Better than the bloke in Delhi managed, but then I suppose I would have wanted a good bit more for my time than he charged. Stuck it together with the welder, and started on giving it some paint. 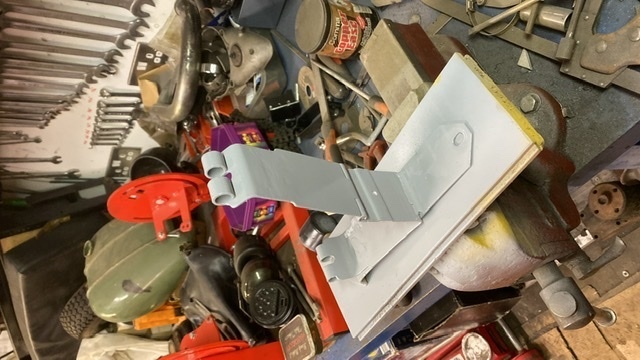 It’s not really the right time to be painting things in a cold and dirty garage, but it’s not a concours machine. I’ve got some bolts on order, and a new battery, so I’m not in a massive rush for the paint to dry. |
| |
My worst worry about dying is my wife selling my stuff for what I told her it cost...
|
|
goldnrust
West Midlands
Minimalist
Posts: 1,887
|
|
Jan 10, 2022 21:31:00 GMT
|
|
Having run bikes with a capacitor instead of a battery I think you're making the right choice.
I distinctly remember just how rubbish it was when on an especially dark, wet and cold night riding home on my RGV250. The sparks decided they didn't want to go through the spark plugs but should instead short out via the water that had got under the plug caps and the bike cut out. Thanks to my capacitor instead of battery I was instantly plunged into darkness. Thankfully I wasn't far from civilisation and was able to trudge my way alone the lane till I found a street light to work under and eventually got the bike running on one cylinder and nursed it home! Had it been a busy road, or had I been further out into the countryside (as I had been only minute previous to this point) then it could have been a much more ugly situation. Nowadays I'd have a phone with a torch on it, but still, made me think, as I'm not a racer and saving that extra few grams won't be make or break, that a battery isn't a bad price to pay.
|
| |
|
|
|
|
glenanderson
Club Retro Rides Member
Posts: 4,352
Club RR Member Number: 64
|
|
Jan 10, 2022 22:36:17 GMT
|
Yes goldnrust , you make a valid point. The ability, in an emergency, to charge my phone from it was another reason behind the decision. 👍 |
| |
My worst worry about dying is my wife selling my stuff for what I told her it cost...
|
|
glenanderson
Club Retro Rides Member
Posts: 4,352
Club RR Member Number: 64
|
|
Jan 10, 2022 23:19:27 GMT
|
While the paint is slowly drying, and the tank is off to get at the wiring, I thought I’d take the opportunity to tidy up the saddle. When we got the bike, it’d done 25 years of daily commuting, and the original saddle cover was in a shocking state. In 1989, at the end of my apprenticeship, I spent a few weeks stationed at the Bluebell Railway in Sussex, and rode the bike down there one week. There were two, long retired and very elderly gents there at the time who operated the “Trim Shop”. One of them had commuted many years before on a similar bike, and they offered to retrim the saddle for me. They duly did so one afternoon, using the original cover as a pattern. They did a fine job (even transferring the original maker’s badge), and it’s lasted well, but the vinyl they used was old stock at the time, and another three decades have passed. The material is splitting, and the springs are poking through. 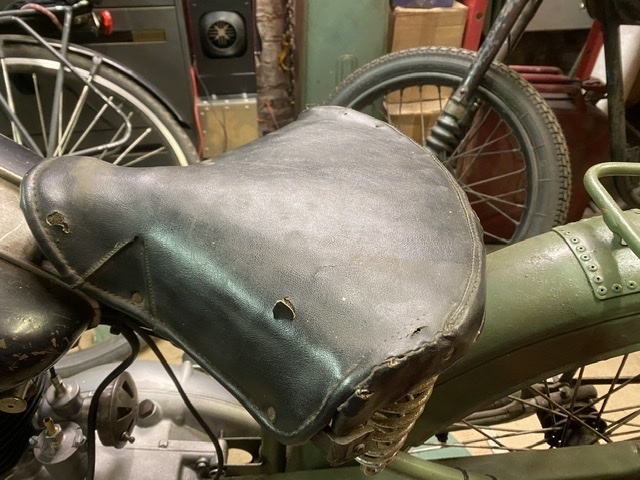 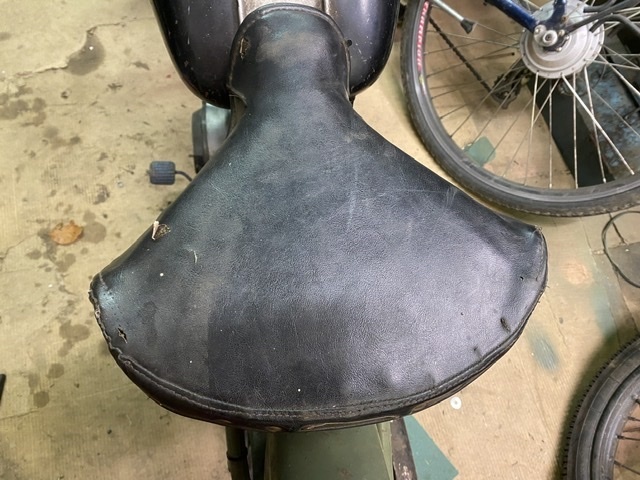 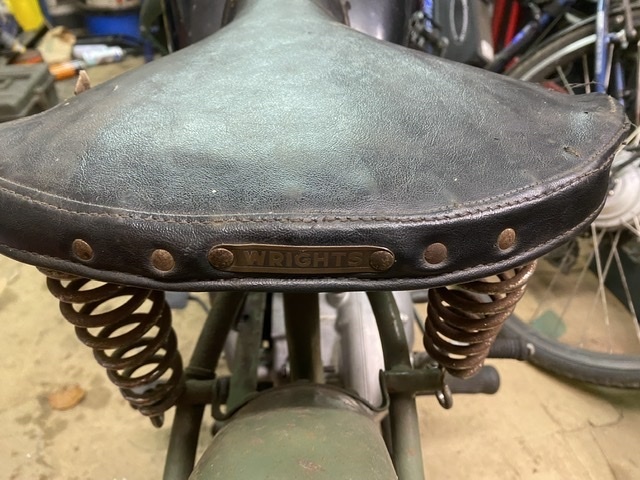 These days it’s possible to buy replacement covers off the shelf, and I have had one waiting to fit for about five years. 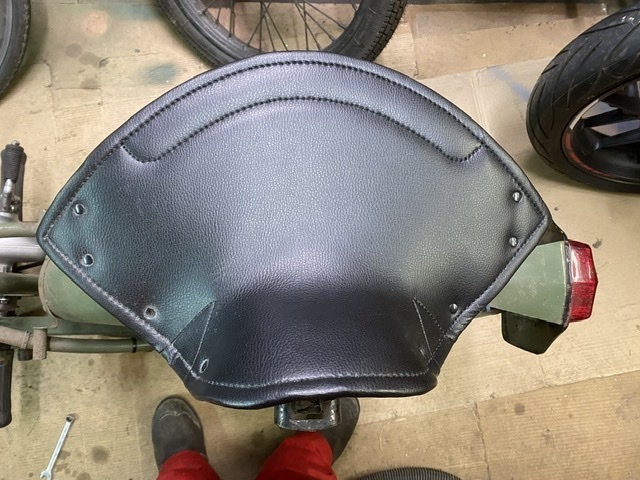 The old cover is simply held on with clips, and popped off easily. The remains of the original cover’s horsehair padding had been included under the replacement one, but is now only really fit for the bin. 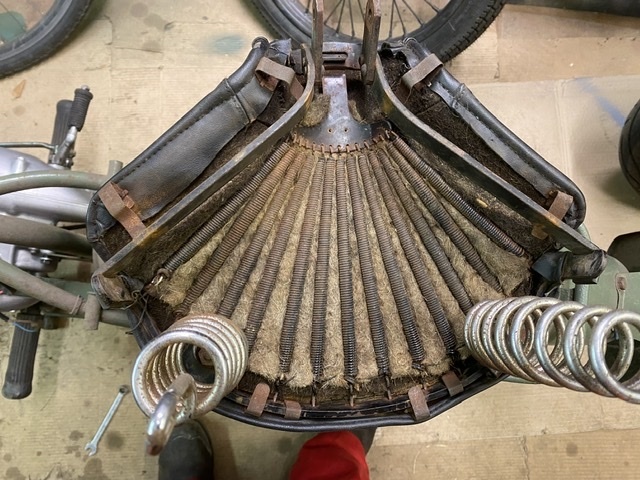 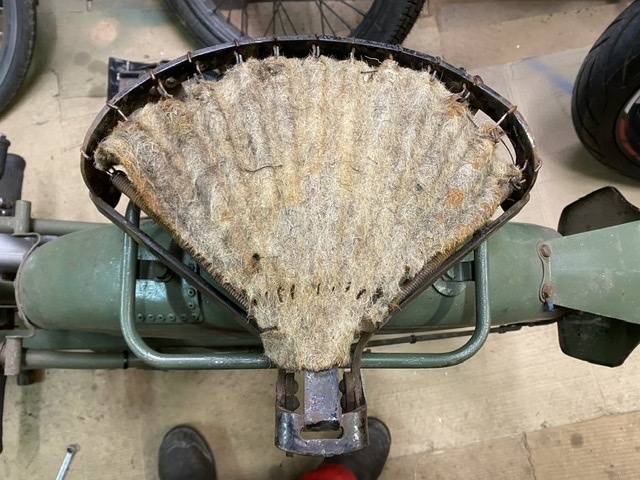 Taking a leaf out of the trimmer’s book, I’m going to use the padding they stitched into their cover in a similar fashion under the new one. 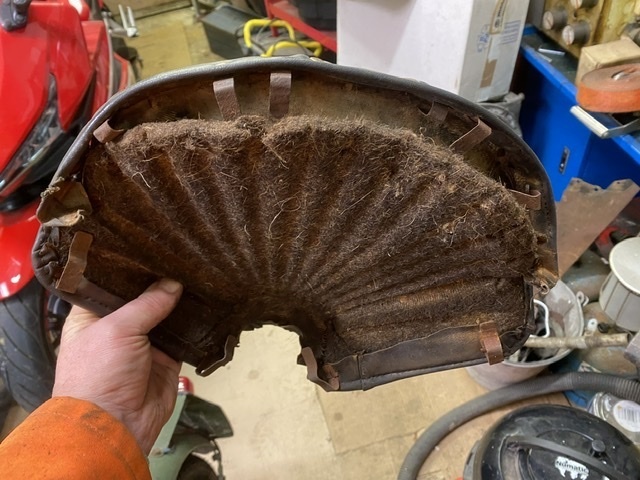 With it all apart I could address some very loose springs with a judicious twist of the pliers. I need to give it a bit of a wire brushing and a quick squirt of paint before I go any further. |
| |
My worst worry about dying is my wife selling my stuff for what I told her it cost...
|
|
glenanderson
Club Retro Rides Member
Posts: 4,352
Club RR Member Number: 64
|
|
Jan 19, 2022 19:05:46 GMT
|
Slapped some Vauxhall “leaf green” on the carrier, which is a pretty close match to the original shade visible inside the toolbox. Certainly closer than any of the alternatives I’ve encountered over the years, and cheaply available in aerosols from Halfords. Then applied a waterslide decal. It’s not the best job, but it’ll do. I’ve lacquered it now, just waiting for it to dry. 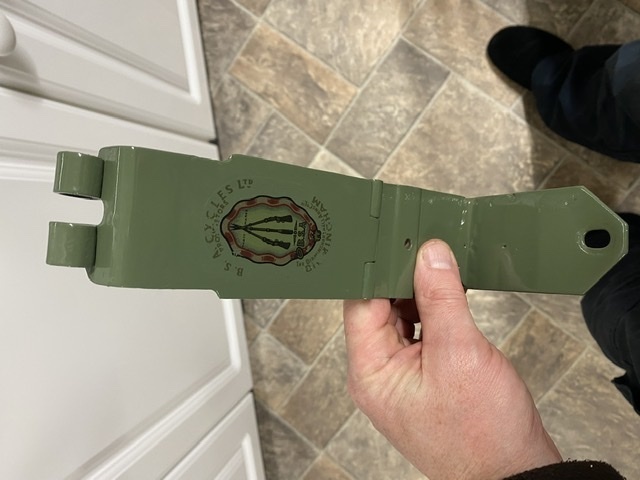 If you look closely at the new seat cover, you will see that it’s not very symmetrical. Still, it wasn’t dear and it’s a lot better than the old one. A bit of jiggling got it on reasonably straight. I gave the frame and springs a quick squirt of high zinc paint. I’ve got some new chrome springs but I know they’ll go rusty in minutes, so they can stay in the stores until I need them. 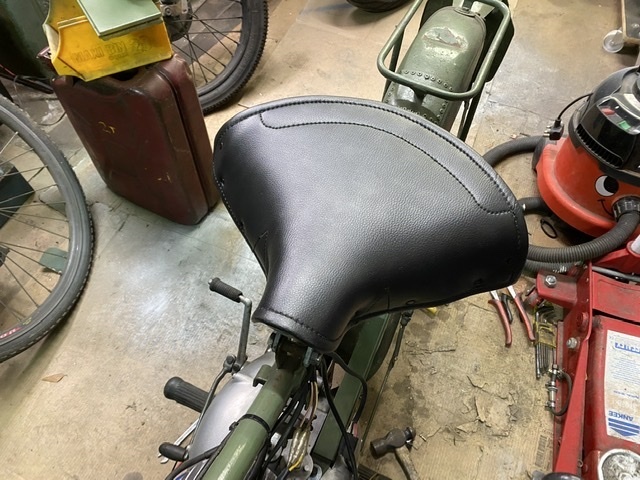 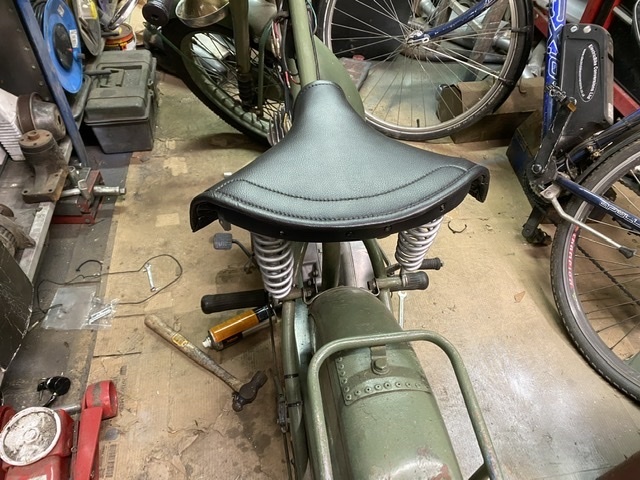 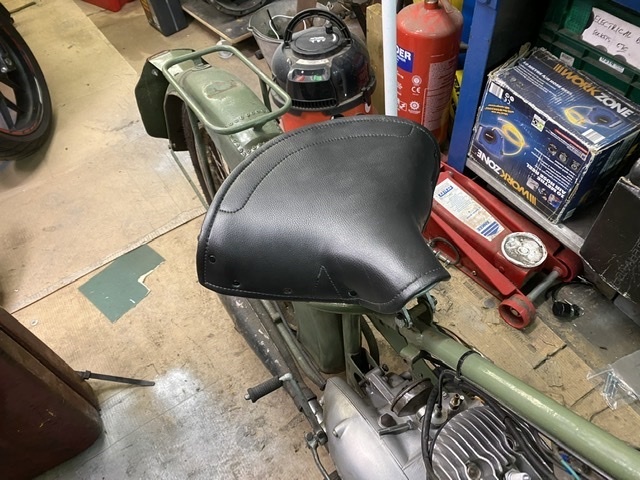 It’s much better than it was. 👍 Next job is to tidy the wiring. 😃 |
| |
My worst worry about dying is my wife selling my stuff for what I told her it cost...
|
|
goldnrust
West Midlands
Minimalist
Posts: 1,887
|
|
Jan 19, 2022 20:53:15 GMT
|
|
Seat looks good, the old one did look to have just crossed that line between shabby chic and knackered.
Mmm wiring. At least there won’t be much on a bike like this! I keep telling myself I should build a tidy loom for my Suzuki, as it’s about about 10 wires, but I think I’ve been saying that for about 4 years now and somehow I’ve still got the hack job I threw together when I first got the bike going!
In Bantam news, I saw this YouTube video the other day, I did very much like the customised Bantam he’s got here (10 mins in), I’m sure the forks are terrible but they look great! The overall style is great (to my uninitiated eyes anyway)
|
| |
Last Edit: Jan 19, 2022 20:53:53 GMT by goldnrust
|
|
glenanderson
Club Retro Rides Member
Posts: 4,352
Club RR Member Number: 64
|
|
Jan 19, 2022 22:36:37 GMT
|
|
The seat’s OK. It looks better than it has done since the 1960s probably. I’m a bit humpy that the new cover is as skew-wiff as it is, and that I didn’t notice until I went to fit it, but it’ll do. If I manage to get to an autojumble where I can actually see stock in the flesh, I might buy another, but I’m not taking a punt on buying sight unseen again as no doubt it’s going to be just the same.
His Bantam’s quite quirky. I like it. It certainly sounds like a late top end on there; very snappy compared with the earlier engines. The biggest issue with putting a late top end on the earlier bottom half is that the heavy generator rotors on them don’t like sustained high revs and can fail pretty spectacularly. That one might well have an aftermarket ignition though, as it picks up pretty sharply. Later bikes have a completely different generator and ignition setup.
Bantam’s kickstart mechanisms are a bit on the marginal side. They’re ok if the engine is spot on, but if it doesn’t want to start then a grown man flogging away at it is a recipe for breaking something. Years ago I was advised to bump mine if it’s not run for a while, and it’s something I always do.
Wiring should be straightforward enough. I redid it years ago as the original harness had all fallen to bits. There’s precious little on there really. I have gained a good deal more experience, as well as tools and kit, in the twenty odd years since I last looked at the wiring, so if nothing else I will do a bit of tidying. I dug out a horn that will go on too, so that might as well be included in the upgrade.
Another few hours and it should be done. 😃👍
|
| |
My worst worry about dying is my wife selling my stuff for what I told her it cost...
|
|
Dez
Club Retro Rides Member
And I won't sit down. And I won't shut up. And most of all I will not grow up.
Posts: 11,790
Club RR Member Number: 34
|
|
Jan 20, 2022 13:48:29 GMT
|
|
That bantam is sort of cool but painfully hipster at the same time. None of the modifications on it serve to improve its performance in any way, only it’s looks. The ‘it’s a race bike’ thing is obviously rubbish, it’s a old field bike at best.
I’d have more respect for it if he went ‘look at my hipster bantam bobber’ tbh.
|
| |
|
|
goldnrust
West Midlands
Minimalist
Posts: 1,887
|
|
Jan 20, 2022 17:49:59 GMT
|
As I said, it 'looks cool'...  I'm old enough and stupid enough to stick my head above the parapet and say that I often like the hipster aesthetic on vehicles, it is very much the point to look cool first and be function second. That said I wouldn't necessarily do it to my own vehicles. It's a caricature isn't it, like so many other more extreme vehicle fashions. My bike would be considered hipster by many I'm sure, but it does have concessions to function, for example a sensible amount of padding on the seat which doesn't look as good as the super slim 'race' seats but does mean I can ride it for more than 10 mins without feeling sore! You're right he'd be better saying it's a just a bit of fun with some old parts, something custom because he likes they style rather than trying to emphasise any race pedigree, but he's far from on his own in trying to claim that modifications to his vehicle are for performance/racing when actually they are pure fashion... Anyway, I don't suggest glenanderson gets some girder forks for his bike, no matter how interesting they look, haha. |
| |
|
|
|
|
|
Feb 14, 2022 21:40:24 GMT
|
|
Hi, I had finally got to the point of resolving to sell my D1 which I have owned since I was in my teens (back in ahem 1981) when, fumbling around the net for ideas for asking prices, I stumbled upon your engrossing story. Coincidently I grew up in East Kent and the Bantam (and numerous boxes of bits) is still in Dover! Really loving reading your entries! Can't wait to find out how the rebuilt engine runs!
|
| |
|
|
glenanderson
Club Retro Rides Member
Posts: 4,352
Club RR Member Number: 64
|
|
|
|
Hello. My name is Glen, and I am an addict. 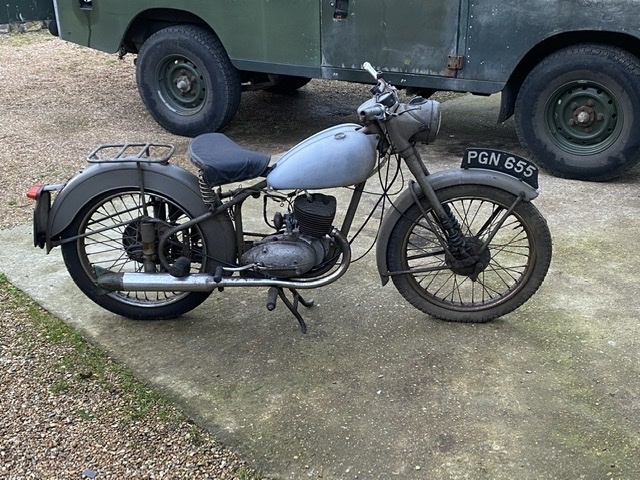 I just can’t help myself. 🙄🤣 Early start tomorrow, so I’ll fill in the details later. 👍 |
| |
My worst worry about dying is my wife selling my stuff for what I told her it cost...
|
|
|
|
|
|
|
|
Can you knock up a ramshackle chook shed to store all your Bantams in?
Purely for my own amusement, but I give you permission to use as you see fit for your own bad puns.
|
| |
|
|
|
|


