jimi
Club Retro Rides Member
Posts: 2,219 
|
|
Mar 11, 2022 11:28:39 GMT
|
Nice  This takes me back 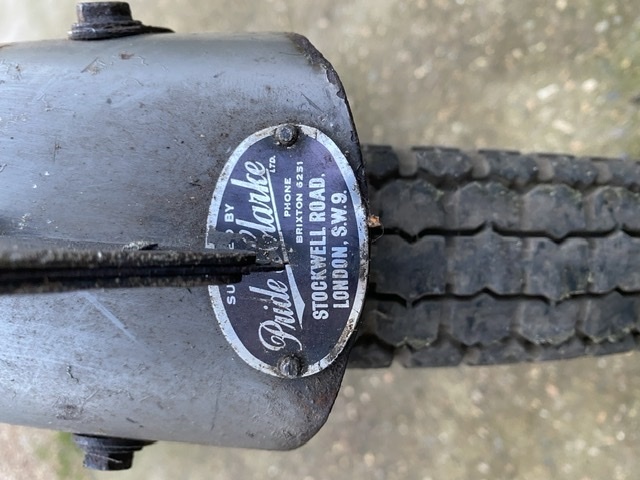 Back in the sixties they always used to advertise in the Exchange & Mart and sold everything for bikes. So when I was down at Biggin Hill for an RAF selection test, as I was passing through London on the way home I visited their spares dept in Stockwell road, it occupied several buildings on both sides of the road. I had a list as long as your arm of bike things to get for friends (and me) I seem to remember spending over £100 which was a lot of money back then  |
| |
Last Edit: Mar 11, 2022 14:48:15 GMT by jimi
Black is not a colour ! .... Its the absence of colour
|
|
|
|
glenanderson
Club Retro Rides Member
Posts: 4,352
Club RR Member Number: 64
|
|
Mar 11, 2022 12:21:04 GMT
|
|
My dad bought a bike from them shortly after the war, an ex-WD BSA M20 for £39-19”-10”, and said they were a big concern. By the late seventies they owned all the shops the entire length of the street. Sadly, they stopped trading in 1979, selling out to Inchcape with messers Pride and Clarke retiring, so I never got to see the place as my motorcycling career really started in the mid 80s.
|
| |
My worst worry about dying is my wife selling my stuff for what I told her it cost...
|
|
glenanderson
Club Retro Rides Member
Posts: 4,352
Club RR Member Number: 64
|
|
|
|
We had a little play with the new D3 on Saturday. Generally poking about and seeing what was what really. Pumped up the tyres, both of which held air after being fitted with new valve cores, which is handy. The tyres are ancient, probably fitted while it was still in use in the late sixties or early seventies. They’ll do for the time being, there’s no way I’d trust them on a wet road, but they’ll be ok for laps of the garden. We removed the clumsy looking aftermarket rear footrests. They weren’t exactly quality items to begin with, and time had not been kind. In the unlikely event of wanting to carry a passenger I’m sure something better can be fabricated. 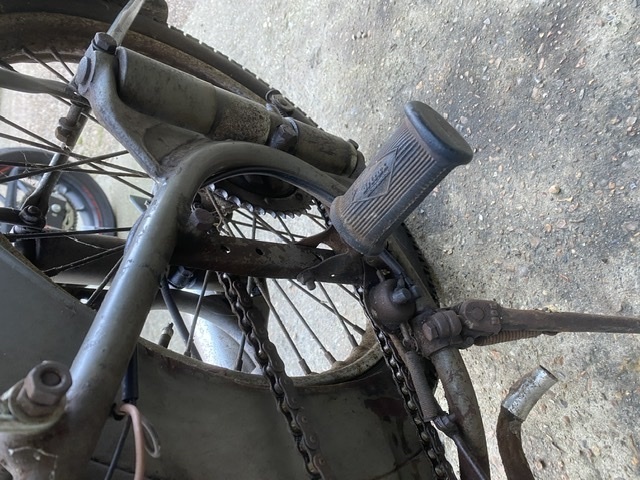 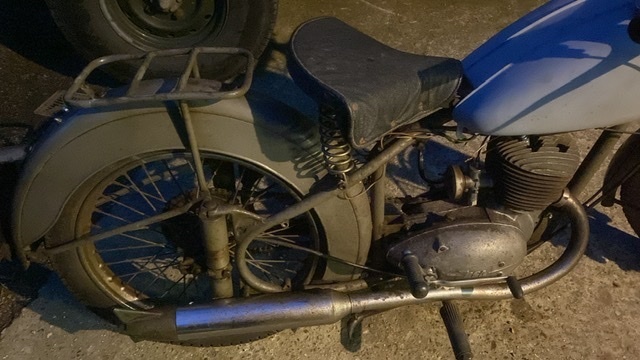 The missing control levers were the next thing on the agenda. There were two brand new ones in the stuff that came with the bike, but they were going to look way out of place so I had a rumble through my boxes of bits and found a pair of suitably aged ones that, when fitted, look like they have always been there. We also found a pair of new handlebar grips, so we fitted them. Fin thought I was pulling his leg when I said you use hairspray to fit them. The laughter turned to bemusement when I produced a can of Boots’ finest own-brand hairspray from the shelf in the garage, then surprise when I showed him how a generous squirt of it allows the grips to slide on really easily, but within a few minutes sets so they can’t be twisted off. 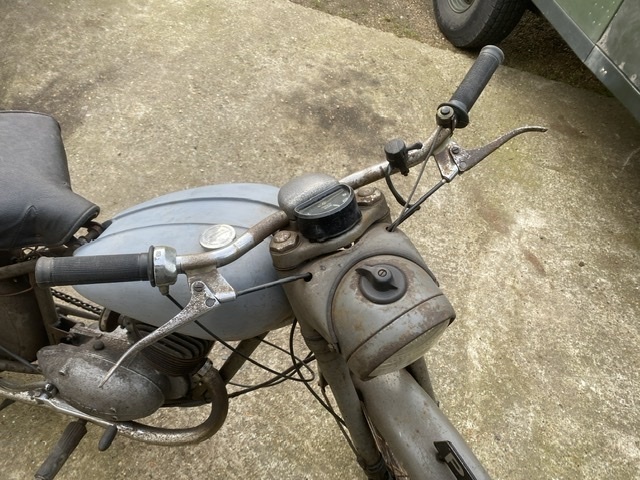 With the levers and grips done the front brake and clutch cables were connected up. The brake works, but it’s pretty poor even by Bantam standards, and feels like it’s oil contaminated, so will get a bit more investigation in due course. The clutch, as is usually the case with these if they’ve been sat for any length of time, was stuck on, but it freed up by sticking it in first gear and bumping it back and forth with the lever pulled in. Then we checked the points, cleaned them and tried for a spark. I only had the type of cap with a built in resistor, and Bantam ignitions don’t like them very much, but we did get a spark, so we then moved on to cleaning the carb. As anticipated, it was choked with gunk and long dried residue, but it’s a really simple thing and didn’t take much to clear out. By this point we were running out of time, but really wanted to see if it could be persuaded to start. I didn’t want to put petrol into the tank fitted to the bike as it needs to come off for paint, and because we didn’t have a tap for it, so we made do with sticking a capful of fresh fuel in the float bowl. It’s normally a waste of time trying to kickstart a Bantam that’s not run for ages, so I didn’t bother and went straight for a bump. It tried to go on the first attempt, and caught for a bit on the second. Third try it went for a bit longer but by then we were definitely out of time so had to call it a day. It’s not the time of year to be trying to paint petrol tanks properly, and I am fairly sure that Fin won’t want to wait, so I dug out one of my old tanks that I know had a fair chunk of filler in (because I put it there), and also a split seam (that I found after filling and painting it😡). I scrubbed off the bulk of the paint today and broke out my TIG welder and sorted out the seam. It’s currently sat full of vinegar to clean up the inside, but over the next few days I’ll strip the rest of it and give it a couple of quick coats of paint. Once that’s done it can do temporary duty on Fin’s bike until we’ve either properly painted the original, or found a suitably weathered replacement in original paint. Next jobs will be to replace the HT lead and cap, and see if we can get a better spark, then fit the temporary tank so we have a proper fuel supply. Then we can have another go at getting it running, which I’m hopeful will be successful. More as it happens. 🙂👍 |
| |
My worst worry about dying is my wife selling my stuff for what I told her it cost...
|
|
glenanderson
Club Retro Rides Member
Posts: 4,352
Club RR Member Number: 64
|
|
Mar 16, 2022 23:00:18 GMT
|
What’s this? Another Bantam update? Yes, really! I know, I’m spoiling you. 😀 Actually, I’m quite keen to get the D1 back together and get some tidying up done. The recent addition has upset the apple cart somewhat, and I’m wary of getting deflected onto other things while the D1 is still in bits. So, the D3 did get a little attention today, peripherally, as I rinsed and flushed the vinegar out of the spare tank. I then stuck a couple of handfuls of gravel in it, together with 1/2 gallon of water, then wedged it in here and left it running for the afternoon. 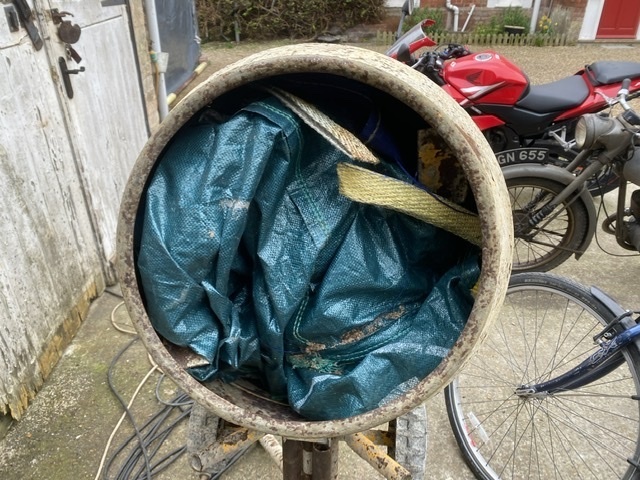 I did pause midway, and turned the tank around inside so the gravel wasn’t going the same way all the time and missing bits. After another good rinse, and a thorough drying off with the heat gun, I then set to with the paint stripper and a scraper and took all the rest of the paint off. I’ve found another suspect bit of seam, which I’ll attack with the welder, then finish sanding it down later in the week. While the tank was chuntering around in the mixer I turned my attention back to the D1. The generator setup I have fitted is an aftermarket 12v one, with Cdi ignition, and a much smaller and lighter flywheel than originally used. 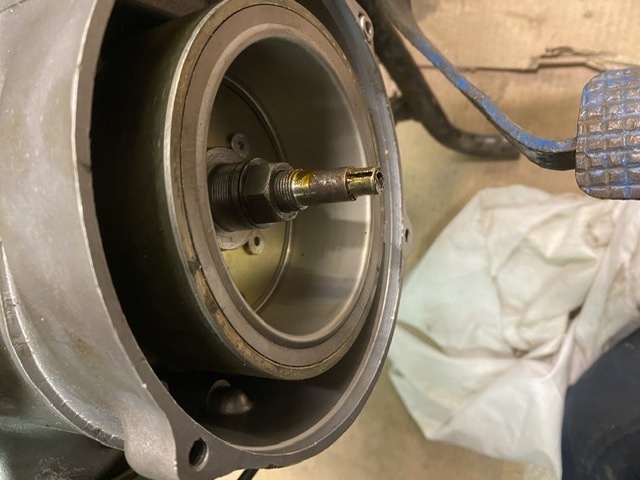 The long output shaft, on a stock setup, has a points cam on the end of it, and the shaft is prevented from whipping about by a bush in the stator plate. 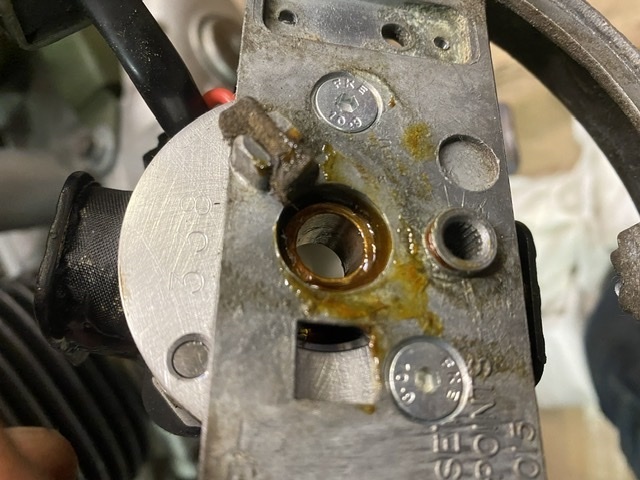 When I fitted this system, about ten years ago now, the instructions said that refitting the cam was unnecessary. This is true, inasmuch as there’s no points for it to actuate anymore, but I found that the stator bush worked out of its housing without the cam there to retain it. Maybe I was just unlucky, but I didn’t realise it had even happened until I took the unit off the 125cc engine a few weeks ago. I have fitted a new bush, loctited in place, but I think it’s best to have something on the shaft preventing the bush moving again. The little cams can be total swines to fit, and none of the ones I have here were a decent fit on the crank, all too tight, so I decided to just make up a spacer ring instead. So, instead of this: 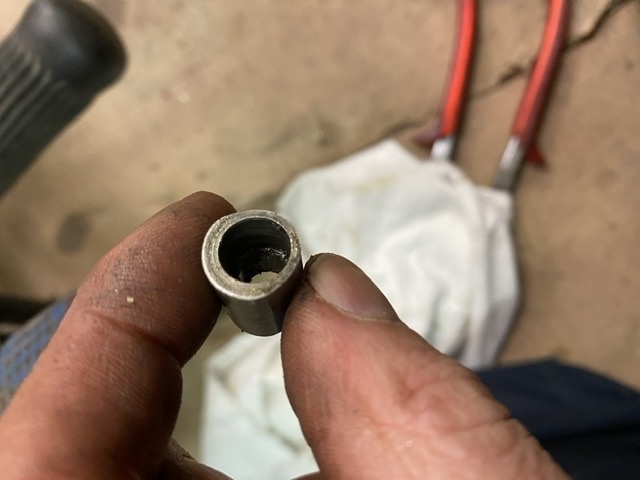 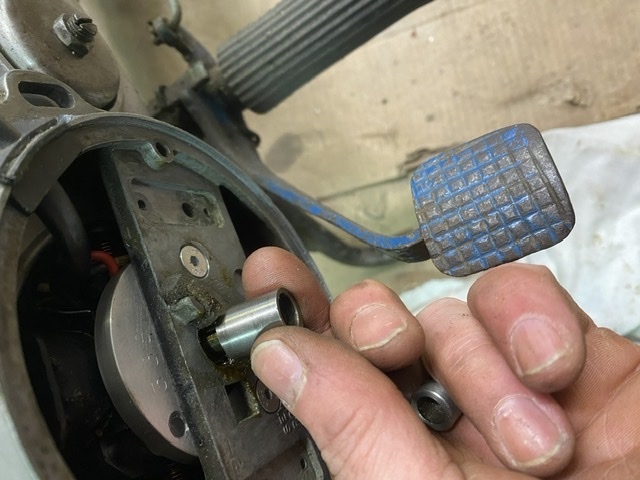 We have this: 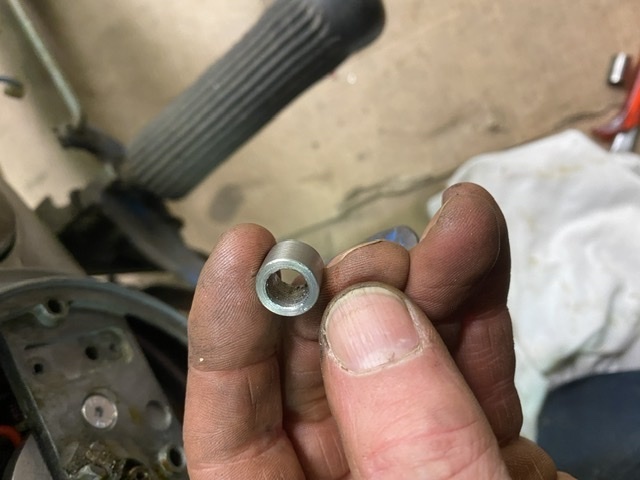 Which fits like this: 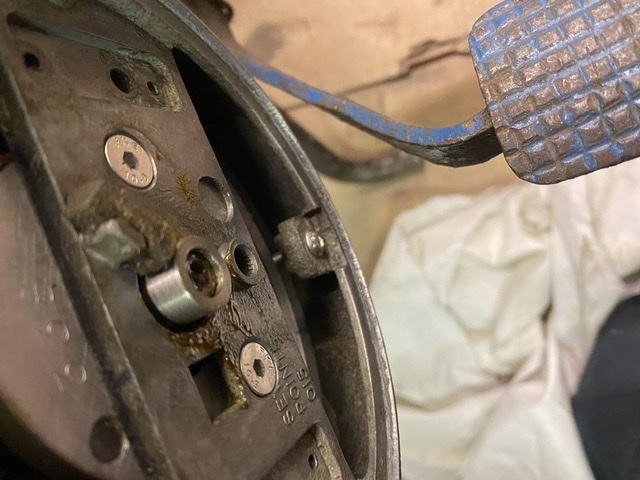 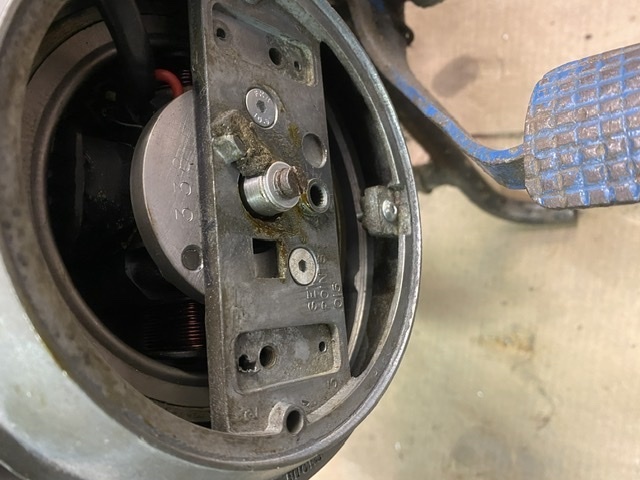 With that done and the felt oiler pad doused with oil, the stator plate can be tightened down and the cover plate fitted. 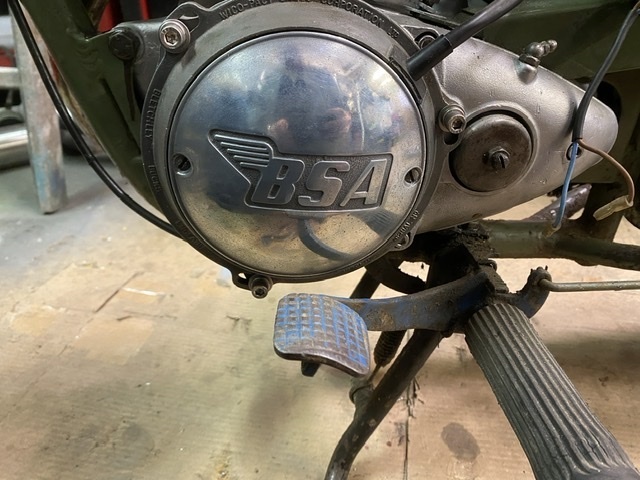 Next job was to remove the garish modern label from the new battery. I did take the time to copy the code number, capacity and date onto it though, for future reference. 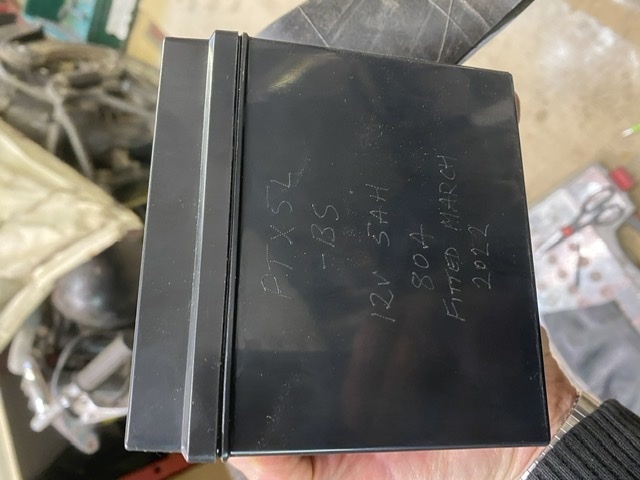 Then a bit of inner tube to take up the slack in the mounting bracket. 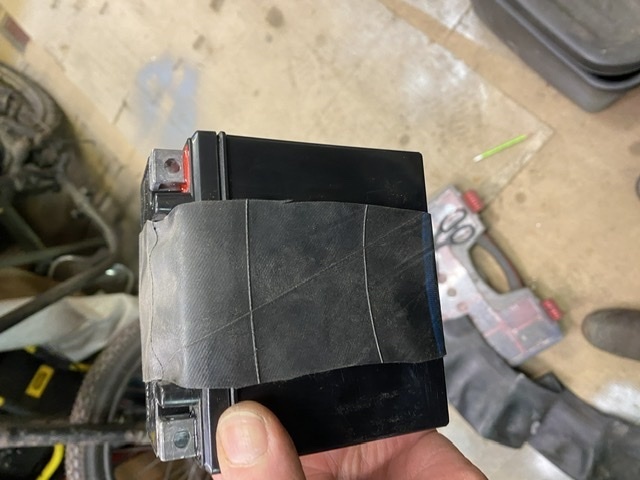 I spent a bit of time making a saddle washer for the carrier’s securing bolt. 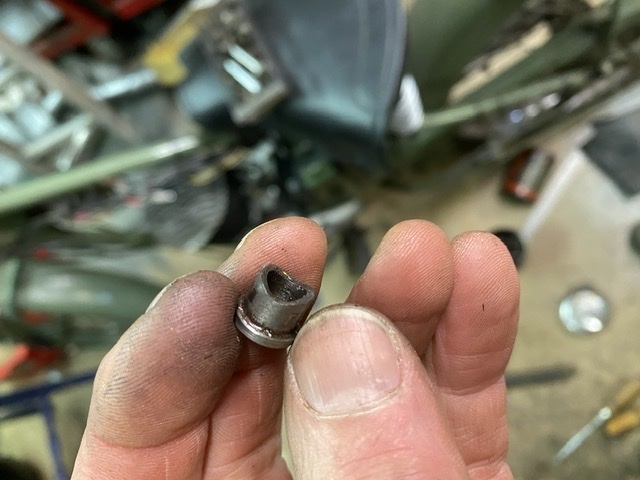 Which allows enough clearance to prevent the bolt damaging the carrier’s paint. 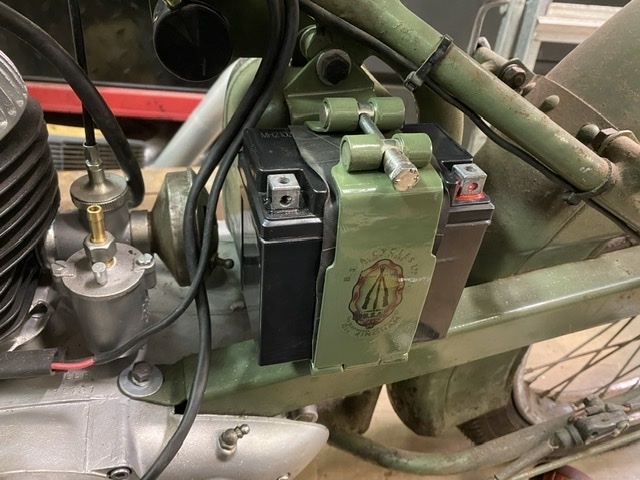 Now I can do the wiring upgrades I have been planning. Nothing major, just the addition of an ignition switch for a little added security, and to isolate the lights so they can’t run the battery flat if they’re left on by accident. Shouldn’t take long. He says. Famous last words. 🤣 |
| |
My worst worry about dying is my wife selling my stuff for what I told her it cost...
|
|
Dez
Club Retro Rides Member
And I won't sit down. And I won't shut up. And most of all I will not grow up.
Posts: 11,790
Club RR Member Number: 34
|
|
Mar 16, 2022 23:30:55 GMT
|
|
Excellent purchasement.
I saw that bike pop up on the group and thought it was criminal that someone had primered the tank on what looked like such an original bike. It would be great if you could find an old well worn tank for it as other than that it looks a proper survivor.
|
| |
|
|
glenanderson
Club Retro Rides Member
Posts: 4,352
Club RR Member Number: 64
|
|
Mar 18, 2022 16:01:36 GMT
|
|
Yes, I’m hoping that a suitable tank will present itself in due course. If not, then I’ll paint the one that came with it. Who knows who or why the original one got stripped and primed. Maybe there’s some damage hidden underneath the paint? It will get sanded back if it does end up being used. The chainguard is also in primer, but I’m less bothered about that as it’s a less “in your face” part. It doesn’t look like the missing toolbox or battery carrier are going to materialise, so replacements for them will have to be found at some point too; preferably without spending a fortune on them.
|
| |
My worst worry about dying is my wife selling my stuff for what I told her it cost...
|
|
Dez
Club Retro Rides Member
And I won't sit down. And I won't shut up. And most of all I will not grow up.
Posts: 11,790
Club RR Member Number: 34
|
|
Mar 20, 2022 23:51:41 GMT
|
|
I need a toolbox for mine really, and I’ve been watching them fetch eye-watering prices on eBay over the last few months (although it was around Christmas which may have inflated prices). But at well north of £100 I think it’ll be staying toolboxless tbh!
A competition get away with bits missing more than a road bike though.
|
| |
|
|
glenanderson
Club Retro Rides Member
Posts: 4,352
Club RR Member Number: 64
|
|
|
|
|
Yes, I found a toolbox of the correct pattern on eBay at £130 plus post. At that price I think I’d sooner modify an earlier version I already have. I might list up a few bits I won’t be using and see if the current asking prices for stuff translate to actual selling prices. I don’t mind buying for over the odds if I’ve sold for the same.
|
| |
My worst worry about dying is my wife selling my stuff for what I told her it cost...
|
|
glenanderson
Club Retro Rides Member
Posts: 4,352
Club RR Member Number: 64
|
|
Mar 25, 2022 23:13:12 GMT
|
Fin and I spent a little more time on his D3 at the weekend. The saddle fitted to is the right size and type, but I suspect it was originally destined for a different machine. There’s a couple of redundant holes in the mudguard which, together with the passenger footrests we removed the other week, suggests that at some point at least the bike had a dualseat. I think, although I’m not certain, that a dualseat was the standard setup on a D3, and the single saddle/rack was an option. Anyway, if you compare the two bikes side by side you’ll see that the D3’s saddle sits up at an odd angle at the back, because the springs fitted are at least an inch longer than they ought to be. 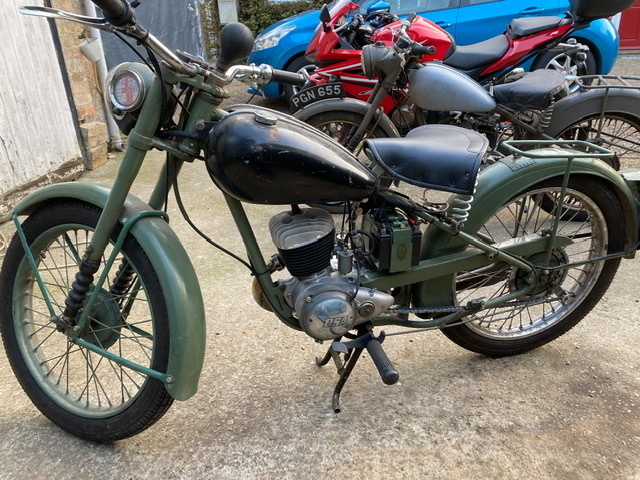 The front pivot mount was also way wider than it should be; two inches instead of the inch and an eighth of the frame bracket. Whoever had fitted it had done so with a pair of M12 nuts as spacers, which was sort of ok, but meant that the mounting bolt was really close to the petrol tank and likely to cause issues with scratching the paint. 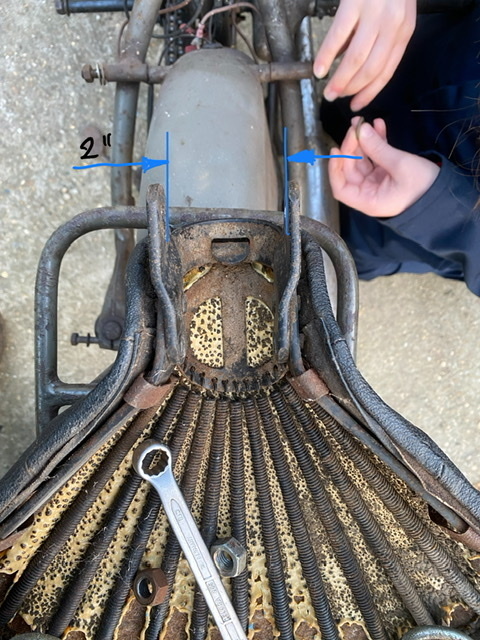 We got around the mount issue by knocking the rivets out holding the mounting tabs to the saddle frame, swapping them side to side, and bolting them back on again. We dug out some suitably weathered saddle springs of the right length from my stash, and swapped them too. A relatively quick and simple fix which cost nothing but time. 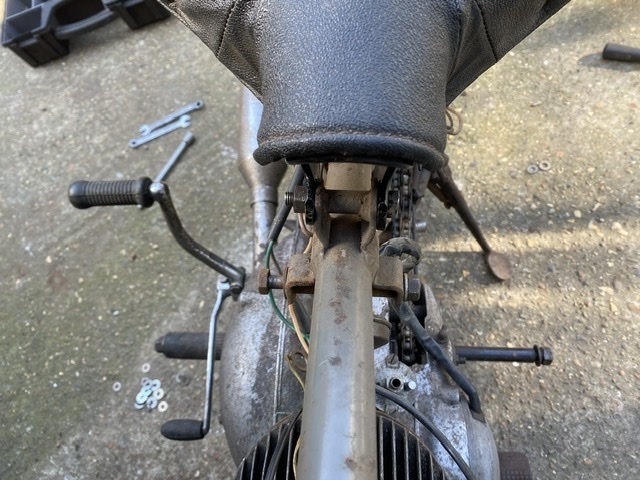 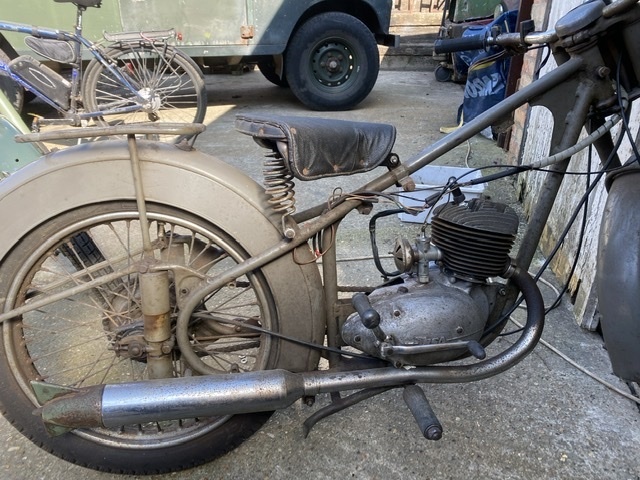 I have splashed out on a couple of cans of air-drying 2k to use to paint the spare tank and chainguard. I was going to just sling a coat of whatever I had lying around on the tank, but the fact that it would then need a coat of appropriate lacquer to make it fuel spill proof, which I would have to buy, meant that it made just as much sense to buy suitably resistant paint in the right colour. There’s no exact match, but RAL7039 Quartz Grey is close enough. |
| |
My worst worry about dying is my wife selling my stuff for what I told her it cost...
|
|
glenanderson
Club Retro Rides Member
Posts: 4,352
Club RR Member Number: 64
|
|
|
|
I have also put some time into the D1… ”Tidying the wiring” has ended up being a new loom. Not that there’s much to it, but I decided that my previous efforts, whilst entirely functional, merited being updated completely rather than further modified. I’ve incorporated a basic ignition switch, a pattern one from an 80s era CG125, so cheap and easily obtained. This is a simple key operated “on-off” affair, but in addition to a contact made in the “on” position for the electrical services, there’s a second one made in the “off” position that shorts out the coil to earth acting as a kill switch. I made a simple bracket for it that picks up on the toolbox and tank mounting bolts. 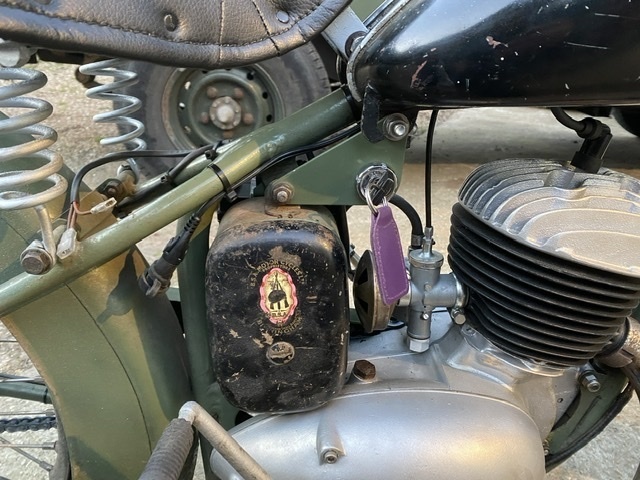 I didn’t want all the bike’s services running through the somewhat weedy looking cables attached to the switch, so used it to trigger a relay housed in the headlight shell. I also laid in provision for an electric horn and fitted a fly lead with a charger plug on it to suit my battery monitor. 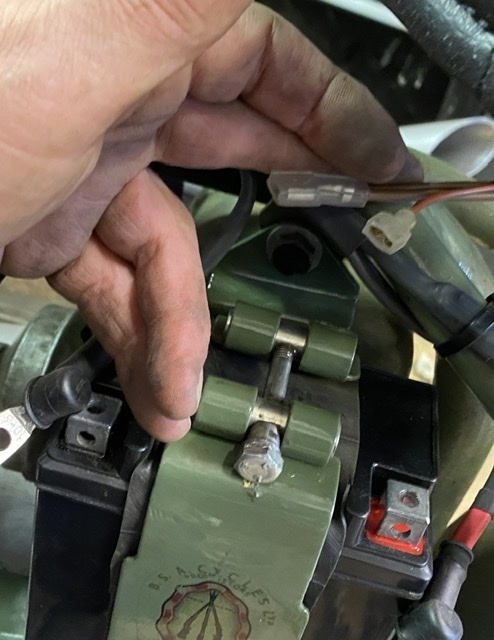 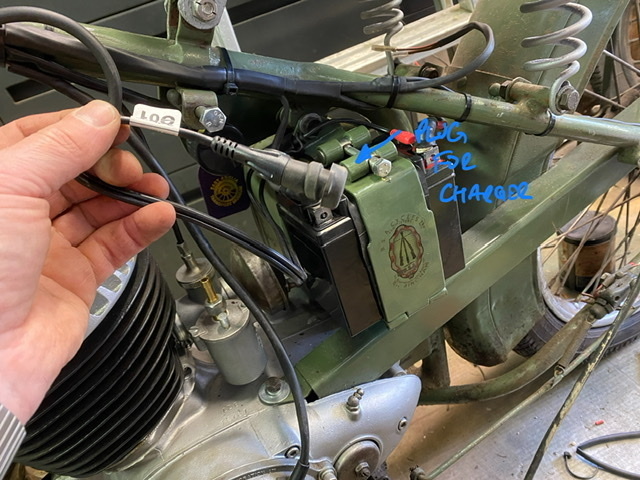 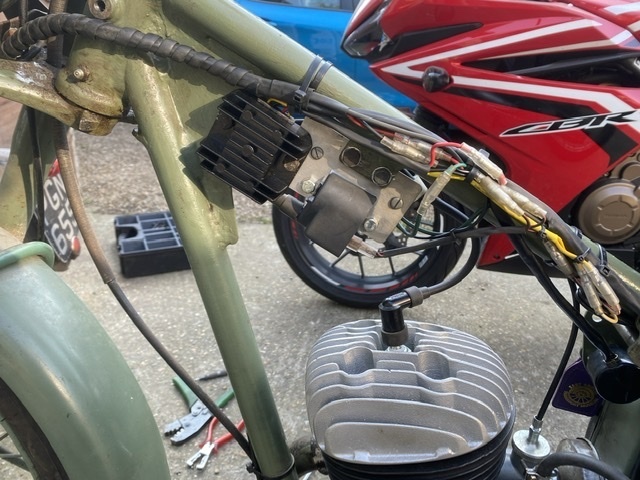 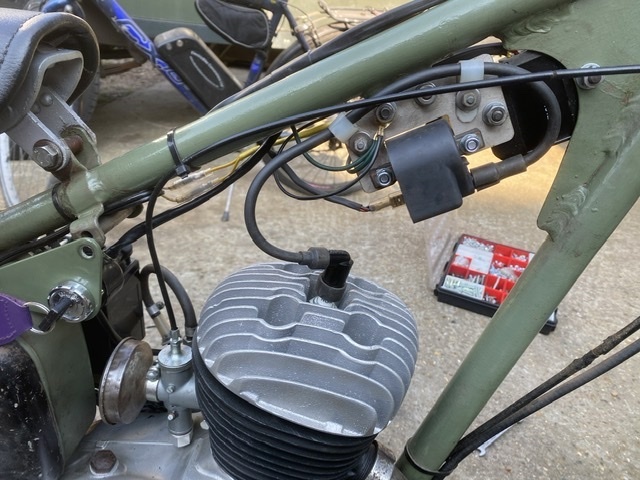 I put the tank back on, and then it was the moment of truth Success! Sort of. I took it for a quick trip around the block. It was a bit missy and hesitant. I got a belt off the ignition barrel, and when I stuck a meter on the battery it was showing a charge rate of 18v. So, further investigations. It looks like the regulator/rectifier supplied to me with the generator/ignition kit was miswired, either that or it’s faulty and I didn’t pick up on it. So the first job was to swap that out for a replacement. Fortunately, universal ones are not expensive or difficult to find these days. Next, an inspection of the ignition switch showed that the coil connection and the ground wires had been fitted the wrong way around. The paint on my bracket must have been offering just enough electrical insulation to allow the engine to run at low revs, but was shorting the ignition out at high ones. A few minutes with the soldering iron swapped those around and both stopped the shock from the switch body and cured the misfire. So another test ride. The good: It’s definitely got more go than the 125. The higher ratio layshaft gears make a big difference. The higher first doesn’t hamper pulling away, but it will put north of 20mph on the dial before needing second, whereas you would have had to change up at fifteen before. Thirty is now a speed you can sit at in second, rather than having it revving really high looking for third, and it will get to forty on the clock in second. The bad: It bogs down at high throttle openings, so I am going to have to play with the carb settings. I’ll try adjusting the needle first, but I suspect that I’ll need a bigger main jet. I will have a play with the timing too, just to see if it makes any difference. It was reluctant to change into top. It feels like the actuator isn’t moving the selector quadrant. I did manage to get it into top once, but it wouldn’t do it a second time whilst riding it. Bizarrely, it happily went into all three gears when stationary with the engine off. It might just be something sticking that’ll ease up rapidly with a bit of use, or it might mean having to have the cases apart again and see if it’s a result of me mixing and matching the wrong bits as there are some very subtle variations between early and late three speed selector parts. Anyway, we’re getting there. Sort of. At least it’s all back in one piece. I have a lot of tidying to do, and want to keep the momentum going with Fin’s D3, so if it does mean having to split the cases on the D1 again it’ll be a job for next winter and I’ll swap the 125 engine back in again for this summer. I have an en-suite bathroom to concentrate on, and the possibility of upheaval here at Anderson Towers has once again raised its head, so I’m trying to focus on putting the things together that are in bits, rather than taking more of them apart. More as/when it happens. 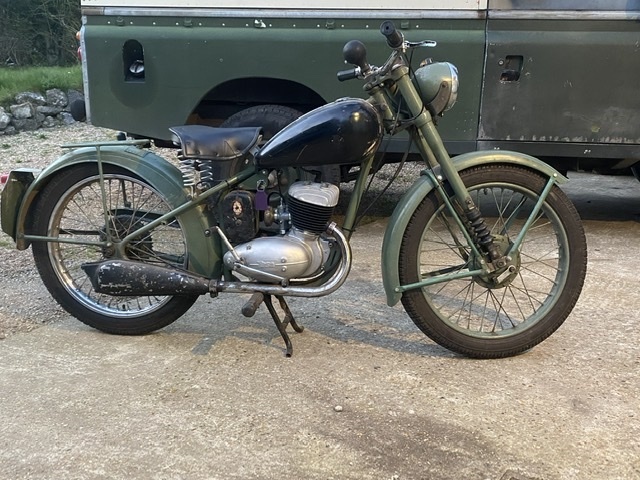 |
| |
My worst worry about dying is my wife selling my stuff for what I told her it cost...
|
|
|
|
|
|
|
Mar 26, 2022 12:10:28 GMT
|
|
That exhaust is almost there already, but it looks like it needs sharks teeth
|
| |
|
|
mrbig
West Midlands
Semi-professional Procrastinator
Posts: 505
|
|
|
|
Just caught up on this thread from the beginning. Love the stories of D1's history especially. Also makes me wish I had a lathe. Had free access to one at school and uni but never had my own  Great to see your son getting involved too. I've mentioned elsewhere on here that I'm hunting for a bike project to show my sons how to twirl a spanner, but 2 stroke aircooled bikes are (relatively) silly money now. Your escapades have renewed my enthusiasm to pick up the hunt again! To my eyes the D1 looks fantastic, like a tidy, honest bike that's lived a life and has stories to tell. Which I think for most of us on here, is what it's all about! |
| |
1969 German Look Beetle - in progress
|
|
glenanderson
Club Retro Rides Member
Posts: 4,352
Club RR Member Number: 64
|
|
|
|
|
There’s been zero progress on the Bantam front, other than a bit more fettling of Finlay’s D3. I painted the chainguard and we fitted it. Colour is way off really, but it’ll do. I’ve also picked up the right style of toolbox and battery carrier for it. The toolbox was, in my mind, a ridiculously expensive £130, but I simultaneously sold an early one for £125, so I guess if I look at it as having cost me a fiver to get where I needed to be then that’s ok. I’ve had no luck with sealing the leaky seams on the old tank I stripped, so I gave up on that and sanded the one that came with the bike. As suspected, the primer concealed a big dent and some filler, so it’s just going to get a quick blow over as a temporary job; I’m still keeping an eye out for a decent unrestored tank
I’ve done nothing with my D1, beyond a couple of brief rides. The carburation is way off, and I haven’t been able to find an unworn replacement body. All the ones I have are similar degrees of knackered. I think I’m going to fit a modern Dellorto and be done with it. I did ride over to Canterbury on it one afternoon in August, and dropped in on my dad’s mate Harry, who was instrumental in getting me riding the bike when I was a schoolboy.
My D3 project has not progressed one iota. I’m drowning in “things that need doing”, and am now of the mindset that it’s genuinely unlikely that I’ll ever get around to actually doing it. It’s more of a liability than anything else, and I have way too much money tied up in it, not to mention the space it takes up spread around the garage in bits. I’ve been helping a mate with his late 4-speed Bantam too, and it’s apparent that some 4-speed engine parts are really hard to find, really expensive, and that the trials and racing boys pay eye-watering amounts for complete engines. So I’ve decided to part with the whole thing. I doubt that I’ll see the best return selling it complete, so I’ll be breaking it down and selling it piecemeal.
|
| |
My worst worry about dying is my wife selling my stuff for what I told her it cost...
|
|
|
|
|
|
|
|
spent 5 years trying to get an early bantam trials bike (bushman?) from a guy at work
it just needed the ignition sorting he said , me and my brother will sort it soon
i kept chasing and never got an asked that indicated he would sell , it was always i’ll have a think about it
then got told he had an mgb on his drive that had literally collapsed and was a pile of rust
been offered a few over the years and never been in a position to afford them at that time ☹️
|
| |
|
|
|
|
|
Oct 22, 2023 18:50:11 GMT
|
|
If you are stuck for Bantam bits I know a bloke who has loads, let me know if you are stuck for anything.
|
| |
It will come in handy even if you never use it
|
|


