|
|
|
Sept 2, 2020 13:30:54 GMT
|
Meant to say before....... the pits shown near the lobe peak on your first cam photo mean the cam is on the way out. Should be no pits on the working surfaces. You can also measure the heel to peak distances for all lobes and compare them. They should be all the same on a standard cam. They rarely are on a used one, even when they look ok. Follower condition is also very important. Light circular markings on the flat face are normal but it should be flat. Any dishing indicates significant wear as does pitting or a a diametric wipe mark or score showing the follower has stopped turning. Old followers in good condition may be reused with the same cam in the same block provided they are returned to their original position. Be wary of new followers. These are flat tappet engines and flat means flat...... not CROWNed. Even those who should know better have been known to supply CROWNed...... so check! Nick Cheers for the advice Nick - I suspect I'll end up sticking a new camshaft in given that I've come this far. This started off as a $100 freshen up but I feel will snowball into something far more expensive but also more satisfying. Newman cams seem to do a selection for this engine, including the early PI profile mentioned earlier. Might give them a call and enquire about shipping down under... |
| |
|
|
|
|
|
|
|
Sept 2, 2020 23:55:50 GMT
|
Only just found this, and very pleased to have done so.  Love the Triumph (had a 2000 Estate way back when), such nice motors and that six, when set up right, is smooth as silk. Keep up the good work. Bookmarked. |
| |
|
|
|
|
|
Sept 17, 2020 3:25:15 GMT
|
Right, picking up from where I left my last post, I have gallantly continued the strip-down of the engine block – removing the pistons and crank, the front and back plates, the oil pump and whatever assorted sundries that also remained. I then bundled the whole lot into the wife’s my car and dropped it off to a local machine shop which seems to have experience with older British engines and some good reviews online. 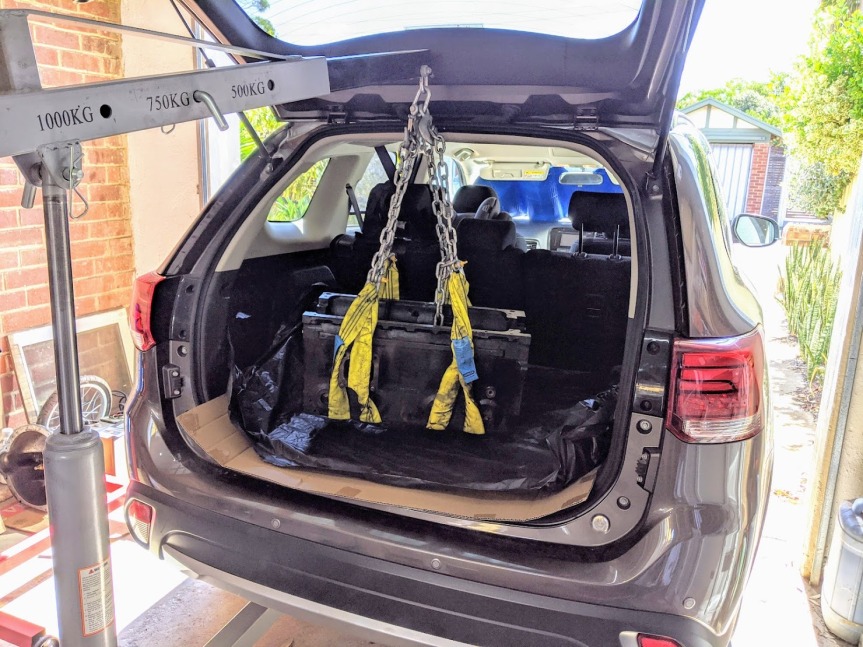 This being my first foray into completely stripping a Triumph 6 cylinder block I was a little surprised at the sheer heft of the crank – it’s a big old lump which you don’t want to be lifting with greasy hands… 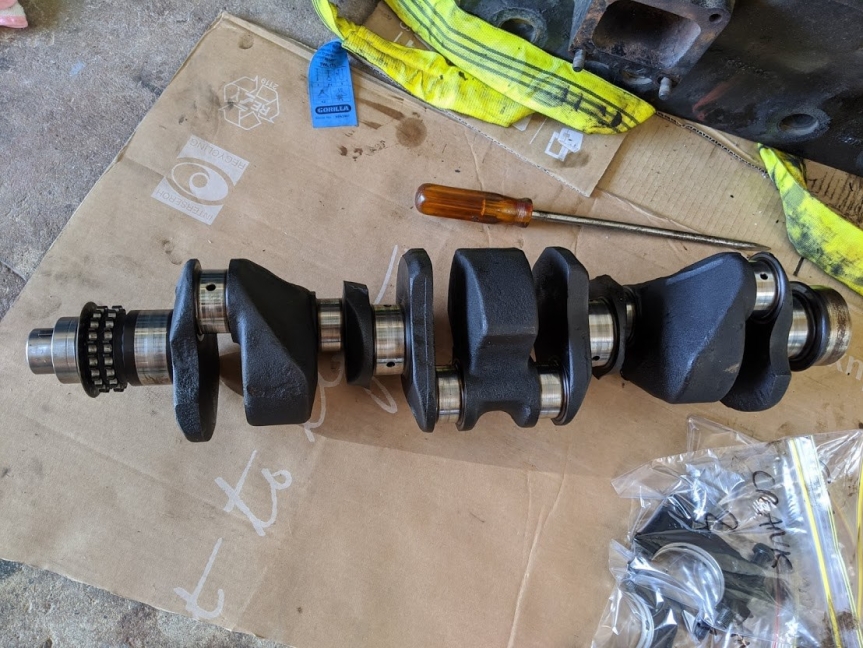 The machine shop promised to hot tank the block and then take a look at the crank and camshaft to let me know what work will need doing. A few days later they called to confirm that a 0.020″ overbore and a crank regrind of 0.010″ would suffice. As expected they reckon the camshaft is on its way out and should be replaced. I'll investigate options on this front over the coming weeks. I have placed an order for the appropriate pistons, bearing shells and an assortment of other engine parts from Chris Witor in the UK but in the meantime I'll be busying myself with some of the jobs which are easier with the engine removed – such as renewing some suspension/steering parts and replacing a few bushes whilst I have the access. I’ve also taken the opportunity to clean up the engine bay a little given that it was covered in oily deposits from various leaks in the original engine. Because everyone loves some hot before-after action, here’s the nearside inner wing before my half-arsed scrubbing efforts: 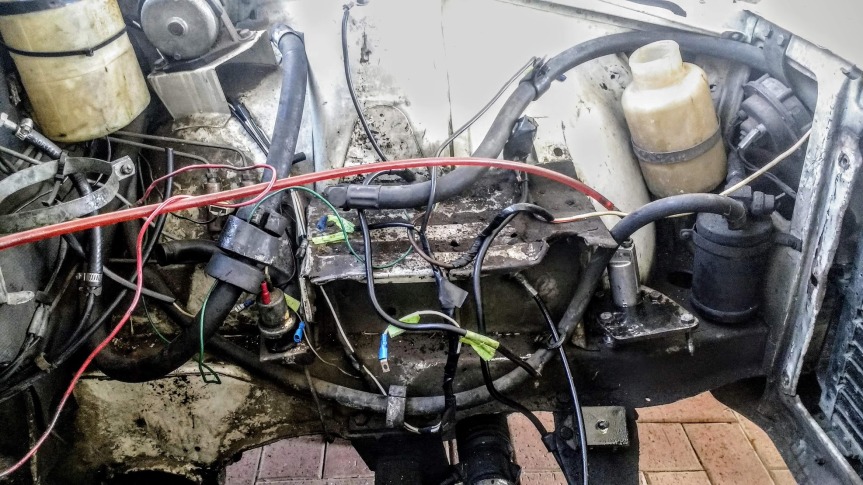 And after: 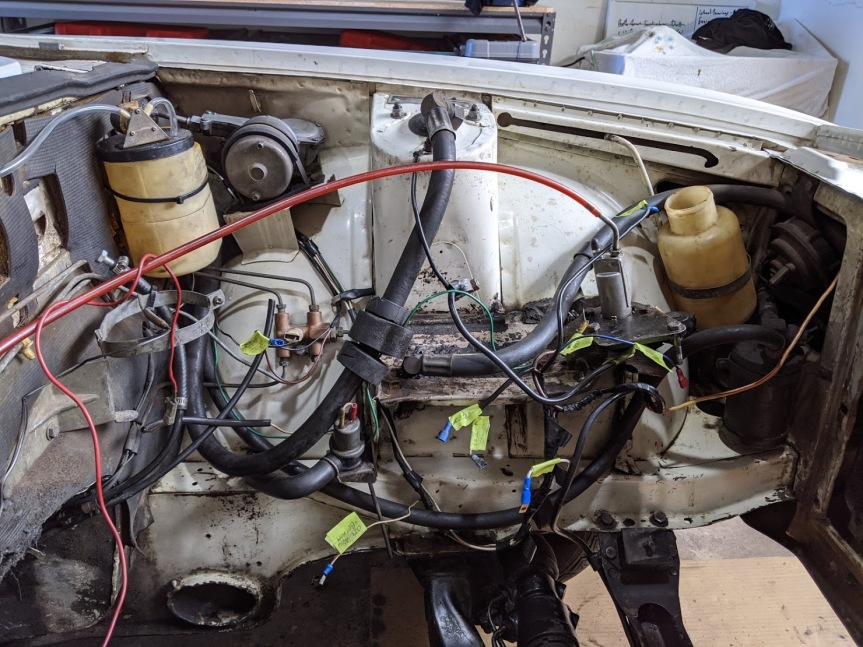 The nearside before: 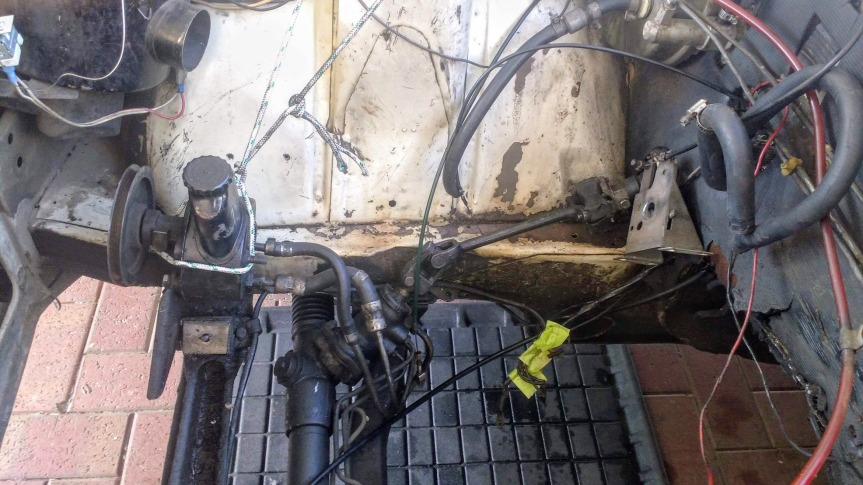 And after: 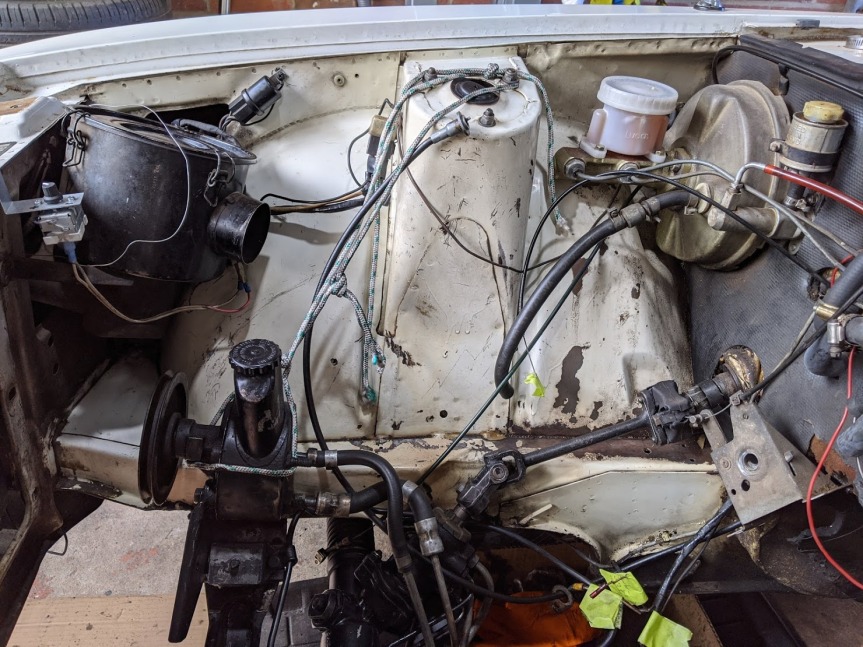 The cross-members and steering rack before: 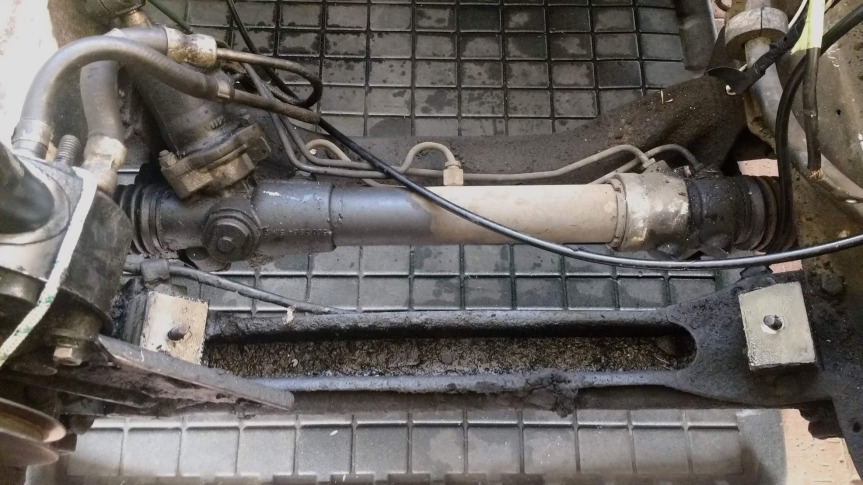 And after: 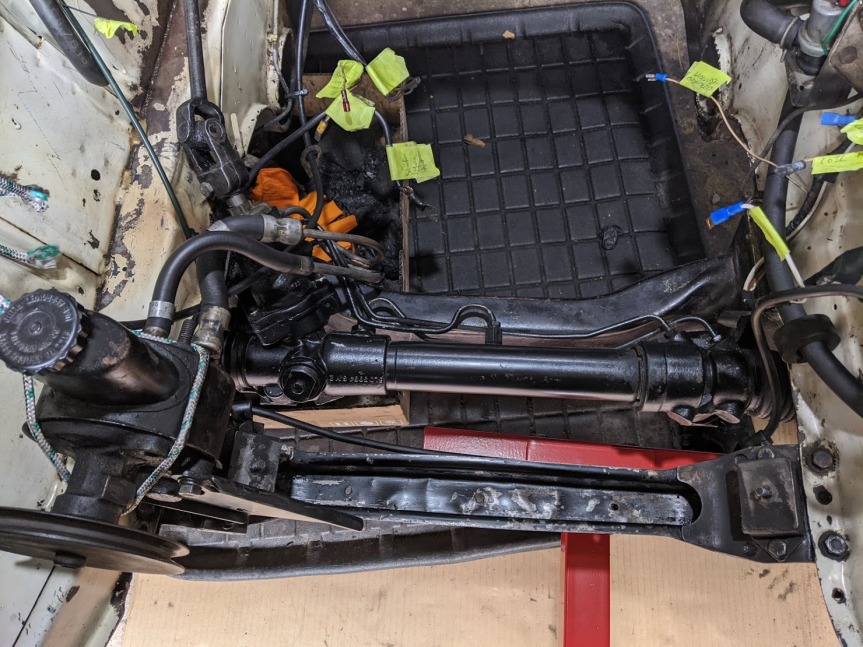 Underneath before: 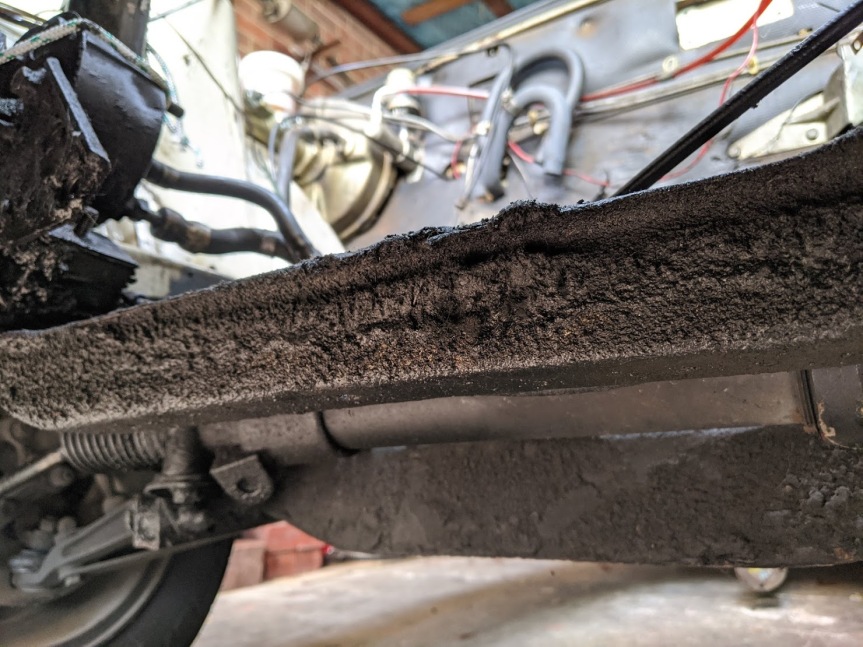 And after: 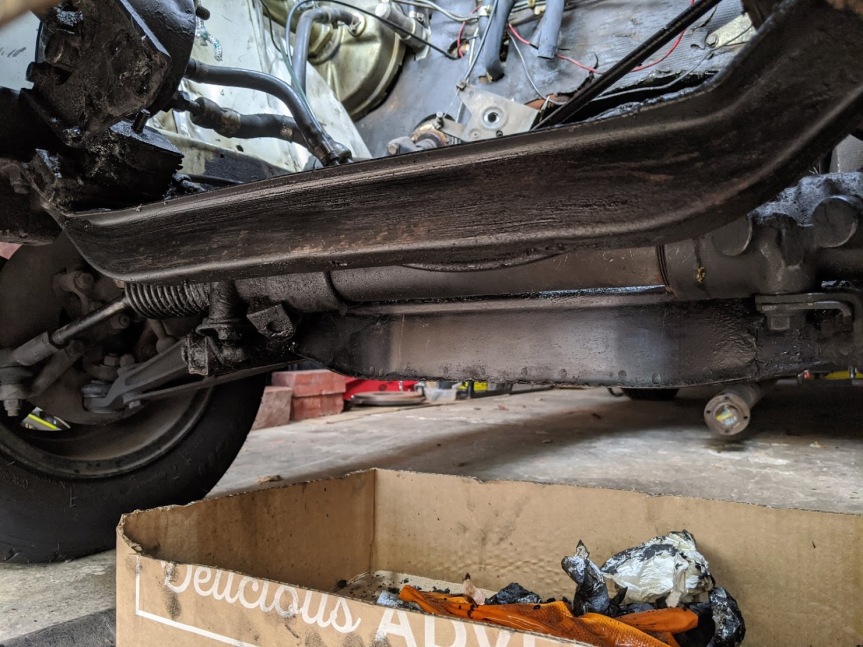 I’m not in any way aiming for concours under the bonnet (or anywhere else for that matter) but cleaning off the bulk of the thick oil and grease deposits will at least mean that I won't get absolutely filthy every time I so much as brush past the car, nor should it smell quite so badly of hot oil after a long run. It’s a shame the offside wing and chassis rail have been damaged by brake fluid spilled over the years, If I can be arsed I might see if I can do a quick touch up job on that with a vaguely-matching rattle can before I refit the engine. Otherwise it can remain as honest patina. The old engine must have had quite a leak (or several of them) for a significant time – the congealed oil was getting on for 10mm thick in places, especially around the engine cross member and offside engine mount, another good reason to be replacing the lump. 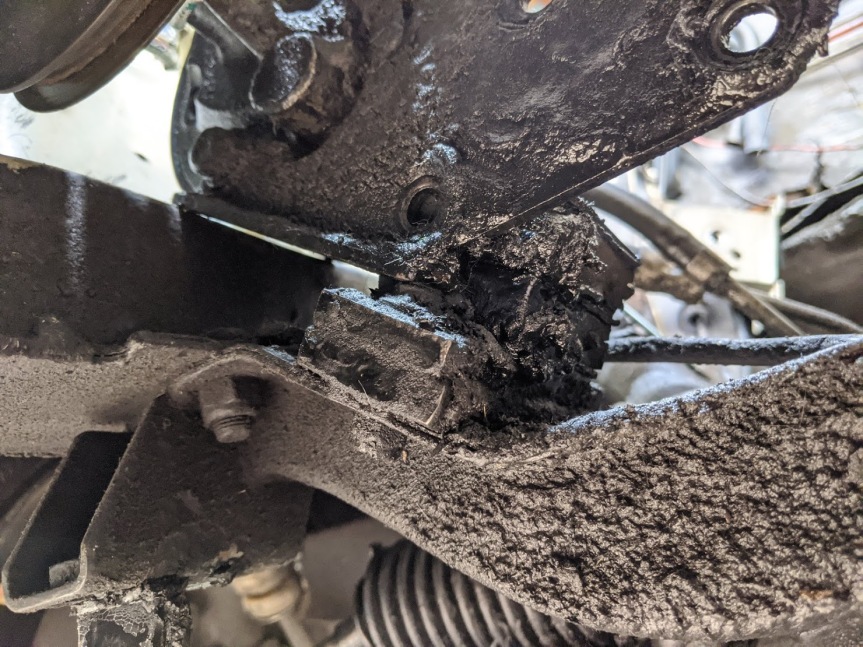 Whilst the engine mounts don’t actually seem too bad, various other rubber components have fared less well to their extended dousing in the black stuff – particularly the offside anti-roll bar bush which literally melted off once I removed the mount. Luckily I have some polybushes to replace these: 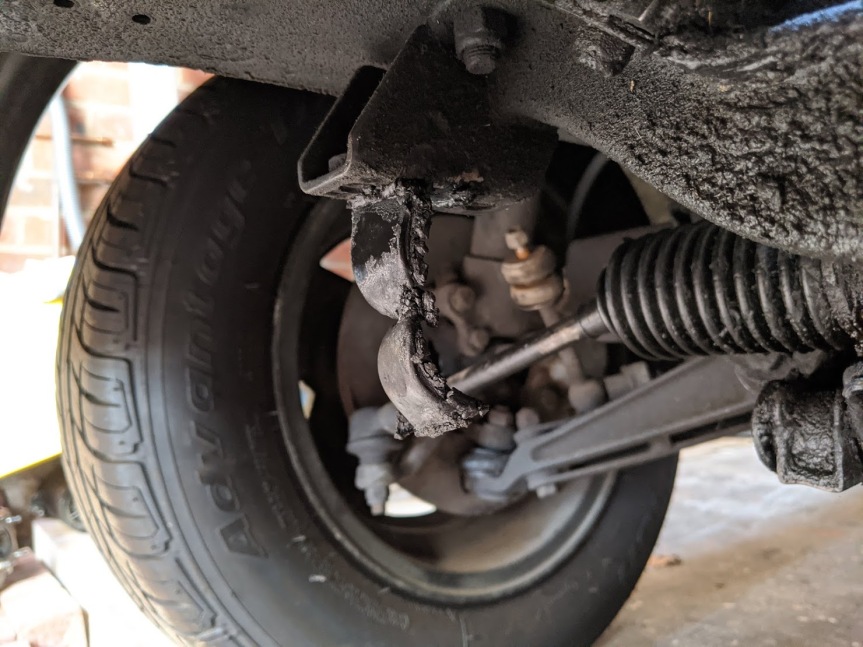 The anti-roll bar itself has cleaned up well. I might come over all Edd China and give it a quick coat of satin black if I’m really stuck for something to do, most likely not though as it’s quite presentable as it is and I don't want its opulence to show the rest of the car up: 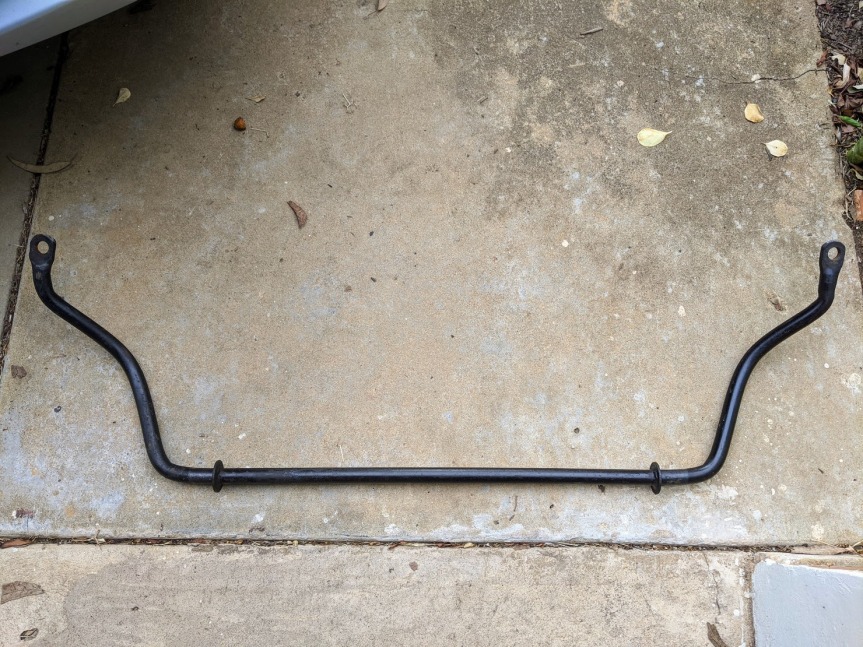 Turning the steering to full lock to remove the anti-roll bar also gave me another insight into the less than healthy state of my bonded rubber steering joint coupling. This will be replaced before the car sees the road again as I'm weirdly fond of the steering wheel being at least vaguely attached to the steering rack: 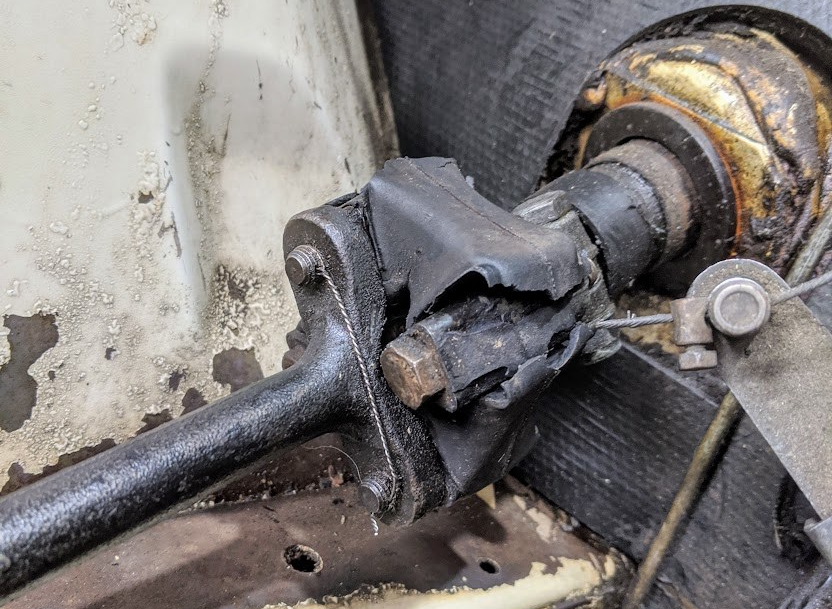 So all in all, despite the large number of photos in this post, not a huge amount more actual work has taken place. Hopefully the coronavirus situation won’t delay the arrival of the engine parts for too long and the machine shop can get on with doing their bit and I can start on the rebuild. In the meantime I have a fence that needs painting and a sash window that needs repairing, or I might just sit around in my pants eating cheesy Wotsits and watching the telly. I'll see how the mood takes me. |
| |
Last Edit: Sept 17, 2020 3:40:54 GMT by llessur
|
|
|
|
|
Sept 17, 2020 8:45:21 GMT
|
|
Great progress! Agreed that steering joint doesn't look healthy in the slightest!
Depending on where you balance looks vs protection, for all its sins POR-15 is brake fluid resistant. I've painted the area under my Jag's master cylinder with it to offer some extra protection. I suppose you could paint over it with white if you wanted it to blend in, but the POR should help prevent any nasty brake fluid rust spots.
Oh, and the cranks on these engines are very beefy! As they're 4-bearing cranks they need pretty substantial webs between the unsupported sides of the cylinders to keep rigidity. If anything they're not quite substantial enough for the long throw they have, if you want to rev them up above 6000rpm.
Does mean you can happily run very light flywheels to make up for the extra mass though. It's total rotating weight that keeps the thing spinning, not just the flywheel.
|
| |
Last Edit: Sept 17, 2020 11:33:35 GMT by biturbo228
|
|
jamesd1972
Club Retro Rides Member
Posts: 2,921  Club RR Member Number: 40
|
1977 Triumph 2500Sjamesd1972
@jamesd1972
Club Retro Rides Member 40
|
Sept 17, 2020 14:12:48 GMT
|
|
In the meantime I have a fence that needs painting and a sash window that needs repairing, or I might just sit around in my pants eating cheesy Wotsits and watching the telly. I'll see how the mood takes me.
[/quote]
Many thanks for the mental image !
Progress being made !
James
|
| |
|
|
|
|
|
|
|
I acknowledge I’ve completely dropped the ball on keeping this thread updated – a multitude of little things got in the way including but not limited to the ongoing pandemic (that's turned out to be a great excuse to cover all manner of procrastinations), having another baby and accidentally depositing this beautiful selection of additional project cars on the driveway (note – I’m definitely not having a mid-life crisis). 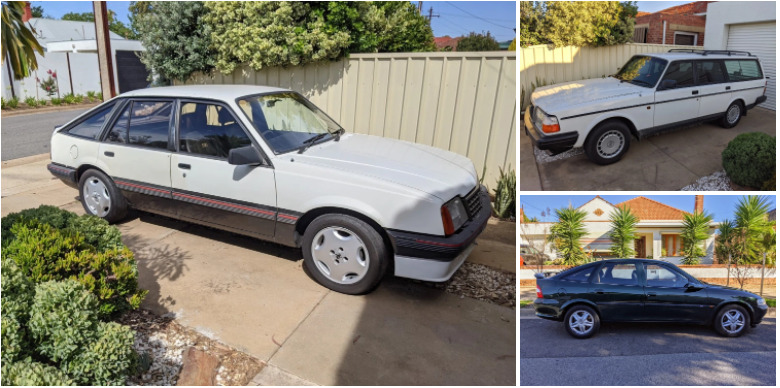 Despite my other distractions the progress on the Triumph has continued – albeit at a slower pace than I would have liked. In something vaguely resembling my best guess of chronological order, here’s what’s been going on. With the engine out of the car it seemed like a good opportunity to address the perished steering column rubber coupling. As luck would have it, a few parts orders ago one mysteriously turned up amongst some other bits and pieces. I hadn’t ordered or paid for it but I popped it up on the garage shelf just in case it came in handy one day. That turned out to be good forward thinking on my part. Here’s a reminder of the offending article in-situ: 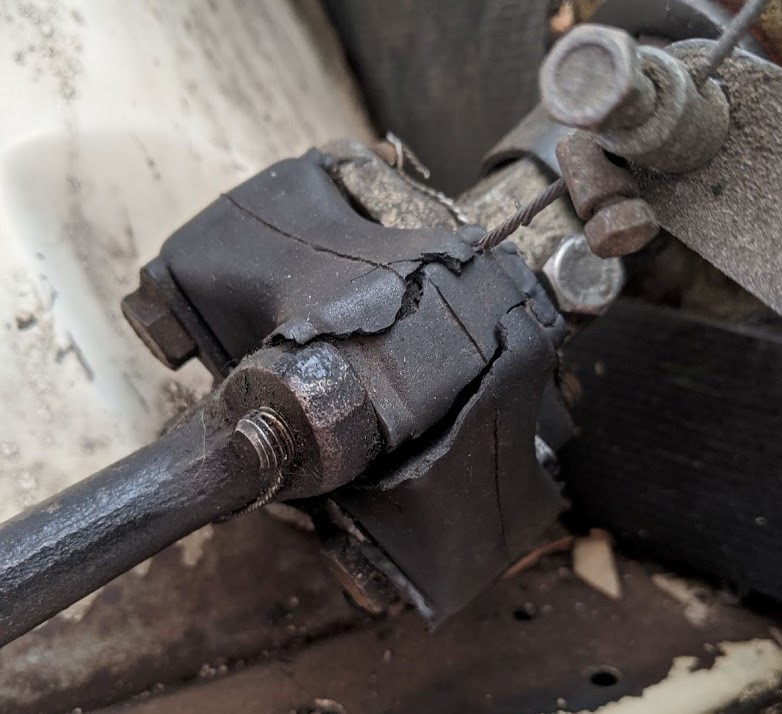 And here’s what it crumbled to upon removal. Probably due a replacement then… 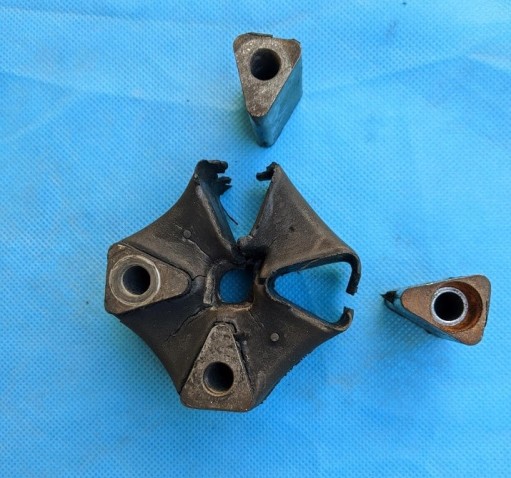 I’d read that fitting the new coupling was much easier if it is first compressed with a large jubilee clip. Luckily I had such a clip in the shed, leftover from some long-forgotten project car or another mechanical folly of mine no doubt. Getting the bugg er on and bolted up was tricky enough with the coupling compressed, I can’t for the life of me see how it would have been possible without it… 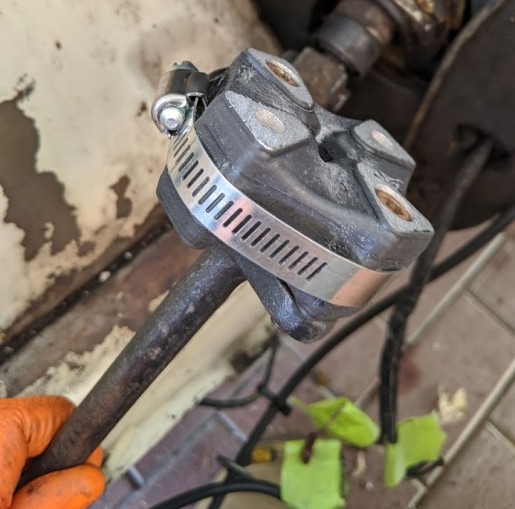 Eventually, and with much faffing and a generous helping smattering of adult words later, the new coupling was fitted. I wire-locked the bolts as per the original and stood back to admire my handiwork. 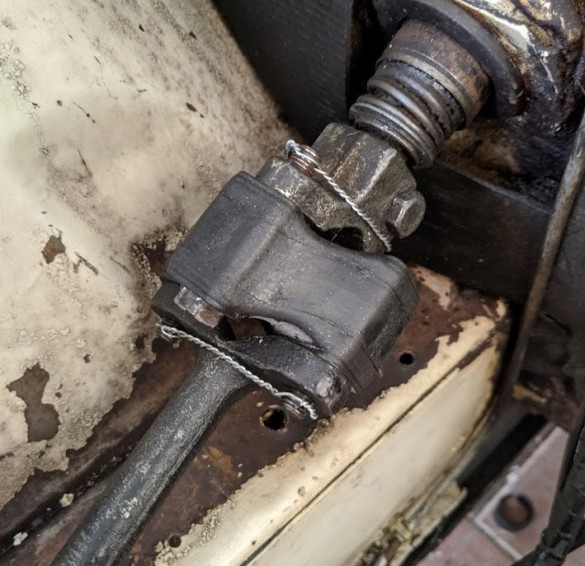 Time will tell how long the new one will hold out – I don’t have much faith in modern bonded rubber components but hopefully I’ll get lucky this time. I’ll definitely keep a good eye on it due to the critical role it plays in the steering department. In hindsight I should have also ordered a polybush for the steering column where it passes through the bulkhead to fit whilst the steering column was split but in order not to delay finishing the job by another couple of weeks whilst I waited on parts to arrive in the mail I deemed that the existing one looked fine and with the limited miles I’ll put on the car will probably last for many more years yet. Feeling in the mood for some more steering-related improvements, I turned my attention to various other degraded components at the front of the car. First up were the track rod ends which had split boots and looked potentially to be original to the car. Rather than forking out (no pun intended) for a ball joint splitter, I used the ‘undo nut and hit the side of the steering knuckle with a hammer’ approach with good success – this worked pretty well but one side did need a little more persuasion than the other but finally succumbed to the two-hammer method. 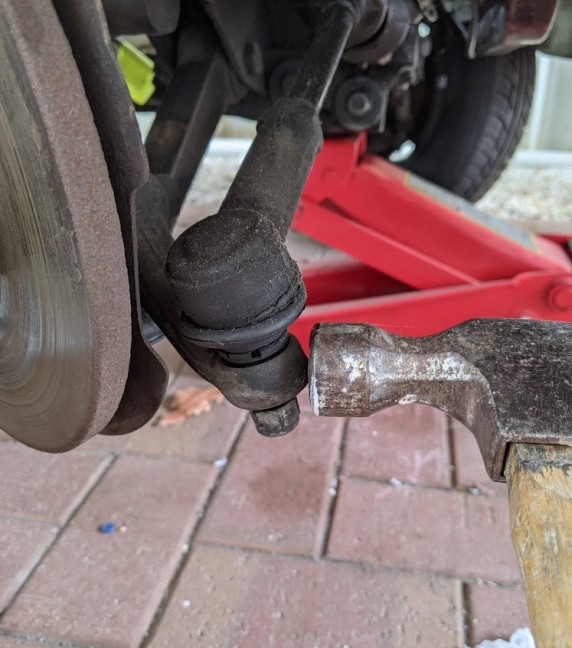 And here’s the obligatory old vs new shot for comparison. It’s always satisfying putting shiny new bits on…  Although I’ll be sending the car for steering and wheel alignment before it gets used in anger, I did my best to keep the tracking unchanged by both counting the number of turns to remove the old track rod ends and also taking a measurement of the distance between the end of the visible threads on the track rod end and the centre of the ball joint on each new end. Whilst the track rod ends were removed, I also changed out the perished steering rack gaiters for new ones. Well, that was after cursing the supplier for sending me the wrong parts only to realise after quite some time that I was erroneously trying to fit the shock absorber gaiters instead. After retrieving the right parts from my stash, the replacement process was pretty simple – I cut off the old gaiters, cleaned up the steering rack, applied a quantity of grease to the inside of each new gaiters as per the workshop manual, as well as some to the rack, slid the new gaiters over the track rod end and rack and then buttoned them up with cable ties. Job done. Comparing the old and new gaiters was like comparing chalk and cheese. Literally. The old one had hardened to the point that it was more like a rigid plastic than rubber whilst the new one was soft and supple, just like me. 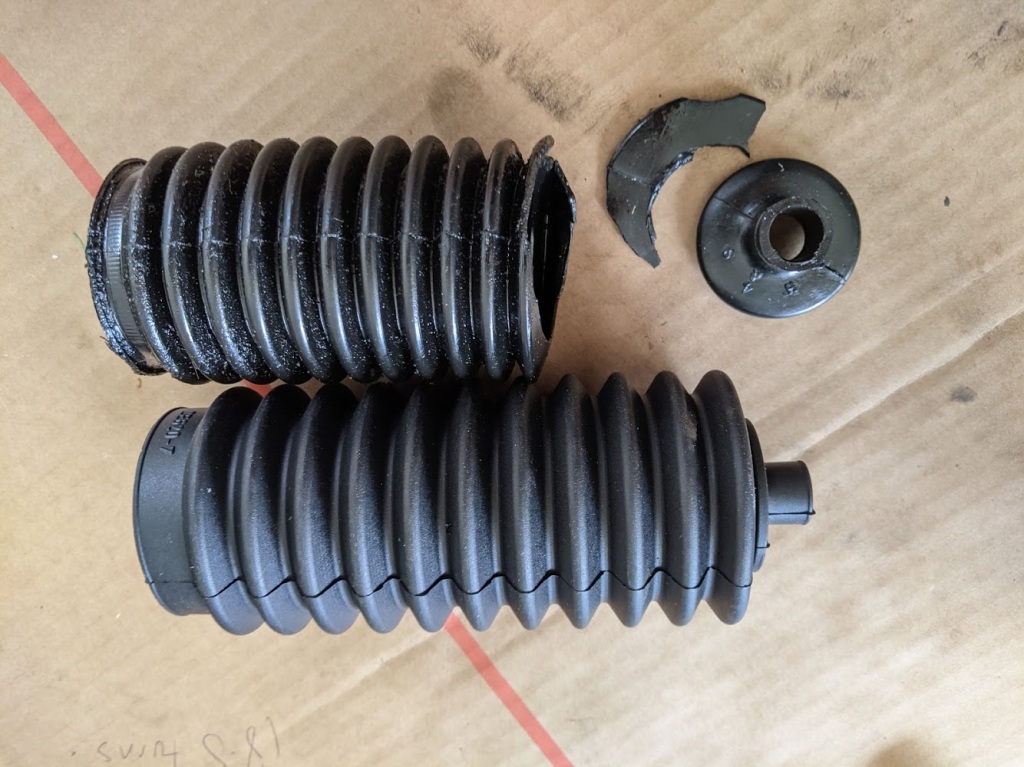 Here’s one of the new gaiters fitted: 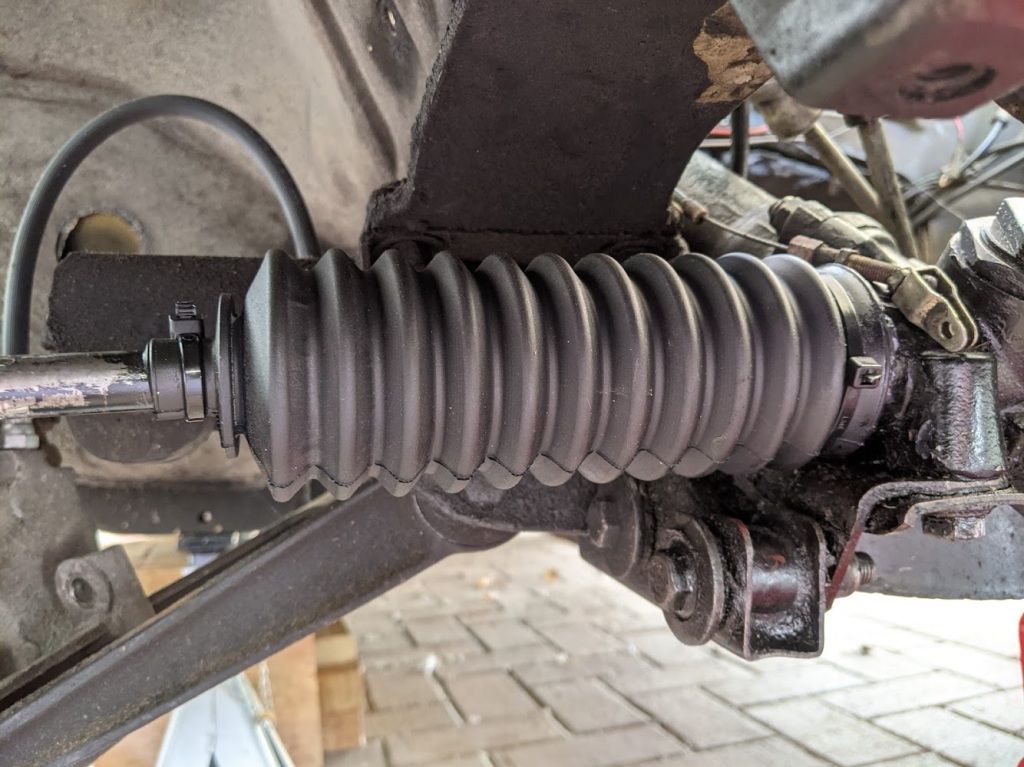 And here was the view from front and centre after buttoning everything back up. Note the anti-roll bar and drop-links still haven’t been replaced at this stage. It’s on my to-do list… 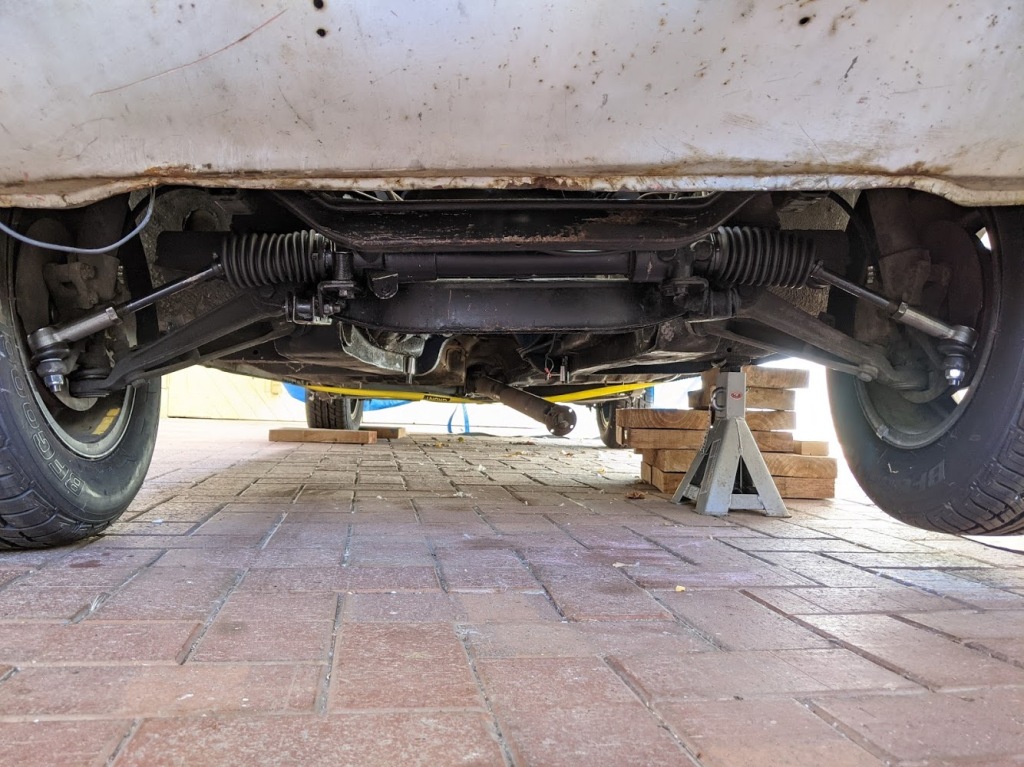 But wait! The fun doesn’t stop there! I’ve also made some solid progress on the engine front. I’ll cobble together an update of that in the next few days. Watch this space… |
| |
Last Edit: Jul 16, 2021 4:39:58 GMT by llessur
|
|
|
|
|
Jul 19, 2021 11:54:23 GMT
|
|
Looking good! Keeping an eye on these tips and tricks for when I get round to mine. Pretty sure the whole suspension will need refreshing in some form or other...
|
| |
|
|
pollystag
Part of things
 
Posts: 156
Member is Online
|
|
Feb 19, 2024 23:13:12 GMT
|
|
So what happened to the cobbled up report from two and a half years ago?
|
| |
|
|
|
|
|
|
|
So what happened to the cobbled up report from two and a half years ago? Good question. I think in a nutshell adding a second child to the mix significantly reduced the already-limited amount of time I could devote to car-related stuff and two of my other projects (the Vectra and now sold Cavalier - see other threads) sucked up the small amount of time I did have available. The V6 Vectra in particular is a bit of a pig to work on so even the smallest of jobs seems to involve stripping down the whole front end and spending a week faffing around with torx bits. As great as it's been I think I might have to shift that one on in the near future as if something like an alternator or manifold gasket fails I don't think I could be stuffed devoting another week of my life to replacing it. Aside from the other cars, last year we decided to knock down half of our house for an extension and I've spend the last 12 months filling, sanding and painting various surfaces. I now hate painting with a passion I've never felt quite so intensely about anything or anyone else. Anyways, I did actually make some progress after my last post and with renovations nearing the end I'm at a point where I can pick up where I left off. Seeing as I can't really remember exactly where that was, putting another update post together would be useful to determine what's next on my list: First up, I wheeled the block outside for a good pre-build clean, to ensure that no machining swarf or other debris was left hiding in any corners or channels. here's the pre-cleaned block: 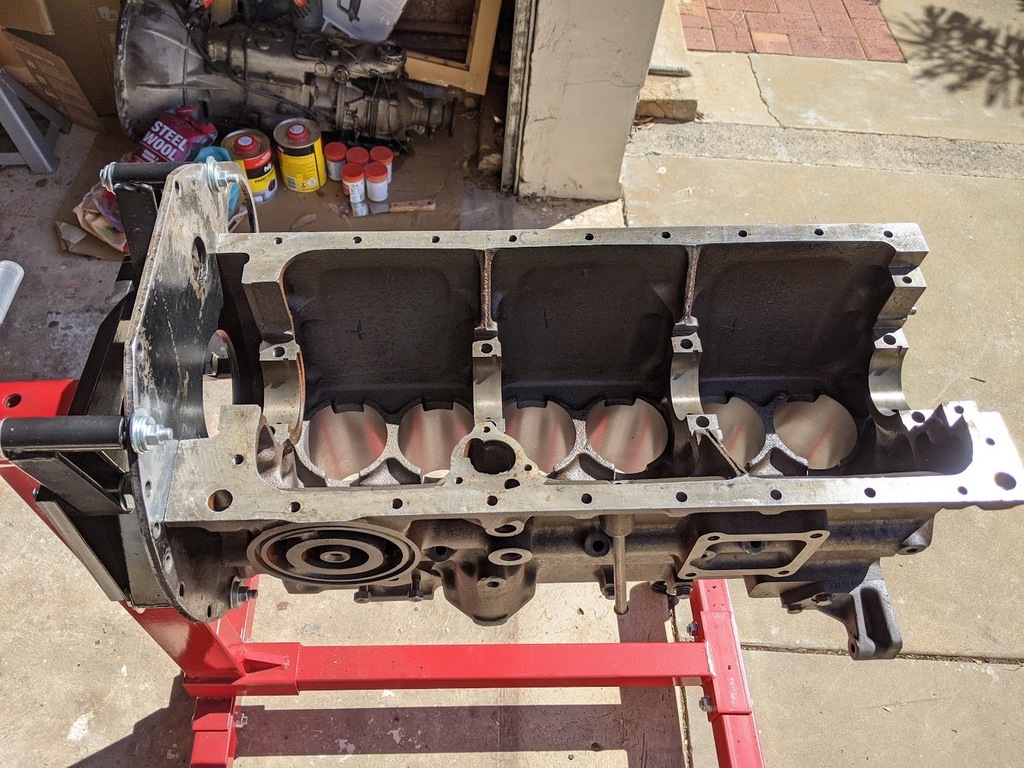 For this I used standard engine degreaser together with a selection of bottle brushes I picked up on eBay - including a nice long bendy one for the main oil galleries: 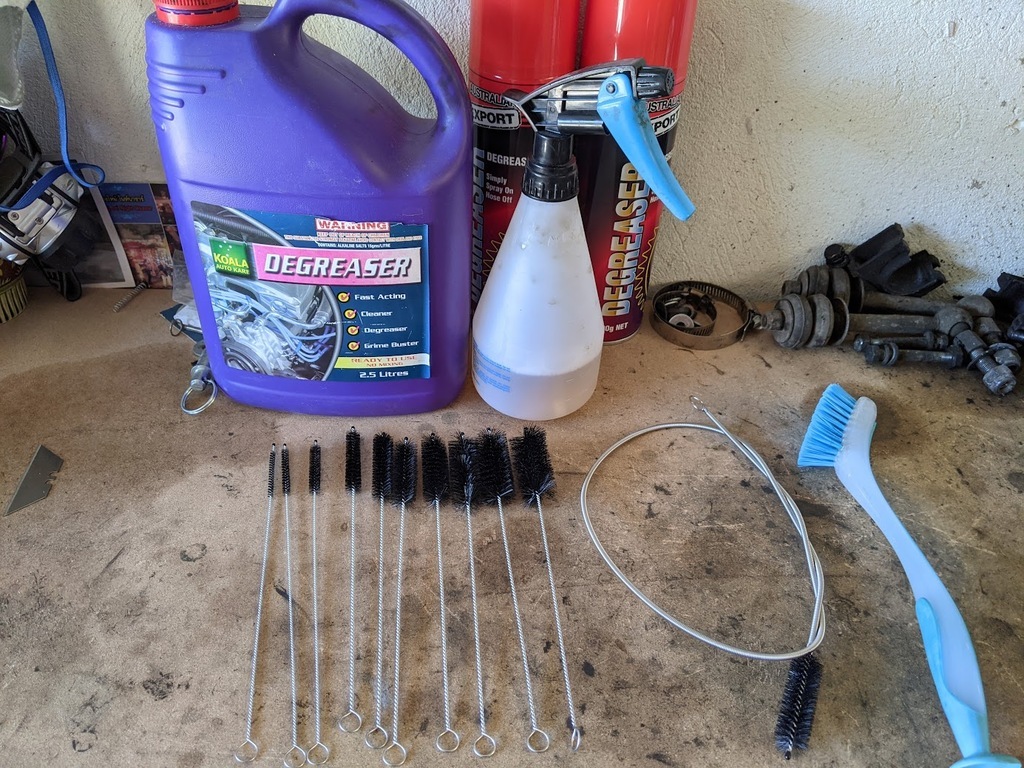 I also gave the crank a good wash, ensuring that the bottle brushes were run through all of the oil galleries feeding the journals. Here's the nice clean block: 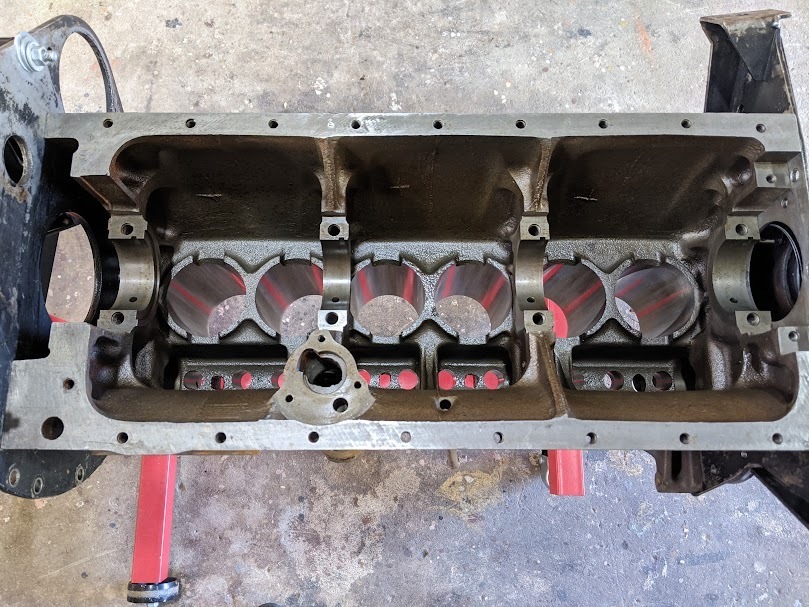 Next up, I popped in a set of new core plugs - the engine machinists having helpfully removed the old ones for me: 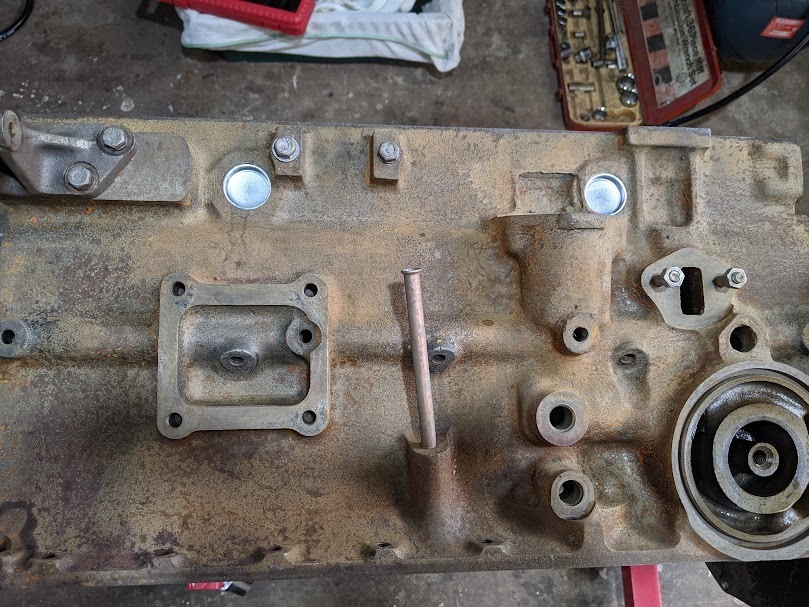 As it was easiest to paint the block with the front plate attached, I removed the last remnants of gasket from that. I'm a bit funny about asbestos-containing material and think it's glossed over quite a lot in the classic car world. As the old front plate gasket was almost definitely asbestos-based I scraped it off in a sink full of water to ensure that no naughty fibres were made airborne: 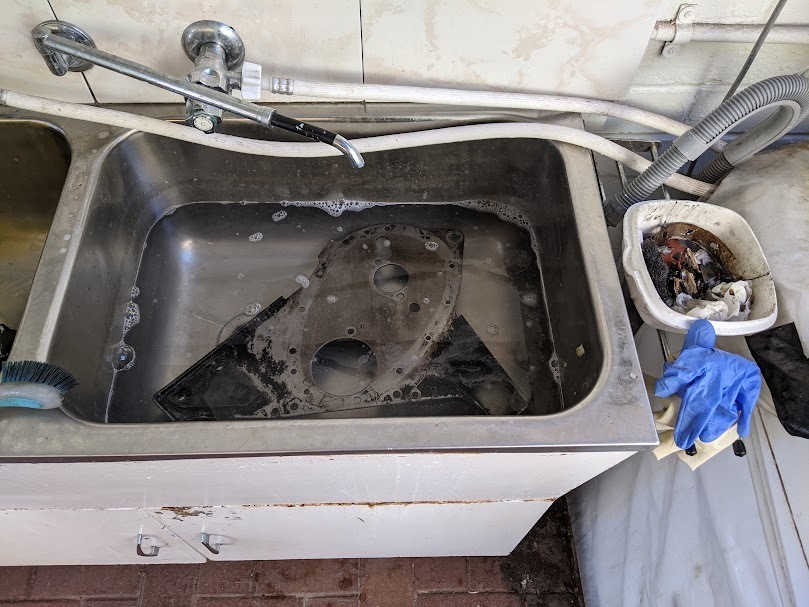 After this I temporarily attached the front plate and timing cover: 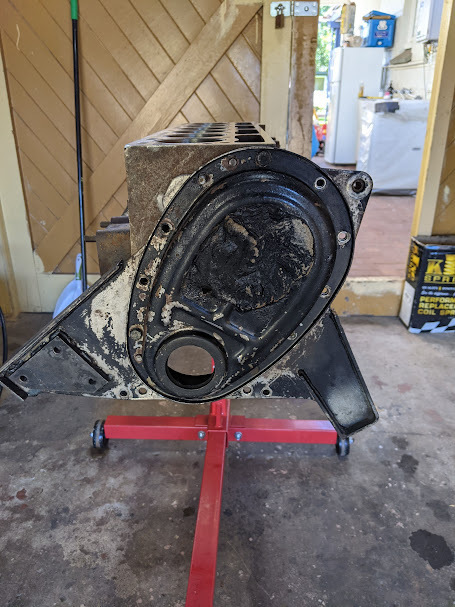 And spent an enjoyable hour masking up all of the various mating surfaces ready for painting: 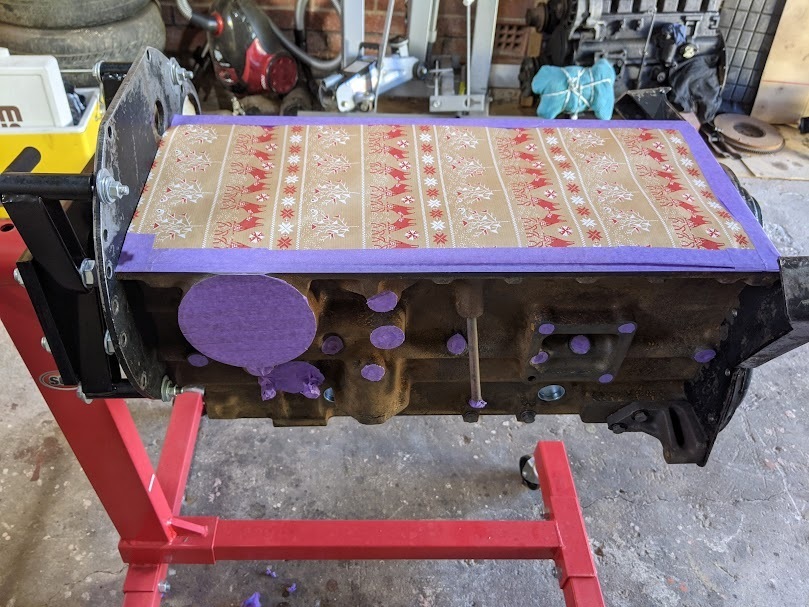 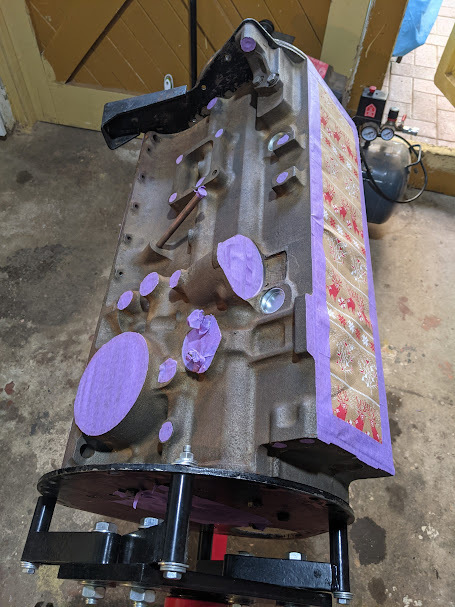 The block was then primed: 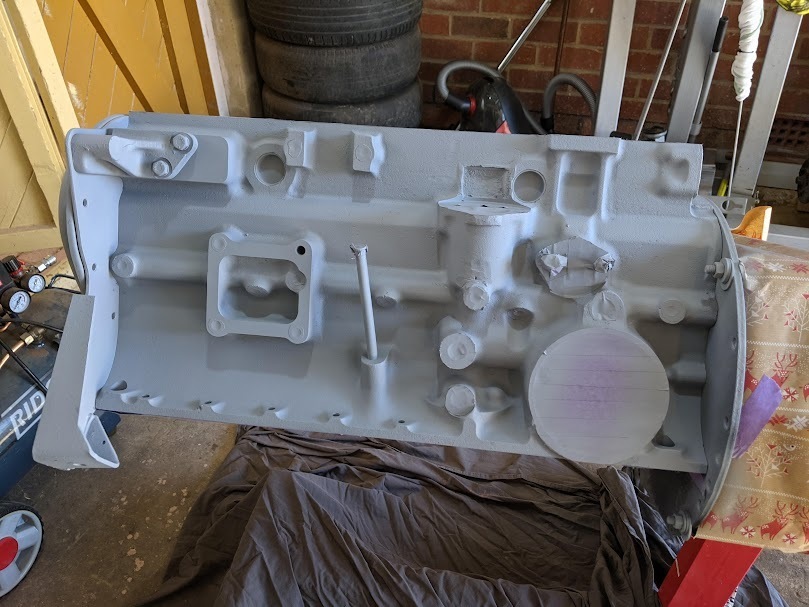 And painted: 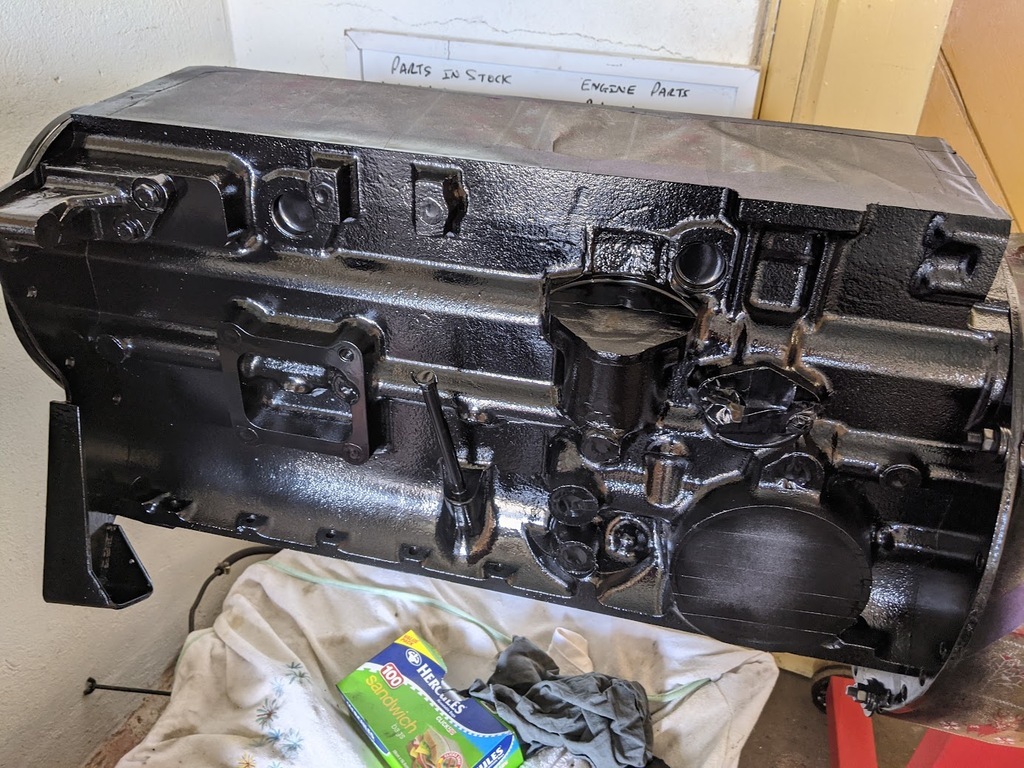 The front plate and timing cover were then removed, the temporary assembly for painting meaning that no clean-up of gasket surfaces is needed: 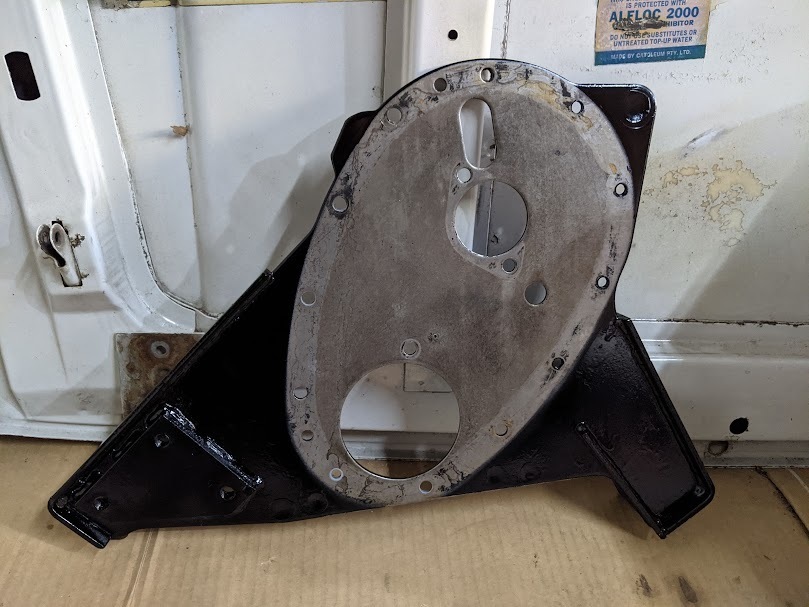 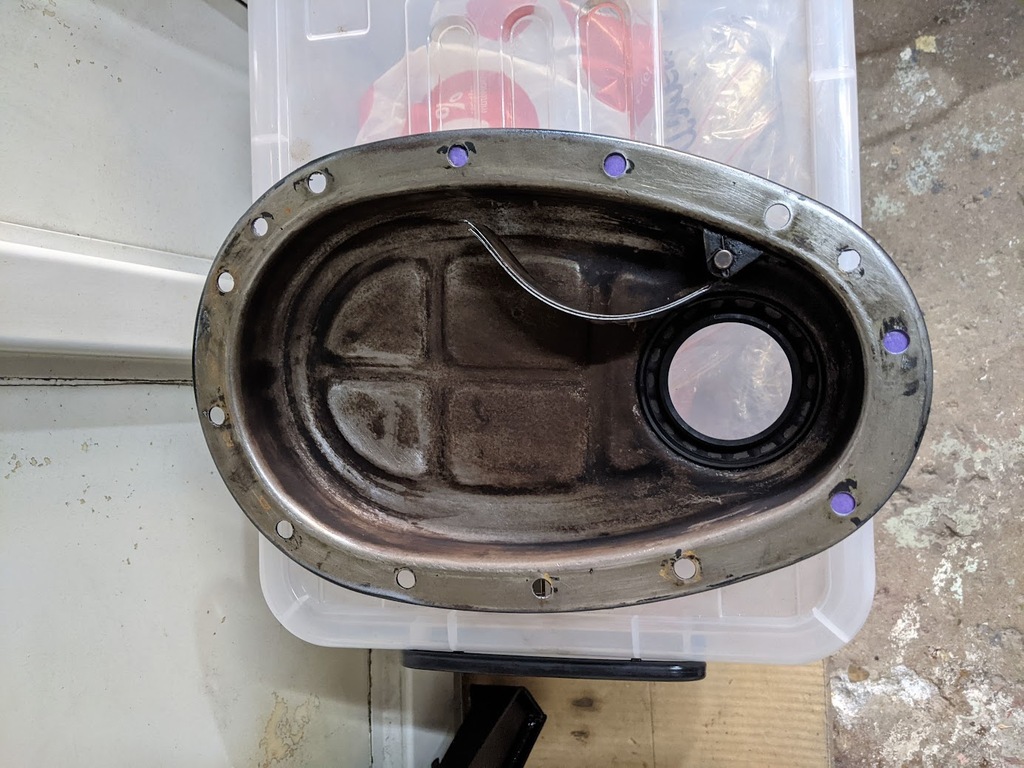 The timing chain sprocket was removed from the crank. My puller wasn't quite right for this but I managed improvise with a convenient pair of wood chisels: 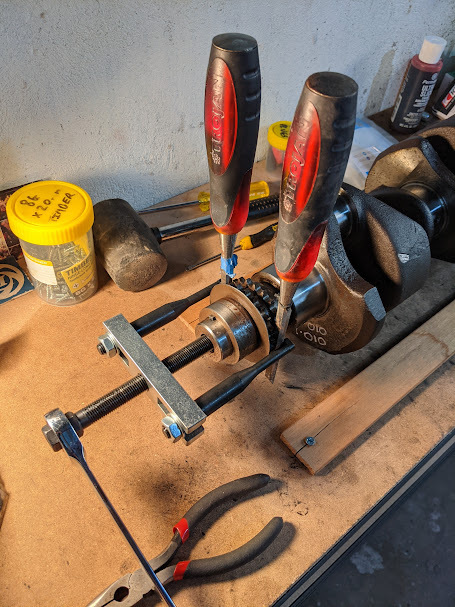 Crank bearings were installed and treated to a nice dose of assembly lube, as were the crank journals: 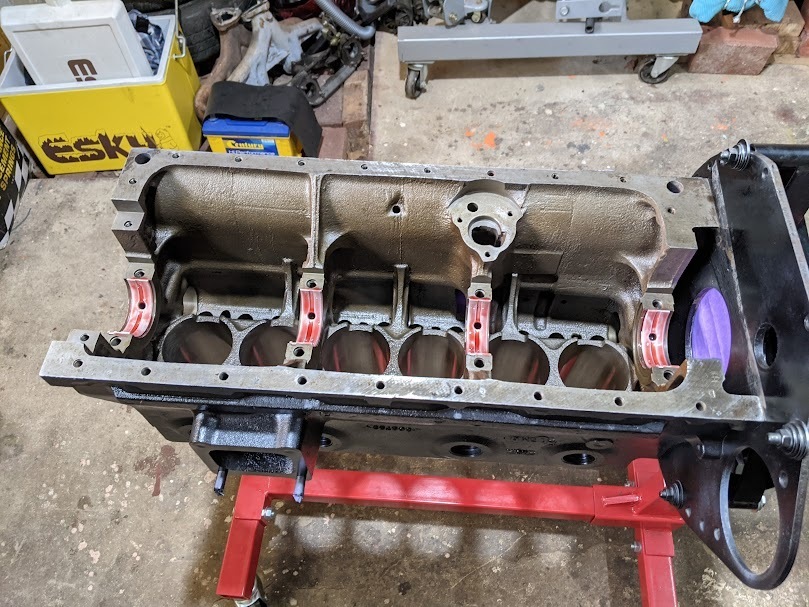 And the crank was installed, with the bearing caps being appropriately torqued: 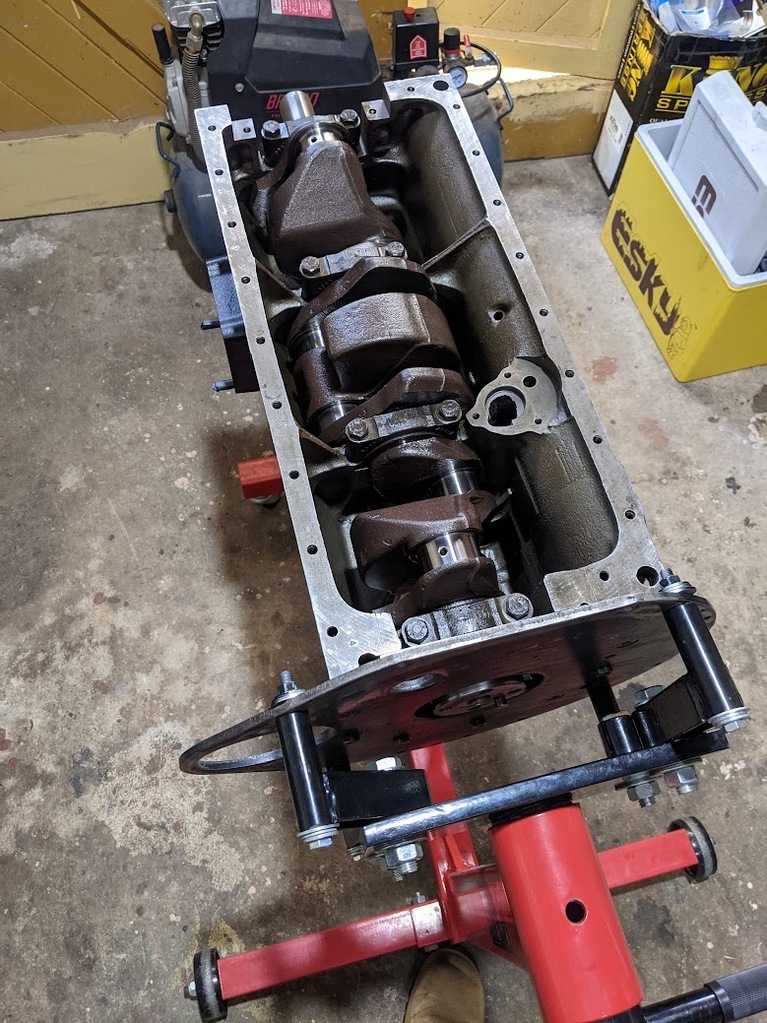 The front seal was installed: 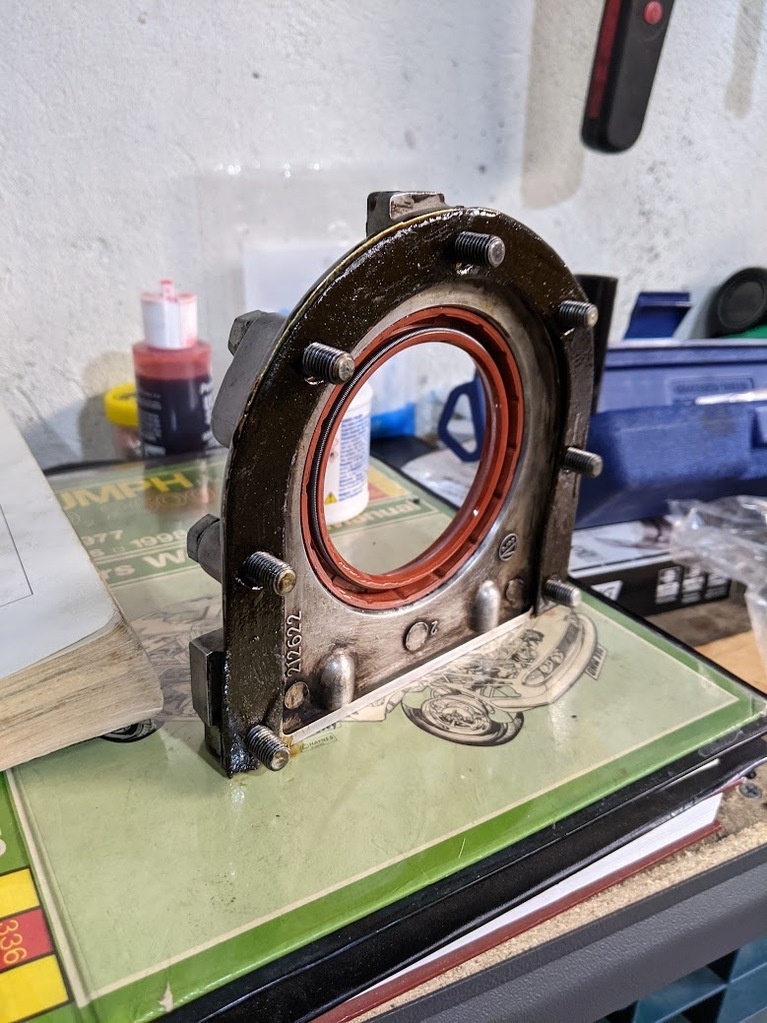 And then the crank checked for endfloat with the right combination of thrust bearings installed to bring within published tolerances: 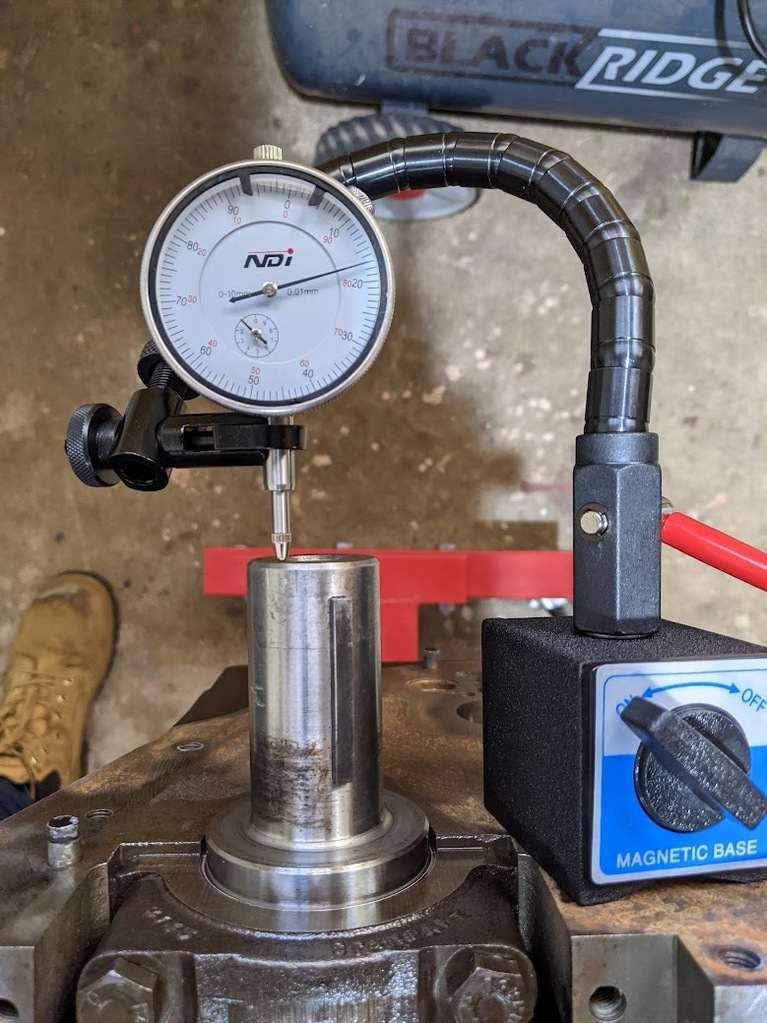 That's almost as far as I got. I did start having a play around with pistons and ring gaps but realised I needed a piston ring grinder which I didn't have. The delivery of that set me back a couple of weeks and then other priorities got in the way. I did make sure the block was well oiled and double wrapped in thick plastic before being put into hibernation, with a lot of desiccant sachets thrown into the mix for good measure. I did have a little peek at it a few days ago and it has been stewing well, with no sign of surface rusting. Which is nice. I hope to get back onto it in the very near future. Writing the above has helped with the enthusiasm levels too! |
| |
Last Edit: Mar 12, 2024 6:44:48 GMT by llessur
|
|
logicaluk
Posted a lot
   Every days a school day round here
Posts: 1,373
|
|
Mar 12, 2024 12:26:44 GMT
|
|
Excellent to see this project under way again, big saloon estates make fantastic family classics.
|
| |
|
|
|
|
pollystag
Part of things
 
Posts: 156
Member is Online
|
|
Mar 12, 2024 13:56:46 GMT
|
|
Nice update, keep them coming, I have just bought a T2000 saloon.
|
| |
|
|
|
|
|
|
|
Nice update, keep them coming, I have just bought a T2000 saloon. A fine choice of automobile. Will we see a thread for this? |
| |
|
|
pollystag
Part of things
 
Posts: 156
Member is Online
|
|
Mar 15, 2024 21:19:41 GMT
|
Doubt it hopefully not to much to do, took for an mot and it passed with no advisories so that's a start. 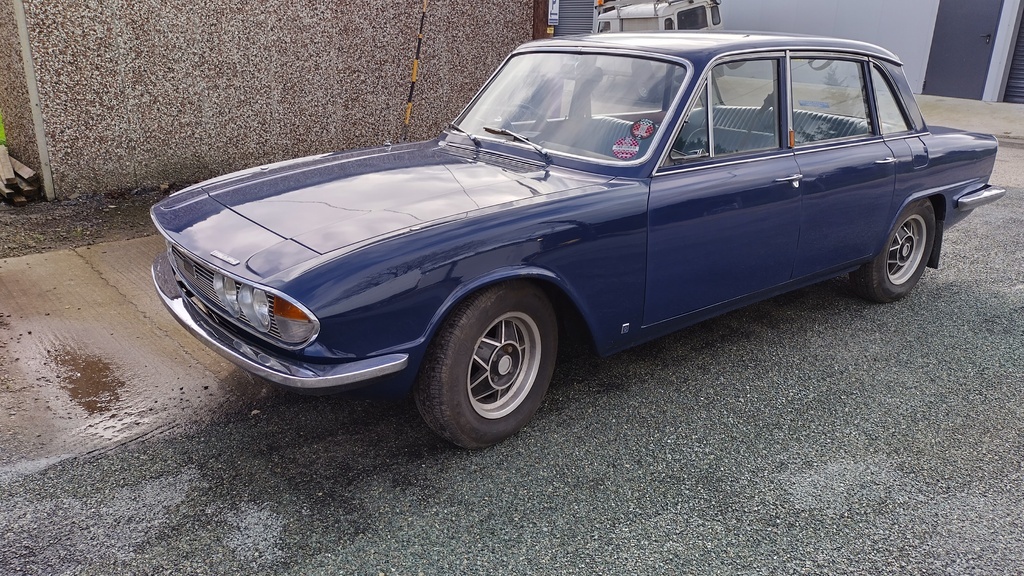 |
| |
|
|
logicaluk
Posted a lot
   Every days a school day round here
Posts: 1,373
|
|
|
|
|
It's a Triumph, it will need its own thread eventually.
|
| |
|
|
|
|
|
Mar 28, 2024 12:54:48 GMT
|
It's a Triumph, it will need its own thread eventually. I think Rudyard Kipling owned a Triumph at some point... ...If you can meet with Triumph and Disaster And treat those two impostors just the same;... |
| |
|
|
logicaluk
Posted a lot
   Every days a school day round here
Posts: 1,373
|
|
|
|
It's a Triumph, it will need its own thread eventually. I think Rudyard Kipling owned a Triumph at some point... ...If you can meet with Triumph and Disaster And treat those two impostors just the same;... Very true, see my thread for proof. LoL |
| |
|
|


