lebowski
Part of things
  Hillman Avenger, Clan Clover
Posts: 488
|
|
Dec 24, 2020 17:28:09 GMT
|
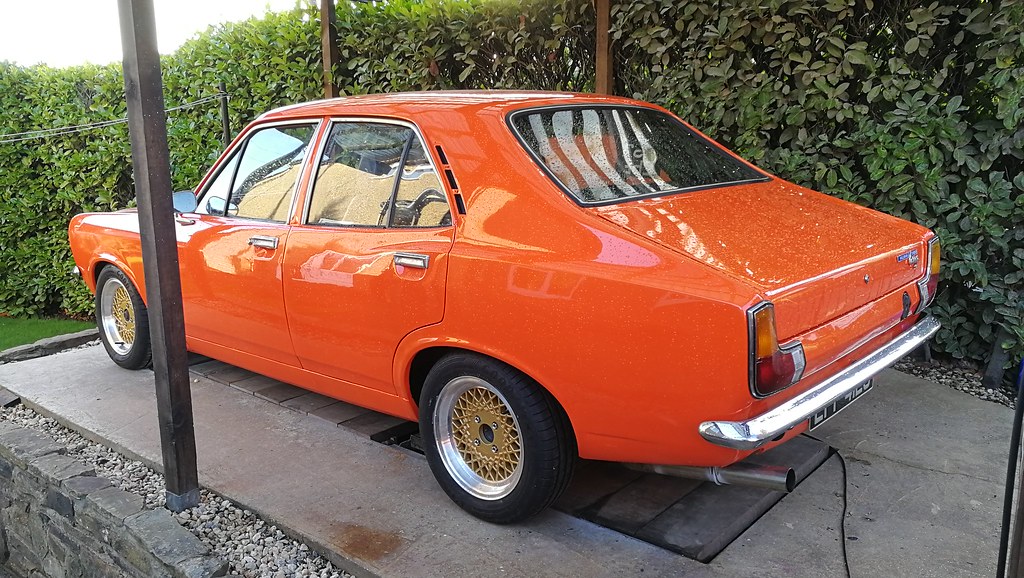
I finished work at lunchtime today, so I actually got to work in the light for a change. Got the rear bumper fitted.  IMG_20201224_141739 IMG_20201224_141739 by Chris Witkowski, on Flickr  IMG_20201224_141756 IMG_20201224_141756 by Chris Witkowski, on Flickr  IMG_20201224_141806 IMG_20201224_141806 by Chris Witkowski, on Flickr I then spent the rest of the afternoon giving the interior a thorough clean and putting the sill trims back on. There are still a few bits to fit inside such as seat belts, sun visors, interior lamp, C-pillar trims etc.  IMG_20201224_163309 IMG_20201224_163309 by Chris Witkowski, on Flickr 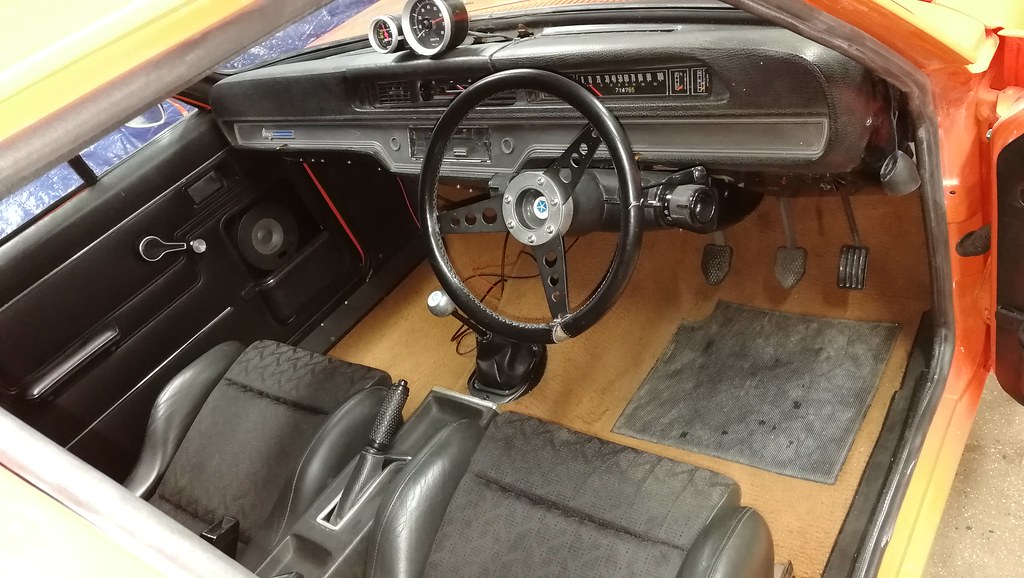 IMG_20201224_163336 IMG_20201224_163336 by Chris Witkowski, on Flickr I haven't bolted the dash in properly yet as I have a pair of steering uj's to replace the existing arrangement with the donut at the bottom of the steering column. Anyway, Merry Christmas! |
| |
|
|
|
|
hagus
Part of things
 
Posts: 35
|
|
Dec 24, 2020 22:49:46 GMT
|
|
Awesome this mate, love it.
|
| |
|
|
|
|
|
Dec 25, 2020 18:34:01 GMT
|
|
Outstanding effort and results. Good on yer.
John
|
| |
|
|
lebowski
Part of things
  Hillman Avenger, Clan Clover
Posts: 488
|
|
Dec 27, 2020 19:49:38 GMT
|
|
|
| |
|
|
lebowski
Part of things
  Hillman Avenger, Clan Clover
Posts: 488
|
|
|
|
I spent a few hours making a bracket which bolts through the rear seat belt captive nuts, and helps secure the rear seat base. With just the usual two tabs at the front to hold it, it seems very loose and tends to slide forwards a bit.  IMG_20201230_143602 IMG_20201230_143602 by Chris Witkowski, on Flickr I also refitted the interior mirror base and interior lamp, and the C pillar trims.  IMG_20201229_143344 IMG_20201229_143344 by Chris Witkowski, on Flickr The old stereo has decided to become intermittent, so I've bought a replacement, and now one of the rear speakers seems to be playing up. I will try cleaning the connections but it might just be old age. I'm also trying to find somewhere to permanently mount my inverter without looking horrific. I use it to power my laptop for any tuning whilst driving, but it's also handy to have a plug socket and USB socket in the car. Under the passenger seat is possibly an option but will require some more fabrication. |
| |
|
|
lebowski
Part of things
  Hillman Avenger, Clan Clover
Posts: 488
|
|
|
|
I've finished making a bracket to secure the inverter. It basically bridges the gap between the bulkhead and the bottom of the dash. I already had two holes in the bulkhead here where i used to have a vacuum manifold mounted, and at the other end of the bracket it has one hole which goes to one of the screws for the glove box hinge. 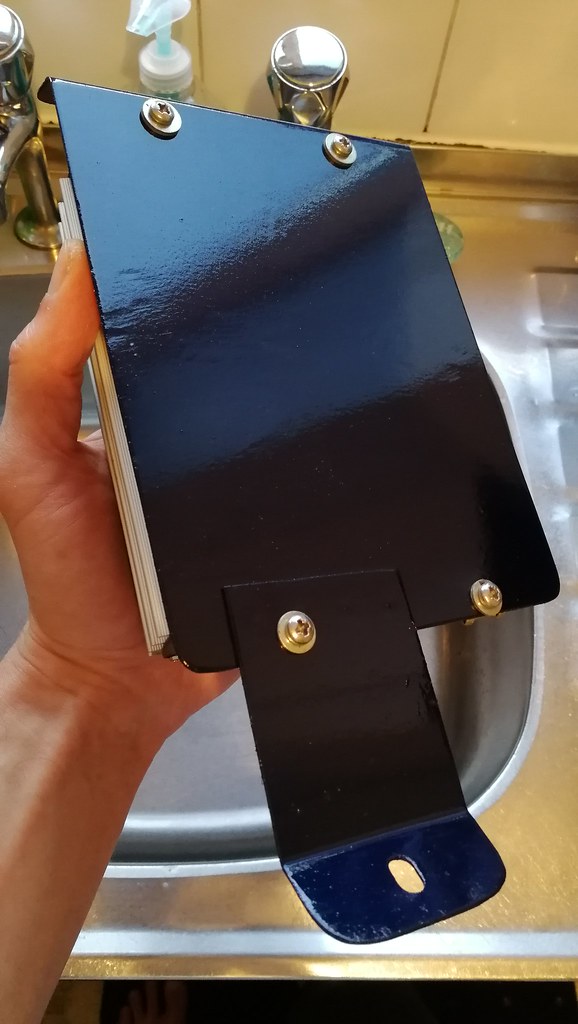 IMG_20210101_154522 IMG_20210101_154522 by Chris Witkowski, on Flickr 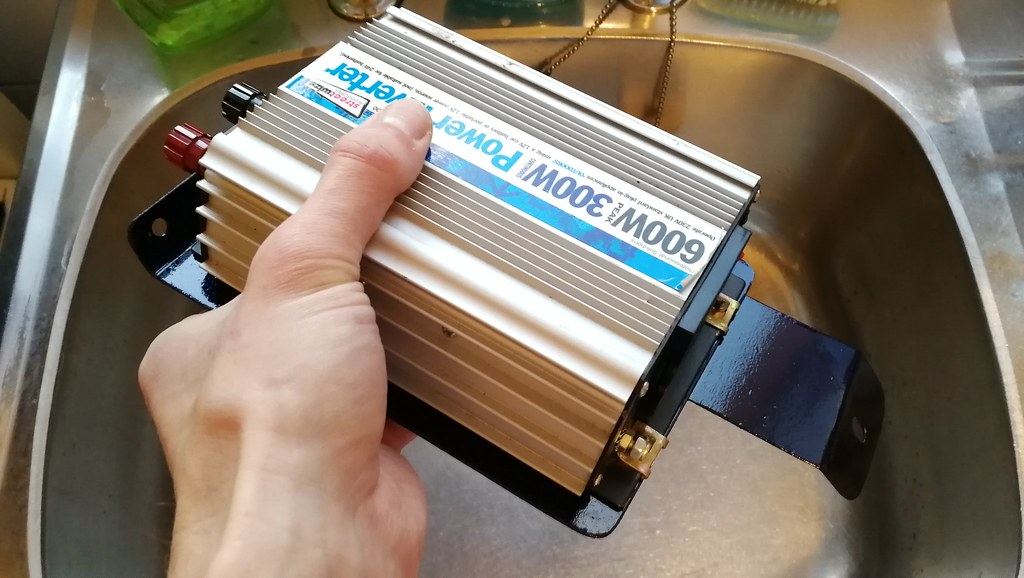 IMG_20210101_154543 IMG_20210101_154543 by Chris Witkowski, on Flickr It's pretty well hidden and can only be seen if you stick your head under. I'm yet to wire it up as I'm running out of space on the starter. I could do with a busbar for all my live feeds. This is the view looking down at the glove box and you can see the bracket at the bottom. The silver box on the right is the ecu, then the power steering controller, fuse box, relay box and water pump controller.  IMG_20210102_122514 IMG_20210102_122514 by Chris Witkowski, on Flickr 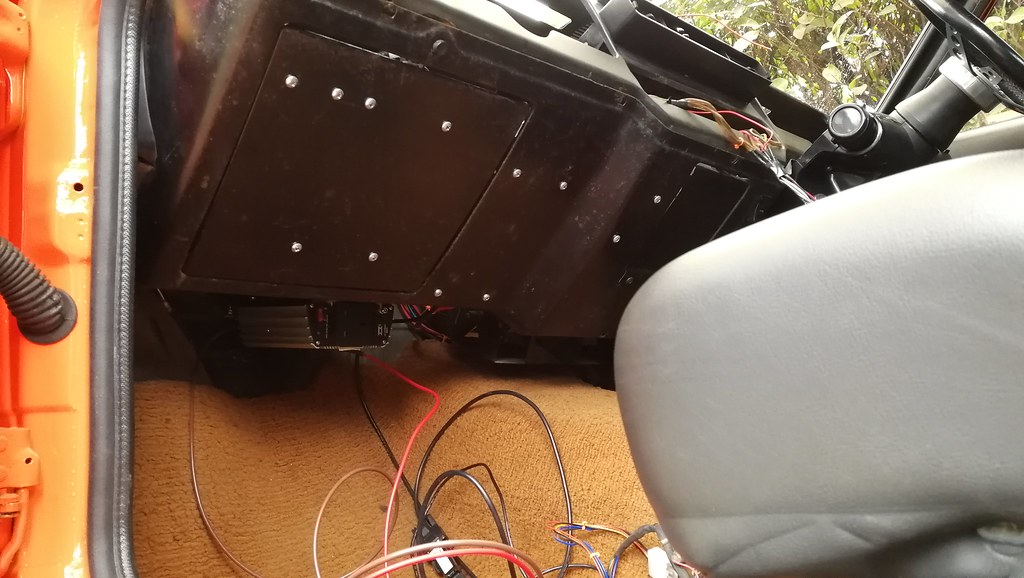 IMG_20210102_122532 IMG_20210102_122532 by Chris Witkowski, on Flickr I spent the rest of today making a new shelf for behind the rear seat, and then made a bulkhead to try and reduce the noise coming into the cabin. I used 3mm hardboard cut to shape, and then glued soundproofing on the back. For the shelf I drilled a couple of holes and used fir tree clips to keep it held down otherwise it springs back flat again.  IMG_20210102_181933 IMG_20210102_181933 by Chris Witkowski, on Flickr For the bulkhead, I drilled some holes in the framework behind the seat back, and used plastic captive nuts and self tappers. Whether it will significantly reduce noise remains to be seen.  IMG_20210102_181925 IMG_20210102_181925 by Chris Witkowski, on Flickr |
| |
Last Edit: Jan 2, 2021 20:47:10 GMT by lebowski
|
|
|
|
|
|
|
Just catching up on the last few months. Man this is looking great! Really nice work all round  Must feel nice to be on the home stretch. |
| |
|
|
lebowski
Part of things
  Hillman Avenger, Clan Clover
Posts: 488
|
|
Jan 10, 2021 17:40:39 GMT
|
Cheers Biturbo! I'm actually running out of stuff to do for the time being.
This weekend's work...
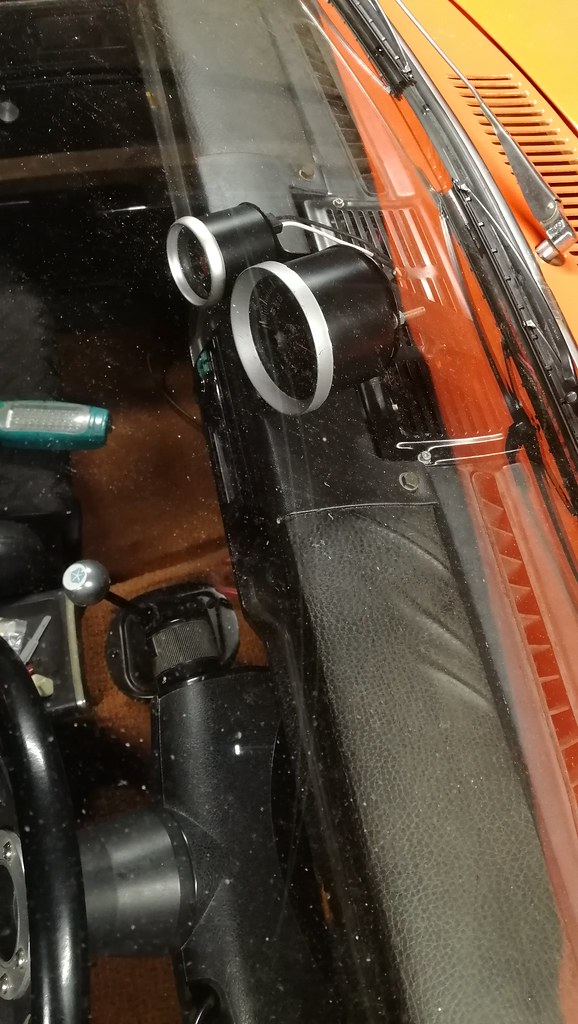
Like most Avengers (mk1 at least), the top of my dashboard is cracked. A while ago I bent a piece of metal to match the shape of the dash top, which slips over the dash and covers the cracks. I also fitted a captive nut into it for extra gauges, and then covered it in vinyl. This allowed me to make a couple of big P-clips which held my rev counter and boost gauge like so... This works fine but it means that every time I remove the dash, the gauges have to go somewhere too. Depending on what I'm doing, sometimes I leave them hanging, or sometimes I have to remove them. The rev counter has its own little harness with a plug, but the boost guage means disconnecting the vacuum line and taking out the bulb, which is a bit of a pain, as you can't get in with the spanner until the dash is half out, so it becomes a balancing act.
So I decided to make a new mount for these gauges, so that they can stay in the car as they don't ever need to come out. These are supposed to be in dash gauges, so first I cut out some holes for the back of the rev counter and bent the sheet so that both gauges line up. A few hours later and I'd fabricated this contraption. The centre grill is metal which allowed me to spotweld the new brackets to it. I didn't know that these metal grills actually existed, but my Dad found it on ebay. I thought they were all plastic like my original one. I'm currently waiting for the paint to dry but should get it fitted tomorrow. I also painted the sides of the gauges black, as one is white and one is old zinc passivate kind of colour, which might look odd.
|
| |
|
|
lebowski
Part of things
  Hillman Avenger, Clan Clover
Posts: 488
|
|
Jan 12, 2021 17:30:09 GMT
|
|
|
| |
|
|
|
|
|
Jan 12, 2021 22:01:58 GMT
|
Yeah that looks very neat  much more convenient too |
| |
|
|
|
|
lebowski
Part of things
  Hillman Avenger, Clan Clover
Posts: 488
|
|
|
|
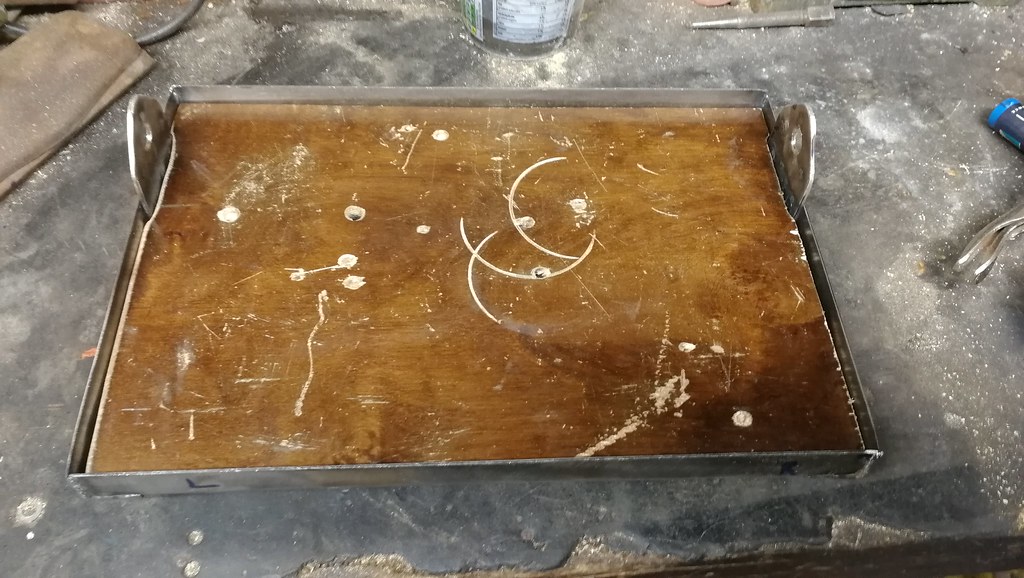
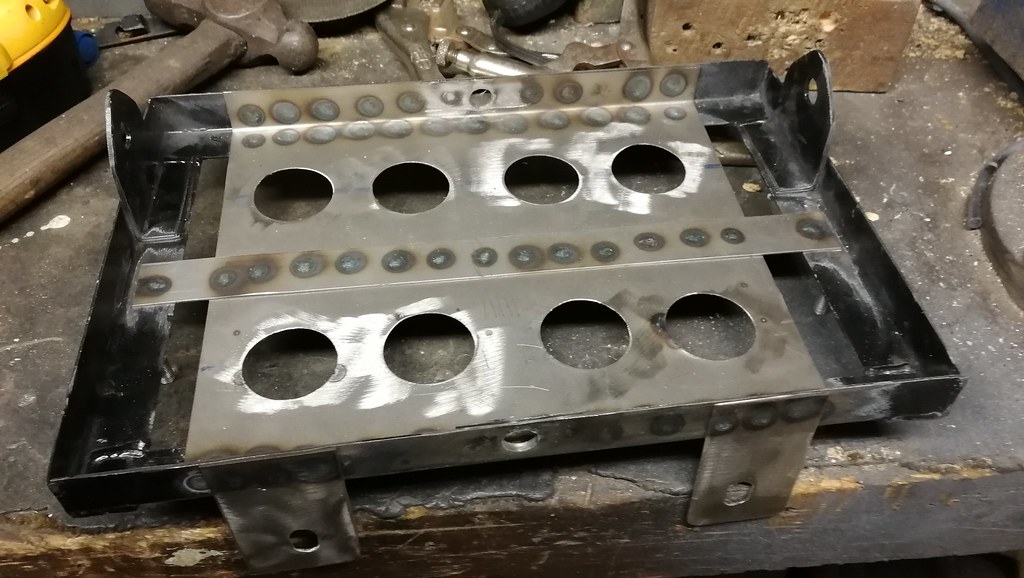
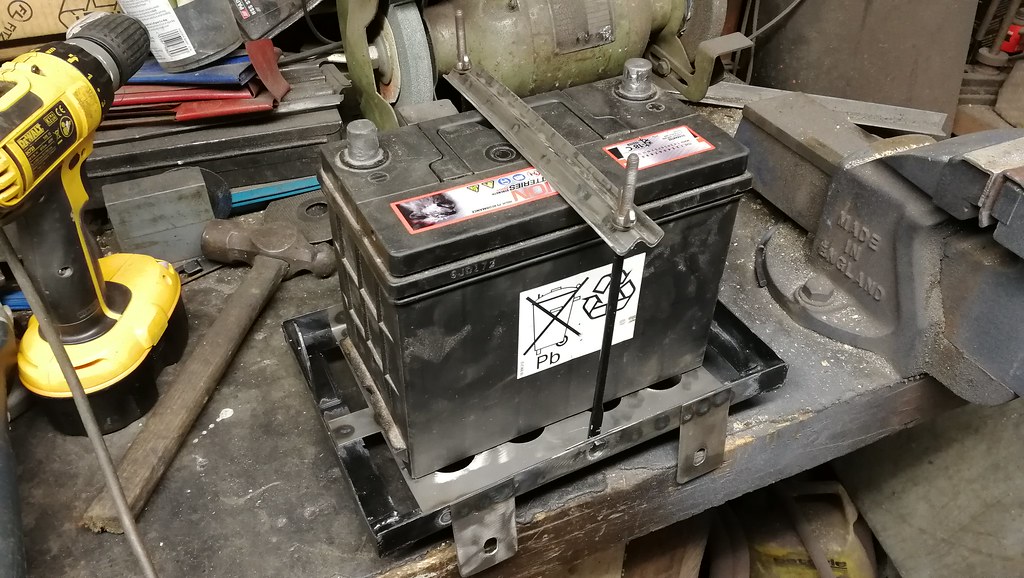
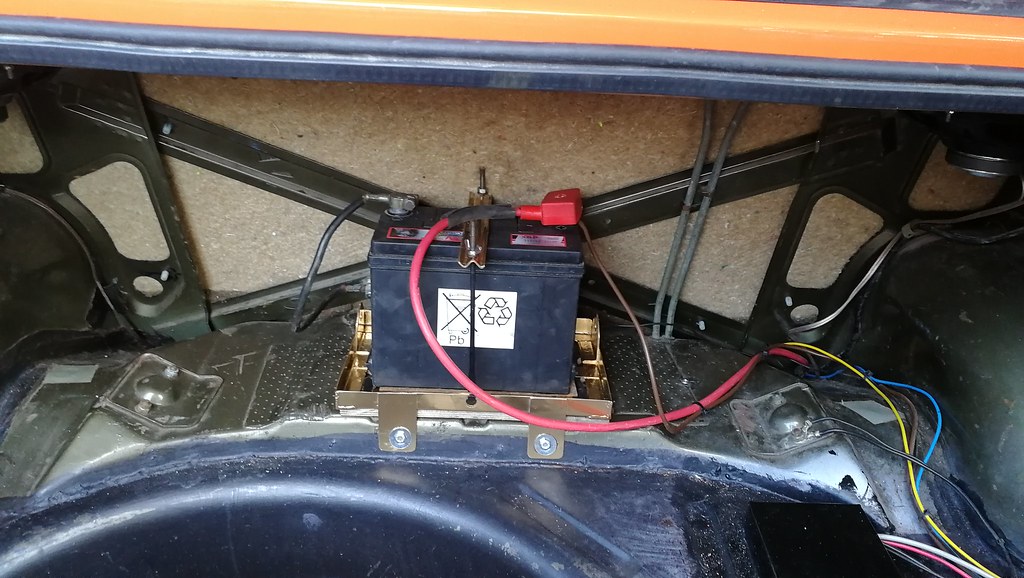
I haven't been doing much on the Avenger but I did decide to make a battery tray. The battery has previously been moved into the boot just behind the rear seat. I made these clamps a few years ago which bolted to the boot floor and clamped onto the little step on the bottom of the battery on either side. With these it was a pain to remove the battery, as the clamps were just held with nuts and bolts so removal entailed going under the car to access the nuts whilst someone else had a spanner on the bolt heads. My battery is also on the small side, which means it goes flat fairly quickly when you're trying to fine tune the cold start settings in winter. So I decided to make a battery tray which would stay bolted in the car, and would use the regular hook and strap type affair for retention. I also made it oversize as I'll probably buy a bigger battery.
Anyway it looks like this: I cut a bit of plywood to act as a floor, as the bolts are welded on the underside meaning that the tray stands about 5mm off the boot floor. |
| |
|
|
lebowski
Part of things
  Hillman Avenger, Clan Clover
Posts: 488
|
|
|
|
|
|
| |
|
|
lebowski
Part of things
  Hillman Avenger, Clan Clover
Posts: 488
|
|
Feb 10, 2021 20:50:38 GMT
|
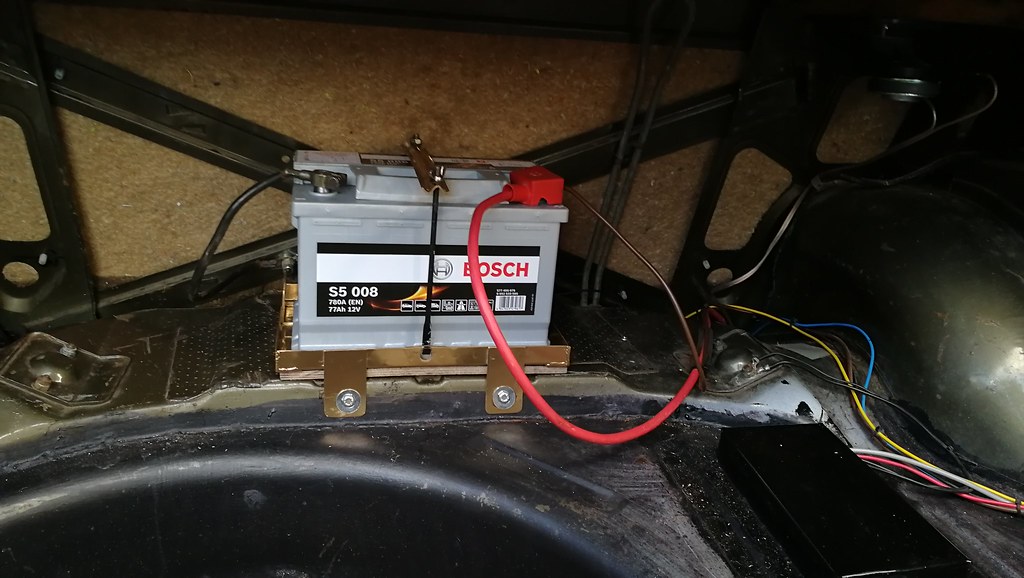
The battery tray is finished now and holds the battery firmly. I could do with shortening that +ve lead though.
I also got my new battery today. It's a Bosch S5 and has much higher CCA (from 400ish upto 770), so should be significantly better all round. I'm planning on tweaking the cold start settings next. In the really cold weather lately the car has been struggling to start. I think it's been a multitude of factors, mainly that the old battery was getting a bit duff, and that the car keeps fouling its spark plugs unless I go for a drive to burn off the carbon. It has BPR8ES plugs fitted. I'm going to buy a set of BPR6ES just for the purpose of cold start tuning, as they'll be far less prone to fouling with all the cold starts. Once I have it starting nicely I'll put the 8's back in.
|
| |
|
|
lebowski
Part of things
  Hillman Avenger, Clan Clover
Posts: 488
|
|
|
|
This is what the plugs looked like when I took them out. Very fouled plus they were wet with petrol too.  IMG_20210212_082011 IMG_20210212_082011 by Chris Witkowski, on Flickr I put in a spare set of BPR6E and the car started immediately and ran very well, despite the fact it was -3C. So at least I don't have to change the map. I think probably the BPR8ES are too cold really. They work fine as long as you drive the car after you start it, but 3 or 4 cold starts in a row without getting it up to temperature and the picture above is the result. I will most likely put in BPR7ES and it should be fine. |
| |
|
|
lebowski
Part of things
  Hillman Avenger, Clan Clover
Posts: 488
|
|
Feb 20, 2021 19:11:36 GMT
|
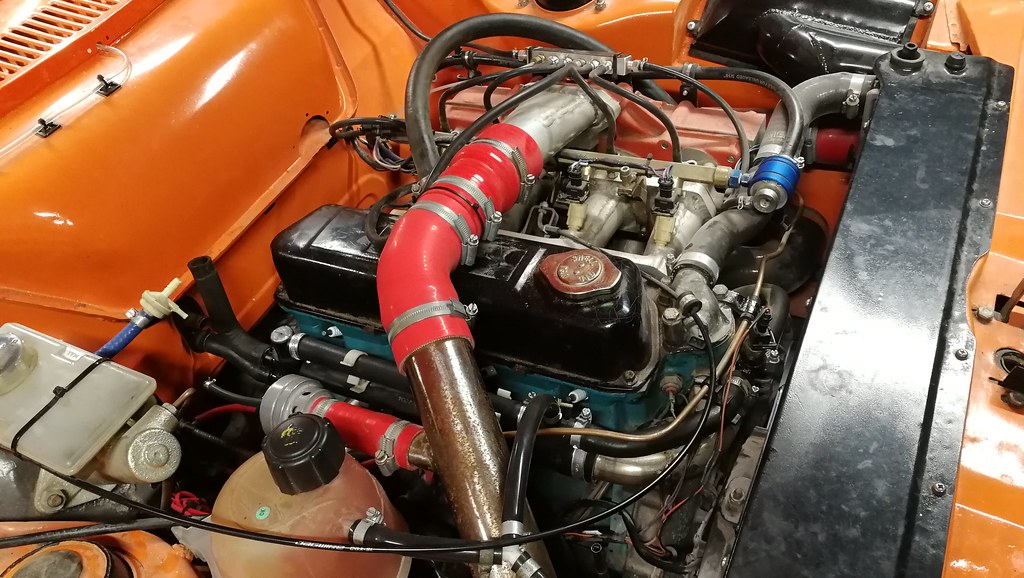
I've been trying to improve the heater output today. It only seems to get lukewarm since I rerouted the pipes. I'm not sure if I've just got used to modern, better heaters or if there's a problem. The circuit looks like this: The red line shows the path out of the head towards the heater matrix. The bypass Z-piece is just before the pipes pass through the bulkhead. The blue line then shows the return, where it goes away from the matrix, through an oil/water heat exchanger and then back to the waterpump inlet. My thinking is that maybe most of the coolant is taking the path of least resistance through the bypass, rather than going through the matrix. So with this in mind I bought a Transit Mk7 bypass valve to replace the Z-piece. This looks like below: When this valve is open, coolant follows the red arrow into the heater matrix. The blue arrow shows the return from the matrix. When the valve is closed, coolant does a U-turn as shown by the yellow arrow. The valve came with a vacuum actuator, but this unbolts so I can fabricate a bracket for a regular cable. Anyway, to cut a long story short, I replaced most of the pipes and put the valve in place of the Z-piece. When I took the pipes off, not a great deal of coolant came out, so perhaps my actual problem was an airlock. I decided to fit the new valve anyway as it should perform better. I also put in a T-piece to act as a bleed line in the upper hose. You can see it where it joins back to the header tank and the radiator bleed line. I'm still missing one piece of hose as you can see above (the 90 degree bend is just there to stop coolant spilling out), so I can't put it back together yet. I'll also possibly need to drill a hole for the cable. |
| |
|
|
lebowski
Part of things
  Hillman Avenger, Clan Clover
Posts: 488
|
|
Feb 27, 2021 18:31:21 GMT
|
I have made a little more progress on the heater valve.
First I needed a longer Bowden cable. You can obviously buy these online but I was too impatient for that, so I used an old throttle cable outer, and a stainless welding rod for the inner. Initially I put loops on both ends but it wasn't working that well at the valve end, so I cut it off....
....and JB welded this plastic bit on the end. I haven't used JB weld before so I don't know how good it is, but I guess I'll find out. I also made this bracket to hold the cable in place. I'll paint it once the JB weld has dried and I'm happy that it works properly. The white plastic sleeve is for retaining car badges, and fits nicely over the lever on the valve. The black loop then fits well over this sleeve.
|
| |
|
|
|
|
|
Feb 28, 2021 10:39:11 GMT
|
|
I'd have been temped to put a key on the stainless rod before JB welding it so it'll stick better, but I suppose you cn do that if it has issues. Interested to see how well it works...
|
| |
|
|
lebowski
Part of things
  Hillman Avenger, Clan Clover
Posts: 488
|
|
Feb 28, 2021 18:08:25 GMT
|
I did scuff up the end with some coarse sandpaper, so hopefully it'll stay on. I got the bracket painted and fitted today. Here's a fully assembled pic before painting. It seems to work fine, the only issue is that the throw on the lever is shorter than the existing valve, so the control on the dashboard only travels about half as far from cold to hot. Not an issue as such so I'll probably leave it for the time being.  IMG_20210228_115739 IMG_20210228_115739 by Chris Witkowski, on Flickr I also took advantage of the good weather and blasted and painted my C-pillar vent trims, which I've been putting off for ages.
If the decent weather persists I might actually drive it this month, which will be nice.
|
| |
|
|
lebowski
Part of things
  Hillman Avenger, Clan Clover
Posts: 488
|
|
Mar 14, 2021 17:58:49 GMT
|
My rev counter hasn't been working properly since I remade the mounting bracket. Obviously I had disturbed or broken something. I decided to take it out today and see if I could fix it. It's very delicate and fiddly, but the problem was that there were tiny bits of swarf that had made their way onto the magnet. This must have happened when I was making the bracket. The holes to access the calibration potentiometers were uncovered so it will have got in there. You can see the swarf in the pic below, it was causing the needle to stick and behave erratically.
I managed to clean it all out with some carburettor cleaning brushes, and now it works properly again. I have also been messing about with centrecap ideas for the wheels. They didn't come with any, but they have this single step fixing. My Dad has loads of centrecaps, including these below, but I'm not sure if I like them and they're a bit of a loose fit. I think I'd prefer some flush fitting caps, and these tins/lids from some old airgun pellets fit the hole perfectly. They will need a light bead of sealant on the back to stop them vibrating out.
Obviously they will need painting or coating. I haven't decided on a colour yet, but probably silver, black or gold are the safe bets. I might get some stickers printed for them too.
|
| |
|
|
|
|
|
|
|
|
Custom centre caps is a neat idea! Hadn't considered those. Interested t see how they come out if you do them.
If you do get stickers you could lacquer over them to protect them and they'd probably be pretty hard wearing.
|
| |
|
|
|
|
 IMG_20201224_141739 by Chris Witkowski, on Flickr
 IMG_20201224_141756 by Chris Witkowski, on Flickr
 IMG_20201224_141806 by Chris Witkowski, on Flickr
 IMG_20201224_163309 by Chris Witkowski, on Flickr
 IMG_20201224_163336 by Chris Witkowski, on Flickr
 IMG_20201224_141739 by Chris Witkowski, on Flickr
 IMG_20201224_141756 by Chris Witkowski, on Flickr
 IMG_20201224_141806 by Chris Witkowski, on Flickr
 IMG_20201224_163309 by Chris Witkowski, on Flickr
 IMG_20201224_163336 by Chris Witkowski, on Flickr


