That sounds like a reasonable point glenanderson but given that this is an old fashioned low-tech engine, I'm confident that a micrometer check will be adequate. Speaking of which, I've arranged to borrow a freshly calibrated micrometer from a friend to check my crank with  I can always check it for straightness with my dial gauge and a couple of V blocks, but I have no reason to think it wouldn't be straight. The 'new' crank on the other hand... given how aggressively it was unseized by the previous owner I would definitely want to check for straightness!
So what have I been upto the past few days... Firstly I've been in touch with Graham Whitehouse Autos (thanks for the heads up homersimpson) and Graham has very kindly filled in some of the gaps in my knowledge. I measured my end float at less than my slightly exaggerated guess, it measured at 0.065". The spec is 0.010"-0.025". Graham said that it's unlikely to have caused any issues and that the end float isn't especially critical on these gearboxes. He said it's a known modification, and one they offer, to convert the P-R-N-D2-D1-L shift pattern into the more standard P-R-N-D-2-1 pattern. This is done by changing the valve body, and is likely what's been done to mine. He was also able to say that the only difference between the 3EG gearbox, fitted to my car, and the 11EG, that it should have, is the kickdown cam shape. Given that my gearbox appears to have a different valve body that's probably not relevant anyway.
I will hopefully be purchasing a full set of thrust washers/bearings, a gasket set and replacement parking pawl from them in the near future, then I can get the gearbox put back together
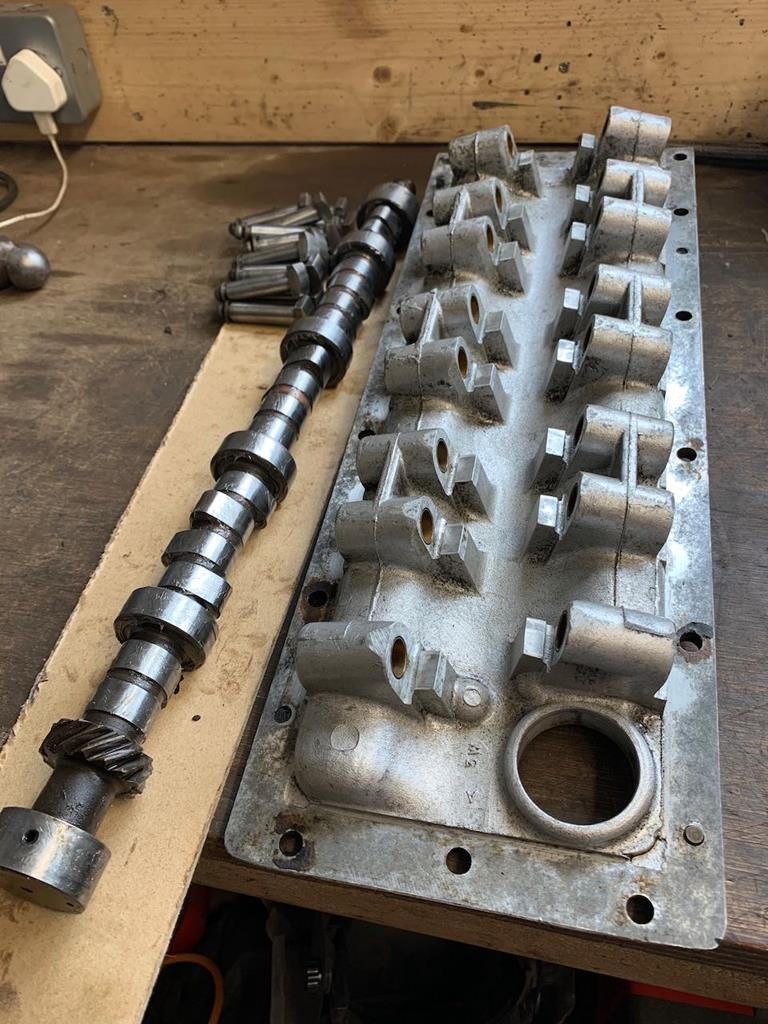
I also carried on with cleaning up my cam followers, and now have a full set of 16 all cleaned up and ready to go into the new engine.

The next investigation was to see if the same technique could be used to salvage my cam. Having now compared 2 sets of cam followers and studied photos online of others, they all seem to have similar wear to mine, which means I can't imagine any used cam would be any better than mine is. I also think it wouldn't be wise to use my home polished lifters on an expensive new cam... So lets see what I can do to save mine.
The first thing I did was to check the cam with the dial gauge to see if I could measure how worn the lobes were.

The spec from new would theoretically be 0.203" lobe height (thanks sonus for the info!). Most of my lobes measured at ~0.199", with a couple up at 0.201" and a couple down to 0.197". So no drastic wear, not like the stories you read of cams with lobes worn round on some engines, like the Rover v8.
This is an example of the scoring on of the worst lobes, this one measuring at 0.199".

I gave it a polish, using fine wet and dry wrapped round the lobe and then a strip of fabric wrapped a couple of times round that and then worked back and forth, as is the old fashioned way to polish a crank journal. The end result looks much better, and more importantly I can no longer feel any scores running my nail over it. I measured it again at 0.198", so within the range of lobe heights I'd already got.
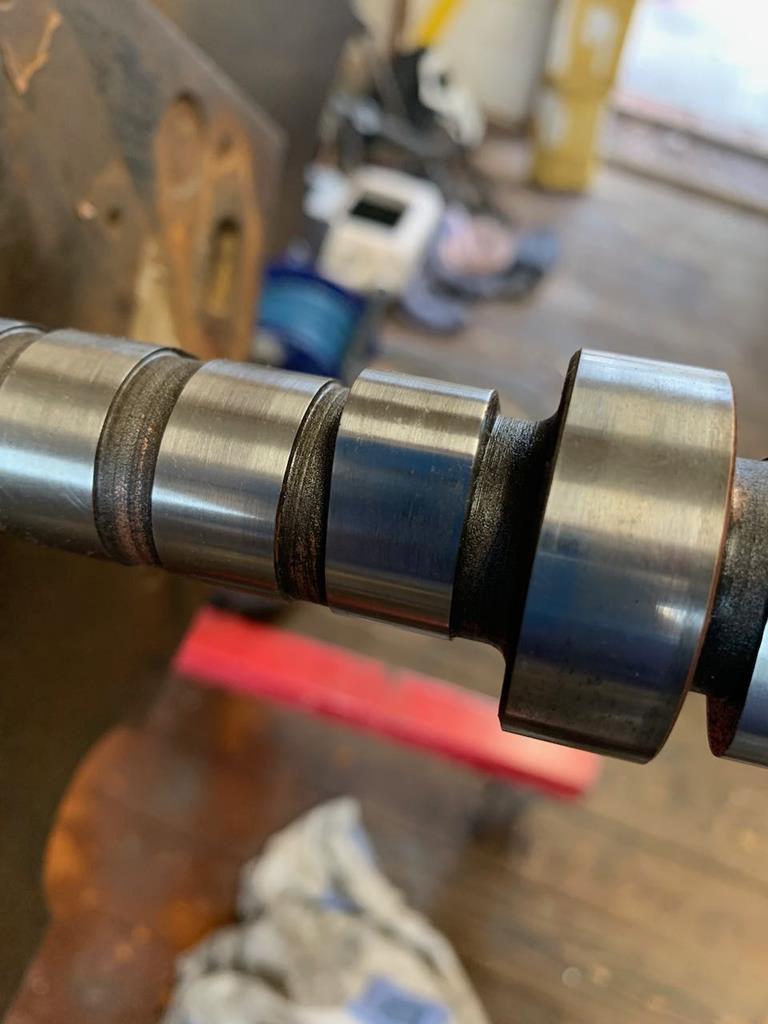
It cleaned up well enough that for this 'budget' engine build, I'm happy to give it a shot So I went over the rest of the lobes, some needed similar amounts of polishing, but most came up looking brand new after just a very light going over. I re-measured all the lobes and now had most lobes at 0.198-0.199" with a couple of outliers up at 0.200" and down to 0.197".
There didn't seem to be a correlation between the smaller lobe lift and the heavier scoring, so I've no reason to believe that polishing the scoring away will break through a hardened surface. If it does turn out to be the case, and I get lots of cam wear, then I've not really lost anything and will just have to look into a new cam (read upgraded cam) and a new set of followers if that time comes.
So now I have a small pile of parts ready to go into my engine (little bit more cleaning still to do on the tappet chest but it's mostly done!), which is a nice feeling.
A couple of little cosmetic jobs also this week. Firstly it's been long enough since I painted the bonnet, that I could give it a polish.

So nice to see it all shiny! It's never been all shiny in my ownership, so thats a nice little moment. I'm waiting on some new clips for the chrome trim to arrive in the post, but will get that on when they arrive.
I also decided it was time to deal with the sun visors. My originals were not in a good way, not only were they rather mouldy under the covers, but the foam inside was breaking down and so they flopped and made crunchy noises.

Having decided there was no way to save them, I decided to split one open to see how it was constructed.
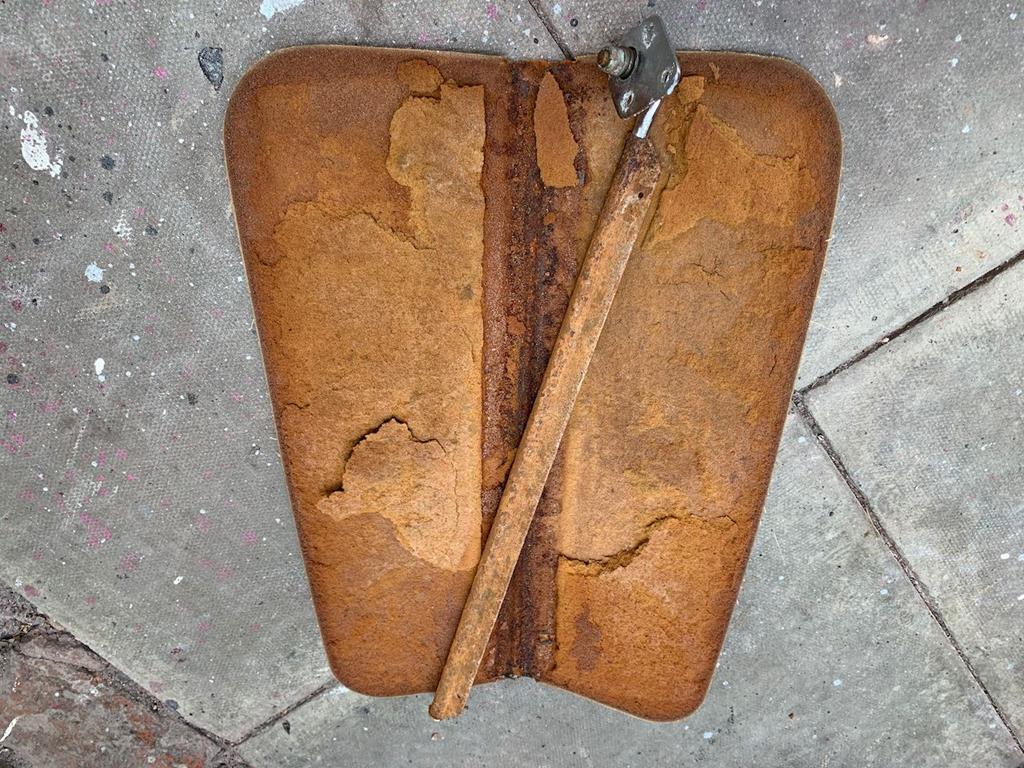
mmmm.. looks nice in there. But the good news is that the metal hinge strip can be cleaned up and easily attached to any sun visor material I might like. I couldn't directly replicate the factory hard foam, so I decided to copy the shape on the standard visors on to some hardboard, which I then screwed and glued to the metal strip, and cover it with a thin layer of foam.
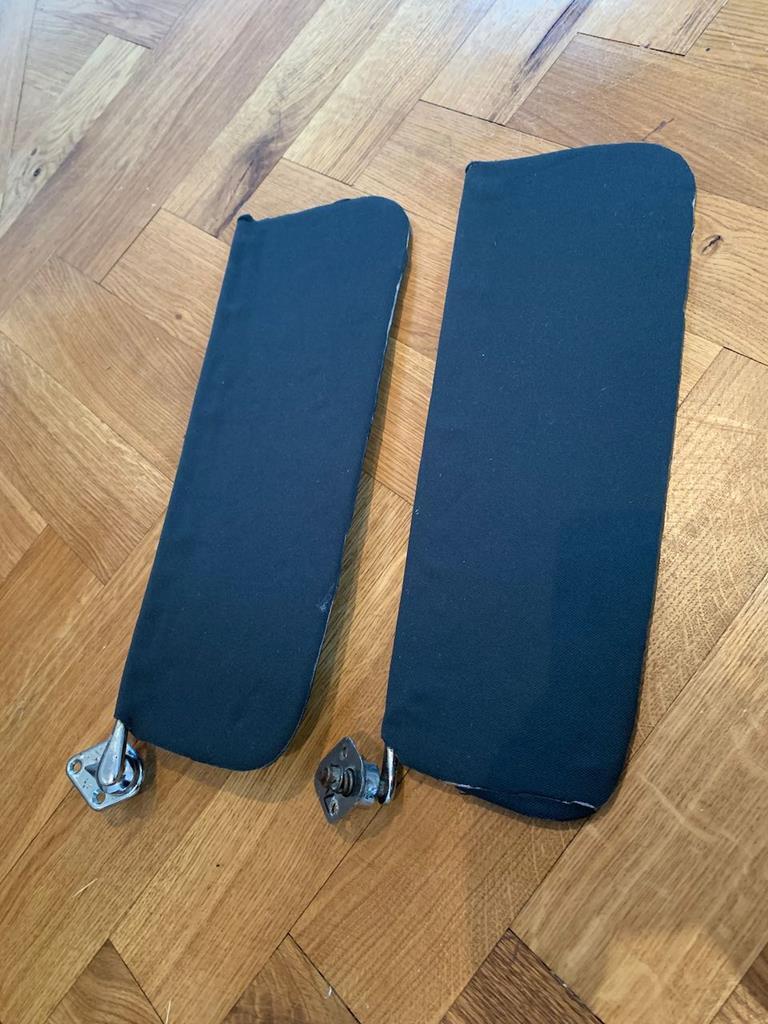
With the hinge mechanism lubricated, this worked well and gave me a nice stiff sun visor that wasn't too heavy. All that was left was to break out the sewing machine and sort some covers out from the left over headlining material.
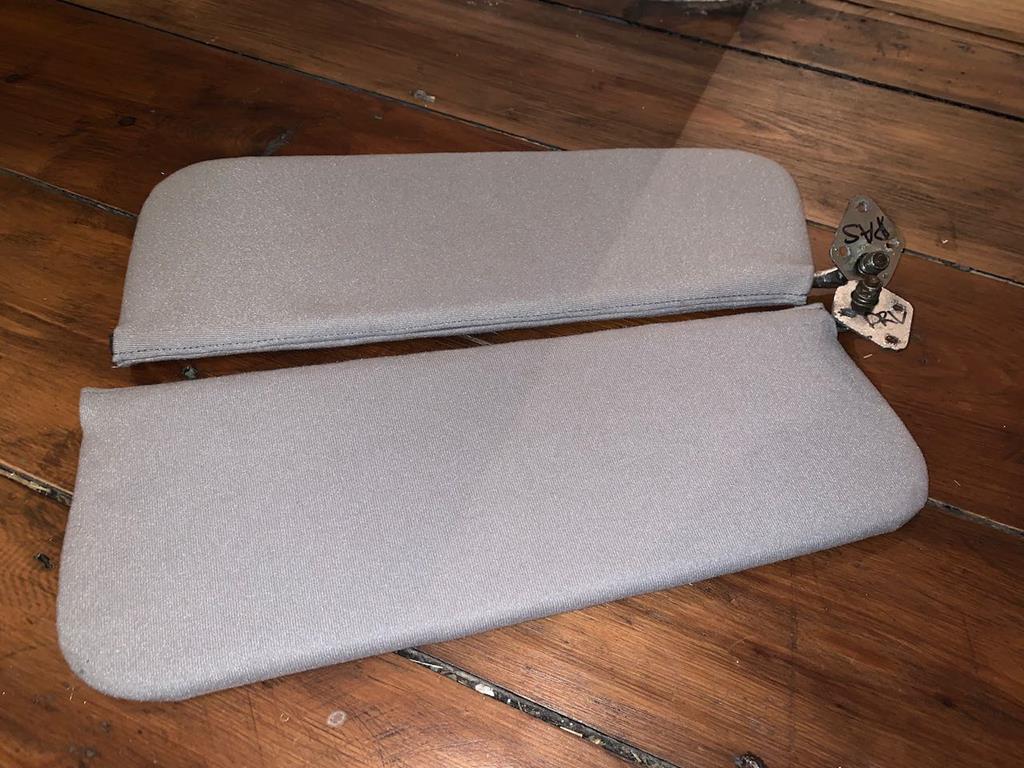
Which came out relatively well It's only a small job, but another one off the list. And the list is getting shorter
  I'm pleased to feel like I've got the gearbox problems under control, and can start to focus some actual time and energy on the engine build.
 I can always check it for straightness with my dial gauge and a couple of V blocks, but I have no reason to think it wouldn't be straight. The 'new' crank on the other hand... given how aggressively it was unseized by the previous owner I would definitely want to check for straightness!
So what have I been upto the past few days... Firstly I've been in touch with Graham Whitehouse Autos (thanks for the heads up homersimpson) and Graham has very kindly filled in some of the gaps in my knowledge. I measured my end float at less than my slightly exaggerated guess, it measured at 0.065". The spec is 0.010"-0.025". Graham said that it's unlikely to have caused any issues and that the end float isn't especially critical on these gearboxes. He said it's a known modification, and one they offer, to convert the P-R-N-D2-D1-L shift pattern into the more standard P-R-N-D-2-1 pattern. This is done by changing the valve body, and is likely what's been done to mine. He was also able to say that the only difference between the 3EG gearbox, fitted to my car, and the 11EG, that it should have, is the kickdown cam shape. Given that my gearbox appears to have a different valve body that's probably not relevant anyway.
I will hopefully be purchasing a full set of thrust washers/bearings, a gasket set and replacement parking pawl from them in the near future, then I can get the gearbox put back together

I also carried on with cleaning up my cam followers, and now have a full set of 16 all cleaned up and ready to go into the new engine.

The next investigation was to see if the same technique could be used to salvage my cam. Having now compared 2 sets of cam followers and studied photos online of others, they all seem to have similar wear to mine, which means I can't imagine any used cam would be any better than mine is. I also think it wouldn't be wise to use my home polished lifters on an expensive new cam... So lets see what I can do to save mine.
The first thing I did was to check the cam with the dial gauge to see if I could measure how worn the lobes were.

The spec from new would theoretically be 0.203" lobe height (thanks sonus for the info!). Most of my lobes measured at ~0.199", with a couple up at 0.201" and a couple down to 0.197". So no drastic wear, not like the stories you read of cams with lobes worn round on some engines, like the Rover v8.
This is an example of the scoring on of the worst lobes, this one measuring at 0.199".

I gave it a polish, using fine wet and dry wrapped round the lobe and then a strip of fabric wrapped a couple of times round that and then worked back and forth, as is the old fashioned way to polish a crank journal. The end result looks much better, and more importantly I can no longer feel any scores running my nail over it. I measured it again at 0.198", so within the range of lobe heights I'd already got.

It cleaned up well enough that for this 'budget' engine build, I'm happy to give it a shot
 So I went over the rest of the lobes, some needed similar amounts of polishing, but most came up looking brand new after just a very light going over. I re-measured all the lobes and now had most lobes at 0.198-0.199" with a couple of outliers up at 0.200" and down to 0.197".
 There didn't seem to be a correlation between the smaller lobe lift and the heavier scoring, so I've no reason to believe that polishing the scoring away will break through a hardened surface. If it does turn out to be the case, and I get lots of cam wear, then I've not really lost anything and will just have to look into a new cam (read upgraded cam) and a new set of followers if that time comes.
So now I have a small pile of parts ready to go into my engine (little bit more cleaning still to do on the tappet chest but it's mostly done!), which is a nice feeling.

A couple of little cosmetic jobs also this week. Firstly it's been long enough since I painted the bonnet, that I could give it a polish.

So nice to see it all shiny! It's never been all shiny in my ownership, so thats a nice little moment. I'm waiting on some new clips for the chrome trim to arrive in the post, but will get that on when they arrive.
I also decided it was time to deal with the sun visors. My originals were not in a good way, not only were they rather mouldy under the covers, but the foam inside was breaking down and so they flopped and made crunchy noises.

Having decided there was no way to save them, I decided to split one open to see how it was constructed.

mmmm.. looks nice in there. But the good news is that the metal hinge strip can be cleaned up and easily attached to any sun visor material I might like. I couldn't directly replicate the factory hard foam, so I decided to copy the shape on the standard visors on to some hardboard, which I then screwed and glued to the metal strip, and cover it with a thin layer of foam.

With the hinge mechanism lubricated, this worked well and gave me a nice stiff sun visor that wasn't too heavy. All that was left was to break out the sewing machine and sort some covers out from the left over headlining material.

Which came out relatively well
 It's only a small job, but another one off the list. And the list is getting shorter
  I'm pleased to feel like I've got the gearbox problems under control, and can start to focus some actual time and energy on the engine build.


