|
|
|
Feb 28, 2024 22:13:20 GMT
|
I've got the evolution finger sander too... Great bit of kit, especially with Norton belts on it. I bought these linkI bought 60grit...for weld removal Next time I'd probably go for 80 or 100... They seem much sharper than the previous cheaper belts I've used. Seems to be lasting really well too... I'm still on my first one! |
| |
|
|
|
|
|
|
|
Feb 29, 2024 10:37:16 GMT
|
|
Cheers Dave, got them on my saved list now.
|
| |
|
|
|
|
|
Feb 29, 2024 10:45:54 GMT
|
|
I know this is probably of little use but I've found (off ebay) that the brown ones are rubbish, but the blue (zirconium ??) are quite good and last well,
Nigel
|
| |
BMW E39 525i Sport
BMW E46 320d Sport Touring (now sold on.)
BMW E30 325 Touring (now sold on.)
BMW E30 320 Cabriolet (Project car - currently for sale.)
|
|
|
|
|
Feb 29, 2024 16:41:47 GMT
|
I know this is probably of little use but I've found (off ebay) that the brown ones are rubbish, but the blue (zirconium ??) are quite good and last well, Nigel Isn't it brown for wood and blue for metal? |
| |
|
|
|
|
|
Feb 29, 2024 16:42:16 GMT
|
So, back to Wifeys Pop  You may recall this from earlier. 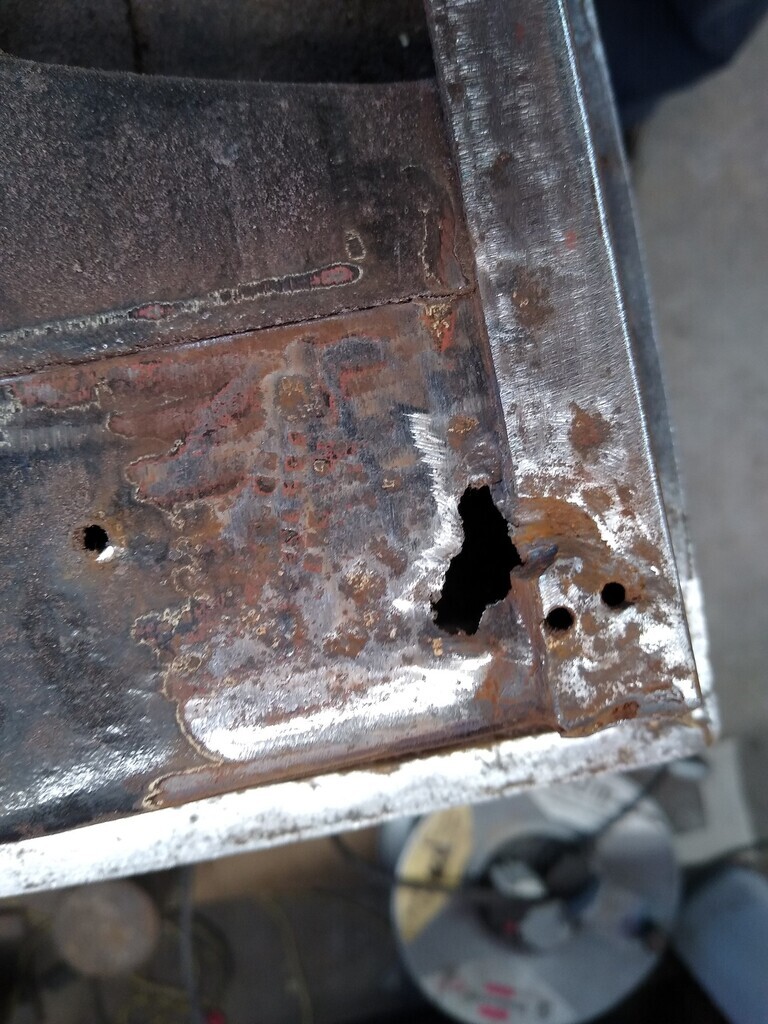 I cut away all three faces so that I could remake the corner, Folded up some 1mm zintec to suit and firstly remade the door inner lower face (if that makes sense). This has a joggle in it to accommodate the side face coming down to meet it. Welded up and cleaned off with the much mentioned finger sander  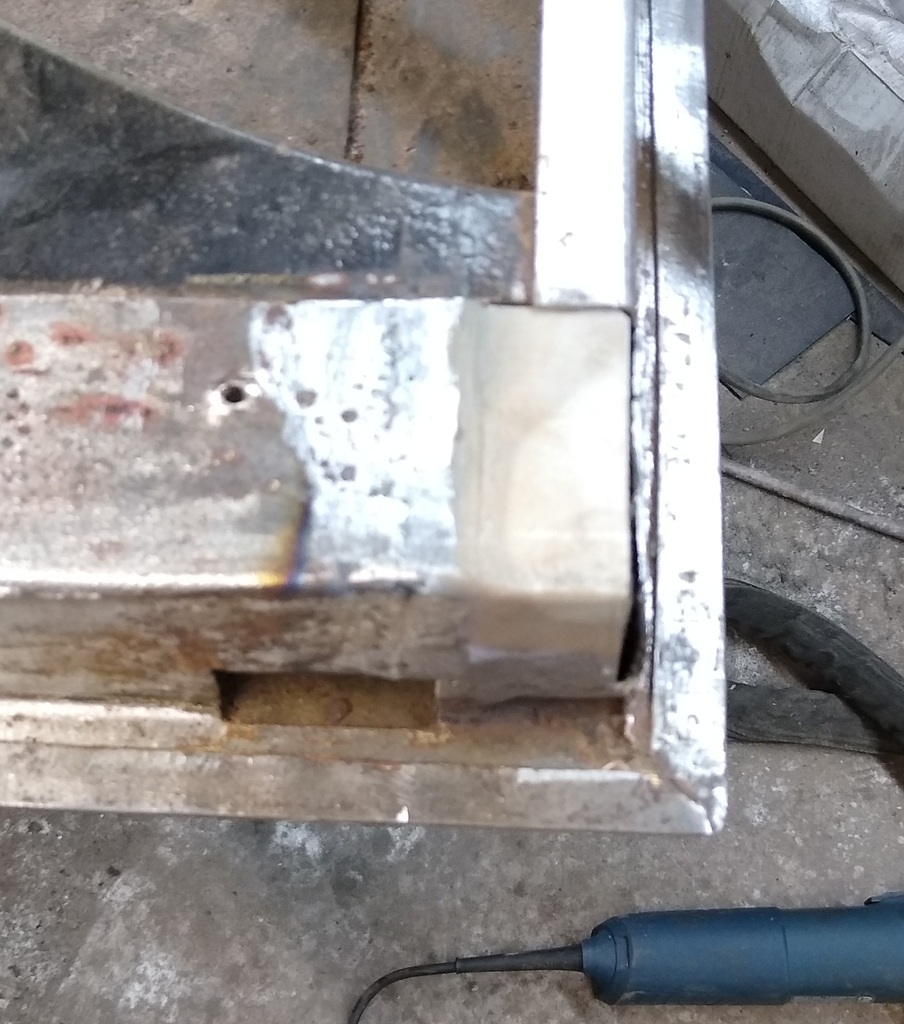 The next piece was the vertical piece that comes down to the corner. This was bent to go around the section and welded in after trimming the door and patch to fit. 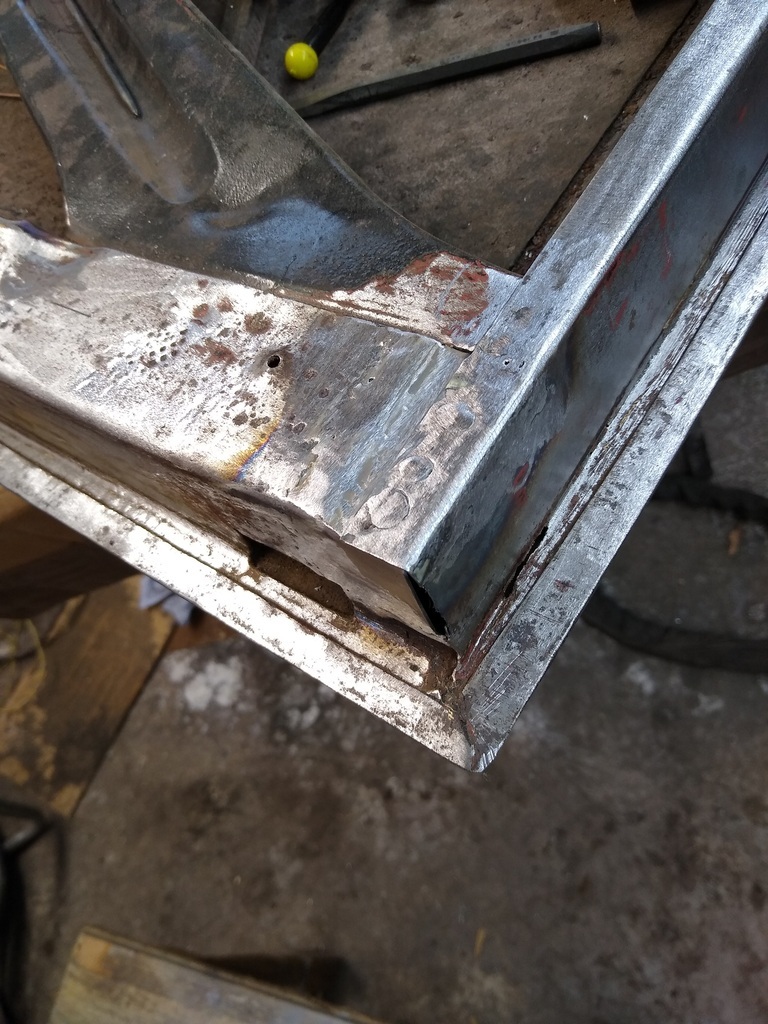 Finally a small piece was bent up and let in to reproduce the bottom part that folds under the door frame. I also drilled and welded the spot welds to finish it off. 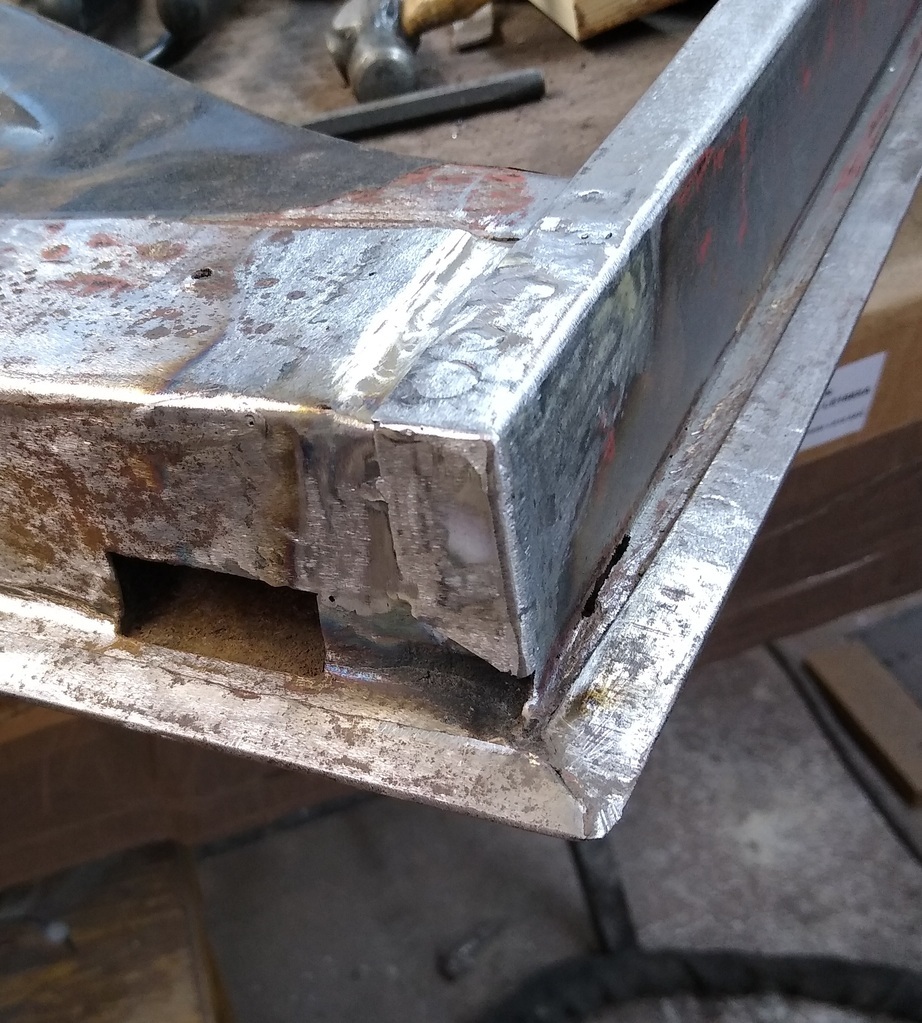 The eagle eyed may notice a thin gap where the corner has rusted through. The metal is solid all around so I may just drop some bronze weld in and call it good (the bottoms of my first pop's doors were manky but never gave any issues in 10 years of ownership so i'm not getting precious about them). |
| |
Proton Jumbuck-deceased :-(
2005 Kia Sorento the parts hauling heap
V8 Humber Hawk
1948 Standard12 pickup SOLD
1953 Pop build (wifey's BIVA build).
|
|
|
|
|
Feb 29, 2024 18:46:45 GMT
|
|
I was more noticing the missing bit in the fold up the side?
|
| |
|
|
|
|
|
Feb 29, 2024 19:12:41 GMT
|
I was more noticing the missing bit in the fold up the side? Sorry, not sure what you mean Mark. There's nothing missing, it's been rebuilt as it was and the same as the other one. Do you mean the oblong hole? That's the bottom of the door, there's three along the bottom. Failing that I'm at a loss as to the missing bit. |
| |
Proton Jumbuck-deceased :-(
2005 Kia Sorento the parts hauling heap
V8 Humber Hawk
1948 Standard12 pickup SOLD
1953 Pop build (wifey's BIVA build).
|
|
|
|
|
Feb 29, 2024 19:56:22 GMT
|
The bit I have ringed in the photo Paul - looks like it's rusted out?? 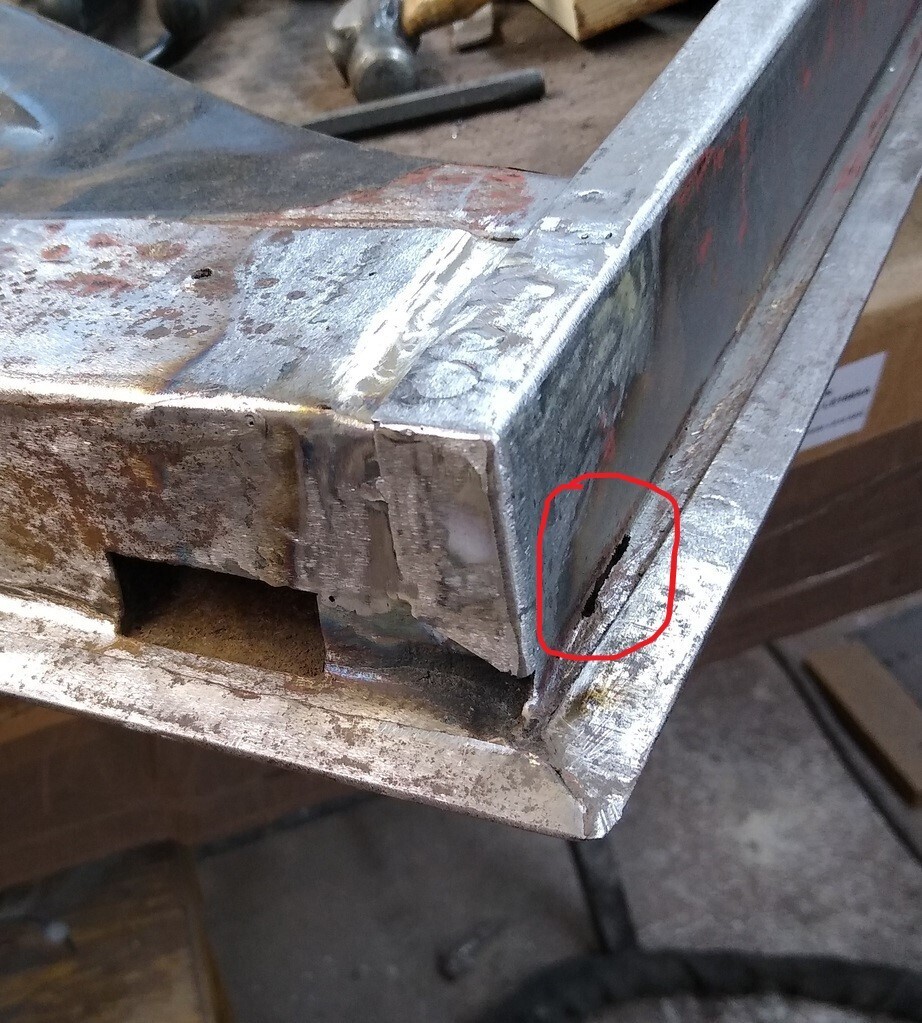 |
| |
|
|
|
|
|
Feb 29, 2024 20:37:41 GMT
|
|
Ah! I refer you to the what I wrote
"The eagle eyed may notice a thin gap where the corner has rusted through. The metal is solid all around so I may just drop some bronze weld..."
It's just a line of rusted through, I'll make a decision tomorrow.
|
| |
Proton Jumbuck-deceased :-(
2005 Kia Sorento the parts hauling heap
V8 Humber Hawk
1948 Standard12 pickup SOLD
1953 Pop build (wifey's BIVA build).
|
|
|
|
|
Feb 29, 2024 20:42:38 GMT
|
|
Ah, did not realise you were referring to that bit.
Edit, it's not easy to reach but I applied a bit of tiger seal on the inside of the door to seal the skin to the frame so any water entering cannot get down the seam.
|
| |
|
|
|
|
|
|
|
|
|
So, after a couple of days of phosphoric acid cleaning the door bottom is rust free. Some of it was deep and there were two tiny spots where it had gone through. The rust that Mark spotted tigged up without issue, the metal was solid either side. I now have to clean the door again with 15% acid and dry really well. once fully dry a scuff up with grey Scotchbright will see it ready for epoxy primer then filling. 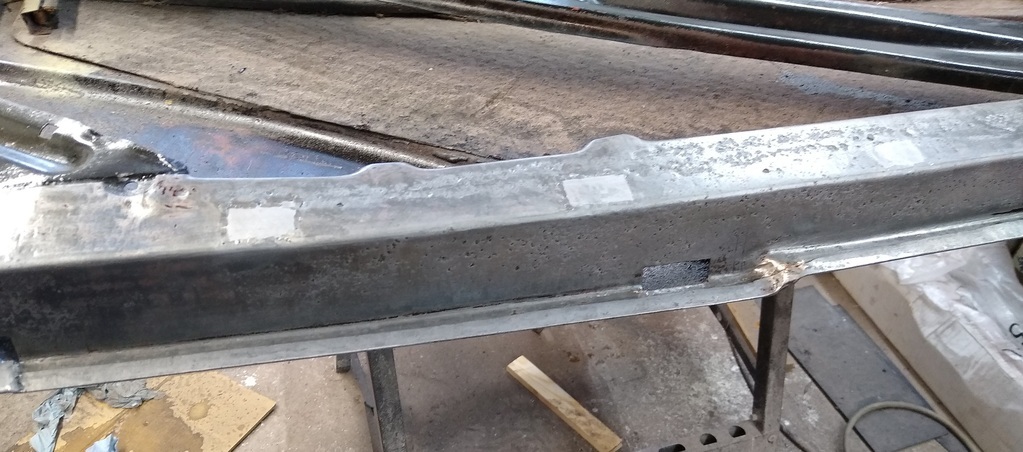 After all that my workshop is a tip, clean up time  |
| |
Last Edit: Mar 2, 2024 16:07:40 GMT by crockpot
Proton Jumbuck-deceased :-(
2005 Kia Sorento the parts hauling heap
V8 Humber Hawk
1948 Standard12 pickup SOLD
1953 Pop build (wifey's BIVA build).
|
|
|
|
|
|
|
Today I set my workshop heater on "bake" and hung the door up. It had been washed and dried yesterday and scuffed up ready for primer. A good wash down with panel wipe and two coats of Lechler epoxy primer. I left it to cook for a couple of hours before turning the heating off and leaving it for today. 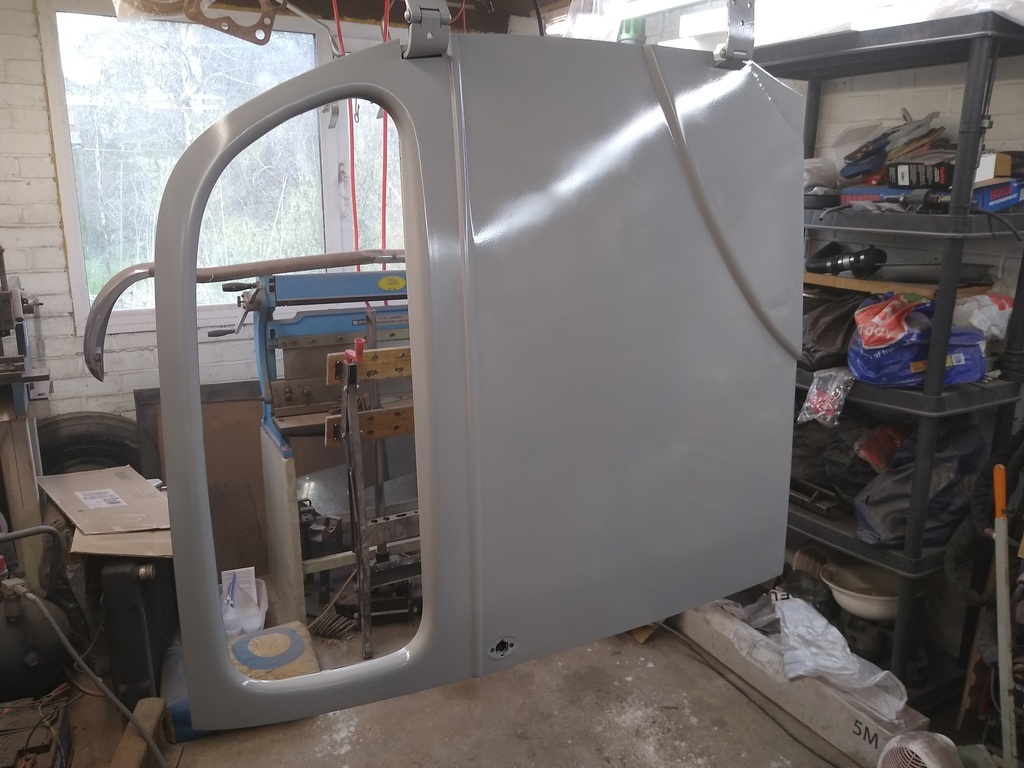 Tomorrow I'll start on the filler work and maybe start on the other door if I can find space. |
| |
Proton Jumbuck-deceased :-(
2005 Kia Sorento the parts hauling heap
V8 Humber Hawk
1948 Standard12 pickup SOLD
1953 Pop build (wifey's BIVA build).
|
|
|
|
|
Mar 19, 2024 15:36:09 GMT
|
I finally got the door painted. It has been a right pain, it was very subtly not flat and took a fair bit of work to get good. The last two coats of epoxy went on two days ago and were then flatted out yesterday. Today was base and lacquer day. 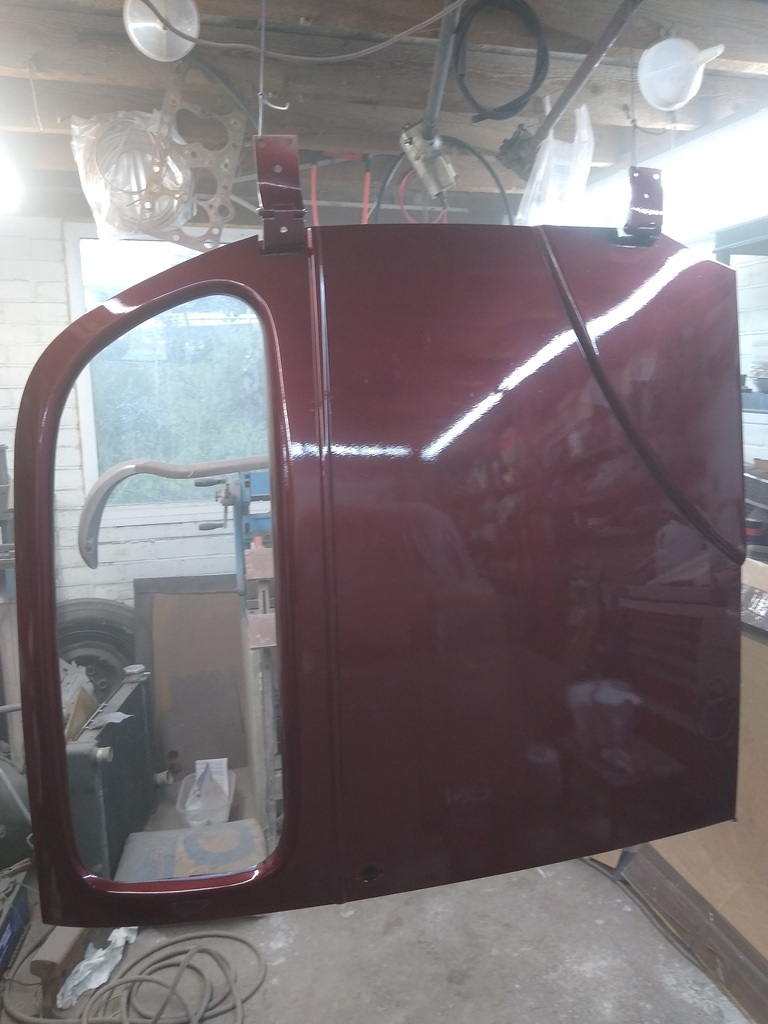 I'll start flatting and polishing in a couple of days. |
| |
Proton Jumbuck-deceased :-(
2005 Kia Sorento the parts hauling heap
V8 Humber Hawk
1948 Standard12 pickup SOLD
1953 Pop build (wifey's BIVA build).
|
|
|
|
|
Mar 19, 2024 21:11:31 GMT
|
|
Nearly there Paul.
|
| |
|
|
|
|
|
Mar 19, 2024 21:50:47 GMT
|
It doesn't feel like it ! I hope the other door goes better. |
| |
Proton Jumbuck-deceased :-(
2005 Kia Sorento the parts hauling heap
V8 Humber Hawk
1948 Standard12 pickup SOLD
1953 Pop build (wifey's BIVA build).
|
|
|
|
|
Mar 28, 2024 16:23:31 GMT
|
It doesn't feel like it ! I hope the other door goes better. This was a foretelling of doom! The reason for the lack of an update since this is that I had to respray it  . When I took it down from it's hanging and laid it flat it had the dreaded "tiger stripes" that metallic type paints can get. So I redid it laying flat. Anyway it's now polished. 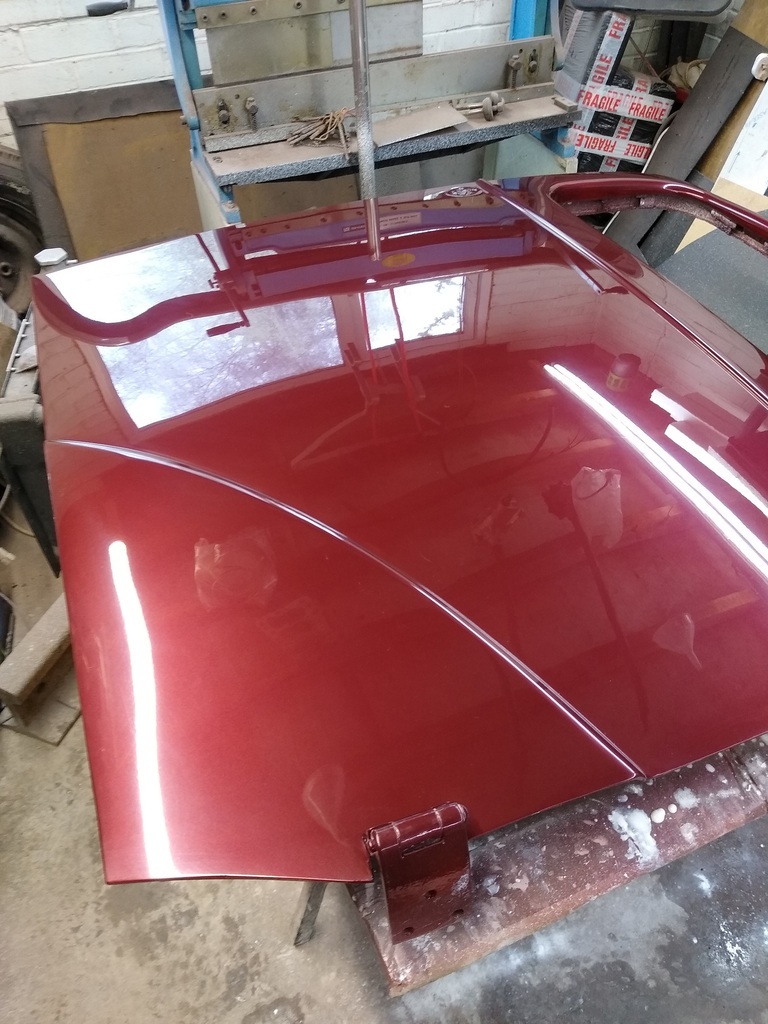 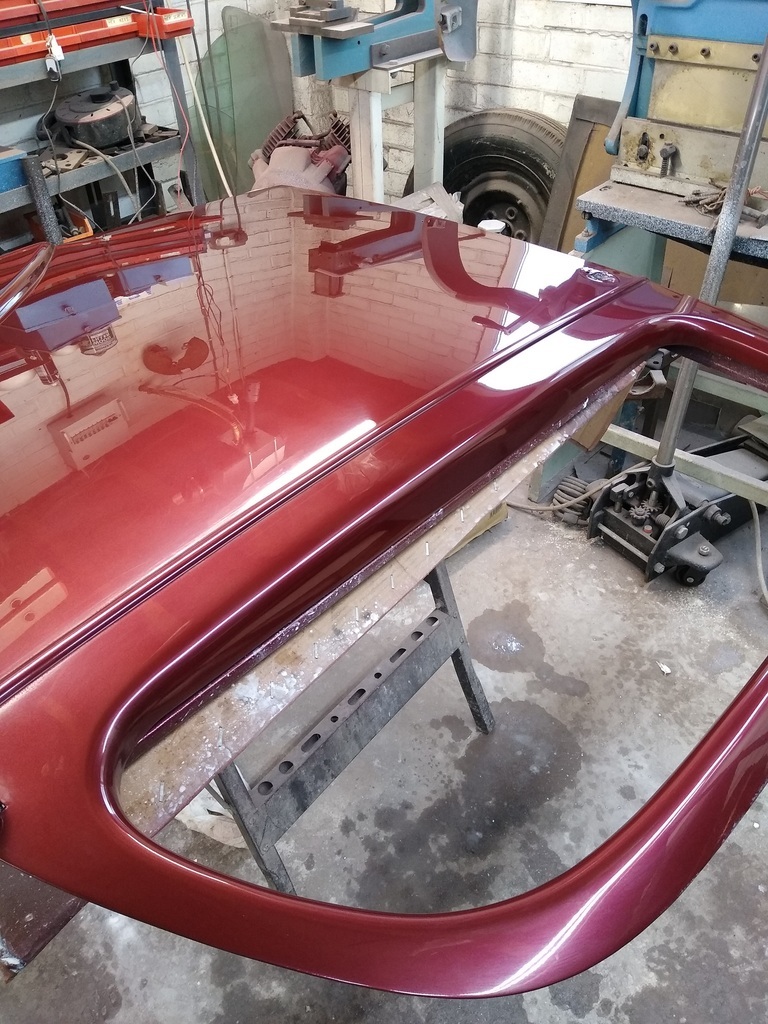 After a bit of thinking I worked out how to fit it on my own (I'm of generous years!) so I did. I already had new mushroom head bolts for the hinges in S.S. so it seemed rude not to get on with it. 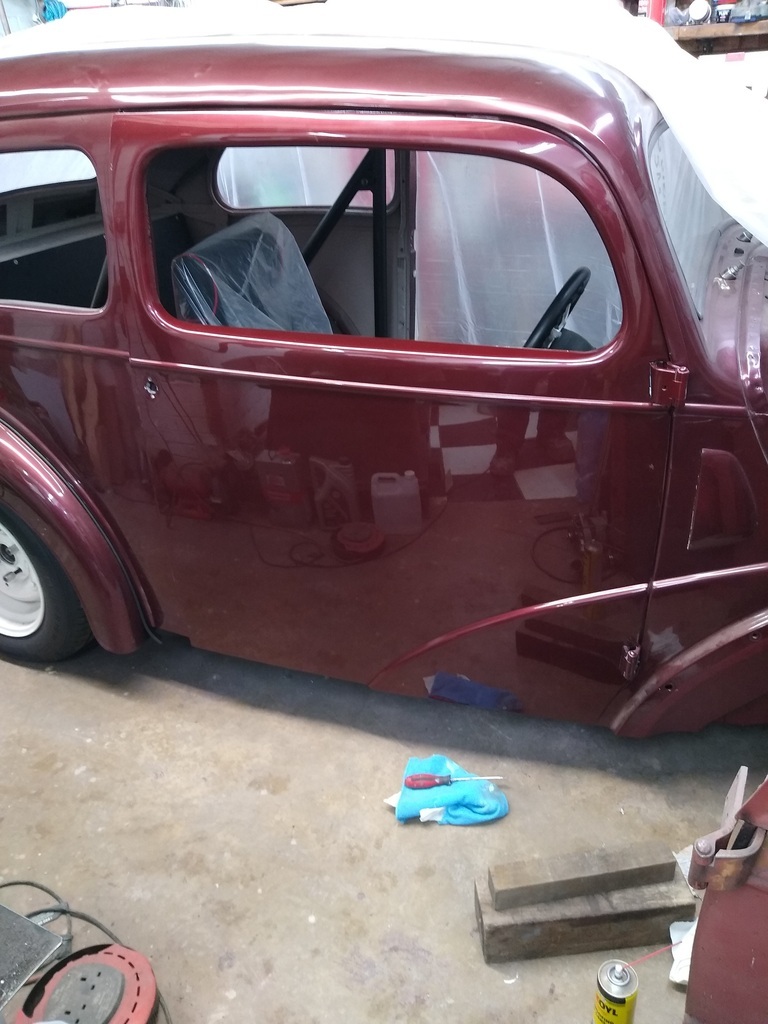 Up next is the passenger side piece of junk waiting to be turned into something half decent. At least there doesn't appear to be any holes this time. 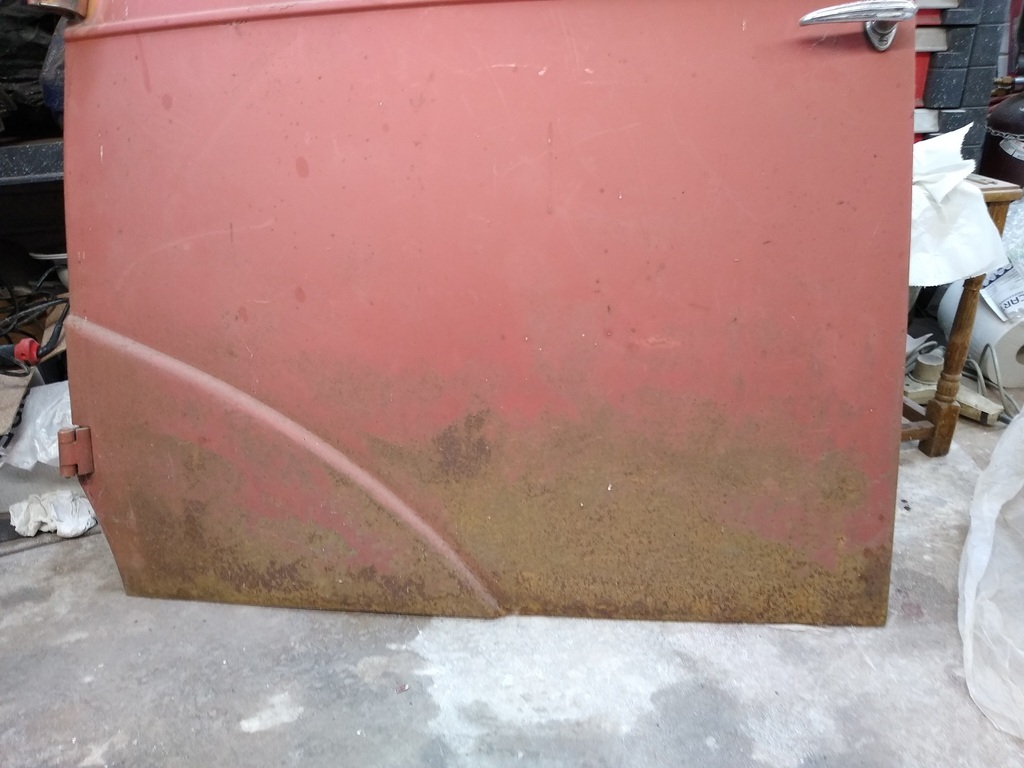 |
| |
Proton Jumbuck-deceased :-(
2005 Kia Sorento the parts hauling heap
V8 Humber Hawk
1948 Standard12 pickup SOLD
1953 Pop build (wifey's BIVA build).
|
|
|
|
|
Mar 29, 2024 16:53:20 GMT
|
Me and my big mouth. I hadn't actually looked at the passenger door in detail, just "it doesn't look bad". Have a look at the close ups before and after I used the finger sander of truth. 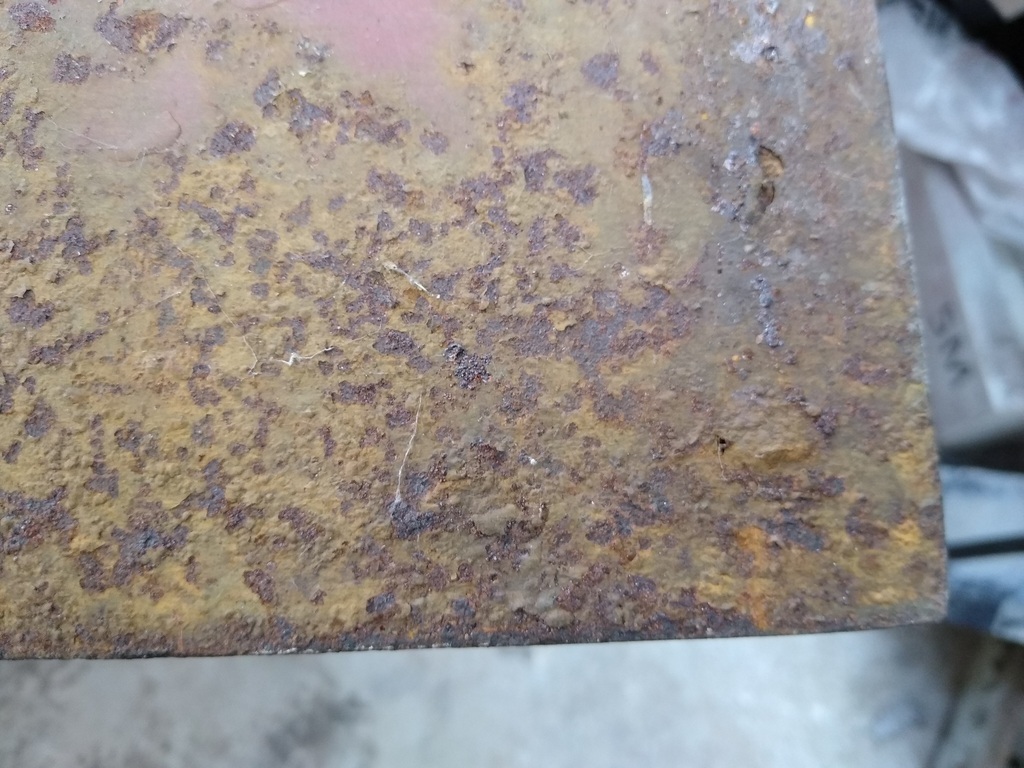 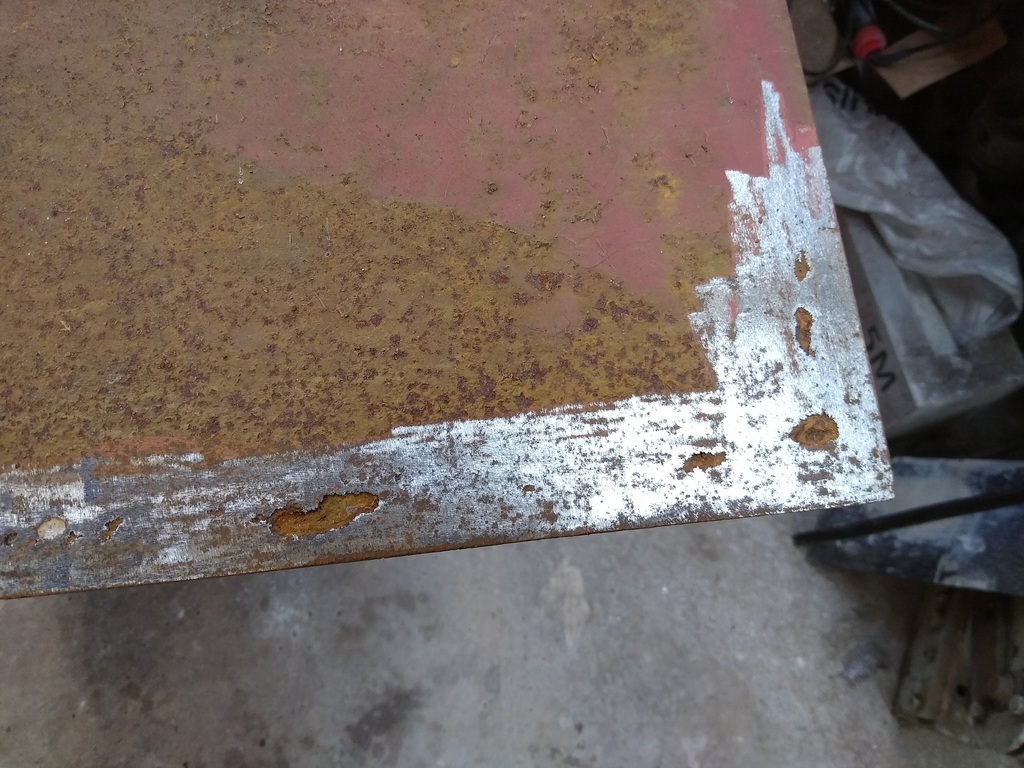 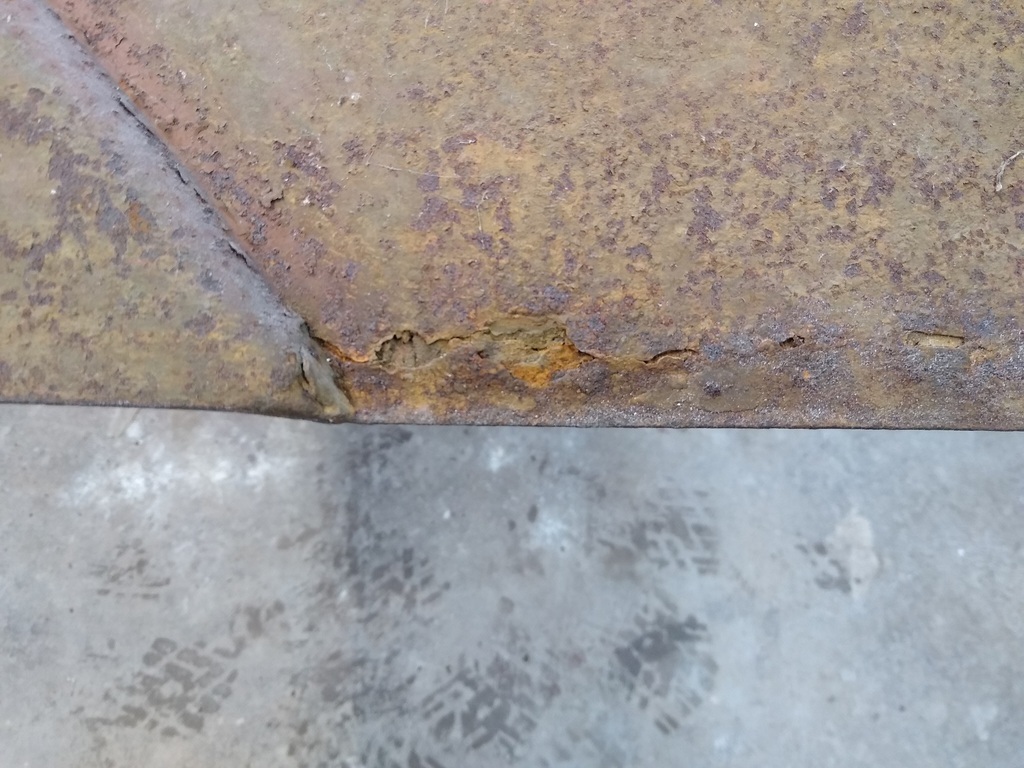 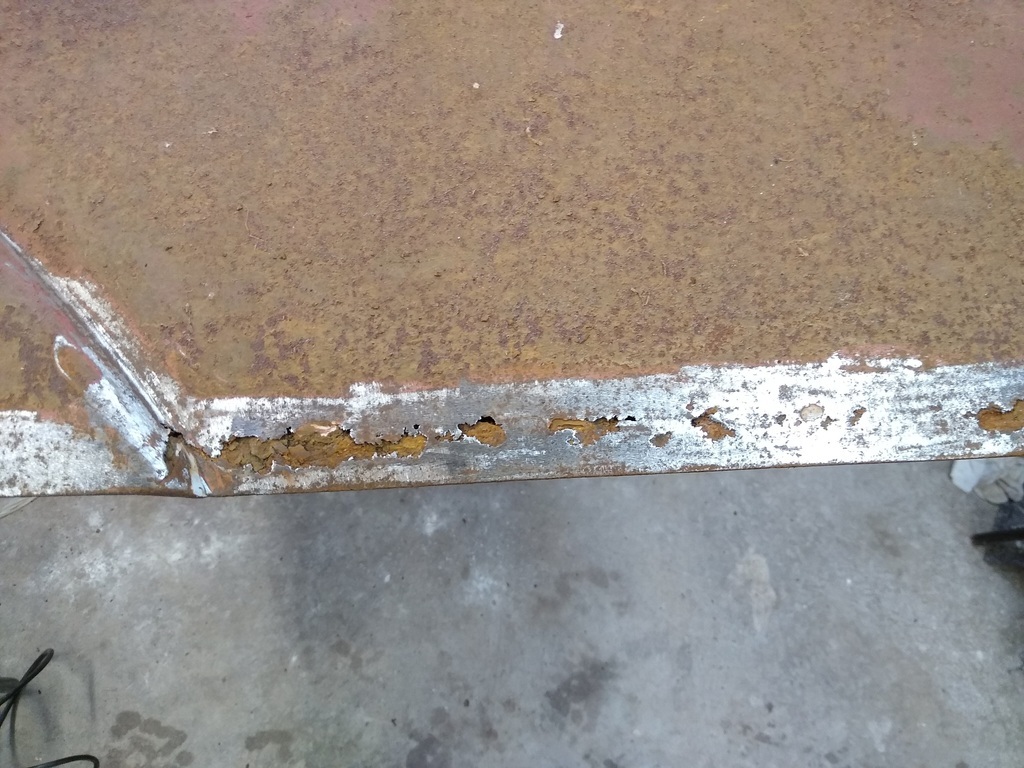 I have some work to do  |
| |
Proton Jumbuck-deceased :-(
2005 Kia Sorento the parts hauling heap
V8 Humber Hawk
1948 Standard12 pickup SOLD
1953 Pop build (wifey's BIVA build).
|
|
|
|
|
Mar 29, 2024 18:25:57 GMT
|
|
What a shame! We all know that you will fix that but I feel for you finding that.
|
| |
|
|
|
|
|
Apr 11, 2024 16:16:57 GMT
|
After a bit of a diversion, back to the door. I cut back the paint to see what I was dealing with (I knew really but it focus's the mind). 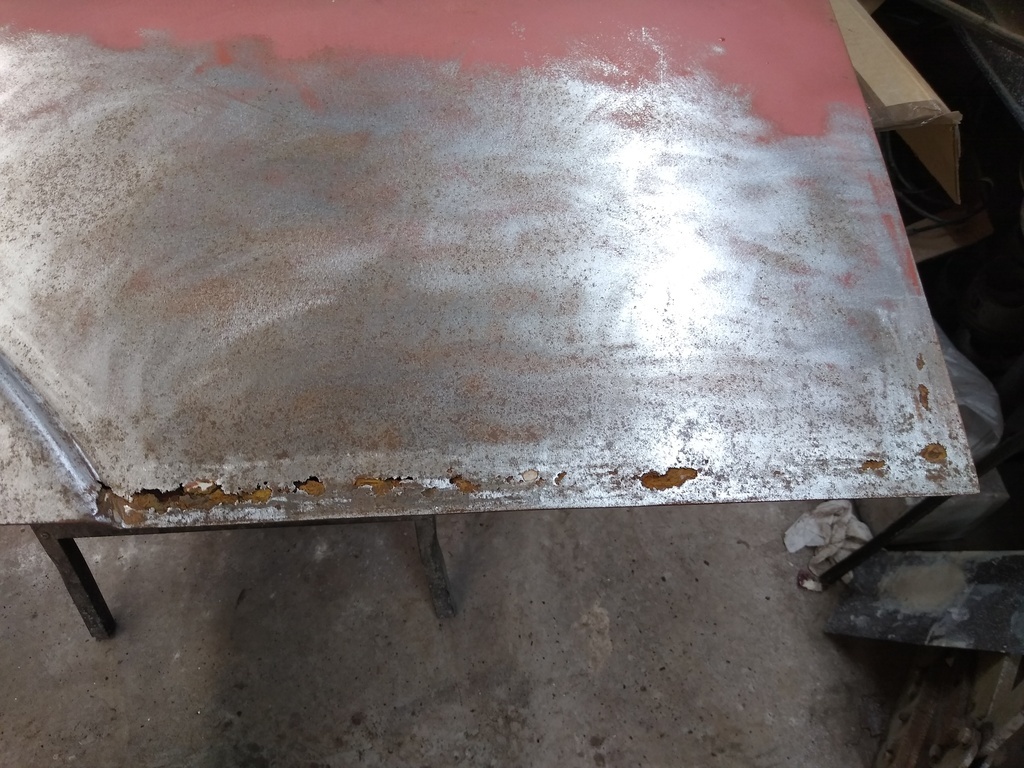 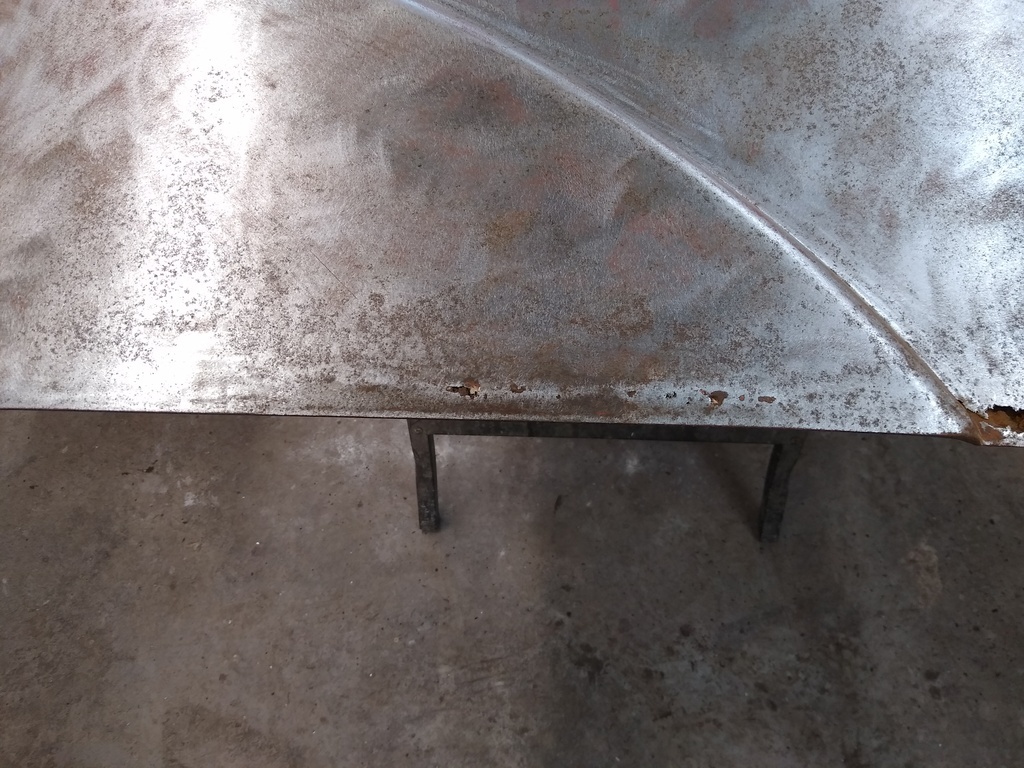 I decided that it would be best tackled in two halves. I wanted to keep the doors stiffness as I know that just cutting it all ut leaves them a bit "wibbly wobbly" (technical term) with no reference points regarding twist. Apologies for the following photo, it was taken with the door the wrong way up and after I had done some of the following work. First job was to cut the skin off on one half to expose the frame, or what was left of it. 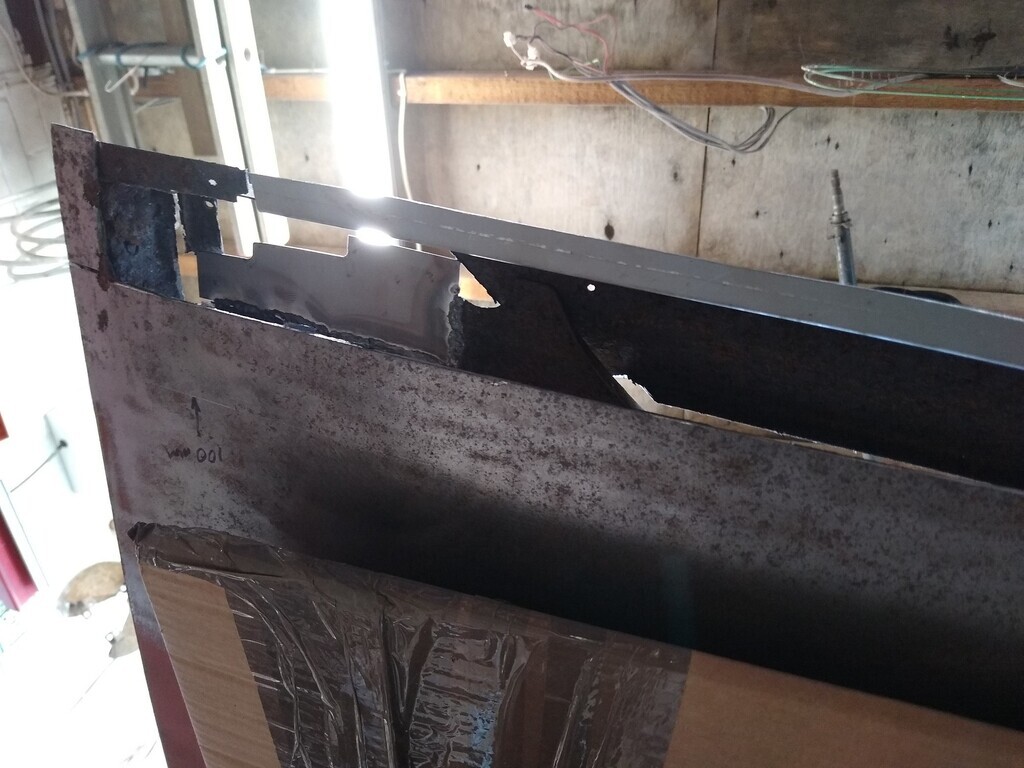 I then made a replacement section fot the outer lip of the frame, leaving the corner intact for now. This piece has a gentle curve to it. I used heat shrinking to get this. 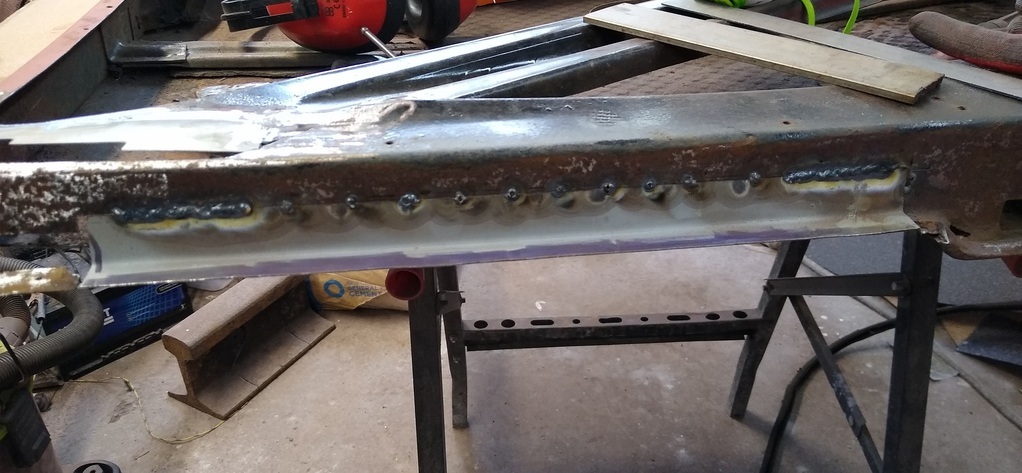 This gave me a solid section so that I could tackle the corner. I cut the layers away down to the diagonal brace. The end of this was well perforated so using the traditional Cardboard Aided Design a template was made and a repair section cut and welded in. The odd shape is as original. 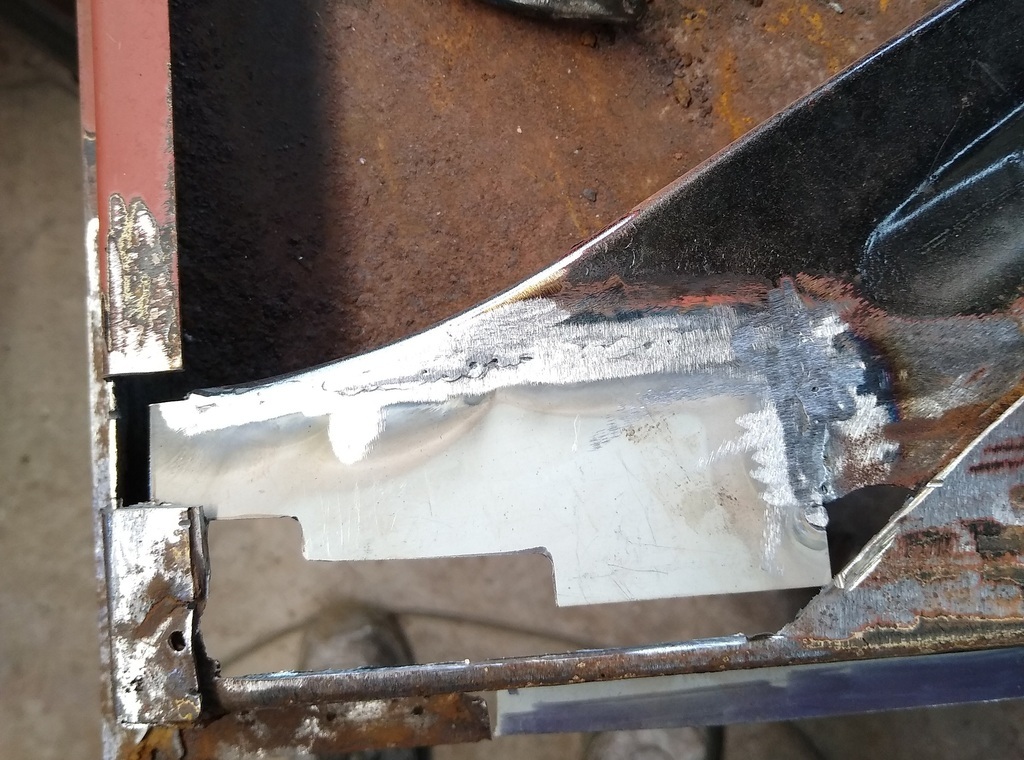 The next layer is the door bottom. The same technique was used again. The corner joint was still partly in place at this point, keeping the door in line. The holes are for the "spot welds". 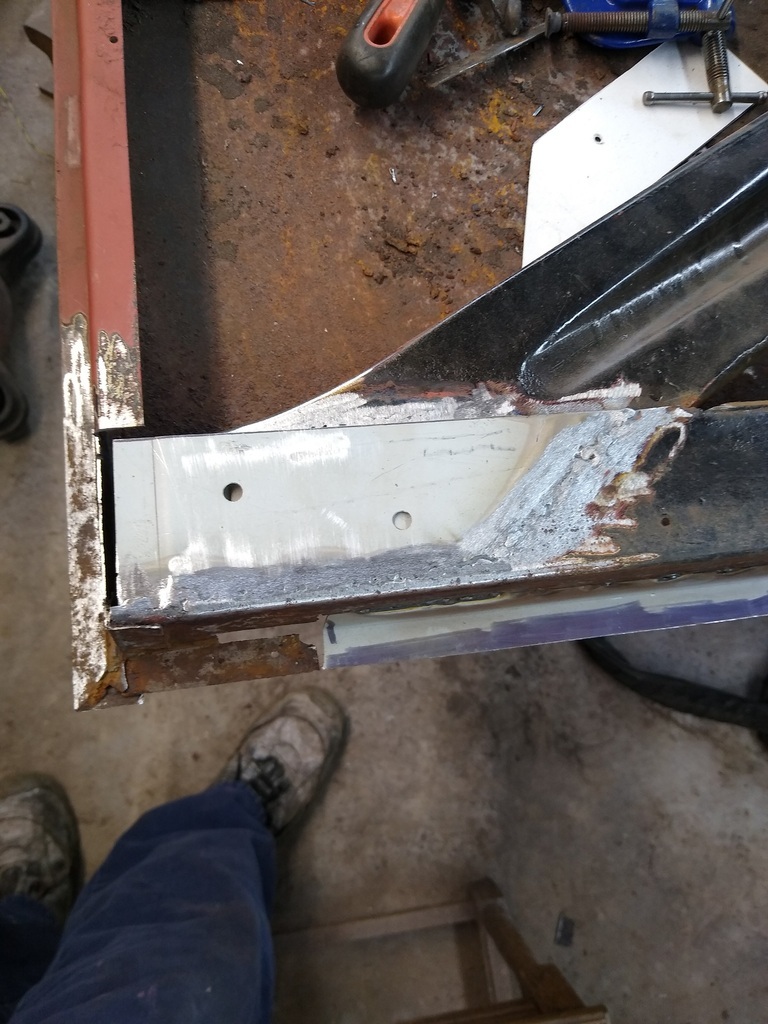 Thats it for now. It will be Saturday before I get on it again. I have to unpick the corner and reconstruct that. |
| |
Last Edit: Apr 11, 2024 16:19:05 GMT by crockpot
Proton Jumbuck-deceased :-(
2005 Kia Sorento the parts hauling heap
V8 Humber Hawk
1948 Standard12 pickup SOLD
1953 Pop build (wifey's BIVA build).
|
|
|
|
|
Apr 15, 2024 15:32:23 GMT
|
The door saga continues. The next bit was the bottom of the door side where it meets the bottom and diagonal. Just a small piece to let in. 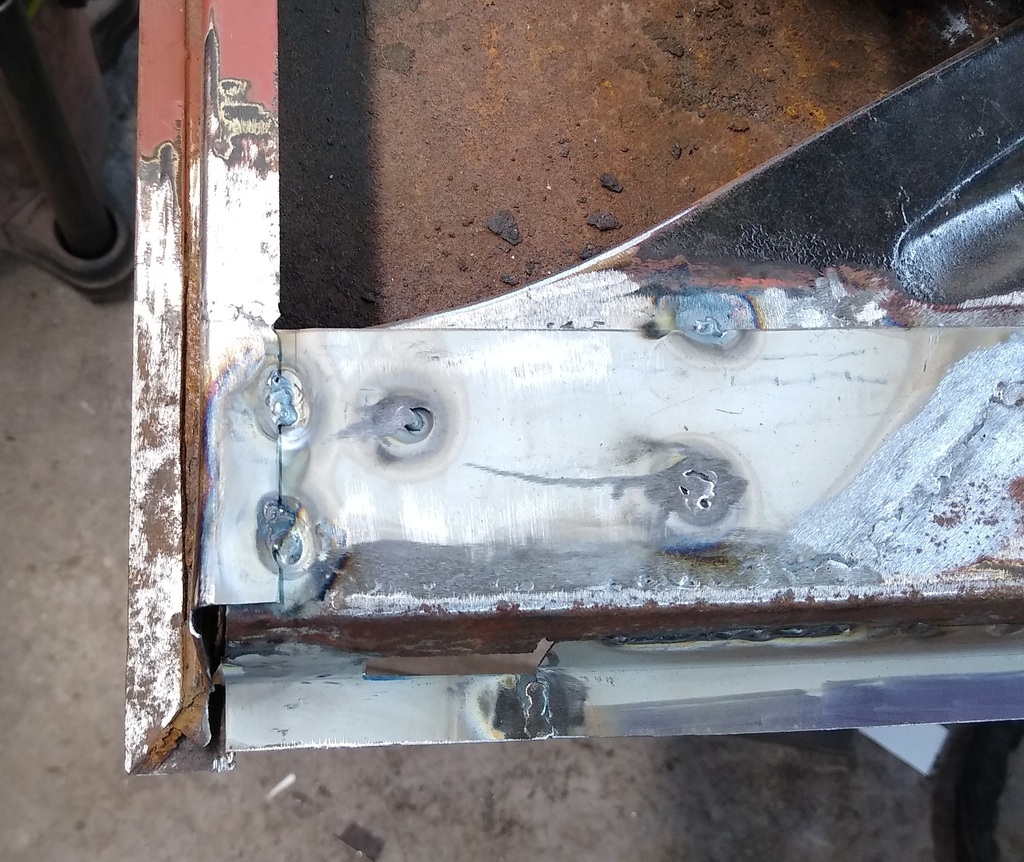 Then weld the whole lot up including the bottom flange section. 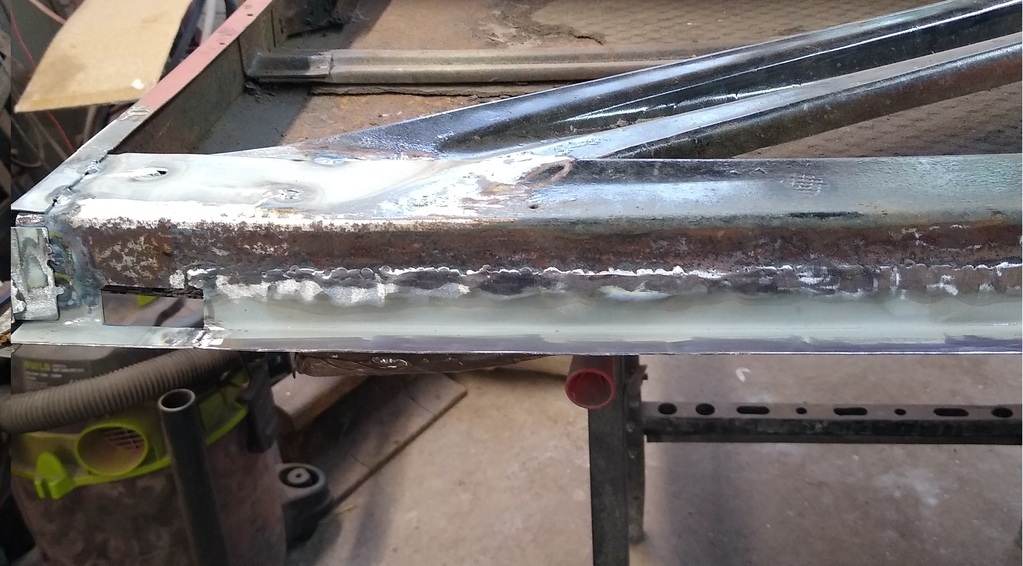 That left the door side flange at the bottom which had bulged the door skin considerably at the bottom 4". The side material was still full thickness so not too bad to so. It looked like this. 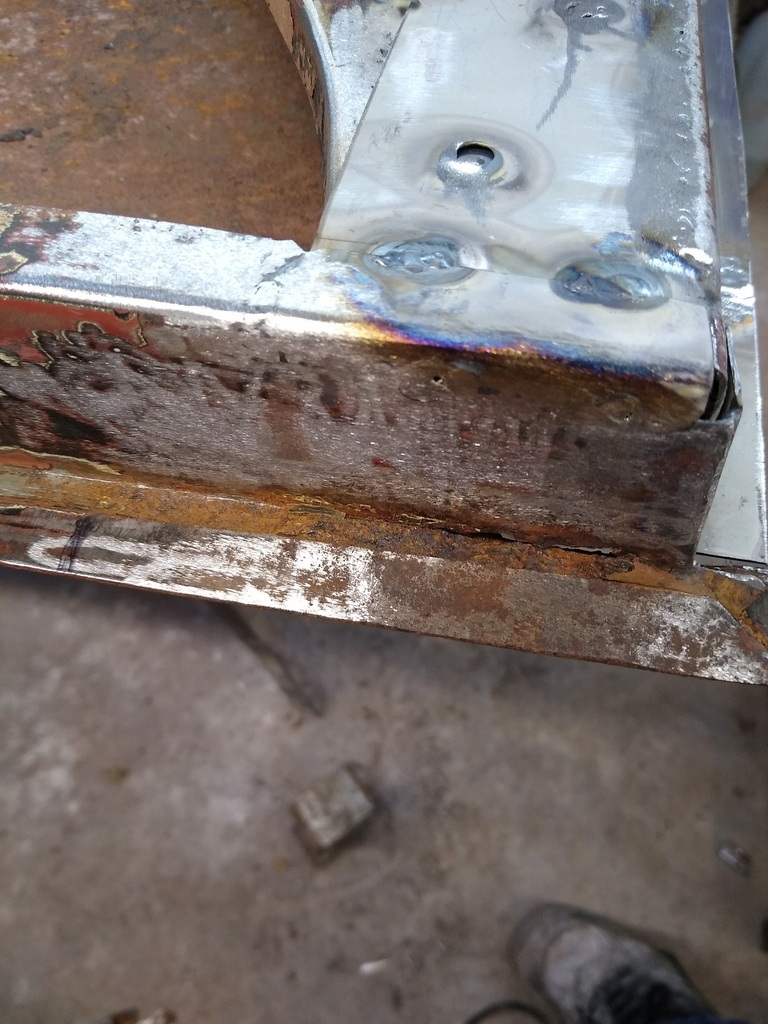 I had to cut a bit higher because of the bulging door skin. 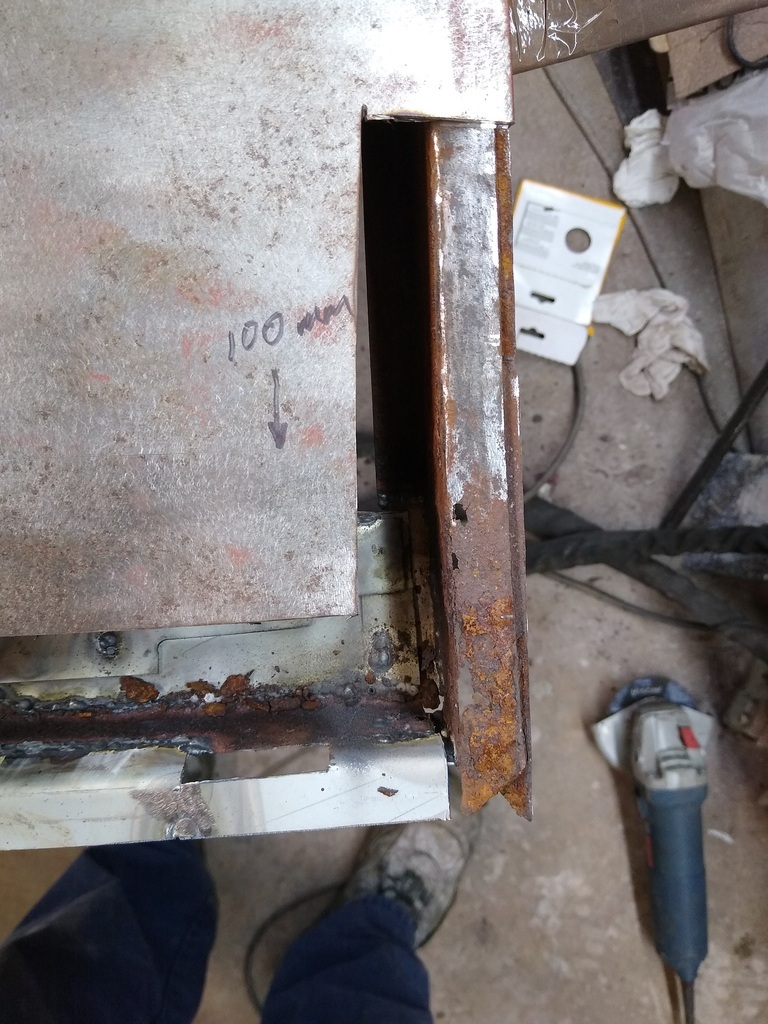 Again a simple 90 degree bent piece was let in and welded up. 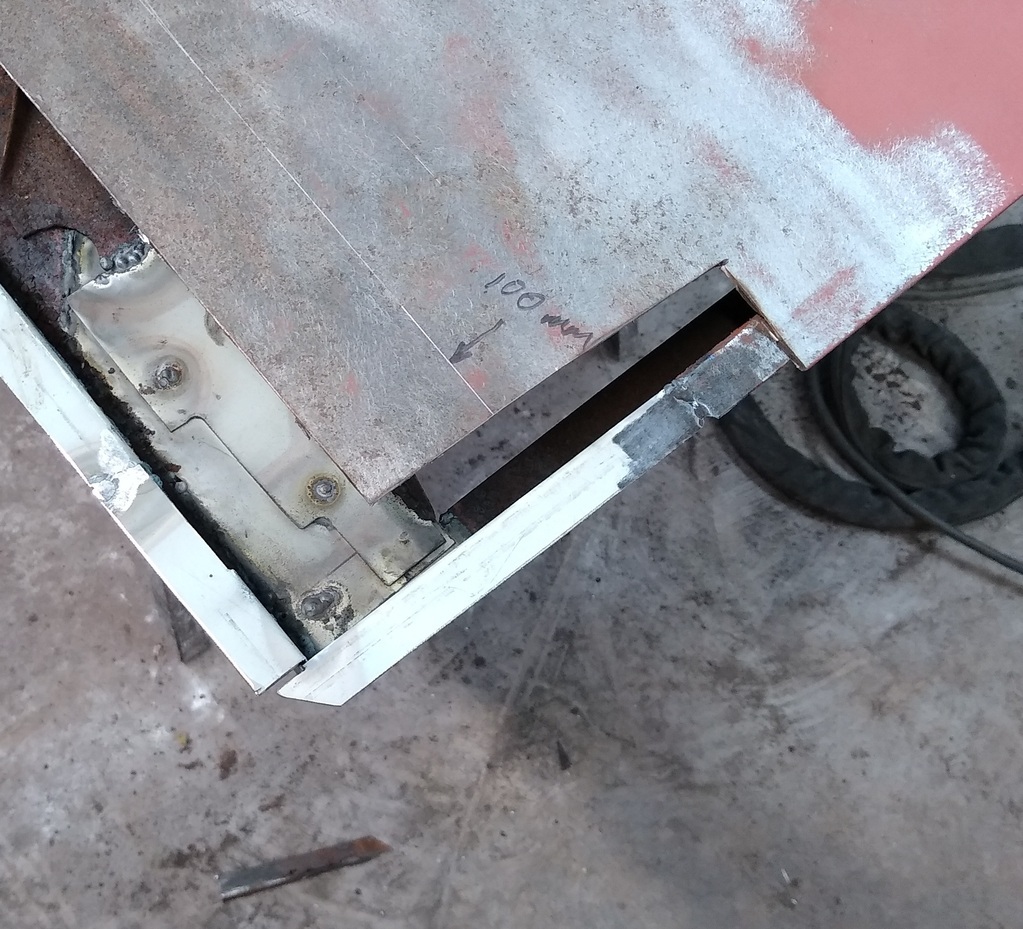 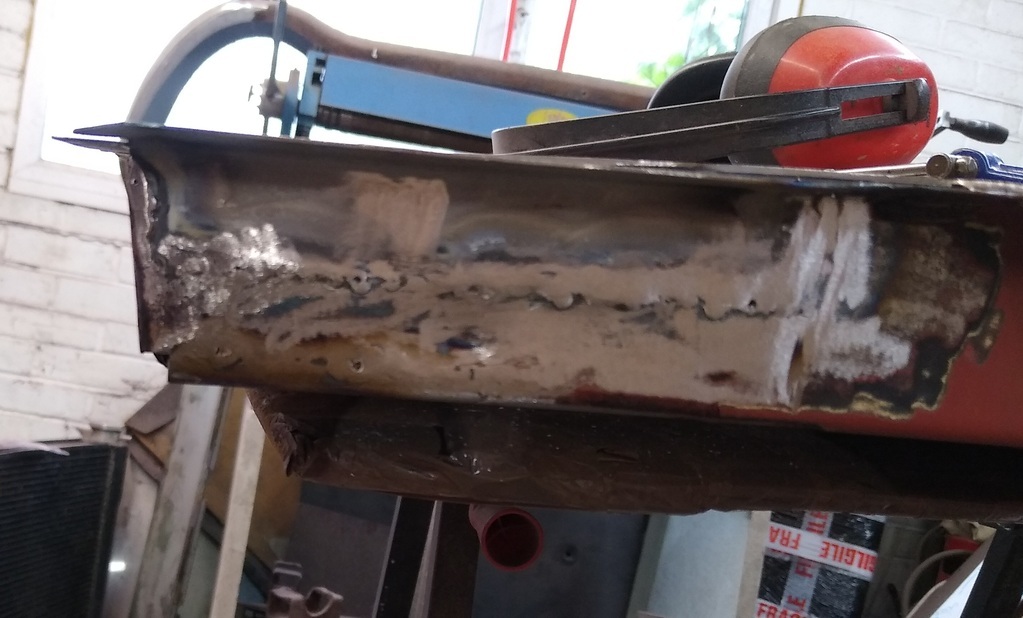 The final bit for today was to fold a piece at 180 degrees to make the outer section of the skin. It's in place for scribing the cut and to mark the bottom edge. 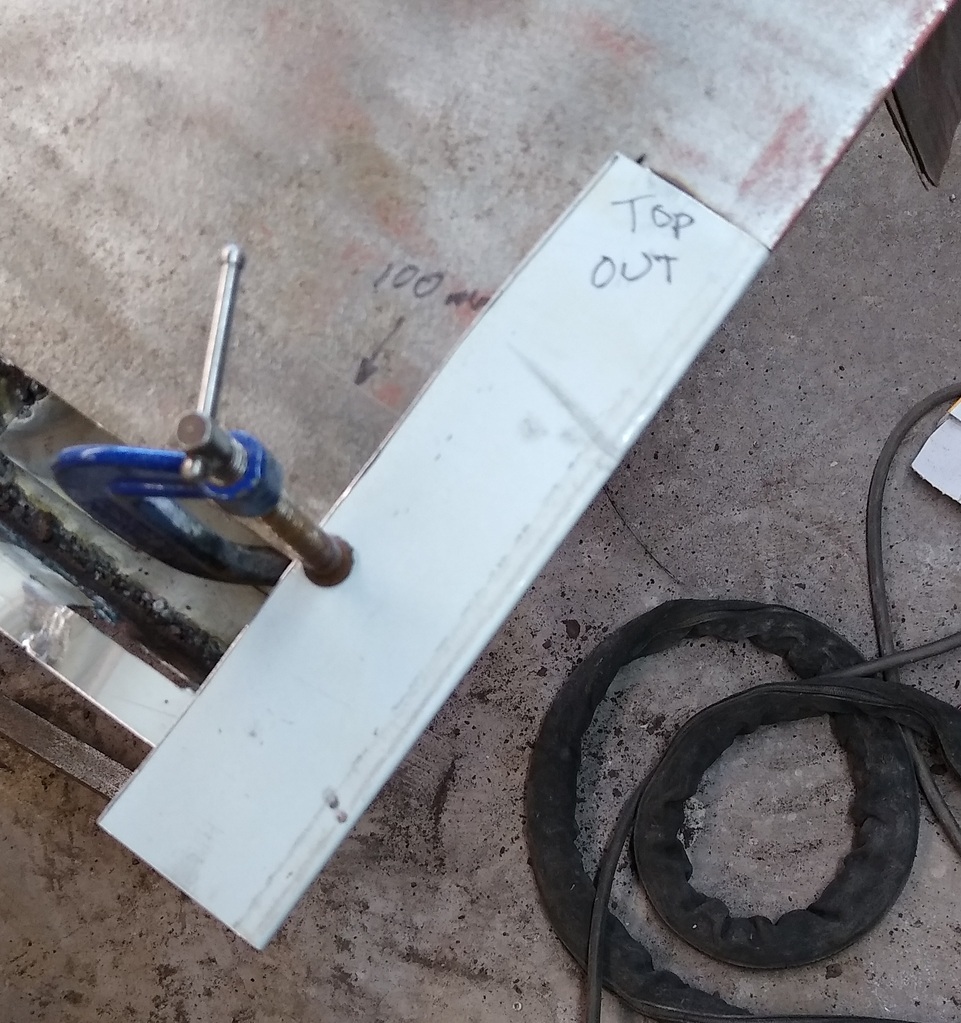 |
| |
Proton Jumbuck-deceased :-(
2005 Kia Sorento the parts hauling heap
V8 Humber Hawk
1948 Standard12 pickup SOLD
1953 Pop build (wifey's BIVA build).
|
|
|
|


 . When I took it down from it's hanging and laid it flat it had the dreaded "tiger stripes" that metallic type paints can get. So I redid it laying flat.


