ian65
Part of things
 
Posts: 276 
|
|
|
|
|
depends how you want to drive it.... 1500's need to be driven in a very narrow rev range..... they are also inherently weak after being bored and stretched to their limit.
I had more 1500 Spitfires than 1300's and I do prefer the 1500 with O/D as a road car for touring / commuting but for a free reving fun engine they will never cut it and the sharp drop off in power once you get out of the power rev band quickly becomes tiring.
|
| |
|
|
|
|
goldnrust
West Midlands
Minimalist
Posts: 1,887
|
|
|
|
Thanks for the engine pros and cons guys.  As this car will be a weekend/fun car, I've no problem sacrificing s bit of mid range torque for some more free revving lively feeling. I've had Mazda rotaries and 2 stroke motorbikes, I'm quite happy to have a little revvy engine and to row the car along with the gearbox. I don't intend to spend any money on specific mods for the 1500 at the moment but upgrades like fitting an electric fan, or better exhaust & carbs should transfer onto a 1300 if I go down that route. Engine swap thoughts really are for well into the future though. First I need steel back in the floors and sills, then after that a general overhaul of suspension and brakes, and then I'll see where I go from there. I had a quiet day work wise, so got on with some of the metal work this afternoon. First up I made up a middle sill piece. 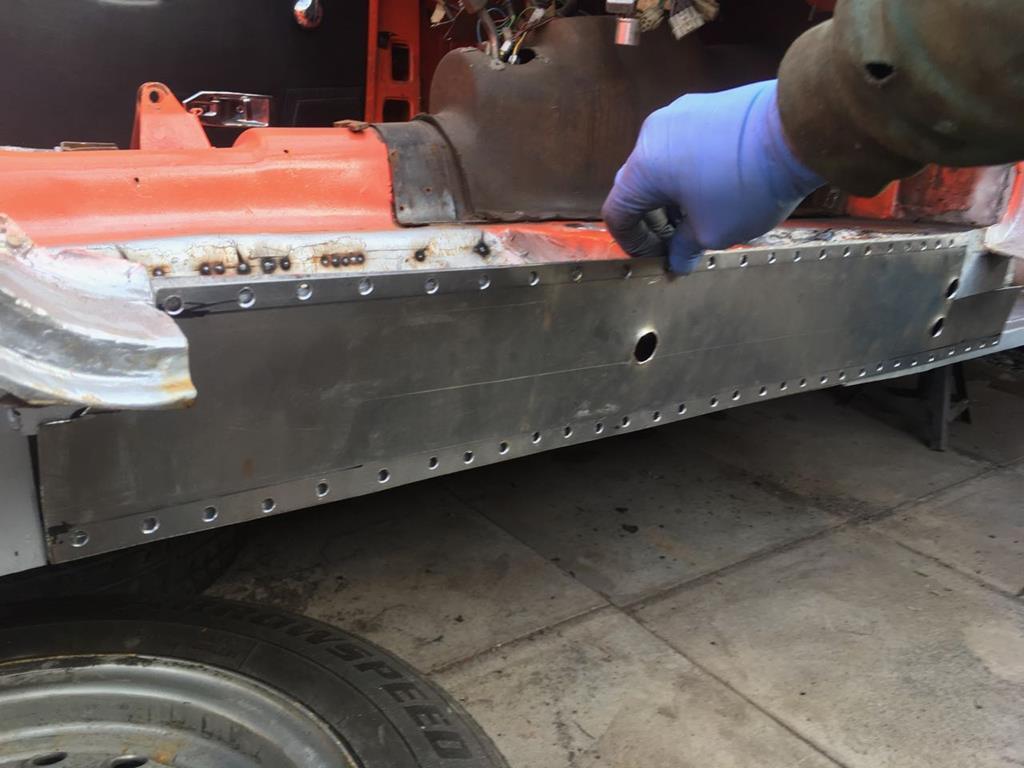 Nice simple piece to make up, after the complexities of the body mount area last time. I got it welded in, along with another section to close off the drivers footwell. 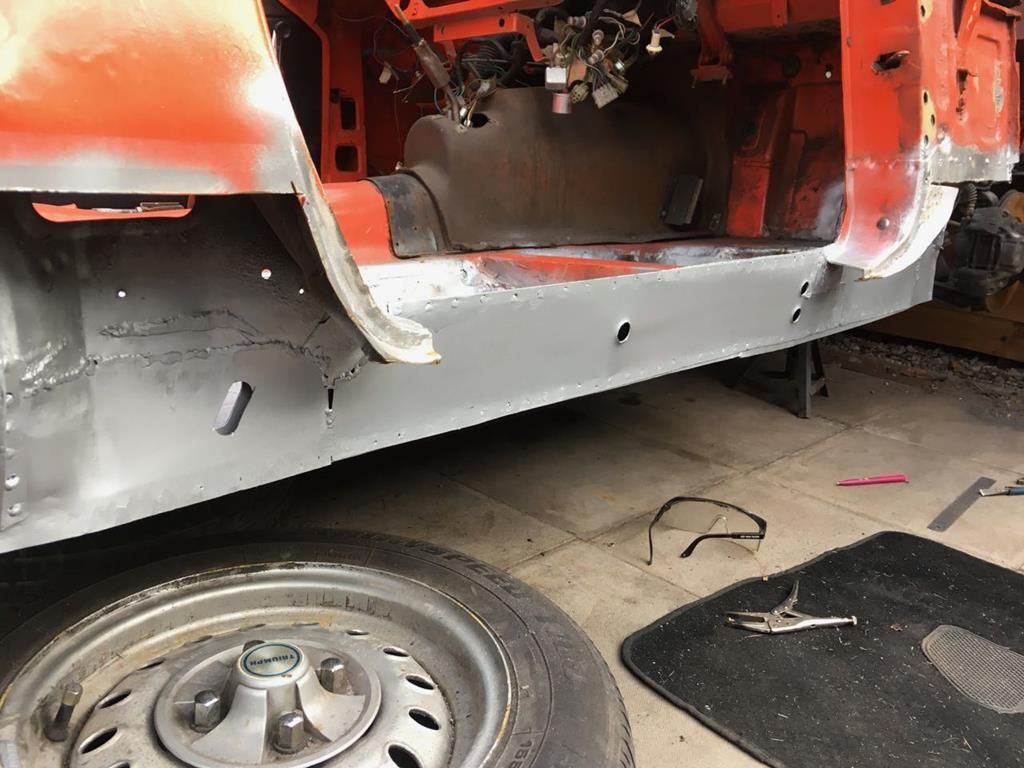 And while I was at it, did what seemed like miles of seam welding around the front floor. 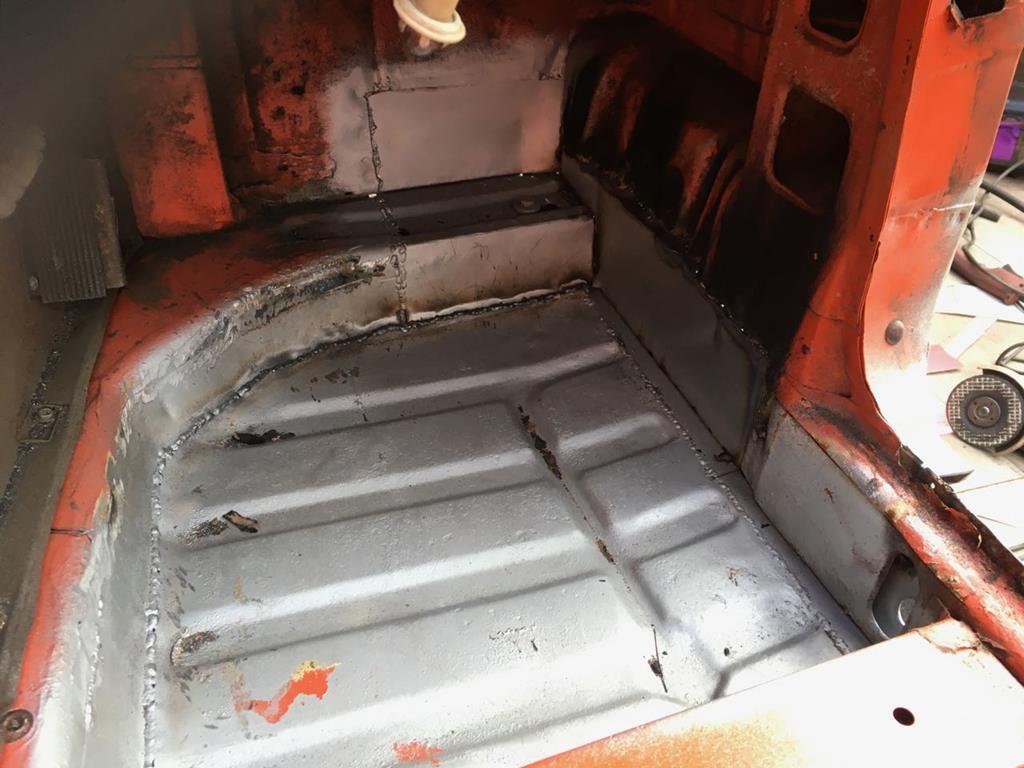 Which means the next thing to do is to fit the outer sill. As recommended I bought a heritage full length sill, along with a rear arch repair section for the rear end of the sill. I got the door bolted back up, once I'd found the bolts, which I'd filled in one of the places so safe you can't remember where it is. With the door on, I was able to start trying to line up where the sill should line up. The shut lines are not good, going back to when I pulled the old sill of, it had been built up 1/2" or more think with filler in places, which hid how badly it fitted. I messed about with the door alignment, but I need to look at the bonnet position too I think, I shall have to consult my handy spitfire book (thanks Miatamark!) on how to do this. I'm thinking I might have to open up another can of worms and dig some of the filler out of the bottom of my door too, as it's clearly thicker than it should be, and that could be throwing off my panel gaps. As a bit of a moral booster, when I'd got the sills lined up as good as I could for now, I held them in place with some mole grips just so I could see how it would look. Gonna be so good when these are lined up and welded back in place. 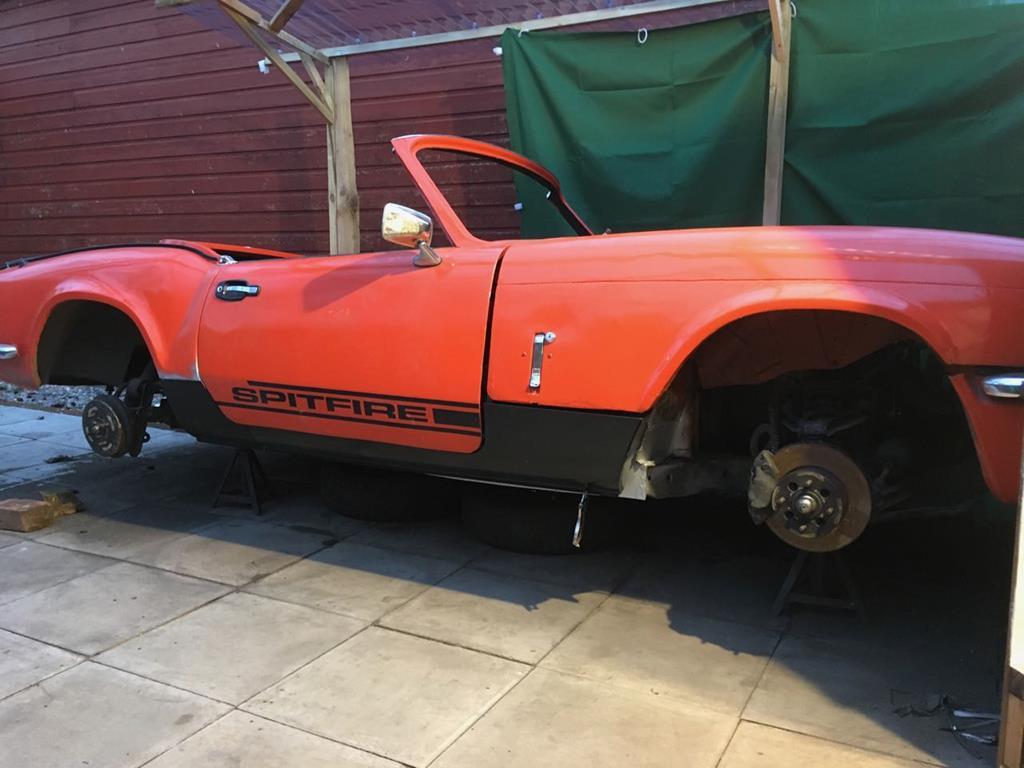 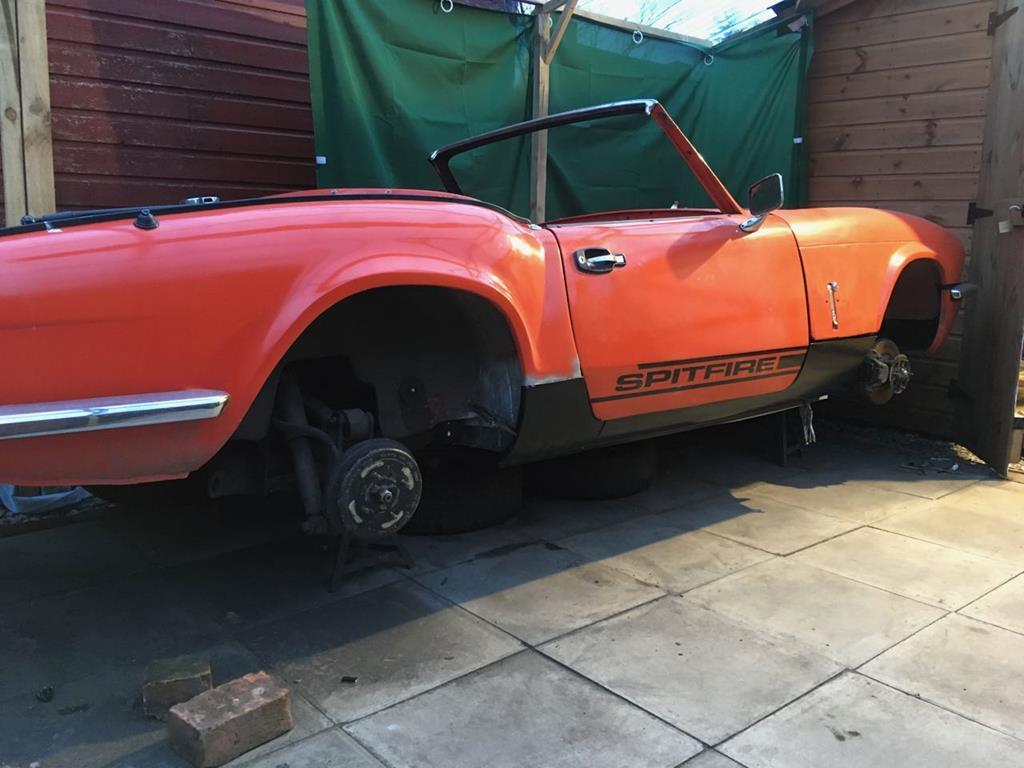 |
| |
Last Edit: Feb 7, 2018 22:09:52 GMT by goldnrust
|
|
ian65
Part of things
 
Posts: 276 
|
|
|
|
|
shaping up well Steve
|
| |
|
|
goldnrust
West Midlands
Minimalist
Posts: 1,887
|
|
Feb 10, 2018 23:57:14 GMT
|
Had another good day on the car today. My carport was earning it's keep, as I was able to get on despite the weather.  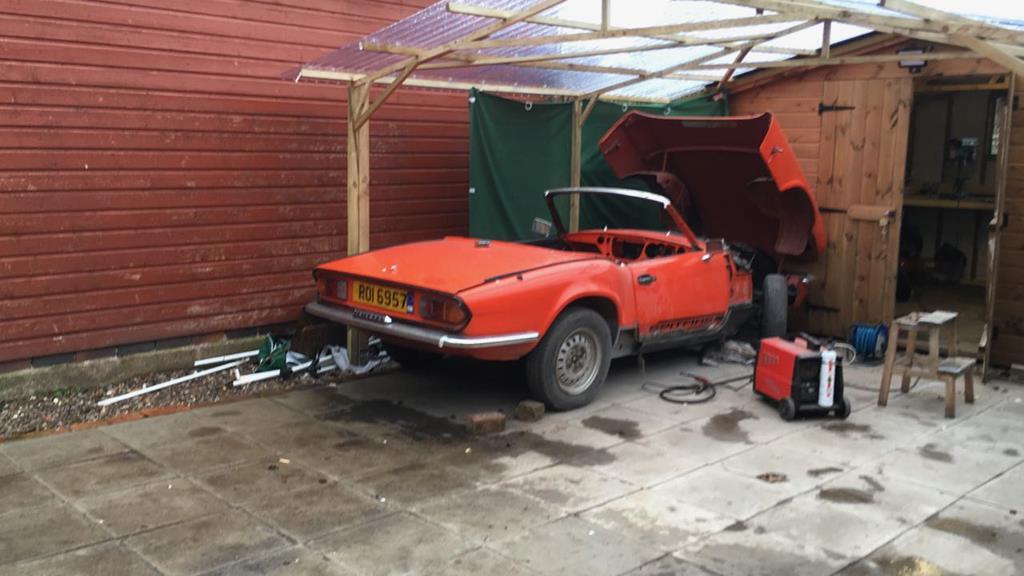 So picking up where I left off with the last update... panel gaps.  As I mentioned, the doors are clearly full of bog, and I hadn't been planning on disturbing it quite yet, but having seen that other lines of the car had been built up and shaped with filler, I felt it was necessary to make sure that I was making the sill line up correctly to the metal. 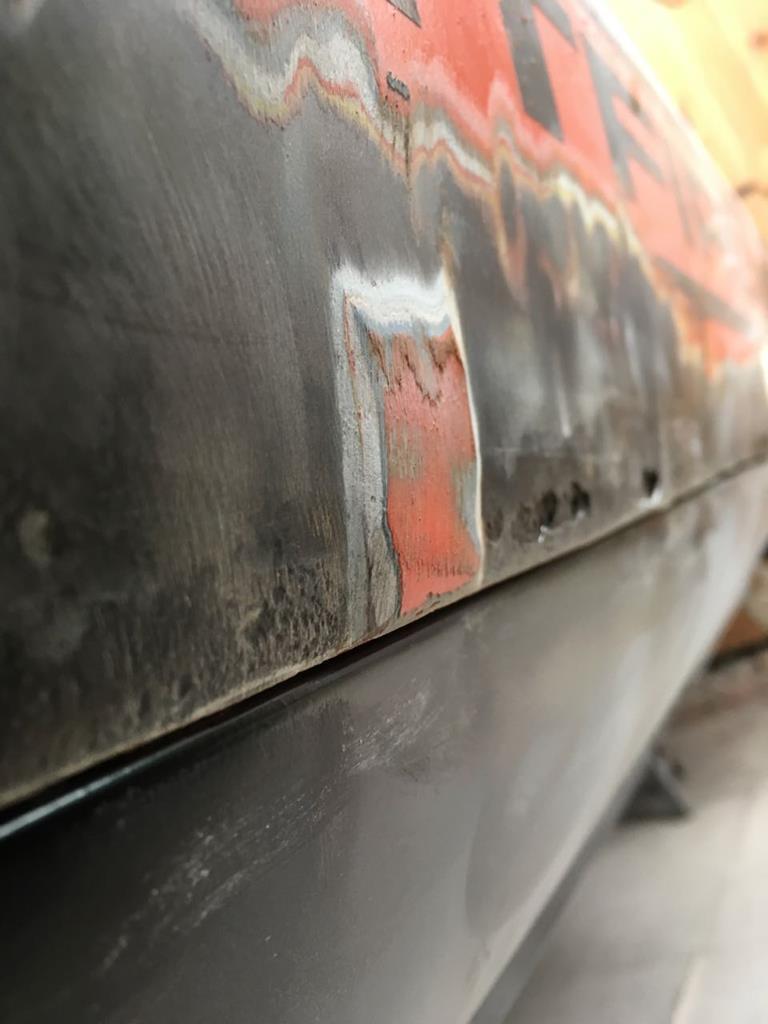 There was about 1/4" thick of filler across the whole bottom edge of the door, which explains why the door stuck out about 1/4" more than my new sill. So on the upside, the sill depth is now matching the door much better, but on the downside it's clear the door is pretty rotten and has a lot of fibreglass and filler in it. I've haven't decided what to do for sure yet, but I'm thinking some temporary repairs might go back on for now with the aim to just replace the door in the fullness of time. So with the depth of the sill matching to door now, the big problem is that the door was close to the back of the frame and there was a big gap at the front edge. Clearly it needed to come forward, but it wouldn't go any further. The door was catching at the bottom of the windscreen frame. Comparing it to the other side, it was clear the frame was fatter on the drivers side. Oh dear... 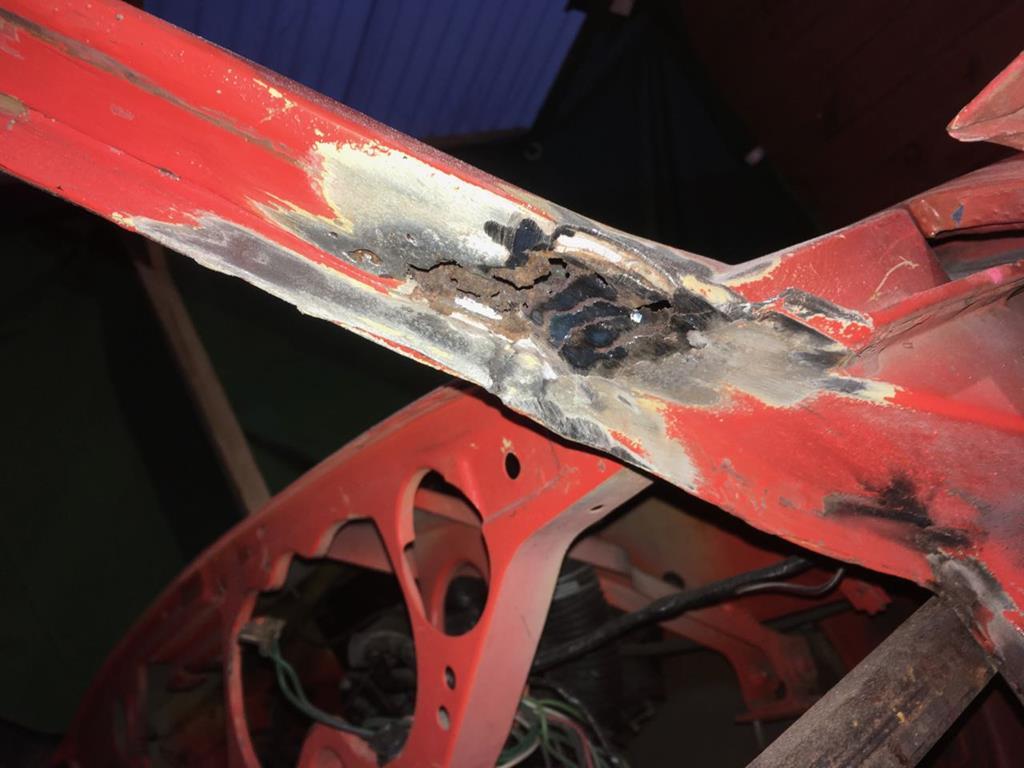 A wire wheel soon showed me that it had rusted and been plated over, which has swollen over time. With that ground back, the door could come forward, which makes the gaps front and back of the sill better, it's not brilliant, but this ain't pebble beach, it'll do. Now the door and sill were working together, it was obvious that the bonnet needed to come backwards and down at the front. Investigating the adjustment at the hinges, opened yet another can of worms. It's very clearly got random bolts that've been bodged in there, and because they don't have the correct shoulders/spacers the bonnet can just slide back and forth in its adjustment grooves every time you open and close it. 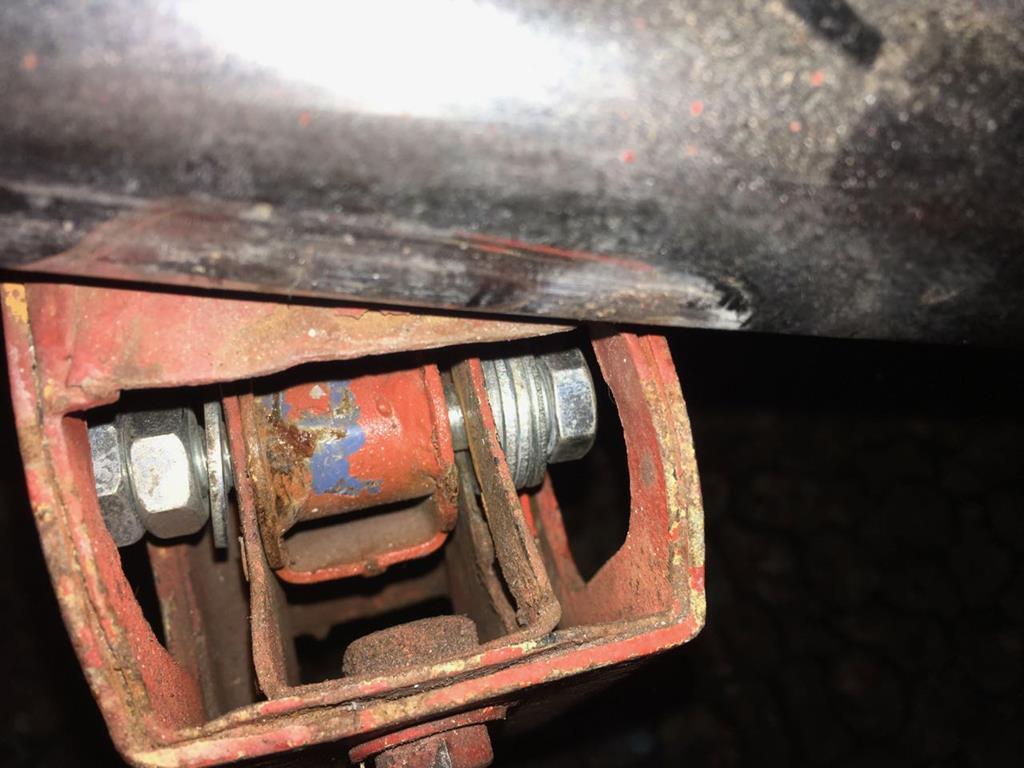 To compound the problem, I was unable to adjust the bonnet hinges low enough to get the panel gaps right. The brackets that weld to the front of the chassis have clearly been subject to rust repairs, and I suspect they've been welded back on too high. Either way, a problem for another day. Right now I just wanna hit that meanness milestone of getting the sill on and saying 'the driver side floor and sills are solid'. So I lined up the sill as best I could and broke out the welder. The main sill and front section went on smooth enough. I had to make up a closing section for the front edge, but that was simple enough. 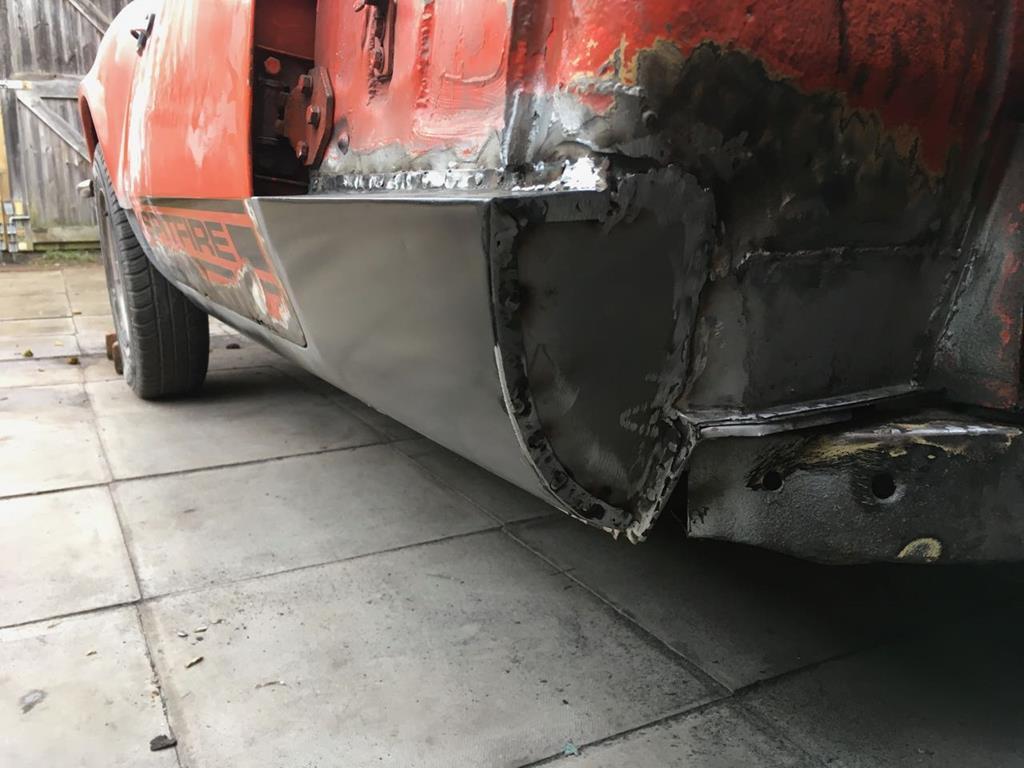 Moving backwards, with the sill aligned nicely to the bottom of the door the rear edge now didn't match up with the old metal work. After the wire wheel removed the paint/filler, it was clear why. Again this section had been plated over. 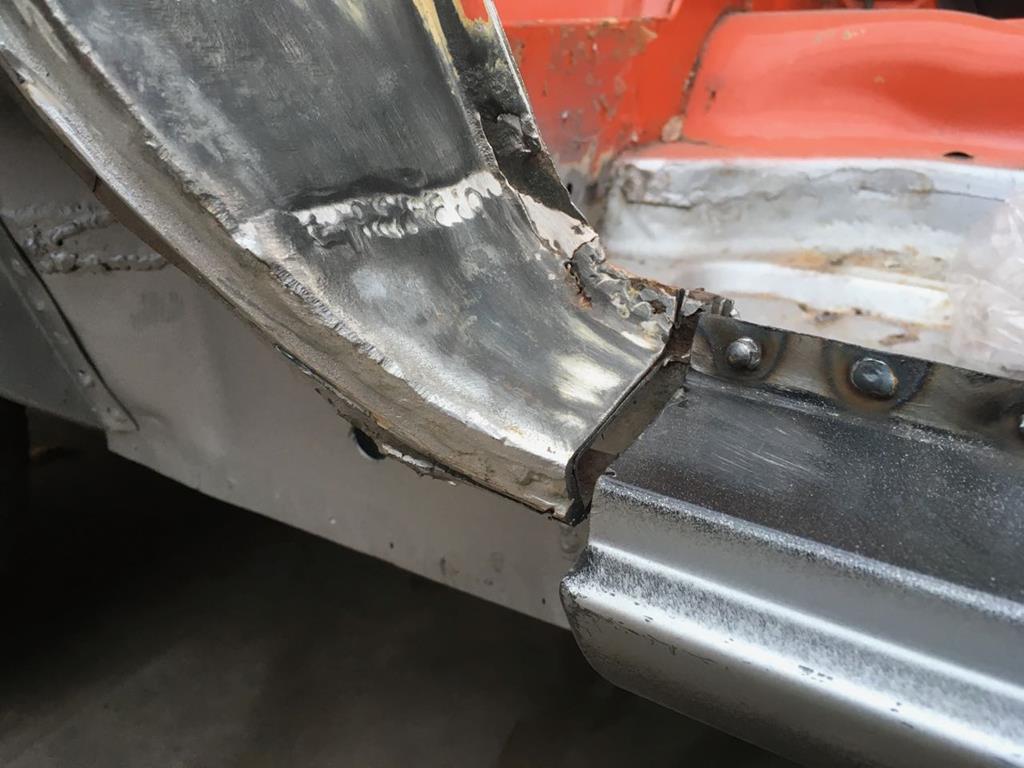 I got the rear arch repair panel in, and lined up with the door, then chopped out the old repair and with the help of the usual card templates, made a new little closing piece to go in there. 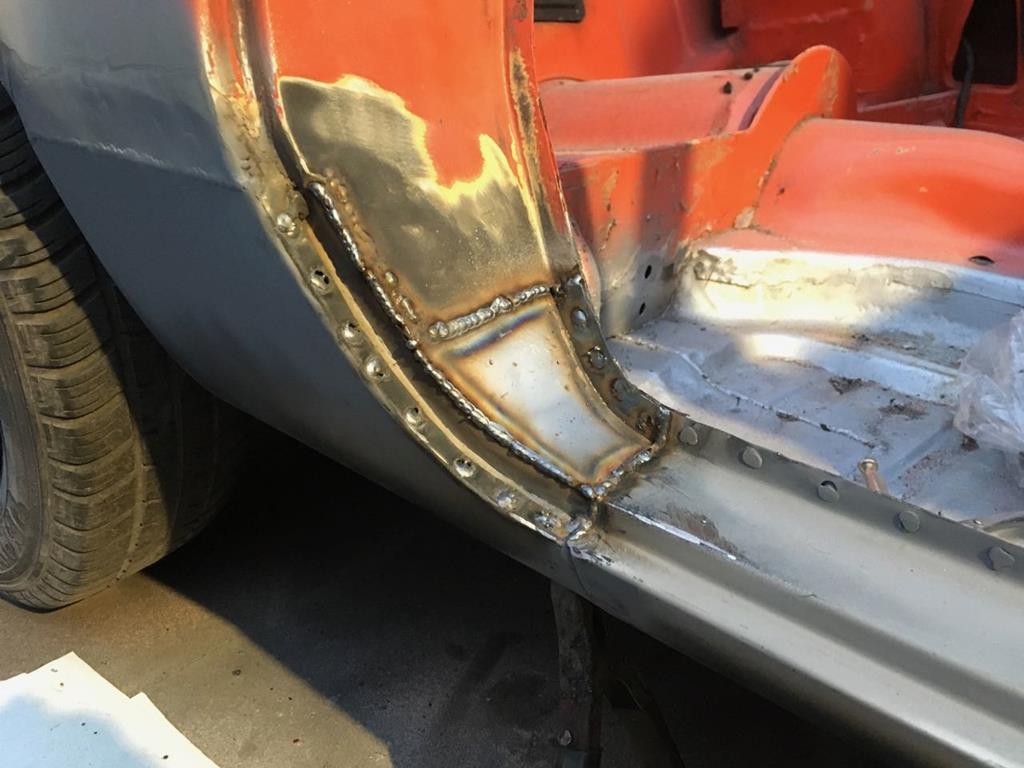 So that's it, sill and floors are done on this side  Yay! I ground down the welds where necessary and chucked some primer on. 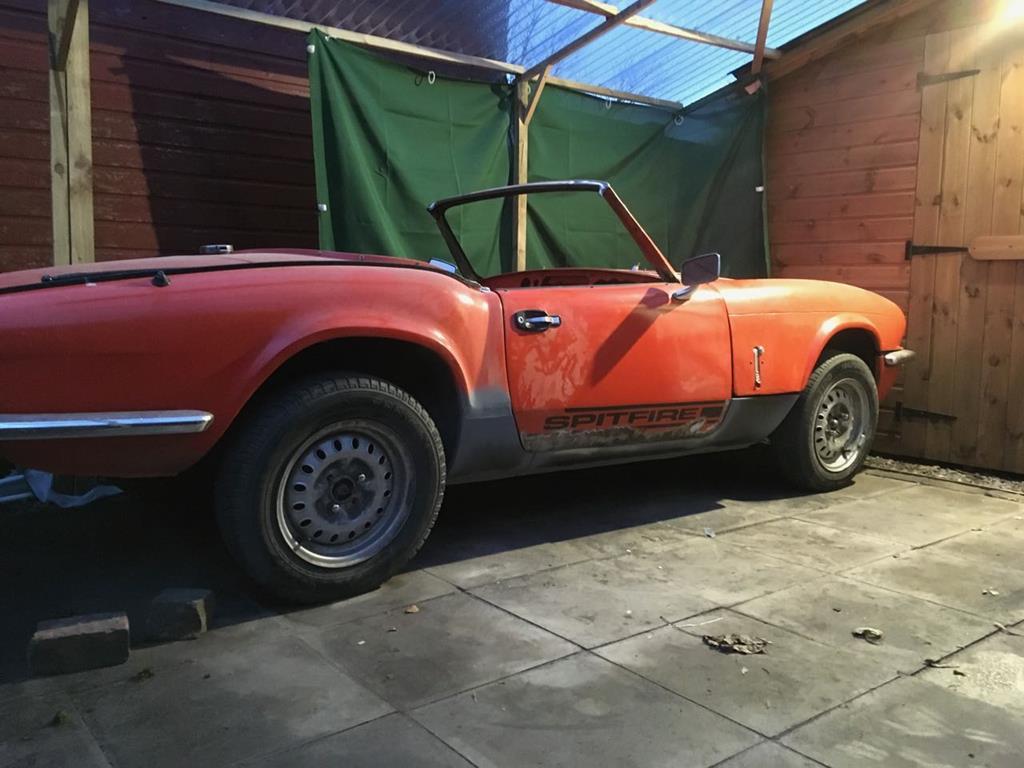 This is where the panel gaps ended up. 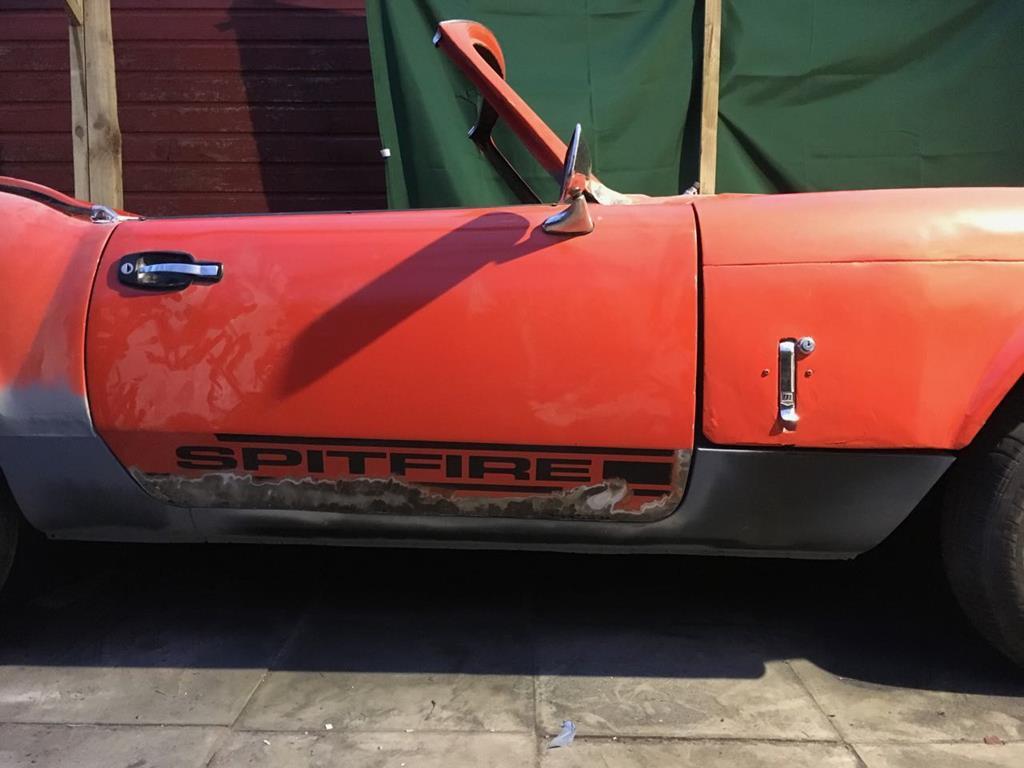 I'm happy enough with how the door, b pillar, a pillar and sill work. The bonnet as you can see needs to come down at the front and then back a bit more. So, ignoring the door/bonnet for now. That leaves me with 2 areas still to address on the drivers side. I need to look at what's happening with the windscreen pillar, and also I need to look at what repairs are necessary to the top of the bulkhead where the brake and clutch master cylinders mount, as it's all looking a bit crusty. Whilst they might be fiddly, thankfully neither of those two are on the scale of the works that the floor & sills required, so it shouldn't be long till I can start on the other side of the car.  |
| |
|
|
|
|
|
Feb 11, 2018 19:06:16 GMT
|
Looking good so far..... The screen pillars...... can be horrible....... and yours look like they are. Fiddly but doable. Do have a really good look right in the corners under the dash because there is a panel up in there that is supposed to be sandwiched into the screen lip joint but is often rusted through just short of it which makes everything very flexible. To compound this there is a further section which is tacked (and only tacked) a bit further forward and the tack sometimes breaks (weighty person using the screen surround to haul themselves out of the car!) and it all gets very floppy and saggy. After pic of ours (seems I didn't take a before). The orange circle shows the tack that lets go. The red oval shows where it rusts in a hard to spot fashion and the panel between the arrows is a non-Triumph extra that we added. Nick 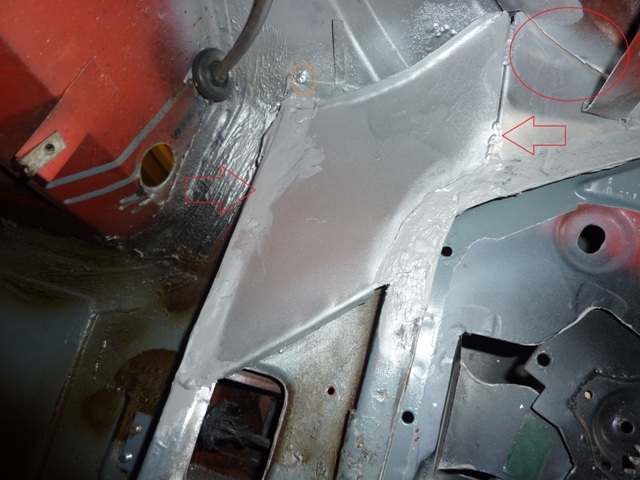 |
| |
1967 Triumph Vitesse convertible (old friend)
1996 Audi A6 2.5 TDI Avant (still durability testing)
1972 GT6 Mk3 (Restored after loong rest & getting the hang of being a car again)
|
|
goldnrust
West Midlands
Minimalist
Posts: 1,887
|
|
Feb 23, 2018 10:11:33 GMT
|
Thank you for that picture Nick. This is how mine looks, the tack appears to be intact, but I will probably do some similar mods to yours to help make things a bit more solid  As an aside, it wasn't till I took the picture for the thread that I could make sense of your picture, it's hard when you're lying upside down in the footwell! 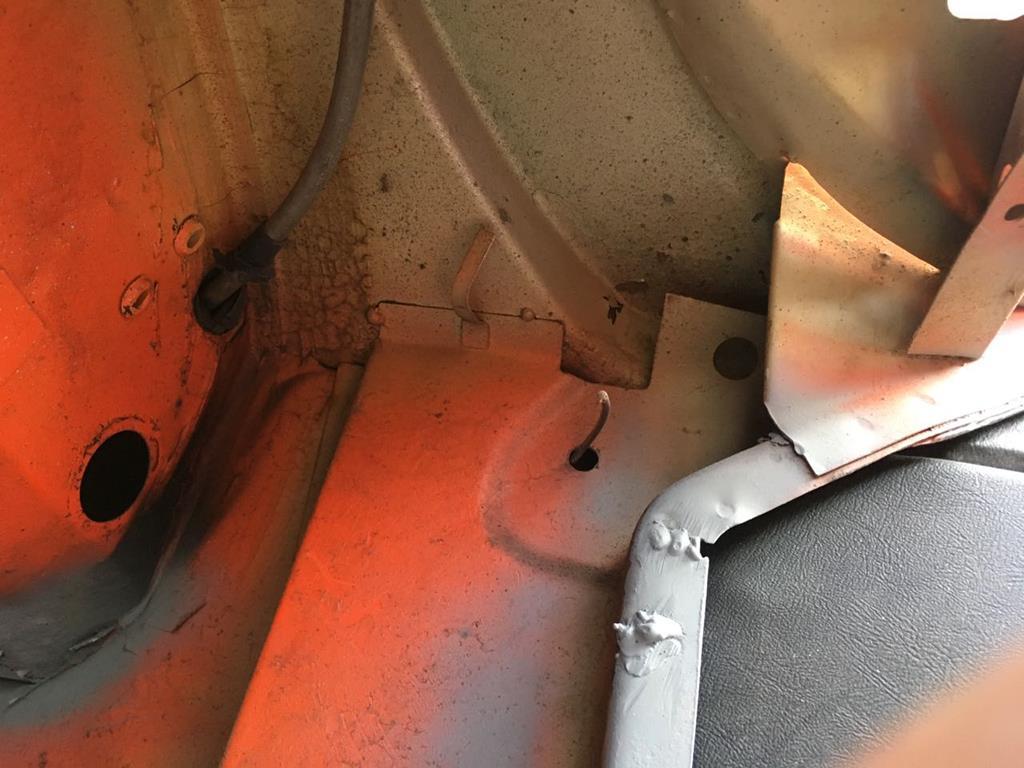 I think it's safe to say that flexibility in my screen was due to a fair percentage of the lower corner being made of filler. This is what I was left with after removing the rotten sections... 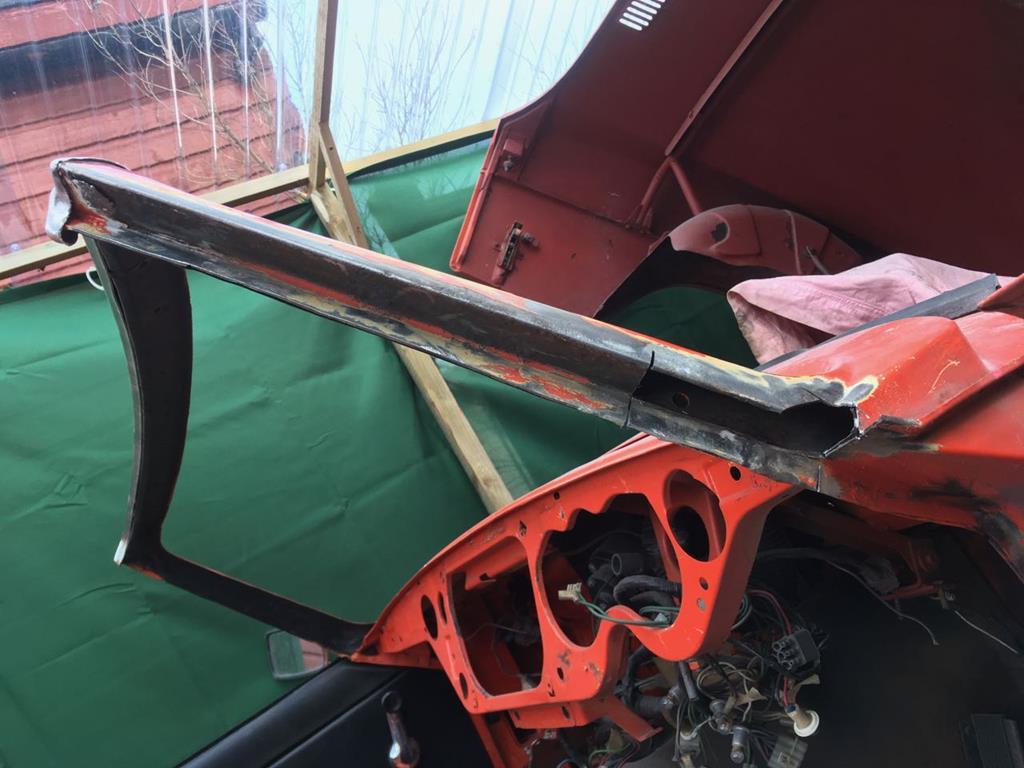 Looks worse than it is, to be fair. The majority of the frame is good and solid still, so I just had to make up the fiddly repair in the lower corner an then a new gutter. 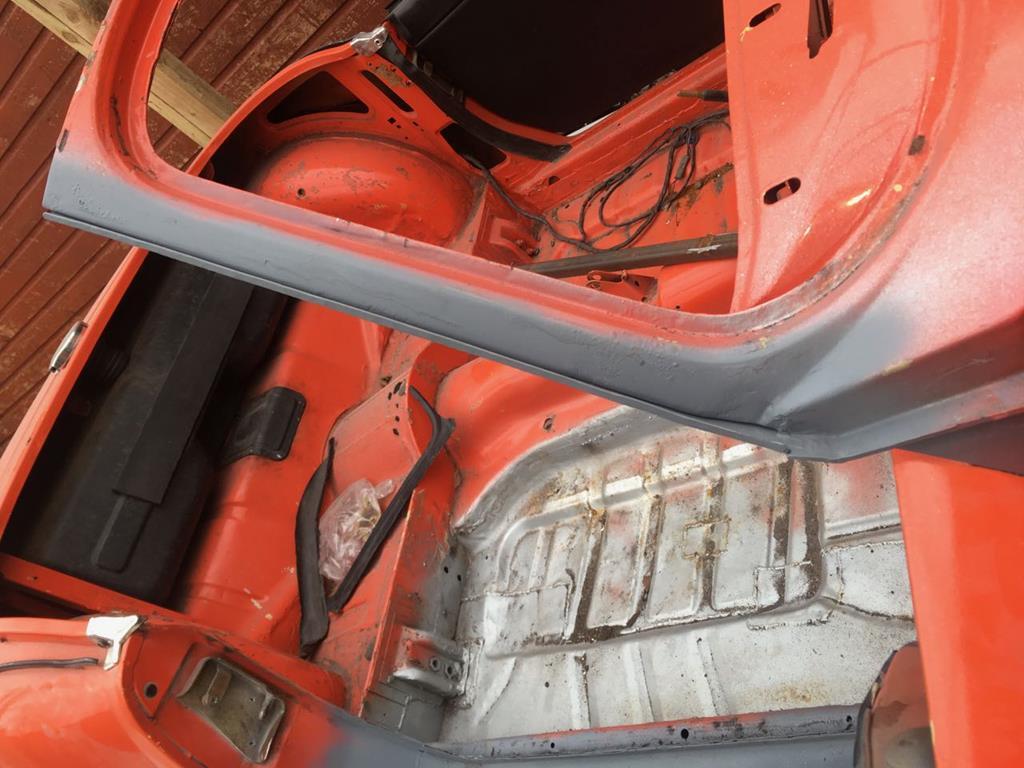 With that done, next up was the bulkhead by where the master cylinders mount. It was looking very suspect, but thankfully again this wasn't as bad as it could have been. Removing the master cylinders was fun. It quickly became apparent by the mount of fluid leaking all over me that the brake master cylinder needs some attention. I haven't stripped it yet to find out in the bore is ok, hopefully it is and I can get away with a rebuild. The union for the clutch line was seized in place, so I had to cut the line, not the end of the world as the line was a bit kinked and curse word in places, but still annoying. Now I could get at the panel and wire brushed it down, removing the many layers of gooey brake fluid saturated paint, seam sealer and filler (why....) this is what I was left with. 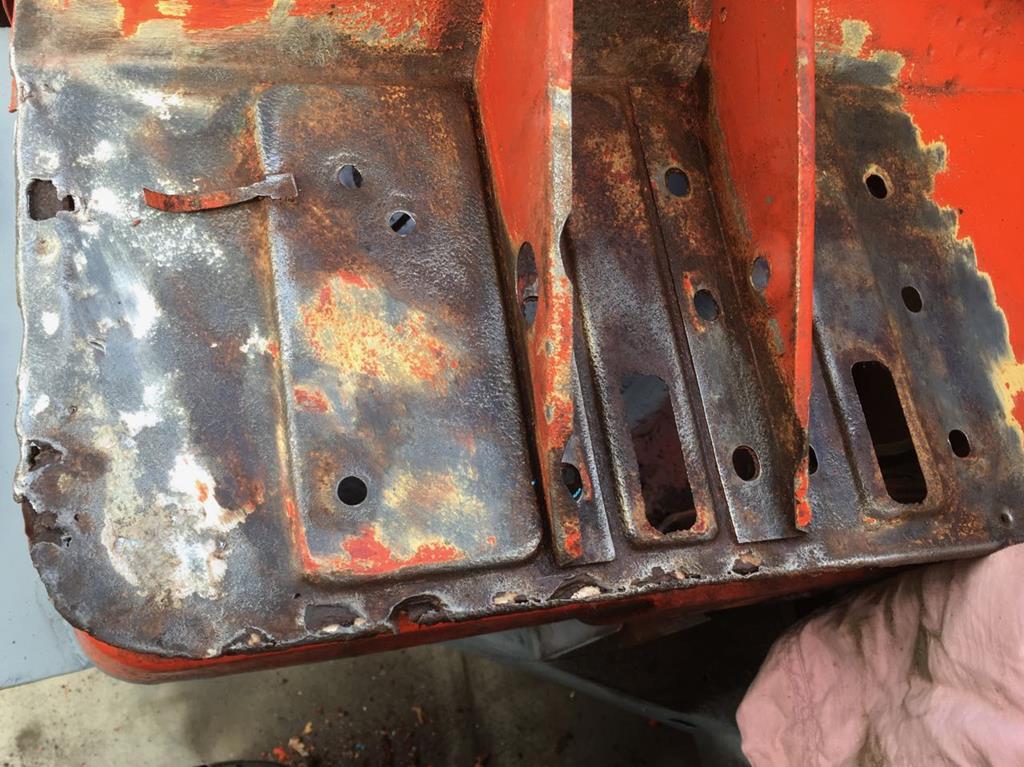 Frilly round the edges, but essentially solid. With that in minds I decided to repair, rather than replace. 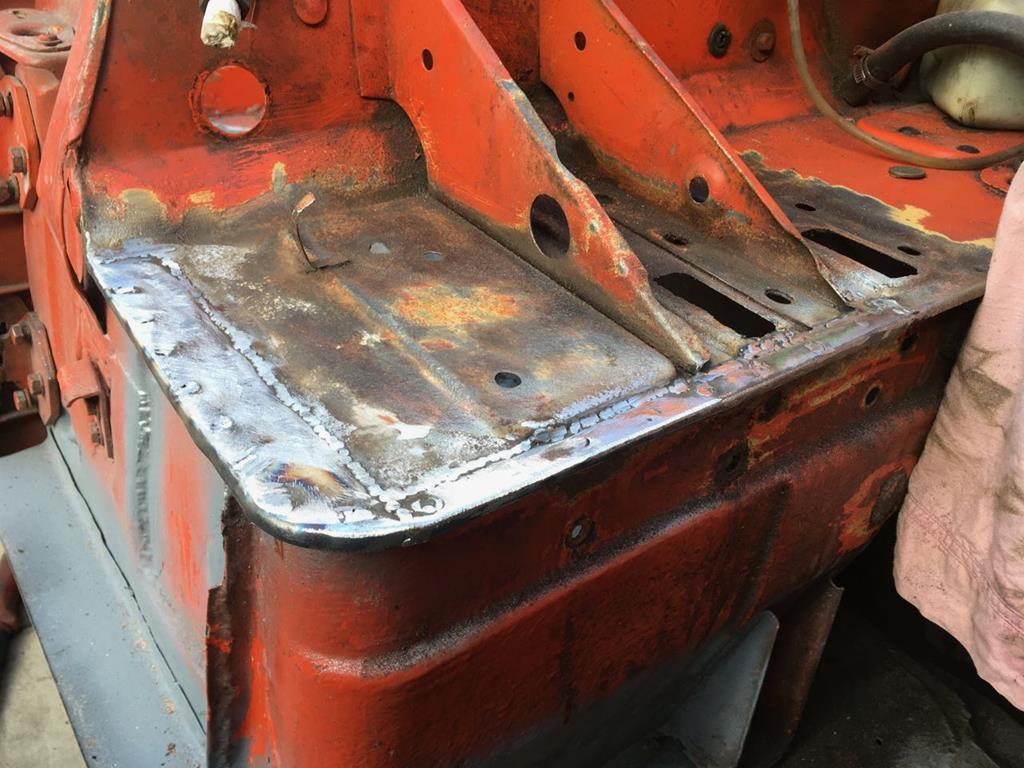 And with that job sorted, the drivers side of the main body is solid enough for now.  The door will still need looking at, I'm yet to decide how best to deal with it. At some stage in the future, judging by the state of the floors and sills, I'm sure there will be some filler to dig out on the back edge of the rear arches / wings, but for now it's solid and tidy enough.  So there was noting for it, but ot turn the car round and start chopping no the other side! 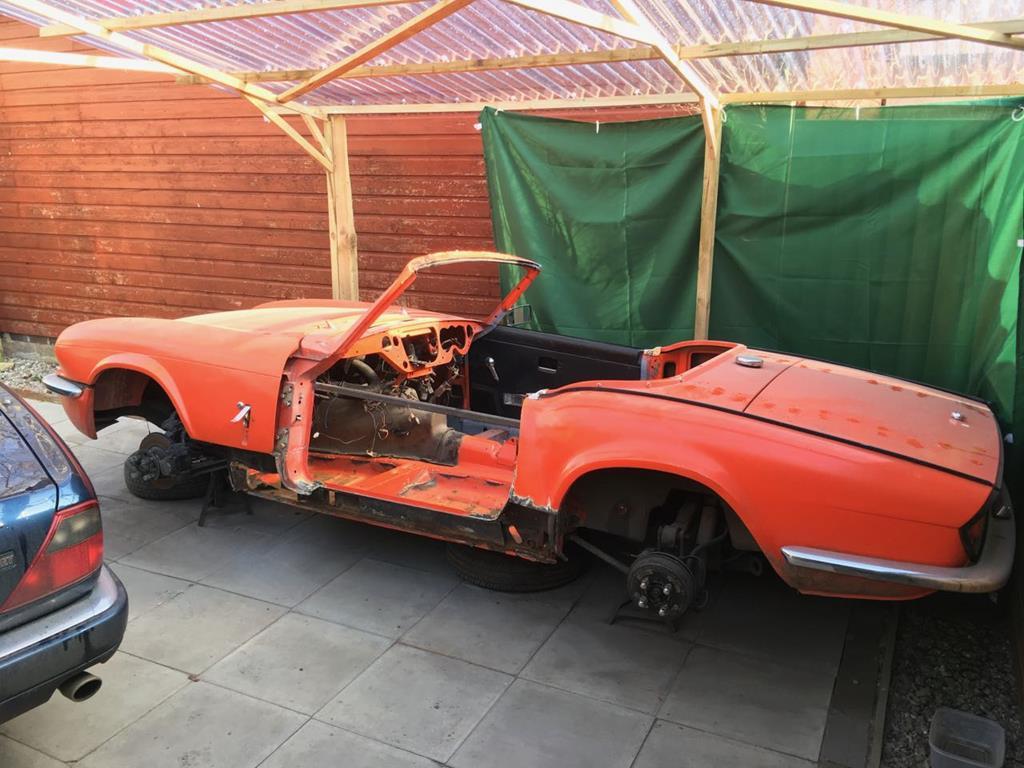 Mmmmmmm yes. The story is roughly the same as on the drivers side. The same inch thick filler over poorly fitting sills, the same extra layer of floor tacked on over the top from the inside. I'm sure having the sill full of sand is really helping the metal... 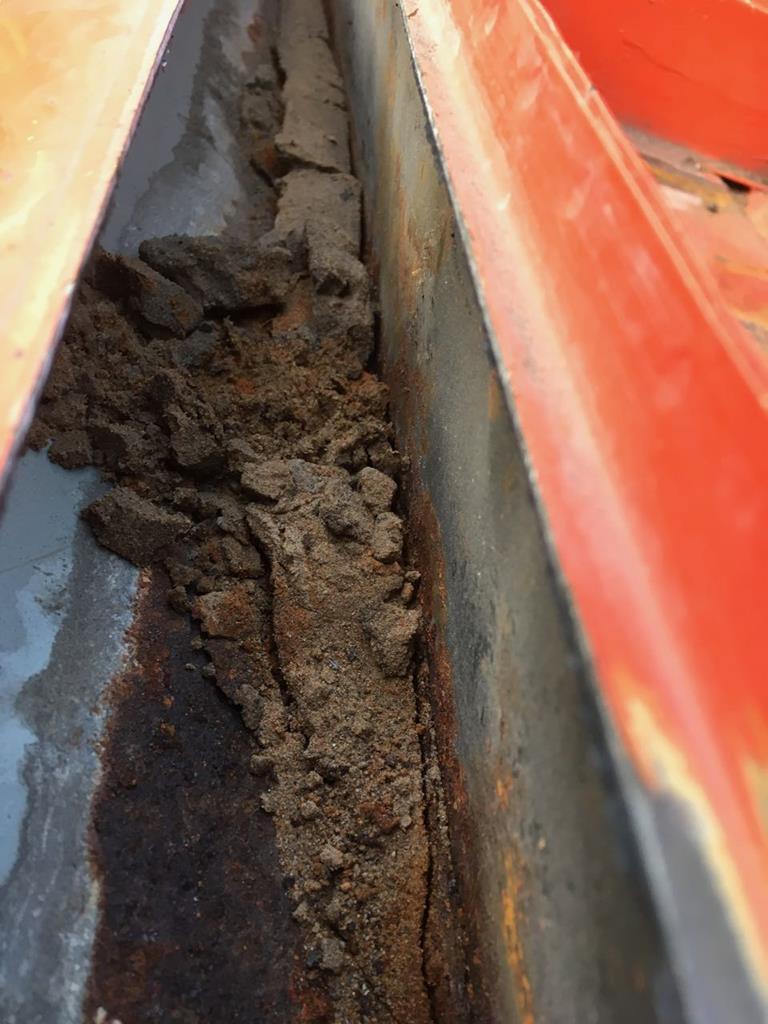 How does that even happen?! Overall though, it's slightly better than the drivers side was. The windscreen frame isn't bulging in the same way and the bottom of the door is made of metal, so thats good. The front floor pan is broadly similar, and the majority of it will need replacing. After the success from the other side I shall once again re-use the extra layer of floor I've just cut out to create the repair panels. 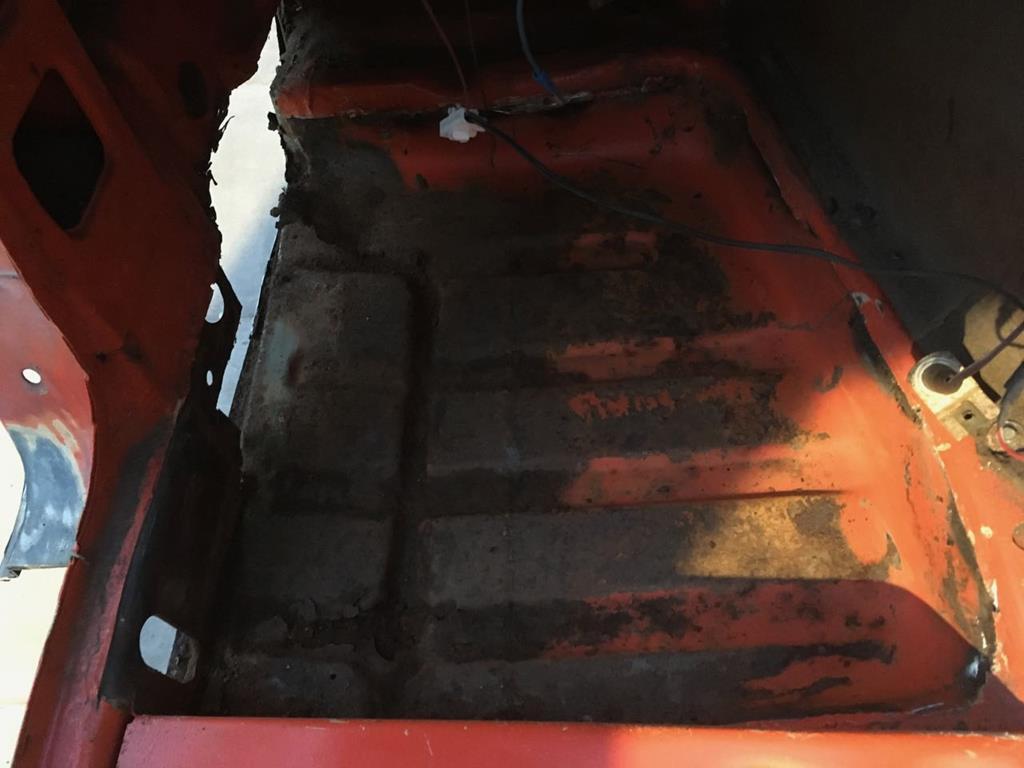 But the bottom of the bulkhead is in better condition, so it looking like I wont have to rebuild as much of that. Likewise the rot in the rear floor is much less. 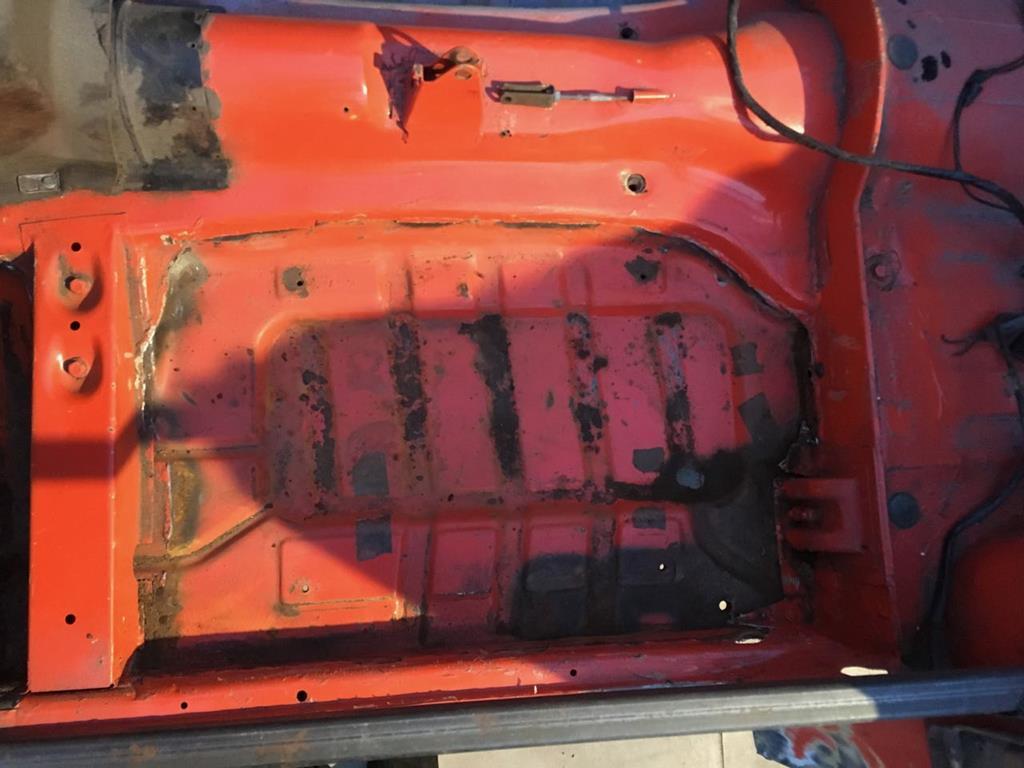 A lot of that can stay, with that rear outer corner section being the main area that will be replaced. The inner arch and suspension arm amount area is also much less rotten, so that's promising overall. As this is a repeat of the otherwise, hopefully as the hard thinking and planning is done, it's just a case of getting down to work and it wont take as long.  |
| |
Last Edit: Feb 23, 2018 10:43:20 GMT by goldnrust
|
|
|
|
|
Feb 23, 2018 14:37:36 GMT
|
|
I like your no nonsense approach. very realistic. great little car.
JP
|
| |
I know its spelled Norman Luxury Yacht, but its pronounced Throat Wobbler Mangrove!
|
|
|
|
|
Feb 23, 2018 18:05:22 GMT
|
I'm sure having the sill full of sand is really helping the metal... How does that even happen?! Do you suppose it's been sand blasted at some point in its life? It would seem a lot of effort if you are just going to patch over the rust anyway. I'm a newcomer to your thread. It's great, it makes my car seem less rusty! Keep up the good work. James |
| |
|
|
goldnrust
West Midlands
Minimalist
Posts: 1,887
|
|
Feb 23, 2018 23:16:29 GMT
|
Cheers guys  Lilredwagon, I think my 'no-nonsense approach' is more like a jaded approach  You'll notice some of the earlier comments in the thread being along the lines of 'I see you've done it again and bought a rusty wreak of a car'. I'm sure there was more drama and ambition to build some sort of show winning perfect car a few years ago! haha. Sandblasting could be an option Sweetpea. Id say at least 2 different shops/owners have done rust repairs in this, theres a mix of styles of patches and welding types, I'm pretty sure it's had 2 resprays on top of the original factory paint. It's not unrealistic to think someone might have had a go at it with a sandblaster at some stage as part of that. I figure it's that or some person with no mechanical sympathy ragged it round a beach for a while... On the paint front... As I do more and more rust repairs the number of panels that won't need some sort of paint is reducing rapidly. I might end up having to repaint it properly, at which stage the question is do I stick with orange, sorry I mean Vermillion Red (red? it's clearly orange). I'm not 100% sold on the orange ,but equally it is original, so something to think about there. |
| |
|
|
adam73bgt
Club Retro Rides Member
Posts: 4,998
Club RR Member Number: 58
|
|
Feb 27, 2018 17:49:06 GMT
|
I'd somehow missed you were back on here with a car project again, I enjoyed watching your Lancia build so I'm bookmarking this for sure  I had a similarly engined XJ40 for a time as a daily alongside my MGB, a slight parallel there almost aha! Impressed with the way you're cracking on with the welding though |
| |
|
|
|
|
goldnrust
West Midlands
Minimalist
Posts: 1,887
|
|
Feb 28, 2018 22:49:00 GMT
|
Cheers Adam.  This thread is aiming for a similar amount of rust to the old Lancia thread, so hopefully you'll enjoy this just as much. I've had my Jag for just coming up to a month now, and I've really been enjoying it. After I had to let my Alfa 166 go (head gasket + gearbox problems meant it wasn't worth me fixing) I'd really missed having a big cruiser. The Jag, or blue whale as my wife has taken to calling it (it is very long and it is blue), has filled that gap and is even better at eating up the miles than the 166 was. I think it will complement the Triumph's small, simple, raw experience well, just as I'm sure the MBG and XJ combination worked well together. Not much to report since the last update, I did spend a good few hours on it on Saturday cutting out the remaining rust on the floors, and grinding back all the rough edges, so it's ready for the new metal to start going back in. 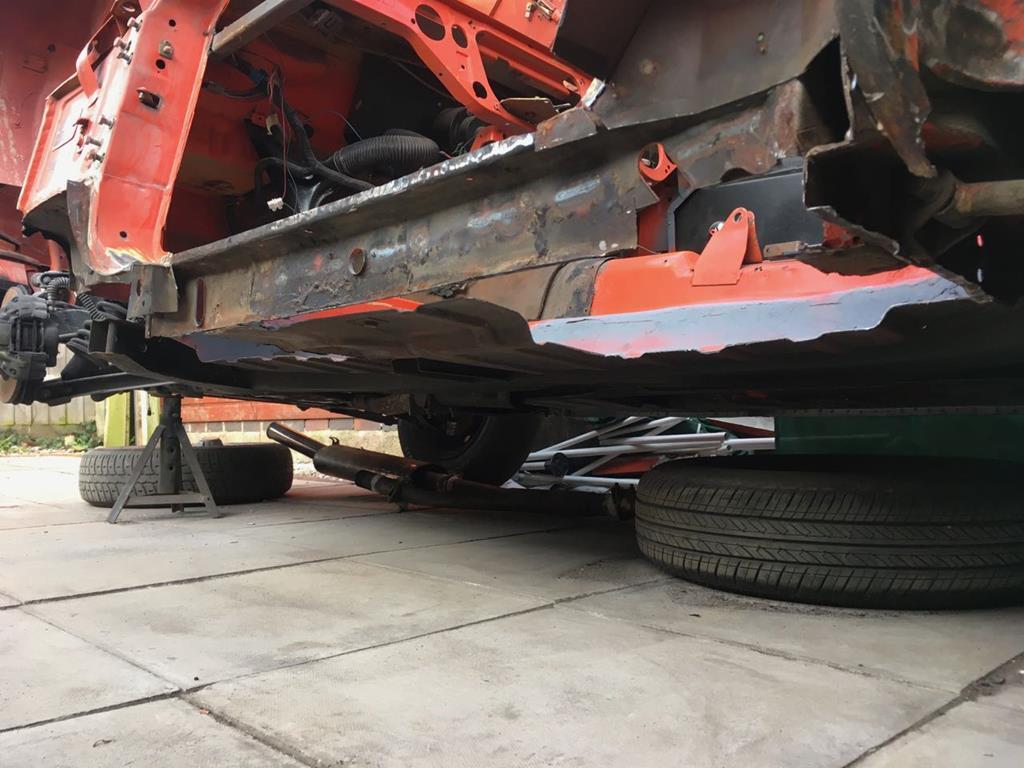 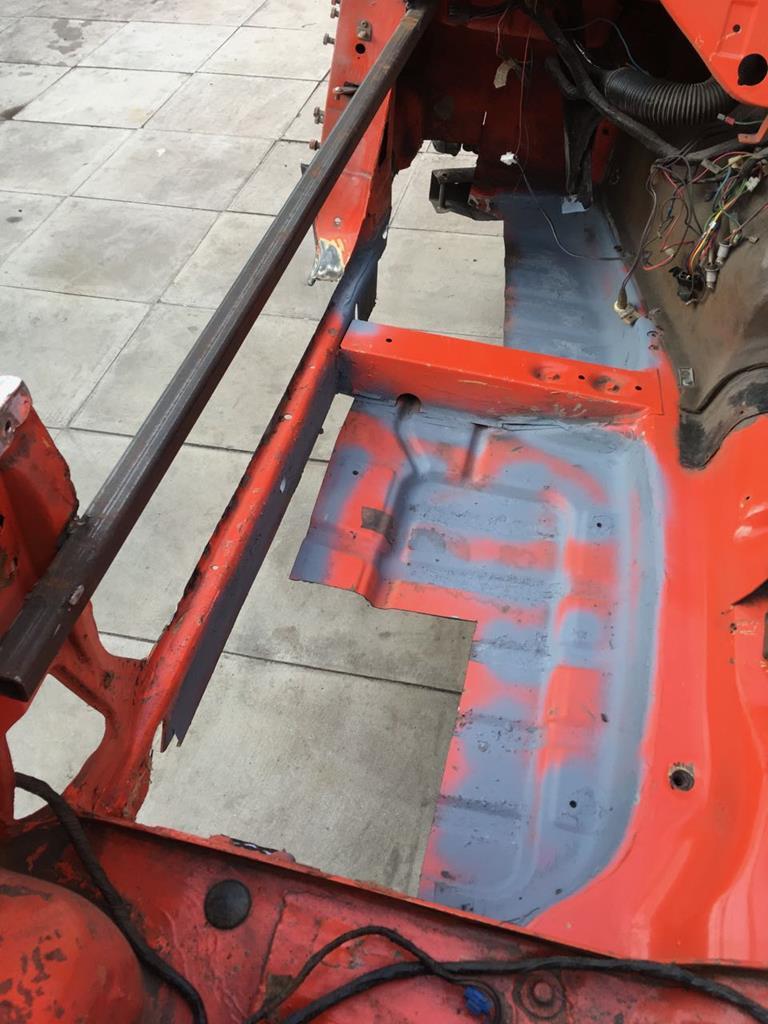 I was hoping not to have chop it out, but like on the other side I've ended up chopping out the body mount from the bottom of the front bulkhead. It's not as far gone as the other one, so I might end up repairing this rather than rebuilding, but there was no way to access it while it was still on the car. 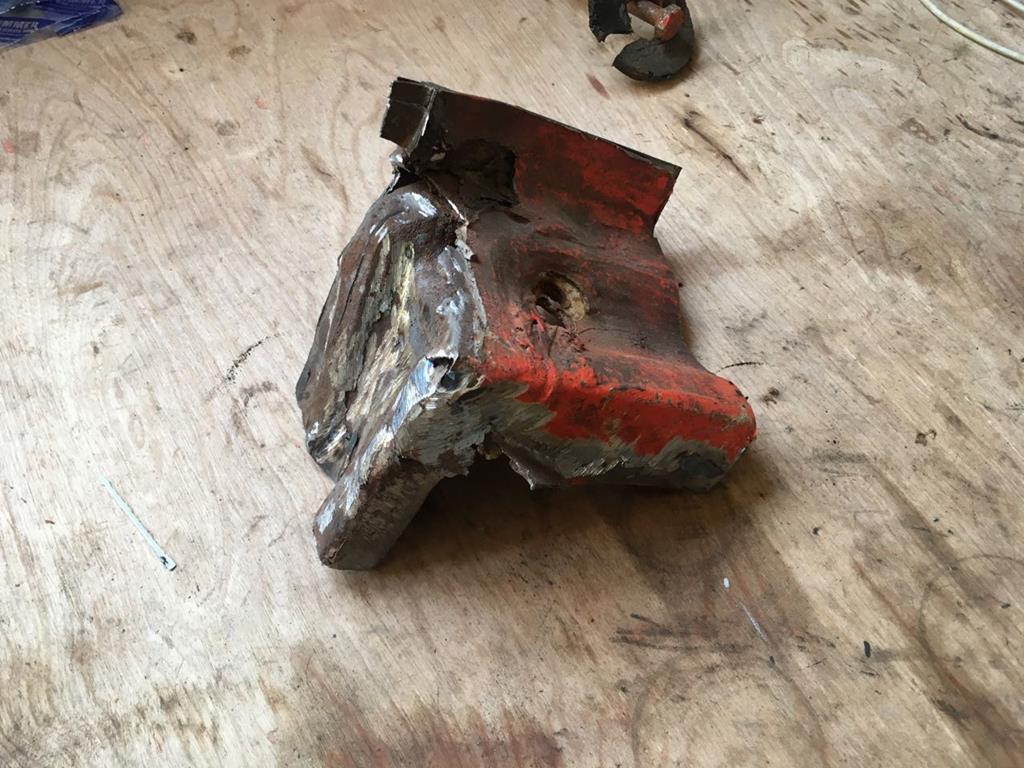 I think any further work might have to wait till it's back above freezing outside though! haha. |
| |
Last Edit: Feb 28, 2018 22:55:16 GMT by goldnrust
|
|
|
|
|
|
|
|
looking good keep her lite
|
| |
|
|
goldnrust
West Midlands
Minimalist
Posts: 1,887
|
|
Mar 10, 2018 22:31:39 GMT
|
Things kinda ground to a halt recently thanks to the white stuff that fell from the sky! 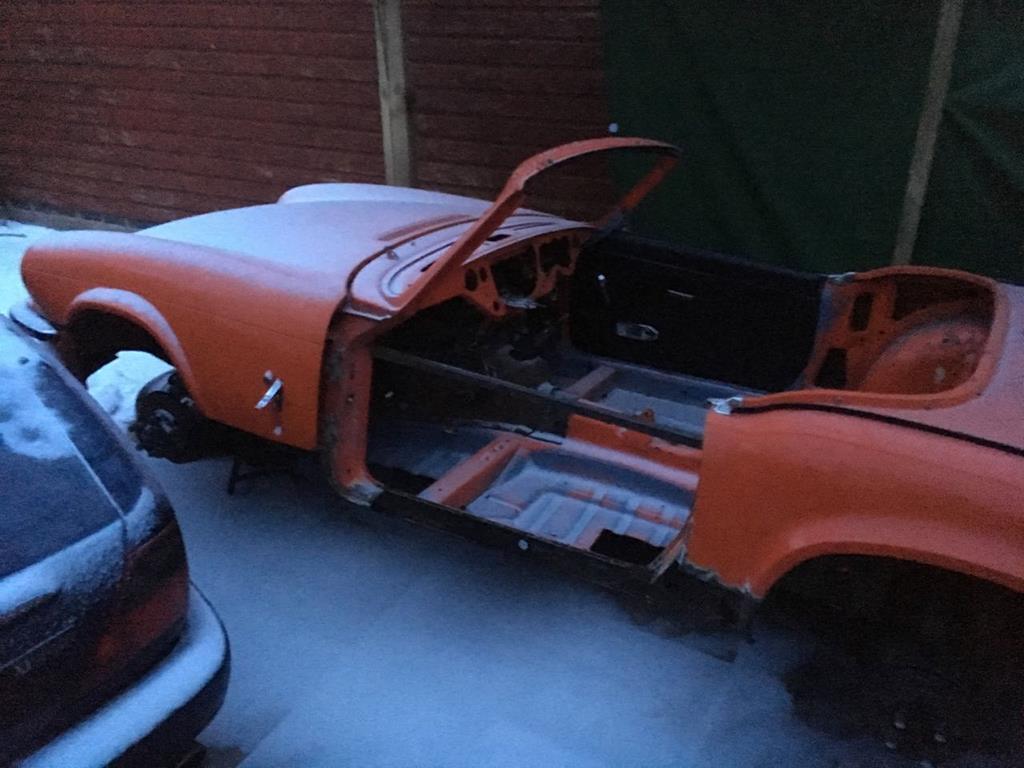 Thats the downside of a carport, rather than a garage/shed! On the plus point, my carport held up to the snow very well. Unlike the old gazebo! 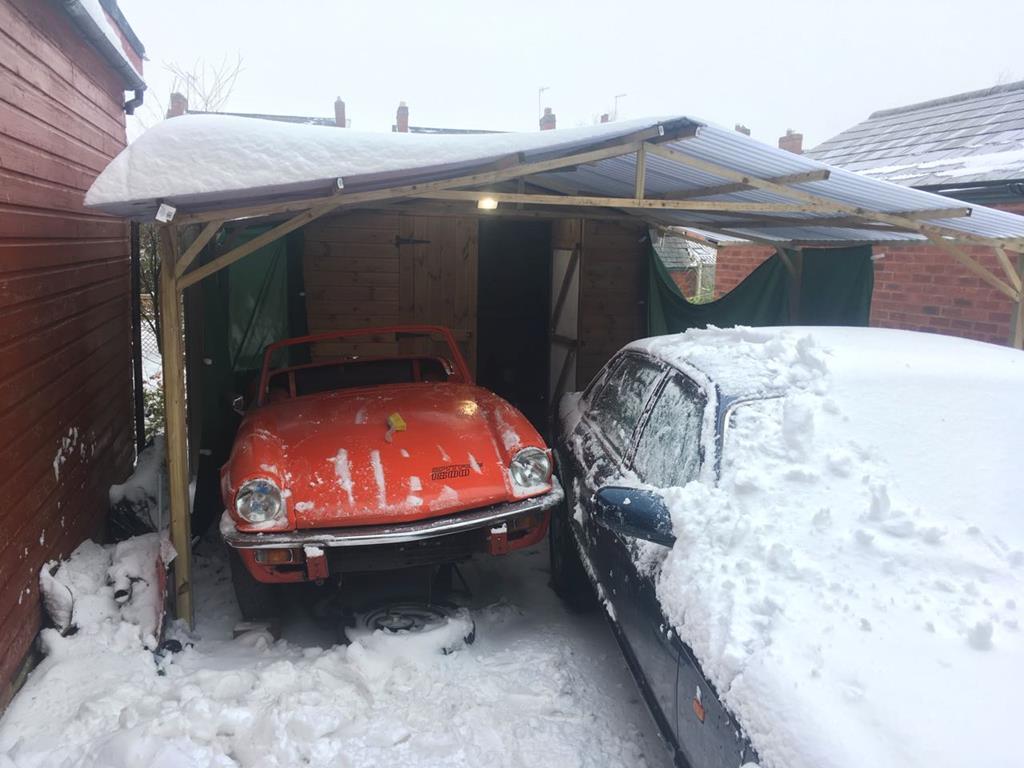 Anyway, I have found a bit of time in the past few days to make a bit of progress. I started by cleaning up the body mount / bulk head section that I cut out at the end of the last update. Thankfully it was in much better condition than the otherwise, and it was really only the floor and bulkhead that needed repair. So I made up some card templates... 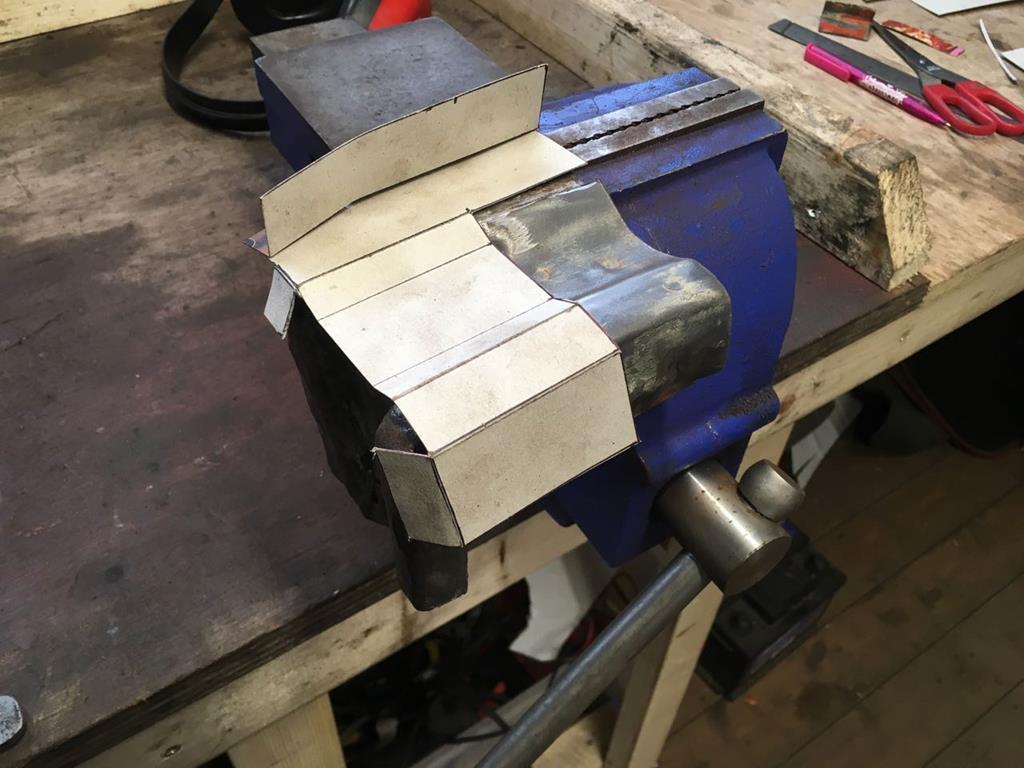 And then turned them into metal and welded the section back into the car. 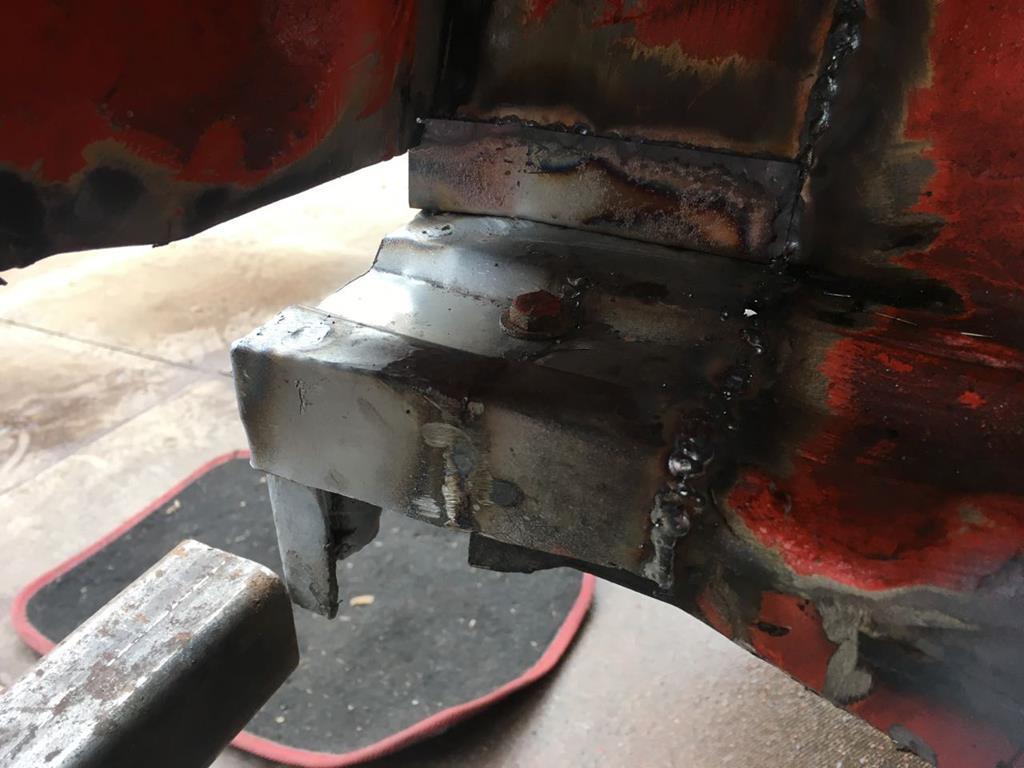 With this front corner back in place I could now sort the gaping hole in the front floor. Like on the drivers side I decided to re-use the previous floor repair panel, which had just been bodged over the original floor from the inside. Like the otherwise, I still needed to make a new sill flange for it though. 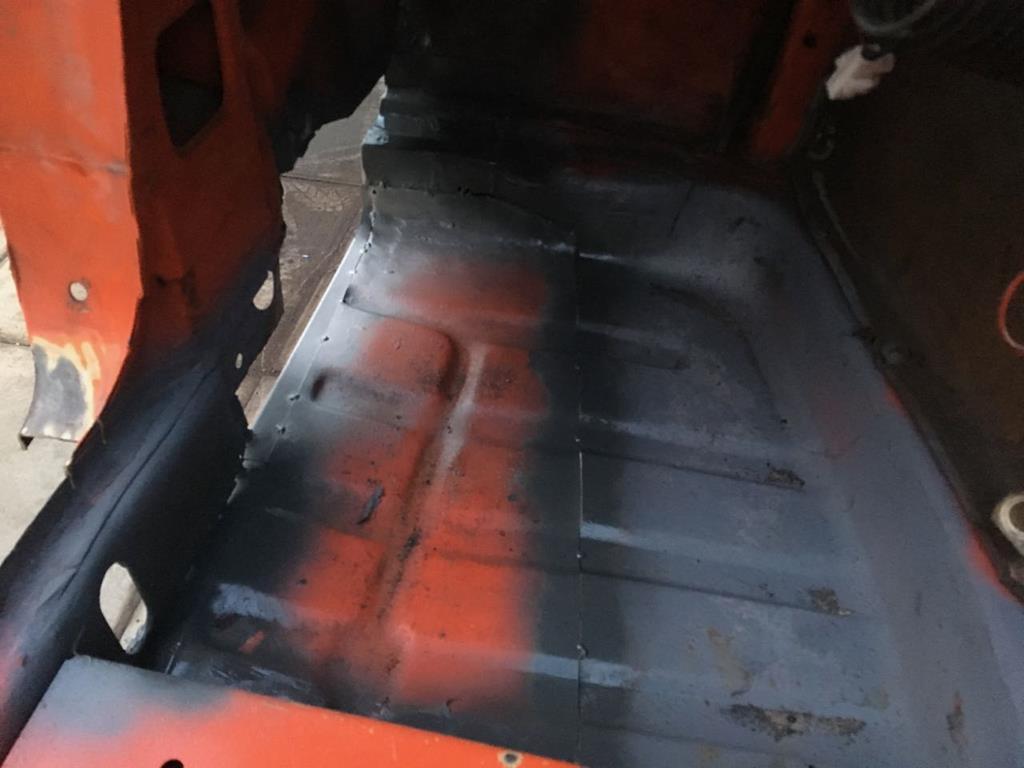 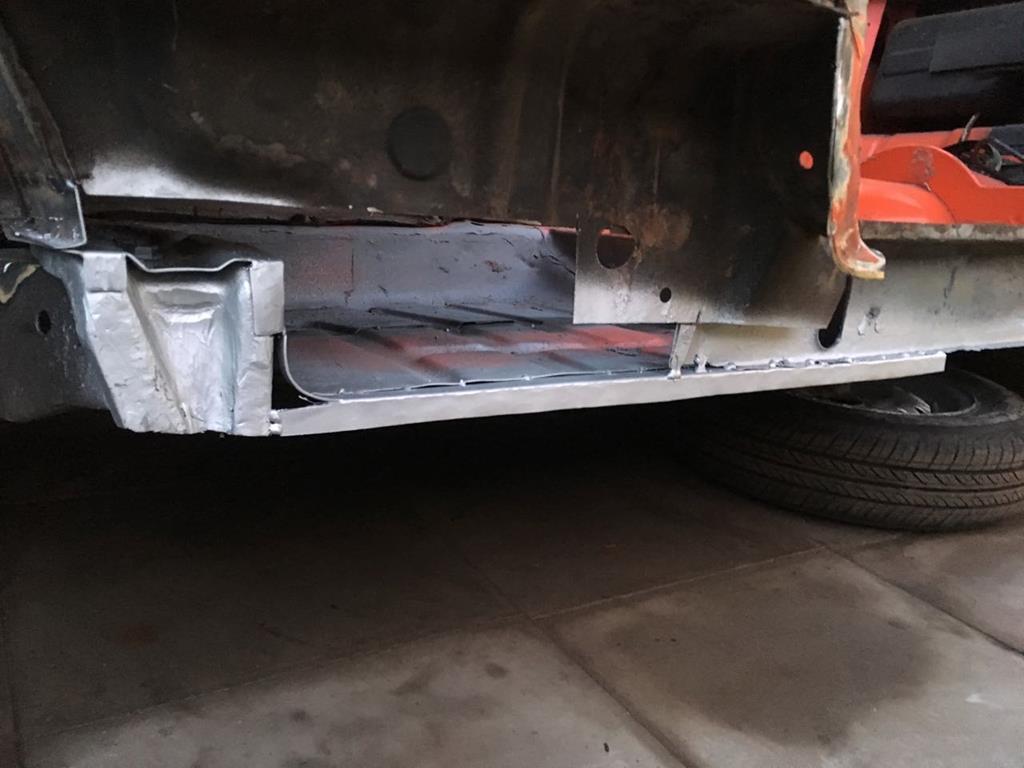 Feels good to not see so much daylight through the floor! I've only tacked it in for now, I'll seam weld it next time I'm out there. For today I wanted to try and keep making progress, so I sorted out the small repair that was needed the rear edge of the inner sill. It's not as elegant as the other side, but just as functional. 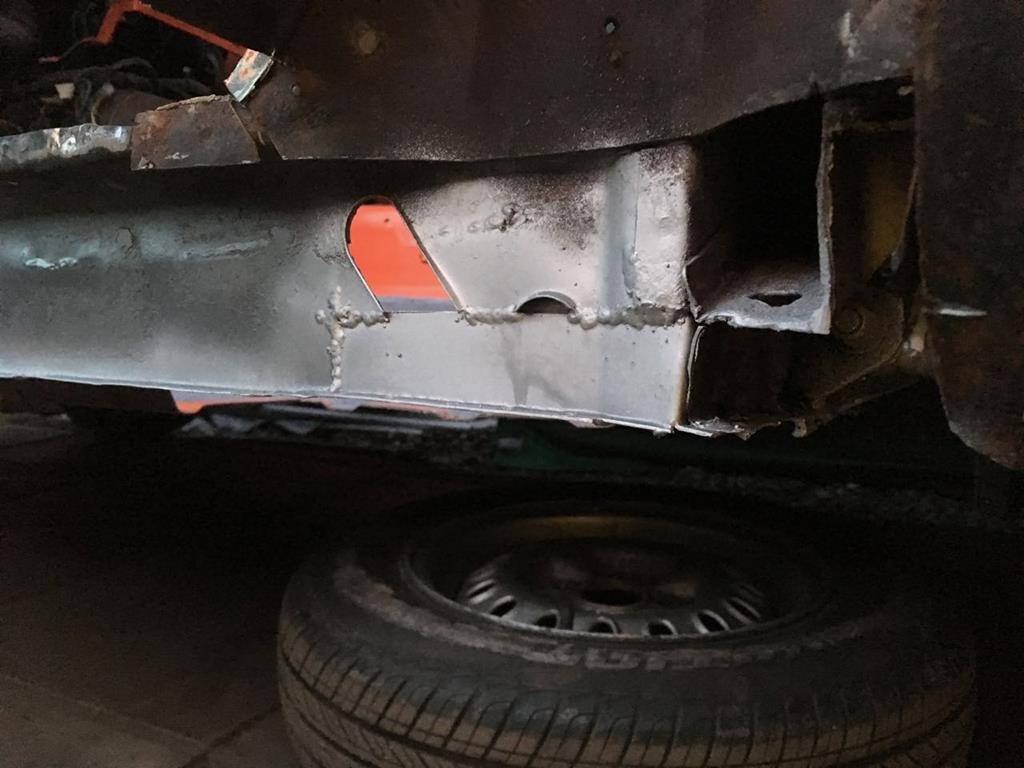 That's as far as I got today before the light faded, but it feels really good to have some visible progress again, and I'm looking forward to getting out there again soon and getting the floor sorted and sill on. |
| |
Last Edit: Mar 10, 2018 22:31:51 GMT by goldnrust
|
|
|
|
|
Mar 10, 2018 23:05:10 GMT
|
|
thorough job you are doing! It may be wise to test fit the glas in the door as you welded the front window frame and this could be warped a bit because of shrinking after welding. If its not oke its better to do some adjustments now instead of after the paint job.
Keep up the good work!
Peter
|
| |
|
|
goldnrust
West Midlands
Minimalist
Posts: 1,887
|
|
|
|
|
That makes sense Peter, I used the windscreen itself to check that the frame hadn't twisted, and gave the frame an appropriate tweak, but I didn't think to check against the door glass. I presume there's some adjustability in the door glass?
I think I'll end up putting with car back together with just some temporary rattle can paint in the short term, I'm undecided on what colour I'd like it to be and there's probably more bad repairs to dig out and sort before I put the time and effort into a paint job, I just wanna be able to get out and drive again!
|
| |
|
|
|
|
|
Mar 11, 2018 22:34:00 GMT
|
. I presume there's some adjustability in the door glass? I don't know if there is adjustability in the door glass as i never owned a car like yours but i think its worth to invest time in this as if it needs a bit of tweeking, its better and faster to do before painting it. . I restored an MGB which has a loose front window frame and a quarterlight frame in the doors. I had big problems lining these up and it needed enlarging of some holes and this all needed to be done on a fresh and expensive paint job. It all went well but taking a lot of time and scary moments not to scratch the paint. Peter |
| |
|
|
goldnrust
West Midlands
Minimalist
Posts: 1,887
|
|
|
|
Work has been quiet so I've made some really good progress this week, and reached a meaningless but nonetheless less satisfying milestone... The welding on the body is done! Anyway, lets wind the clock back a few days... Picking up where we left off, the next section to put back in was the rear floor. Once again I decided to make it up from a section of the extra floor I removed, with a new sill flange and rear edge. Here it is just tacked in. 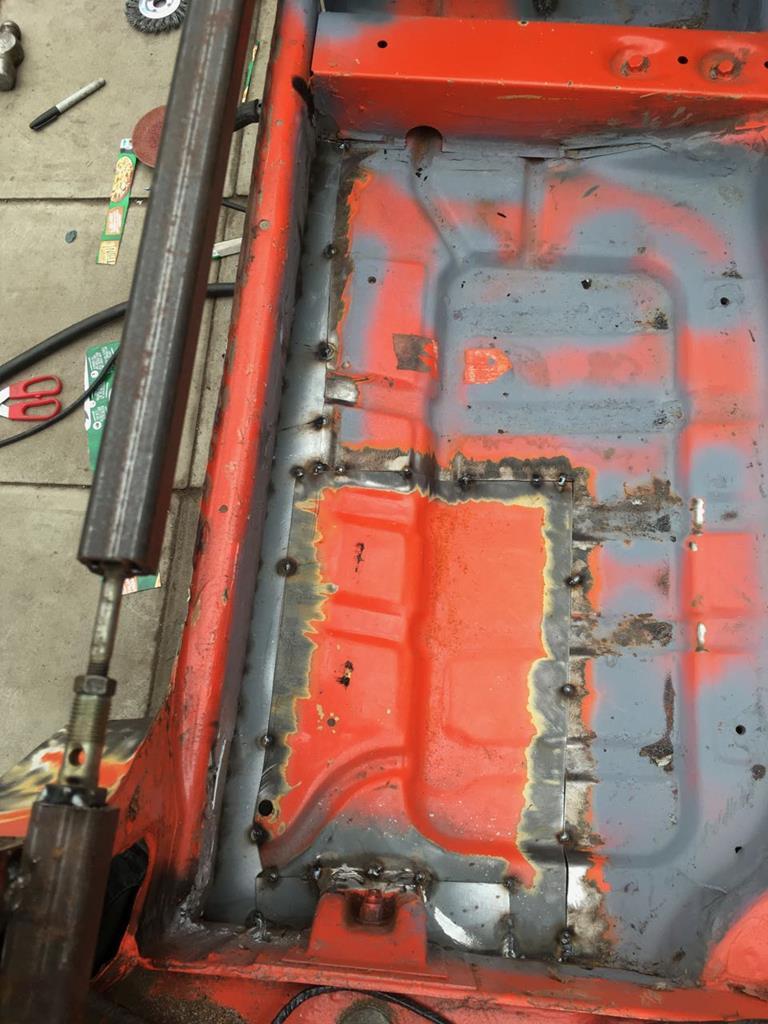 After what seemed like an eternity of seam welding, both the front and rear floor sections we in permanently and securely. Which meant the next panel to go in was the bottom of the A pillar. As I dismantled this side I realised that my repair to the bottom fo the drivers side A pillar wasn't quite 'right' to the factory metal pressing, it was missing a couple of ridges. On the drivers side I had simply copied the existing rotten section, but that must have been an incorrect repair. For the sake of consistency, I copied what I'd done on the drivers side, not that anyone would see once the carpet is in. 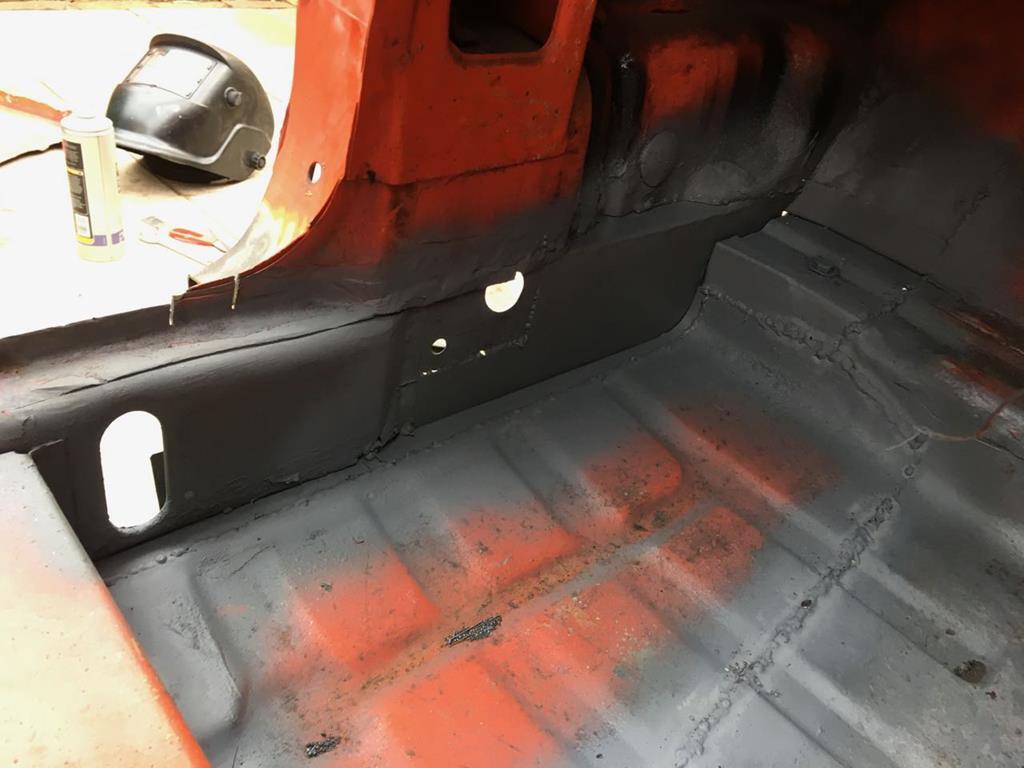 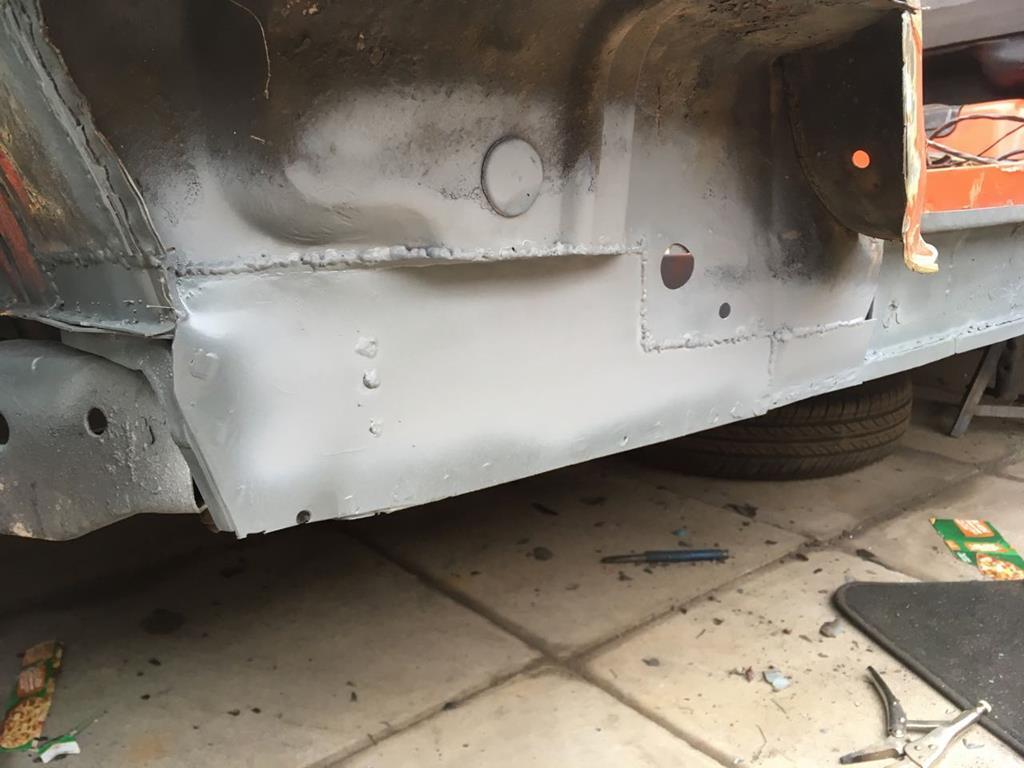 I then worked my way along the sill fitting the middle sill, which was fairly straight forward. 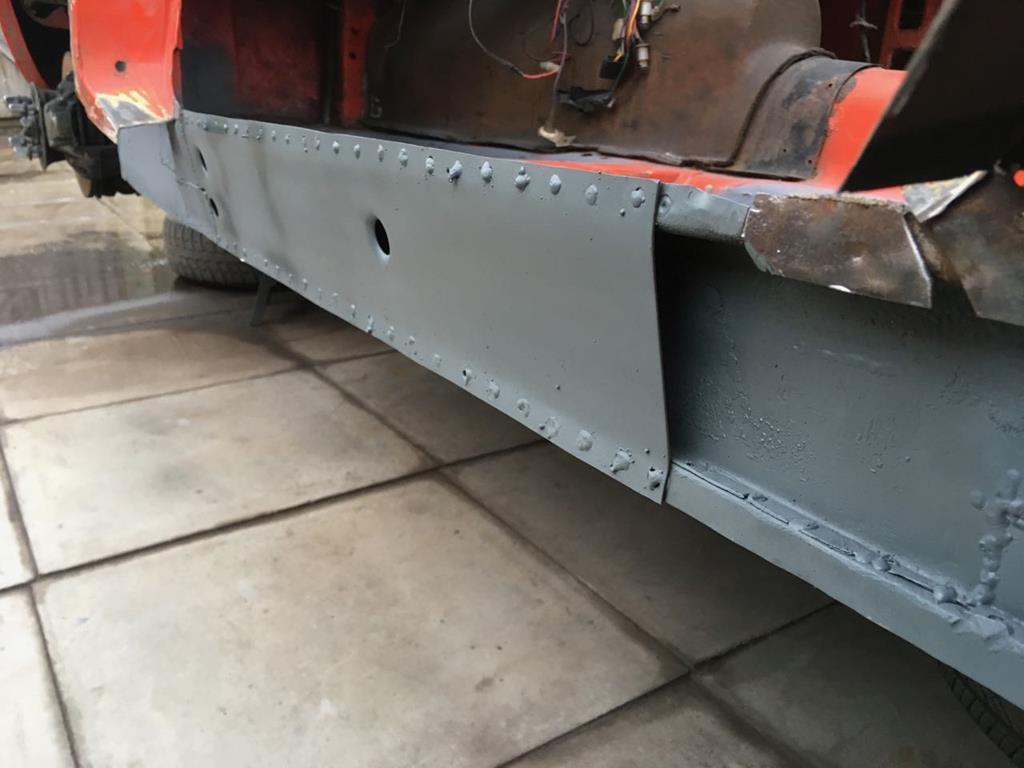 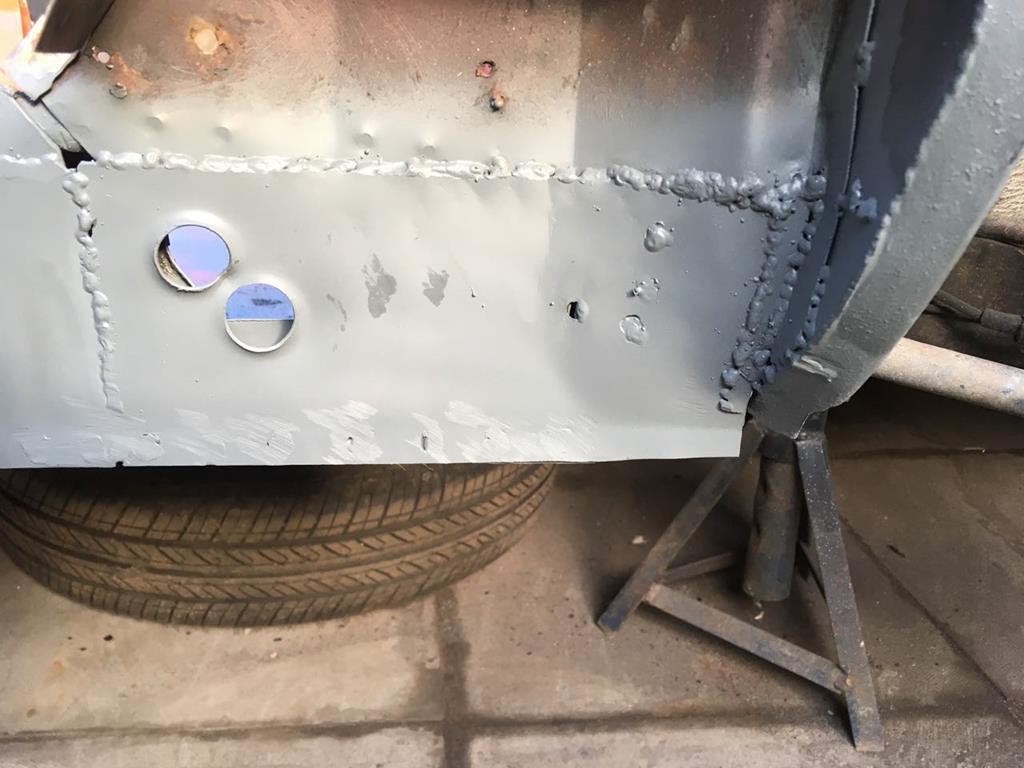 Which meant it was time to offer up the outer sill I've bought and start looking at panel gaps again, oh good.... Like the drivers side, the initial offering up of the sill left me with gaps I could put my whole arm through in some places and overlaps in others. The rear sill repair panel I'd bought didn't seem as good as the drivers side, it was supposedly a heritage panel, same as the main sill and both panels on the drivers side, and from the same shop, but must have been from a different batch or something, as the paint finish was different and it seemed further from the right shape. Anyway, after many hours of faffing about, I got the sill tacked on, with panel gaps broadly similar to the other side. 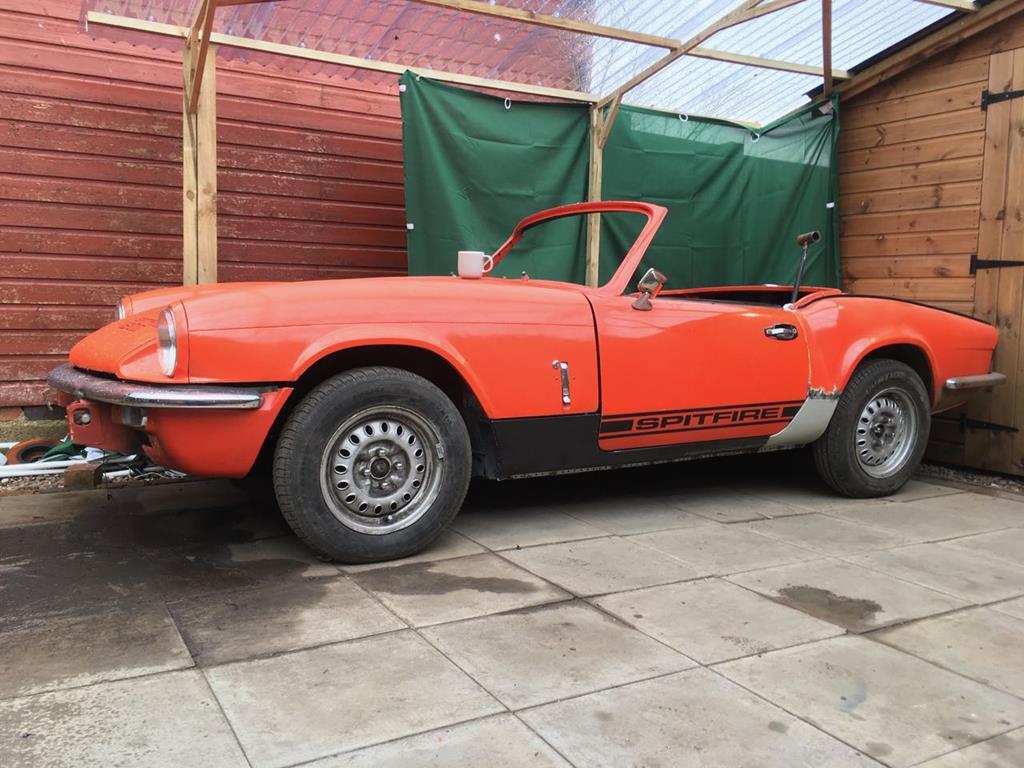 Not too far to go now! There were various small pieces to go in next that close up the sill. Like the other side I had to rebuild some of the door step in both corners where it met the sill. It fought me a little more than the drivers side, so isn't quite so pretty, but will be just as strong. 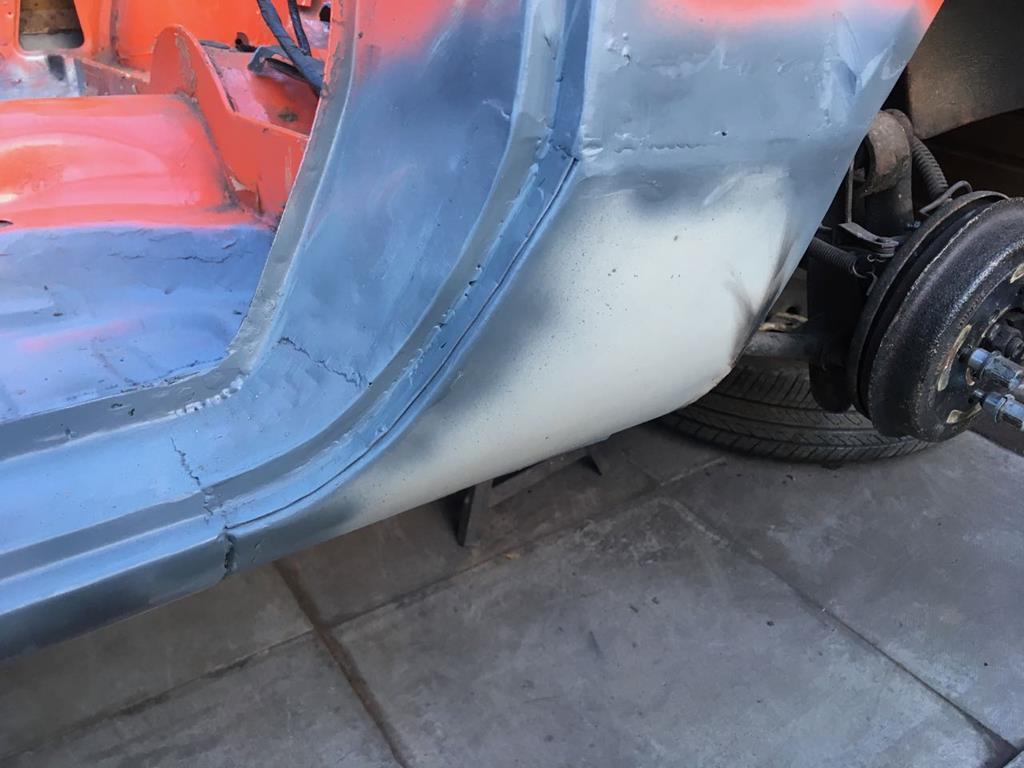 I had thought the windscreen pillar on this side looked better than on the other side, and it was much better, but sadly it still needed some work. It was beginning to swell at the base, which was causing me issues with the door fit. Thankfully this time I only needed to cut out and replace a section of the gutter and pillar about 3" long. 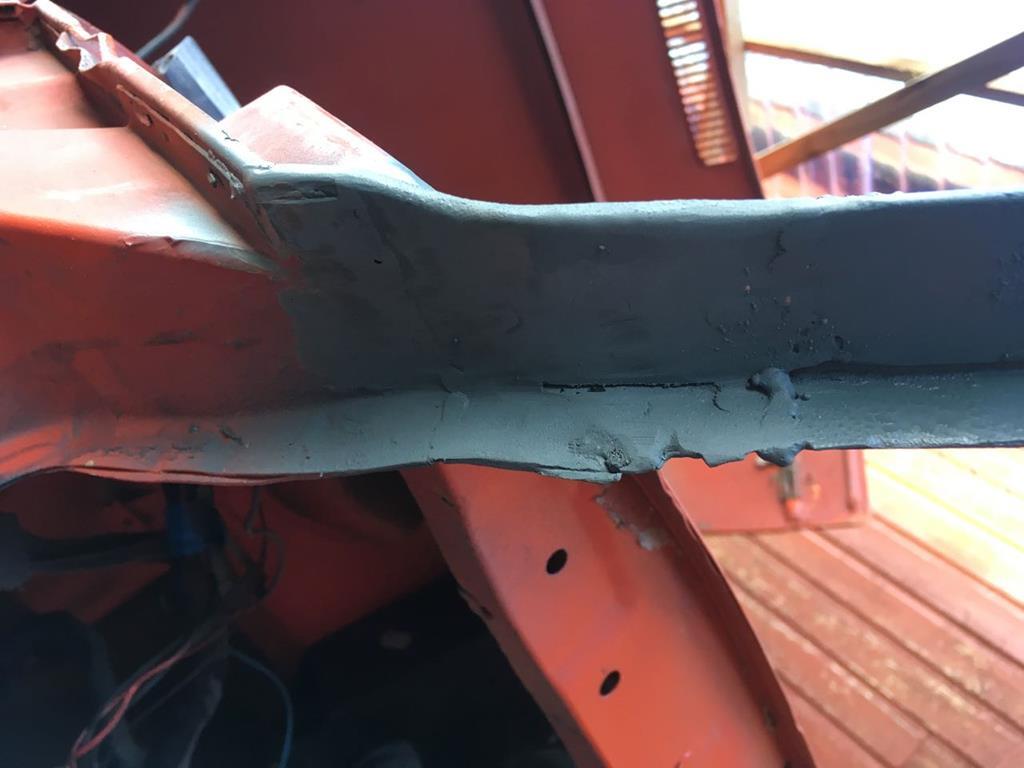 And finally on the welding front, there was a bit of a swollen section of chassis by where the outrigger mounts on this side, poking it with a screw driver revealed this mess. 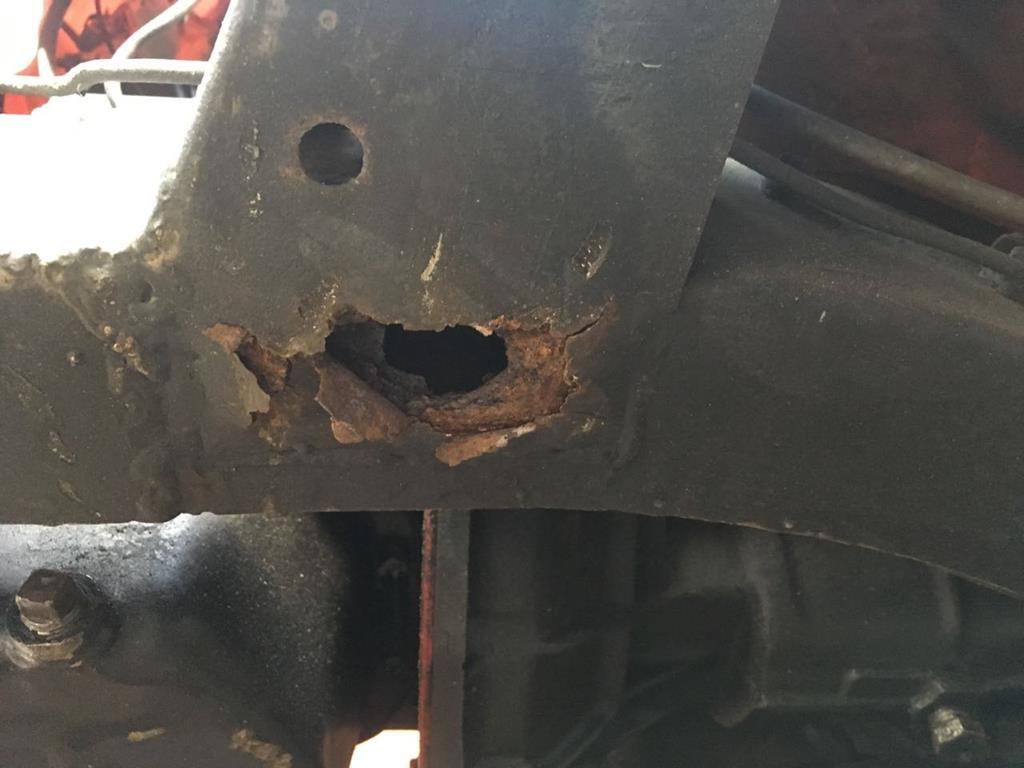 After all I've been doing on the body, to do this small repair, with nice thick steel in simple flat shapes was a walk in the park! 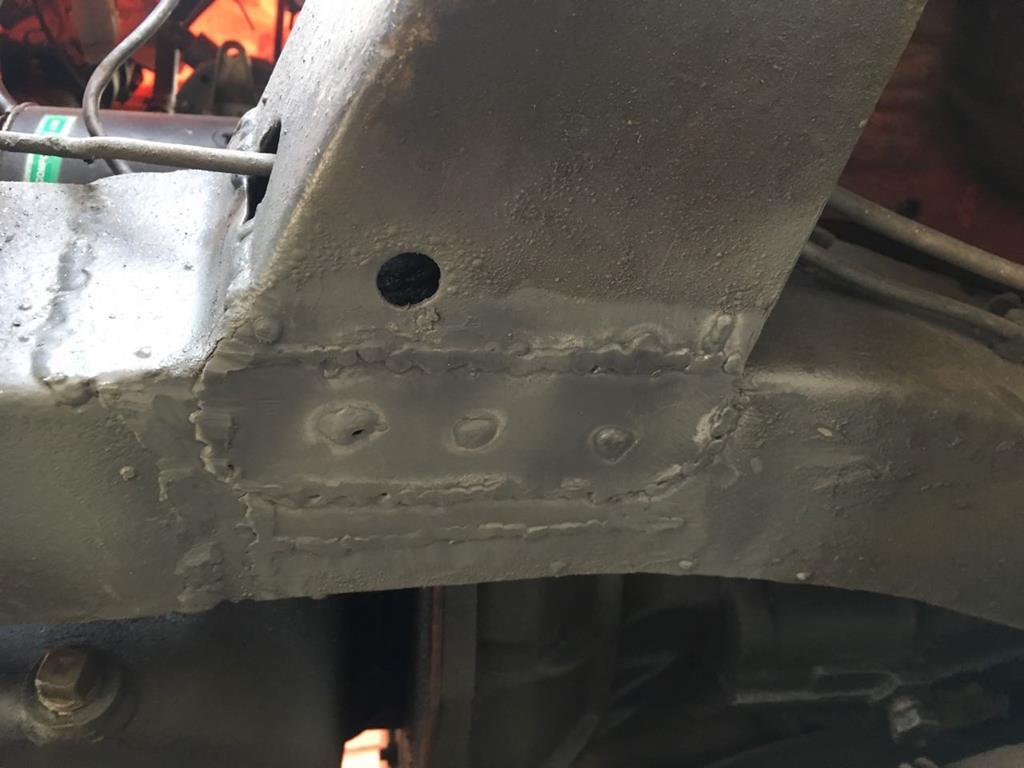 And we're there! body is all welded! I hope I never have to do that again. haha. There will inevitably be more welding to do in the future, the bonnet is a state and the bonnet mounts will need looking at to make it line up right, but that's a job for another day. I have to remind myself that I want to drive the car this spring/summer, so to not get too carried away with the 'restoration'. Finally for this update, in order to not have to do any more welding to the floors for a while, my next priority is to protect all my new metal work properly. I've been priming the metal as I've gone, and yesterday I made a big mess with seam sealer. 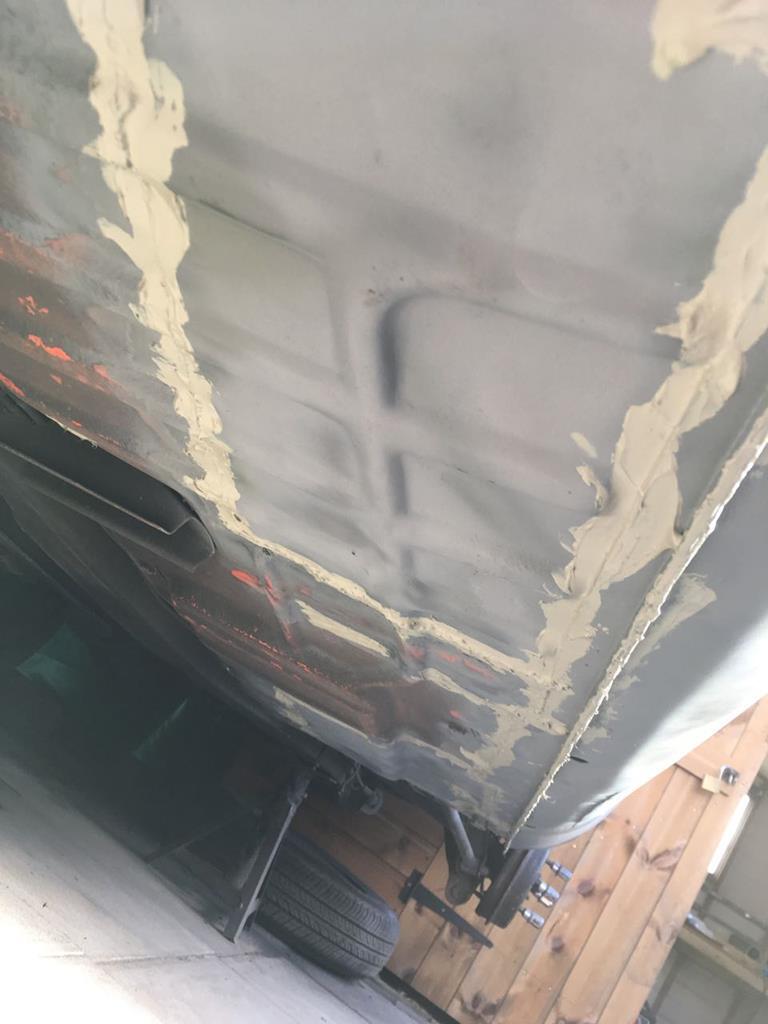 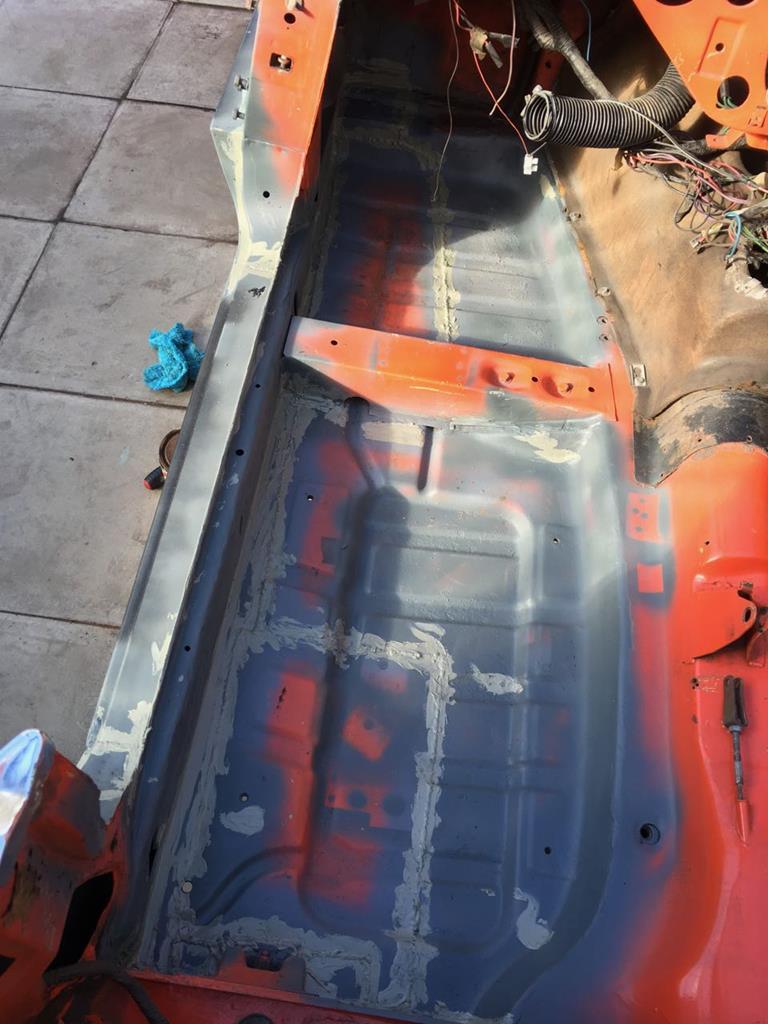 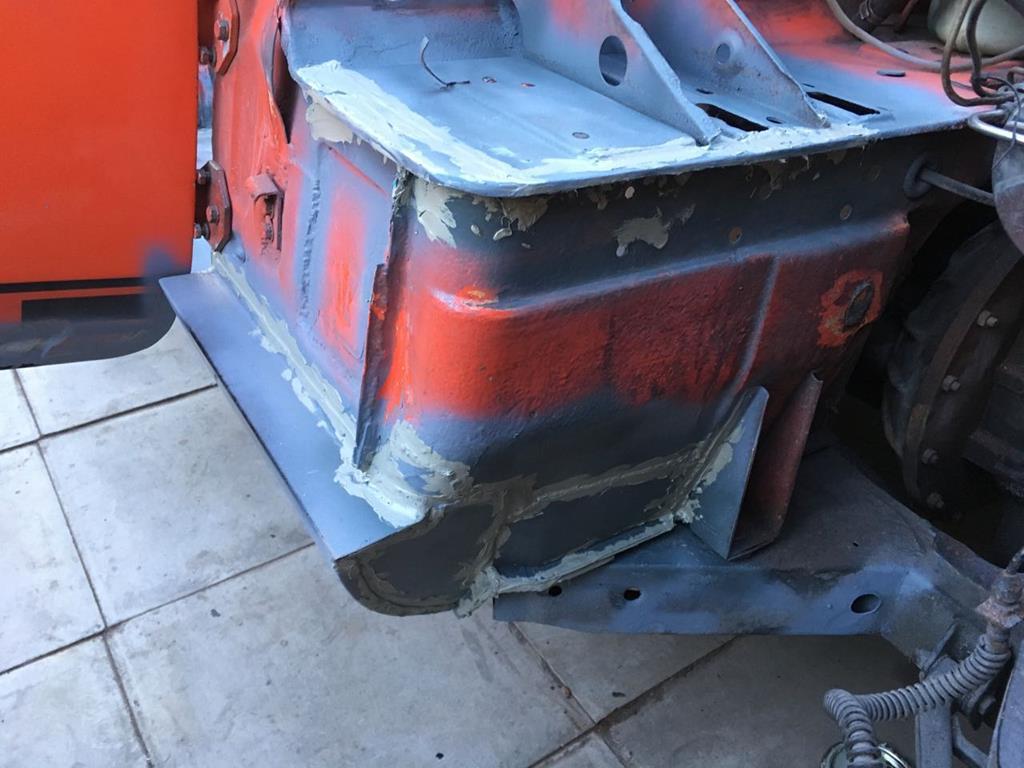 Next step will be to get some paint on the inside of the floors  |
| |
|
|
ChrisT
Club Retro Rides Member
Posts: 1,670
Club RR Member Number: 225
|
|
|
|
Good progress  Liking this project as I may well be welding up a mates Spitfire soon and this is preparing me for what it could entail...... |
| |
|
|
|
|
|
Mar 17, 2018 18:43:04 GMT
|
|
Good job and congrats for doing it all in the cold, ready for spring :-)
|
| |
|
|
qwerty
Club Retro Rides Member
Posts: 2,420
Club RR Member Number: 52
|
|
Mar 17, 2018 20:04:57 GMT
|
|
Excellent and inspirational work! I like your approach of trying not to get too wrapped up in getting everything done, so that you can get onto the more important issue of getting out and about in it!
Tom
|
| |
|
|
|
|


 As this car will be a weekend/fun car, I've no problem sacrificing s bit of mid range torque for some more free revving lively feeling. I've had Mazda rotaries and 2 stroke motorbikes, I'm quite happy to have a little revvy engine and to row the car along with the gearbox.


 As I mentioned, the doors are clearly full of bog, and I hadn't been planning on disturbing it quite yet, but having seen that other lines of the car had been built up and shaped with filler, I felt it was necessary to make sure that I was making the sill line up correctly to the metal.


 You'll notice some of the earlier comments in the thread being along the lines of 'I see you've done it again and bought a rusty wreak of a car'. I'm sure there was more drama and ambition to build some sort of show winning perfect car a few years ago! haha.


