goldnrust
West Midlands
Minimalist
Posts: 1,887
Member is Online
|
|
Apr 10, 2018 11:09:45 GMT
|
Cheers guys.  It's been a few weeks, and I've been a bit quiet. Work has been mental, and when I've not been working I've been trying to sort this damn car out! hahaha. So where were we... With the welding done, I needed to make sure that the new metal I'd put in wasn't going trust away to nothing! Before I went any further with protecting the underside, I wanted to put the interior back in. I wanted to do this for 2 reasons 1. the interior is bulky when its out of the car and I really wanted the space back and 2. the seatbelt and seat mounting bolts protrude through the floor, and I wanted them to be under the paint/under seal otherwise they will soon rust to the point of not coming out ever again. Much easier to wire brush a bit of paint off if I need to remove the seat belt that deal with a bolt thats rusted. Before I put the interior in, I needed to actually paint the inside of the floors, which I did with a combination of satin hammerite brushed on the floors themselves and normal stain black aerosol into the more hard to reach areas. Before I put the carpets in I also emptied a can of cavity wax into the sills and other hidden areas. 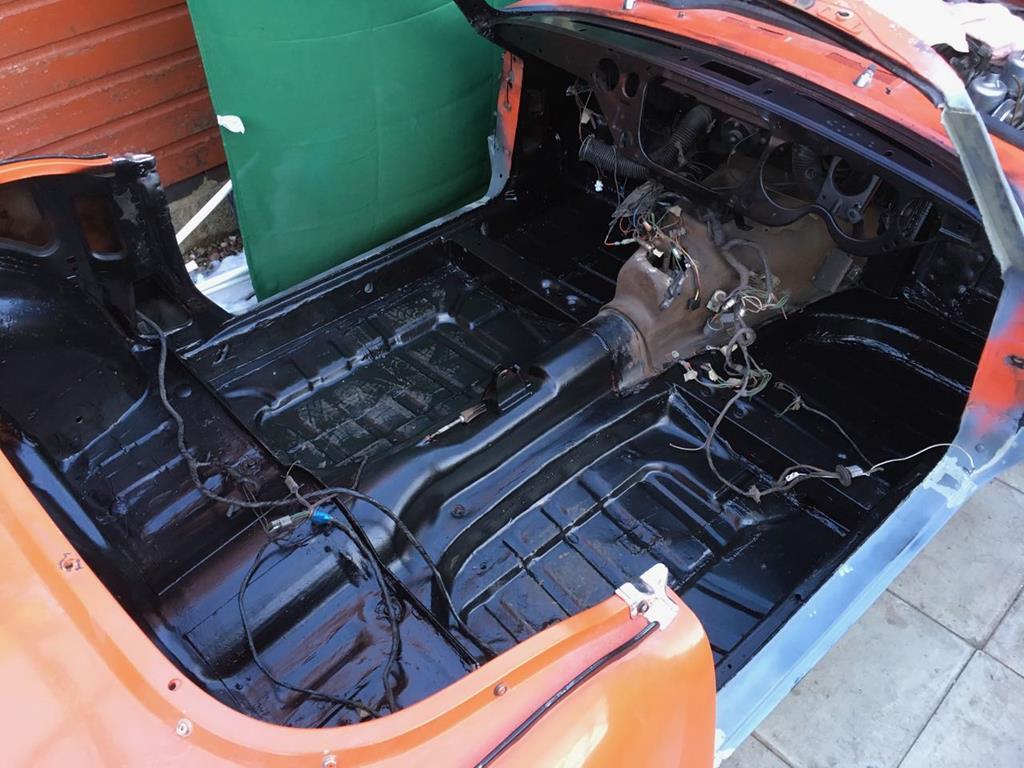 In the past I've paid for the expensive 'restoration' grade paint and protection products, but as projects have gone by I've come to the conclusion that some of the traditional (and importantly cheaper...) products aren't as bad as people say they are, and with the right prep as used in the right locations they work just fine for my needs. I decided to go for black as it left me flexibility for the future with the colour of the body. I also personally think as the carpets and other trim will be black I don't like it when a chink of body colour can somethings show through, I'd rather it was black underneath. Then if a 40 year old bit of trim doesn't fit quite as well as it should, then its less obvious! 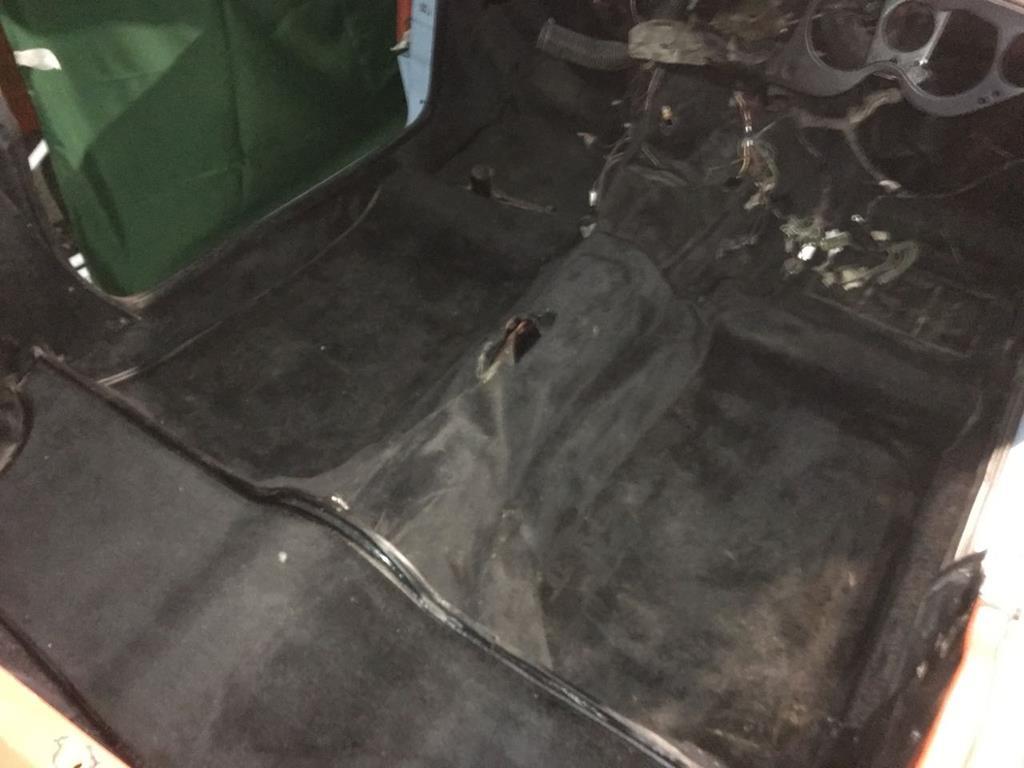 The carpets went back in, they are pretty worn but they will do for the short term. In the fullness of time I'd like to replace them and fit a little sound deadening under them. I'm under no illusions that this car will ever be quiet or civilised, but if a little sound deadening can keep the worst of the road noise and rattles at bay then that's no bad thing. In theory the car stays dry now I have a carport for it... but this tends to go out of the window when it snows. The snow blows around and swirls right in under the carport. With the carpets now in, and that late march snow shower predicted I had to rush forward and get the car weather proof. Edit: Remembering things out of order gonna edit the next post! |
| |
Last Edit: Apr 10, 2018 11:23:46 GMT by goldnrust
|
|
|
|
goldnrust
West Midlands
Minimalist
Posts: 1,887
Member is Online
|
|
Apr 10, 2018 11:21:06 GMT
|
It was around now that my hand was forced regarding body colour. I was rushing headlong towards making the car weather proof, which amongst other things means windscreen in and door seals on. Areas like the inside of the windscreen frame need painting before I fit the screen, I thought it much better to decide on a colour and paint under the seals now, rather than have to pull the windscreen out again in future to paint. My wife and many of my friends were boring with long discussions about paint colours, and the conclusion was that I was going to change it. The car's not original enough to make it important to keep the orange, and I've not made enough memories with it yet for me to have any sentimental attachment to the orange. I wanted something a bit more classic and tasteful feeling than the orange and settles on Triumph Wedgewood Blue, a spitfire colour, just one offered a few years earlier on MK3 and MKiv spitfires. I had an aerosol mixed up at my local paint place, just to do the areas that are currently critical, if I like the colour then I can go back and get a can mixed up to spray the whole car properly later on. I did the basic prep needed, finish isn't overly important as its 99% going to end up under the seals and likely the rest of it will be sanded back and sprayed over when I do the rest of the body. After the critical areas undertake seals, I used the rest of the can up on the sills, so they were protected from the elements till I get round the painting properly. 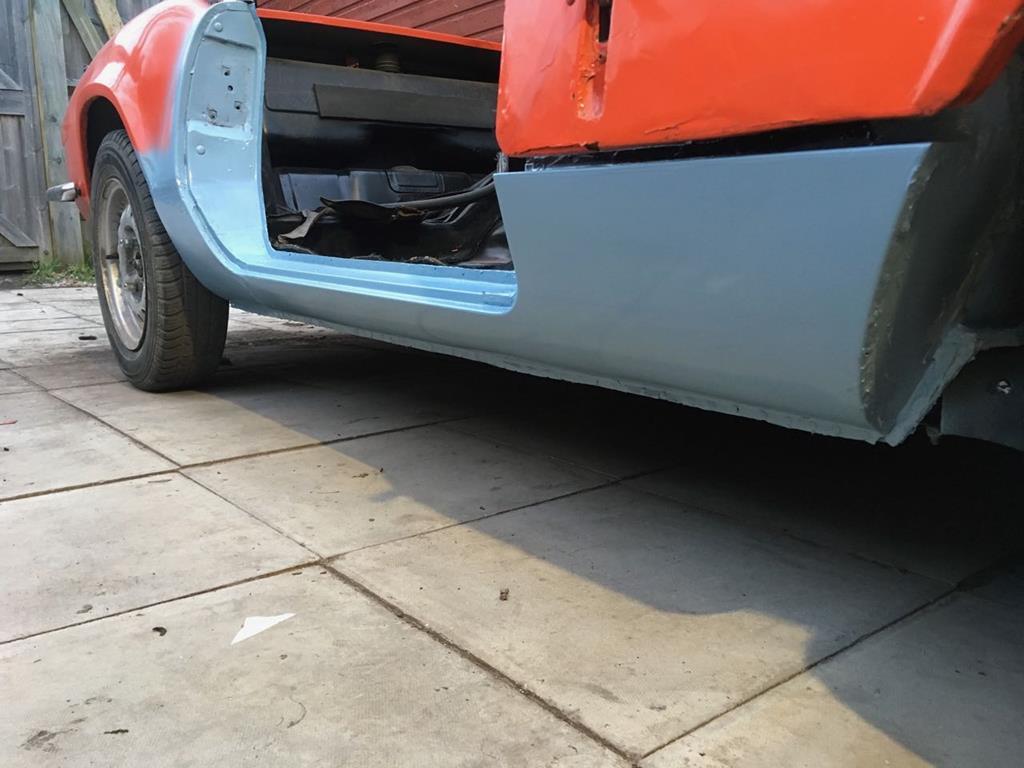 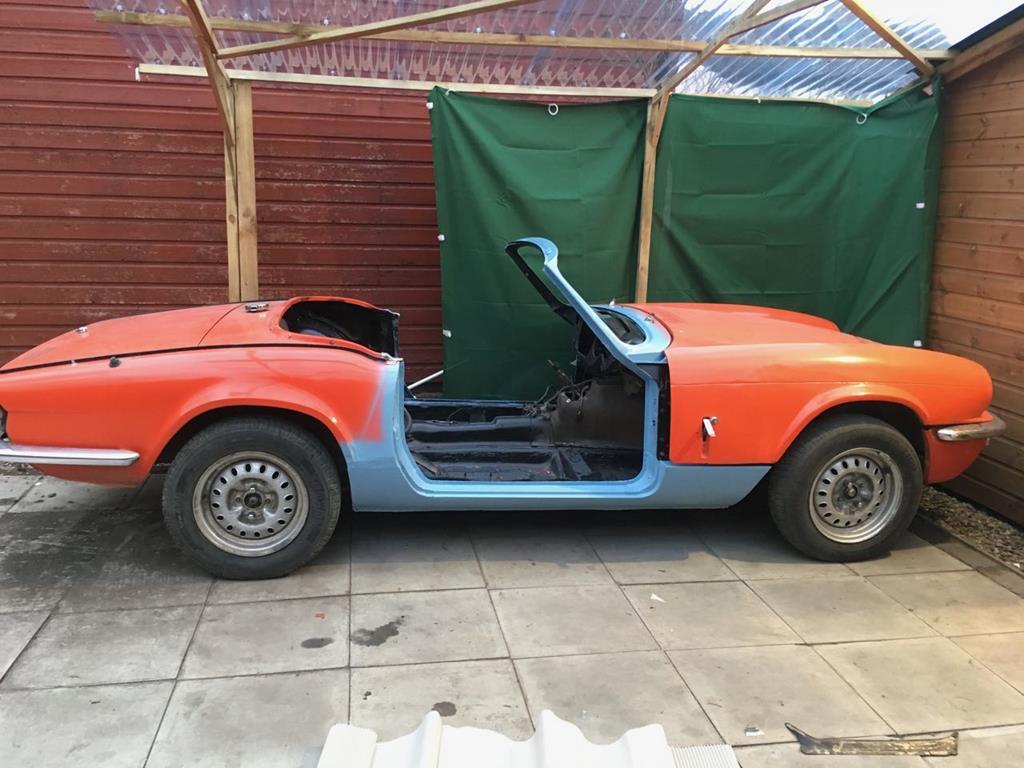 Despite currently looking like a really bad Gulf colour scheme, I really like the blue and will definitely be sticking with it to do the whole car.  As soon as the paint was dry enough I rushed onwards trying to get the car weather proof before I risked ending up with wet carpets! The roof went on pretty easily, the windscreen was as much of a pain in the as as you'd expect, but went back in without any real drama and then I went to hang the drivers door and remember it was full of holes... damn! After a coffee break, there was only one thing for it, I felt ashamed, but I just bashed some filler in the bottom of the door and spend 5 minutes very roughly shaping it, and again that will do till I can source a new door, this one is too far gone to bother repairing. 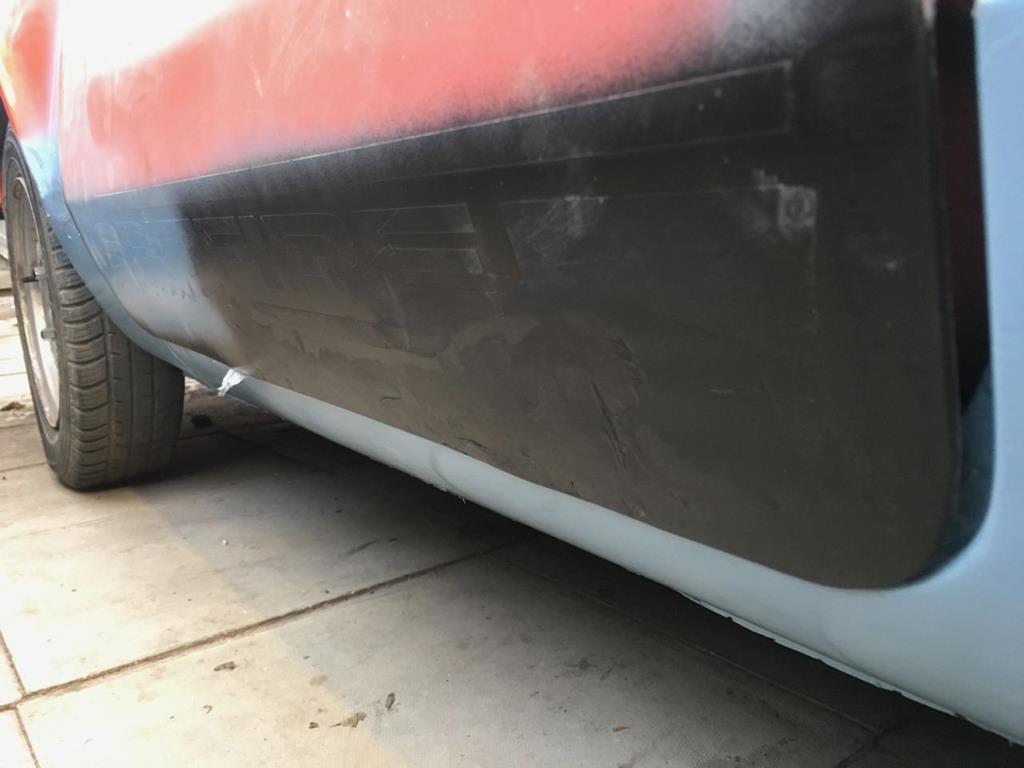 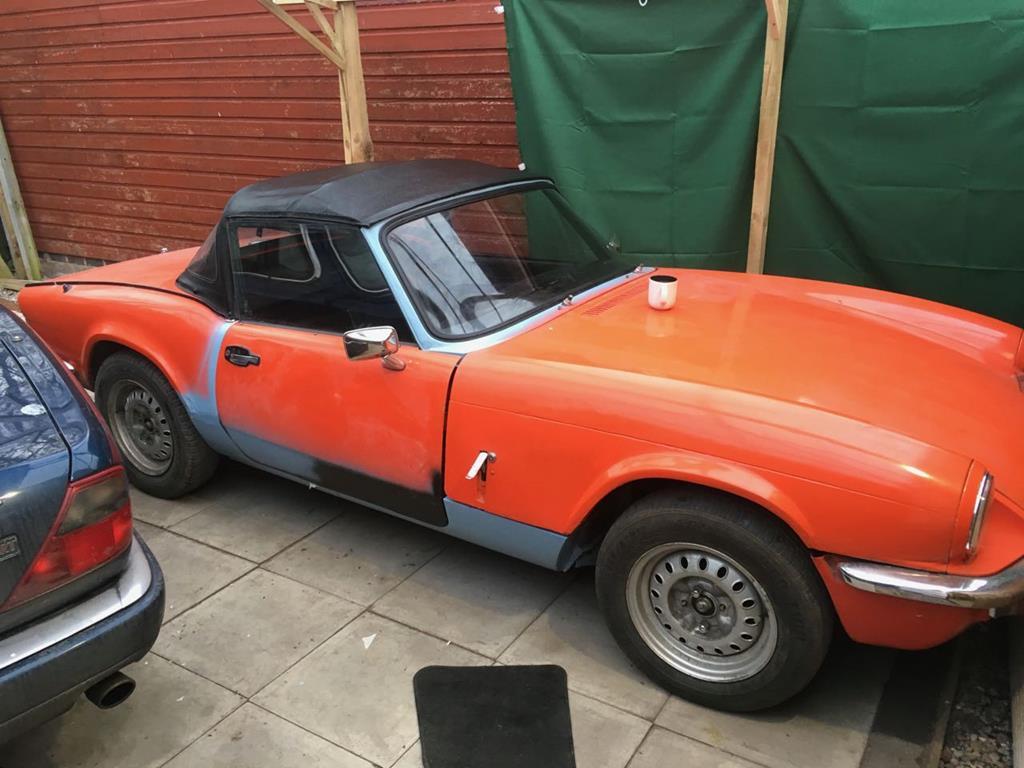 While the weather was being horrid, I retreated inside the shed and started to look at the master cylinders. 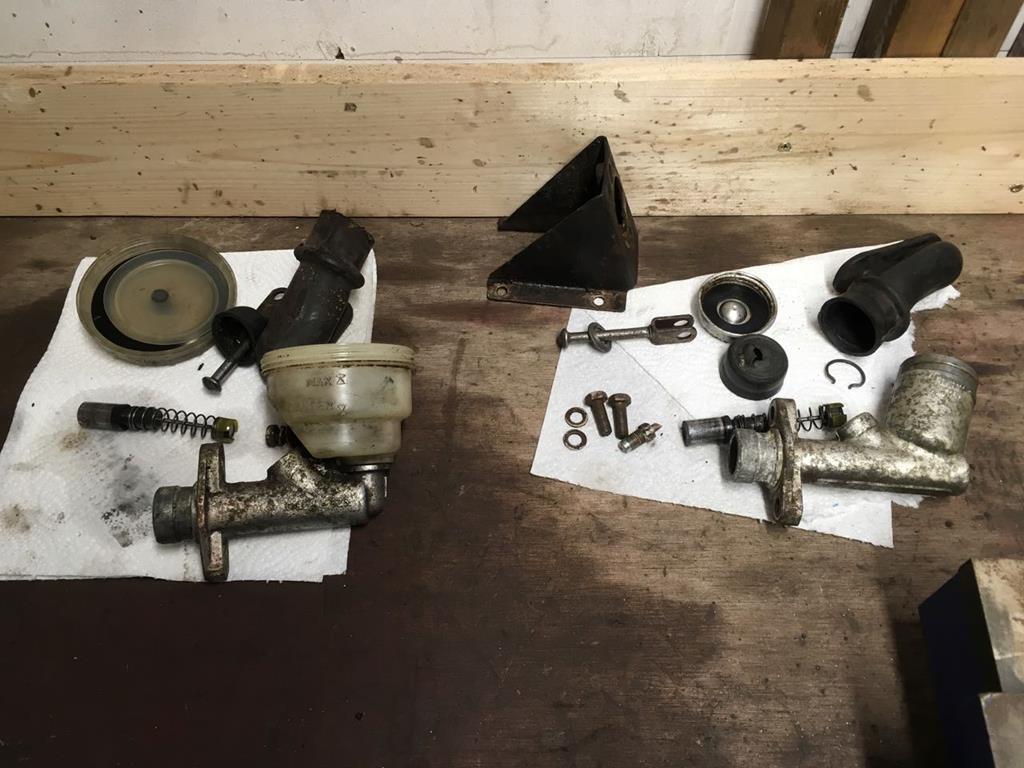 Both were looking pretty mucky, and the brake master was definitely leaking. Given that they are only single circuit brakes, I wanted to play things safe and so there was no way I was going to just bolt this back in. A positive of the single circuit brakes is that the master cylinder rebuild was the easiest I've ever done! The bores inside both brake and clutch masters were good condition, I polished away a little corrosion right at the opening end with a soft brass wire wheel and a little autosol, and gave the outer surfaces a quick clean up. Both master cylinders went back together with new seals and put a new fitting and flare on the clutch line (I'd had to cut the original to remove it) and they were ready to go back in the car. 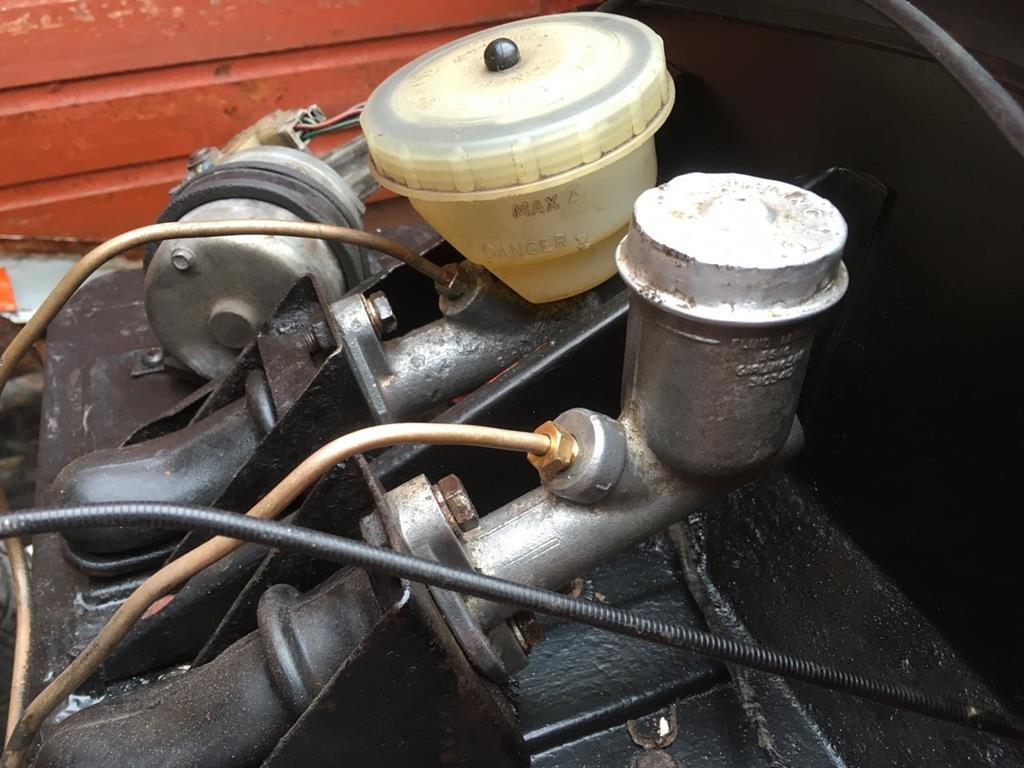 I was a bit curse word with pictures as I was just focused on getting the car back together and going for a drive, but I also stripped the pedals down and polished and greased all of the pivots. I know with my motorbikes how much of a difference in feel this can make, and it did make a good difference the pedal feel here too. I could now put the rest of the interior back in, I'd just done the essentials for now, I still need to sort some sort of audio set-up and some fo the trim is missing but the important stuff to enable me to go for a drive is there. Still, what I have bolted in has been done properly. I bought new bolts for the seat mountings (proper imperial ones that screw into the nuts welded to the floor, rather than the undersized metric ones the previous owner had bodged in with big washers and unlock nuts under the car) and used all matching trim screws (rather than the mess of different types fitted when I bought it) 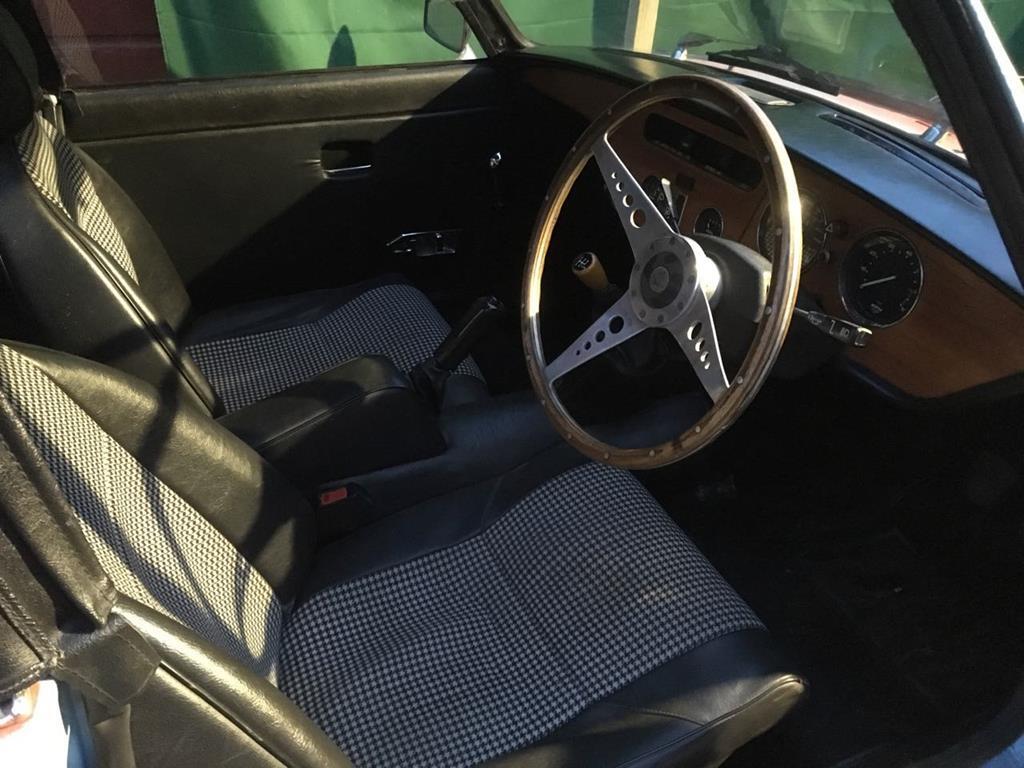 Starting to look like car now  Phew, all of that just so the seatbelt bolts were in, so I could deal with the underside. 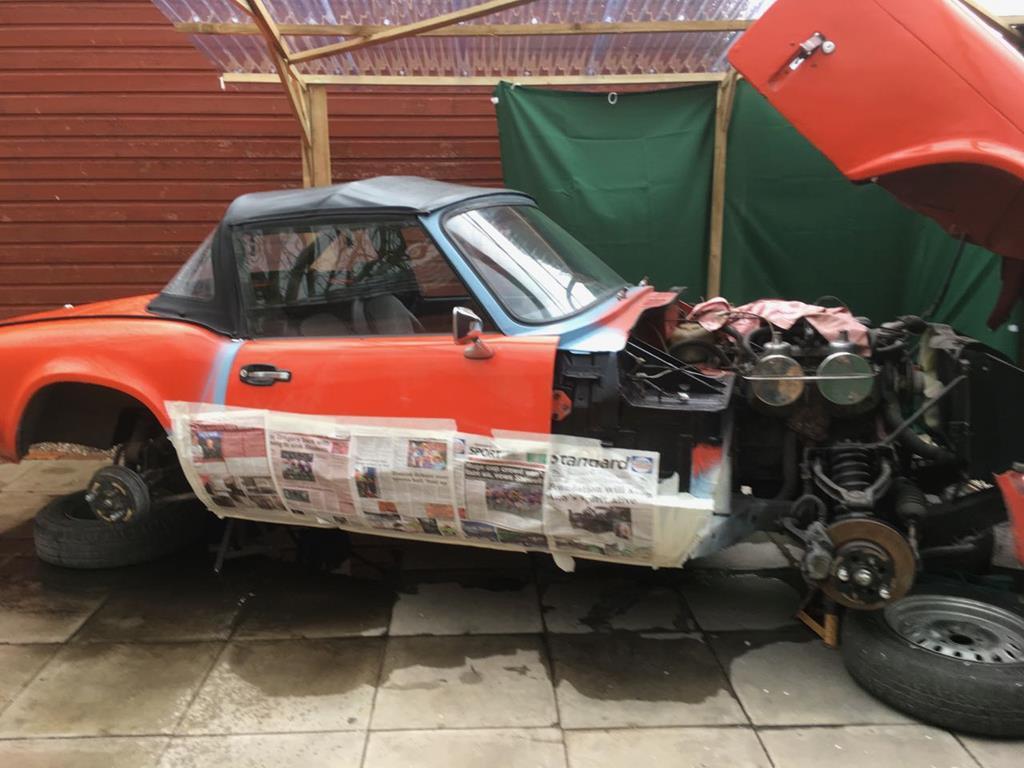 I masked up then sprayed the underside with a coat of stone guard,a quick lick of cheap paint and a good coat of underseal. Hopefully that will all work together to keep the rust at bay! There were various other small niggly jobs to sort, but essentially that was a reassembled car, and seeing as it still has all the requisite pieces of paper to make it legal to drive on the road, that had to be the next step! So the big moment, I reconnected the battery, turned the key and she fired into life with relative ease. Popped it in reverse, which went in with a loud clunk and then I shot backwards! The clutch wasn't working. It took me a couple of evenings of messing about making sure that the system had bled properly and was all working before I was sure that the clutch had stuck to the flywheel. Google had many suggestions and I worked my way though them, starting with the gentle and moving on to the severe! In the end I finally got it free by putting the car on stands, warming it up till the engine (and therefore flywheel) was good and hot, then starting it in gear and repeatedly revving ti and then stamping no the brakes, all with. my foot on the clutch. After 5 or 6 revs up, it made a loud bang and then the clutch was working. Time to drive! 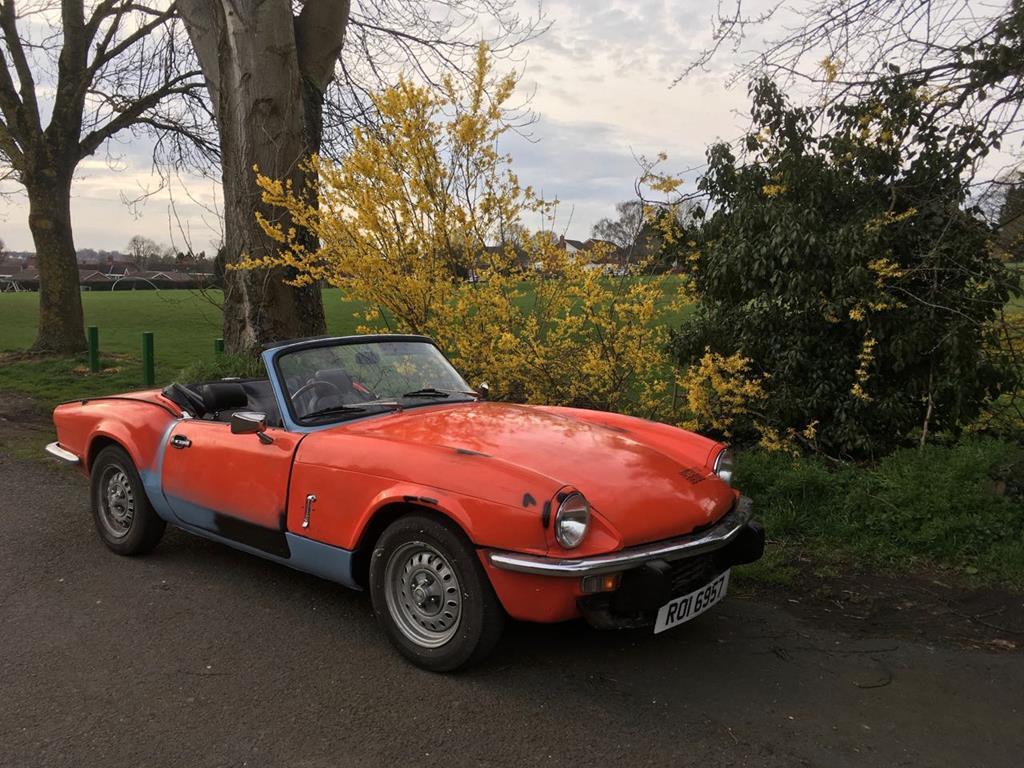 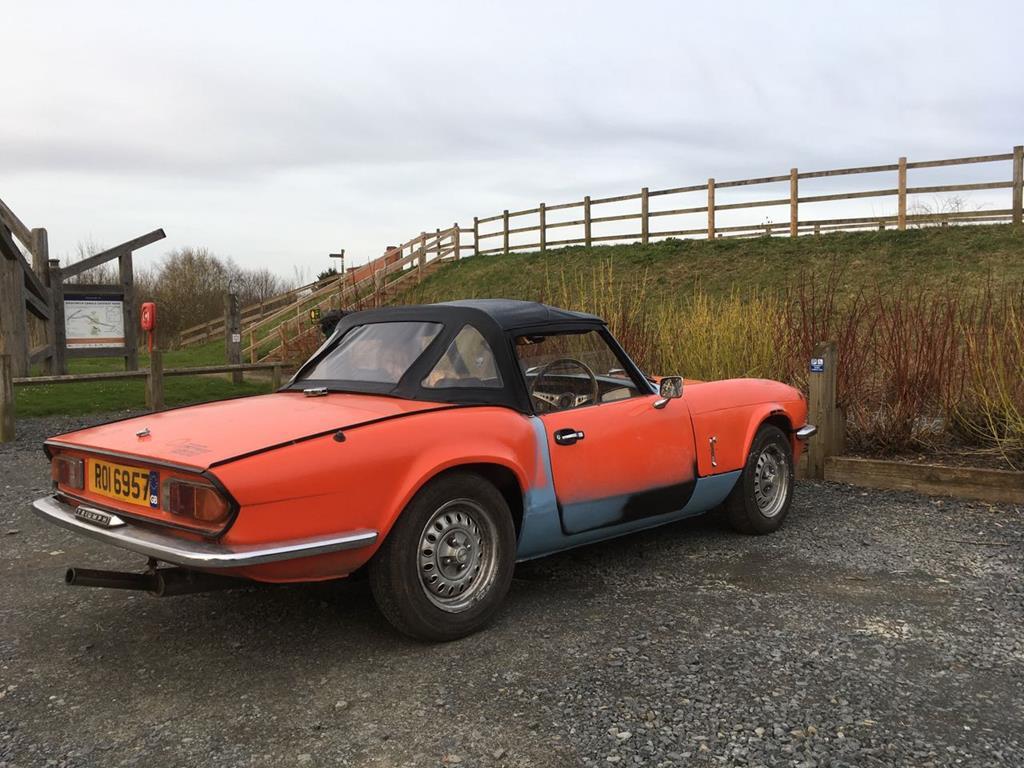 I've been driving her about all this weekend, turning lots of heads, not for good reasons though I don't think, hahaha. It's rubbish in so many ways, but also rather wonderful. Nice to be really 'driving', working the precise and mechanical feeling gearbox, feeling the road through the steering etc. I could really feel the extra stiffness in the sills to, I could feel the suspension working more through the bumps and the car staying on line better over bumps in the road, so all that welding was worth it. There's a long list of things to look at still, especially as the MOT is due at the end of the month! But it feels really good to know that the floors are solid. Changing a few bushes and bearings is a lot less daunting that looking at a car with huge chunks cut out of it! hahaha. |
| |
Last Edit: Apr 10, 2018 11:57:53 GMT by goldnrust
|
|
|
|
|
Apr 10, 2018 12:40:39 GMT
|
|
Well done! Decent doors are getting pricey now. You can buy door skins (though if only holed below the swage line it's perfectly possible to make your own repair section) and the frames are not usually too bad to repair.
Good luck with MoT. Our is due Friday. It's only done just under 3k since the last, so hoping all will be well!
Nick
|
| |
1967 Triumph Vitesse convertible (old friend)
1996 Audi A6 2.5 TDI Avant (still durability testing)
1972 GT6 Mk3 (Restored after loong rest & getting the hang of being a car again)
|
|
|
|
|
|
|
|
what a "triumphant" victory!....
sorry, had to say it. Must have been great driving around in a car you resurrected. glad the clutch issue went well..wow...you have courage...or determination...or both!
I think it looks great and is very clear that it is a work in progress....
well done
jP
|
| |
I know its spelled Norman Luxury Yacht, but its pronounced Throat Wobbler Mangrove!
|
|
goldnrust
West Midlands
Minimalist
Posts: 1,887
Member is Online
|
|
|
|
Thanks guys.  I didn't realise doors were going to be tricky to find. The rot is fairly well contained to the bottom couple of inches of the door, but will require repairs to the frame and the skin. Not impossible, just looked like a fair bit of work! Good luck with your MOT Vitesseefi, as you say if you've only done a few thousand miles it's probably not had chance for much to go wrong  I've got a list of things to sort ready to get mine MOTed, most of them are niggly little things, but the biggest is theres some play in one of the front trunions that I think will need replacing. I was a bit bored last night, so went for a late night blast. I was a cool murky night, but roof down, heater on with music blasting (in my headphones as the radio/speakers aren't sorted yet!) over the top of the classic gurgle of a little 4 pot on twin carbs .... was rather wonderful. It's that hairs on the back of your neck moment that make all those weeks of welding worth while  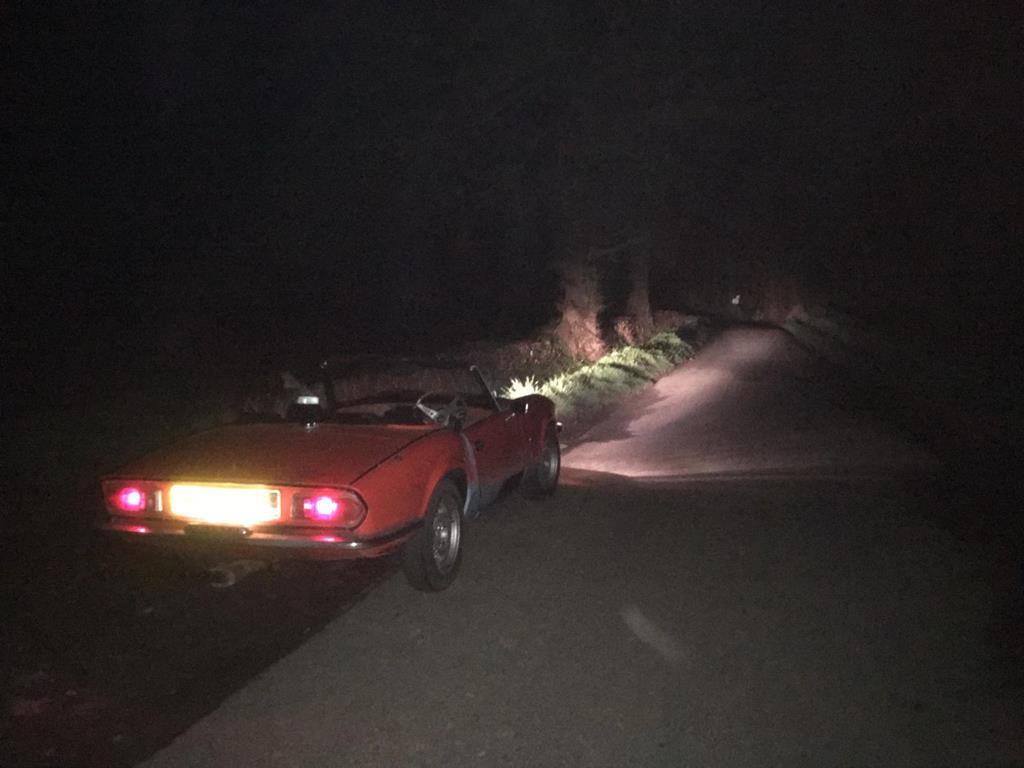 |
| |
|
|
goldnrust
West Midlands
Minimalist
Posts: 1,887
Member is Online
|
|
Apr 27, 2018 21:51:12 GMT
|
Wow. It's amazing how time passes when you can actually drive your car! Doesn't feel like nearly 3 weeks since I got the car on the road. I've been using the car as much as I can. Sadly, I knew that this would only be relatively short lived bit of fun, as there wasn't much time left on the MOT. I was half hoping that I could work my way down the list of MOT updated in time, so I've been working my way through the mechanical issues in between drives. First up on the list was that front trunion I mentioned in the past couple of posts... turned out it wasn't the trunion at all. I could swear I felt play in the grunion before, but as I started to pull the car apart to investigate it was obvious the play was in the wheel bearing. I'd already adjusted the wheel bearings shortly after I got the car, so maybe I'd discounted it for that reason. 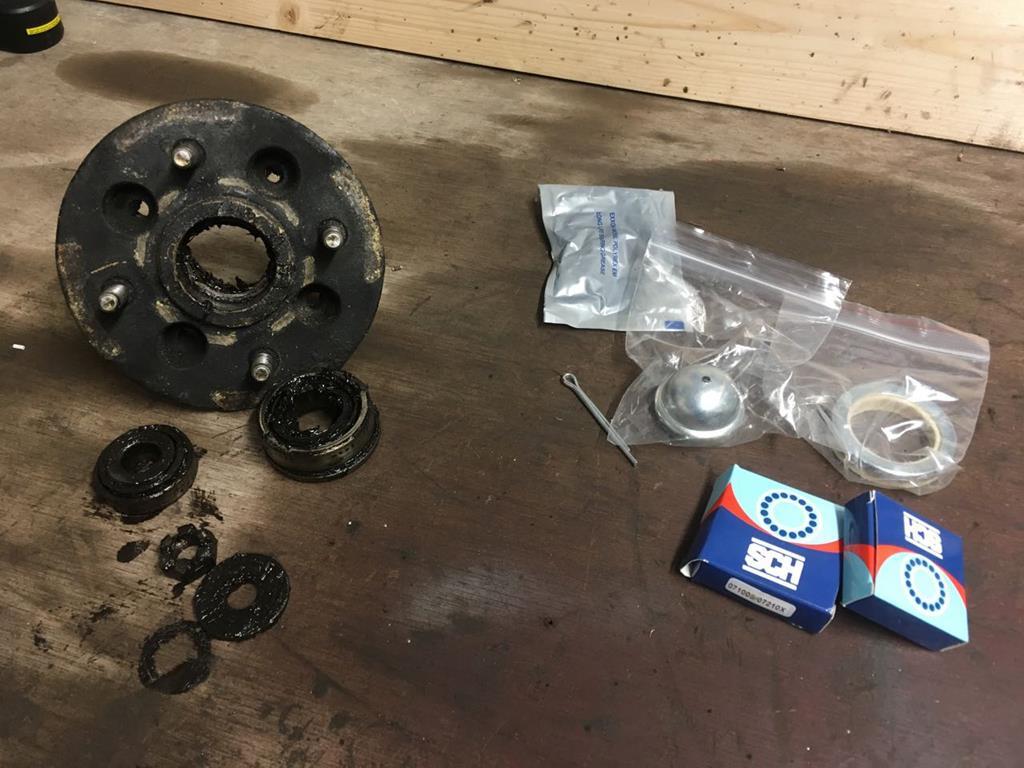 Rummaging through my box of spares I found a brand new front wheel bearing, which was a nice surprise. The car came with the boot full of all sorts of parts, and a surprising amount of new parts , I can only presume the previous owner had big plans to do it up and then never got round to it. Anyway, pulling the old wheel bearing out, it was trashed and full of metal fragments. I'm fairly sure that it had eaten one of the legs of the split pin, so that might be might fault for re-suing the original pin when I adjusted the bearings. Oops! Not to worry, the new bearing went in nice and easy, and with a new split pin this time! Out on the road it was noticeably quieter and the play at the front wheel has gone. The next thing to get a bit of attention were the carbs. From day one of my ownership the car has idled terribly, and been lumpy on seal throttle openings, it was time to sort that. The cause was fairly obvious, the throttle spindles were worn and leaking. Stripping the carbs down there was a visible wear step in the spindle so I was hopeful that the carb bodies were ok, and new spindles would sort it. 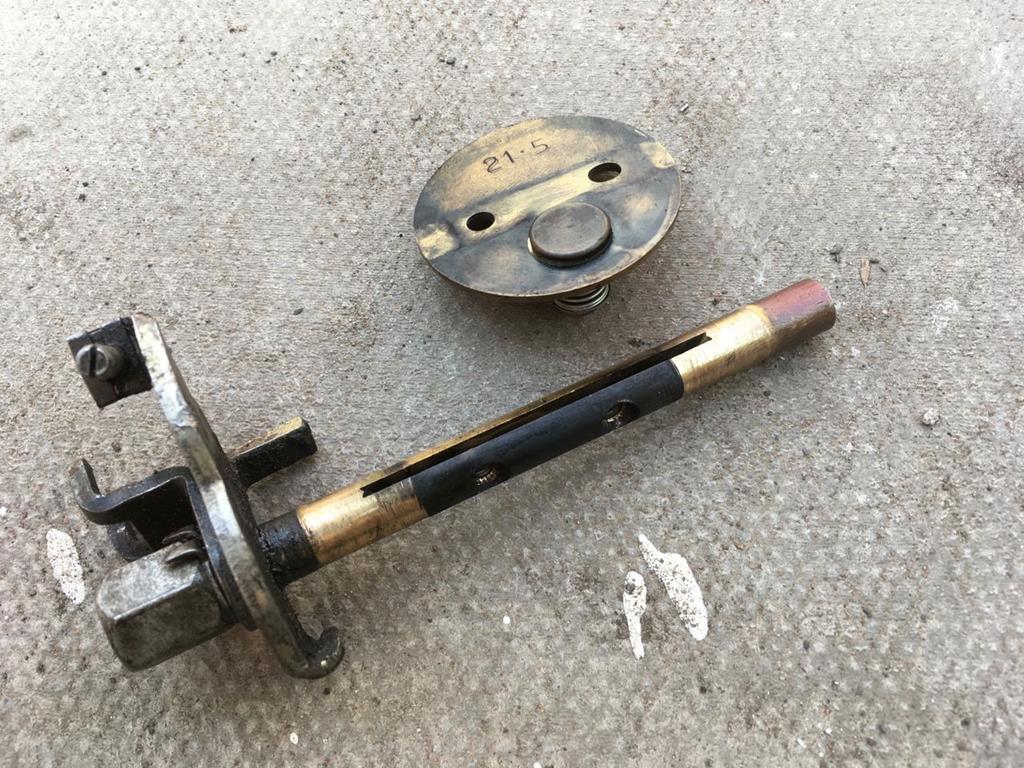 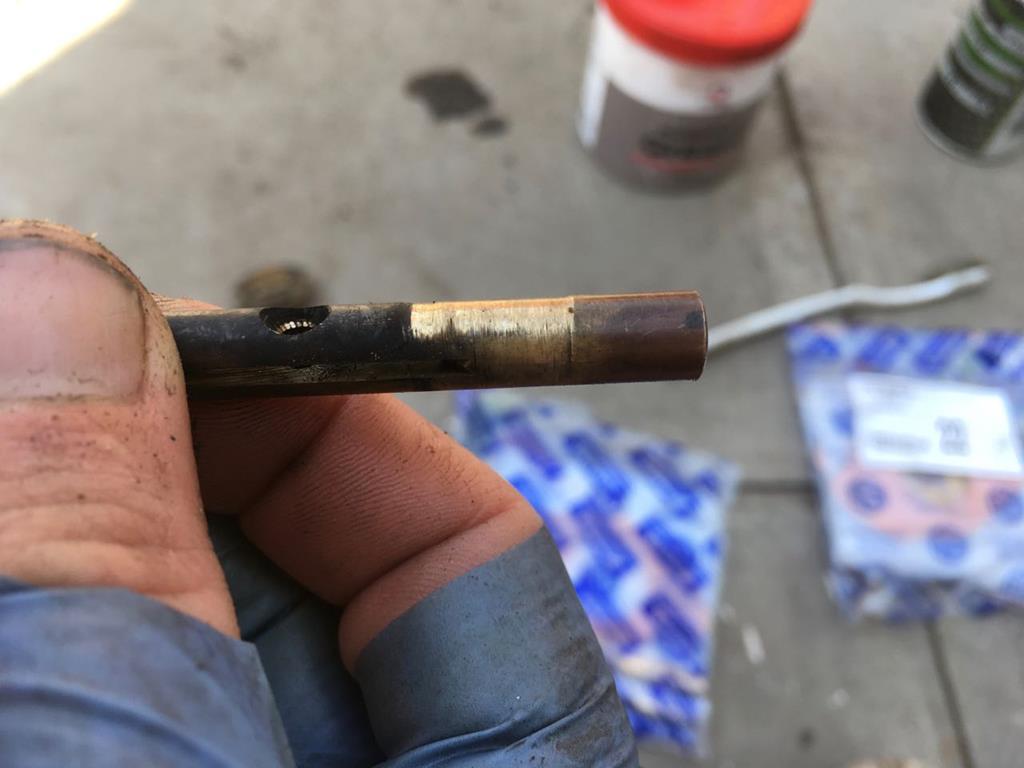 While I was at it, I took the opportunity to replace these nasty throttle plates with the poppet valve. That's gotta ruin the air flow in what is already (to my eyes at least!) a fairly small pair of carbs. 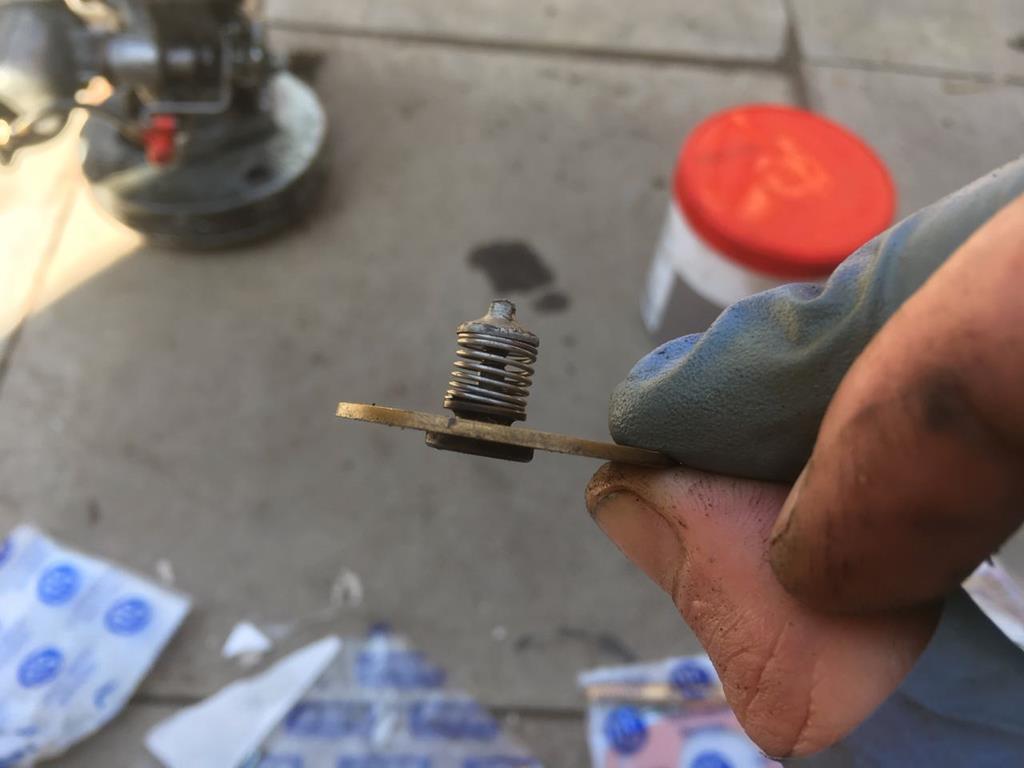 Here's the shiny new spindles and plain throttle plates. 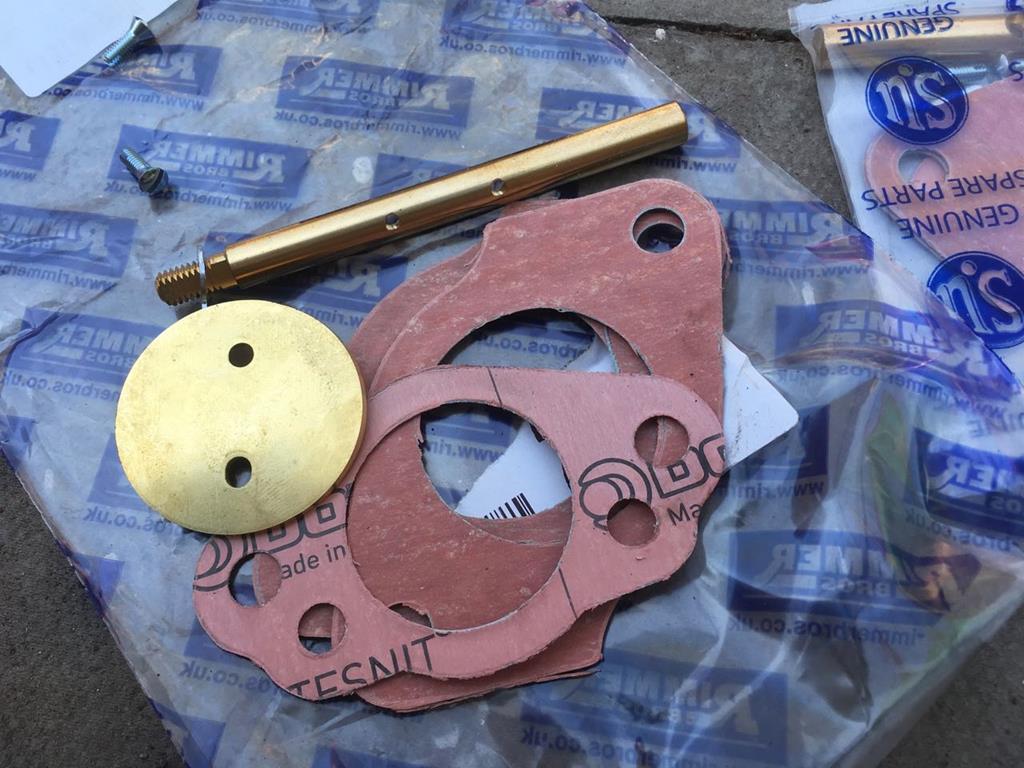 The carbs went back together fairly easily, and once back on the car it immediately felt smoother. It also responded to tuning the carbs in the way described by all the guides for SU carbs, lifting the dashpot a touch and seeing how the engine responded. It took no more than 20 mins to get it tuned up way better than I'd ever managed before. So that was a definite success. While I had been sorting that front wheel bearing I noticed just how destroyed the front anti roll bar bushes were. 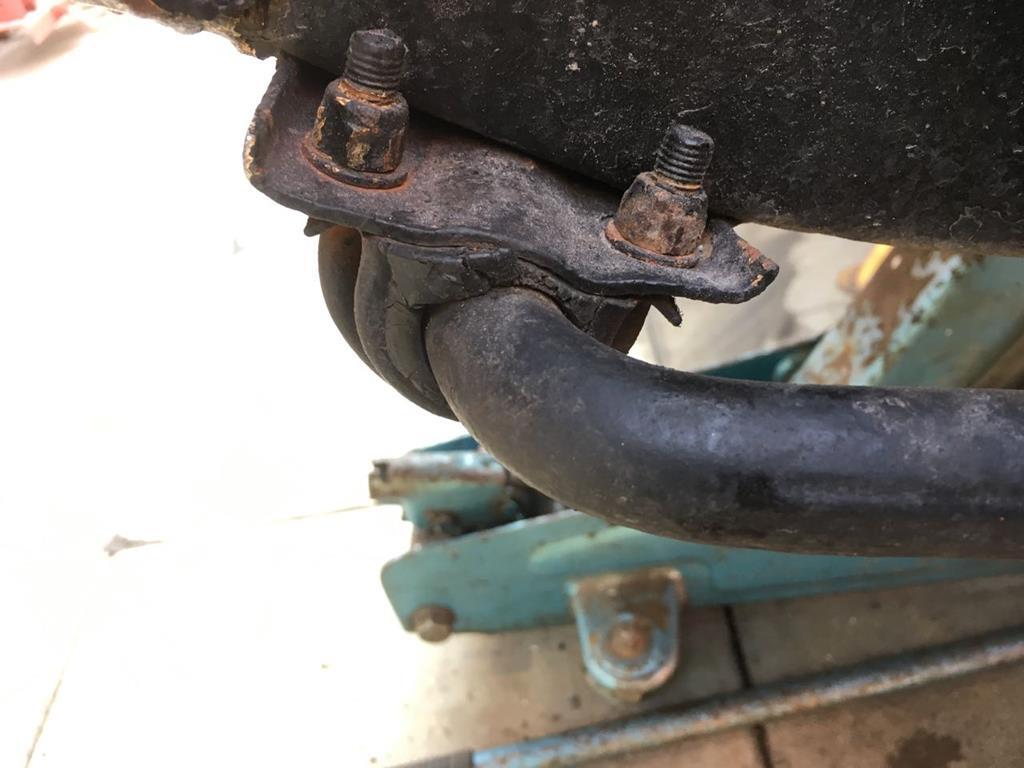 So I picked a couple of those up too when I ordered the carb parts. New Vs old here, no guesses for which is which... 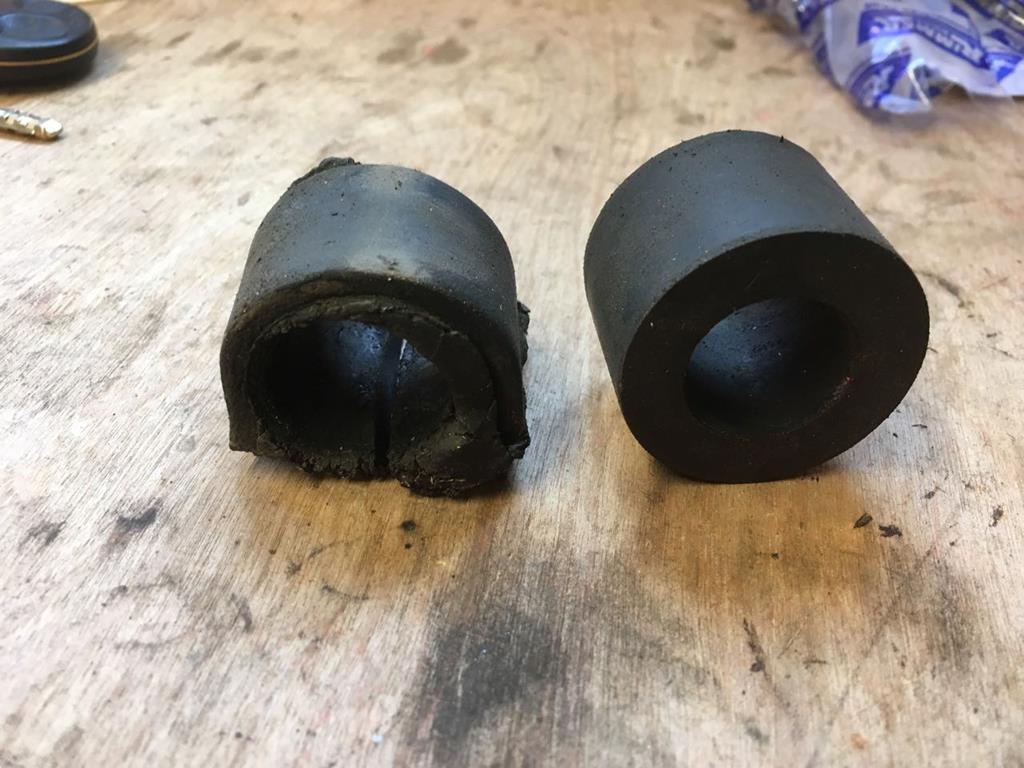 Slowly but surely as I would through the mechanical issues the car is starting to feel more tight and together. It's really nice when straight forward jobs like this that only take a couple f hours make a good noticeable difference to how the car drives. Sadly there will be no more driving for a bit now. The MOT ran out a couple of days ago and there's still a list of things to look at. Not least of which is that it needs a set of 4 tyres, which will probably have to wait a few weeks till I can spare the money. So I'm. going to take a slightly more leisurely approach and work my way through the to do list, putting a little less pressure on myself than I did to get the welding done! Top of the to do list are the rear wheel bearings and to sort the rather large oil leaks (engine and diff!). I'm going to have to wait to buy the tyres for the Spitfire as my Jag has been bleeding me dry! In the past few weeks its had 2 front wheel bearings, a new water pump and a set of 4 tyres. Still, its a rather wonderful way to travel and I'm very happy with it. It even looks good after a wash and a polish (I know, I actually polished it, must be losing my mind) 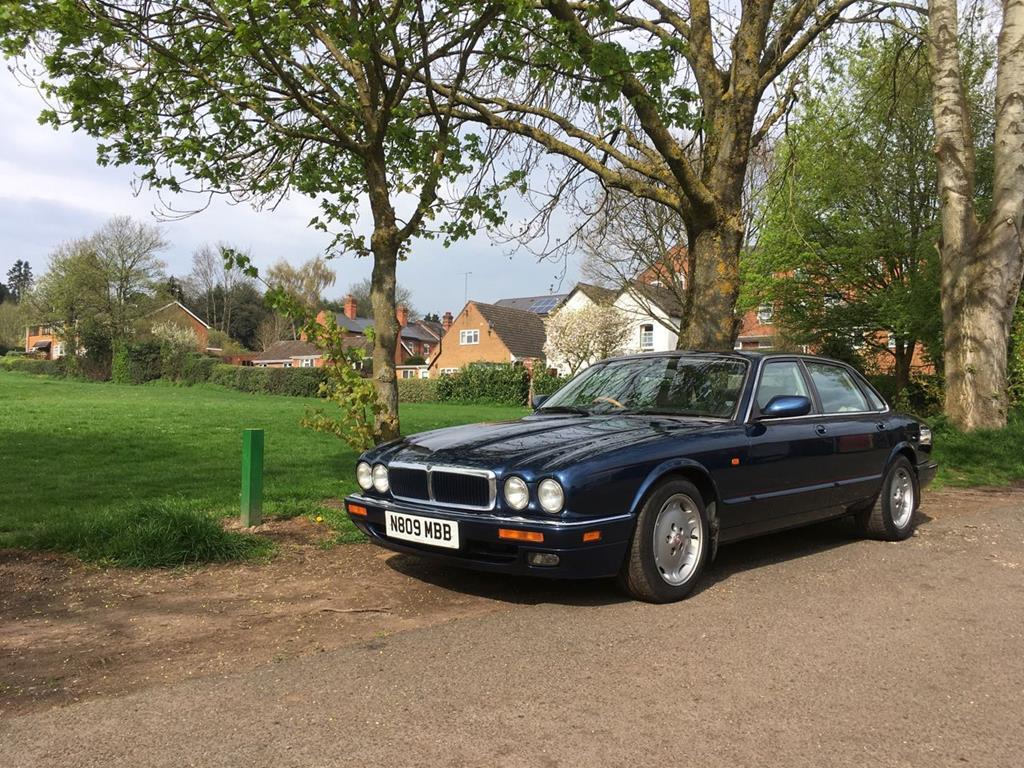 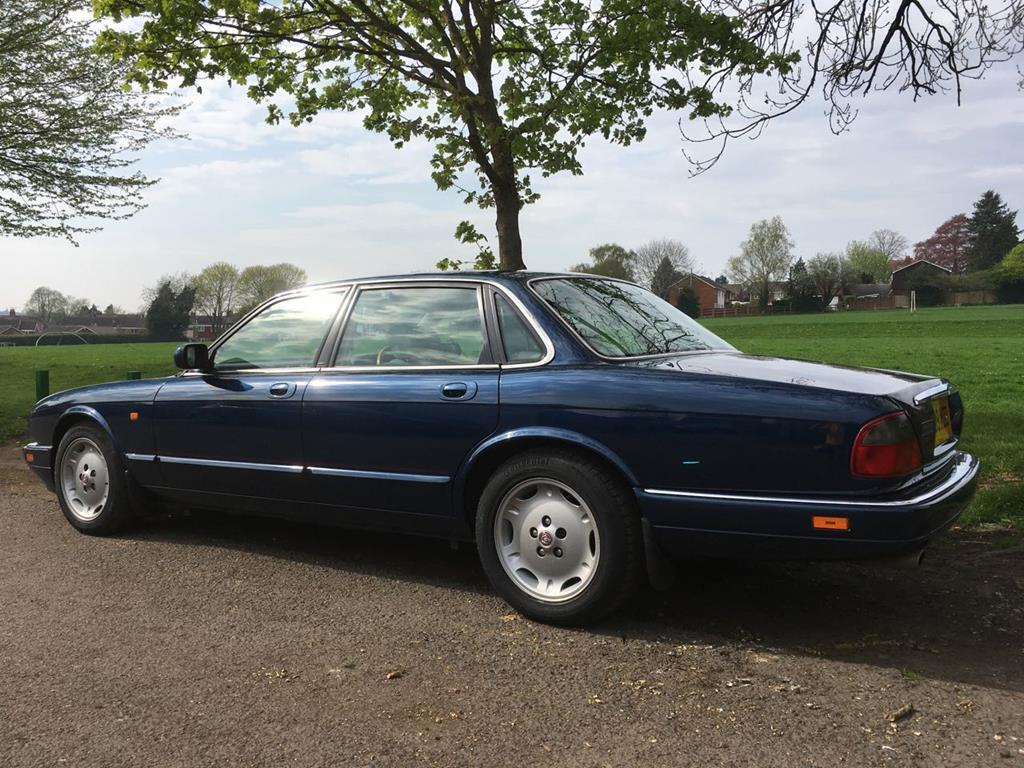 |
| |
|
|
goldnrust
West Midlands
Minimalist
Posts: 1,887
Member is Online
|
|
Apr 28, 2018 19:19:08 GMT
|
So yeah.... Kinda cursed myself here I think. Normal service was resumed today at the Goldnrust house hold, broken car, broken bike and the welder out to play. 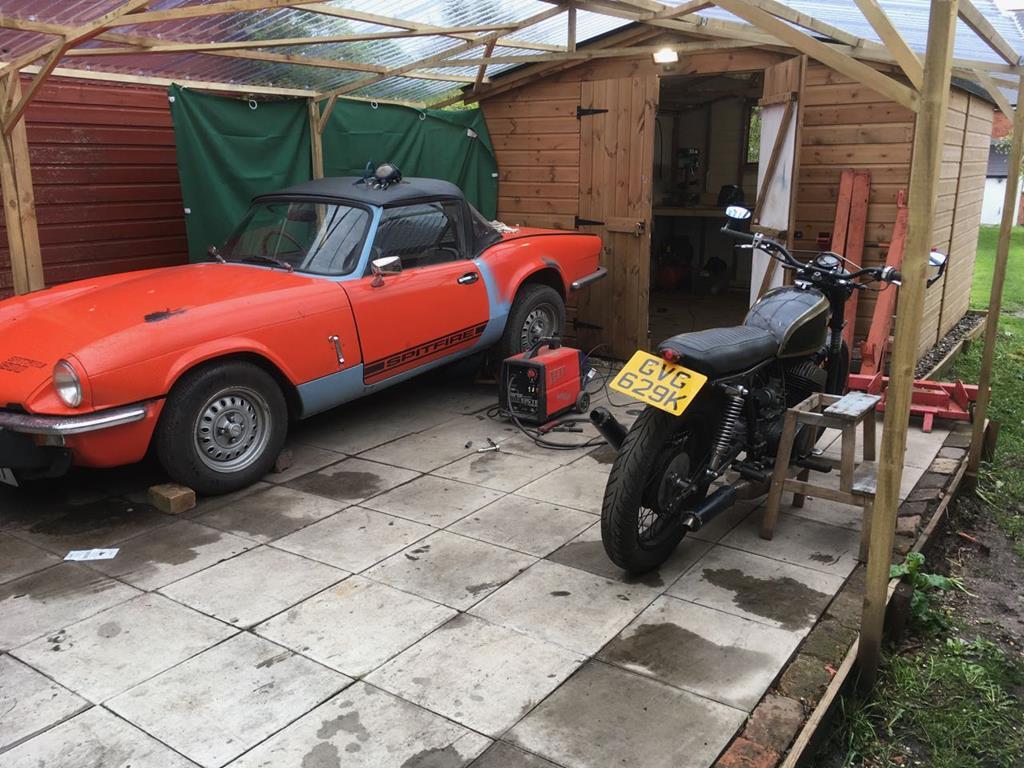 My bike was having an exhaust re-design to make it marginally less antisocial, it's not set any car alarms off yet (like my rotary Mx5 did  ) but yeah it's too loud! The side stand is a temporary set-up, the proper side stand ejected itself last time I was out riding  Anyway, back on topic, Spitfire! So, as mentioned last night, number 1 on my to do list is rear wheel bearings. While I'm at it I'm going to give the whole of the rear suspension a once over. It's already had new U joints in my ownership, so thats done, but the rest of it needs some love. Anyway, first things first, wheel bearing. It started well... 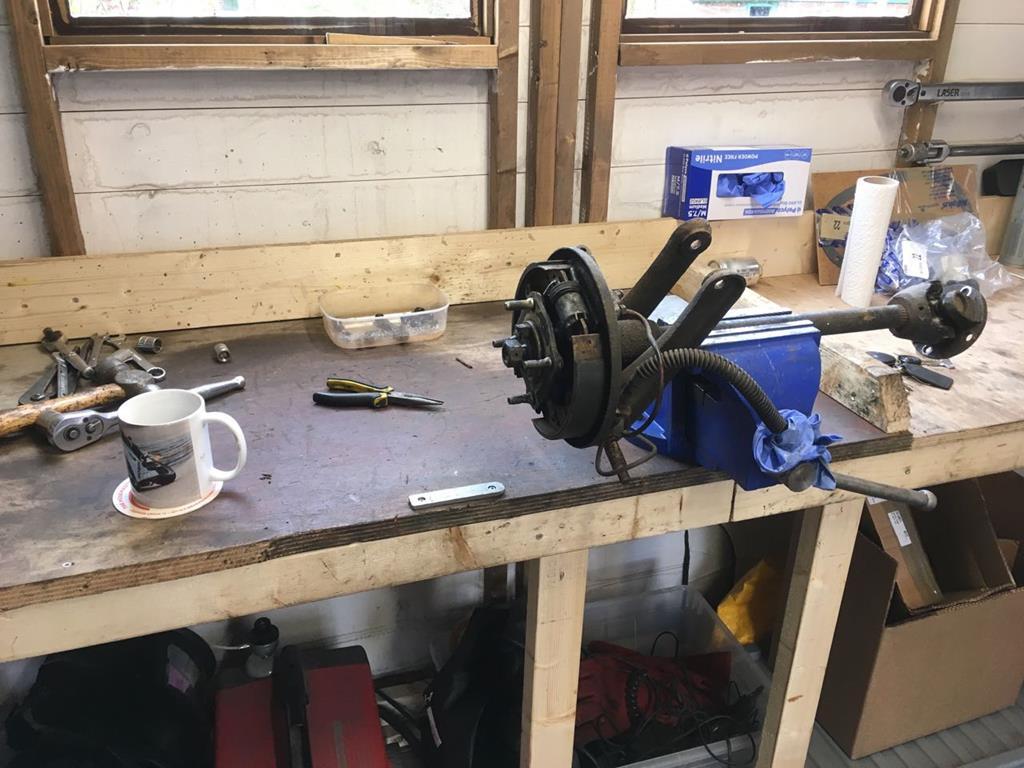 The axel came off easily, and it's a casual afternoon job with a mug of coffee in the war and dry of the garage. Excellent. Things went downhill fast though. I'd read enough to know what removing the hub flange wasn't necessarily going ot be a barrel of laughs, and that a special tool is recommended. I'm a cheap skate so I figured I'd make my own... I stripped off the brake and then on closer inspection noticed the hub flange is looking rather distorted. 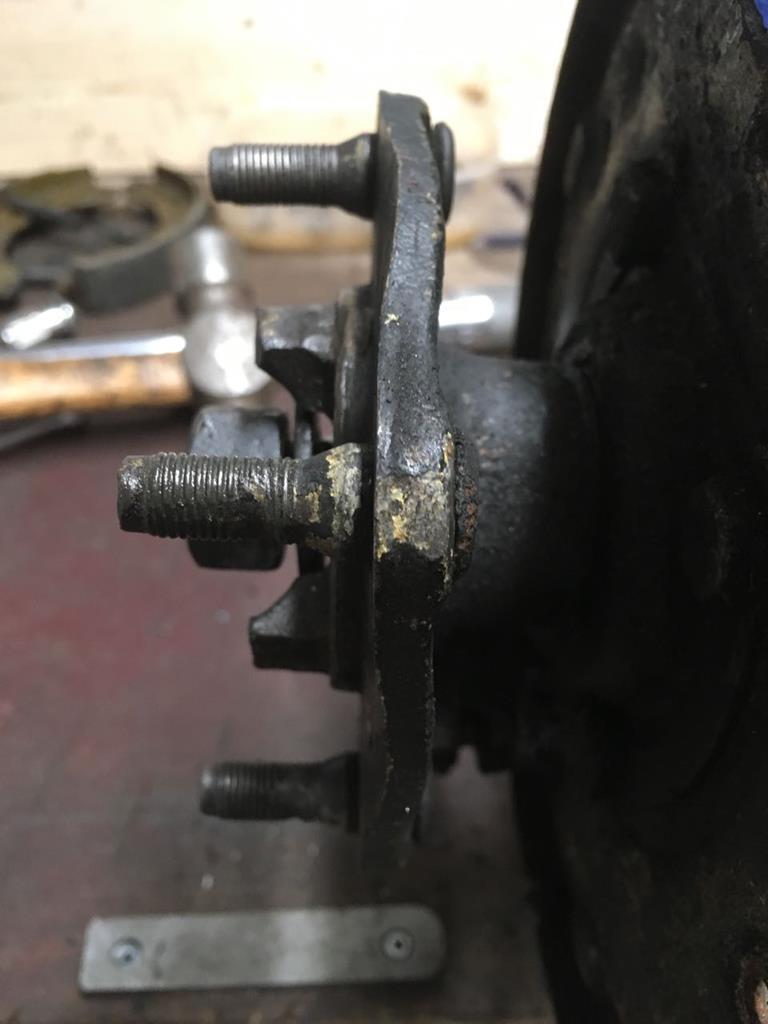 The car came with a set of new rear wheel bearings as part of the pile of spares, and then seeing this knackered hub flange, I'm wondering if someone has tried, and failed, to do this job before. I knew the studs were knackered, they've corroded and loose in the hub, so I've got a new set ready to go in. I suspect I will be ordering a new hub flange and the suds can stay in the spares box! Either way, I still need to do this wheel bearing, so I still need to remove the hub flange. I built a puller that bolted up to two of the studs... 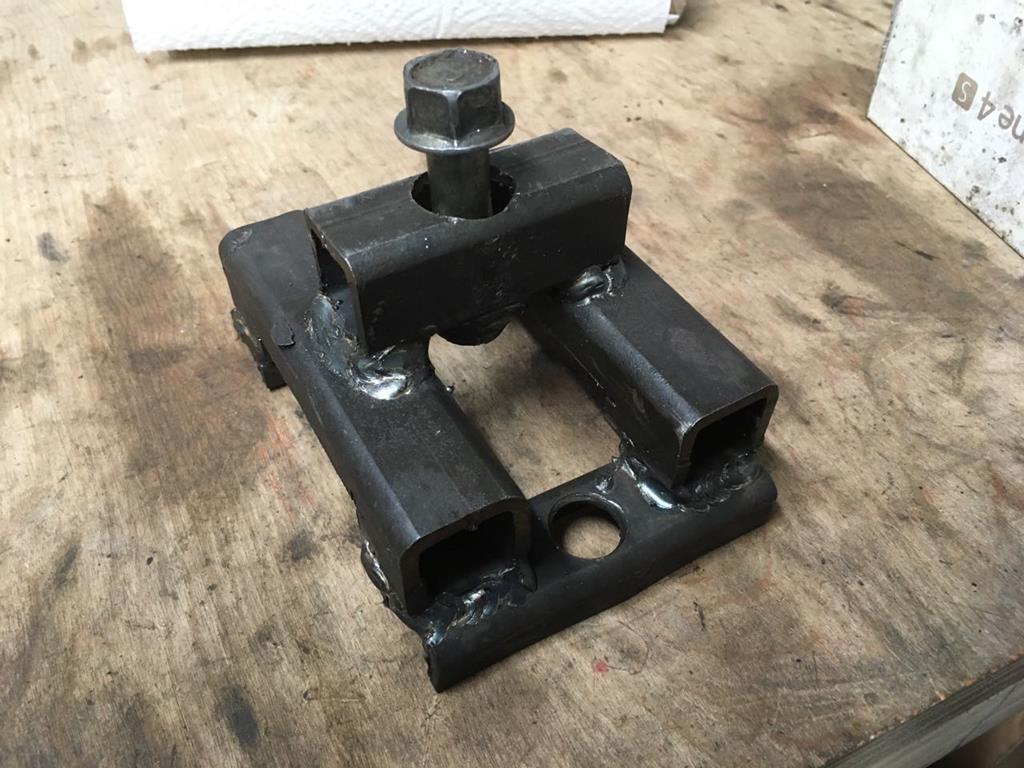 I fought with it for a while, but didn't get anywhere. Fallen at the first hurdle... oh dear. I think next time I'm out there I'll have to get serious and bring some heatinto the mix. The air hammer is yet to be defeated... but tends to destroy things in the process of removing them, hopefully it wont come to that! |
| |
|
|
|
|
|
Apr 28, 2018 19:53:57 GMT
|
|
great progress...
heat can really be your friend sometimes....might work like a charm.
JP
|
| |
I know its spelled Norman Luxury Yacht, but its pronounced Throat Wobbler Mangrove!
|
|
MiataMark
Club Retro Rides Member
Posts: 2,971
Club RR Member Number: 29
|
|
Apr 28, 2018 21:12:30 GMT
|
|
Great to see lots of progress, jag' looks nice as well.
|
| |
1990 Mazda MX-52012 BMW 118i (170bhp) - white appliance 2011 Land Rover Freelander 2 TD4 2003 Land Rover Discovery II TD52007 Alfa Romeo 159 Sportwagon JTDm
|
|
steveg
Posted a lot
  
Posts: 1,586
|
|
Apr 28, 2018 22:18:44 GMT
|
|
I took my Herald driveshafts to the local BL dealers to take apart. They had the proper hub puller and it was pretty huge. The guy said he wound it up with an air gun, went and had a cup of tea and came back for another go ! They did finally come off.
I think the TSSC used to sell an OE style puller.
|
| |
|
|
|
|
|
|
|
|
|
Oooh, glad I spotted this.  And here I was, going to suggest you change your name to orangenrust.  |
| |
|
|
goldnrust
West Midlands
Minimalist
Posts: 1,887
Member is Online
|
|
|
|
Cheers guys. Given that this hub is already mangled by a previous owners efforts, I'll carry on with my home made tool efforts, but if the other side looks better I might have to butter the bottle and buy a proper tool, its cheaper than the cost of the replacement hub flange! Varelse, I did almost change it to Rednrust when I got the Lancia  Orangenrust doesn't roll off the tongue as we'll, maybe thats the underlying reason why I didn't like the colour, hahaha. |
| |
|
|
MiataMark
Club Retro Rides Member
Posts: 2,971
Club RR Member Number: 29
|
|
|
|
|
|
| |
1990 Mazda MX-52012 BMW 118i (170bhp) - white appliance 2011 Land Rover Freelander 2 TD4 2003 Land Rover Discovery II TD52007 Alfa Romeo 159 Sportwagon JTDm
|
|
|
|
|
Apr 29, 2018 10:38:09 GMT
|
|
In most cases you will need the proper puller for these and even then, failure is possible. They can be proper tight!
Is there actually any free-play or roughness in the old bearing. Be prepared for further disappointment as the roller bearing runs directly on the shaft and often eats it, rendering it scrap. If buying new, note there are two possible lengths - yours will be the longer one I think.
Nick
|
| |
1967 Triumph Vitesse convertible (old friend)
1996 Audi A6 2.5 TDI Avant (still durability testing)
1972 GT6 Mk3 (Restored after loong rest & getting the hang of being a car again)
|
|
goldnrust
West Midlands
Minimalist
Posts: 1,887
Member is Online
|
|
Apr 30, 2018 20:02:29 GMT
|
|
Oh good. This could be lots of fun then!
Sadly yes, there's some play and roughness in both wheel bearings, they're not the worst I've felt, but as I'm taking this opportunity to give the mechanicals a proper once over, I wouldn't feel it was right to leave them as is. Feels like the differential output shaft bearing on the drivers side is shot too, and the seals leaking.
|
| |
|
|
|
|
|
Apr 30, 2018 20:41:07 GMT
|
|
Ah, diff side shafts as well..... what a lucky man you are. Actually they are less aggro than the wheel-bearings. I once spent an entire day separating 8 hubs from shafts. Two of them were mine and the deal was that I could use the special puller my trade mate had to do my two if I did 6 he had lying about at the same time. He had the proper puller and a decent 6" vice attached to a serious steel bench, plus hammers, gas axe etc - what could possibly go wrong...?
5 came off relatively easily. 2 of them I had all kind of fun with - things like pulling the thread out of 4 proper wheel nuts simultaneously, 1/4 ton work bench wandering around the workshop, but did eventually win. The final one beat us (my mate got involved half way through the previous two) and was eventually cut up with the gas axe by way of revenge. I forget how many shafts were good to go again but it certainly wasn't all of them.
The diff side bearings are not that bad. Especially if you set out with the expectation that the bearings will be scrap. My first attempt, I thought I was only changing the seals..... The bearings are very tight on the shaft and you need to avoid pulling so hard against the seal plate that you bend it. Breaking up the bearing and grinding the inner race to the point where you can split it can turn out to be the quick way though it is worth a hopeful swing on a puller first. I have to do this job on my GT6. Really looking forward to it - not! At least the diff is already out. While you are in the area, make sure the jiggle pin in the breather (on top of the right hand rear mounting lug is clear and free to move as blockages here are a great cause of leaks and a diff with low oil.... dies.
Nick
|
| |
1967 Triumph Vitesse convertible (old friend)
1996 Audi A6 2.5 TDI Avant (still durability testing)
1972 GT6 Mk3 (Restored after loong rest & getting the hang of being a car again)
|
|
logicaluk
Posted a lot
   Every days a school day round here
Posts: 1,373
|
|
Apr 30, 2018 20:53:40 GMT
|
|
I have heard many storys of woe begin with a triumph rear wheel bearing, 100 ton presses have failed to budge them. A combination of heat and the correct puller is supposed to be the most effective treatment, but usually recommend sending them off to a specialist. but having seen the state of your hub go for it.
Dan
|
| |
|
|
|
|
|
Apr 30, 2018 21:32:15 GMT
|
|
Heating hub then hitting the centre nut of the puller when it is as tight as you dare with a large hammer can shock them free.
|
| |
|
|
|
|
|
|
|
|
I have a nice set of cobra slot mag wheels for sale for a triumph if you are interested
|
| |
|
|
ian65
Part of things
 
Posts: 276 
|
|
|
|
I have a nice set of cobra slot mag wheels for sale for a triumph if you are interested Cobra Slots, the best ever wheels for a Spit, look great polished up. |
| |
|
|
|
|


 ) but yeah it's too loud! The side stand is a temporary set-up, the proper side stand ejected itself last time I was out riding


