|
|
|
|
|
Hi everyone. Long time reader, first time poster. I have this thread posted on a couple of others, and thought it might be of interest to some members here. This thread will begin at the start, way back in.... November, last year and end at current day. So, about 10 years ago I had an SD1, an 85 Vanden Plas EFI in Cashmere Gold. Sadly i sold it because i couldnt afford to run it as my daily back then, and have regretted selling it since.  Anyway, yesterday i picked the new toy up. Its a 1985 Rover SD1 Vanden Plas EFI (again), but in Zircon Blue. It needs some love, but its got good bones. It runs and drives, and actually drives really well.        The powerhouse   So the plan is to give it a really good tidy up, get it in as good condition as i can, but also build a new engine wiring harness and install my Speeduino ECU. Early next year i intend to use the car as my wedding car, so the clock is ticking! Theres more info on the car on my website too. www.tasteslikepetrol.net/cars/rover-sd1-two/ |
| |
|
|
|
|
|
|
|
|
|
The work started quickly. I don't mess around. The car had a really bad surge when i got it, especially at cruise, so i took a look into it. Since getting the car, it had a really bad surge at cruise. Internet wisdom pointed towards the throttle potentiometer/position sensor. It’s an easy part to get to, and apparently they can be fixed. So following Ramon’s great guide, I got stuck in. First step is to mark the location of the pot, so you can put it back where it came from, as it is adjustable. I didn’t have any paint pens, so just used a vivid marker.    There’s meant to be three screws holding it in, but mine only had two. Remove those, disconnect the plug and pull it out. Once on the bench, there are three really small screws holding the whole thing together.  Take them out, and it all comes apart, and the issue becomes obvious.   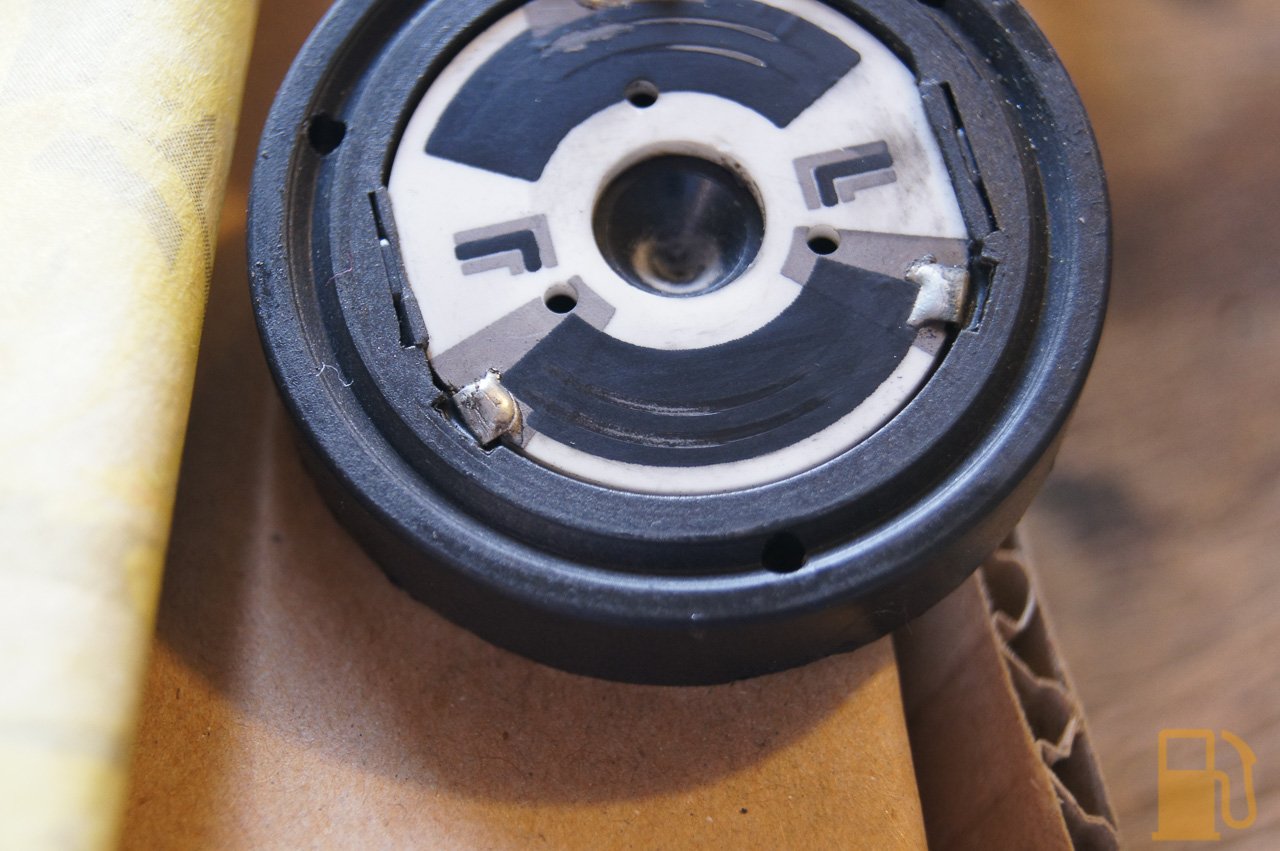   The metal wiper had just straight up worn right through the carbon track, meaning the readings being sent back to the ECU at that throttle position would be all over the place. As per Ramon’s guide, the trick is to move the wiper over slightly, so that it contacts a fresh part of the track and gets a clear reading again. To do this I cut the plastic tabs off with a knife, moved the wiper slightly down, and then used superglue to hold it back in place. Hopefully it holds OK, but i’ll probably look at changing to a more modern, reliable unit when I fit the Speeduino anyway.  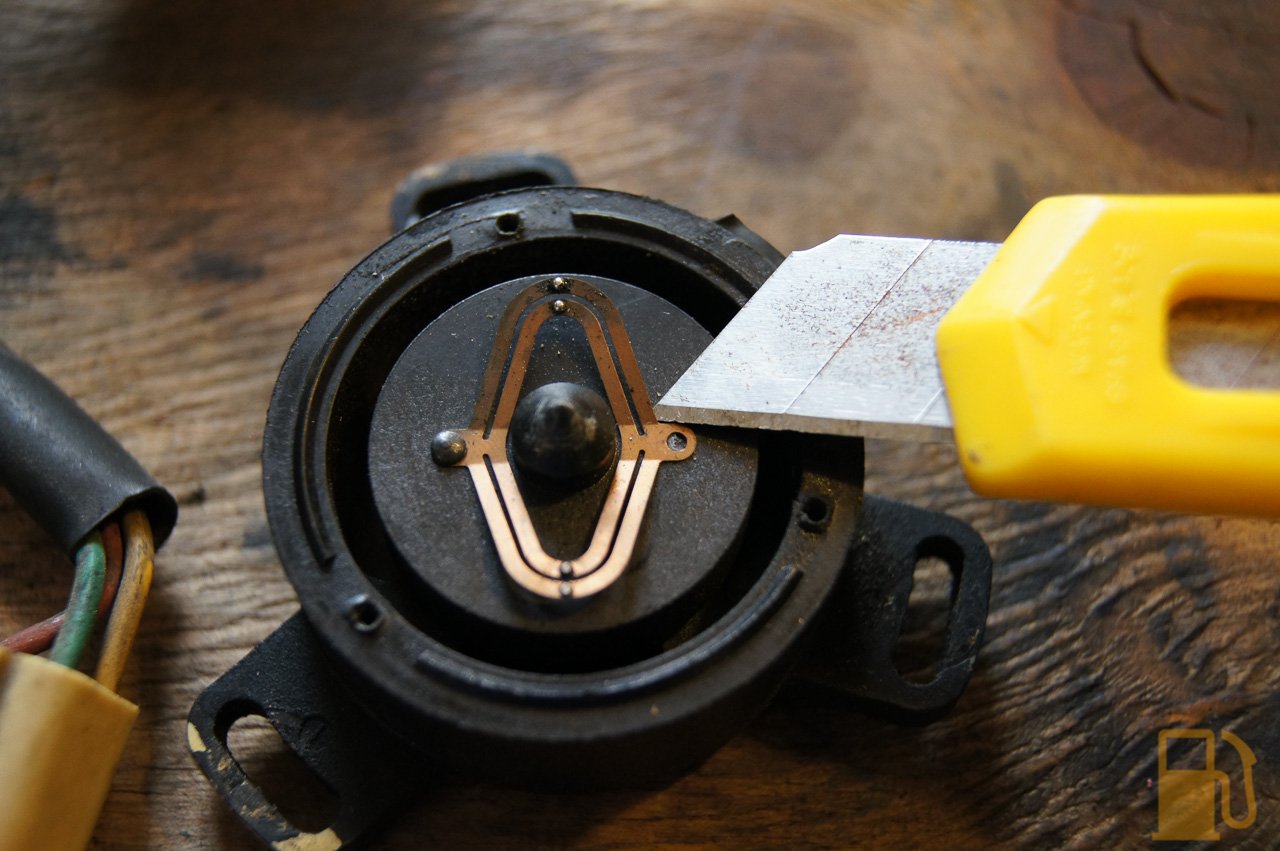   I reassembled the unit and refit to the car, making sure to give everything a good clean down, including the electrical connector. A quick test drive showed that the surging is gone straight away, it pulls smoothly and even idles better now. I wont tell if its gone 100% until I get on the open road again, but with a battery that was flat, a jump pack that also needed a charge, and anywhere between “E” and 1/4 in the gas tank, I couldn’t risk going far at the moment. It’s a success so far though. |
| |
Last Edit: Mar 16, 2022 10:26:38 GMT by Kelvinator
|
|
|
|
|
|
|
Like usual, I don’t mess around when I get a new toy, so after work I cracked into the Rover again. The first thing I had to do was put the battery back in the car, because it had spent 24 hours on charge. Unfortunately the “charge indicator” is still showing red, so the previous owner may have nuked the poor thing and it may need replacing (I'm hoping the receipt for it is in the pile that are on their way to me, but I’m not holding my breath). In the meantime it seems to be working OK, as it started the car multiple times without trouble. I can’t trust it though.  As mentioned earlier, the battery hold down is missing. I didn’t really want the damn thing flying around in the engine bay, so I channelled my inner MacGyver and ended up with this. 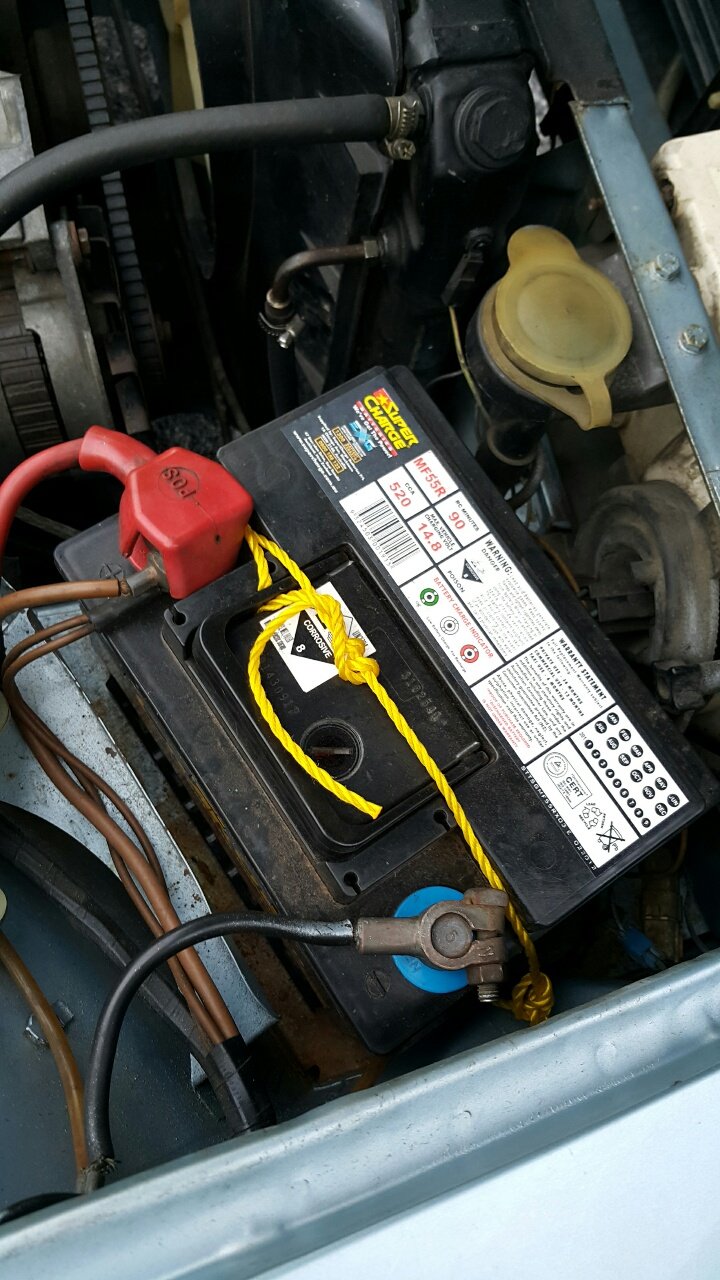 Now it won’t slide into the alternator and make bad things happen. I also tested out the front screen wash…. which is lethargic at best, like most things in this car. It appears a previous owner has decided that instead of replacing the failed washer pump, they would just install a secondary, standalone pump on the guard. So now it sucks through the old, dead pump and then sprinkles out onto the windscreen.  I’ll try to get a replacement standard pump at some point and do away with the standalone one. I’ll need to see if I can clean the washer jet out too, as the washer bottle was full of gross water and algae (and no doubt the jet is too). This is the color of some of the water in the bottle, and it just got greener and lumpier.  There was no washer additive at all, just water and growth. I removed the bottle, gave it a real good shake and rinse. A quick scrub with some Simple Green and its a bit cleaner and no more algae. The bottle is heavily stained though. I refilled with some nice clean water, and a quality additive.  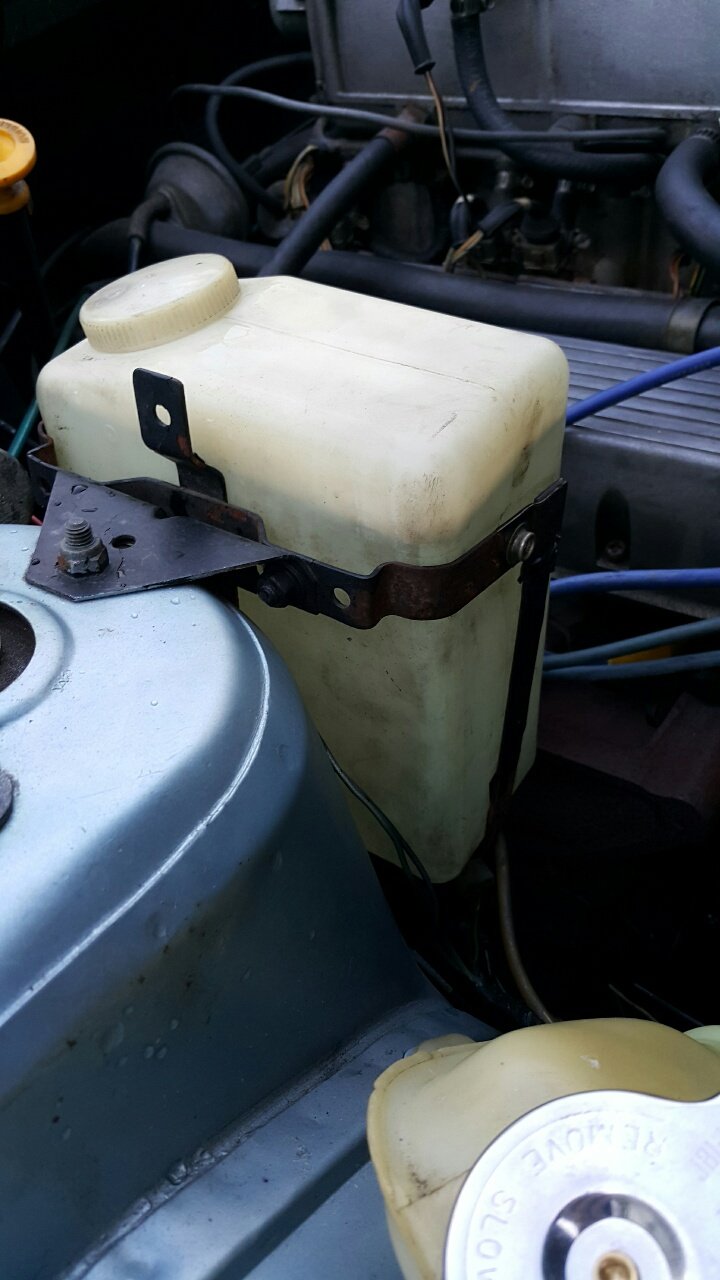  I did happen to find one thing that isn’t lethargic on this car (almost everything else is!)…. the headlight washers. They spray with a vigor I have never seen, it’s a shame it just ends up covering the front of the car in water and additive. Oh, and in this instance, my face too, oops 😂 With the battery back in the car, and the car actually running and driving again I decided to shoot down and get some gas. The fuel gauge had been wavering between below “E”, and 1/4 of a tank since I got it, and the light kept coming on and off randomly. 54L went in the 66L tank, so obviously there was still some in there. It’s good to know how inaccurate the gauge actually is, and how much I can rely on it. Not much, is the answer. EDIT: Upon reading the owners manual, the light switches on at 12L left in the tank, so in this instance, the gauge is woefully inaccurate, but the light is spot on. The idle was a bit low though, has been since I got the car, so I took to putting the car in neutral at intersections to keep the revs up. It also stalled a couple of times when navigating my driveway, due to the load from the power steering pump. I tweaked this when I got home and now have a solid idle at around 800rpm, where it should be, instead of under 500rpm. It does dip down when in gear, like all autos do, but it doesn’t try to stall anymore. I can also conclude that the work I did on the throttle pot has completely cured the surging at cruise, it now settles in a nice smooth cruise and drives like a champ. Nothing like idling along, arm out the window in the sun, listening to the burble of the exhaust 😀 Winning. A great end to an otherwise unpleasant work day. |
| |
Last Edit: Mar 16, 2022 10:27:21 GMT by Kelvinator
|
|
|
|
|
|
|
Heh, I'm ready for the inevitable breakdown in the dark. I bring you, DAYLIGHT!   #MadeInBritain |
| |
|
|
|
|
|
|
|
Another day, another attempt at fixing things in the Rover. Well, first off, I’ll say it. The car is parked up for the near future whilst it waits on some rather important parts. I did some work to the car today, as ill explain below, but whilst checking my work with the engine running I discovered a very serious fuel leak from the return line off the pressure regulator. Its dripping at a rate of a drop every couple of seconds, and there was a growing puddle at the back of the engine. I did note a slight fuel smell, and the puddle of liquid (which I checked with the engine off, and couldn’t tell if it was oil or not) when I test drove the car, but I decided to overlook it as I couldn’t see any injector hoses leaking. Just this morning I ordered some new injector seals so I could take the injectors out and replace the perished fuel hoses. It appears that the fuel lines have all been replaced in the past, but it’s either with low quality hose, or just so long ago its perished again. I can tell this because of the clamps on the injectors, instead of the usual metal ferrule.   This is the condition of the fuel hoses and why I wanted to change them. The fuel filter also looks old as, so I have a replacement for that ready to go.    Anyway, the plan today was to go out and condition all the leather in a desperate attempt to get some much-needed moisture into the leather. I went over every seat with a thick layer of my good conditioner, and it seems to have made the leather a bit softer. I’ll need to do another couple of coats, and then I’ll give them a good clean. The leather was so neglected that it was hard and starting to crack. Thankfully other than cosmetic cracks it’s actually in really good shape, no rips/tears or anything. No photos, because nothing to see here. Once that was done I moved into the engine bay to check the throttle pot reading, and make sure it was set correctly. When I removed it I just reinstalled it back where it came from, I didn’t check it. The initial reading had me thinking something was dead, as I got a solid 0.00V with closed throttle, when it should read 0.32V +/-. Opening the throttle showed that it was reading the voltage correctly, but it was well out of adjustment. what was at only 2.83V, when it should be close to 4.7V.  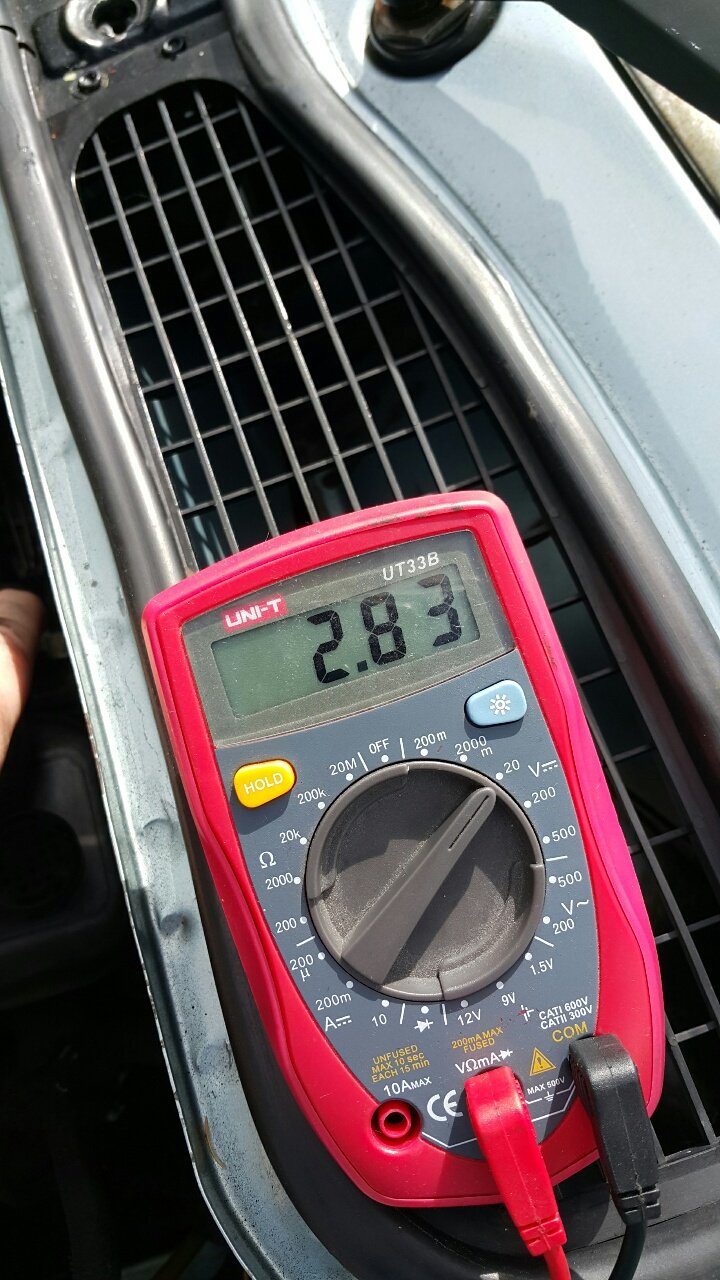  I tweaked the position by loosening off the two screws and rotating the pot until I got the reading I wanted with the throttle closed. Unfortunately what was still low, only 3.17V. I’m not sure if this is because the sensor is just stuffed, or because of what I did when I moved the wiper on the tracks. Either way, it should be a lot better down low now, but may still fall a little flat at what. This isn’t an issue, ill replace the pot when I install Speeduino. In the meantime it now starts easily, and idles better. Havent managed to drive it though due to the fuel leak.   Whilst under the bonnet I decided that I should fix the most important thing in the car…. the under bonnet lights. Should the inevitable happen and I break down at night, these little babies will help me pretend i’m a mechanic and get it going again. The standard lights were in bad shape, with no light being emitted, and the housing full of crud. Obviously they aren’t sealed all too well and have had 30 years of water ingress to deal with.   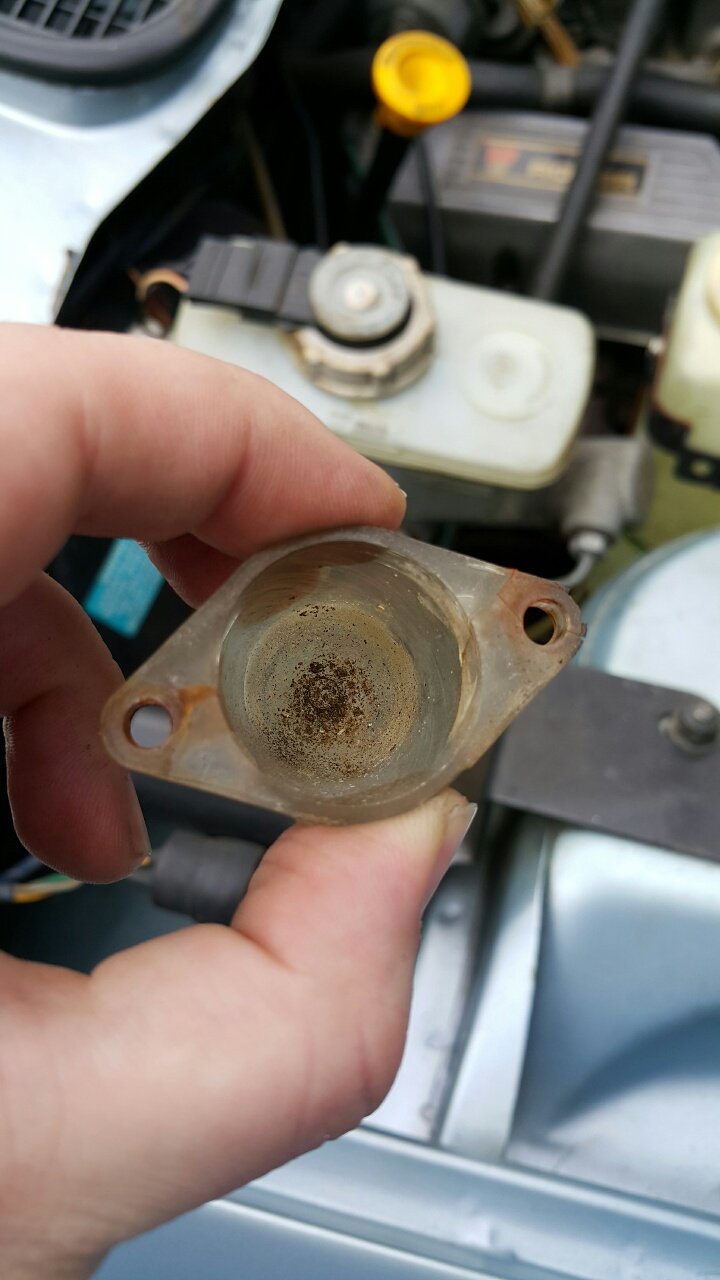  In the interests of slightly and subtly modernising the car, I installed a pair of LED bulbs I had kicking around. They use less power, but the light output will be a billion times better than the old bulbs (if they even went, mind you). 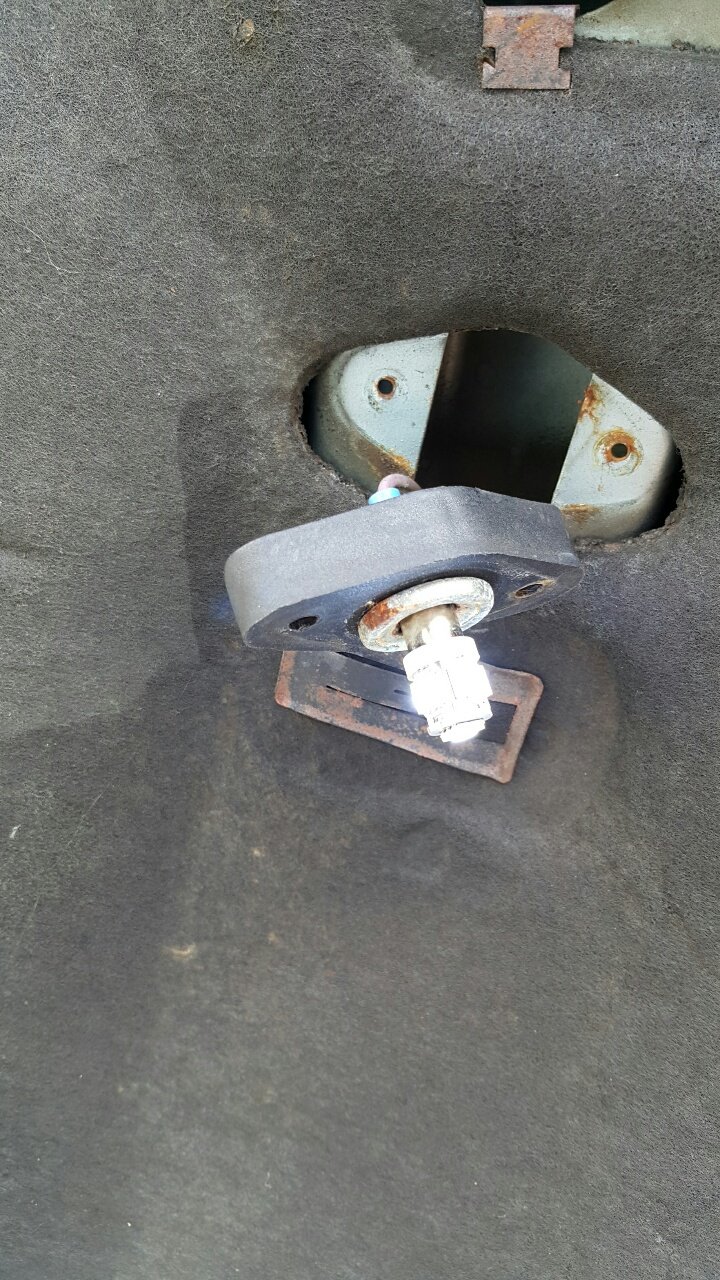 I cleaned all the contacts in the socket, but there is a lot of rust on the terminals on the back. I also used some dielectric grease to lubricate and seal the central contact, and insides of the socket. The housing got a good cleaning with some Simple Green, and they came up well. All screws were in bad shape visually due to rust, but appeared to be solid with good threads. I smothered them in some copper grease to help keep the rust at bay, and help stop them seizing in if I need to remove them in the future.    And at night!  Great success. So now I have a great blue whale stuck in my driveway, also blocking in the S401. I can move it if I HAVE to, but will try not to run it if possible. As soon as the injector seals arrive, i’ll get some new hose and proper fuel line safe clamps (unlike what’s on there, which is likely half the issue), pull the plenum off and replace all the fuel lines. The previous owner is lucky him and his family didn’t die in a fireball whilst driving this thing 😲 |
| |
Last Edit: Mar 16, 2022 10:27:56 GMT by Kelvinator
|
|
|
|
|
|
|
The box of bits from the previous owner arrived, so out goes the pod, in goes the original filter. Back in the NP70 days I had some issues with the original air box having the incorrect filter fitted, and strangling the engine. A quick fix was to chuck a fully sick red pod filter on the AFM…. and boy did it make a huge difference. The engine could breathe again. It also made lots of loud noises, such as an annoying whistle. 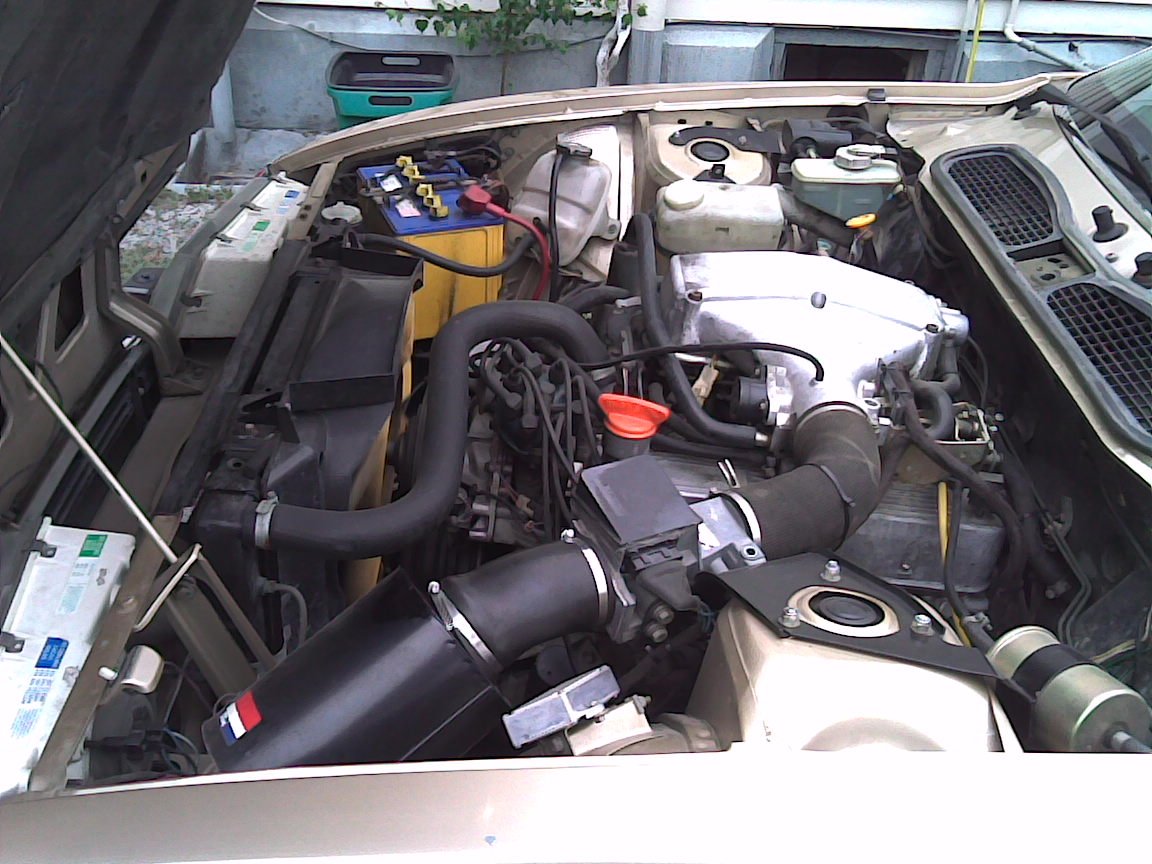   I sold the car with the pod on there (and the original box in the boot) because it wasn’t worth my money or effort replacing the standard filter. Fast forward many years, and I'm back in an SD1, and sure enough, it too has a pod filter installed.   Its ugly, looks out-of-place, is sucking hot engine bay air, and it whistles like crazy. Certainly wouldn’t be my choice to install these days. Thankfully, the previous owner still had the original air box and filter, and it was a condition of the sale that he sends them my way. Today I received the package, and went to work installing the original air box. It was dirty and looks like it’s had some touch-ups in the past, but its complete and in good condition. The filter inside wasnt dirty either, so ill reuse that.   It even still has the original Unipart sticker 😀 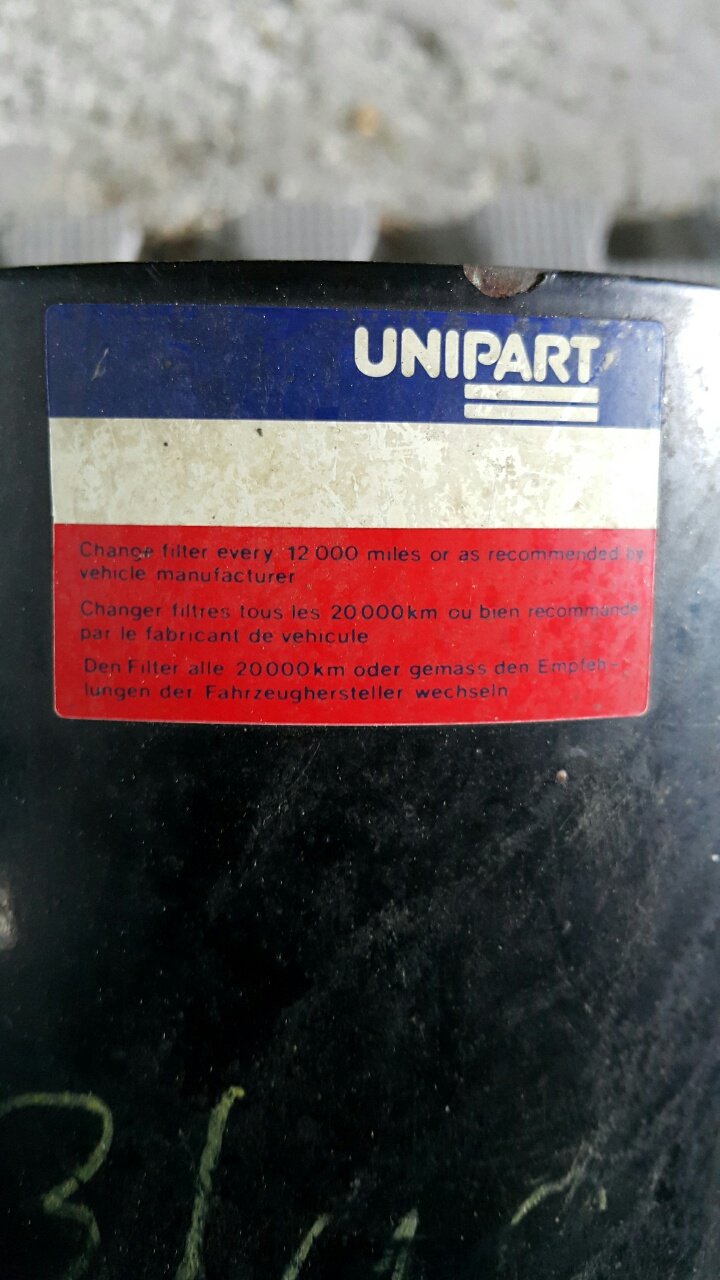 I gave both the whole air box and the area on the car where it will sit a good clean and degrease.  And removed the pod filter. Just the one clamp to remove it. 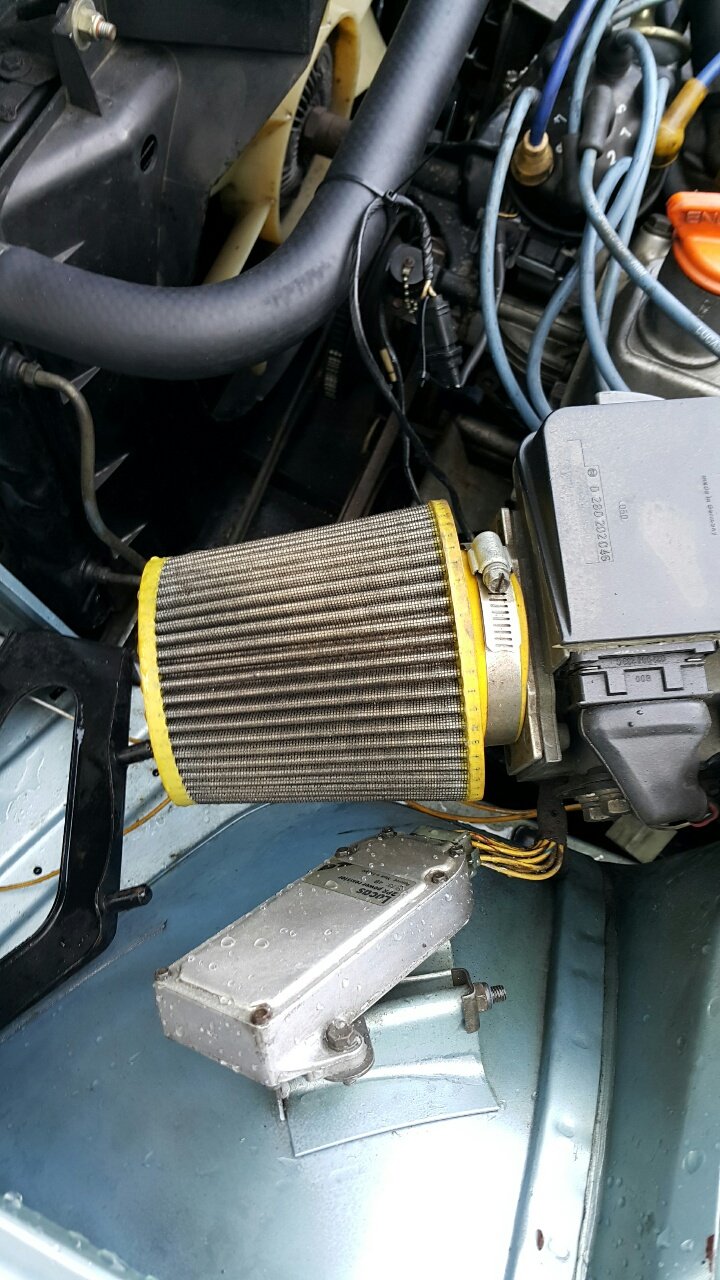 With some wiggling and jiggling I got the air box, its trumpet and the rubber hose all fitted up, with some new hose clamps. I then gave the whole lot a quick splash of 303 to make it look nice (and to condition the rubber hose).   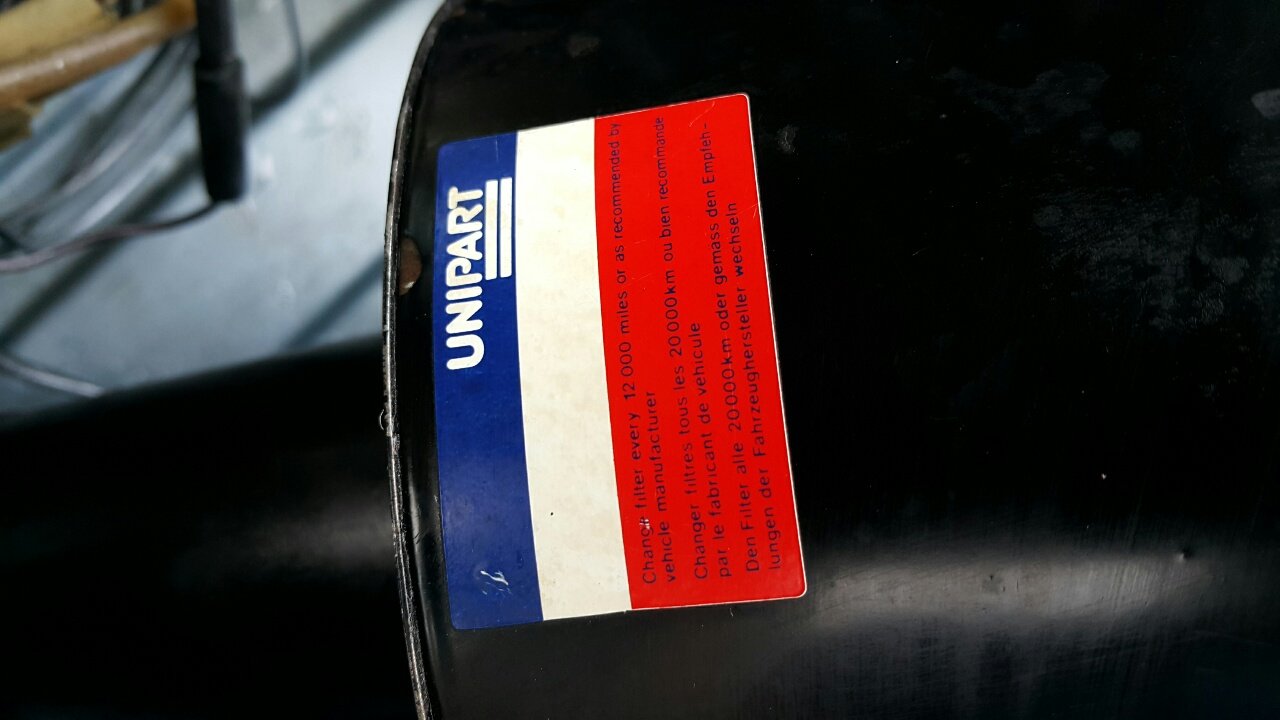 Over all, much much happier. It looks the part, and will hopefully make the engine sound a bit less silly. I obviously haven’t driven it yet though due to it curse word fuel out everywhere, but that’ll be fixed soon. Whilst under the bonnet I took a few seconds to just tweak a few things and make it look tidier. I cleaned up the ignition leads, and tucked away the vacuum hose on the top of the plenum. 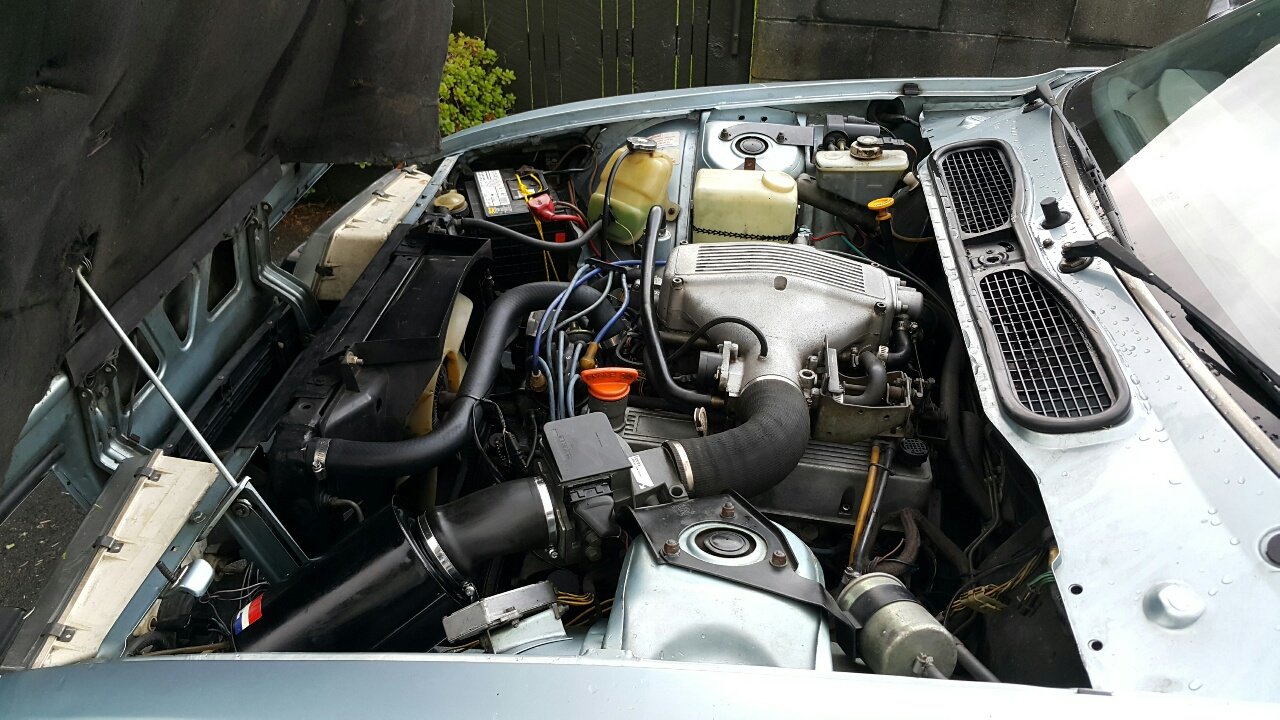 Looks a bit better than it did. Its the small things 😊 Speaking of fuel leaks, the hose arrived today, so not long until I can fix it. This is proper SAE R9 high pressure, ethanol safe fuel hose, in the CORRECT ID of 7.6mm.  Just waiting on parts from Rimmers, and the hose clamps, then it’s all go. |
| |
Last Edit: Mar 16, 2022 10:28:30 GMT by Kelvinator
|
|
|
|
|
|
|
As i have mentioned here and there, one of the big draw cards for having the EFI model isnt just the awesomeness, but the fact that i can convert the car to run a Speeduino custom ECU. I built the Speeduino ages ago, well before i got the car, and have been waiting to get the project moving again. With the car now in my possession, the Speeduino project is back on the boil and parts have been ordered. I will be removing the standard engine loom and making a custom loom with all new wire and plugs. I also intend to run a pair of Subaru coil packs and igniters in a wasted spark configuration. I havent quite worked out where i will mount them. I have completed the initial wiring diagram sketch,  And will be building off that with a V2 sketch outlining all the connectors and where it will run in the engine bay. I also need to fuse the main power feed to the Speeduino. I picked the enclosure for the Speeduino today. Has enough space for the boards, wiring and even the Bluetooth adaptor. Being plastic it should help with reception for Bluetooth too, although i may look at mounting that module outside the box. The wiring will come out the end of the box, once i decided which connector to use.  I have the new wiring for the harness on the way, along with all the weather proof connectors i could ever need. I just need to weld the WB02 sensor bung into the exhaust, buy and fit the trigger wheel/sensor, and make up a new intake pipe to bypass the AFM (and weld the bung for the IAT into that). |
| |
|
|
|
|
|
|
|
I’m slowly working through the list of things that were wrong with the car when I got it. Todays task was to remove the 30-year-old radio, and look into why the RH rear window is dead. First job of the day was to pull the battery out, again. I noticed the other day when I was under the bonnet that the little condition indicator had gone from red (bad) to white (charge), but started the car like a champion. I have taken it out again to give it another good long whack with the charger and see if I can bring it back to green. I have almost managed to source a proper battery hold down, just waiting on payment details; no more rope, yay! Since the battery is out I will also be replacing the rather crappy condition original main ground cable from the battery. The wire where it joins the terminal on the guard is badly frayed, and only about half of the strands of wire are actually being used. No good at all. 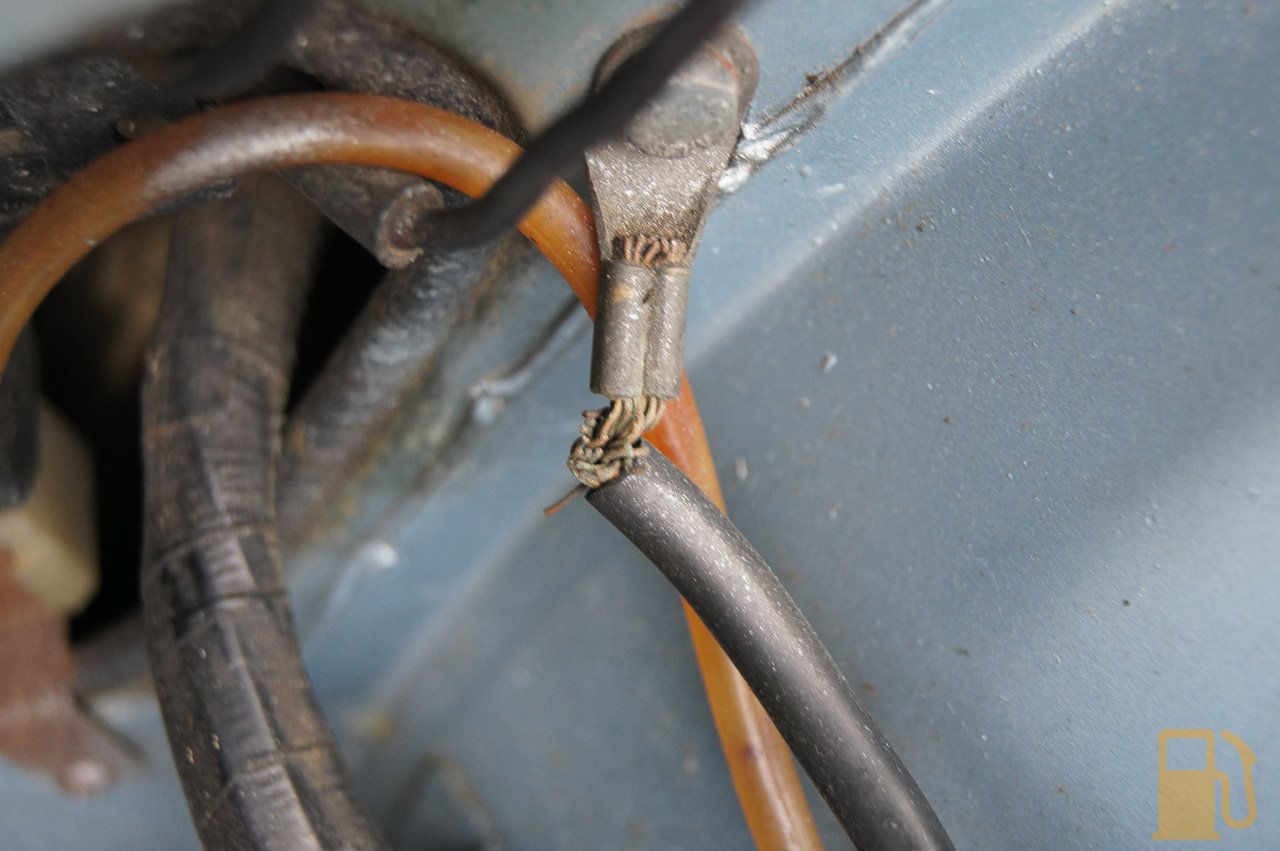     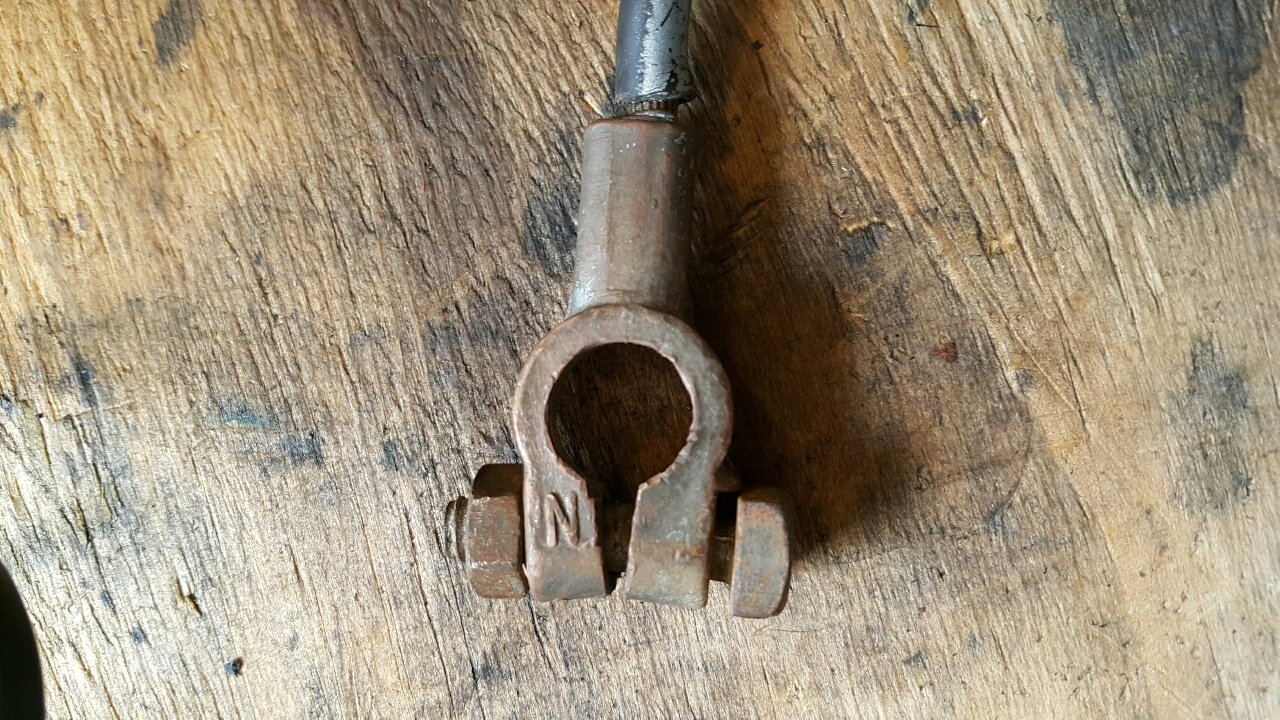 Probably doesn’t help that for a period of time the negative cable was the only thing holding the battery in place. I do have some new wire to go in, I just need to buy some terminals and make the cable up. I didn’t really want to use the last one I made up (from one of my skylines), it was a tad…. flashy.   With the battery out and on charge, I was limited to things that didn’t need power. I have mentioned in the past that the speakers are curse word…. well, the front ones are, they are both blown…. and the rears are gone (one was hanging by the cables, so I pulled it out). I have purchased a set of Pioneer speakers all round, with 4″ in the front and 6×9 in the rear. To get the most from this setup ideally I would run new wiring to all the speakers, but since I'm not overly crazy about audio quality, i’m going to reuse all the original wiring, including the fader in the center console. 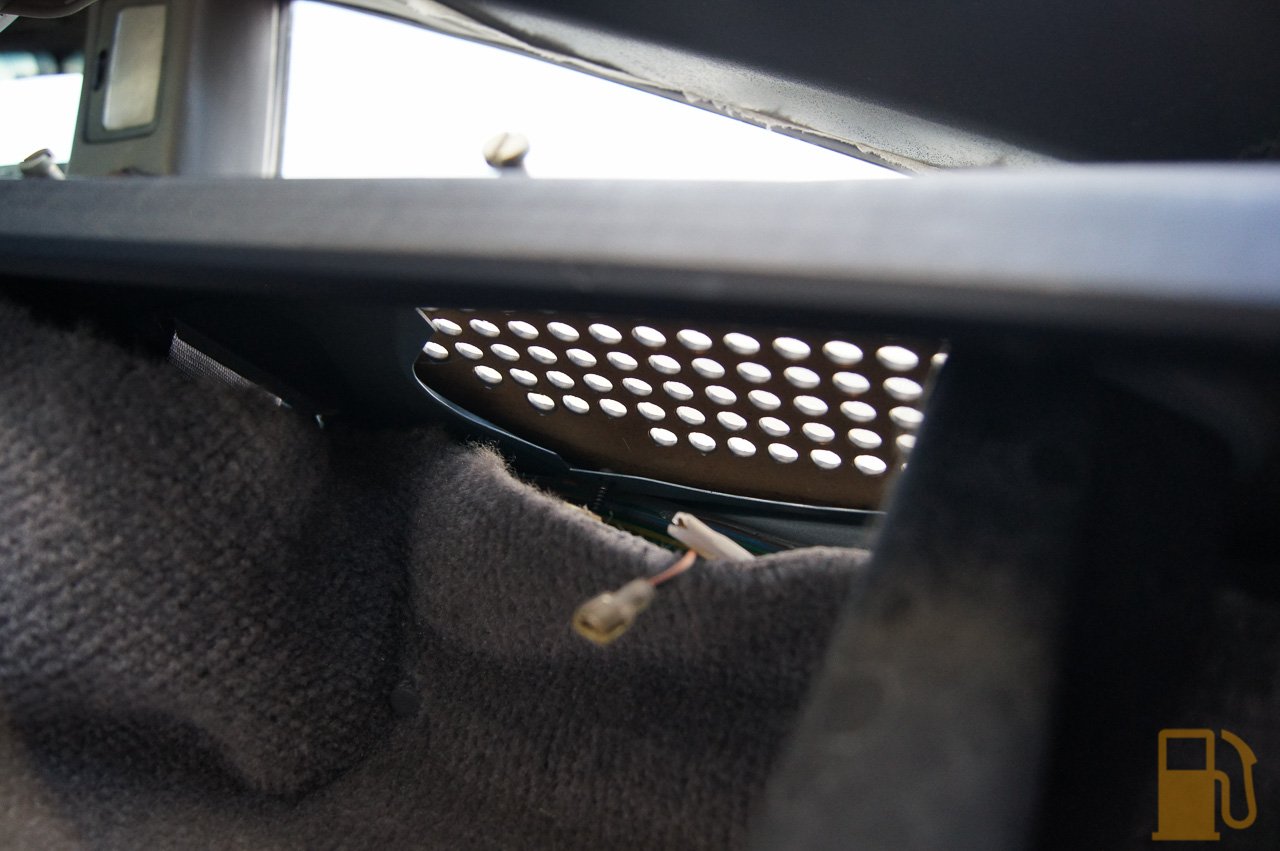 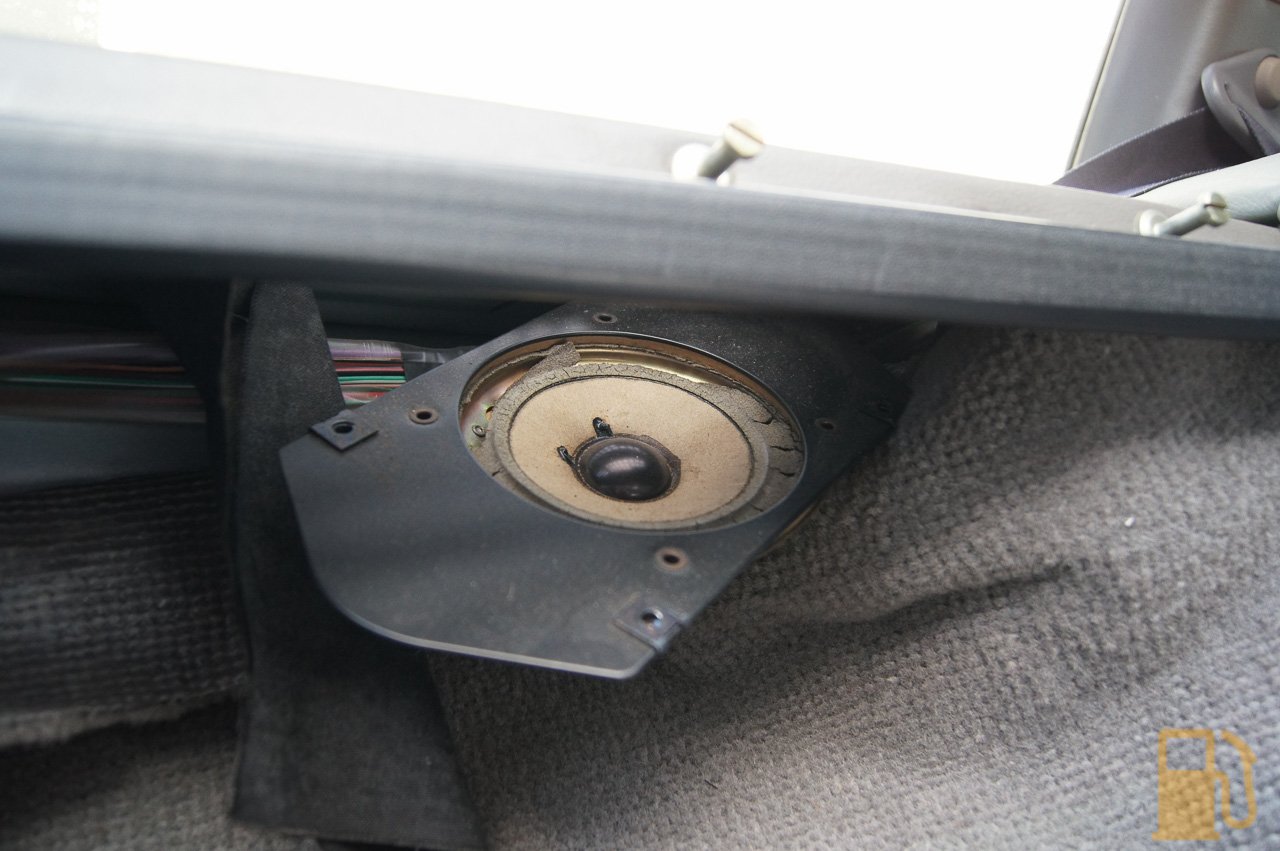  The standard cassette tape headunit had to go though, and will be replaced with my JVC headunit from the MX5. I can change the color of the buttons and display to match the standard backlighting, and has all the goodies like bluetooth. Looking at the face of the original headunit one would presume that you stick some rods in the fours holes, and the whole thing slides out. Nope, I just couldn’t get it budge. 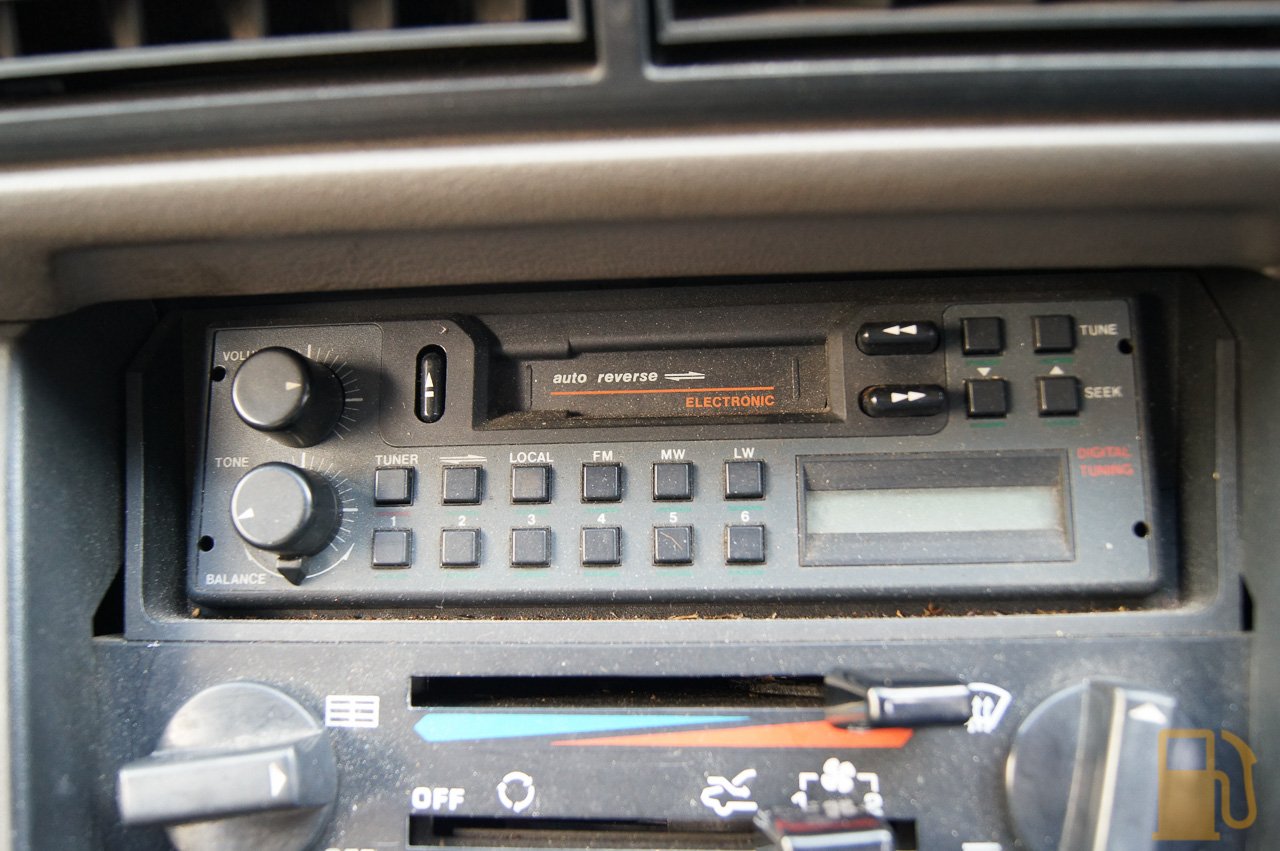 So I went into full Rip-It-Out mode. Pulled the LH knobs off, and undid the little retaining ring under the volume knob. The faceplate then folds down, and you can gently pull the ribbon cable out.   With the faceplate off, its kinda obvious what’s holding the damn thing in now. Its four little locking tabs, each with a ramp to release them. Obviously the tool I was using just wasn’t special enough to trip the ramps and unlock them. 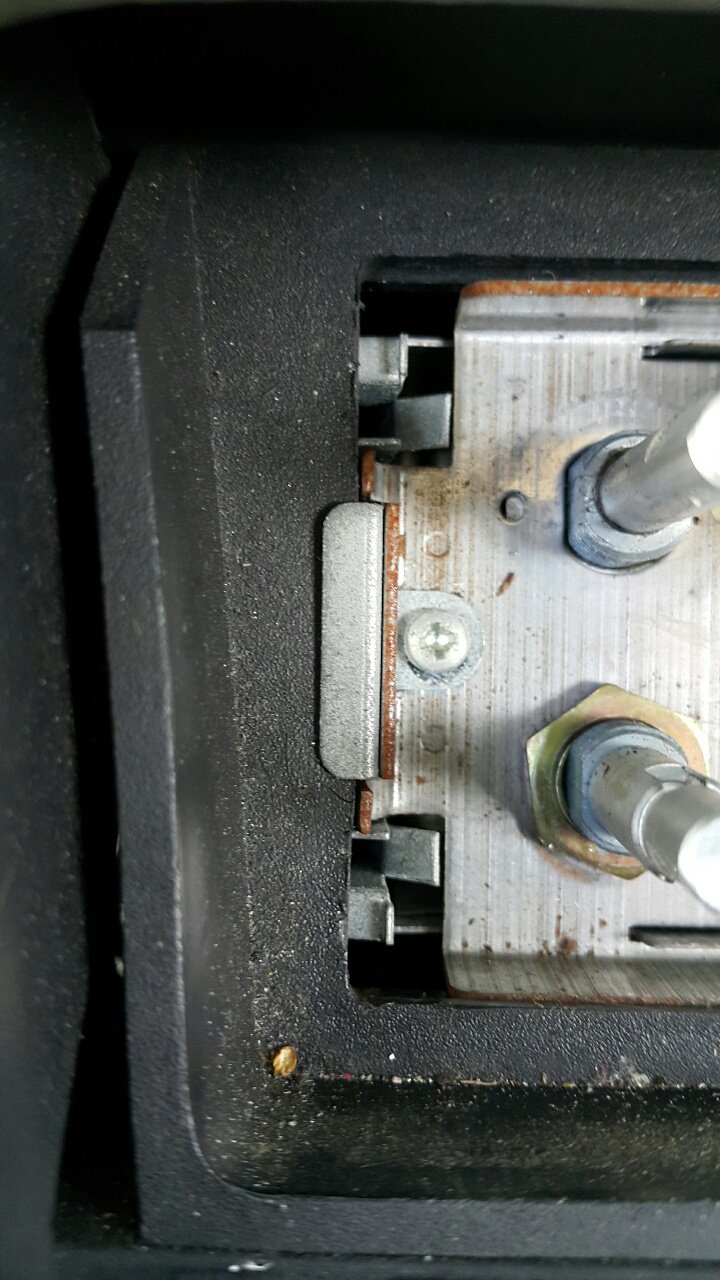 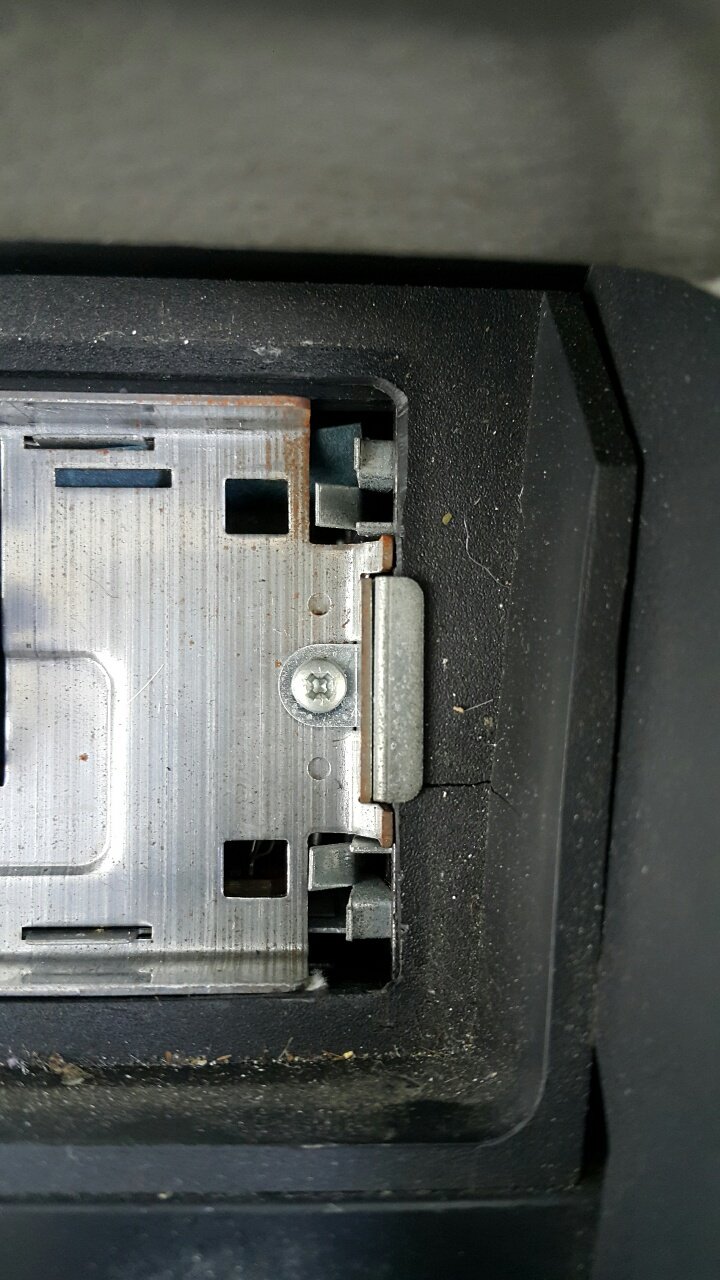  Even with the faceplate off I couldn’t release the damn things. More disassembling was needed. Off came the plastic surround trim, revealing a metal plate with two screws in it.  Whip those screws out, and GENTLY pry the metal plate forward. Being super careful not to pry against the heater controls, as all the plastic there is fragile. With the metal plate off, the radio finally slips out and can be removed.   With the radio out you can see the tabs that lock the thing in place.   The radio was made by Motorola England for Austin Rover Group.  The whole lot is wired in with two standard RISTS connectors. I can’t seem to find any plug-and-play ISO adaptors for these, so my only options are to chop the loom, or chop the plugs off the radio and reuse them. I know which one I will be doing…. 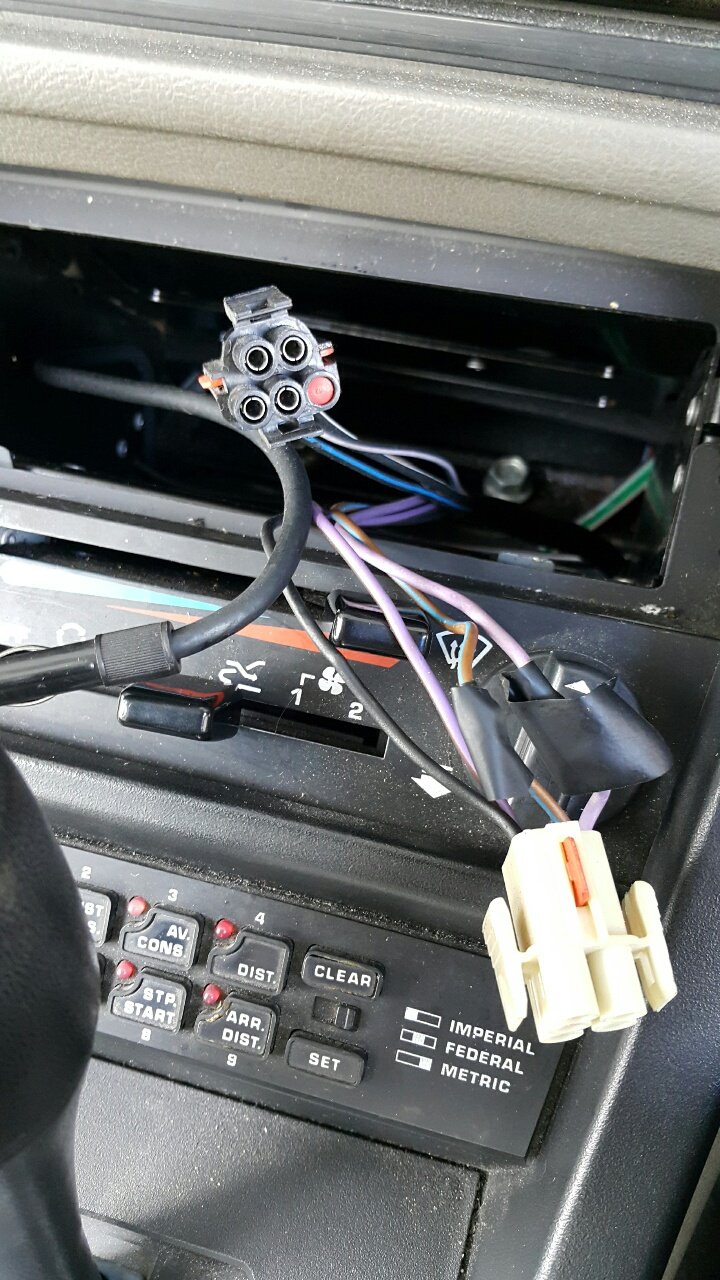 I wont be using the standard radio ever again, but I will keep hold of it, and will be sure to leave enough loom on the radio that the connector can be spliced back in if ever needed. I’ll build the loom and install the new headunit once the speakers arrive. Moving right along, I also decided since it was such a lovely day outside that I would also take a look at why the rear window doesn’t function correctly. It drops an inch or so by itself (and can be pulled up and down by hand, by that much), and doesn’t go up or down. The relays click when buttons are pressed, but the motor is silent. Taking the door card off was easy, there is one screw on the front of the door card, in the carpet section, and a screw in the door handle. Take both of those out, and then using a trim removal tool, carefully lever the door card off the clips and then lift the whole door card out of the window channel at the top. The window switch needs to be disconnected too.     It was pretty obvious with the door card off, that I wasnt the first person in here…. 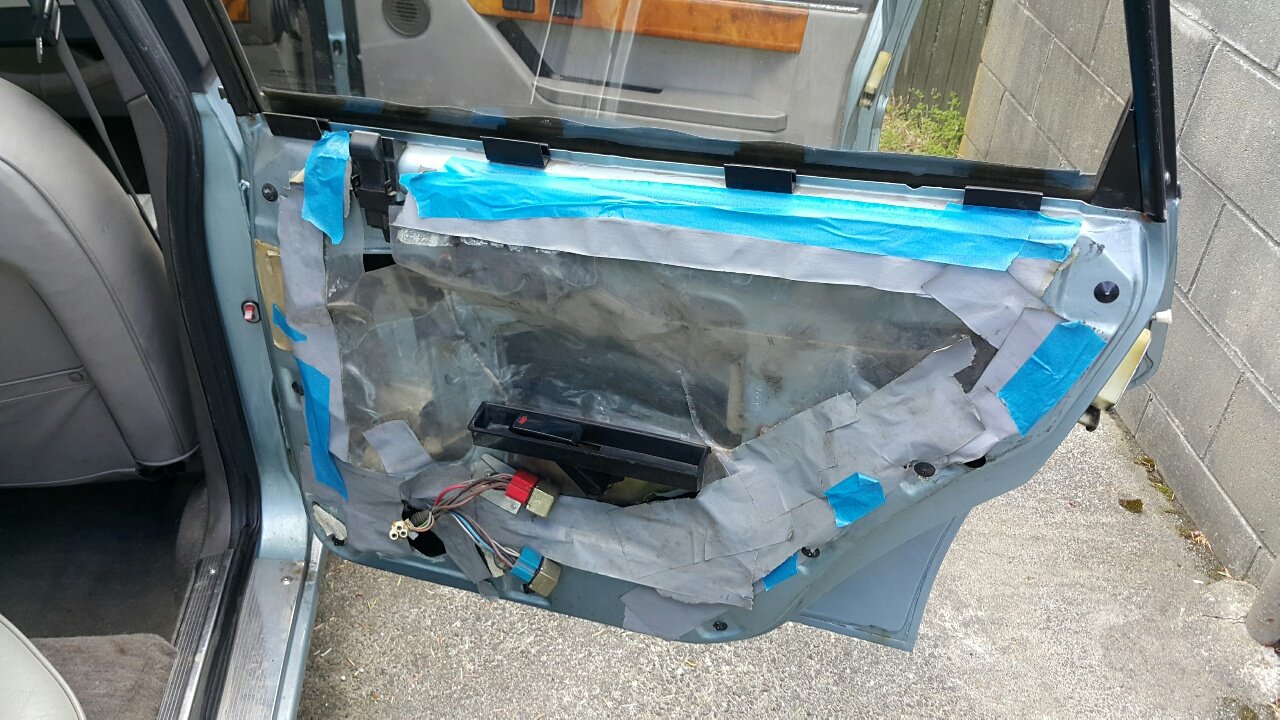 I suspect that no matter how bad BLMC build quality was back then, duct and masking tape probably weren’t original equipment for the moisture barriers. One of the relays was also just floating around, not attached to the bracket. The window motor wiring had a big ziptie around the plug holding it together, but the motor is still riveted to the regulator so I suspect it may be original and someone tried to fix it and failed. everything in the doors looks good, no obvious rust, and all the rails etc look good. It’ll need a thorough greasing, but I need to get the motor working first.  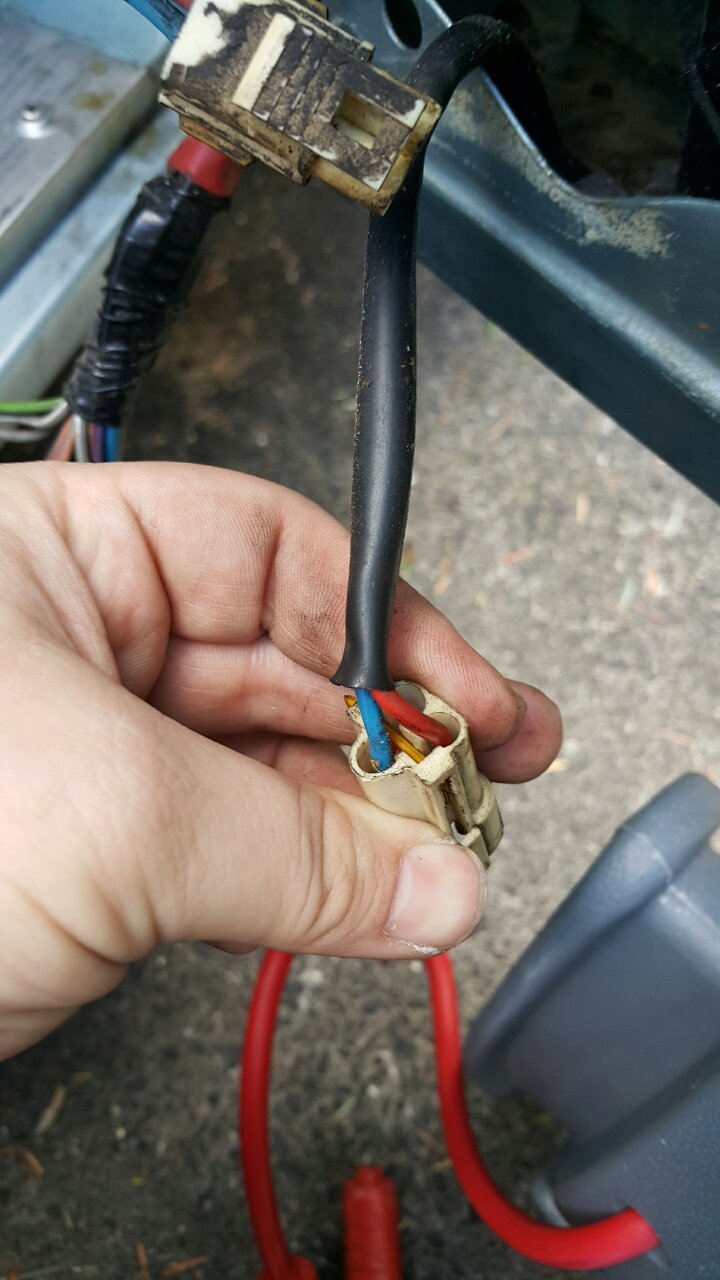 I tried feeding 12v directly into the motor, but nothing happened. I tried feeding 12v in via an even bigger supply, nothing. I tried percussive “persuasion” whilst feeding the motor power, nothing. The reason for the window moving by itself seems to be related to the motor too. All the linkages are working, but the movement is where the main gear meshes with the motor. I don’t know what part is damaged there, hopefully its the motor. I’m currently trying to source a replacement regulator and motor now, and will have to change it over. Not a job I’m looking forward to. In the meantime, the tape is back on the glass, and the door card is in the back seat. Classy. |
| |
Last Edit: Mar 16, 2022 10:29:29 GMT by Kelvinator
|
|
Tepper
Part of things
 
Posts: 381
|
|
|
|
|
Really interesting stuff, I saw this car on your website when I first found out about Speeduino - I'm surprised there aren't more people on here messing about with it.
|
| |
1989 Peugeot 205 GTi - stolen!
1983 Mazda RX7
1968 Rover P6 - also stolen.
|
|
|
|
|
|
|
Finally, the weather let up for a few minutes today, so I carried out some more work. The past week has just been a complete write off. First NZ was hit by a 7.8 magnitude earthquake, and although it was in the South Island, about 400km away from where I live, my city still took some damage. Thankfully we are OK, no damage at home and life goes on. It did slow everything down and cause disruption for a bit, especially when waiting on parts from the South Island, where there is very limited transportation options due to major infrastructure damage (IE: The main state highway up the Island is complete cut off by massive landslides and broken up roads). Then, the next day, we got hit with massive flooding. Only some minor leaks in my garage, and the Rover ended up with some water in the boot… but due to flooding and slips it took a heck of a long time to get home, once the roads even reopened. Its been a crazy week. Anyway, the tape on the Rovers window held up and kept the water out. During the week a replacement rear window regulator and battery hold down arrived; Many thanks to Gareth at SD1 Travelled Spares for supplying these. I also picked up a new ground lead from the battery, and a new negative terminal. The first job on the list was to install the new negative lead. I got a 4GA lead with ring terminals on each end, and a brass terminal with a stud and wing-nut on it for quick removal of the negative lead. This new lead is about twice as thick as the old one, and much better condition.  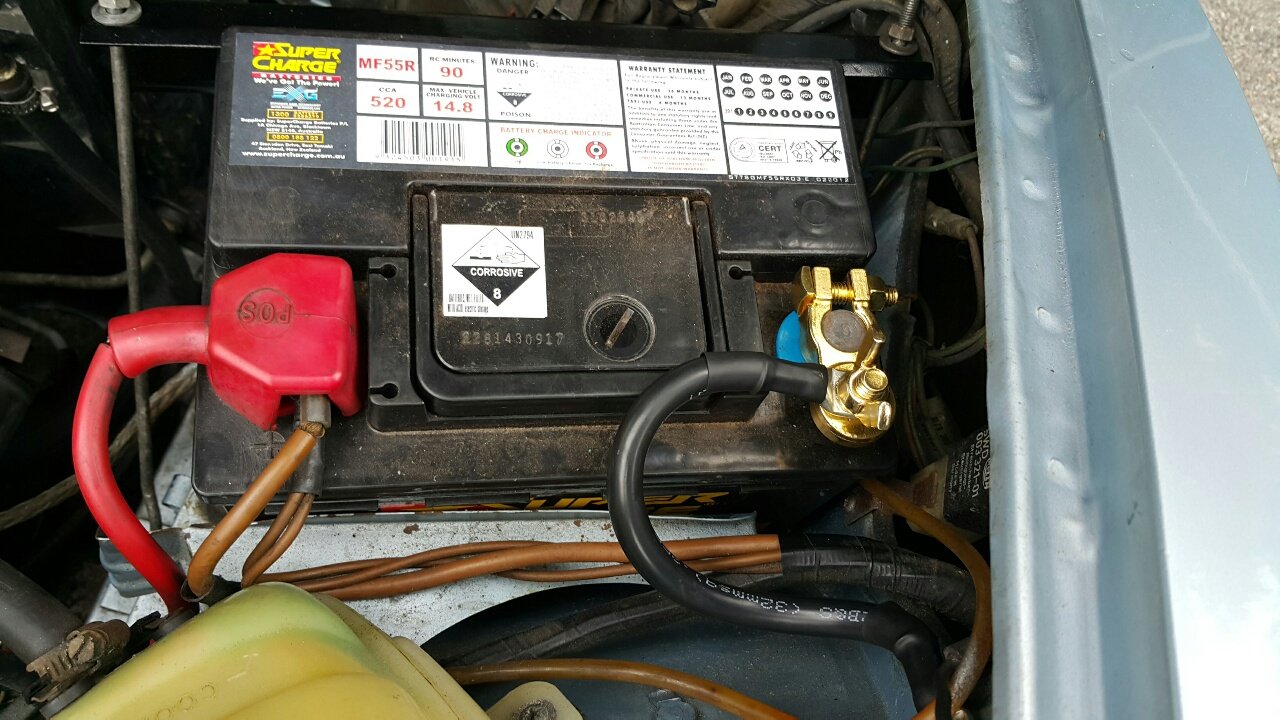 I also fit the original battery hold down. It’s a weird design, and its no wonder this style isn’t used anymore, but hey, its original and better than rope 😆   It was a bit of a bad joke trying to get the hooks to stay in place whilst you hooked the other one in. Got there in the end though. After that, I got on with fitting the headunit to fill the gaping hole. Cut the plugs off the standard radio, leaving enough on the radio that I could join the plugs back on if needed.   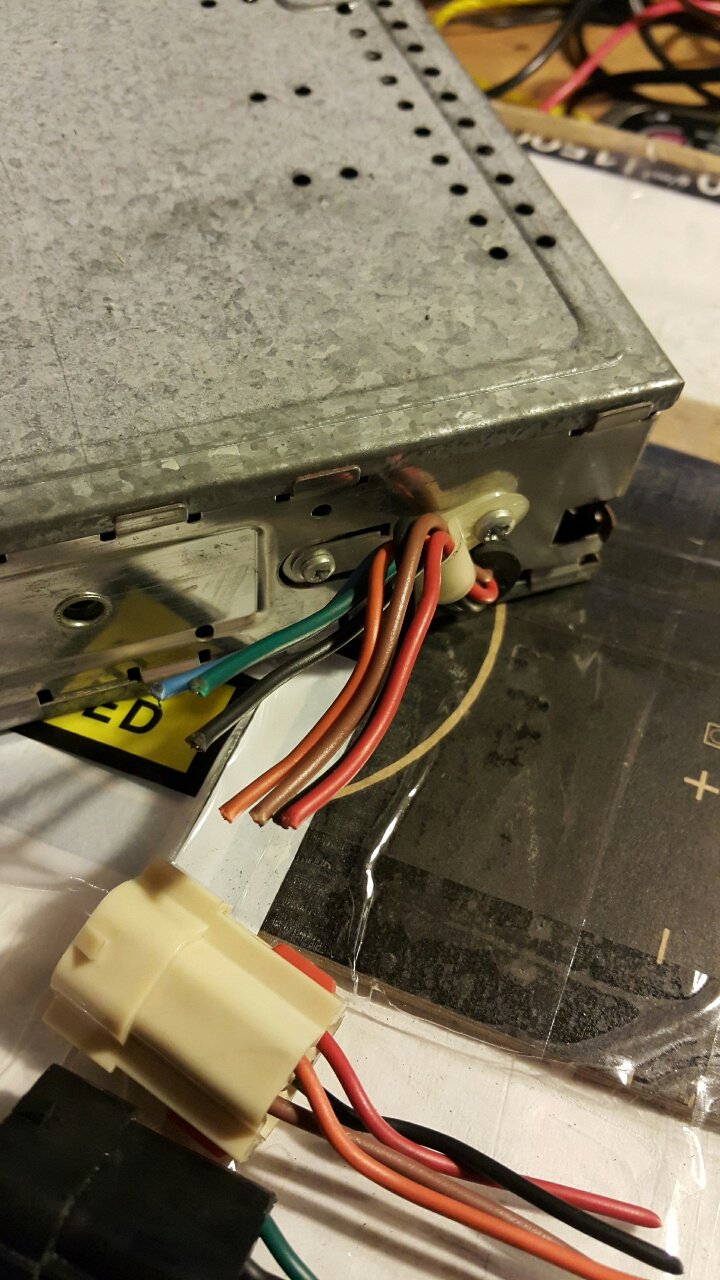 Chopped the radio harness up, as it still had all the bits from the MX5 wiring, like the steering wheel controls (which for obvious reasons aren’t needed).   Soldered it all together. 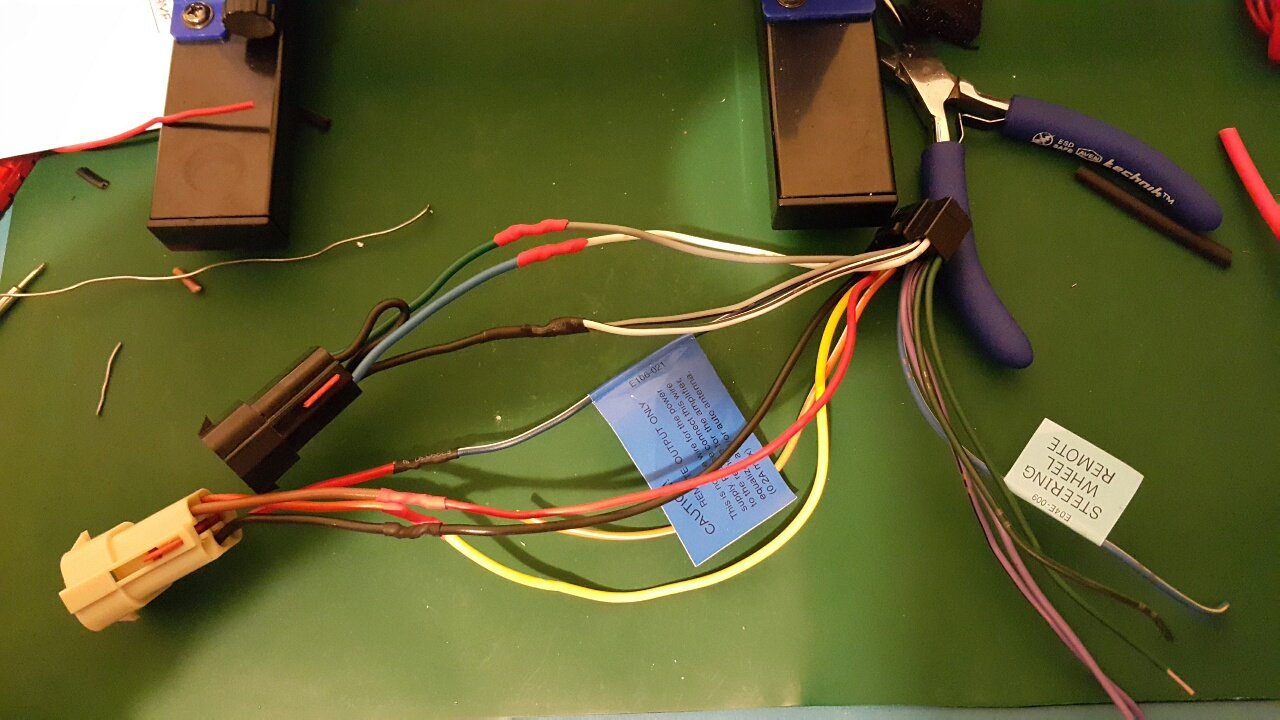 Note the two speakers connected to the harness. Fronts only here, the rears are powered by the same output via the factory fader control in the console.  Also tested the stereo bracket in the standard garnish. Looks mint, almost like it was made for it.   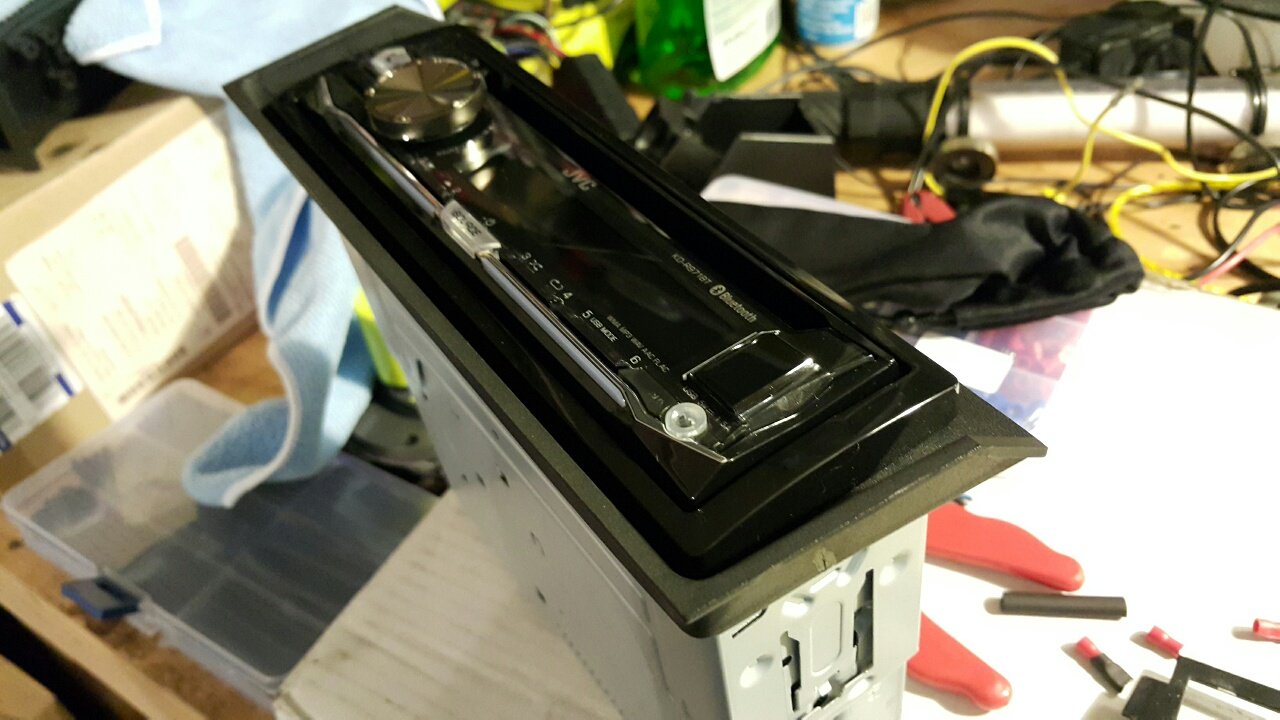 The next fun thing was to get it all into the dash, and test the wiring. One thing I wasnt sure of, because the wiring diagrams I used didn’t mention it, is that the purple wire with brown trace is for the auto antenna trigger. Everything else is as per this diagram. 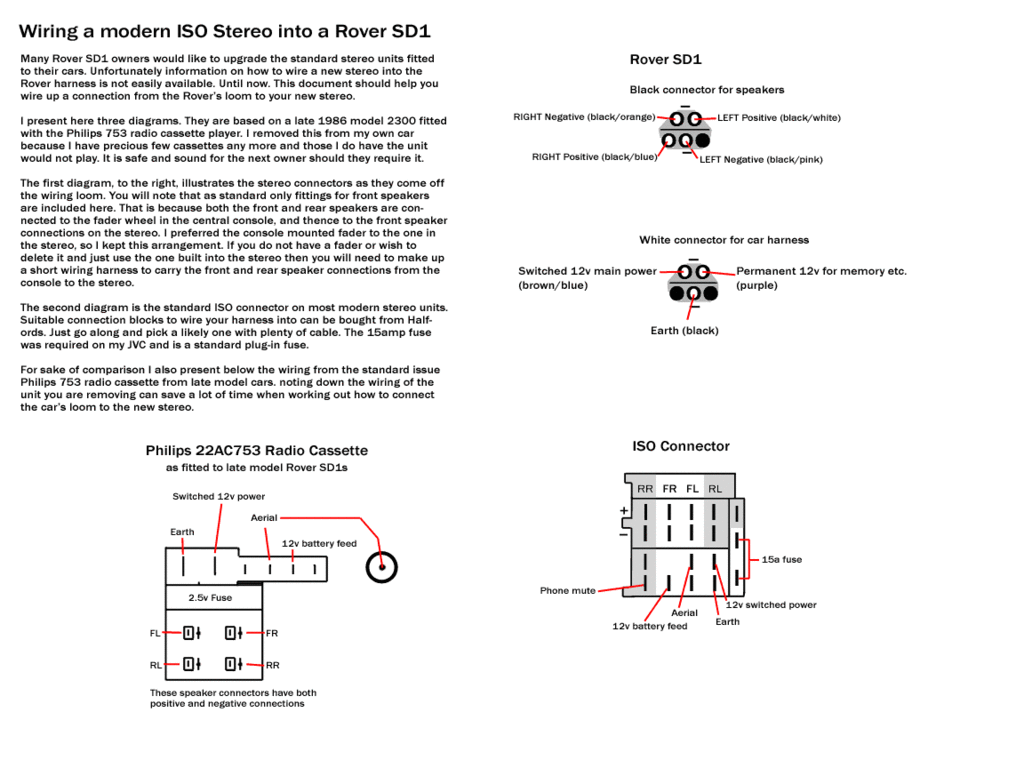   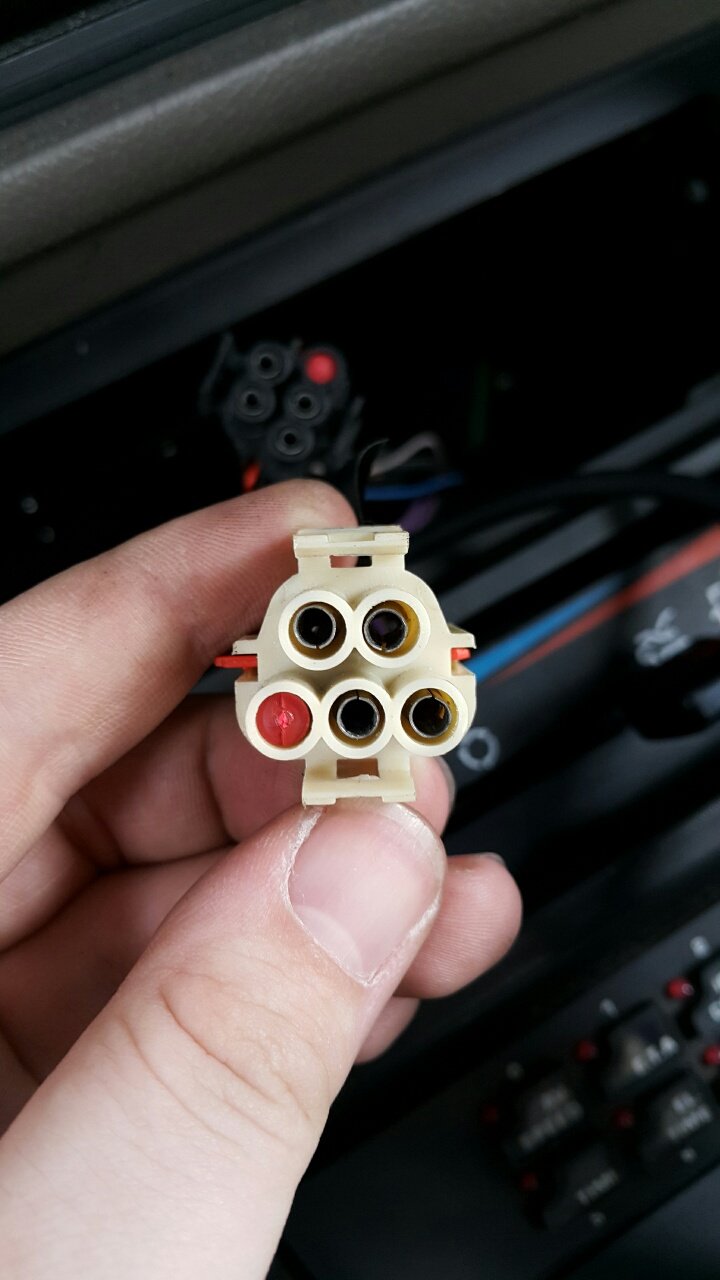 I plugged it in, and bam, it worked straight away. Stoked. 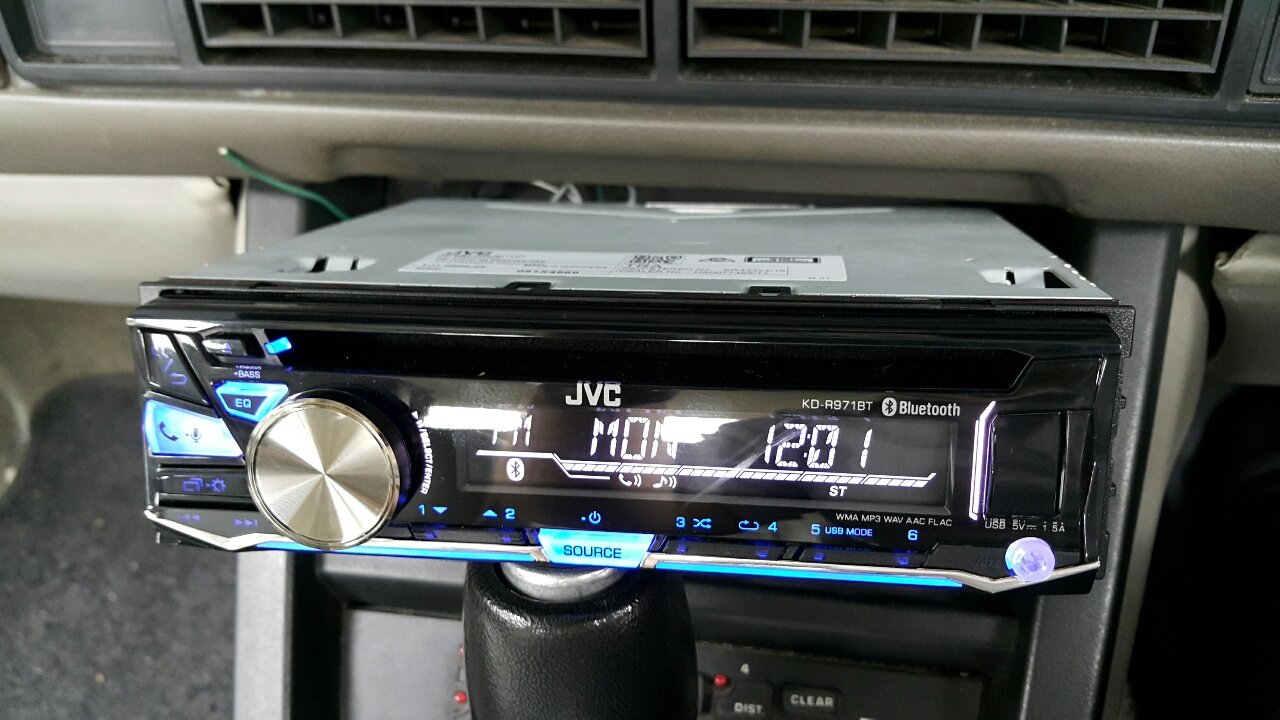 Fitting the frame was bit of a prick. Limited space, rivets in the way, and it had to go in on an angle so it cleared the dash. Got there though.    Worked like a charm (although I forgot to plug the external mic in for bluetooth so it needs to come out again). The front speakers are buggered, but sound still came out of them and the radio reception was good. Bluetooth audio worked too. I had a quick look at fitting the rear 6×9 speakers, but sadly they are WAY too big and I need to go back to the drawing board and work out what to do there. The standard speaker is a 4″ in a mount which IIRC is about 7×4. Apparently 6×9 will fit and its been done before, I just don’t know how.    Since the weather was still holding out and not raining again, I made a split second decision to replace the failed window regulator. It was seized solid, and the window wouldn’t shut. No real pictures of this process because it was very messy, and there were no hands free since my better half was holding the glass up from slipping down and smashing. The process is easy though. This is the door, 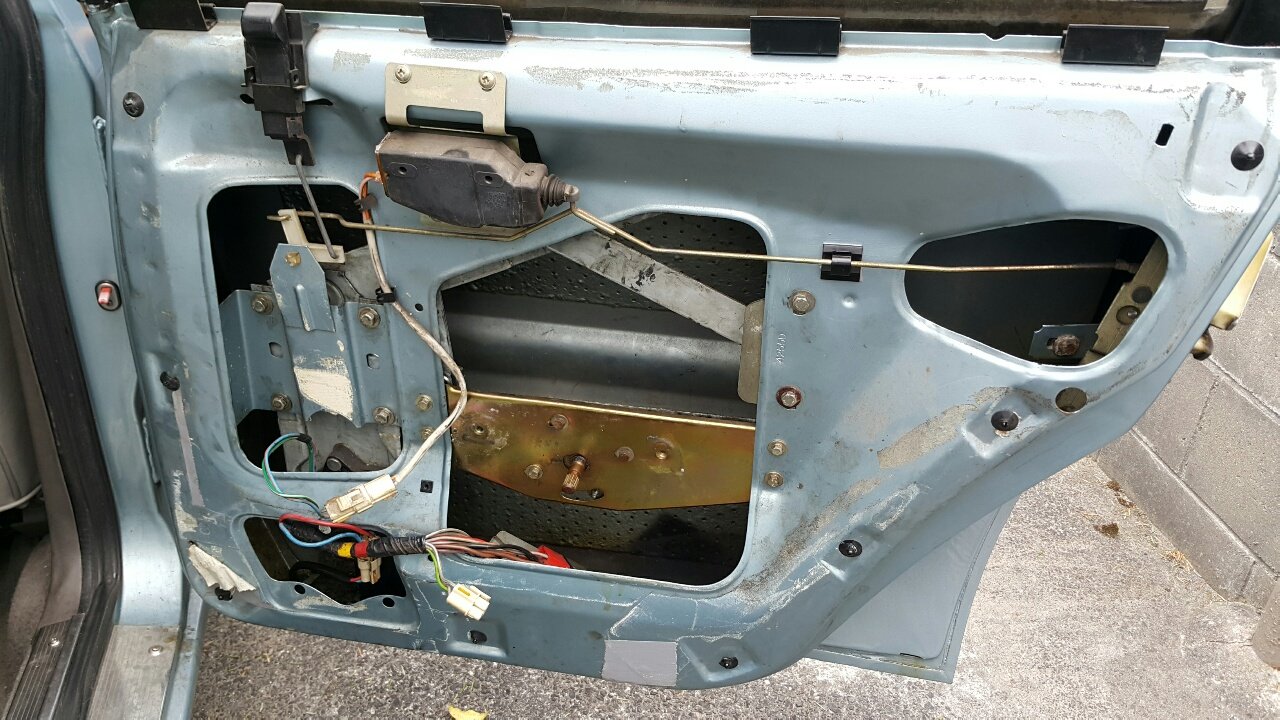 Start by removing the door handle mount. Disconnect the linkage at the bottom, buy popping the little metal clip holding it in, up, and the pushing the linkage out of the plastic clip. Two screws on either side (not the three in the middle). 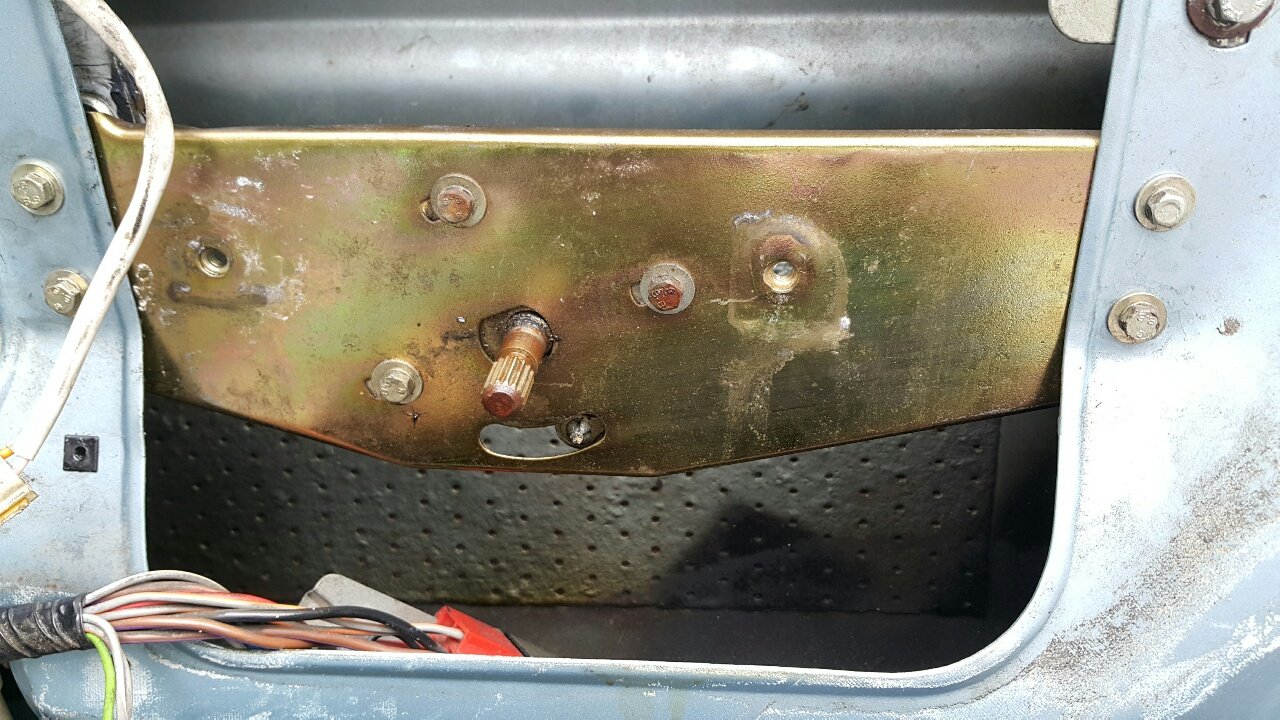 And then remove the lower rail. Another two bolts and the rail plate comes out. Take note of which way around it goes.  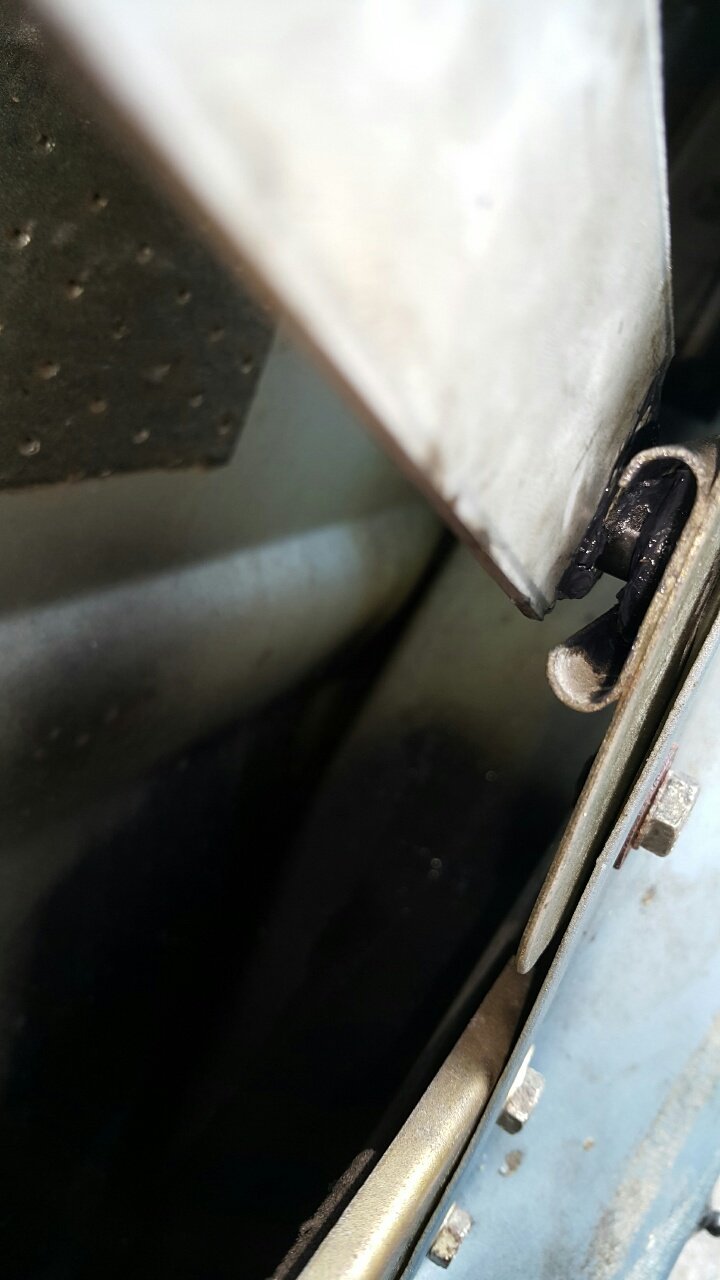 Then get your lovely assistant to hold the glass, as well as make life easier for them by strapping the glass to the frame with lots of tape. Once they are comfortable with the glass, undo the four bolts holding the regulator and motor to the door. Make sure the motor connector is disconnected of course, and before I did this I used a battery to activate the motor on the replacement regulator to try to get it into the same position as the failed one. Once the four bolts are out, all the weight of the glass is on the regulator, tape and assistant.  The only thing left to do with the old one is to disengage it from the rails, and then pull it out. There are two rails on the bottom of the glass. Slot the replacement into the door housing, and engage it with the rails. I found I could only get it to engage in the rails from the front edge of the rails (edge towards the front edge of the door). These are the rails (albeit after I had greased them)   Bolt it in, refit the lower rail, reinstall the door handle plate and away you go. I suspect the reason for the original failure was due to the complete lack of lubrication on any of the rails. All of them were completely dry, and the main gear had only traces of dry grease, but some heavy wear. Before fitting the new regulator I applied grease to all moving parts, and anything I couldn’t get grease into, I sprayed liberally with a sticky liquid lubricant that won’t wash away. I also applied grease to the rails. I sprayed lubricant on the runners and tracks inside the door that the glass runs on too. This is the old seized regulator. The only traces of grease you can see are where I hosed it with lubricant to try to free it up (without success, even out of the car its dead). The regulator appears good, but the motor is stuffed.    It’s now the world’s quickest window to go down, but is a bit lethargic going up. Its getting better though, it started really slow and almost stalled half way up, but now it goes up without fail, it’s just not fast. This is testing with the engine off though, and apparently they are faster with a bit more voltage going to the motors. It’s good to have the glass going right up, and no more tape.  I still have to refit the door card, but before I do that I have some new door handle gaskets on the way as all of mine are long gone. I will be lubricating all the window regulators as I take the door cards off to do other work, like the handle gaskets and front speakers. A little maintenance would probably have saved this regulator before it died, but i suspect the window seized in its rail without being completely shut due to lack of lubrication, and then someone just kept holding or pressing the UP button until the motor died. |
| |
Last Edit: Mar 16, 2022 10:30:48 GMT by Kelvinator
|
|
|
|
|
|
|
|
|
This week just won’t end. Today started well, I got out fairly early and made a start on fitting the rear speakers into the Rover. I checked my vast databank of photos of Rovers, and found a couple where the exact same speakers I have were fit to the standard locations. Upon inspection, I worked out how it was done. These are the photos (credit to the owner),   The issue I had yesterday was that the speaker was too wide and wouldn’t fit between the guard and the little step down that can be seen in the second picture above. It occurred to me that the speakers don’t sit flush, and must be screwed into the step down. Using the cardboard template off the box, I copied that to some more cardboard and trimmed it to the correct size of the speaker (the original template from the box is far larger than the actual speaker).  Using this, I worked out that I could reuse an existing hole, and would only have to drill one extra hole. So I did.  And then I bolted the speaker in place. The plastic trim still fits too. 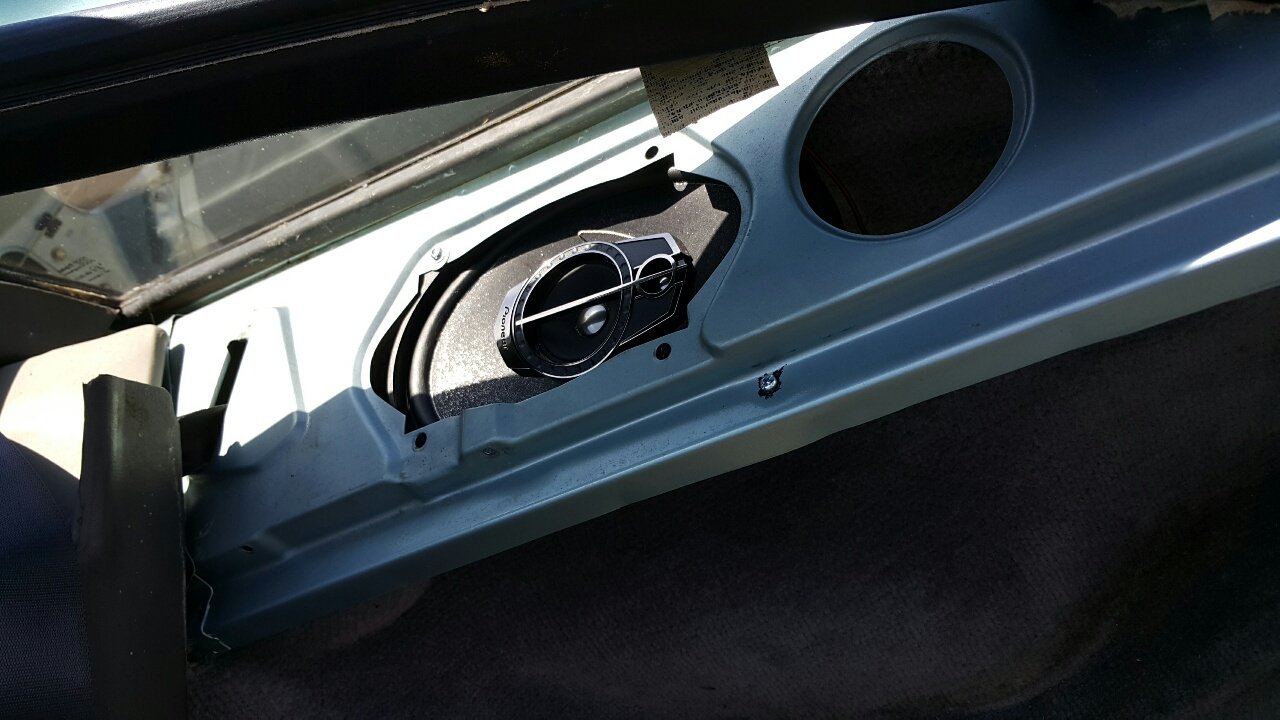 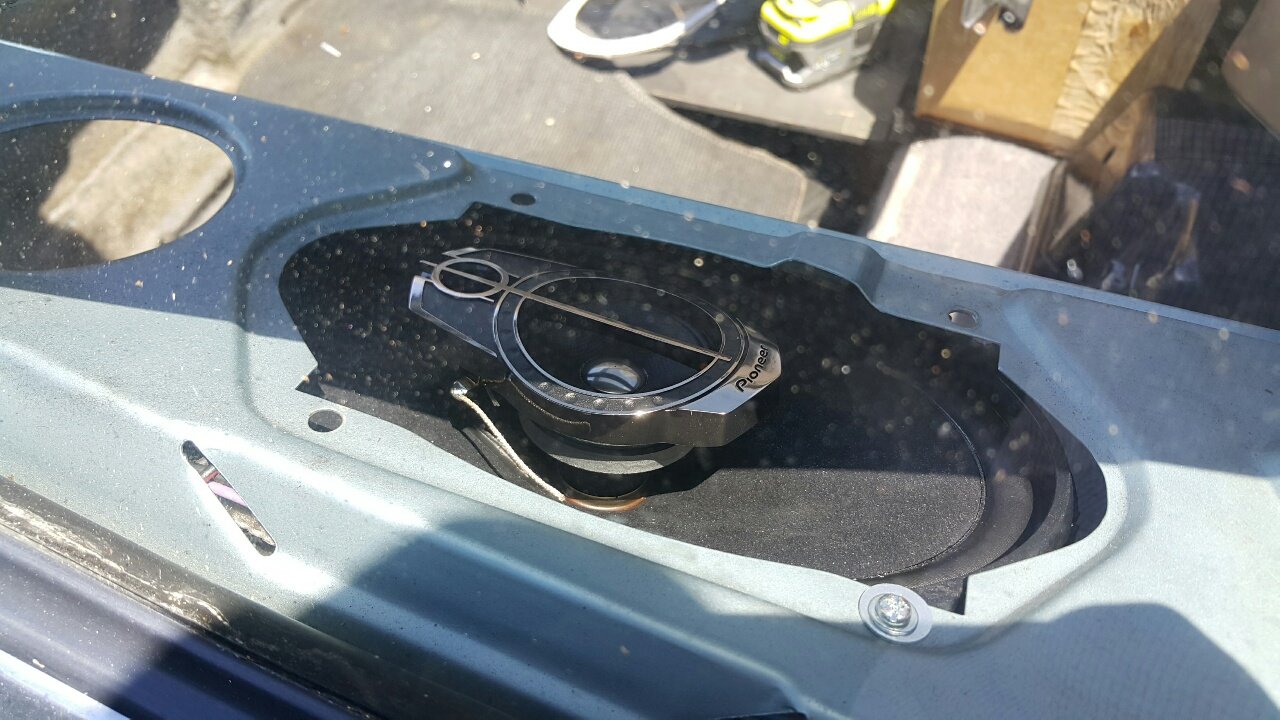 I made a short adaptor loom to go from the speaker terminals, to the standard terminals on the car loom. Upon testing, it sounds good. Plenty of bass, good clarity and most importantly, no rattles. The other speaker should be easy to fit now. But then this is where it all went to curse word. To get the speaker cover panel back into place I need to remove the side squabs on the back seat. To do this there is apparently a bolt at the bottom. Whilst crouching down next to the car, reaching in to try to find the bolt, my right knee made a horrific POP noise and the kneecap badly dislocated. The pain was excruciating, and thankfully my screaming in pain had my fiance out there in a flash. She managed to get me into the car and lying on the back seat whilst on the phone to the emergency services. The ambulance crew arrived smartly, they proceeded to cut the leg of my jeans open and gave me some “laughing gas”. As soon as I was high as a kite on the gas, the paramedic proceeded to pop my kneecap back into place. That is a feeling I wont forget for a long time 😣 The rest of the afternoon was spent in the Emergency Dept, getting checked, X-Rayed and then strapped up and put on crutches. I’ll be off work for a period of time, and also unable to drive 😥  Oh well, life goes on. Hopefully it wont be long until the hose clamps for the injection system arrive, and then as soon as I can drive again (or bend my leg for that matter) i’ll get the car in the garage and under the knife. Rover 1 – Me 0 |
| |
Last Edit: Mar 16, 2022 10:31:33 GMT by Kelvinator
|
|
|
|
|
|
|
Really interesting stuff, I saw this car on your website when I first found out about Speeduino - I'm surprised there aren't more people on here messing about with it. Thanks. It is surprising really. Most people tend to go with what they know and what is more available i guess; Megasquirt. There isnt a huge following for MS here, so it was well worth trying out Speeduino. its been in the car a couple of months now, and runs great. For now though, there is still a lot more to catch up on in the cars history, but i need some sleep. Ill post more tomorrow. |
| |
|
|
|
|
|
|
|
|
Put all the receipts i have with the car into a spreadsheet, its a bit of a read.
Almost $15,000 in receipts, and thats from 41,000 miles back in 1989 to the current 77,700 miles. Thats not taking into account inflation, and I'm missing the first 20,000 miles of receipts in NZ. In that time its had two rear shocks, lots of spark plugs, couple of trans services, 3 power steering racks, two radiators, oh, and two complete engine rebuilds (cam, followers, pistons, rings, bearings, valves, seats etc). The first rebuild was 48,071M, the second was at 61,816M. The second one was was due to incorrect parts being used in the first one, like Holden cam followers instead of Rover ones.
|
| |
|
|
|
|
|
|
|
|
Cool car! Bit of a curse word with the knee there!
As an MS person I was intrigued to hear of Speeduino - I have just spent my lunchbreak googling and firing off links to my youngest brother who is an Arduino bod. He wants to do his Series 3 Landrover now, thanks for the headsup!
|
| |
|
|
|
|
|
|
|
Right, another day, some more posts. My knee is healing reasonably quickly, thankfully, so I decided now would be a good time to ease myself back into working on the Rover. Its been a long as two weeks, not being able to do anything other than sit with my leg in a brace. It’s also been a real shame having to neglect the cars for this long. The good news is that I finally have the last piece to the puzzle to getting the Rover running again, the EFI hose clamps. I originally purchased 30 of them off eBay, but a month later they are still “in transit” and I’m sick of it. I’ll be applying for a refund when the delivery timeframe expires tomorrow. I ended up using my trade discount through work to get 30 clamps from a local parts supplier. Sure, it cost twice as much as the eBay ones, but I could have done the job a month ago if I had just done this in the first place. Live and learn. The reason I was waiting on these clamps is that someone has used incorrect worm drive clamps on the hoses currently, and they are damaging the hose. EFI clamps are designed to spread the clamping force and not bite into the hose.   EFI clamp on the left, worm/jubilee clamp on the right  And this is how they clamp.  In the meantime, I decided since the door card for the rear right door is still off (I was waiting on new door handle gaskets which arrived the day after I maimed myself) that I would take the window switch out and give it a quick once-over. The switches are known to have some intermittent issues over time, as the switch ages and wears out. In my case it worked OK, but since i’m there, I might as well do it. Removing the switch from the door card was easy enough, just squeeze the two tabs (one top and bottom) and it pushes out the front.  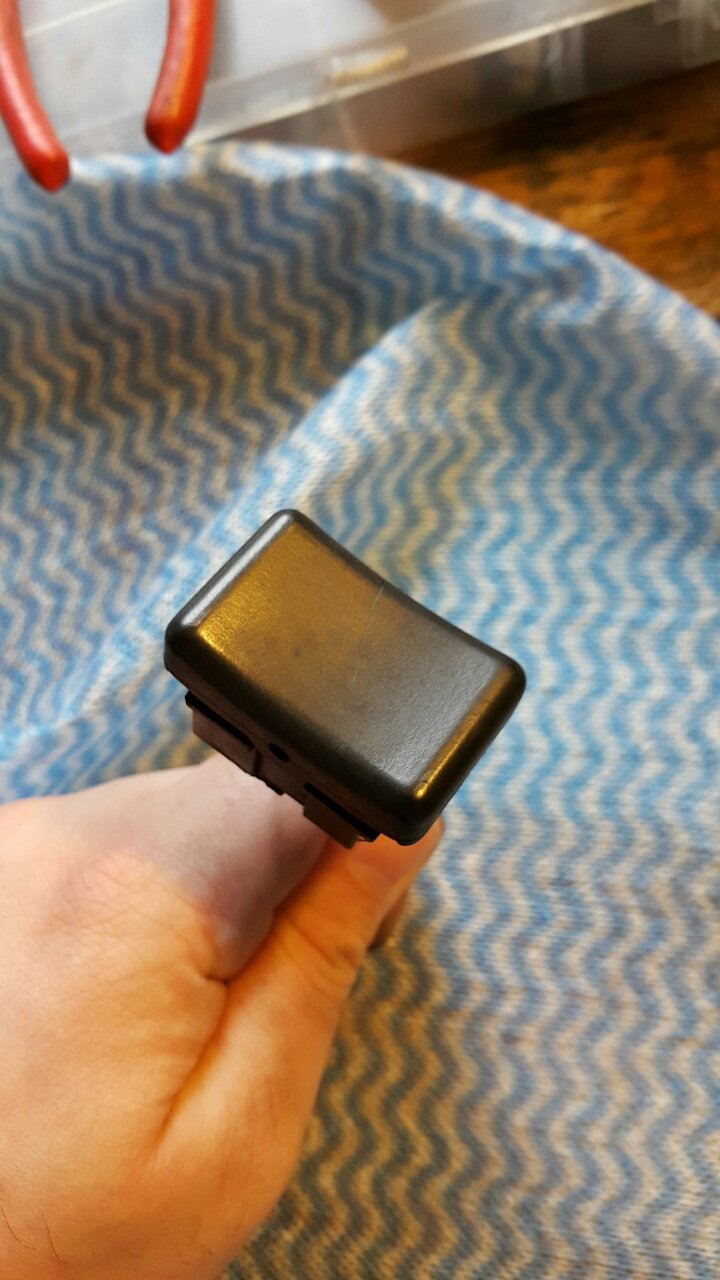 Popping the front cover off was also easy. I used a small flat head screwdriver to pop the tabs on each side and gently slide the front cover off. Be careful, if your switch isn’t holding together well there is a spring in there that might ping off into the black-hole that eats springs, screws and small ball bearings.   Mine was intact and actually in decent shape. I guess the rear windows got little use (as shown by the seized regulator). There was clear signs of corrosion and oxidisation in there though. The grease had also turned into a gritty, sticky goop. A quick clean with Contact Cleaner, a small wire brush, and a scraper got all the contacts cleaned up and looking good. I then applied some dielectric grease on the contact points where I removed the old grease from, and popped it back together. Done. 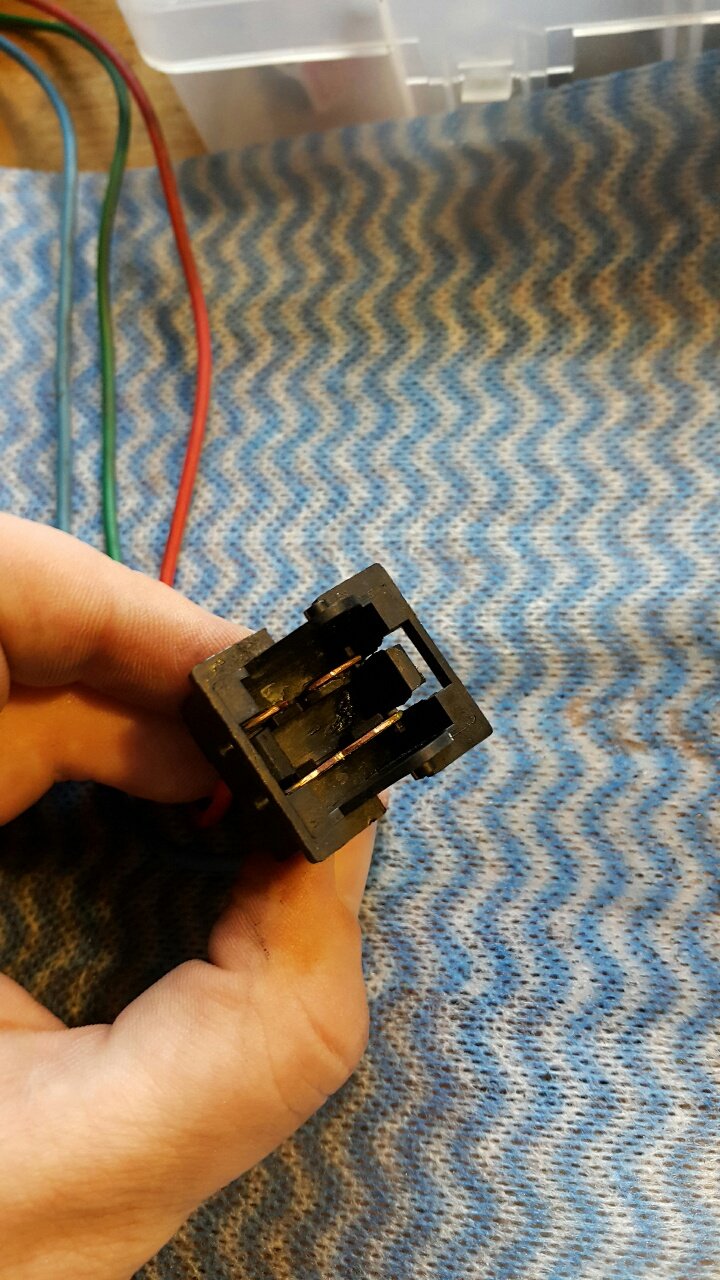 All the window switches will get this treatment as I go around the car taking the door cards off (to lubricate the window runners, replace speakers and fit new handle gaskets). My lovely better half helped clean the cars (or more like, I kinda pointed the hose at places and told her she was doing it wrong 🙃), and I gave the super bloody dirty wheels a quick spray with Dragons Breath. They came up a lot better, but still far from clean. Doesnt help I couldn’t crouch and give them a scrub.   The hydrophobic wash that we used works well, and although the car is in dire need of a wax, it still managed to get some beading on it after washing. beforehand it didn’t bead at all. Before and after (Yes, the whole panel is wet in the first picture….)  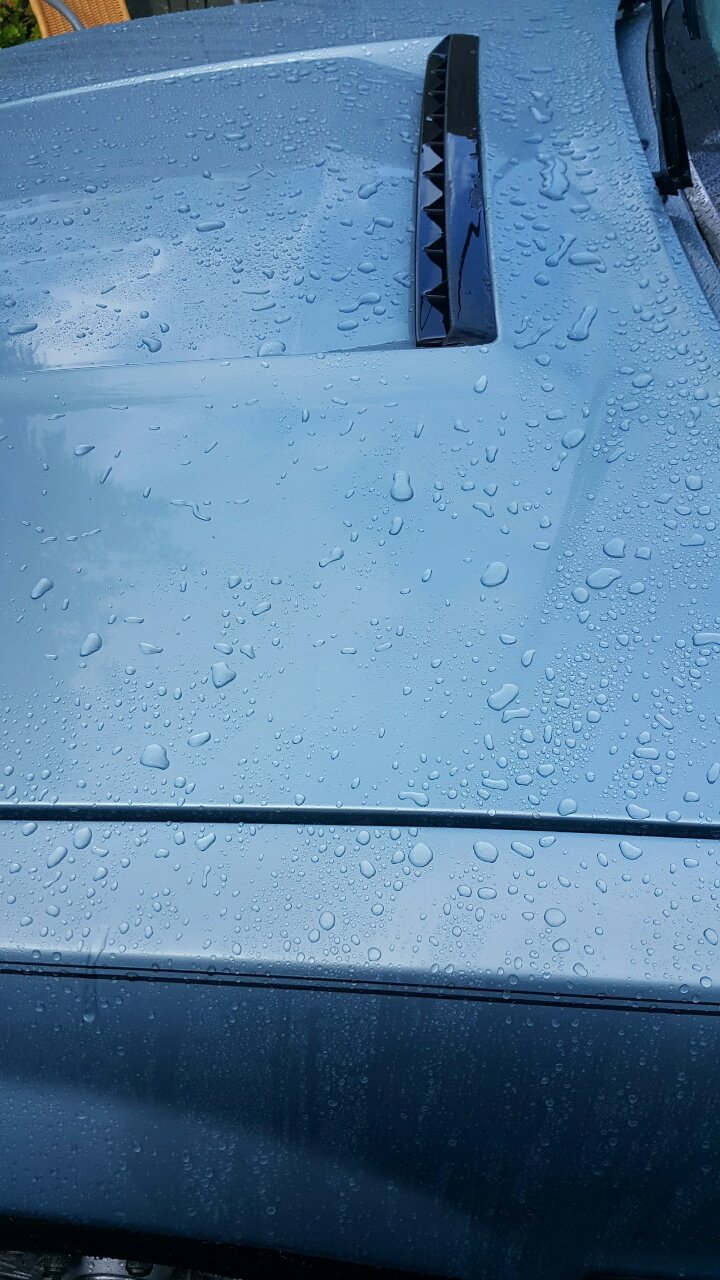 It will get a full machine polish and wax when I can, and will hopefully make it look a bit tidier. |
| |
Last Edit: Mar 16, 2022 10:32:52 GMT by Kelvinator
|
|
|
|
|
|
|
Its taken three weeks, but I thought it was about time I reassembled the door…. I’m sick of looking at the sad little Rover, with the door card off, and the boot all in a mess. The first step was to install the door handle gaskets I purchased. The original gaskets are something similar to cardboard or cork, and quite simply ceased to exist on this car years ago. Original gaskets can be purchased from the UK, but Gareth at SD1 Travelled Spares has created the dies to actually make the gaskets out of rubber, which is a far better material.  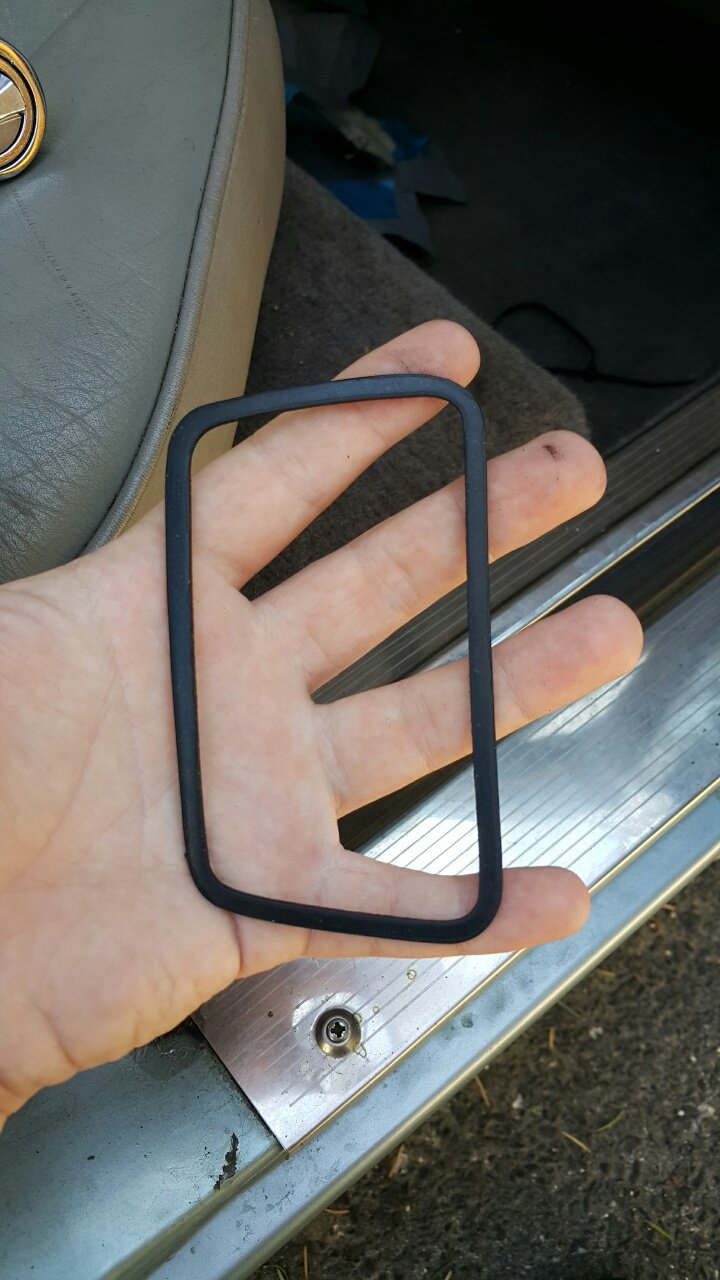 The rears are easy to change, with the door cards off. Two 7MM nuts hold the handle in place, and if they are backed off slightly, the rubber gasket can be stretched over the handle and then the nuts are tightened. Done. My handle was super loose and moved when you opened the door, but now it’s firm, and solid.    Once I had done that, I began putting the door back together. The first step was to reinstall the moisture barrier. I pulled all the old tape off it, and taped it onto the door. Not flash, but it works.   I also reinstalled the door handle and relays. I refit the window button to the door card, and then fit the door card to the door. Pretty easy to fit, just need to hook the top of the card onto the door properly, and make sure the door handle surround clears the opening. 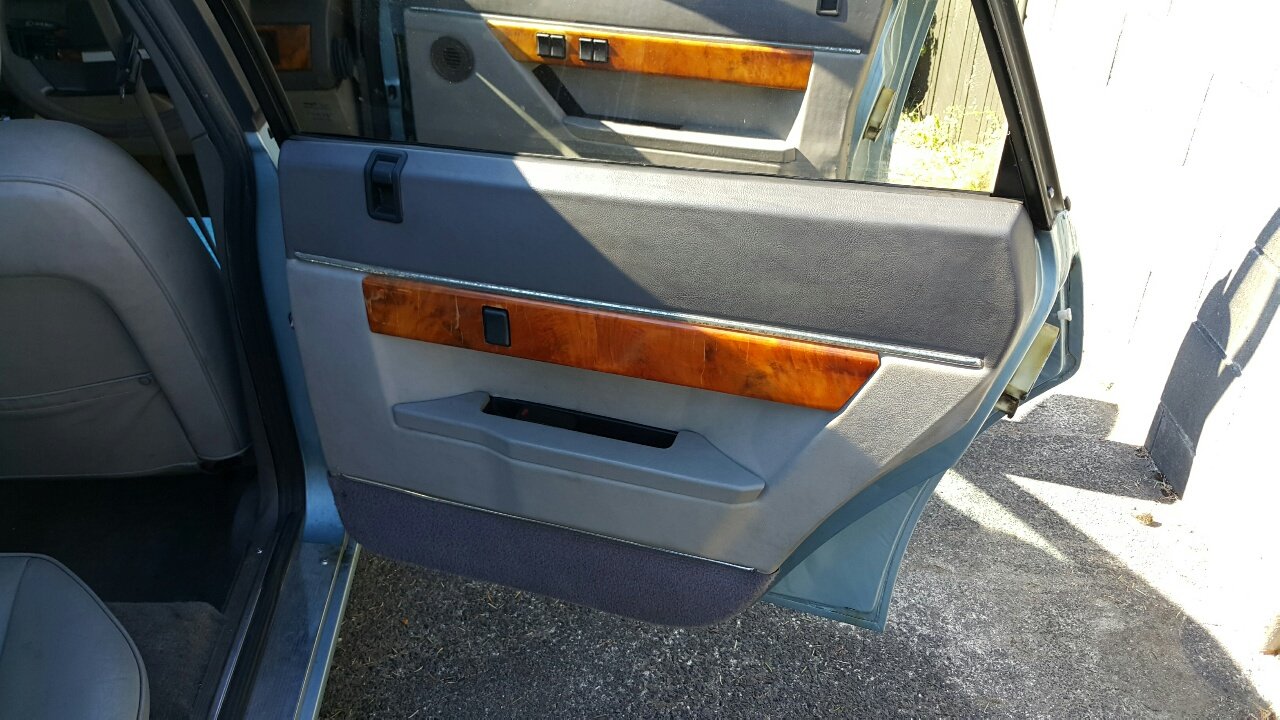 Since I was on a roll, and it was really nice outside, I replaced the door waist mouldings on the two right hand doors. The old ones were badly aged, dried out and falling to bits (literally like plastic instead of rubber). Pulling the old ones out was easy, they just pull straight up. The front door one started to come apart, so I gently levered it up with a plastic tool. The old ones  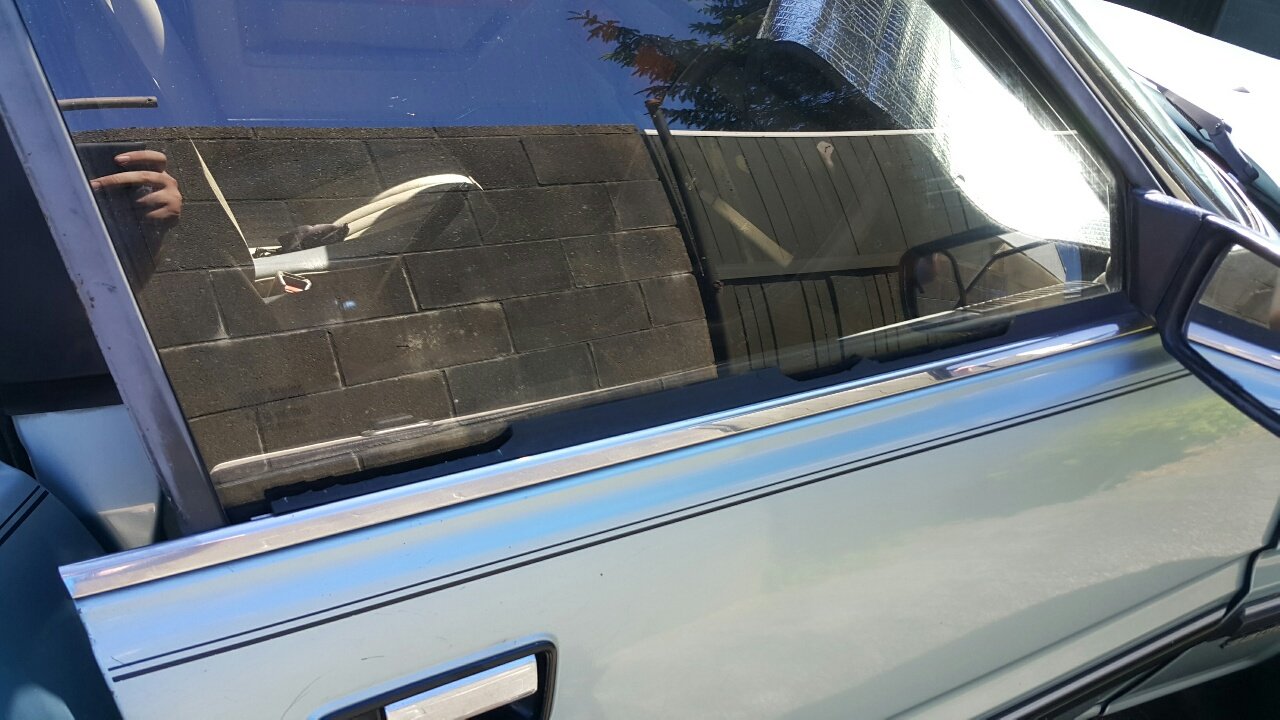  And the new ones. Fitting wasn’t too hard, I used plenty of silicone spray to lubricate the seal, and then it just pushes into the holder. Its needs to be cut to fit, and the ends can take some time to get right.     The one last thing I wanted to do was to reinstall the speaker cover that I removed last time. This is what I was trying to do when I stuffed my knee. I was trying to find the bolt to remove the side bolster on the seat. In my down time I enquired on the SD1 forum on how to remove the bolster and got some good hints, and told it was a Phillips head screw I was looking for. I managed to find the screw this time, and once I managed to get the screwdriver on it, it was easy to push the bolster upwards and remove it. Three weeks in the making. Finally.    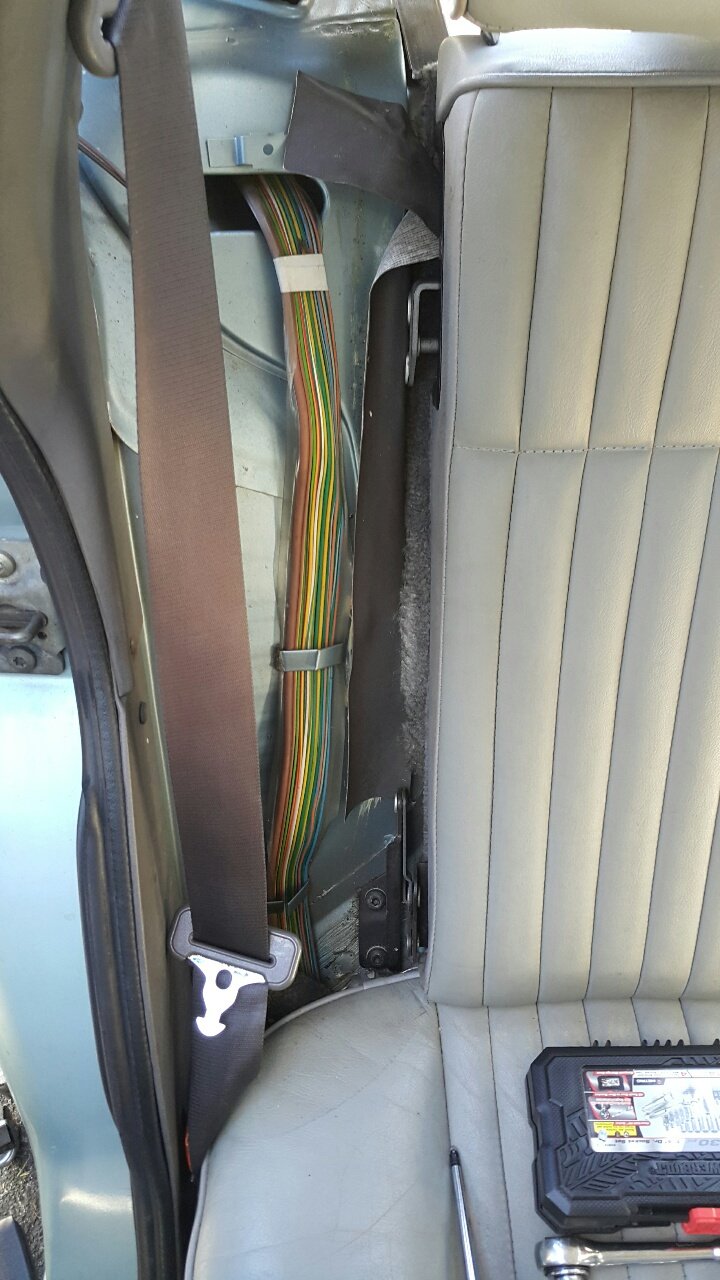 With that out, I got the speaker cover back in, and put it all back together. Because of how curse word the access to the screw is, I decided not to refit the screw. If I have to take the back seat base out, i’ll put the screw back in then, but until then it’s not going anywhere.  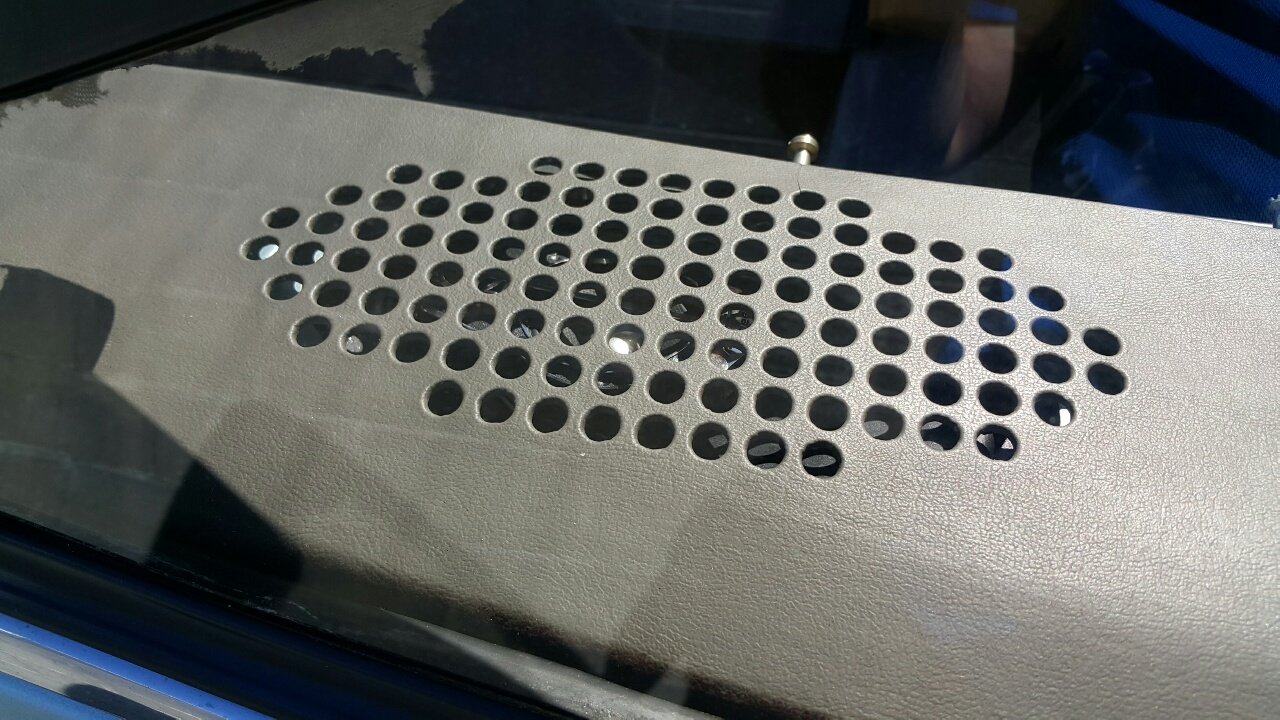  Still a lot of work to do, and I really need to focus on fixing the fuel leak now. |
| |
Last Edit: Mar 16, 2022 10:33:32 GMT by Kelvinator
|
|
|
|
|
|
|
And then it was that time. Injection system overhaul time. Its time to fix the reason I havent driven the SD1 since the day I purchased it. The leaking fuel return hose. I knew it was going to be a big job, but its in dire need to be done, because it’s a serious risk not to. Unfortunately this is the result of a failed fuel EFI fuel line. This poor chap on the SD1 Facebook group lost his beautiful car, and it’s utterly heart breaking. All EFI owners NEED to check their hoses. 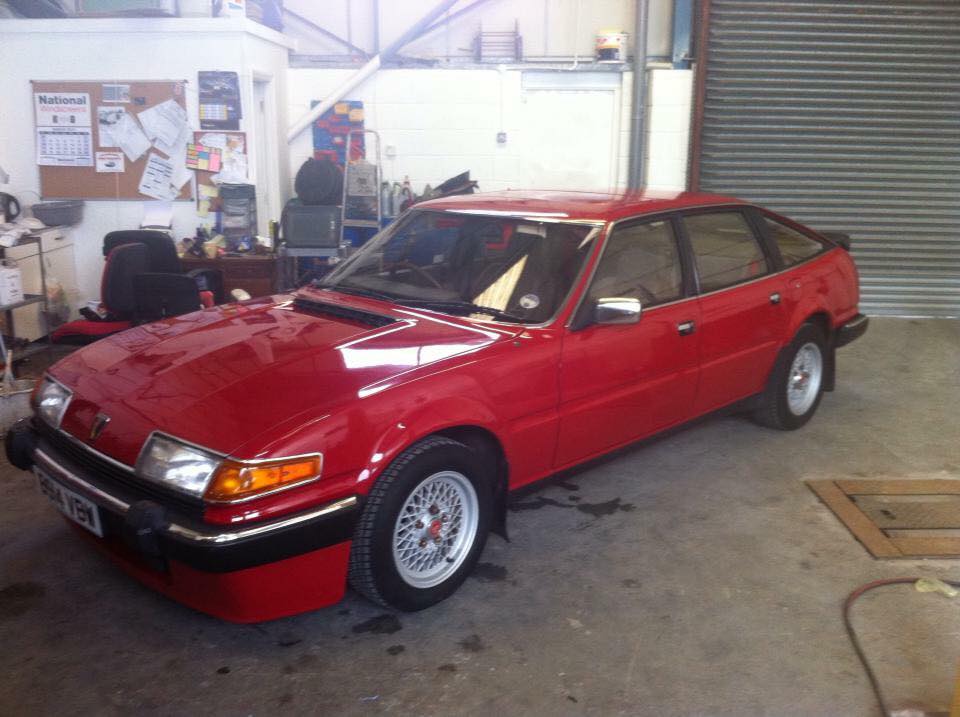   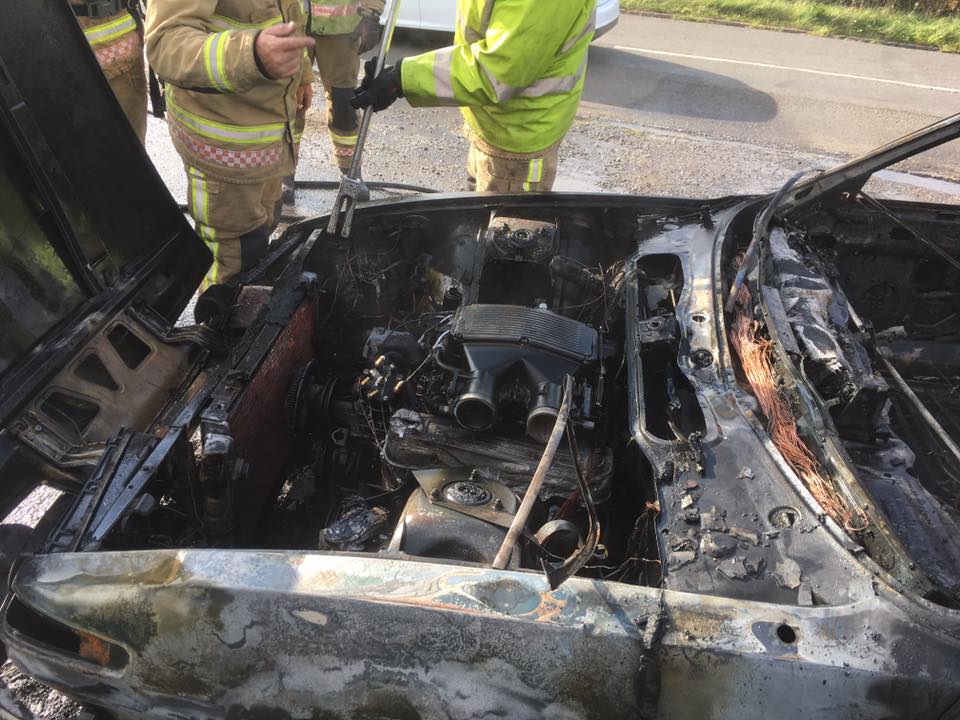 I’m extremely lucky that I noticed my fuel leak before it got to that point. I’m amazed that I didn’t end up in the same situation on the drive home, and that the previous owner didn’t end up flambéing his family. I noticed it when poking around under the bonnet, and sniffing a strong petrol smell. I noted it when I viewed the car, but disregarded it as just being “an old car” and making smells. When I looked, it was pretty obvious where it was coming from. It was literally dripping from the return line off the fuel pressure regulator, down the back of the engine and onto the bellhousing…. right next to the exhaust Y-Pipe. Since all the parts finally arrived, I moved the Rover into the garage today and began pulling it apart. 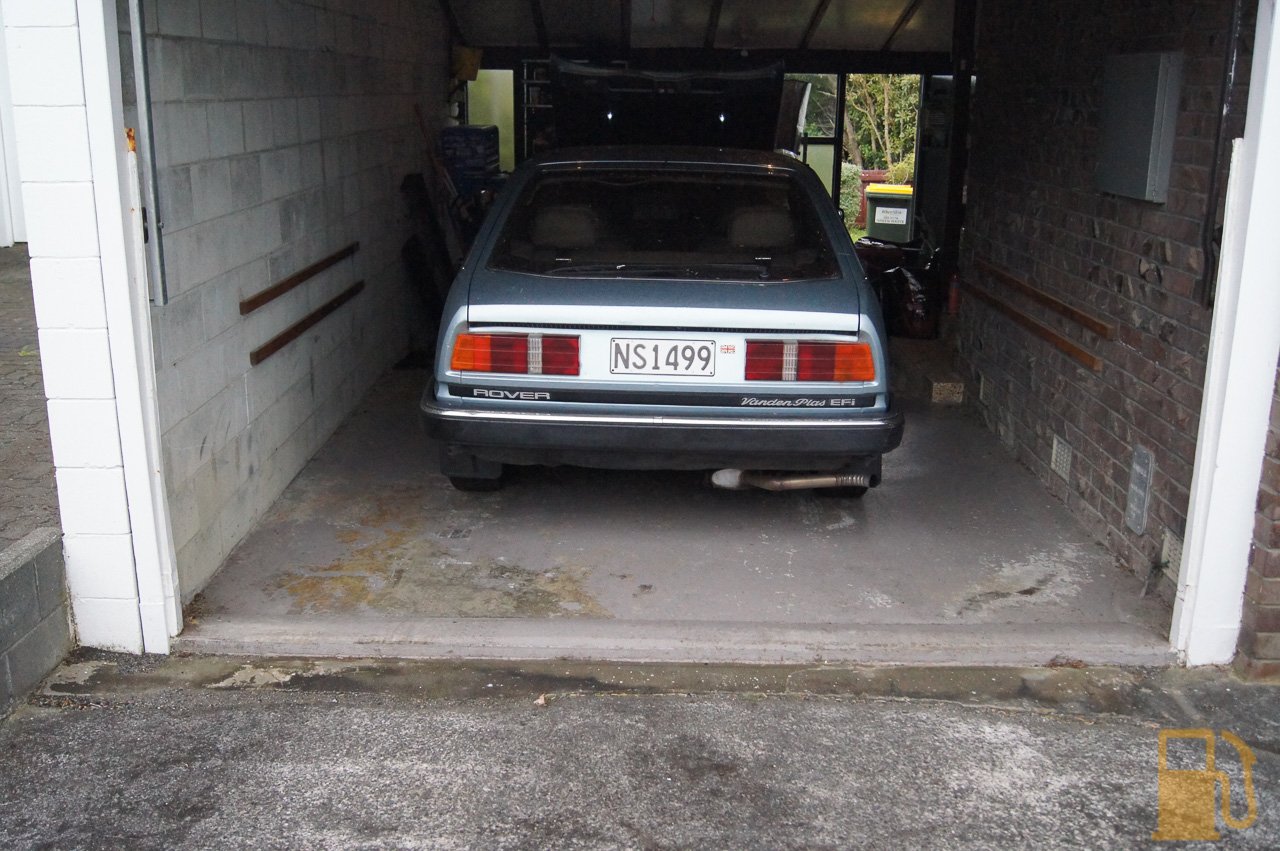 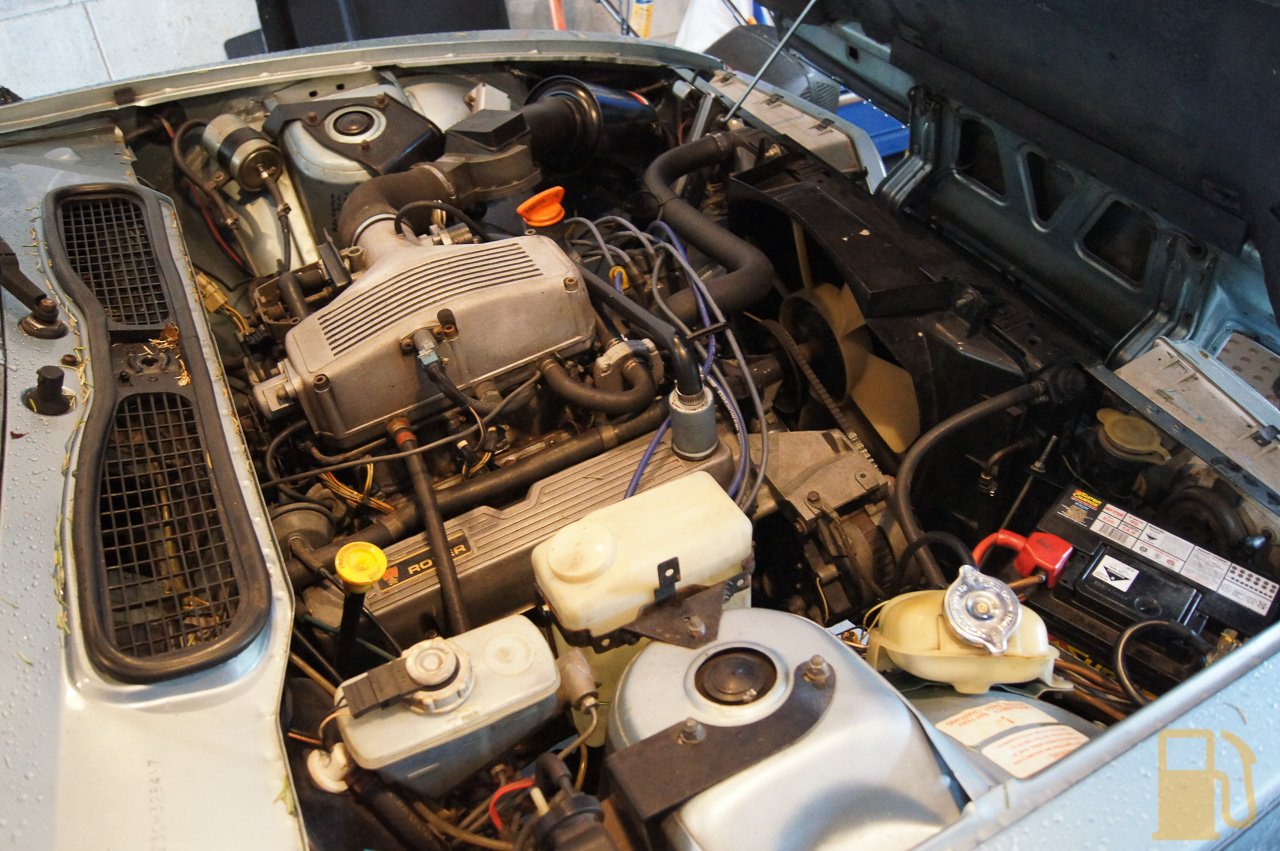 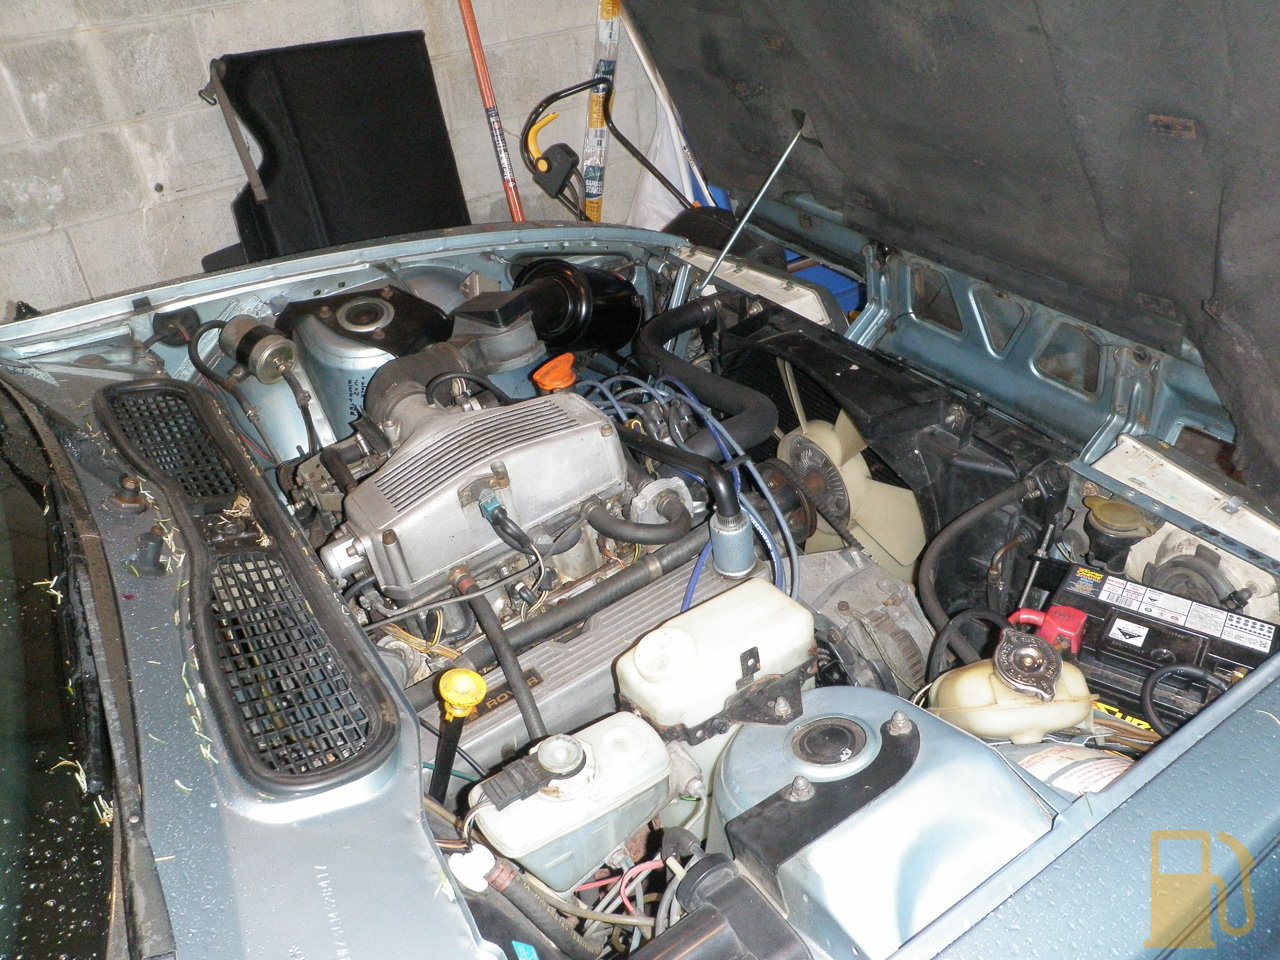  It’s actually amazing working on this engine. I’m used to Japanese cars with everything crammed in, with small fine threaded bolts and lots of complexity…. the Rover is the exact opposite. Its simple, well laid out, big coarse threaded bolts, and no complexity at all. The only pain is working with both metric and imperial bolts. The first steps were to remove the intake plenum top. I removed the intake piping, all the extra air pipes, and disconnected the coolant pipes under the throttle body. Six large hex bolts, and it lifts off easily.    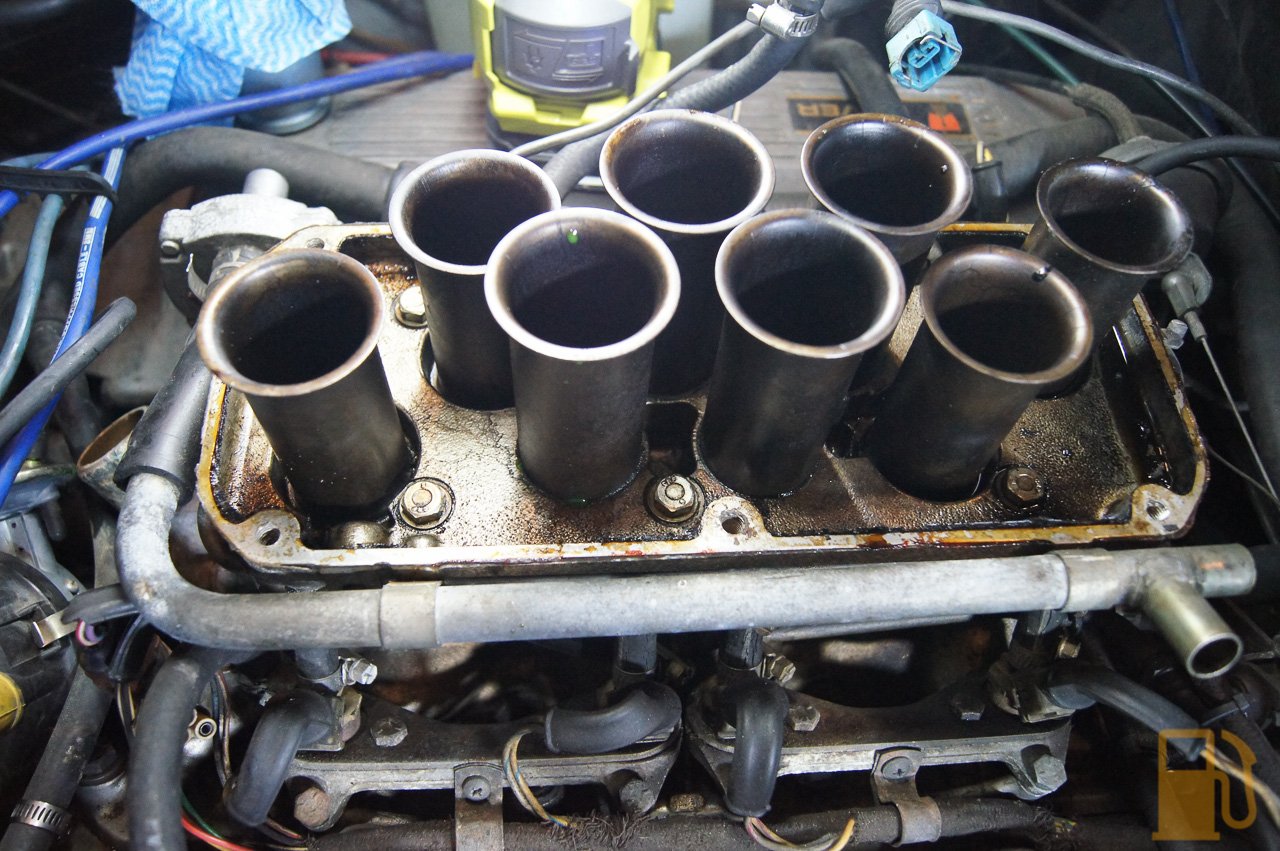 There was some traces of oil in the trumpet base, but nothing too major. I’m quite pleased with the condition really, although there was very little sealant left between the base and top, and what was there was sticky and degraded, so that may have been leaking air.  Six more bolts, a couple of air lines, and the plenum base was off too, leaving me with a clear inlet manifold and access to the fuel rail.   I also removed the fuel filter, because that will be replaced, and all the rubber hoses need replacing too. Interestingly the filter looks old as hell, and has a sticker indicating that it was removed from the previous owners other car and fitted to this at some point. 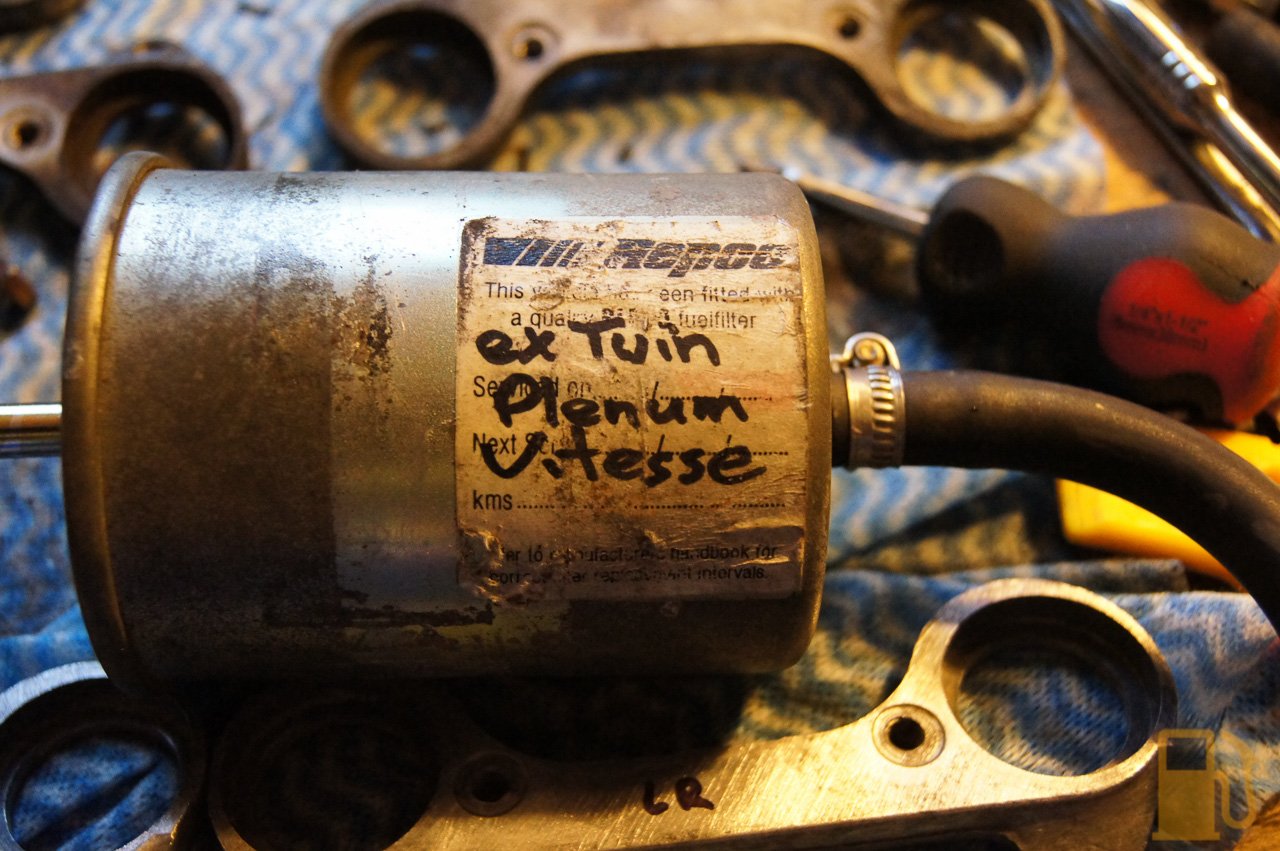 With the plenum off I got a real good look at all the injection hoses, and it wasn’t pretty. It was only a matter of time before the whole lot started jetting pressurised fuel everywhere. On one side you had massive cracks in all the injector hoses, on the other side you had injector hoses that didn’t have massive cracks but instead had all the wrong hose clamps which were biting into the hoses, and the wrong size hose. I also noticed that all the feed and return lines were cracked too.      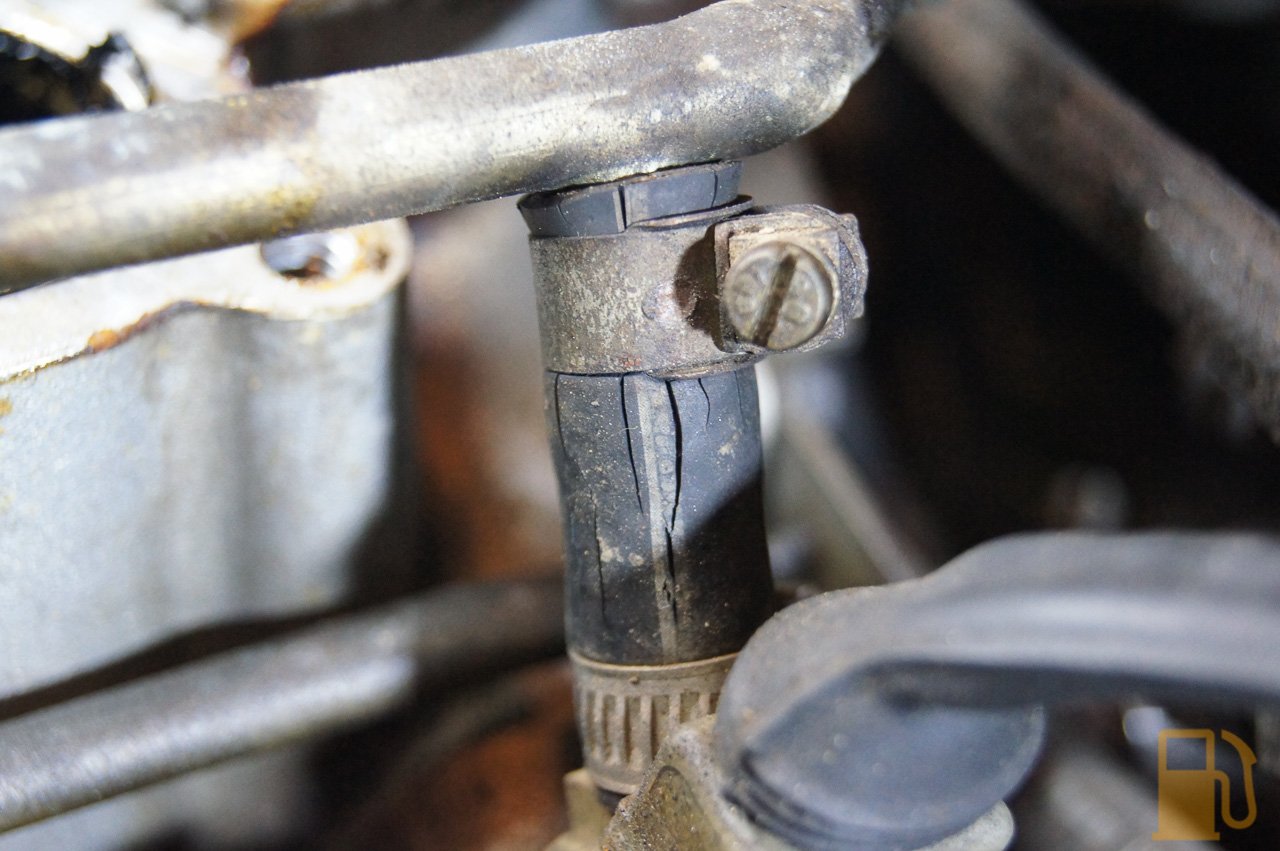 After undoing heaps of bolts, spilling petrol everywhere, and noticing all the injector electrical connectors are worse for wear (it’s OK, I have new ones to go on with the Speeduino loom), I pulled the fuel rail and injectors off.    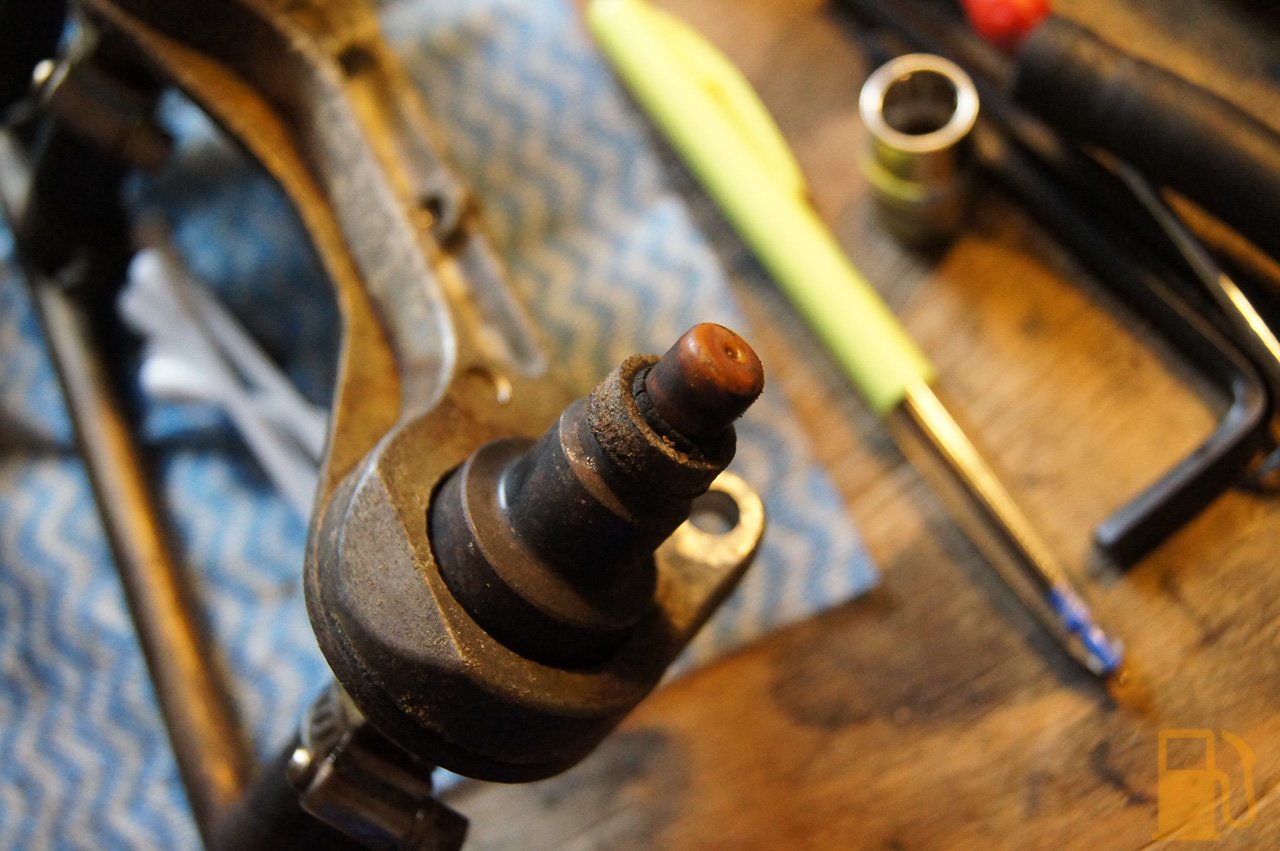 The lower injectors seals were perished and showing signs of cracking. I noted that there were some proper EFI clamps on some hoses, but they were corroded and in bad shape.  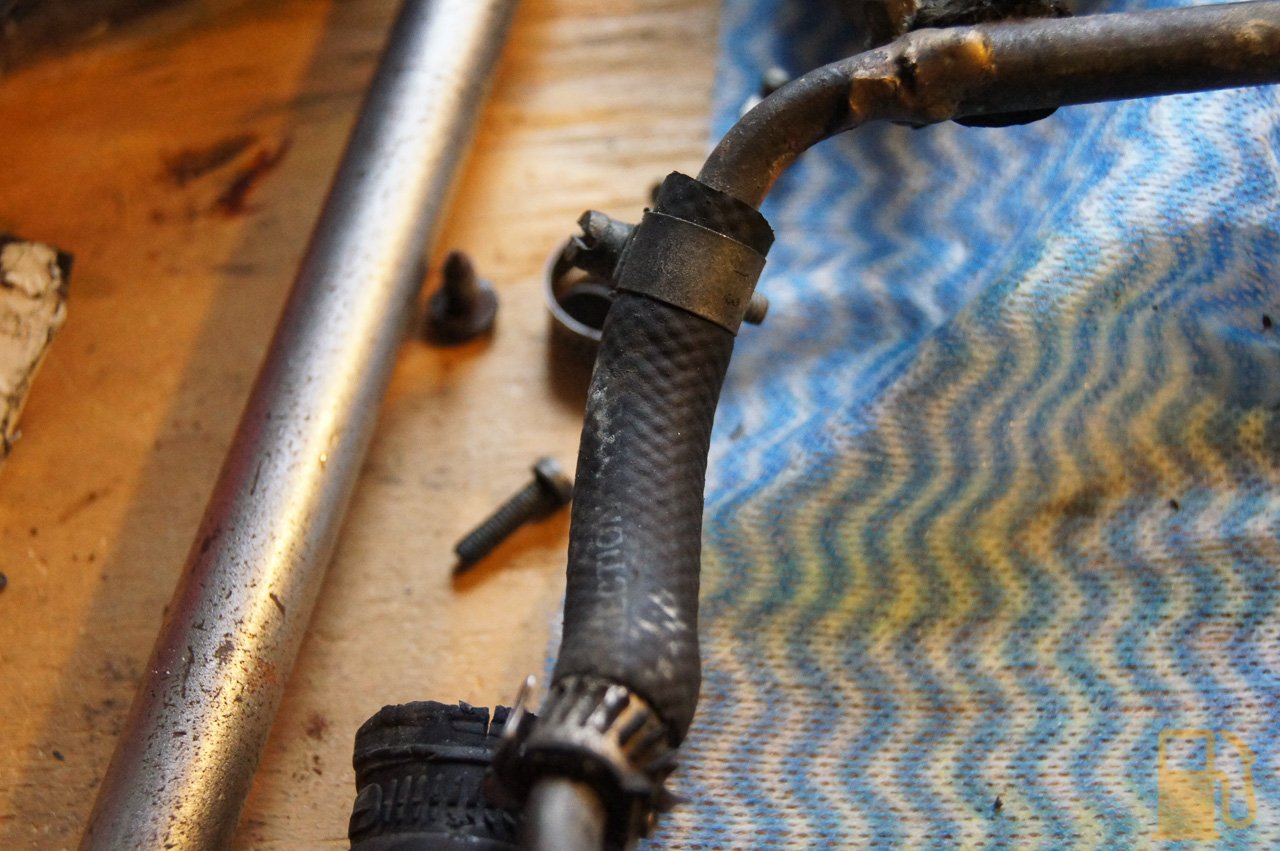 Removing the injectors was a pain in the  . The upper seals were corroded into the aluminium retaining plates. I had to use a small pick to dig into the seal and lever it out of the housing. They obviously hadn’t been out in a while.  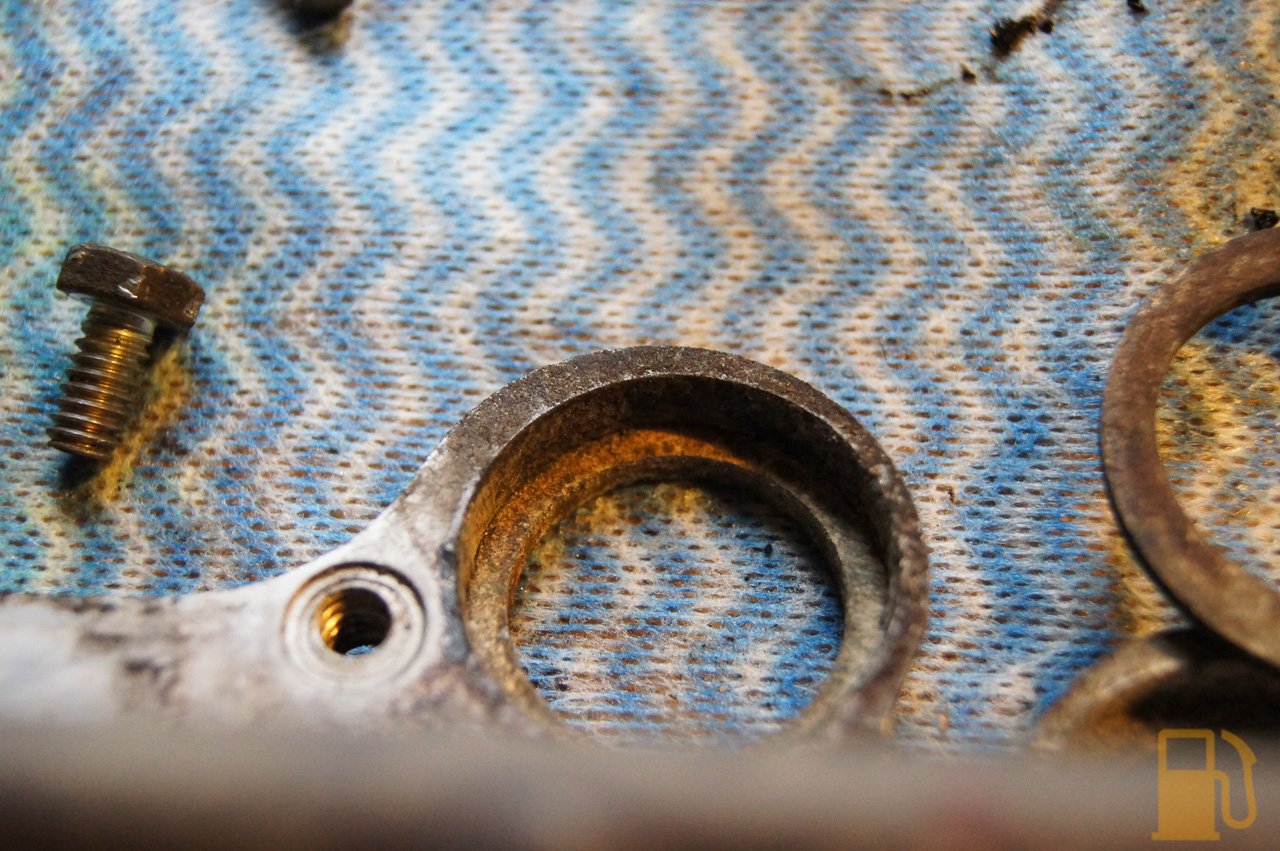 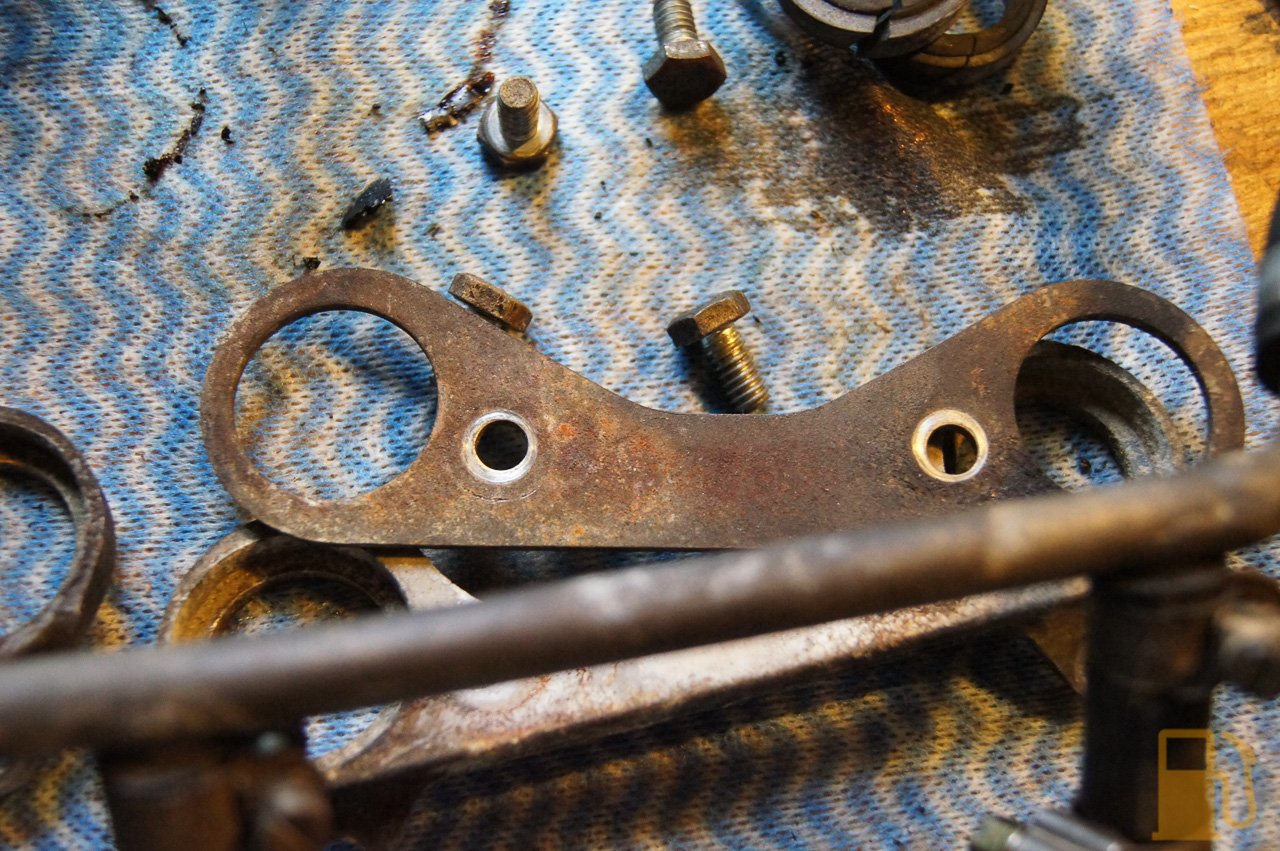 Once the retaining plates were off, I proceeded to remove all the injectors and hoses from the rail. All but one injector hose came off the rail easily, one had to be cut off. You can see the effects of using the wrong style clamps on the hose, and also the two different hoses used left to right.     All the hoses had to be cut off the barbs of the injectors, there was no way they would pull off.   I had a price to test and clean all the injectors, but it worked out to be about $400 and quite frankly that’s more than I want to spend on these old injectors for now. If I was going to spend that much I would change to a hotwire plenum with the new style injectors and rails (and no more hoses for the injectors). Instead, I decided to have a whack at giving them a basic clean and check the spray patterns. I set up a container, and a can of brake clean with some vacuum hose on it. Plug the injector into the hose, press the button on the brake clean to pressurize the line, and use a 3v power supply (in my case, 2AA batteries) to trigger the injector.   Worked like a treat, the spray patterns seem to be OK. There will be some improvement with a proper service but I lack the parts to service the injectors themselves. I’m happy with them for now. This was the graveyard of injector hoses and old clamps. 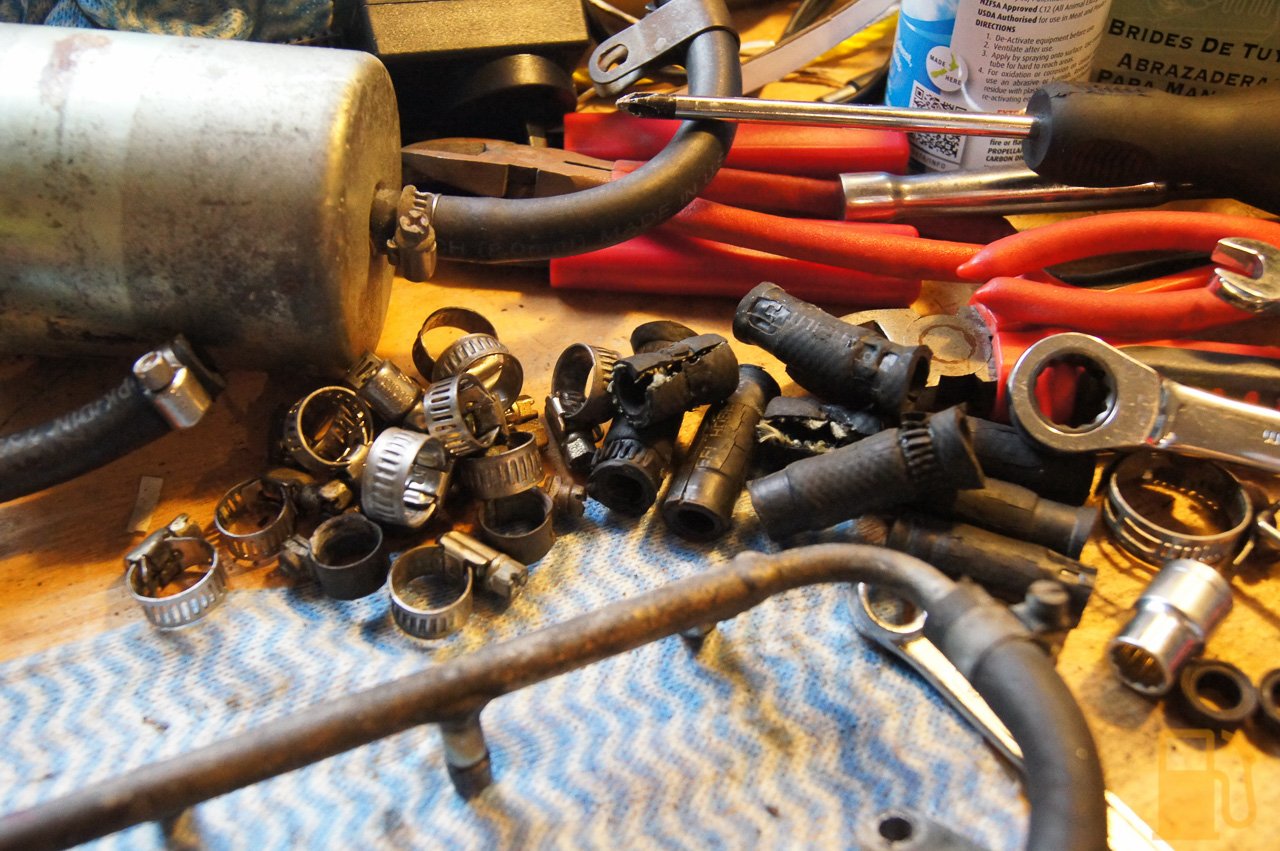 I pulled the fuel pressure regulator out too, so I can replace the leaking hose on that. The hoses were badly perished, with lots of large cracks in both. The leak wasnt out of one of the big cracks though, it was from a small little split in the hose, where a hose clamp had previously bitten into the hose. The vacuum hose was on its last legs too, with multiple large cracks in it.  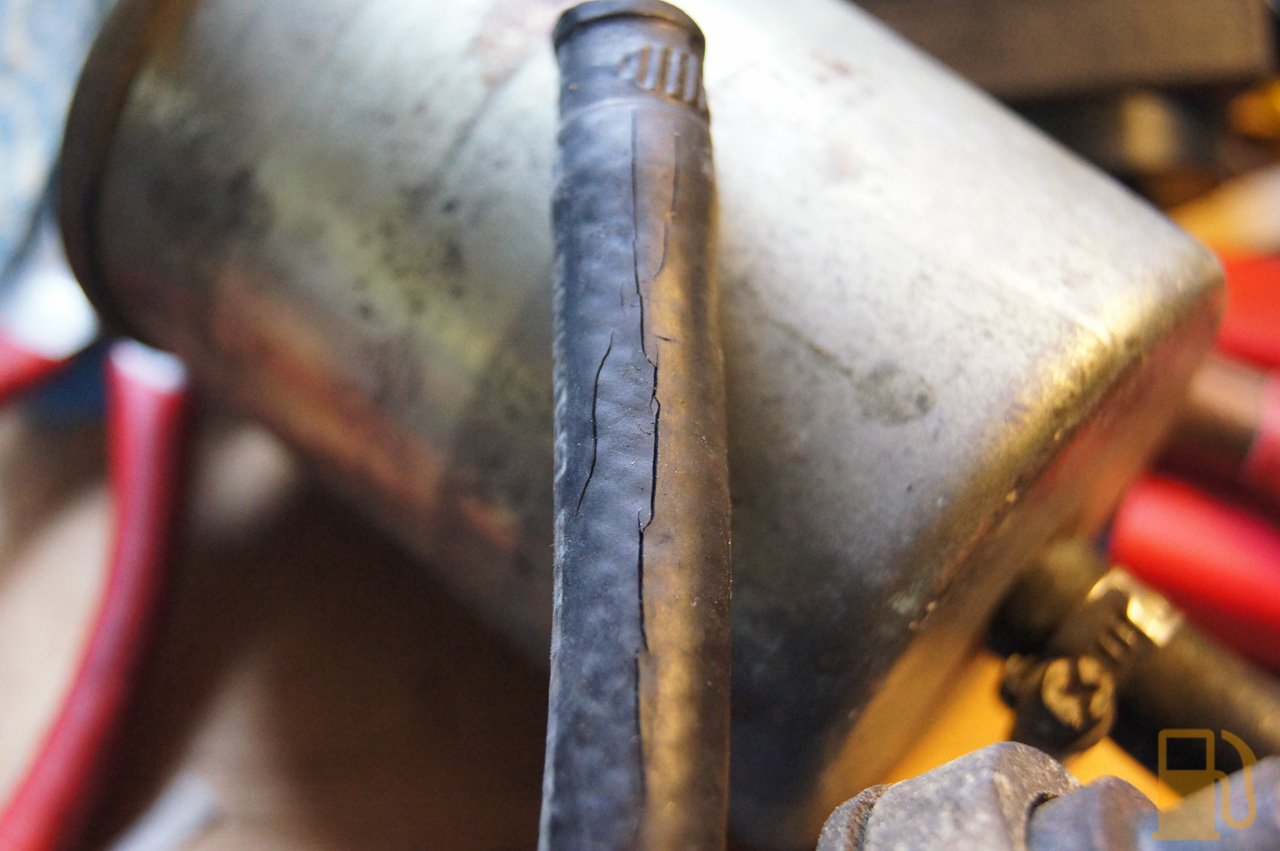  The whole lot gets binned, because I have a new regulator, new hoses, and new clamps 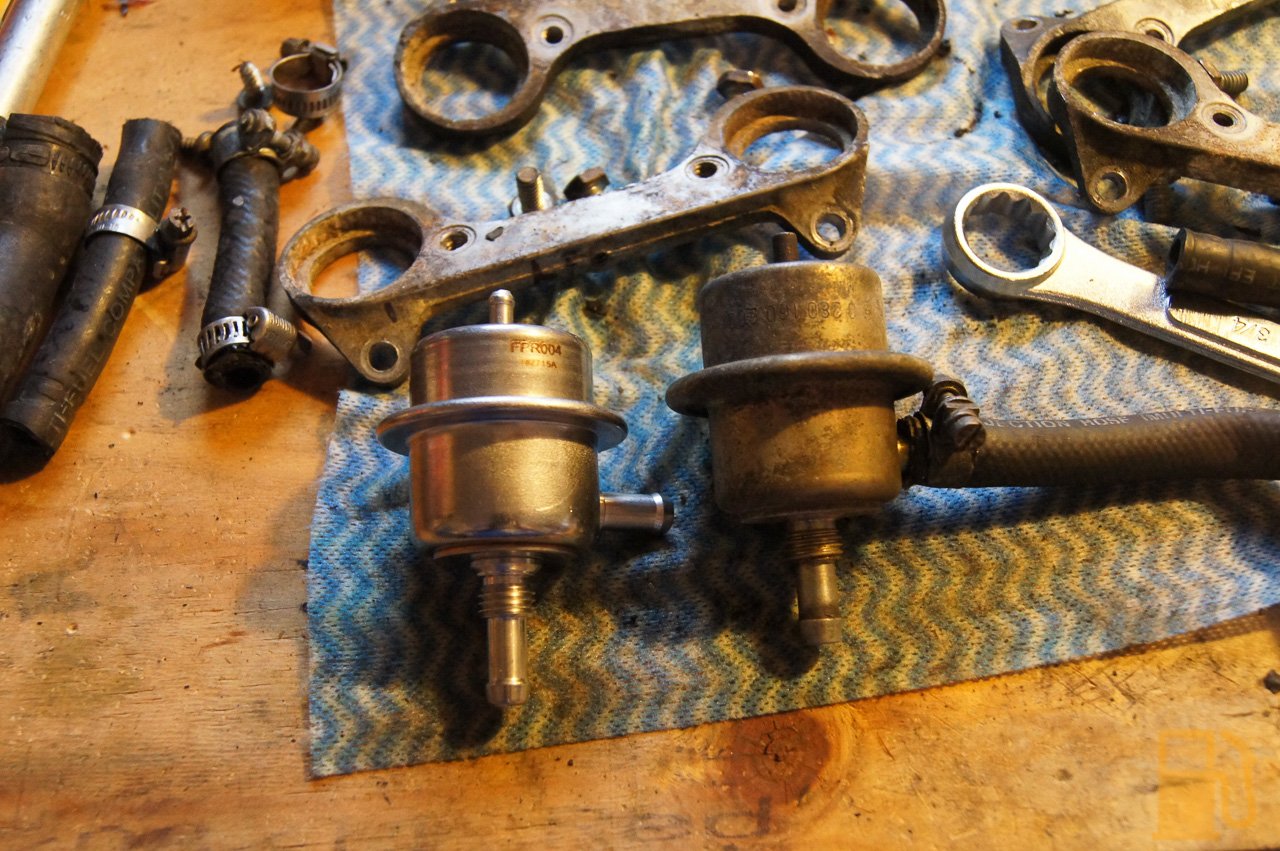  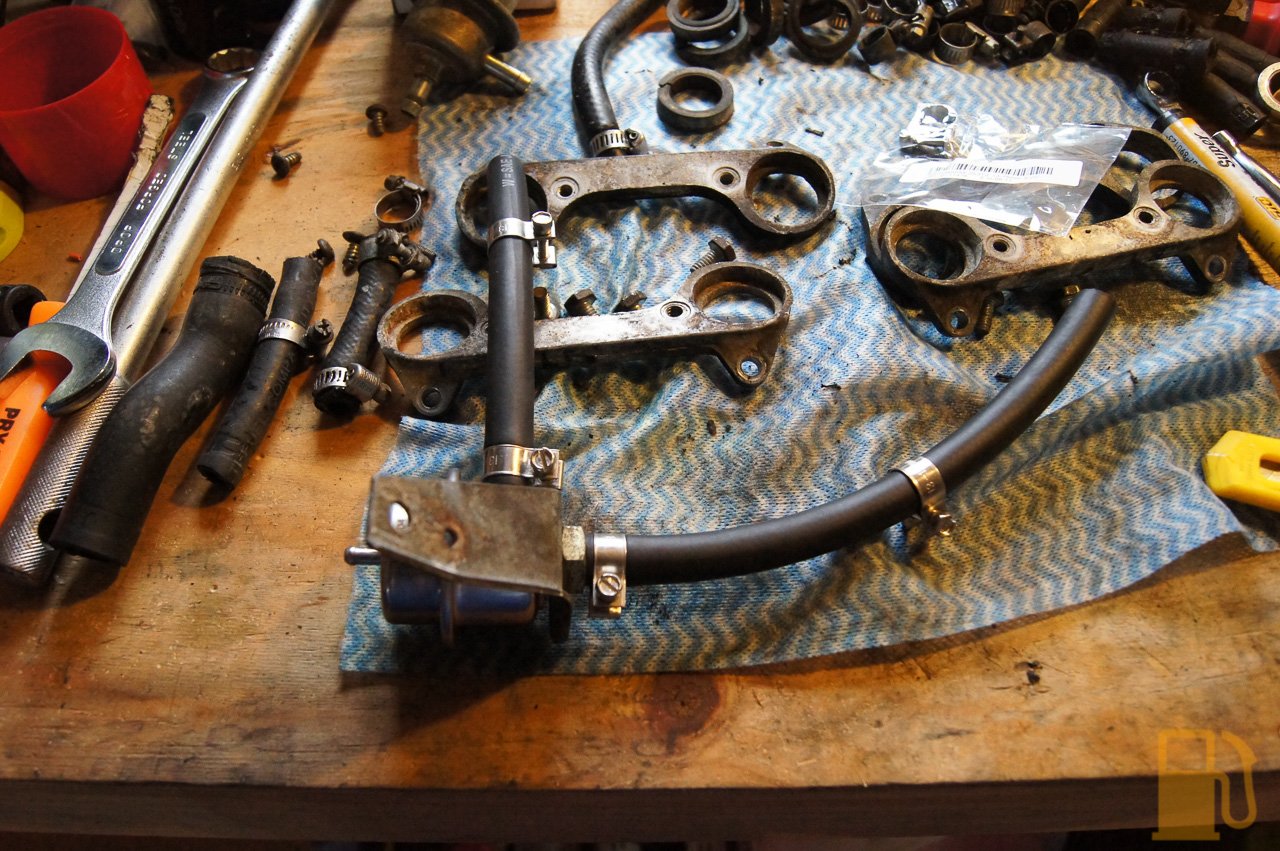  And since I was in there, I just couldn’t leave it well enough alone. The retaining plates and fuel rails just didn’t look good, they were corroded, rusty and just letting the team down. So I wire brushed the top plates and fuel rails, and hit them with a coat of CRC Zinc paint.   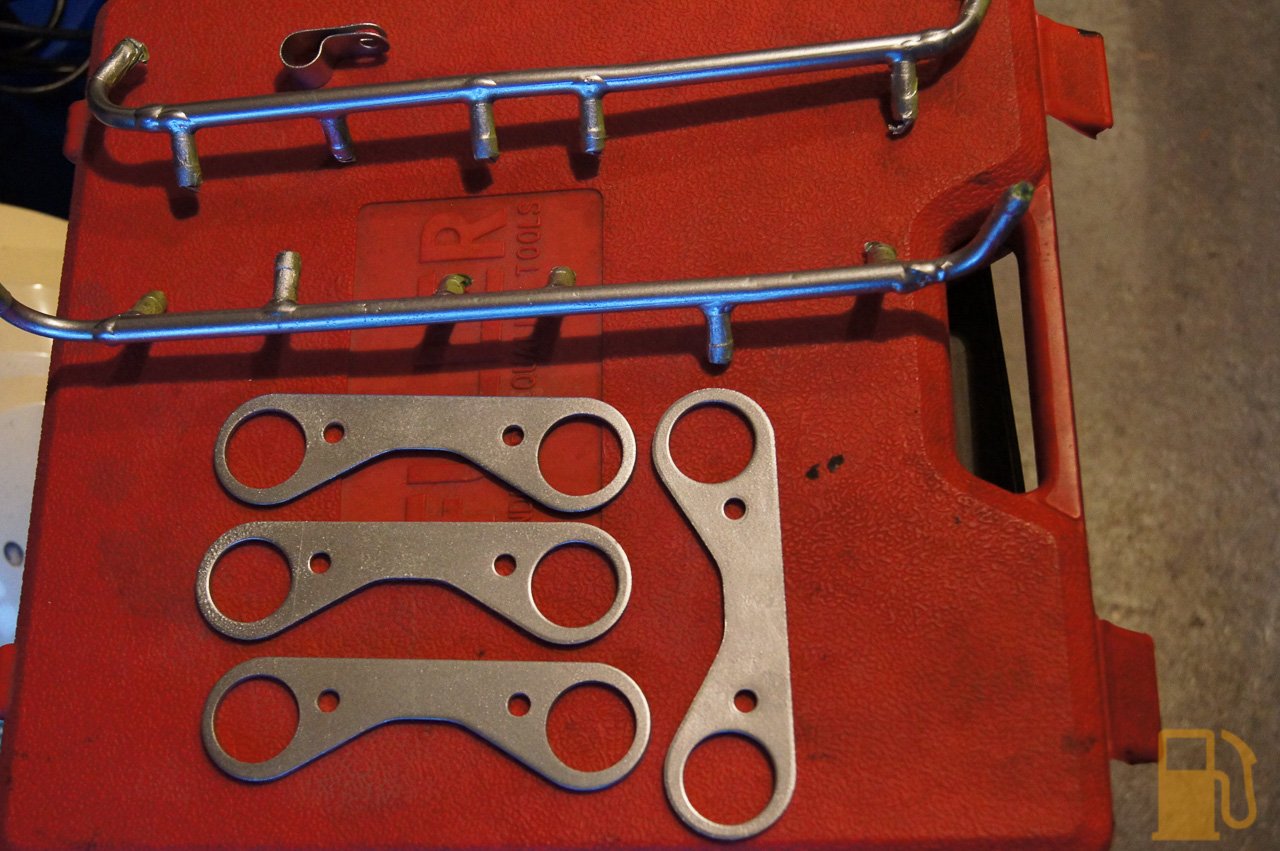  The finish is quite pleasing for such little work. It’s not perfect, but a hell of a lot better than they were and will keep rust away. The lower plates also needed some attention. They were aluminium and were badly corroded. There was a lot of oxidation in the injector seal holes too. Lots of wire brushing later, and they were starting to look good. I wont paint these, just leave them bare alloy.  So this is where I got to. Tomorrow I need to change the thermostat out, and then the whole lot goes back together again. In the meantime, this is how it sits.  |
| |
Last Edit: Mar 16, 2022 10:34:01 GMT by Kelvinator
|
|
|
|
|
|
|
Following on from the first days work, I jumped back in and started putting it all back together again. I left off having removed all of the injection system, and painting some parts that were a little worse for wear. With the retaining plates and fuel rails looking a bit nicer, and all the corrosion removed from the injector seal recesses, I cut the new injector hoses to length and began fitting them. In hindsight, I would make the hoses slightly shorter as it’s a very tight fit with the plenum base now (the hoses set the height of the rails). I made them slightly longer presuming that the old hoses would have shrunk. They obviously didnt. You can really see the difference between the correct 7.6MM hose, and the 8MM hose that everyone in NZ tried to sell me. No matter what they say at Supercheap or Repco, no, 8MM is not “close enough” to 7.6MM to work well. The hose clamps require a lot more force to clamp the pipes correctly, crushing and biting into the hose. 7.6MM doesn’t have this issue. 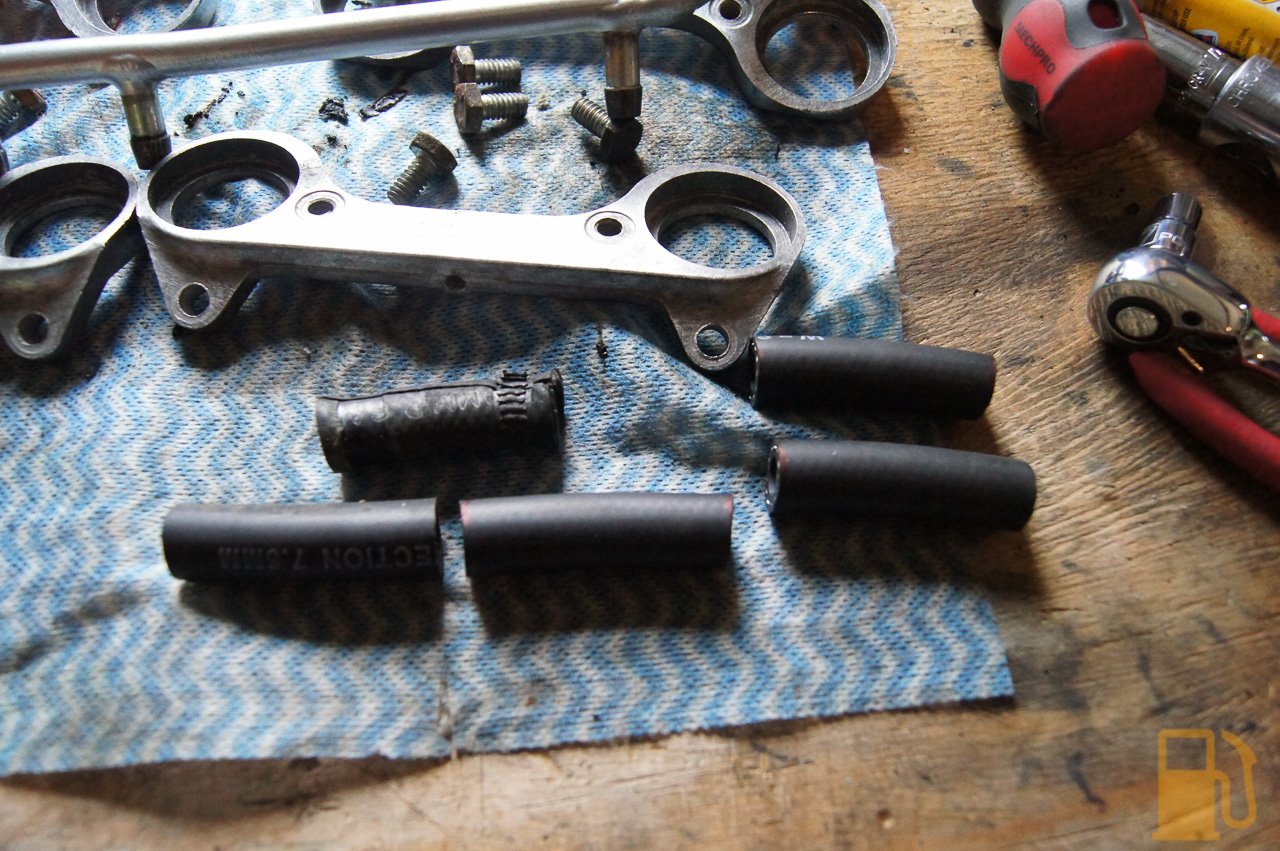  And with lots of pushing and twisting, all the hoses and clamps went on the injectors. The injectors were then fitted into the retainers, with new seals. Don’t do what i did and fit the upper seals to the injectors before the top plate in on, as it doesnt fit over the seals, you will find yourself removing all 8 upper seals and doing it all again.   Which then went onto the rails, which had new hoses too.   With a bit more wiggling and jiggling, the whole lot went onto the intake manifold and the bolts were torqued to 11NM as per the manual.   I took a quick break from the injection system to change out the thermostat. The old one was causing the engine to warm up really slowly, and the “operating temperature” was too low. Easy enough to change. Top radiator hose off, two bolts and the housing pops off. There should be a paper gasket on the housing which is a bit of a pain to scrape off the housing, and my old thermostat was stuck in the housing and required some persuasion to get out. The old one was stuck partially open, as shown by it weeping coolant when cold. The old thermostat was 84c, and the new one is the correct 88c.    Its bit of a fiddle to keep the new thermostat in the recess whilst putting the housing back on. My new thermostat also came with a rubber seal ring around it, which is not needed. Moving back along to the injection system again, I started working on the plenum base, getting it ready to refit. It needed a really good clean to get the oil residue out, and all the old remnants of the liquid gasket removed from both the top and bottom. I don't know what sealant was used last time, but it had turned to a sticky gel in places.  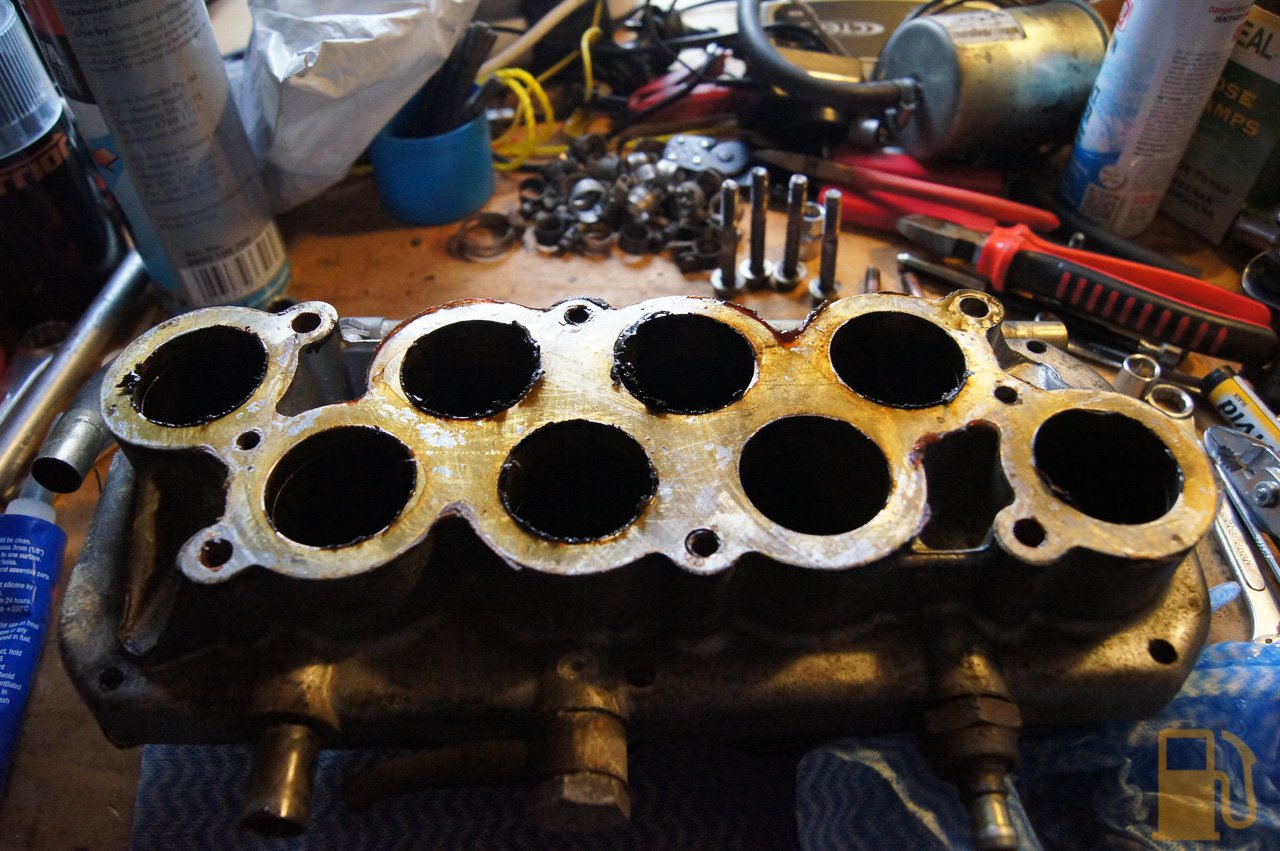 I also removed and repainted the extra air pipe that runs around the plenum base, as it was badly oxidised and ugly. Once that was in a condition I was happy with, I refit it to the intake manifold. As I mentioned earlier it took some fiddling to get in due to the tight clearances with the fuel rail. I also made sure to use a thin smear of sealant on the face of the base where it meets the intake. I chose to use sensor safe sealant, as standard RTV sealant can cause issues with wideband O2 sensors (which I will be fitting for the Speeduino). The plenum chamber was a bit more work, as there are a couple of things that need work before fitting. The first one was to remove the over run valve, and to correctly set it as per Ramon’s detailed information. 5 turns from fully home. Mine was a lot further out than that. The old gasket was split in a couple of places too, so a new gasket with a smear of sealant went in.     After refitting the over run valve, I cleaned the breather inlet on the plenum. It’s notorious for getting blocked up with gunk from the breather system, and not working correctly. it’s a large diameter pipe which goes into a small right angle passage in the underside of the throttle body. I used a stiff wire, and LOTS of brake clean to blast the passage clear, and sure enough I got a lot of gritty black rubbish out of mine. Initially it was hard for the brake clean to pass through the passage, so it must have been partially blocked. The breather system is fairly simple, but it requires all parts to work correctly. In my case the inlet filter on the valve cover was missing too, so that wouldn’t be helping. A new one has been fitted.  The plenum was refitted, with all new hoses (except the over run valve to air rail hose, as the one supplied by Rimmers was wrong; far too small diameter to ever fit) and a smear of sealant on the face.   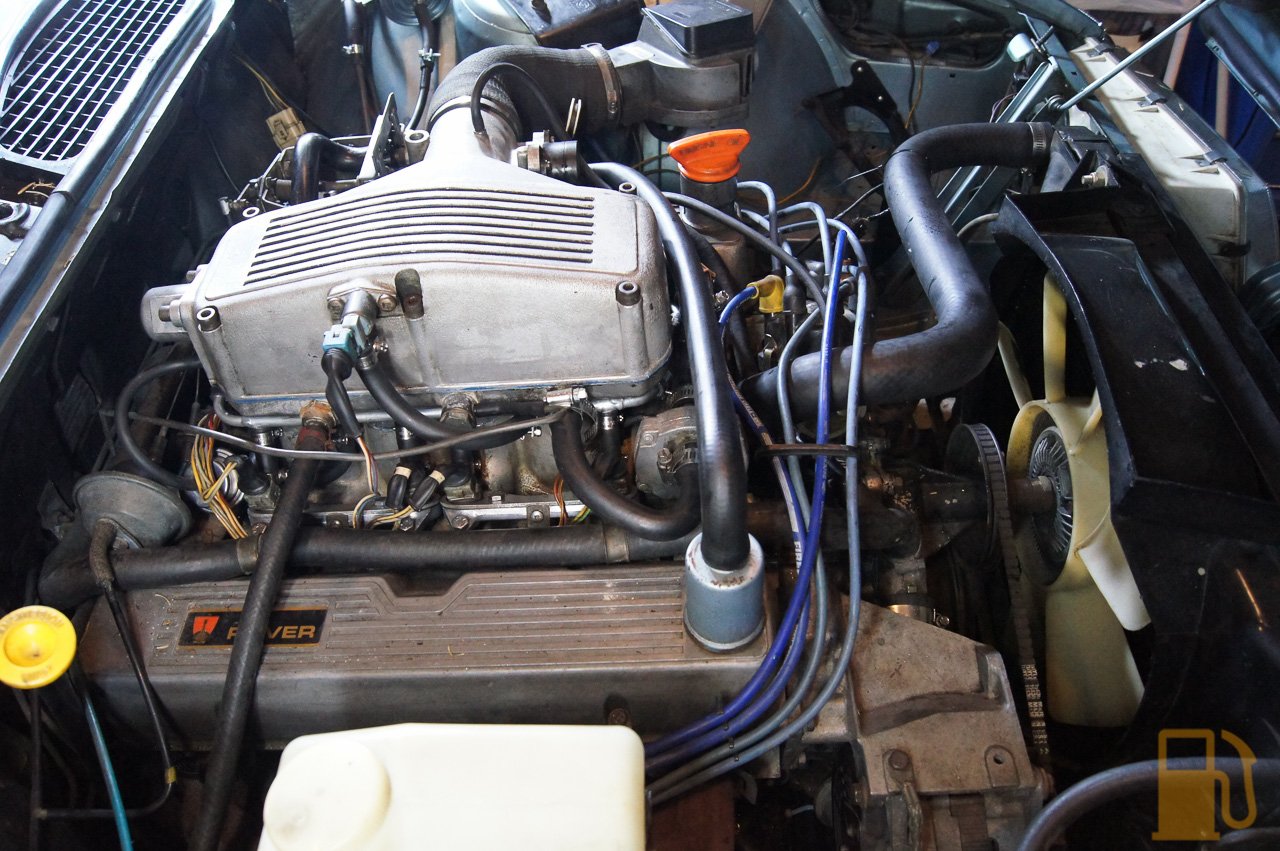 New hoses and fuel filter went on next. Much better than the old dodgy looking one. All up I used about 35 efi hose clamps. Glad I got some spares as I originally planned on less than 30!  Once it was all back together the only thing left to do was to bleed the cooling system. This was bit of a prick to do, and I think it might be because my heater core is blocked with gunk. I will try to flush and clean the heater core at some point, but in the meantime just having the cooling system working is OK (coming into summer anyway). My issue seemed to be that even though the system was full and no longer burping air, it wouldn’t come fully up to temperature and even when the needle did rise up the gauge it would randomly decrease back down to stone cold. I suspect this was as a pocket of air surrounded the sensor, isolating it from the coolant. I tried a few things, including using a hose and funnel to raise the highest point of the system, which did actually help and it burped a bit more air, but still wasnt enough. Note my sweet self catching overflow system 😄   I got sick of messing with it, and moved the car outside into the driveway. The driveway is on an incline, so I parked it nose up. I decided that I would over fill the coolant tank in the hopes it would burp some more air and take in more coolant as it cooled. Sure enough I checked it this evening and it had taken more coolant, and seems to have bled the system. The temp gauge is stable, but now it looks like it’s over cooling the system as it will not go over the first white mark (which is 80c or so), when it should be running closer to the 100c mark. The viscous coupling and fan are incorrect for the EFI as it should have an 11 blade fan, but appears to be fitted with a 7 blade fan from a Carb car. The coupling also seems to be playing up, as it engages and locks when the engine is revved when cold and doesn’t freewheel. I can hold it stationary when starting the car, but cannot stop it when the engine is running. Replacing the fan and viscous coupling with correct (well, as correct as they can be when the original units are NLA) parts is next on my list, but I’ll settle for running a bit colder as long as it is sealed and doesn’t leak anything or overheat for now.   All in all its a win. The injection system is sealed and doesn’t leak, which is fantastic. The car also runs and drives well (although some room for improvement, likely with a service). With this out of the way I can now drive the car again, and get around to the other work I need to do (speakers, door handle gaskets, leather conditioning, fixing the oil leaks, and then Speeduino). Love the rumble of the V8 engine though, I look forward to driving this more. |
| |
Last Edit: Mar 16, 2022 10:34:39 GMT by Kelvinator
|
|
|
|
|
|
|
I’m slowly getting there, I finally finished installing the rear speakers into the Rover. The boot has been a complete mess since I did the RH speaker and mangled my knee, and it’s been bugging me since. Having already done one speaker I knew what I was getting into. Using the same template I drilled another hole, whacked some screws in and away it went. This time I also used some foam edging to insulate/seal the speaker against the panel. When I can be bothered I’ll seal the other speaker the same way. It should help the sound quality, and stop any rattles.  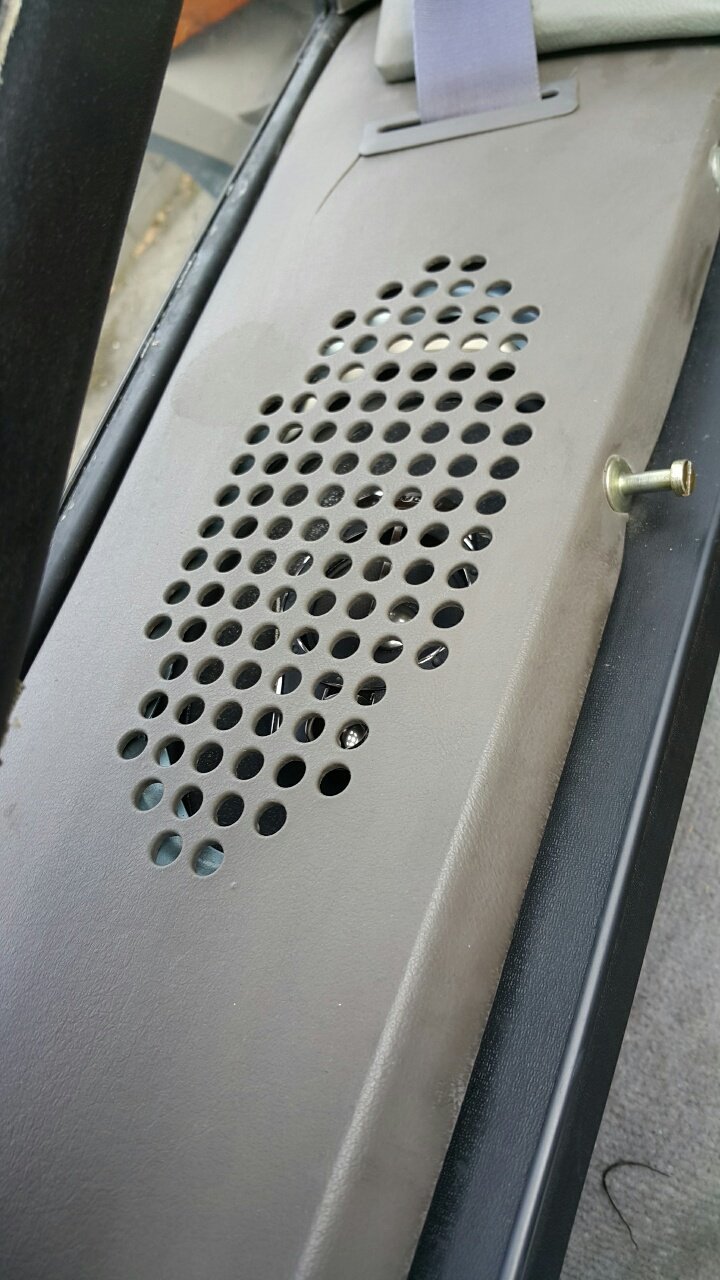 I also purchased some new conditioning cream to try to get some much-needed moisture into the leather. I like my old leather conditioner but it just isn’t powerful enough to work on these seats. This new one is made with lanolin, beeswax and emu oil (whatever that is!). Natural ingredients are good, chemicals are not. 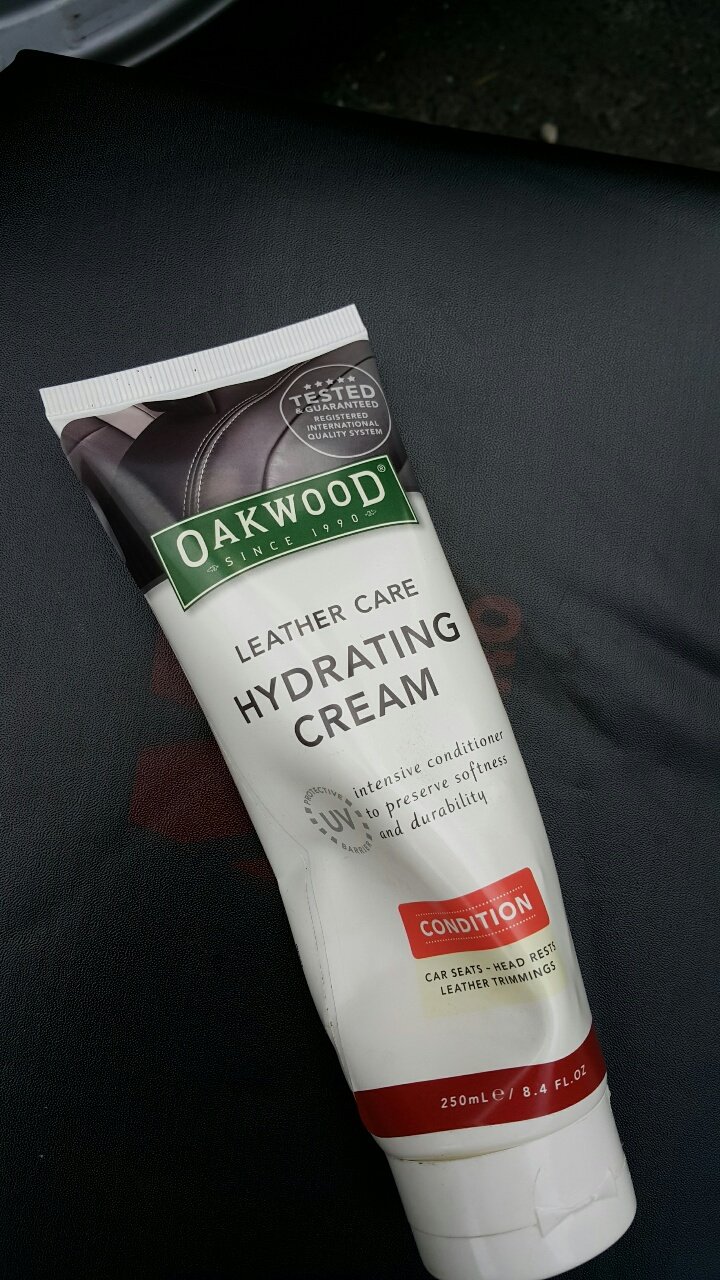 Another change from my usual conditioning was the fact this isn’t a liquid, more of a thick cream. I decided because of this that I would get in there and massage it into the leather by hand. It left my hands very soft 😄 It’s also made a noticeable difference in the feel of the leather. It’s a little softer, but mainly it’s more flexible and less like dried out old jerky. Smells nice too.  I have only done the rear seat so far, as it was the worst, and the weather decided I had overstayed my welcome outside and started to rain again. I will do the front seats in the near future. Whilst poking around the rest of the car like I do (I just can’t leave anything alone) I decided to put in one of my LED brake light “bulbs” to see if they are any good. Unfortunately whilst doing this I also noticed where my boot leak is coming from; the tail light gasket is stuffed. I tried this type of LED that kind of replicates the shape of a bulb, so it uses the reflector and doesn’t just have one solid bright spot. It’s also a series of red LEDs instead of white, so it won’t wash the lens out.  Clear signs of liquid, and sadly also rust. These lights wont be easy to get out…. and that’s before I even get to the sealant someone has used to try to stop them leaking. 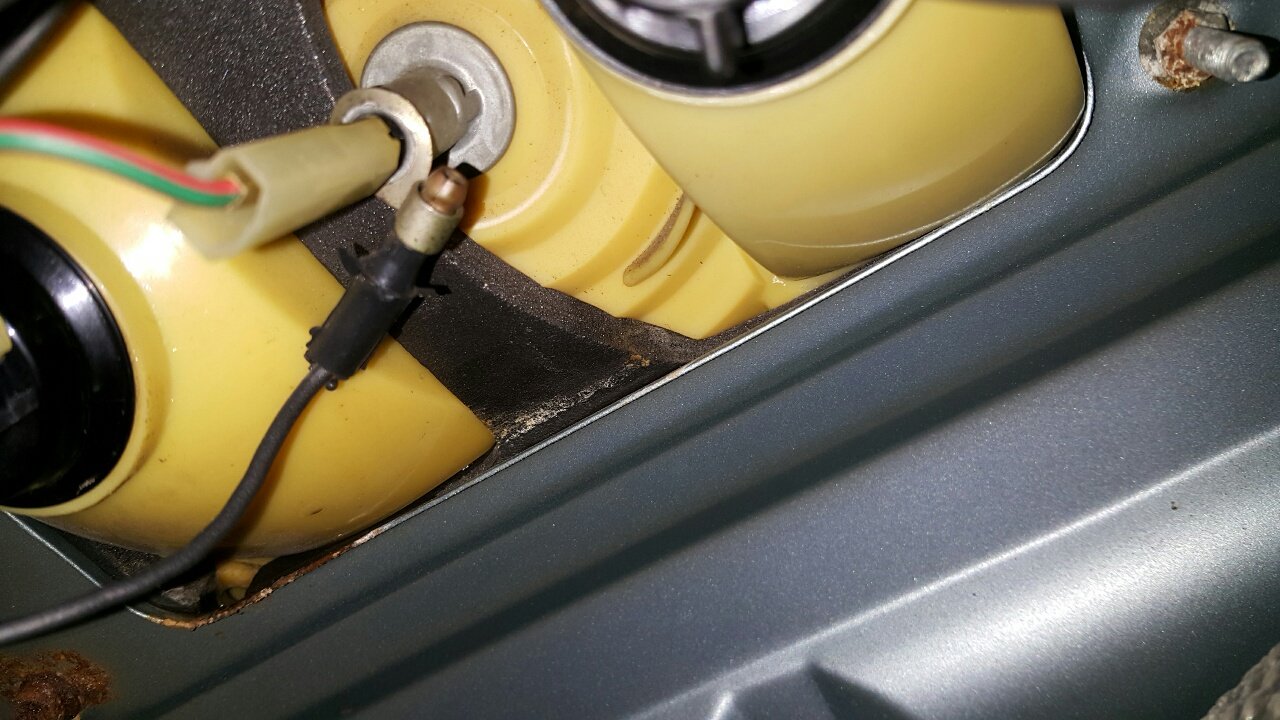 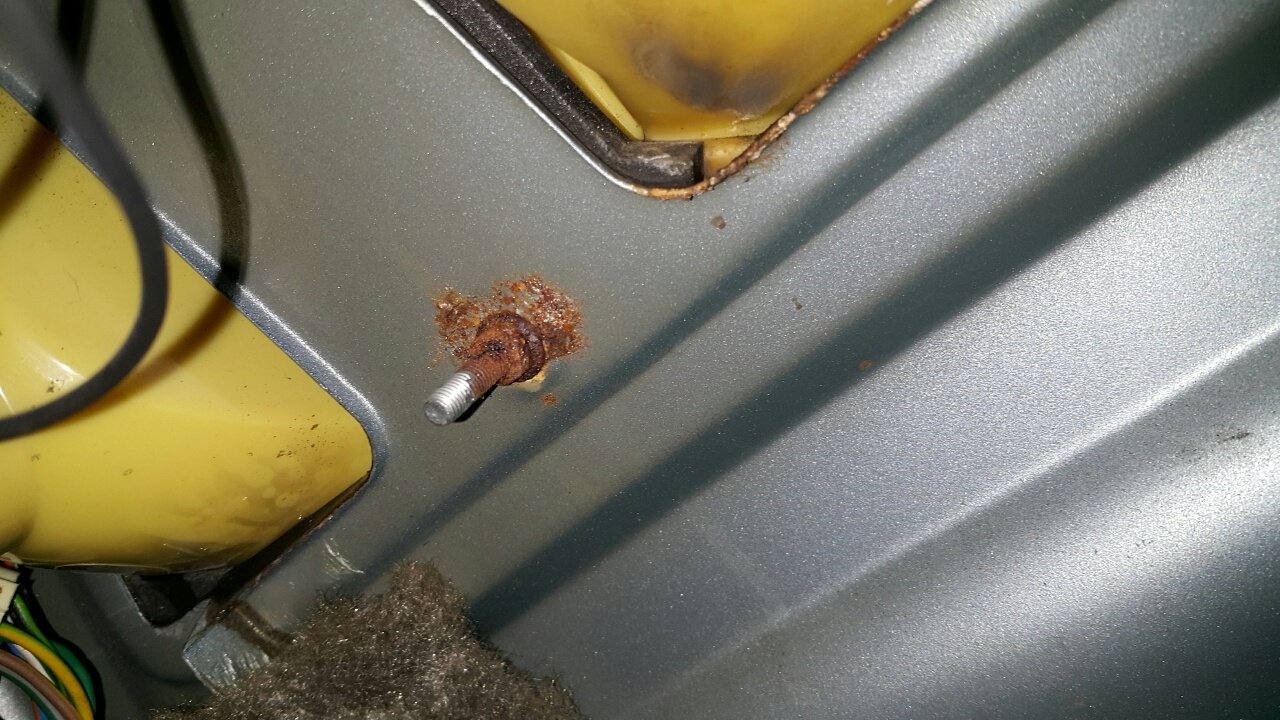  Unfortunately testing wasn’t great. The LED was only as bright as the other light, with the standard bulb, or maybe even slightly dimmer. It also tripped the blown bulb warning (although you can bypass that by turning the wiring to the check unit around). I swapped back to a standard bulb, and will be fitting an LED strip high stop lamp to the top of tailgate glass. Bulb left, LED right 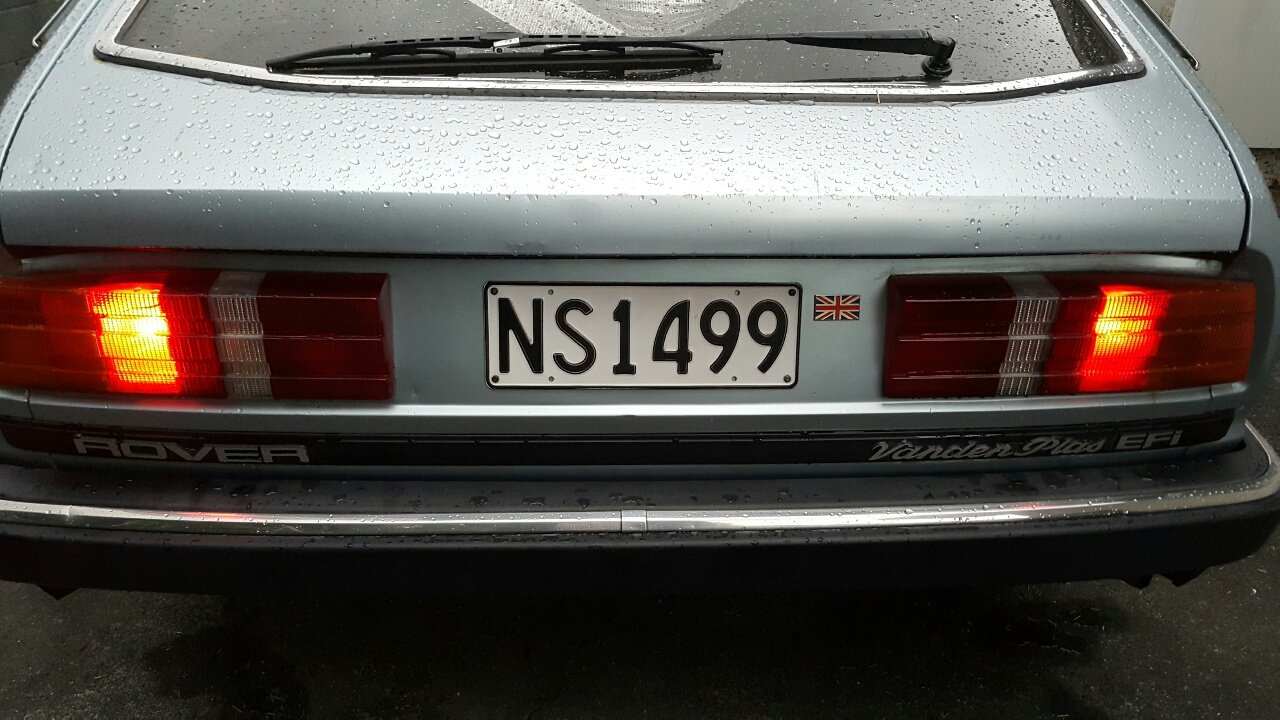   I also checked out the super lackluster tail light setup on the SD1. Two tiny little bulbs, lighting up the smallest parts of the light cluster. I really want to get dual filament bulb holders and upgrade the brake light bulbs to tail/stop bulbs which would make a huge difference.  This was a good laugh. This is in the rear panel, behind the number plate. It looks like someone has filled a small hole in the panel with a spot of weld…. a very bad spot of weld, with chunks of welding wire stuck in it! Quality Rover construction right there. 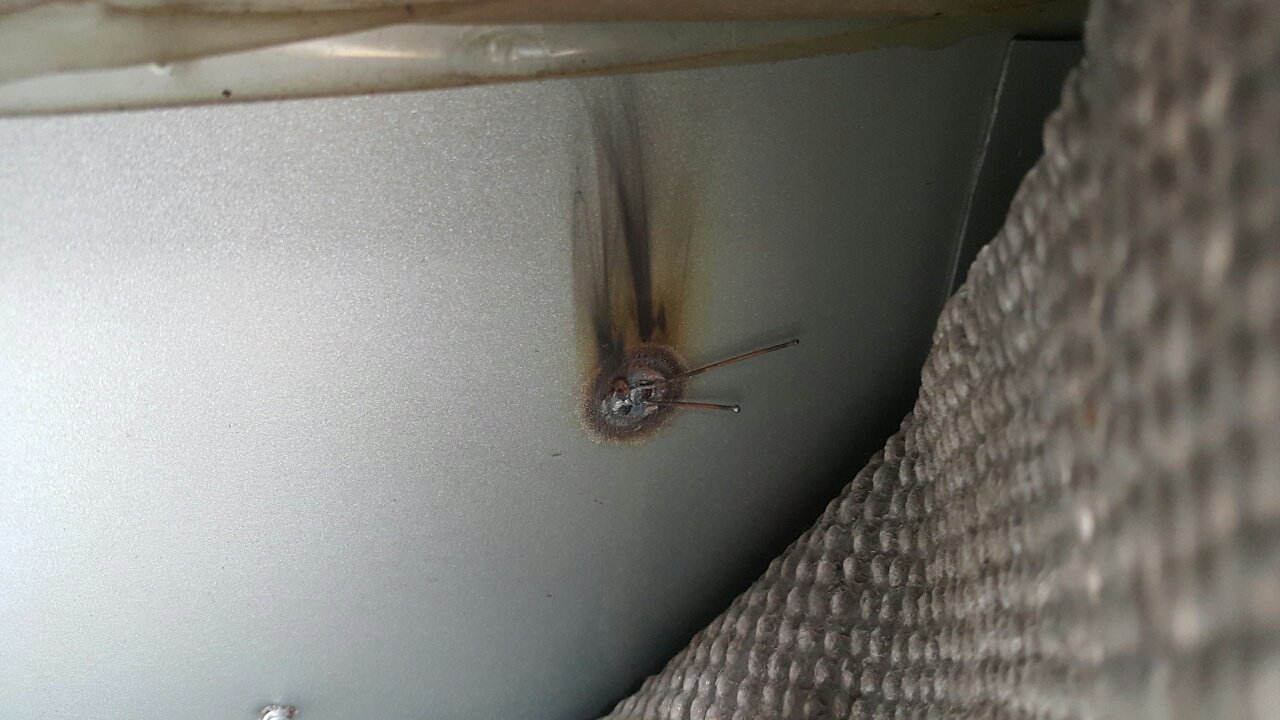 I still have a lot to do to the Rover. It’s in dire need of a machine polish and wax, but I just haven’t had the time or motivation to do it. I also noticed there appears to be a leak coming from my thermostat housing, so that’s something I will need to check now (and may go some way to explaining why it didnt come to temperature like it should have after replacement). It’s never ending. |
| |
Last Edit: Mar 16, 2022 10:35:07 GMT by Kelvinator
|
|
|
|
|
|
|
Not everything I do when working on cars is a success. Sometimes I completely cock things up, and since this website is more or less a candid view of me working on cars, I post everything, warts and all. Since I did the injection system and thermostat on the SD1 I have had trouble bleeding the system and getting it to come up to temp correctly. It would very very slowly creep up the temp gauge, and just wouldn’t get to operating temp. Initially I thought it was because the heater core is not working correctly, but I always had my suspicions about the thermostat itself. When I was fitting the housing with the new gasket, I had issues with the thermostat not staying in its little recess and slipping down.  The biggest give away I had done something wrong, was that there was fresh coolant under the thermostat housing after the engine cooled down. The gasket was leaking.  A combination of procrastinating, being away for the holidays, and not wanting to play 3 car musical cars AGAIN had really slowed down my efforts to fix the cooling issue, but tonight I decided to finally crack on with it. After playing musical cars and getting the Rover in the garage, I took a good look at what I was working with. Sure enough, with a small mirror I could see coolant seeping through the gasket at the bottom of the housing. I quickly drained the top hose, dumped a whole lot of coolant on the ground again, and removed the thermostat housing.  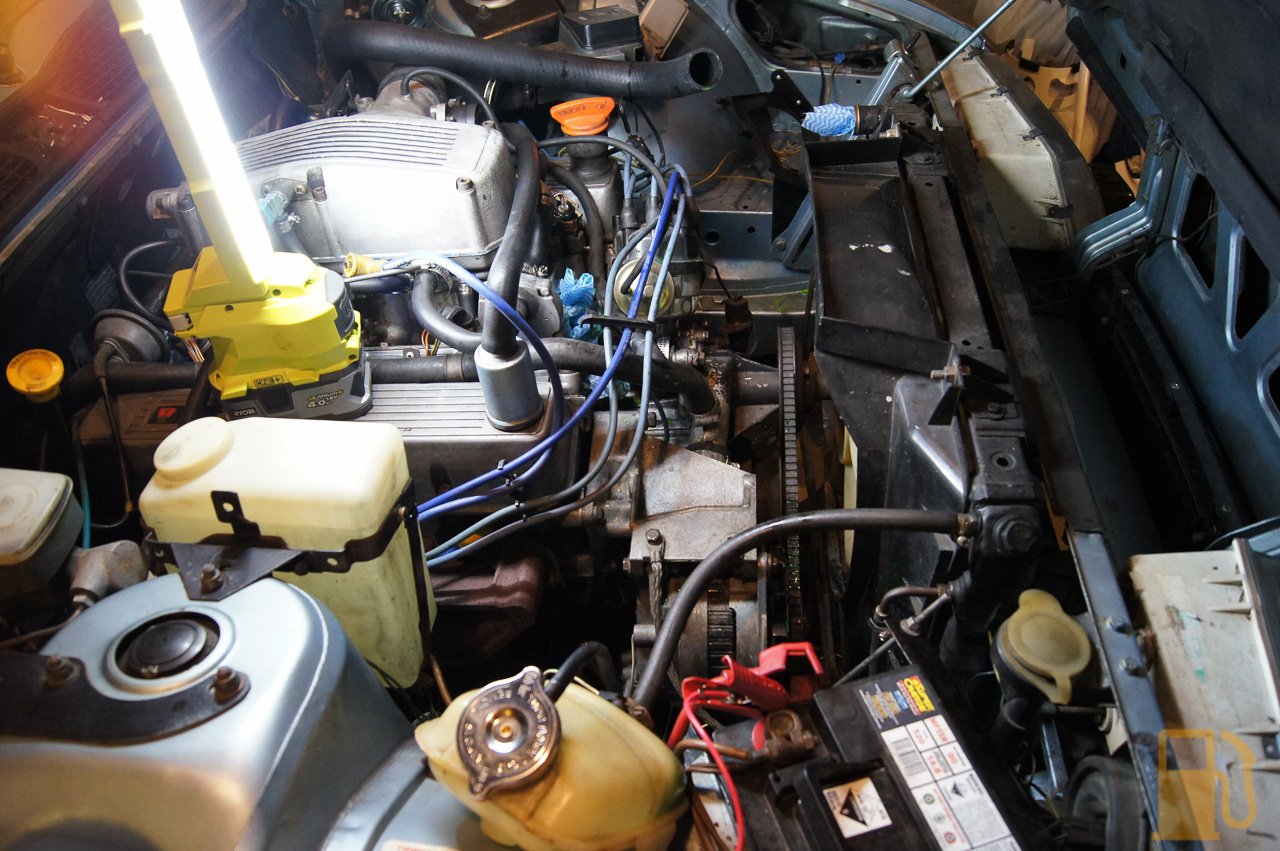  Sure enough, as soon as the thermostat was removed it was obvious I had stuffed it up. 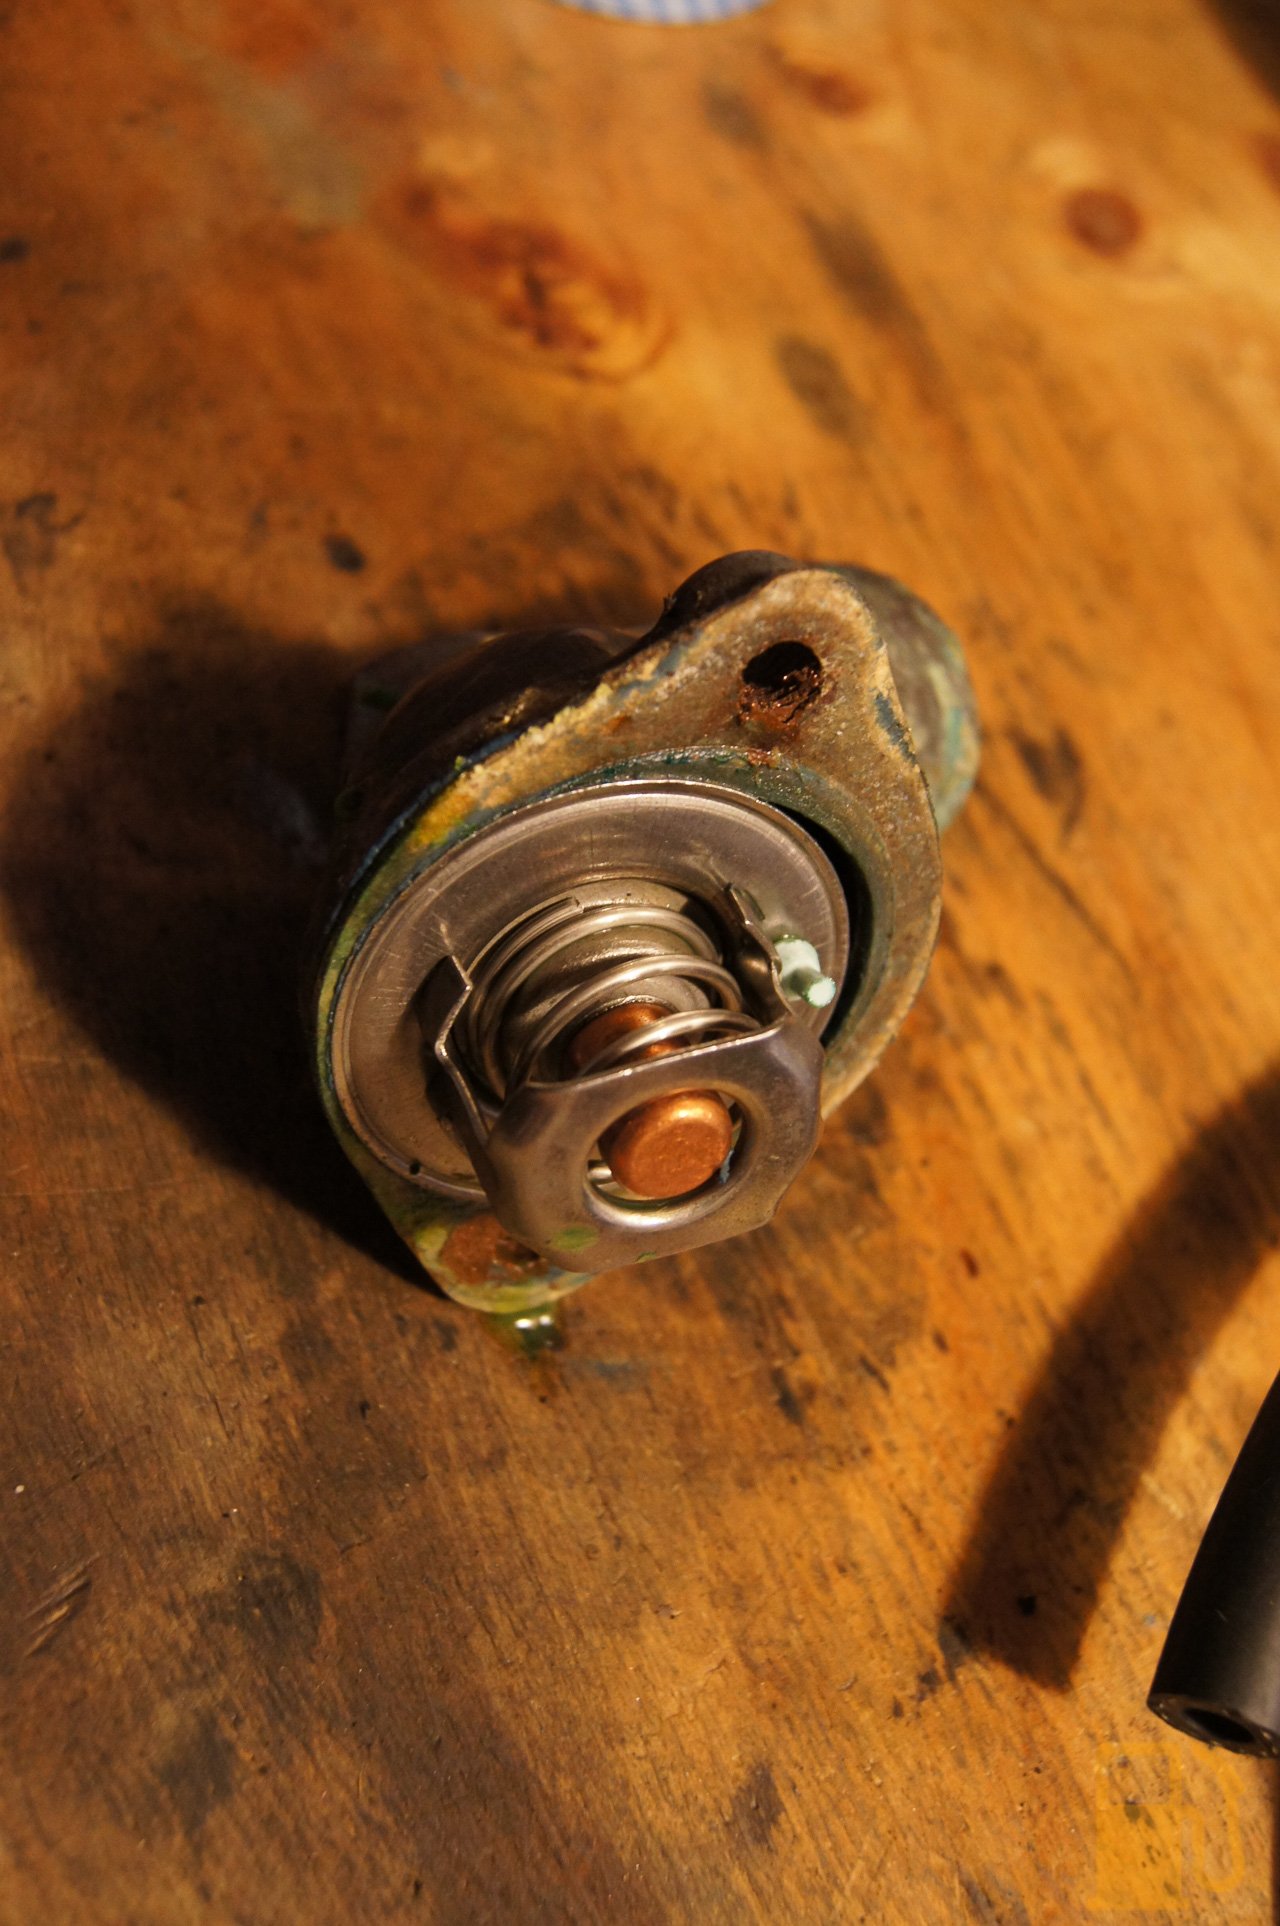   The thermostat has slipped, and ended up compressing into the gasket. This left a rather sizable gap at the top of the thermostat, which was letting coolant through with the thermostat closed, clearly not helping my cooling issue. Thankfully the thermostat itself looks OK, but the gasket is trash. I will have to get some gasket paper tomorrow and make my own. I also decided whilst I was there, to remove and replace the old rusty and crusty looking hose clamp under the thermostat housing. I don’t want to do this job again, so this was a good opportunity to fix this before it became an issue. I need to reorient the new hose clamp though as it may interfere with the thermostat housing.   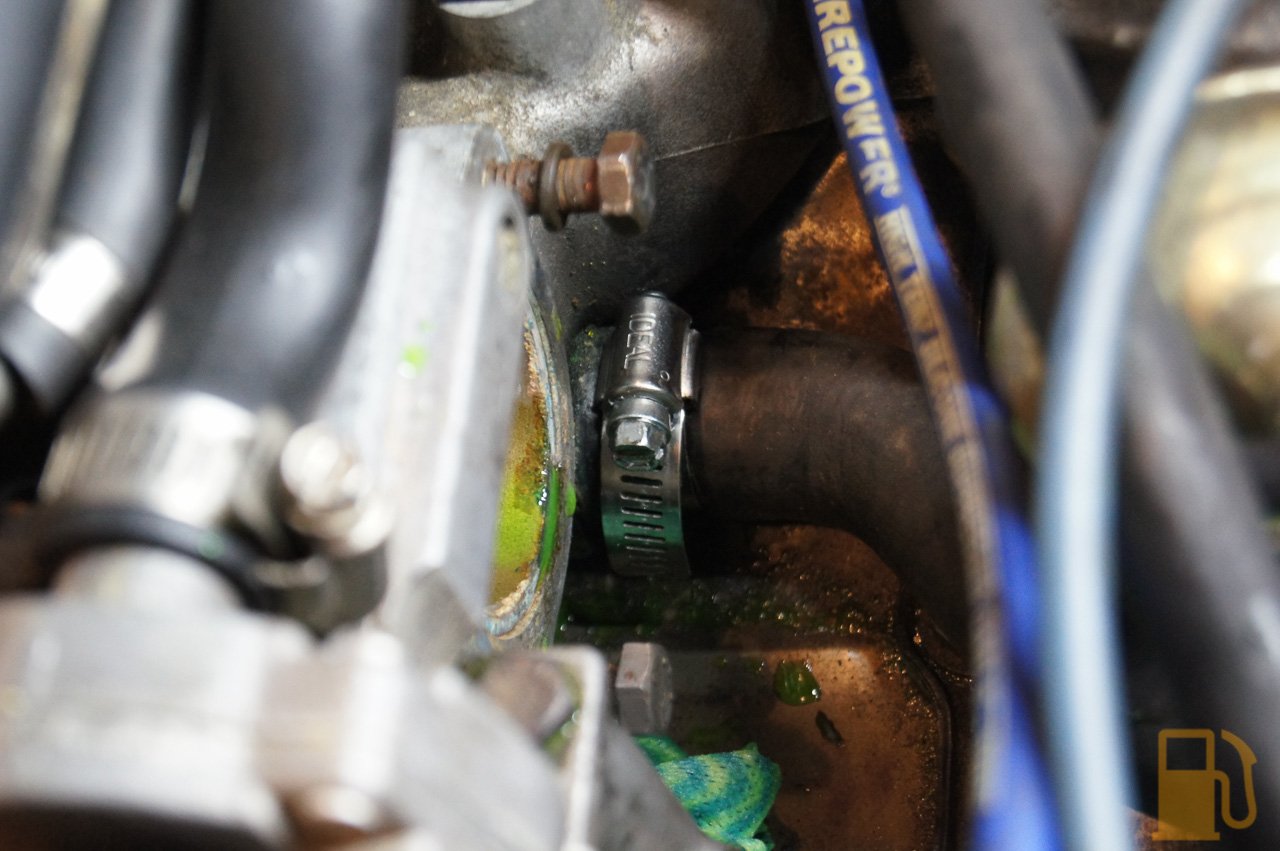 So I’ll grab some gasket paper tomorrow, make a new gasket, and do it right this time.  |
| |
Last Edit: Mar 16, 2022 10:36:13 GMT by Kelvinator
|
|
|
|


 . The upper seals were corroded into the aluminium retaining plates. I had to use a small pick to dig into the seal and lever it out of the housing. They obviously hadn’t been out in a while.


