|
|
|
|
|
Only a small update this time. I have finally got around to doing a job that I have been putting off for a while, fixing and reconditioning the steering column and steering wheel. The column was not that bad it just needed stripping down and having any scratches filled then repainted in its new colour and having a new ignition lock fitted (now my doors now match my ignition lock ), the only awkward bits was fitting a new rag joint ( the new one was missing some parts so some parts had to salvaged from the old one ) and making new foam seals to go on the shafts, having said that getting the steering wheel of was a complete pain as it took 2 days to get it separated from the column and that was using the correct puller tool.
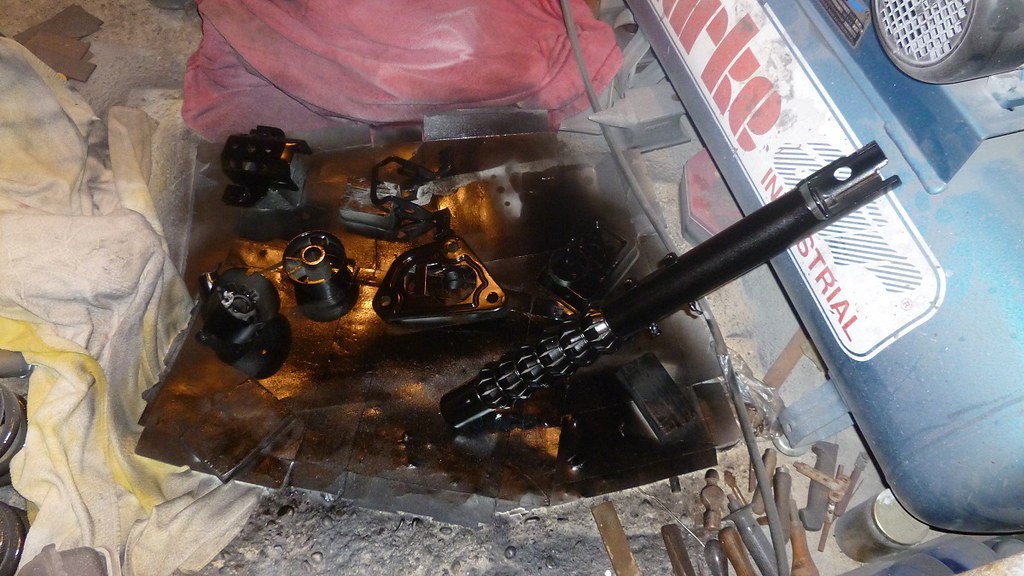 P1010015a by karl stroud, on Flickr P1010015a by karl stroud, on Flickr
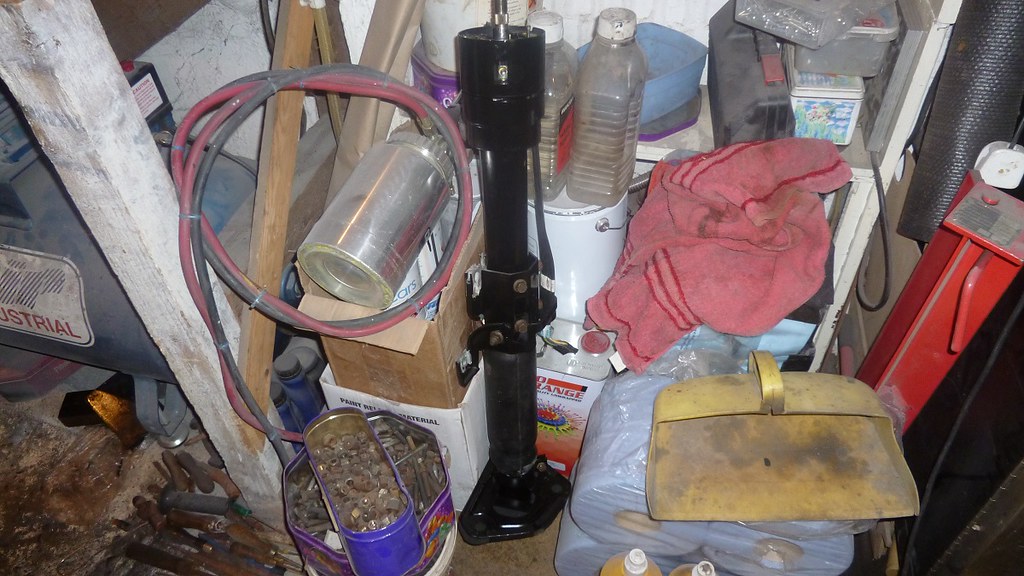 P1010017a by karl stroud, on Flickr P1010017a by karl stroud, on Flickr
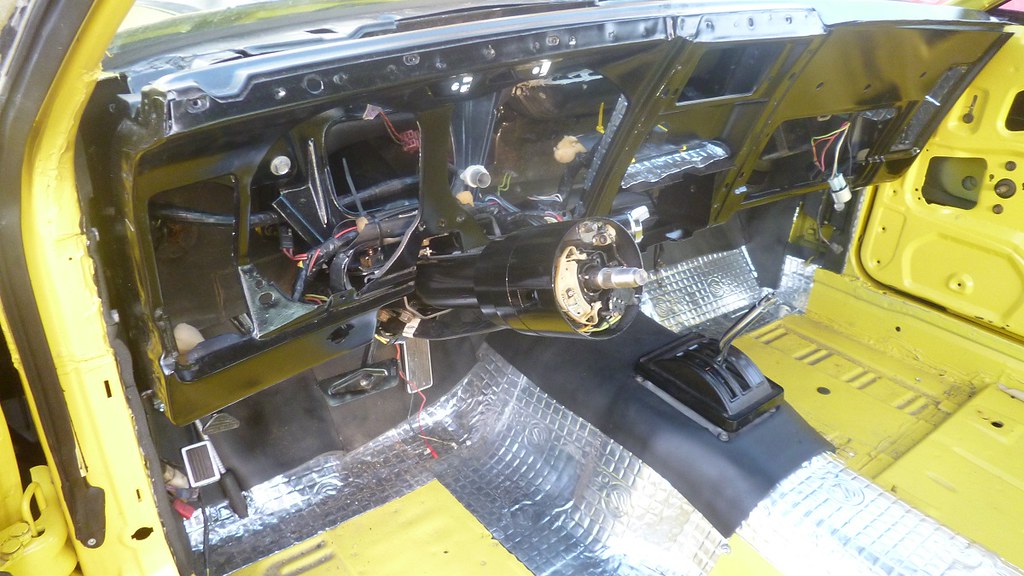 P1010019a by karl stroud, on Flickr P1010019a by karl stroud, on Flickr
The next job was to fix the horn push assembly as one side did not work and the fixings that held it onto the steering wheel had been forced at some time in its life and broken ( a new assembly is available but about $90 but that is too expensive for a bit of plastic ), making the horn pushes work was easy it was just corrosion on the copper strips but fixing the plastic required epoxy and some small bits of metal for reinforcement .
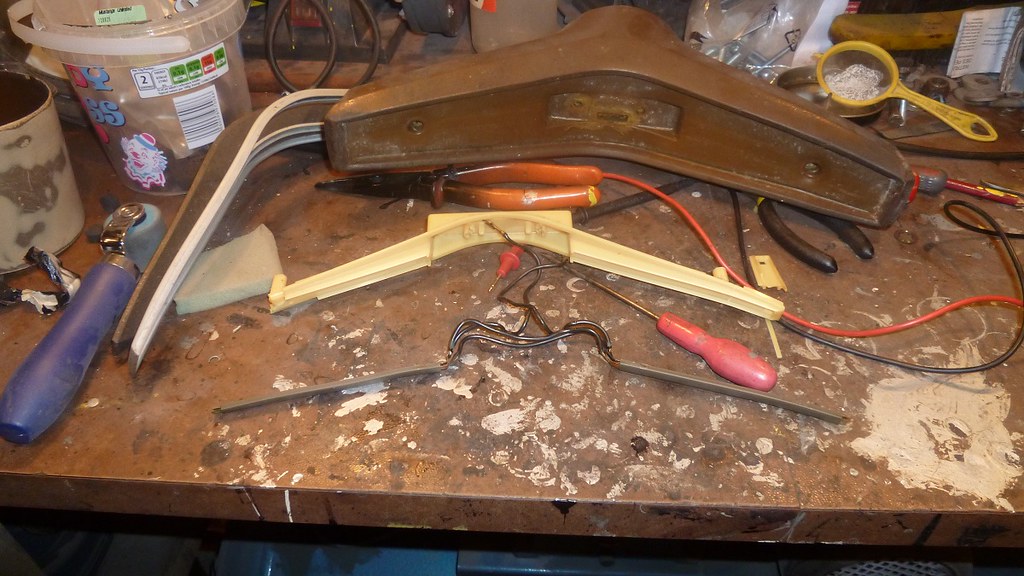 P1010018a by karl stroud, on Flickr P1010018a by karl stroud, on Flickr
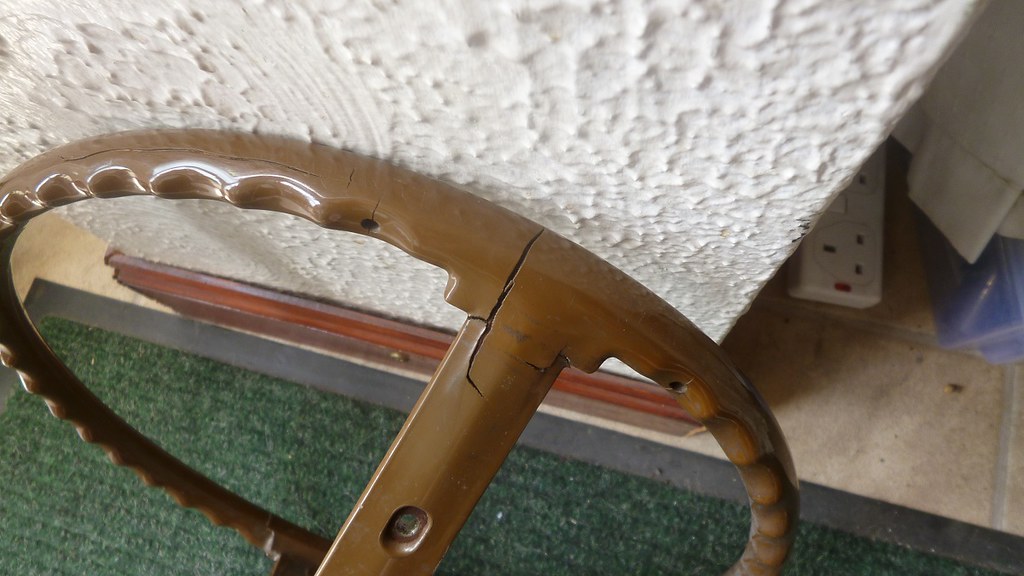
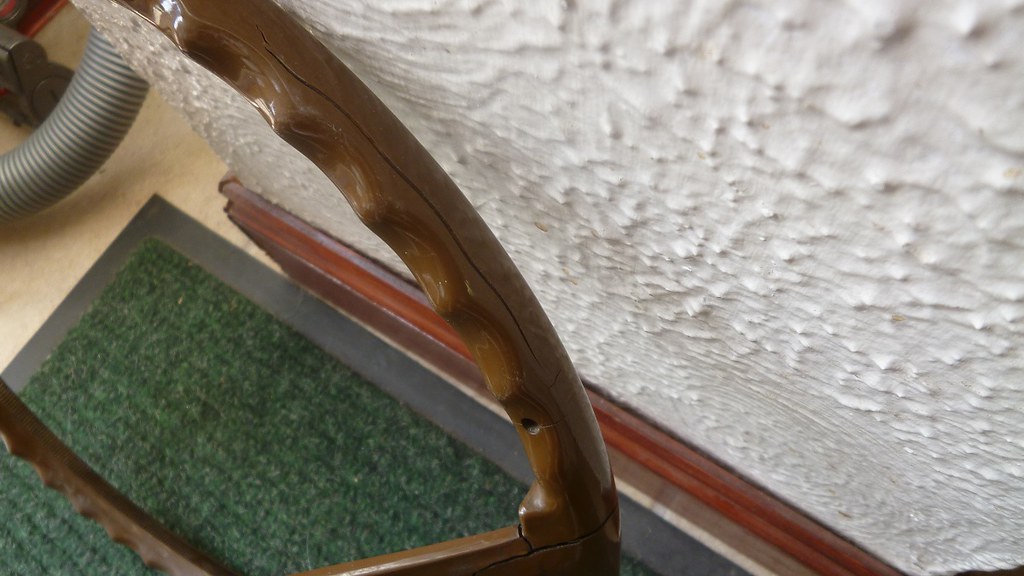
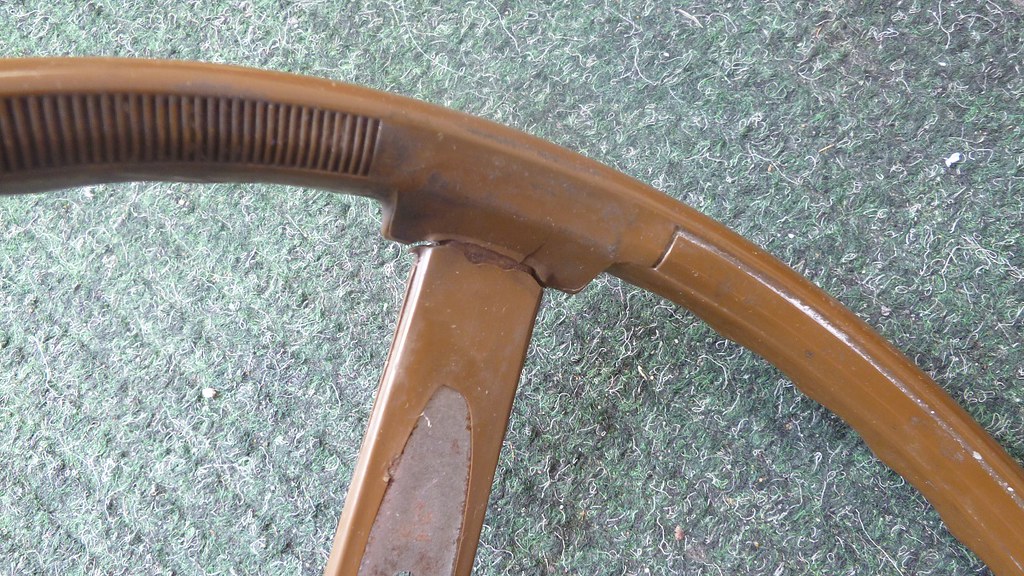
The last was the job I was the one I was not looking forward to, fixing the cracked steering wheel as I had never attempted to do this before.
 P1010020a by karl stroud, on Flickr P1010020a by karl stroud, on Flickr
 P1010021a by karl stroud, on Flickr P1010021a by karl stroud, on Flickr
 P1010022a by karl stroud, on Flickr P1010022a by karl stroud, on Flickr
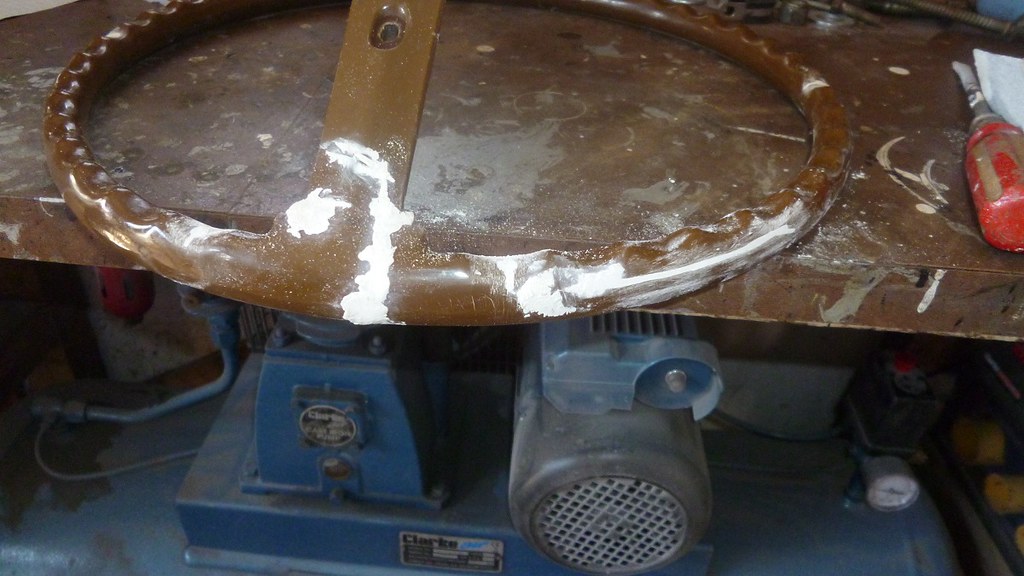
Firstly I opened up the cracks and splits with an air cut off tool, treated any rust with a rust cure then filled the gaps with an epoxy putty then waited 24 hours for it to fully go off.
 P1010023a by karl stroud, on Flickr P1010023a by karl stroud, on Flickr
Next the putty was sanded down with 80 grit.
 P1010024a by karl stroud, on Flickr P1010024a by karl stroud, on Flickr
This was then filled with stopper putty.
 P1010025a by karl stroud, on Flickr P1010025a by karl stroud, on Flickr
When that had gone off the stopper was sanded down with 600 grit wet and dry to get a smooth finish then the items to be painted were given a good degreasing then when dry, covered with a plastic primer, when this was dry all the parts were give several coats of grey primer and left for 24 hours to fully go off.
 P1010026a by karl stroud, on Flickr P1010026a by karl stroud, on Flickr
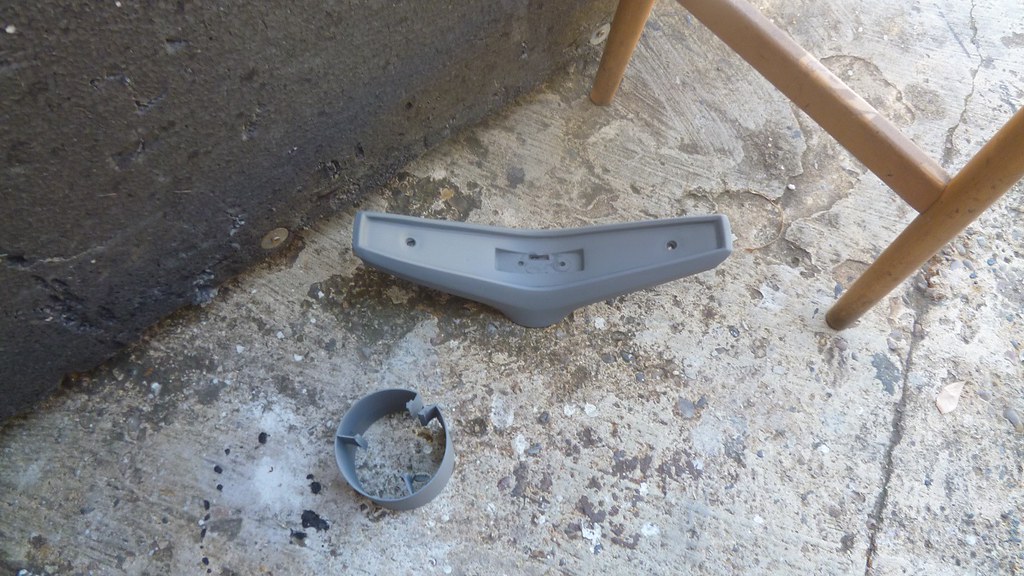 P1010027a by karl stroud, on Flickr P1010027a by karl stroud, on Flickr
When dry and fully cured the steering wheel parts where given several coats of gloss black.
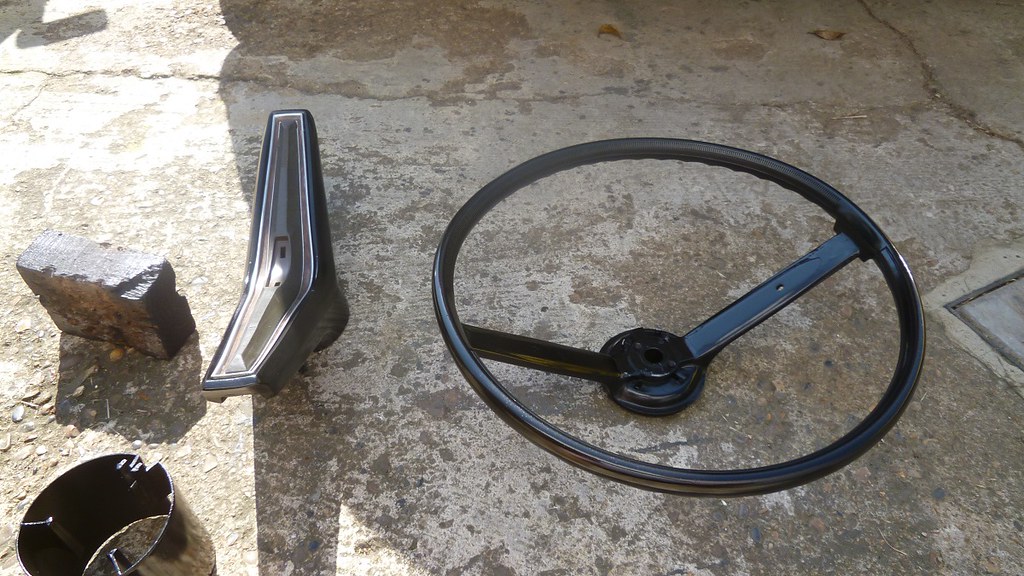 P1010031a by karl stroud, on Flickr P1010031a by karl stroud, on Flickr
When these were dry the parts were fitted to the car.
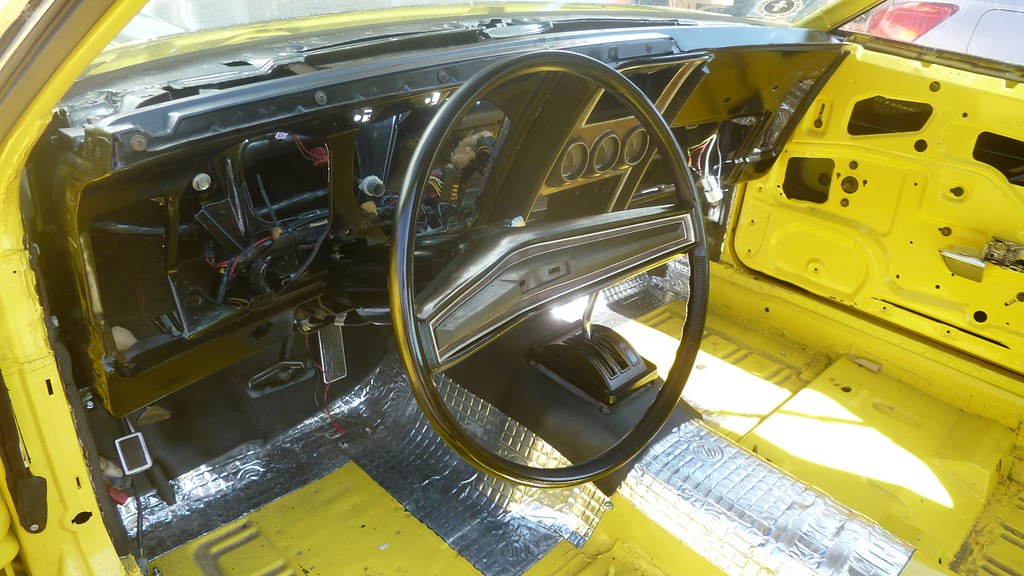 P1010032a by karl stroud, on Flickr P1010032a by karl stroud, on Flickr
|
| |
Last Edit: Sept 9, 2017 2:14:18 GMT by kusanagi
71 ford mustang being restored
71 triumph spitfire 3.5 v8
88 bmw e32 735 --SOLD--
|
|
|
|
|
|
|
May 28, 2017 12:13:26 GMT
|
|
nice detail work on that steering wheel...
JP
|
| |
I know its spelled Norman Luxury Yacht, but its pronounced Throat Wobbler Mangrove!
|
|
|
|
|
May 28, 2017 12:18:08 GMT
|
|
professional results....driveway workspace...awesome job!
JP
|
| |
I know its spelled Norman Luxury Yacht, but its pronounced Throat Wobbler Mangrove!
|
|
|
|
|
|
|
|
Subscribed. Very inspiring especially since it's a driveway job.
|
| |
Mk2 Golf 16V resto
|
|
|
|
|
Sept 12, 2017 23:01:19 GMT
|
Well its about time I updated this thread now that I have got around to re hosting my photos.
First of the jobs lined up was to repair the light switch surround, the problem was that it had been repaired by a previous owner ( but not very well ) so it had to be taken apart and re-glued.
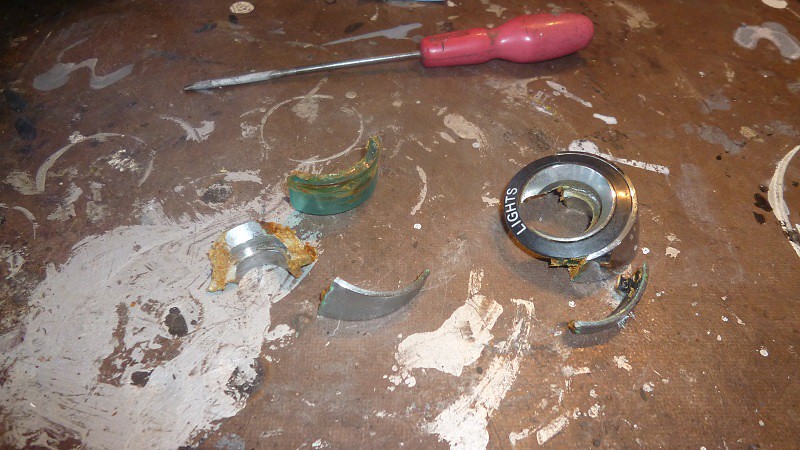 P1010029a by karl stroud, on Flickr P1010029a by karl stroud, on Flickr
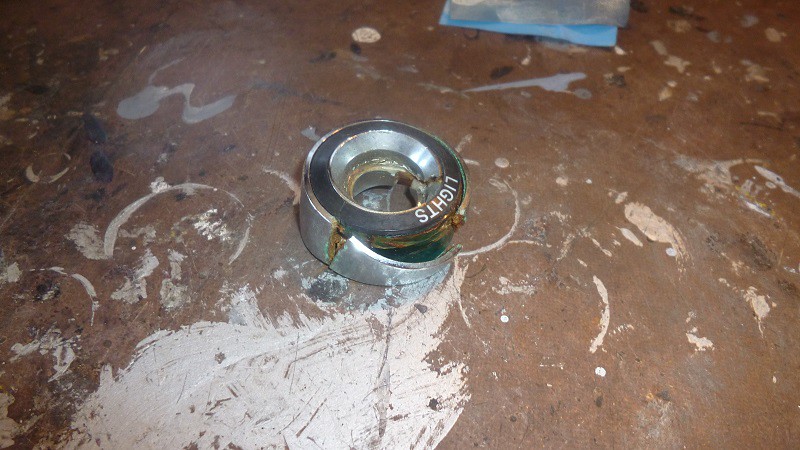 P1010028a by karl stroud, on Flickr P1010028a by karl stroud, on Flickr
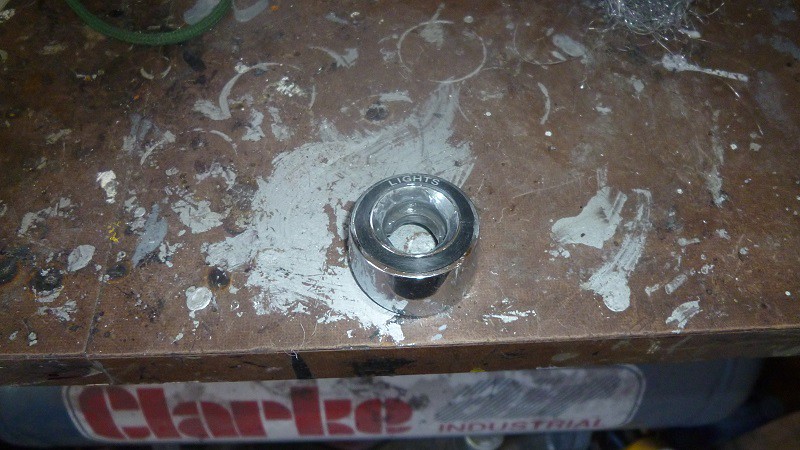 P1010033a by karl stroud, on Flickr P1010033a by karl stroud, on Flickr
The next job to be done was the front grill ( a job that I had been putting off ) as I just bought myself a gas powered plastic welder, the main problem was the grill was in lots of bits, I.E. smashed.
This meant taking something like this,
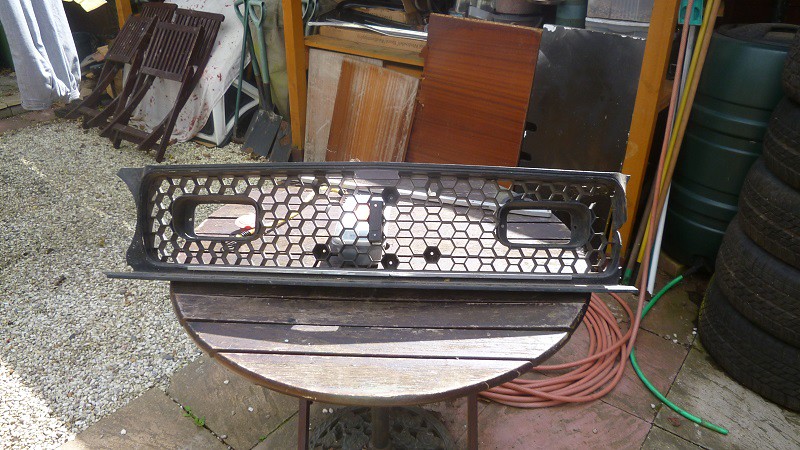 P1010089a by karl stroud, on Flickr P1010089a by karl stroud, on Flickr
and doing this,
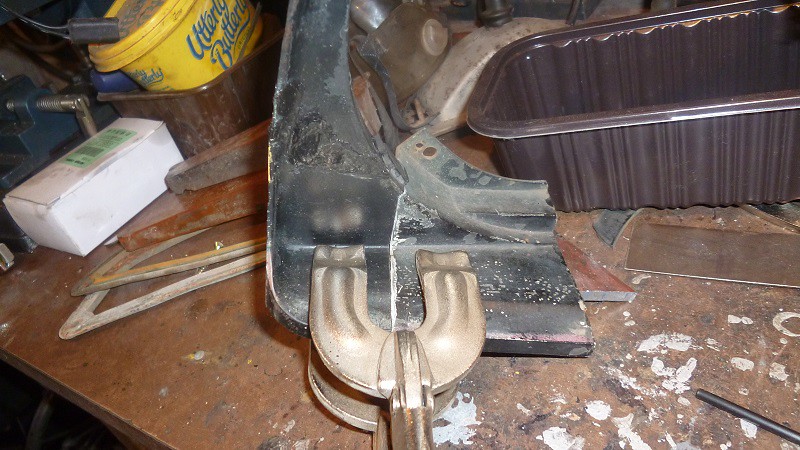 P1010037a by karl stroud, on Flickr P1010037a by karl stroud, on Flickr
and this,
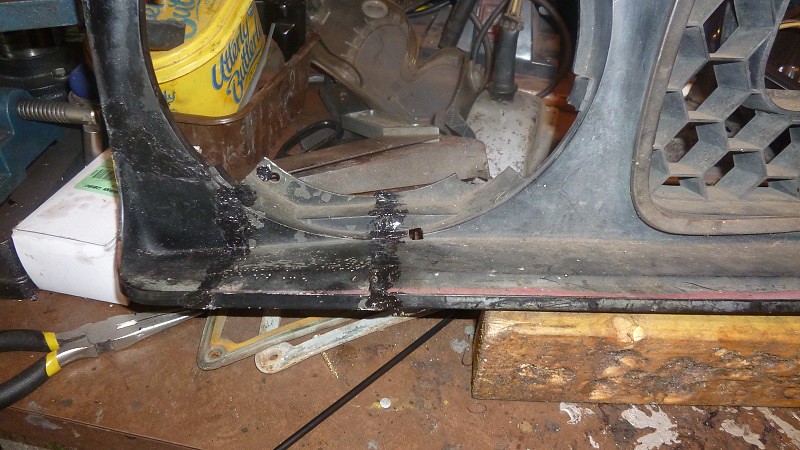 P1010038a by karl stroud, on Flickr P1010038a by karl stroud, on Flickr
and this,
 P1010039a by karl stroud, on Flickr P1010039a by karl stroud, on Flickr
to end up with this.
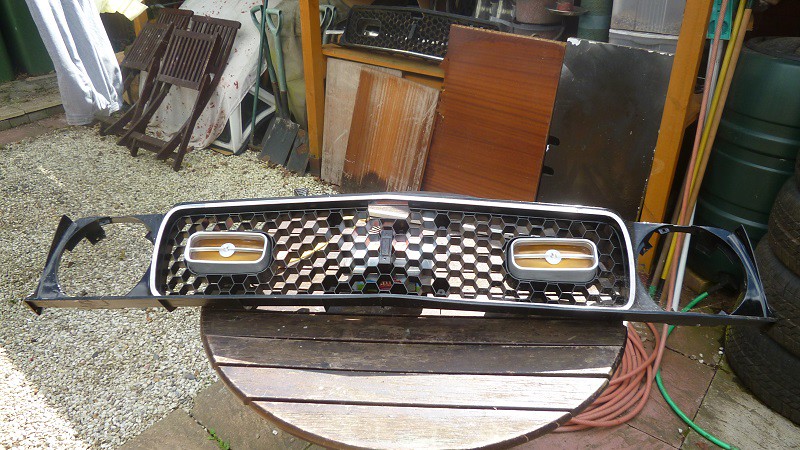 P1010090a by karl stroud, on Flickr P1010090a by karl stroud, on Flickr
Next to be done was to fit the headlining ( this was a pig to fit and get the seams straight ).
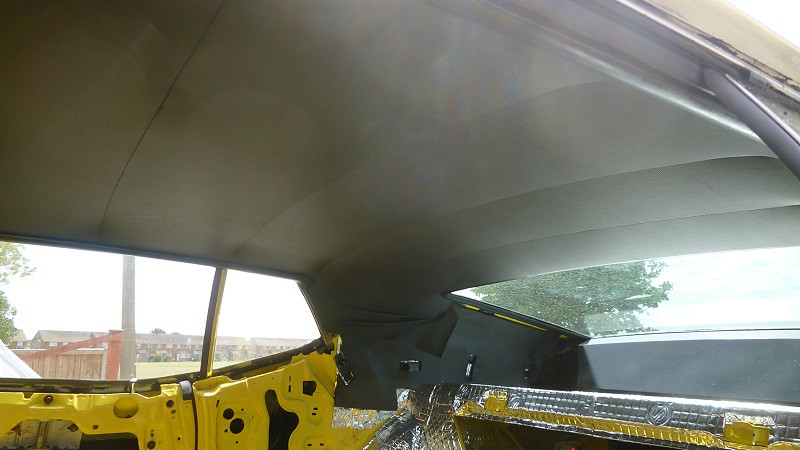 P1010047a by karl stroud, on Flickr P1010047a by karl stroud, on Flickr
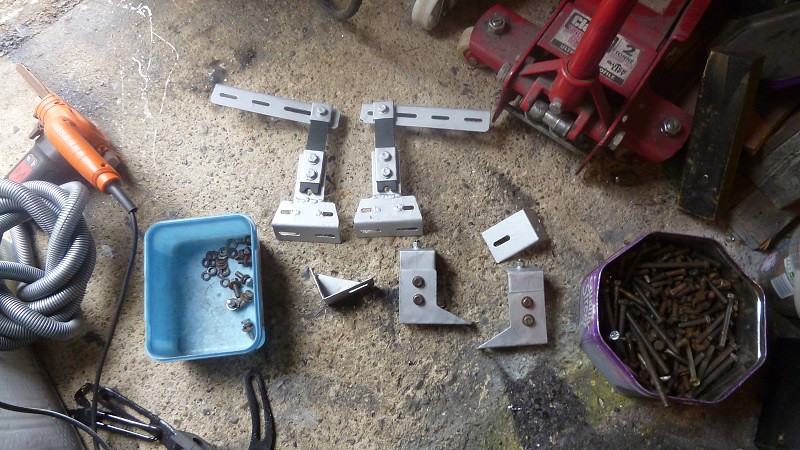
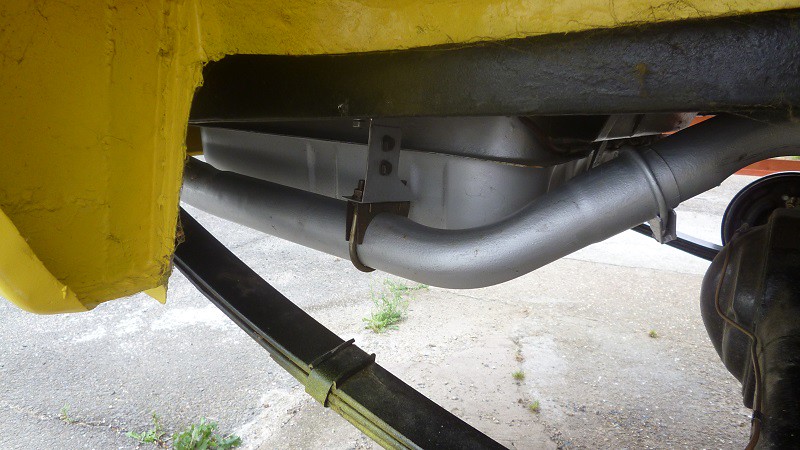
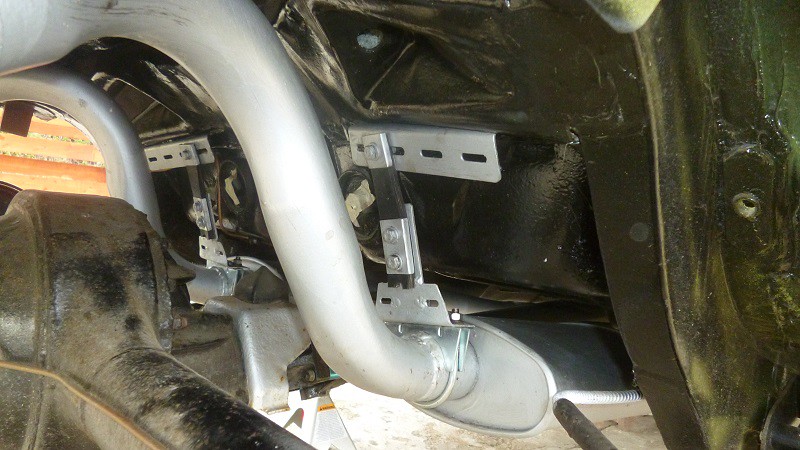
Then it was the turn of the exhaust hangers, this was a pain to do as the car is fitted with a custom exhaust system and the stock hangers would not fit as when the exhaust was fitted it was fitted to some previous brackets which where fitted in the wrong places and I wanted to use the correct mounting points to mount the exhaust but it needed to be adjustable as to line up with the headers when the engine gets fitted.
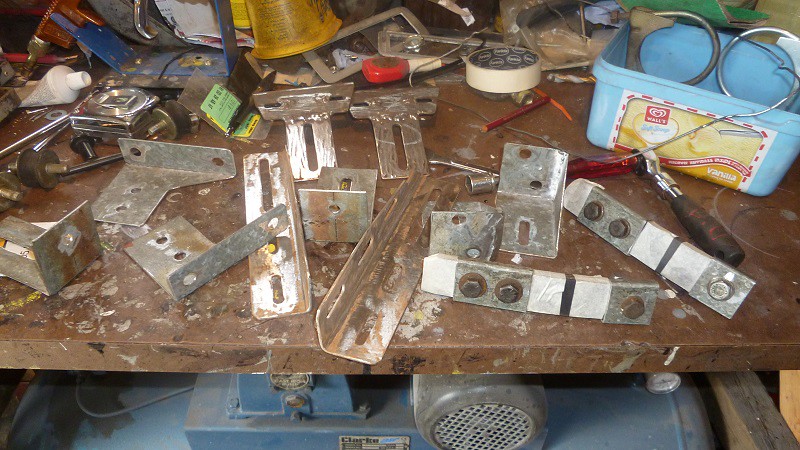 P1010056a by karl stroud, on Flickr P1010056a by karl stroud, on Flickr
 P1010059a by karl stroud, on Flickr P1010059a by karl stroud, on Flickr
 P1010060a by karl stroud, on Flickr P1010060a by karl stroud, on Flickr
 P1010061a by karl stroud, on Flickr P1010061a by karl stroud, on Flickr
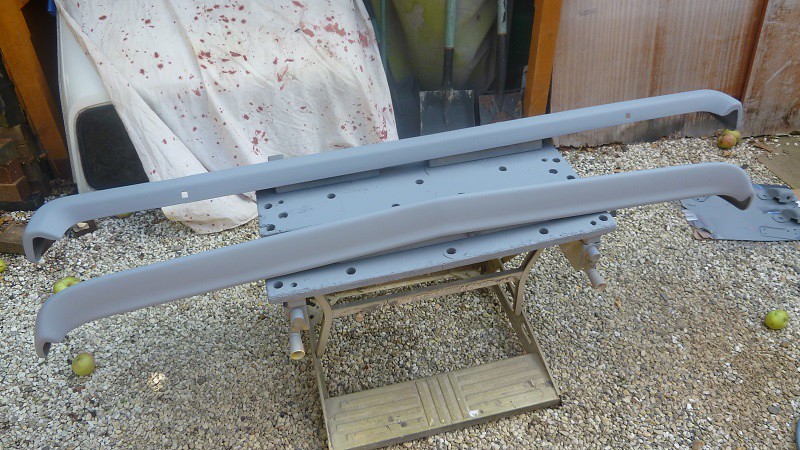
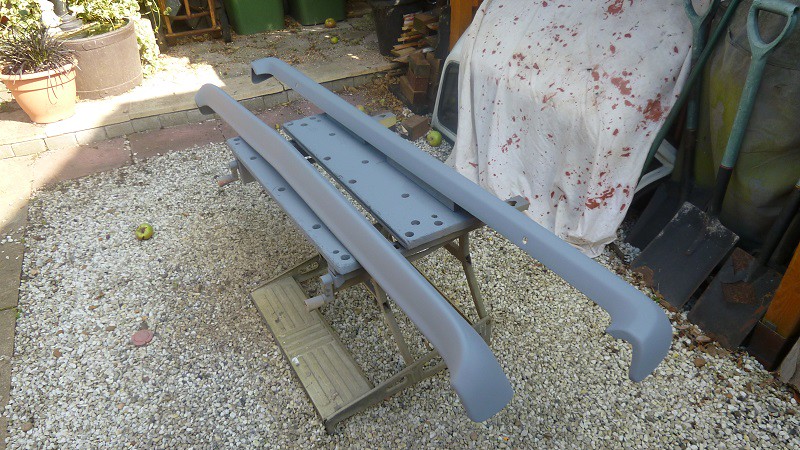
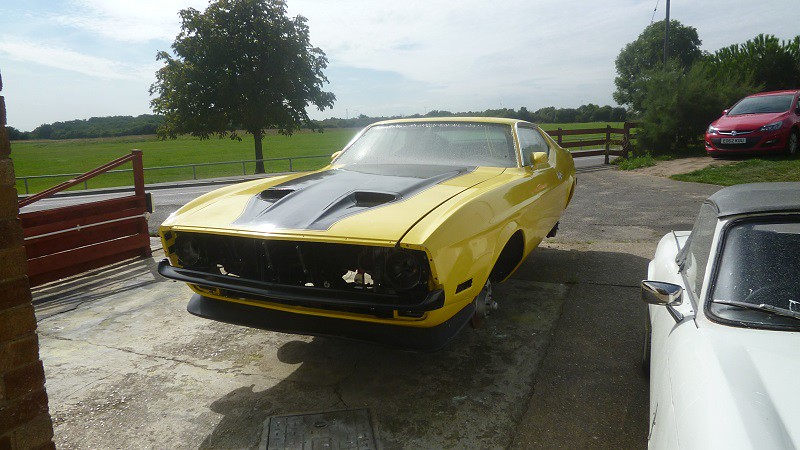
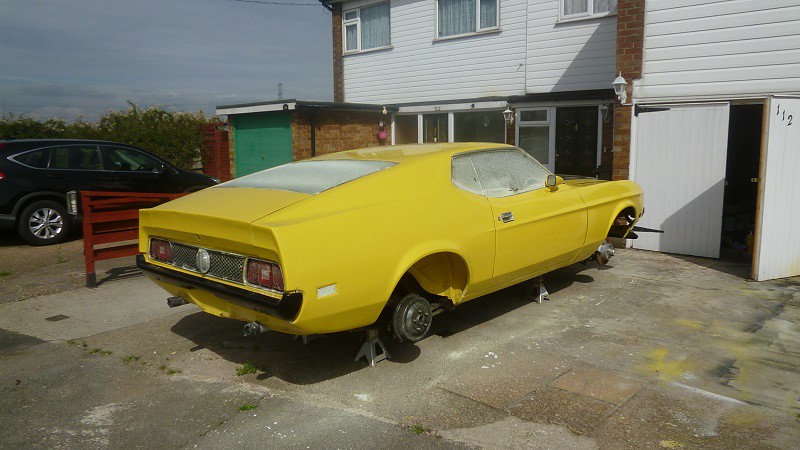
Now it was time that I thought that I better get the bumpers fitted, but again there is a problem, the 71 mustang Mach 1 should have a urethane bumper fitted to the front but mine had been replaced with a chrome bumper that matched the back. So you think chrome bumper no problem but both chrome bumpers have gone a bit manky and being to tight to buy new chrome bumpers I decided to repair the bumpers best as possible and paint them black to match the colour layout on the car.
 P1010075a by karl stroud, on Flickr P1010075a by karl stroud, on Flickr
 P1010074a by karl stroud, on Flickr P1010074a by karl stroud, on Flickr
 P1010082a by karl stroud, on Flickr P1010082a by karl stroud, on Flickr
 P1010081a by karl stroud, on Flickr P1010081a by karl stroud, on Flickr
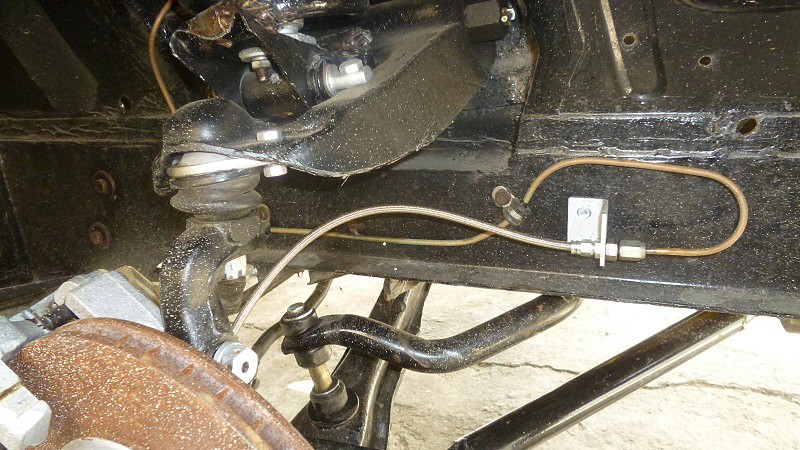
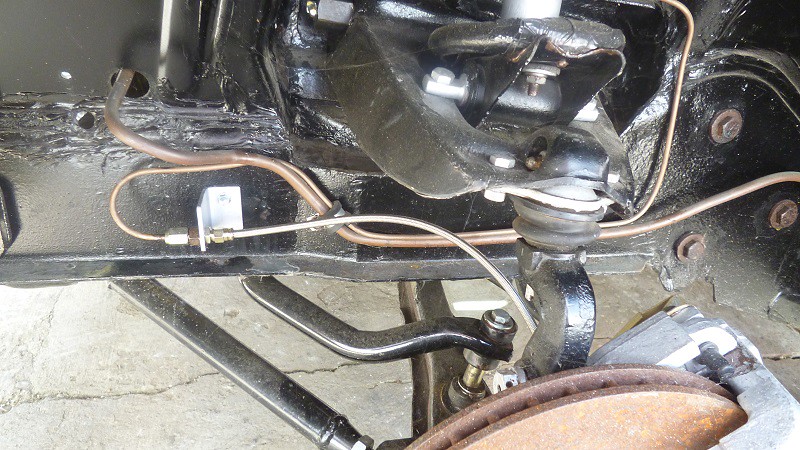
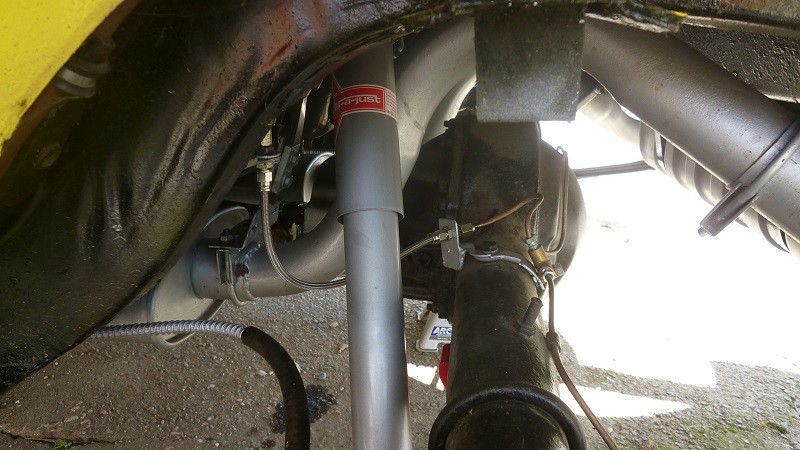
Now it was time I returned to the brakes as I had rebuilt the front calipers and fitted them it was time to make and fit my braided brake lines.
 P1010079a by karl stroud, on Flickr P1010079a by karl stroud, on Flickr
 P1010098a by karl stroud, on Flickr P1010098a by karl stroud, on Flickr
 P1010097a by karl stroud, on Flickr P1010097a by karl stroud, on Flickr
 P1010096a by karl stroud, on Flickr P1010096a by karl stroud, on Flickr
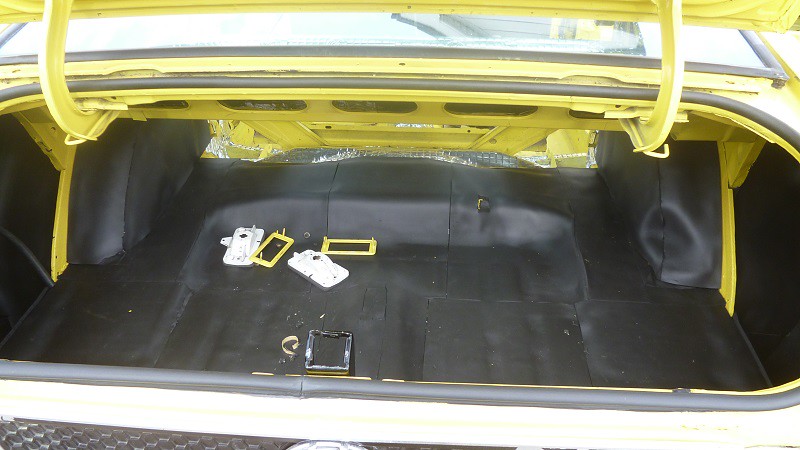
After tracing my last leak in the boot of the car I finished sound proofing the boot.
 P1010078a by karl stroud, on Flickr P1010078a by karl stroud, on Flickr
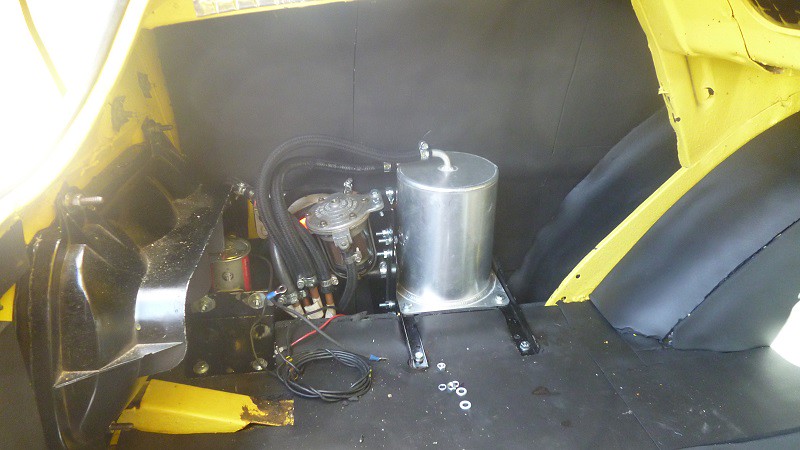
And then I could fit the fuel pumps, swirl pot, filters and pipes.
 P1010093a by karl stroud, on Flickr P1010093a by karl stroud, on Flickr
 P1010095a by karl stroud, on Flickr P1010095a by karl stroud, on Flickr
There is also a injection pump fitted below the swirl pot.
I also started fitting some of the interior trim.
 P1010100a by karl stroud, on Flickr P1010100a by karl stroud, on Flickr
That's about all I have been doing on the car up until now ( apart from moping the paintwork and sorting a couple of blisters on the roof and readjusting the panel gaps ) the next job that I am in the process of doing is reconditioning the wheels and repainting them, but more about them when done. |
| |
71 ford mustang being restored
71 triumph spitfire 3.5 v8
88 bmw e32 735 --SOLD--
|
|
|
|
|
Sept 12, 2017 23:10:30 GMT
|
|
Lovely work, as ever.
|
| |
|
|
|
|
|
Sept 13, 2017 1:26:42 GMT
|
|
very brave and very difficult to get those old broken bits back to the right shape.....never mind that they are plastic too.....
looking good!
JP
|
| |
I know its spelled Norman Luxury Yacht, but its pronounced Throat Wobbler Mangrove!
|
|
|
|
|
Sept 15, 2017 0:58:21 GMT
|
As the project is creeping on I am thinking about the engine build.
This is my proposed build:
Cleveland 2v block rebored to 20 thou ( might need more as the block is quite worn ) new sealed power hypereutectic pistons and rings new eagle conrods reground crank ( already done ) new bearings ARP main bolts oil restrictors in cam oil ways high volume/pressure oil pump increased capacity oil pan adjustable roller timing chain comp cams 282s mech cam solid lifters uprated push rods ( hardened ) roller rockers ( not decided on make but possible trick flow or comp cams ) guide plates for push rods speedmaster 3v cylinder heads ( bare ) with 3 angle valve seat single groove stainless steel valves to suit heads springs, retainers and seals to match head, valve and cam setup tall ford motorsport rocker boxes ( black ones ) 4v headman headers to suit car and engine setup ( long style ) speedmaster inlet manifold to suit heads drilled for fuel injectors speedmaster or holly carb style throttle body ( so I can use stock ram air setup ) motorsport front damper alloy waterpump high torque starter distributor modified to cam timing pickup megasquirt 3x ECU fully sequential injection and ignition
If anyone has input or opinions as to this setup it would be appreciated as this is all quite fluid at the moment as nothing has been bought at this time ( apart from the engine block ).
|
| |
71 ford mustang being restored
71 triumph spitfire 3.5 v8
88 bmw e32 735 --SOLD--
|
|
|
|
|
Sept 15, 2017 7:13:50 GMT
|
really nice work on the restoration so far! It is coming together very nicely indeed. As you are going to all this effort rebuilding the motor.. may I be the devil on your shoulder and mention stroker kits at this point? *408 cough cough*  And rather than all the effort of custom EFI stuff, as you are buying lots of new bits for that, why not skip the headache and go for a Holley EFI kit? Basically keep all the intake and so on you have and just replace the carb with an 'EFI carb'? These kits are bloody lovely: www.holley.com/products/fuel_systems/fuel_injection/terminator_efi/terminator_stealth/They are all self tune and there are some lovely aftermarket dash bits you can go for if you ever want to! |
| |
|
|
|
|
|
Sept 15, 2017 9:26:37 GMT
|
|
Love the black bumpers, miles better.
|
| |
The Millenium Volcon"Get yourself a Volvo if that's what you really want, you might be dead next year. In the meantime, you could be going sideways in a gigantic land barge."
|
|
|
|
mk2cossie
Club Retro Rides Member
Posts: 3,063  Club RR Member Number: 77
|
1971 mustang mach1mk2cossie
@mk2cossie
Club Retro Rides Member 77
|
Sept 15, 2017 12:28:39 GMT
|
Sounds like a good build spec to me  And I would personally go for the inlet manifold mods to fit the injectors at the back of the valves (1 per cylinder), instead of the EFI 4barrel route that is suggested above  |
| |
|
|
|
|
|
Sept 15, 2017 22:57:12 GMT
|
|
I would of gone the stroker route if I had not already had my crank reground, tufftrided, polished and straightened 4 years ago ( cost me an arm and a leg ), as for the injection setup the heads require a special manifold as the inlet port is at a different angle to a normal heads and the manifolds you need to use already have the bosses for the injectors cast on them, they just need to be drilled out, so it seems a shame not to use them. Also I have a megasquirt ECU on my other car and as I have got to know that setup and how it works and it would be a pain to have to learn a new system, plus I can spread the cost of buying the EFI bits.
|
| |
71 ford mustang being restored
71 triumph spitfire 3.5 v8
88 bmw e32 735 --SOLD--
|
|
|
|
|
Sept 16, 2017 1:23:52 GMT
|
|
looks great , engine wise consider the crower group 3 hydraulic ,p/n 15966.
|
| |
|
|
|
|
1971 mustang mach1peteh1969
@peteh1969
Club Retro Rides Member 107
|
Sept 16, 2017 10:41:58 GMT
|
|
Where are you going to keep it when it's done?
|
| |
|
|
Paul Y
Posted a lot
  
Posts: 1,951
|
|
Sept 17, 2017 16:16:04 GMT
|
Could you find somebody to sell your crank too? As you are going for a complete rebuild have a look at this 408Kit includes pistons, rings, rods, bearings and crank. I only bring this up as a friend of mine took me for a ride in his MAch1 about 3 months ago with this kit in it and it was really really fast! Bags of low end torque and really drivable. EIther way a really great build,love the attention to detail. Please continue Sir! P.  |
| |
|
|
|
|
|
Sept 19, 2017 10:56:10 GMT
|
|
With your engine parts a note of caution. Speedmaster don't have the best reputation. They were previously known as Procomp or Procr*p as many refered to them.
I have purchased one small item from them (Alternator bracket) and it didn't fit without modification.
Also be realistic with what you want your engine to do a big solid cam sounds cool and makes more horsepower but is it necessary. Link to video with an interesting conclusion.
|
| |
|
|
|
|
|
Sept 19, 2017 23:13:34 GMT
|
That's a nice stroker kit but way out of my price range once you factor in shipping, import duty and vat. As it is I am only buying the parts as and when I have got the cash, also with this build I am trying to emulate a slightly modified boss engine hence most of my choices in engine parts.
Interesting video, thanks for the link. As for my cam choice the main reason that I was looking at that particular cam was that it is very close to the original boss cam grind:
71 ford boss grind comp cams 282s
RPM range -6500 2000-6000 lobe separation 116 110 duration 290 / 290 282 / 282 duration @ .050"lift 230 / 230 236 / 236 valve lift .477 / .477 ( net ) .570 / .570 ( gross ) lash .26 / .26 .26 / .26
but as I have said I have still not fully decided on a mech cam ( flat tappet only not roller ), Here are a couple of hydraulic cams I have also considered :
comp cams 280 H comp cams XE 274 H crane cams 278
RPM range 2000-6000 2000-6000 2200-5800 lobe separation 110 110 110 duration 280 / 280 274 / 286 278 / 278 duration @ .050" lift 230 / 230 230 / 236 222 / 222 valve lift .530 / .530 .562 / .565 .539 / .539
I will also have a look at the crower cam that has been recommended, I have read that some of speedmaster/procomp stuff is not up to scratch but as far as the heads go the casting are supposed to be a little rough and can need a little cleaning up and the valve seats sometimes need recutting, both not to hard to do especially as I am planning on giving what ever heads I use a 3 angle cut, but the main warning I have had about these heads is do not for any reason buy fully populated heads as the valves and springs assembly they supply are absolute rubbish, use your own on the bare casting, also I am willing to take a chance at under £300 a head against £1400 to £1800 for trickflow or eldelbrock a head.
Anyway thanks for the advice and please keep it coming because every bit helps.
|
| |
71 ford mustang being restored
71 triumph spitfire 3.5 v8
88 bmw e32 735 --SOLD--
|
|
|
|
|
Sept 25, 2017 22:57:55 GMT
|
Well here's another job done off the list, the wheels and tyre's.
This is another job which I have been putting off as the wheels when new were chromed and as they have gone manky over time, previous owners have painted them but the paint has lifted of the chrome and they had starting to rust under the paint.
The first thing I did was to buy a tyre removal tool as the local tyre places were going to charge me silly prices to take my tyre's off.
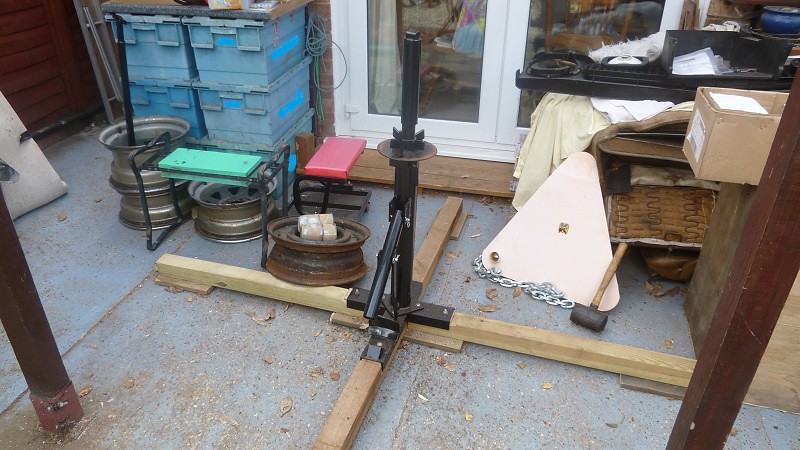 P1010086aa by karl stroud, on Flickr P1010086aa by karl stroud, on Flickr
The wheels first had to be wire wheeled with an angle grinder to get the old paint and the worst of the corrosion.
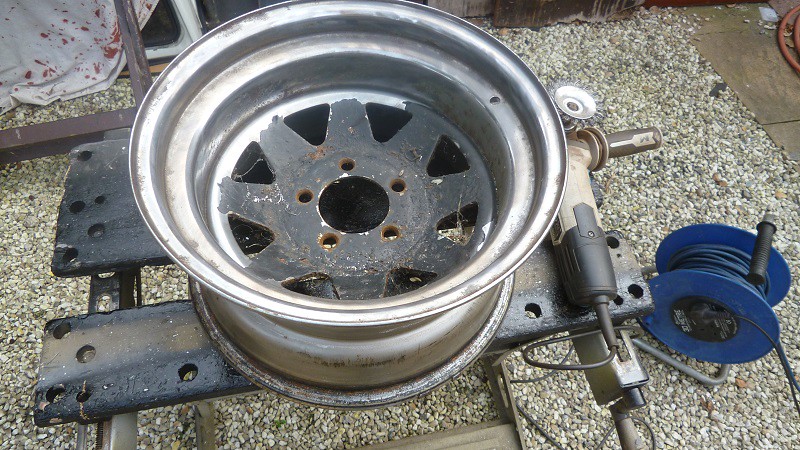 P1010087a by karl stroud, on Flickr P1010087a by karl stroud, on Flickr
Then I blasted them to get the last of the corrosion off as well to key the surface for painting.
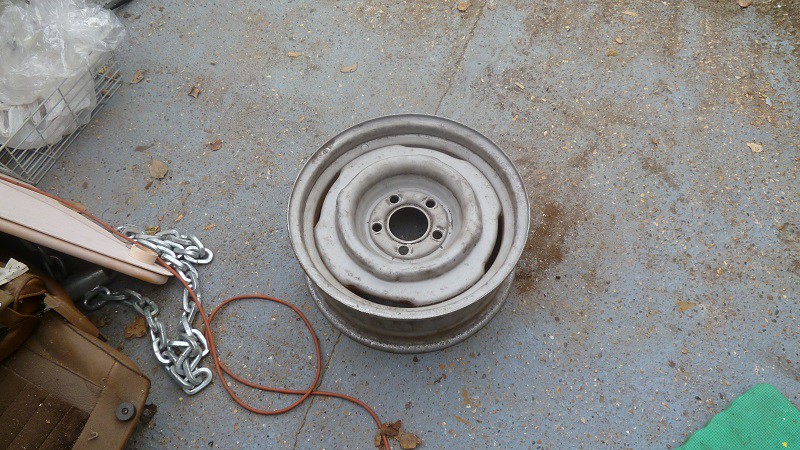 P1010101a by karl stroud, on Flickr P1010101a by karl stroud, on Flickr
Then they need rust treating.
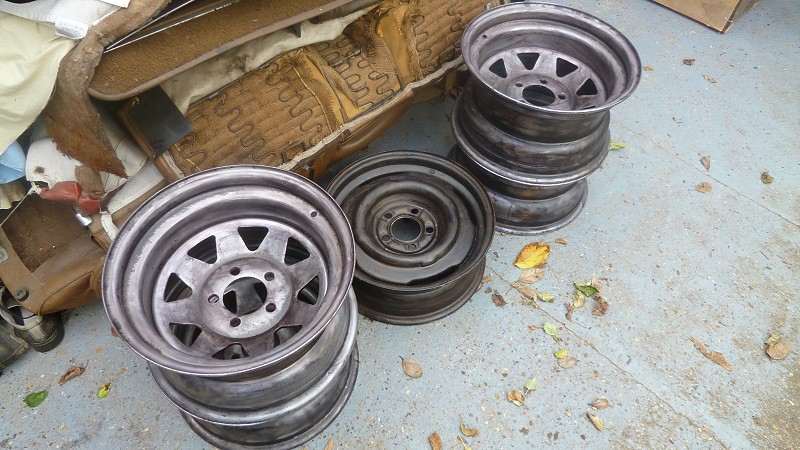 P1010102a by karl stroud, on Flickr P1010102a by karl stroud, on Flickr
Next they needed a little repair work to get rid of any surface pitting.
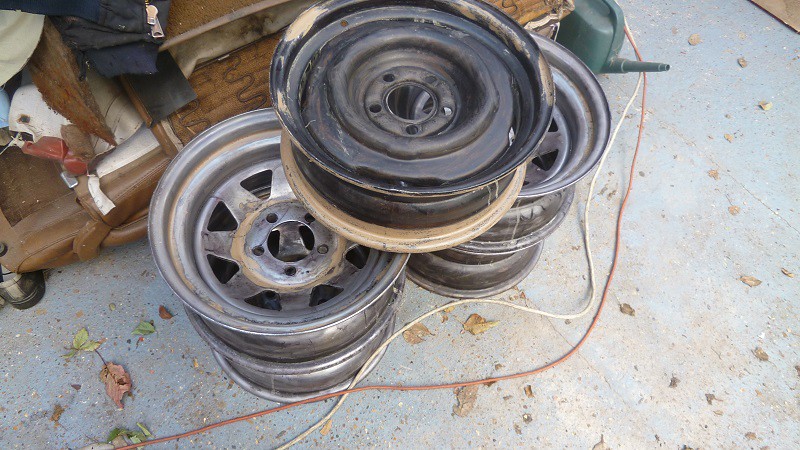 P1010103a by karl stroud, on Flickr P1010103a by karl stroud, on Flickr
The wheel nuts were also blasted and rust treated.
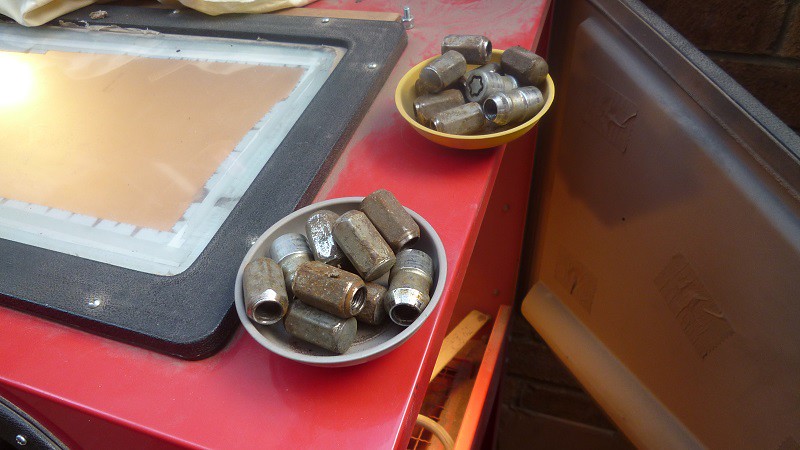 P1010104a by karl stroud, on Flickr P1010104a by karl stroud, on Flickr
Next everything was given a coat of etch-primer then rubbed over with 600 grade when dry.
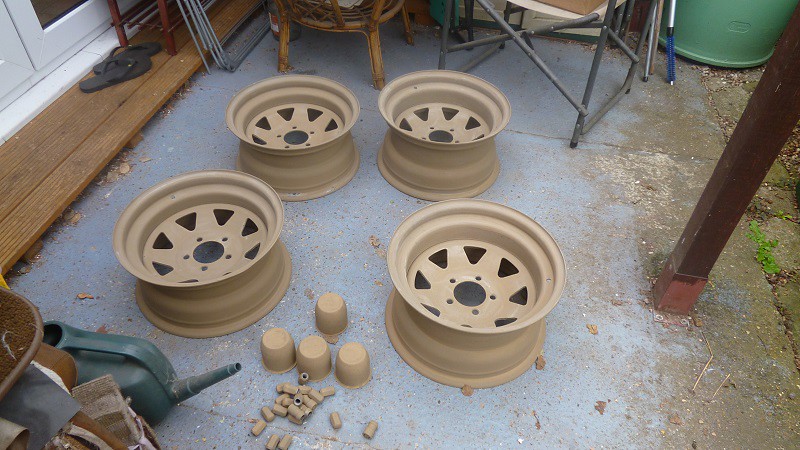 P1010105a by karl stroud, on Flickr P1010105a by karl stroud, on Flickr
Then everything was coated in primer then rubbed over with 1500 grade when that was dry.
 P1010107a by karl stroud, on Flickr P1010107a by karl stroud, on Flickr
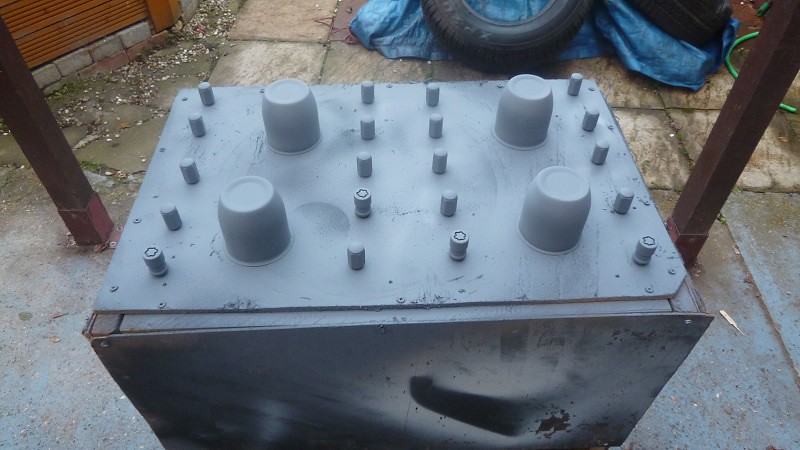 P1010108a by karl stroud, on Flickr P1010108a by karl stroud, on Flickr
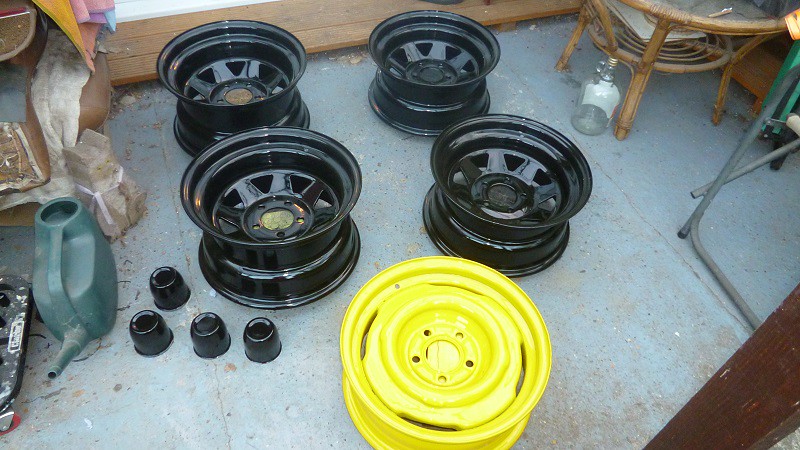
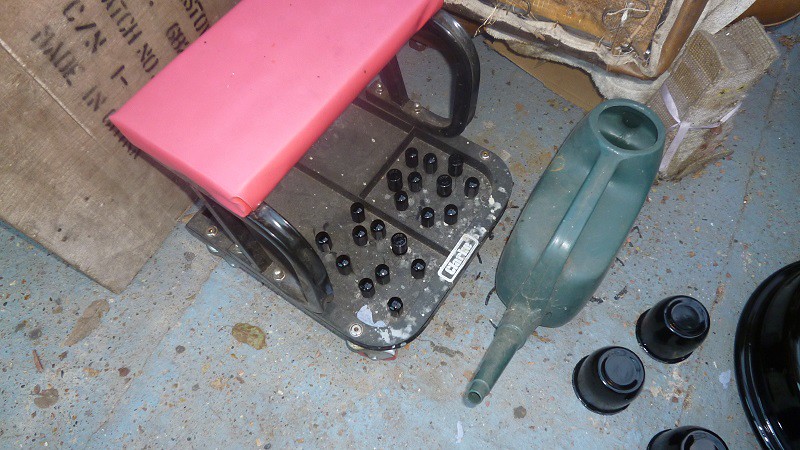
Next the four main wheels and centre's plus wheel nuts were painted gloss black and the spare was painted a nice yellow when these were all dry they were then painted with lacquer.
 P1010110a by karl stroud, on Flickr P1010110a by karl stroud, on Flickr
 P1010111a by karl stroud, on Flickr P1010111a by karl stroud, on Flickr
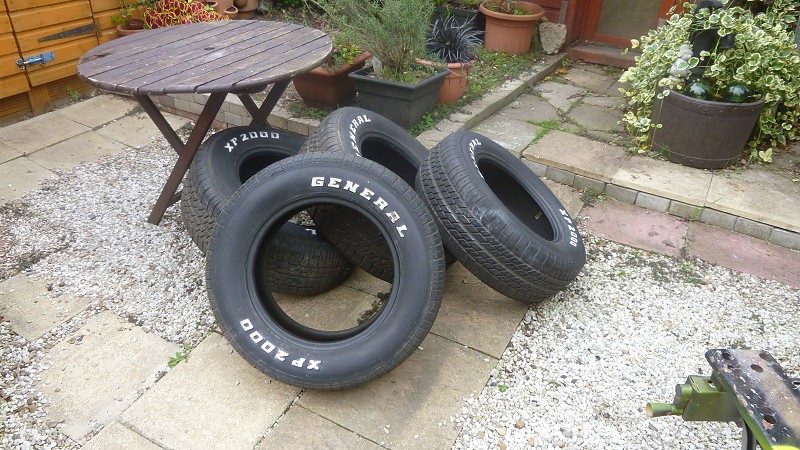
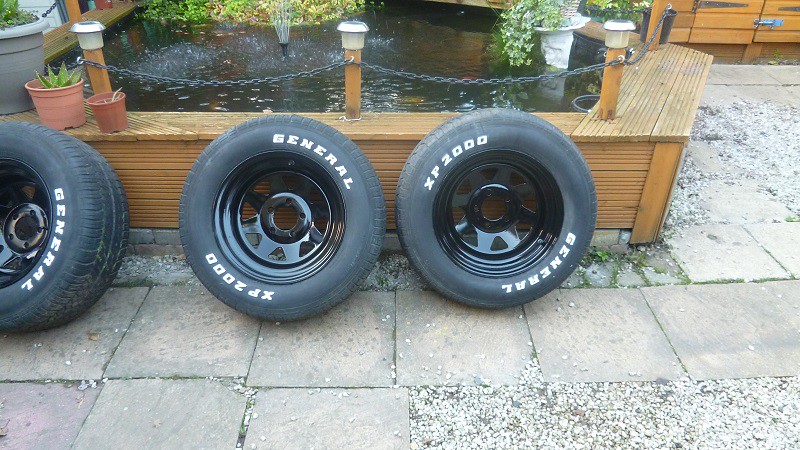
Then it was the turn of the tyre's to be cleaned and refitted to the rim's.
 P1010113a by karl stroud, on Flickr P1010113a by karl stroud, on Flickr
 P1010114a by karl stroud, on Flickr P1010114a by karl stroud, on Flickr
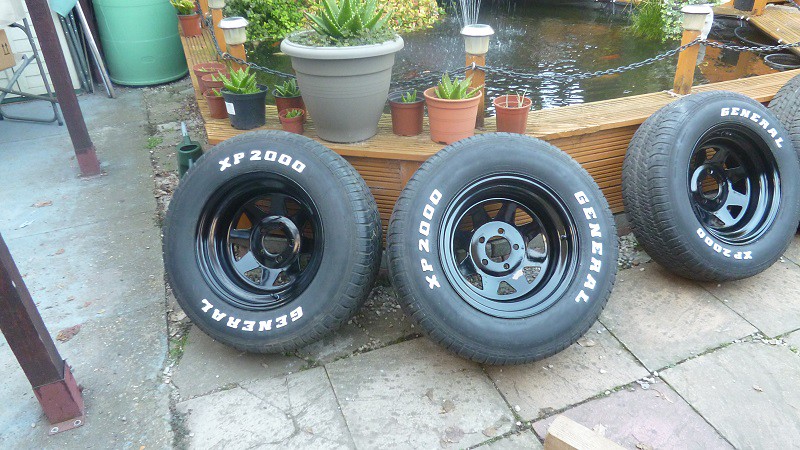 P1010115a by karl stroud, on Flickr P1010115a by karl stroud, on Flickr
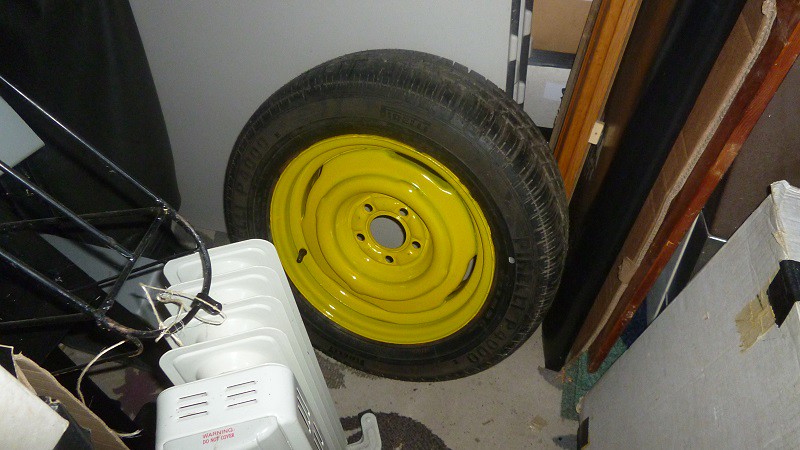 P1010116a by karl stroud, on Flickr P1010116a by karl stroud, on Flickr
Then it was just a matter of fitting them back on the car.
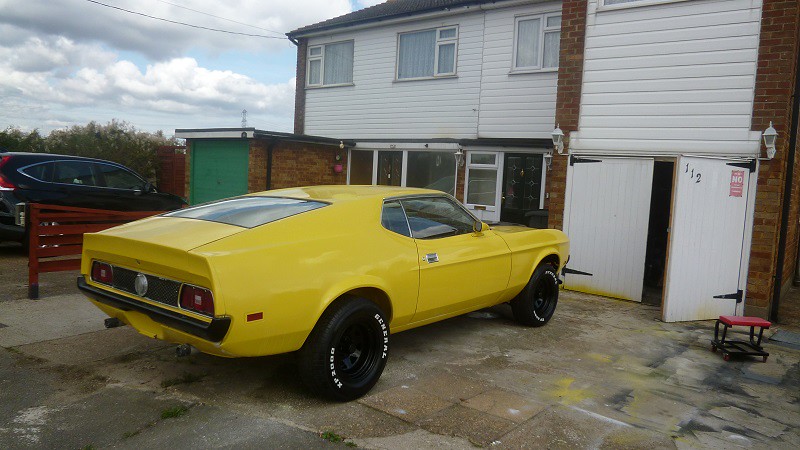 P1010117a by karl stroud, on Flickr P1010117a by karl stroud, on Flickr
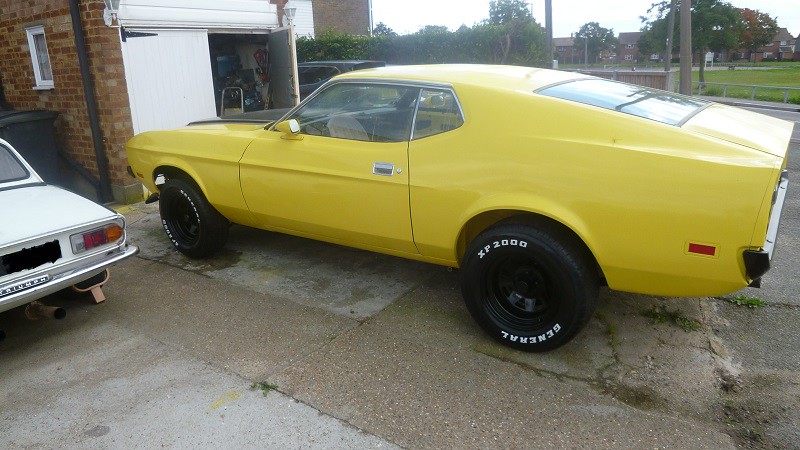 P1010120a by karl stroud, on Flickr P1010120a by karl stroud, on Flickr
I have also installed the hydraulic lines for the gearbox.
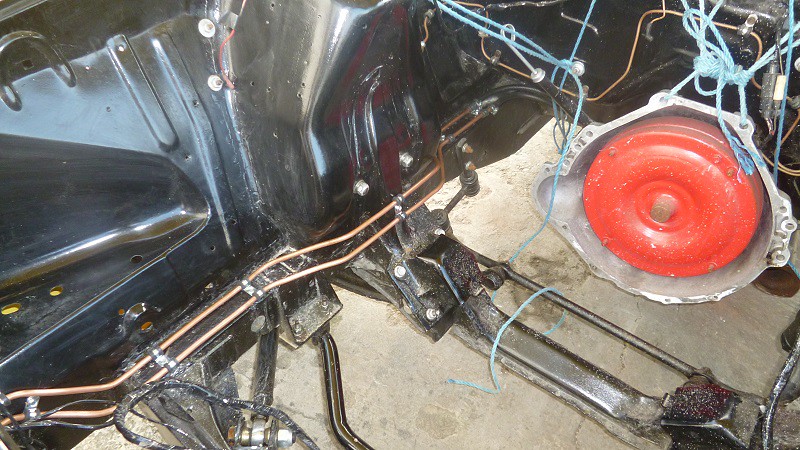 P1010123a by karl stroud, on Flickr P1010123a by karl stroud, on Flickr
This now leaves the next job to do which is to fit the puddle lights, the door marker lights and the central locking.
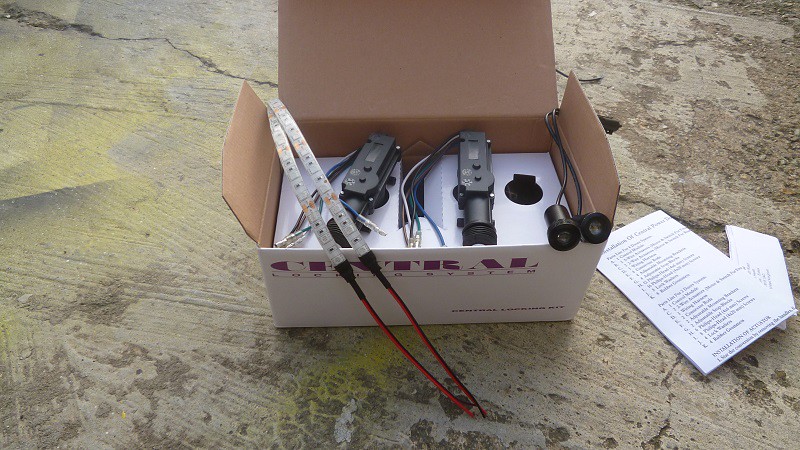 P1010130a by karl stroud, on Flickr P1010130a by karl stroud, on Flickr
|
| |
Last Edit: Sept 25, 2017 23:05:48 GMT by kusanagi
71 ford mustang being restored
71 triumph spitfire 3.5 v8
88 bmw e32 735 --SOLD--
|
|
|
|
|
Sept 26, 2017 1:10:17 GMT
|
|
beautiful work on the wheels....they look great. Though they are not original to the car, you did a very nice job with them.
that central locking mechanism looks ambitious...is it difficult?
JP
|
| |
I know its spelled Norman Luxury Yacht, but its pronounced Throat Wobbler Mangrove!
|
|
eurogranada
Europe
To tinker or not to tinker, that is the question...
Posts: 2,556
|
|
Sept 26, 2017 6:15:32 GMT
|
|
Very nice work on the wheels. I like the hands on approach of even removing the tires yourself!
|
| |
|
|
|
|
 P1010015a by karl stroud, on Flickr
 P1010017a by karl stroud, on Flickr
 P1010019a by karl stroud, on Flickr
 P1010018a by karl stroud, on Flickr
 P1010020a by karl stroud, on Flickr
 P1010021a by karl stroud, on Flickr
 P1010022a by karl stroud, on Flickr
 P1010023a by karl stroud, on Flickr
 P1010024a by karl stroud, on Flickr
 P1010025a by karl stroud, on Flickr
 P1010026a by karl stroud, on Flickr
 P1010027a by karl stroud, on Flickr
 P1010031a by karl stroud, on Flickr
 P1010032a by karl stroud, on Flickr


