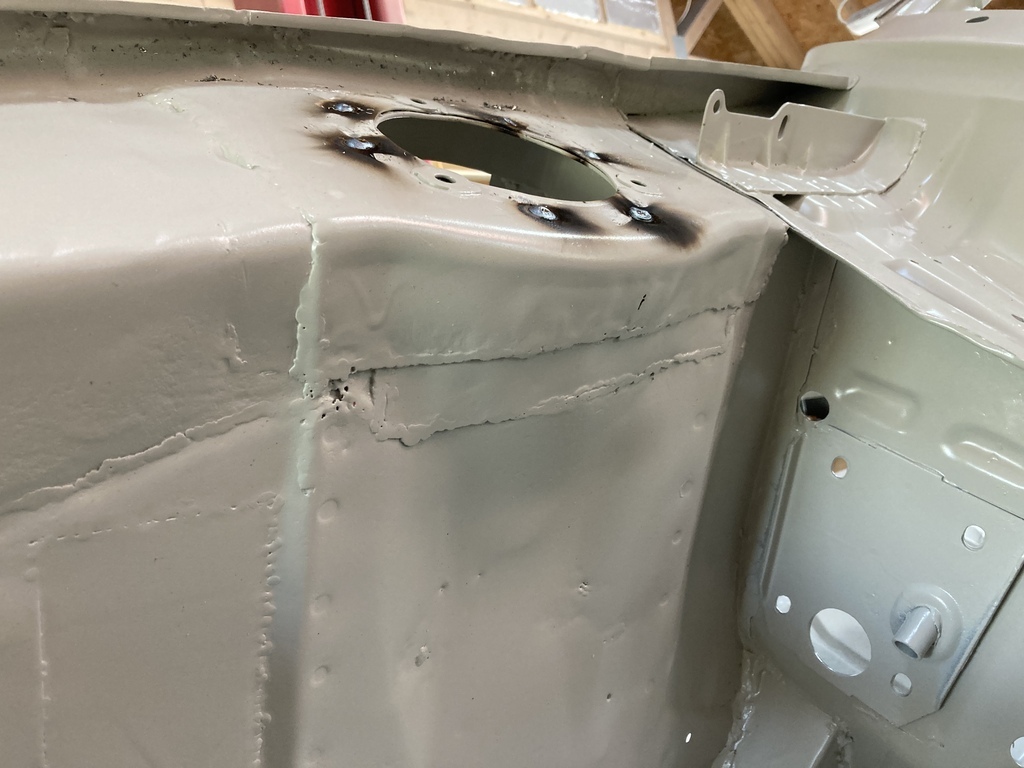
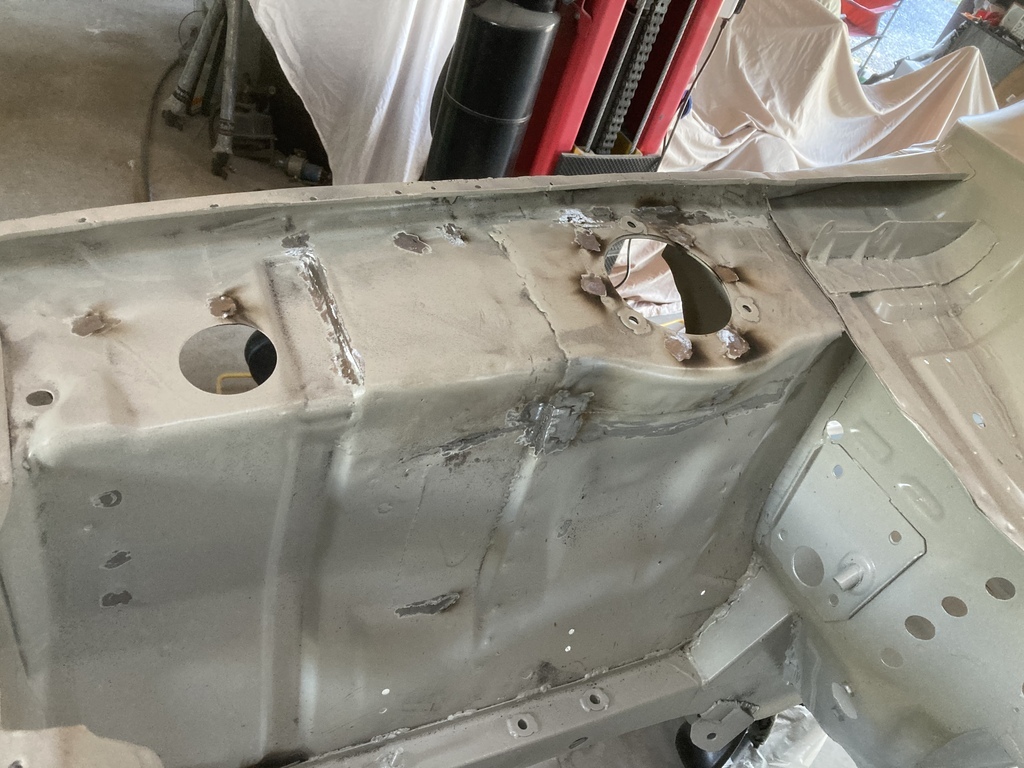
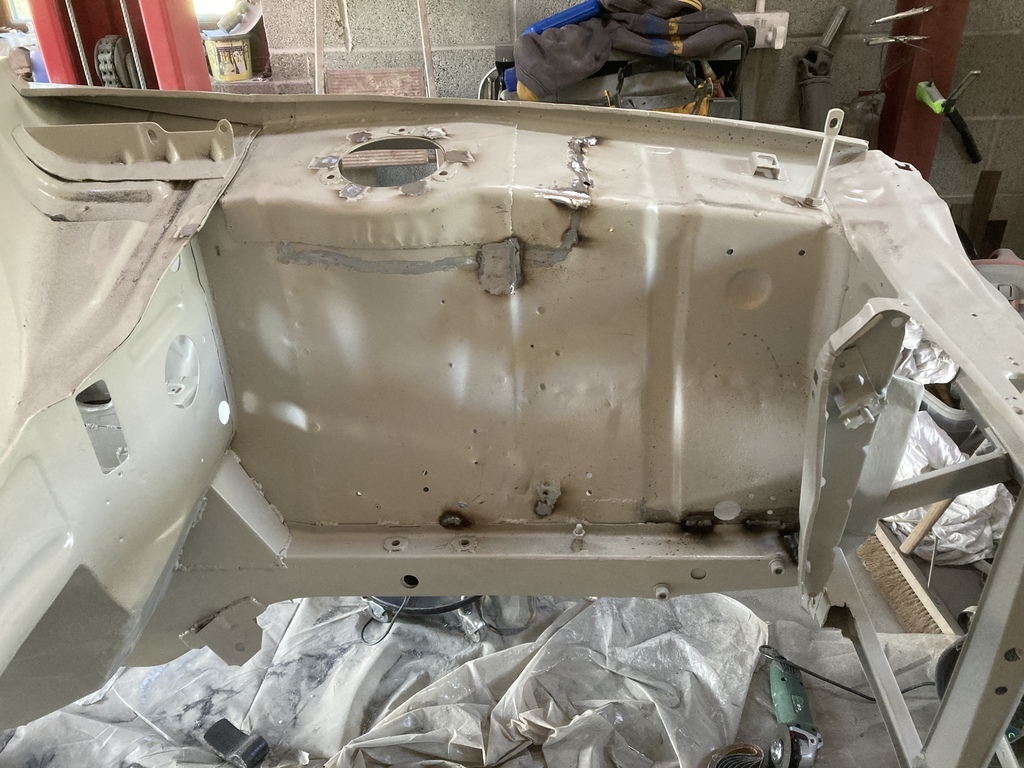
|
|
|
|
|
Those rear quarters have lived a life! nice work and at least it wont be so perfect your too afraid to use it They have indeed Gtviva. Some of the damage is from being hit whilst circuit racing. But probably most of it is me running out of talent. But then again I can only remember hitting the rear end three times, and my brother did a bit of damage on a cone once, but I did loose a rear wheel once which buckled the arch and lower corner. The rest I’ve probably forgotten all about 😁 |
| |
|
|
|
|
|
|
|
Aug 29, 2022 17:59:44 GMT
|
|
|
| |
|
|
|
|
|
Sept 3, 2022 16:25:23 GMT
|
So I’m continuing the welding after blasting. A couple of bubbles on the bottom of the passenger front chassis rail where the compression strut bracket is welded on 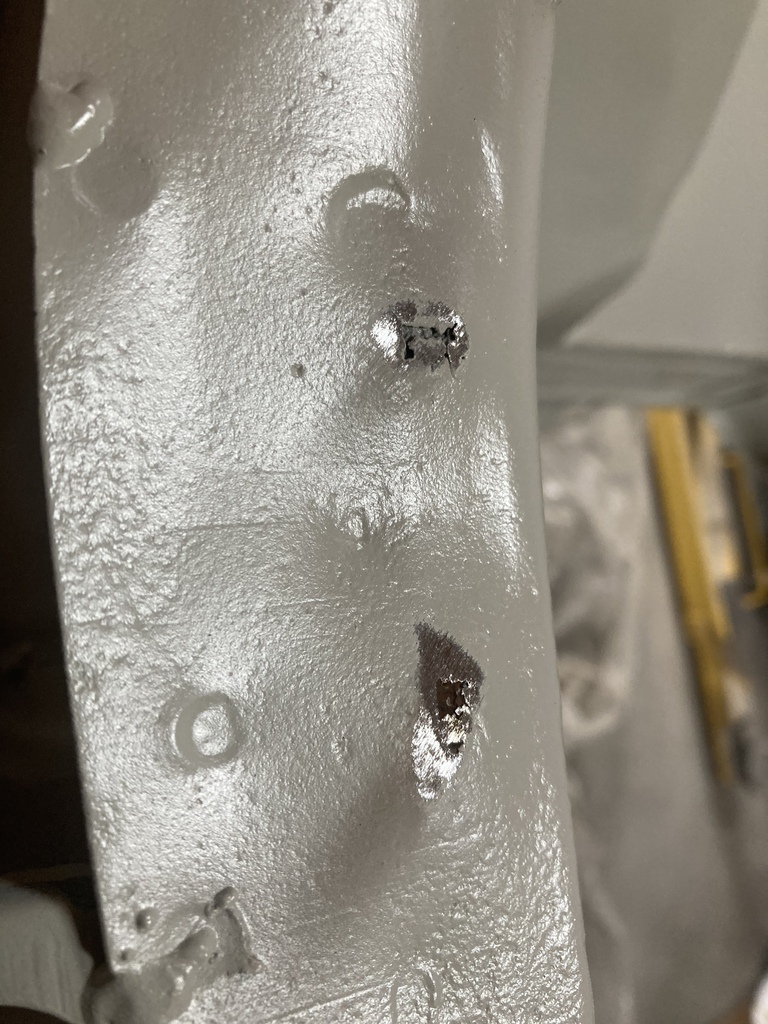 Only a couple of of pin holes. I’ll soon have that sorted. 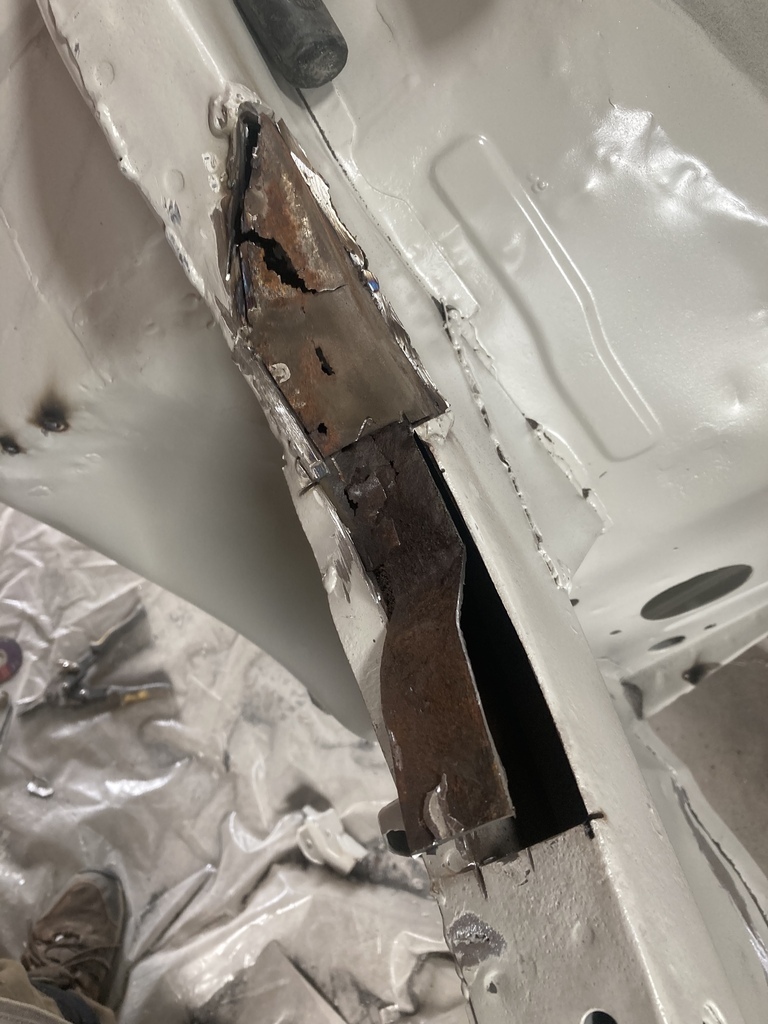 Perhaps not. It even went up below the compression strut bracket so that had to be removed too. All grot removed. 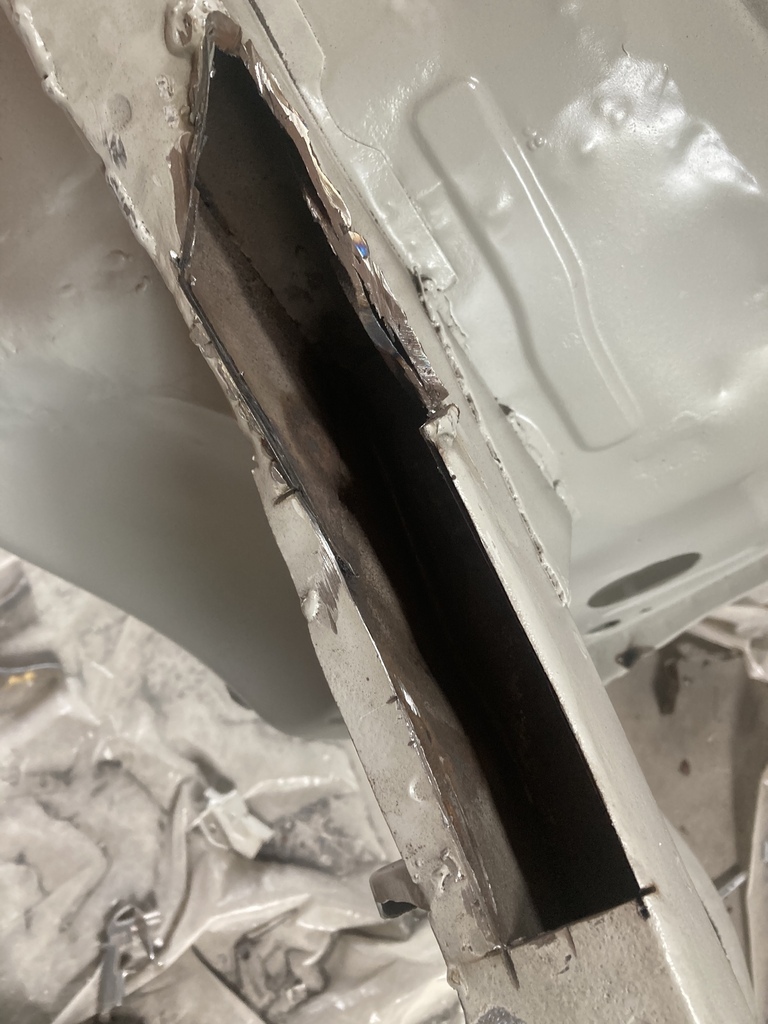 Outer, inner strengthener replaced 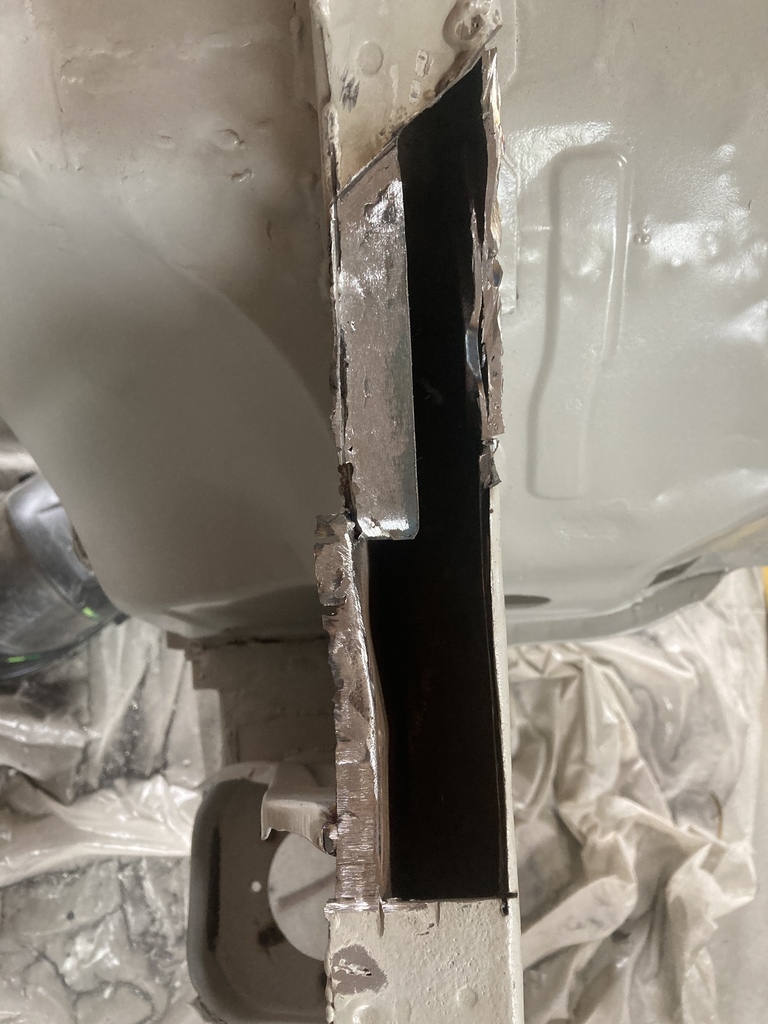 Starting to rebuild the inner, inner strengthener. The half moon shape in the new bit is the top of a 3” swaged hole. 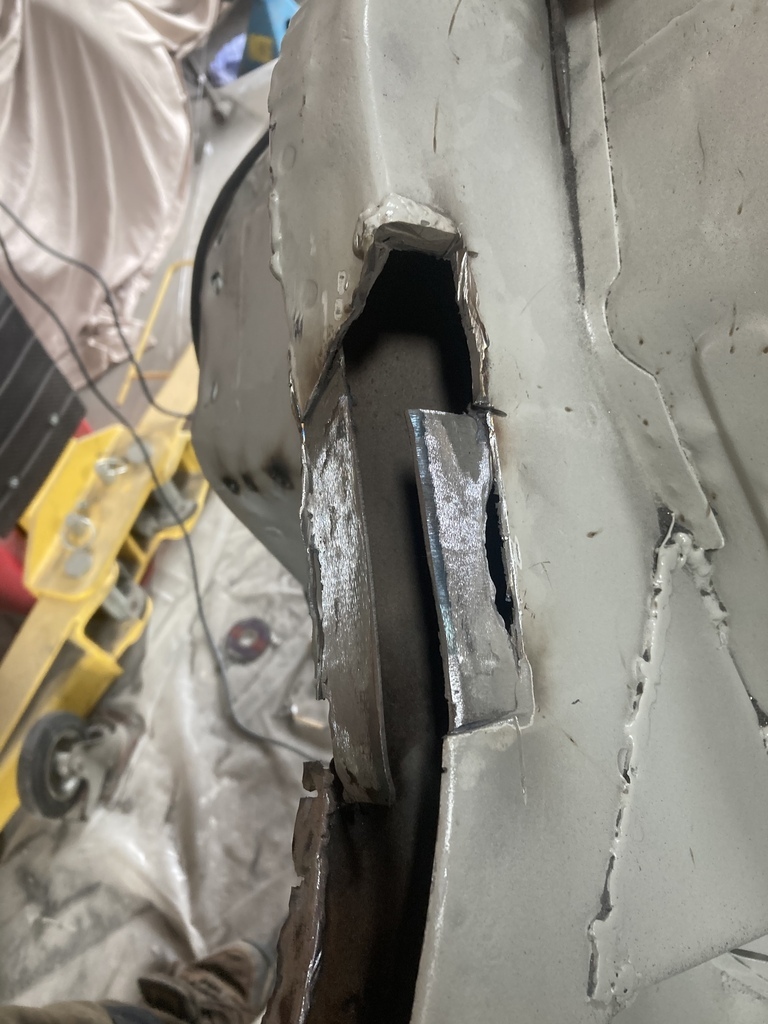 And the top of the inner, inner welded on. I don’t think these bits were welded together originally, but they are now 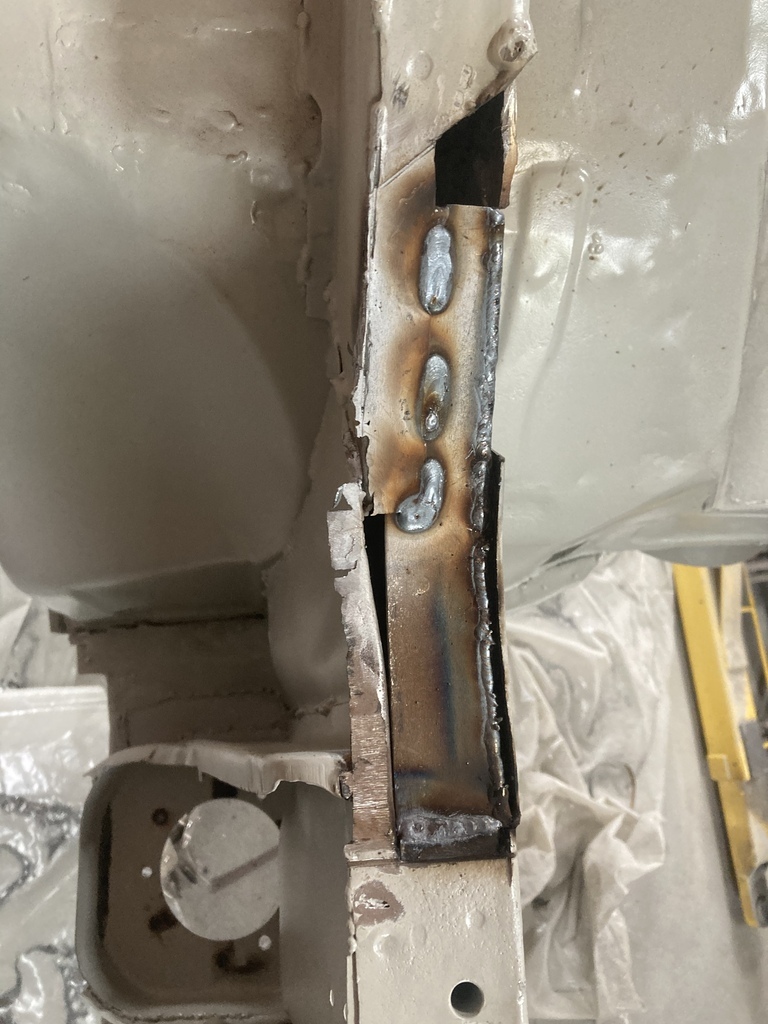 And ground back 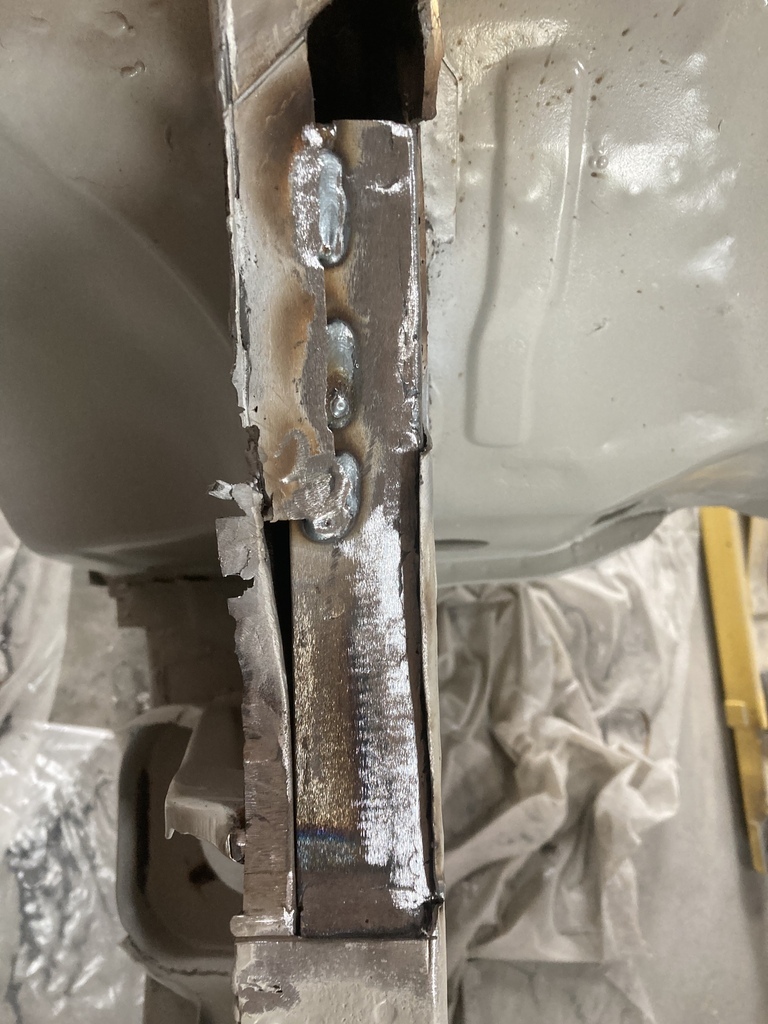 Outer skin welded back in. Had too use smaller bits welded together as that’s what I had 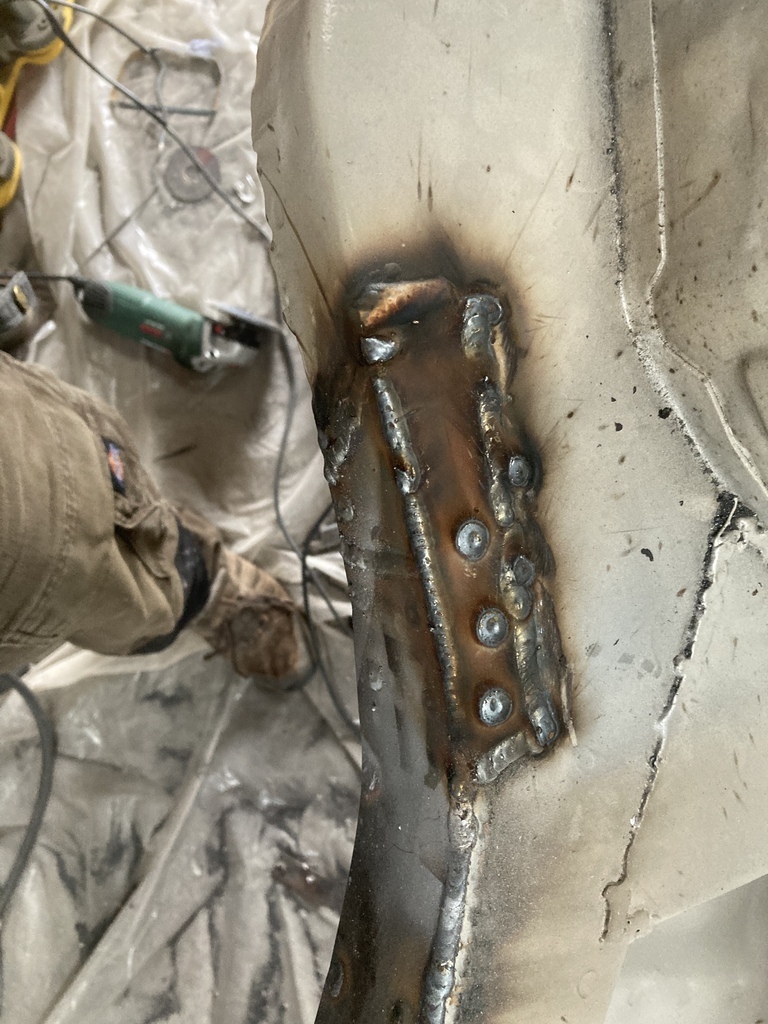 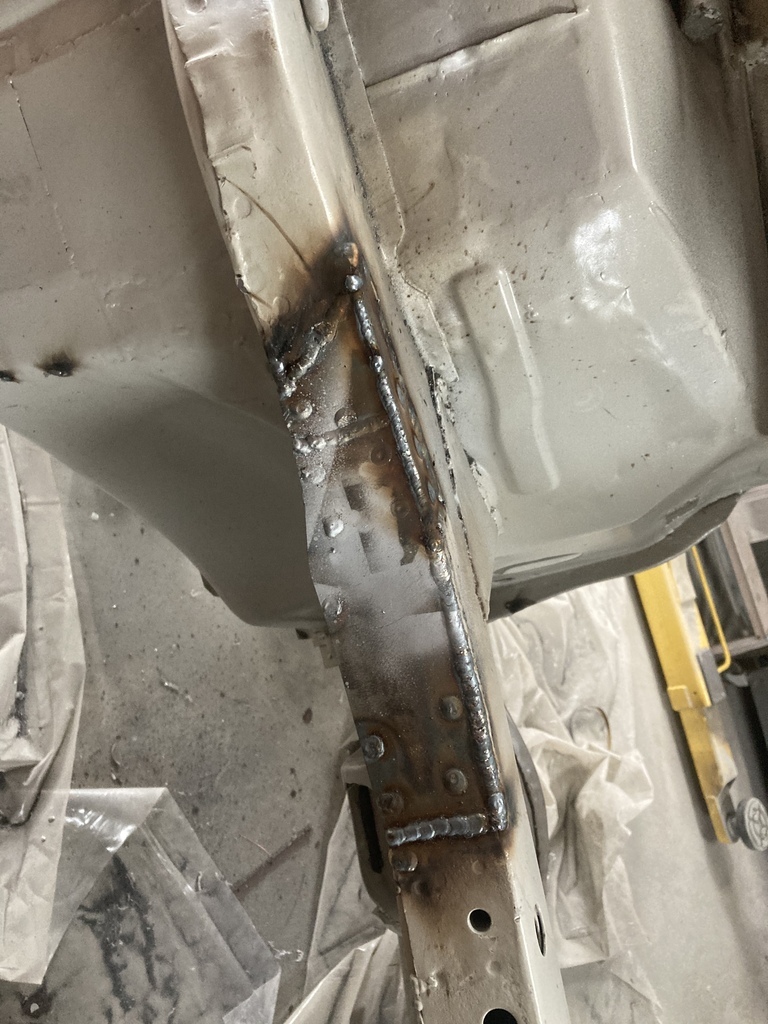 Ground back nice. 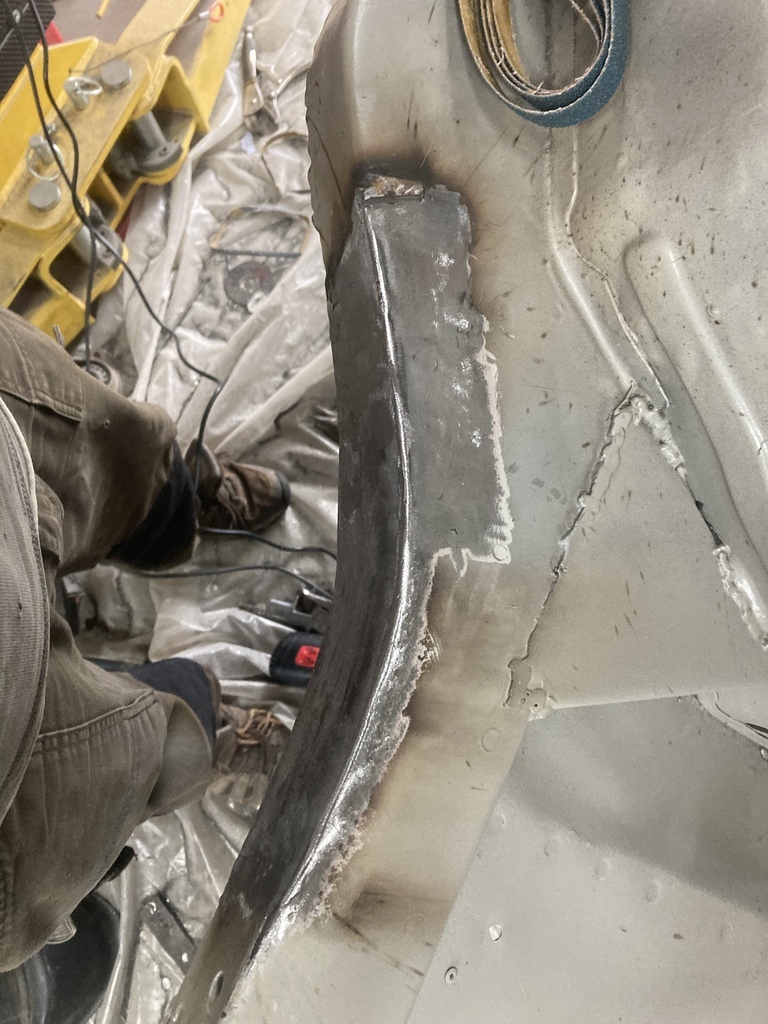 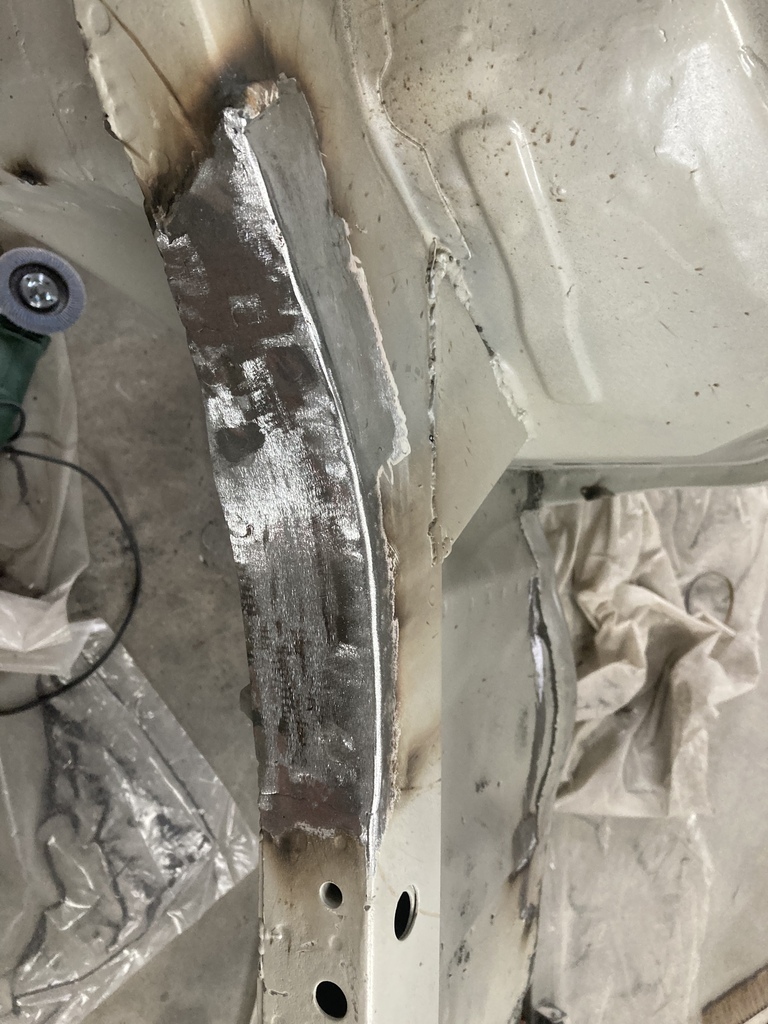 Finally with the compression strut bracket welded back on 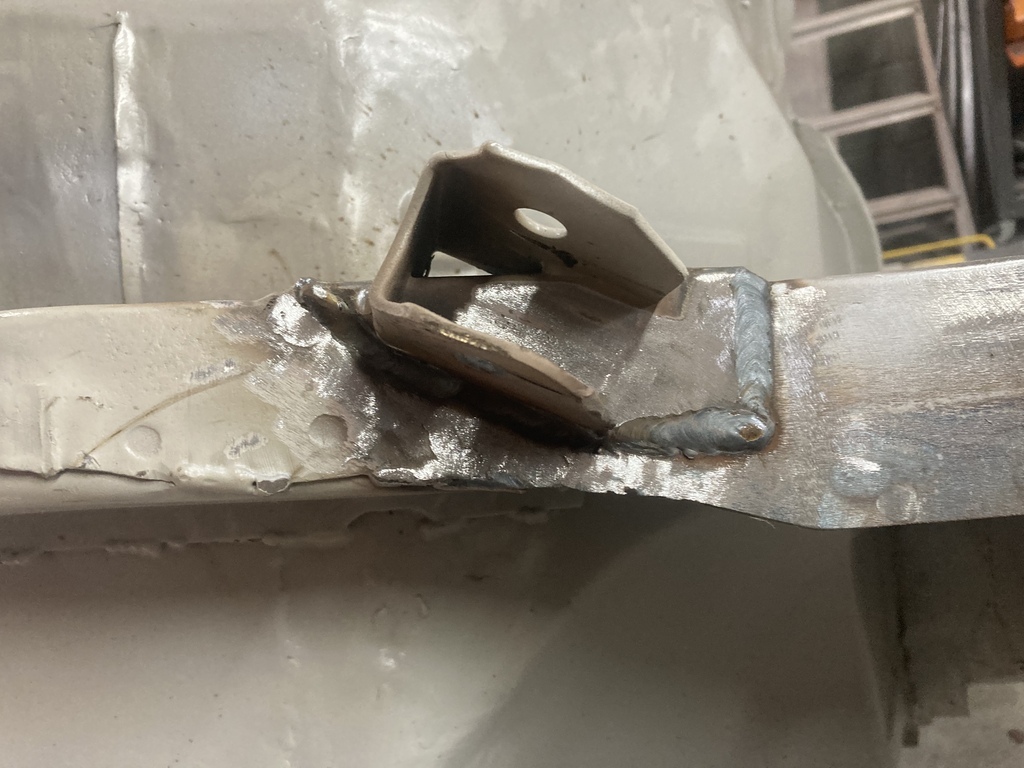 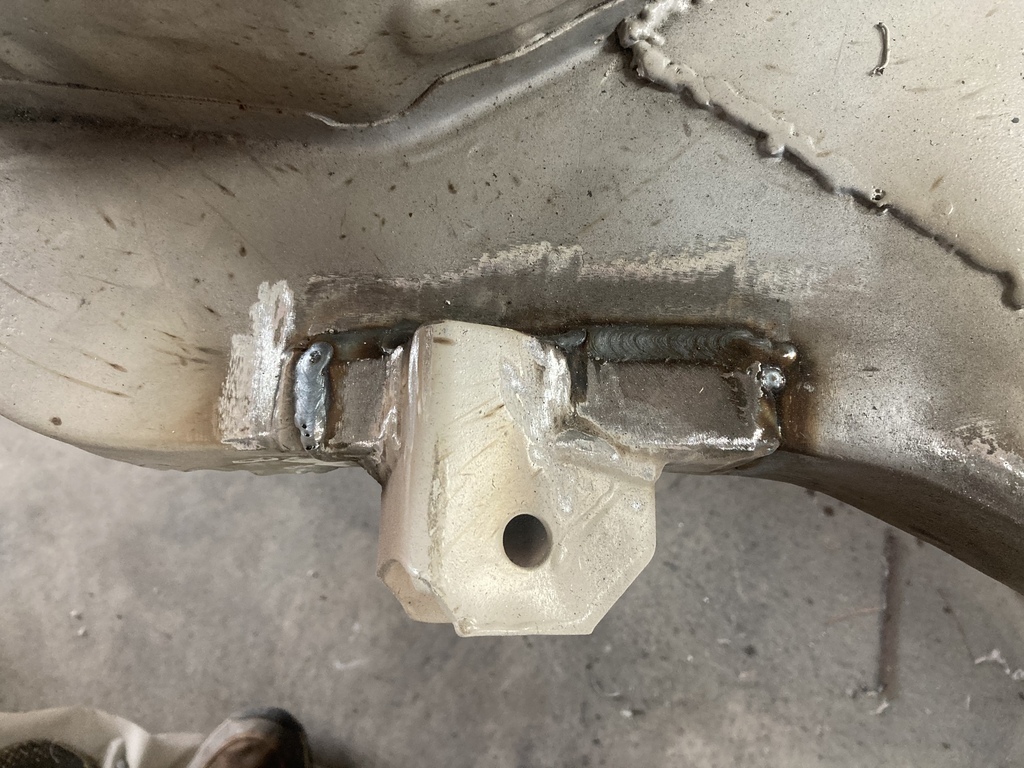 This really stressed me out when I saw it getting worse and worse, but in the end it was about 3 hours work and not to bad at all. Am I going to investigate the other side? No. There’s no tell tale signs so I’m going to draw a line. Even though I probably should have a look. There was a couple of pin holes in the driver kick panel. No photo, but cut it out 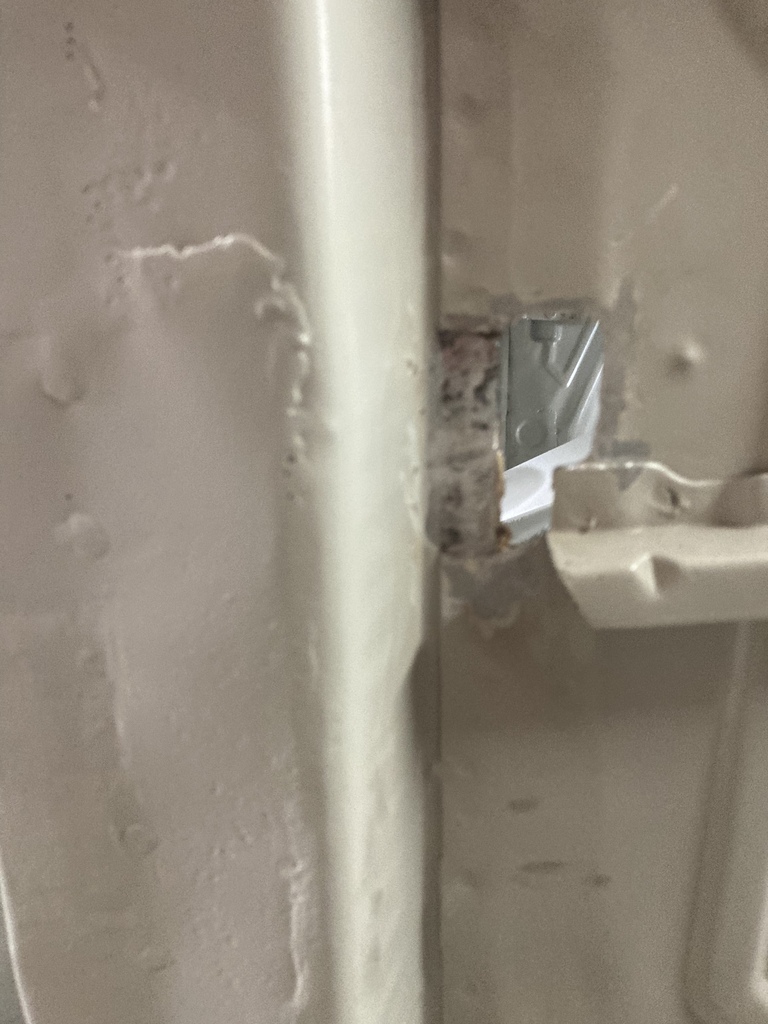 And welded a bit in 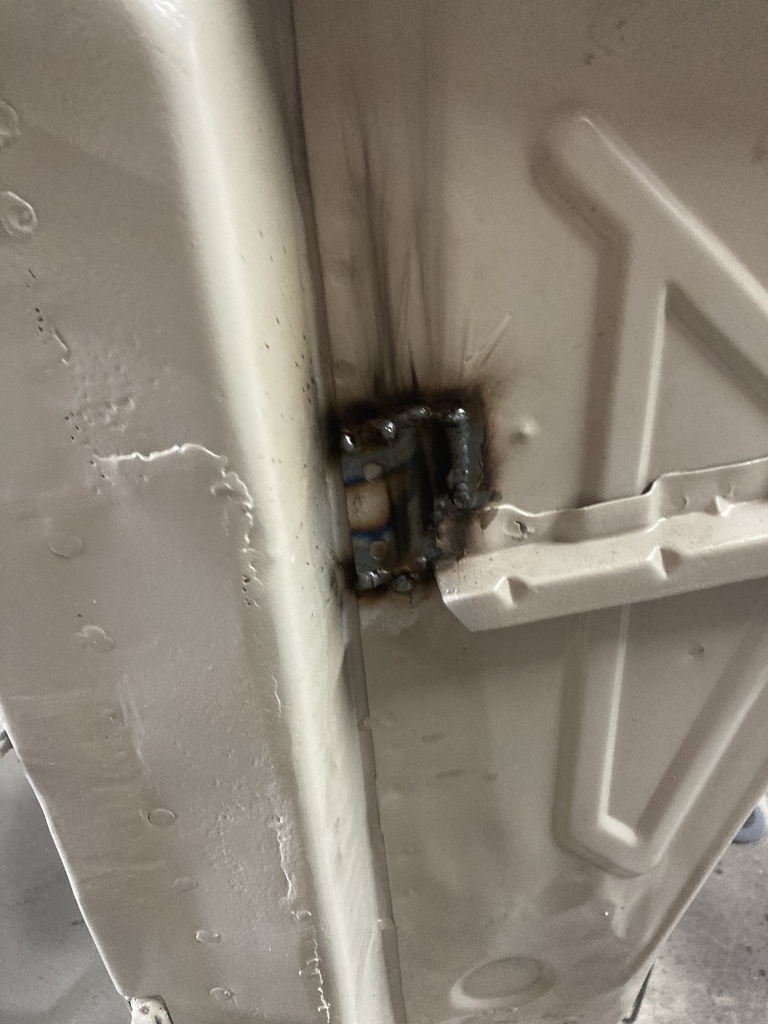 And ground it back 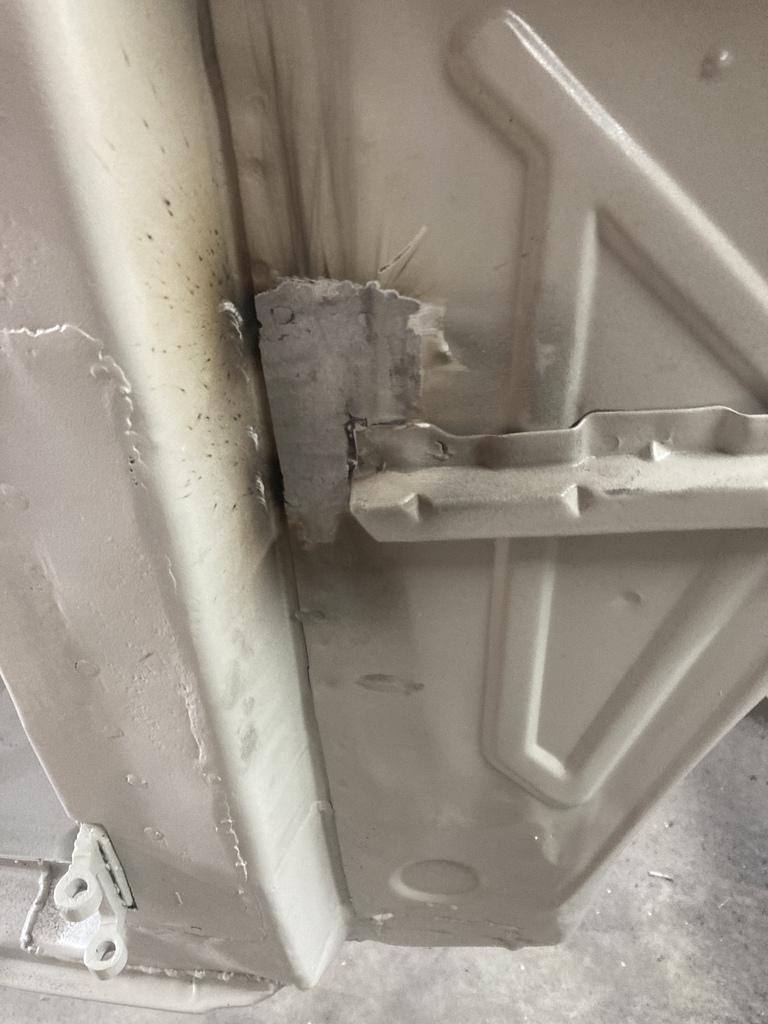 I filled the pin hole in the middle of the roof by drilling through and plug welding. 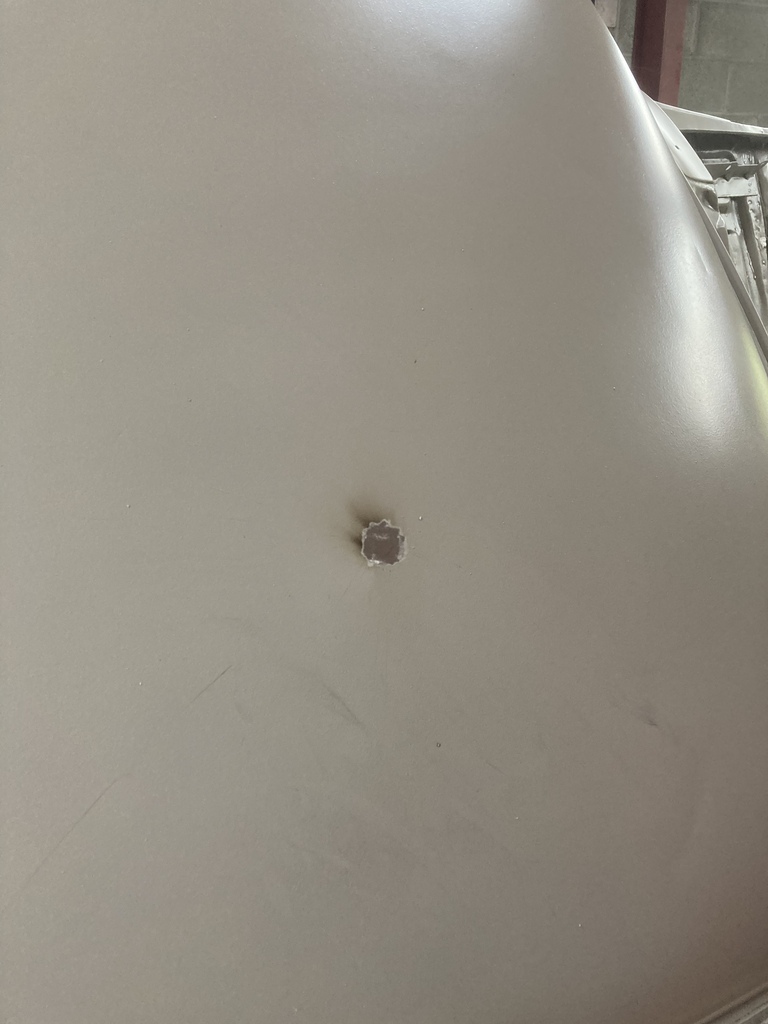 Used the blow jet so no distortion. We’ll no more than what the was in the first place. I also filled a metric ton of other holes😁, but no photos. I might get a bit more done tomorrow. |
| |
|
|
teaboy
Posted a lot
   Make tea, not war.
Posts: 2,126
|
|
Sept 3, 2022 17:55:21 GMT
|
|
Good stuff dude, I like looking at your work so selfishly I’m hoping there’s a few more holes to fill.
Is a metric ton a tonne?
Anyway, I hope you are getting down to the last few kilos of holes to fill.
|
| |
|
|
|
|
|
Sept 3, 2022 18:04:25 GMT
|
Good stuff dude, I like looking at your work so selfishly I’m hoping there’s a few more holes to fill. Is a metric ton a tonne? Anyway, I hope you are getting down to the last few kilos of holes to fill. Thanks Teaboy. There plenty more kilos to come- rear chassis rail, boot floor, rear floor under rear seat, roof, tank well. The list goes on, lots of seam welding. I’m trying to go from front to back. I believe a metric ton is a tonne. I’m sadly of the age where we were taught both. |
| |
|
|
|
|
|
Sept 3, 2022 22:18:59 GMT
|
|
Excellent work, looking good!
|
| |
|
|
|
|
|
Sept 3, 2022 22:35:32 GMT
|
Excellent work, looking good! Thanks Rascal 👍 |
| |
|
|
|
|
|
Sept 4, 2022 16:24:08 GMT
|
So what’s new in the world of grotty Mk1 Escorts? A new bit of floor under the rear seat. That’s what! Scabby bit 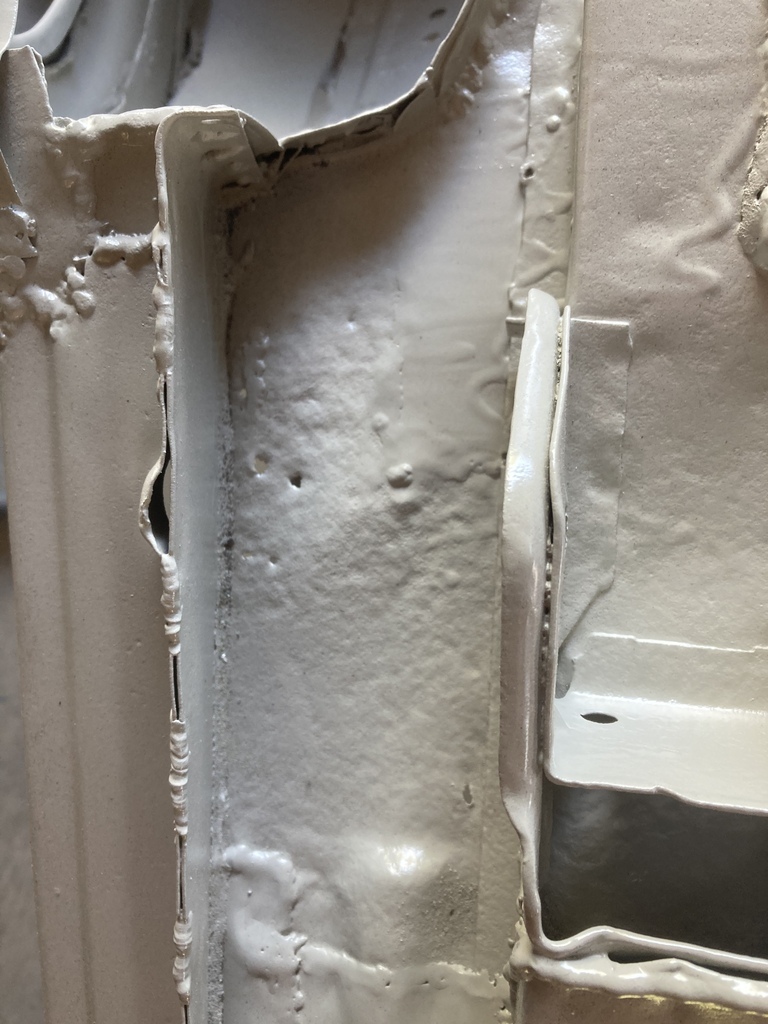 Chunk cut out 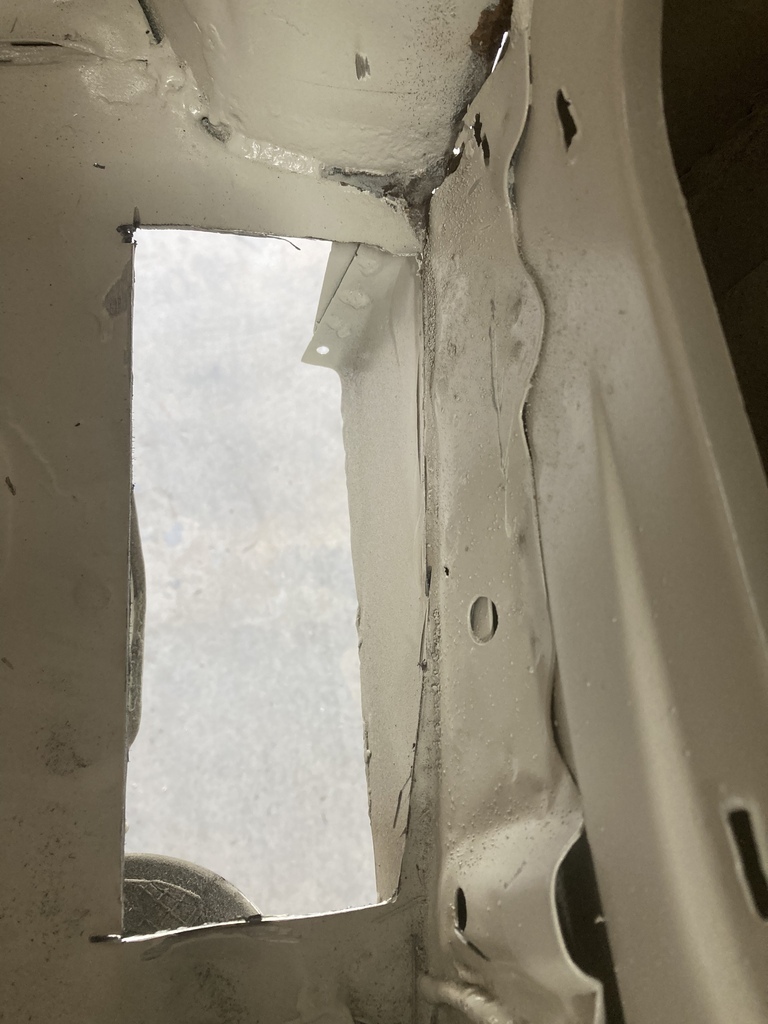 New bit welded in 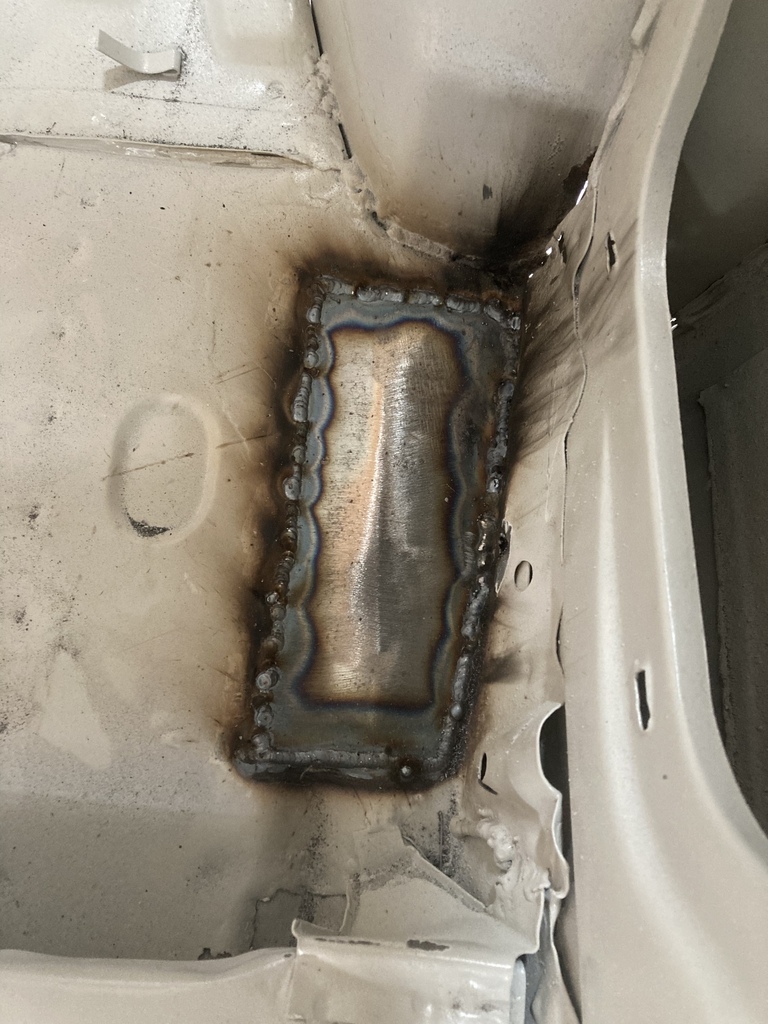 And ground back 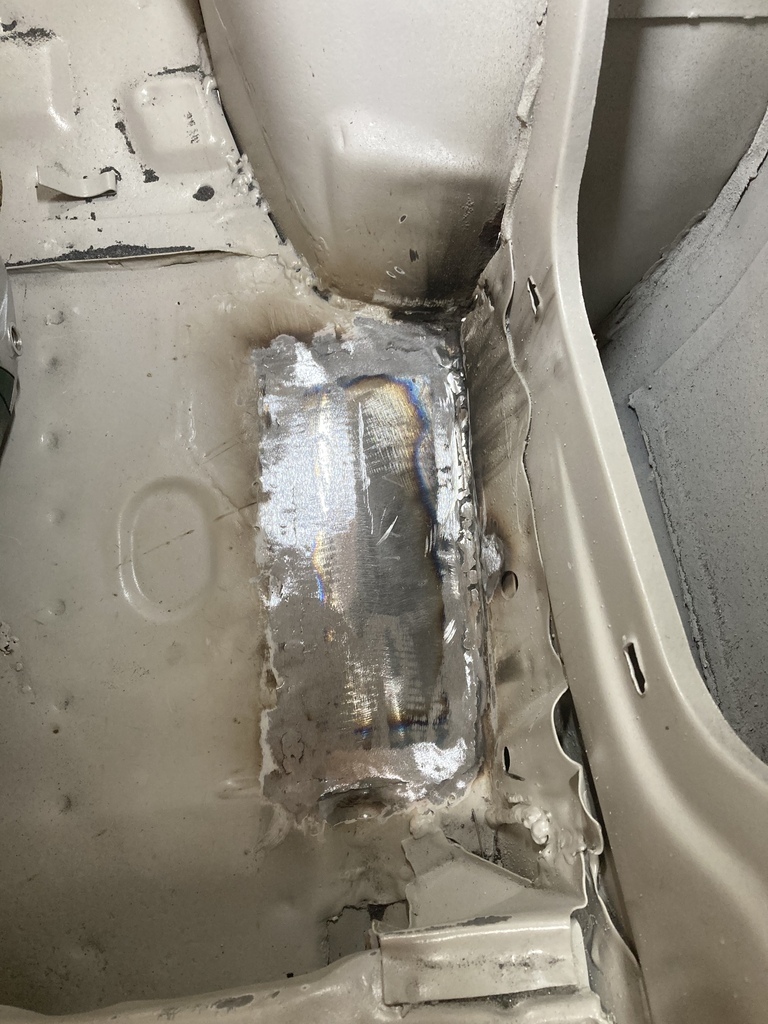 There was another grotty bit in the corner so cut it out 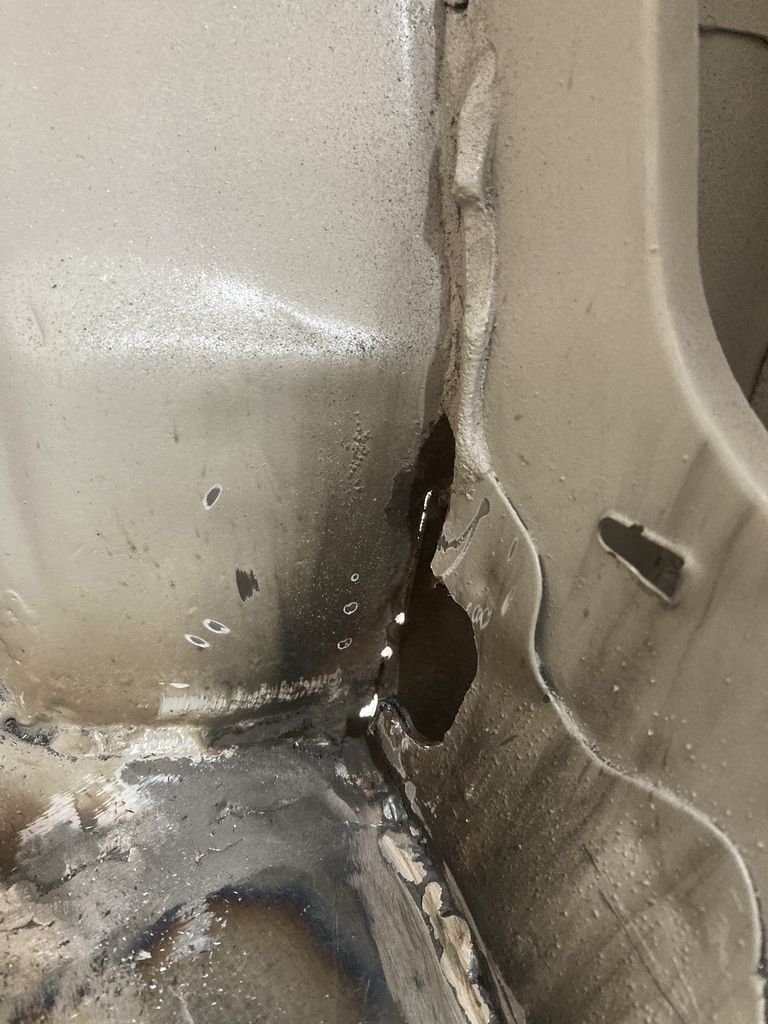 Made a bit 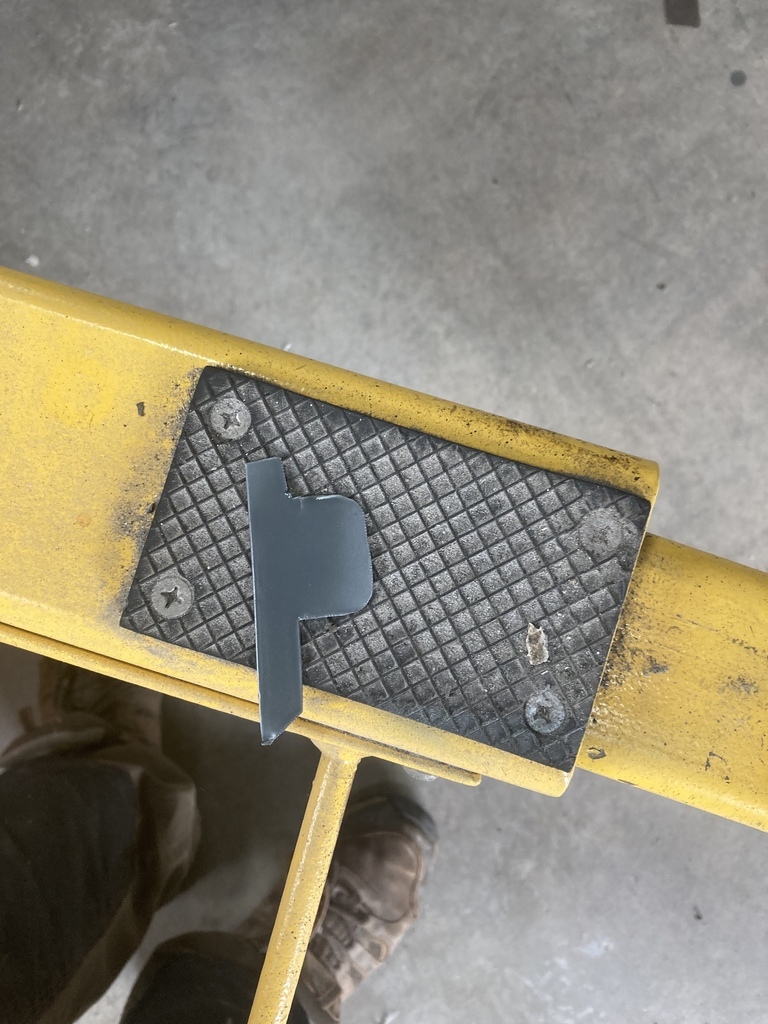 And welded it in 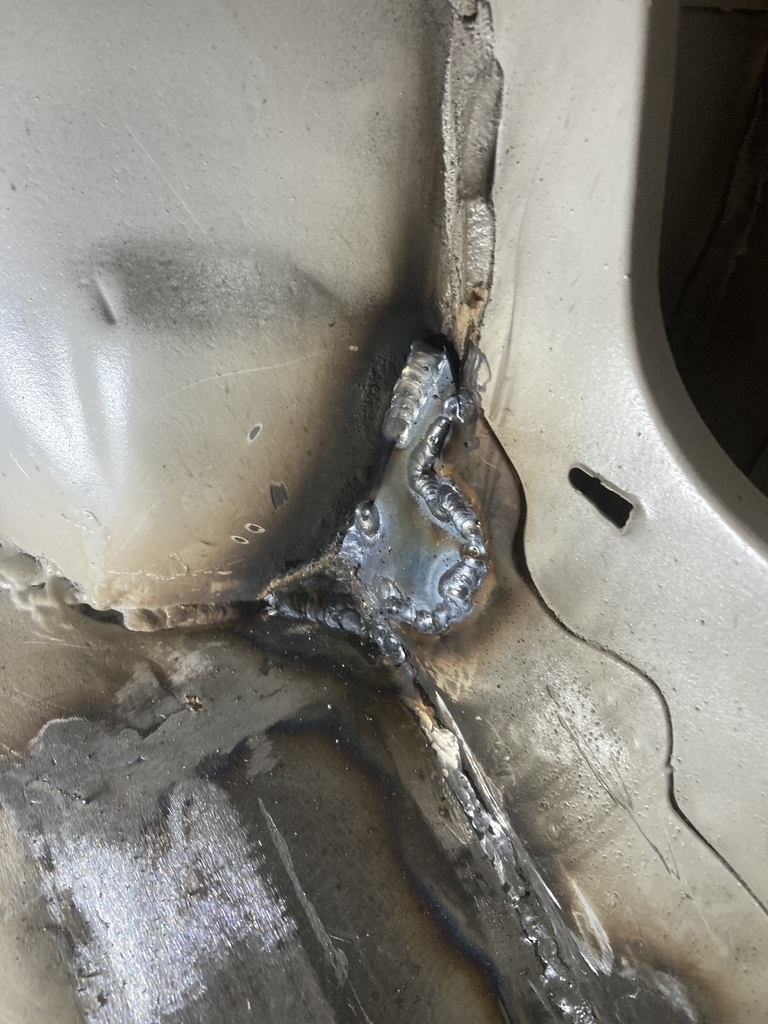 And ground it back 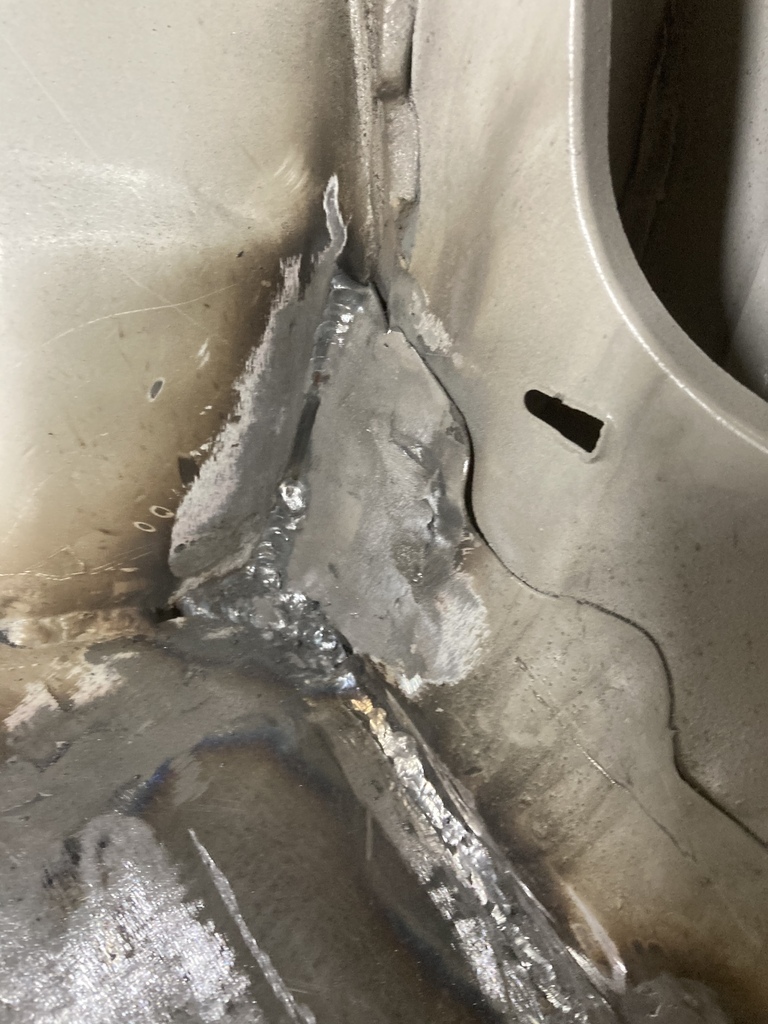 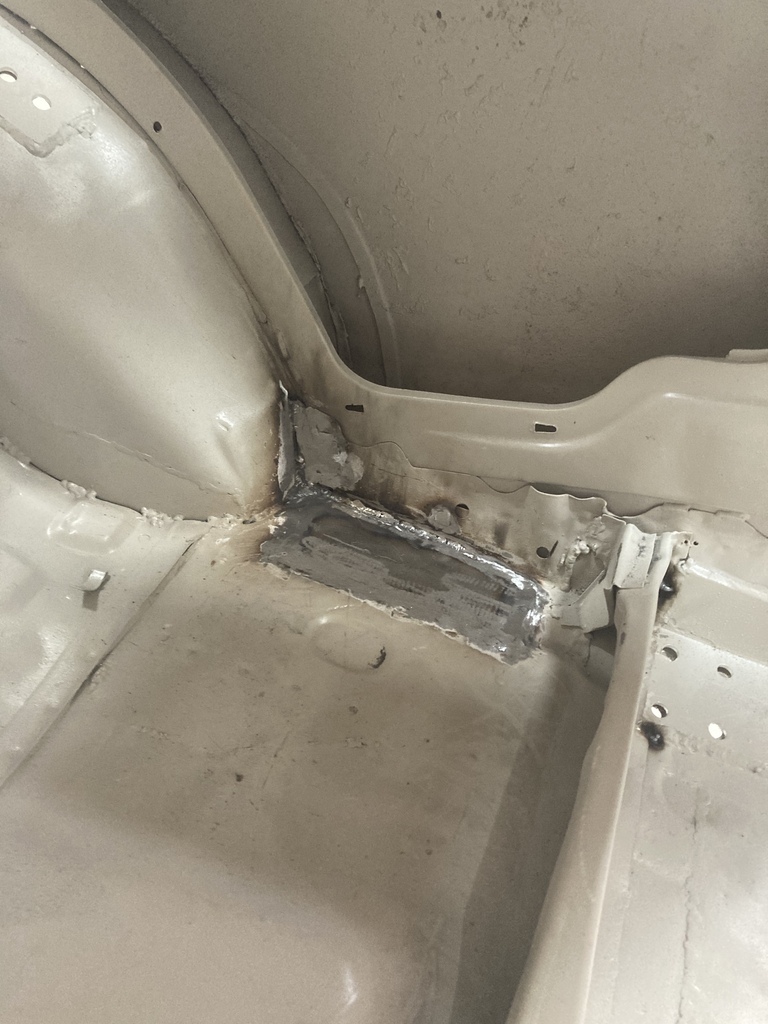 I also welded a load of pin hole in the welds on the door pillar 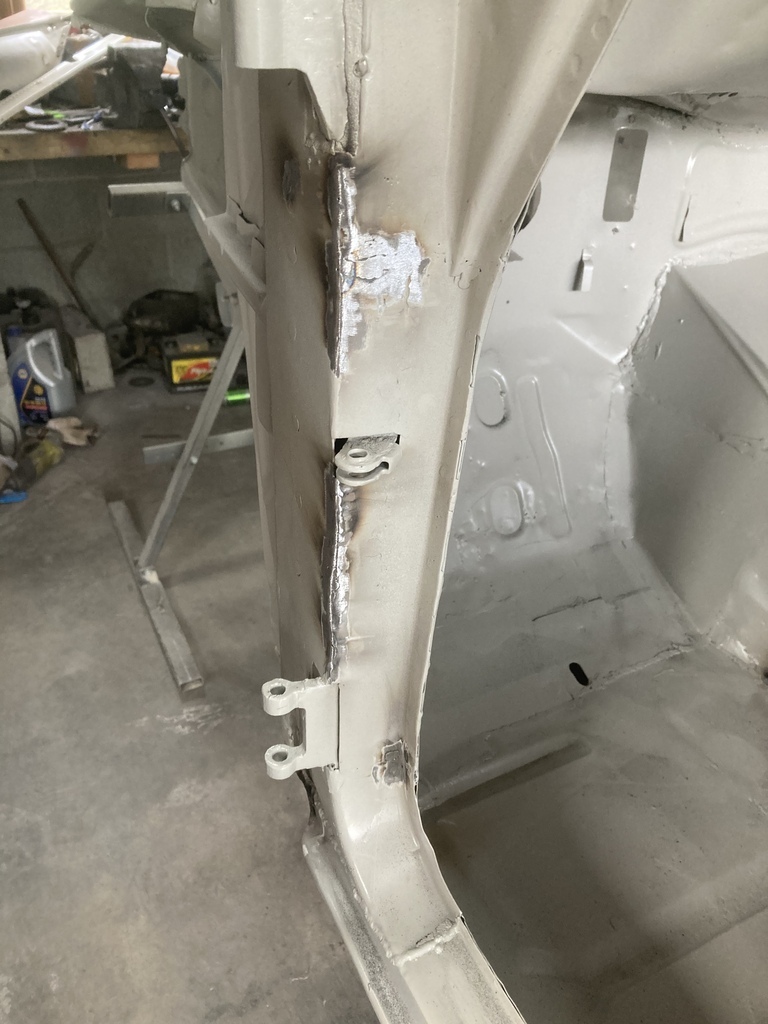 Might get some more done tomorrow before work. |
| |
|
|
|
|
|
Sept 5, 2022 11:55:37 GMT
|
Had an hour or so out the garage before work today. I ground down the underside of yesterday’s patch but no photo. I then ripped out all the under seal from one of the rear arches that the blaster couldn’t remove 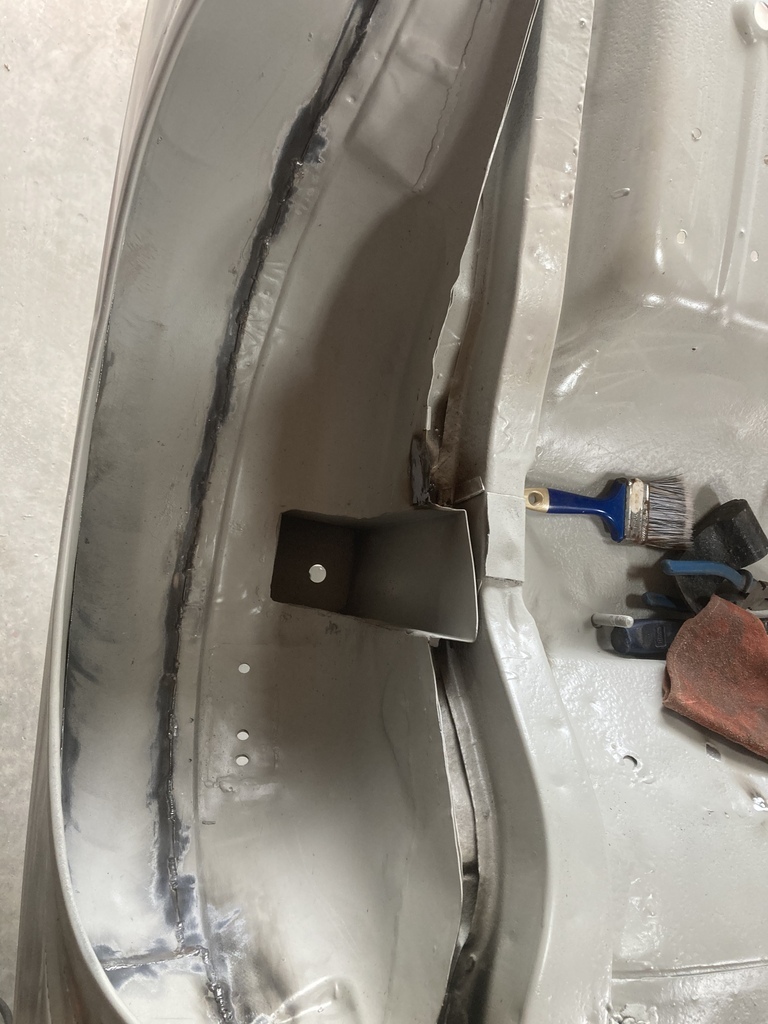 I don’t know what the stuff is but it doesn’t appear to have gone off completely even though it was put there in 2007. The guy who painted it worked in a Peugeot main dealer so may be something they use. The rear arches are “semi tubbed”. Meaning instead of cutting out the complete tub and replacing with larger items to accommodate wider wheels, the outer half of the tub which is the main restriction, is removed and a sheet of steel curved (bent around a tire) is welded to the inner tub and the rear quarter panel. When I did this originally I only stitch welded the outer to the inner so I run some fat slugs of weld in the gaps 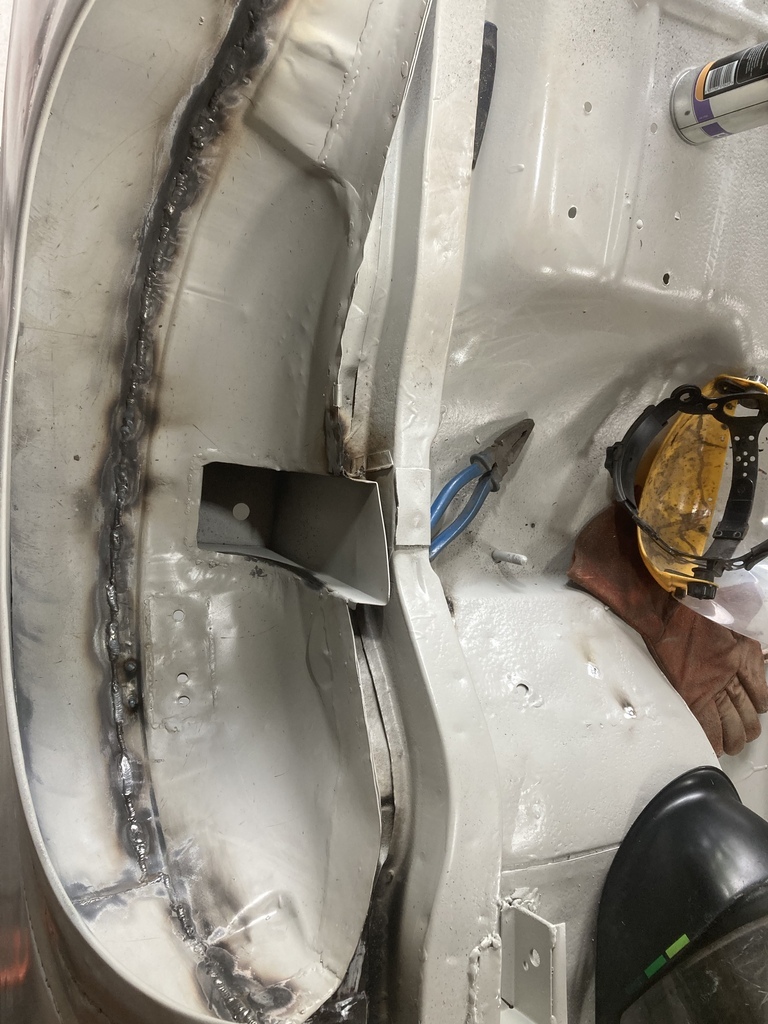 This was the rear bump stop 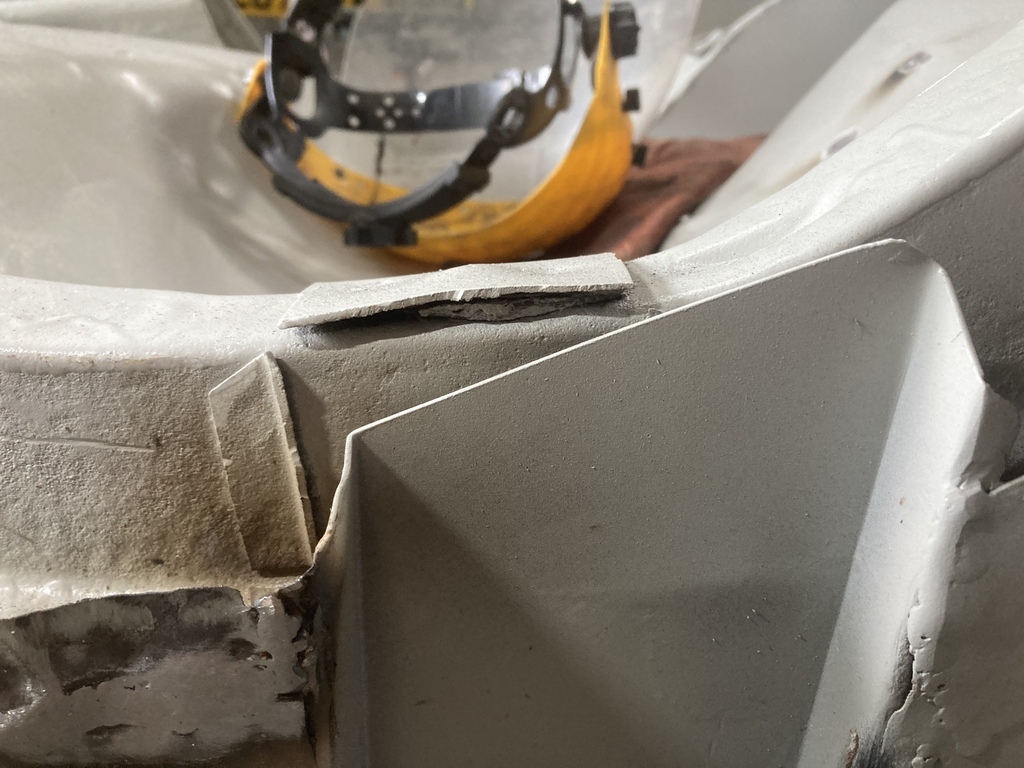 We’ll it’s half a rear pump stop as I cut the rest off to fit the suspension turret. The bump stops are now on the damper. It’s looking a bit bloated so I cut it off 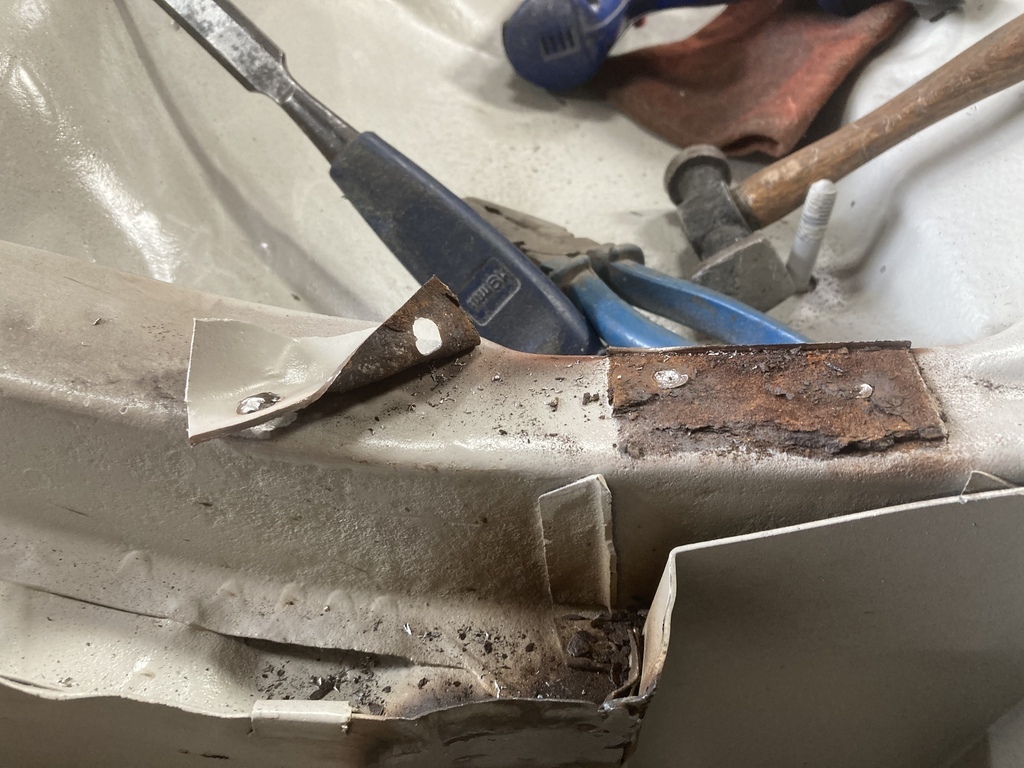 The chassis section beneath was a bit thin so I cut that out too. The inner strengthener is good. Yay 😁 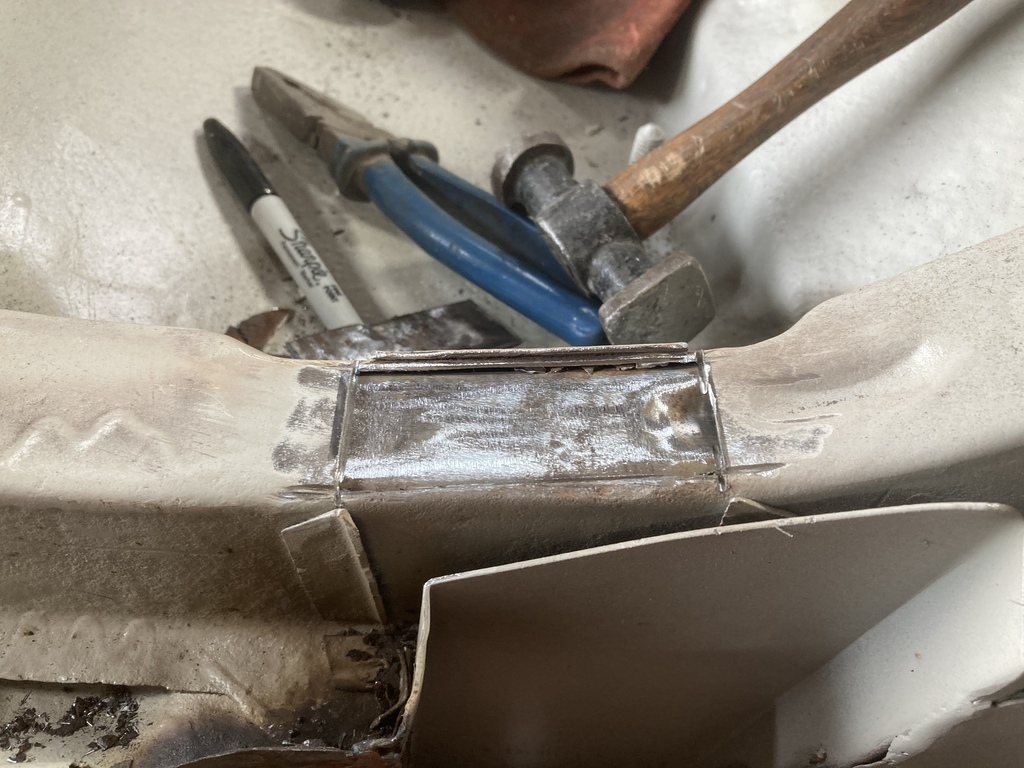 I made a bit and welded it in 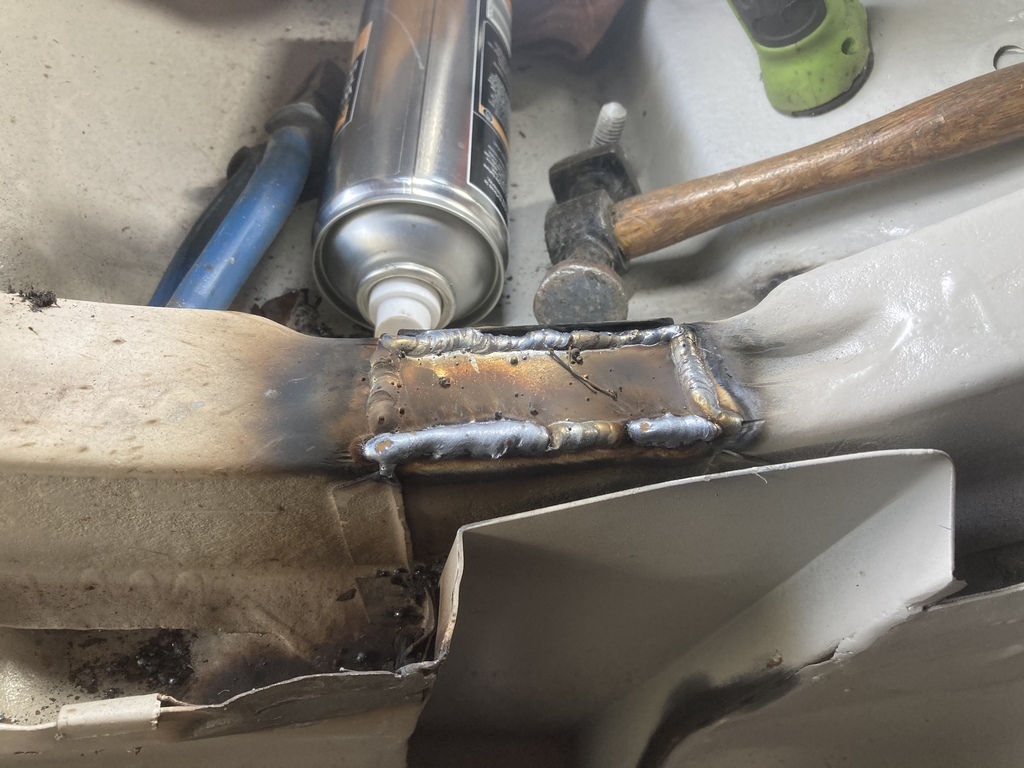 And ground it back 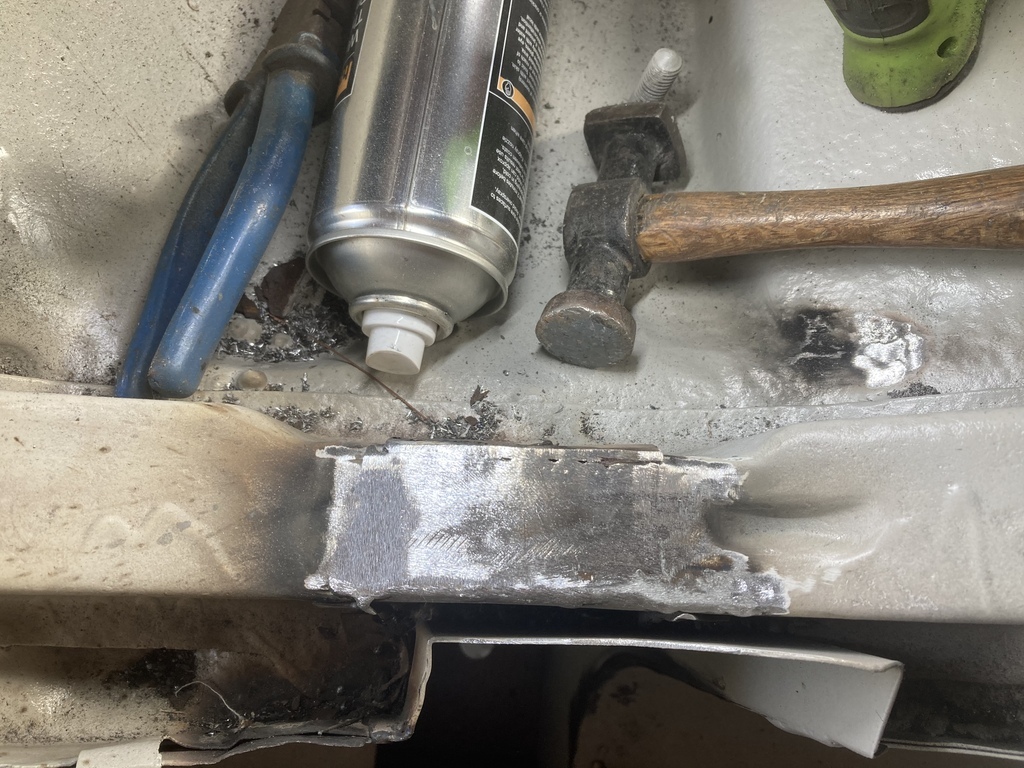 There was no need to replace the other bit of the bump stop, as like I said, it’s not used but refitted it anyway 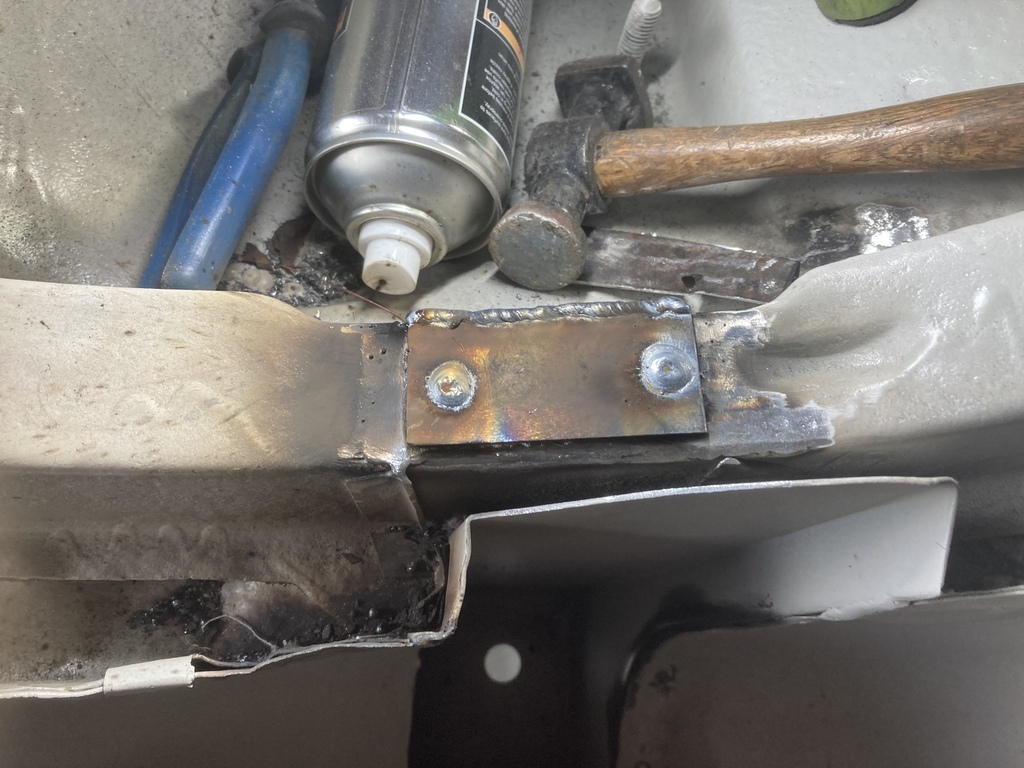 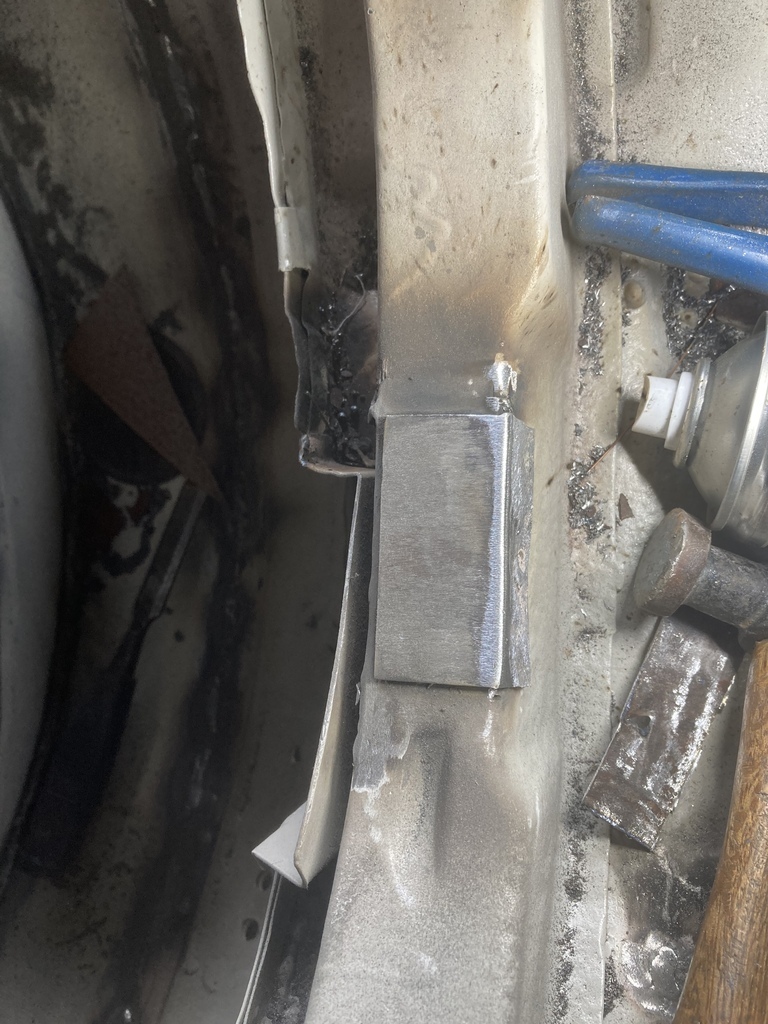 And that was that. A bit more done. |
| |
|
|
|
|
|
Sept 6, 2022 19:40:48 GMT
|
The sand blast man phoned today to say he was doing the panels I left with him. We agreed on the doors bonnet and boot lid that he would leave the outside as the paint was good and he’d just do the frames and inside to remove the grot. So bit of a panic to get home from work on time to pick them up and get them in epoxy. The weather is wet wet wet here so I didn’t want to leave them bare. My brother came over to give me a hand Cleaned out the spray booth and hung the panels on my “frame” 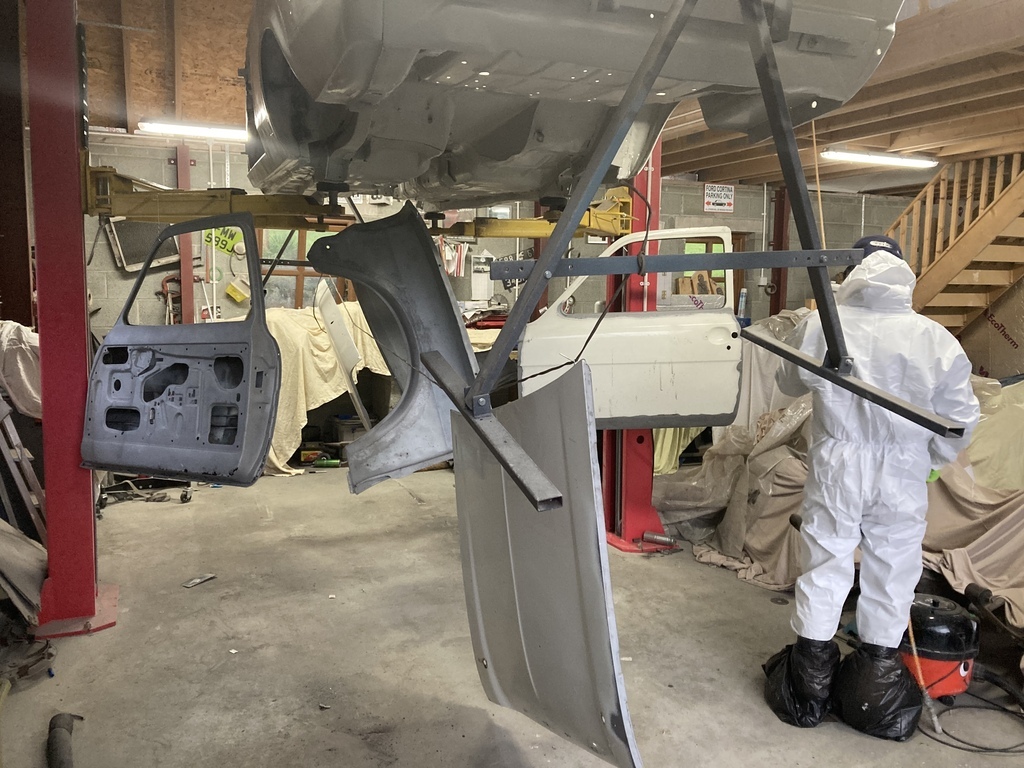 And all in epoxy 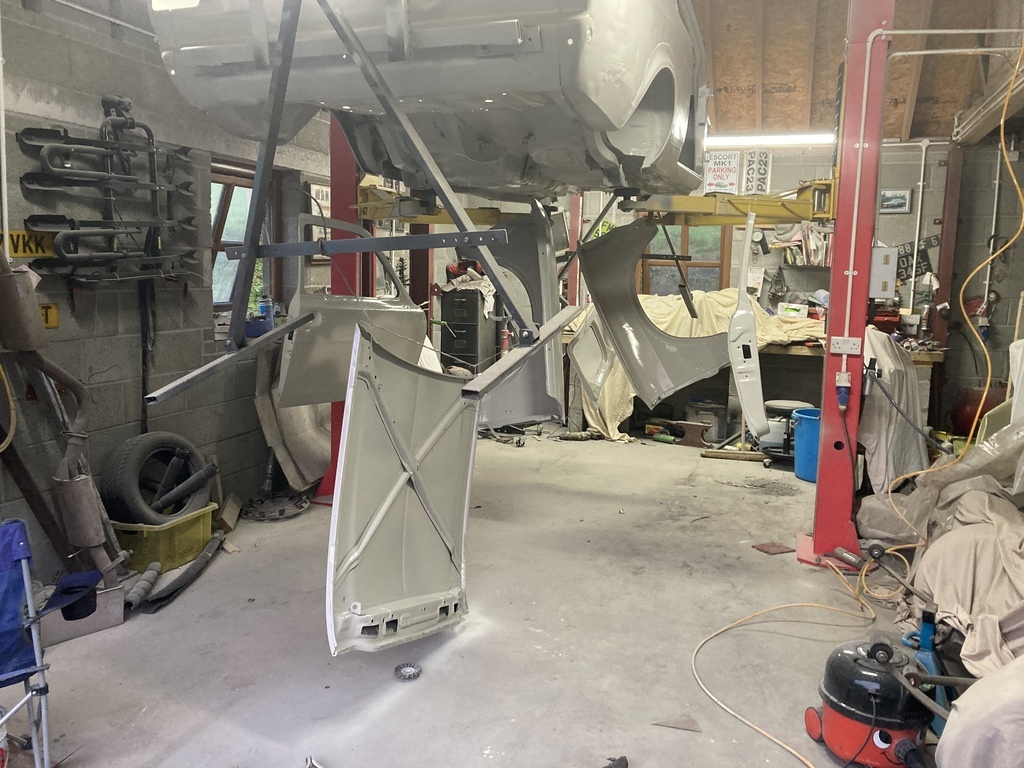 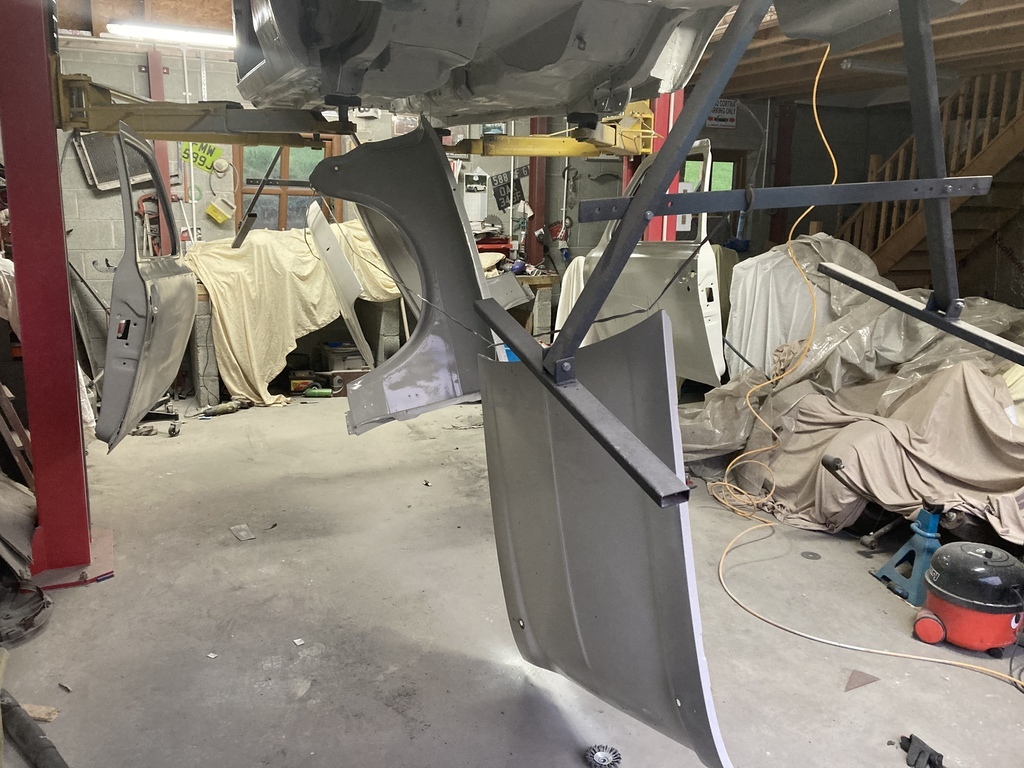 I’ll try and get some photos of the repairs that are needed tomorrow |
| |
|
|
|
|
|
Sept 7, 2022 16:50:52 GMT
|
So how did all the panels turn out after blasting, I here you ask! Wings 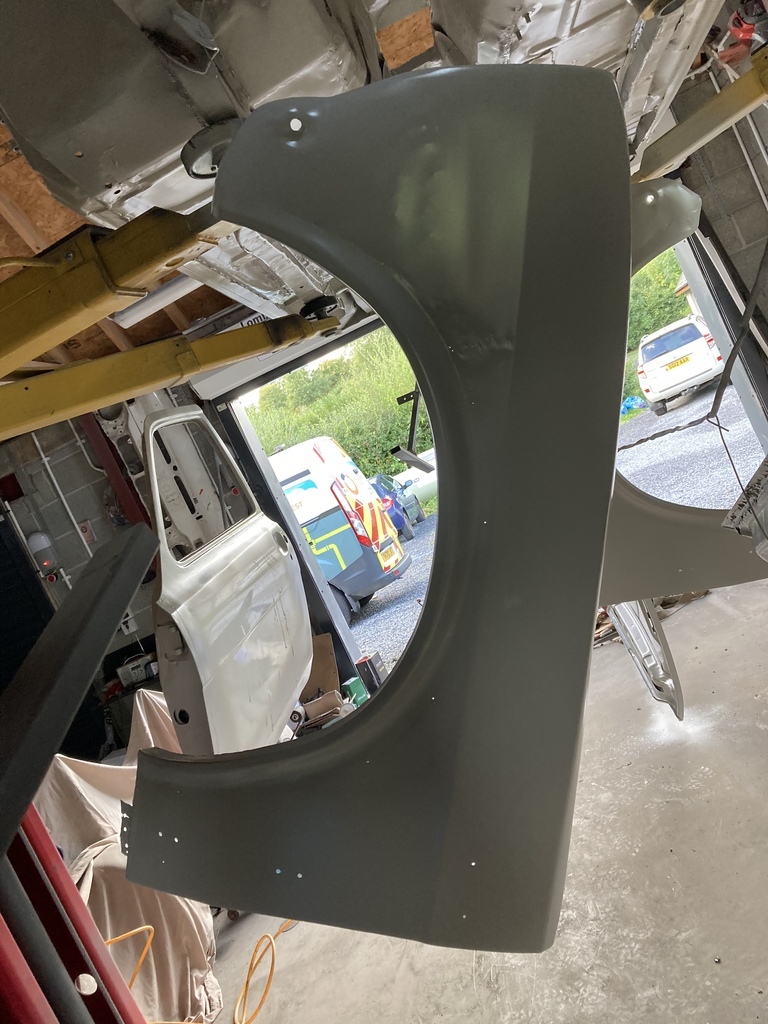 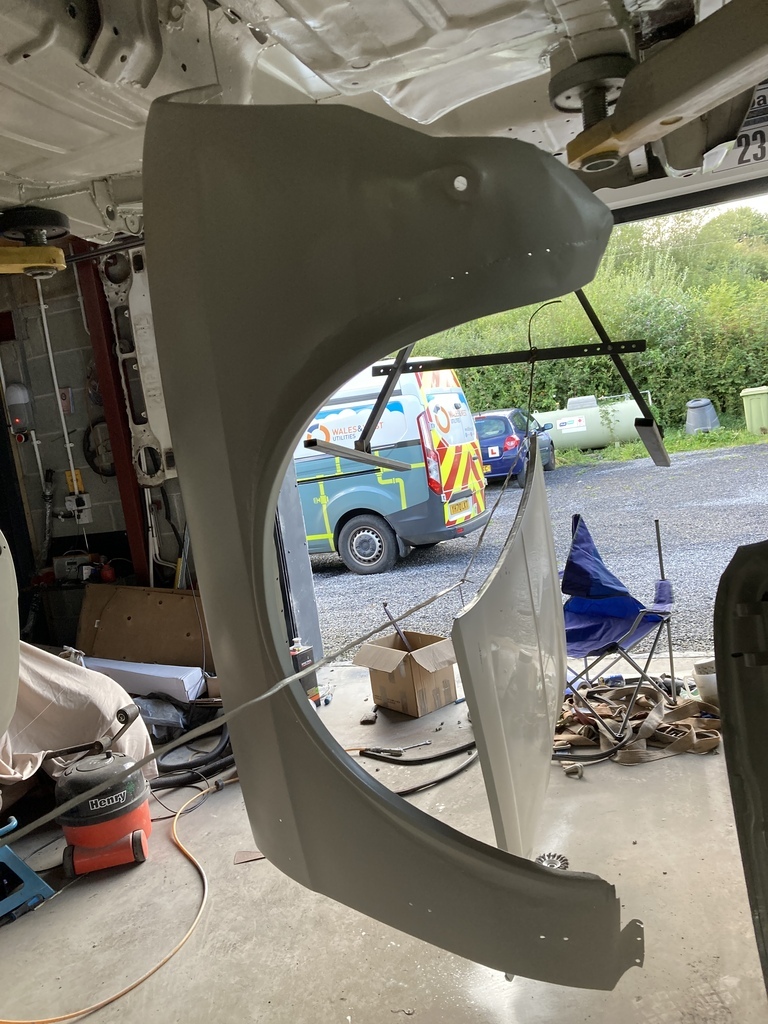 These are pretty good as they were new back in ‘97/98. I think there 1 tear in one near the front after hitting something whilst racing and a few drill holes where I’d used rivets to hold the GRP Mexico arches on. Bonnet 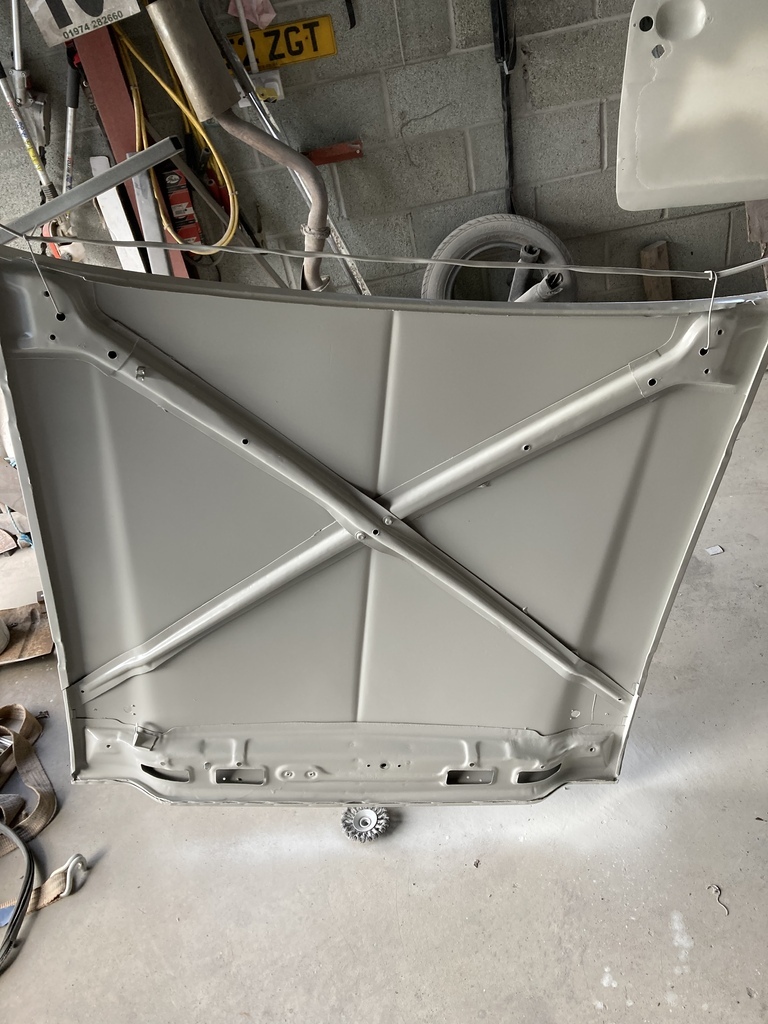 Amazingly it’s like new. Not a spot of rust.👍👍👍 Passenger door 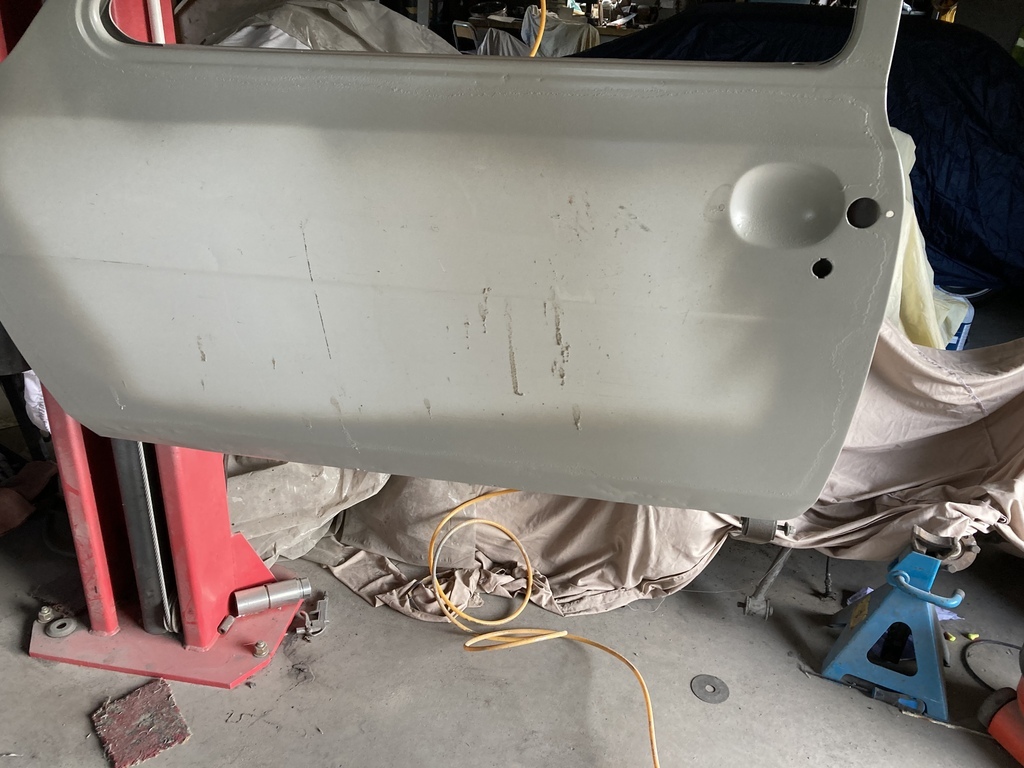 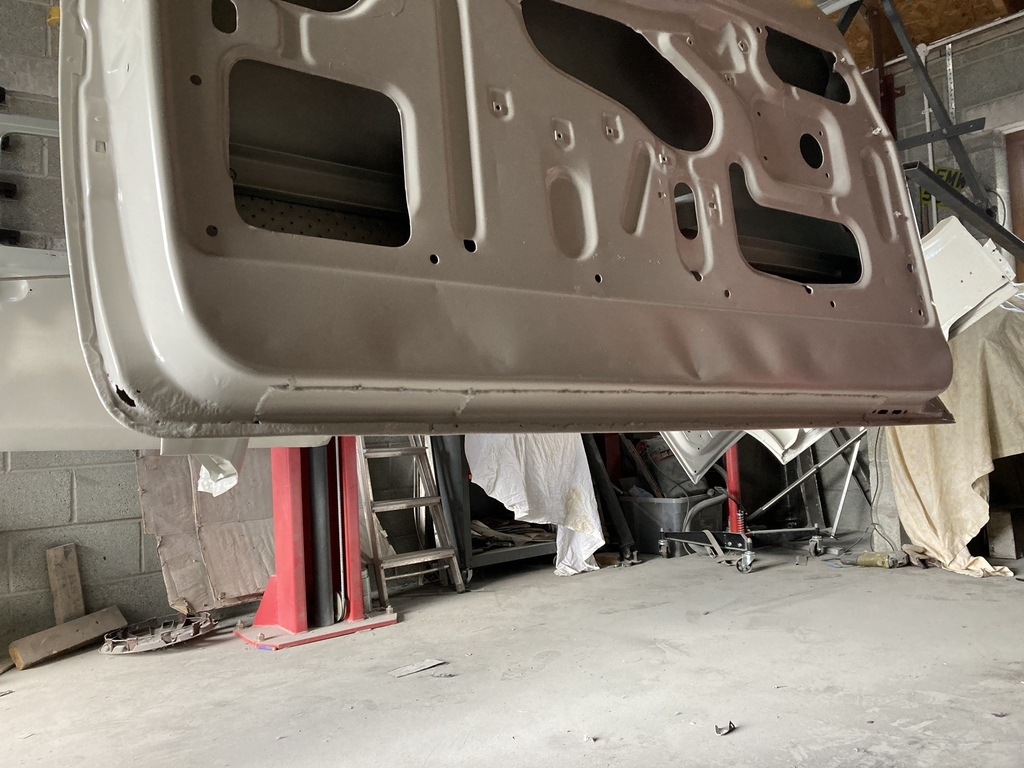 Pretty good overall. There one hole in one corner of the frame and there inner lip of the door skin at the bottom has some bits missing Driver door 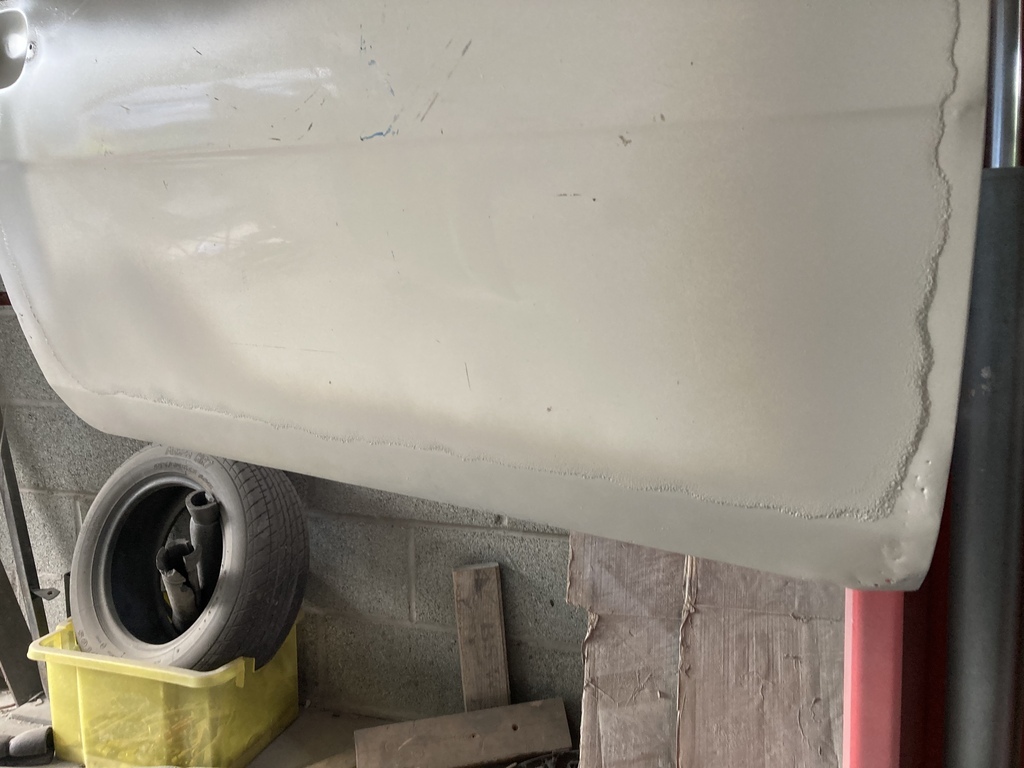 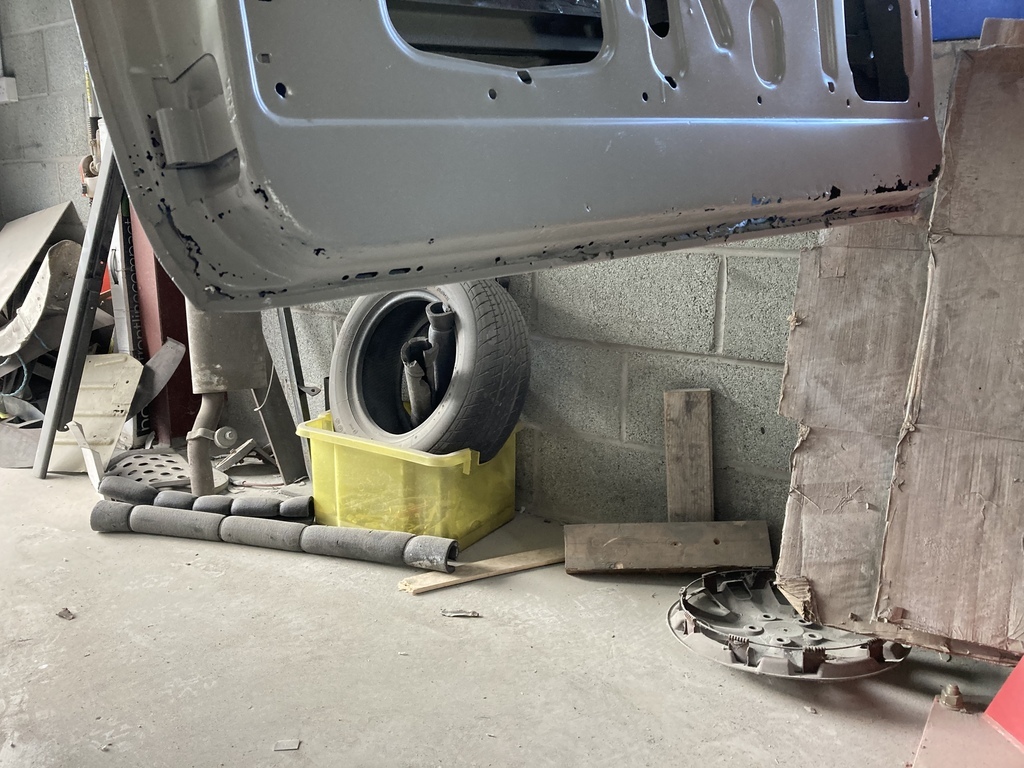 The outer skin isn’t to bad. A couple of cracks up by the window frame and some holes in one bottom corner. The frame bottom is shot. Could be some tricky repairs here, but all doable. I new this was bad as I’d asked the painter to fill it with clag back in 2007. Obviously it’s got worse Boot 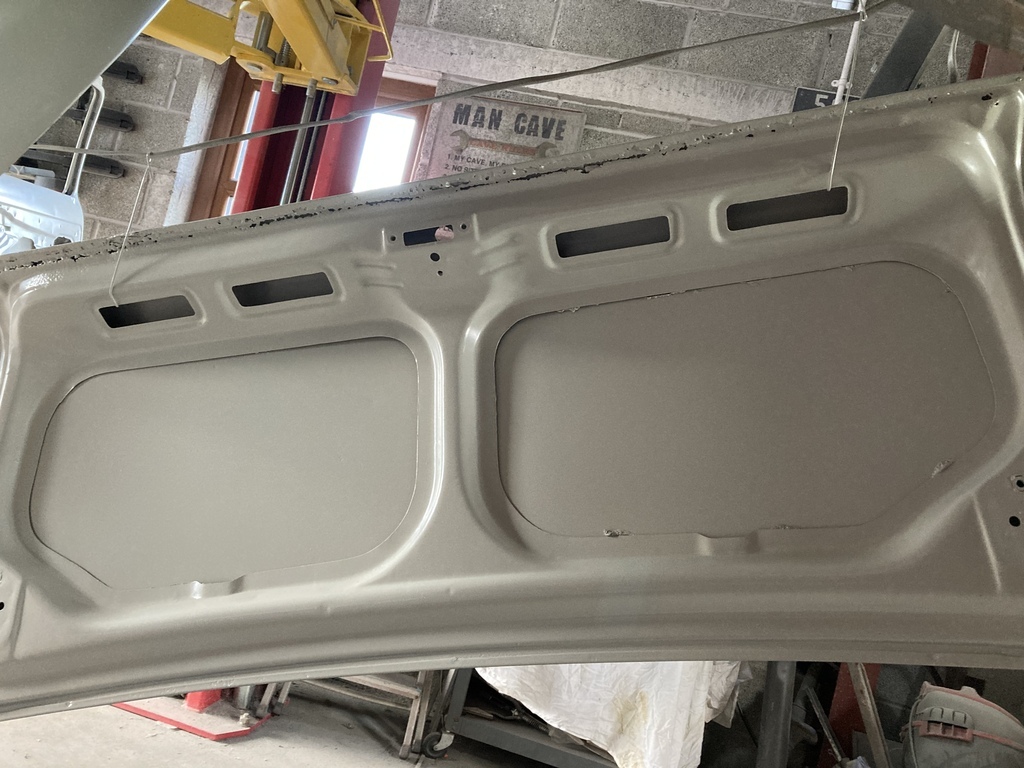 Generally not to bad but the trailing edge of the frame is shot. I think it was quite thin years ago. Most of it will be sorted with one length of folded steel though. So all in all not to bad. This cost me another £300 to reveal another few weekends work 😩. |
| |
Last Edit: Sept 7, 2022 16:55:03 GMT by jonsey
|
|
|
|
|
Sept 8, 2022 16:32:49 GMT
|
I managed to get off work a few hours early today, with the added bonus of Mrs Jonsey still being in work so I don’t get nagged to do Stuff. I painted all of the repairs I’ve done so far with some epoxy that was left over from spraying the panels. No photos of that. I then sorted a couple of holes in the roof / rear window aperture Holes 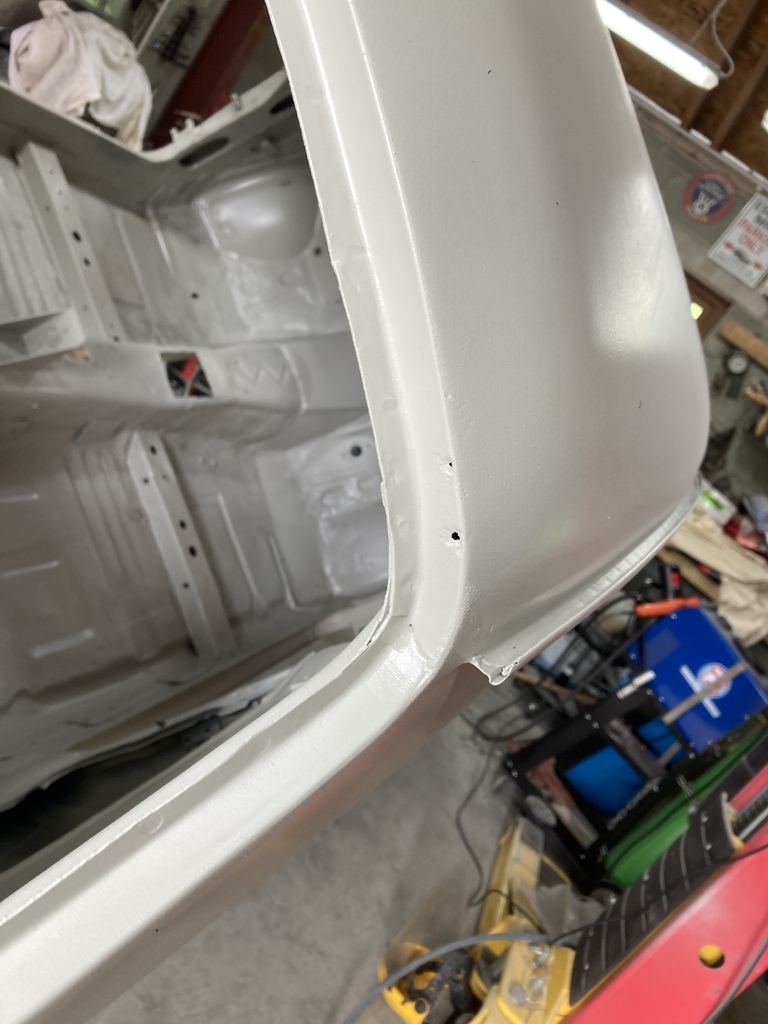 Bigger holes, ground out with the die grinder 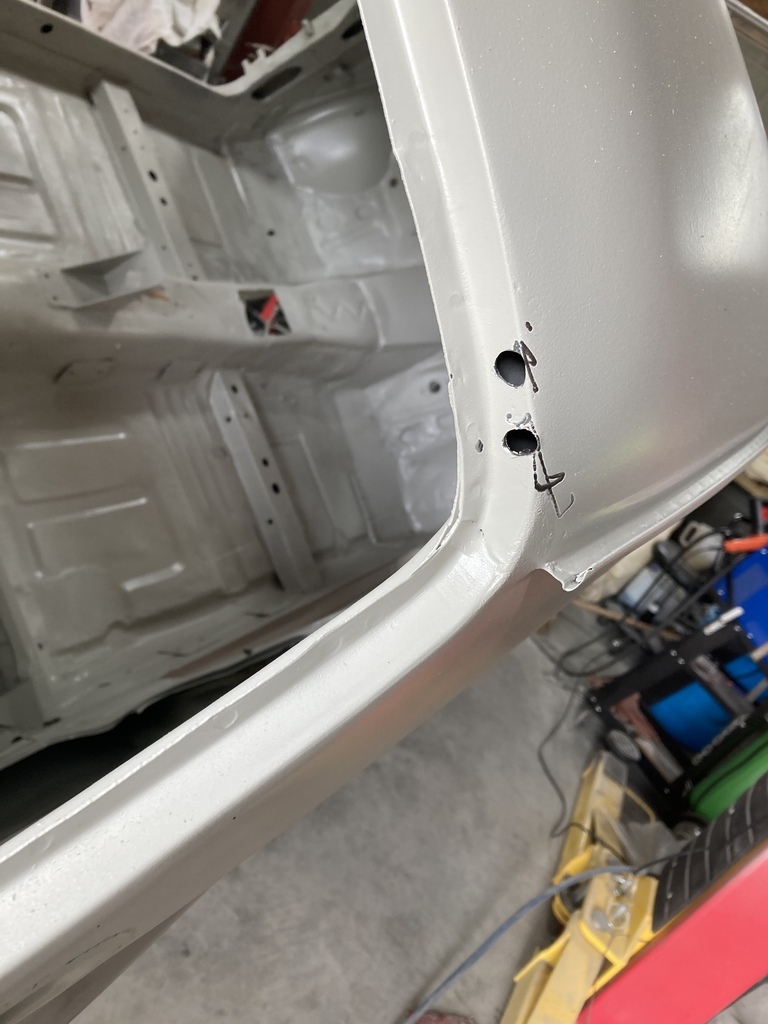 I’ve always struggled making little bits to fill this sort of thing, tying to hold it with a magnet that never lets the welder work properly. But I had an epiphany 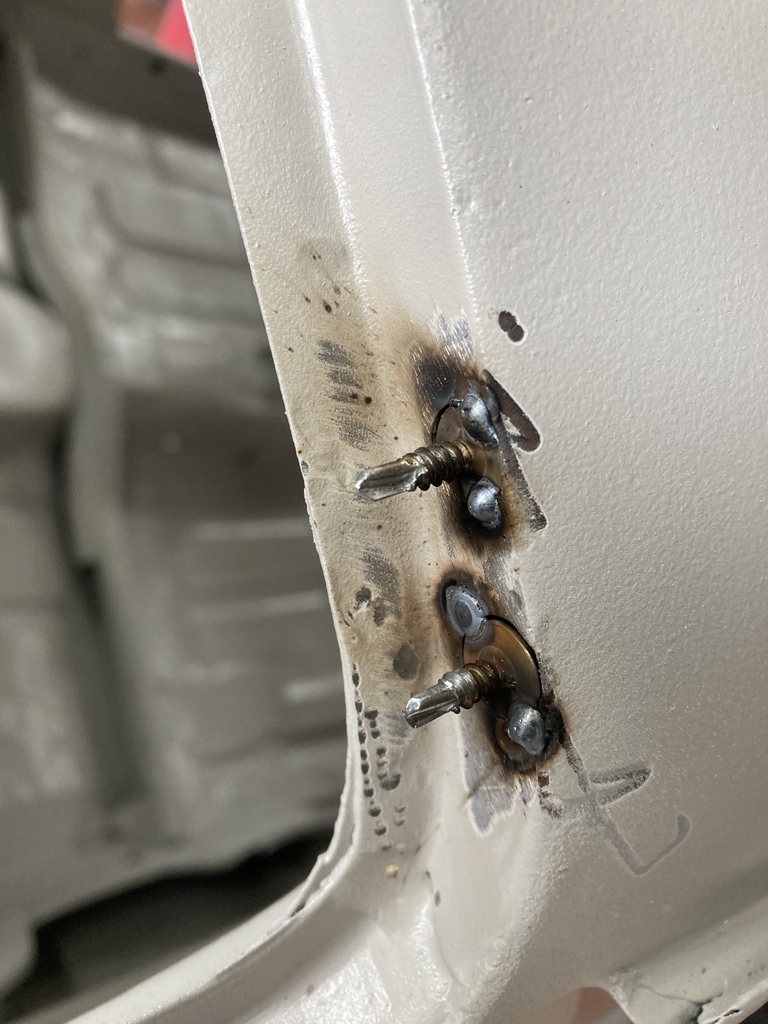 You can hold the screw with a pliers while you weld! All welded in. 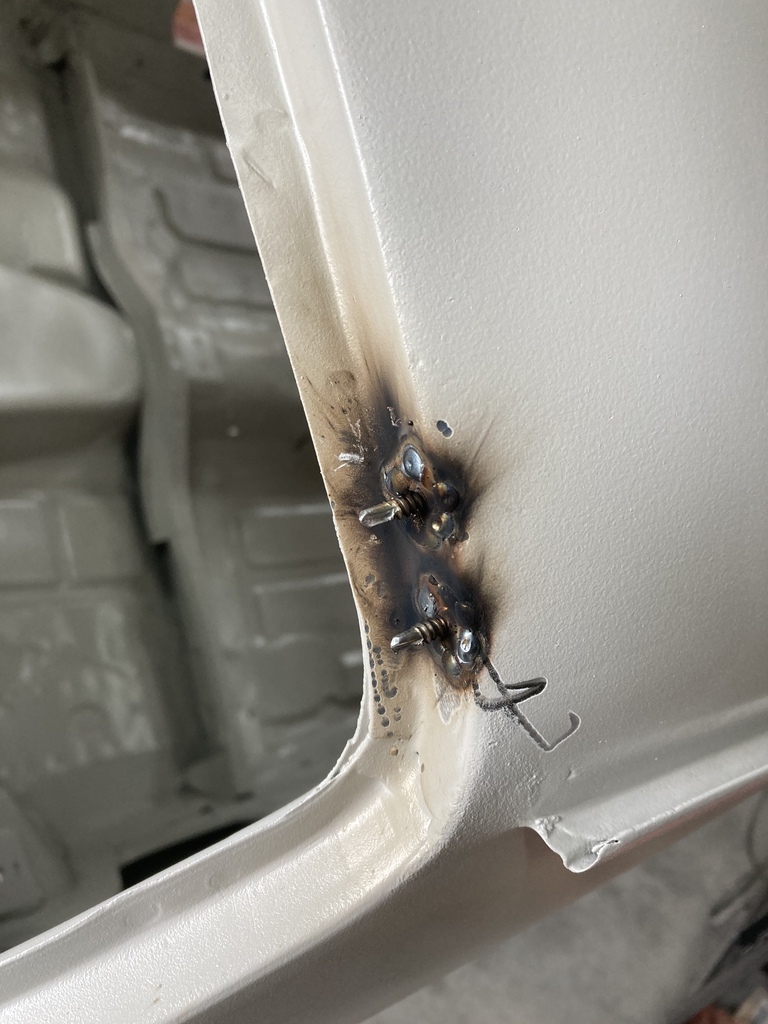 And all ground off 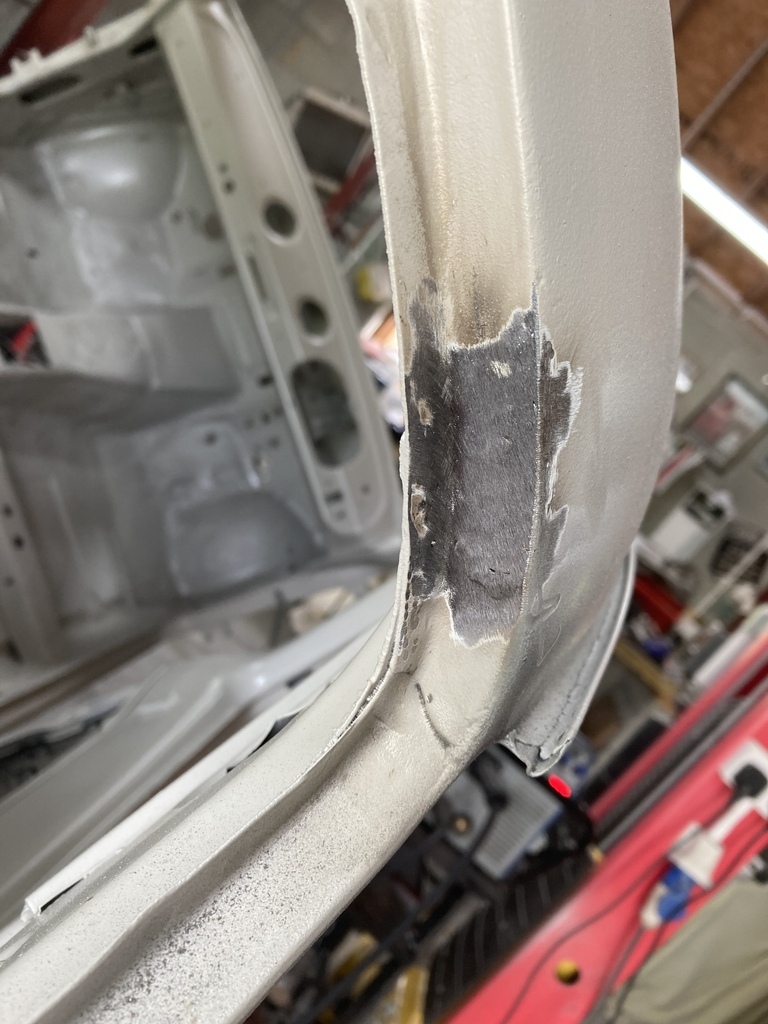 Only really suitable for when you can’t see the back This is the boot drip rail where the rear panel meets the rear quarter. The hole was there before blasting 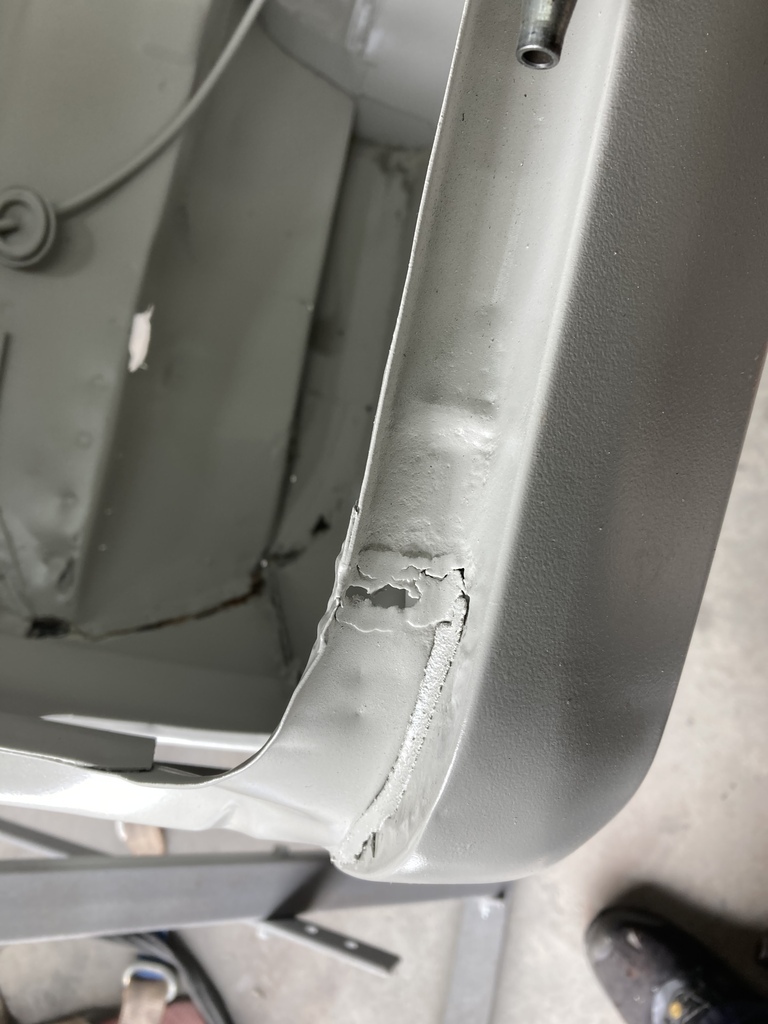 Bigger hole with a bit tacked in 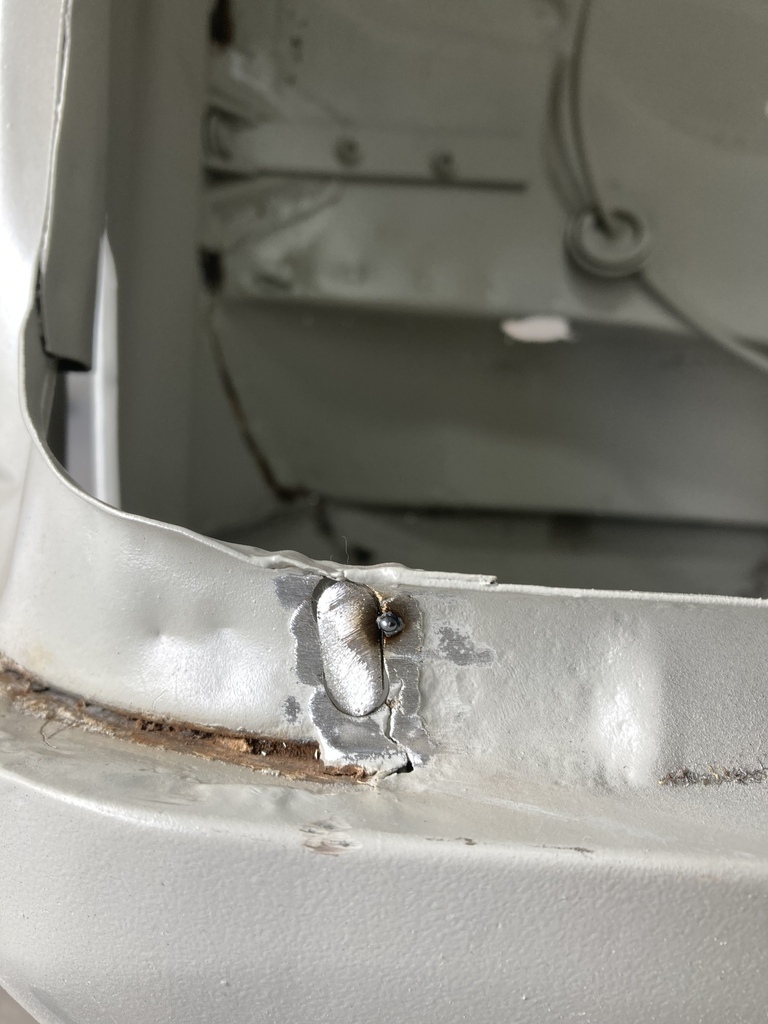 Bit welded in 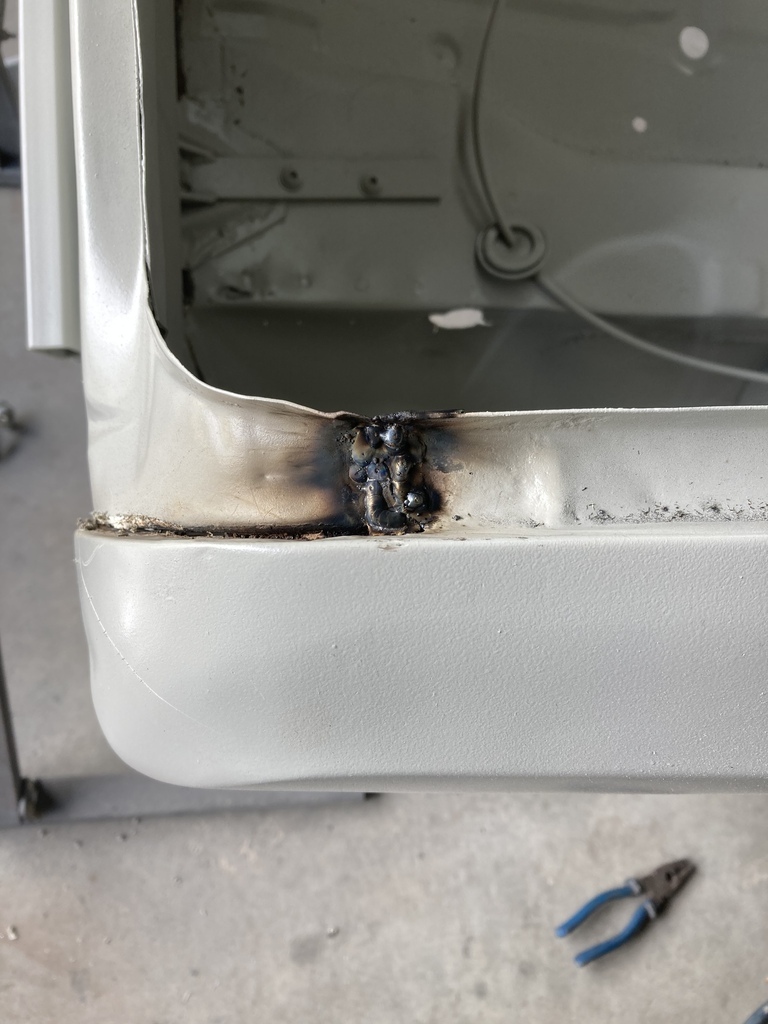 And ground back 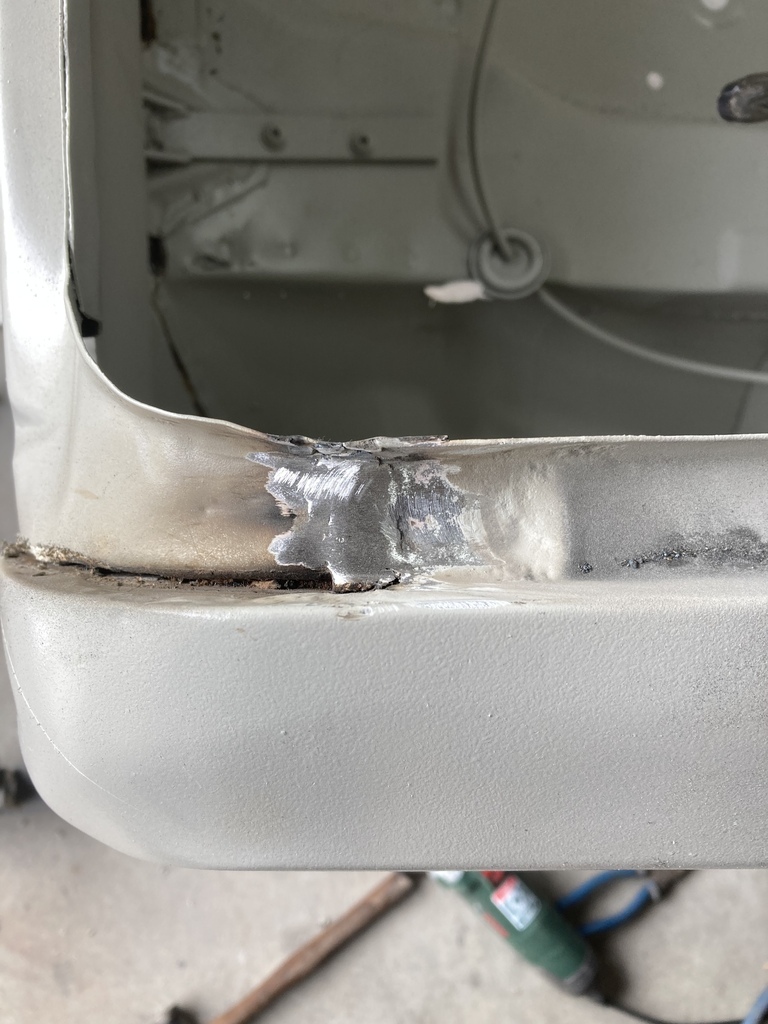 I’m off tomorrow as I’m going to London in the afternoon but might get something done in the morning if I’m allowed |
| |
|
|
|
|
|
Sept 9, 2022 13:27:16 GMT
|
I managed to get a couple of hours in this morning. I new this was grotty before blasting 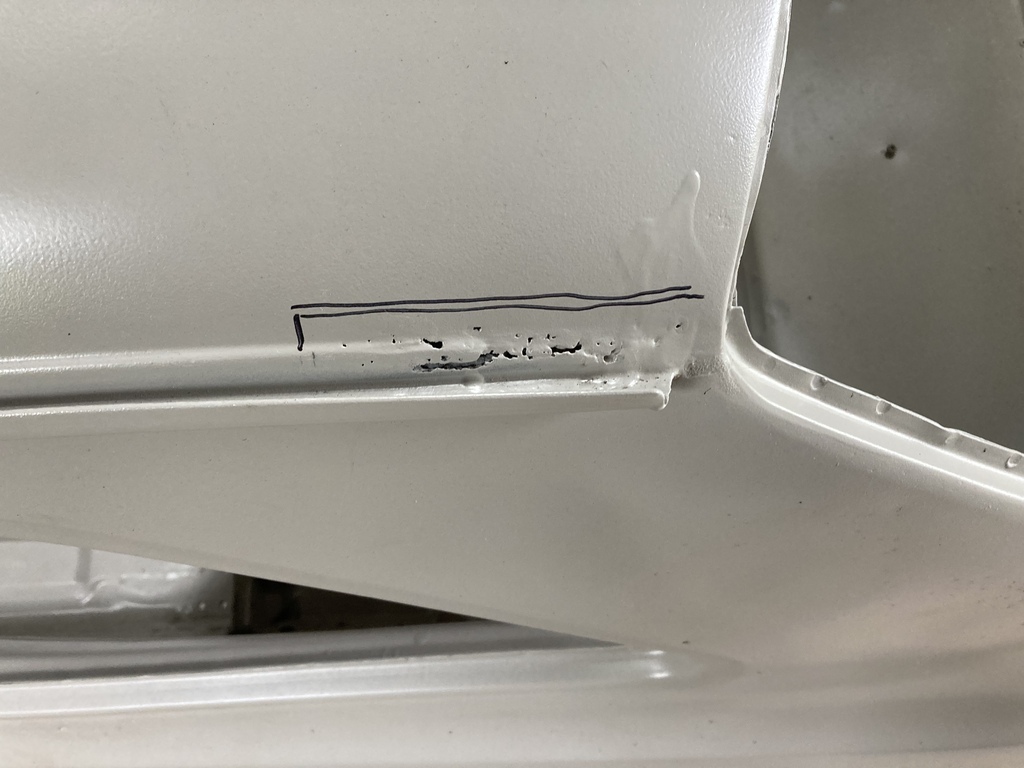 Made a bit. I ground a bit of 3mm steel to the profile of the swage line, clamped it in the vice with a bit of tin and used a hammer and blunt chisel to bash the shape in. 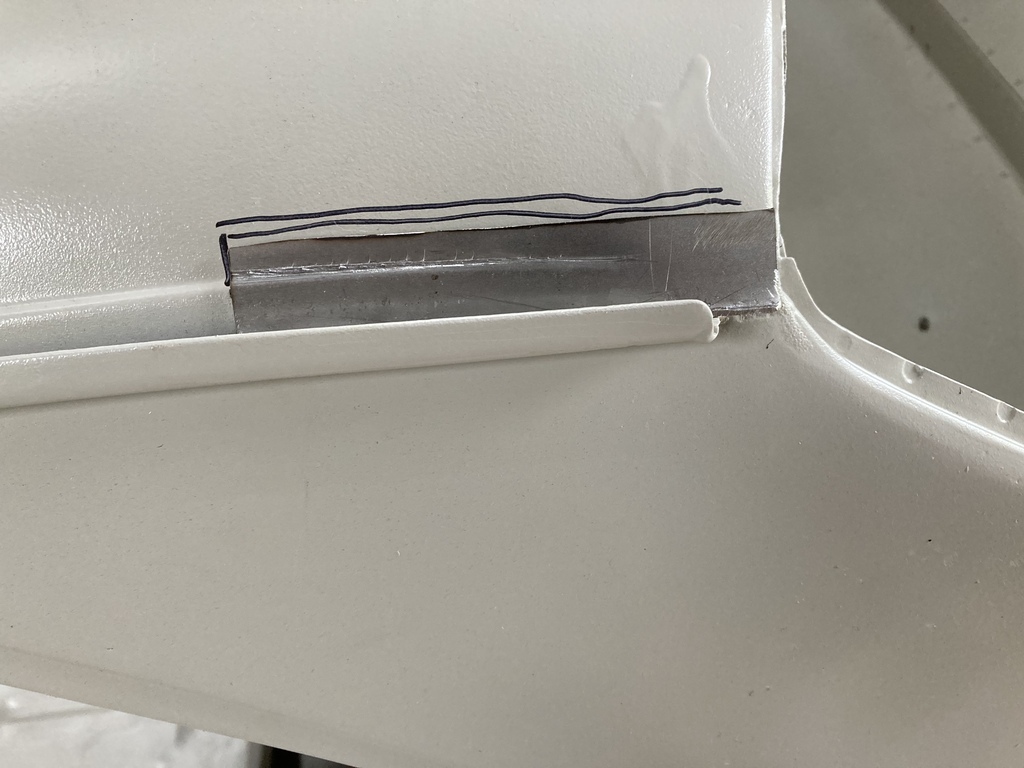 Cut out the grot and tacked in 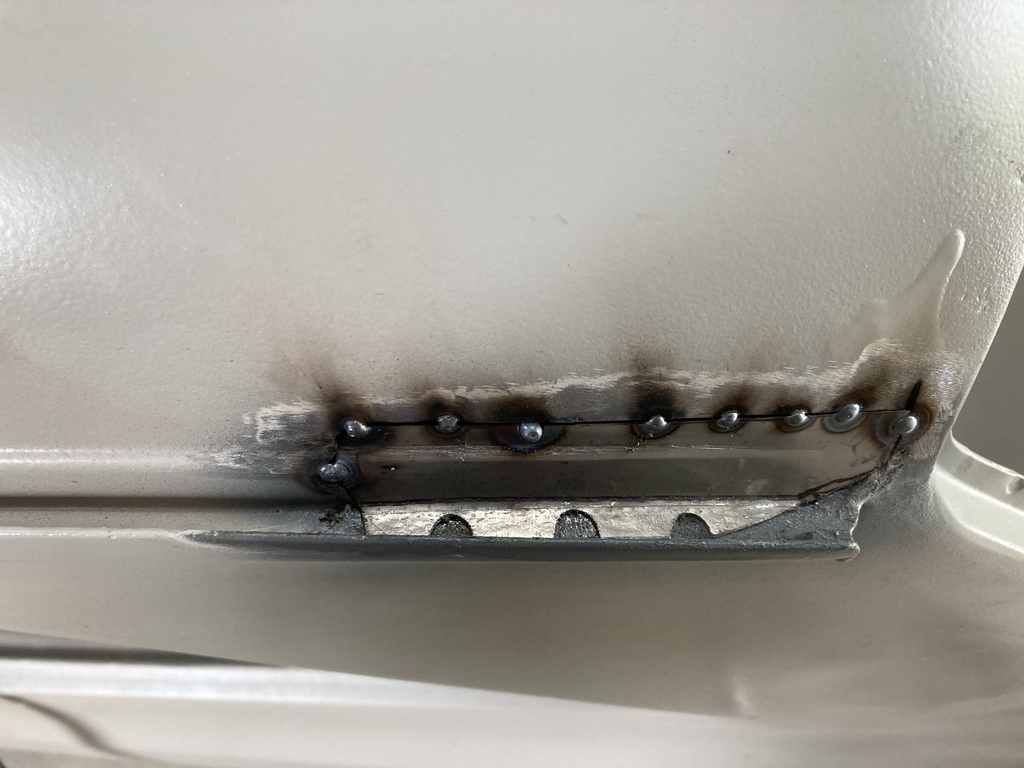 Welded 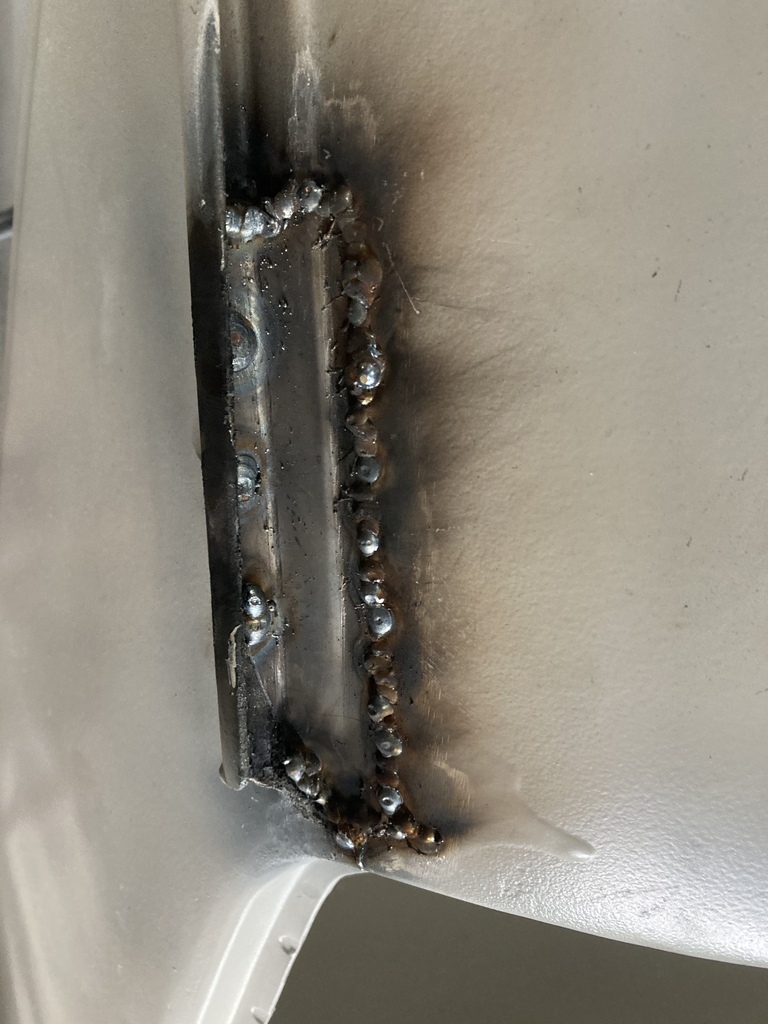 And ground back 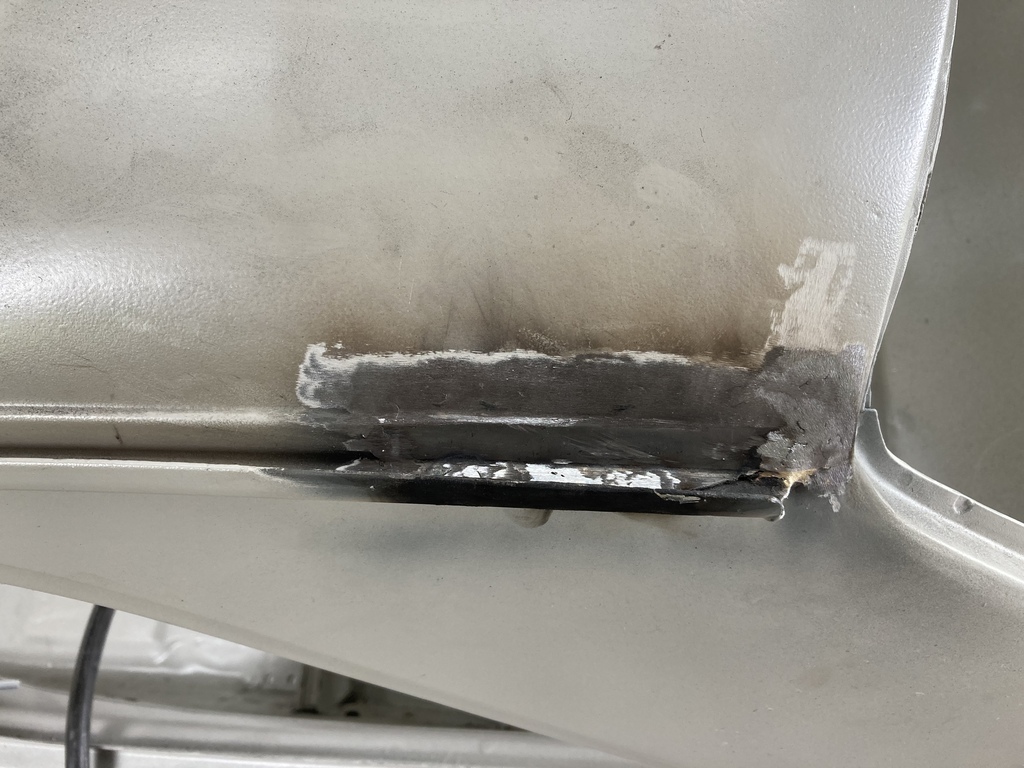 I also filled in a couple of trim holes and some pin holes but no photos. Hopefully more on Sunday |
| |
|
|
|
|
|
Sept 11, 2022 15:54:22 GMT
|
I wasn’t really in the mood for working on the car today so in the morning I went to watch a bit of the Motorkhana at Pembrey Citcuit. I watched about 3 stages, had a burger and came home. I went in the Cortina as it was filthy so I thought I’d wash it when I got back. I even washed the Rav4 which is white and gets really dirty. No photos of any of this. In the afternoon I did muster some energy to fit the heater bowl. This and the scuttle grille are riveted together and the grille is screwed to the bulkhead. I did this so the bowl sat in the correct position before welding. Welded on 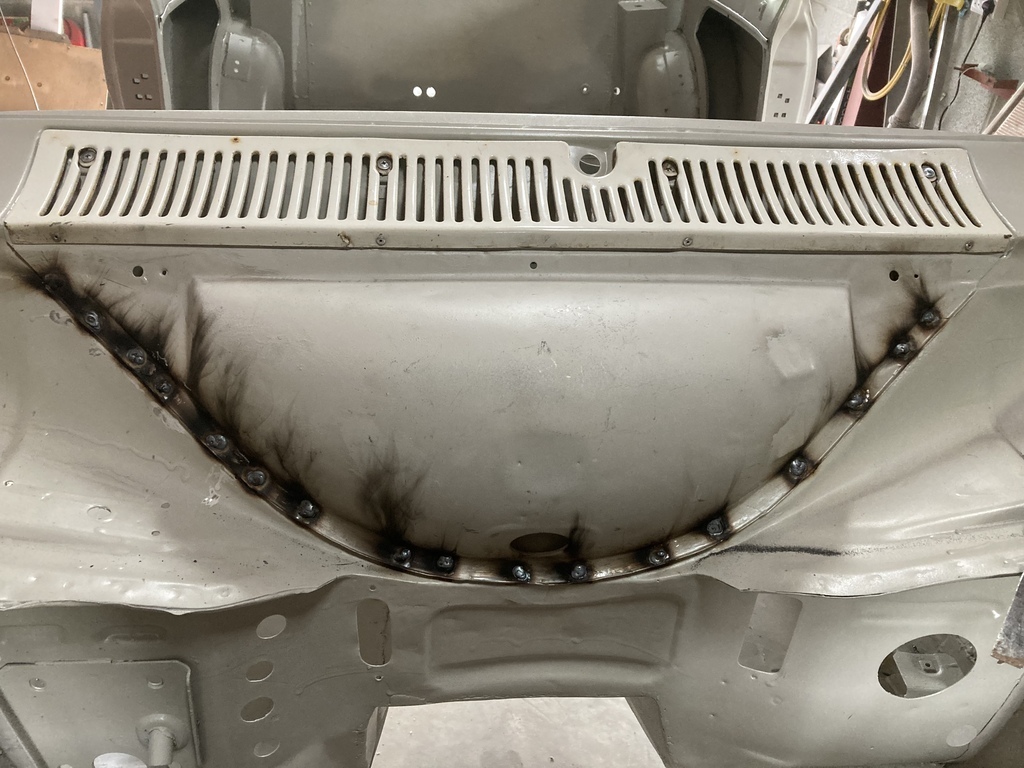 Welds knocked back with the stone on the grinder 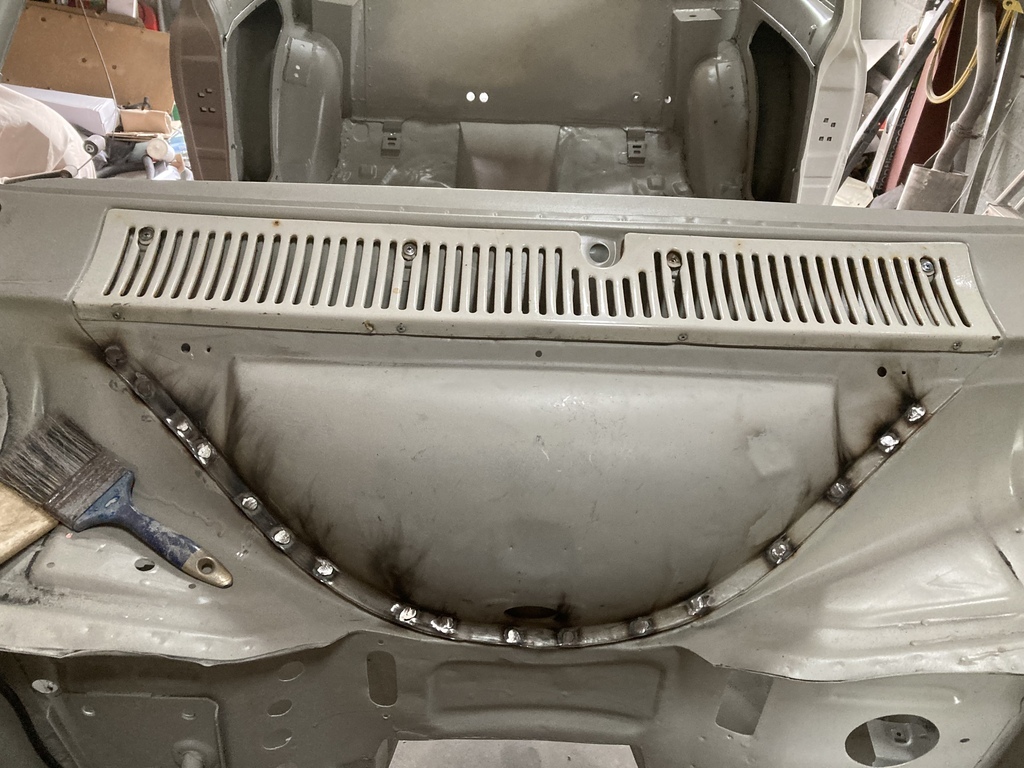 And buffed of with the power file as best I could 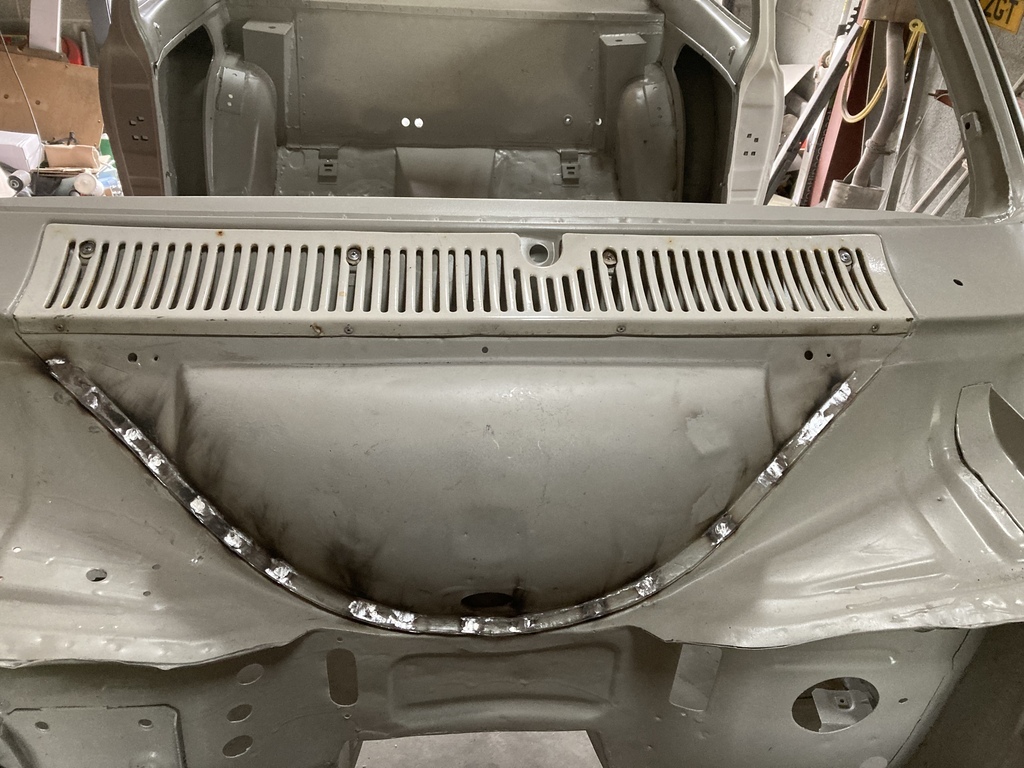 And a shot of all the epoxy burnt off on the inside of the bulkhead 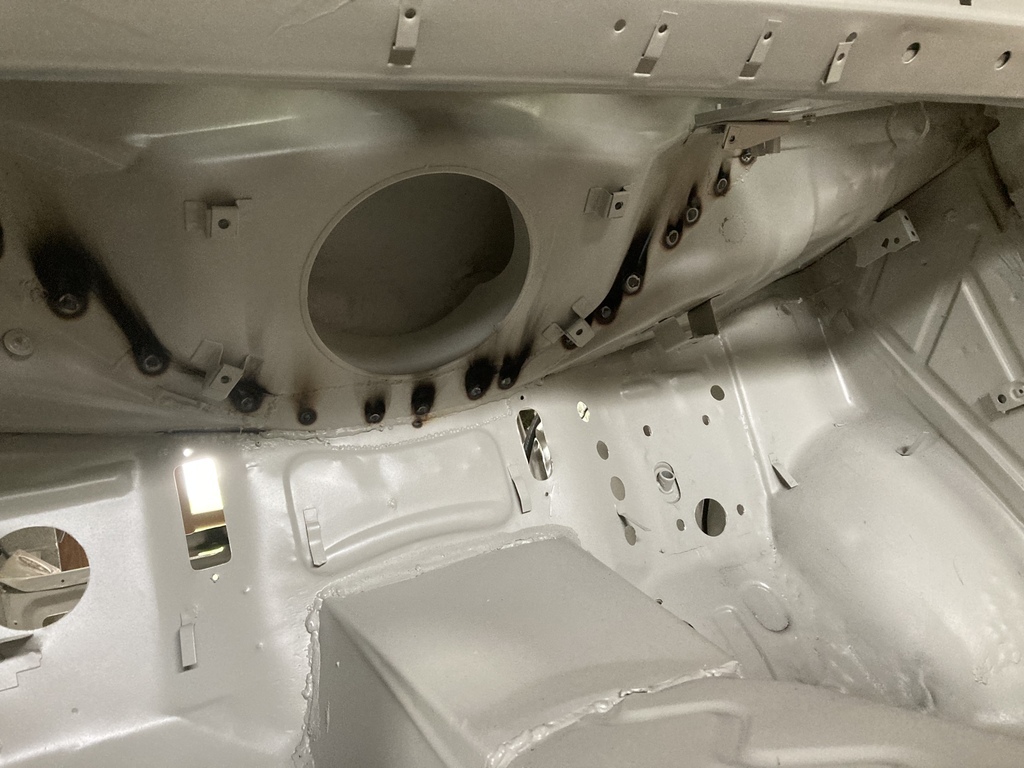 There are two more welds under the grille to do but I forgot about those. When the grille is off I’m going to pore some epoxy into the heater bowl from each side to try and fill the seam between it and the bulkhead. Hopefully this will stop rain water getting to where I don’t want it and rotting the whole lot again. |
| |
|
|
ChrisT
Club Retro Rides Member
Posts: 1,670
Club RR Member Number: 225
|
|
Sept 11, 2022 16:27:04 GMT
|
|
Probably too late now but IIRC in one of their recent videos Retropower were figuring out a way of making that area not such a rust trap, can't remember what the solution was though..
|
| |
|
|
|
|
|
Sept 11, 2022 16:37:40 GMT
|
Probably too late now but IIRC in one of their recent videos Retropower were figuring out a way of making that area not such a rust trap, can't remember what the solution was though.. I’ve been watching the series but can’t remember either. The main problem is that the drain hole at the bottom, is not really the lowest point, so water can sit there and do it’s worst. I’m hoping the epoxy idea will resolve this by pouring it in until it runs out of the drain. Therefore filling the lowest point. |
| |
Last Edit: Sept 11, 2022 16:38:17 GMT by jonsey
|
|
ChrisT
Club Retro Rides Member
Posts: 1,670
Club RR Member Number: 225
|
|
Sept 11, 2022 16:50:27 GMT
|
|
Sounds like a good idea to me.
|
| |
|
|
|
|
|
Sept 11, 2022 17:09:20 GMT
|
|
Is the shell still on the rotisserie? If so you could rotate it to get proofer well into the seams all round.
|
| |
Last Edit: Sept 11, 2022 17:10:03 GMT by westbay
|
|
|
|
|
Sept 11, 2022 17:51:21 GMT
|
Is the shell still on the rotisserie? If so you could rotate it to get proofer well into the seams all round. Yes Mr Bay. Still on the rotisserie. Good idea to give it a spin to makes sure all the seam is covered |
| |
|
|
|
|
|
Sept 19, 2022 16:36:07 GMT
|
I had a busy day in work yesterday so didn’t fancy doing a lot. A fuel tank strap had snapped on the van so was going to fit the new one but decided to paint it first to give it a bit more chance. But just doing that got me in the mood, so I decided to start on the boot floor of the Escort. First I had take it off the rotisserie as I needed to take the bumper strengthener off and this is where the rotisserie is bolted on. 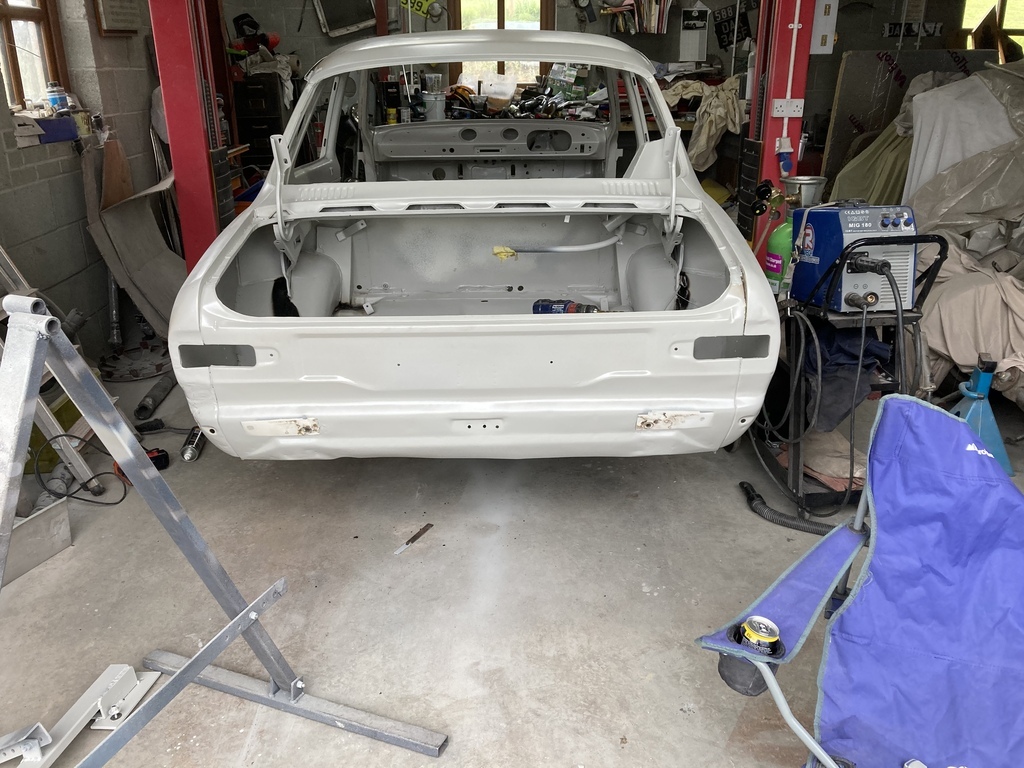 About 12” of the boot floor is like a doily here. I have removed the bolt on strengthener I fitted as I also use the bumper mount as a tow point. 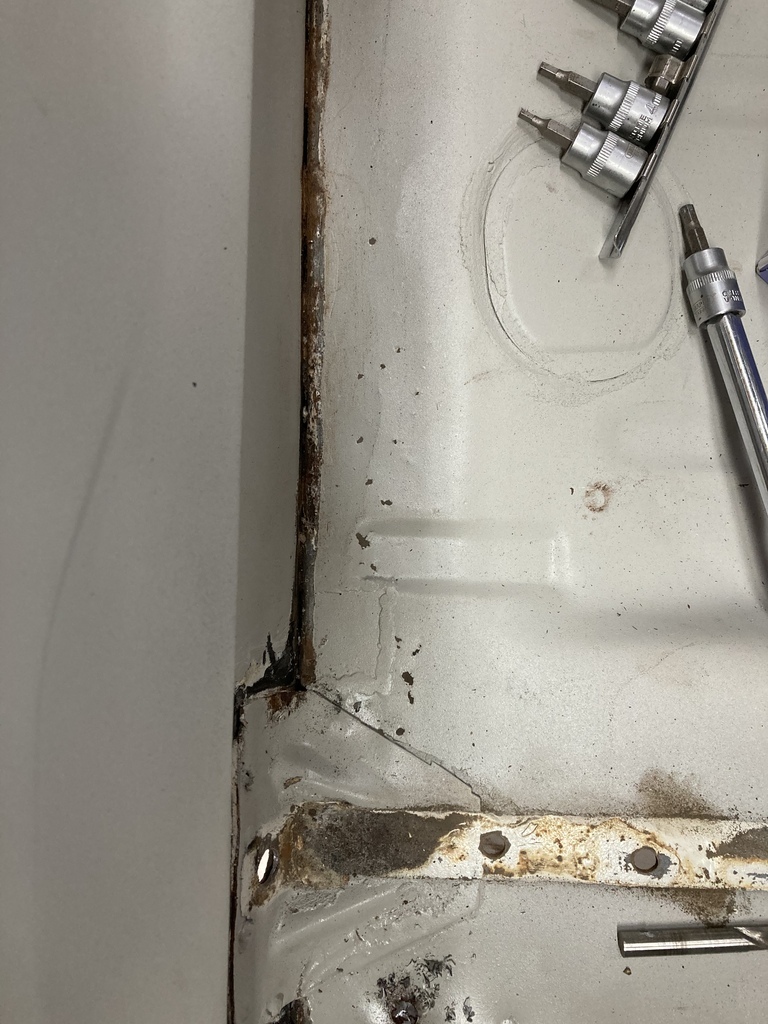 Boot floor and bumper strengthener out. 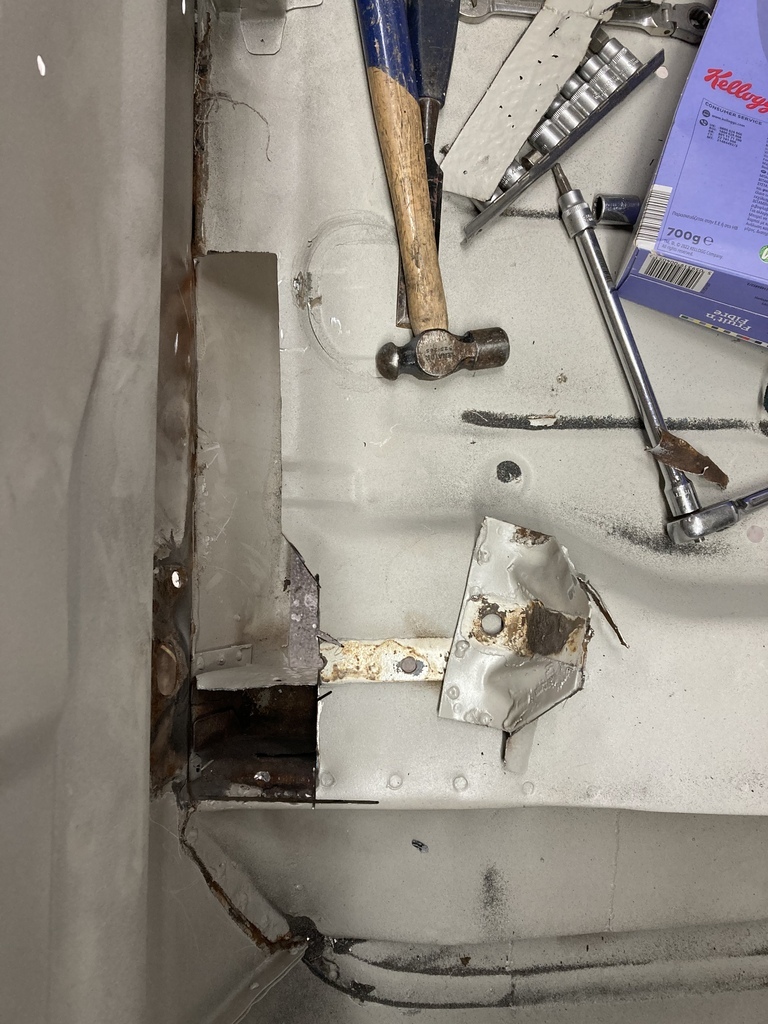 Bit made 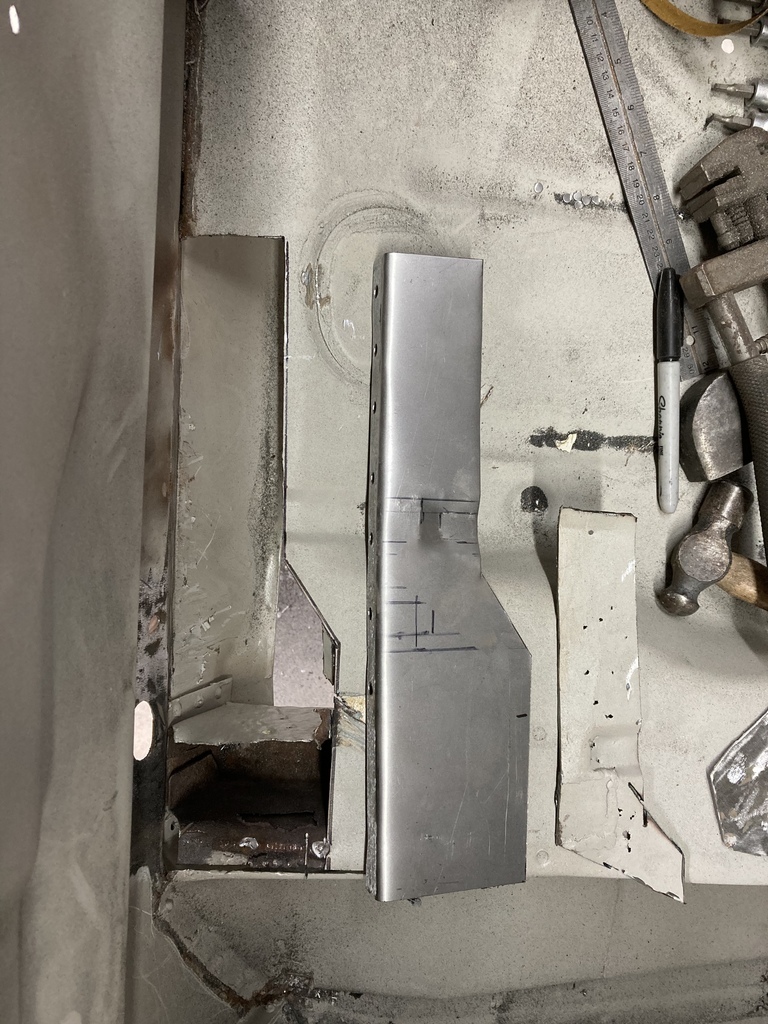 It goes in here 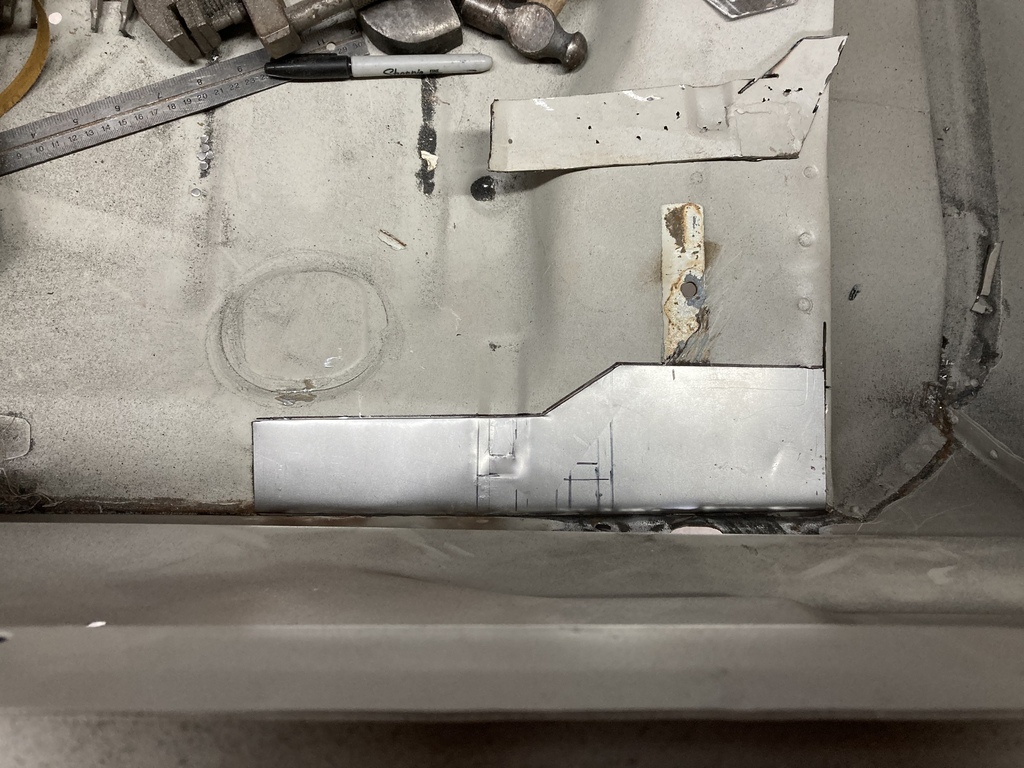 I then cleaned the strengthener up. 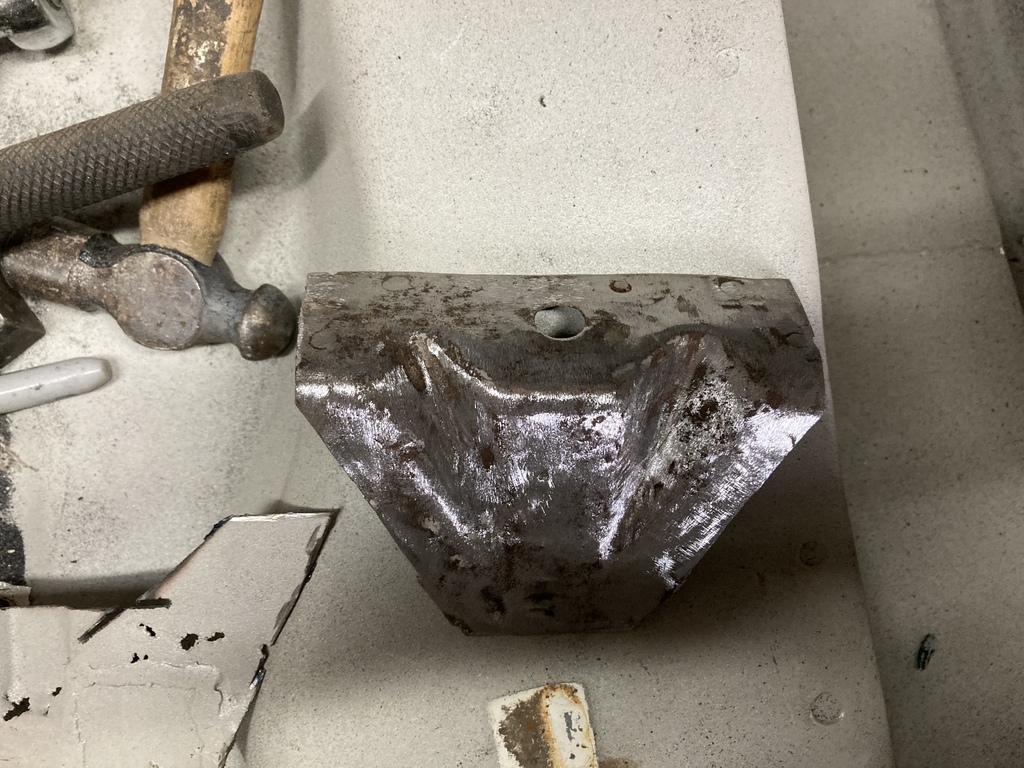 I then covered everything in weld through primer ready for welding, possibly on Wednesday morning before work. Even though I’ve bought a section to repair the chassis rail on this side, I have decided not to fit it. I have already repaired where the rear spring mount for an MOT a few years ago. The rail now needs repairing behind and in front of this mount so I have decided to replace a bigger section. I put an add on an Escort FB group and a guy replied with an apparently good chassis rail cut from another car for £90. Hopefully this will be as good as he says and I’ll fit as much as I need from that. |
| |
|
|


