|
|
|
Dec 10, 2016 22:14:27 GMT
|
Did a bit more last night and tied the engine framework to the lower part of the diff and to the original transaxle mount that sits on the crossmember. 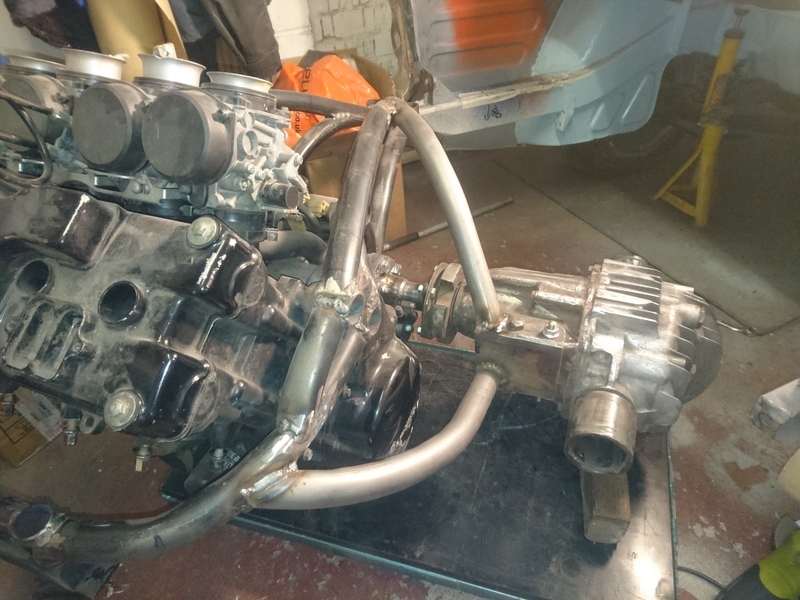 All tacked together just now but will soon be fully welded over the weekend. ;-) Cheers Col |
| |
Last Edit: Oct 20, 2017 8:35:33 GMT by colimp66
|
|
|
|
|
|
|
Dec 10, 2016 23:03:56 GMT
|
|
Looking good. That tube bender's getting a good hammering!
|
| |
|
|
|
|
|
Dec 10, 2016 23:43:29 GMT
|
|
It sure is George lol. It has to be the best thing I haven't bought. Lol
Cheers
Col
|
| |
|
|
|
|
|
Oct 19, 2017 16:49:43 GMT
|
Painted two of my wheels after polishing the rims. 7x13 Minilites. 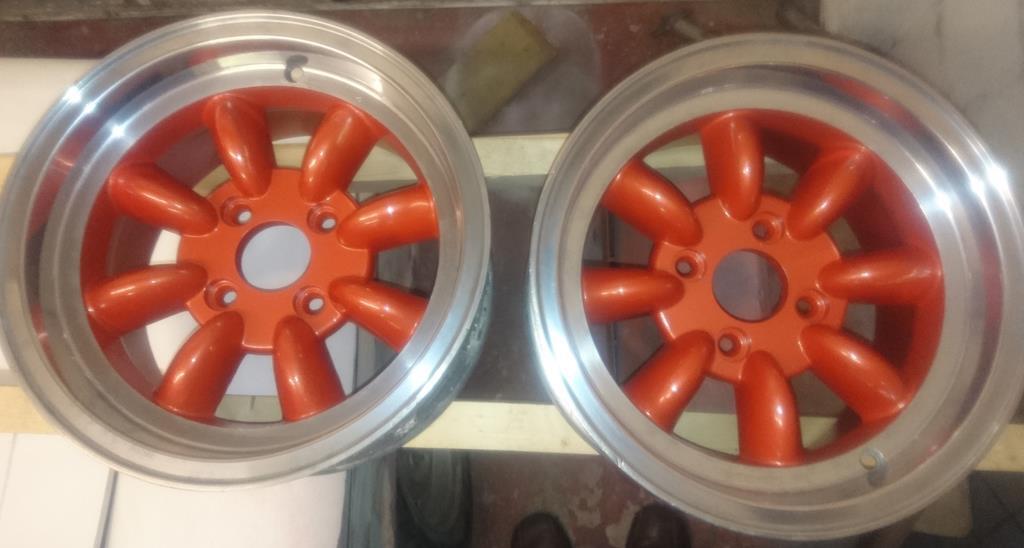 Cheers Col. |
| |
|
|
kitch
Part of things
  Counting his chickens
Posts: 157 
|
|
Oct 31, 2017 13:33:54 GMT
|
|
Just stumbled across this build while Googling something. Looks great, and the question I normally have of "How are you planning to IVA that?!" (if you want it road legal) aren't really relevant, as (correct me if I'm wrong) you've got a bolt-in cradle there, and haven't modified the shell structurally, or the suspension pick up points? Clever stuff, and that cradle really is a work of art!
I built a Saxo VTR engined 1973 Imp a year or two ago, originally for a customer but then I bought it off him. Been on the road on and off since, and is so far doing quite well. There is plenty I want to improve/alter, but then cars like this are an ongoing project until you sell/scrap them! But I managed to swerve the IVA issues by only opening the boot tray out (even more than you have) and retaining the original transaxle setup (yeah, 60mph @ 4000rpm......great!). Everything else is Imp, only the engine is alien.
Keep going on it! I love driving mine, it's massive fun!
|
| |
|
|
|
|
|
Dec 14, 2017 10:06:35 GMT
|
Hi Kitch, Thank you for your comments on my Imp build. I only plan to take it for an MOT and see where it goes with that. As you say I have changed the engine without any structural change to the chassis of the car so I am hoping for no issues on the IVA front with it. Although I am not using the Imp gearbox it can all be reversed back to the standard engine/gearbox configuration that it had originally if required or desired. Yes the engine cradle all bolts in so can easily be removed like an original Imp engine/gearbox. I have seen your car on the Imp forum a whilst ago and was a route I though about before the bike engine route I have went I had a 106 Rallye engine for it at one point but had the offer of the Blackbird motor which I thought would be a different was to go and more interesting for me. Still to figure out if it was the correct one though lol. Lately I have been messing around with the heater position and little jobs around the car. Finishing of the roll cage so I could fit the 4 point harnesses aswell. I didn't want to fit the harnesses thought the bulkhead or parcel shelf so made up a curved bar connecting to the roll cage so a rear seat could still be fitted and used , in the middle anyway. 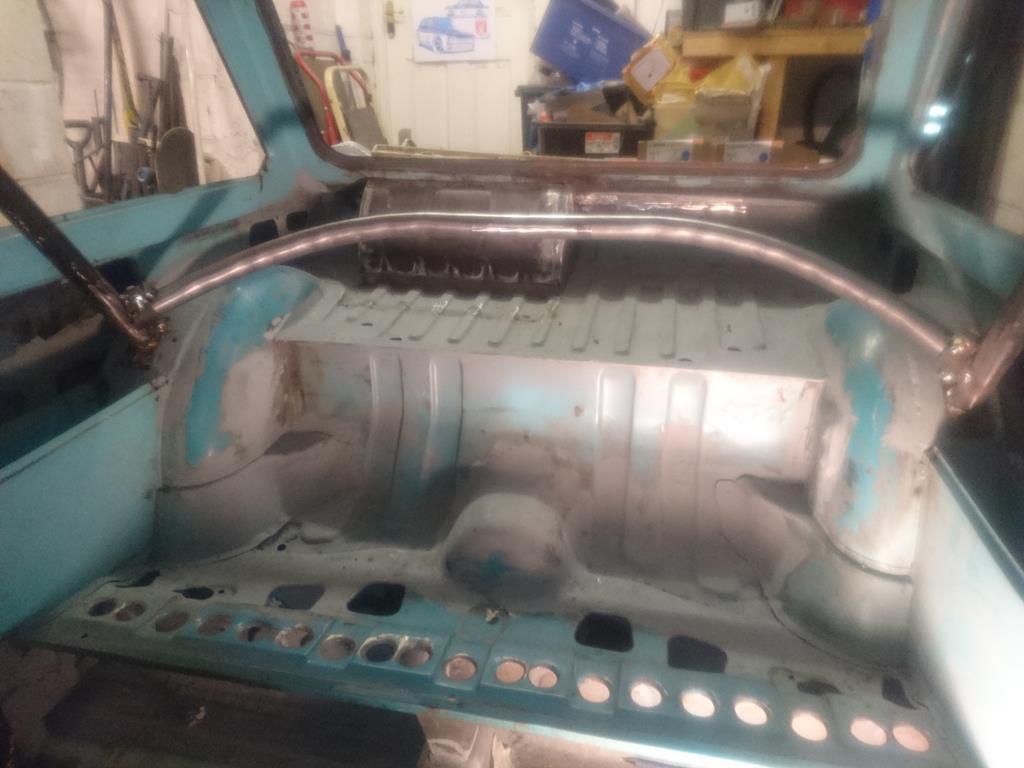 The heater that I am using is non original and is from CBS so is quite compact and slots under the dashboard quite neatly. One problem is I had to pocket the bulkhead so it fitted under the dash as I wanted it to then have to make up the routing for the demisting of the windscreen. This is never been great on an Imp so hopefully my modifications will be an improvement.. We will see. 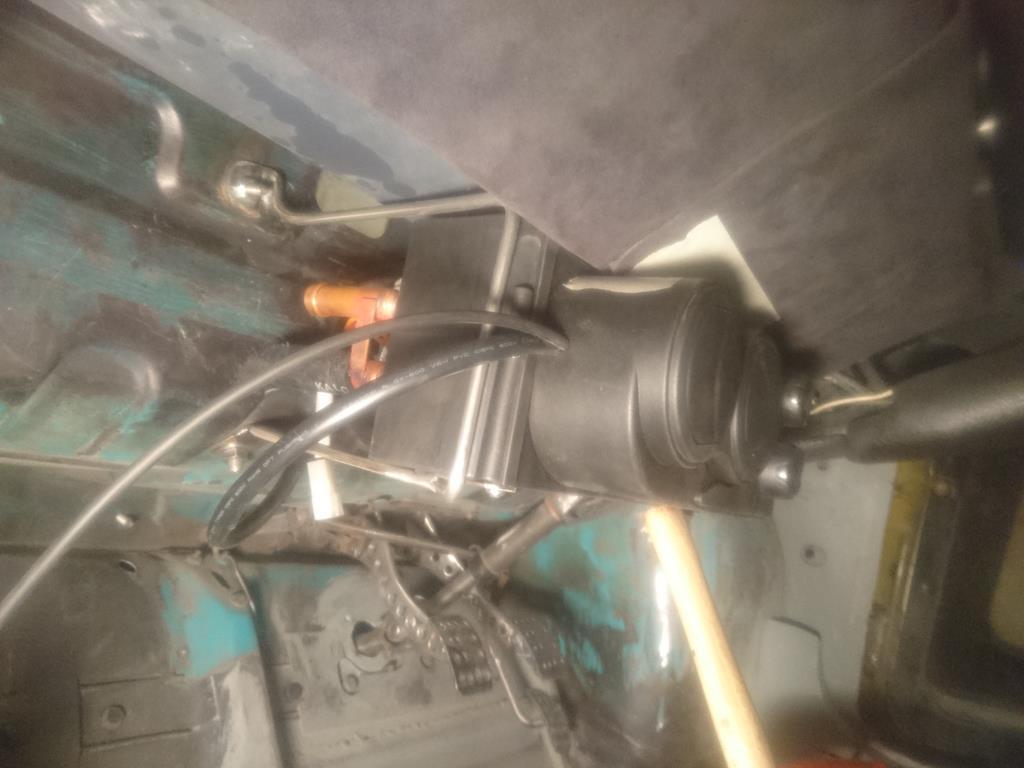 Cheers Col. |
| |
|
|
MR TIKI
Posted a lot
   TIKI,style from a different angle!
Posts: 1,154
|
|
Dec 22, 2017 17:35:47 GMT
|
|
Bookmarked,this is all looking very exciting....
|
| |
Boldly driving faster than a tin worm can wiggle.
|
|
v8ian
Posted a lot
  
Posts: 3,832
|
|
Dec 22, 2017 18:59:11 GMT
|
Col, can you tell us more about the heater?? CBS heater dosent work on google, all I get is CBS broadcasting.  |
| |
Atmo V8 Power . No slicks , No gas + No bits missing . Doing it in style.
Austin A35van, very different------- but still doing it in style, going to be a funmoble
|
|
|
|
|
Dec 22, 2017 19:08:00 GMT
|
|
|
| |
retired with too many projects!
|
|
|
|
|
Dec 23, 2017 16:35:06 GMT
|
SupaImpy is correct. It is a Kalori heater from Car Builder Solutions(CBS). This is the finished article more or less with the venting to allow the demisting of the windscreen. 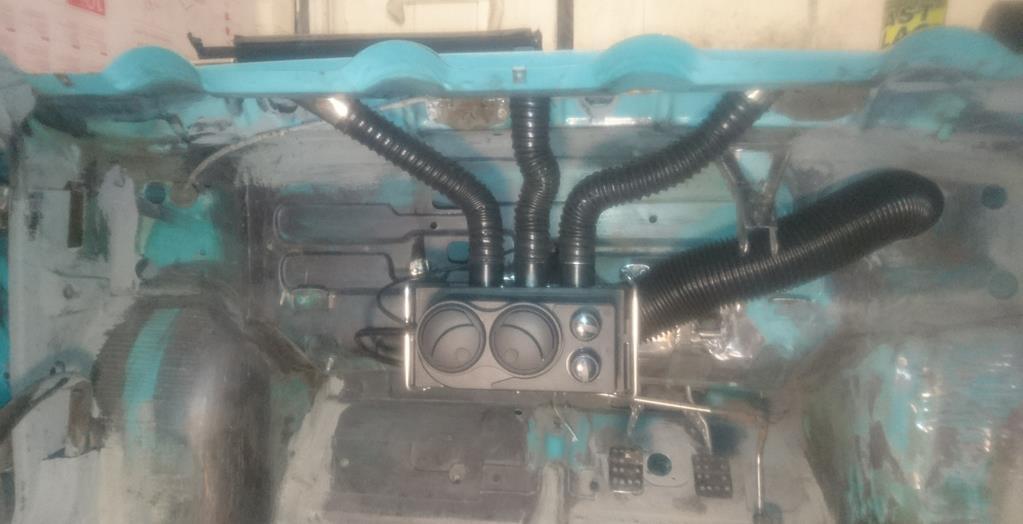 Cheers Col. |
| |
Last Edit: Dec 24, 2017 9:49:53 GMT by colimp66
|
|
|
|
|
|
|
|
|
So after finishing the heater brackets and positioning of it I then thought about the brake pipe routing I wanted. For me they had to be inside the car for neatness and keeping them out of the way so corrosion can't get a grip. I used copper pipe and stainless 90 degree bulkhead fittings at the rear with a straight bulkhead fitting through the forward bulkhead. 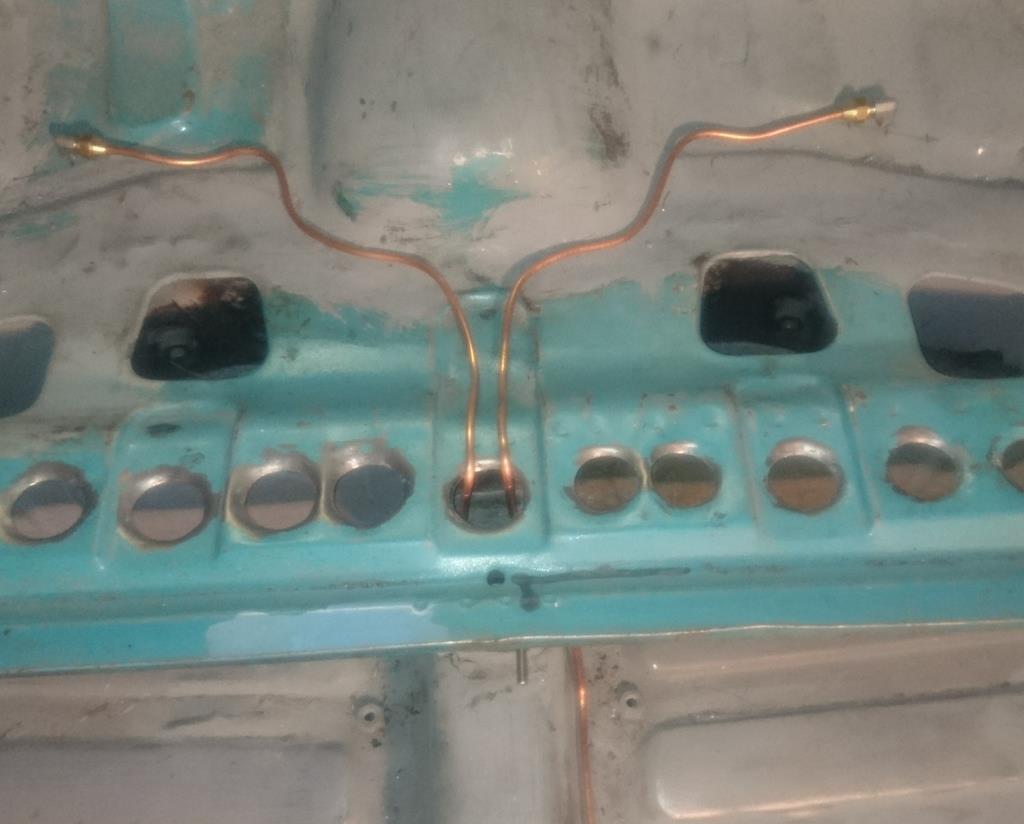 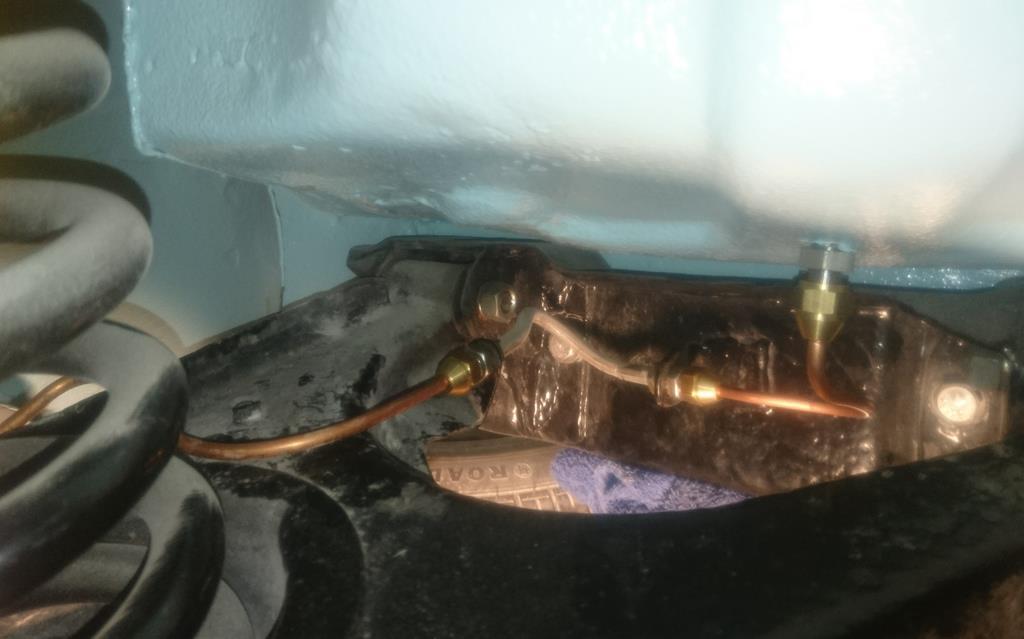 The interior has been multicoloured for years and today was the day it changed to the same colour the underside is. Although it looks white in the photos it is a light-blue BS colour code of 18e50. 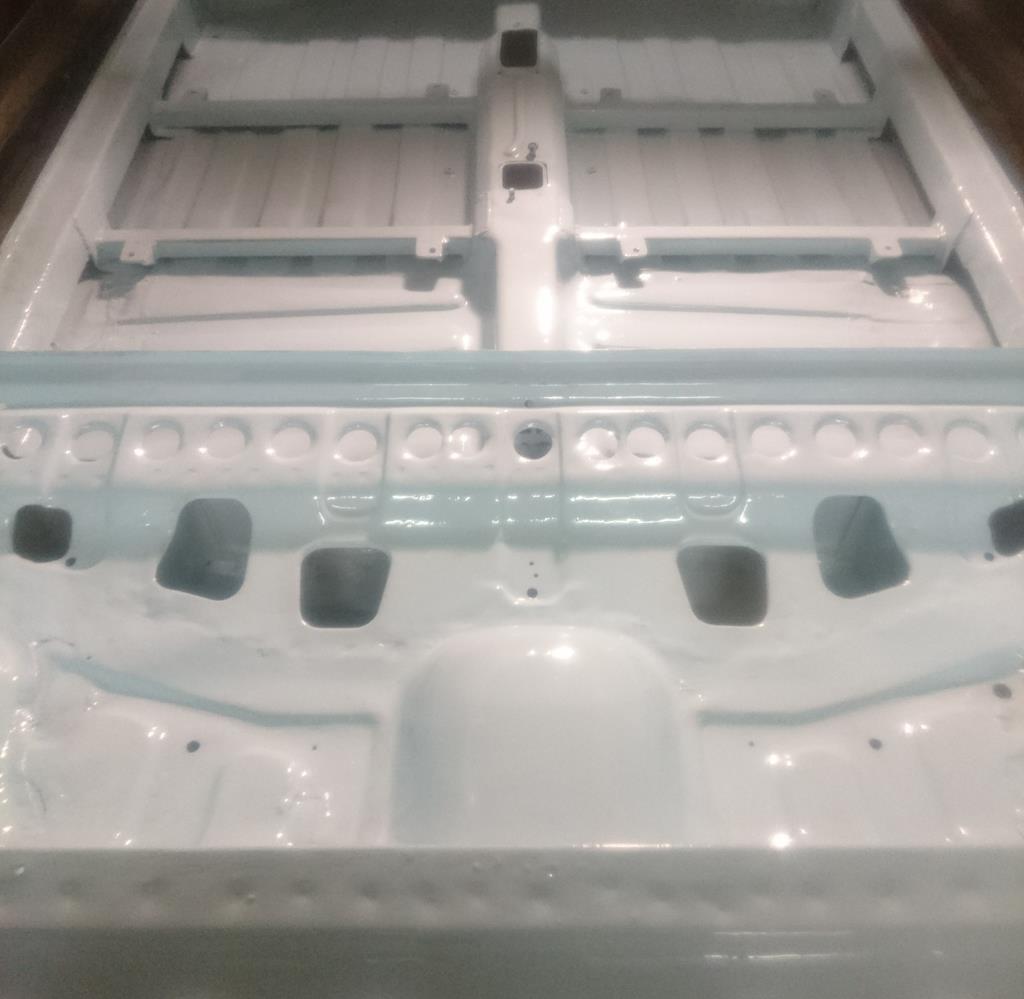 Cheers Col. |
| |
Last Edit: Jan 7, 2018 18:55:00 GMT by colimp66
|
|
|
|
|
|
|
Meant to show the heater fitted with the dash in aswell so here it is 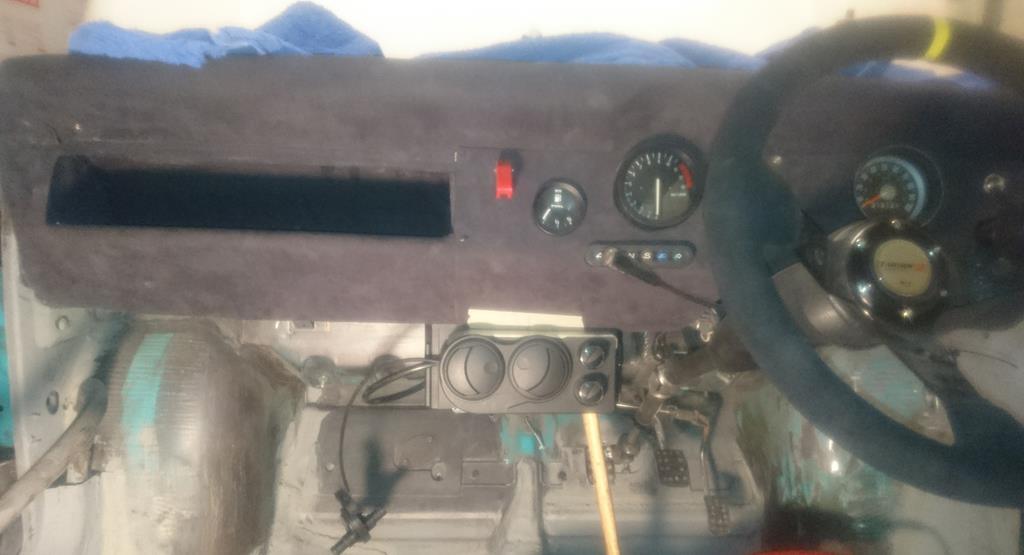 The extra roll cage that I added to take the harnesses aswell 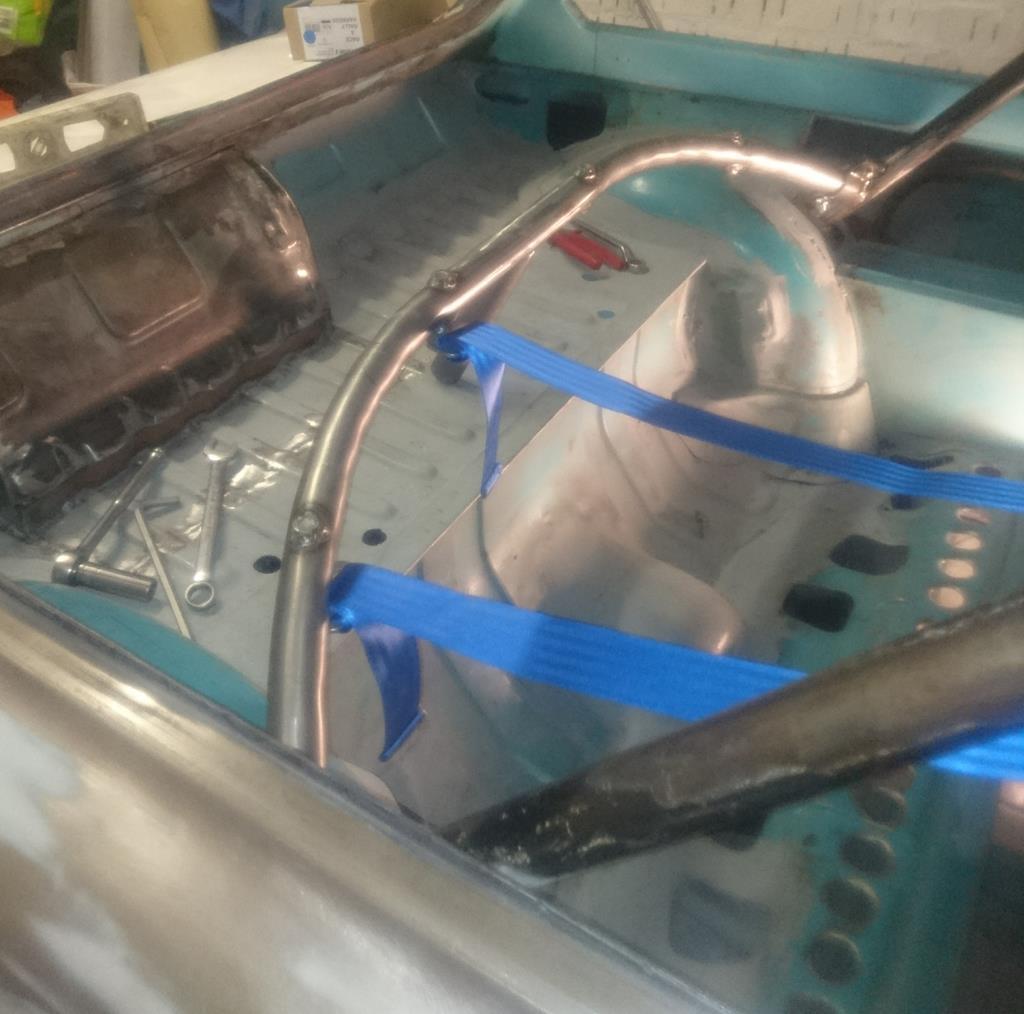 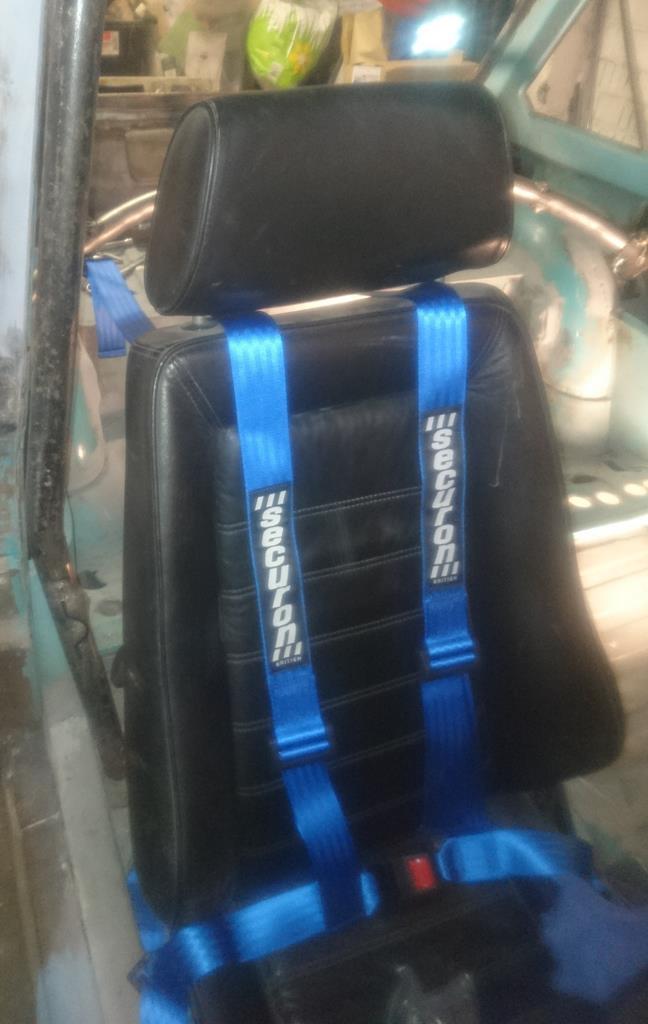 Cheers Col |
| |
|
|
|
|
|
|
|
So wirh the new paint on the inside and not wanting to be marking it just yet I was working on the outside today. The grill was in need of some modifications for the look I am after so out with the grinder, the drill and some files. This is what I ended up with. 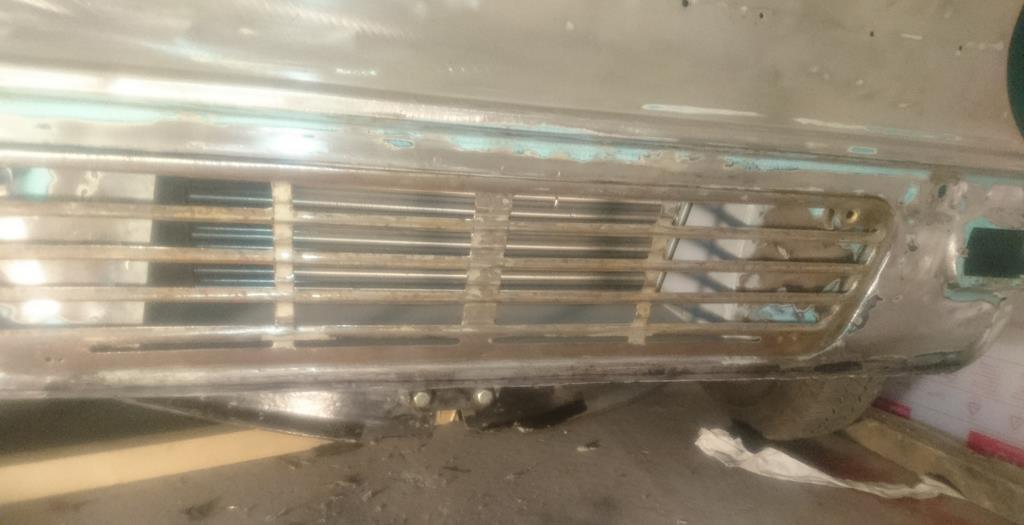 Cheers Col |
| |
|
|
|
|
|
|
|
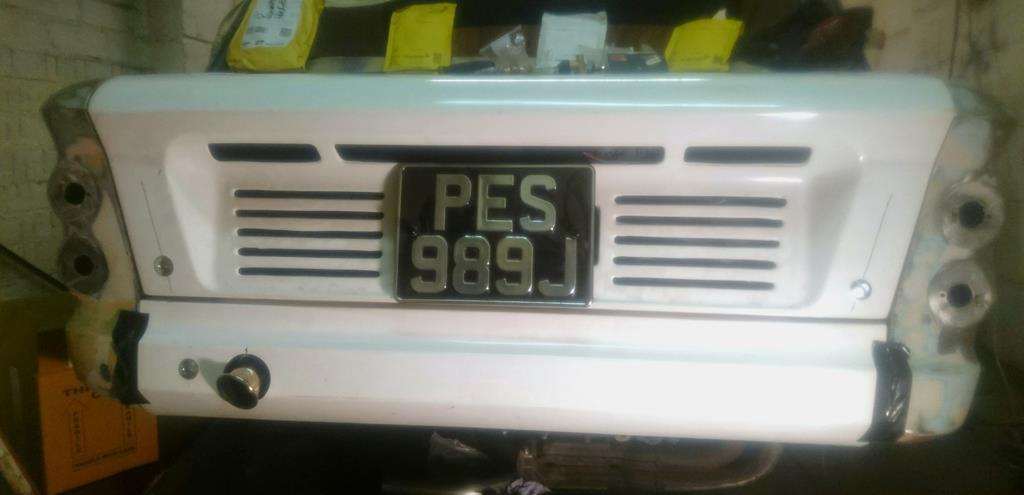 This is the rear end mocked up with the button panel fasteners to allow the engine lid to be locked in place neatly and the rear crossmember. The crossmember is only half completed as can be seen with the gaffe tape at each end holding it on. The tail pipe from the Scorpion tail can I purchased from EBay is poking out through it too.  Hoping to get it all solidly fitted by the end of the week. Cheers Col |
| |
|
|
|
|
|
Feb 10, 2018 20:05:06 GMT
|
This is the rear crossmember cover fitted with the button fasteners holding it in place. 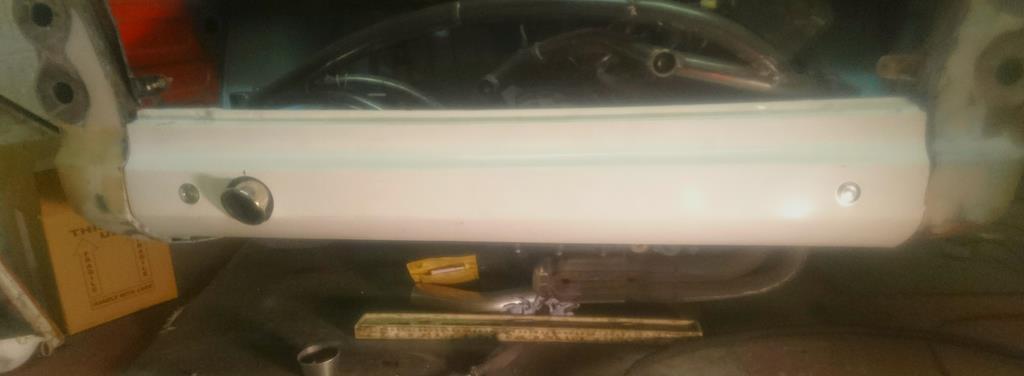 Instead of welding the bracket it in the rhs chassis leg like I did for the lhs I used rivnuts to hold it in place. This will allow me to remove it easier than unbolting the exhaust system if I ever need to remove the engine. 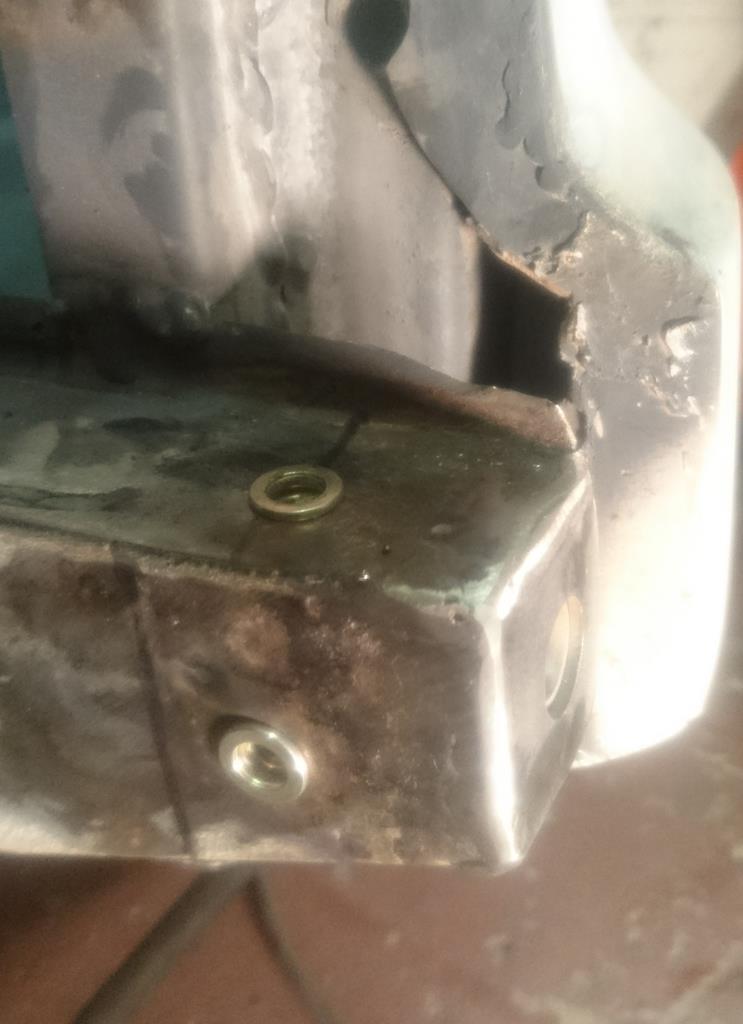 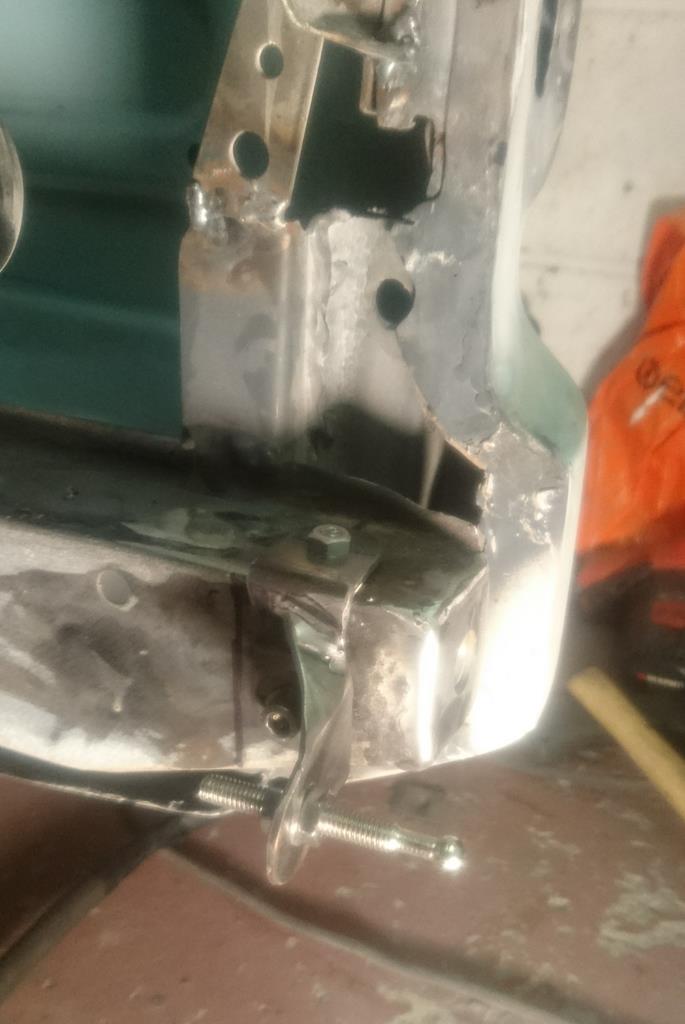 Cheers Col |
| |
|
|
|
|
|
Feb 12, 2018 19:59:26 GMT
|
Had a bit of time this afternoon so thought I'd sort out the exhaust and weld in the 50mm sections I had bought a week ago to join the tail can to the headers. 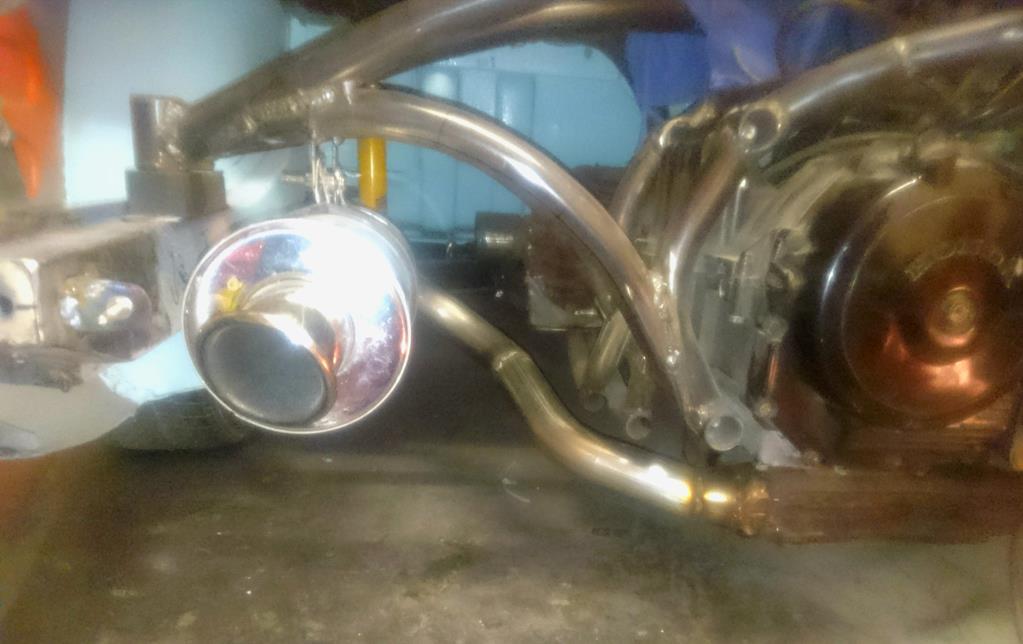 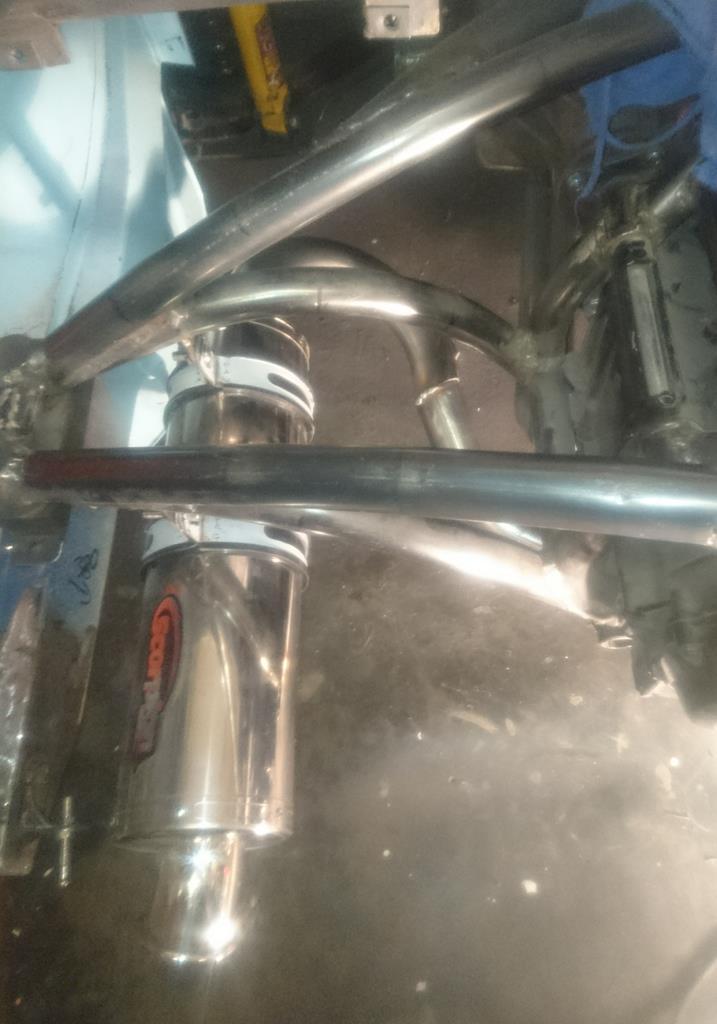 Just need to add a little bracket so the manifold section can be bolted to the back of the engine cradle. Cheers Col |
| |
|
|
|
|
|
|
|
So not aassive amount done over the past few weeks, only little bits here and there. One thing I have achieved is a lightweight prop for the engine cover to stay put when accessing the engine. I build motorcycle wheels for folk and often have spare stainless spokes left over so I put one to good use last week. After a few,attempts I settled on this. 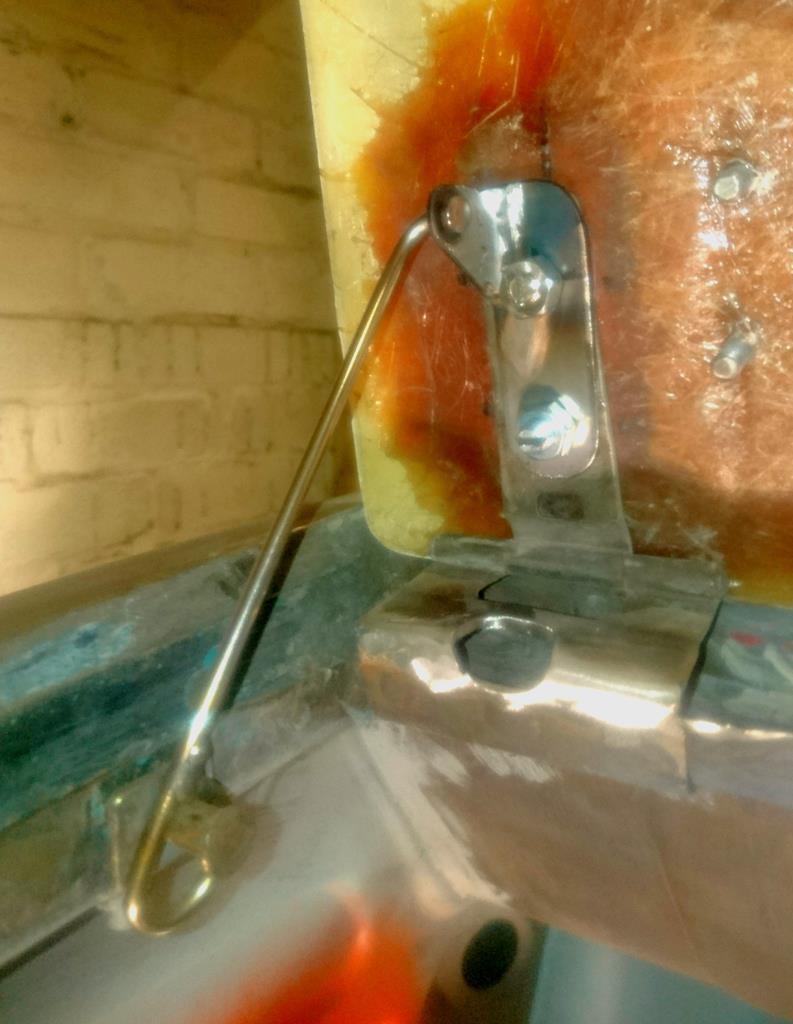 It will be kept in place when not in use by a clip you can buy from CBS which I will bond to the fibreglass cover. Cheers Col. |
| |
|
|
|
|
|
|
|
|
amazing amount of working the details....looks great.
JP
|
| |
I know its spelled Norman Luxury Yacht, but its pronounced Throat Wobbler Mangrove!
|
|
kitch
Part of things
  Counting his chickens
Posts: 157 
|
|
|
|
|
I knew recognised your name when you replied to my thread. Cracking build, looks really good!
I may nick your engine lid prop arrangement!
|
| |
|
|
|
|
|
|
|
|
Hol-eeee shhhhhhhhhhhhhh eeeeet. Good work.
BOOKMARKED.
Just for my own interest really... at your current rate/speed of work, when do you anticipate driving this thing out as a completed project?
|
| |
Last Edit: Apr 10, 2018 9:38:29 GMT by Deleted
|
|
|
|


