|
|
|
|
|
Started on the TR's new roof yesterday, firstly drilled out the rivets on the header seal.  Peeled back the cloth and then it just lifts off the frame leaving the 7 nuts accross the rear which came undone easily. Header looks worse it the pictures, most of what looks like rust is old glue. 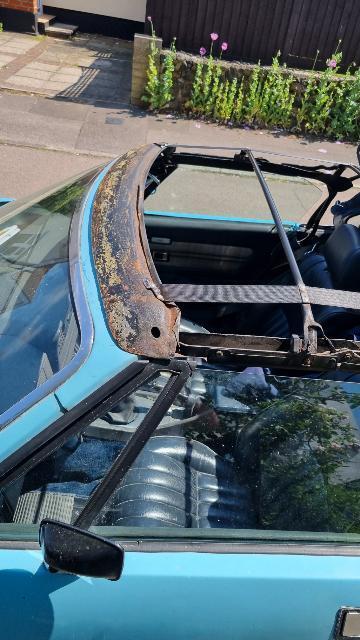 Took stock of the parts. 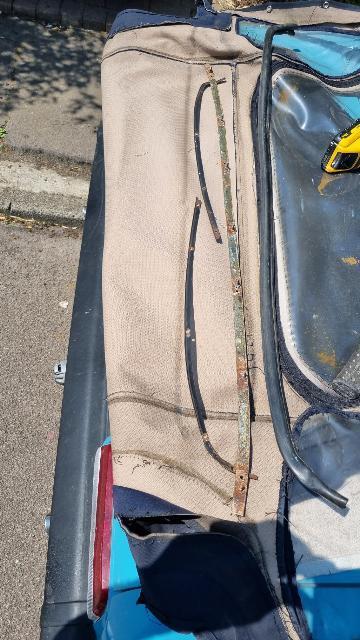 A bit of surface rust but all serviable, they were cleaned up and given a coat of black paint as was the header. 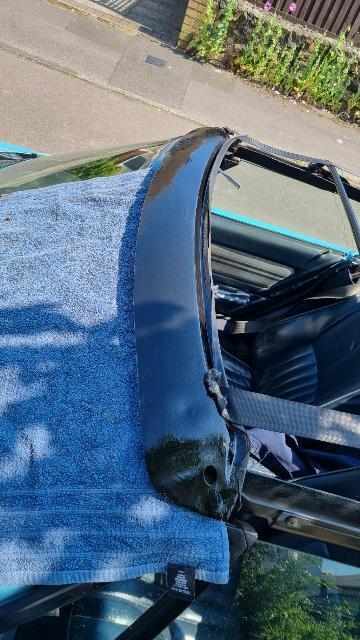 Gave the frame a good look over, only issue I could see was this plate which controls the centre bow was bent. 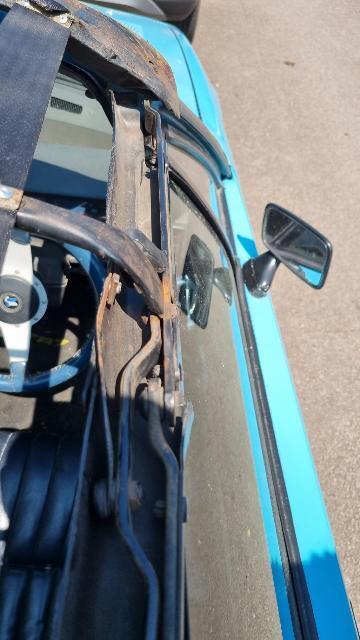 A few taps sorted that out. 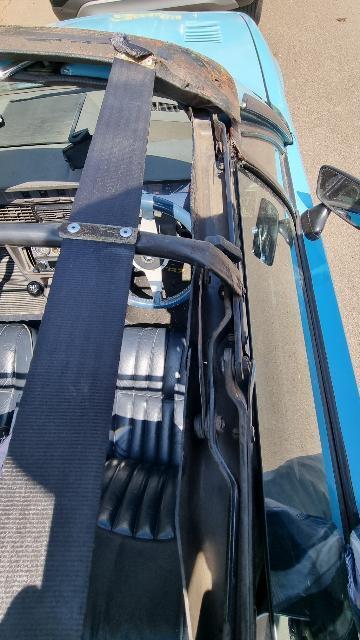 Just need tp get some glue and clean the frame up then it can all go back together, might be a couple of weeks though as I am in Germany for work most of this week. |
| |
Last Edit: Jun 5, 2022 6:25:05 GMT by kevins
|
|
|
|
|
|
|
|
|
Finished the hood this evening, Firstly marked the centre and punched the holes for the rear retainong strip, fortunately noting the centre hole is not in the centre before I made any holes! 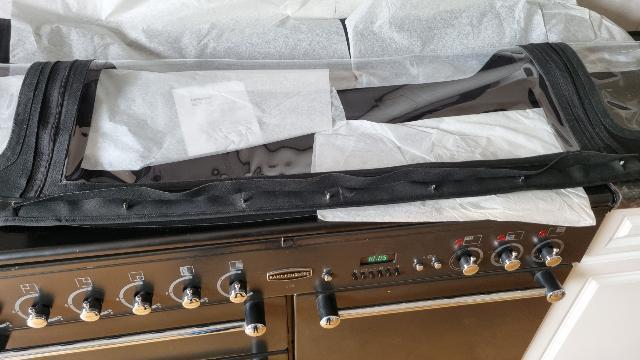 Cleaned up the hood frame. 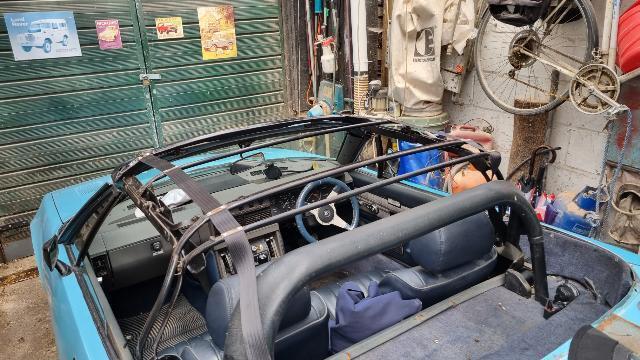 Then bolted the back on loosley, and marked the centre of the windscreen and hood at the front. 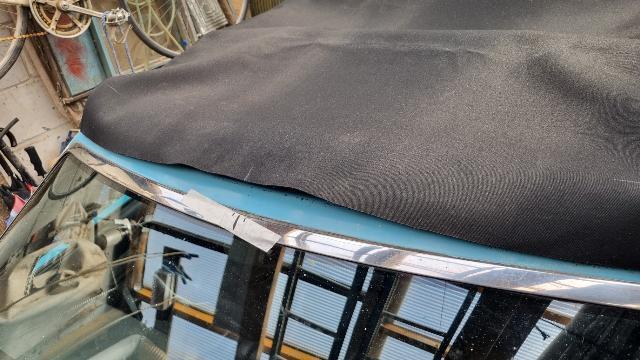 Marked where the glue was needed and glued the header and hood.  Once it had dried I covered all but the centre with clean cloths. 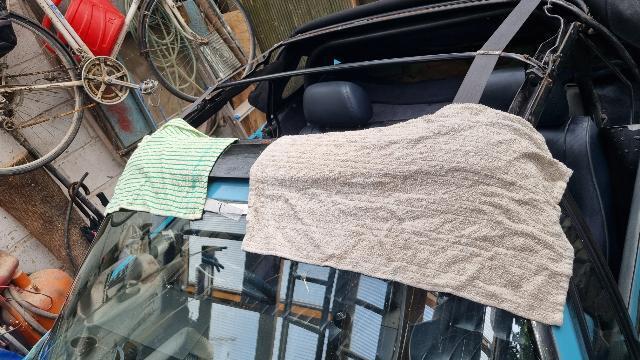 Then pulled it forward glued the centre, the slowly pulled the cloths out while stretching and gluing the sides. The hood was not latched at this point, pulling it into the latches will tighten it further. Opened it up glued the underside and trimmed it back.  Then riveted the header seal, 2 little straps at the front corners and press studs in, job done. 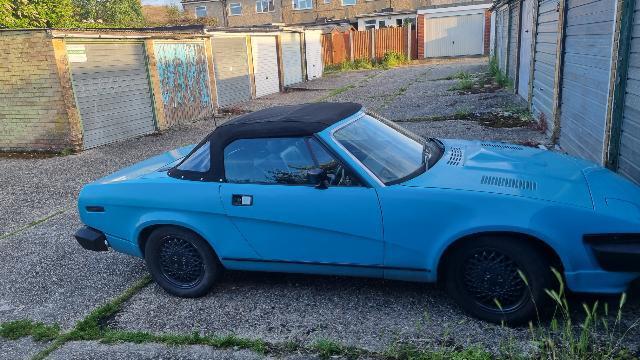 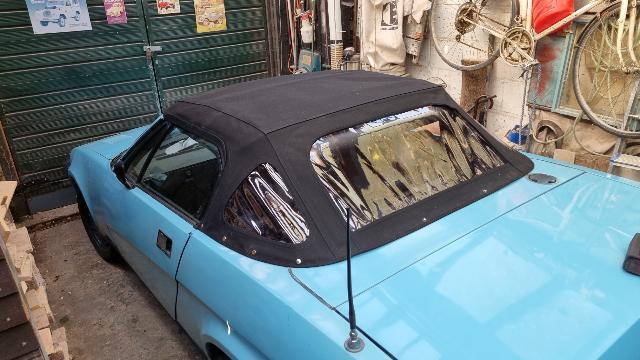 The cloth is nice and wrinkle free, the windows are not as bad as the picture makes them look, hopefully they will flatten out a bit more with time. |
| |
|
|
|
|
|
|
|
Used the elan in the 31 degree heat on friday, wanted to see how it performed with the new alloy radiator, with original tiny rad it would climb up close to the red area of the gauge, on friday I had this after sitting in traffic for 10 minutes. 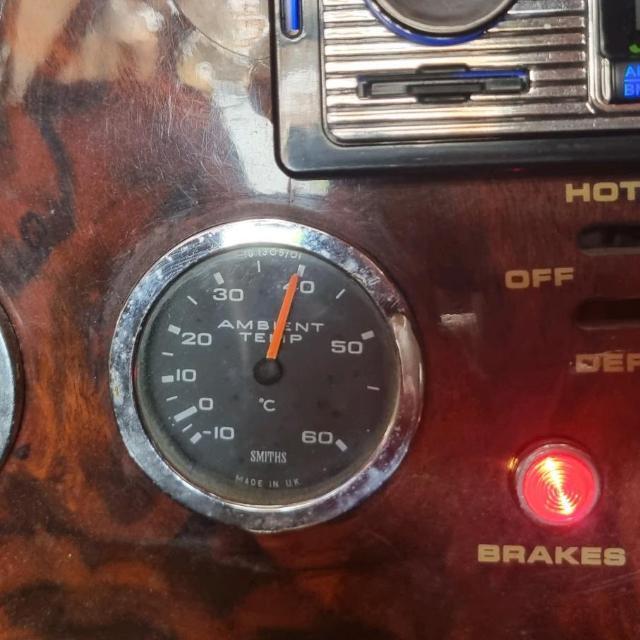 Ambient reads at the air intakein the front. 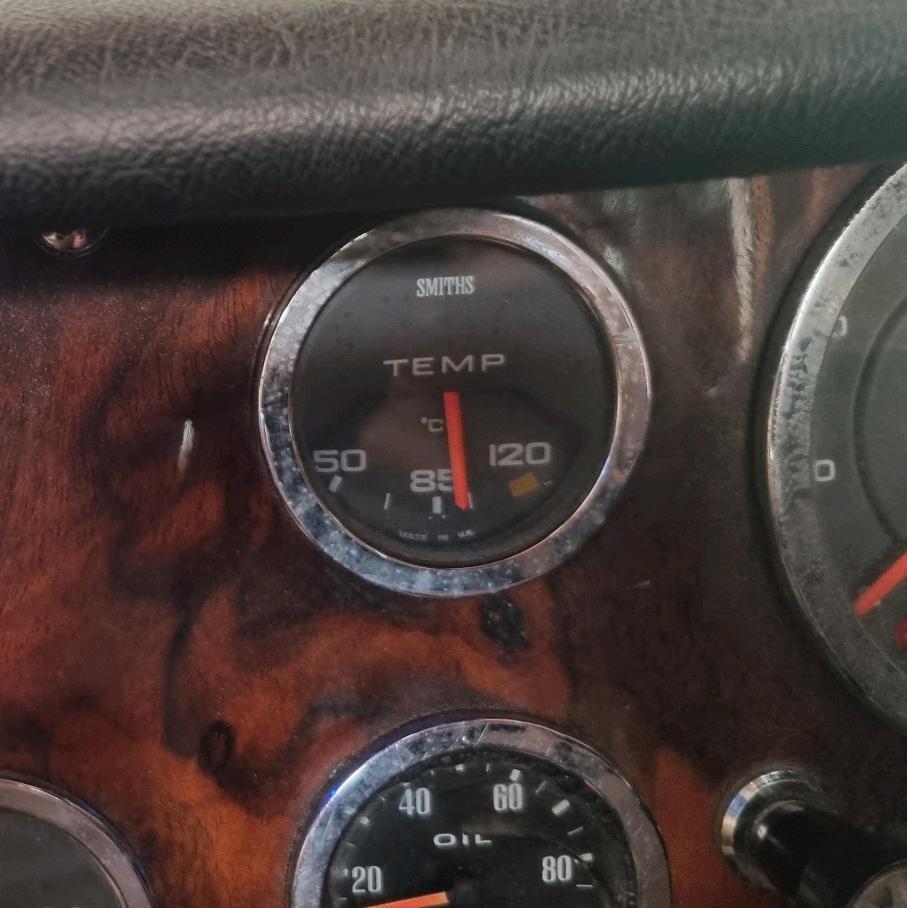 And the temperature never went above here (cycled down by 3 or 4 degrees as the fan went off and on). So thats a sucsess, only issue I did did find is it's developed a horrible creak from somewhere on the front suspension, I had a look and everything seems fine so it must just be the heat affecting a bush somewhere. Range rover is being used for transporting building materials (half a ton of ballast last week) but I did have to clean it up to take people to a family wedding in the week, mx5 has also been regularly used. I'm taking the TR7V8 to the Peter Best show later, this will be the first time I have used it this year, I'm thinking of getting rid of it though because it just doesn't get used. |
| |
Last Edit: Jun 19, 2022 7:18:57 GMT by kevins
|
|
andyf
South West
Posts: 415
|
|
|
|
|
Nice tidy finish on the hood of the TR looks good.
|
| |
1980 Triumph TR7.
|
|
|
|
|
|
|
Well done, and thanks for the detailed tutorial. Even if I do not have one, it is great learning from others and the jobs done before. merlind100 Richard I am sure would agree, learning from others successes makes for an easier life. Like the waterway failure Nick sorted on the engine if my MX5 motor. |
| |
|
|
|
|
|
Jun 23, 2022 20:34:26 GMT
|
TR windscreen has a bit of an issue.  Started off as a small crack at the bottom, in 30 miles it's extended top to bottom, body around it seems in good condition so its a call to the insurance company to relieve me of £100 tomorrow. |
| |
|
|
|
|
|
Jun 25, 2022 20:59:43 GMT
|
Been looking at my idea to fit mx5 engine mounts to the minor, First thought was to modify a standard tower. 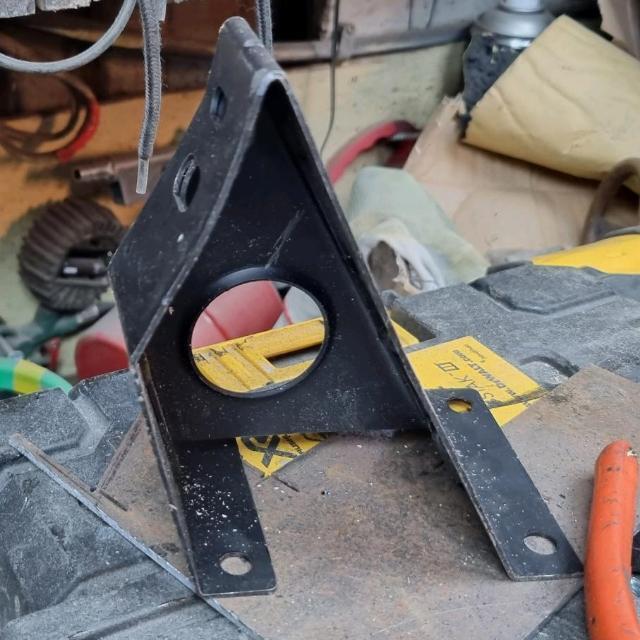 After a few attempts I ended up with thus which did the job but is rubbish. 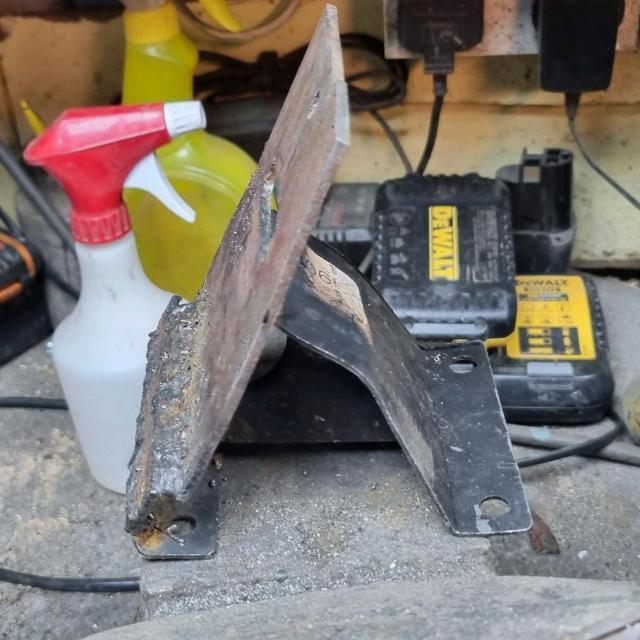 It does though gve me a pattern from it I made a wooden jig to make one from scrath using 4mm plate. 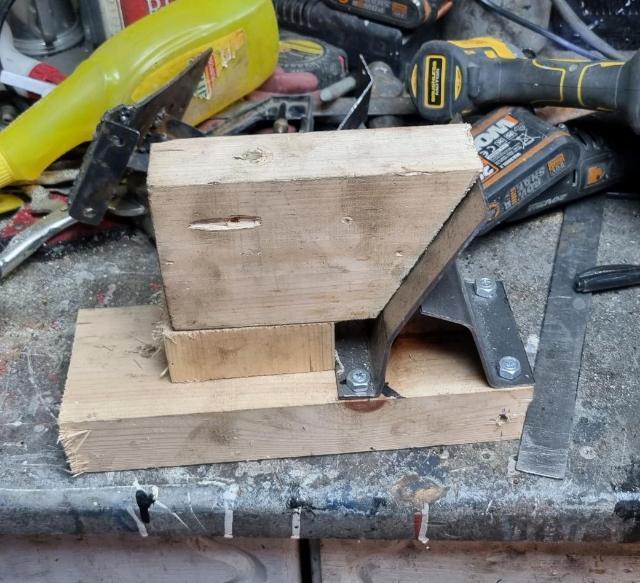 Cut the plate up with my evolution saw (amazing tool) and ended up with 2 of these. 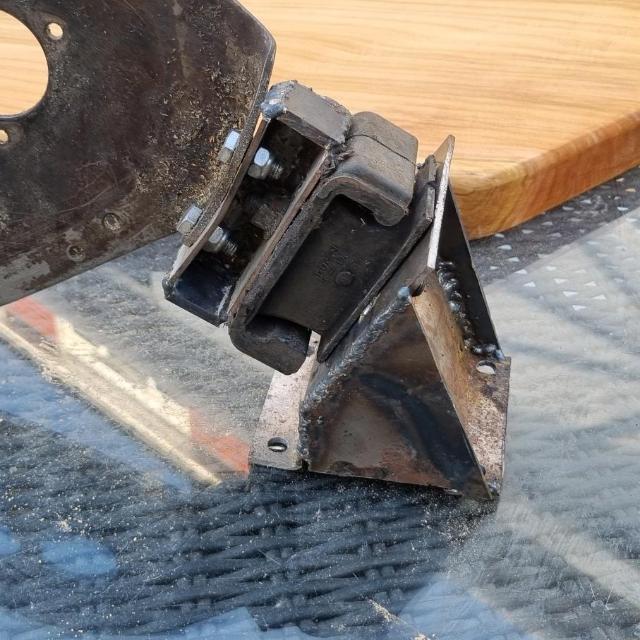 Which when assembled looked like this. 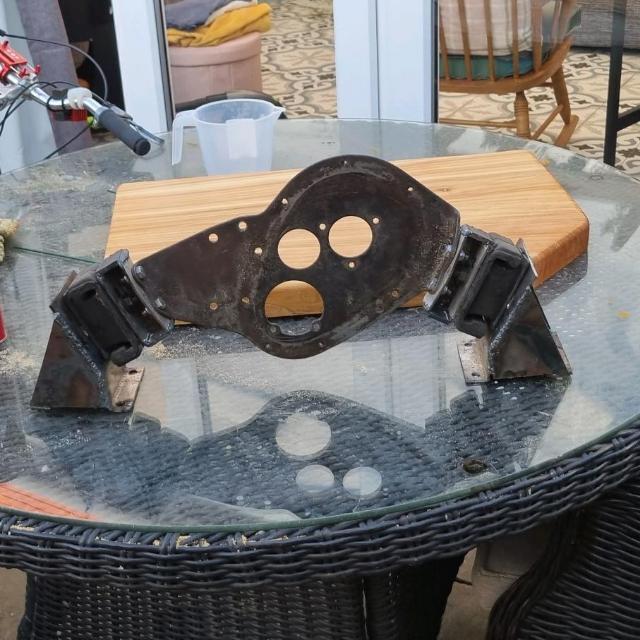 Just need to clean the welds and paint it all. |
| |
|
|
|
|
|
Jun 25, 2022 21:14:22 GMT
|
|
Pretty neat. It'll be interesting to hear what effect this has on NVH...
|
| |
|
|
|
|
|
|
|
Master cylinder mounted and ready to go in car, alloy spacer on the front was machined up to give flat surface for the screws to pull up on. all in place along with the pedals and plumbed into the rear  Kevins, just found this thread while searching for Minor brake mods, some great info here, thank you. Do you have any pics of how you connected the fluid reservoirs? Thanks. |
| |
|
|
|
|
|
|
|
I used 2 lengths of pvc coated copper pipe as used in LPG conversions, they run down the inside of the chassis leg held in with p clips and through 2 holes drilled in the front. 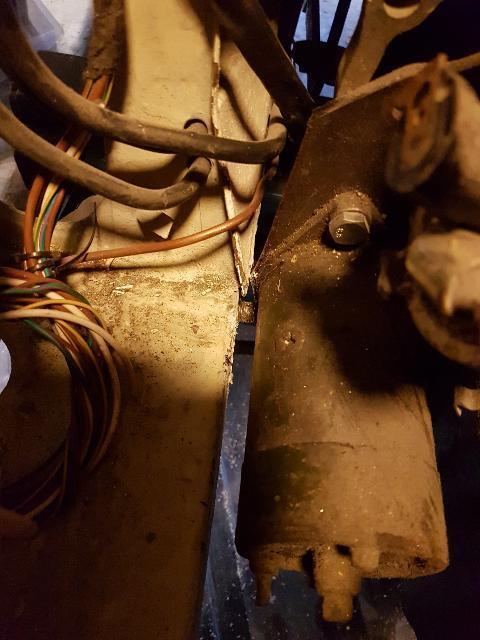 From here they and similar clutch pipe run up to a fiat reservoir with 3 outlets and level switch. Which can just about be seen in this picture 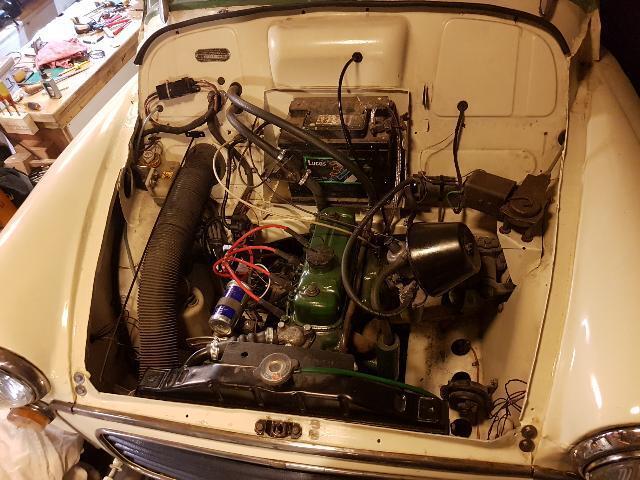 On the car front i'm on holiday for a couple of weeks but before we left we gabe the minor a service and adjusted tappets and handbrake, only issue we coud find was leaking from one of the rear brake bleed nipples, nipped it up which seems to have stopped it, wonder if it may be the repro ones are too short as it seems to bottom out against the nut rather than the taper. Only other issues are it uses oil, it smokes whenever it's been idling or slowing down but is fine when driving along, normaly this would point to valve guides but it has new A+ guides and seals, only thing I wonder is if the cam having a higher lift is causing the spring cap to hit the seal and force oil past it.. 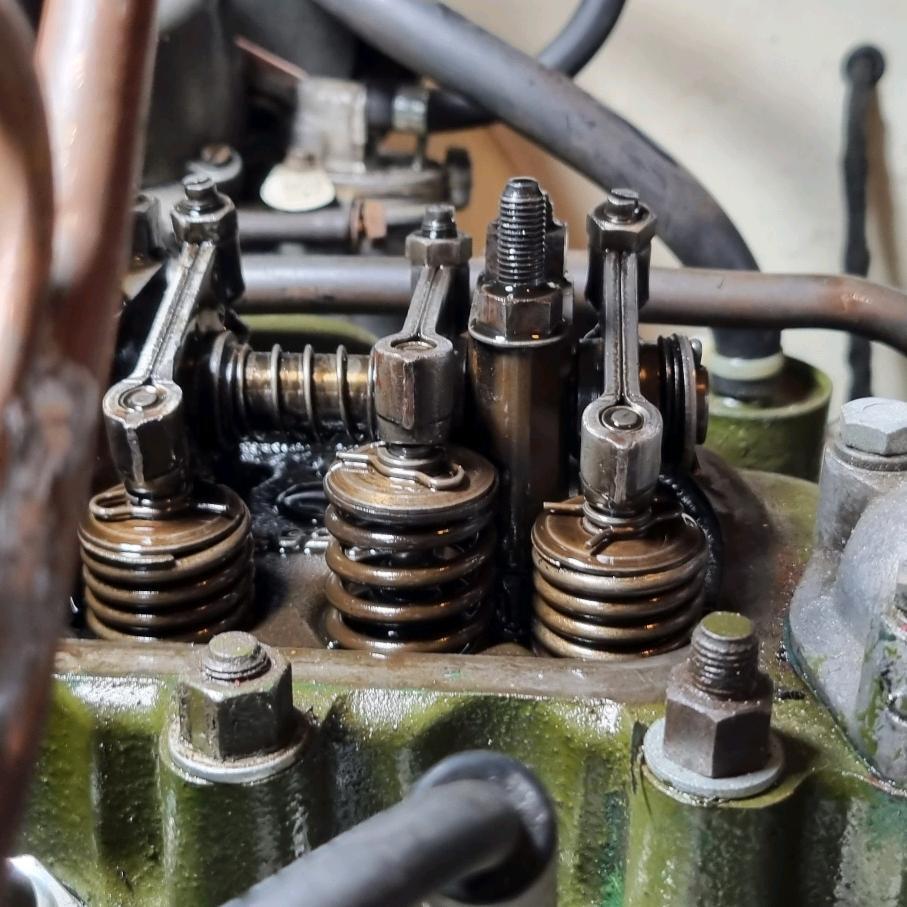 Not the end of the world, it drives really well but I would like to get to the bottom of it. Other issue is the gearbox is sounding pretty rough, I'm pretty sure it just needs new bearings so we have bought another one for £60 which is supposed to be OK to strip and re-build. |
| |
Last Edit: Jul 5, 2022 9:42:15 GMT by kevins
|
|
|
|
|
|
|
I used 2 lengths of pvc coated copper pipe as used in LPG conversions, they run down the inside of the chassis leg held in with p clips and through 2 holes drilled in the front. Perfect, thanks. I wasn't sure from the picture if they cleared the standard floor enough for pipes to be fitted. I've seen this done with both the Beetle and Wilwood master cylinders but could never work out how the reservoirs were plumbed in. Thanks for your help. |
| |
|
|
|
|
|
|
|
|
|
| |
Last Edit: Jul 5, 2022 17:57:35 GMT by kevins
|
|
|
|
|
|
|
|
Break down on the minor today, it's fuel starvation, (loses all power, leave it idling for a whole and it's ok for another few minutes). It's been fine for 3 years but last trip Andrew could only get E10, fuel pump and tank were on the car when we got it and it had been off the road for ages so my guess is either it has washed crud loose in the tank or damaged something in the pump. Also since adjusting the tappets which had quite big gaps it apparantly smokes at idle even more which I think means we may be onto something with the valve spring cap hitting the stem seal.
|
| |
|
|
|
|
|
Jul 22, 2022 21:29:31 GMT
|
Been away for a couple of weeks, went to Nothumberland, lovely part of the country, I could easily move up there. First thing I did when we got back was look at the minor, fuel delivery at the carb seems fine, only thing we could find was the dashpot was bone dry and the piston seems a bit loose, put some oil in it and it seems to drive fine, not sure this would explain a top speed of 20mph though, Andrew's driven it for an hour with no problem though and it played up after only 20 minutes before so we will have to see, he knows what to check for now anyway. The noise he was worried about was an easy one, the exhaust rubs on the body when accelerating. Today I had a few hours on the cars, firstly not a car, I got our chainsaw to run properly, its an almost new Stihl but after the first time it was used in anger it started playing up, I found a fault with the carb, a plate behind the diaphragm had a sharp edge which had cut through the rubber. Fitting a new one solved the starting and idling problems but it wouldn't rev or produce any power, looking at a few online videos about how to set them up I followed their advice and removed the emissions stops from the adjustment screws with these off it was obvious what the problem was, the high load one must have turned within it's plastic sleeve meaning it's adjustment range was 1.5 to 2.25 turns out, it's supposed to be around 3/4 of a turn, with this fixed it runs perfectly, it's soon to be used to remove large plum tree which has overgrown it's place. 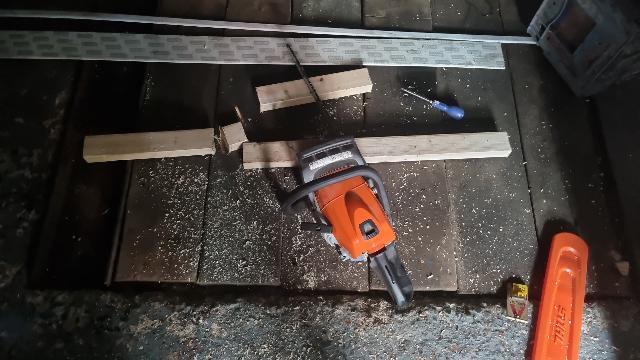 on the car front I started looking at the A/C on the range rover, last year I tried to get it working but nothing doing so I fitted a new expansion valve and some O rings that were missing on the evaporator pipes. Today I decided to put some gas in it, a bit of research showed that a R290 / R600 mix is a good drop in gas for R12 that has a low impact on the environment if it leaks out, that is propane and Iso Butane which you can conveniently buy is small containers from any camping shop, I know it's not refrigerant grade but for a test I am prepared to take the risk. 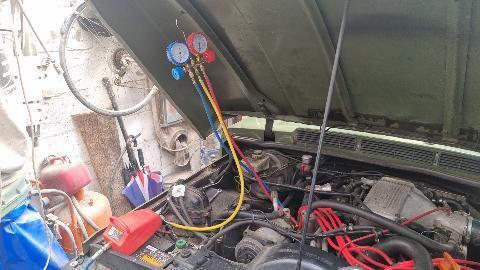 evacuated it, left it for 30 minutes no loss of vacuum so put some gas in, did IT based on pressure and kept it pretty conservative so around 130psi on the high side and 30psi on the low, seems to work and no obvious leaks lets see how long it lasts. I did the same with the KA aircon, I've been filling it with small cylinders on R134a from ebay but it only lasts a month or so, I've put some dye in it this time and bought a black light, at only £20 I've also bought a new condenser, once it arrives I'll take the bumper off see if I can find a leak i'll replace the condenser and all the seals in the front whatever while it's apart . Finally it was time to go over the mx5 before it's MOT, With being my wife's car and her recovering from Cancer it wasn't driven much last year, but it did get an advisory on cracks in the lower ball joint boots last year and I like to fix these before the next year, went over it all and apart from a lot of cobwebs it all seems fine so it was onto the ball joints. 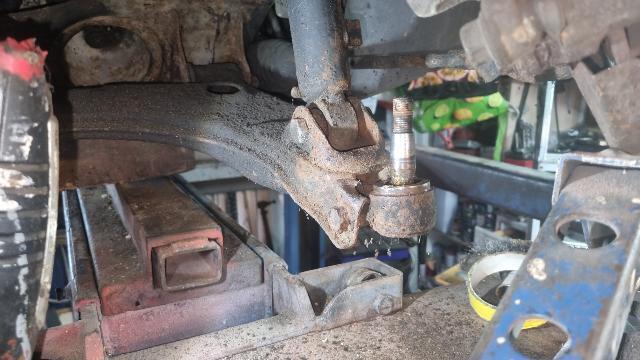 Managed to get them apart without too much trouble, despite looking like it had been dragged out of the sea the rust only seems to be light and on the surface. Joint seemed fine and all nice and clean inside, added some new grease, then cut a piece of scaffold tube down to give me something to push it on with. 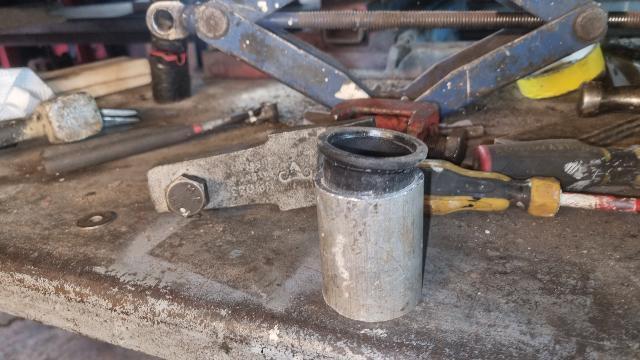 using a G clamp the boot pushed on easily enough, then it was a matter of putting it back together. 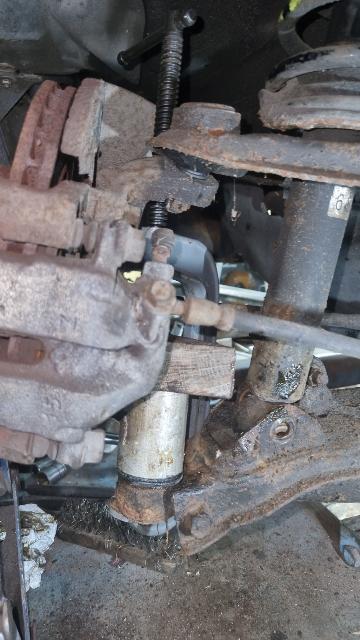  Might try to paint the back wheels to match the fronts this weekend as well. Other thing I did was unbolt the bottom of the wings at the back, clean all the debris out from behind them and splash some dynax around. The structure on it is pretty good but the wings are getting a bit rough there are a few holes around the very bottom and they have been dinged and straightened out several times, at some point may treat it to a new pair. |
| |
Last Edit: Jul 22, 2022 21:47:48 GMT by kevins
|
|
|
|
|
|
|
Washed and polished mx5 ready for MOT tomorrow, only thing which worries me is the catalyst, it's been getting more and more difficult to get through the emissions the last few years.  Once this is done apparantly my next job is to fix the aircon, the conenser is falling to bits and one of the pipes in the front leaks but it does work for while, you can't get any new parts so plan is to re-do the whole front end with parts from car builers solutions. While on the subject of A/C the recharged Ka seems to bevworking too well, water is spraying out of the air outlets into the footwell. 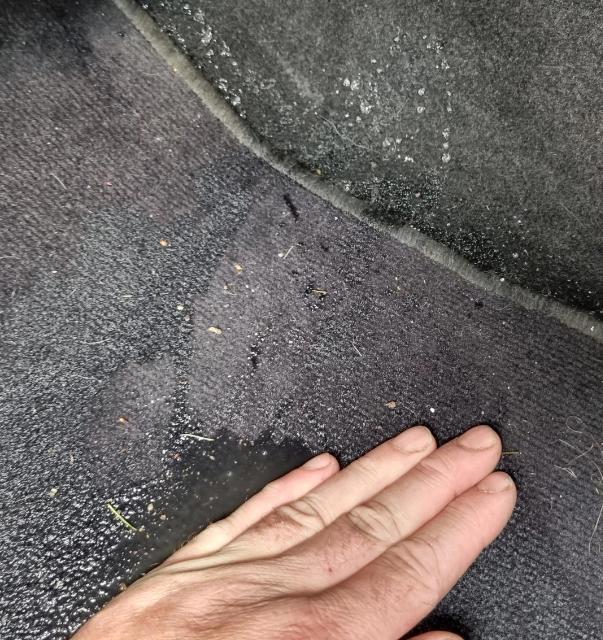 It's coming out like a spray, under the mat is dry, I guess it needs the drain looking at, trouble is I think it's above an exhaust heatsheild in the centre so will involve a bit of pfaffing about. |
| |
|
|
|
|
|
|
|
|
Good luck with the emissions and test Kevin.
Rezin Rockit will be interesting when the time comes.
|
| |
|
|
pptom
Part of things

Posts: 475 
|
|
|
|
|
My wife's 1.6 auto failed it's emissions test and really struggled the year before. I fiddled with things a bit, cleaned the injectors and gave it an Italian tune up and it scraped through. Thought the cat was toast.
Then I got a bit bored and wanted another project so picked up a manual 1.6 engine to rebuild. Put this in and it sailed through the emissions on the next mot with the same old cat.
Bit drastic, I agree, but I think the NA engines suffer a bit from glazed bores and the 25 year old stem seals won't help either.
|
| |
|
|
|
|
|
|
|
|
It passed and sailed through the emissions 16ppm hc (200 limit) and 11%co (20% limit), no idea why, perhaps because it's done fewer short journies, perhaps they never got it properly warm in the past or perhaps the added baffle in the exhaust has improved distribution through the cat. Whatever it's ok for another year!
Streetka next.
|
| |
Last Edit: Aug 3, 2022 14:03:04 GMT by kevins
|
|
|
|
|
|
|
Got the ka on the ramp, a/c drain was easy to access. 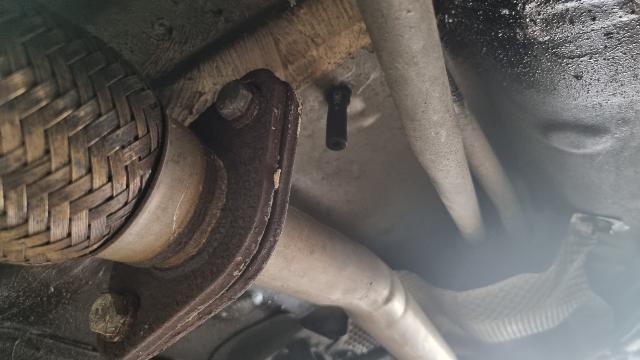 Wiggled a tie strap around it and was rewarded with a puddle.  Also noticed the brake lights were flickering with brakes off, a quick tweak on the switch adjustment fixed that. Then I thought I would have a look for the slow A/C leak with my new black light. (takes about 3 months) You can't see much of it but this is clearly one issue looking through the radiator grille mesh, one of the condenser O ring connections clearly glows. (Couldn't get a good picture it is the yellow bit in the centre)  I'll take the bumper off and change all of them when I get a chance. In the meantime I've bought the TR home, firstly to rub down and paint the windscreen surround before a new screen is fitted and secondly to strip and re-paint the badly crazed bonnet. |
| |
|
|
|
|
|
|
|
The windscreen on the TR has a crack from top to bottom so needs replacing, it's bonded in so will be down to the insurance to sort out. Before that though the bodywork around it needed tidying up, no rust but chippped and worn paint, so after a fair bit of flatting back, some epoxy primer and 3 topcoats I had this.  Not perfect but a vast improvement. One thing it does suffer from is the paint wearing away where the hood seal rubs on it,I'm thinking about using some paint protection film if I can find something suitable. Also decided to fo something about the hood latch plates, they are painted black but that gets destroyed the first time you use it. 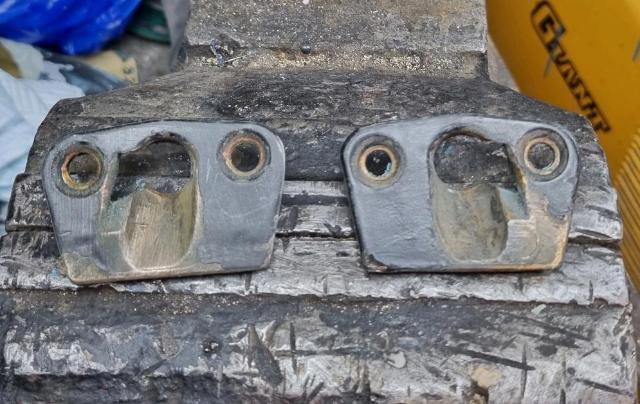 They appear to be made of bronze, so plan is to strip all the paint off and leave in bare metal. Next while the weathers hot is to take the bonnet off and strip/ re-paint it, there is also a bit of rust on the lh inner wing, that can wait till the autumn though. |
| |
Last Edit: Aug 7, 2022 13:01:18 GMT by kevins
|
|


