Paul Y
Posted a lot
  
Posts: 1,951
|
|
|
|
Thanks Rian, I found that forestry truck when doing my searches. It was the only one I could find that had the black shields on the doors, strange. Not going to get all bent out of shape over it if I cant work out the original, will just make something up! Would be nice to retain some of the originality. Anyway, wind stopped blowing so I have a destiny with a tree.... P.  |
| |
|
|
|
|
Paul Y
Posted a lot
  
Posts: 1,951
|
|
Feb 20, 2022 12:07:06 GMT
|
In between cutting up fallen trees and convincing my father that it was really not a good idea to go and cut the tops off the trees that hadn't fallen I did manage to find a few hours on Saturday to play Tetris in my garage and get the front clip onto the lawn for cleaning and prep ahead of a coat of Raptor. What should have been an hours job tops ended up being a 3 hour marathon as my petrol pressure washer decided that it didn't want to play ball and I spent an inordinate amount of time stripping the carb and cleaning it - who said this e10 stuff was harmless.... Anyway. Spray spray. Wash, wash. Ta DA! 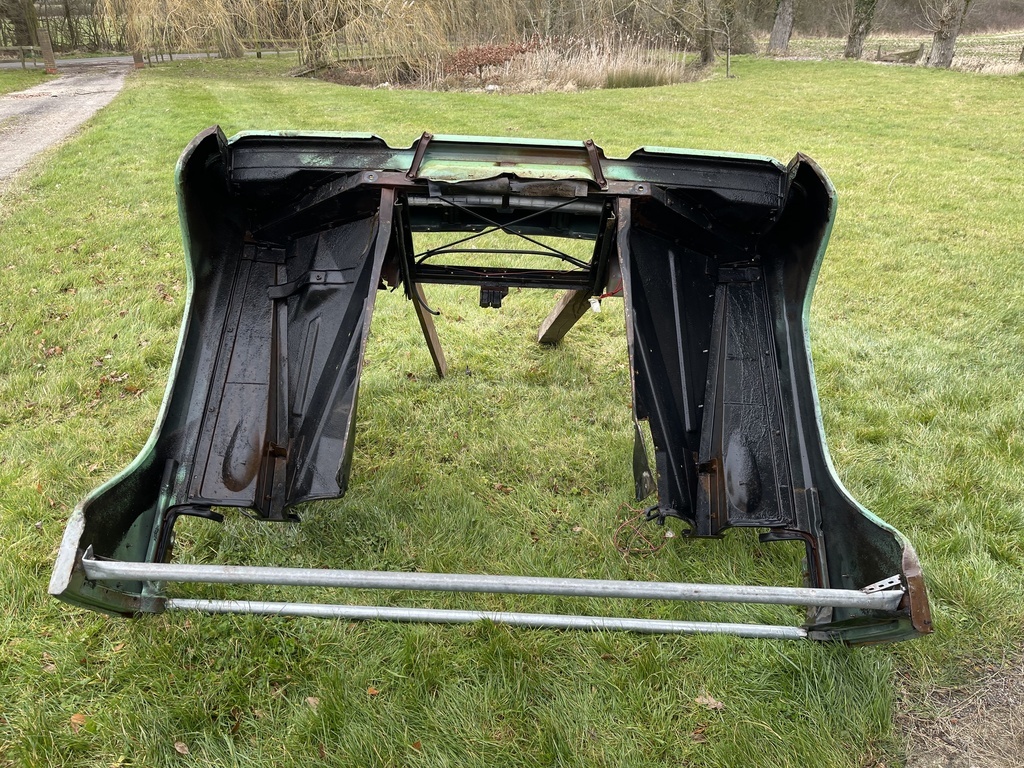 Clean. Then reverse Tetris to get it back in the garage, rough up the surface, throw some rust converter on it and mask up. 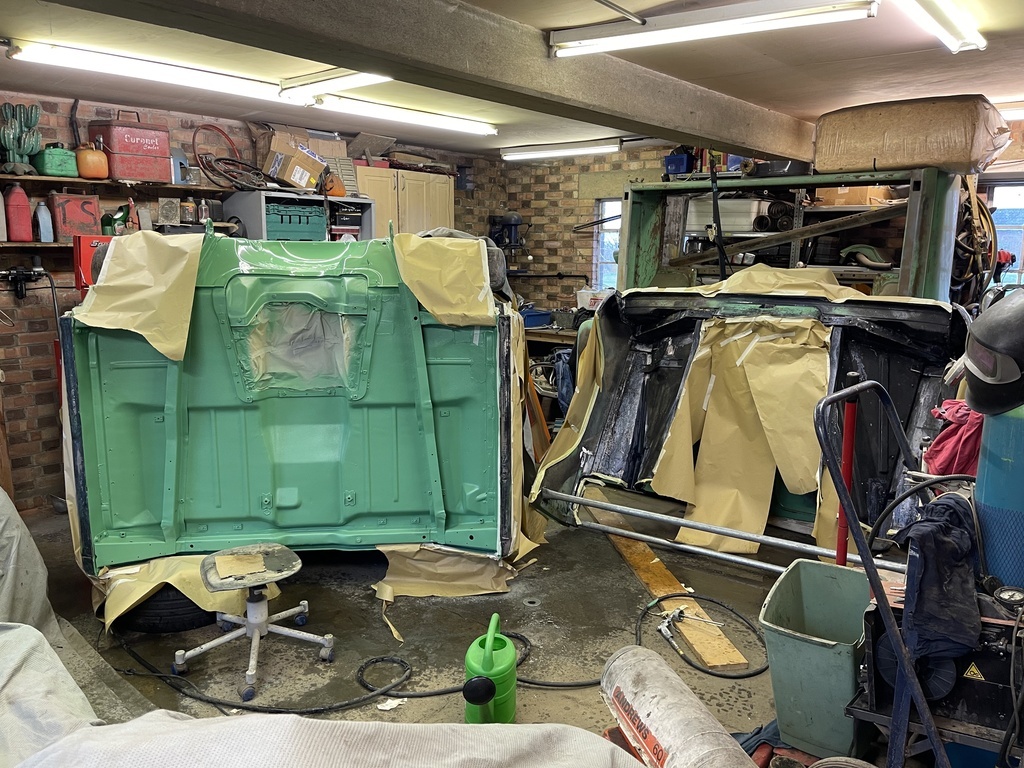 30 seconds to type, 2 hours to achieve. Which is where I left it as I was in danger of loosing vital parts of my anatomy if I did not spend some time with Lady P. Up early this morning and mixed up the Raptor for my first solo flight. Must admit I stood there for a good 10 minutes going over how I was going to spray this in my head and then another 10 procrastinating until I thought, Sod It, added the paint and harder to the pot and Pssshhhh. PPPPssssssssssshhhhhhhhhhhhhhhhhhh... Two coats later. 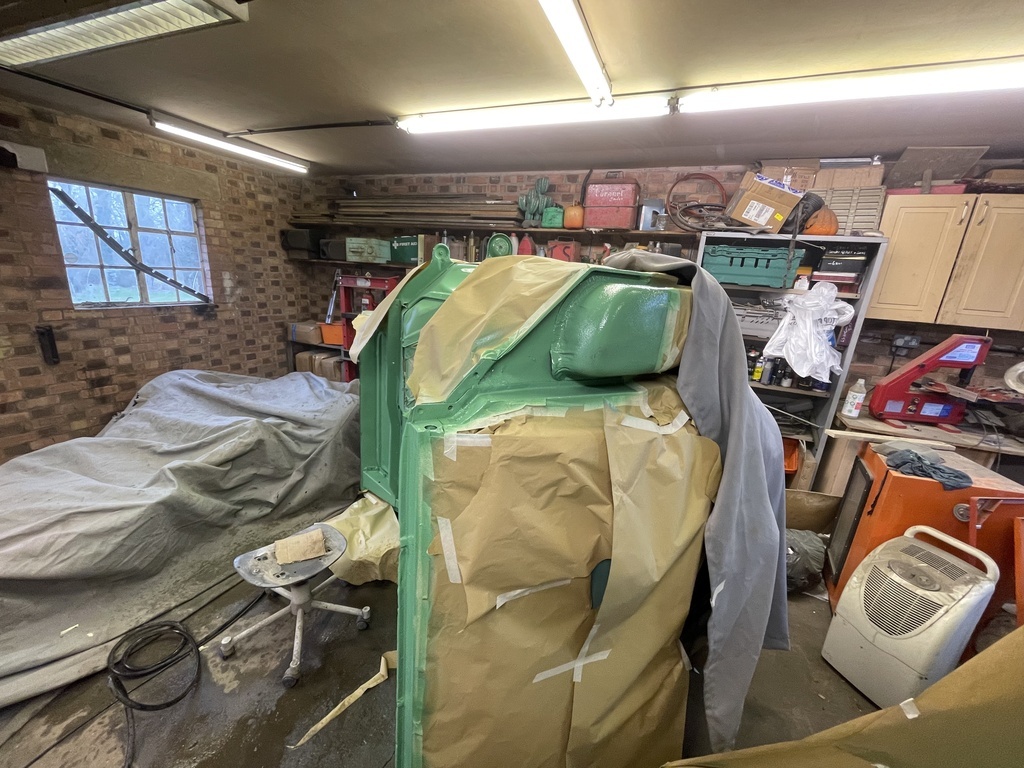 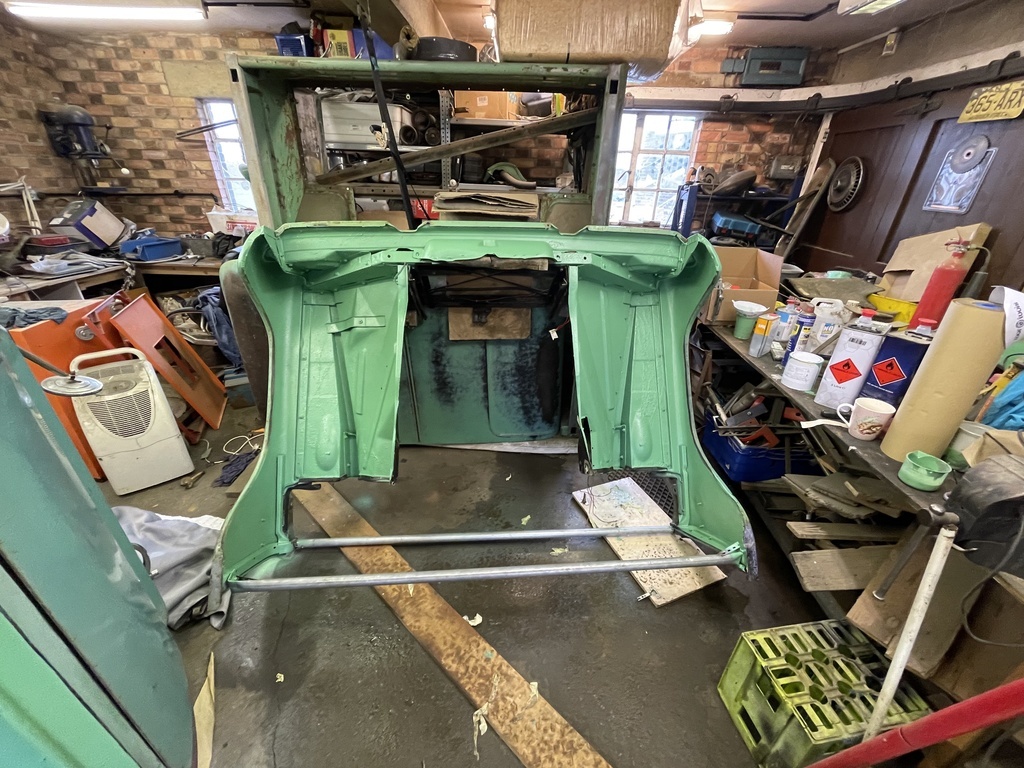 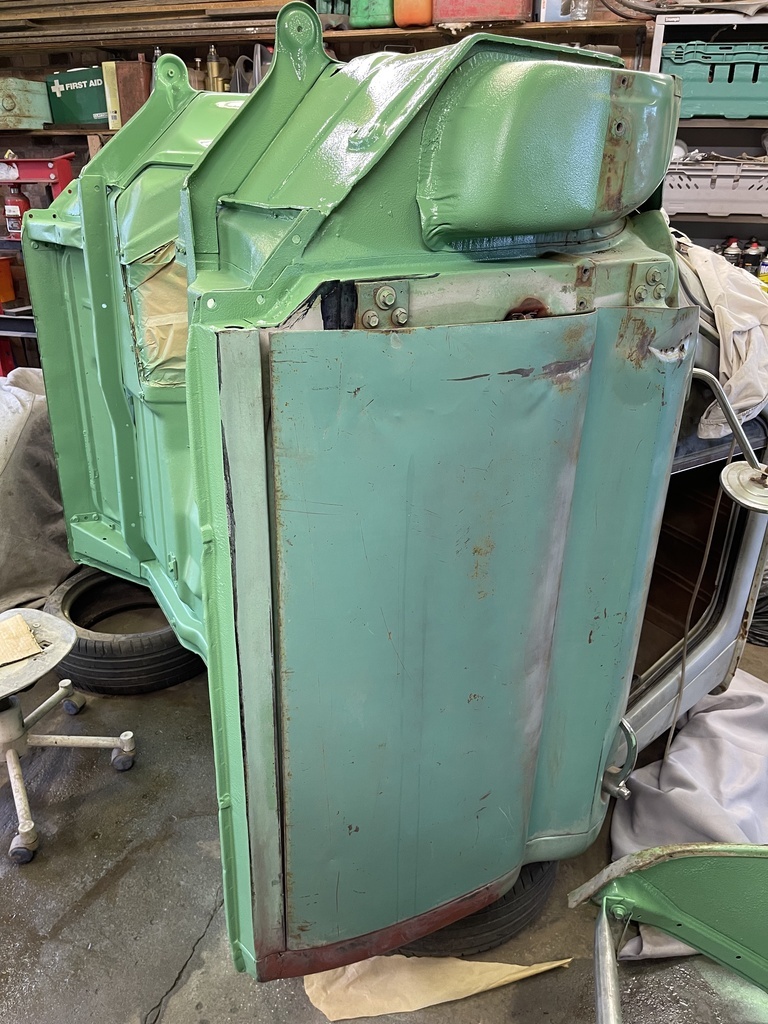 Think I have just become 'dangerous' with a gun.... 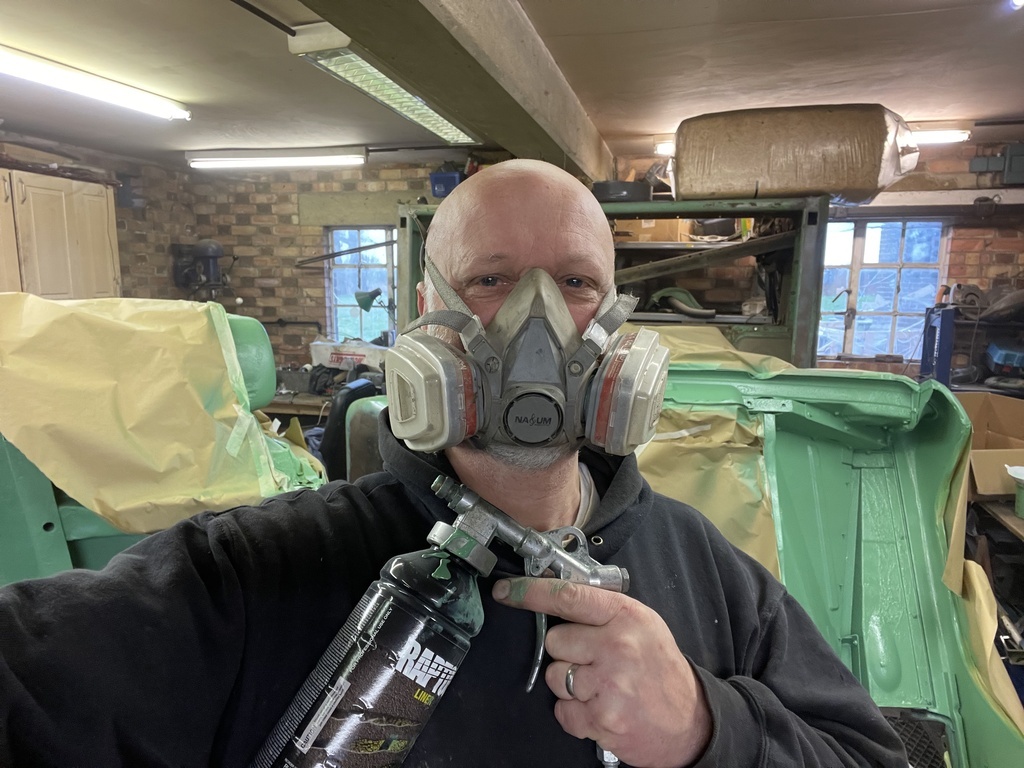 That now concludes the painting element of our program - well until the inside - next, back to mechanical, building an exhaust working out what the hell to do with the gearbox and plonking the body back on the chassis. 47 days and counting. Can see some late nights in my future. With that I will leave you to your Sunday roast. Until the next time.... Onwards!!!! P.  |
| |
Last Edit: Feb 20, 2022 12:10:39 GMT by Paul Y
|
|
Paul Y
Posted a lot
  
Posts: 1,951
|
|
Feb 20, 2022 15:59:52 GMT
|
Quick Sunday, post lunch, update. grizz posted on the Garage Journal asking for a bit more detail on the Forest Truck question I pose earlier. The amount of tacit knowledge that is out there continues to amaze me. For future reference I have copied and pasted this directly from Aaron on the afore mentioned. "I retired from the US Forest Service and own a 1958 US Forest Service fire engine so am a bit of a nerd about the vehicles. I looked through the linked thread where you are documenting your project. It looks like you did a pretty good job matching the green, and realistically it is not as uniform as you would think. You do see some minor variation in color between different truck brands and years. It is not clear to me how you are painting the top, but it should have a grey roof down to the base of the windows, a light to medium grey. They didn't adopt all green scheme until the mid 1970s. The large USFS shield on the door as on that tribute truck went away in 1940. The 1960s was a transitional period in markings, but in 1966 your truck probably would have had this style of door markings as I believe the change occurred about 1964-65. The USFS shield approximately 6", the block below about 4x18". The 4 digit number at the bottom is simply a property number, not any kind of radio ID. Choose any 4 numbers that amuse you, occasionally you will find only 3 digits, but that is unusual. White was more common, but black or brown are occasionally seen, usually about 1" in height. The USFS was not a highly centralized agency back then, so things were much more laid back. They would use what was readily available locally that they could get a good deal on so if that meant 3/4" brown numbers that is what they used. This use what you got is also what makes nailing down the exact date of the markings change hard. I'm sure many forests used up their supply of the old marking decals before buying the new ones so when looking at old photos you find a bit of a mix rather than a hard cut off. 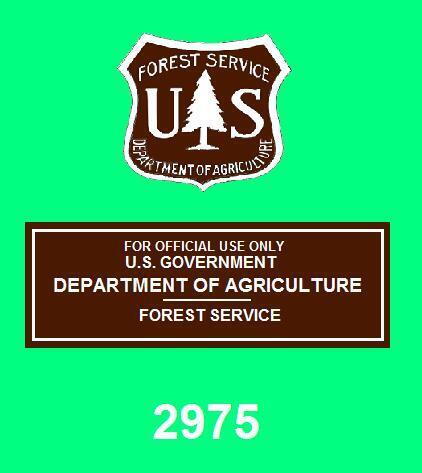 This is the older version of the markings used in the late 1950s to early-mid 1960s, sizes given for the above would apply here as well. 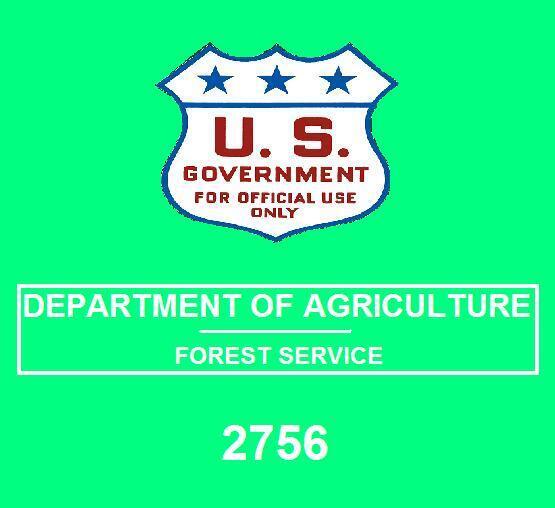 A great video clip of a similar truck in action (obviously not 1950s when it features a mid 60s Chevy...) Numbers on the roof didn't become a thing for the USFS until maybe the late 1990s, but it is possible that it was something local, particularly if the truck came from a Southern California forest. Reality is in the 60s and 70s a helicopter calling on the radio "hey you, Chevy truck by the big rock" would have worked in most cases. Just not that many resources back then in the remote areas where the forest service works. If they needed to talk to a specific person they would use their position, call sign (for important people, or equipment) or often just last name, not some numbers on the roof. Here is a slightly older Dodge, it has the older all white markings but shows the classic forest service hand rails often used used on patrol trucks and pickup trucks even into the present day. This is actually a screen shot from an old Lassie episode. The Forest Service worked with the TV producers so you can find lots of authentic late 1950s and early 1960s forest service vehicles in the show. 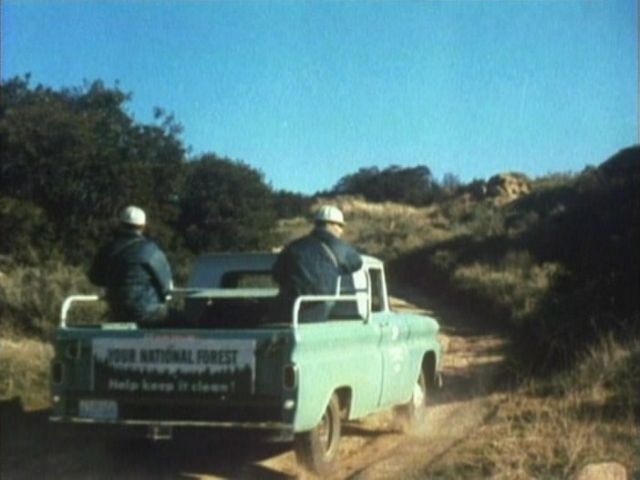 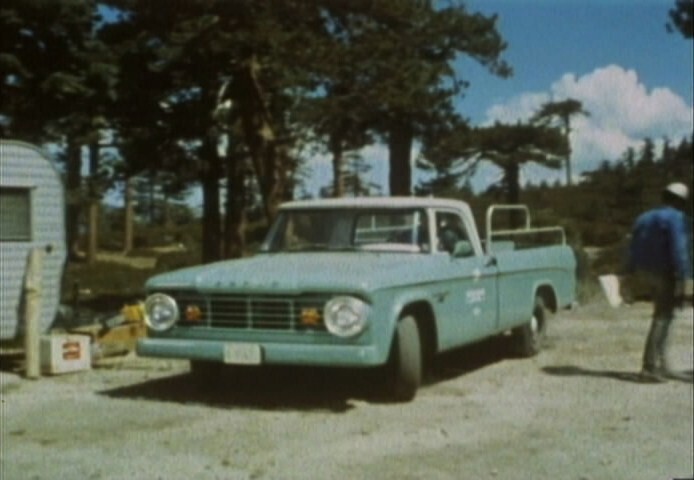 So there you have it. A little history on Forestry Commission trucks. P.  |
| |
Last Edit: Feb 20, 2022 16:02:08 GMT by Paul Y
|
|
|
|
|
Feb 20, 2022 23:29:40 GMT
|
I guess that gives you a little bit of wriggle room to make it a bit more how you want it. So what are you going to do for the bed rails?  |
| |
|
|
Paul Y
Posted a lot
  
Posts: 1,951
|
|
Feb 21, 2022 22:25:36 GMT
|
I guess that gives you a little bit of wriggle room to make it a bit more how you want it. So what are you going to do for the bed rails?  Absolutely no idea! In fact, I did not even notice that they are on all Forestry Trucks until you brought it up. As for the logo on the door.... undecided. Might be good to have some fun with it but, at the same time, might just leave it as is. Time will tell! P.  |
| |
|
|
Paul Y
Posted a lot
  
Posts: 1,951
|
|
Feb 24, 2022 20:58:44 GMT
|
So, on a day of pretty dismal international news I thought I would share what some would call Karma, or paying it forward according to grizz and why I have this in my hand... 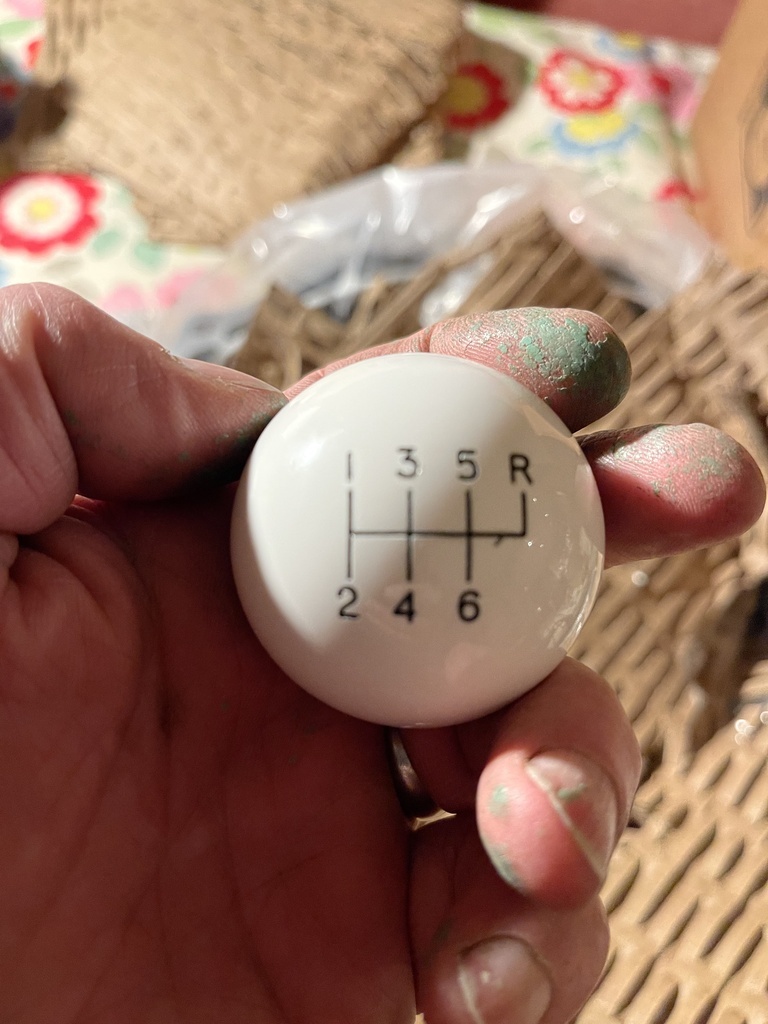 Without going into huge detail I am fortunate enough to be reasonably well known in my industry which means I occasionally get asked to present at conferences, sit on panels and, a first for me, give lectures to university's. The later resulted in another opportunity which in turn lead to a conversation that culminated in "well if you don't want to be paid what do you want?" This all happened back on October and, to be very honest I didn't think what I asked for as a joke would actually turn up until a rather cold February morning found me in Southampton with this in the boot of my wife's car. 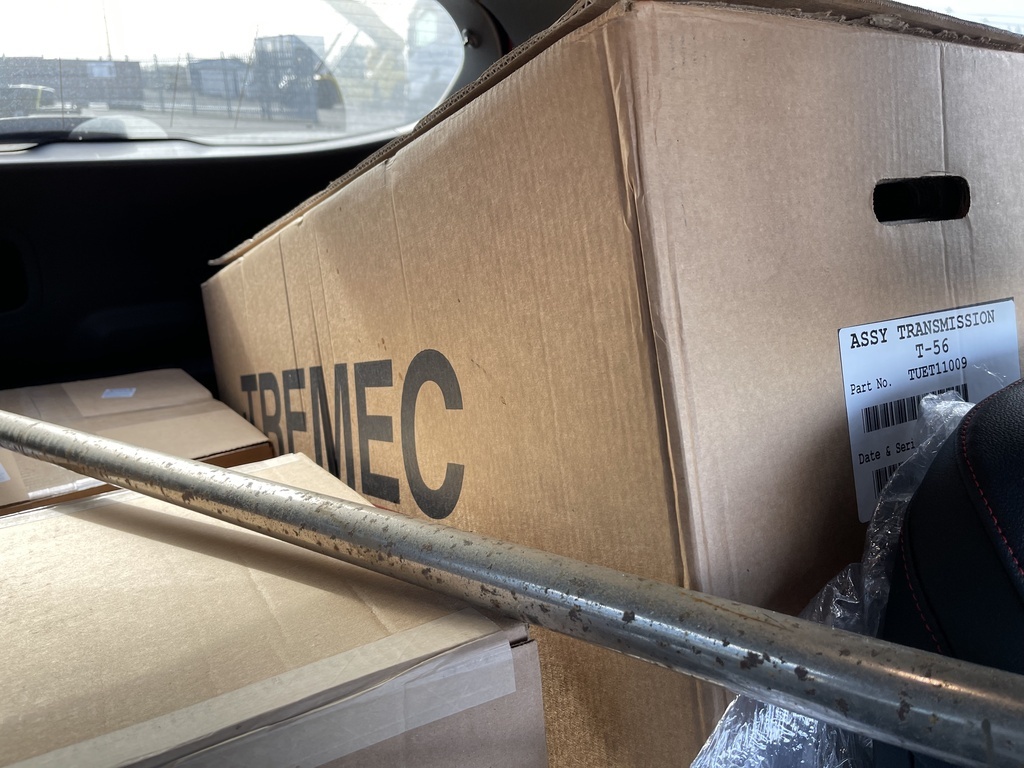 For those keeping up with the story you will probably remember that I had resigned myself to using the SM420 that came with Woody so had already ordered a flywheel and was going to reuse the clutch but, on the off chance that this stupid story was actually turn into reality I had ordered a clutch kit and various other components to fit the T56 as, at some time, I would have use for them. So what was in the box then Baldy? 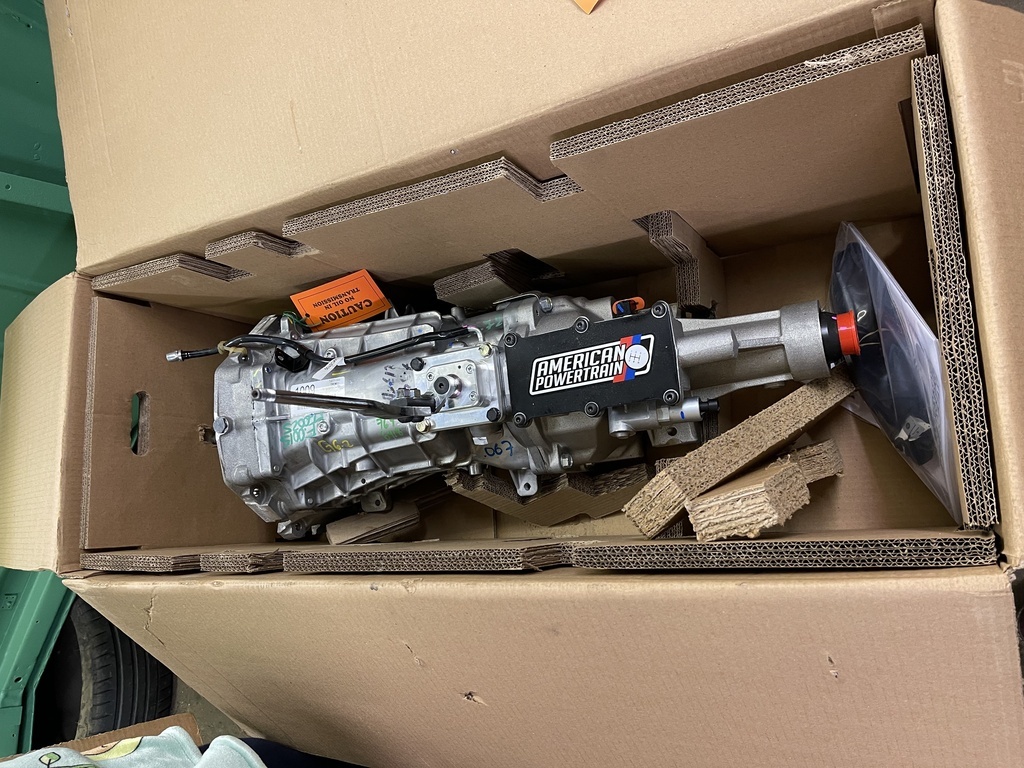 I still cant believe that this actually happened. Anyway, my aim has been to spend an hour per night in the shed - it always ends up being more like 2 - as I try to get Woody ready for the 9th April. I had already decided to upgrade the dog bone in the oiling system and replace the RMS so that was one nights work. For those that don't know the dog bone resides behind here. 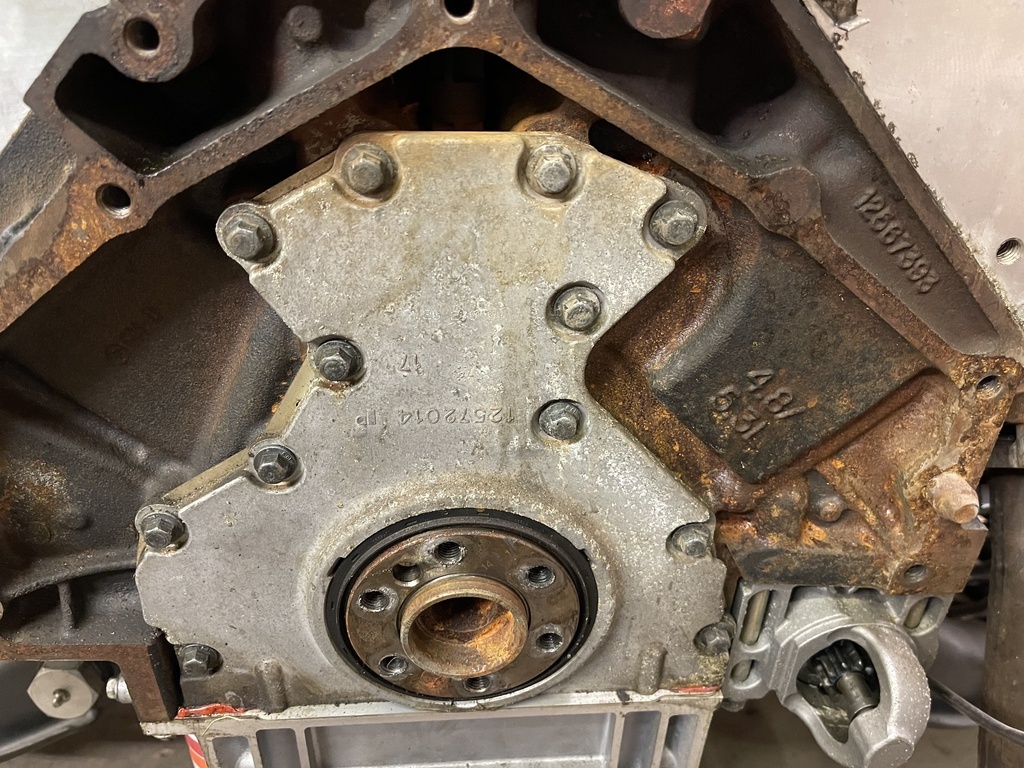 And is the beige plastic thing on the lower left of the picture. 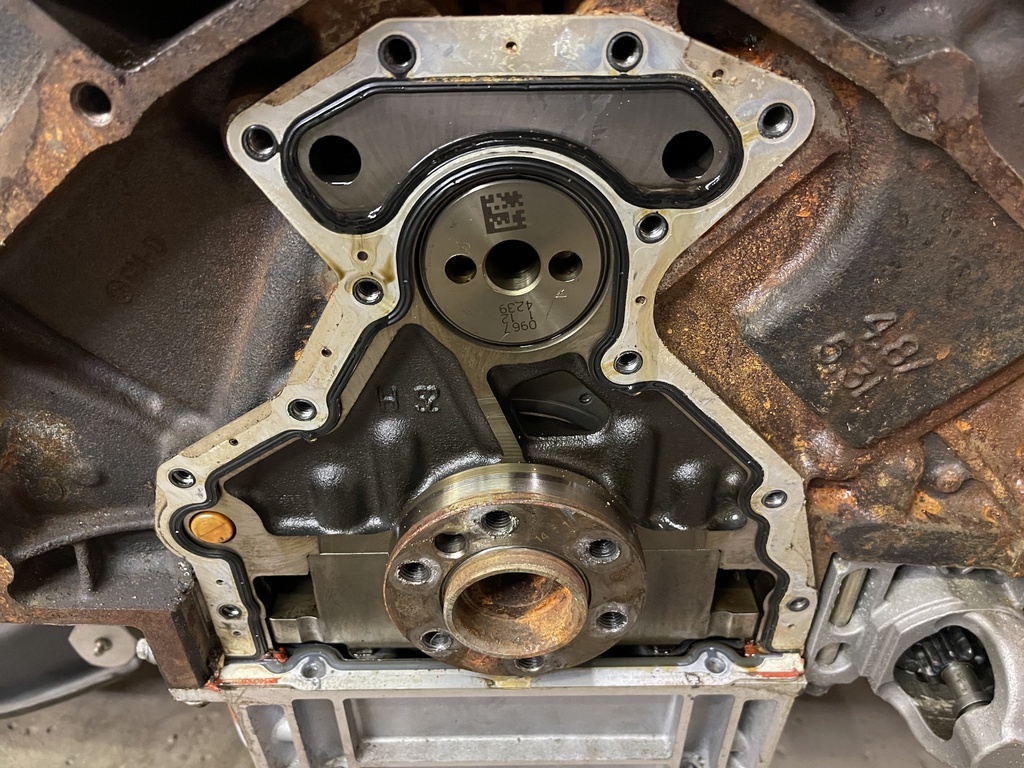 Extraction is a bit of a faff but nothing a wood screw can't overcome... 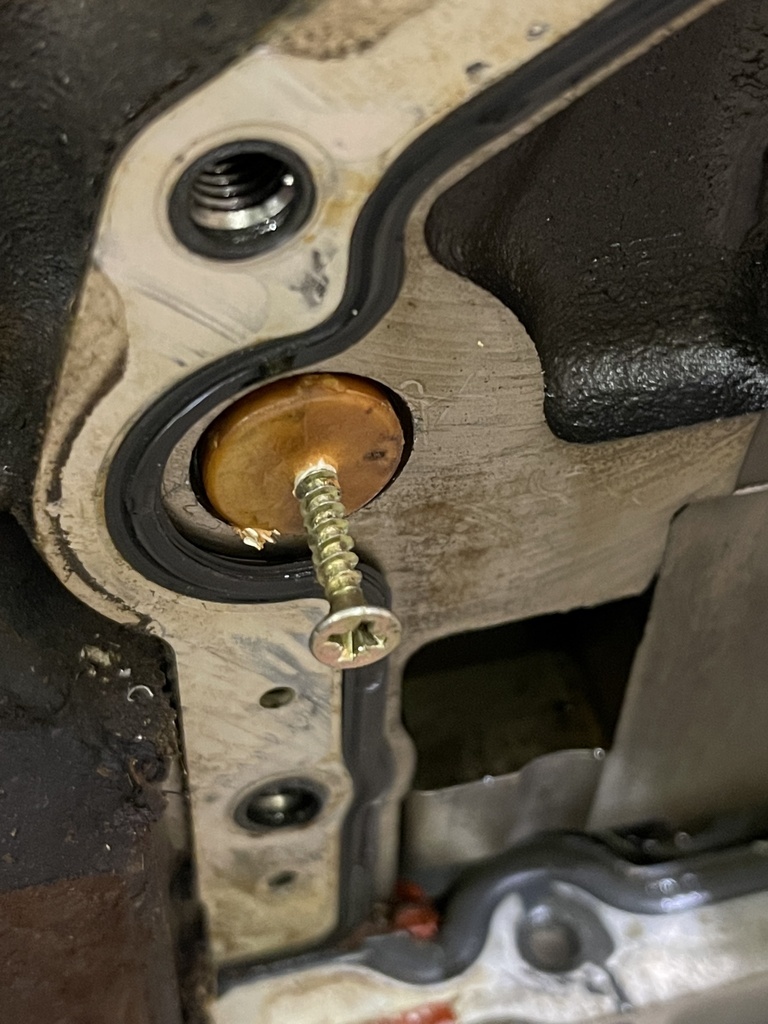 So why do you replace it then. Quite simply it diverts the oil from the main oil gallery through the filter and is a little 'weak' when compared to the aftermarket alternatives. Plus for $20 it is cheap insurance. Observe. 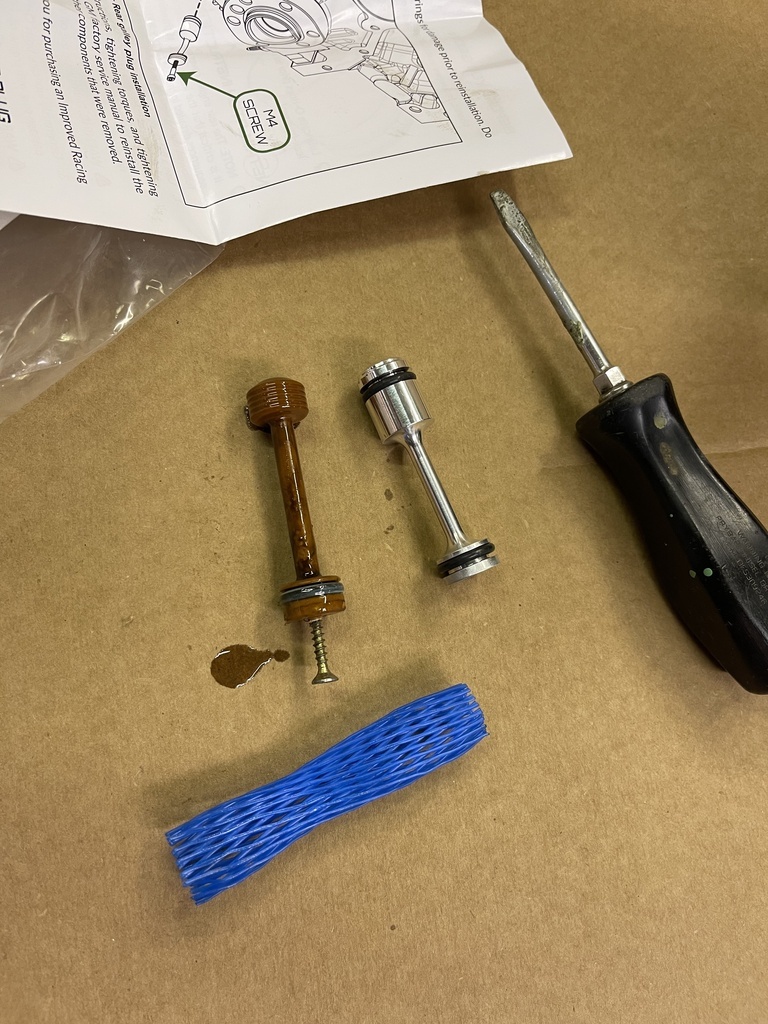 And installed. 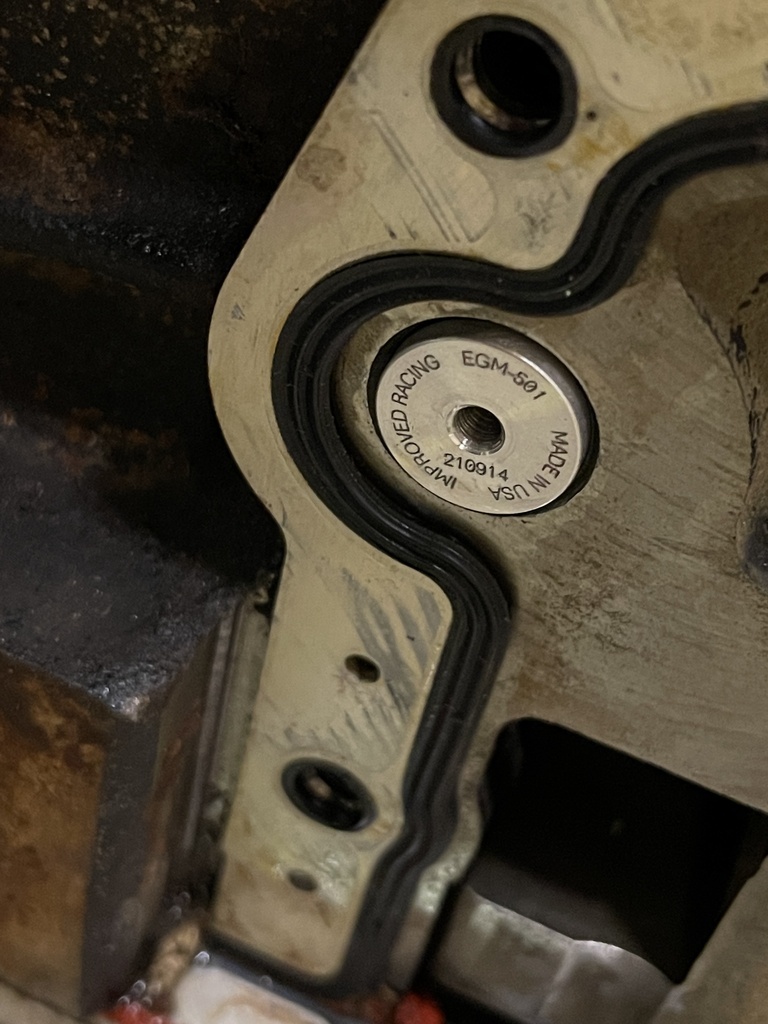 Next job on the list was to install this little Johny. 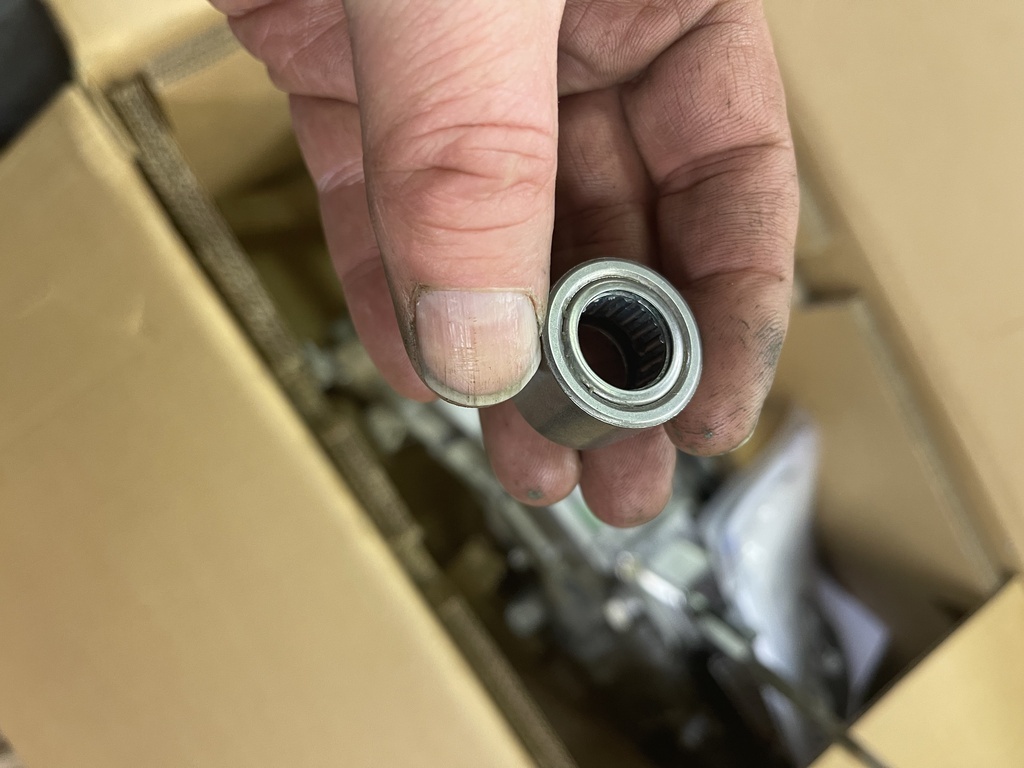 Pretty simple operation once I had cleaned out the end of the crank and deployed my assortment of Tonya Hardings... 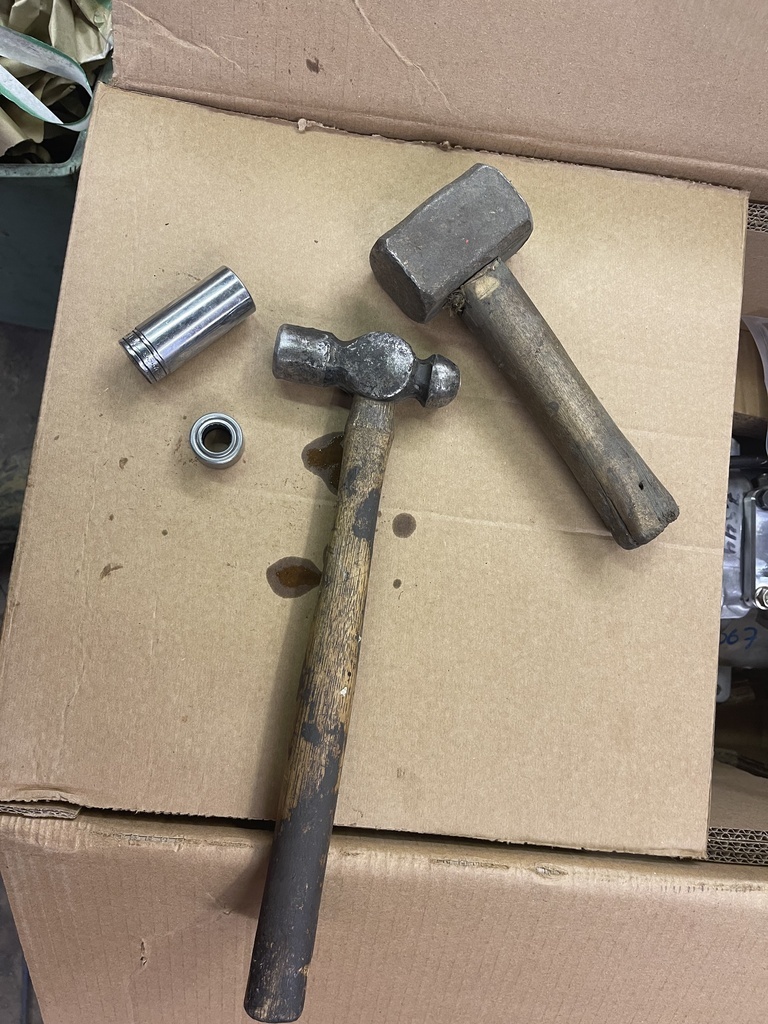 Aannnnndddd... in. 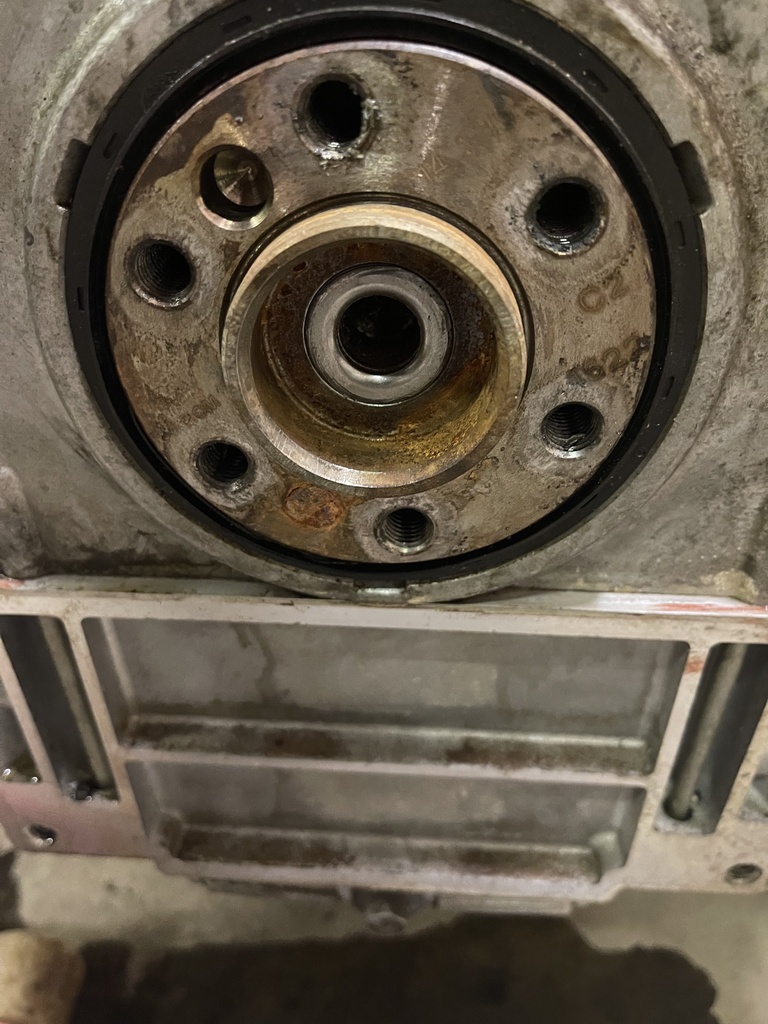 Flywheel next after I spent 2 hours calling around all of the local motor factors looking for blue loctite. I mean you would think I had asked for Vlad's telephone number.... Which lead me onto the the first challenge of the proceedings. The instructions/warranty that come with the gearbox are very specific that you must index the bell housing. What they don't tell you is that you need an index plate to accomplish this which I only realised after spending 2 hours with a dial indicator thinking I must be some sort of numpty... Needless to say I realised my mistake and the plate is making its way across the ocean as we speak. Problem is I really wanted to fit the gearbox for two reasons. A) I wanted to make the exhaust over the weekend and wanted to make sure that everything lined up with the box in place and B) I wanted to make Brumm Brumm noises. So, lets break out the trusty Cheap engine crane Use a stap as a sling 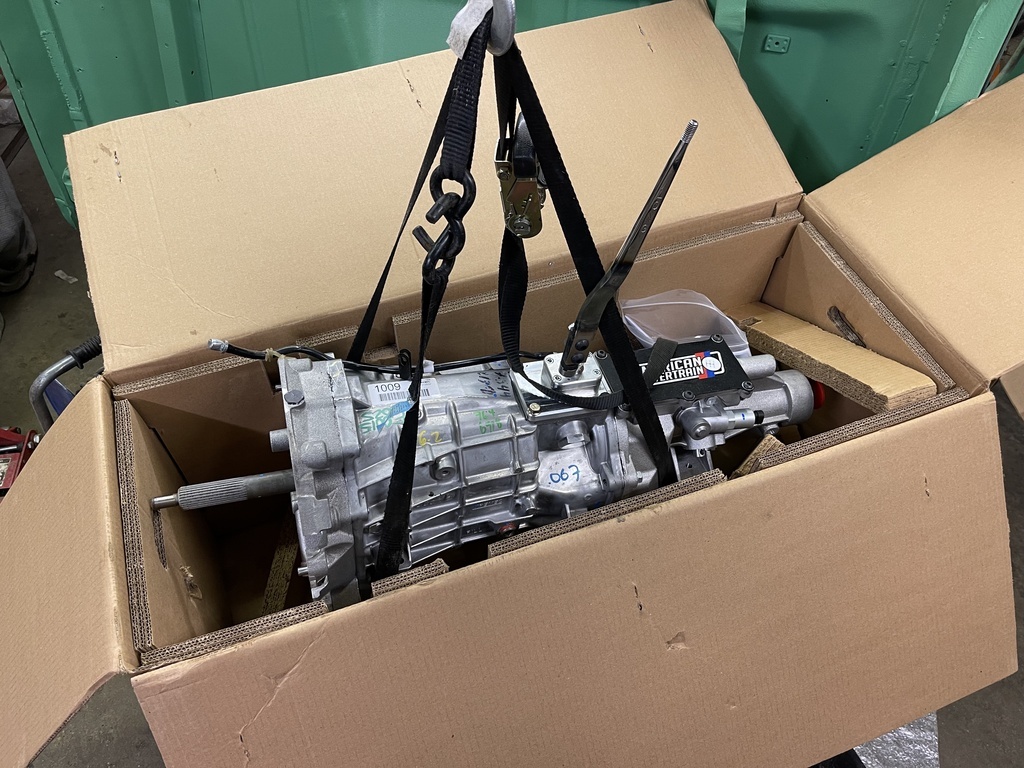 And hoink this bad boy out of its box... 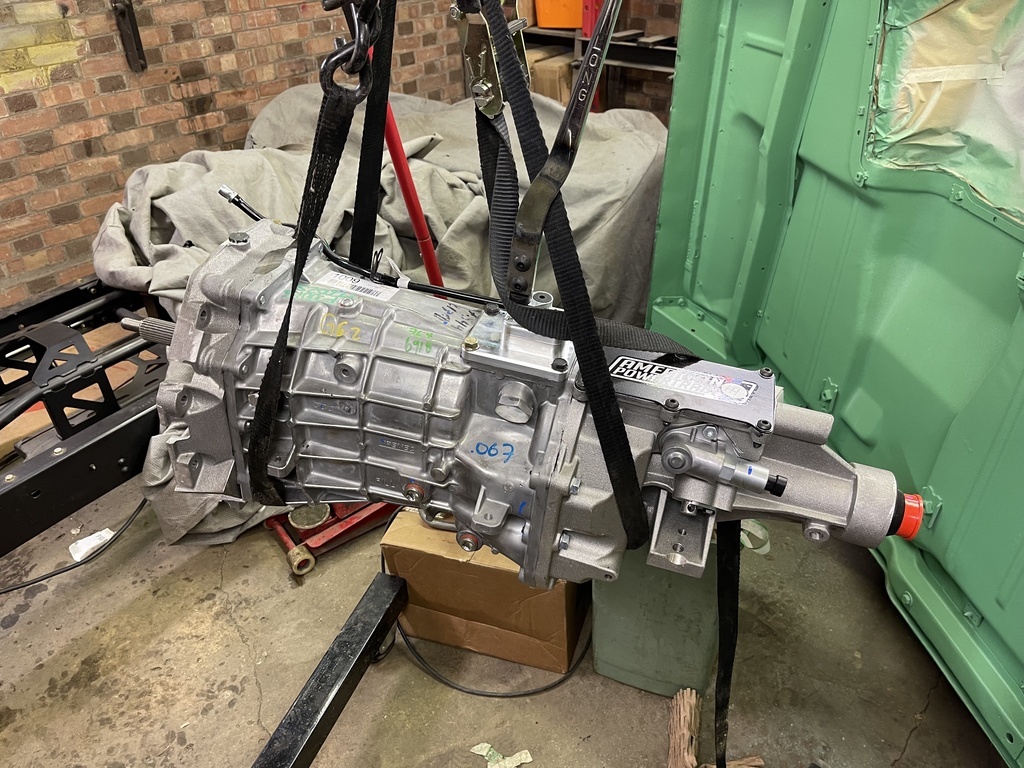 Oooooohhhh....She Thiccccccc And in! 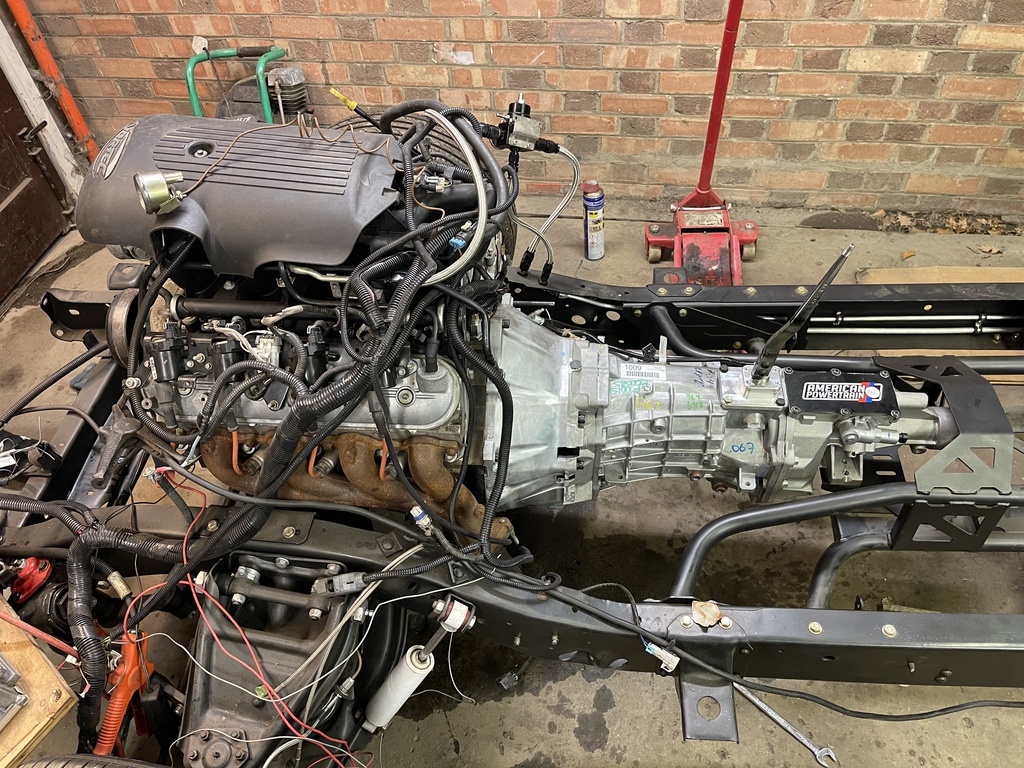 Believe me, the struggle was real hence the lack of actual instal pictures. Annnnndddddd... The money shot.... 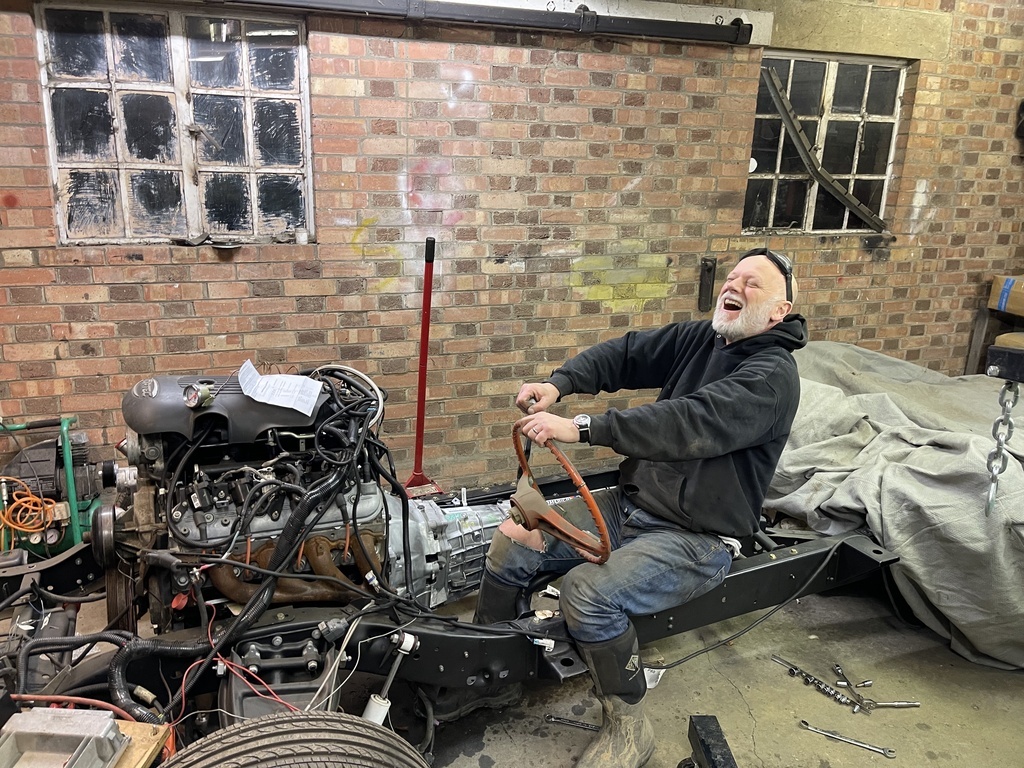 BRUUUUMMMMM, BRRRRRUUUUUUUMMMMMM, BBBBRRRRUUUUUMMMMMMM etc. In closing, sometimes it pays to invest time, give of your self and 'pay it forward' . I think that this is especially important given the events of today. Stay safe people and until the next time...... ONWARDS!!!!! P.  |
| |
Last Edit: Feb 24, 2022 21:34:05 GMT by Paul Y
|
|
|
|
|
Feb 24, 2022 21:20:33 GMT
|
|
OHHHHHHH MY WOOOORRRD……! ! !
That is pretty awesome Paul.
You do a ton of stuff for random people, strangers and friends.
Pretty cool that your scratch card had the numbers.
Well done.
ONWARDS…//
BRUUUUUUUMMMM, BRUM BRUM BRUUUUUUMMMM
|
| |
|
|
Paul Y
Posted a lot
  
Posts: 1,951
|
|
|
|
Thanks Rian, Was in two minds whether to include this part of the tale but I suppose it is a bit like a marriage. For better or worse... On which note I realised that I am going too have to respray the firewall again as I was a little less fastidious with my masking than I should have been and now have Raptor overspray on the bits that are not supposed to have Raptor on.... Oh.... fiddlesticks.... P.  |
| |
|
|
|
|
|
Feb 25, 2022 12:00:08 GMT
|
|
That's great news!
|
| |
|
|
|
|
|
Feb 25, 2022 20:40:26 GMT
|
|
So glad you decided to share your win.
Karma certainly has rewarded your efforts, that are never an effort for you.
Well done
|
| |
|
|
|
|
Paul Y
Posted a lot
  
Posts: 1,951
|
|
Feb 25, 2022 21:48:44 GMT
|
Evening all, After spending an hour looking at a pair of Flowmaster 40's and a bunch of 2 1/2" pipe I have given up and returned to the sanctity of curse word tv and some sort of Rhubarb beer. Which tastes a bit pants. Two options open to me. 1) Sulk 2) Ask you lot for your thoughts. I will take 2 for curse word beer please Paul. Right. So what is the problem... Let me illustrate through the medium of a few rubbish pictures. From the down pipes to the trailing arm crossmember I have a pretty straight run. Behold! 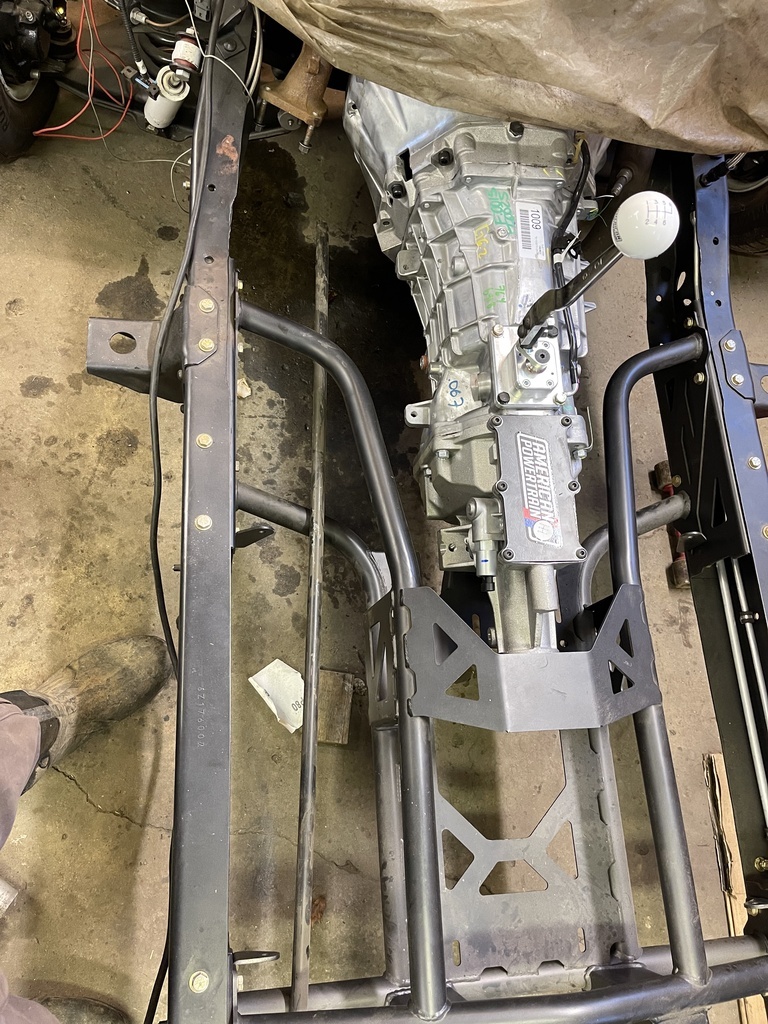 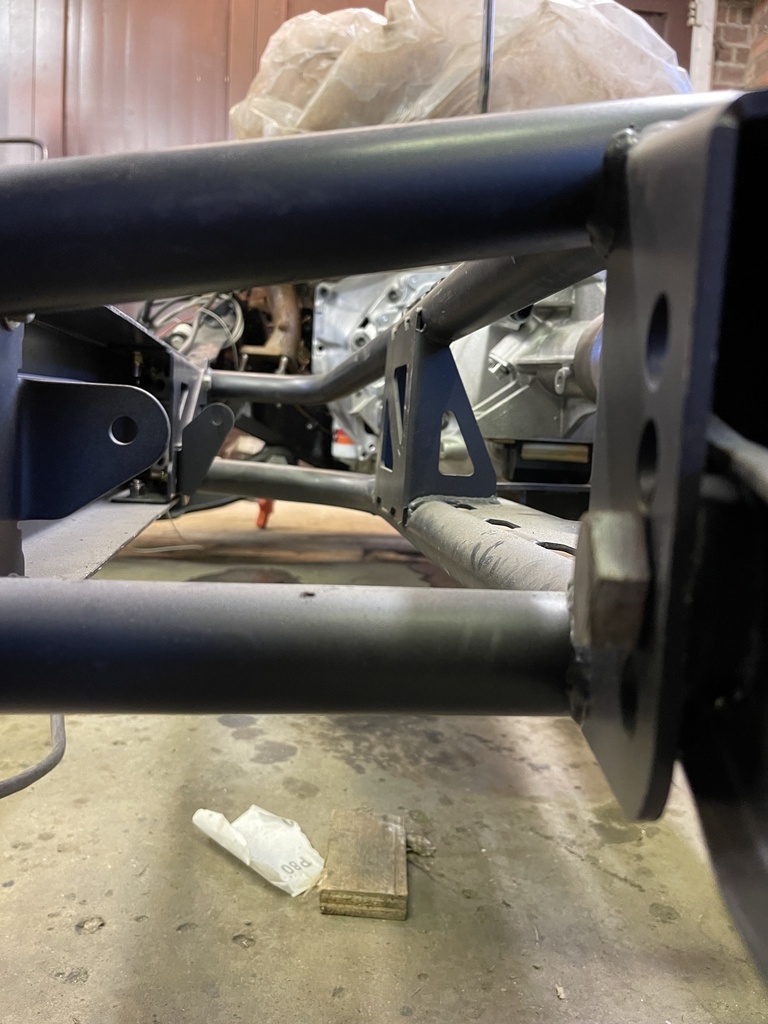 There is enough room between the braces to run a 4" pipe so plenty of room for activities. My initial thought was to put the flow masters there standing vertically but after a quick mock up they hang too far below the chassis rail. Not what I am really after. I could mount them in front of the axle, again standing vertically to get the exit from the box over the top of the axle. Ok that would work on the passenger side 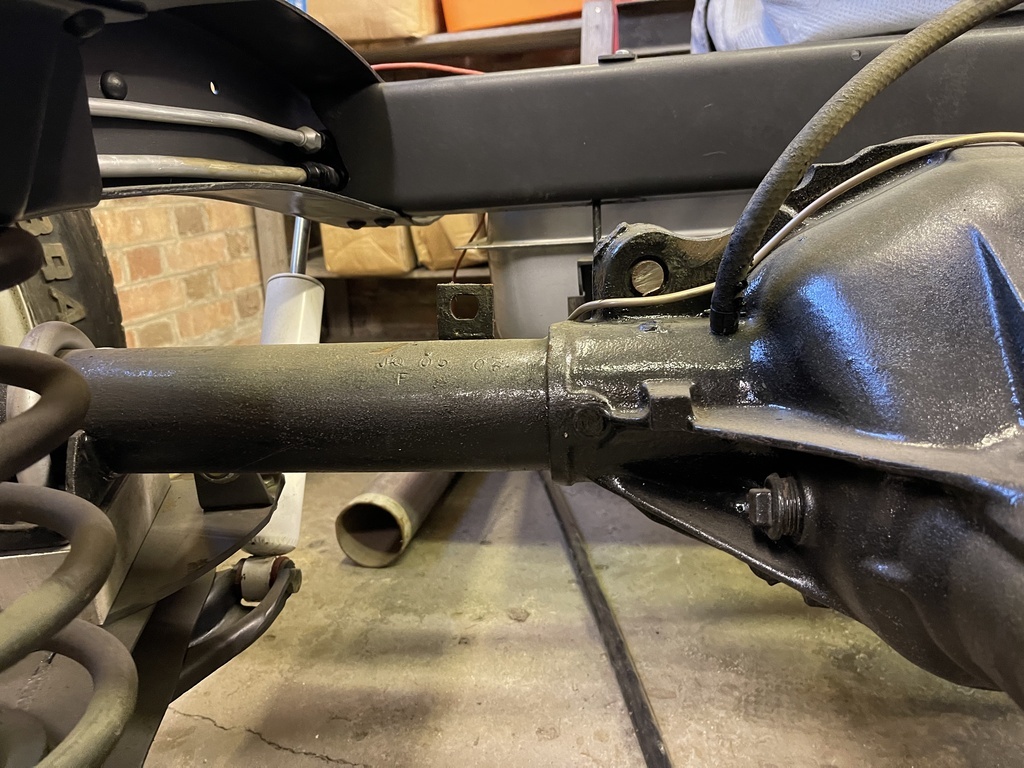 But on the drivers side we run into clearance problems.... 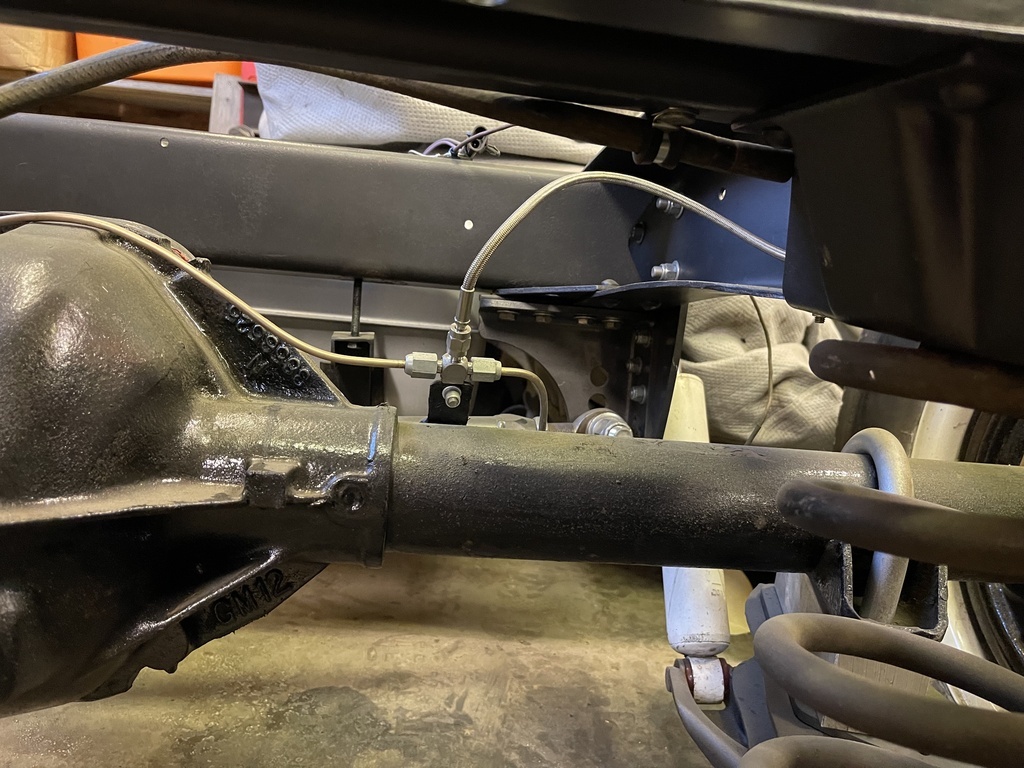 Over the axle is fine bit we then have the challenge of the tank and Panhard bar mount. 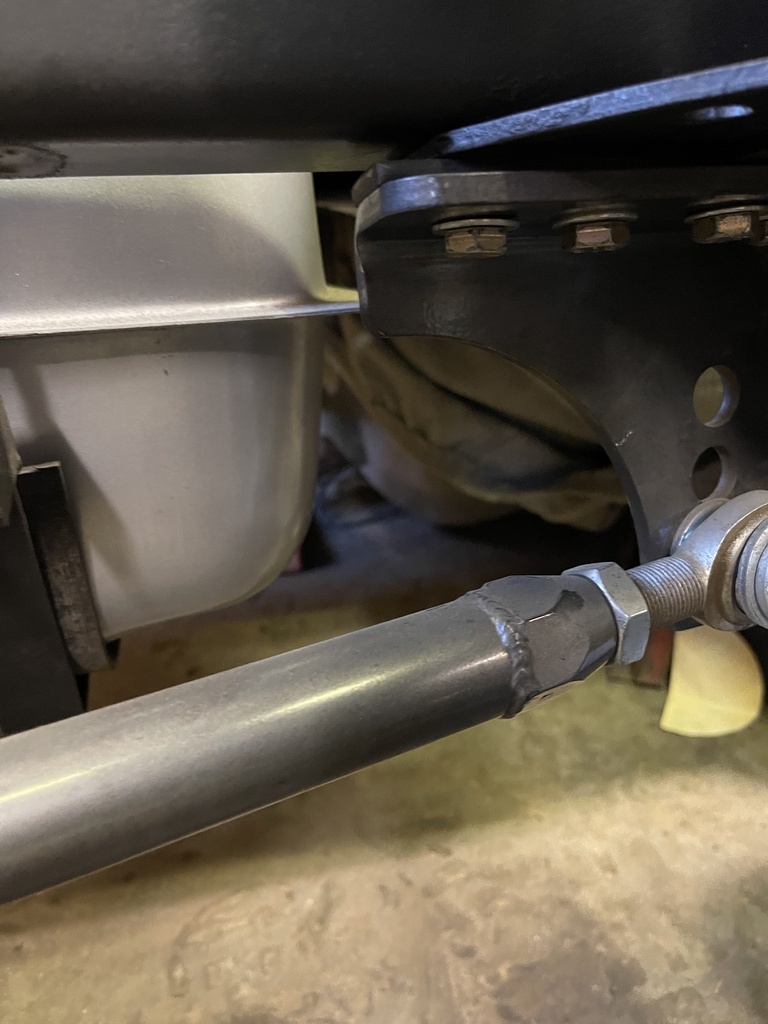 I can get a 2 1/2" pipe between the mount and tank but there is no room for movement of any kind. So probably not going to work. Cant snake it outside the chassis rail as there is not enough room between the axle and frame rail. I could be lazy and just dump the exhaust in front of the axle but not a big fan of that. Second option is to get a pair of bullets or Cherry bombs - if anybody has a pair in the shed in 2 1/2" flavour please let me know - and place them between the frame rail and brace. 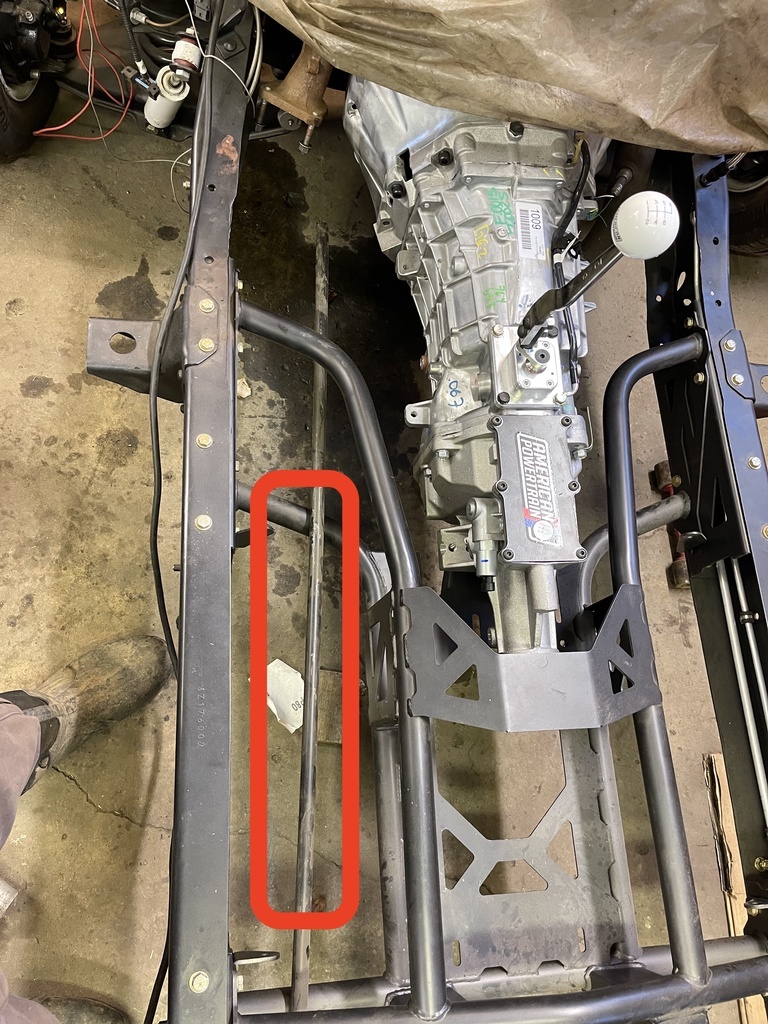 Here. Thinking then is to run the exits out each side in front of the wheels, 3rd option is the same as above but merged the two 2 1/2" pipes into the spare bit of 4" straight I have and run it through here to the back bumper. 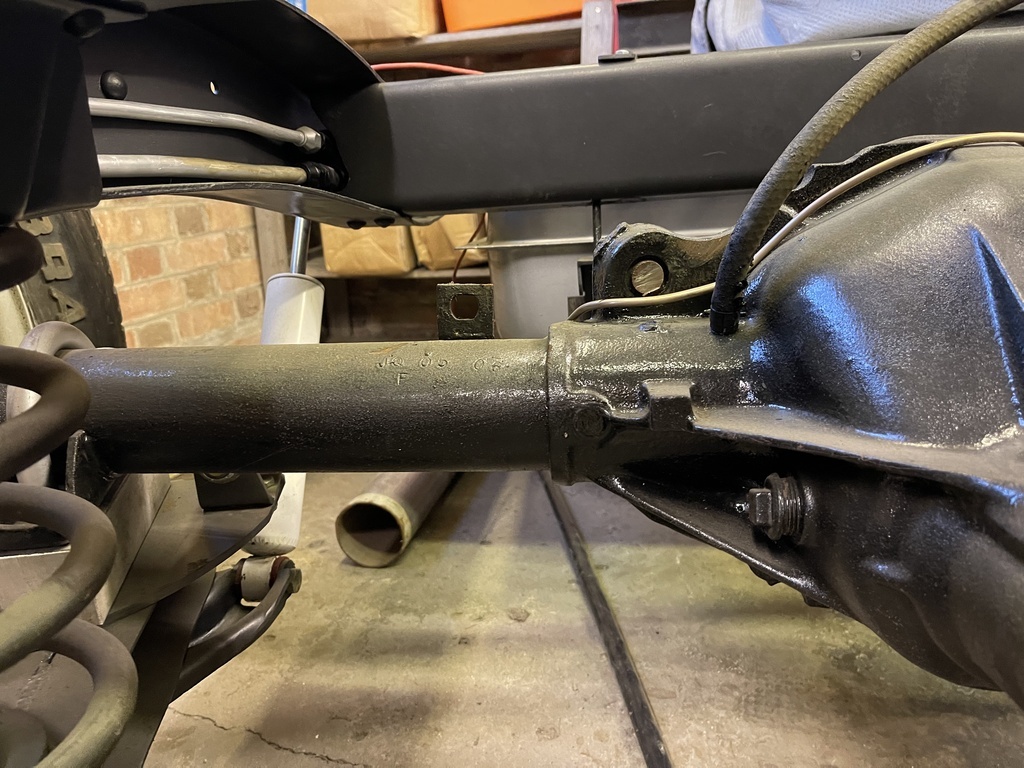 In time I will probably get the exhaust done professionally but, for the interim, just looking for something that works, is reasonably low cost and will sound OK. How would you tackle the problem? Have I missed something, is there another way to do this? Let me know as my plans of getting this done over the weekend have been dashed - due to lack of material (thought I could use the old exhaust) so have time to collect bits and get it done during the week. Thanks? P.  |
| |
Last Edit: Feb 25, 2022 21:55:07 GMT by Paul Y
|
|
|
|
|
|
|
|
Could you run it under the axle, may need to add some straps to reduce axle rebound travel but with it being lowered it's probably part of the travel you will never usually use anyway.
|
| |
|
|
Paul Y
Posted a lot
  
Posts: 1,951
|
|
|
|
Could you run it under the axle, may need to add some straps to reduce axle rebound travel but with it being lowered it's probably part of the travel you will never usually use anyway. I did consider that kevins but it is not my preferred option. Looking again there might be enough room to go over the axle turn sharp left, run the pipe between the axle and tank, and then exit out the passenger side. Any supplier advice whilst I am here? eBay is the obvious but any recommendation for somebody local to Essex? Thanks, P.  |
| |
|
|
|
|
|
|
|
|
I think the exit ahead of the wheels idea may be good for now.
Also, it is quite aggressive looking.
Alternately, the single rear exit is pretty cool because so many people insist on having two pea shooters sticking randomly out the rear bumper.
PS. Bacon sandwich is waiting for you…; )
|
| |
|
|
|
|
|
|
|
|
PPS.
Remind me to pull some tips out my stash.
Corvette units.
You can just take a look, in case they resonate with your greater scheme.
|
| |
|
|
Paul Y
Posted a lot
  
Posts: 1,951
|
|
Feb 26, 2022 19:47:29 GMT
|
So.... 20 months ago Woody's cab was firmly ensconced on his rather grubby chassis. 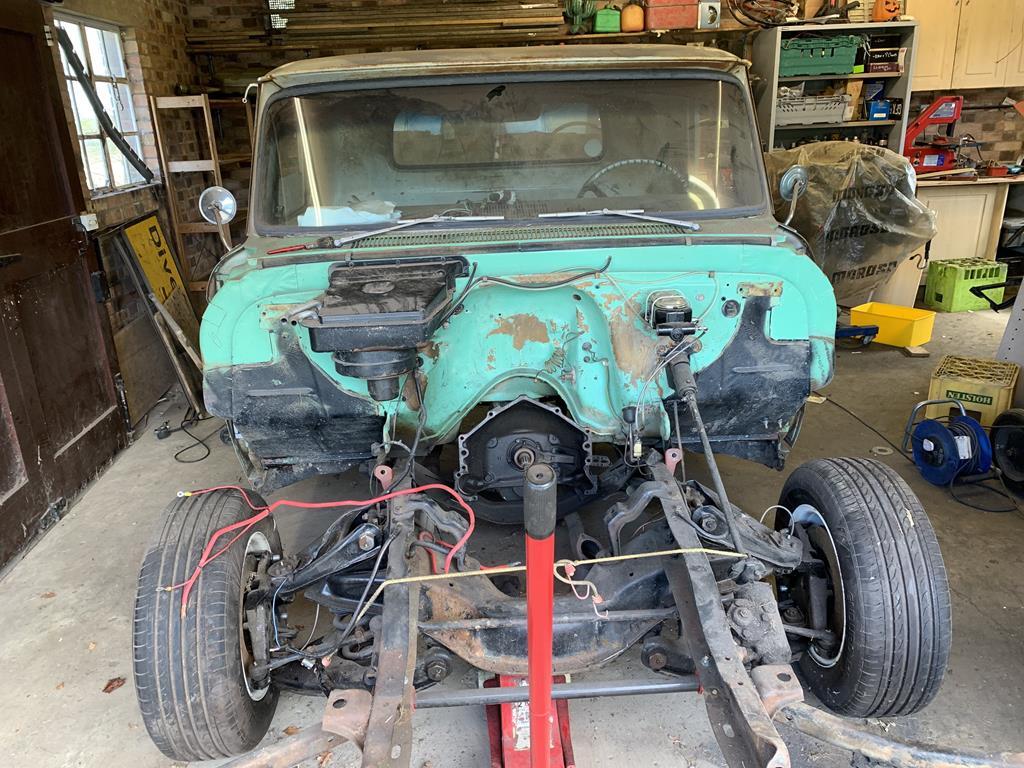 And #3 son was manning the engine crane as separated the cab from the chassis for the first time in 54 years. 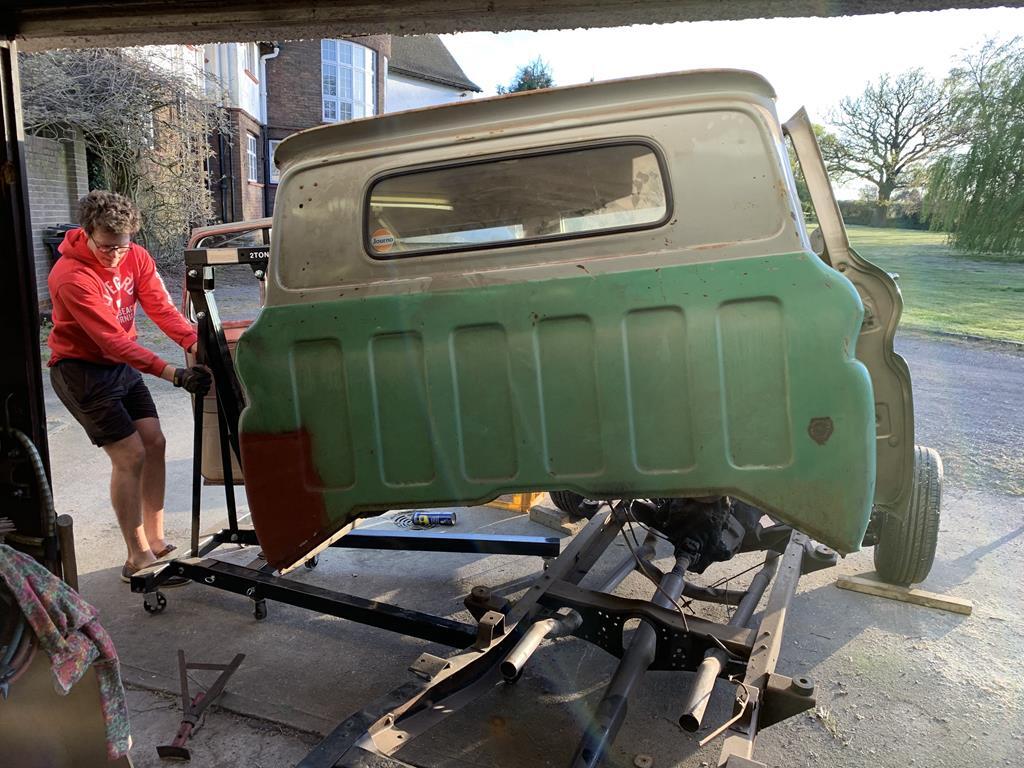 So today righted his Woodship back onto the pallet dolly and peeled him out into the sun. 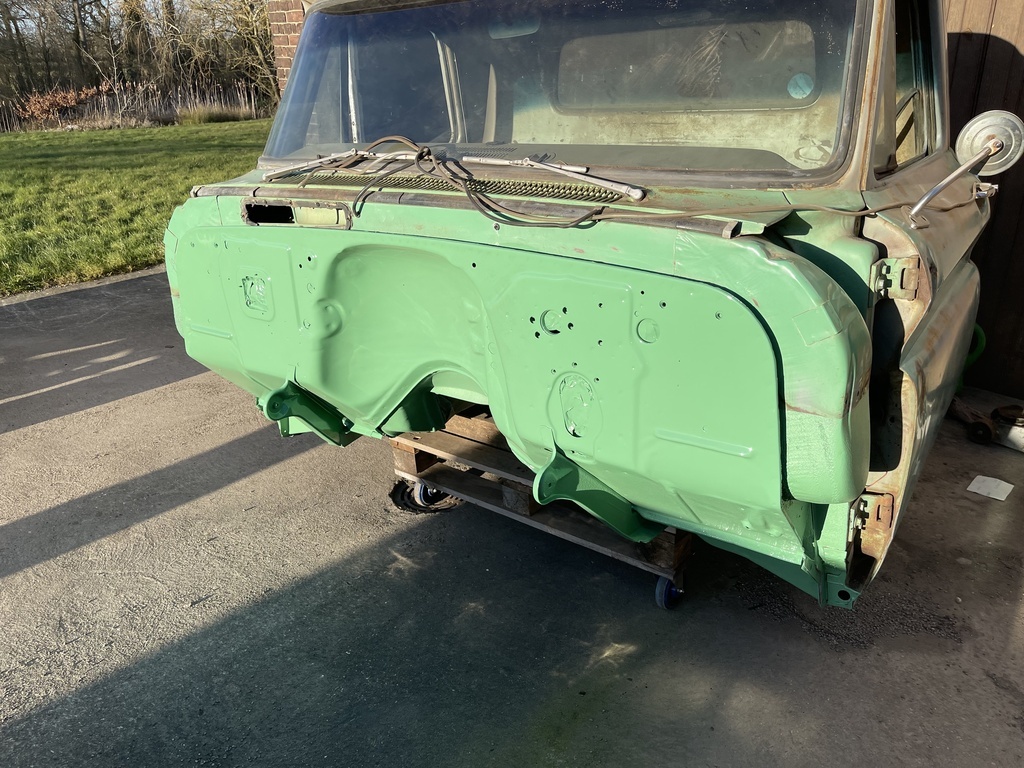 Pretty happy with that colour match. 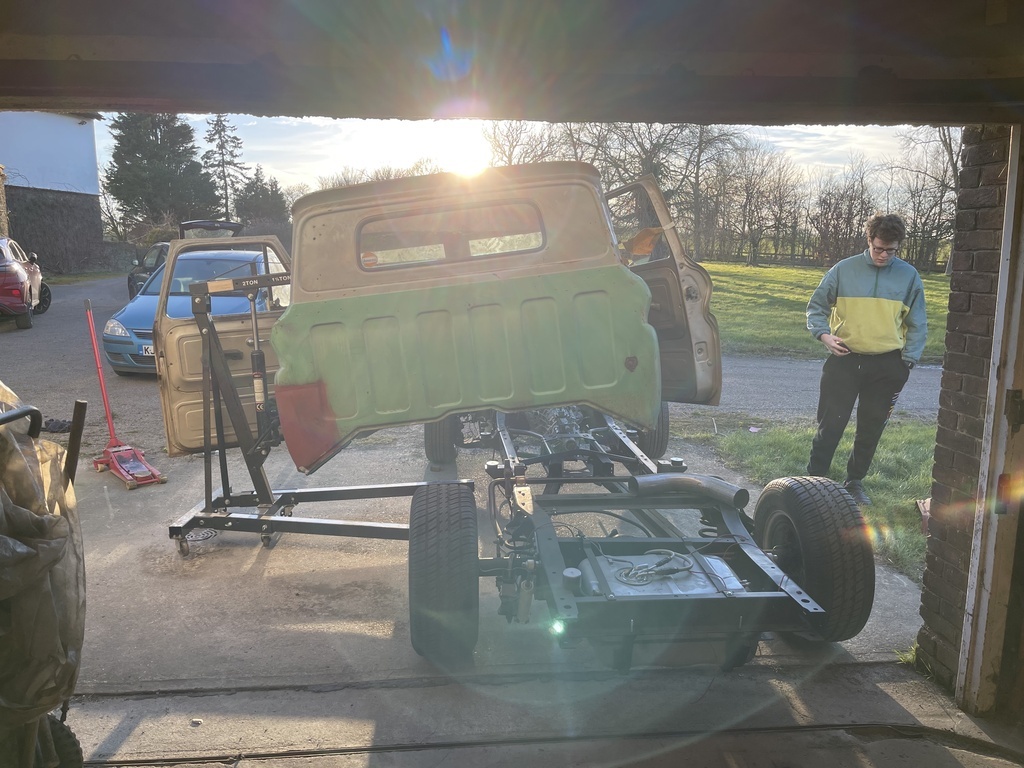 Deployed the cab lift collected from grizz this very morning - thank Martin! And with #3 sons help... 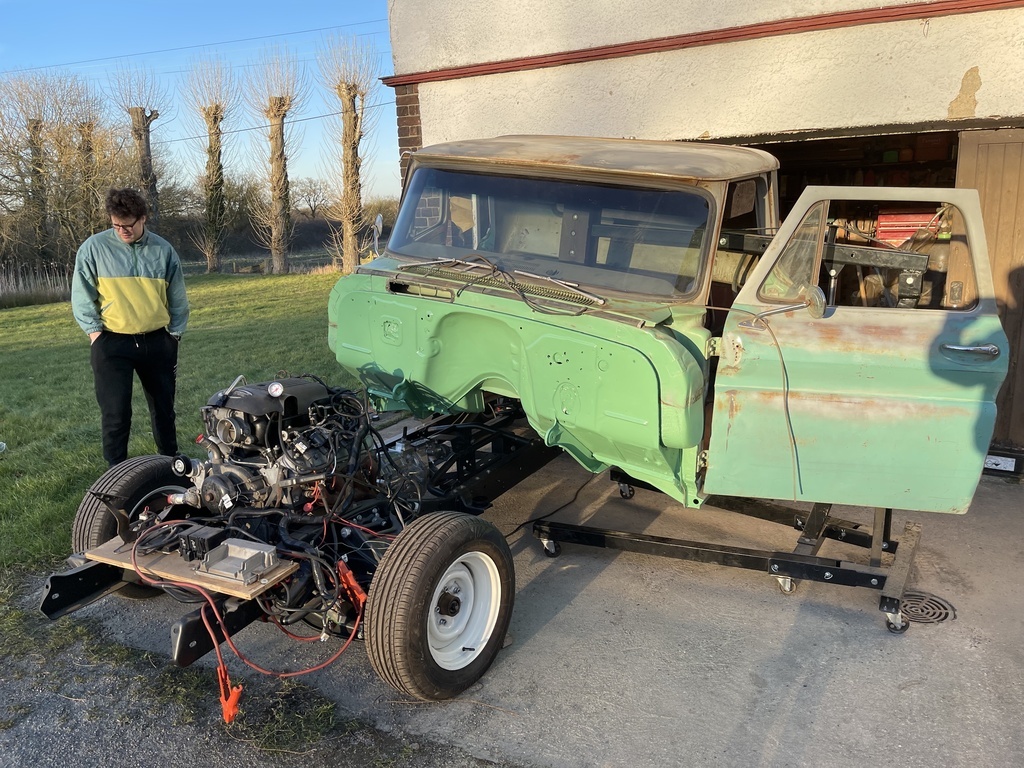 Carefully manoeuvred Woody back onto the chassis. 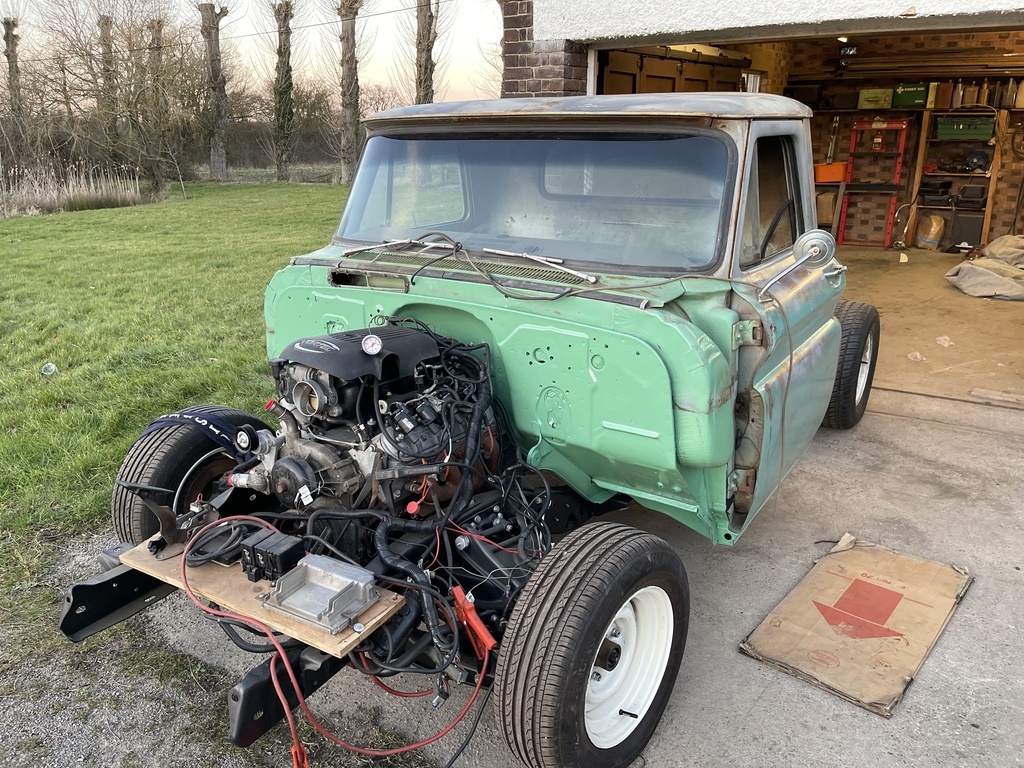 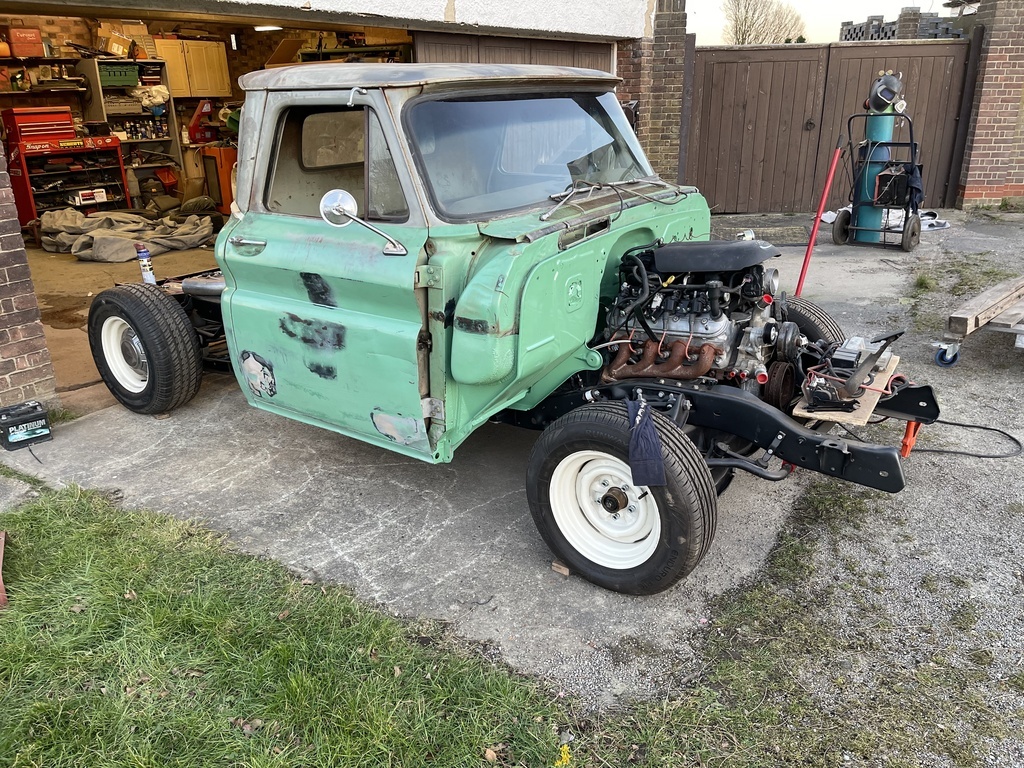 Very Very happy with that! So... Why did I plonk the cab back on the chassis? Quite simple really, I wanted to make sure I had the engine back as far as possible before I measured and ordered the prop shaft - Turns out I can go back at least an inch, maybe 1 1/2" 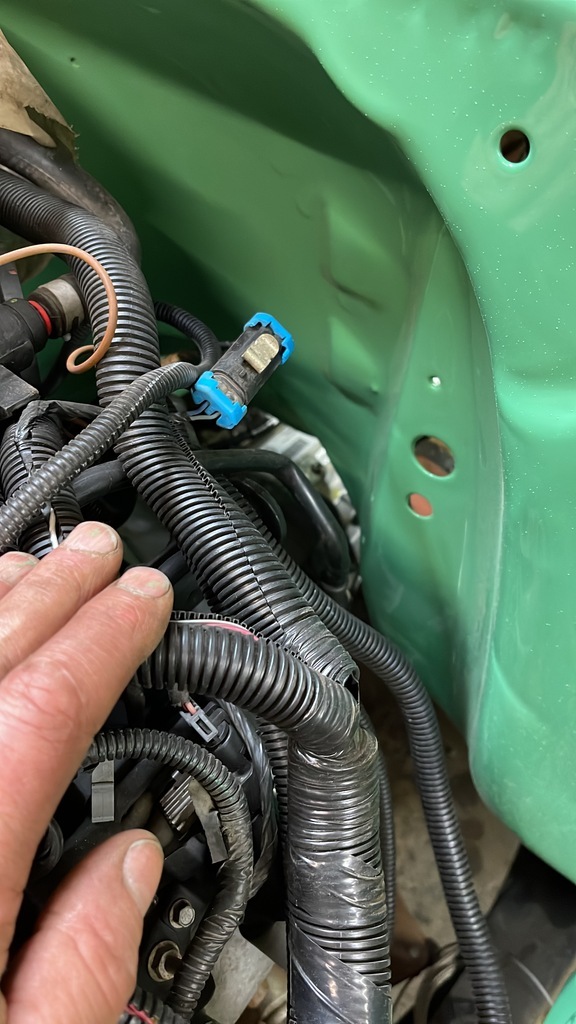 You can also see the Raptor overspray which I am going to try clay baring before resorting to more drastic measures. Which In turn means I can now cut the new shifter hole plus make sure the exhaust will actually fit. Nice. Mr Grinder and Mrs Spring are definitely going to have a second date in the not too distant future 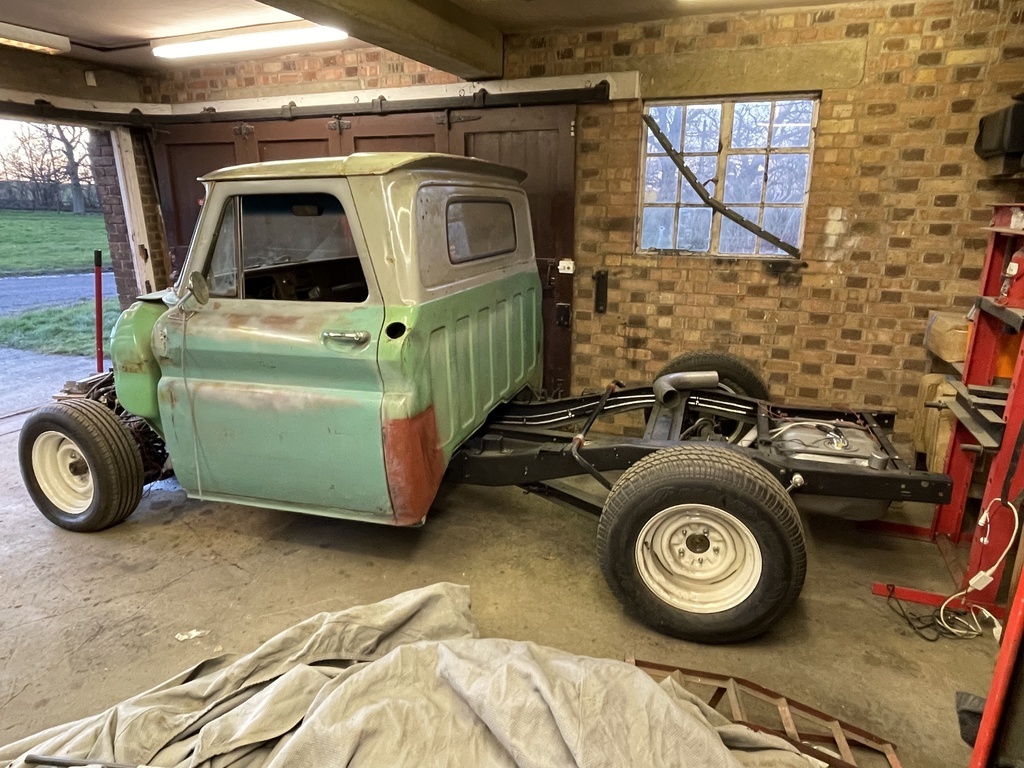 The drivers door is definitely not the original judging by the paint either now that I have removed the awful rattle can paint job... Tomorrows job between servicing #3 sons Mini and repairing the fences will be to move the engine back as far as I can before taking the cab off again to measure the run out on the bell housing, make the exhaust and run the electrical cables from the mid mounted battery box I still have to make... Progress? Nah.... But it made me feel good so that is always a plus point. Until the next time viewers. ONWARDS!!!!! P.  |
| |
Last Edit: Feb 26, 2022 19:53:02 GMT by Paul Y
|
|
|
|
|
Feb 26, 2022 21:17:05 GMT
|
|
Good to see you as always Paul.
That truck looks great now.
Big grin here.
|
| |
|
|
glenanderson
Club Retro Rides Member
Posts: 4,355
Club RR Member Number: 64
|
|
Feb 26, 2022 21:21:15 GMT
|
|
Love the steel wheels. 👍👍
|
| |
My worst worry about dying is my wife selling my stuff for what I told her it cost...
|
|
|
|
|
Feb 26, 2022 21:58:13 GMT
|
|
Progress I think it's called a dry build. Getting there.
|
| |
|
|
|
|
|
Feb 27, 2022 20:36:05 GMT
|
|
Oh man! So stoked for you! That is absolutely epic!
The gearbox is sweeeeeeeet!!!!
What industry do you work in?
Mega result dude!
Also, what's happening on the 9th April? Be cool to see this truck in person.
|
| |
|
|
|
|


