|
|
|
Mar 18, 2015 21:33:44 GMT
|
Now waiting anxiously for the next update ! Me too! But I reckon we'll get fobbed off with some garbled excuse about "holidays". Whatever they are. Could this thread turn into another saga along the lines of Toyota MR2 bumpers, Porsche oil tanks and now I think about it, me replacing my cooling system? Sir, you must be a mind reader! Which is doubly surprising as you are some 7000 miles away and I am a bear of very little brain. Or you spotted the holiday admission in my other thread... Nah, you must be a mind reader. |
| |
|
|
|
|
|
|
|
Mar 23, 2015 22:50:53 GMT
|
Oh well, holiday over. Time to get back on t' 'oss as my uncle would put it. In an earlier post I said that I'd installed the three steel runs at the very back of the house. I also said I'd take a snap to prove it. Well I'm a man of my word - here's the snap. 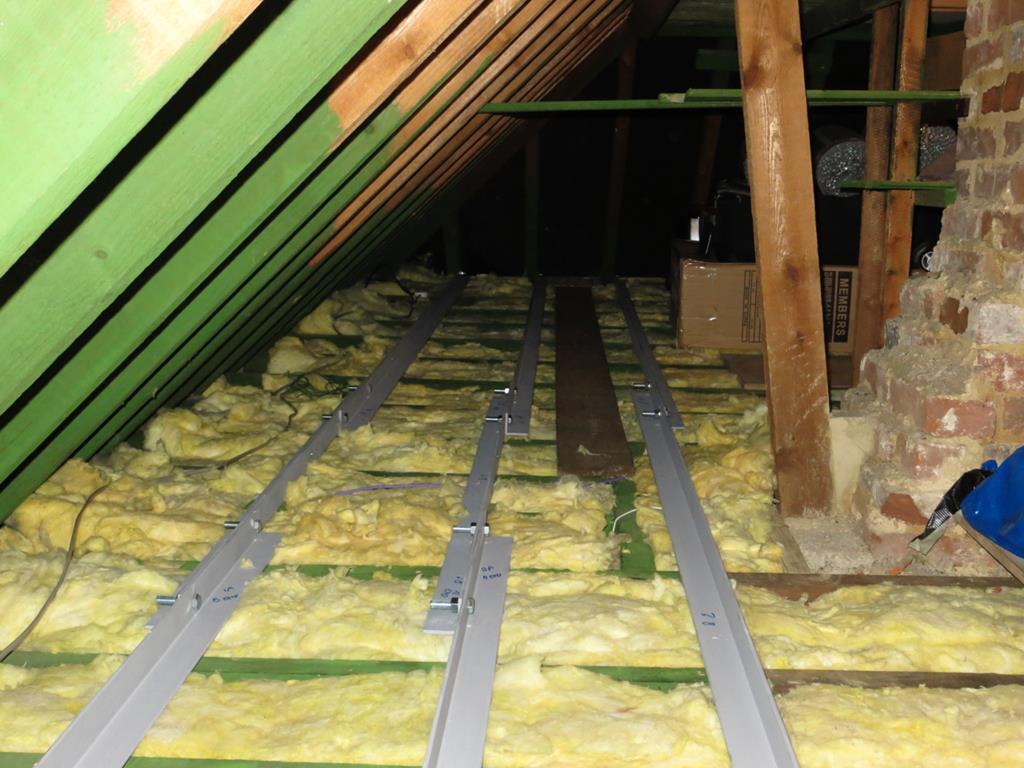 Run number 3 (on the right) is bolted together in a different order. This is the run that picks up the big cross pieces that bridge the chimney. Here's how it all bolts together… The bit of wood with the pipe in the ends is a drilling guide. 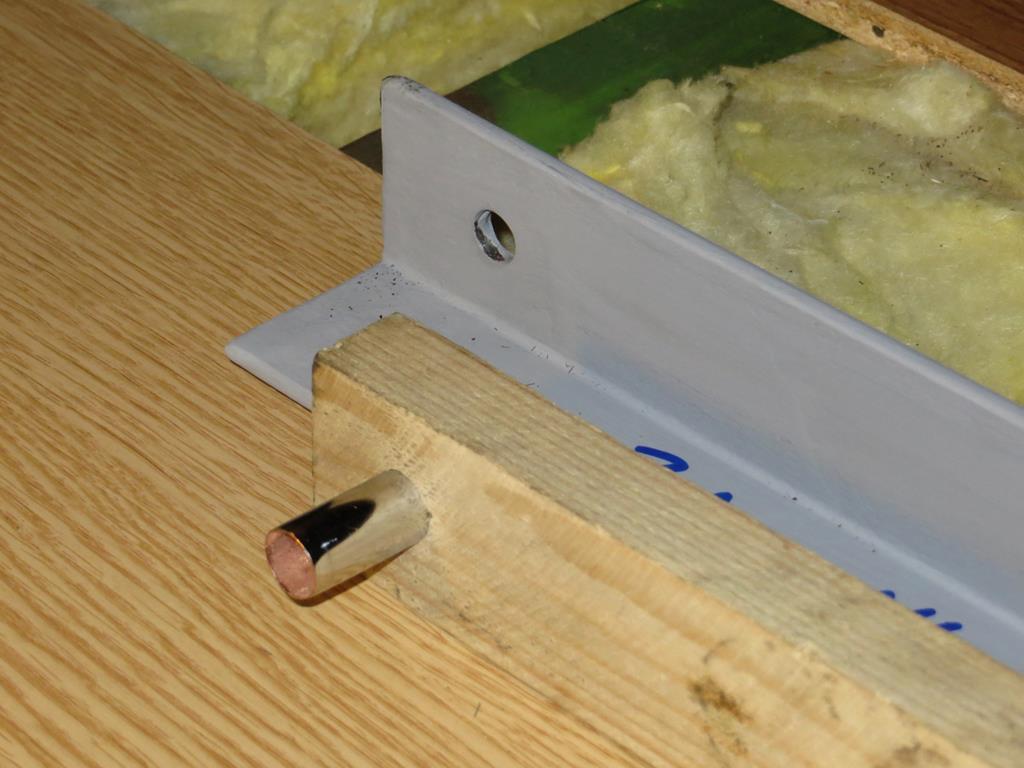 It clamps onto the end of the metal work and guides the drill bit through the bottom of the rafter. 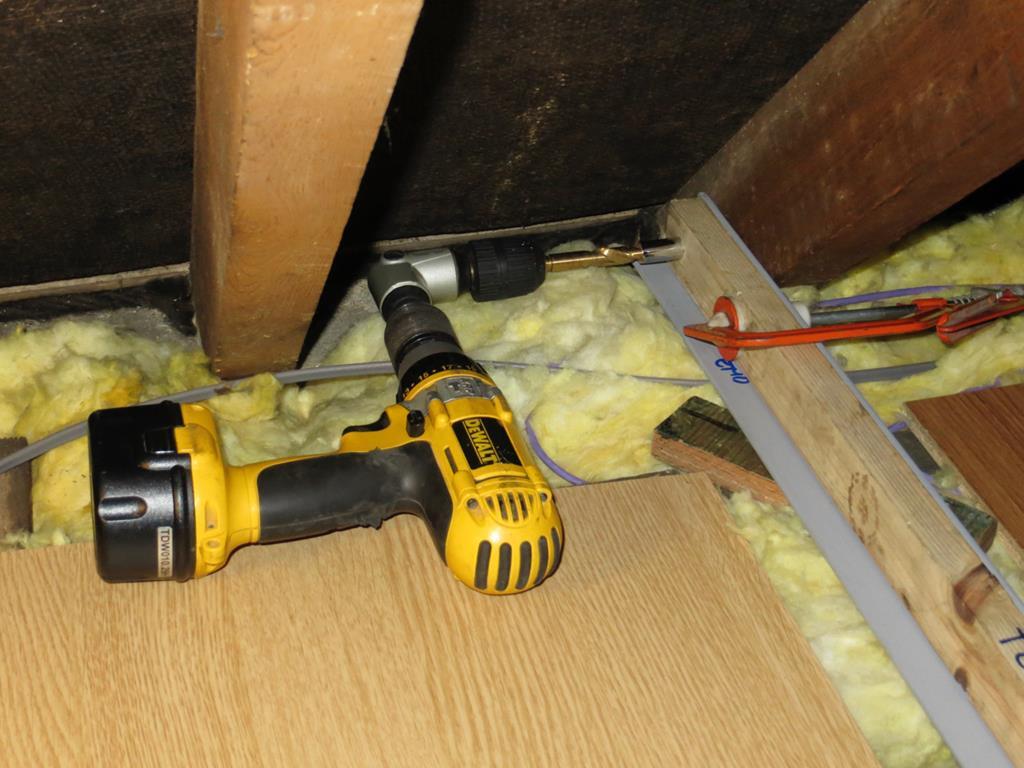 Because I have to use an angle doohickey on the drill and I'm working right in the corner of the roof I reckoned that getting the bolt square through the bottom of the rafter could be challenging. The guide makes sure it's in the ball park without having to think about it. Also notice the small block of wood between the steel and the joist. I'm installing all this just clear of the existing joists so when tensioned it floats and doesn't add weight to the original structure. 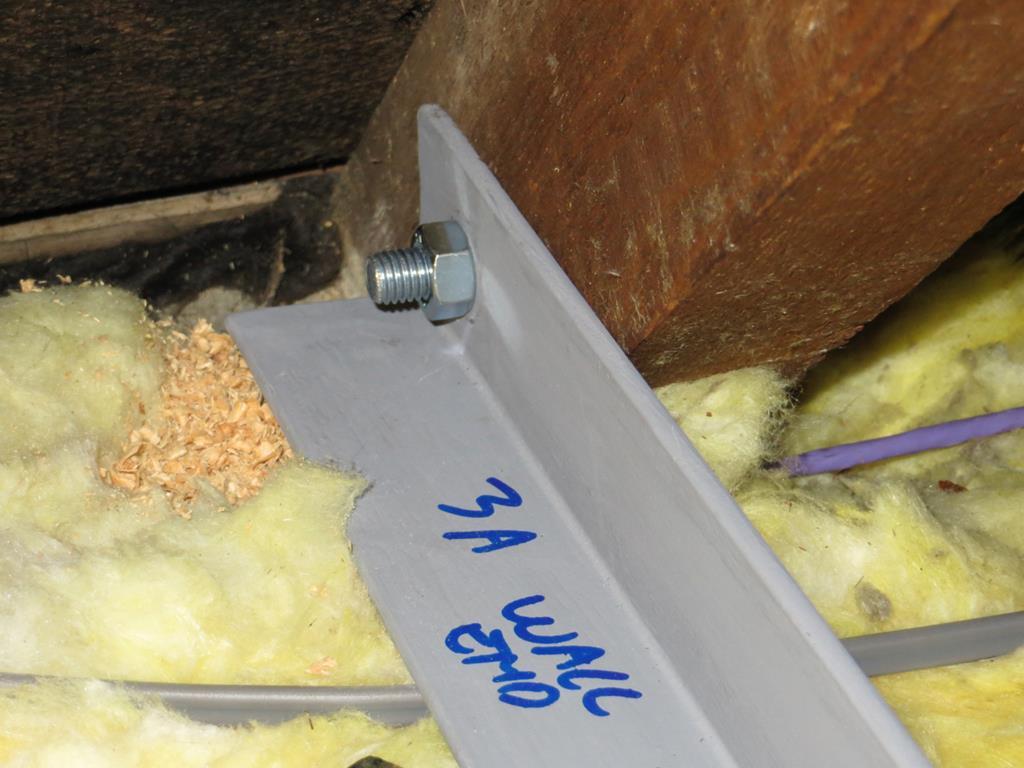 A big bolt with a big square washer finishes the job. T'other end goes in the same way. So, pretensioning then. There are two bits of steel next to each other that need pulling tight. I built a tool for this. Essentially it's two very long bolts (threaded rod with a nut welded on the end) and some brackets that bolt to the steel. Here it is laid alongside. 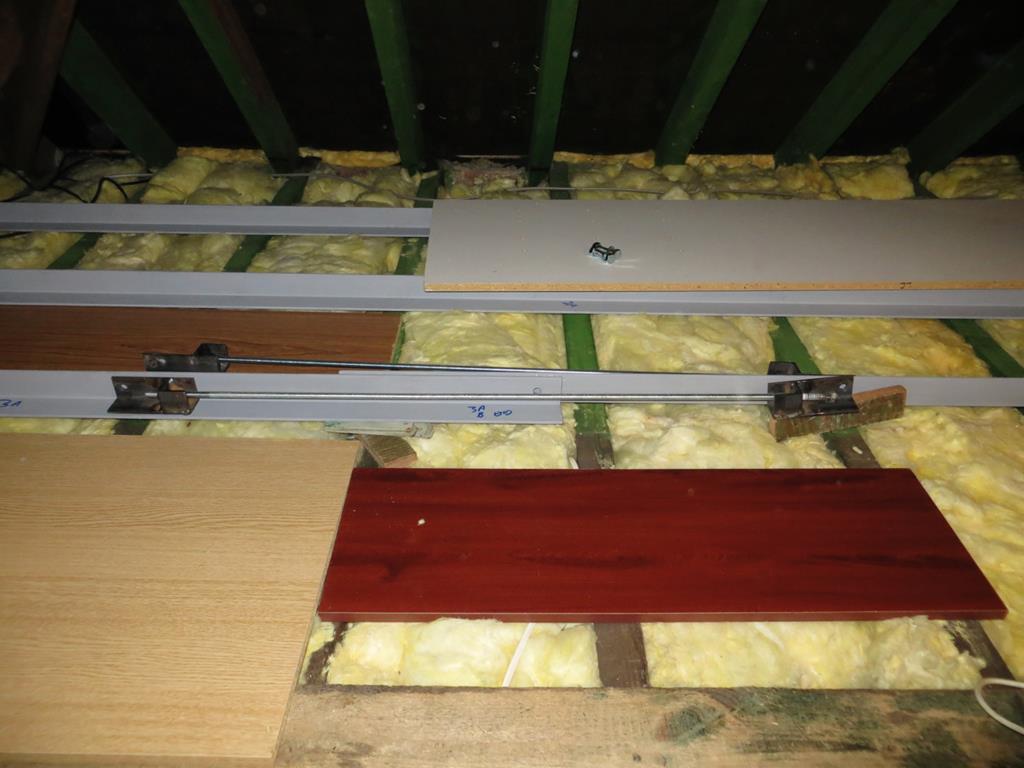 And this is one pair of brackets bolted to the steel. 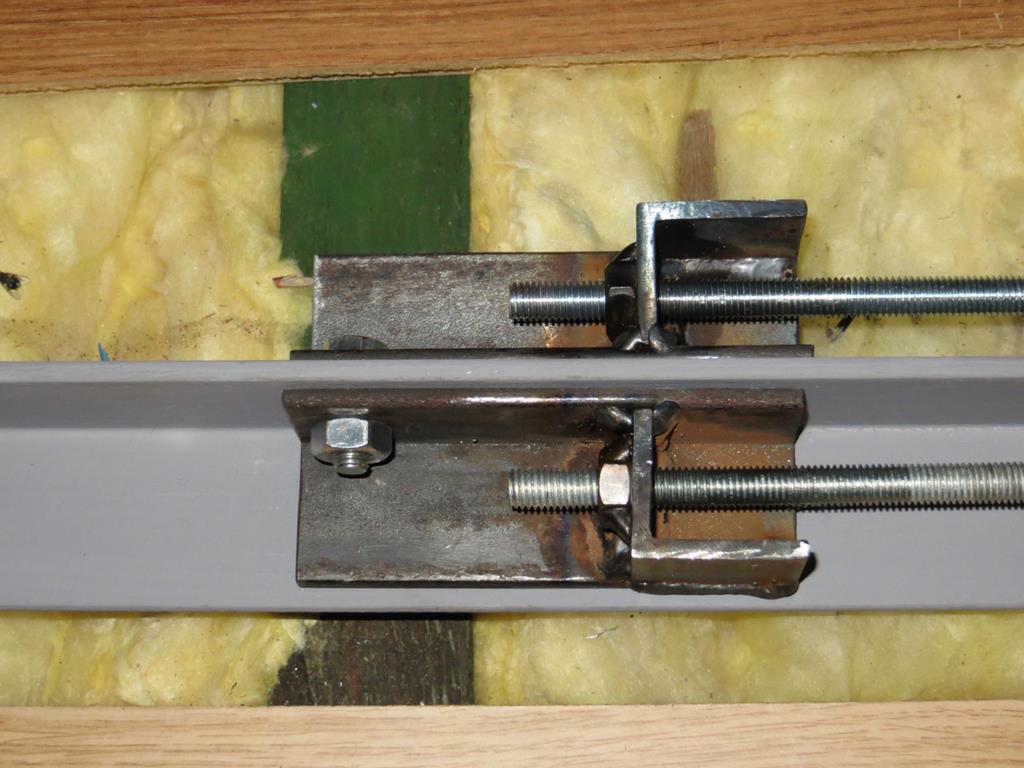 And a slightly dodgy photo of it all bolted on. 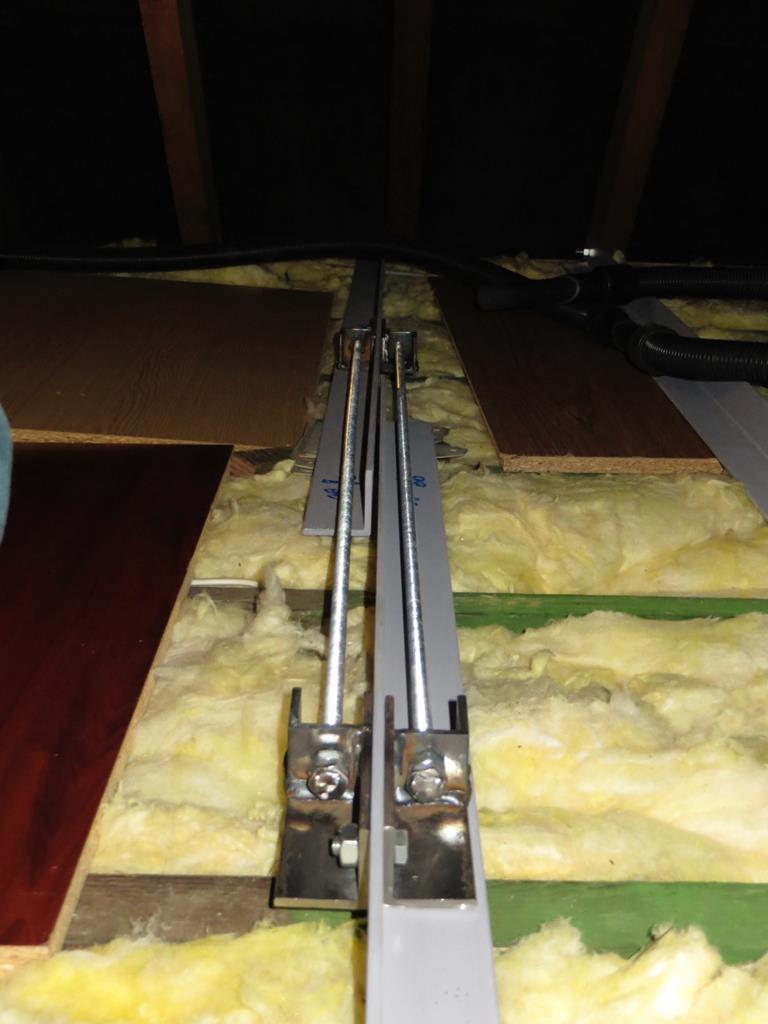 Then you just tighten the long bolts to pull the ends together. Here's a close up of the steel before pulling it tight. I've got a pencil mark on the top so I can see what's going on. 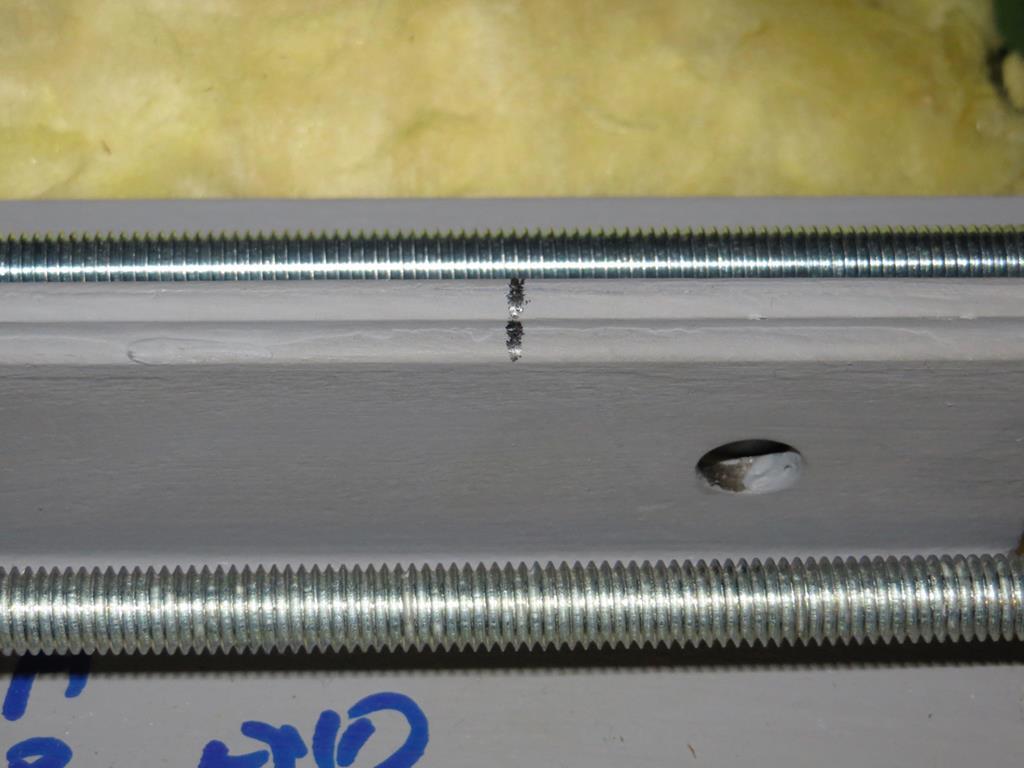 And here is after… 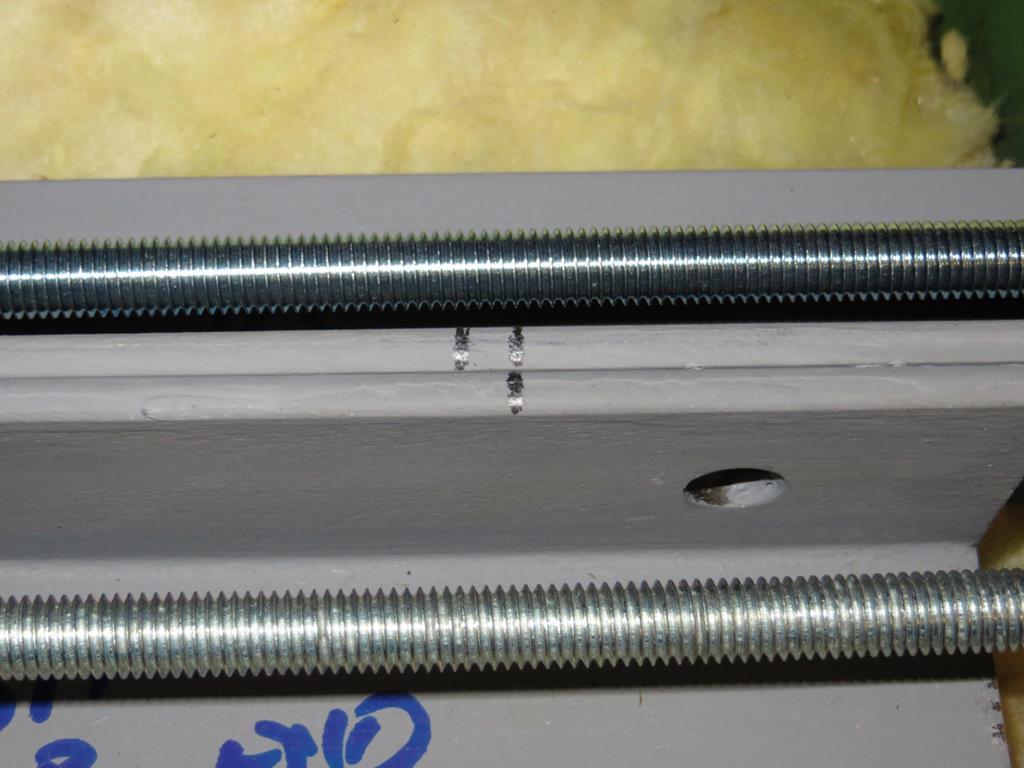 They are pulling up between 5 to 7 mm. I could keep screwing the bolts up tighter and tighter - when to stop??? I'm using the highly technical method of guessing. As they come taught the steel begins to 'twang' in the same way as a guitar string does. I'm tightening them by ear! At this point all I need to do is drill through and pop a bolt in the hole. Er, except I can't. The tensioning tool is in the way. Doh! It's OK, I'm not that stoooopid! I just need to clamp it all together and remove the tensioning tool. This is where I seriously considered a couple of blobs of MIG weld on the top of the two steels. I convinced myself I could do this without burning the house down. But I couldn't convince myself that welding in the loft was a good idea. So I came up with a novel use for… 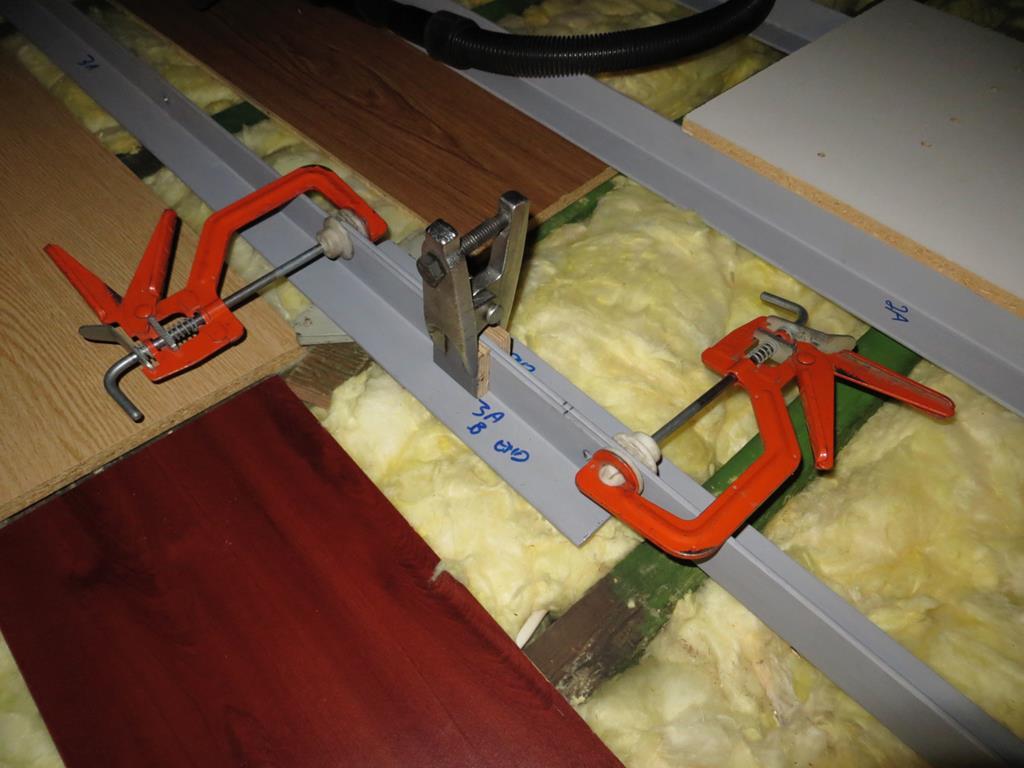 …a ball joint splitter! God I'm good! Not that I'd ever say that, I'm far too shy and retiring. Bolts in… 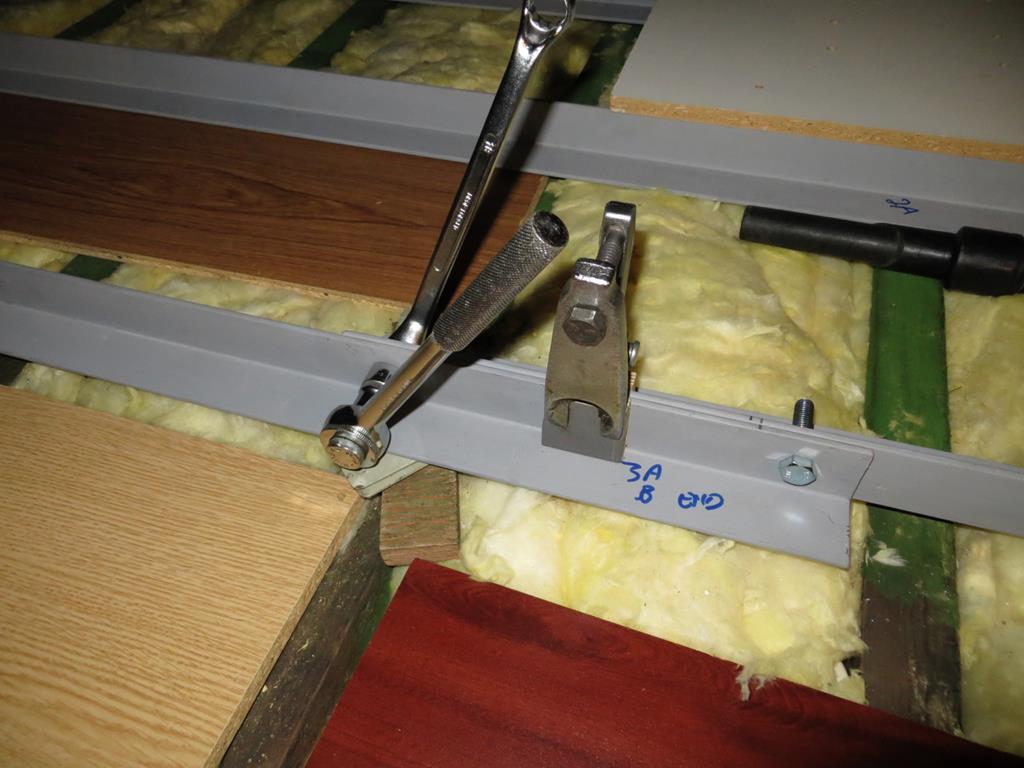 Job done. Lastly in this photo… 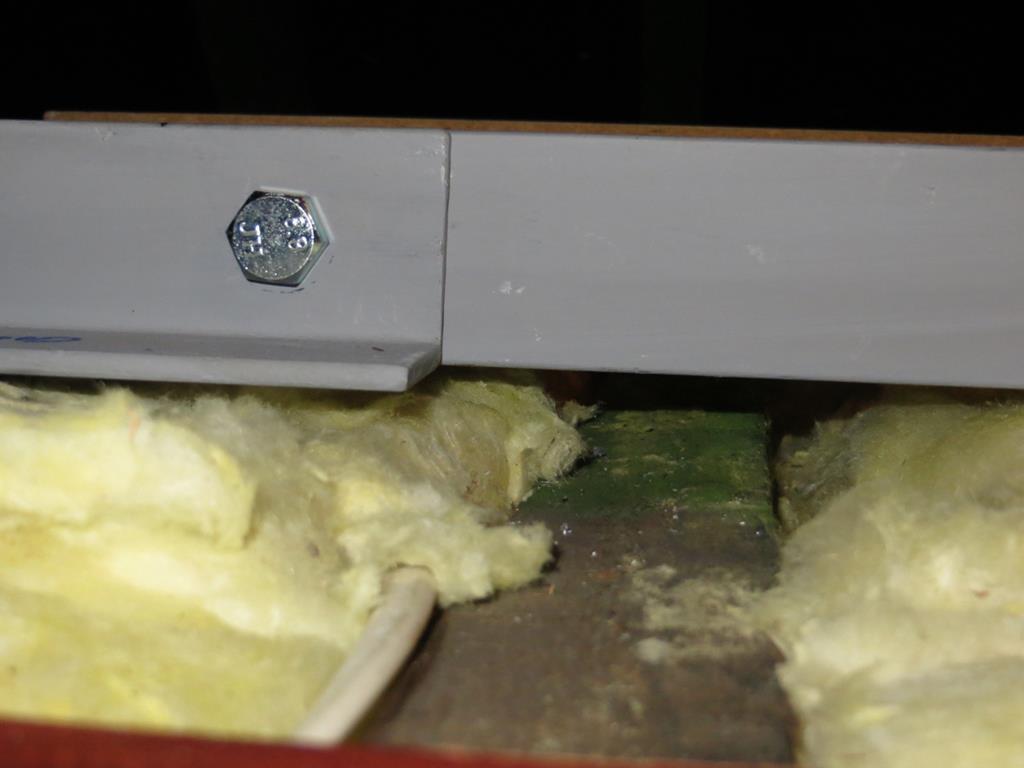 …you can see how the steel work hovers over the old joists. To be fair the old joists have sagged over the years. Where the steels pass over a convenient interior wall I'm putting a block of wood between them to stop them bouncing. Piece of cake! James |
| |
Last Edit: Nov 11, 2018 22:51:24 GMT by Sweetpea
|
|
|
|
|
Mar 23, 2015 23:35:50 GMT
|
|
It's all clever stuff th'a knows.
Very, very neat.
|
| |
|
|
|
|
|
Mar 24, 2015 19:57:58 GMT
|
|
Ingenious old-school problem solving. Hats off to you.
|
| |
|
|
|
|
|
Mar 24, 2015 22:22:29 GMT
|
Thanks for the comments chaps. You have to remember I've been mulling this over for a year or ten so it's a well thought out plan. Wouldn't want to rush it! Don't think the temperature variations will be doing the HiFi gear any good up there, best move it downstairs for safety! I forgot to say - I agree with you about bringing the speakers down. The problem is they just too big to sit in the living room. Interestingly my missus would like to use them too. She has a pretty good idea about what sounds nice and what doesn't. When we were looking for smaller replacements for the Celestions we went to listen to a set of Castles at some shop or another. The chap was proudly telling me they had them tri-wired. I thought they sounded abysmal but politely hmmm'd and ahh'd. Ever since I've wondered if they'd got one of the drivers out of phase. Anyway, as soon as we walked out of the shop Mrs Sweetpea said "Don't know what you thought but I think they sounded curse word!" |
| |
|
|
Frankenhealey
Club Retro Rides Member
And I looked, and behold, a pale horse! And its rider's name was Death
Posts: 3,888
Club RR Member Number: 15
|
|
Mar 25, 2015 11:23:41 GMT
|
So this is a Restomod house then? Good job  |
| |
Tales of the Volcano Lair hereFrankenBug - Vulcan Power hereThe Frankenhealey here |
|
|
|
|
Mar 26, 2015 22:25:45 GMT
|
So this is a Restomod house then? Good job  Restomod house - that's far closer to the truth than I'd like to admit! |
| |
|
|
|
|
|
Mar 29, 2015 20:21:13 GMT
|
Is there a God? I don't know, but if there is he (or she) reads this thread and puts me in my place. I flippantly boasted that I was 'good' in the last enthralling episode. Hmmm. I'd got one last run to install before I need to manufacture the next pieces. It was an easy win. It would just sneak past the right hand end of this shelving unit… 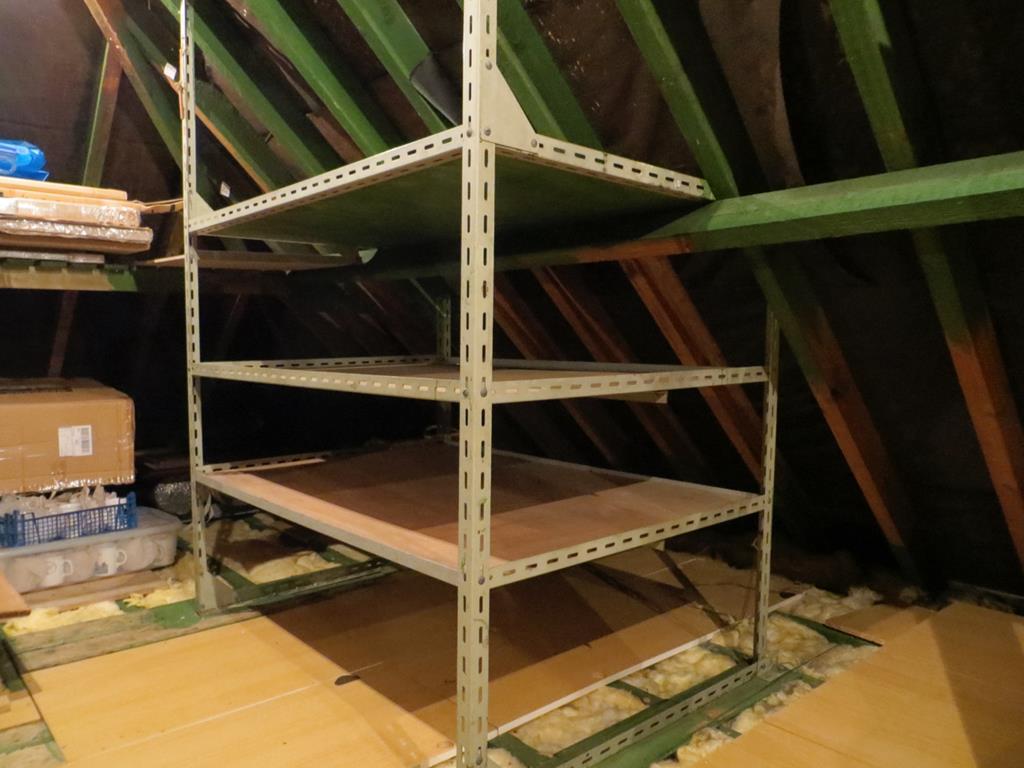 And I'd just need to lift a few bits of old floor… Piece of cake. I've said that before too. Well despite my having measured it and thought about it and measured it some more it didn't sneak past the end of the shelving. It squarely hit it. So - a day later - shelving removed. 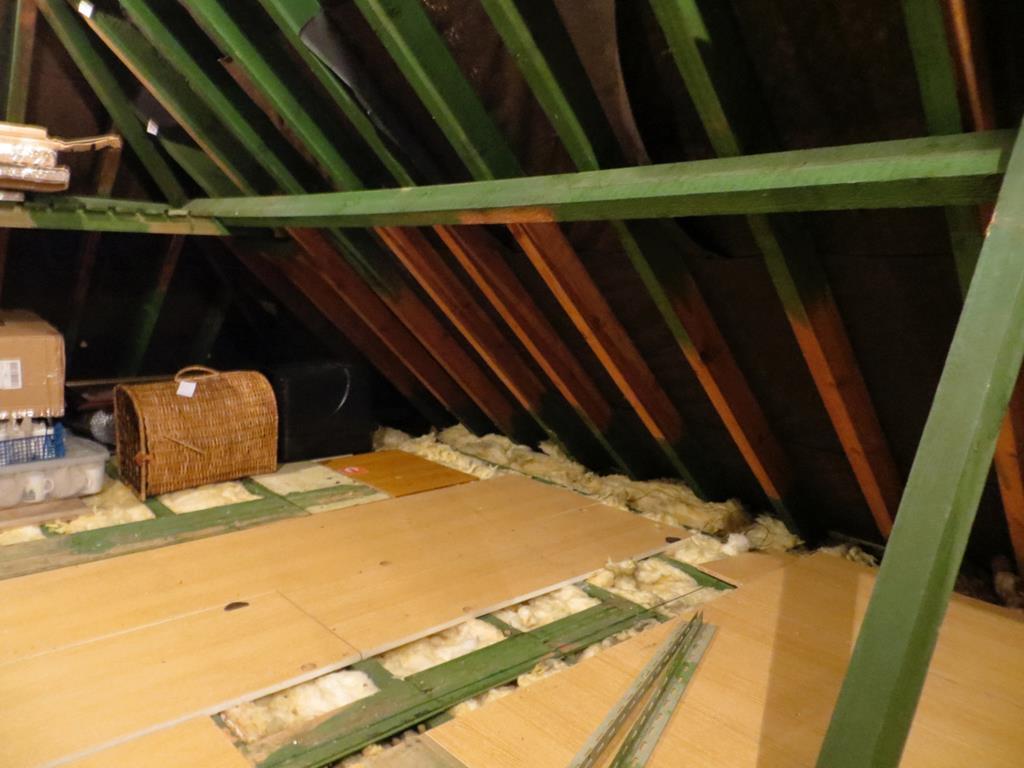 And reinstalled somewhere else… 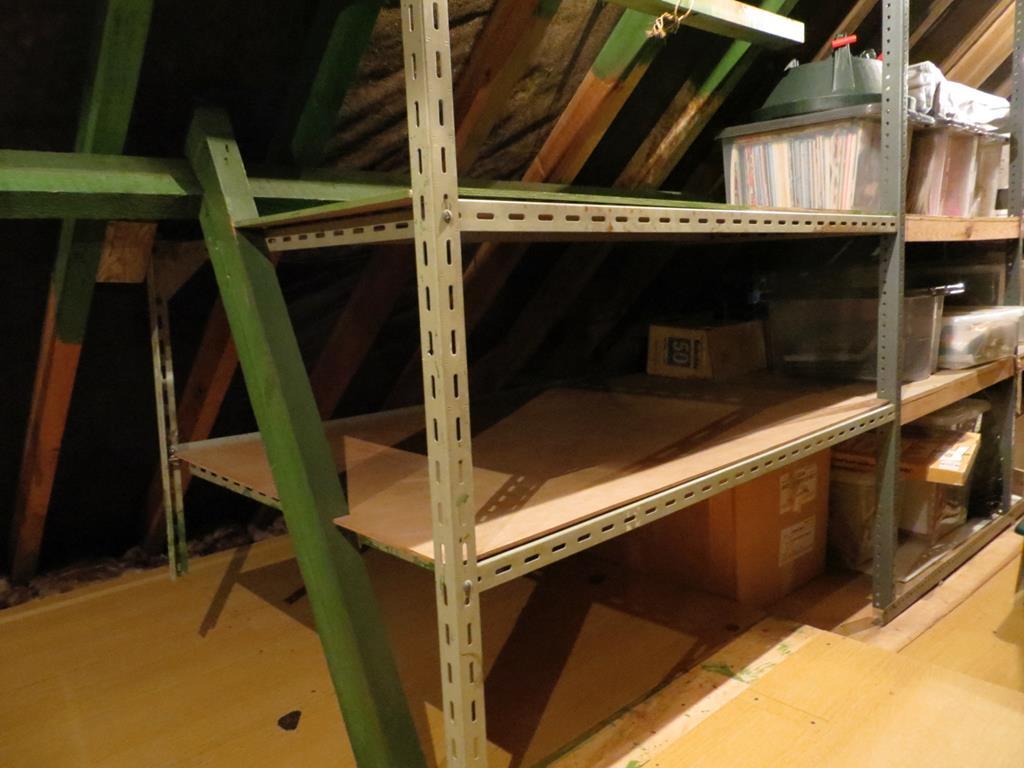 Good. Just lift those bits of floor. Er no. Remember the new flooring I'd put down over the new steel? I'd also managed to cover the screws holding the old floor down. DAMN IT! Never mind. Eventually, a day later than planned, the last piece went in. 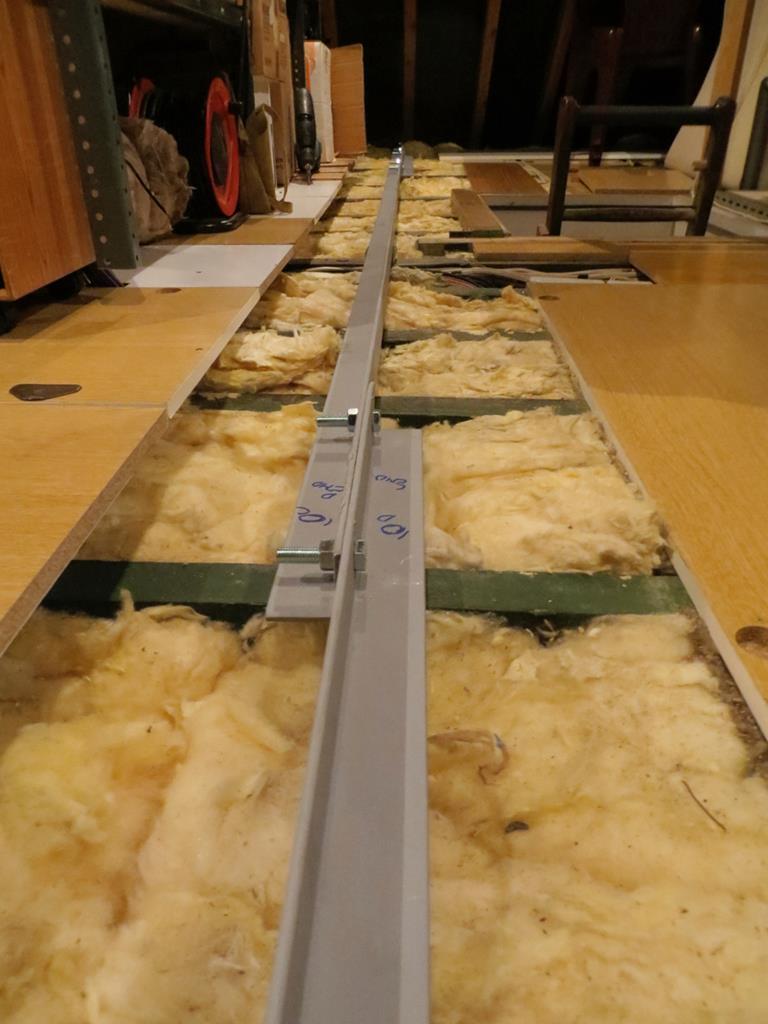 Interestingly, with the shelving out of the way I suddenly got a view along the length of the purlin. Here it is with a straight edge along the top. 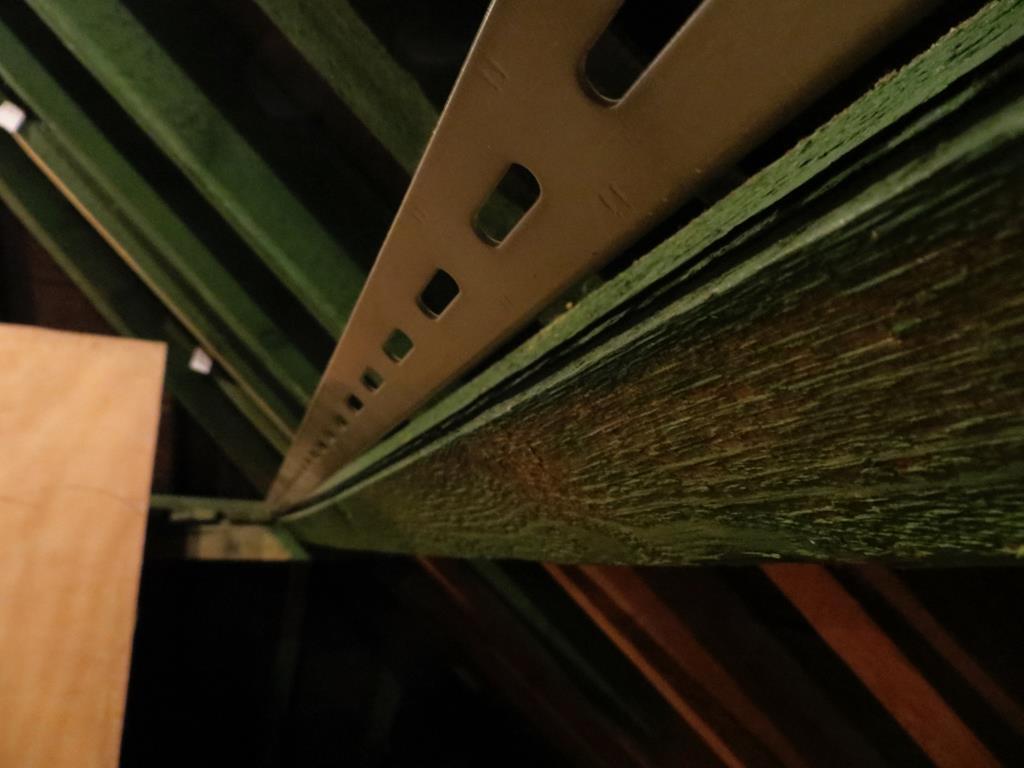 Although it's not clear in the photo the purlin hasn't sunk vertically, it's moved parallel to the rafters. So that's all the steel that I've got ready and painted bolted into the loft. Next on the list is to make up the channel section pieces that will span the length of the chimney. That starts with chopping this… 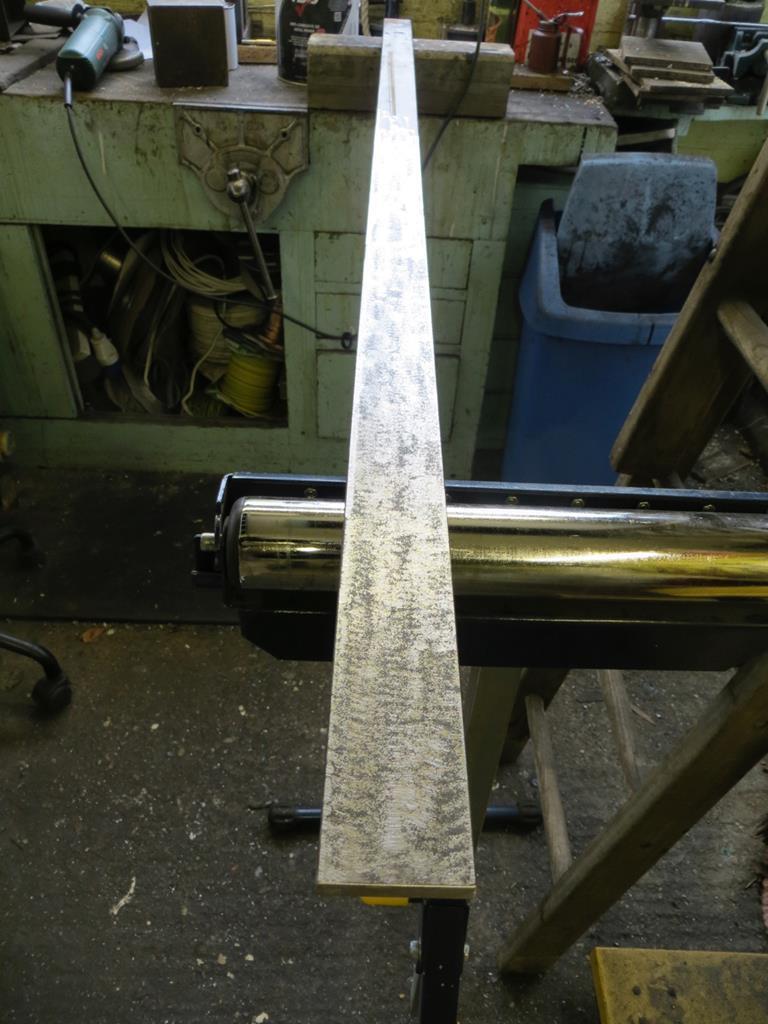 to pieces. 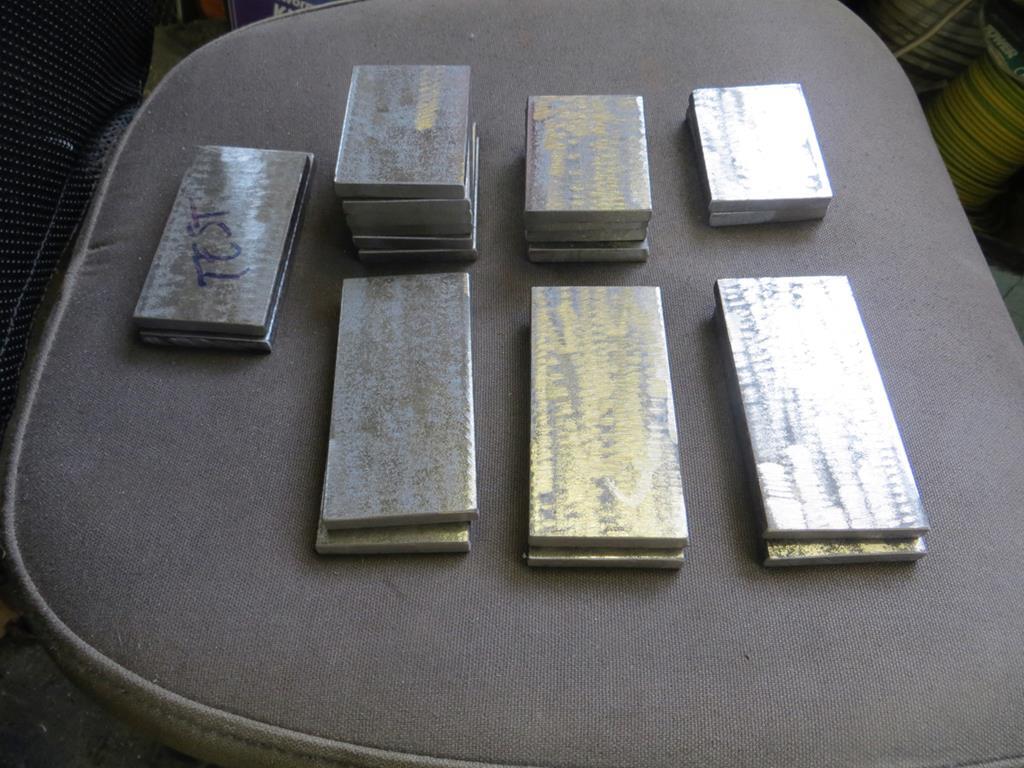 I probably measured them correctly. James |
| |
Last Edit: Nov 12, 2018 21:00:29 GMT by Sweetpea
|
|
|
|
|
|
|
The next item on the agenda would be this… 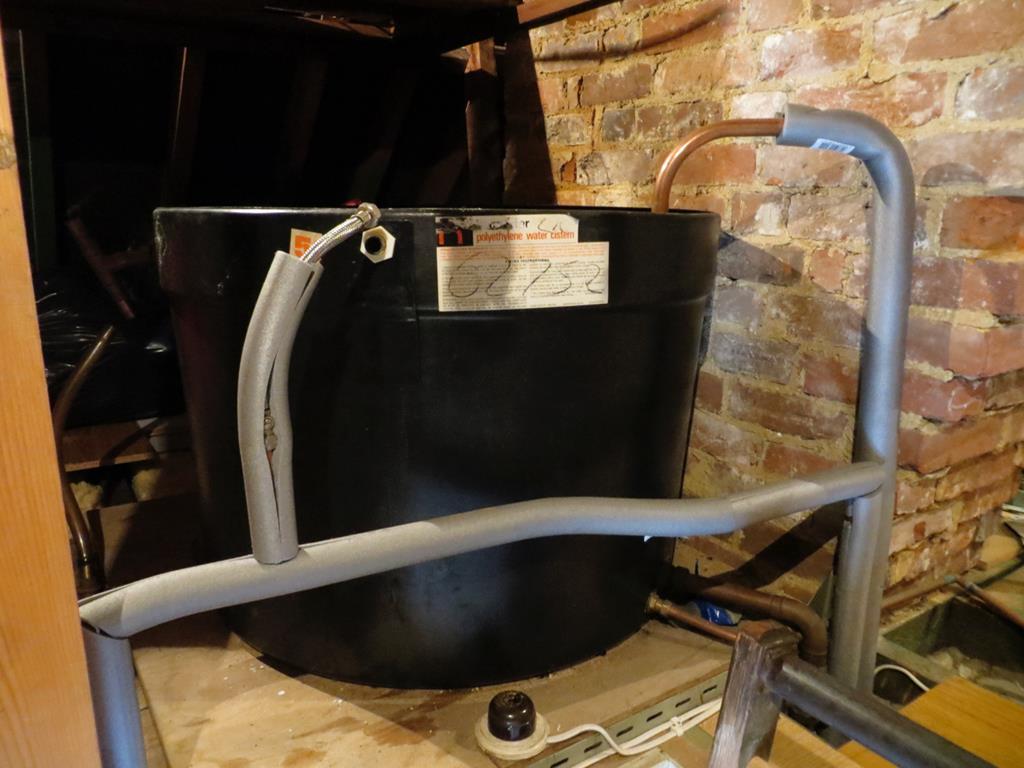 It's the header tank that feeds the hot water tank. My plumbing is very …… er ….. traditional. None of this new fangled 'combi boiler' nonsense here. The steel would cut through the bottom of the tank. This would cause two significant problems. Firstly - sealing it up where the steel went through. Secondly - the steel would rust in the water. Probably best to move the tank then. Not far. Only about three inches upwards. I don't mind plumbing. It's just that I normally hit some insurmountable problem just after all the shops have closed so I had some trepidation about this job. I went to the plumbing shop and bought everything I needed. Then I went back again and bought another load of stuff just in case something went wrong! Oh well. Best get on with it. Even with the tank drained there is still a significant amount of water in the bottom. Out with my little water pump to finish the job off. 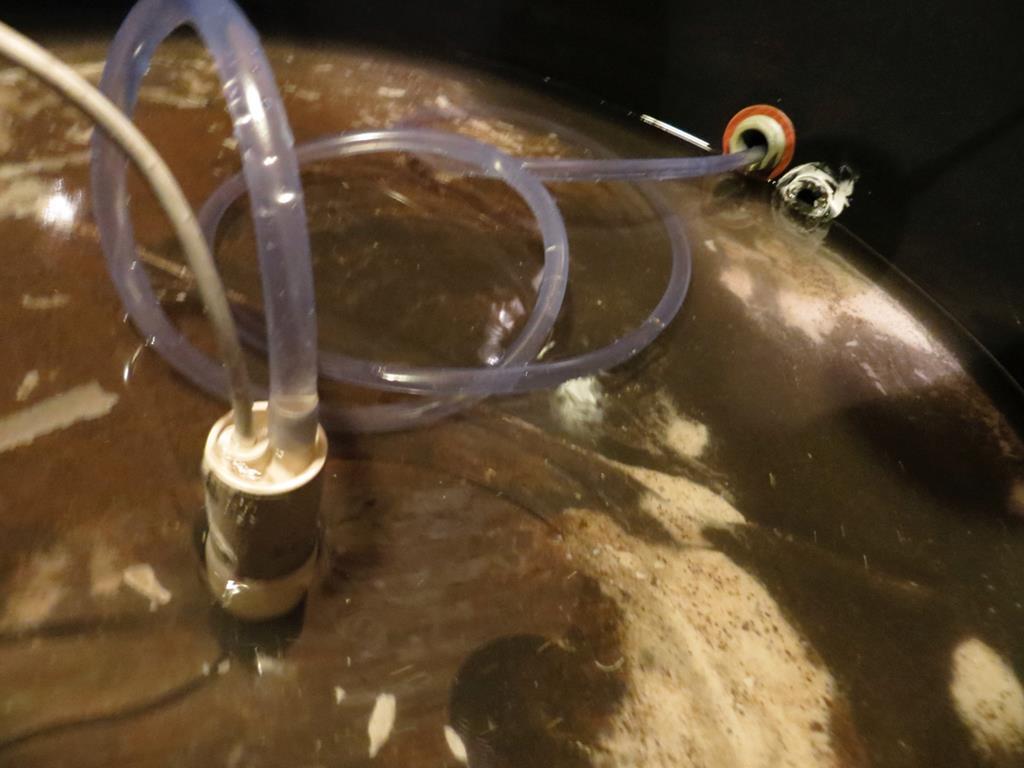 Regular readers of my drivel might recognise this as the pump I bought in a failed attempt at building a parts washer. It's turned out to be quite a handy little thing. "Regular readers'? Blimey, there's a scary thought. Haven't you anything better to do? There is the tank - gone. 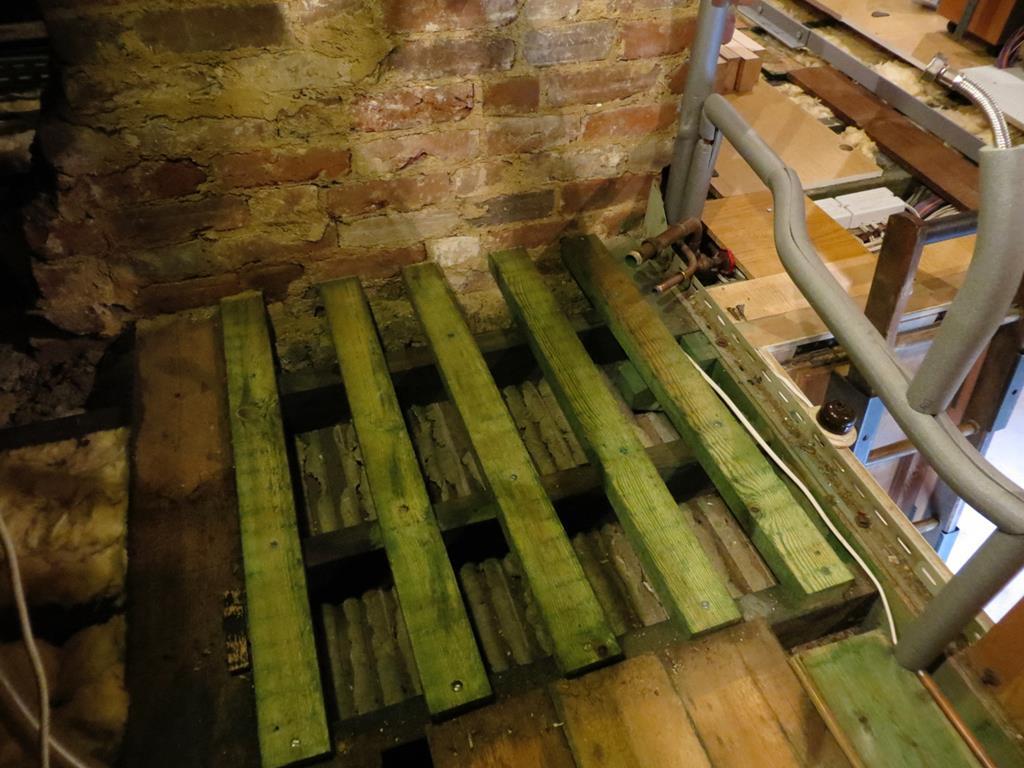 Those old bearers will come out and these shiny new ones will go in such that the steel will slot in around them. 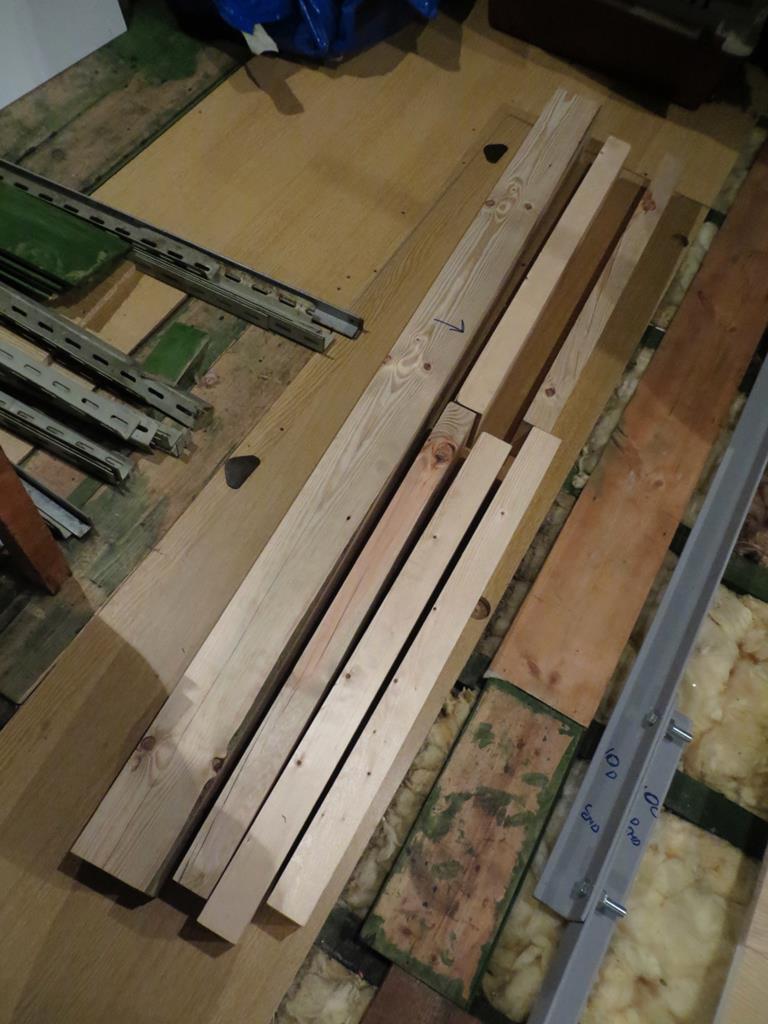 I made those out of an old fence posts from next doors garden. I should stress that my neighbour gave them to me, I didn't just pop over the wall in the middle of the night and pinch them. 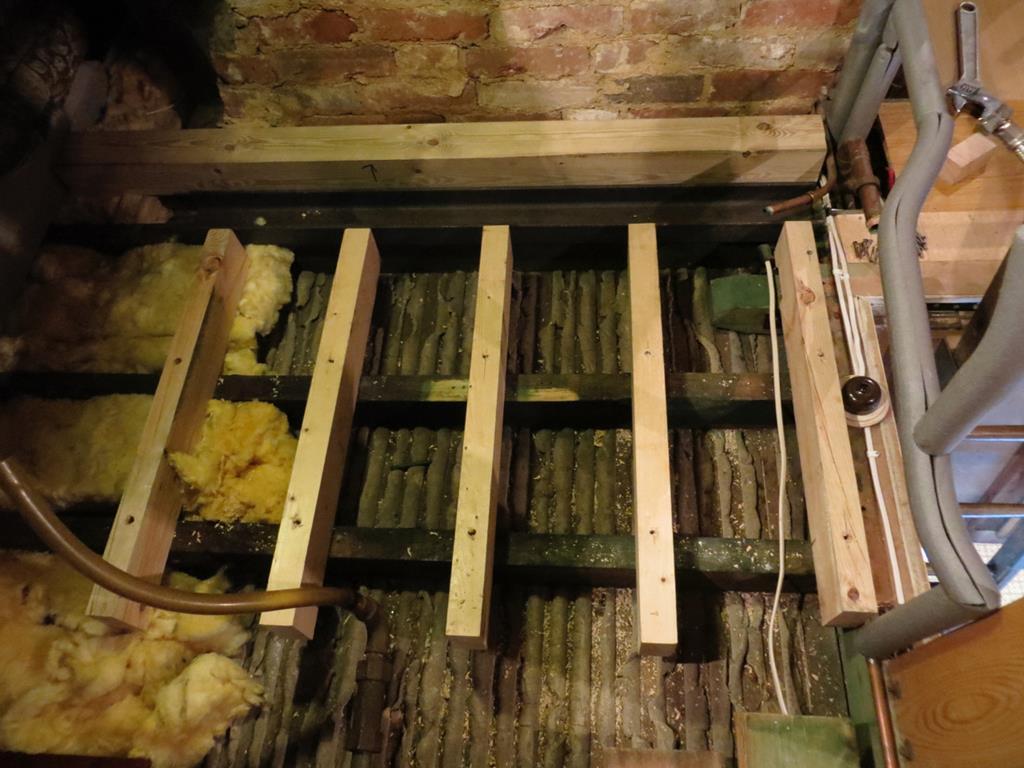 You might just see a piece of channel section parallel to the big timber by the chimney. That's a test piece but the real one will run through that gap. The runs to the rafters sneak between the other bearers. Or rather they'll squarely hit some of them. I'll move the bearers to convenient places when I lay out the steel. That's a story for another day though. 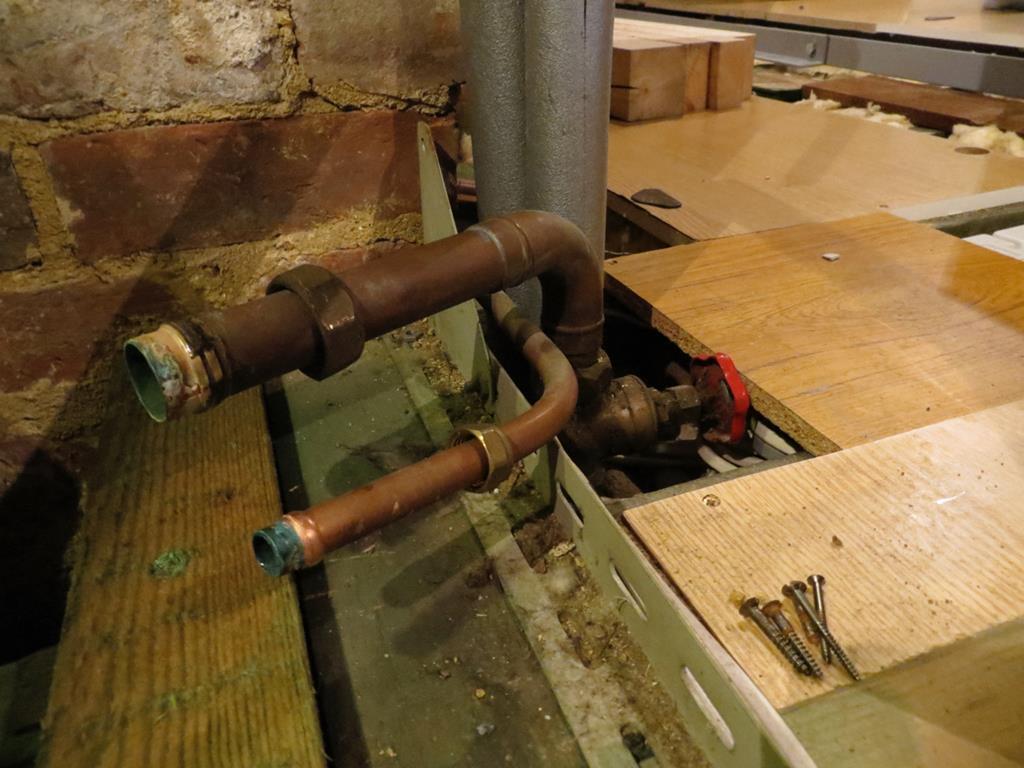 Plumbing wise, the little pipe is a the feed to the shower pump. It's 15mm but it needs rerunning 'cos it's a mess. The big pipe is the feed to the hot water tank. It's 1" and it has a gate valve in it that wont close. So I thought I'd take the opportunity to replace it completely. But that means taking the boss out of the hot water tank and that scares me. I ran badly short of time so no more photos until… 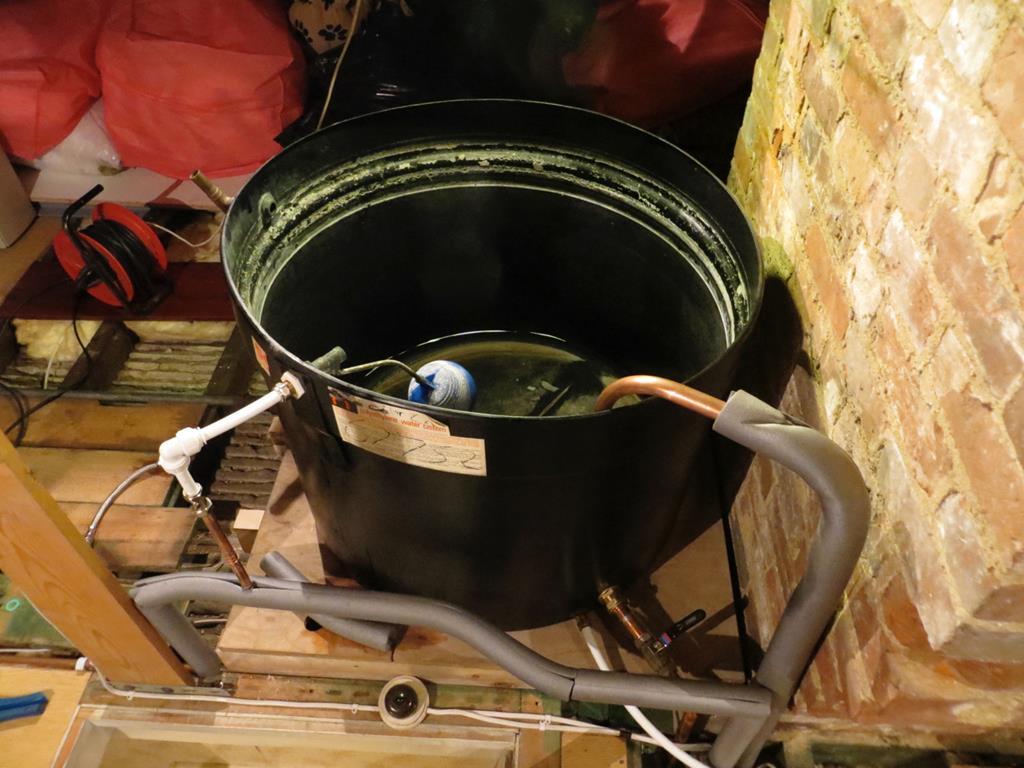 ...refilling the tank. I had a couple of problems. One being the cold water feed leaked badly due to a knackered washer so that got bashed in with some plastic. 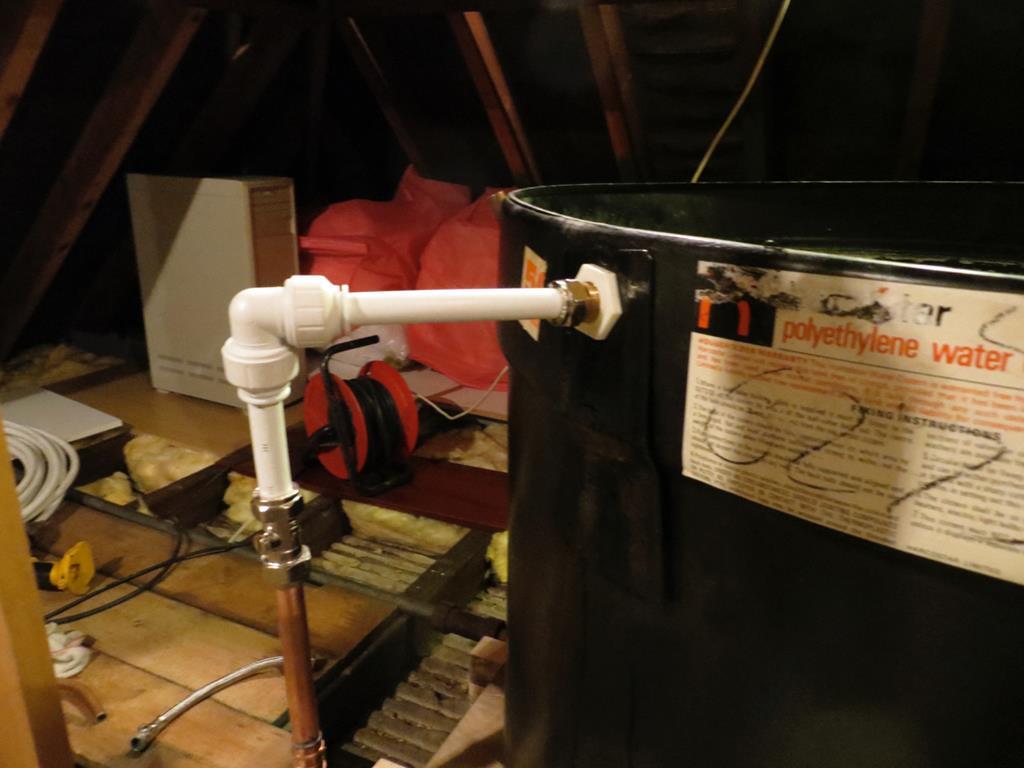 The other being the shower pump feed which also got bashed in with plastic. 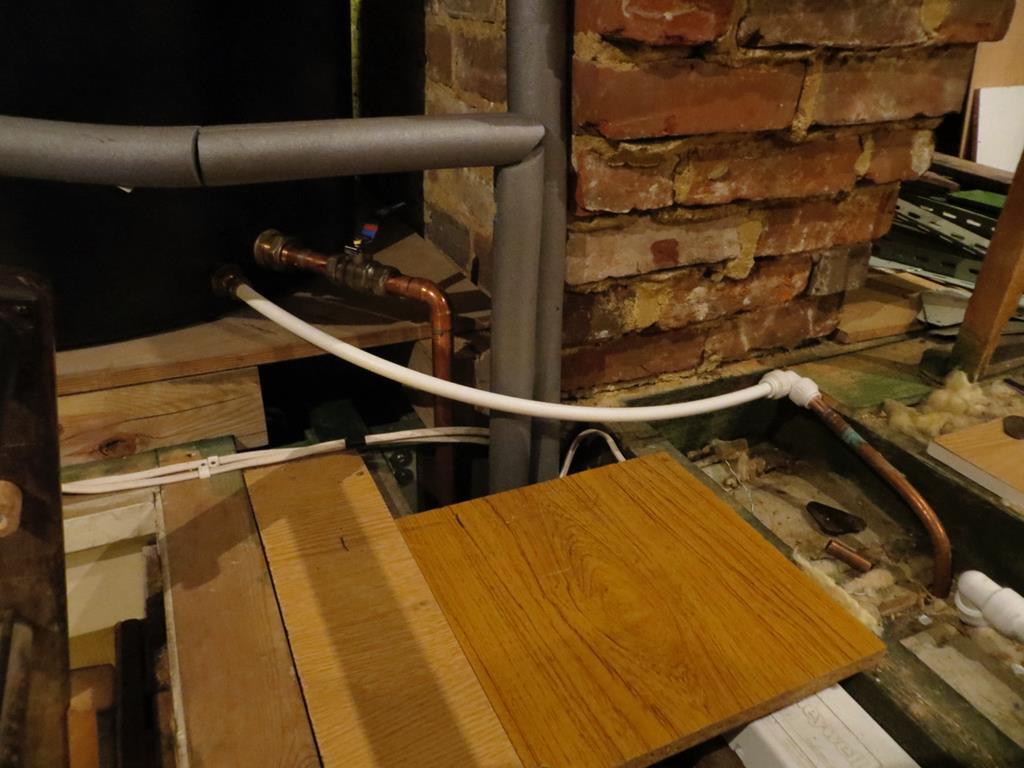 I'll tidy them both up another day. I'm going to need to take the header tank in and out a few times and I don't want to dump the hot water each time - so I've given myself an extra drain point for just the header tank. 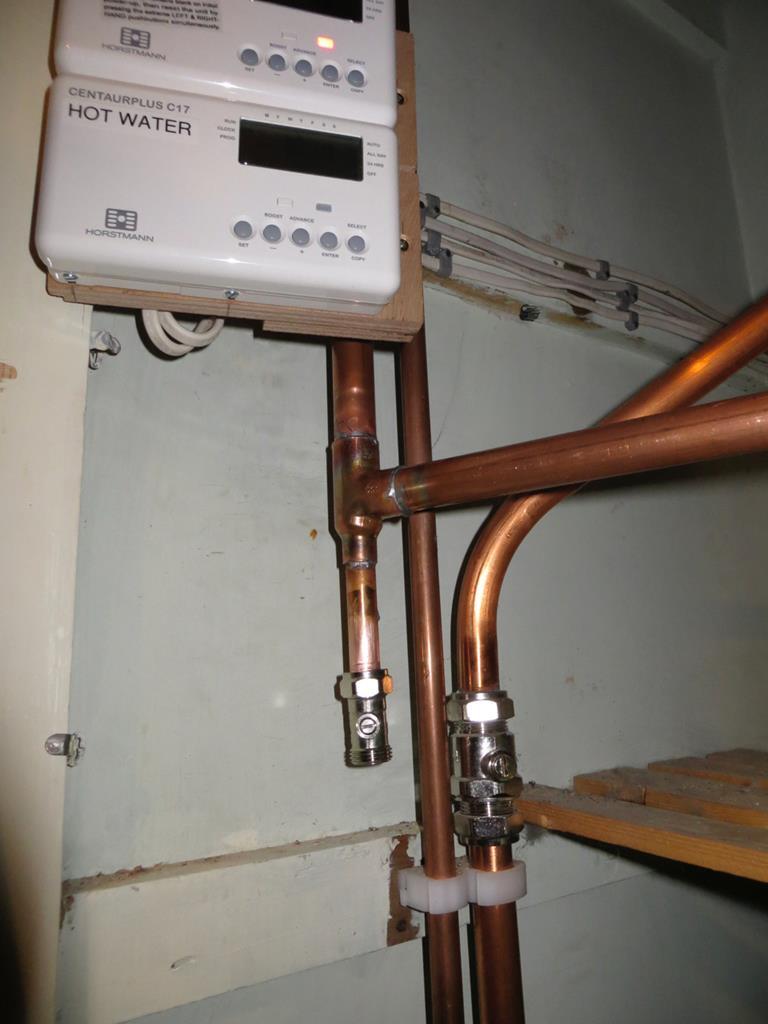 The one bit that was guaranteed to go terribly wrong and leak like a sieve was the entry boss into the hot tank. And guess what… 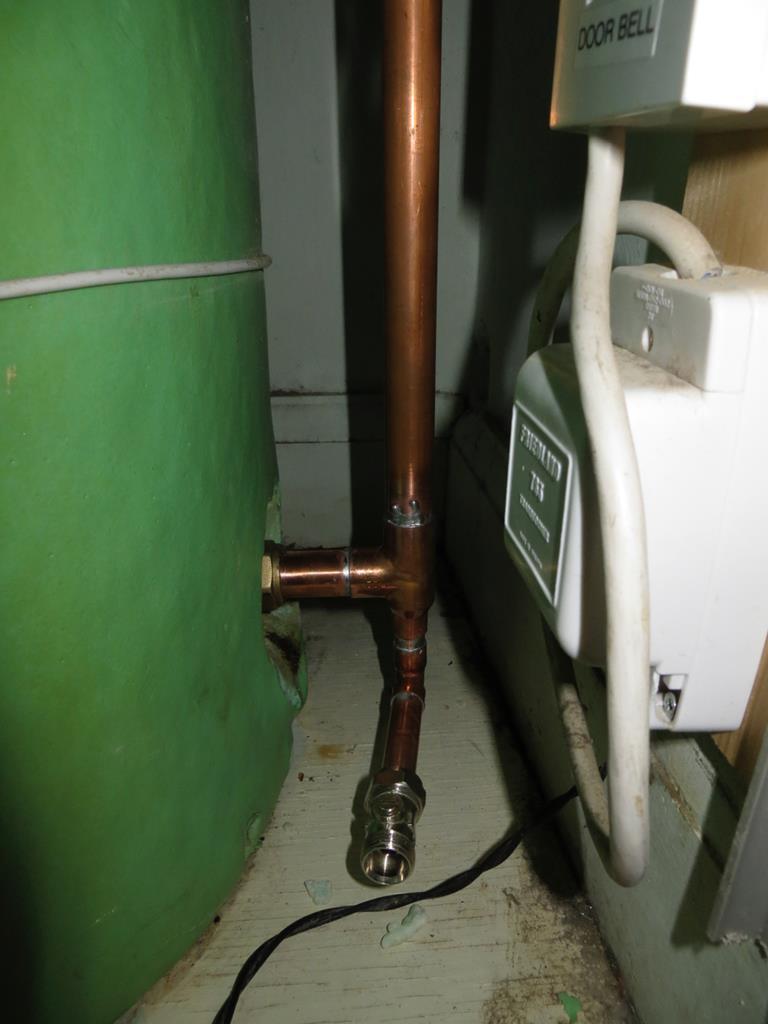 …it was no problem whatsoever. Yay! James |
| |
Last Edit: Nov 12, 2018 21:42:08 GMT by Sweetpea
|
|
|
|
|
|
|
Hi, I'm a bit concerned for you that the loft light switch is so close under the water tank. I would be happier if that was a pull cord switch mounted above the tank and the cord hanging down. Water and electricity don't go well together, and I would hate for you to take your last breaths stumbling around in the loft in the dark.   Happy thoughts..happy thoughts. Colin |
| |
Last Edit: Apr 4, 2015 16:44:25 GMT by colnerov
|
|
|
|
|
|
|
|
|
|
I have far too much to do than to spend time dropping dead at inconvenient moments!
I'll have to be a bit careful while I'l slopping water about but once the tank is finally refitted it'll be fine. The switch isn't even screwed down at the minute.
I'm more surprised I haven't been told off for keeping an old switch in use. I reckon it'll be from the 50s if not from the 30s when the house was built. It's old and it works and I like it so it's staying!
James
|
| |
|
|
|
|
|
|
|
|
There is going to be an awful lot of weight on those trimmed ceiling joists (the ones running upto the loft hatch) when the tank is full, is there a supporting wall underneath them at all to take a bit of the load off? If not it might be an idea to check how they are fixed into the timber around the loft hatch, if they are just spiked in with a single nail I would be tempted to wind a timberlok type bolt or similar in as well.
|
| |
|
|
|
|
|
|
|
I had exactly the same moment of panic too. Nice to know I'm not the only one! Yes there is a wall under the end of the joists.  It has a door in it though.  I did spend a fair amount of time working out how it was all screwed together and did add a plate in one corner just in case. If you look at this photo...  ..the big timber I put at the foot of the chimney. Well that sits on a new timber I fitted at the left hand end, supported by a convenient bit of chimney. And I spent a lot of time looking at the right hand end working out what was under it. As it happens I can actually sit that on a part of the chimney too so I'll probably do that when the tank next comes out. It turns out it's a 50 Gal tank according to the label - 225Kg when its full. Blimey! Eventually I concluded that the tank had been there for probably 40 years and hadn't wound up in the bedroom so there couldn't be a lot wrong with it. James |
| |
Last Edit: Nov 12, 2018 21:43:28 GMT by Sweetpea
|
|
|
|
|
|
|
Clunk. DAMN IT! Darkness again! This is becoming a habit. Having moved the water tank (all of a few inches upwards) I now have room to get the channel section under it. Which means I need to cut and weld it. Here's a picture from my astonishing 3D computer model. 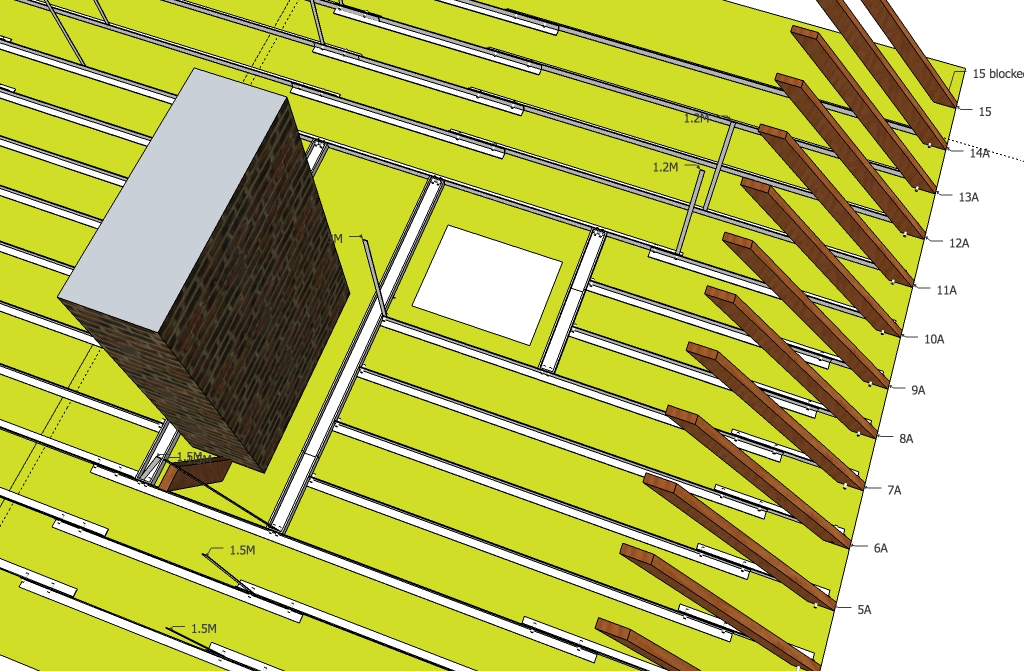 The bits in question are the ones running parallel to the chimney. They bolt to the cross braces at each end so they need the ends capping off with some 5mm steel. The other rafter braces bolt to the channel section too. Onto a tang welded to the side of it. Better get good with dear old dad's stick welder then. The end will look something like this when it all goes together. But without the gap between the pieces obviously. 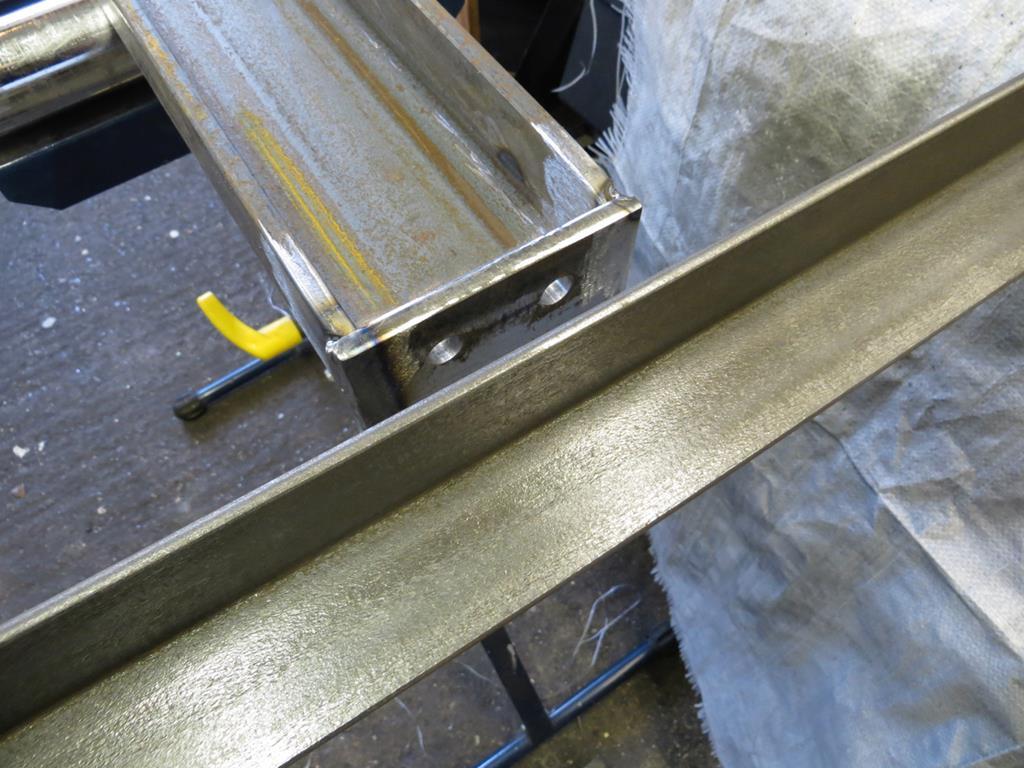 Time for some practice joints to get the welder dialled in. To make sure it sticks I'm going to weld both sides of the joint. On the outside I've made a V to weld into. Partly to aid penetration and partly for neatness. 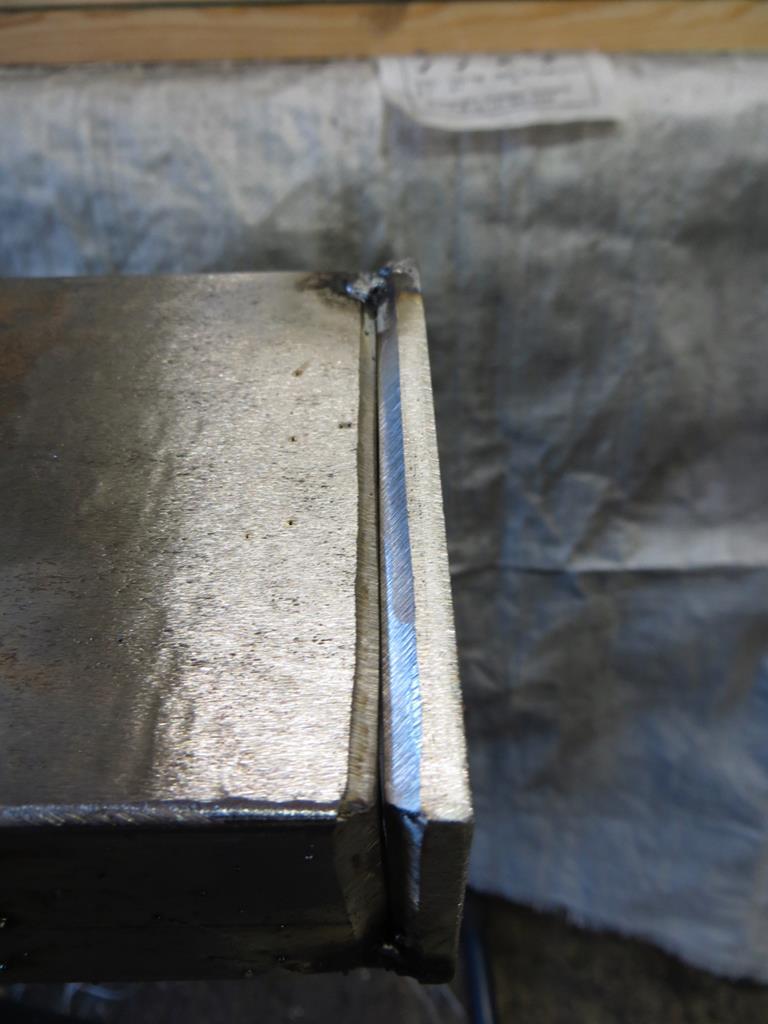 So here is the first test weld. I've turned the power up a fair bit from my previous experimentation. That was on thinner metal with thinner rods. 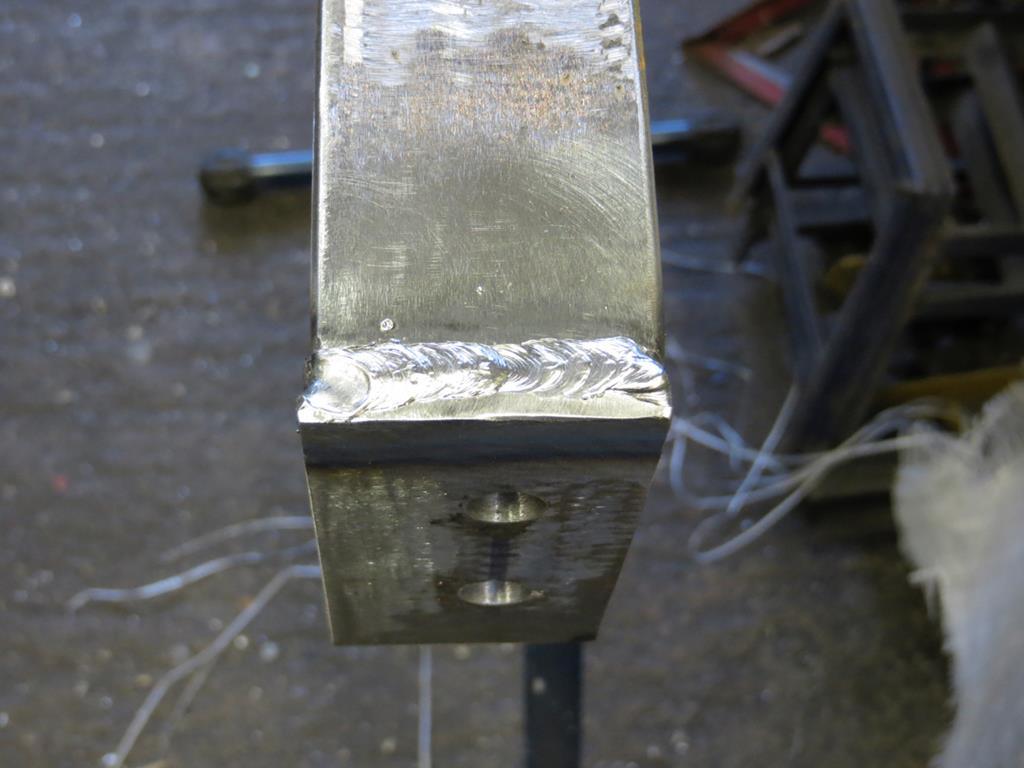 It is, of course, more or less at this point that that the garage is plunged into darkness. The garage is on a 16 amp trip from the house. The increased power setting on the welder is overloading it. Hmmph! Anyway, I'm quite pleased with that. Mrs Sweetpea popped into the garage at this point so I couldn't help grinning and showing off my welding. Me - 'Look at this! Isn't it lovely!?' Mrs Sweetpea - 'Right? Is it?' Me - 'Yes, look how great it is!' Mrs Sweetpea - 'Hmmm. Smashing.' Walks off to put the kettle on. Ah well. Some people just don't understand the beauty in a nice weld. There is no way I can do the welding with the power dropping off every couple of minutes. So there will be a short intermission while I run a new feed cable to the garage. James |
| |
Last Edit: Nov 12, 2018 21:52:37 GMT by Sweetpea
|
|
|
|
|
Apr 11, 2015 20:31:43 GMT
|
Rewiring the feed to the garage!? Short intermission??? Don't think so. It'll be months before Sweetpea is back on the horse… Ye of little faith. Electrics are done. I now have a 32 amp feed and a couple of extra sockets. And I finished that test weld. 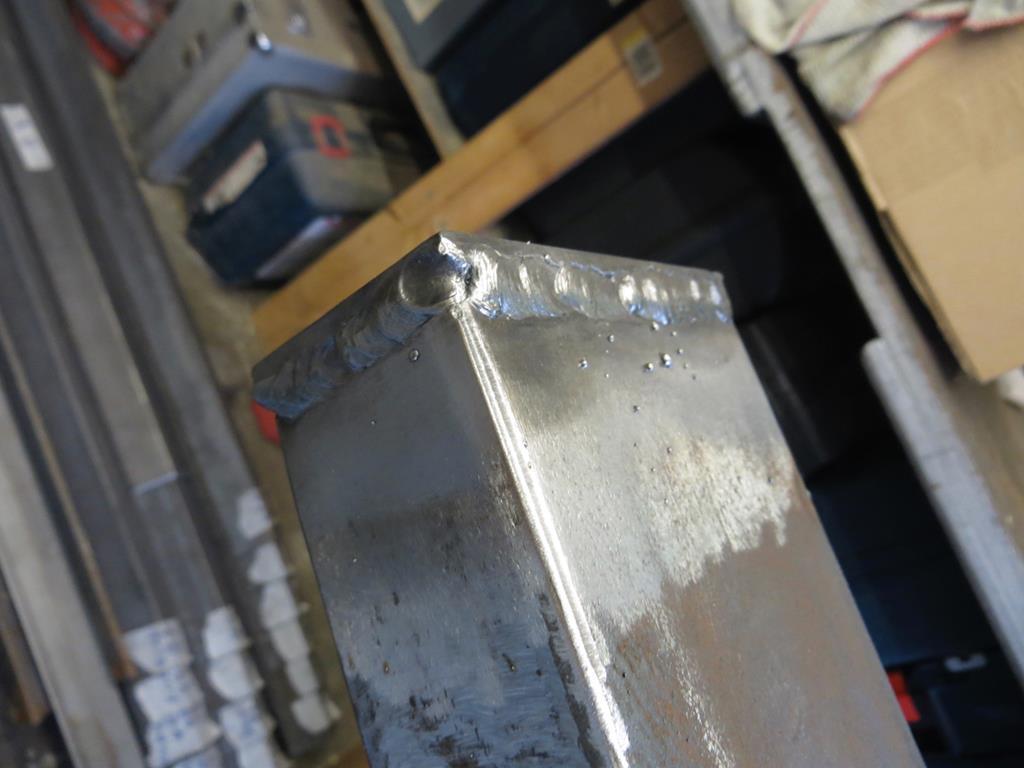 This was yesterday by the way. Looks ok. Inside isn't quite so good though. 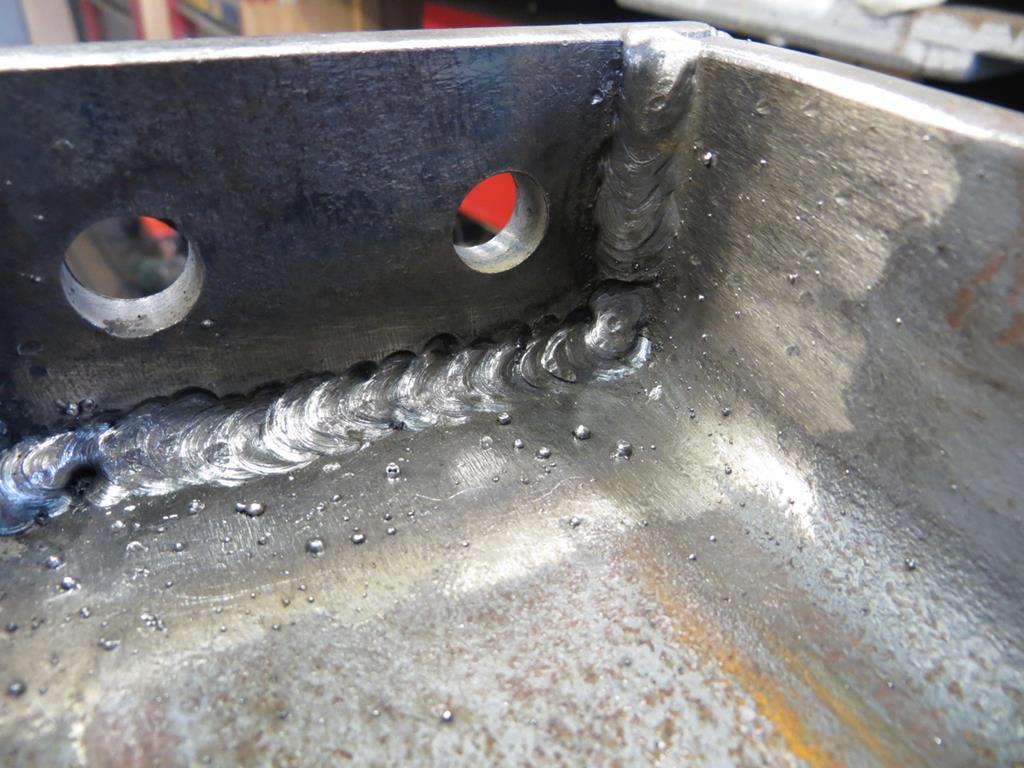 Apart from the slag inclusion in the left side I've got nasty undercutting on the vertical face. It's that dark fringe above the weld. So today I cut it off and had another go on reduced power. Most of the outside looks ok but on the inside I'd got the power far too low. No penetration slag stuck in it all over. Not pretty. All the same I thought I'd like to do an ultrasonic survey of the weld site to see how it looked on the better bits. Unfortunately I don't have an ultrasonic testing machine and Tesco was fresh out to them. So I did the next best thing. Took out my big sledge hammer and spent a few minutes bashing seven shades of poo out of it. Here is the outside after some abuse. 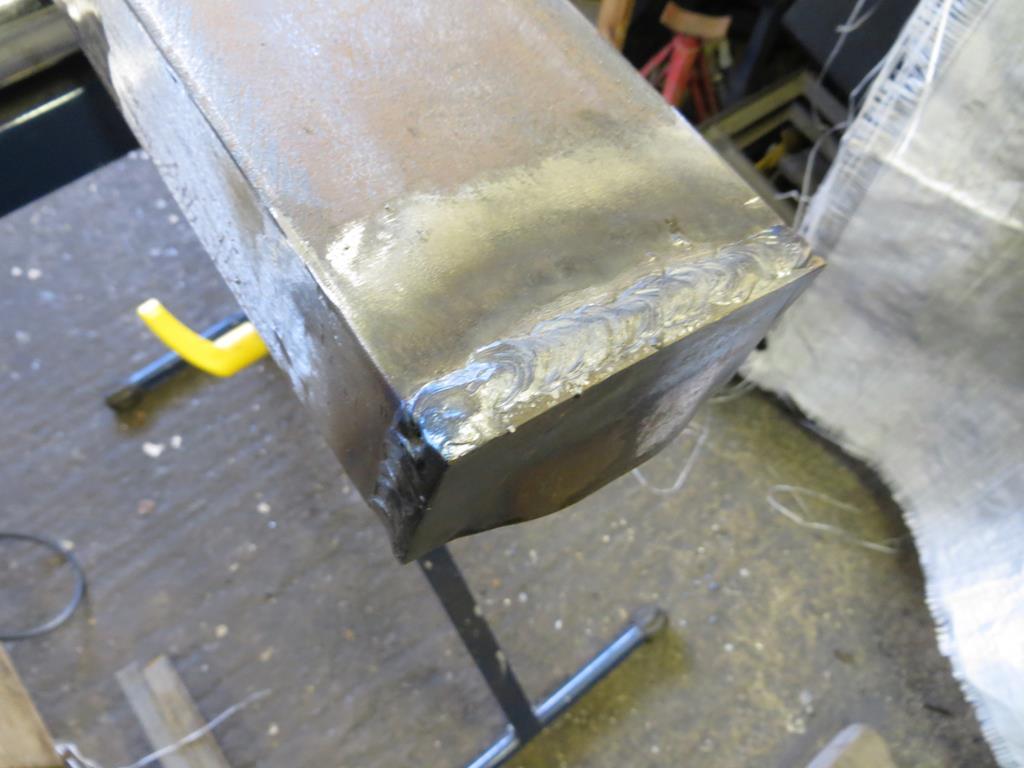 That part held up nicely. And the inside. It broke where the worst of the under powered welding was. 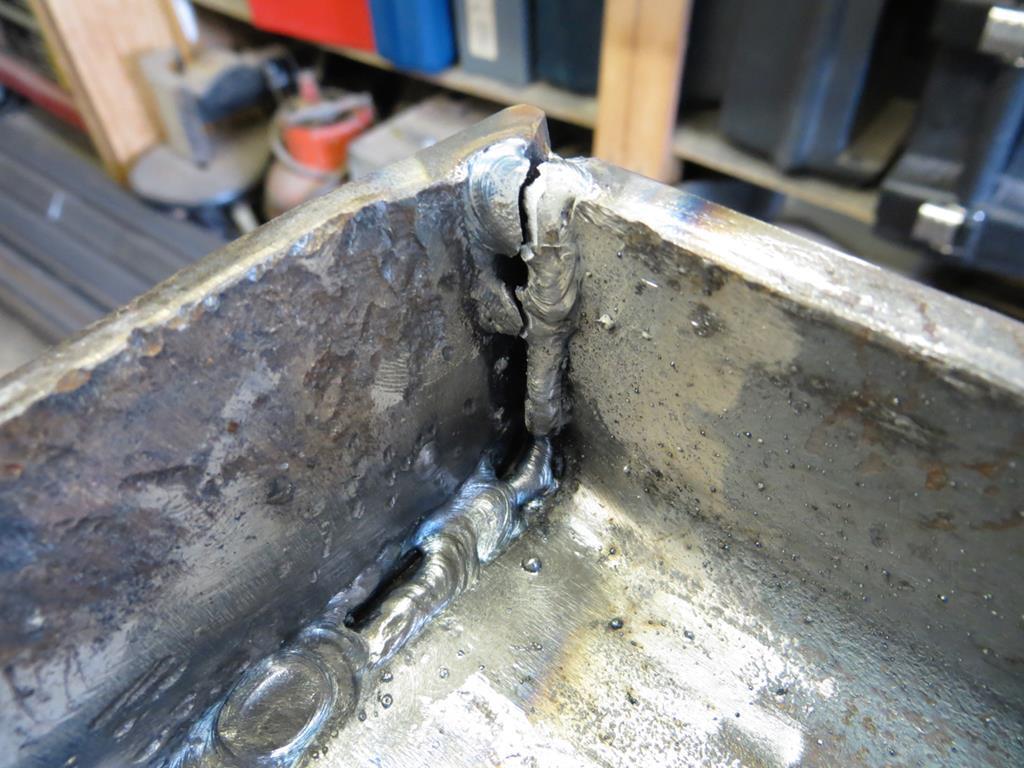 I said it wasn't pretty. Still, it took a serious amount of sledge hammer action to get it to fail. At that point I gave up and went and helped the missus in the garden. Tomorrow I'll cut it off and have another go. Somewhere in the old welder is the power setting I need. And somewhere in this old welder is - er - a welder. Just got to find them both. James |
| |
Last Edit: Nov 12, 2018 21:59:42 GMT by Sweetpea
|
|
|
|
|
Apr 11, 2015 20:51:53 GMT
|
|
How did you position the metal for welding? The limited amount of stick welding I've done I've tried to position joints like that at 45 degrees to help keep both legs the same rather than one being horizontal and the other vertical, if that makes sense?
Also I found that damp rods and cold steel are a pain, so heat the rods in an oven and I'd run the outside weld first where you have best access, then immediately run the inside weld whilst there is still heat in the metal.
You could also put a vertical gusset/web from between the bolt holes to the large side of the channel to stiffen the end plate if needed.
Keep up the good work.
Brian
|
| |
Last Edit: Apr 11, 2015 20:59:54 GMT by Good Scrap
|
|
|
|
|
Apr 11, 2015 21:25:32 GMT
|
|
Hi, another trick to warm up the rod is to touch it on the work piece and hold it there so that the current passes through the rod it will eventually start to glow red then take it off. Another thing is cut the rod in half so that it easier to control in tight spaces. Experiment a bit to see if these work better for you.
Colin
|
| |
Last Edit: Apr 11, 2015 21:26:15 GMT by colnerov
|
|
|
|
|
Apr 11, 2015 22:16:11 GMT
|
|
Hi both,
Thanks for the suggestions. Think I need them!
I'm welding with the beam horizontal although I'm rolling it over so I'm not trying to weld vertically. I had wondered about getting the joint at 45 degrees but that'd mean having the welding end on the floor. Still I might try that tomorrow.
I'm keeping the rods in the airing cupboard so they should be dry. Haven't tried preheating them in the oven though.
I've got a scrap plate clamped to the work and am striking the ark on that for a few seconds. That heats the end of the rod so when I re-strike on the work it lights up instantly.
The rods are quite long so I've been holding them halfway down to stabilise them. It doesn't take a long weld before you can feel the heat of the rod come through your gloves. I've been wondering about using new rods on the outside and then part used rods on the inside to improve control. I'll try that tomorrow too.
Thanks again.
James
|
| |
|
|
|
|
|
Apr 16, 2015 22:24:49 GMT
|
I've been practising and practising. The only thing that has been consistent is that my welds are consistently inconsistent. I'm having horrid problems with slag inclusions and it's driving me bleedin' potty. Just before lunch today I came in completely frustrated and started surfing the web and contemplating. I quickly concluded that… 1, The welding rods are at fault and I need to buy some new ones. 2, Maybe dads old welder is now beyond it's limits and I need to buy a new one. And in the back of my mind there was always the third nagging possibility… 3, I'm a rubbish welder with all the talent of Baldrick on a bad day. Maybe I should just try turning the wick up a bit? More volts Igor! Back to the garage and don the necessary apparel. the Denim Shirt of Youth. the Welding Apron of Protection the Red Gauntlets of Confidence and the Auto Dimming Helmet of Brilliance. These things have magic powers bestowed upon them by the Welding Gods. I also did a dance to the Gods and sang the Welders Hymn. Argh! Argh! F**k! S**t that's f***ing hot! Bu***ry bu***r! A**e! Arrrrgh, s**t! Soapy t*t w**k! And if the congregation would like to join me in the chorus… Anyway, a little more power and I'm getting vaguely ok welds again. 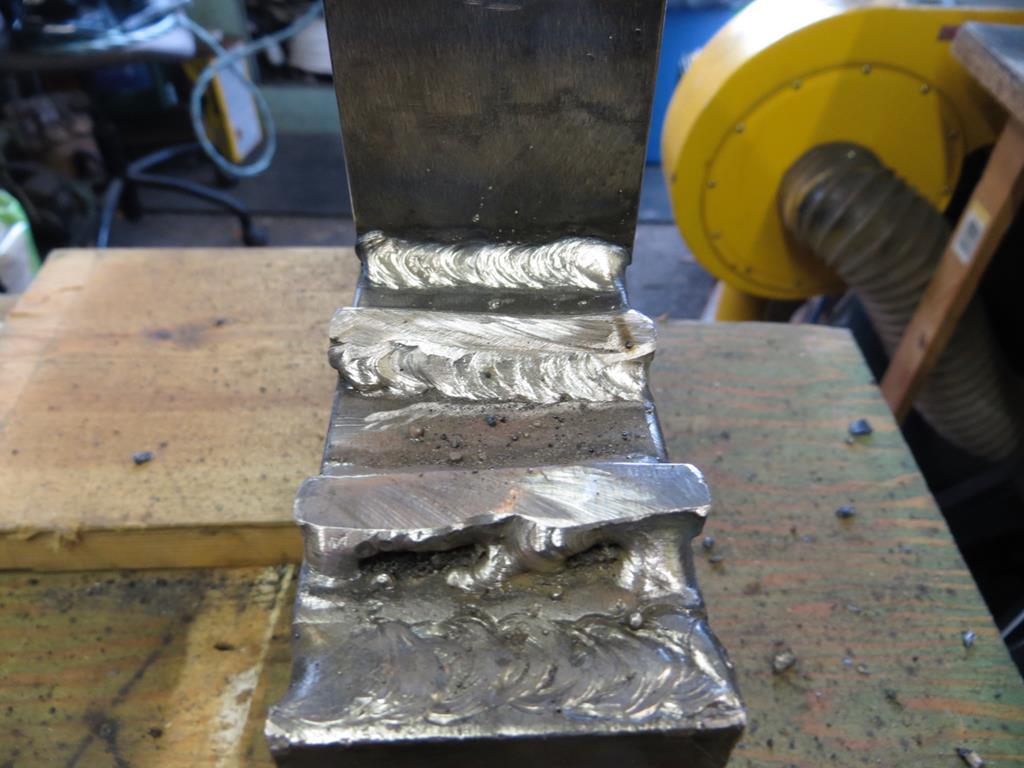 The first one you can see was before I turned the power up. The back two are after. Much better. Right lets get serious, stop messing about, and do some construction. 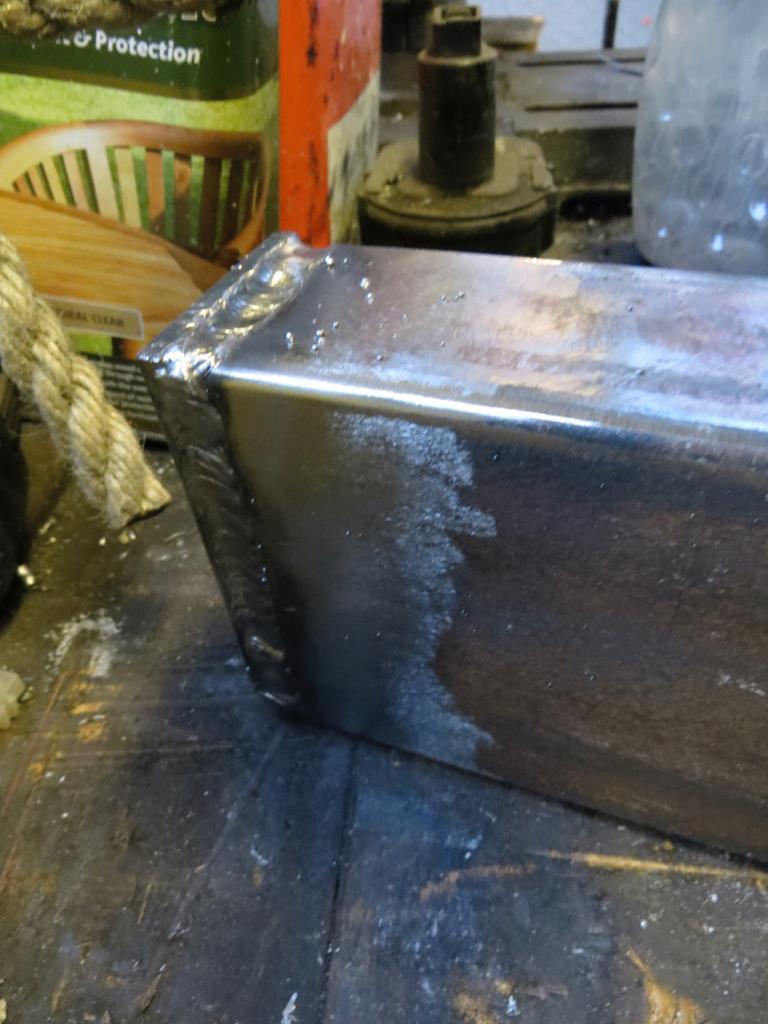 Here is the first end on. Outside is good enough for me. It's not going to fall off. 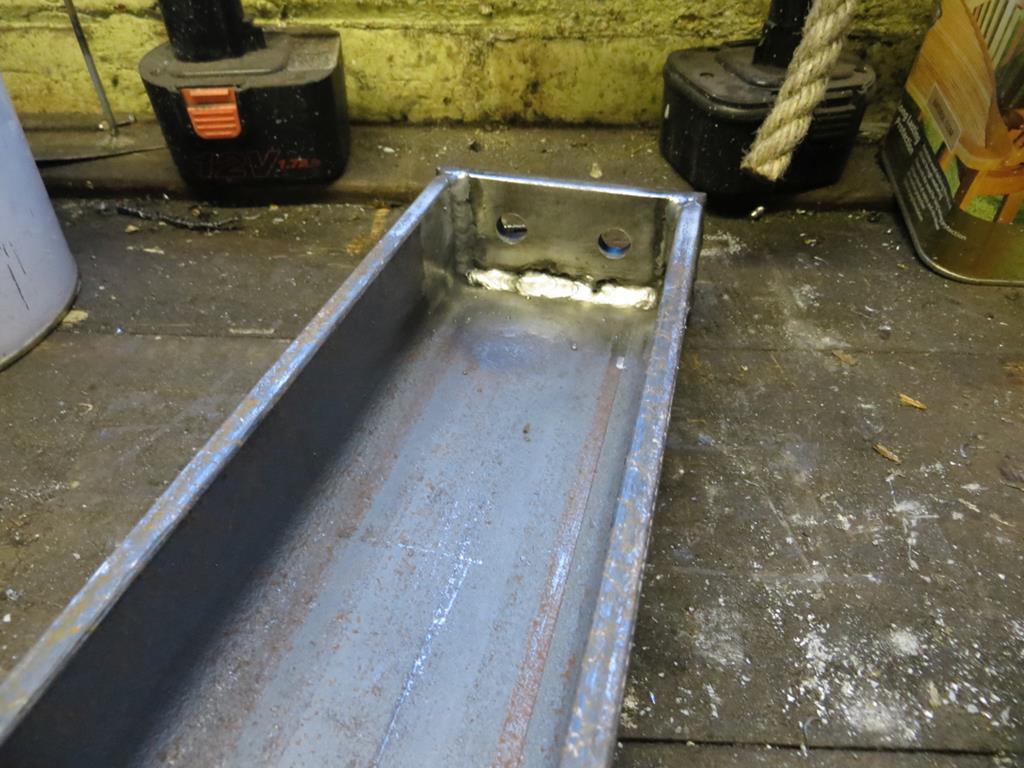 Inside there is a bit of under cutting - probably bad technique - and a nasty inclusion. I have a die grinder coming in the post so I'll grind out the inclusion and reweld it. All in all I'm reasonably happy. I need to cut it to length next and put the other end on. James |
| |
Last Edit: Nov 12, 2018 22:04:38 GMT by Sweetpea
|
|
|
|
|
Apr 17, 2015 20:33:37 GMT
|
Quick measurement in the loft… Ah rubbish. I measured it time and time again. The truth is that I could be 3/4 of an inch out and it wouldn't matter much but I want it within the millimetre. Long and tedious measurement in the loft was transferred to the steel. 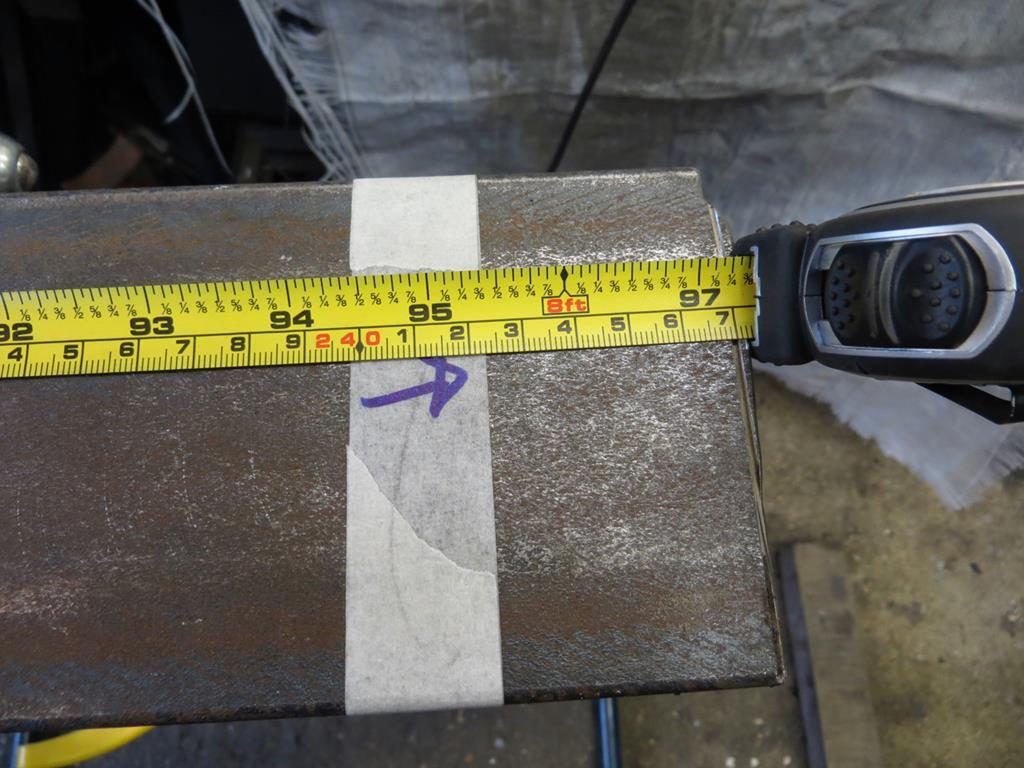 Big arrow to make sure I cut the right side of the tape. Got that wrong before! Then rig for welding. 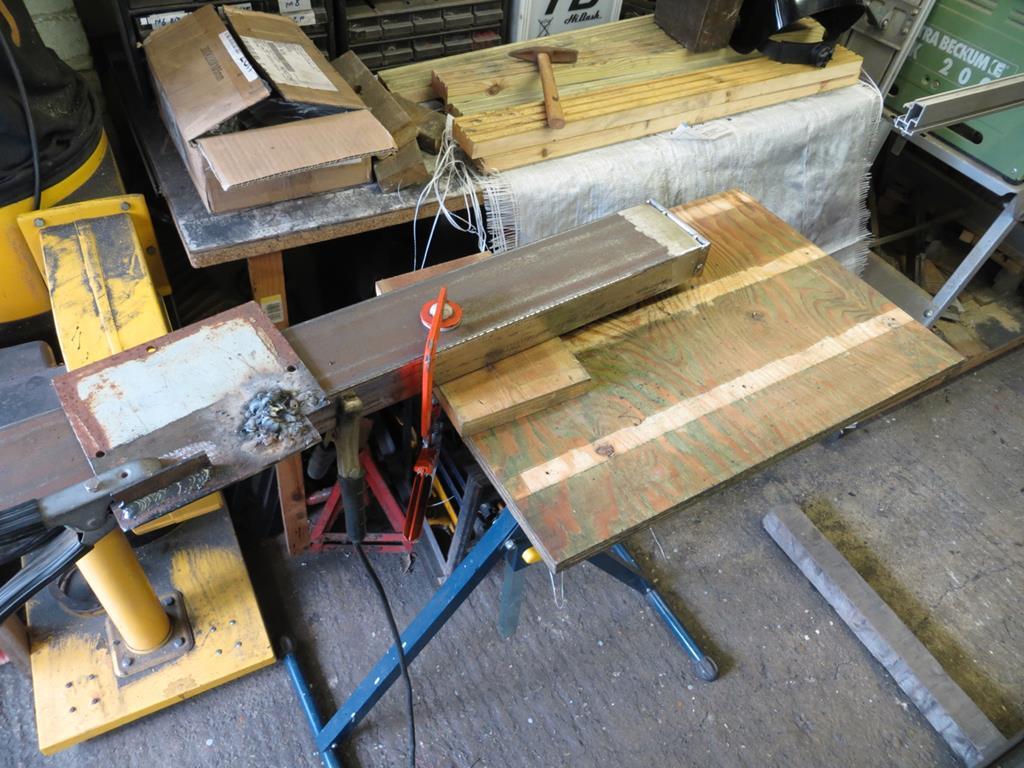 One of the changes I've made to improve my welds is to clamp a piece of ply to the end of the work as a 'table'. Now I've got somewhere to plant my elbow while welding. Previously I had been standing, hand on hip, waving the electrode around like a rapier in a fencing match. Ok, not quite, but I didn't have enough support. Now I do. You can only just see it in the photo but I've tacked the end on with the MIG. Not much penetration but enough to hold it together. No slag to get in the way later though, that's why I used the MIG. The tack remelts under the electrode. You just have to speed up a bit as you pass it to avoid a lump in the finish. 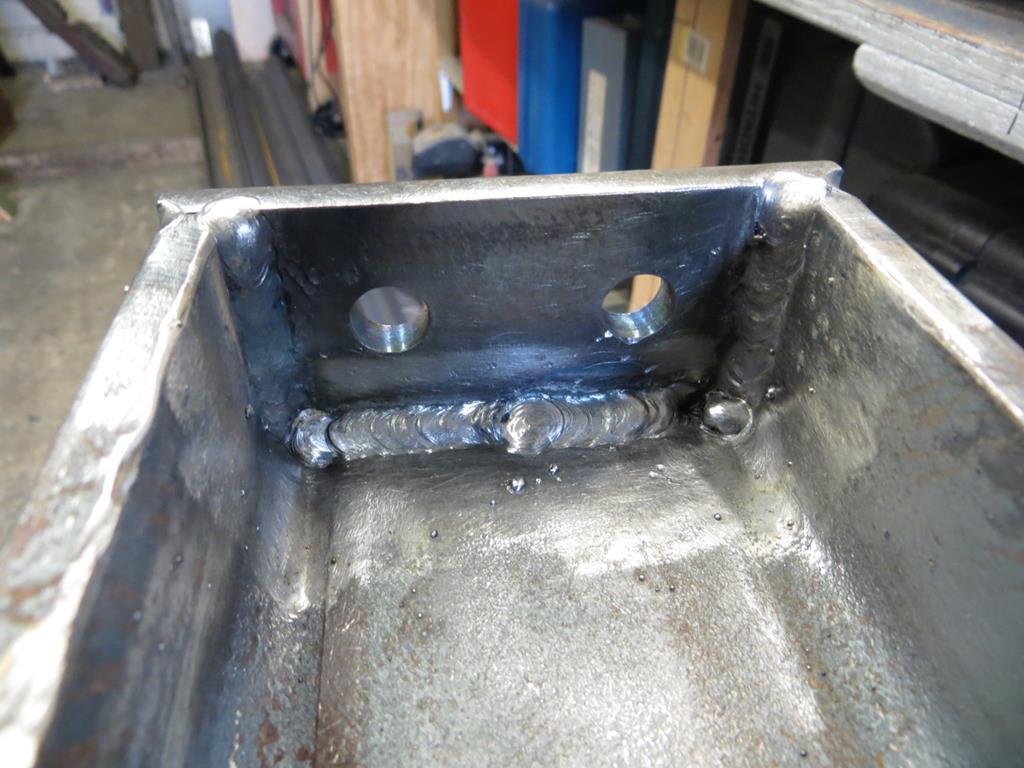 Got an inclusion on this end too but I'll sort that out later. If you are wondering why the bottom looks like it was welded in two goes it's because it was. I found that if I kept going in one pass the rod ends up at the wrong angle at the end and I can't control the weld pool. So I do it in two goes, from each corner in. 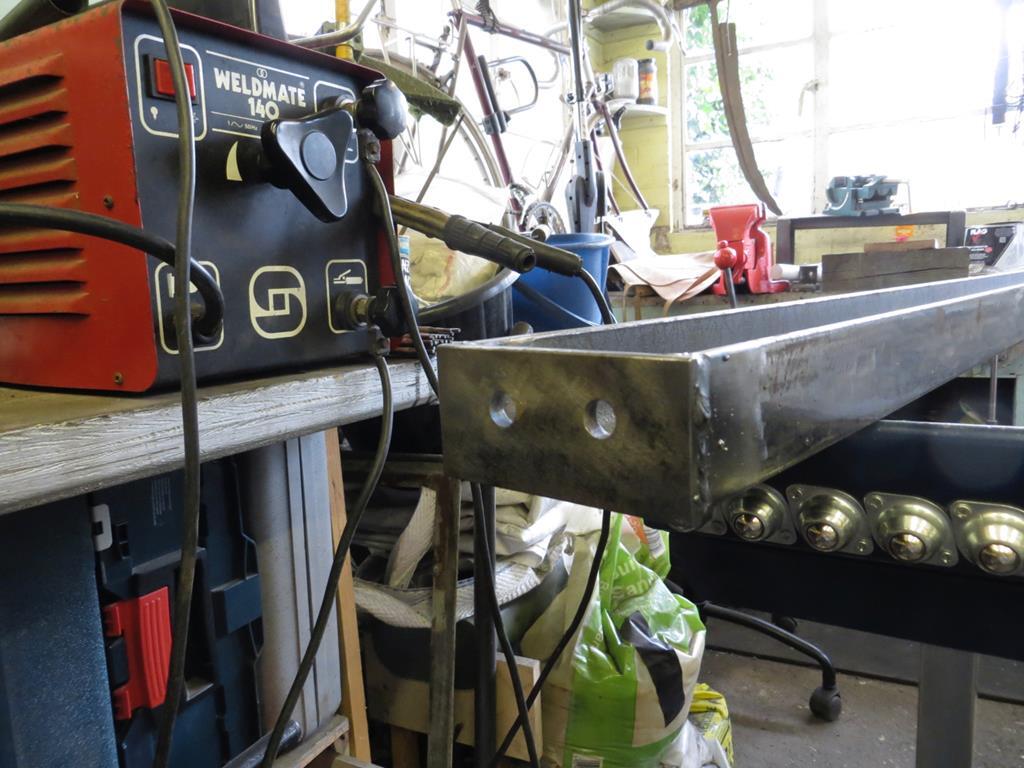 So that's the other end on. Good. Finally today I started preparing the pieces that'll go from the rafters to the channel section. 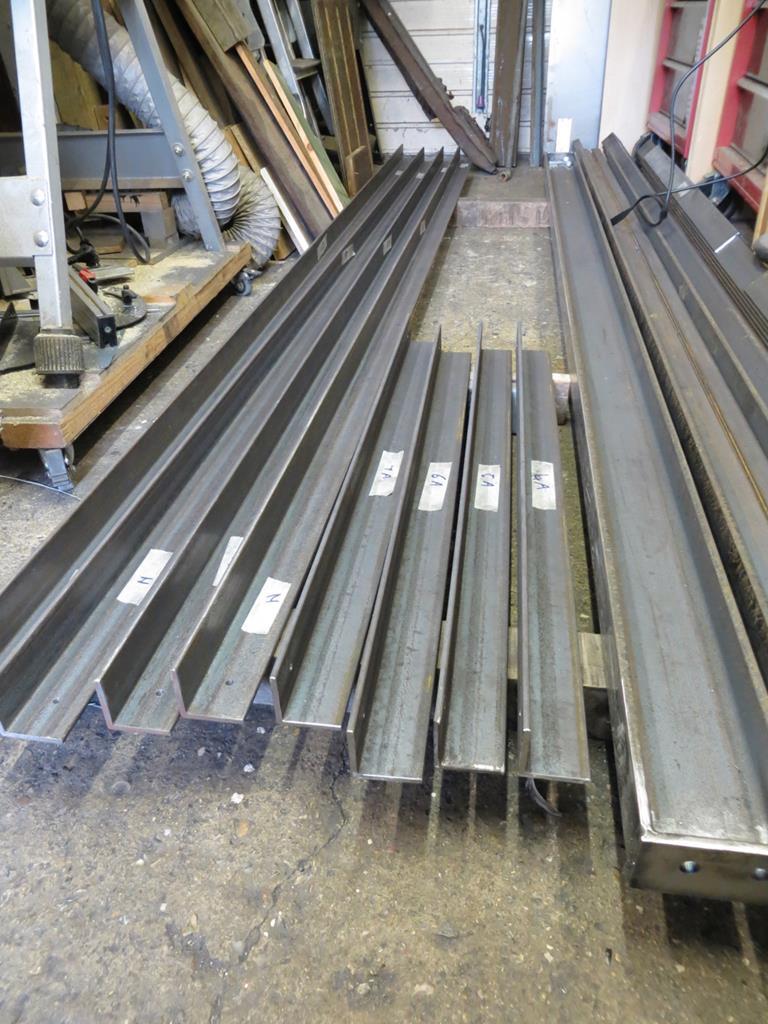 They are almost ready for paint. Guess what I'll be doing this weekend. Nope, sadly not. I have to work. James |
| |
Last Edit: Nov 12, 2018 22:11:29 GMT by Sweetpea
|
|
|
|


 It has a door in it though.
  I did spend a fair amount of time working out how it was all screwed together and did add a plate in one corner just in case.


