|
|
|
|
|
Why don't you just use a single 12V linear actuator? Find an old disability bath lift and you will also get the hand control to control the up and down   This is what I ended up with new; the "recycling center" was not yielding any treasures as of late....especially in the 12v variety...but this is exactly what I need and will be going with. I'm working out the bracketry now. I have to widen the current unit from the treadmill lift and weld some mounts to it so I can bolt it into the inside of the door frames....that way the wheels/lifting arms will be as far to the outside as possible. thanks for the feedback and image! JP |
| |
I know its spelled Norman Luxury Yacht, but its pronounced Throat Wobbler Mangrove!
|
|
|
|
|
|
|
|
|
Another possible option for an actuator could be a seat motor, if you have a look on YouTube at "project binky" they use one to power a flip front on the mini. Ttfn Glenn I am a HUGE fan of project Binky!...great build and wonderful series of vids.... also a big fan of Tigger...TTFN! JP  |
| |
I know its spelled Norman Luxury Yacht, but its pronounced Throat Wobbler Mangrove!
|
|
|
|
E36 trailer for my E91 wagondeanflowers
@deanflowers
Club Retro Rides Member 81
|
|
|
07lilredwagon i used to design medical aids and people were always buying the old actuators for opening hatches on boats  |
| |
'The reason i have pulled you over is to say how incredible and absolutely awesome that is'
Mercedes W109, Mercedes W140 S280 SWB & S320 LWB, W201 cosworth kitted, clk230 Kompressor, w109 300sel, Lincoln Continental 1964, BMW E30 Tech II tourer, MK1 Golf Clipper, BMW E31 840ci sport, JAGUAR XJ40 3.6, Kangoo van, Volvo 740GLE estate, Maserati Quattroporte GTS
|
|
|
|
|
|
|
|
I wish I had thought of that application beforehand...geriatric/medical...but didnt think of it and bought a new actuator...but it was only 70.00 US with a remote control unit....not too bad...
|
| |
I know its spelled Norman Luxury Yacht, but its pronounced Throat Wobbler Mangrove!
|
|
oukie
Part of things
 
Posts: 307 
|
|
|
|
|
Great to see an update,
|
| |
Mr2 mk1 x4
Honda Accord 2.4 Executive (luxo barge)
|
|
|
|
|
|
|
Hey all, I have gotten closer to working out the details with my tonneau cover lift assembly. here is a shot of the pieces I am going to use from the treadmill lift system. I was able to simplify and lighten the whole thing by only using the sections from the steel frame and lift arm that I need. The whole frame weighed 20 lbs before....now I'm down to about half that.... 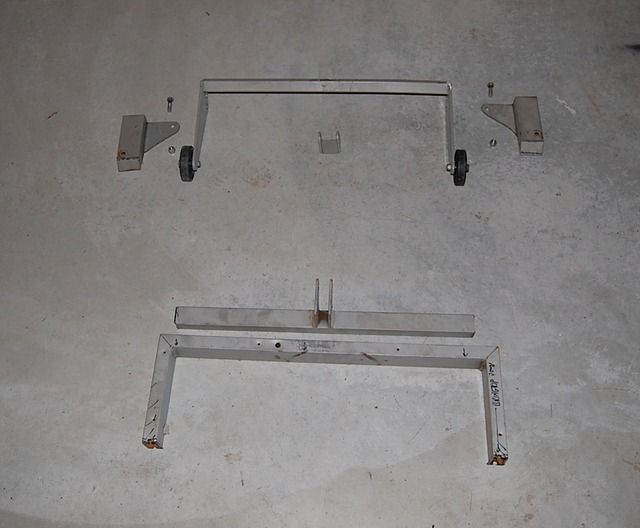 The hinges will mount to the door hinge posts on the trailer. I need to lengthen the arm assembly out from 24" to 52". Ill do that by sectioning in more steel from the frame. Ill mount the actuator bracket in the center of the arm so that it pushes up and extends the arms to a 90 degree angle...though I should not need all of that travel. I am planning on mounting the actuator just above the old transmission tunnel which is what that lower bracket and frame piece are for.... Here is the bracket that will mount to the door post: 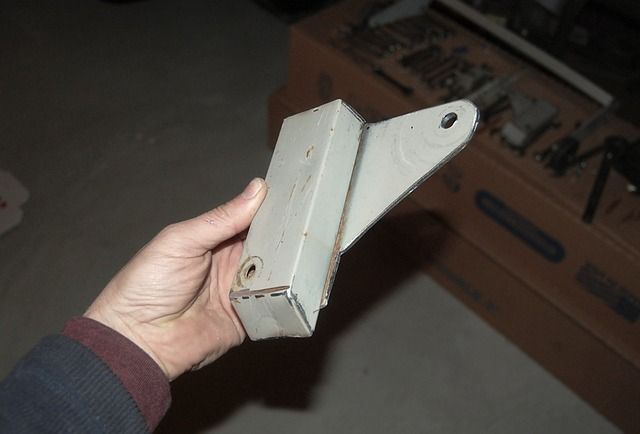 The actuator has been shipped and should arrive next week...hopefully Ill be ready for it! thanks for looking! JP |
| |
I know its spelled Norman Luxury Yacht, but its pronounced Throat Wobbler Mangrove!
|
|
|
|
|
|
|
Very excited to try this out! 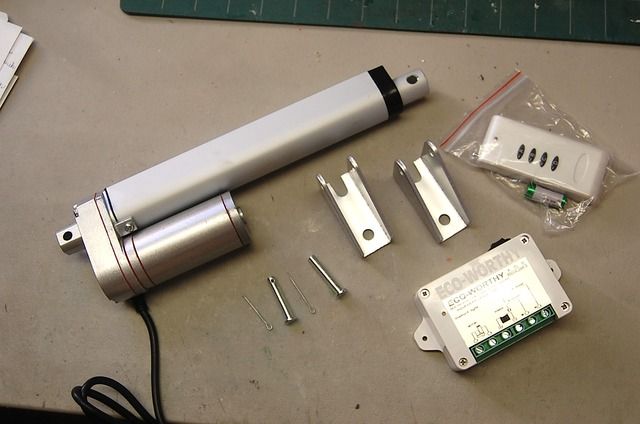 Yahoo! JP |
| |
I know its spelled Norman Luxury Yacht, but its pronounced Throat Wobbler Mangrove!
|
|
|
|
|
|
|
So Ive been going through one or two variations on each piece to get them to work well, fit right and look good. Ive also been trying to save some weight as much as possible. Here is the set up with the actuator and brackets, ect...not too bad. 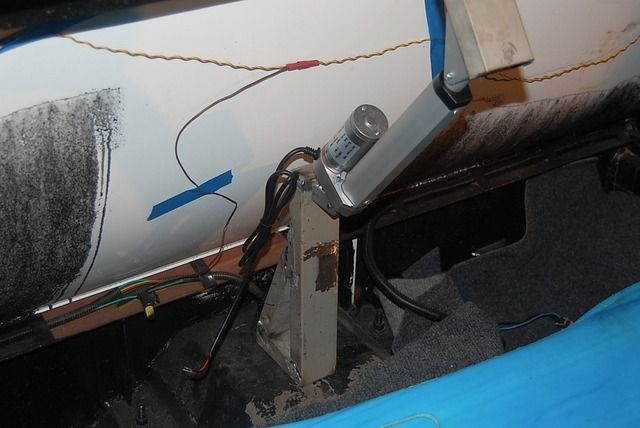 Right now I only have everything clamped in place but the hinge works with no binding or rubbing anywhere and it looks like Ill be able to tuck the lifting arms right up next to the inside of the doors. 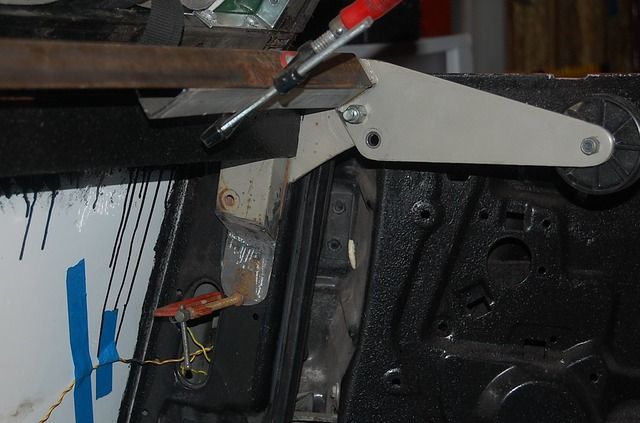 I used the metal from the treadmill frame and made the bottom bracket as minimal but as sturdy as I could...its plenty strong! the welding went well too...its been a while but after a few sloppy welds, it started coming back!... 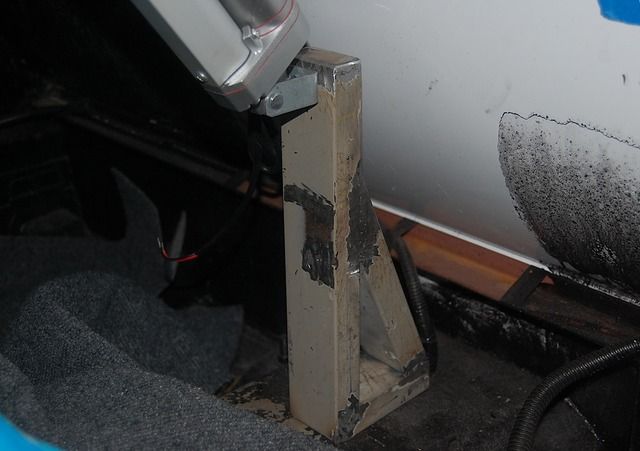 Next Ill get some material to tie the arms together with the center actuator bracket, weld that assembly together, then I should be ready for paint.... thanks as always for looking, guys! JP |
| |
I know its spelled Norman Luxury Yacht, but its pronounced Throat Wobbler Mangrove!
|
|
|
|
|
|
|
|
Only just spotted this. Magic!!
Top work, and looks ace. Well done
|
| |
|
|
|
|
|
|
|
Only just spotted this. Magic!! Top work, and looks ace. Well done thanks, Kebabmonster! looking forward to welding on some mounting flanges to the bottom mount tonight....Then I can hook it up and try it out! JP |
| |
I know its spelled Norman Luxury Yacht, but its pronounced Throat Wobbler Mangrove!
|
|
|
|
|
|
|
Dec 10, 2015 16:57:10 GMT
|
A while back in the thread (and time) I posted about having been given an old interior hood light from a chevy truck....well I finally got around to building a mount for it and getting it mounted. 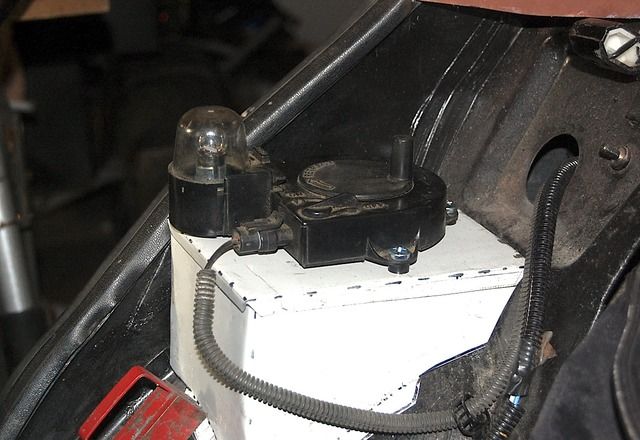 It works great...though it is very old school...we all just use our phones now as a flashlight, but what the heck...its a neat retro touch, I think! 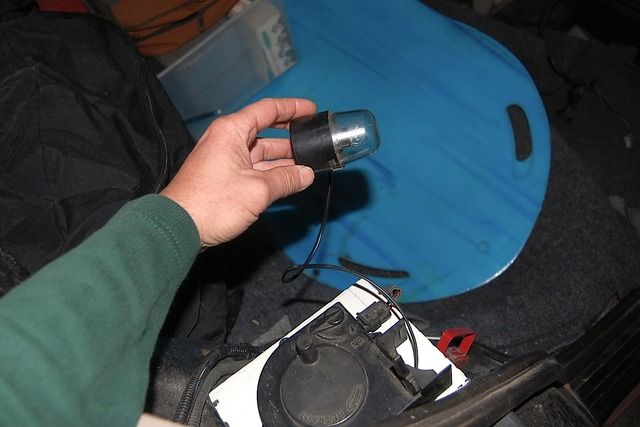 I'm Planning on getting the lower tonneau cover lift frame mounted on the trailer floor tonight then wiring everything up temporarily to be sure it all works...wish me luck! JP |
| |
I know its spelled Norman Luxury Yacht, but its pronounced Throat Wobbler Mangrove!
|
|
|
|
|
|
|
progress continues....I was able to assemble the hinge unit this evening and hook up the actuator and remote control, ect...it works great, but there are some bugs to work out. I think I will have to lengthen the arms as the effort seems somewhat greater than anticipated at the length they are now. I'm planning on posting a video, but don't know how yet...(gotta ask my kids how!) here is the assembly just clamped to a piece of angle iron...I welded all the pieces together and it is now one unit and installed on the trailer. 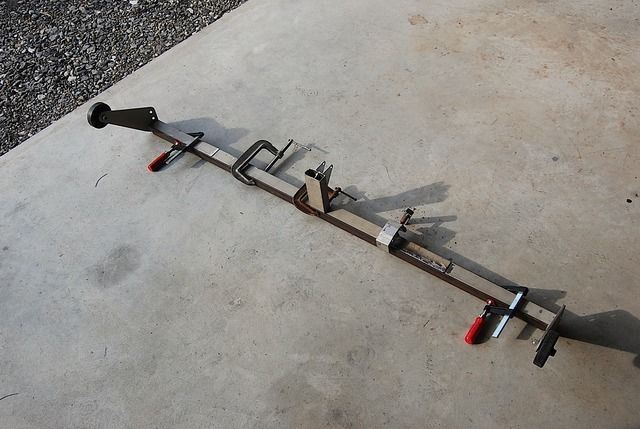 in other news, my buddy gave me an old mountain bike roof rack unit and it fits great. I can now leave the front wheel in place and just clamp and bungee the bike now.... 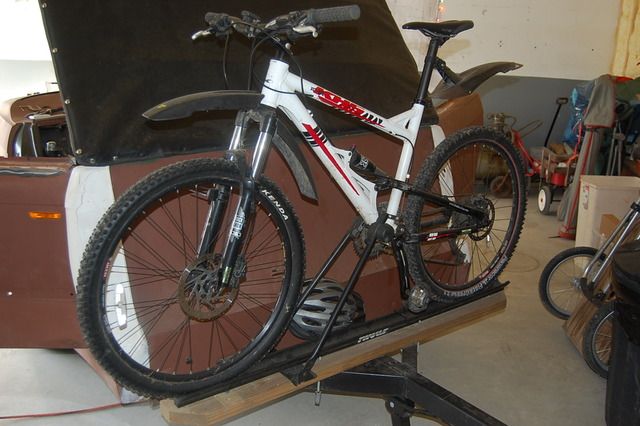 thanks for looking! JP |
| |
I know its spelled Norman Luxury Yacht, but its pronounced Throat Wobbler Mangrove!
|
|
|
|
|
|
|
|
Okay, not much of an update picture wise, but I have decided to go back and do the front corners from metal...couple of good things so far....I have gotten better at shaping metal...not much better, but better (LOL)....and the foam that is there is acting as a template to really help shape the metal pieces. (like using a buck)....I am going to use 3-5 pieces per side (like I said, I'm not THAT good to do them in one or two pieces) and then stitch them together....so far I have 3 of the 4-5 pieces cut and shaped and in place on the drivers side.....pics soon!
JP
|
| |
I know its spelled Norman Luxury Yacht, but its pronounced Throat Wobbler Mangrove!
|
|
|
|
|
Dec 16, 2015 12:36:13 GMT
|
I got some pieces cut and roughly fit in place: 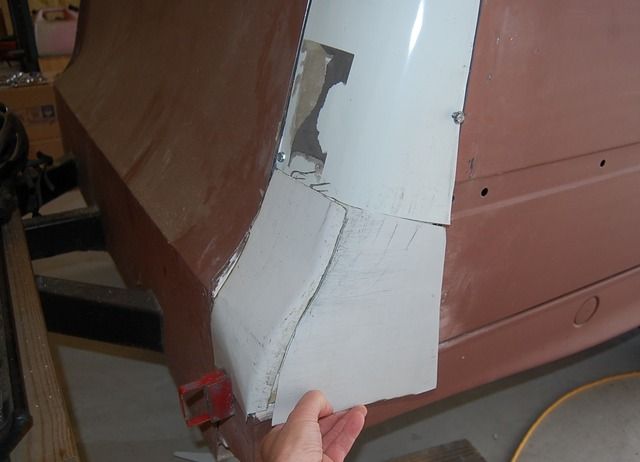 I decided to refine my welding last night on some scrap metal the same thickness as my corner pieces and am very glad I did!.....it took a while to get it to the point where I wasnt blowing through the material, or just plain sloppy!....I am using a flux core wire (ran out of mig gas) and am getting good results and though its not as clean a process as with using solid wire and mig gas, it seems that it can be done.....I have to clean each weld with the wire brush and be sure I have a really good ground. The metal also has to be consistent and clean. I would like to hear back from any welders out there and see if they have had similar experiences with the flux core wire. (Millermatic, lincoln mig wire..) basically I carefully aim the weld about halfway up the last spot weld and don't really move the torch at all..but so far, as long as I am pointing it the right way, the welds are going together nicely with good penetration and no holes or gaps. thanks for looking JP |
| |
I know its spelled Norman Luxury Yacht, but its pronounced Throat Wobbler Mangrove!
|
|
|
|
|
|
|
|
I've only used flux-cored wire in my MIG as they want stupid amounts of money to hire a gas bottle here.
I've used Cigweld 0.8mm (0.030")(Not sure if you can get it over there) but it's worked pretty well. I can get good penetration on up to 5mm mild steel.
If I had the availabilty you do, I'd definitely be going with Lincoln Innershield NR-211-MP in 0.8mm (.030"). Most panel beaters swear by it, but I can't get it over here in smaller spool sizes (I want a 1lb spool).
|
| |
|
|
|
|
|
Dec 17, 2015 13:33:42 GMT
|
I've only used flux-cored wire in my MIG as they want stupid amounts of money to hire a gas bottle here. I've used Cigweld 0.8mm (0.030")(Not sure if you can get it over there) but it's worked pretty well. I can get good penetration on up to 5mm mild steel. If I had the availabilty you do, I'd definitely be going with Lincoln Innershield NR-211-MP in 0.8mm (.030"). Most panel beaters swear by it, but I can't get it over here in smaller spool sizes (I want a 1lb spool). thanks for the info, sciclone Ill definitely look into it....yes, welding gas is expensive over here to. I have gotten to the point with flux core where I'm comfortable enough with it on everything down to thin or compromised metal.....and it is a must for the heavier stuff (I only have a 110v welder) as it seems to burn much hotter than the gas shielded method. I have been told by several sources that I trust that you can build up your welds in layers for heavier metal. it has worked for me on the trailer and also welding repair panels onto a friends plow frame....they have all held up very well....(I am relieved and happy to say!) jP |
| |
I know its spelled Norman Luxury Yacht, but its pronounced Throat Wobbler Mangrove!
|
|
|
|
|
Dec 17, 2015 16:53:52 GMT
|
Here are some fyi pics for you guys as I was setting up the machine and getting the wire speed and voltage in range for my test welds on scrap material. (my technique started out horrible...admittedly) First pic: too hot, too fast. good welds on solid metal, a mess at the joint. blowing through, ect. you cant see them all, but there are gaps and holes all over the place. My technique was based on theory and reading posts, not practical experience!...instead of turning down the voltage and wire speed, I tried to move the torch around to stay ahead of the blow through. this is not efficient!.... 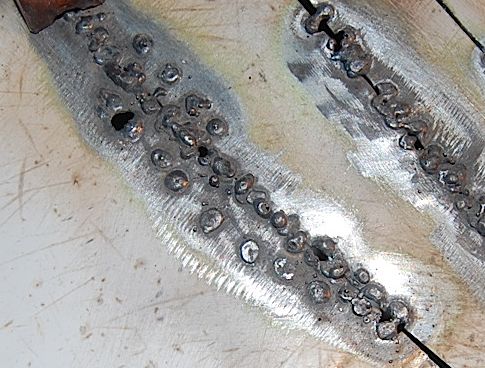 evolving: turned things down and got less fidgety: upper left still pretty sloppy, but then I calmed down and zapped a weld only where I needed it lower right.  The heat generated was also beginning to burn less of the paint around the weld (yes it was clean where I needed to weld). I was also checking weld penetration and gaps and holes around the welds. my technique during this session, anyway, was getting better. (all things considered, of course. I hope I can replicate the same results again tonight....For this session at least, with this metal, with this wire, at this voltage and wire speed....ect things turned out well.) 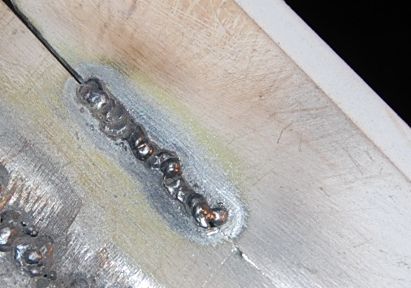 ....and of course any feedback is welcome. |
| |
I know its spelled Norman Luxury Yacht, but its pronounced Throat Wobbler Mangrove!
|
|
|
|
|
Dec 17, 2015 22:27:13 GMT
|
I'm no pro, but they don't look to have enough penetration. A good whack with a hammer should tell you if you've got enough (it'll break/crack or hold) I'm fortunate in that my welder has suggested settings for type and thickness of material, but if it's in between, it can take a bit of fiddling to get right. I find that zig-zagging/little e's help me get a good looking weld with decent penetration. Here are a couple of diagrams that sort of show what I mean.   |
| |
|
|
|
|
|
|
|
I'm no pro, but they don't look to have enough penetration. A good whack with a hammer should tell you if you've got enough (it'll break/crack or hold) I agree, Sciclone. for the most part, the welds really just sat on top.....but once I figured it out, I was able to check the weld penetration and all was good...(at the very end of what you see to the far lower right on the 2nd pic, and upper left in the 3rd pic...the metal is very thin, just scrap from a dehumidifier cover. Your suggestion is spot on for one of my welding demons, though....I am too chicken that I will blow through the material and tend to let the trigger go a little sooner than I should, but once I get going it usually gets better.
thanks for the feedback, I'm going to print out your diagram and tape it to the inside of my welder for reference...
JP
|
| |
I know its spelled Norman Luxury Yacht, but its pronounced Throat Wobbler Mangrove!
|
|
|
|
|
|
|
Happy and Merry Christmas to you all.... I got a bit more done on the trailer this week as I had some time off....Got a new controller from the manufacturer for the linear actuator and decided to take the opportunity while rewiring to tidy up the space and get a coat of paint on the inside front wall. I also began shaping and cutting the carpet too... 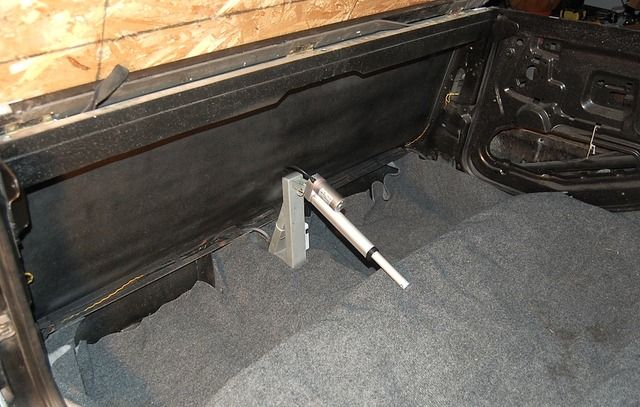 The actuator works great again and I'm going to finish up the work on the front corners... thanks for looking! JP |
| |
I know its spelled Norman Luxury Yacht, but its pronounced Throat Wobbler Mangrove!
|
|
|
|


