|
|
|
|
|
I've had a lot to think about with regards to the project. Have been plowing forward with nothing but paint in mind, but now that only the outside remains to be done I have been considering how awkward it would be to have a painted car and then have to do lots of work in and around it and risk damaging stuff. Have concluded that there is a ton of small stuff that can needs doing before assembly can begin in earnest and there is no time like the present, so get to it. The new 'plan' for the coming months: 1:Get the chassis rolling & steering 2:Prepare all parts that need to go on the car 3:Tackle sound & heat insulation. Have made some progress on points 1&2 today: The steering box and column looked like sh#t, but taking them apart for blasting/coating was more trouble than its worth so I just attacked 'em the old fashioned way, with a wire wheel and paint.   Slap some epoxy primer on after wire wheeling all the rust off: 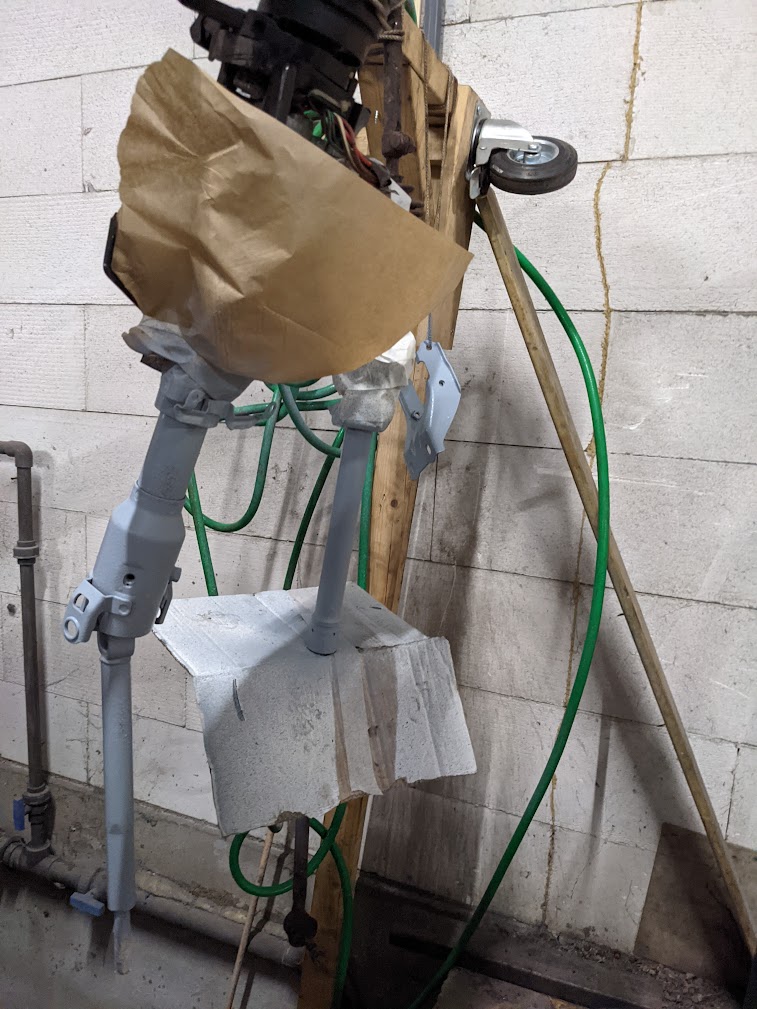 Slap some cheap black paint on:  Finished products with some 2k clearcoat applied  I could not get the column height adjustment off so I had to leave the top bit of the column rusty, was afraid I would break something. The bolt on the adjustment handle is so stuck that it requires application of the ugga-dugga, but I chickened out. Next step towards parts preparation: Get ALL the bolts zinc plated. don't want sh#t looking bolts on a clean shell. First need to get them weighed in.. including loads of spares and new bolts I have about 13,5 kg's of bolts ready to go. 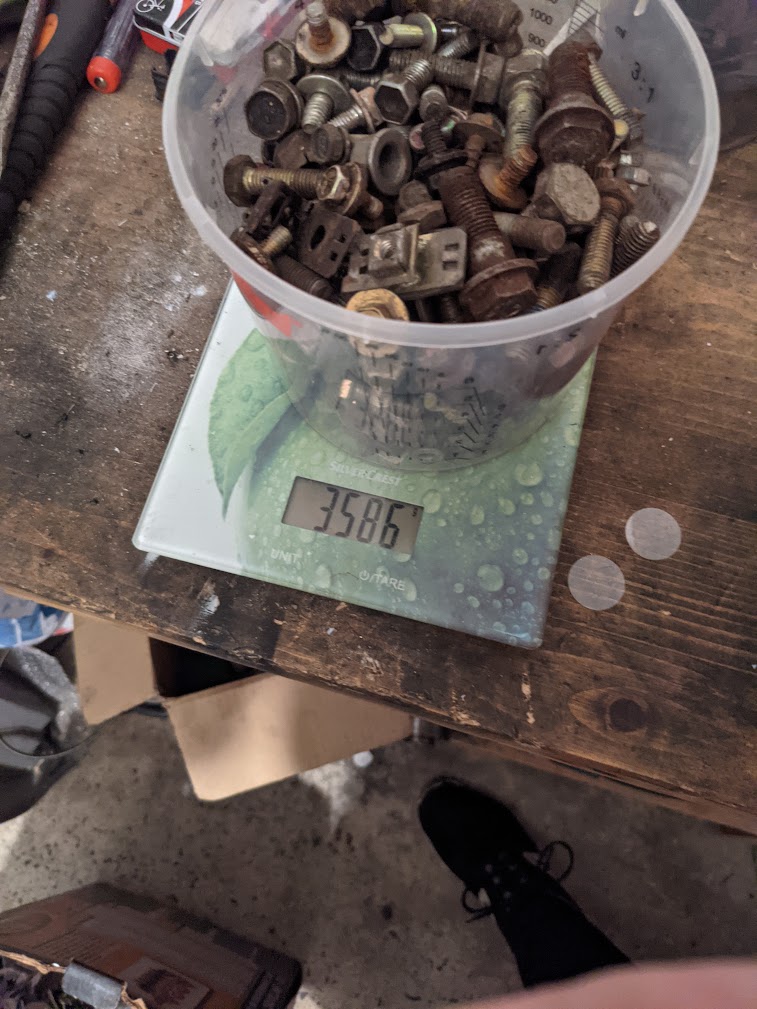 Also collected a bunch of bracketry that will be getting a yellow passivated zinc coating. Hopefully I can show off buckets of shiny bolts and brackets in my next post. |
| |
|
|
|
|
|
|
|
|
|
Big old dump with update posts from the past few months: May: I have been at the garage digging stuff from shelves that hasnt moved in 8 years. All bits and pieces of the corolla that need to be evaluated, catalogued, stripped of all brackets and bolts (more for the coating batch). Then I set to work on my front screens. These came back from blasting with only the edges cleaned up (asked them not to go further if there was a chance of damaging them). So I swung a paint stripping disc in their direction for about an hour and a half and ended up with this: 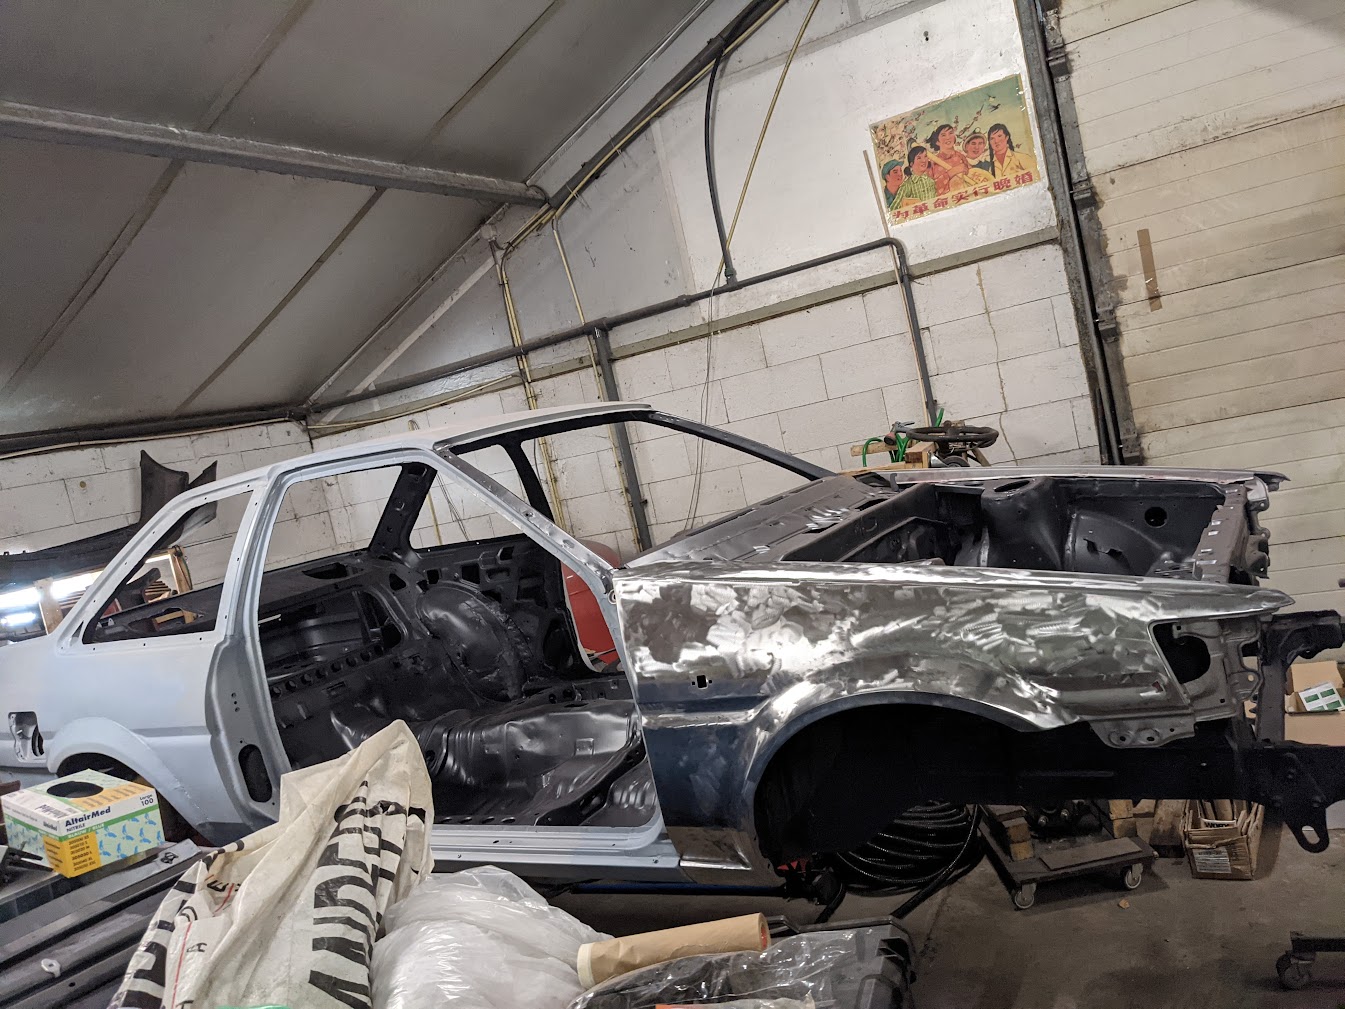 Spotted some minor surface rust taking hold at the bottom of one of them so I welded the pitting on the inside up a bit and then left them bare steel until I can get a can of rust converter (to stop what rust the abrasives couldnt reach). After that a layer of epoxy primer is due, and probably some raptor liner on the insides. Made this shot with an overdose of old Toyota's in it that I just had to share:  Early June: This week I've popped across the border to drop off my fasteners and small brackets for zinc coating. Hopefully I'll get most of what I brought back in a week or two. On the way back I dropped by the garage without any real plan. Ended up finishing the painting the steering column completely. Turns out the bolt on the height adjustment has left-hand thread, lucky I caught on to that before I broke anything. 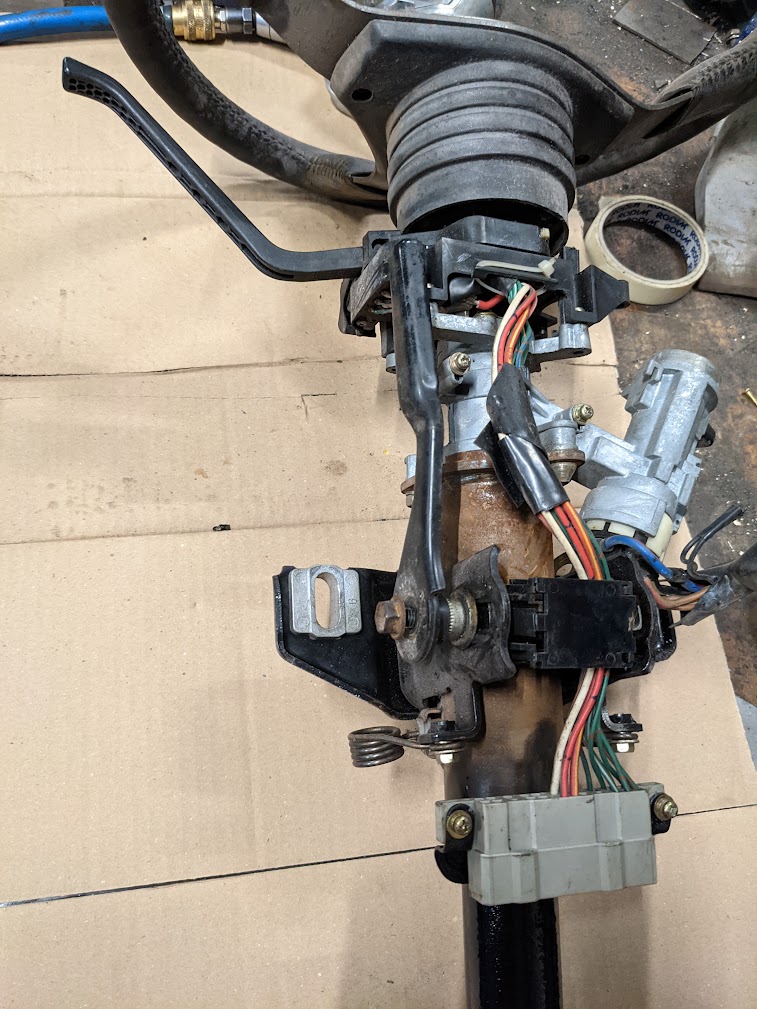 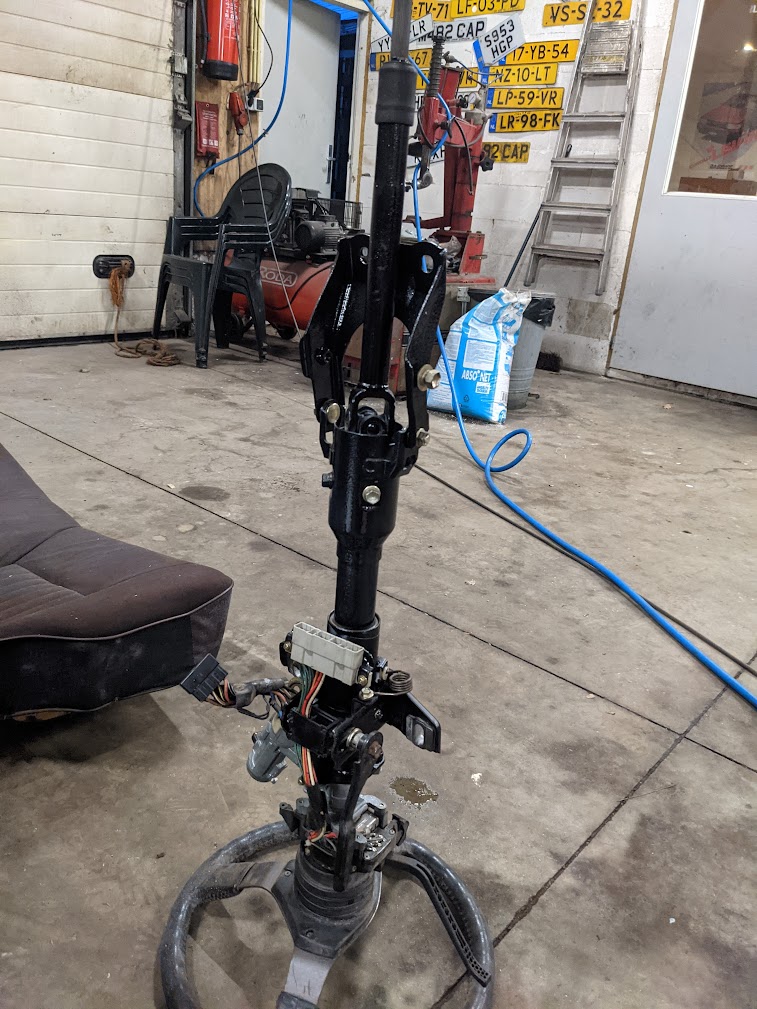 Then primered the front wings which I'd treated with some rust converter a week ago. 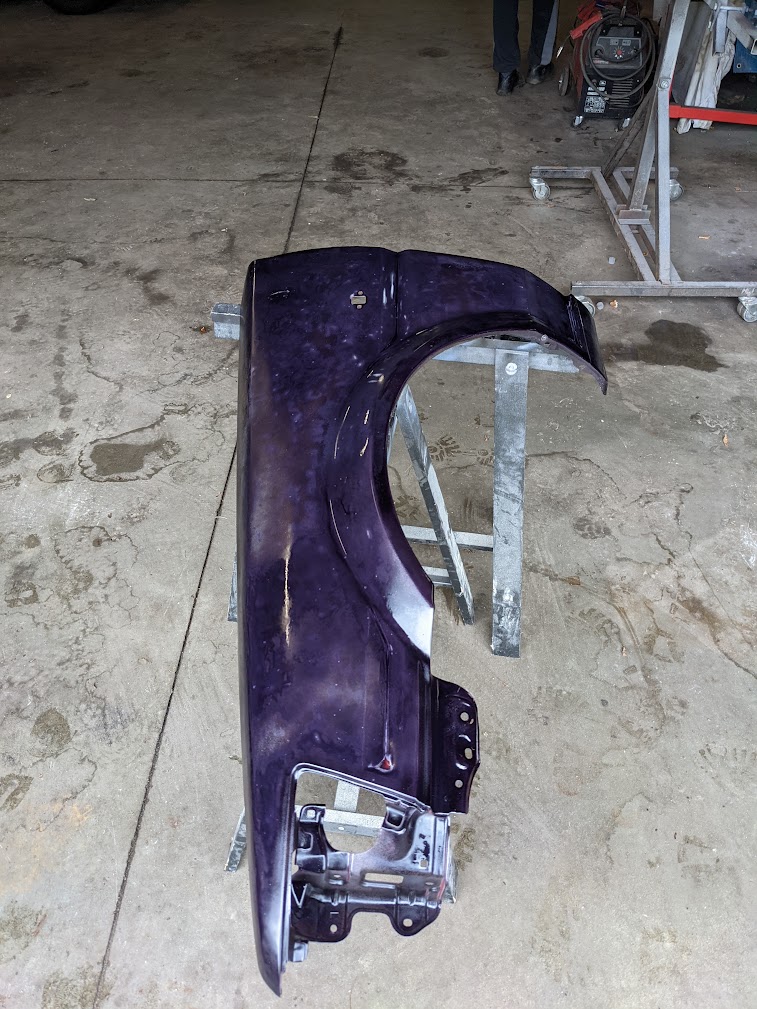  Back at home I managed to finish one rear seat back in some materials I was hoping to try out:   It's a lot coarser weaved fabric, dark brown bottom, beige center, and black leatherette top (original is brown, but I want the seats to match my black dashboard). Interested to hear what you guys think about it. Late June: Got the rear bench done. As first attempts go, it's not too bad, but I did mess up a bit. The bench top ended up a few cm's too wide, causing me to run out of side bolster around the ends left & right. Just took it on the chin because I didnt want to pick it all apart again, it was quite a task to put together. I suspect this also causes the slight looseness around the seams at the front. Will know to look out for this next time.  July: Have been busy sorting out all metal bits and pieces of the car, preparing them to be put back on the car. Bolts & small brackets: -Took all my bolts and brackets smaller than 20x20cm to a zinc plating firm called Duroc in Antwerp. Had them treated with their P1000 zinc flake coating which is awesomely resistant to rust. 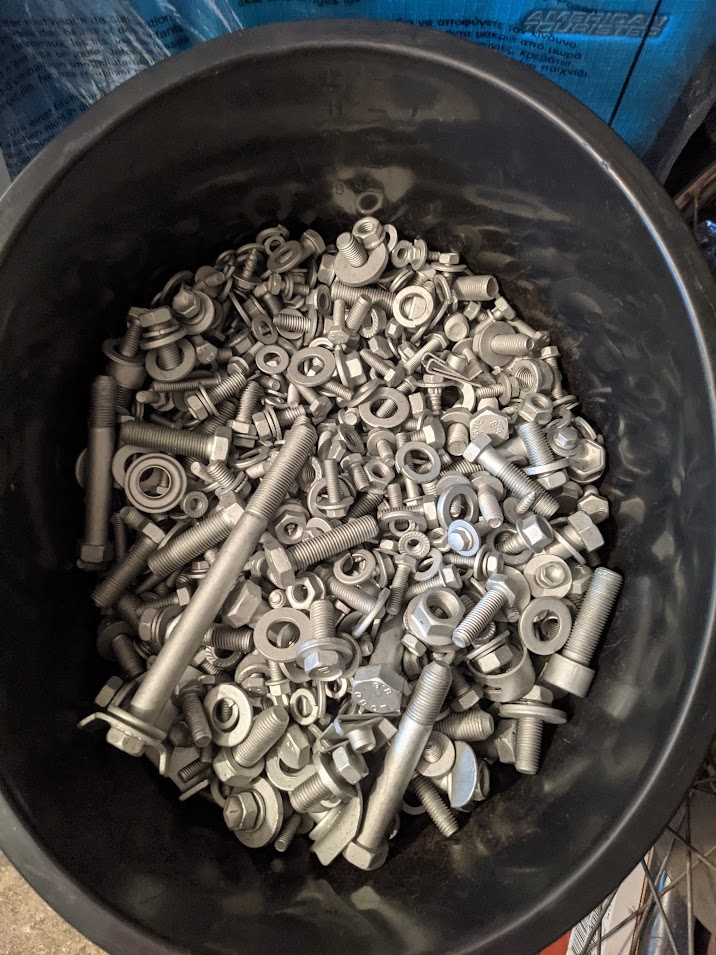 Took a load of bigger brackets and all my seat frames (AE86 rear and MA70 fronts) to get sandblasted. Got a good price for getting it all powder coated while I was at it so I had that done as well. Powder coated seat frames are a bit of an indulgance since you will never see them after the upholstry is fitted, but I just get carried away sometimes. The downside to the cheap powdercoating was that the guy took no effort to shield any threads so I have a lot of cleanup to do manually. Got started on putting the pedals back together yesterday:  Couldnt finish the job as I'd left all my bolts at home, but they came together nicely after cleaning up all bores and threads.  The only new thing on the pedals will be the little rubber bumpstops that broke off during removal. I did change my pedal rubbers for some like-new ones I pulled of some random 80's Toyota in a wrecking yard eons ago (10+ years). Lucky I had them, new Toyota ones are north of 35€ a piece these days at the dealership. The upholstery project is still ongoing. Still have one front seat left to do, then I need to figure out where my front door cards have dissappeared. Bought some blue ones a long time ago but they are nowhere to be found in my stashes of 86 parts. |
| |
|
|
|
|
|
Aug 21, 2021 19:42:43 GMT
|
One last update before I go on vacation. Earlier this week:Holy curse word.. was just looking at the frame of the Celica-Supra drivers seat, look what I found: 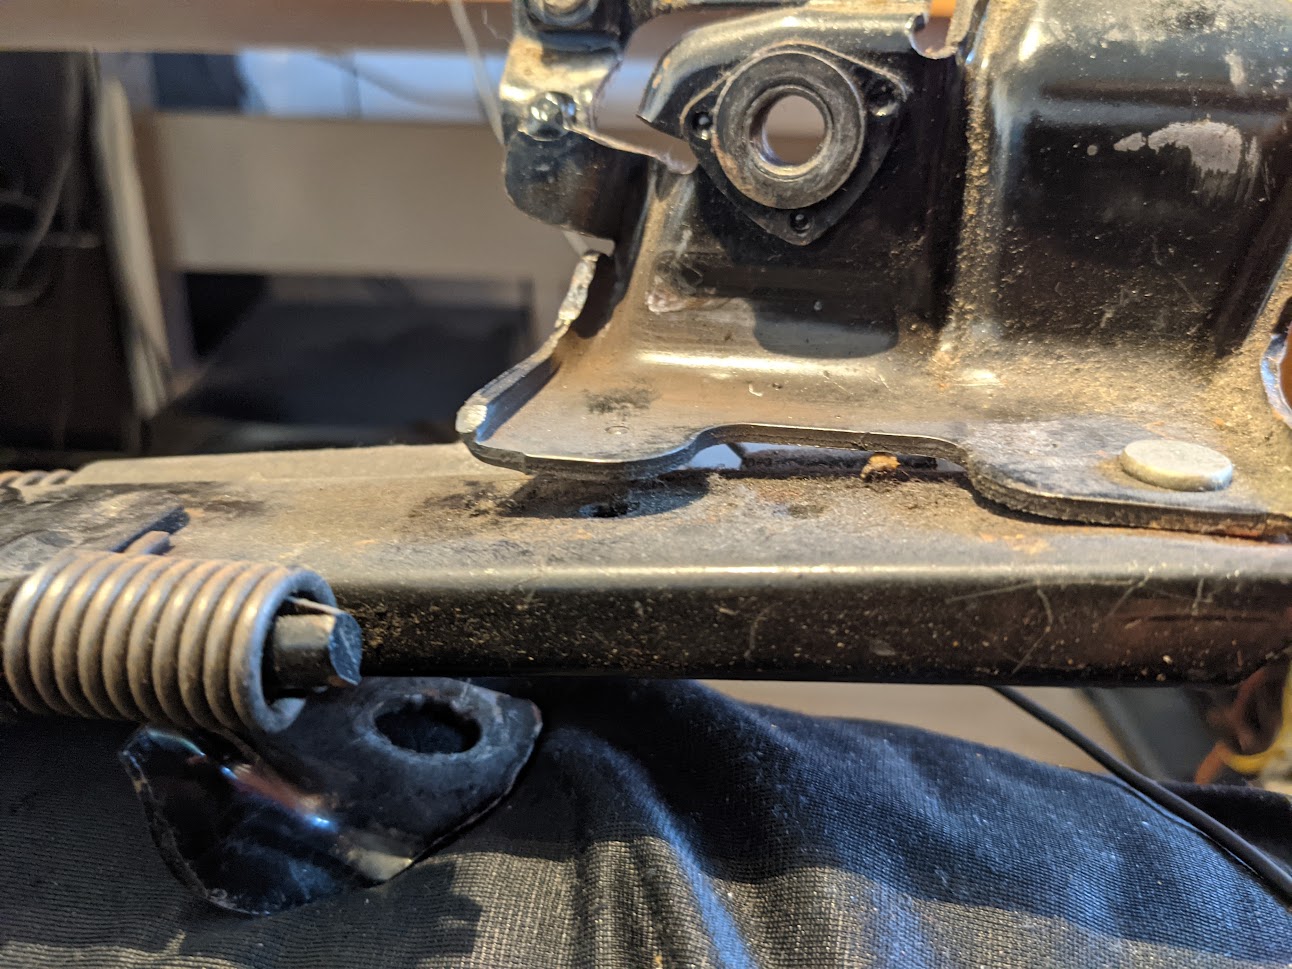 Looks as if a spotweld has given up. So I turned it around and got an ever bigger scare:  Damn.. this thing needs to come along to the garage for some serious welding if I'm ever to sit my heavy ass in it. This weekend:Today's work in the garage was relatively fruitful. I fixed the damaged seat rails of the MA70 drivers seat. Basically chopped the broken bits out, aligned the parts and welded the missing bits full. Also added some seamwelds along the sides for good measure.   These zenki headlight brackets had broken studs on them so I powerfiled the old ones off from the rear and welded some new bolts in there. This is only for completeness' sake since they are identical to kouki brackets of which I also have an intact pair. I did not finish them any further as they are going in a pile destined for powdercoating. Will try to protect the zink treated threads from blasting/coating as it is rather good. Just found a washer that has been laying outside in the rain for weeks (dutch summer) and it's clean as a whistle. 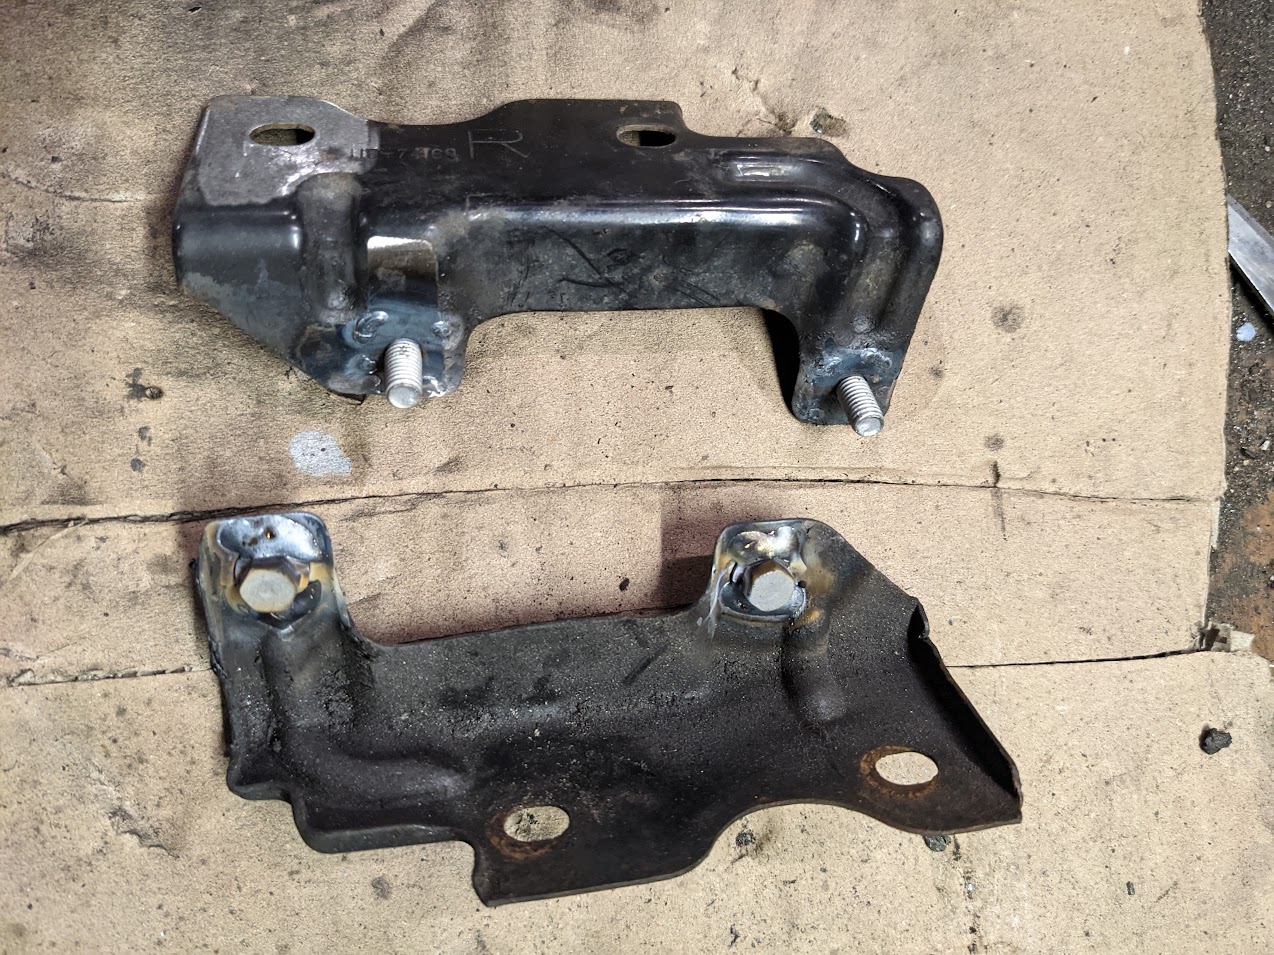 I couldnt be bothered to restore the original fuel tank, which is not beyond rescue, but just a lot of work, so I ordered up an aftermarket Spectra fueltank from Flos.ie. Here it is, scuffed up for primer: 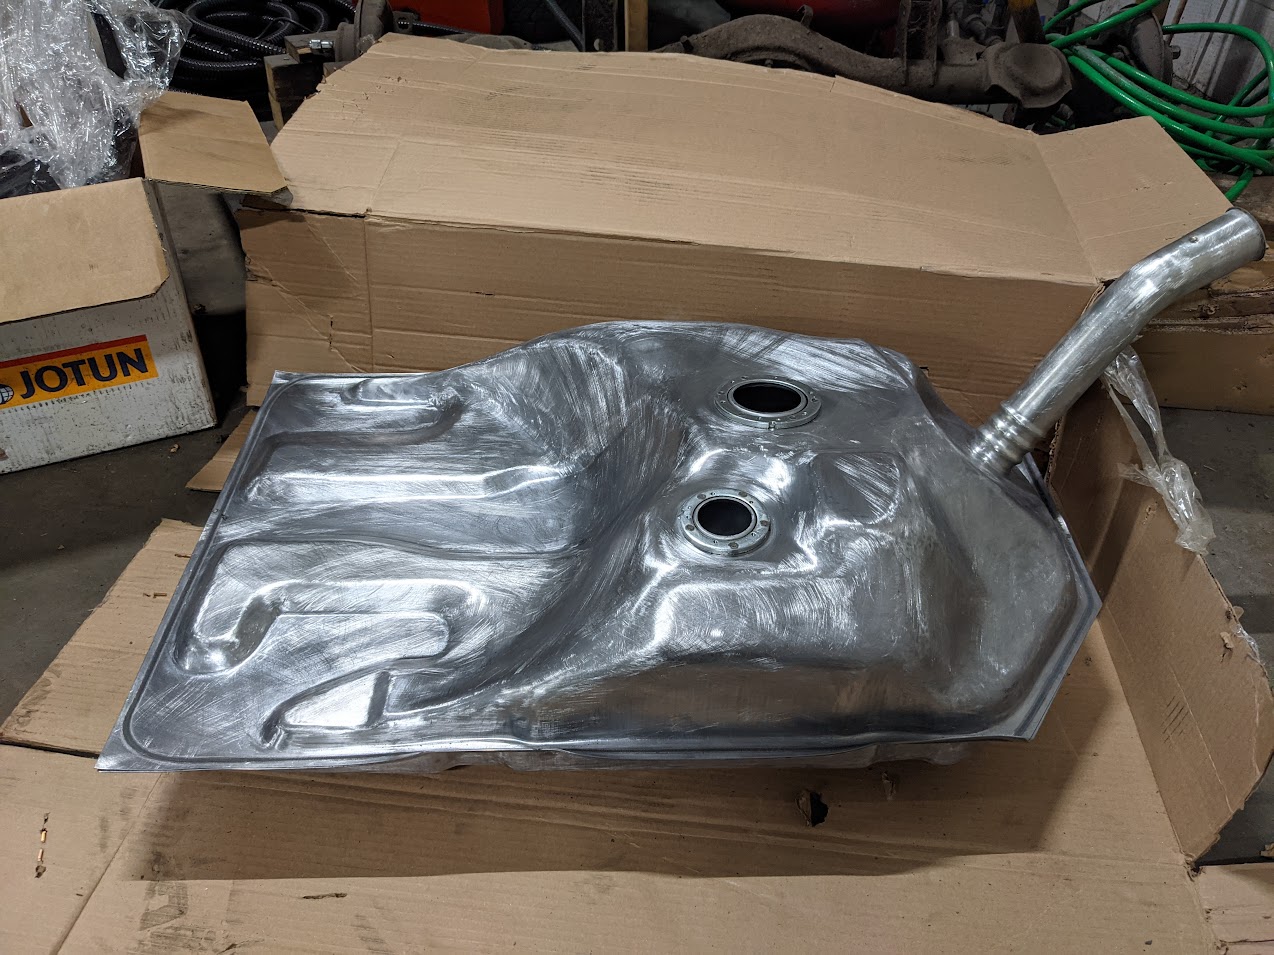 And with some 2k primer on:   You may notice the filler neck looks a bit rustical, this has to do with the paint being scraped off by accident when I turned the tank during painting. My paint gun was empty at this point so just I scraped some leftovers from the mixing cup and just slapped them on with a mixing stick. Will sand it flush before the next layer goes on (which will most likely be Raptor liner tinted to underbody color). |
| |
|
|
|
|
|
Sept 26, 2021 14:10:13 GMT
|
|
|
| |
|
|
|
|
|
Nov 13, 2021 21:12:37 GMT
|
Another small update of the shockingly slow progress on my AE86: Bolted the very first parts onto my bare chassis. Had all kinds of plans of things to do, mostly leading towards getting the shell back on its feet for bodywork. While the body is still in the rotisserie I wanted to get the jobs out of the way that are no fun when working from underneath the car. First thing that came to mind is the fuel tank assembly + lines. I quickly abandoned plans to clean up the fuel lines after wasting 30 minutes trying to get the old undercoating off of them. Bent up a new front-back brake line (cunifer) because I want my brake system to be 100% new lines, then mounted the whole line assembly.  I'll have to buy some rubber hose and a new one way valve to get this to look as fresh as it needs to be: 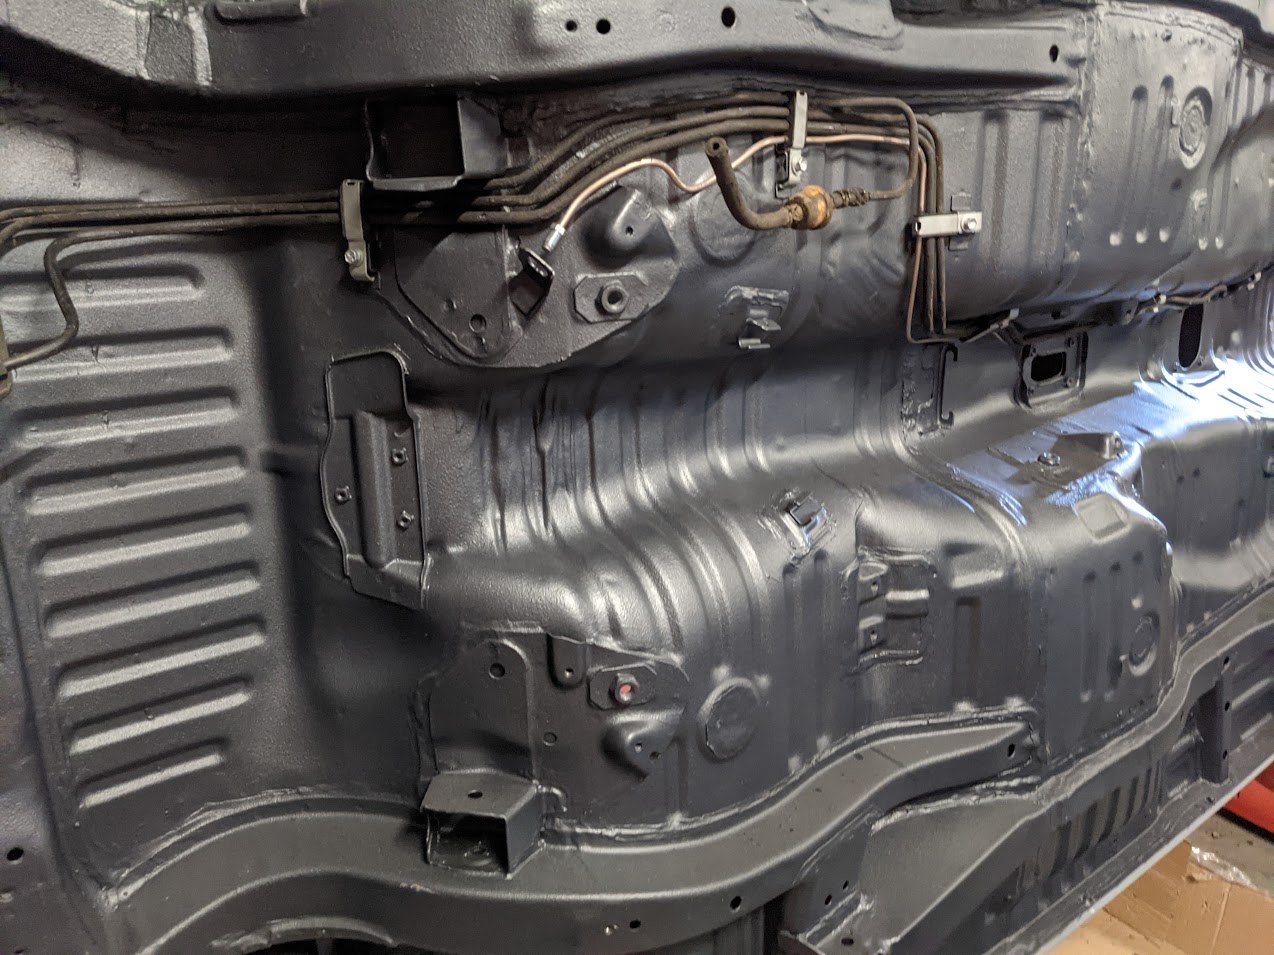 Took the fuel sender off the old tank, had to beat the screws into submission with an impact screwdriver. Then discovered the sender unit was falling apart inside (worked fine when taken off the road). The wiper did not contact the coil at all and some of the shielding had slipped down from its proper position. I bent the wiper arm a bit so it makes good contact again and jerry-rigged the thing back together. When I wanted to mount it to the new tank I discovered I have left my gaskets in a box at home. ffffFFFFFUUUUUuu. Have lost track of 2 fuel line brackets so I bent up some new ones for the time being:  In some further preparations for mounting the fuel tank I treated the nooks and crannies around the fuel tank with cavity wax (Noxudol 700) and emptied the rest of the bottle in all chassis members under the floor.  This stuff was best in test in some british magazine a while ago. eventually I will also fill the sills and other sensitive areas up with Mike Sanders fat, which was best in test in some german magazine. It needs to be heated for application though, which is finicky. |
| |
Last Edit: Nov 13, 2021 21:13:14 GMT by ivan141
|
|
|
|
|
Nov 28, 2021 11:33:57 GMT
|
Today's progress (for lack of a better word): Sprayed the wheel tubs with 3M rubberized stone chip coating. The raptor liner beneath it is strong enough to withstand street use but I wanted some additional noise insulation. 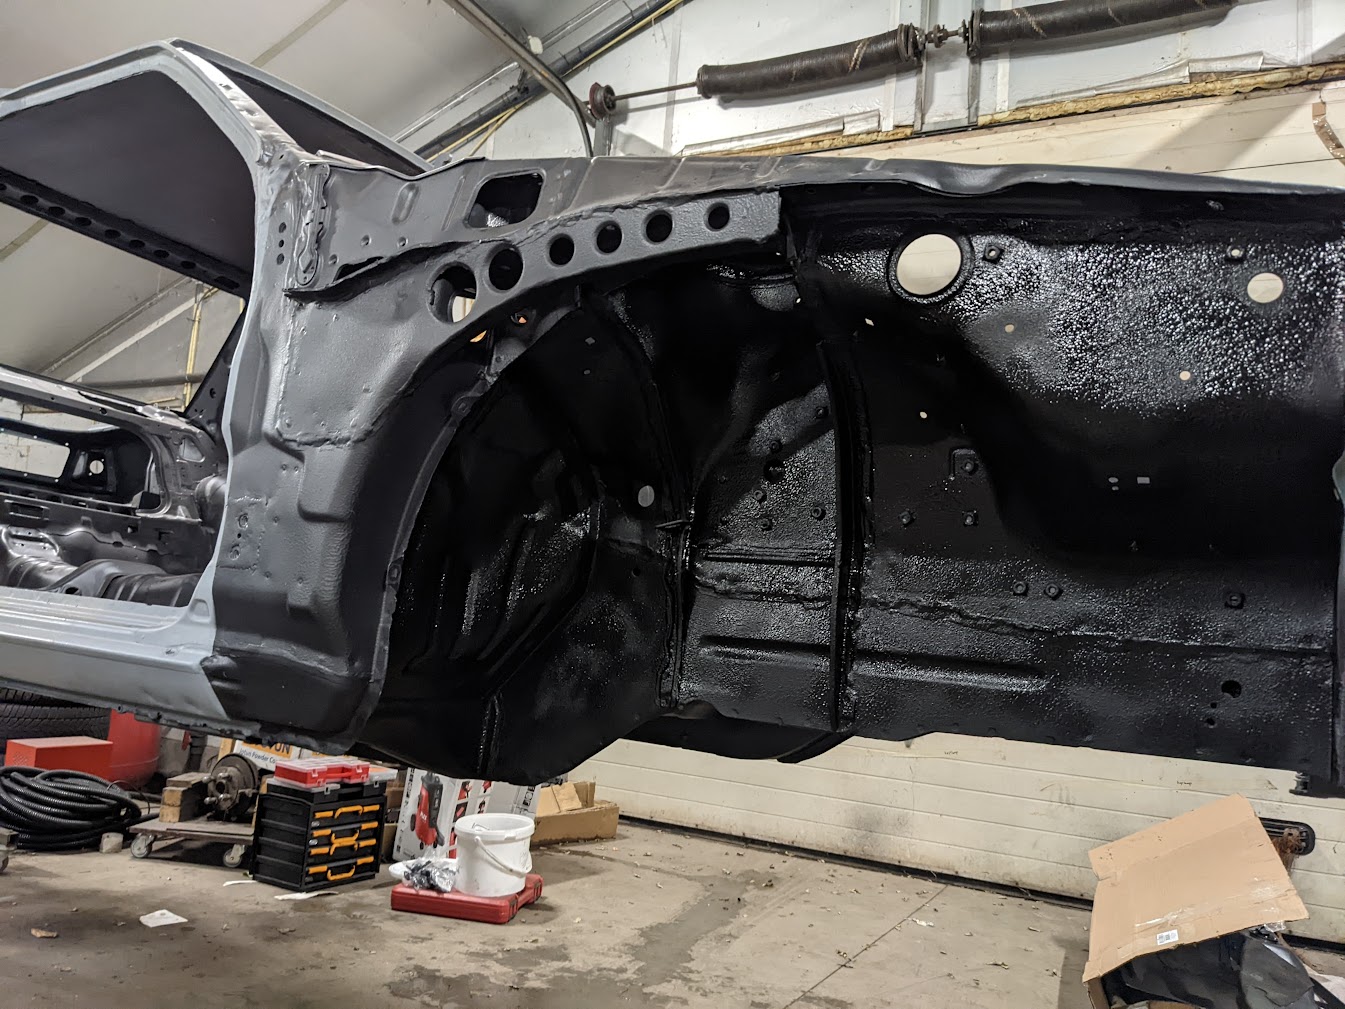  Remembered to bring the fuel tank gaskets this time, so I finished off the tank. My new fuel pump bracket came painted matte black, but I have very little faith in the longevity of toyota's paint, so I slapped some 2k black over it.  Same goes for the sender unit (this got a dose of rust converter first): 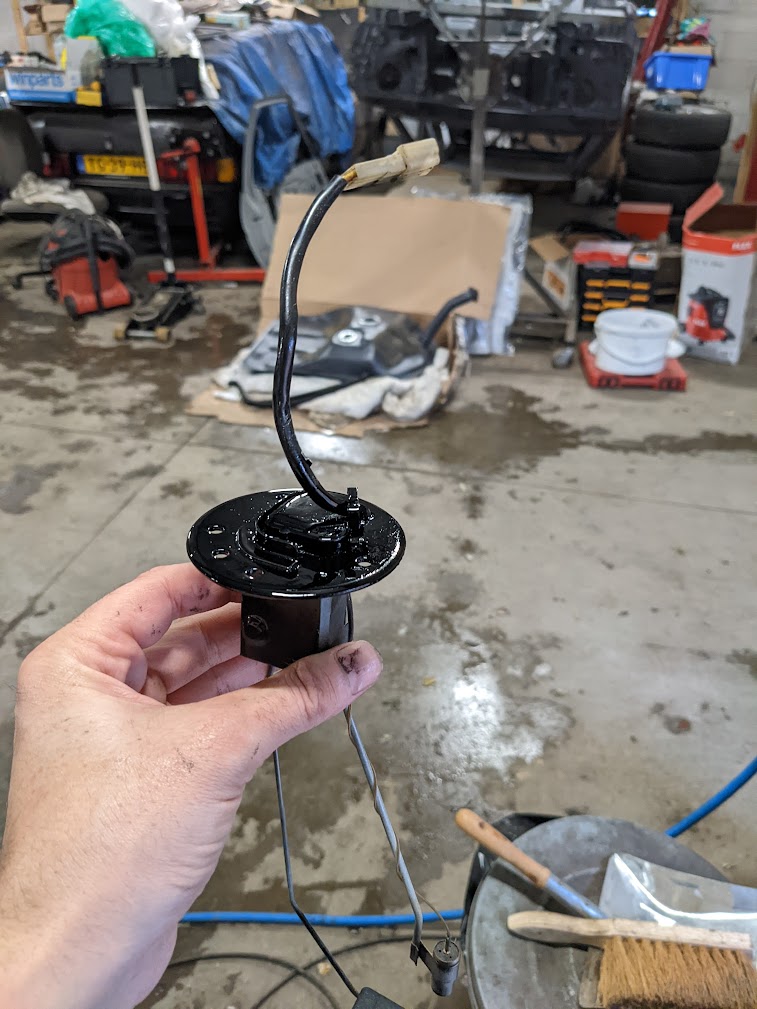 Pouring out a little bit of paint is quite difficult, so after the brackets were painted I still had 3/4 of my mixed paint left in the gun. Sprinted to my big box of zink plated brackets and grabbed some stuff to empty the gun on.  The little spots are a combination of solvent pop and dust.. serves me right for painting on the floor and in a hurry. But they are well protected from rust without the paint so I'm not too fussed. Here is the assembled unit. I glued the old protection pads on with some special body trim glue. Got the orientation of one wrong but who cares eh?  Mounting the thing will have to wait till I get myself a bit of new fuel hose |
| |
|
|
|
|
|
Dec 17, 2021 22:24:09 GMT
|
Had a bit of a marathon today. Started out with scuffing up the engine bay, and painting it over with the gunmetal metallic and some 2k clear. This is the one place where the gunmetal remains visible so I wanted it shiny. Did not do a perfect job, but good enough for a noob painting at 8 deg C using a mini spraygun with a 0.8 nozzle (where 1.2 is recommended). 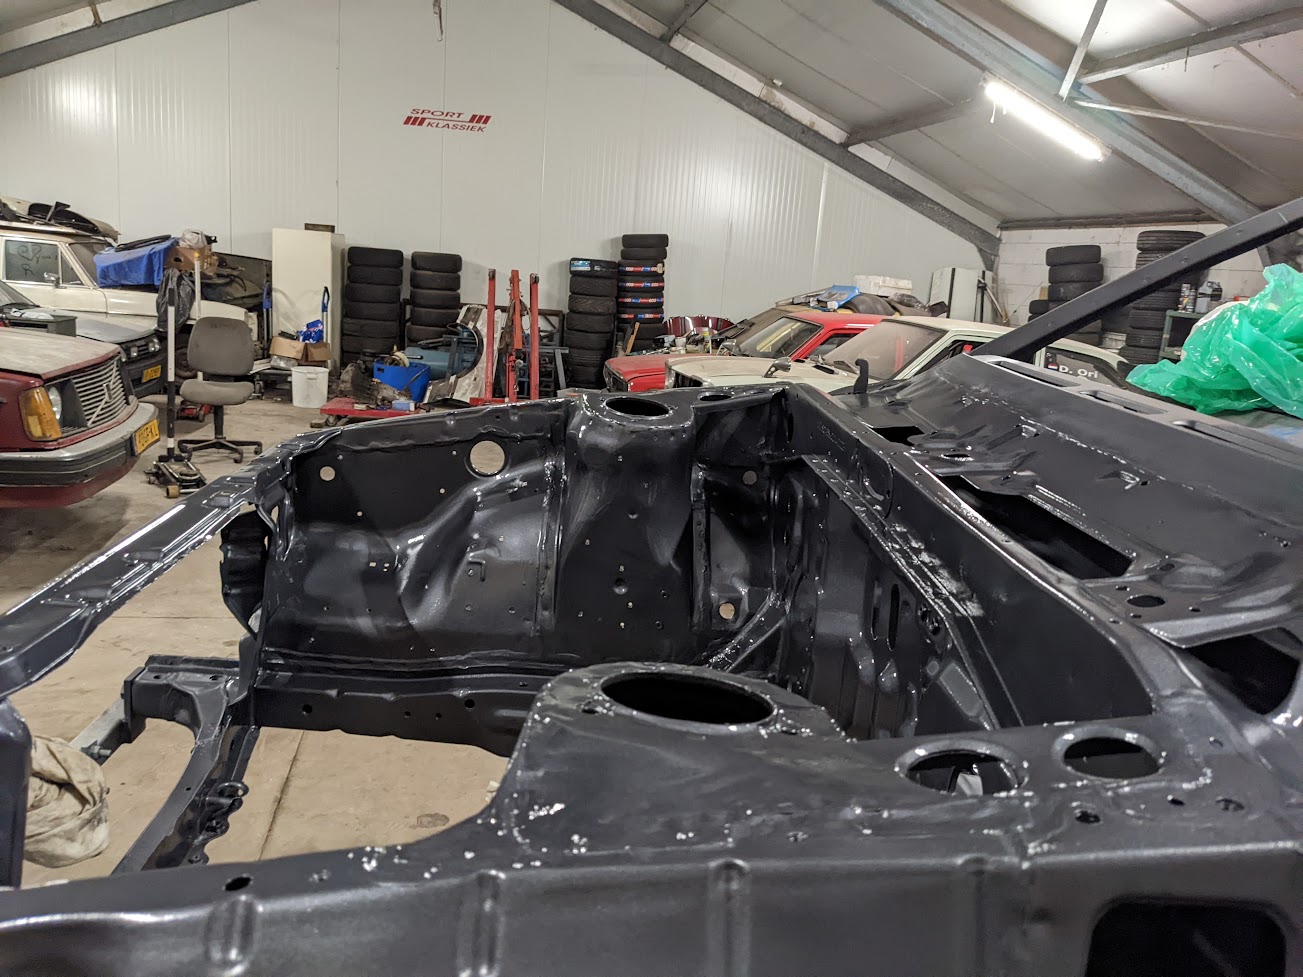  Finally had my Gates Barricade fuel line in (both in-tank and regular), so I replaced the fuel pump to bracket hose and every other rubber fuel line on the car.  Cleaned up the tank vent contraption:  Fuel line hookups.. that one bracket is a fail, should take it off to clean it up. I'm sure either the pump or the sender will give me grief someday, so I'll get to it then.  The money shot (quite literal knowing what I spent on this):  The filler neck is not perfectly centered but it will do. This is due to a combination of replica tank, and my new chassis rail interfering with the tank fitment a tiny bit. 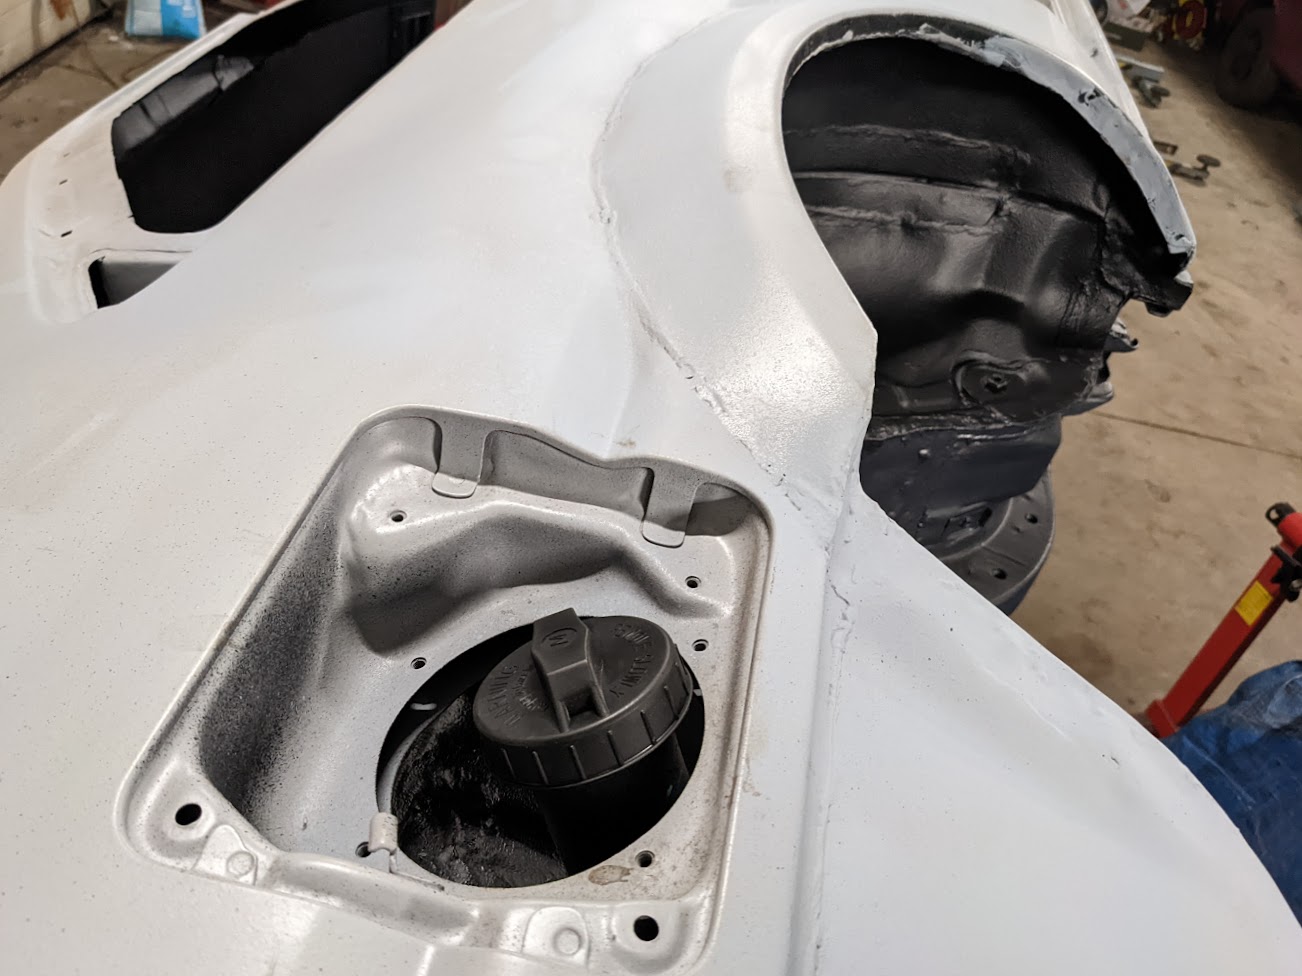 Will make something with my 3d printer sometime to make it look like it was intended that way. |
| |
Last Edit: Dec 17, 2021 22:24:57 GMT by ivan141
|
|
|
|
|
|
|
What better way to celebrate the new year than to tinker on the ol' dungheap again. Last time I had a stab at building a heat shield from some embossed aluminiuim. Quite challenging to get as sturdy as I want it, so I will have to redo this with some thicker aluminium strips for structural support.  Not pictured but did happen: Sprayed a whole lot more cavity wax around the roof, trunk and rear arches area. Next I wanted to have some more tangible progress so I proceeded to slap on some shiny parts:  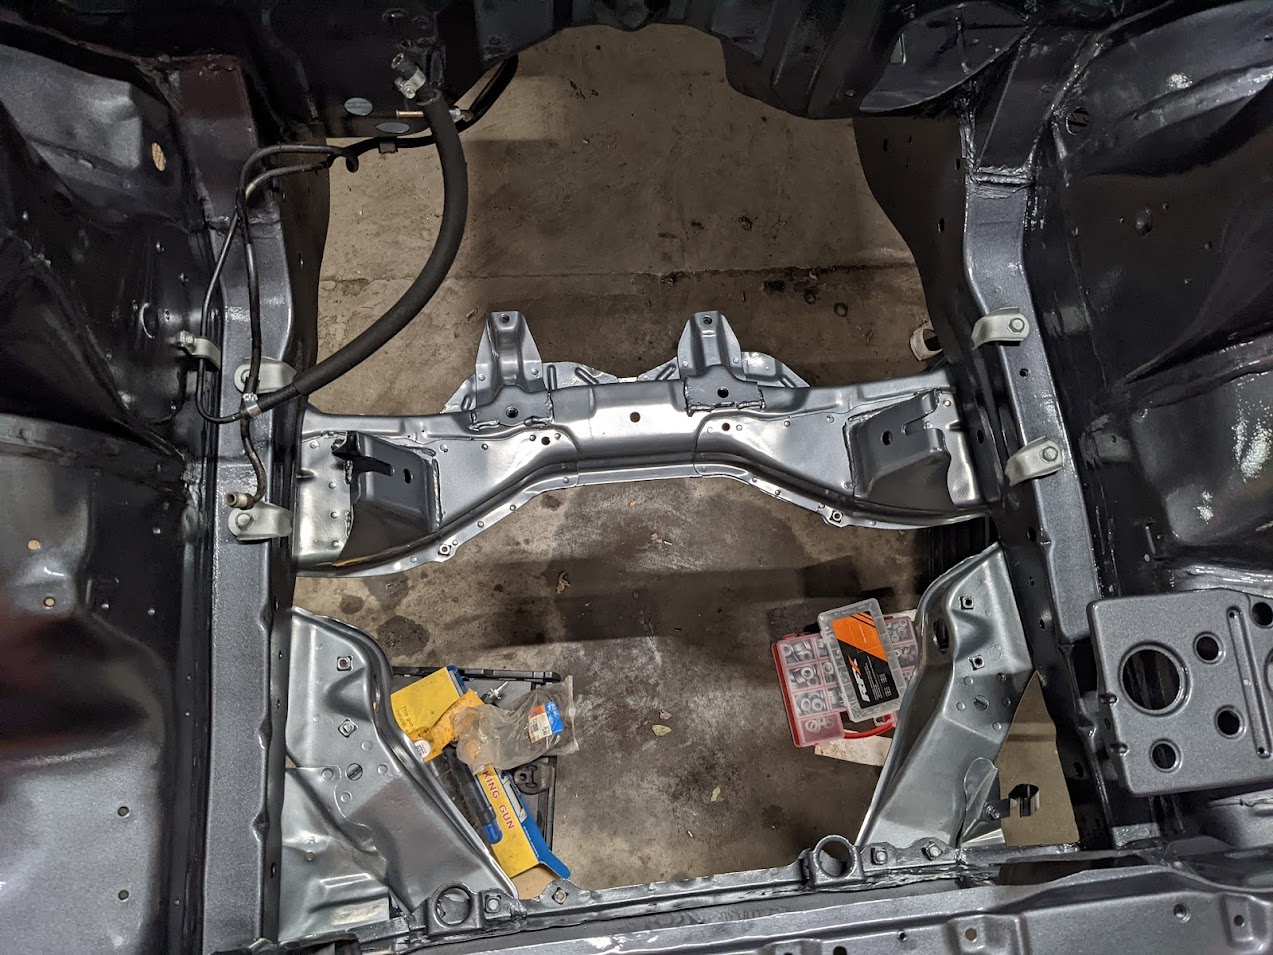  Looking good IMO. I was a bit upset about the amount of play between the new LCA bushings and the LCA bolts. There is almost a mm of play between the 2 of those. I get the feeling it's like this from factory but it feels kind of sloppy. Oh, and I checked the fuel cap clearance. It clears by about a gnat's c%ck with the big plastic cap so it's gripped (sorted, lets offroad!). |
| |
|
|
|
|
|
|
|
Progress: Last weeks todo list: - Check parking brake cables Need new cables and some TLC.- Finish up steering rack (install new joints, boots and lock spacer) and mount it.-Mount steering column. -Mount crusty old front struts. -Mount crusty old rear axle. -Put it back on its wheels. Other things to keep me occupied: - Fit fuel filler door cable release components to shell (some body modifications required)- Clean up and paint prop shaft. -Move the hood & passenger door from my basement to the garage The (somewhat boring) story: Swapped out 3 of the 4 joints for new ones on my steering assembly and assembled everything including lock spacers and new boots.  Installed the steering arms loosely for now. After taking this picture I also replaced the tension rod bolts for the studs that are supposed to be in there.  Dug up my parking brake cables and drew my conclusions. Will be ordering 2 new ones soon.  Gave the parking brake some 2k black and emptied the rest on an assortment of brackets again. 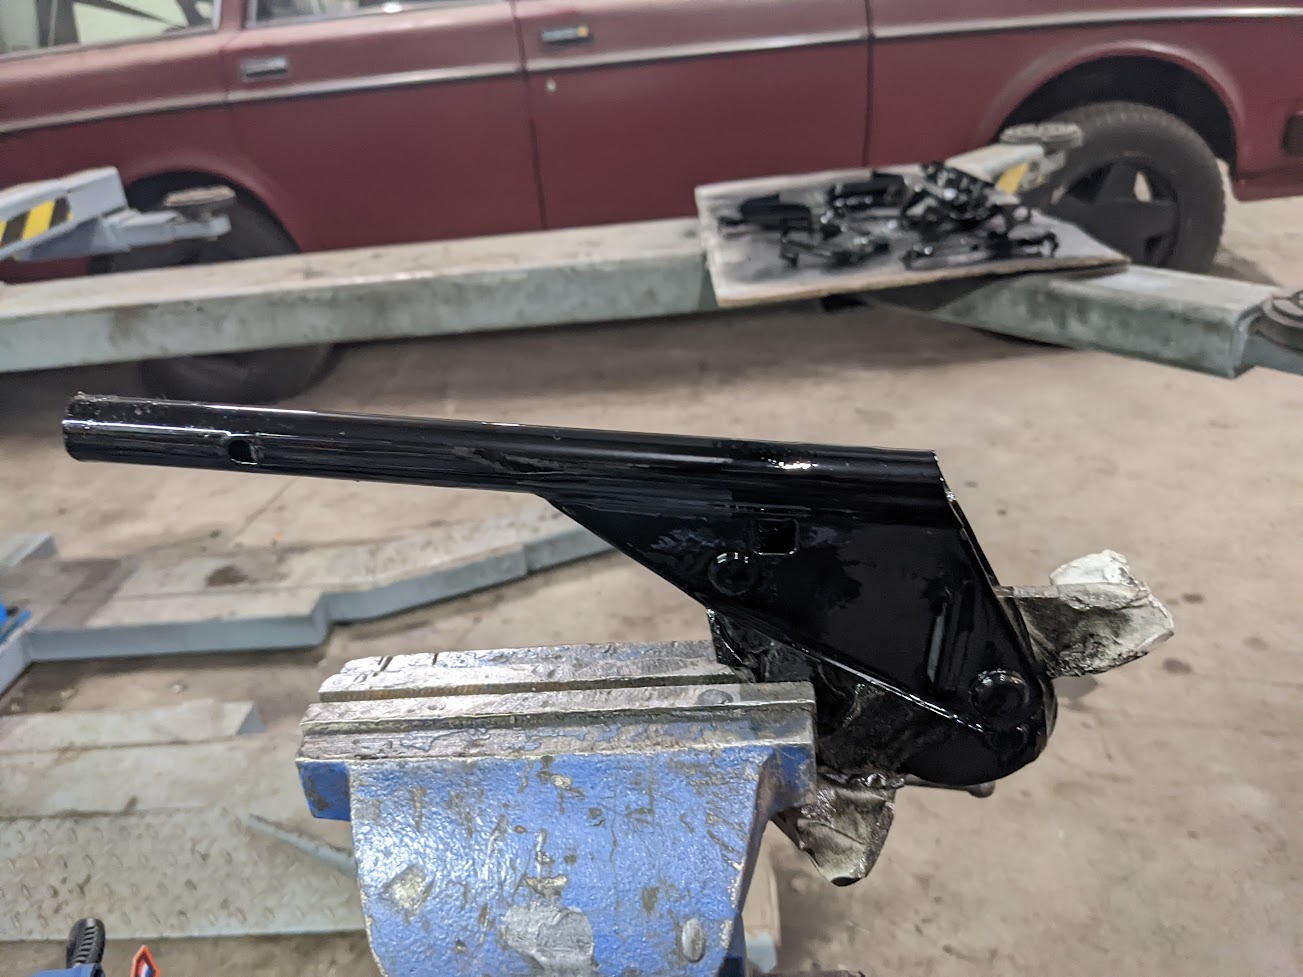  Had a go at fitting the remotely operated fuel filler lid. 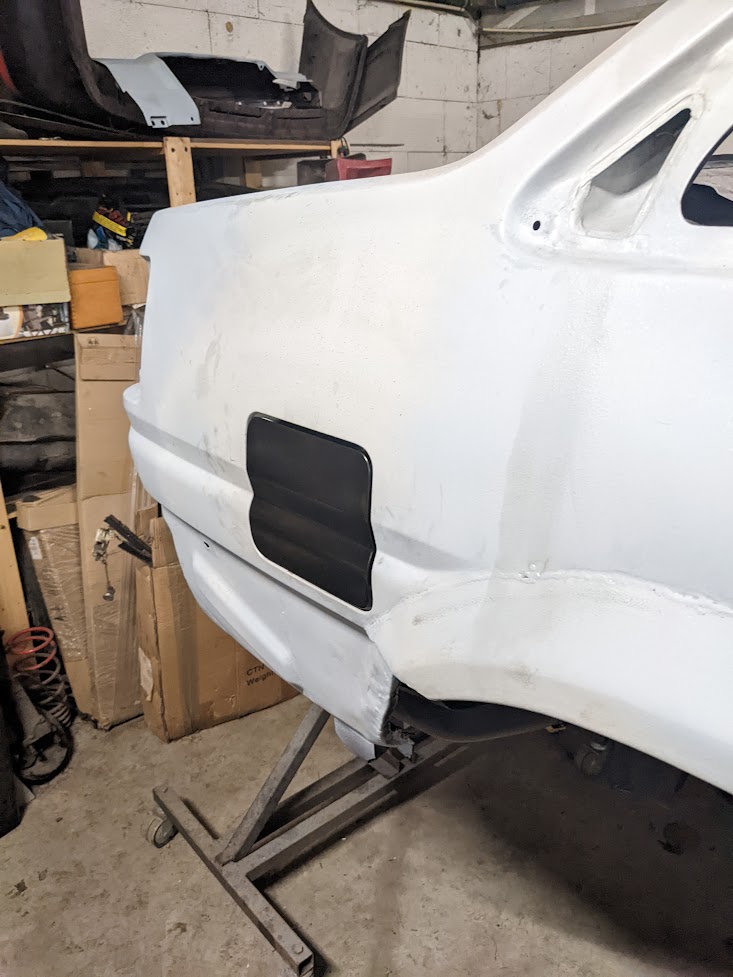 Had to drill off the old lock tab and drill a new hole for the popper: 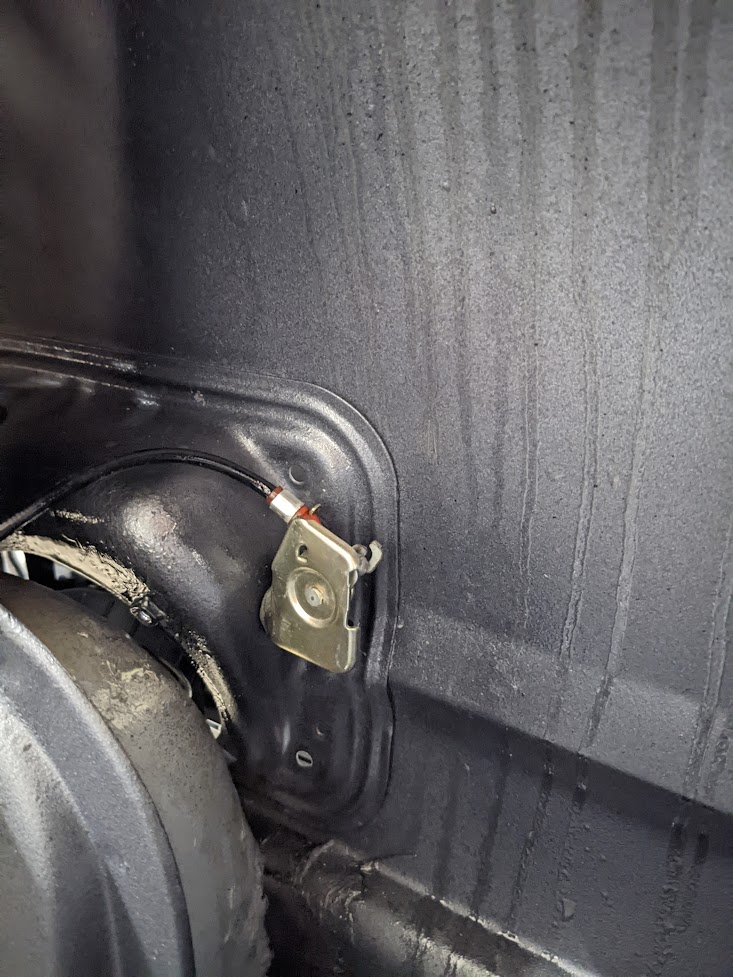  Didnt get the tab off quite cleanly and I didnt want to weld any more at this stage (risk setting paint on fire). So I drilled the rest of the spotweld out, painted it and put a rubber plug in the hole. That will do. To end things, I roughly cleaned up the prop shaft and threw it in the boot of the daily. Will see what to do with it once the new carrier bearing arrives. Might take it to a shop for a refresh, if rates are acceptable. |
| |
|
|
The Doctor
Club Retro Rides Member
Posts: 3,449
Club RR Member Number: 48
|
|
|
|
|
You've been busy after i left yesterday!
|
| |
|
|
|
|
|
|
|
Feb 20, 2022 10:37:02 GMT
|
Got lots of work done today, thanks in no small part to Thomas' assistance (the Doctor). Most of the rear axle is now mounted in place (woo, and might I add: hoo).  I still have to put the half shafts in, but I'm saving that for later since all this weight is not easy on the rotisserie. Also got my new parking brake cables in the mail recently so I mounted those with some electroplated bracketry as well.  Some afterthoughts: Not looking at the clearance of large bolts near custom reinforcements was not very smart. I can now only get the lower 4-link bolts in from the inside due to my bigass jacking platforms. Well, as long as no cutting or grinding is required I will live with the minor inconvenience. My fully custom rear shock towers seem to be doing their job. The shocks are mounted without issue. In hindsight the top of the towers needed a bit more inward slant to account for the angle of the shocks but I'm confident the rubber donuts will take up this offset in angle. don't worry about all the contrasting crusty bits I have now slapped onto the car. I cannot be bothered to go suspension shopping until the car is finished, and the axle will eventually get a matching fully rebuilt pumpkin. I just havent gotten around to building it yet. |
| |
|
|
|
|
|
|
|
Progress report: -Bent up new cunifer brake lines for the rear axle. Not an easy task, but the result looks like it will work:  Next to crusty old suspension for contrast:  What's this? No more rotisserie, thats what.  The eagle has landed:  Todo items on my mind these days: -Refurb driveshaft. I ordered 3 new u-joints for about €30. I'm going to attempt it myself. As long as I don't screw up the yokes I can still dump it at a specialist store if DIY doesnt go well. -Prepare reconditioned rear brake anchor plates and hardware for mounting to axle. (zinc-plate the bolts/nuts, clean up my 'new' calipers. -Buy some stuff for finishing off the rear axle (solid spacer kit, gasket kit, axle end plates). When I have a working parking brake again the next priority is getting the shell reunited with the doors and trunk/bonnet so we can start 'mudding' the heck out of it. |
| |
|
|
|
|
|
Jul 23, 2022 19:59:48 GMT
|
Havent been too busy the past month (too many things going on in my weekends). Spent a few days at the garage helping a mate get his KE30 back on the road (front chassis member replacement). Since he is the guy that will be in charge of getting my car ready for paint and probably the painting part too, that was some good karma points. The KE passed inspection thursday so that worked out well. Today I've finally done something to the 86 again.   Bolted the doors in place temporarily, it helps to have them on there when making things straight. They don't look too bad.. the left one needs some bending in at the bottom corner where I did some welding, the right one might need some subtle tapping down along the top to align with the rooftop a little better. The brand new hinges are nice and tight compared to the old ones. I also put the roof bracing in place and filled the gaps with anti-flutter sealant (which takes forever to dry by the way). I also bolted in the 2 temporary roof supports I built to help stiffen things up for sanding etc.. They will need to come off to fit the headliner though, so I hope the roof wont take liters of mud to straighten out. To do: -Move the bonnet back from basement to garage (pain in ass.. need a bigger car). -Find trunklid latch and other bits -Bolt front together to align all gaps. To buy: -Front inner window guide for LH door (got the door without it). -New weatherstripping for the trunklid. (to help fit the trunklids correctly for bodywork) -Rubber stripping to put between the fenders and the body (as original, which I had to throw away since it was glued on). |
| |
|
|
|
|
|
Aug 13, 2022 20:14:40 GMT
|
I have new developments to report (huzzah!). In what can only be described as a minor miracle, my daily driver Civic FN managed to swallow the bonnet of the Levin whole, so I brought it to the shed with me for fit-up. Together with fellow shed-dweller Dennis we bolted the front together and he got to work adjusting all the shut lines (some pulling and hammering involved). Here she is more complete than I have seen her since 2010, next to my trusty steed (my MIG welder).  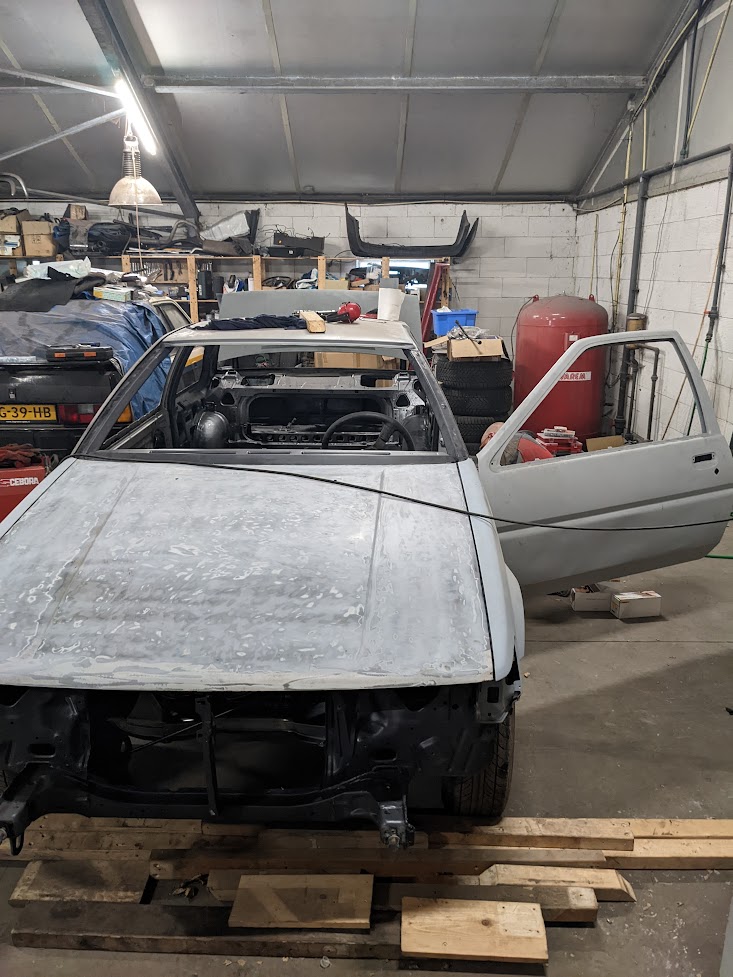 Mounted one of the trunklids too, and you will see where the welder came in play. The shutline between the right quarter panel and the bottom of the trunklid looked really wonky (probably because this quarter has been replaced once) so I had to weld up the panel to get a somewhat decent reveal.  Looks okay after adding a few mm's to the bottom: 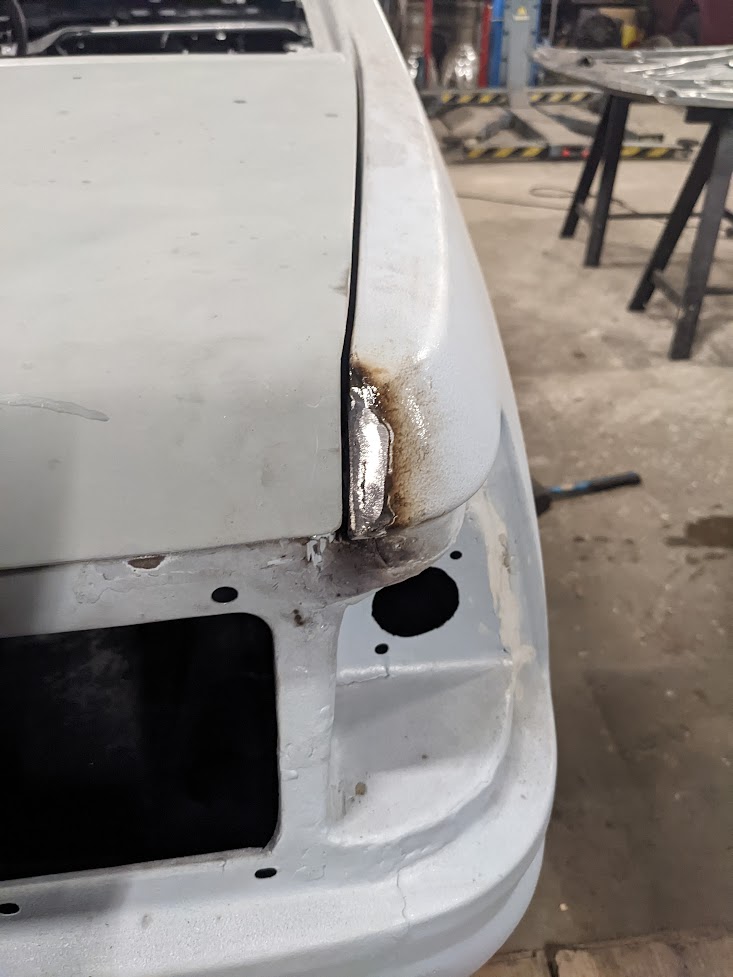 Here's Dennis doing what he does best: body-prep (he's also happens to do this for a living).  It is slow going with these welded arches, this was the result a few hours later. There is a bit of a high spot on both left and right arches that needs to be dealt with. I have full confidence in his skills to get it done.  While Dennis was off bogging and sanding I tried to apply myself to the bonnet. After pulling it from the basement I got a better look at the rust peeking from beneath the dried up seam sealer. No bueno. So I opened up the folded seam and gave it a thorough brushing and drenched it in rust converter.   And to finish off the day I re-seam-sealed the whole thing so it will hopefully last a good few years before the rust sets in again (there is no stopping it without pulling the whole thing apart, which is a non-starter for me.  To do: -Move the bonnet back from basement to garage (pain in ass.. need a bigger car).-Find trunklid latch and other bits-Bolt front together to align all gaps.Panel prep work (metal finish any bumps out of it, sand and paint inside, primer outside): -Bonnet -Trunklids -Doors -Front fenders To buy: -Rear inner window guide for LH door (got the door without it). -New weatherstripping for the trunklid. (to help fit the trunklids correctly for bodywork) -Rubber stripping to put between the fenders and the body (as original, which I had to throw away since it was glued on). |
| |
|
|
jase09
Part of things
 
Posts: 38
|
|
Aug 15, 2022 22:50:11 GMT
|
|
Awesome work mate loving the thread.
Tell me that old white ke corolla is for sale
|
| |
|
|
|
|
|
|
|
|
If you are referring to Thomas' KE20 I think it's safe to say 'tis not.
But if the universe is feeling generous I might dig up my brothers white KE25 someday soon (or confirm its demise).
Probably not selling that either if there is something left of it after 10 years unsupervised storage and a fire.
|
| |
|
|
|
|
|
Aug 22, 2022 18:12:19 GMT
|
Had a bit of time on my hands so I clambered my way into a hot, dark and spider infested corner of a storage facility where it was rumored I could find the 4AGE+box that were last pulled from my AE86 a long, LONG time ago.  It will help my current bid to rebuild the 86's original 3-rib to it's former glory, mostly by donating all the RWD ancillaries. If I cant find or fix the old 40mm crankshaft that I managed to damage I might have to change plans and build this 7-rib instead, but it will cost me more to get pistons for it. That engine also happens to be sitting next to this:  Which is all kinds of awesome, but must stay in it's quiet little corner for a little while longer. |
| |
|
|
jase09
Part of things
 
Posts: 38
|
|
|
|
|
Well as a complete Toyota nut, if the decision is ever made to let it go then let me know.
|
| |
|
|
|
|
|
Sept 17, 2022 21:06:51 GMT
|
Vacation time is well and truly over, time to get back to work. Bondo artist Dennis was in the shed again, finishing off his work on the left rear quarter.   While he was busy doing that, I resumed work on the bonnet. Took it back to bare metal on the top. Toyota used some crazy hard to remove paint on these cars, took a bit of doing. Also hammered out a little dent I created last time I worked on it.  And to finish the day off, a round of epoxy primer everywhere.   Now would you look at that:  To do: Panel prep work (metal finish any bumps out of it, sand and paint inside, primer outside): -Bonnet-Trunklids -Doors -Front fenders |
| |
|
|
|
|
|
Sept 18, 2022 2:13:09 GMT
|
|
Just read through your thread and it's great to see it all coming back together. My mate had a hatchback version back in the 90's with wide Minilites and 4 Cibie Oscars across the front. I thought that car was the mutts nuts.
|
| |
|
|
|
|


