820
South East
Posts: 793
|
|
Jul 13, 2018 22:01:18 GMT
|
Tacked the outlet back on the manifold to test, now in a true horizontal position but the turbo is still to far forward.  Plan now is to cut the outlet off again and extend the collector area down 50mm and back slightly, below is the 2mm stainless steel for this task.  Found a multi layer embossed gasket for the turbo outlet to downpipe, I am hoping this will reliably take up the very slight gap left after my manual skim of the very warped downpipe inlet.  |
| |
Last Edit: Jun 2, 2022 20:37:46 GMT by 820
|
|
|
|
820
South East
Posts: 793
|
|
Jul 13, 2018 22:26:48 GMT
|
I need to reroute the radiator top hose as it touches manifold.  Cutting a spare thermostat elbow slightly shorter and a 135 degree silicone hose gives some clearance but will still need a heat shield.   Final mix of silicone hoses and joiners  |
| |
Last Edit: Jun 2, 2022 20:38:25 GMT by 820
|
|
820
South East
Posts: 793
|
|
Jul 13, 2018 22:36:11 GMT
|
and final unfinished task update is engine mounts and stabiliser, cut and pushed out the soft rubber original bushes now to find suitable solid replacements, off course there is nothing the exact size available so need to make up sleeves of some sort. Engine mount   Stabiliser, this I might just replace with rose joints  That is where it is at the moment Jim, very slow progress, but hope this will give me the kick I need to get back on it, thanks. |
| |
Last Edit: Jun 2, 2022 20:38:58 GMT by 820
|
|
|
|
|
|
|
|
Just read through this thread from the start and wow, what a great car. Love how understated it looks but is a weapon with what is basically factory prototype parts in the engine bay.
So jealous of the 800s you guys got over there, an 820 vitesse is super rare here in NZ and even a normal 800 fastback hardly ever comes up for sale.
|
| |
|
|
820
South East
Posts: 793
|
|
Jul 15, 2018 11:25:04 GMT
|
|
Thanks Kelvinator, they are still cheap over here but low mileage rust free examples are difficult to find, I was going to say still plenty about but just searched ebay and only 1 listing!
Spent half the day in a very very hot garage yesterday trying to make progress on the exhaust manifold, losing patience with it trying to line it all up so everything is in the best position. Getting close to cutting my losses and shipping it off for a custom manifold.
|
| |
|
|
|
|
|
Jul 15, 2018 11:39:49 GMT
|
|
Went to a Rover show in Lincolnshire yesterday for the Sd1 National. Loads of 200,400, sd1, p6,p5 and only 2 Rover 800! One was a mk1 2 litre saloon, the other was a mk2 sterling fastback. Getting rare here now.
|
| |
|
|
820
South East
Posts: 793
|
|
Aug 29, 2018 19:52:45 GMT
|
Managed to get a few days in the garage trying to get the turbo and downpipe in position. No matter how the turbo was positioned with the downpipe fitted there was something not right, to far forward, to close to water pump, downpipe to close to sump, angle from the manifold to turbo to sharp. In the end this was the best position for the turbo with all the compromises so the downpipe was routed with enough clearance. It meant a really sharp angle but maybe I could just about get away with it. With bits of wood taped all round the sump, engine mount water pump etc more wood propping up the turbo this was where it ended up  Next was cut the sections to join the manifold to turbo  Day 2. It was no good could not convince myself this was right, besides the flange was a curse word fit at the turbo. Wasted many hours but was never going to be happy with it like that.  Only way is to start again. Get the turbo in the best position then work back, means chopping up the new downpipe which I wanted to avoid but got no choice the shape is to far off. So to start again, had a new 12mm stainless turbo flange made to match the turbo intake, near perfect match and with threaded bolt holes and a tab so I can add a support bracket.  Turbo in optimum position, new sections were made to join the manifold to flange for best gas flow and clearance. I was on a roll at this point and forgot to get pictures so it jumps to tacked into position and partially welded  It will need some tidying up inside to blend the downpipe tubing into the smaller rectangular turbo intake but should get away with it   Front section fitted. Not the best welding but I might attempt to flatten it all afterwards if it stands out to much, great thing about stainless steel it polishes up like chrome quite easily.   Lastly for now made a start at grinding the sharp edges inside and blending the tubing to the flange  More progress soon hopefully |
| |
Last Edit: Jun 2, 2022 20:40:28 GMT by 820
|
|
|
|
|
Aug 30, 2018 15:47:54 GMT
|
|
Nice work, and forethought with the bracket. How many threads you read with stress fractures round outside of welds on tubular manifolds
|
| |
|
|
820
South East
Posts: 793
|
|
Aug 31, 2018 11:01:33 GMT
|
|
Thanks, plan in my head is to build a little frame or a plate fixed to the block to attach it to.
Just ordered a long burr for the die grinder to blend inside where the pipes enter the collector.
|
| |
|
|
820
South East
Posts: 793
|
|
Sept 14, 2018 14:19:43 GMT
|
Manifold is finished at last, although I might still weld a small plate to the front of the outlet flange and collector to beef it up a bit.   and the little bracket that will have 3 stainless rods attached going in 3 different directions bolted to the head and block to add support  Next to the downpipe and system |
| |
Last Edit: Jun 2, 2022 20:41:08 GMT by 820
|
|
|
|
|
|
|
Sept 14, 2018 15:19:05 GMT
|
|
nice! did you get away without much warpage on the flange (i read this is why OEM's were welded on the inside of the tube, despite the bead hindering flow)
|
| |
|
|
820
South East
Posts: 793
|
|
Sept 14, 2018 15:59:07 GMT
|
|
After the mess I made with the inlet flange I was extra careful to keep the outlet from getting to hot, it was clamped to the steel bar in the pictures above during welding and kept the welds short, this seemed to do the trick and there was no warpage at all.
I am prepared though for some cracking or a leak once it is used at full speed because the old cast iron manifold used to glow red after a few track day laps
|
| |
|
|
|
|
|
Sept 14, 2018 16:21:49 GMT
|
After the mess I made with the inlet flange I was extra careful to keep the outlet from getting to hot, it was clamped to the steel bar in the pictures above during welding and kept the welds short, this seemed to do the trick and there was no warpage at all. I am prepared though for some cracking or a leak once it is used at full speed because the old cast iron manifold used to glow red after a few track day laps i remember seeing an exhaust turbine get white hot (in a rolling road) and you could see the shadow of the impeller through the cast  |
| |
Last Edit: Sept 14, 2018 16:22:18 GMT by darrenh
|
|
|
|
|
Sept 15, 2018 13:31:19 GMT
|
|
Wow that manifold looks good.
|
| |
|
|
820
South East
Posts: 793
|
|
Sept 17, 2018 11:50:06 GMT
|
Thanks Jim, the welding is terrible so expecting a bit of repair work after it has been used. I had to cut and bend the downpipe to clear the sump, it still passes a little close to the sump but should be ok. After patching up the hole I came to two conclusions, I really need to improve my welding skills and this downpipe will probably be cut and joined again in the future. When it comes to building the system I plan to set up a temporary welding station with a bench I can sit at with the pipework properly supported at the right height and practice first.  anyway it fits so I can get on with the system now.  I went a simpler route with the top hose, the first attempt was to many parts to long and looked wrong, this still has some flex so engine movement does not pull on the radiator and is much neater.  It still passes close to the exhaust manifold.  So made a little aluminium heat shield to sit between the hose and manifold, it needs finishing but should do the job.  Because the turbo is now in a different position the intake hose, oil feed pipe and coolant pipes need extending or adjusting one way or another I have some new parts coming this week to sort those out. I want to build a strut brace but keep changing the design, what ever way it goes I need to start at the spring turrets so had these made to get things under way.   Other news, the steering rack is back in with the new bushes, not very interesting so no pictures. |
| |
Last Edit: Jun 2, 2022 20:42:33 GMT by 820
|
|
820
South East
Posts: 793
|
|
Sept 23, 2018 19:55:39 GMT
|
The exhaust system parts arrived this week. My original plan was to have a single centre box with a side exit oval tailpipe just in front of the O/S rear wheel. But once I offered the pipes up under the car it was going to be to low and close to the tyre or need part of the sill cut away. New plan is a straight through system with single silencer at the rear and original tailpipe position, I think this will sound nicer and be more suited to this car. I can still put a flange or v-band joint at the point where a side exit section can be temporarily fitted (with no silencer).  Got as far as I can with the manifold support rods till the turbo comes off again, made from 10 x 1.5mm stainless, crushed the ends and drilled bolt holes.  The gear linkage needs a bit of work so removed this while exhaust is off and car in the air. One of the bushes is worn and an old quick shift mod needs some tweaking. Had to grind off the ends of the M8 rivet to get it apart.  I did a quick shift modification to the gear lever years ago with a section of steel pipe welded to the underside of the gear lever but it was to much, hardly any movement at gear knob so immediately took it apart and cut a piece out. It was better but still to much, that is how it stayed for years. this is a long over due 3rd attempt.  Another piece removed from the previously added steel sleeve.  You can buy a harder silicone bush to replace the rubber mount at the back of the gear linkage but thought I would try tightening the bracket down on the standard rubber mount to get the same effect, the bracket tightens down on to steel sleeves in the mount  One done, I will shorten both 2mm 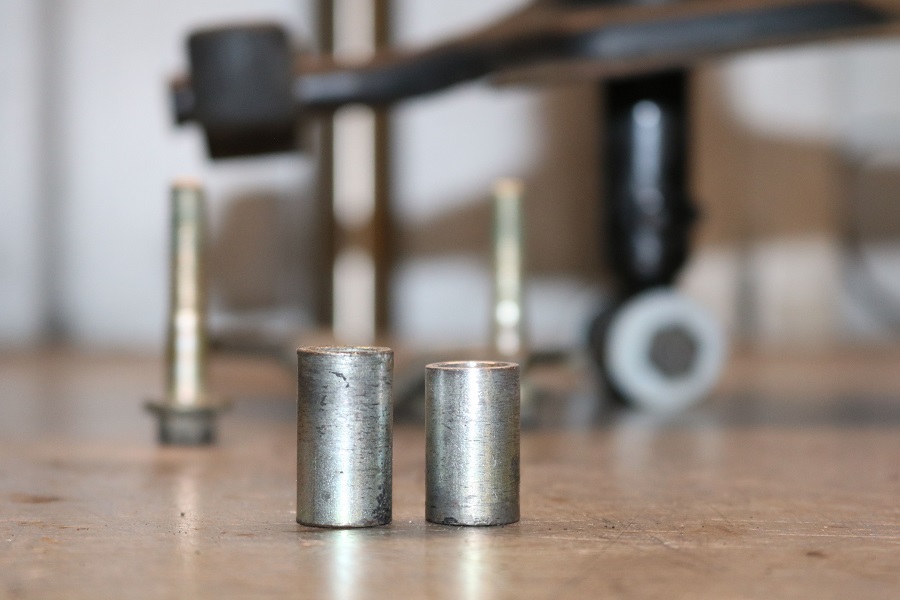 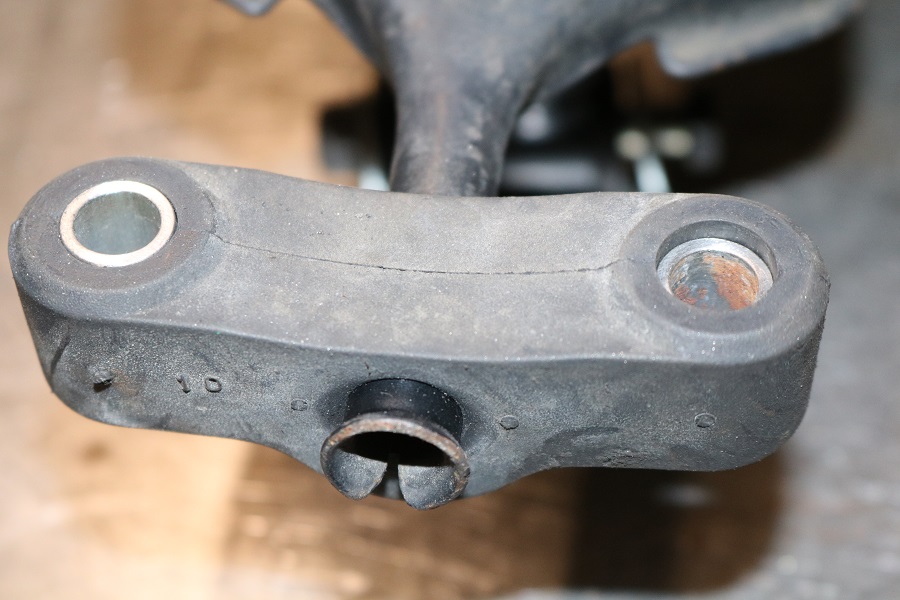 The rest of it is in really good condition, stripped and cleaned it will be reassembled with new grease.  Lastly there were a few rust spots on the support tube so rubbed these down and got it ready for rust converter and a coat of paint  |
| |
Last Edit: Jun 2, 2022 20:43:44 GMT by 820
|
|
|
|
|
Sept 25, 2018 9:24:52 GMT
|
Great car and love the updates. My 820 Vitesse is coming along nicely too and I was wondering if you would sell me you old ss exhaust if its now surplus to requirements? (mine is blowing) i'm only in Fetcham, Surrey so just down the road from you. Thanks Ben 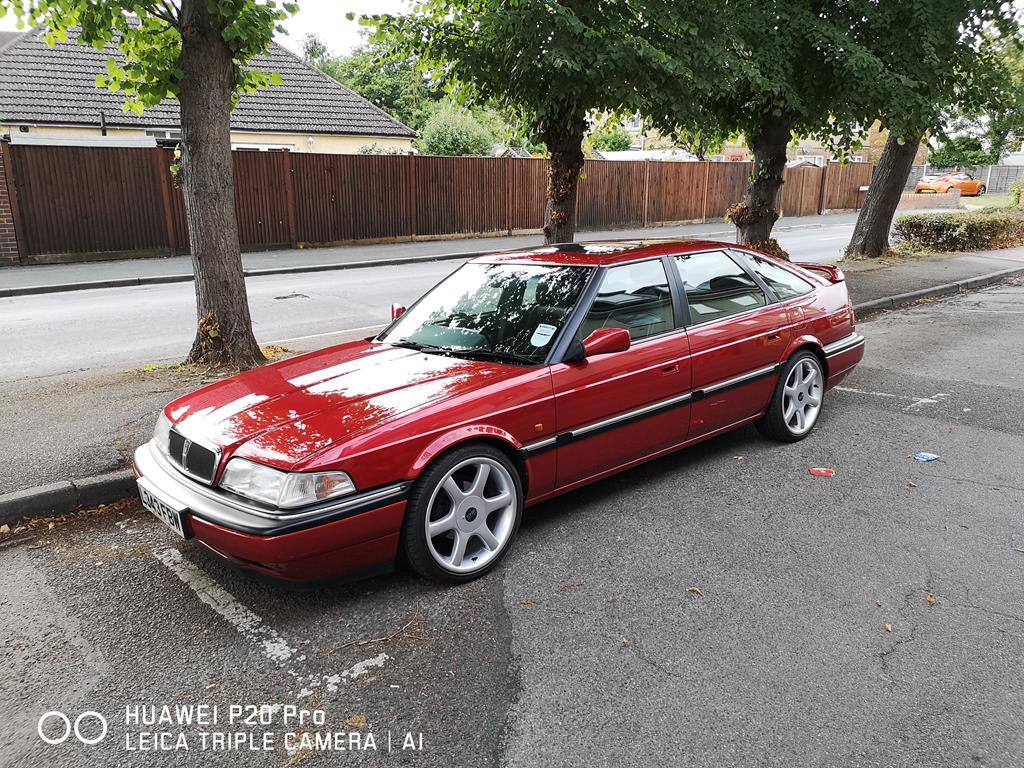 |
| |
Last Edit: Sept 25, 2018 9:32:18 GMT by 820vitesse
|
|
820
South East
Posts: 793
|
|
Sept 25, 2018 16:56:22 GMT
|
|
Thanks. Your Vitesse looks great, very clean.
I will be keeping the exhaust just in case.
|
| |
|
|
820
South East
Posts: 793
|
|
|
|
Found some perfect size brass bushes to replace the old worn plastic gear linkage bushes, so perfect it has no freeplay and operates like its fitted with ball bearings. With the extra bit of gear lever throw from the reduced short shift mod it feels much better.  Cleaned, painted and back together    The cooling fan deserved a clean and paint while it was out. This is a spare but it shows the fibreglass heat shield and how the surface deteriorates after 20 odd years.  Cleaned and painted, with a few extra holes in the cowling  and with the cover tidied up and painted, fitted with chrome nuts  The new downpipe runs close to the water pump and a slightly re-routed bottom hose so I fitted another little aluminium heat shield   Few other jobs done, the steering column UJ was a bit notchy so I replaced it with another good used one. The boost has been controlled by a manual valve, it was a temp fix at the time but worked perfectly and has been completely reliable so no reason to change it really but it was only meant to be temporary so have fitted the original electronic boost control solenoid and wired it to the DTA ECU, cannot set this up fully till it is running again and waiting for some pipe to finish it. thats it for now, thanks Jim
|
| |
Last Edit: Jun 2, 2022 20:45:07 GMT by 820
|
|
820
South East
Posts: 793
|
|
Oct 19, 2018 18:54:24 GMT
|
I have had this steel box for years, I think it was originally from a GPO van around the early 80's maybe even 70's. I currently use it as a spares and tool box in the Rover, it is ideal because I can put a chain through the handles when it is out the car at track days and it fits perfectly behind the drivers seat. The seat belt shoulder strap was added very early on when in one of its many guises it was my fishing box. The hasp and staple was added later when it became a car box for when it was chained to the fence at Santa Pod. Anyway the blue hammerite paint has been flaking off over the years and it was always covered with card and rag to hide the sorry state of it while in the car. Instead of hiding it under card and rag it is time to paint it, I am thinking colour coded to the car in British racing green, a proper base to locate it safely behind my seat with a pair of straps to hold it in place. 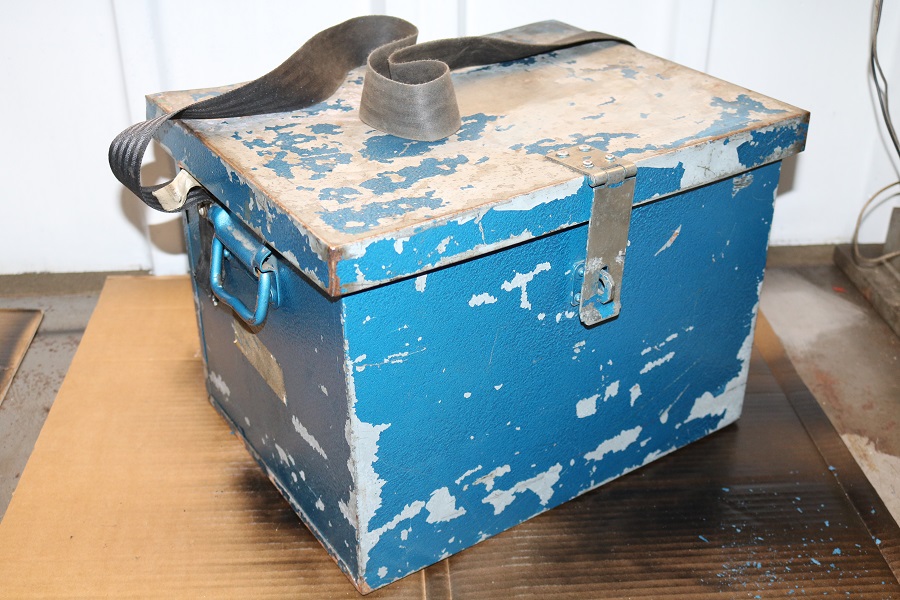 Started stripping the paint, I am pretty sure it is galvanised so any recommendations for preparing for paint are welcome, primer, paint and lacquer is the plan, I will be using spay cans. I have since removed the old seat belt, it might go back on. 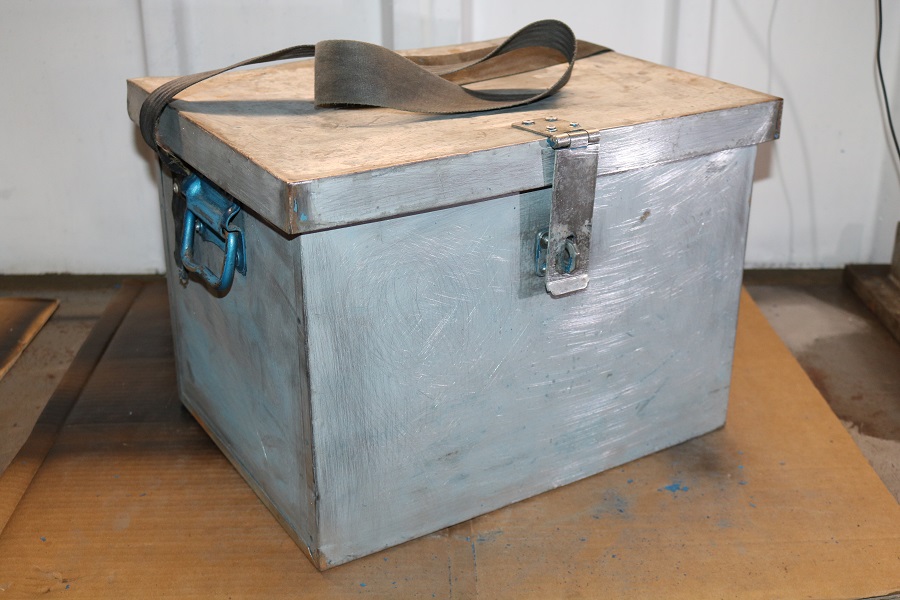 |
| |
Last Edit: Jun 2, 2022 20:45:46 GMT by 820
|
|
|
|


