|
|
|
Apr 26, 2017 22:23:34 GMT
|
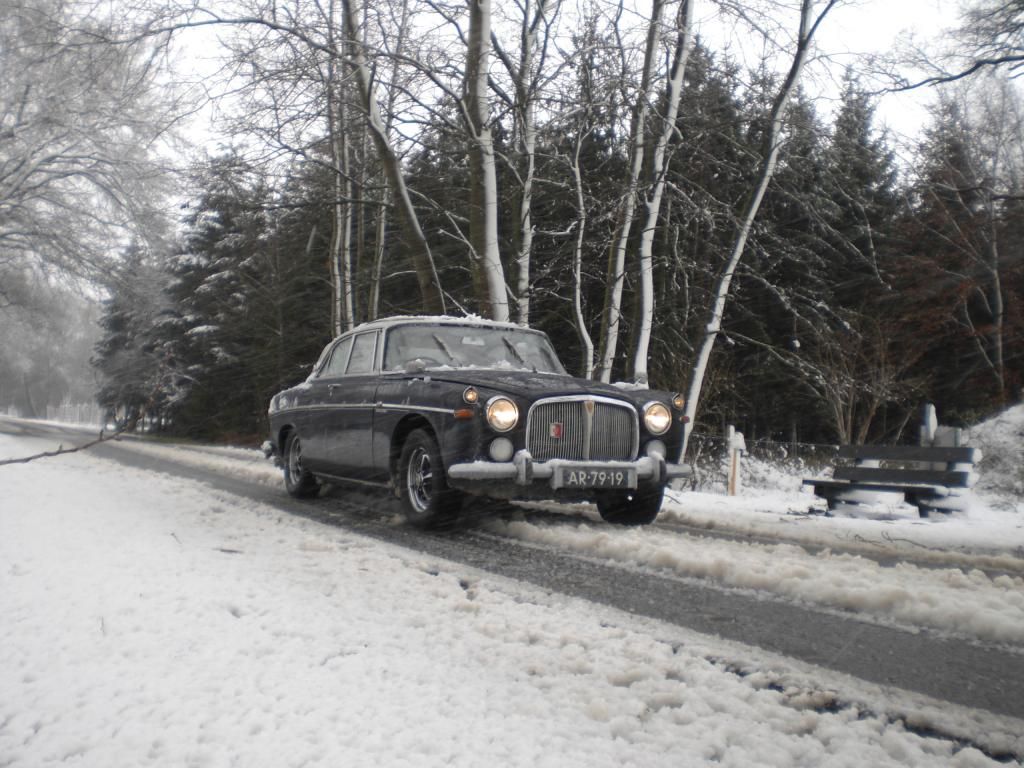
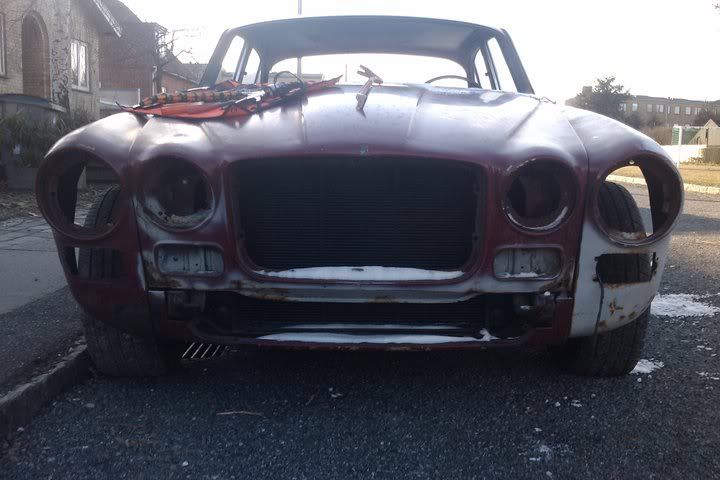
Some progress Fitted the steering column to the car 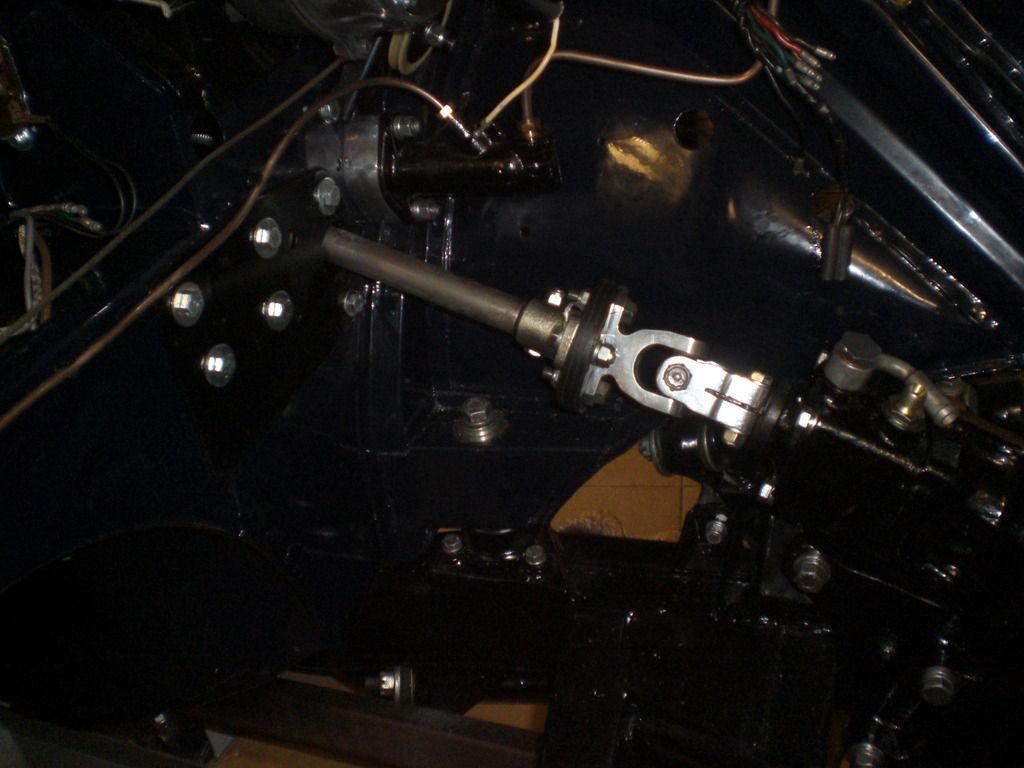 It lines up oke. The home made bracket with rubber tube was clamped by 2 hose clamps and fits nicely 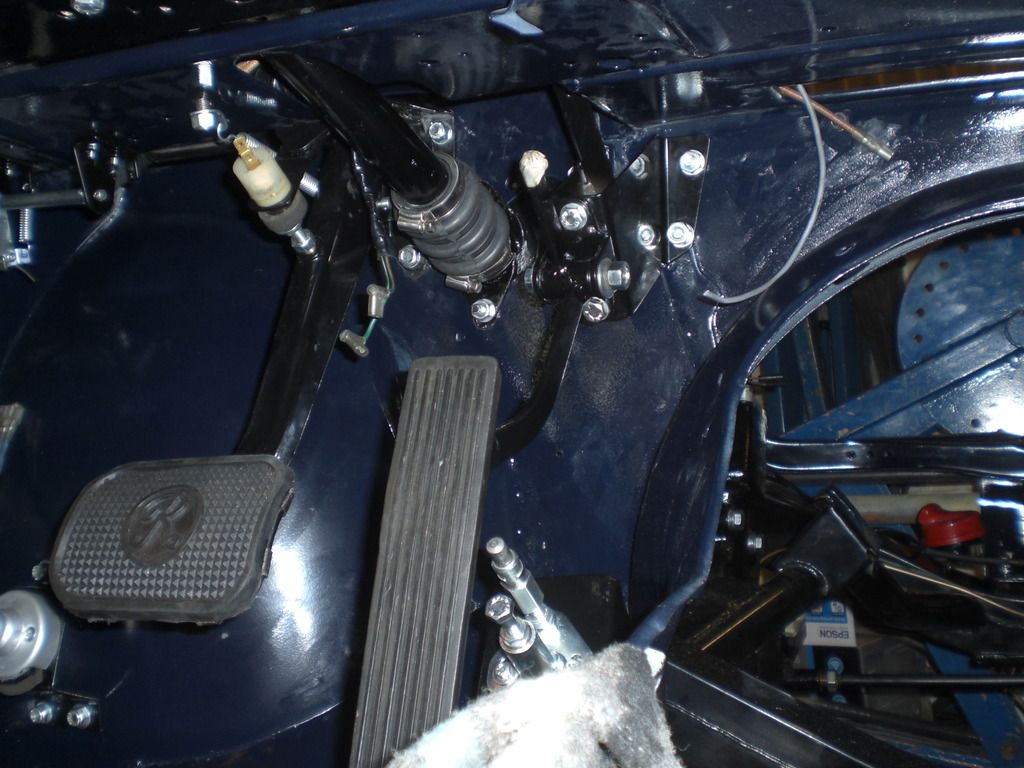 A bigger job i did was to fit the rear screen. After dismantling the car, i had made a wooden box to store the front and rear screen to secure these safely in my shed. Without the box i guess the screens would have been broken or damaged. 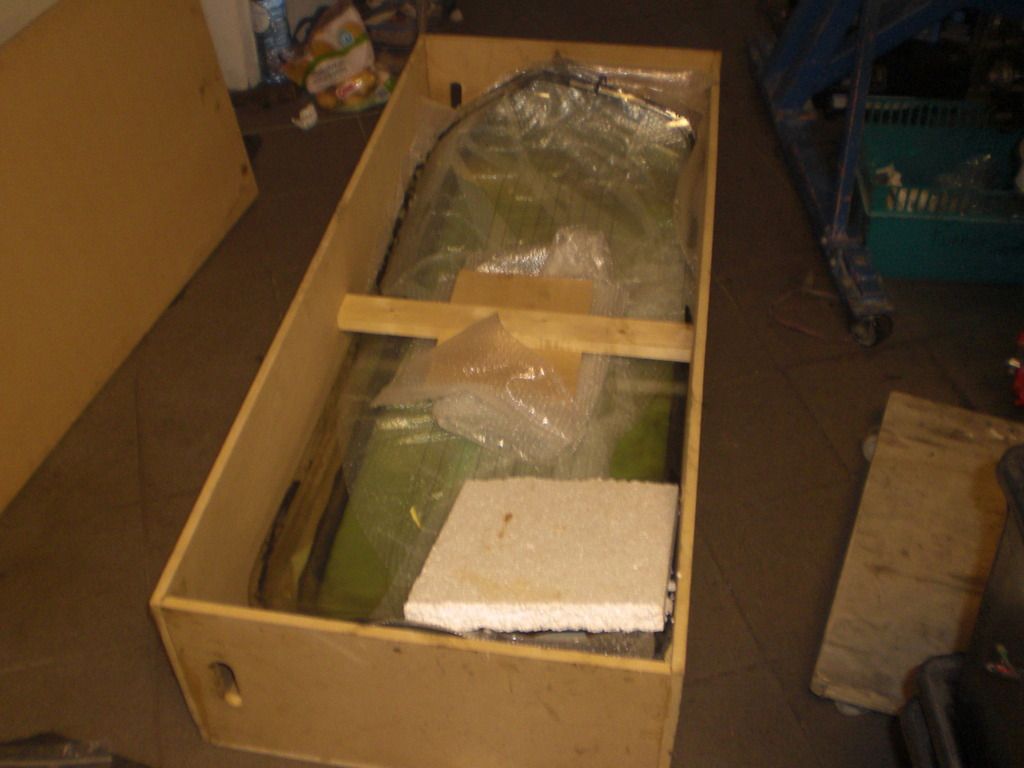 After cleaning the window and fitting the new seal to the window with some sealing compound in the glasses groove, an thin electric wire was positioned into the groove for the body and the glass was positioned onto the car. Added a strap to push the window a bit to the body. 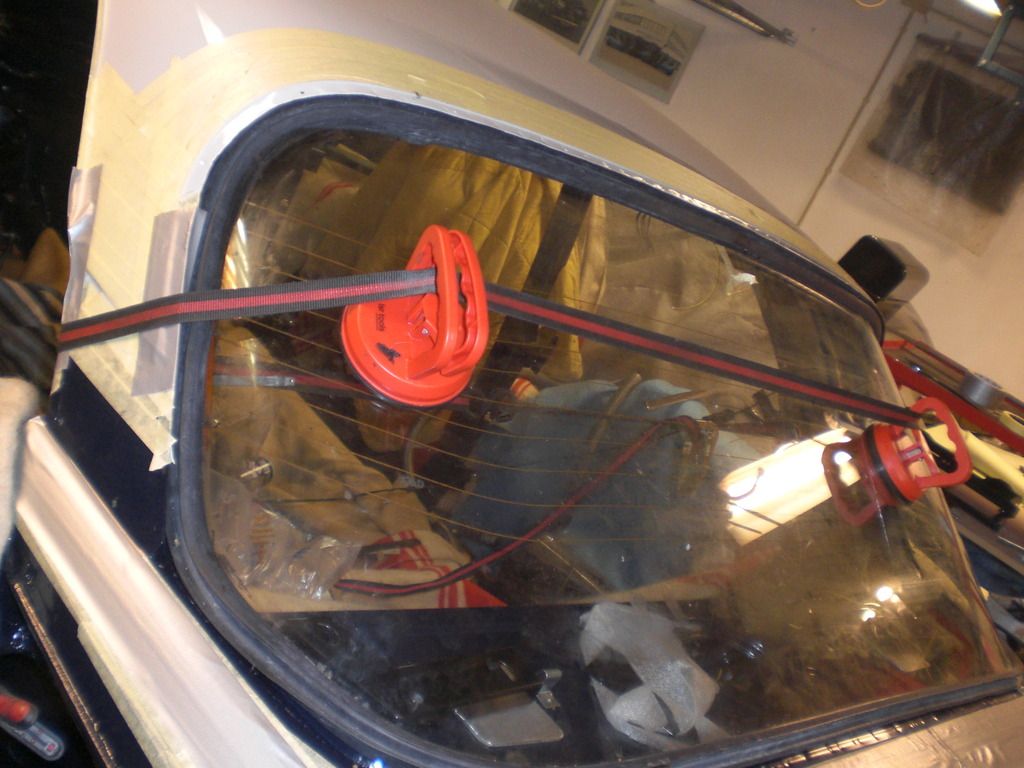 he area of the body around the glass were covered with painter tape and heavy construction tape to protect the paint After some small repositioning of the window, i pulled the electric wire to get the seal lip over the body. 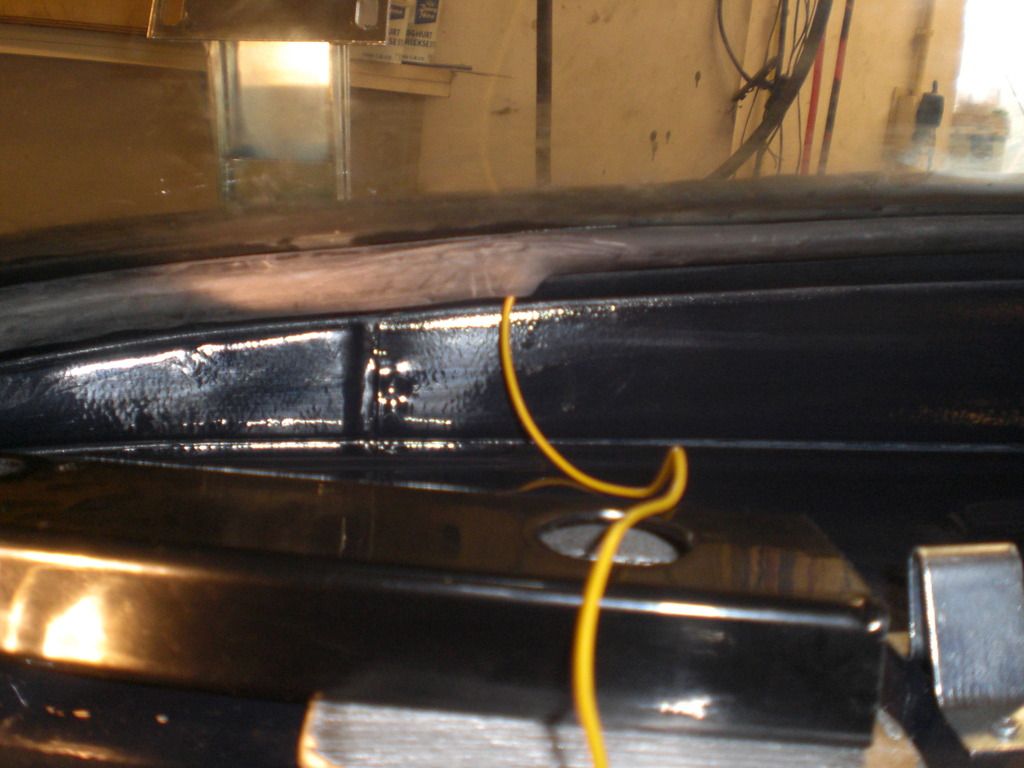 Added some sealant in gaps between body and seal I had bought a fresh set of clamps from Wadhams and started fitting these with a bit of sealant underneath it 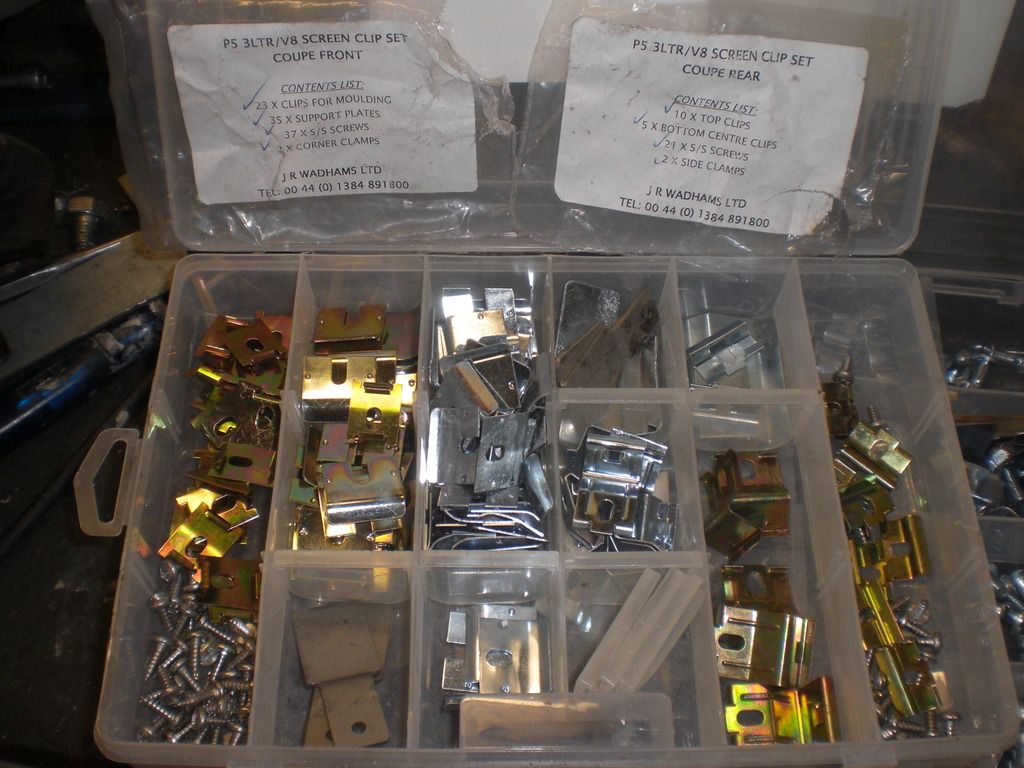 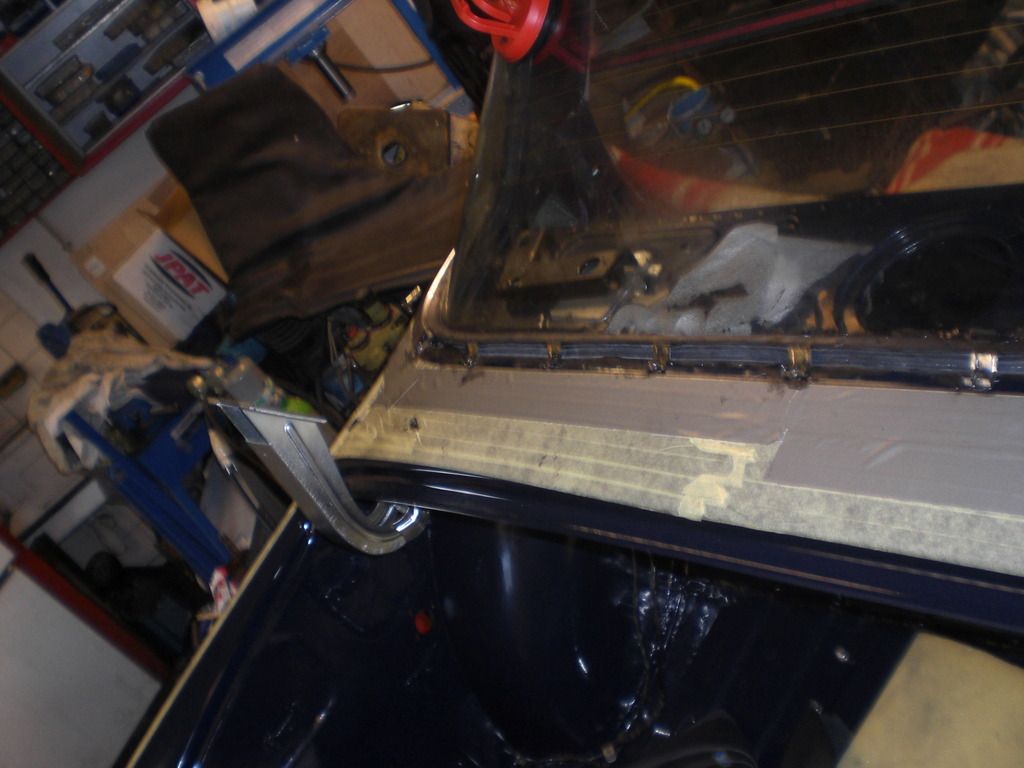 After fitting all the clamps, i started fitted the SS trim, which caused a bit of a mess because of the sealant  After cleaning up a bit, the long lower trim sadly showed some dents. With the palm of my hand, i must have pushed to hard. Luckily i had a spare which was polished and after re positioning some of the clamps, it could be fitted without much force. After cleaning up and removing the tape, i am happy with the way it is fitted. Some pics 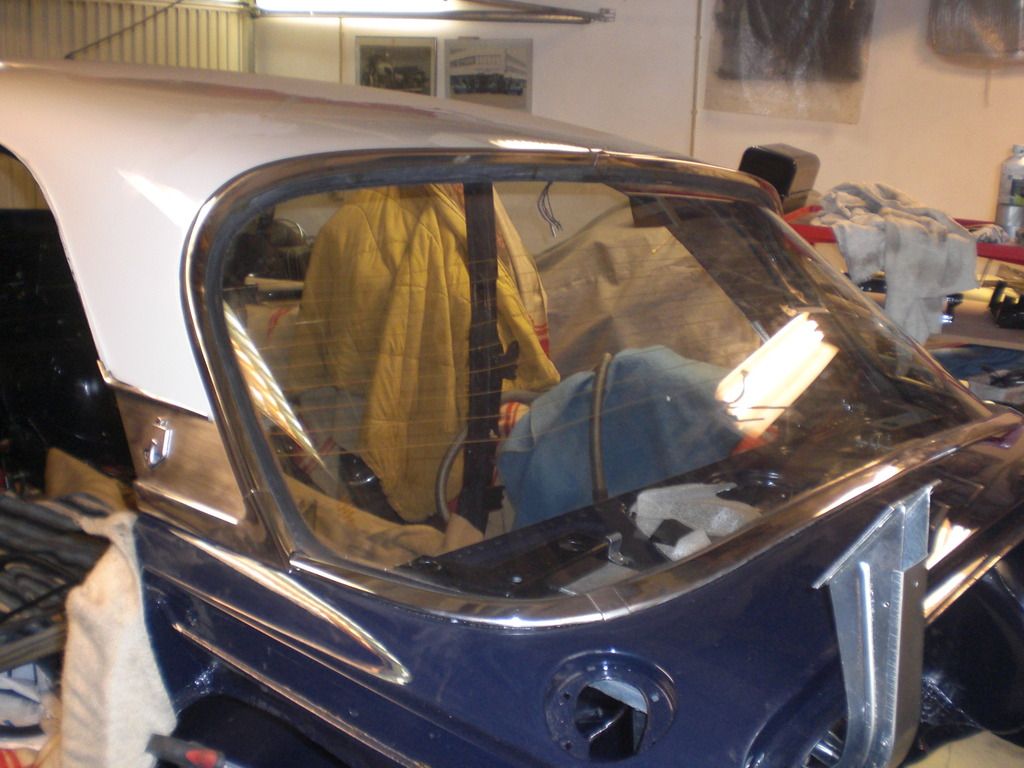 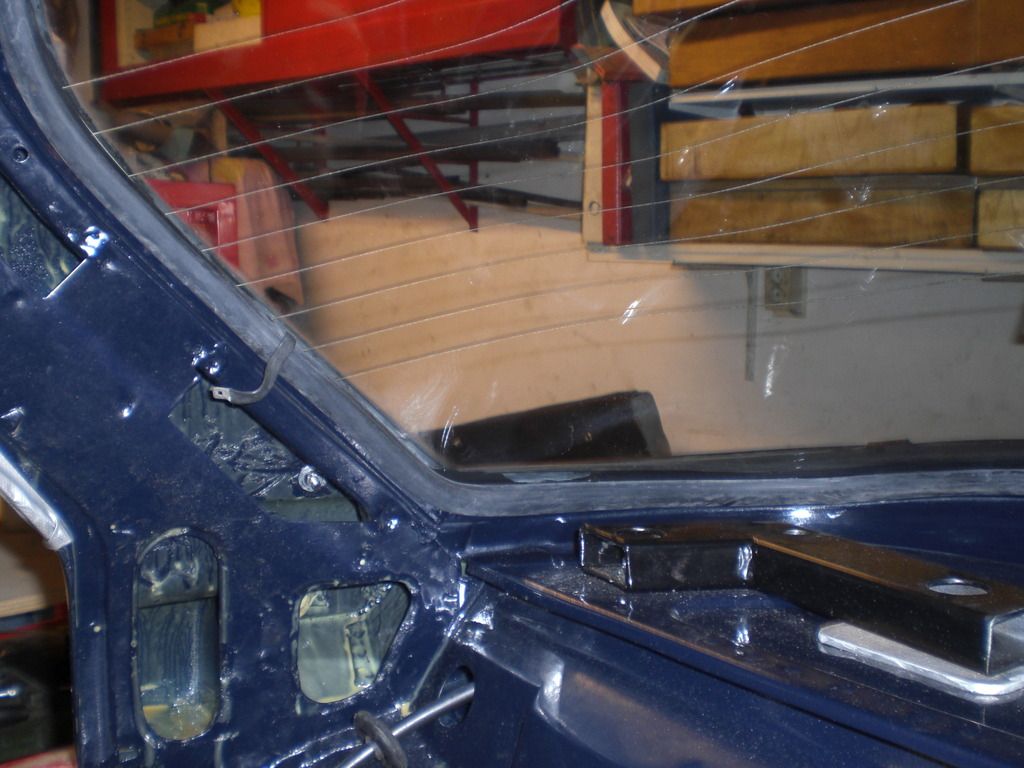 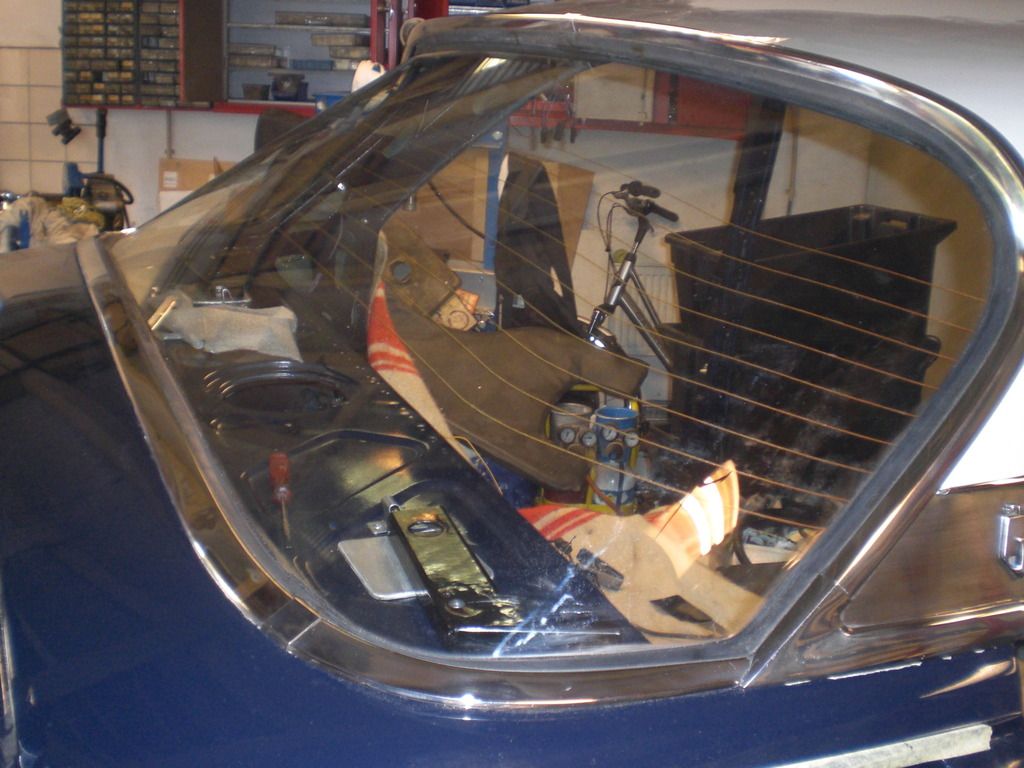 The entire fitting processof the rear screen and trim took approx. 10 hours and it for sure doesn't get a high ranking on my favorite list of jobs! The next weekend, i found enough courage and mojo to start on the front screen. Gave the front screen trim and the trim above the door a clean and a polish. 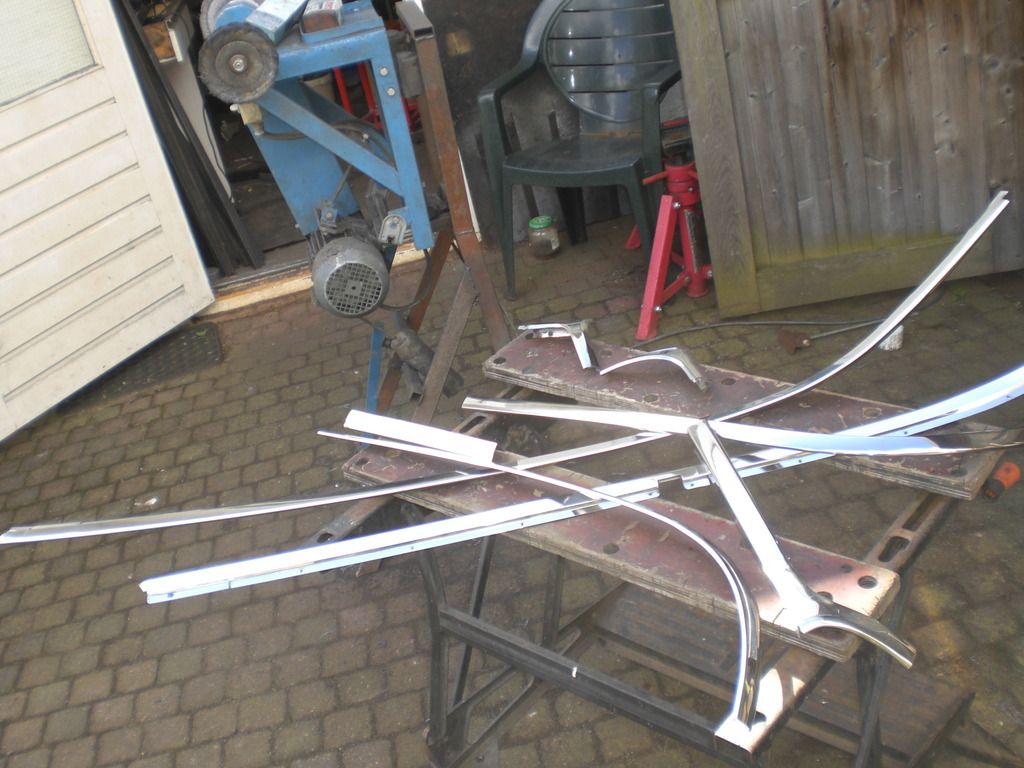 It cleaned up very well. Fitted the seal with some sealant in the groove to the screen and positioned it onto the car with the help of my son. Also protected the bodywork with some tape. It quickly became messy again. 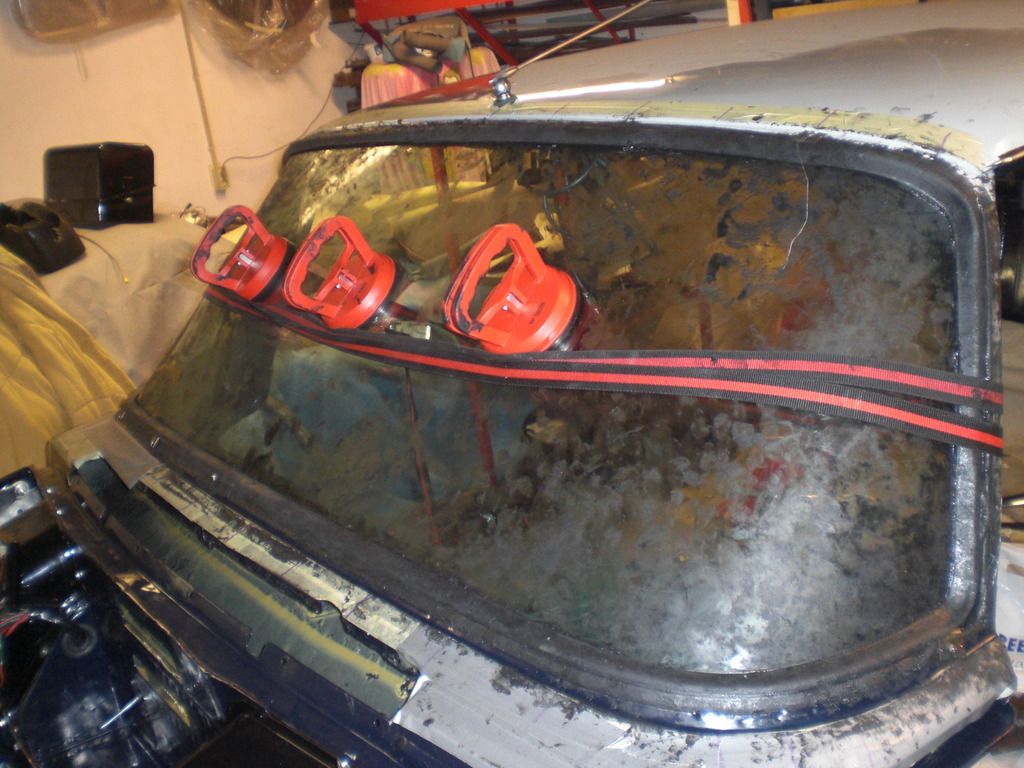 As the screen isn't touching the inner lip of the bodywork, it is very important and time consuming to position the screen in the right way. Getting the rubber into the right position is also very time consuming. First fitted some lower clips and then some upper clips. When the screen was in the right position, the remaining clips were fitted. 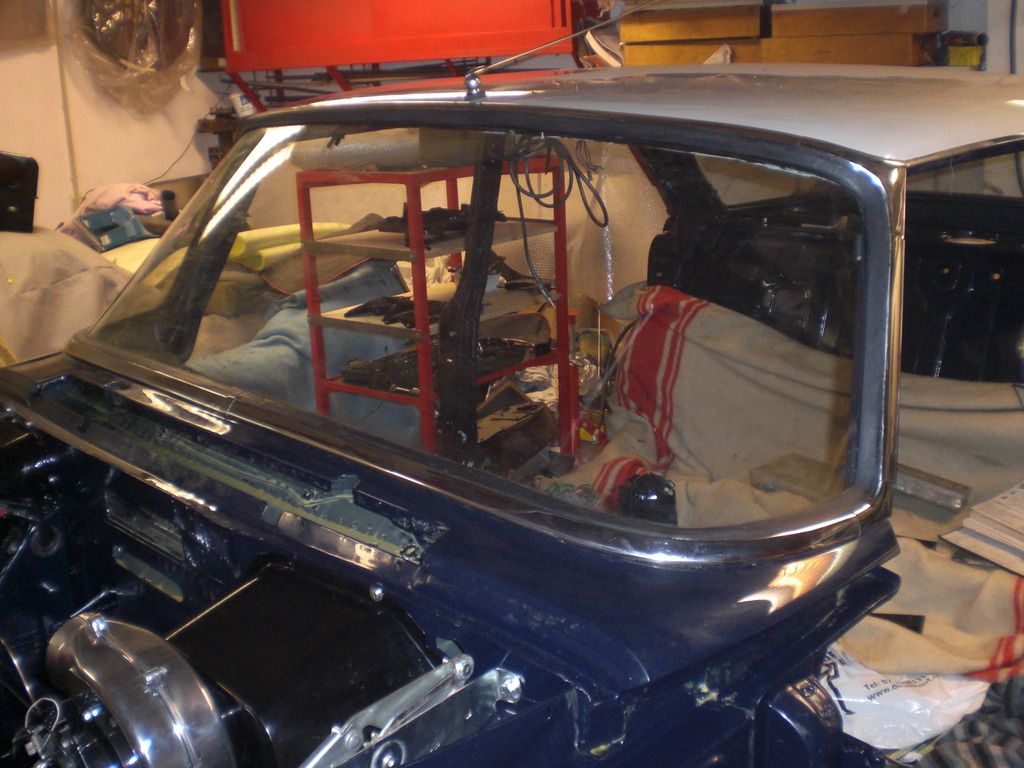  I am glad this awful job is finished! Peter |
| |
|
|
|
|
|
|
|
Apr 21, 2017 17:45:15 GMT
|
|
|
| |
|
|
|
|
|
Apr 21, 2017 17:32:06 GMT
|
|
|
| |
|
|
|
|
|
Apr 21, 2017 17:22:39 GMT
|
|
|
| |
|
|
|
|
|
Apr 21, 2017 17:22:15 GMT
|
|
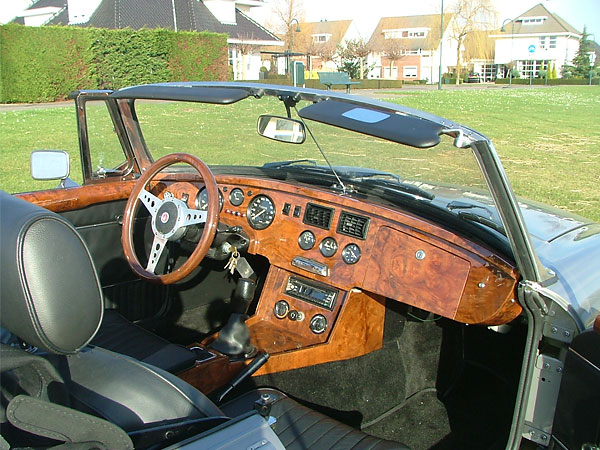
The special walnut interior in my MGB V8 conversion
|
| |
|
|
|
|
|
Apr 20, 2017 16:29:18 GMT
|
|
nice progress! . Instead of using masking tape for your cables, you can use kitchen aluminum foil to wrap around the cables. It works quicker
Peter
|
| |
|
|
|
|
|
Apr 17, 2017 15:21:26 GMT
|
Some progress to show Have worked on the wiring loom. It looked oke but some ends of the wires (especially in the engine compartment) looked a bit tatty and wiring colors were sometimes difficult to recognize and the spade connectors also looked tatty and sometimes corroded   Removed the black wrapping, checked the entire loom and replaced tatty wires by soldering pieces of wire cut from a spare RHD loom and replaced lots of spade and bullet connectors 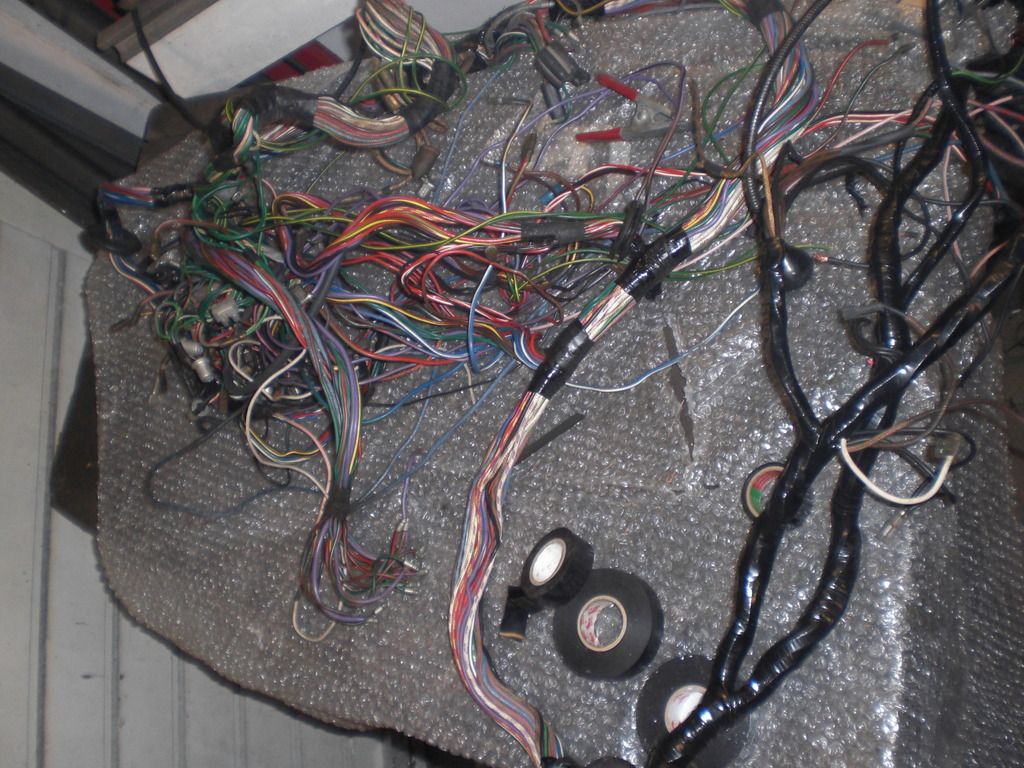 Then added some additional wires for the electric fuel pump, hazard warning lights and rear fog light and wrapped the loom with black tape without glue.  Then fitted the fresh looking loom to the car. i believe the quality of these Rovers looms is good. Will fit some relays near the fuse box for the lights later 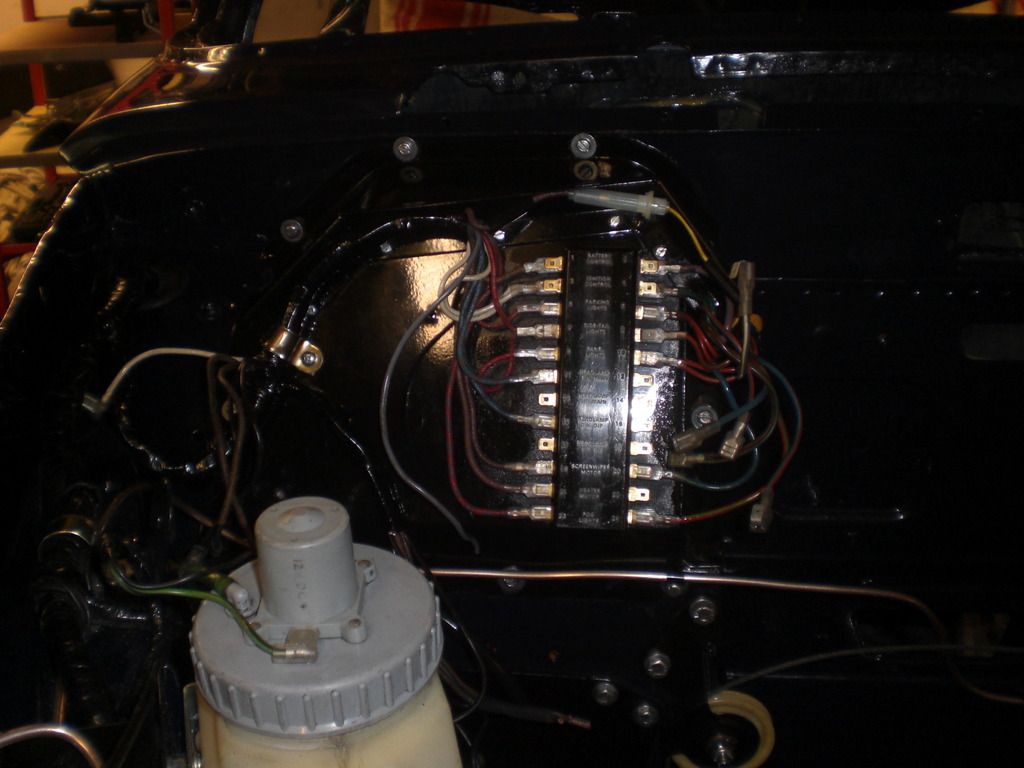 There is still a lot of work with connecting all the wires but this has to wait until the steering column has been fitted. 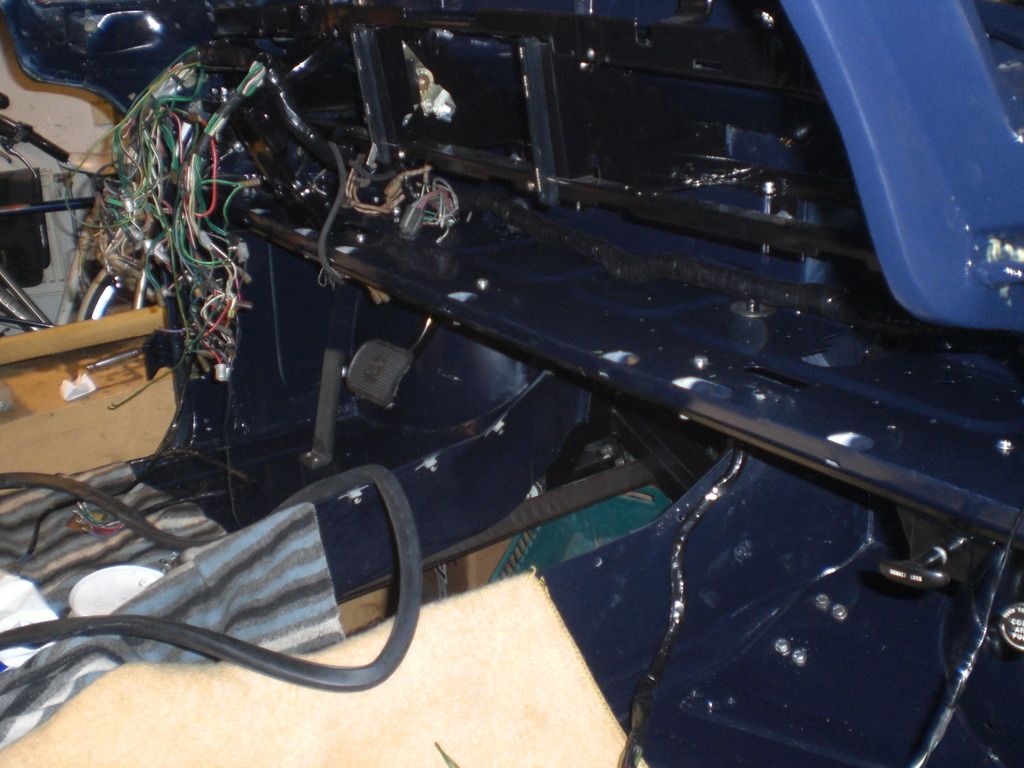 Also replaced the seals of the 2 shafts from the ZF steering box (originally from a Volvo 164) 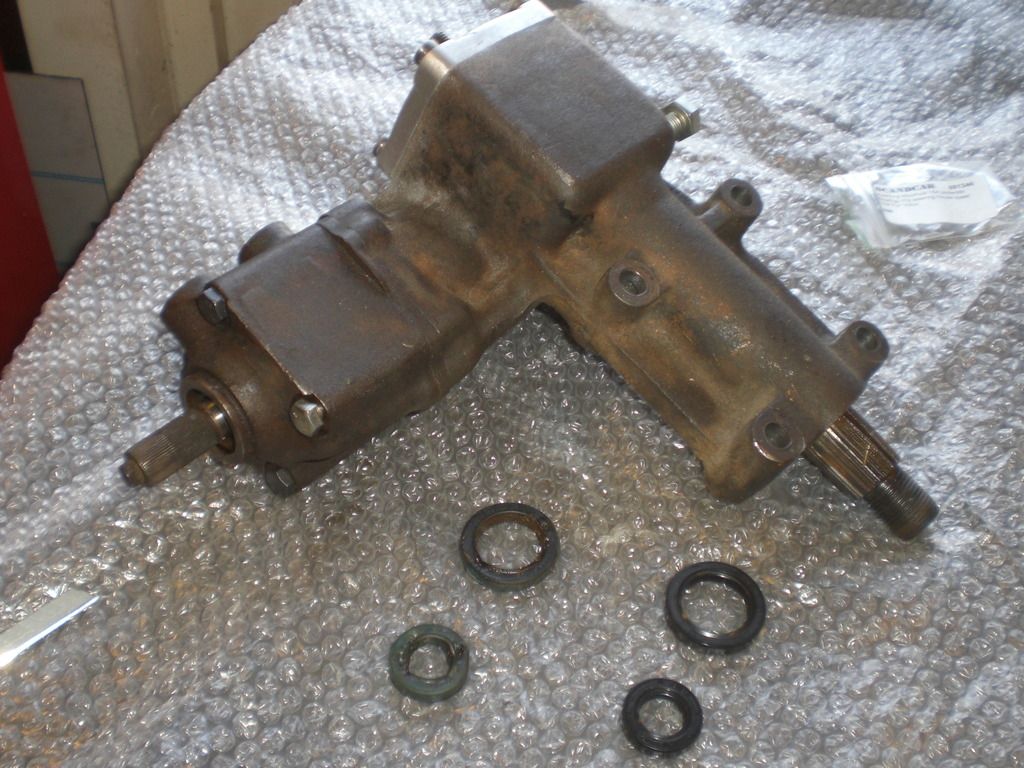 Removed all the rust and gave it a coat of primer and black paint and fitted it to the car. This fitting is a lot easier when the engine is not fitted 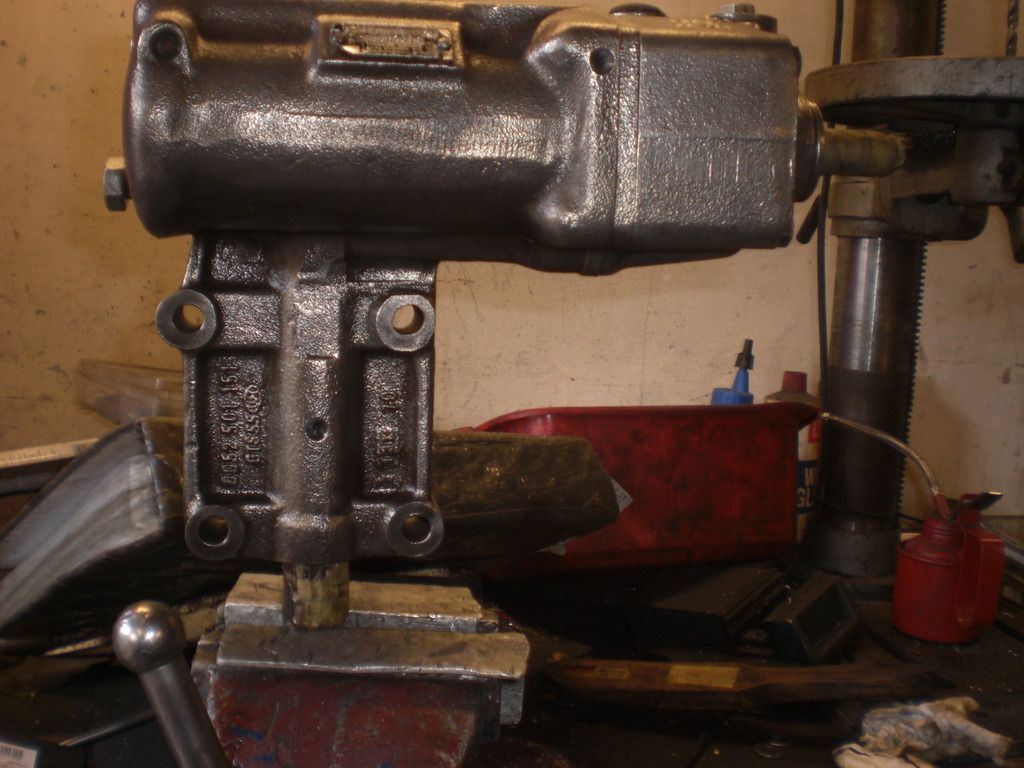 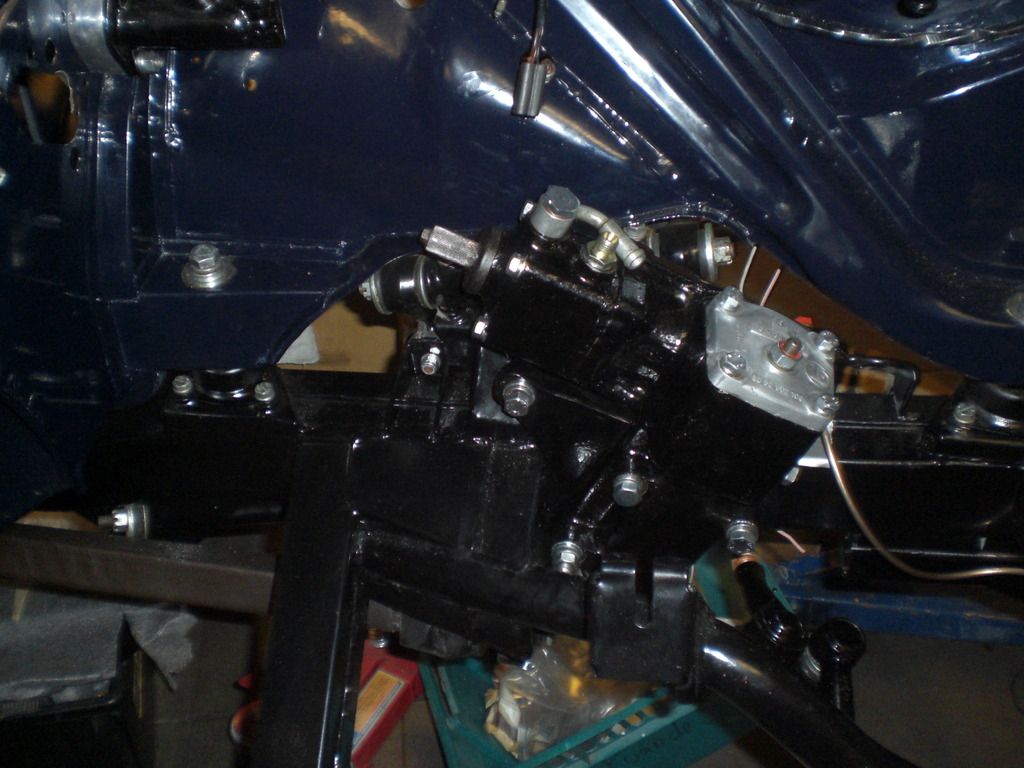 Picked-up a steering shaft from a BMW E30 from the scrap yard as this has identical splines as the Volvo 164 ZF box 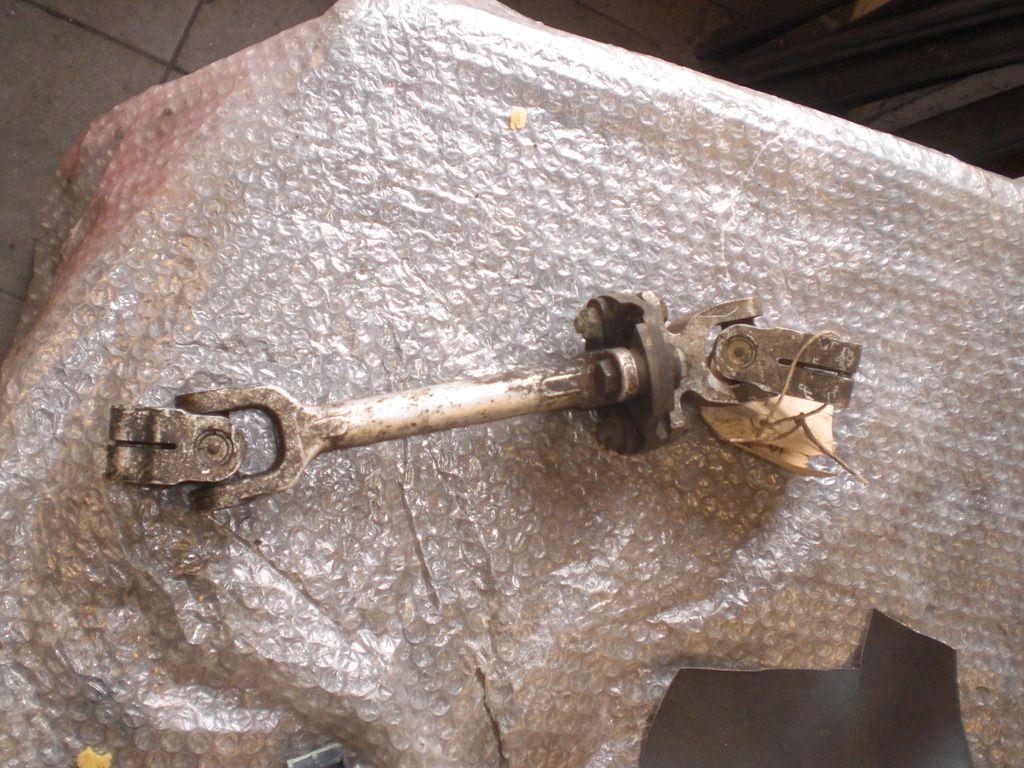 Removed the RH part of the shaft and cleaned/polished it. The pitch of the bolts of the BMW coupling is smaller than the Rover ones so i enlarged the holes on the coupling for the smaller pitch and welded up 2 bushing to fully fill the enlarged holes into the Rover rubber coupling. 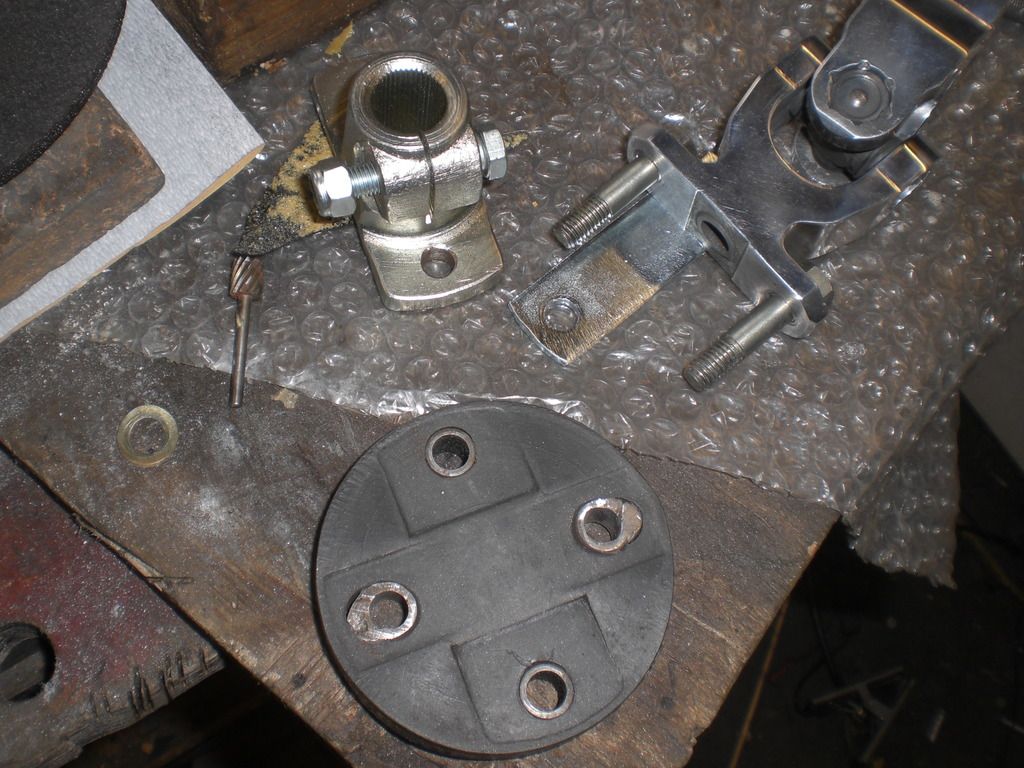 Here's the assembly 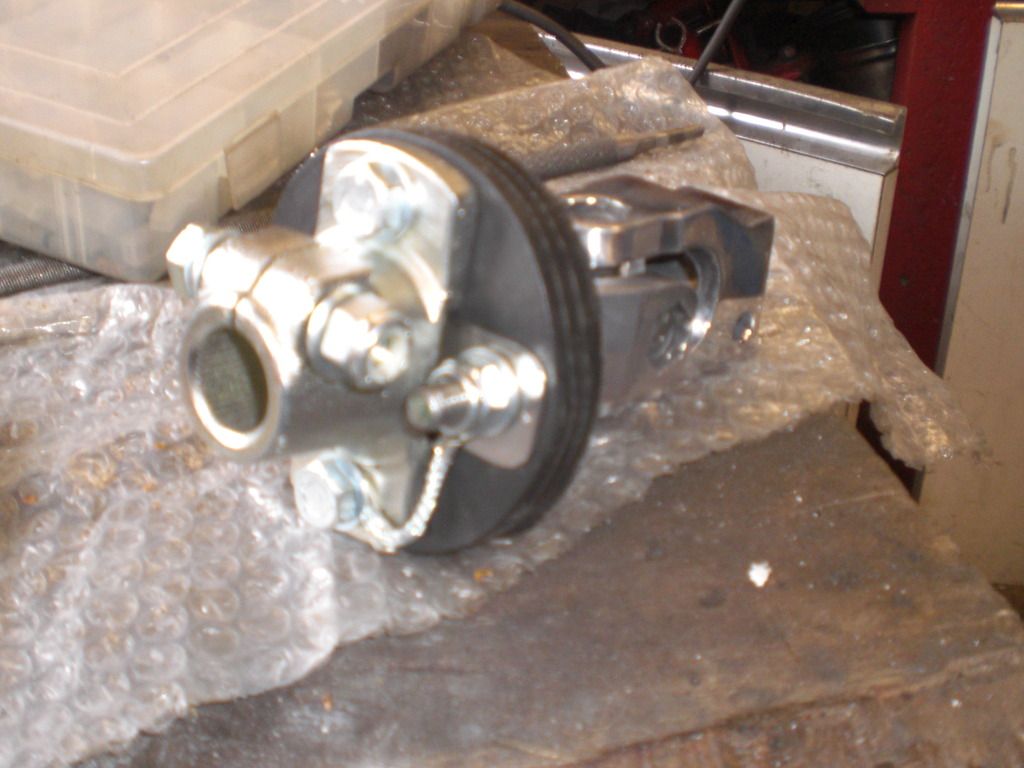 Also picked up parts from the zinc plating company which have an excellent job  Seat runners 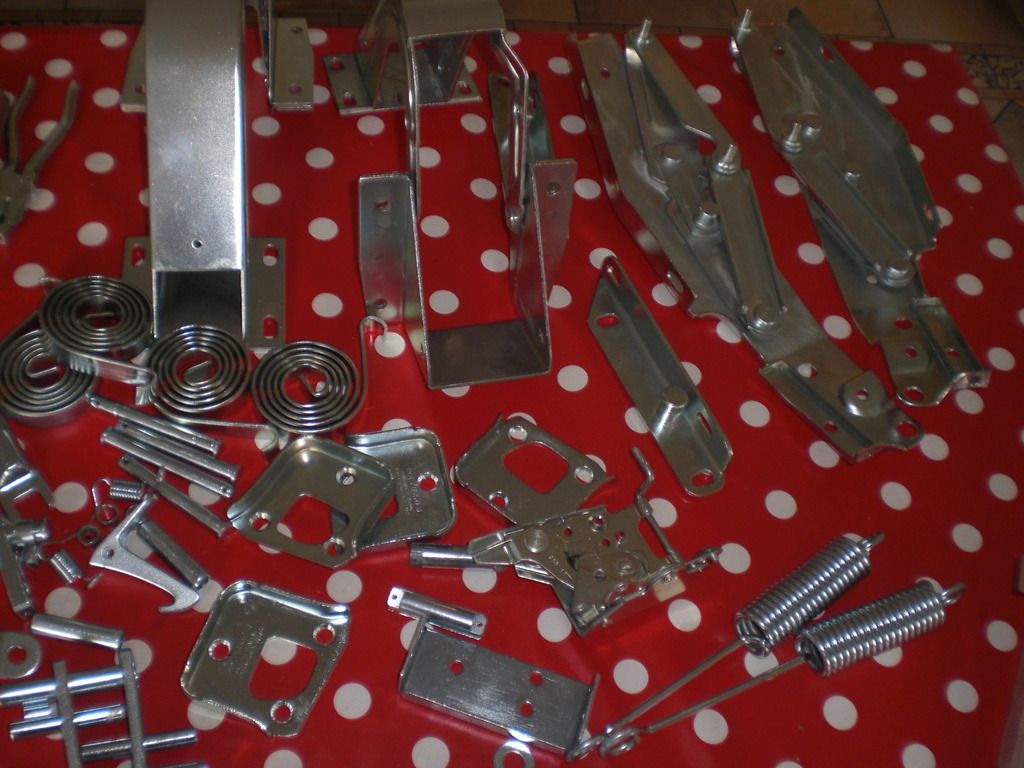 The bonnet and boot hinges and door parts. Even complete door opening mechanism return in a as new condition 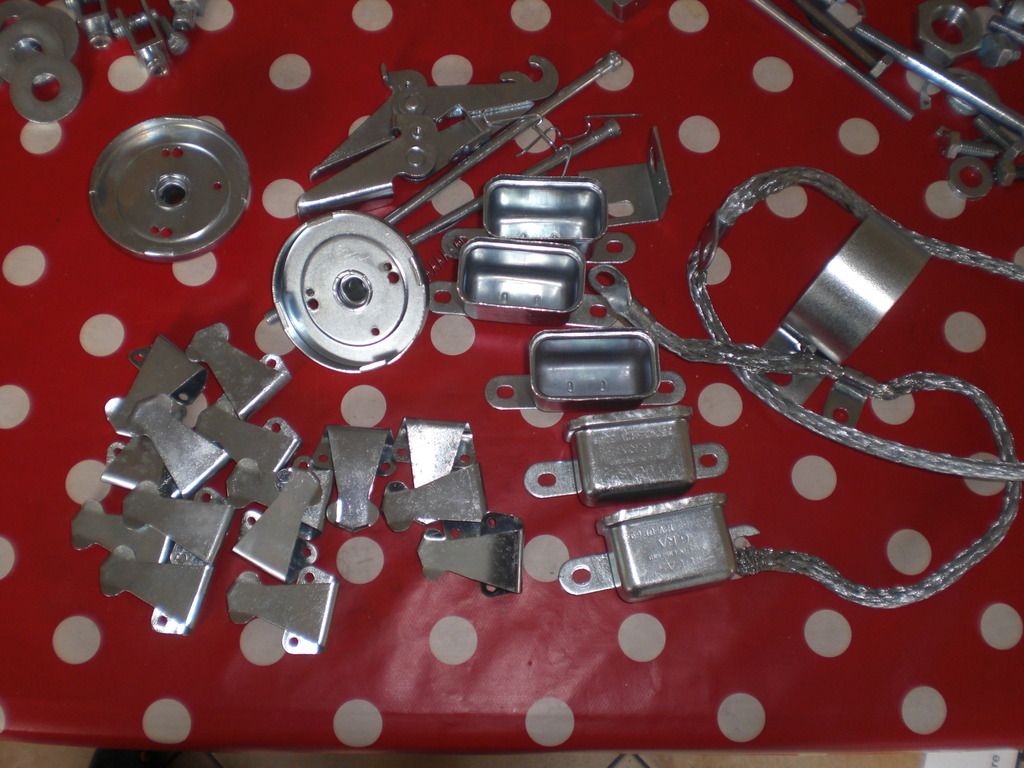 some elctrical components and carpet clamps. The relay covers look new. I checked all the 5 relays and all worked. These are still available new but rather expensive so i prefer this routing 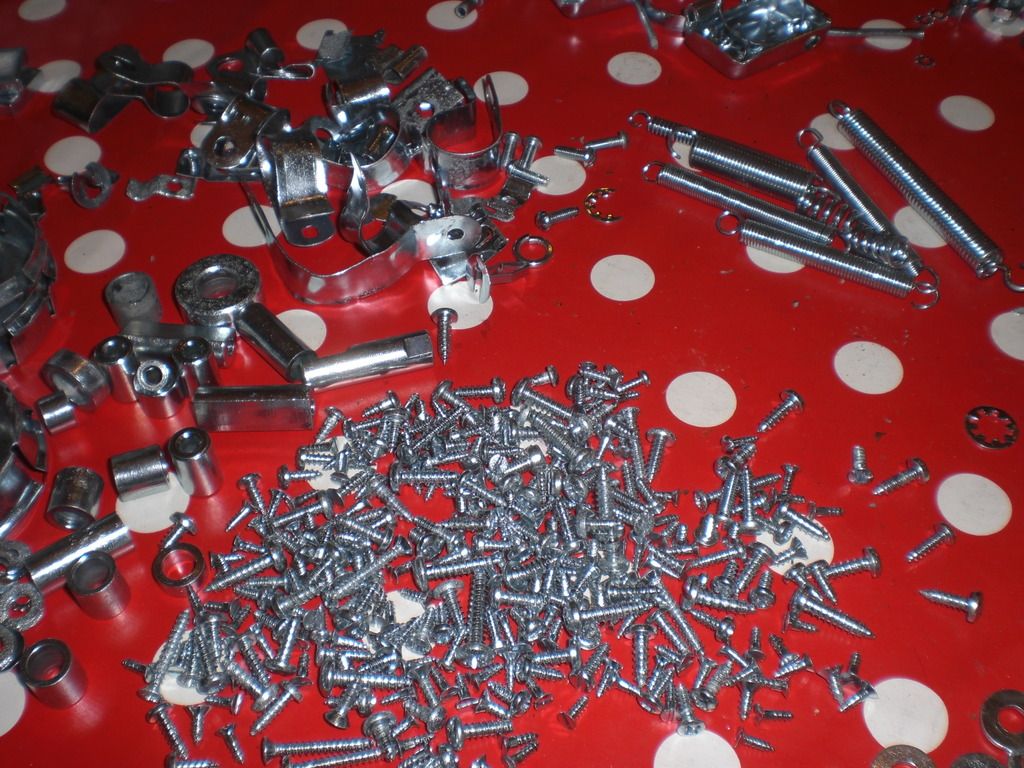 Even had a lot of parkers zinc plated. I find it very difficult to find good matching new ones as there are so many options in diameter, length and these parkers look like new again 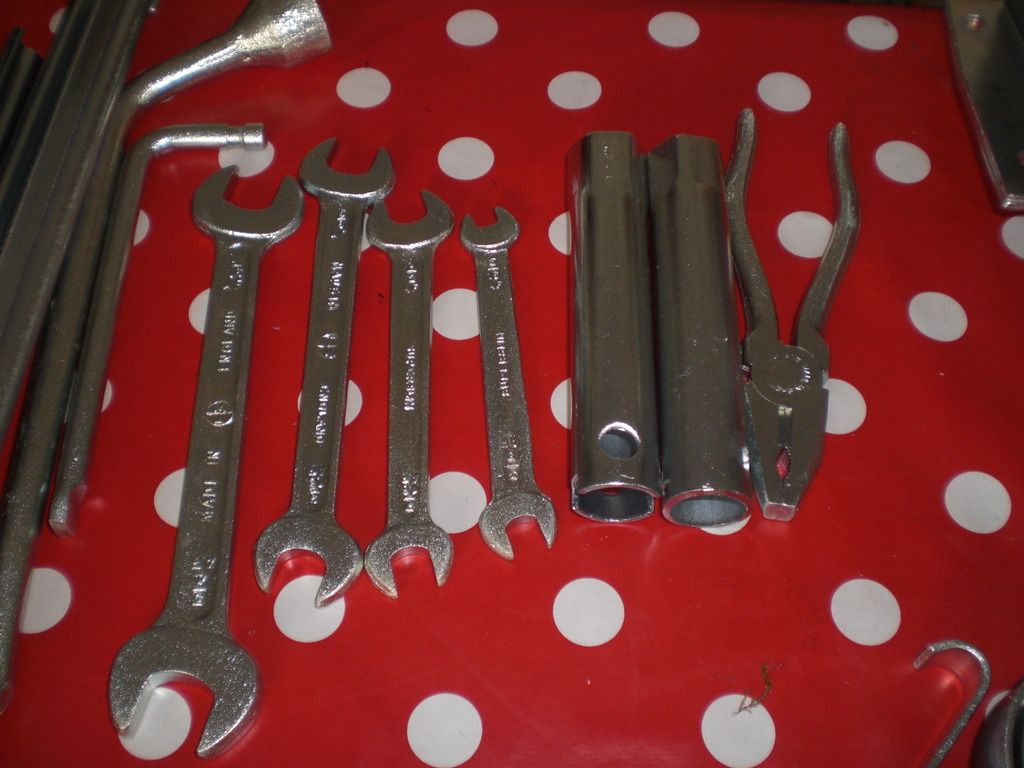 The inboard Rover tools also came out very nice. ![]() 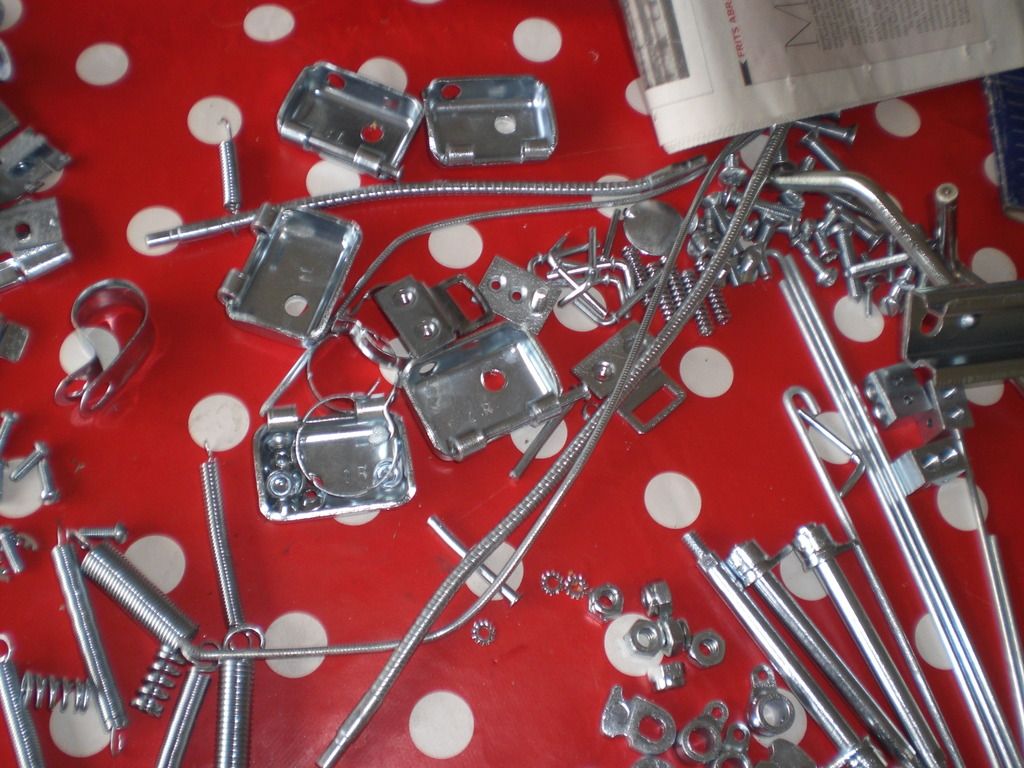 Dashboard door hinges, heather cables and some springs. This zinc coating is money well spend! That's it for now Peter |
| |
|
|
|
|
|
Apr 12, 2017 10:29:42 GMT
|
|
Nice to see a women working on classics and you can see its a women's workshop. Tidy and clean.
|
| |
|
|
|
|
|
Mar 30, 2017 11:40:50 GMT
|
|
|
| |
|
|
|
|
|
Mar 29, 2017 19:58:53 GMT
|
I fitted an RC controlled main power switch which also has a drain protection so it will always start, It switches automatically when the voltage drops below a certain level. I also use it as a anti theft protection as my battery is in the boot.  Peter |
| |
|
|
|
|
|
Mar 26, 2017 19:44:48 GMT
|
Like me you like polished aluminum and SS. Look what i fitted this weekI like that heater Pete, very smart. Please don't cover that spare wheel carrier with underseal, it must be the best looking one on the planet as it is now. Thanks all for the kind words and don't worry Steve, the spare wheel carrier will not be under sealed. Did some work on the car Fitted the 2 brake pipes which were received from Automec 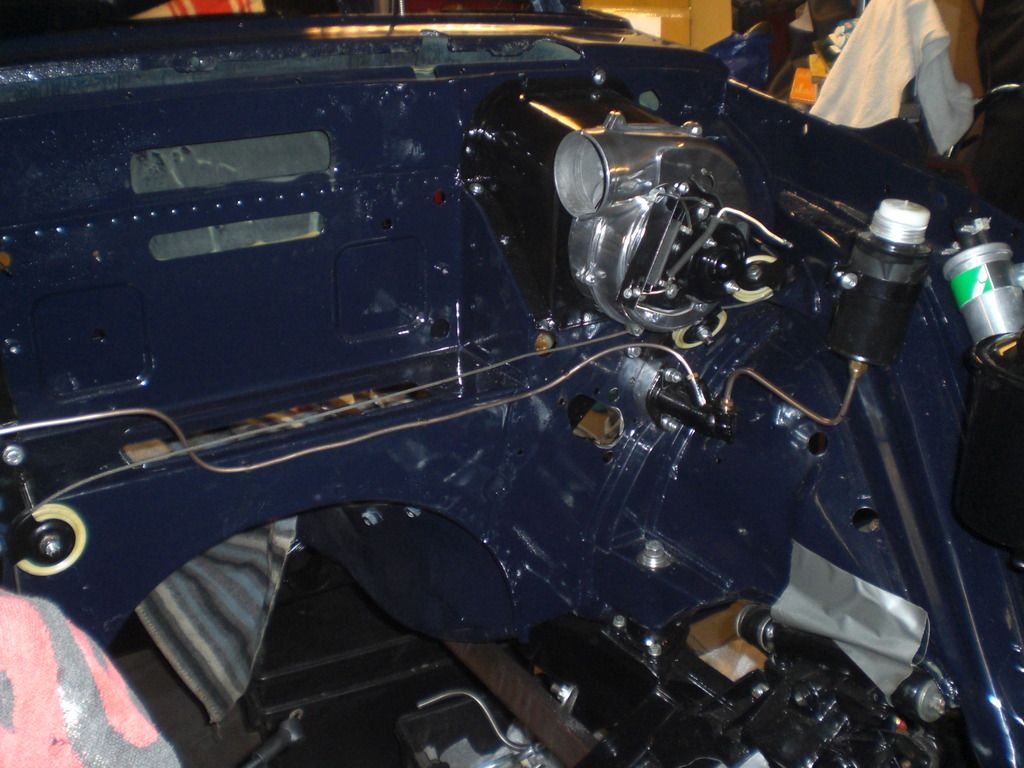 The car gets a Volvo 164 PAS box (ZF) as the original ones almost always leak and the Volvo box is less vague as the original one. I already did this to my daily P5B some time ago and its a huge improvement. As the mounting holes are in a different position, an adapter plate is needed which i made from a 16mm thick steel plate. 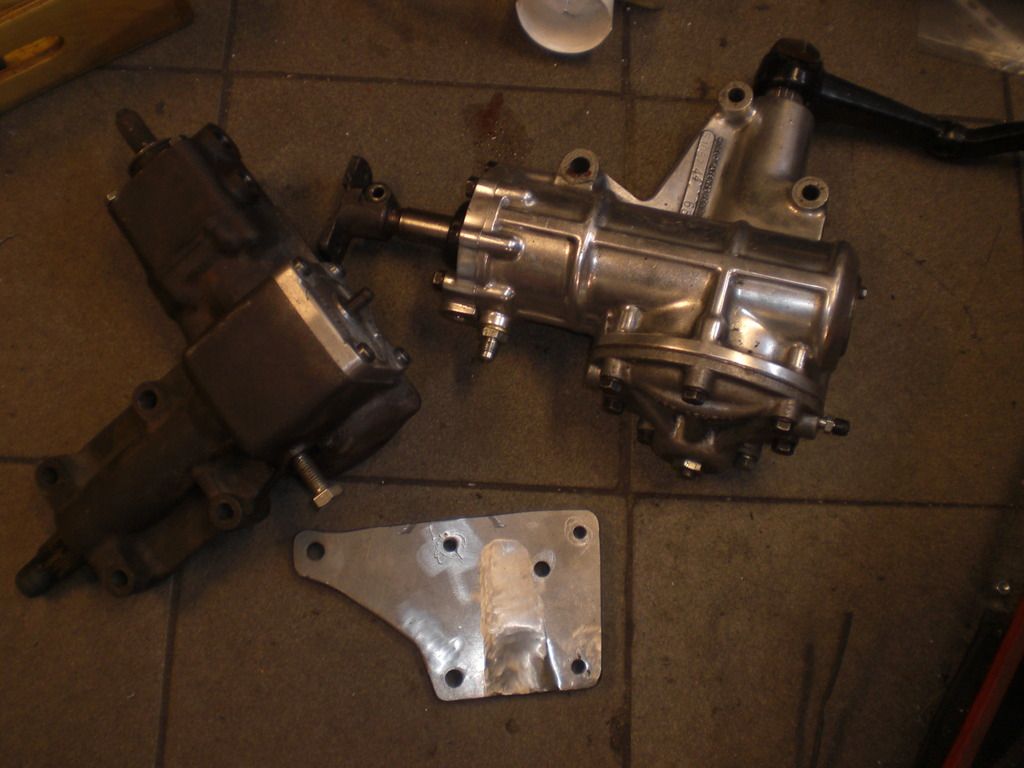 trial fitted the ZF box to check if it lines up with the steering shaft which it did. 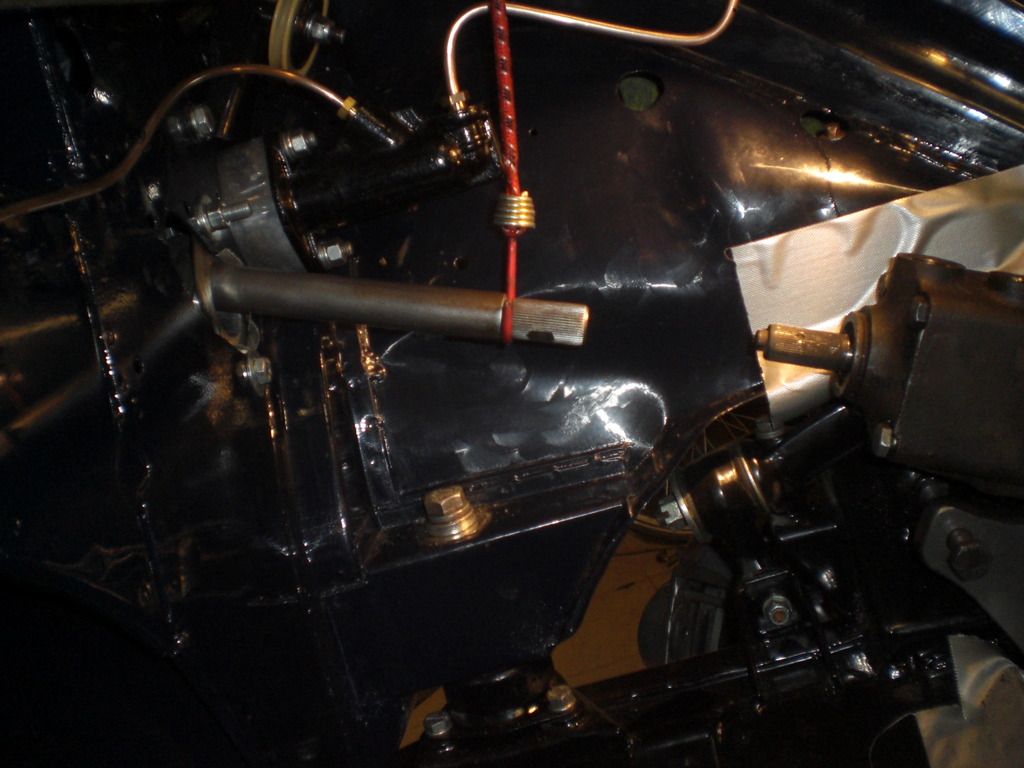 The steering shaft rubbers on the firewall i had were all shot and new ones are unobtainable afaik 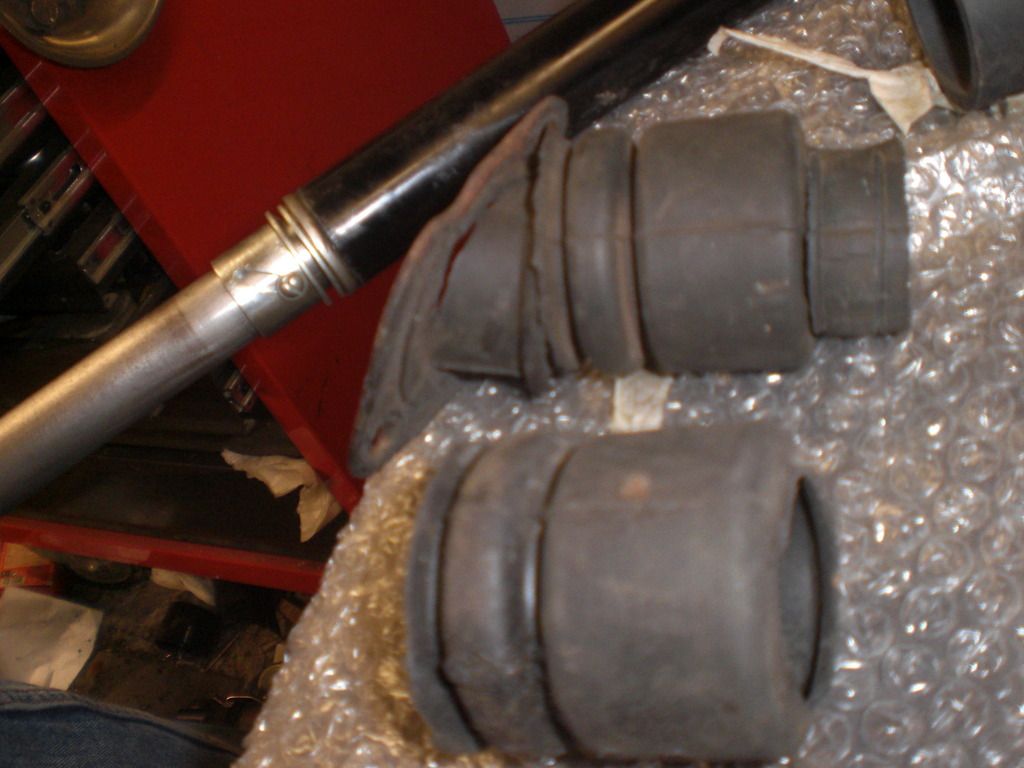 In my shed i found a piece of rubber which was useful to make a new one. I don't know where it came from 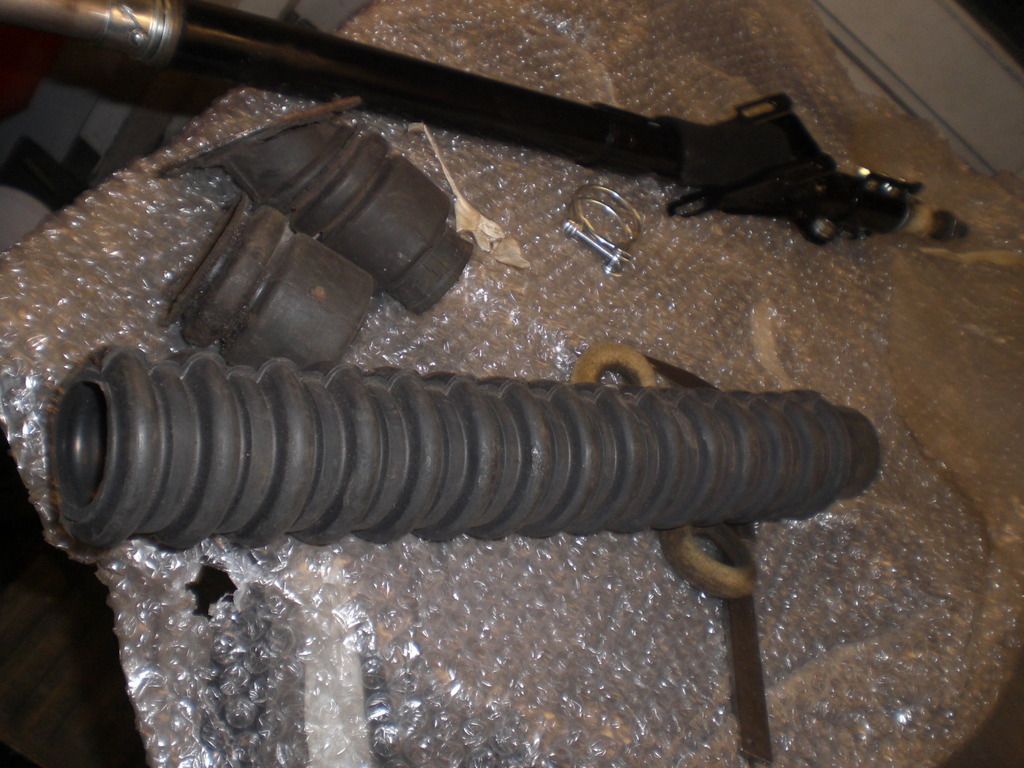 The steering shaft itself has been dismantled, cleaned, parts got a new coat of zinc or paint and new grease was applied to the bearings. Its very smooth again. As the steering shaft go threw the firewall under an angle and the rubber is straight, i welded a piece of pipe angled onto the flange of the original piece where i can slide the rubber over  Will give the bracket a coat of paint later The rear axle bump stop i had all hat badly rusted mounting plates. The rubbers were all in very good nick. I removed the rubbers from the mounting plates and made copies of the mounting plates from 2mm stainless steel sheet. 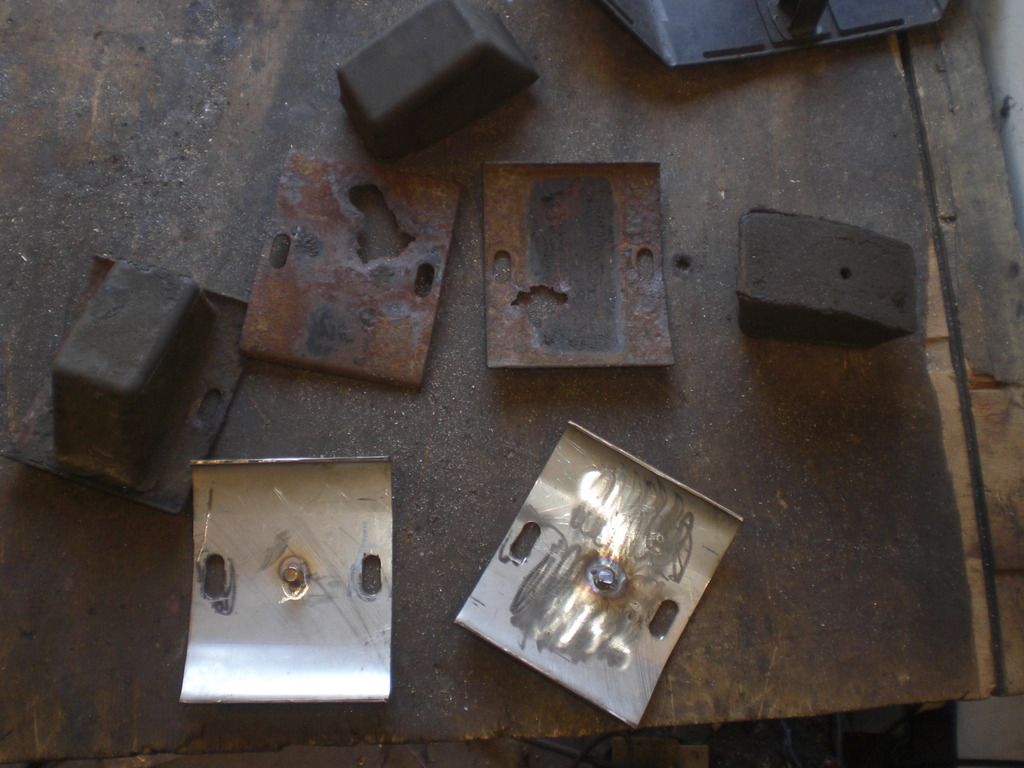 In the middle of the plate, a piece of an 8mm SS bolt was welded onto the plate and a 8mm hole was drilled into the rubber. Then glued the rubbers to the plate with 2 pack glue. The bolt is there to strengthen the connection between plate and rubber Fitted to the car with SS bolts and nuts and the gap between the body and the plate was filled with kit to avoid moisture and dirt could acces 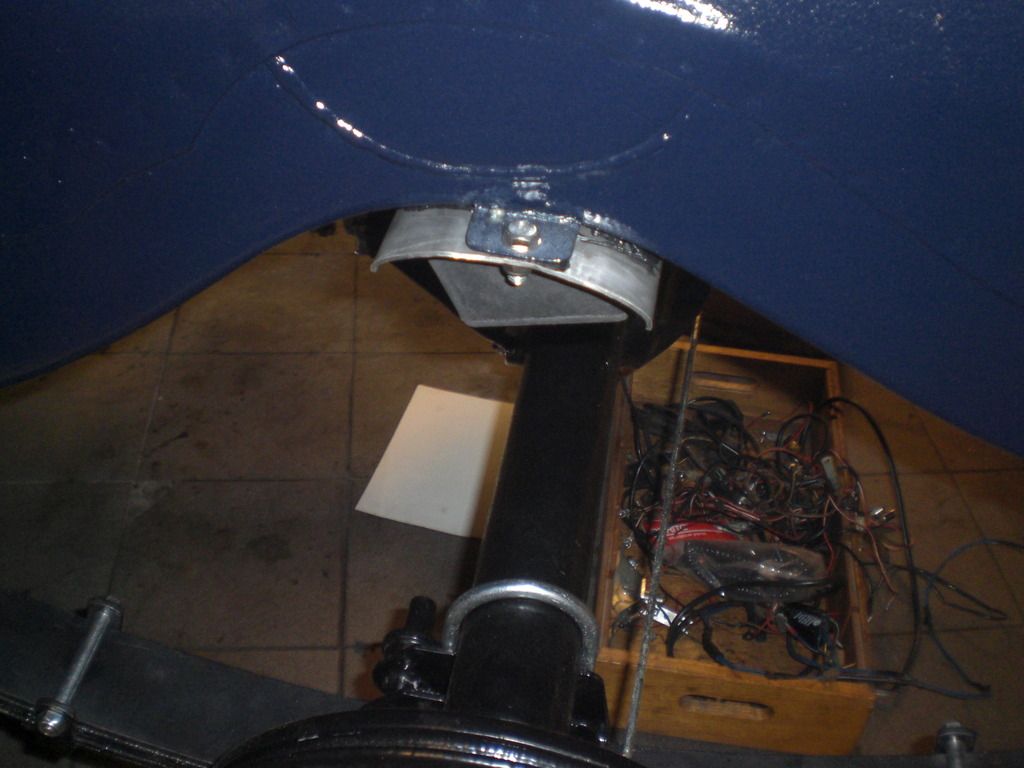 Also cleaned a batch of parts for zinc plating and brought these to the plating company. Due to all the parts assembled to the car, the stash of re zinc plated bolts reduces quickly so a new"delivery" is required. 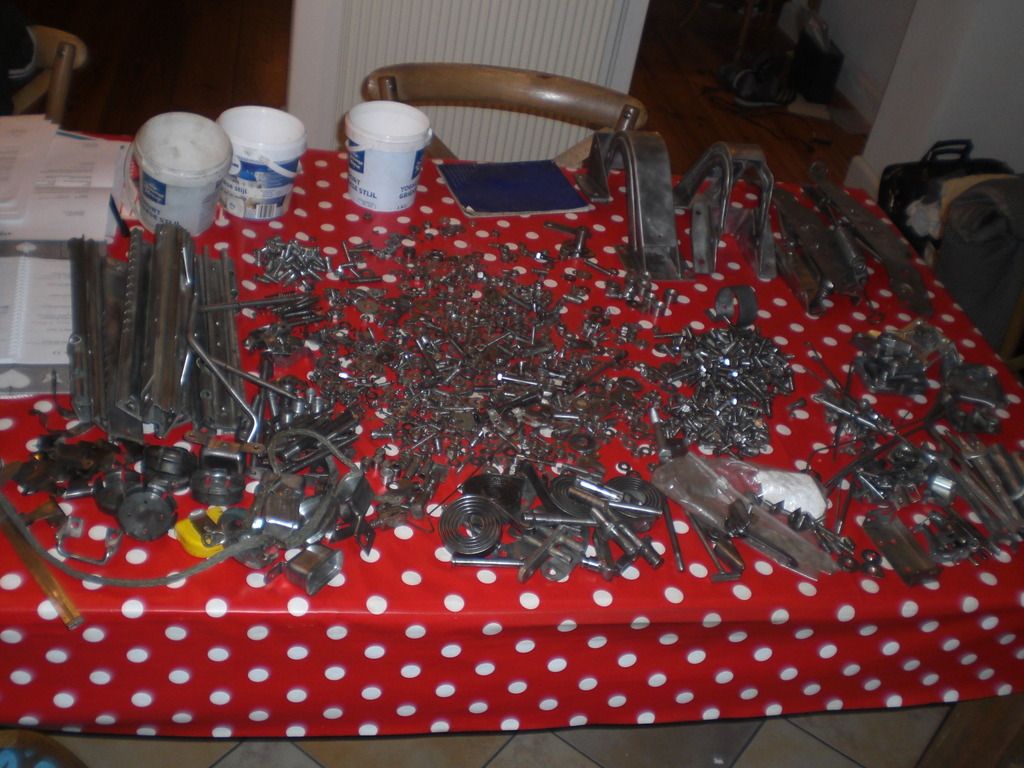 Thats it for now Peter |
| |
|
|
|
|
|
Mar 23, 2017 22:05:20 GMT
|
|
Very very nice job and you must work very efficient as the process go's very quickly!
|
| |
|
|
|
|
|
Mar 21, 2017 16:31:47 GMT
|
Home made bush... Made of the original sleve, a pice of hard old fuel/water hose and:  A rather fancy stainless dish washer brush my sister gave to me a couple of years ago for chistmas... (don't ask) It was the only thing I had that fitted like a glove in the shifter! So now I'm on the hunt for the Original bushes (not in stock any more at SNG Barret) Or some Pom or Poly round bar to make my own. I think that's the way forward! The shifting action is a lot better! But there is room for improvement! May go to the workshop tomorrow and do a bit of this and that :-) Engineering at its best  I read the whole tread. Nice car and nice mods. I believe these rubber bushes are identical to the LT77 ones fitted to the Rover SD1 which i believe are still available from Rimmer Bros. The bracket differs from your Jag but the the mounting points and bushes could be identical Peter |
| |
|
|
|
|
|
Mar 19, 2017 13:48:35 GMT
|
|
you could also drill untill 8 or 10mmmm and then take a Dremel with a grinding or sanding accessory.
Peter
|
| |
|
|
|
|
|
Mar 16, 2017 18:24:09 GMT
|
|
Nice work! I did an MGB V8 conversion which is easier as lots of part needed can be bought from the shelf. I have read more cars (certain MGB's) have the same problem about the running engine with the key removed. I remember that fitting a diode helps but i don't know the details where to fit it
Peter
|
| |
|
|
|
|
|
|
|
|
Amazing build! Keep up the good work!
|
| |
|
|
|
|
|
Mar 12, 2017 21:21:59 GMT
|
After cleaning up the threads, the dashboard frame was fitted to the car 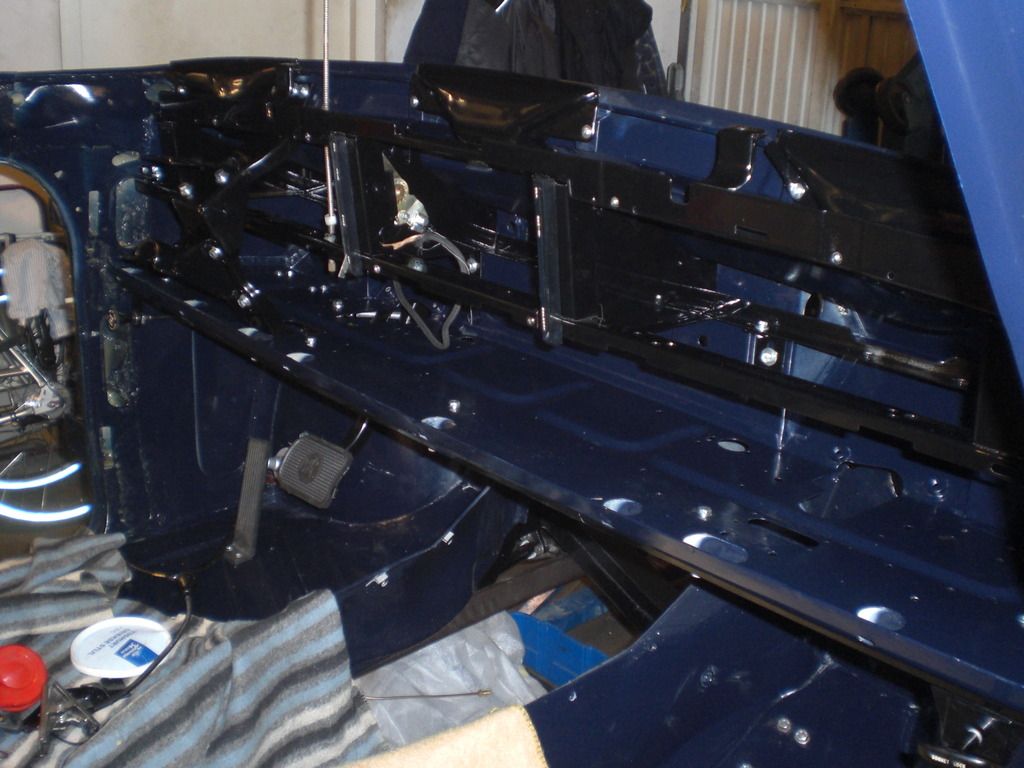 The missing brakes pipes arrived from Automec free of charge which is an excellent service 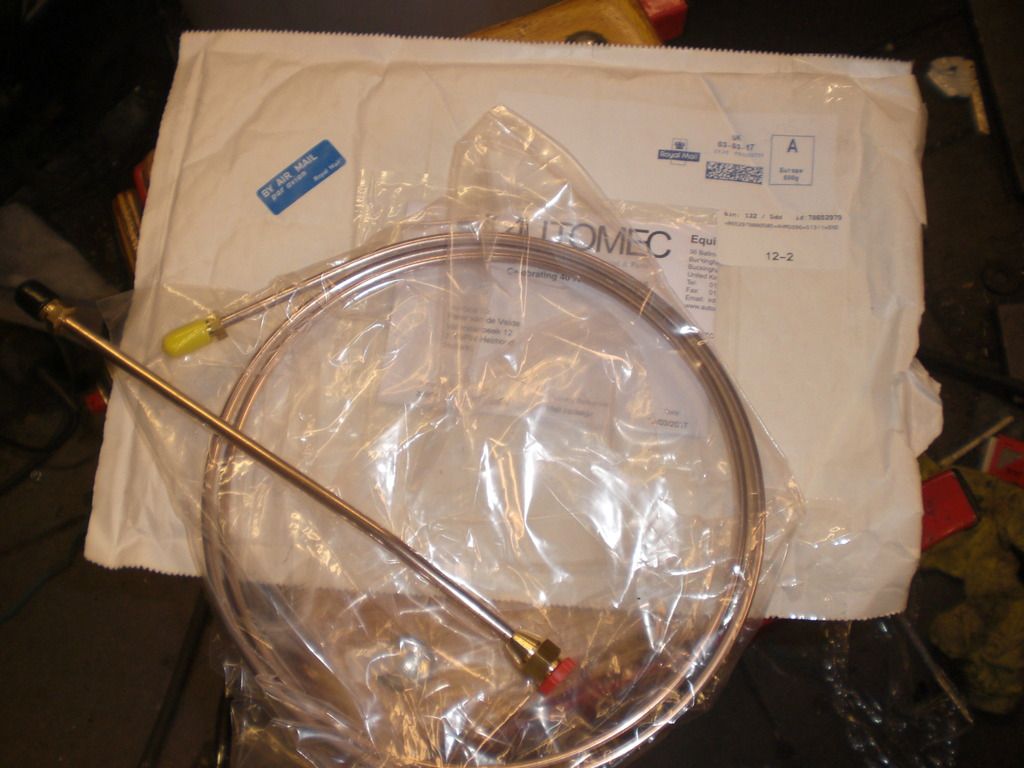 Got a bottle of paint stripper from the powder coating company and stripped the paint of the hinges from boot lid and bonnet 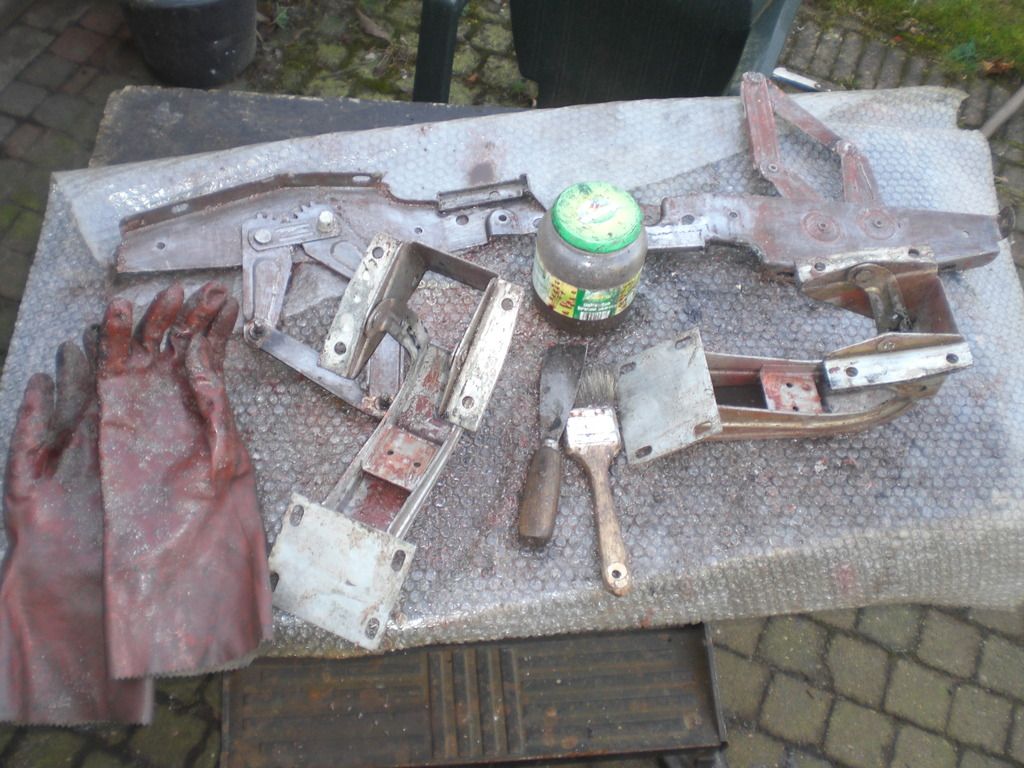 |
| |
|
|
|
|
|
Mar 12, 2017 21:18:22 GMT
|
The radio antenna was also fitted which is easy when the front window is not fitted. 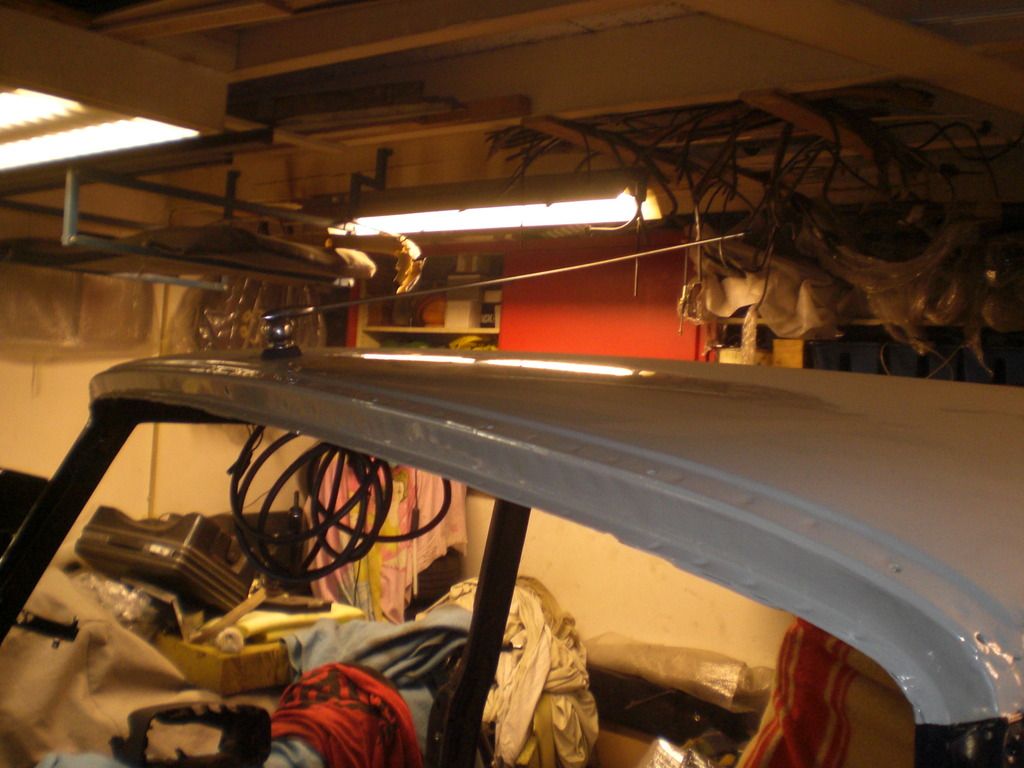 The battery box was in a poor state when dismantled from the car. 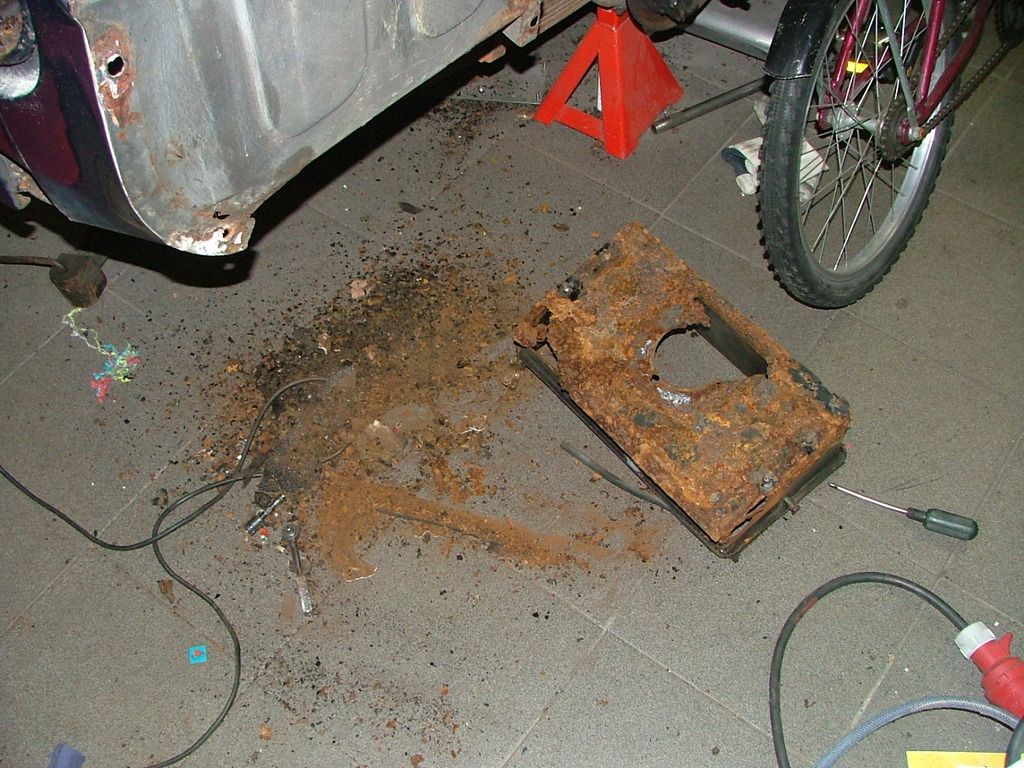 A new bottom plate was welded in and some of the side plate's were repaired and then it was shot blasted and powder coated and some parts were zinc plated 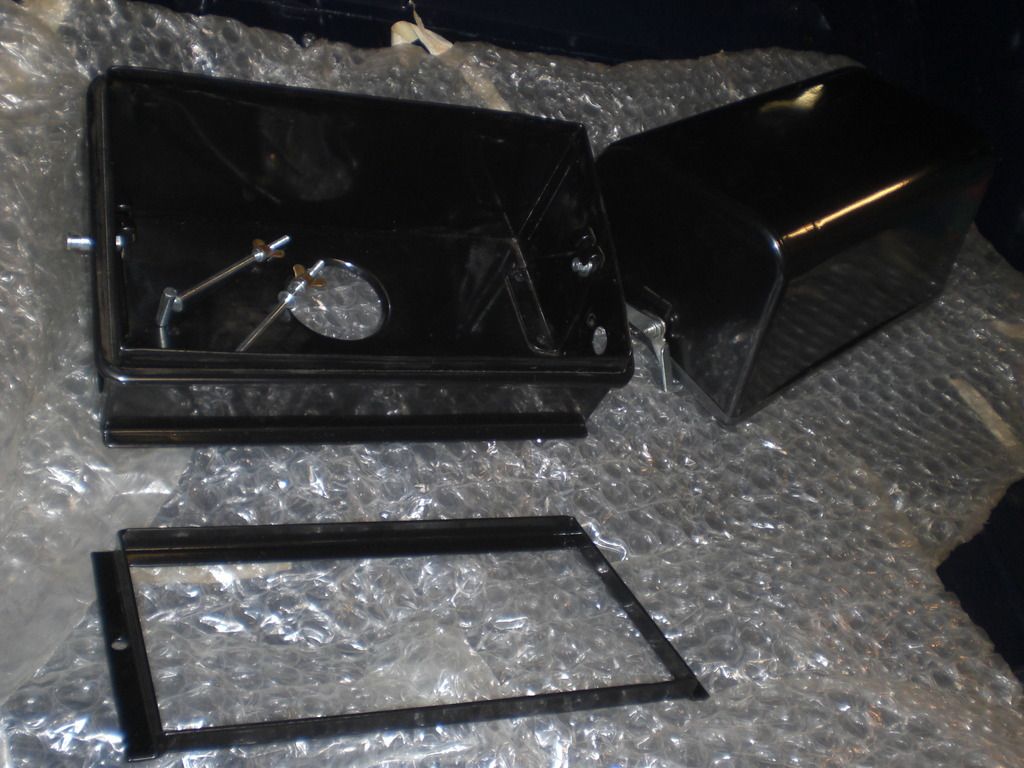 and fitted to the car 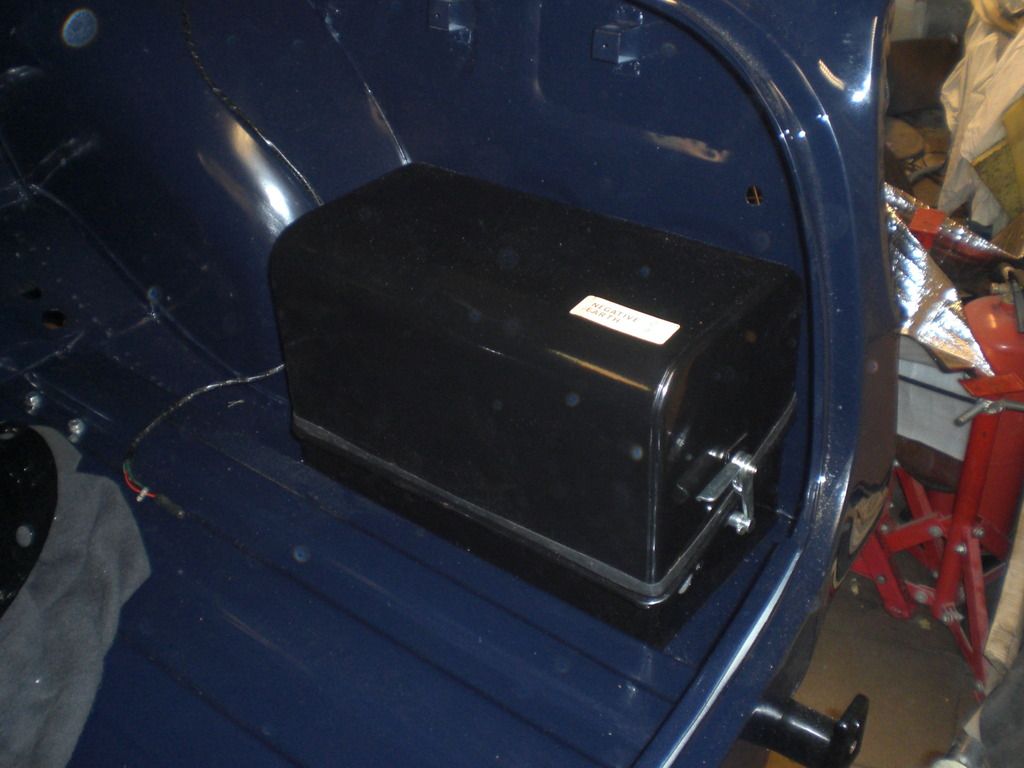 Picked up some parts from the powder coating company 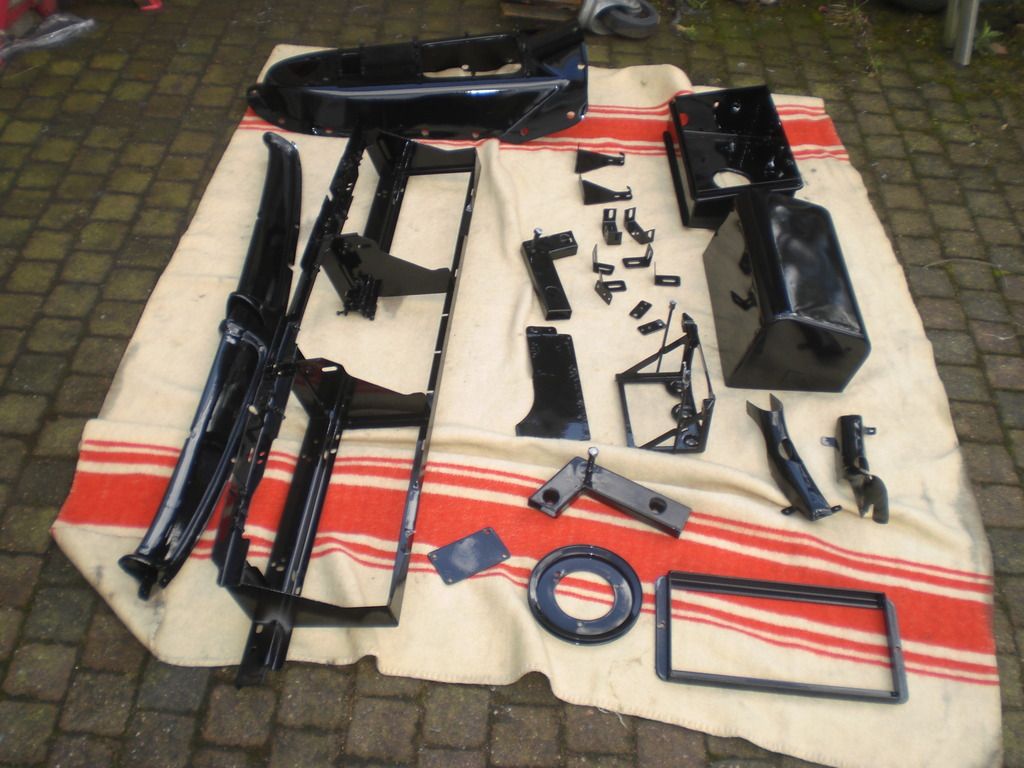 |
| |
|
|
|
|
|
Mar 12, 2017 21:14:01 GMT
|
Fitted the fresh air assembly which were painted and zinc plated. 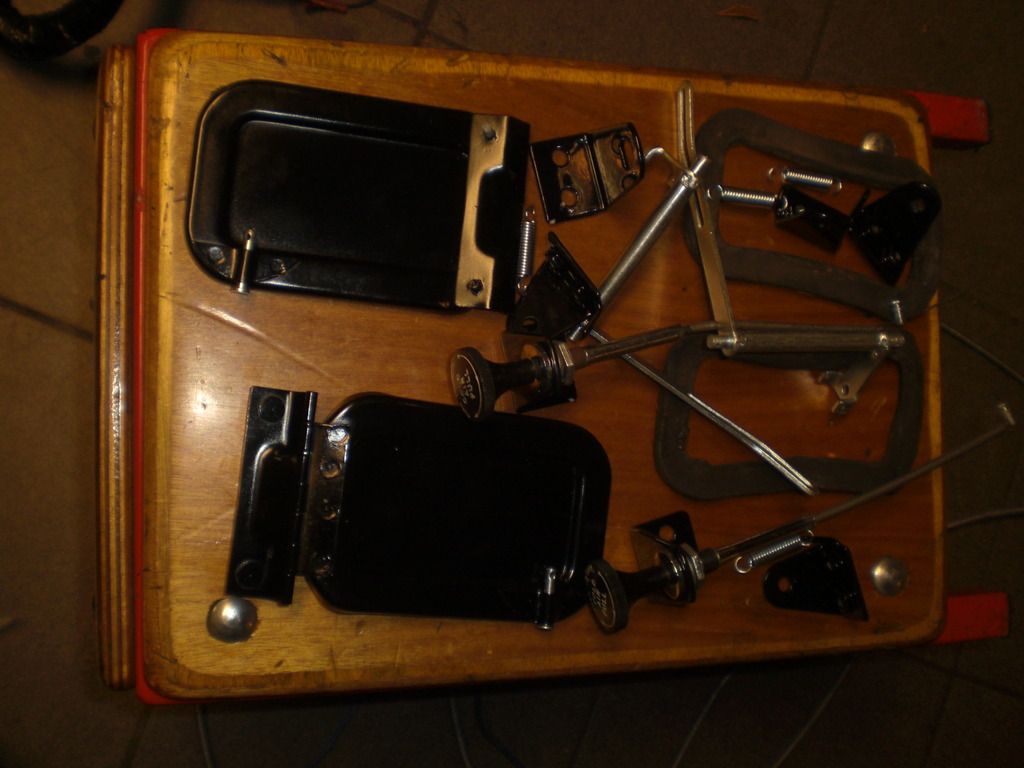 The brackets of the door switches and the springs were zinc plated and were assembled together with the wiring loom of the switches and the ID plate on the A post 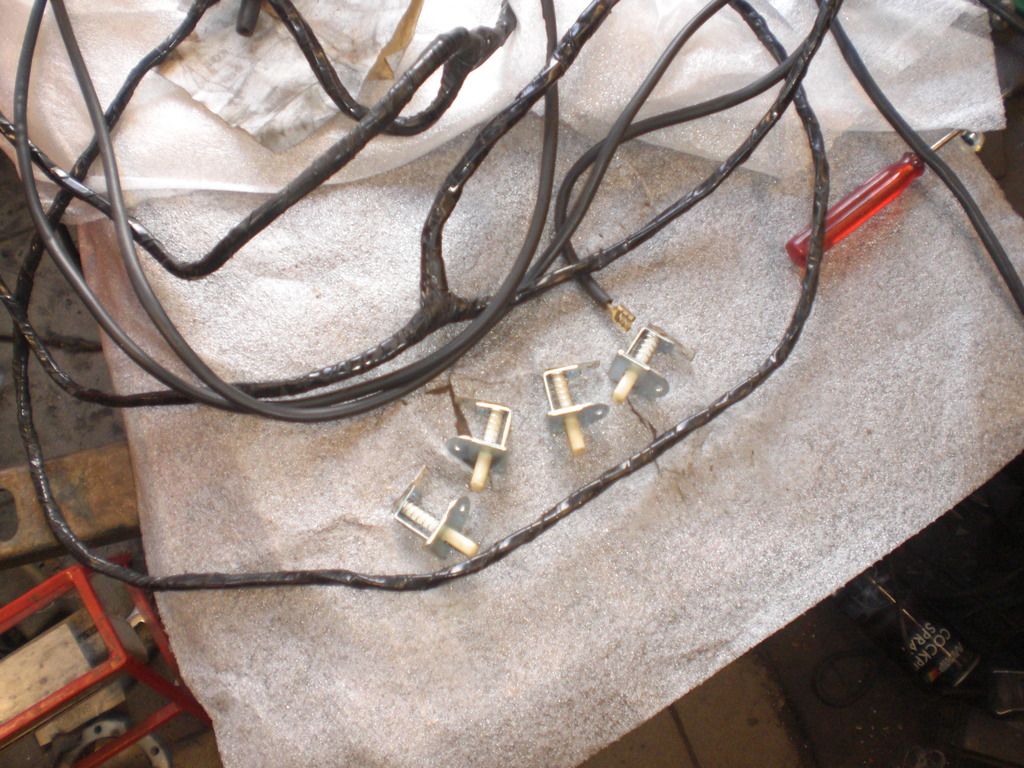 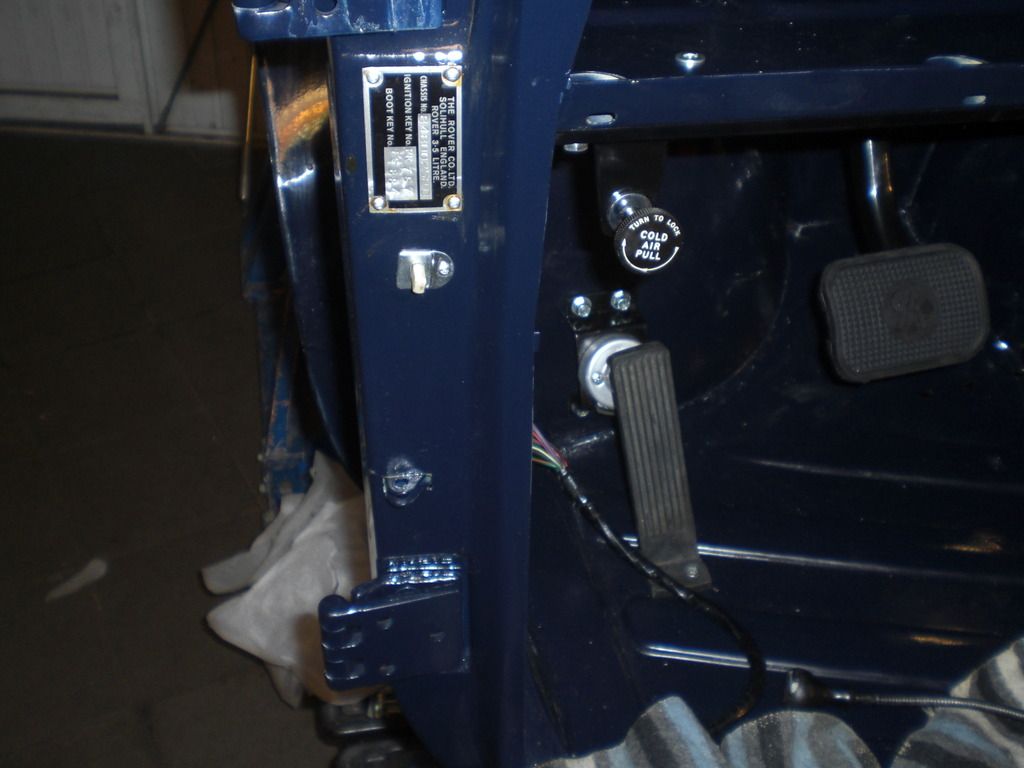 |
| |
|
|
|
|
|
Mar 10, 2017 22:37:07 GMT
|
i love that rig in the vice to get the bearings out. i hope its not insulting to call it a lash up (as it did the job) but that sort of thing is my life, rummaging through the tool box, adapting other tools and lumps of metal on the shelf thinking hmm what could i use. I am insulted that easy and as you say, if it does the job its oke. Peter Should be "i am not insulted that easy....  " |
| |
|
|
|
|


 "
"