drdick
Part of things

Posts: 359
|
|
Aug 27, 2017 22:43:02 GMT
|
|
Rambla 41 which I got online. Incredible, tasted of thyme and rosemary. I also got gin in Menorca, it had a windmill on it, that was awesome as well. Since it's in your picture I found the Bloom a bit tasteless.
Serious time now though, straight, ice, tonic?
|
| |
|
|
|
|
drdick
Part of things
Posts: 359
|
|
|
|
I live in that there London so might be able to suggest something. Where are you staying for your 24 hours since you don't really want to spend the whole time travelling around on the tube? And sorry rude but I don't rate Gaucho. Much better steaks to be had for much less money. Plus their wine list is very pricey and not very good  |
| |
|
|
drdick
Part of things
Posts: 359
|
|
|
|
|
Is the carb an autolite one? Ie the factory one? If it stops working after standing a couple of days then it sounds like the fuel is escaping from the float bowls. Maybe have a look before attempting to crank it next time?
|
| |
|
|
drdick
Part of things
Posts: 359
|
|
|
|
Firstly depends on how fine the grade is that you rubbing back with you can use 1500 followed by 2000 if you are careful and are confident that you have reasonable depth / thickness of paint - however 2000 is the norm for flatting / polishing - sometimes the paper may stick whilst flatting back and then sometimes you may hear a screech type sound has a corner / edge of the paper travels over the paint this often cuts a little deeper into the paint - trick here is use a little soap (just a plain bar of hand soap) to lubricate the paper - this will help prevent the paper from digging in - especially on paints / lacquers that are still curing Secondly - I would only ever use high quality polishes - personally I don't rate the Farecla range at all - I use the 3M range in this order after flatting - First stage: Fast Cut Plus (compound) Second stage: Extra Fine Compound (What it says on the bottle) Third stage: Ultrafina (finishing polish) - 3m do a colour coded 150mm polishing pad that matches the top colour of the polish - these are all Velcro backed hence quick change with a machine polisher which I use at the slowest speed setting - link to 3M polish range www.3m.co.uk/3M/en_GB/bodyshop-solutions/how-to/compounding-polishing/ - At circa £30 + a bottle its not cheap plus if you are purchasing the pads (only sold in twos) and then the backing pad for the polisher you are heading for £200 of expenditure - however it will last you an age and give results that no other polish that I know of can. A couple of final tips and apologies if I am stating the obvious - Compounds contain polymer fillers after compounding I always wash these out before commencing my next stage - so after stages 1 & 2 - I use a household spray on (non aggressive) window cleaner and paper towel to wipe back off - I also wash the compounding / polishing pads out with warm water on a regular basis then spin them dry on the machine at high speed - finally before starting a polishing job I always cut my finger nails short so that they cannot dig into the paint / lacquer whilst undertaking the polishing process Hope this helps but let me know should you have any further questions - Chris Chris Thanks for sharing pro-tips with us amateurs! Car looks incredible. I'll risk painting a car myself one day... Richard |
| |
|
|
drdick
Part of things
Posts: 359
|
|
Jun 23, 2017 18:25:21 GMT
|
See it really is green! 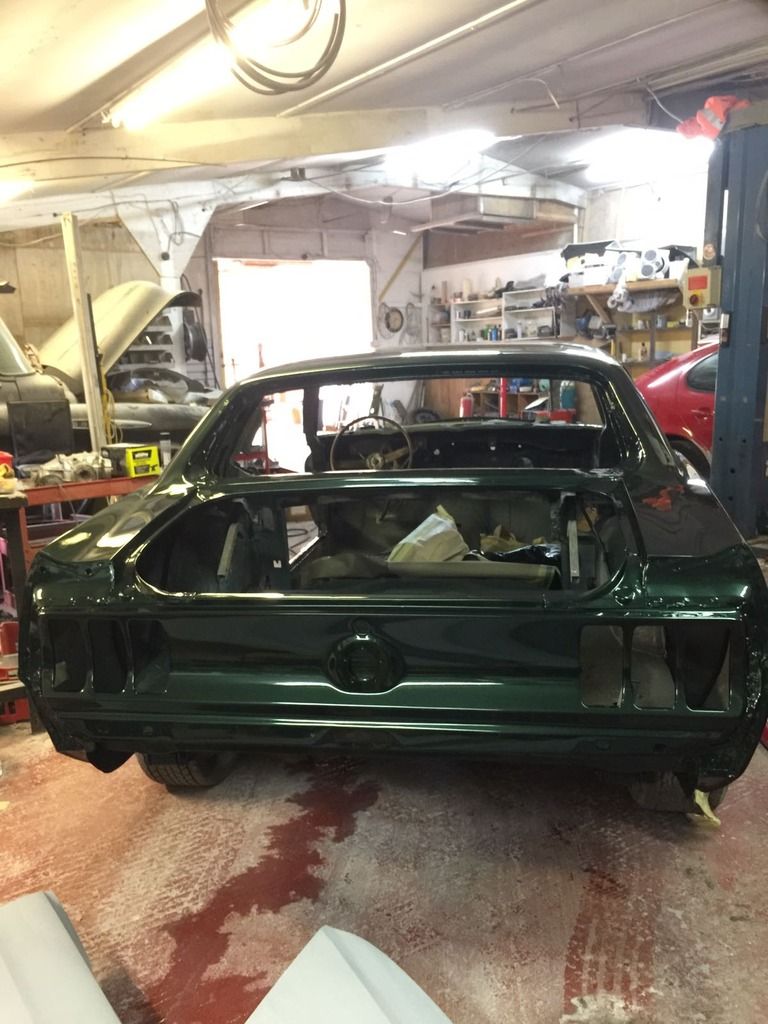 |
| |
|
|
drdick
Part of things
Posts: 359
|
|
Jun 23, 2017 18:24:26 GMT
|
Just read through this entire thing. I'm over here in 'murica, Mustangs are easy to find in that condition and while I firmly believe that it may have been bonkers to tackle a car like that- you've literally saved it. I can't imagine the hours of "Oh curse word, we've gotta replace that section too" and on and on it went. Wow! Hats off sir, that car has been resurrected from the dead and you guys have worked your butts off. I love the dark green color, the wheel choice and the level of commitment. To you and all your family and friends that worked on, helped with and "made it happen", great job! The completed vehicle will be something to behold. Well done sir, well done. Thanks man, this really means something coming from you. Not sure we worked our butts off compared with the speed you attack things and most of the work is down to George the painter! |
| |
|
|
drdick
Part of things
Posts: 359
|
|
Jun 23, 2017 18:21:44 GMT
|
It's looking great now, all the hard work has paid off. Just out of interest, if you're still thinking of selling the turbo vec wheels, how much would you be looking for and what size are they Yeah they'll be on the sale pile in the end. They are in really good nick but missing the centre caps. 14 by 7s I think is the size. |
| |
|
|
drdick
Part of things
Posts: 359
|
|
Jun 23, 2017 18:19:46 GMT
|
I saw it outside in its full glory this morning  It's a bit darker than I expected but it'll look ace once it's got some chrome on there, and those wheels instead of the vecs. You wouldn't believe it was the same car that was delivered a few months back given how it's come out. Can't wait to see it myself Dez! Agreed about how nice it is compared with the wobbly crud I delivered. |
| |
|
|
drdick
Part of things
Posts: 359
|
|
Jun 22, 2017 21:17:36 GMT
|
Wow fantastic. Quit with the teasers, let's see it outside in full glory. Haha. Wish I could show you, this is all I've seen. It was done last night once the temperature had dropped so I've not seen it in the flesh yet. Bonnet wings and boot are still to be finished so a bit more time yet.. |
| |
|
|
drdick
Part of things
Posts: 359
|
|
Jun 22, 2017 20:45:45 GMT
|
Hehe that's the lighting. It's not black, it's Highland Green which is your standard Bullitt Mustang colour. Not a 69 colour so there goes my Mustang owners club membership but I like it. curse word grab from a whatsapp video..... 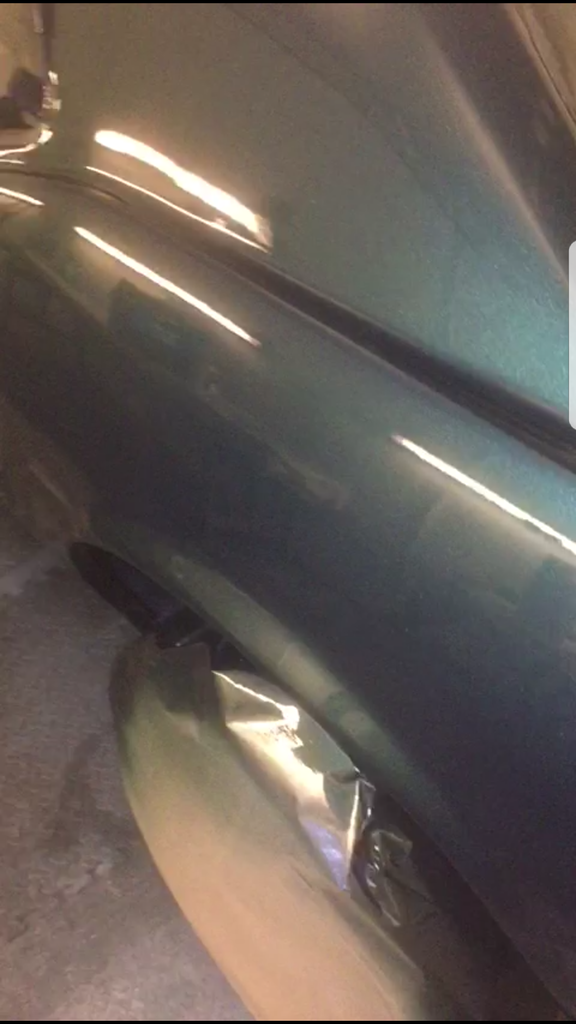 These are the wheels to go on, an alloy version of the original hubcapped steels: 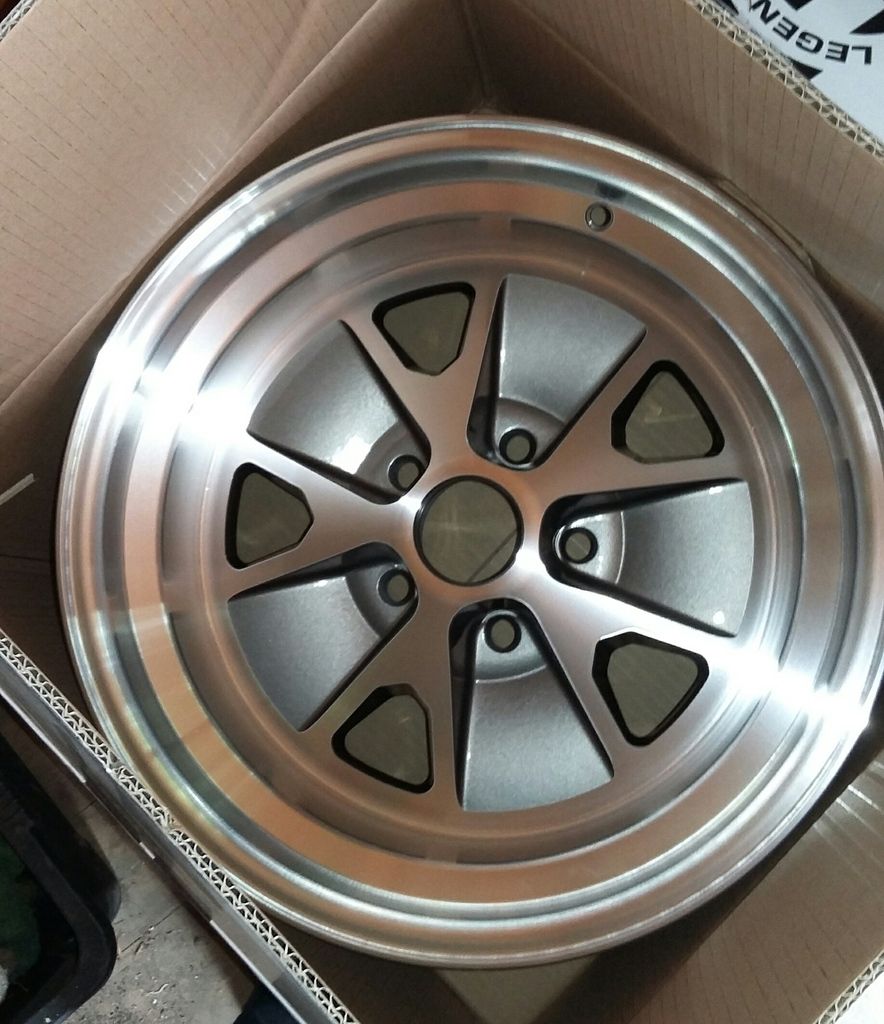 |
| |
|
|
|
|
drdick
Part of things
Posts: 359
|
|
|
|
I'll just throw this in here 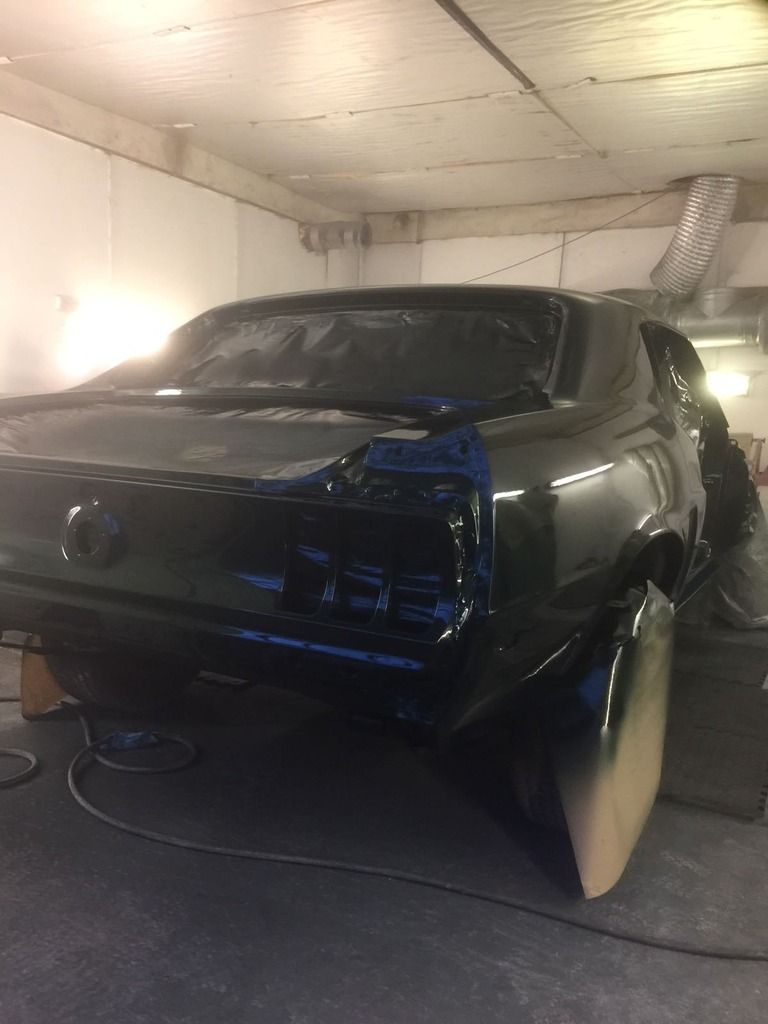 |
| |
|
|
drdick
Part of things
Posts: 359
|
|
|
|
Happened to pass the unit so thought I would waste an hour or so seeing what the situation with lowering the rear is. I disconnected the rear axle and springs, the bolts holding the spring shackles together were a bit of a sorry mess: 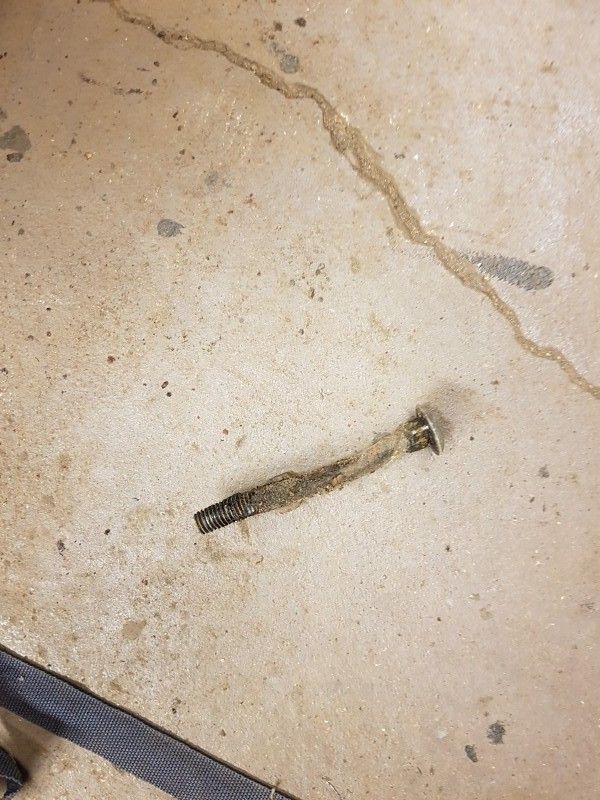 I couldn't really be bothered to disconnect the springs completely (and anyway, I'll probably have to lash it all back together so I can still push it around) so I just used a ratchet strap to pull them out of the way of the decending chassis. 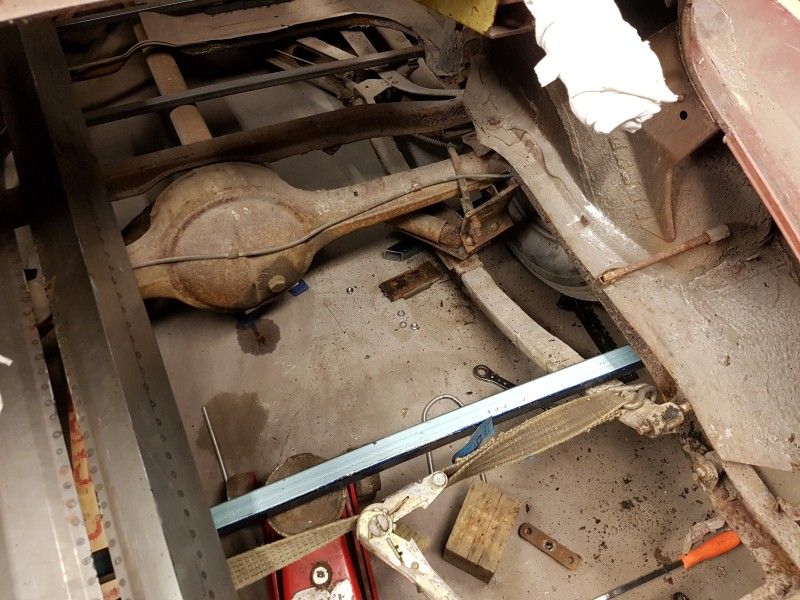 Then, because I was using a load of wood blocks in a very sketchy kind of way, the car feel off the jack  Luckily, I'd anticipated that would happen so I was well clear. Then I jacked it up again and removed all the items that were underneath the car which were now being squashed......  So now there is about 4" between frame and floor 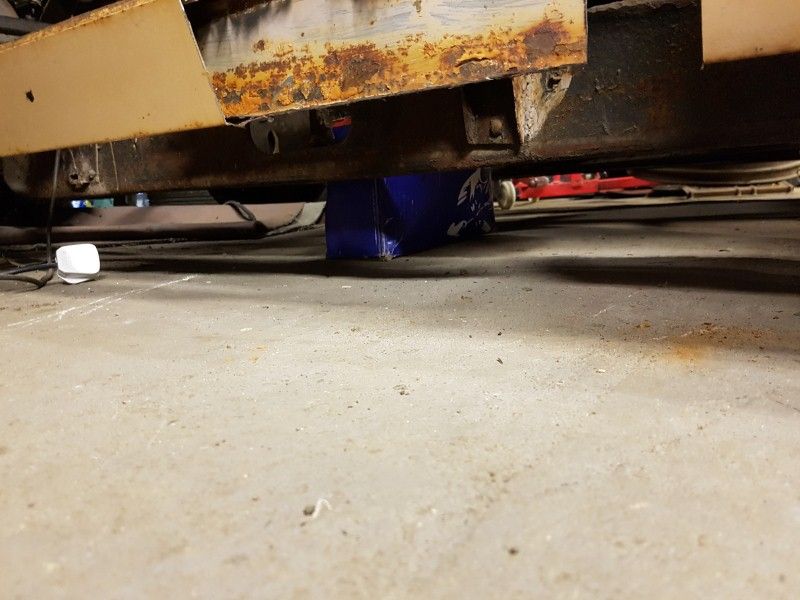 And from the limited angles available for photography it looks like this: 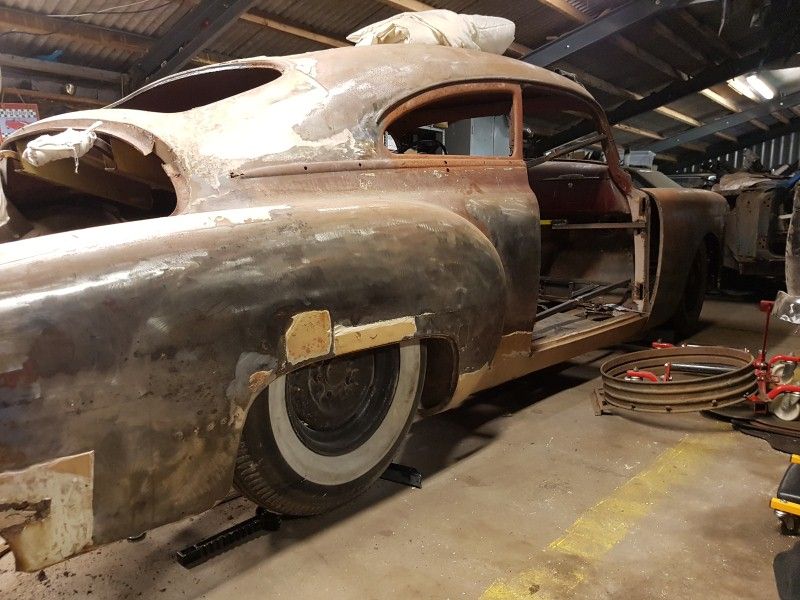 Still feel it needs massaging down further but still umming and ahhing about touching the chassis with the grinder. |
| |
|
|
drdick
Part of things
Posts: 359
|
|
May 27, 2017 15:46:20 GMT
|
|
Oh and I'm East London too if you want me to look. I've done this before so can probably give you a realistic idea of what you might be in for. Time and money would be my initial guess.
|
| |
|
|
drdick
Part of things
Posts: 359
|
|
May 27, 2017 15:43:58 GMT
|
Slow, boat-like and extremely thirsty on fuel. Cruise around and be the centre of attention. If you wrote this on an advert for it I'd buy it.... |
| |
|
|
drdick
Part of things
Posts: 359
|
|
May 14, 2017 10:22:28 GMT
|
good luck with that - the transit i have dumped inside the doorway is decomposing faster than i can weld new bits to it. plus some dosy diptwit has immobilised it by cutting through the wing and the engine loom (not even hiding) behind it  *sadface* You could get it working with some messing about but with the radical changes to the suspension geometry it will basically do nothing even when connected. With the amount of lift you will have it will bind up somewhere unless you rose joint it, and then it'll rattle or clunk. Your roll centre has moved so drastically it'll be fine without it. Thanks, thats kind of what I thought, not like it's going racing after all this is it? Another piece for the scrap pile. |
| |
|
|
drdick
Part of things
Posts: 359
|
|
|
|
|
Cool as fook
That is all.......
|
| |
|
|
drdick
Part of things
Posts: 359
|
|
|
|
|
Actually, question for you Dez. Do I bin the front ARB? What I suppose I mean is, is it possible to get it functioning at all by modifying the length of the drop links?
|
| |
|
|
drdick
Part of things
Posts: 359
|
|
|
|
Devils advocate- you may as well do a couple more mods now and get it laying frame, rather than bag and 4 link the lot and decide it's not low enough after  A bit of bump stop nubbin and Spring cup trimming at the front with get you another 1-2", with drop spindles it will lay frame. It's only a few hours extra work and a couple hundred quid. At the back IIRC you need to find 3-4". A small notch now before the 4 link is fitted is a weekends work (get Mel to help you!) as there's already no boot floor, and won't add any work to the suspension, bags or floor setup. It'll make a massive difference to how the finished car sits (and its value) for a fairly minimal outlay at this point. I'd forgotten about drop spindles but now you mention them......... Fiddling with the bump stop probably will net me an inch or so. There is a practical limit to the stock suspension because the lower arms are very long and mounted way inboard on the crossmember. A slightly smaller tyre and the drop spindle probably would get me very close to the ground. I think the 5.5" bags from Slam Specialties will go inside the existing spring cup with almost no work required. At the back I guess I'll just drop the axle off and see what needs doing. Agreed, it's not a lot more effort since I'm already putting the 4 link in... |
| |
|
|
drdick
Part of things
Posts: 359
|
|
|
|
The standard few hours every few weeks was appied to this yesterday but, for some reason, I didn't fancy carrying on with the bodywork (although I did start making a couple of pieces at the end). Instead I thought I would get some motivational lows on. At the moment there is no weight in the car so the whole thing is super high. I have about this much space between the top of the tyre and the bottom of the front wheel arch: 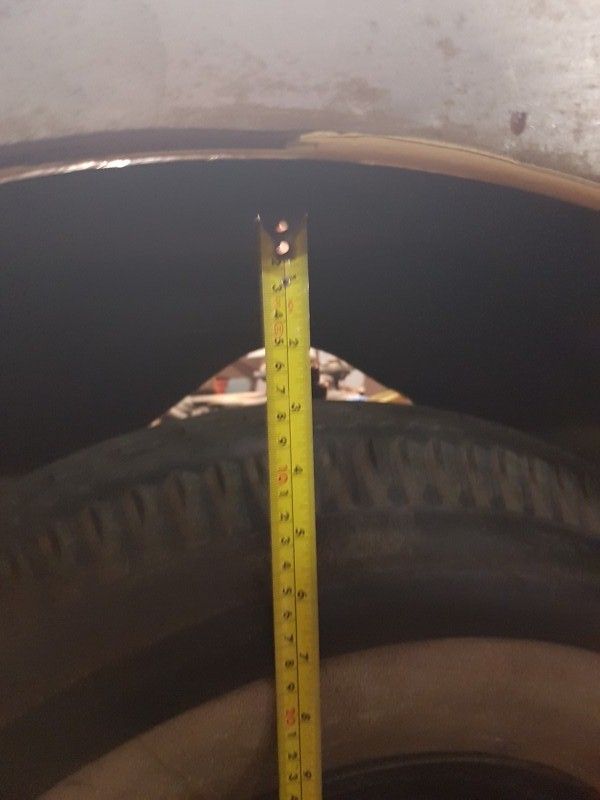 I'm intending to bag it, not to the Dez level because I don't really want to get into frame mods, but I want to get it as low as possible on the stock suspension. The rear will have to have some sort of 4 link put in but otherwise I'm going to work with what I have. So, after much grunting, swearing and judicious use of jacks and ratchet straps I removed this lot: 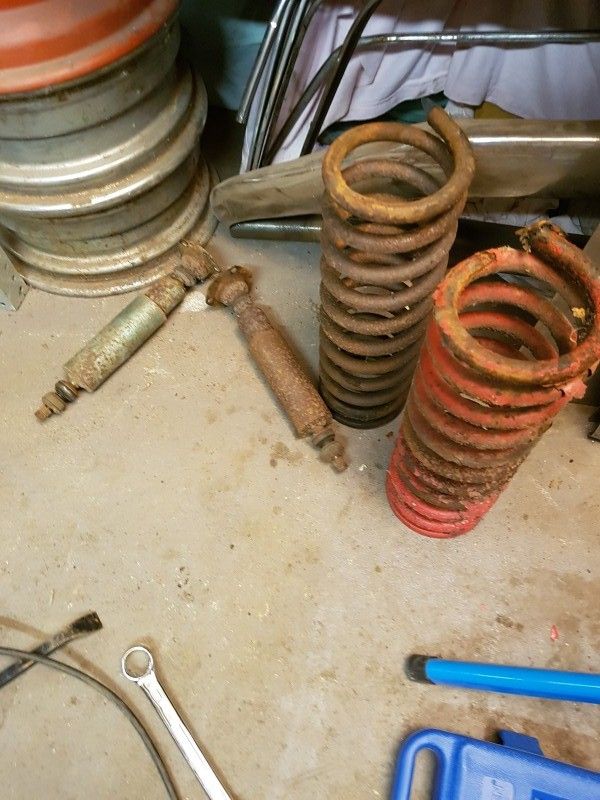 The nice thing on this one is that the spring cups are part of the chassis so I have this 7" diameter hole which my bag can sit in: 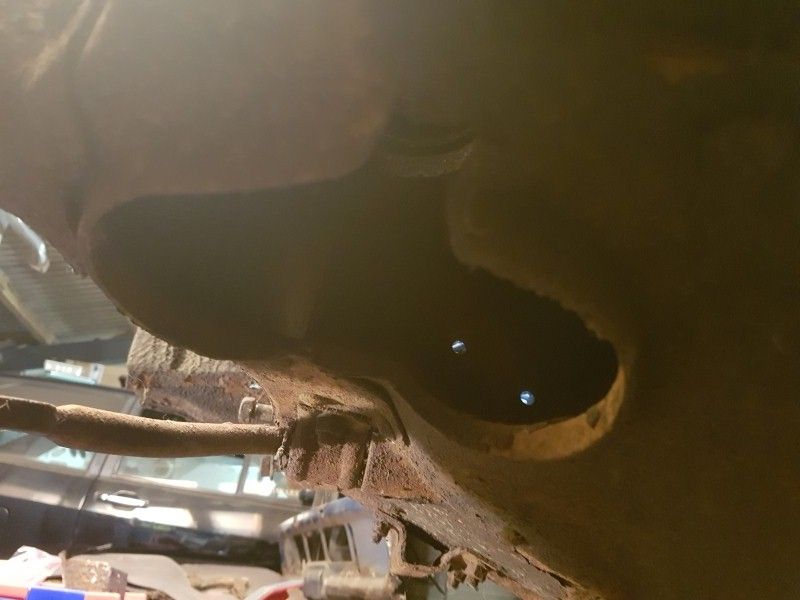 That means I should be able to achieve full drop on the front suspension and only really have to modify the lower wishbone. Anyway, now I have about 4" of tuck: 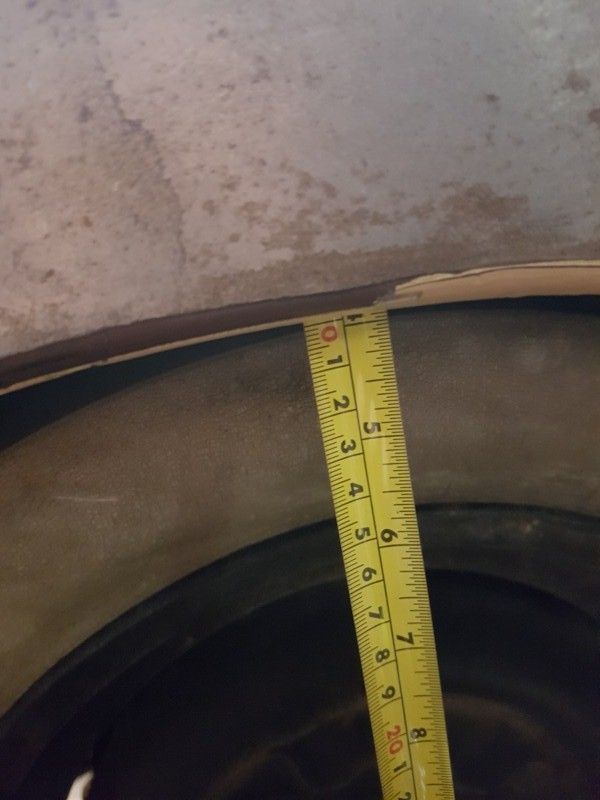 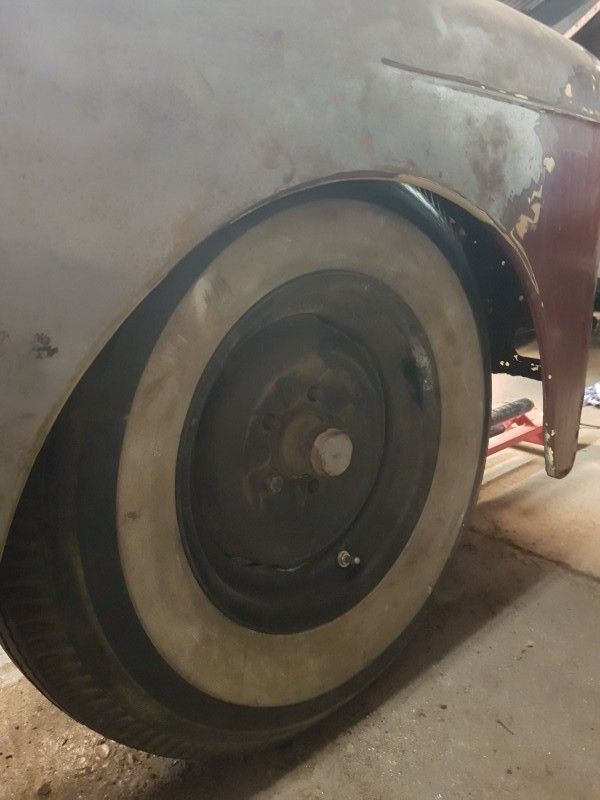 So putting it on the bumpstops has taken about 7" out of the suspension. I might have to roll it outside to get a better look but it feels good 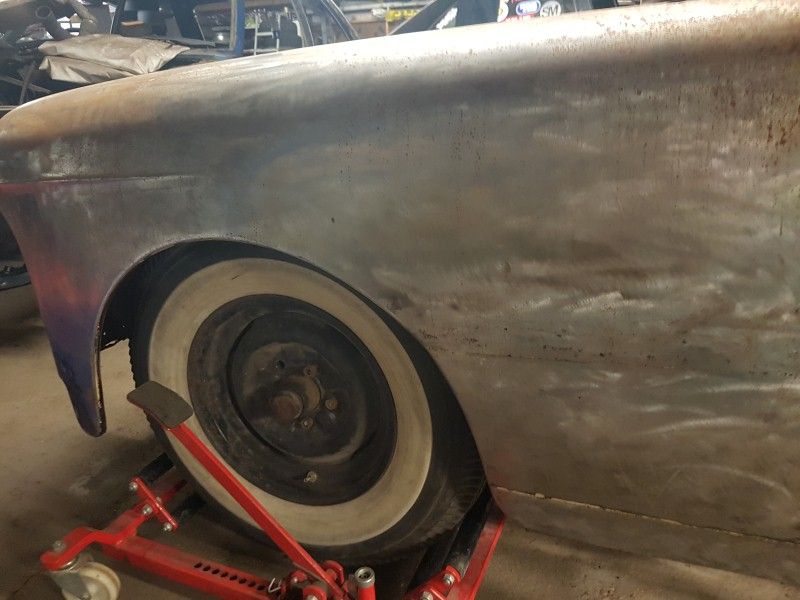 Perhaps I'll do some bodywork next time! |
| |
|
|
drdick
Part of things
Posts: 359
|
|
Apr 28, 2017 20:22:59 GMT
|
Reminds me, I gave more parts for you to George. Cool, mystery bits, thanks! |
| |
|
|
|
|


 Luckily, I'd anticipated that would happen so I was well clear. Then I jacked it up again and removed all the items that were underneath the car which were now being squashed......


