keyring
Part of things
 
Posts: 913
Club RR Member Number: 47
|
|
Mar 10, 2019 19:23:26 GMT
|
Thought i'd get a thread up for my off-road toy that replaced the SJ I had since the SJ finally sold two nights ago... I know 2002 isn't retro, but it's retro at heart... the engine is from a 1995 Patrol I spent months looking about for something to use for off-road fun, but that also wouldn't be too bad on the road, and if required I could use to tow a trailer too. I looked at old Discoveries, Landcruisers, hilux' Jeeps, and Patrols. They all had numerous plus points and negatives. After hours upon hours of trawling facebook pages and forum posts, I decided to go for the patrol, the extremely strong running gear, the reliability and noise if I could get a TD42 engine, and the cool looks of the SWB had sold it to me... I started looking about for one, and one that I had seen advertised while trying to decide what to go for, was still available, and the price had dropped a bit. So I messaged the seller back and forth for a while, ensuring any questions I had were answered, and I didn't rush into buying it. 3 days before Christmas last year, I flew over to Belfast, got picked up by the seller, had a look over the truck, and made my way to the ferry back to Cairnryan with the newest toy.... 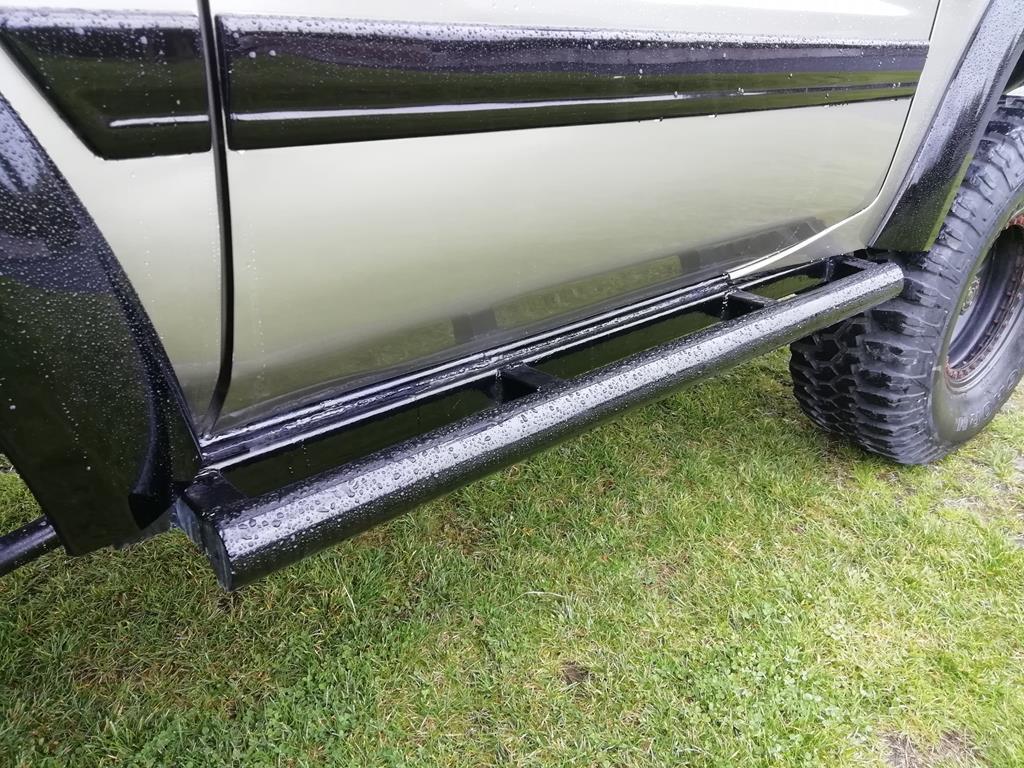 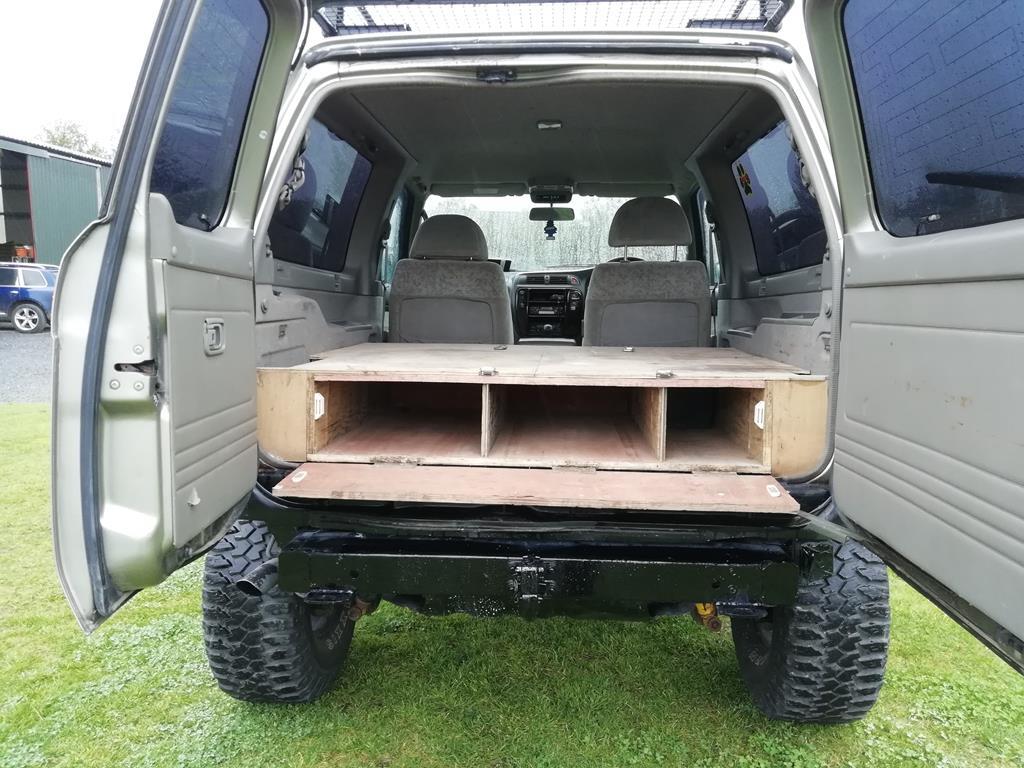 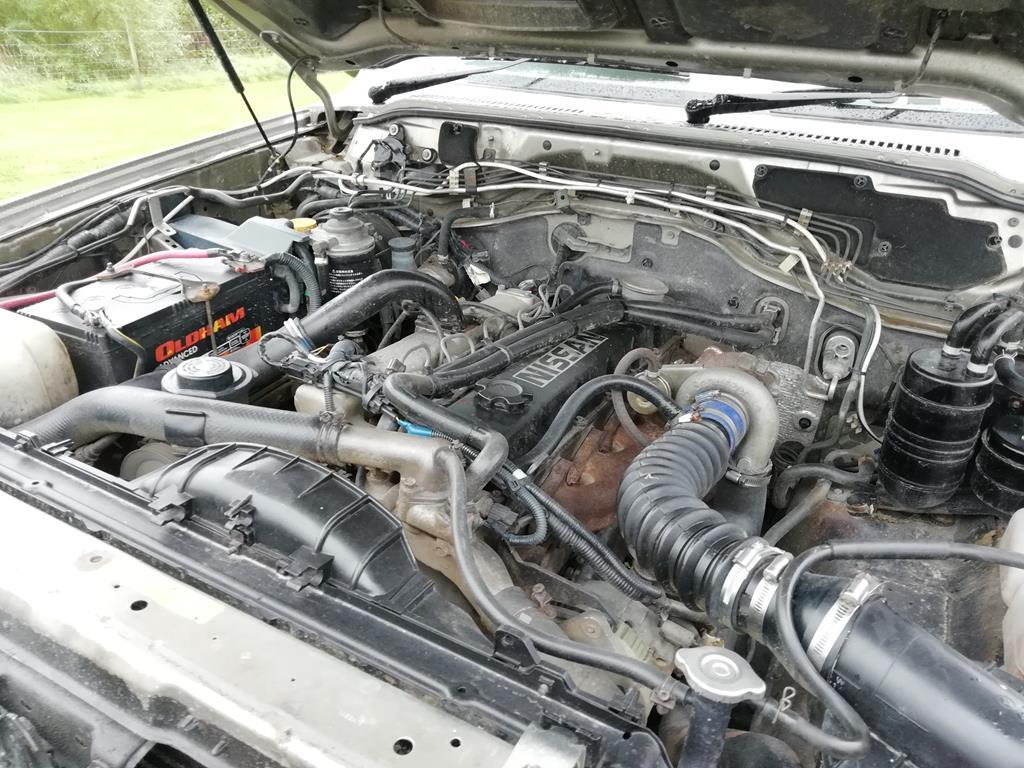 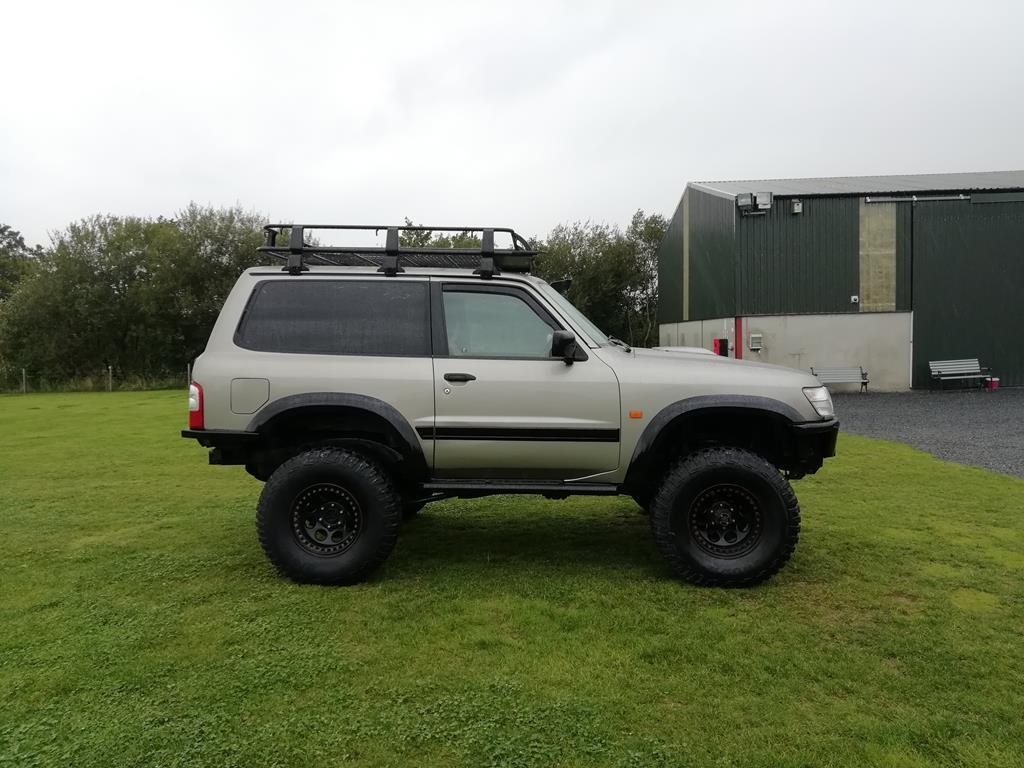 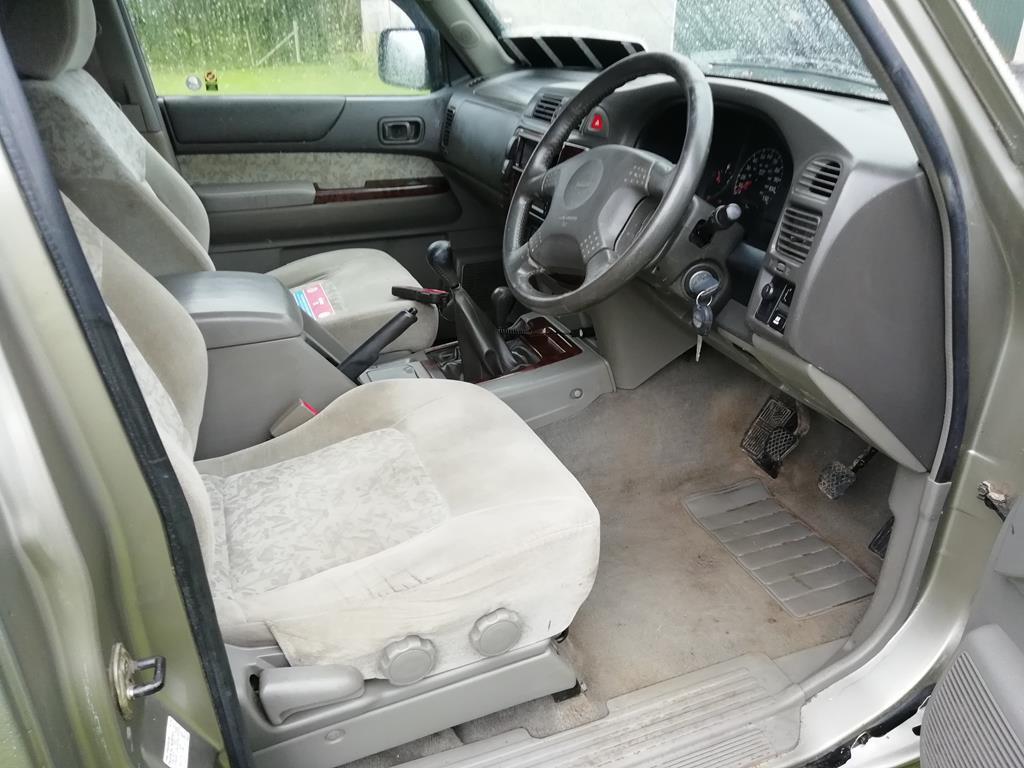 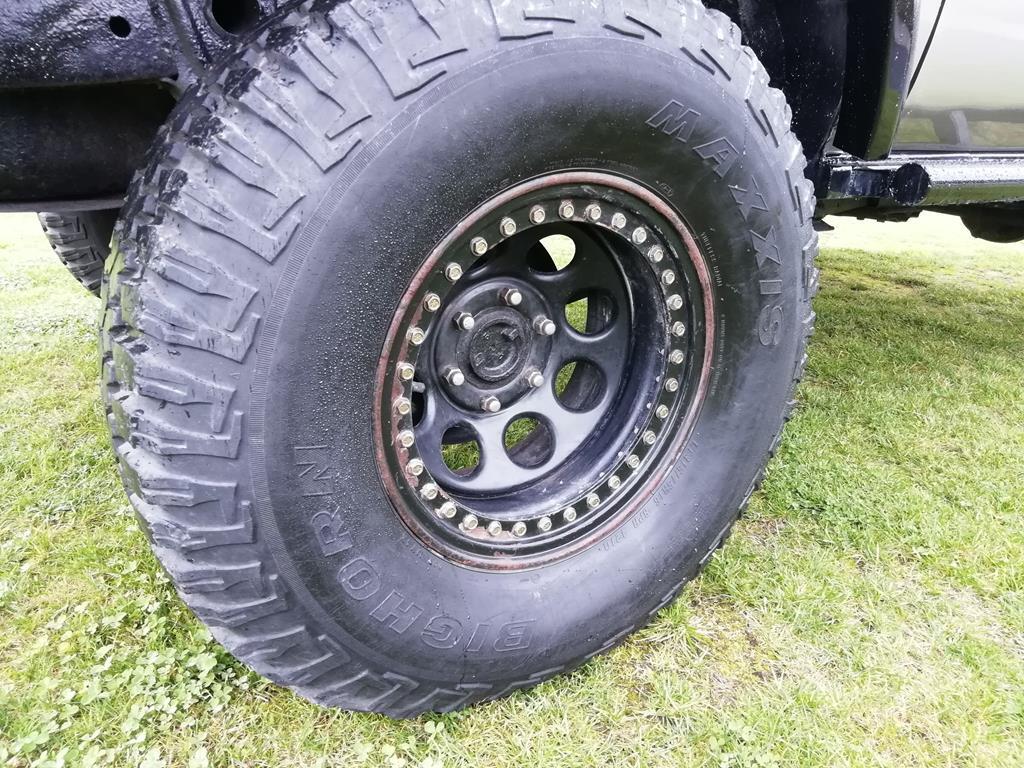 So the spec of it when I bought it was... 4.2 Turbo diesel Wheel base extended 2" (otherwise it looks like the rear wheels are tucking into the front of the rear arches 35 MT tyres on beadlock wheels Safari roof rack Snorkel Fitted with a 2" suspension lift, and came with a 4" suspension lift Recent respray and new front wings, as seen in these photos... 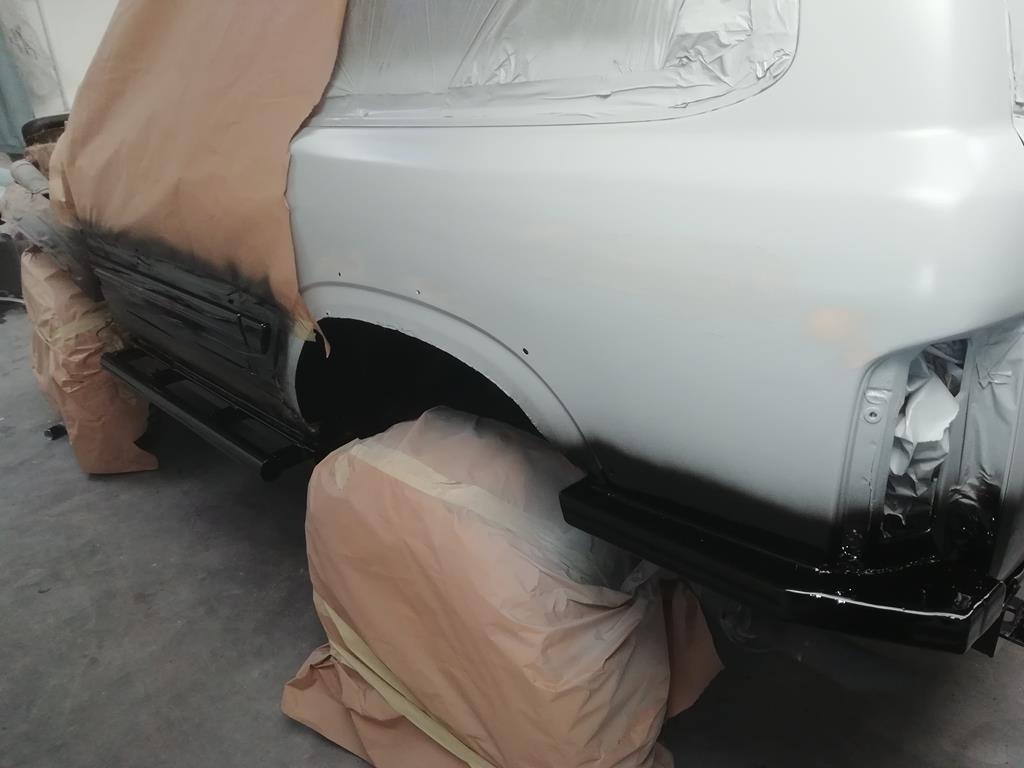 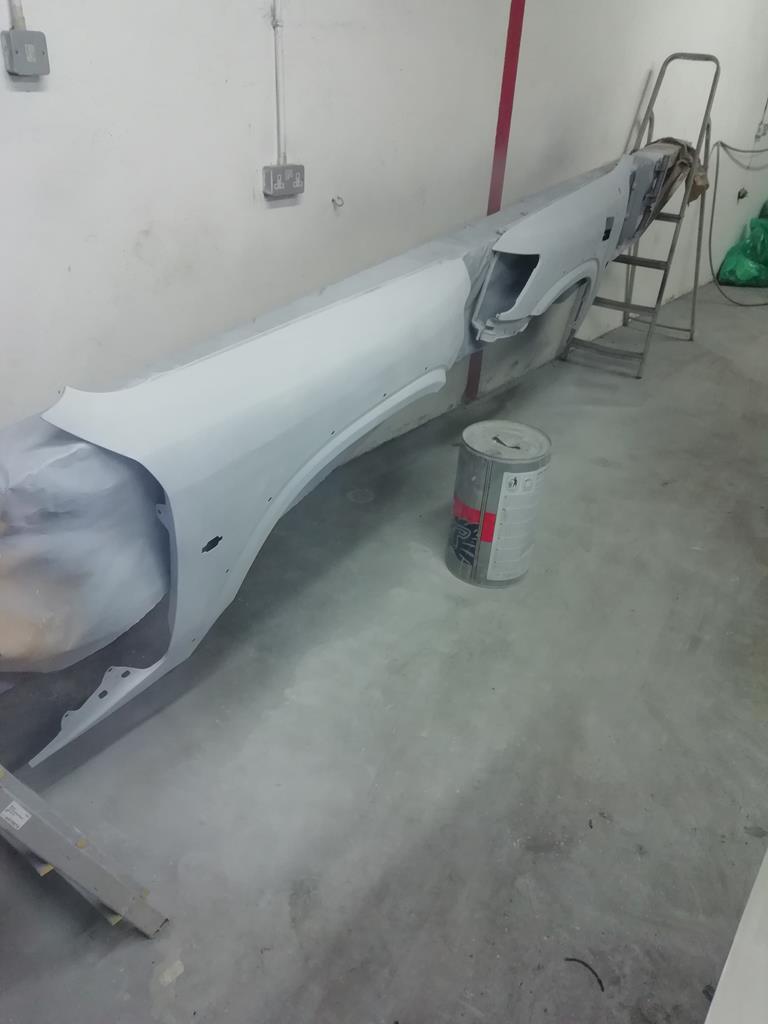 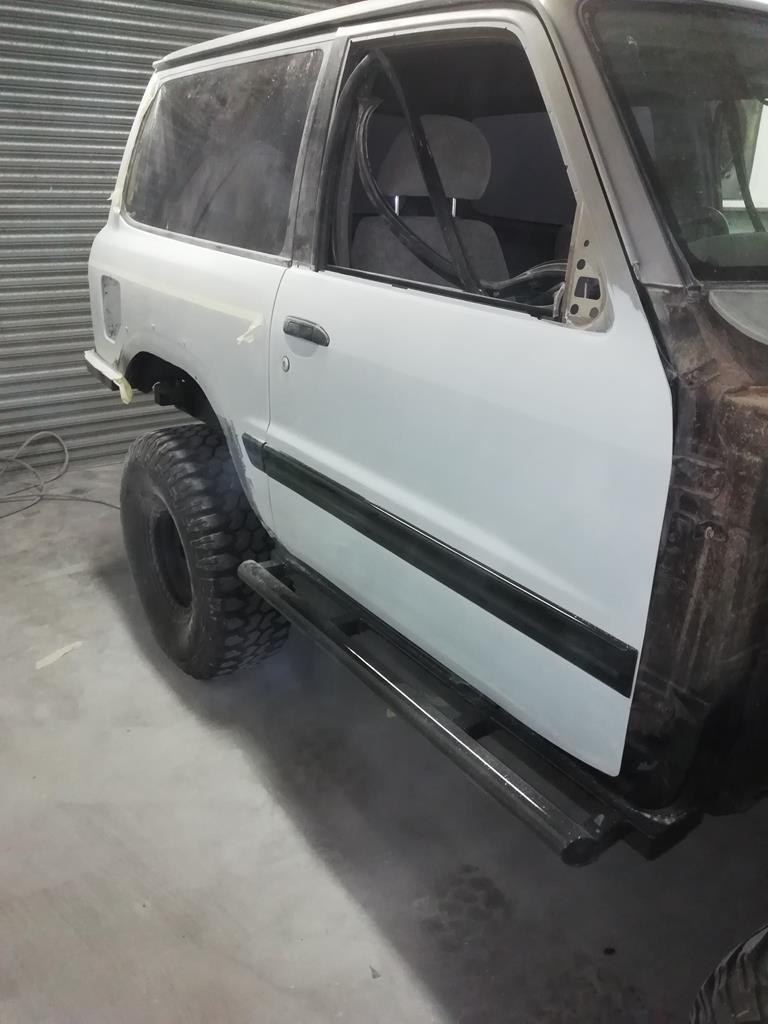 That takes us up to me getting it back home... |
| |
Last Edit: Mar 10, 2019 21:54:24 GMT by keyring
|
|
|
|
keyring
Part of things
 
Posts: 913
Club RR Member Number: 47
|
|
Mar 10, 2019 20:11:12 GMT
|
So I had been driving around in it on the roads over Christmas, and was itching to get out off-road and see how it was... (I didn't expect too much until I got proper mud tyres) On the 30th of December the local site and club had a Christmas/New year day out, so the perfect chance to test it out, my friend even came up on his bike... 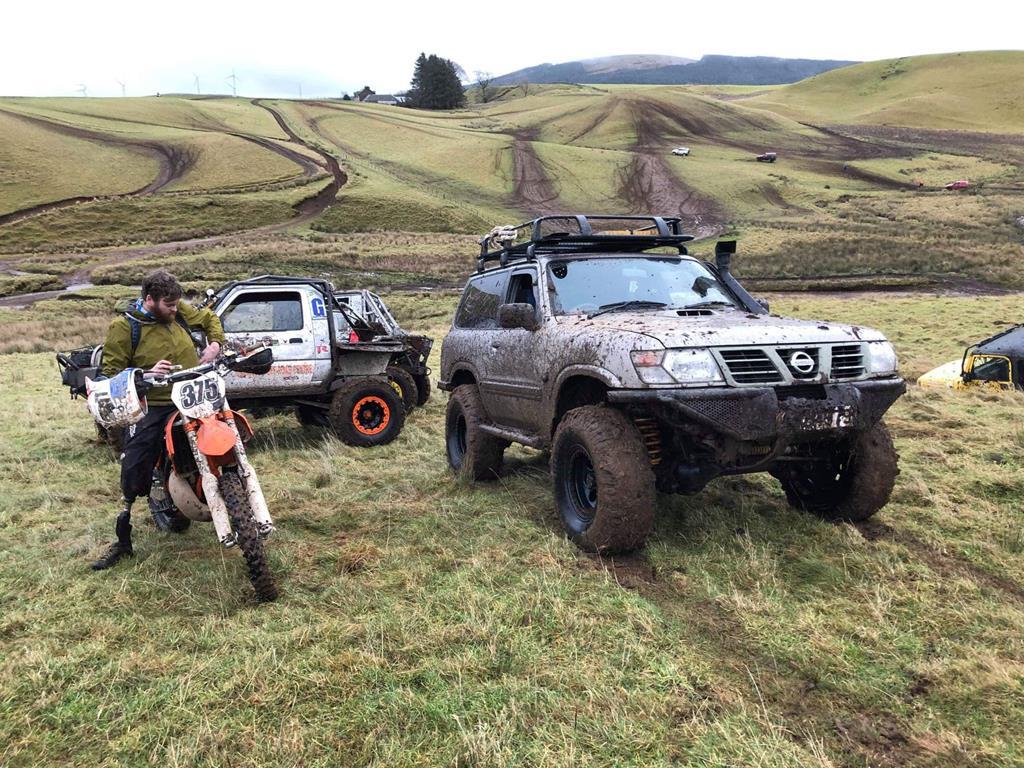 So first mud pit of the trail, and I got stuck... Instantly thinking to myself, what have I done, spent all this money and it's not even getting as far as the SJ would no problem at all, so jumped out and got a friends winch onto me to pull me out... 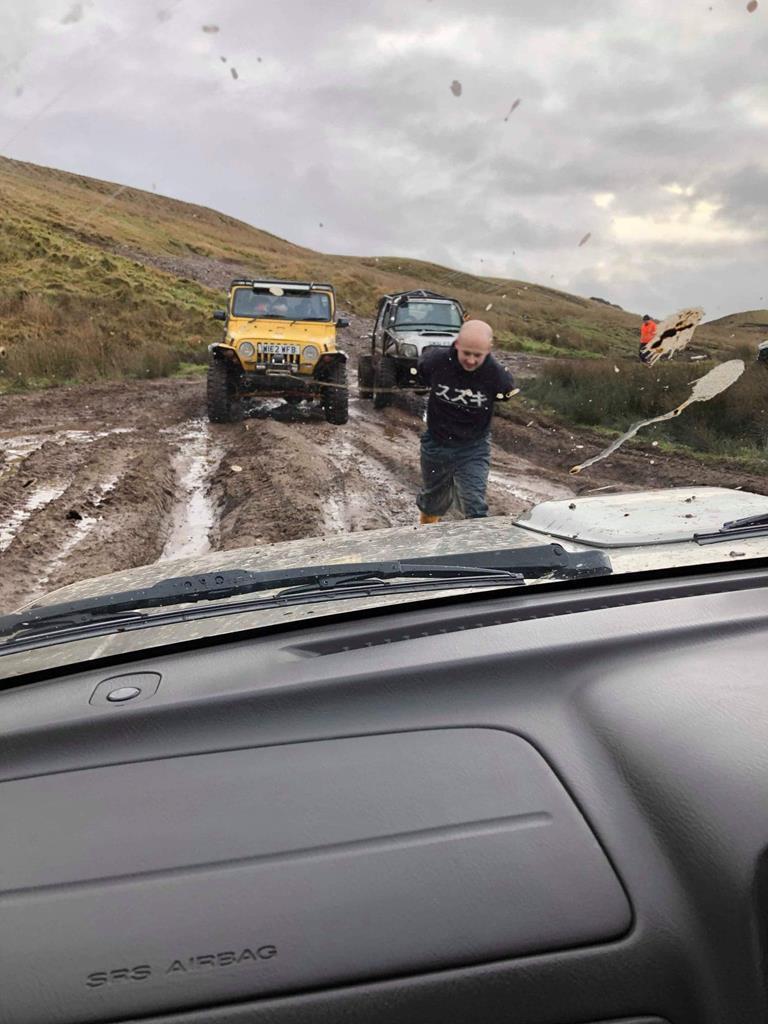 The patrol comes from factory with a locking rear diff, so I turned this on, and started getting on a bit better with it, along with plenty of the loud pedal... I then decided to start making my own tracks and went a different way to everyone else, not what we usually do incase we end up needing a pull out, and of course, I found a nice big bog... Everyone was over the otherside, so I tried out my new waffle boards (I did get out using them - the video was cut short, but it shows the type of terrain) I did struggle to get the boards back out, as they got burried when I gave it the beans to get out, I lost a welly in the process, so someone else had to go get that, and then we pulled the boards out using a winch.... Everyone else got over just in time to get photos of me   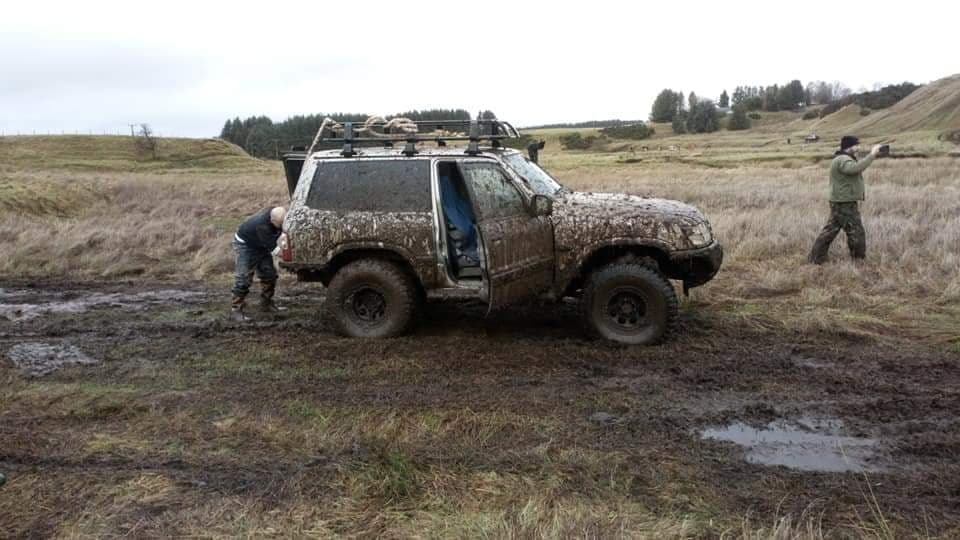 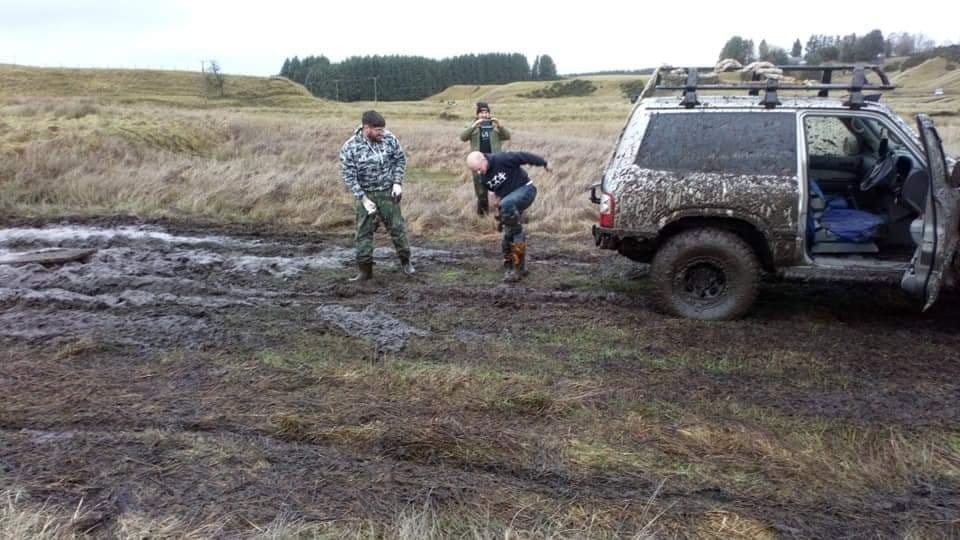 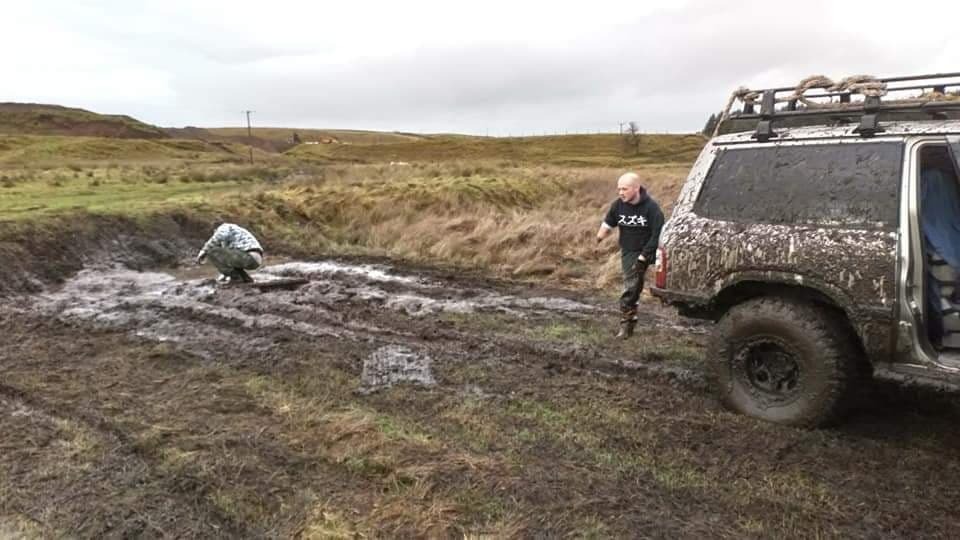 We stopped for lunch not long after this, once we went back out, I was happier with the Patrol, I was getting used to how to drive it (it still needed better tyres) There was a discovery stuck with another group, which when a few guys tried to winch it, were just getting pulled in, so finally the weight of the patrol would come in useful and I got the kinetic rope out... This video was at the end, it took a good 10-15 runs to get the discovery free, it was properly bogged. It did mean my recovery points got a good test So that got that free, and we went for one more run about the site, until a friends landcruiser decided it had enough.... And its half shaft went... 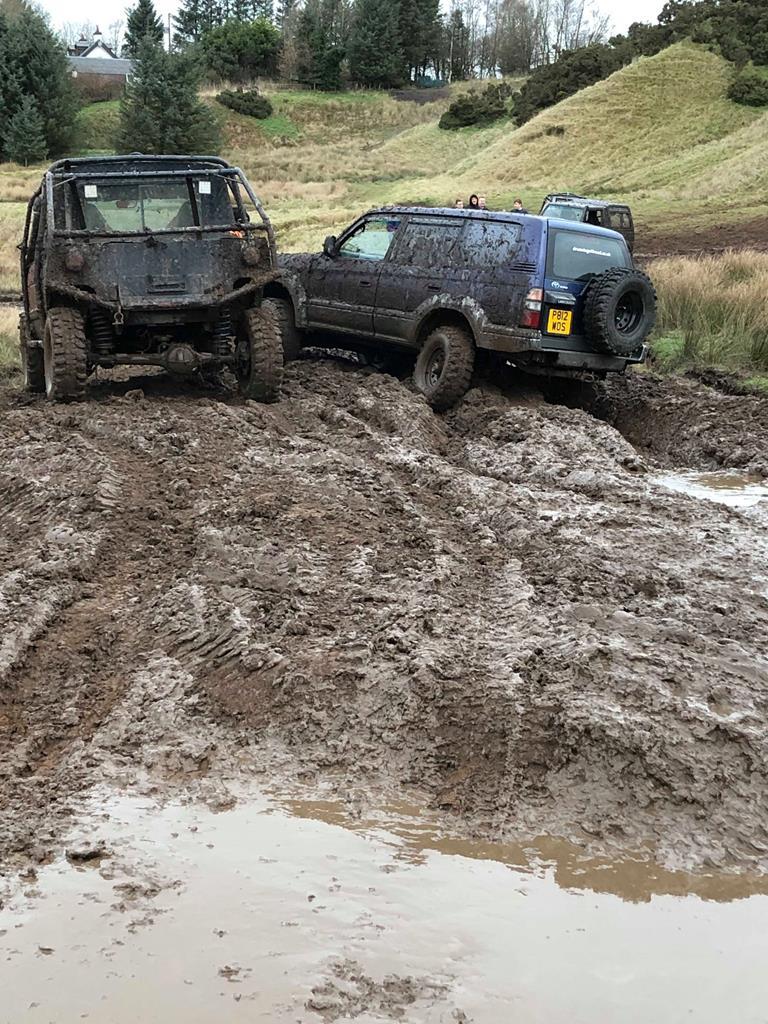 Not a lot you can do when out and this happens, so we got the truck turned and facing the car park using a couple of winches, we stuck a ratchet strap around the wheel to the chassis to keep it in, and we'd just drag him back. To try stop it being jerky we used the kinetic rope, and stuck it onto the back of the tray back disco. Was going perfectly until he got stuck... Patrol weight to the rescue again... I then dragged the landcruiser back to the car park A great day, and by the end of the day, I was happy with the Patrol. It's night and day compared to the SJ, yes the SJ was extremely light so done well in it's own right, and due to the size, it could go some places the patrol can't such as the woods. But the patrol has the power to keep it going, and the bigger wheels mean much better ground clearance, once I get some aggressive mud tyres, it should be pretty unstoppable with the rear diff lock. 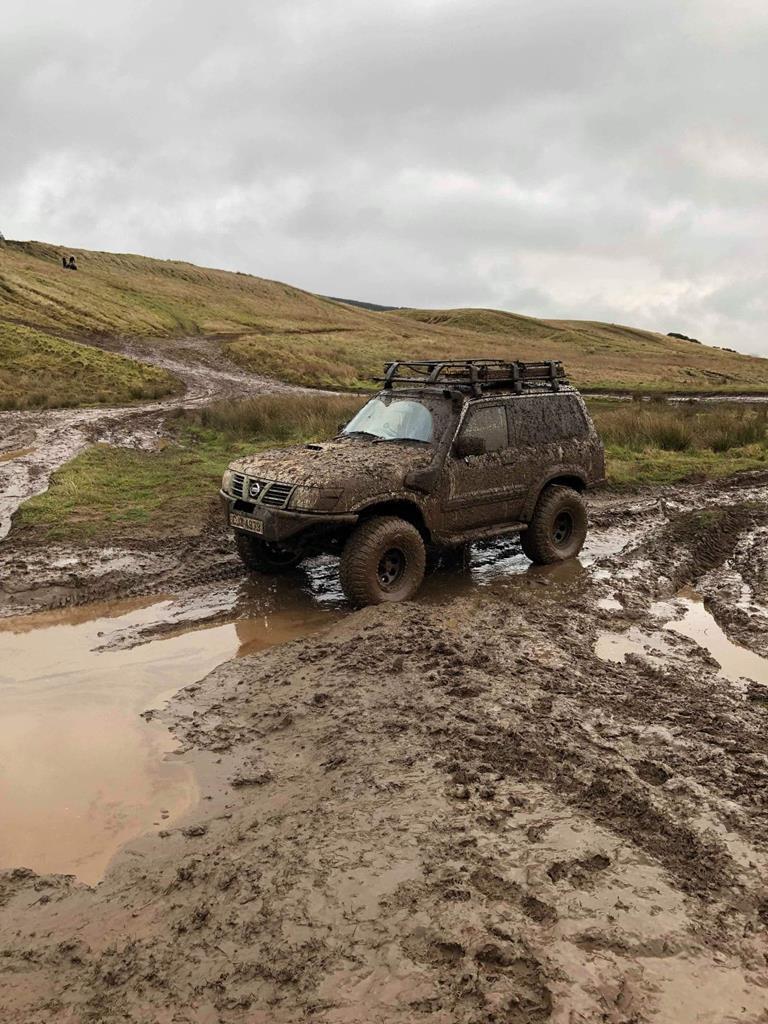 A photo from the end of the day... Unfortunately the mud killed the alternator (not sure how old it is) so I ended up borrowing a battery to get me home... |
| |
Last Edit: Mar 10, 2019 21:49:08 GMT by keyring
|
|
gostin
Part of things
 
Posts: 84 
|
|
Mar 10, 2019 21:09:35 GMT
|
|
Were you down at drumclog? I recognise the wrangler from down this way.
|
| |
Last Edit: Mar 10, 2019 21:10:17 GMT by gostin
L300 and wrangler yj.
|
|
keyring
Part of things
 
Posts: 913
Club RR Member Number: 47
|
|
Mar 10, 2019 21:50:45 GMT
|
Were you down at drumclog? I recognise the wrangler from down this way. Yes mate, Drumclog is my go to site, usually there every Sunday when i'm home  |
| |
|
|
keyring
Part of things
 
Posts: 913
Club RR Member Number: 47
|
|
Mar 19, 2019 19:19:00 GMT
|
Since I got the patrol, it struggled to start in the cold, don't get me wrong, it always started, but it used to put out ridiculous amounts of smoke, and take a while, I changed the glow plugs, and since then it's been perfect.. (unfortunately I didn't take any photos  ) Another issue that existed from when I bought it, is the temperature gauge would never move once it reached the lower mark, initially I worried that the thermostat had maybe been pulled to hide an overheating issue, however I removed the stat, and found it was jammed half open, again changed this, and the problem was sorted... So, that takes us up near enough to the current day, last week when I was out at Drumclog, I decided to take it into the woods (which I said I never would, as really, it's too big a truck to manoeuvre through the trees. It squeezed through spaces much better than I expected, however, there is an extremely steep pointed slope which then drops down into the river, when I went over this, it landed on the rock slider pretty hard on a tree root when the front wheels dropped off. Didn't think anything of it, into the car park for lunch, and couldn't open the door more than an inch   Jumped out the passenger side, and thought all I had done was bent the rock slider, a big hammer and a pry bar later, the door opened although still catching... Now before I go any further, i'll say that I new the rear arches had been hit with the catty welder, but this was fine, in the summer I planned to cut the rear arches out and weld in fresh metal... End of the day, all washed down, and I was inflating the tyres up, and noticed that when I landed on the rock slider, it had burst the rear arch... 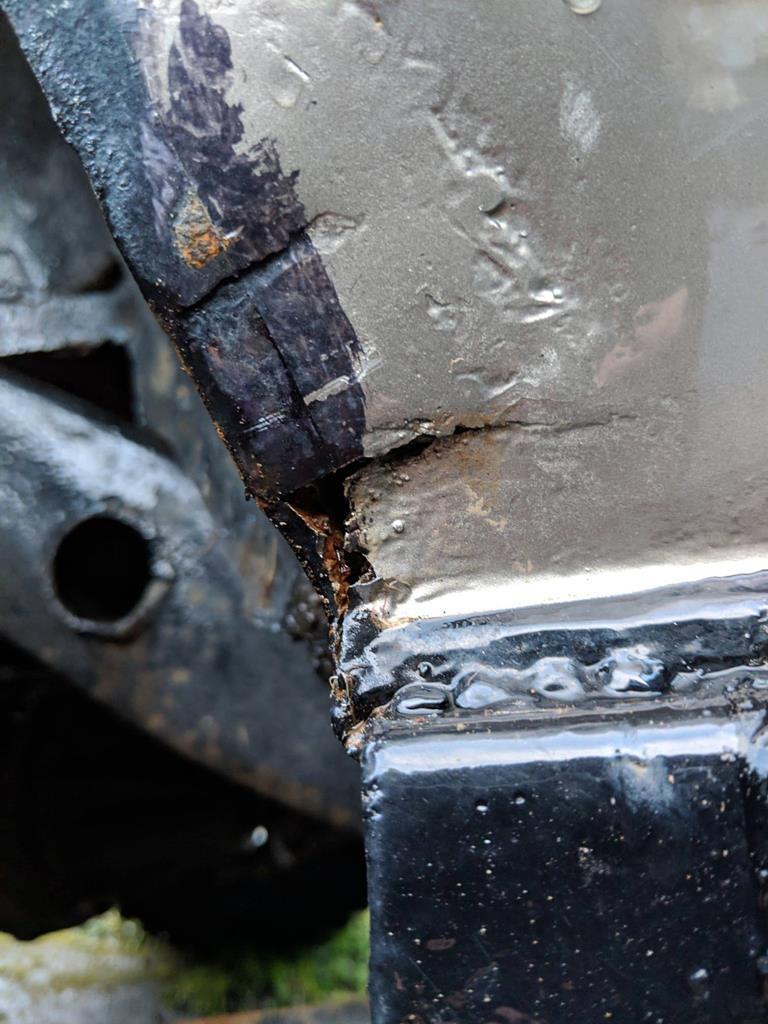 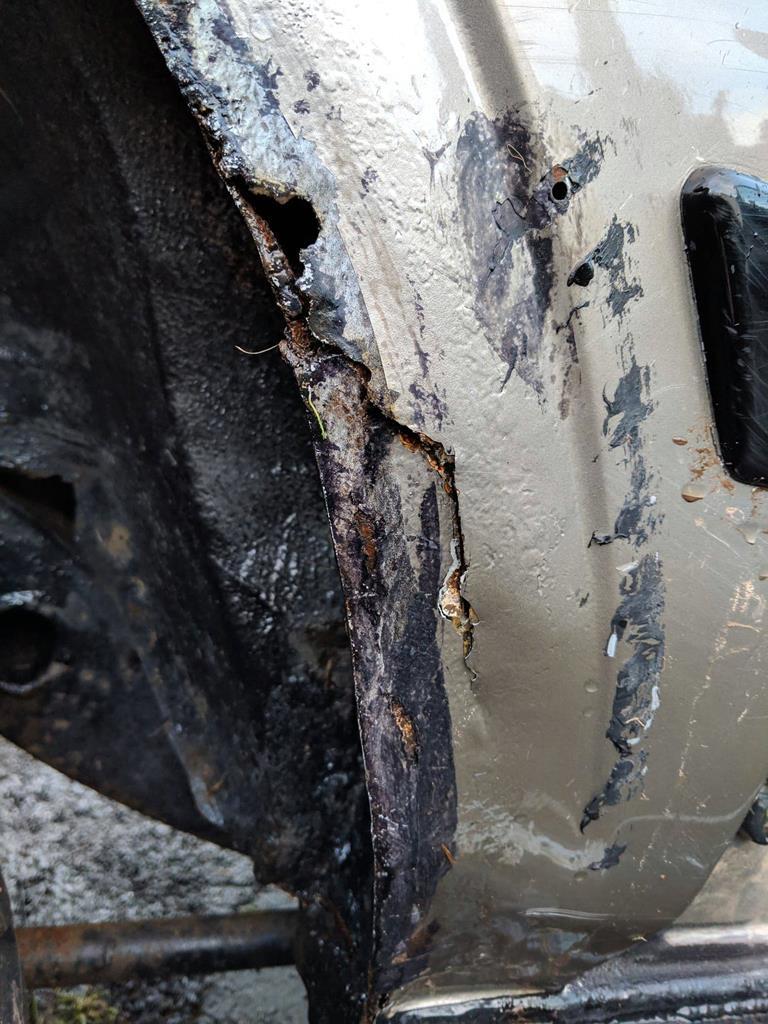 I also noticed the windscreen had 4 cracks coming up from the bottom corner, I can only assume this was also due to the impact to the rockslider/sill Once I was home, I could get a proper look at it, and it's slightly worse than expected, the rockslider didn't bend unfortunately, it's actually pulled the box section sill away from the body. With a proper look under, it would appear that the previous owner hasn't removed all the rusty metal when welding in the box section, and it looked like it hadn't had much in the way of coatings/protection after the welding either, so it has brought forward the plans to get stuck into the bodywork now, as I don't really want to take it offroad until i've sorted the sill.... 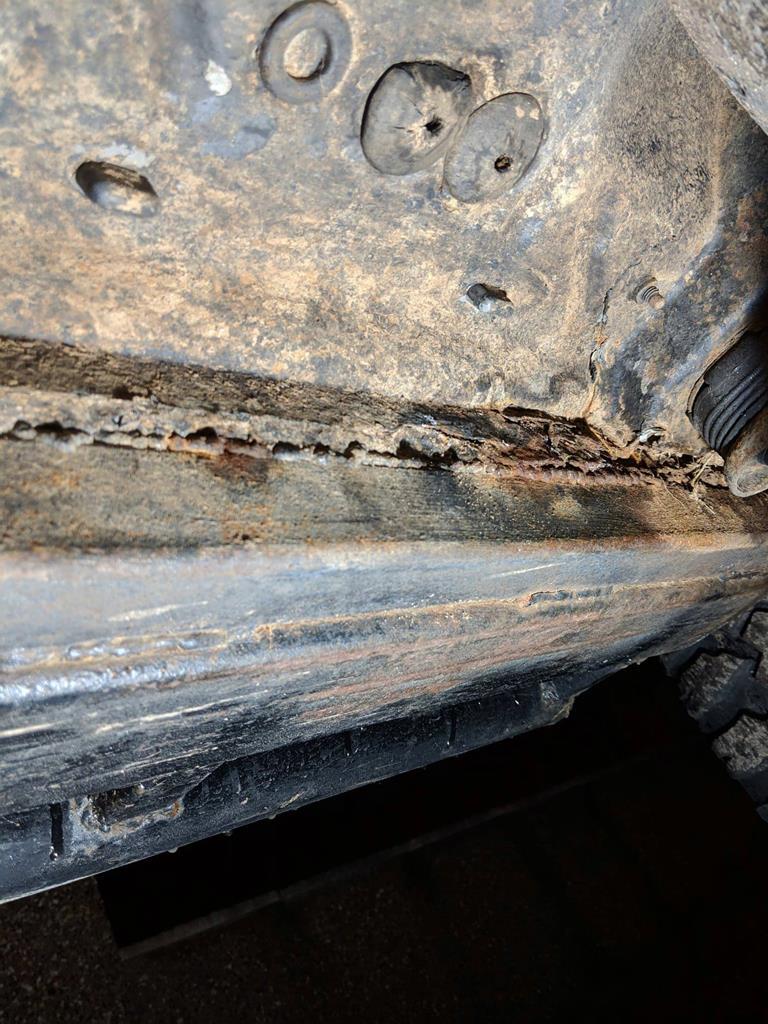 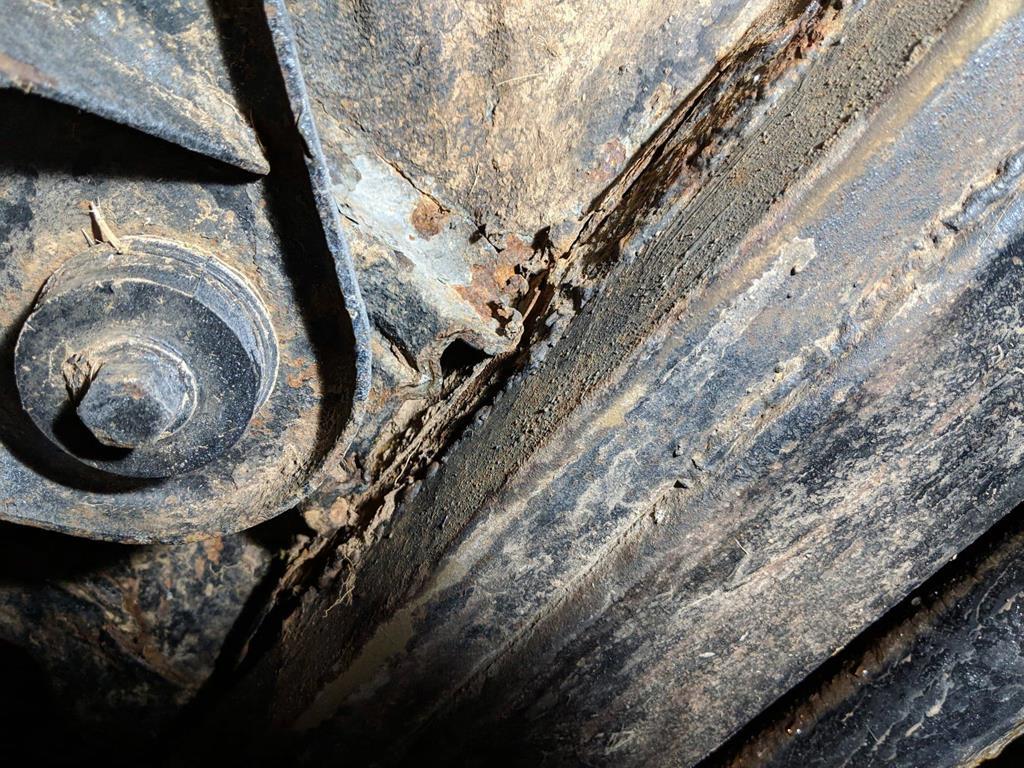 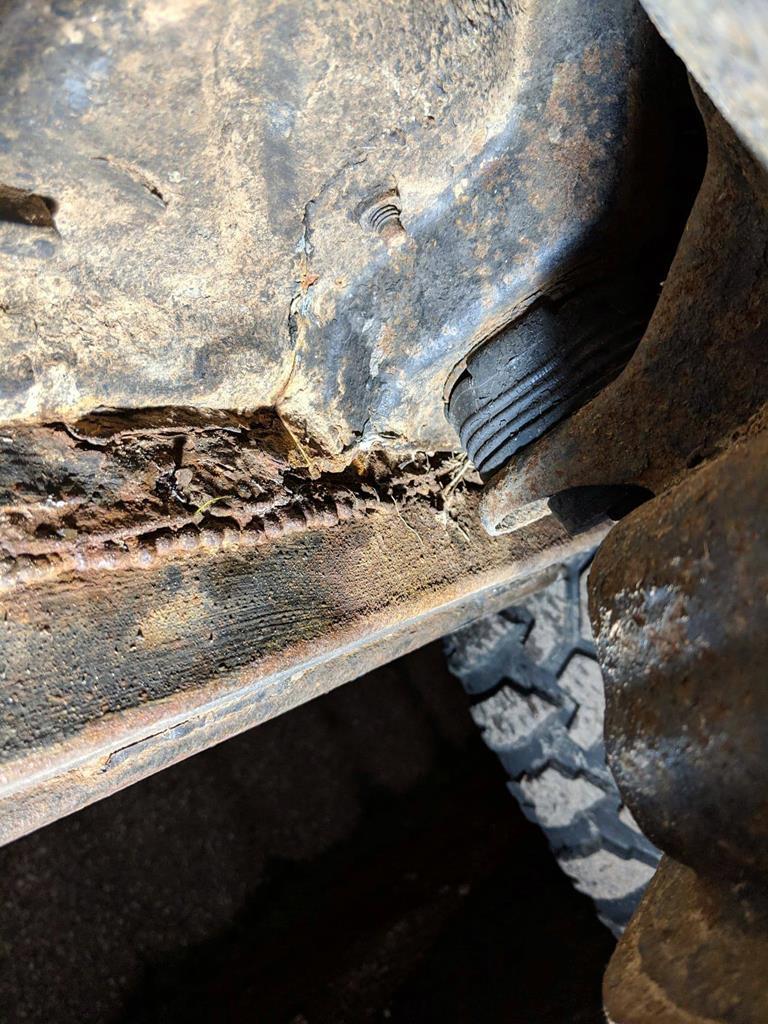 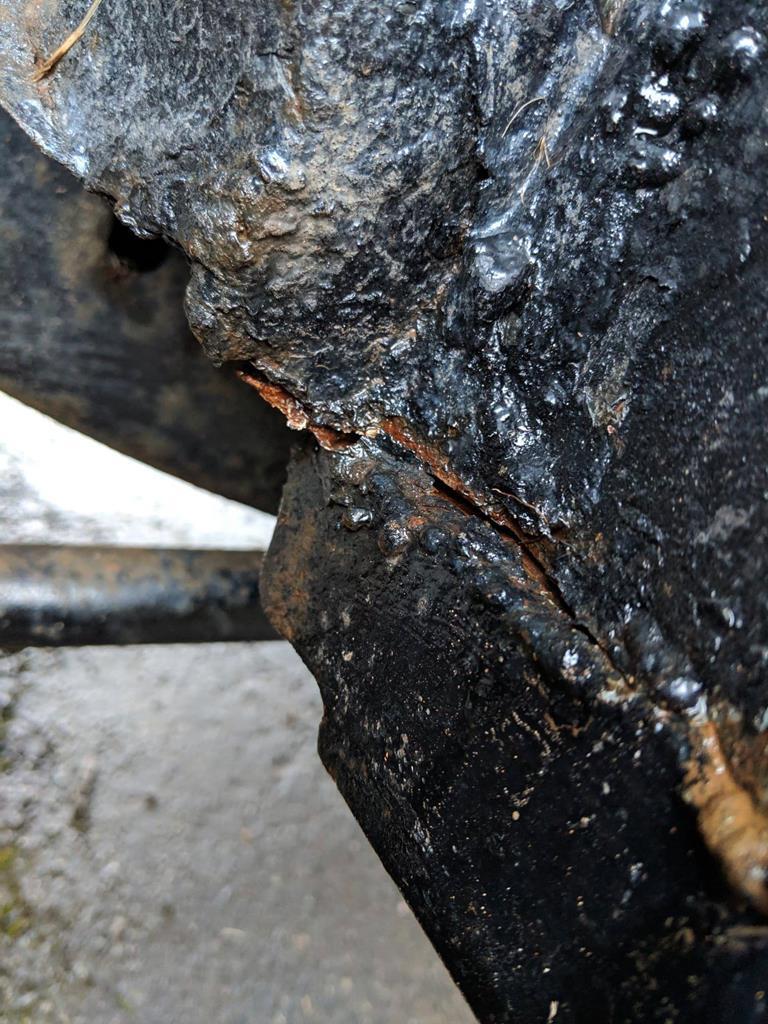 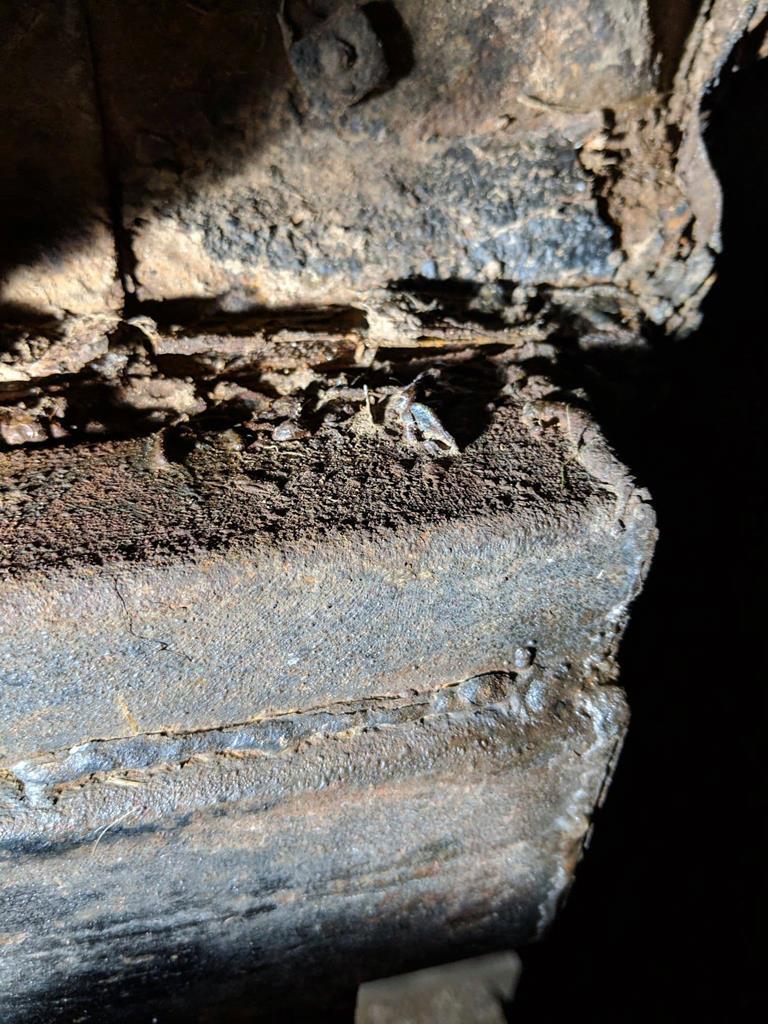 A bit gutting, but nothing I shouldn't be able to sort, there's an offroad weekender in May I planned to attend, so i'm going to try and get it sorted by then, there's a few other bits also needing done, so I think i'll try get it all done at once! |
| |
|
|
keyring
Part of things
 
Posts: 913
Club RR Member Number: 47
|
|
Mar 19, 2019 19:25:08 GMT
|
Although I don't want to go offroad until I have fixed the issues highlighted in the last update, on Sunday we were lucky enough to get a half decent dusting of snow, so naturally I was away up the back roads playing, had to winch someone back onto the road who had tried to tackle a steep hill, didn't have a phone on him, and had put his rear wheel into a ditch (in a FWD car i'll add) He said the snow just came out of no where  So I sorted him out, and couldn't pass up the opportunity to see what flex I could get on the banking  (I know not the best plan when my sill isn't in the best condition) 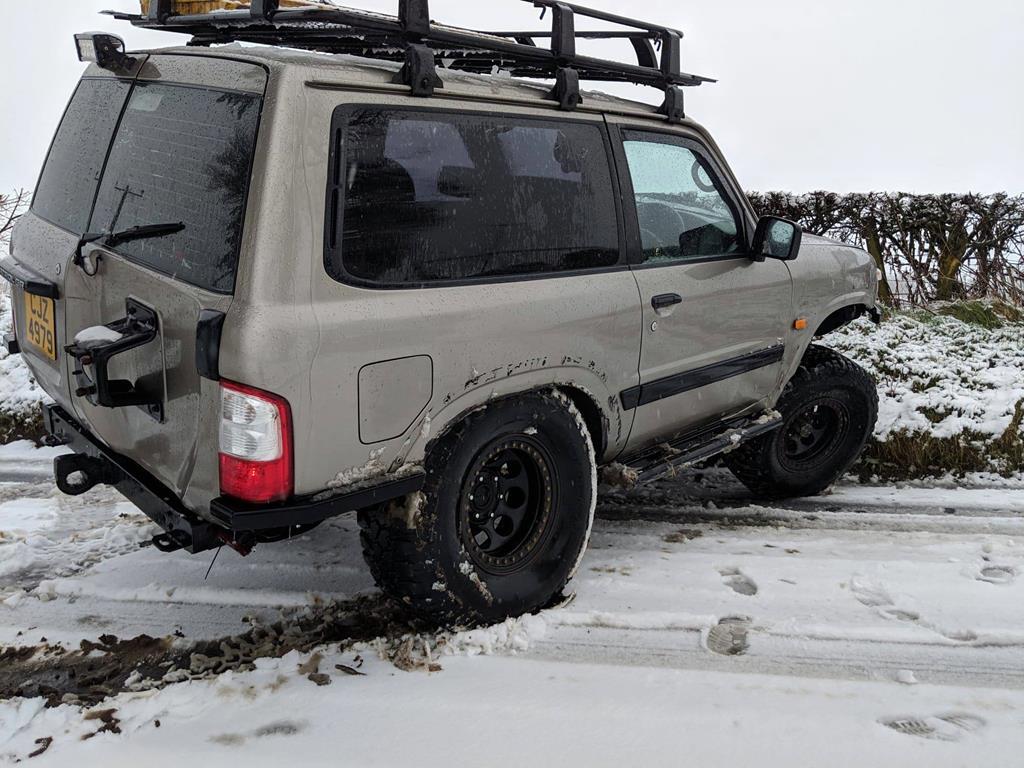 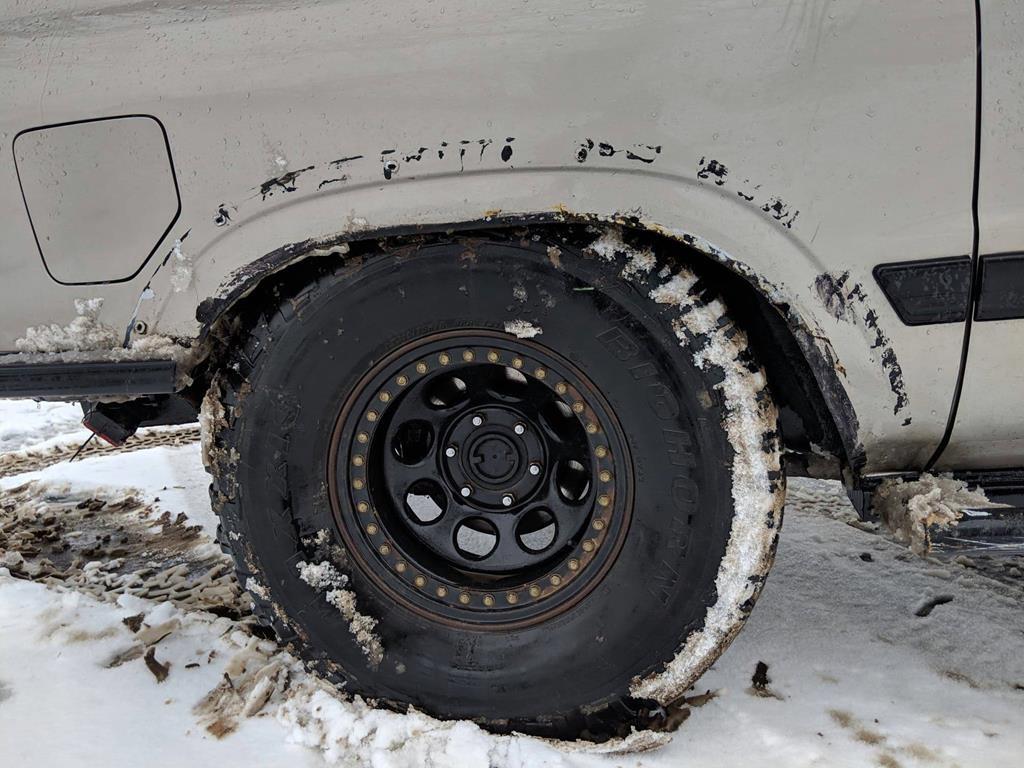 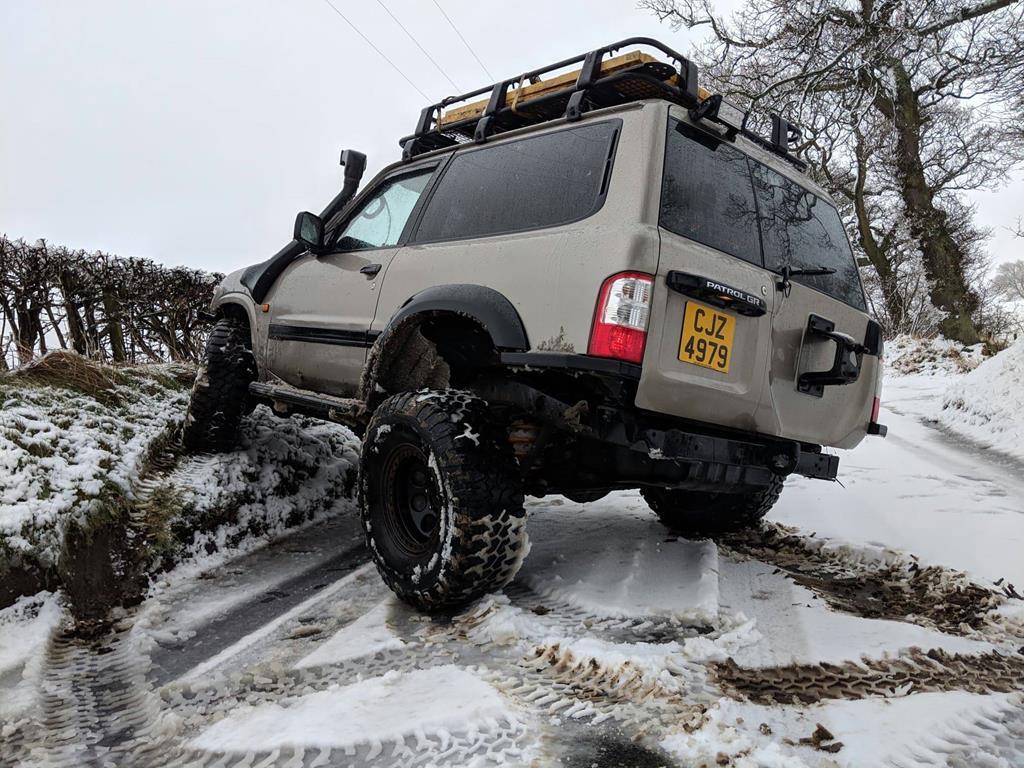 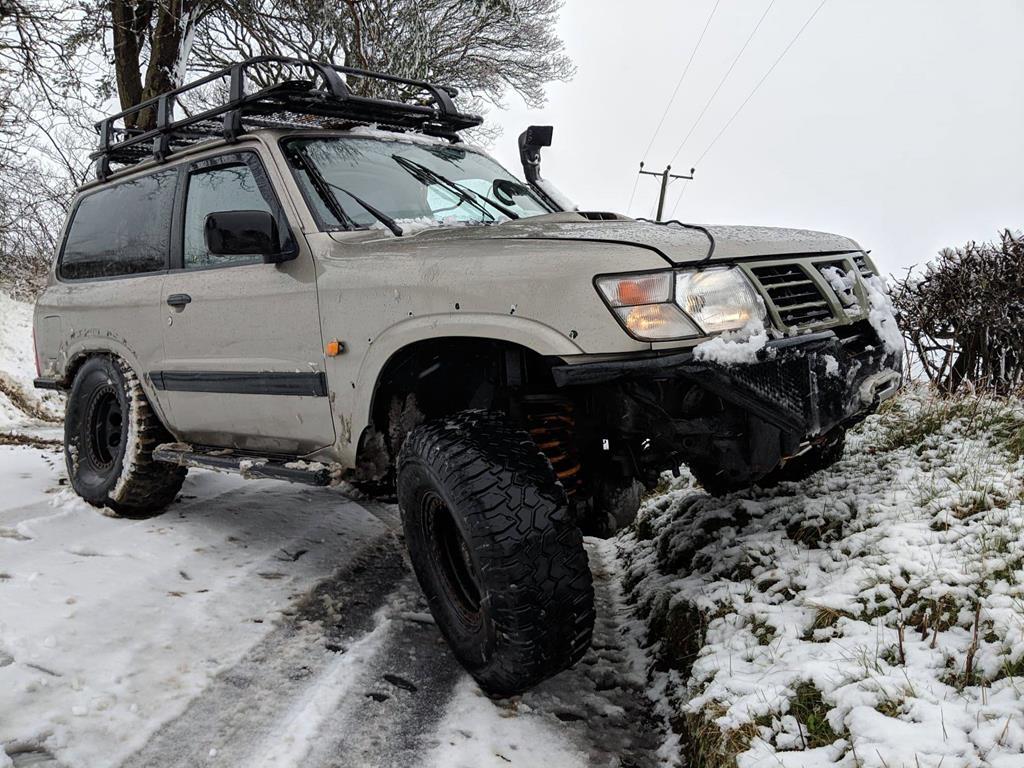 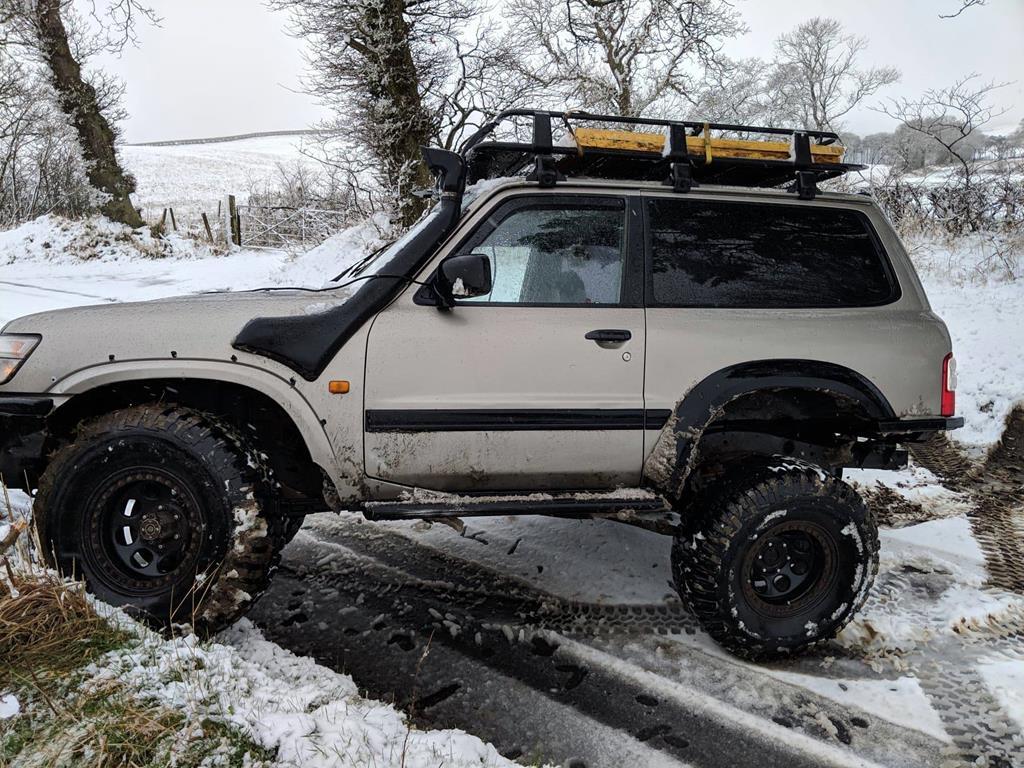 When flexing like this, the rear tyre fully scrubs on the rear tub, which has helped justify trimming the arches around the swage line, which will get rid of all the rust, and give me some more room in the arches - always a bonus as the new tyres i'm going for are slightly bigger and a lot more aggressive than the ones currently fitted |
| |
|
|
keyring
Part of things
 
Posts: 913
Club RR Member Number: 47
|
|
Apr 27, 2019 21:04:55 GMT
|
So I’ve not been on the forum in a while, that whole time home actually I think, in between courses for work, getting an offer accepted on my first house (hopefully get the keys on the 17th may all going well) i decided to take the wooden storage box out the back out the patrol, and see if there was any hidden rust, I already knew the box section sill needed removed and sorted, and the outer rear arch had a bit of rust along with a hole from rubbing with bigger tyres... The rust was a little worse than expected... 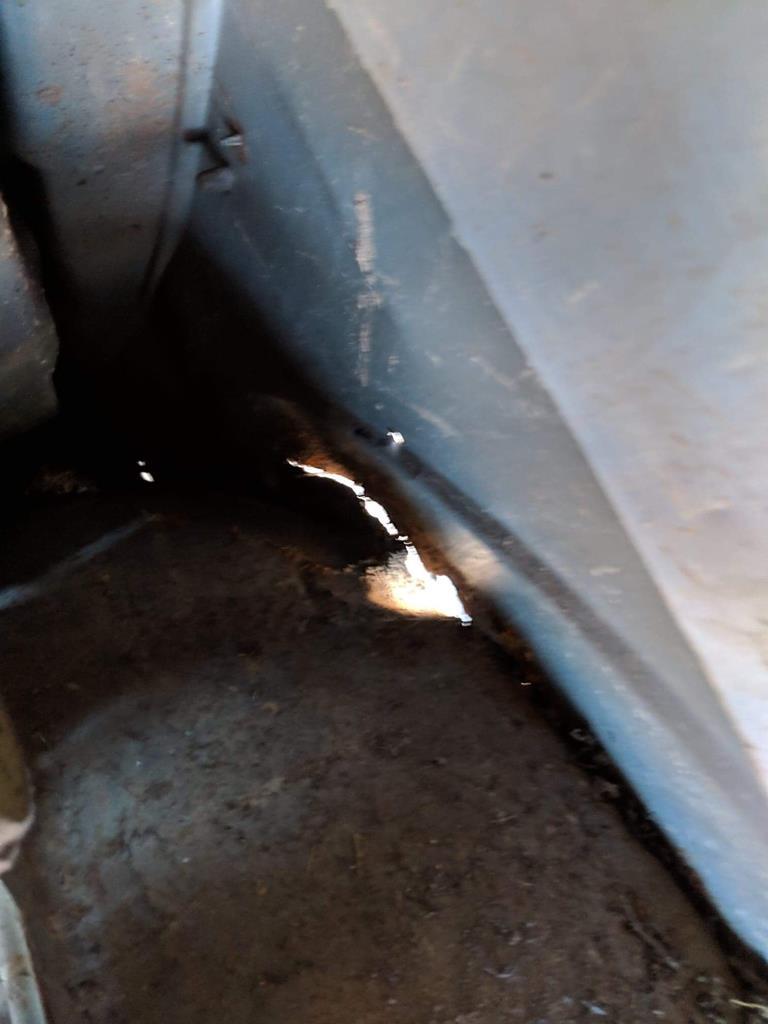 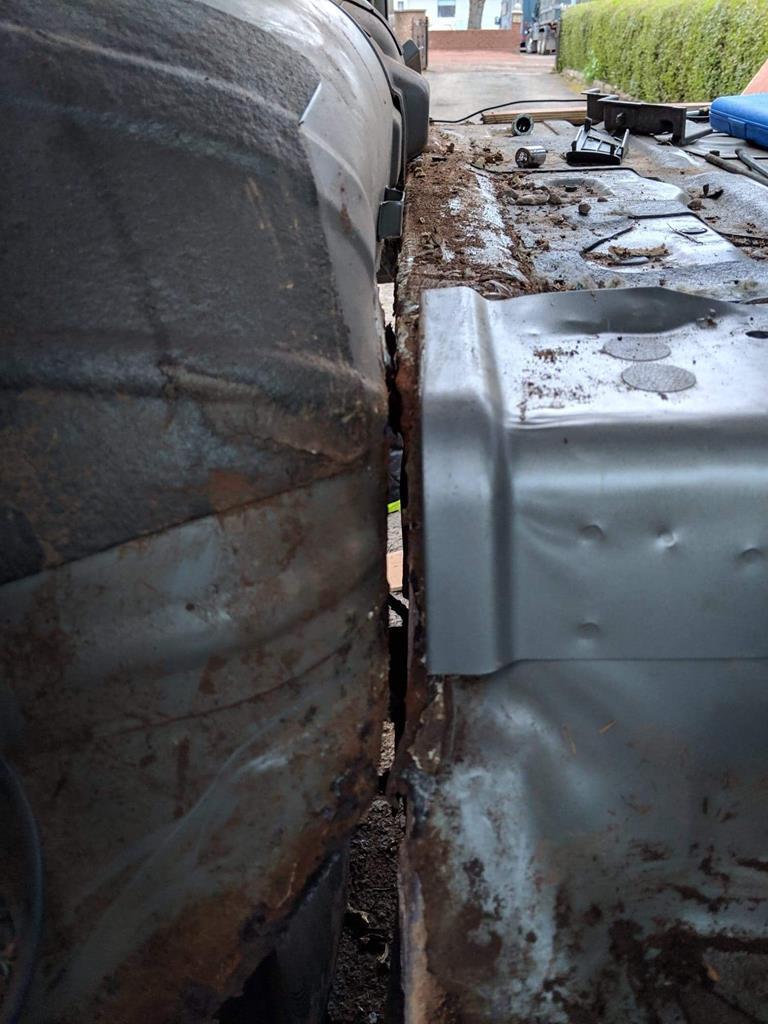 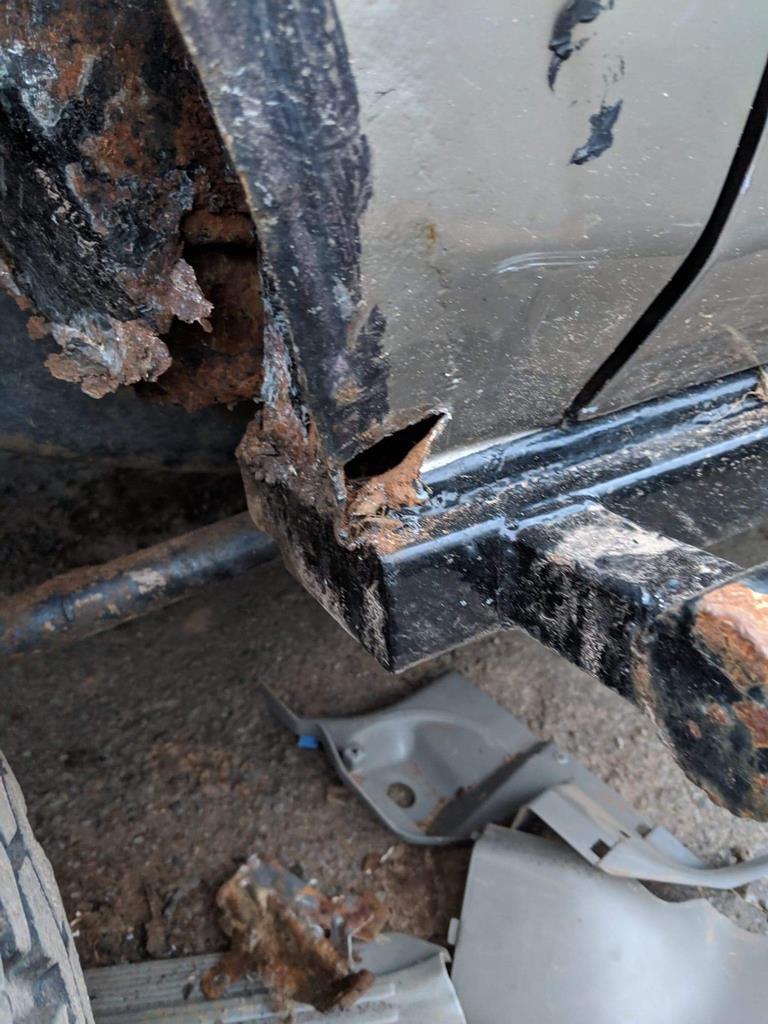 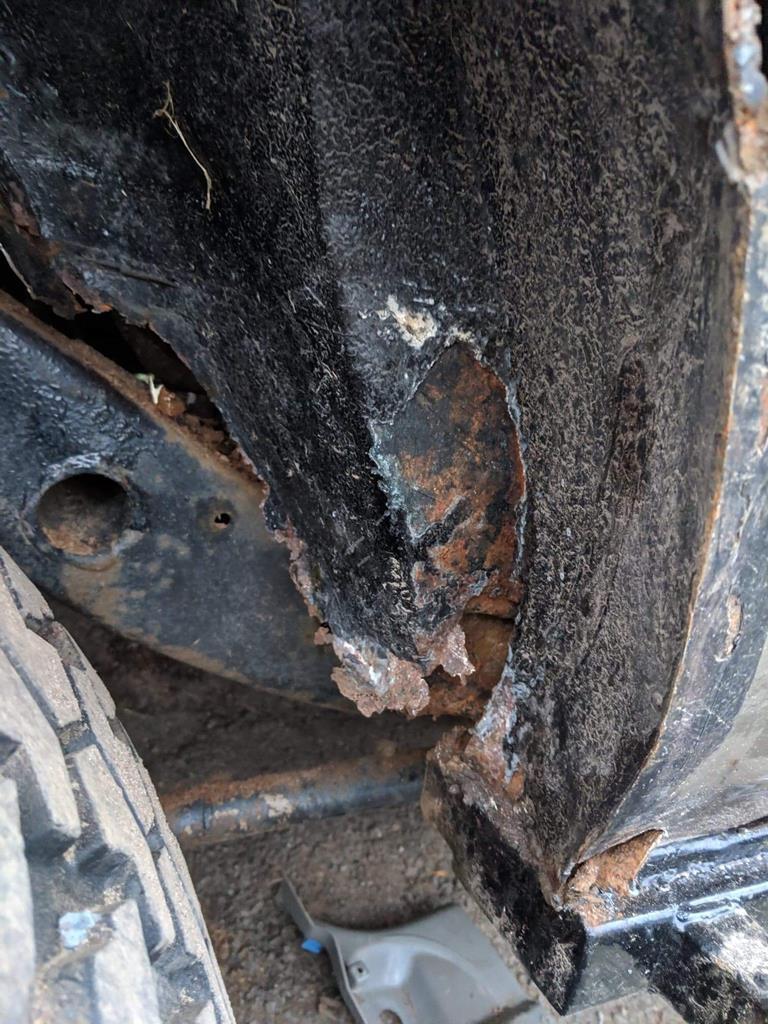 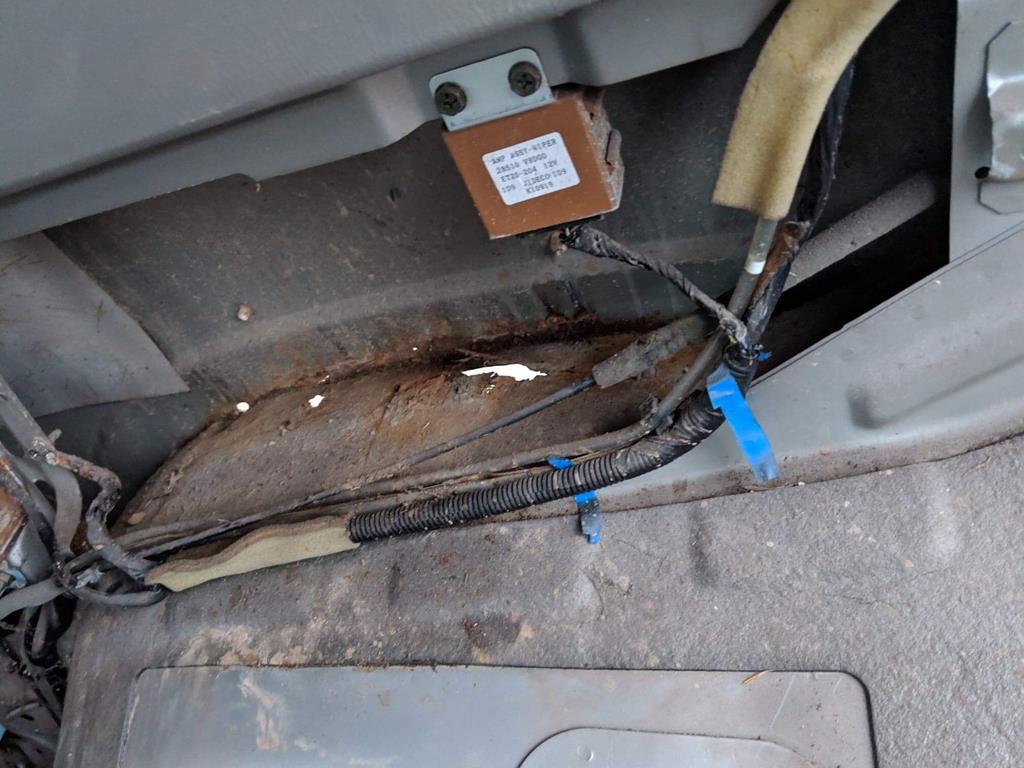 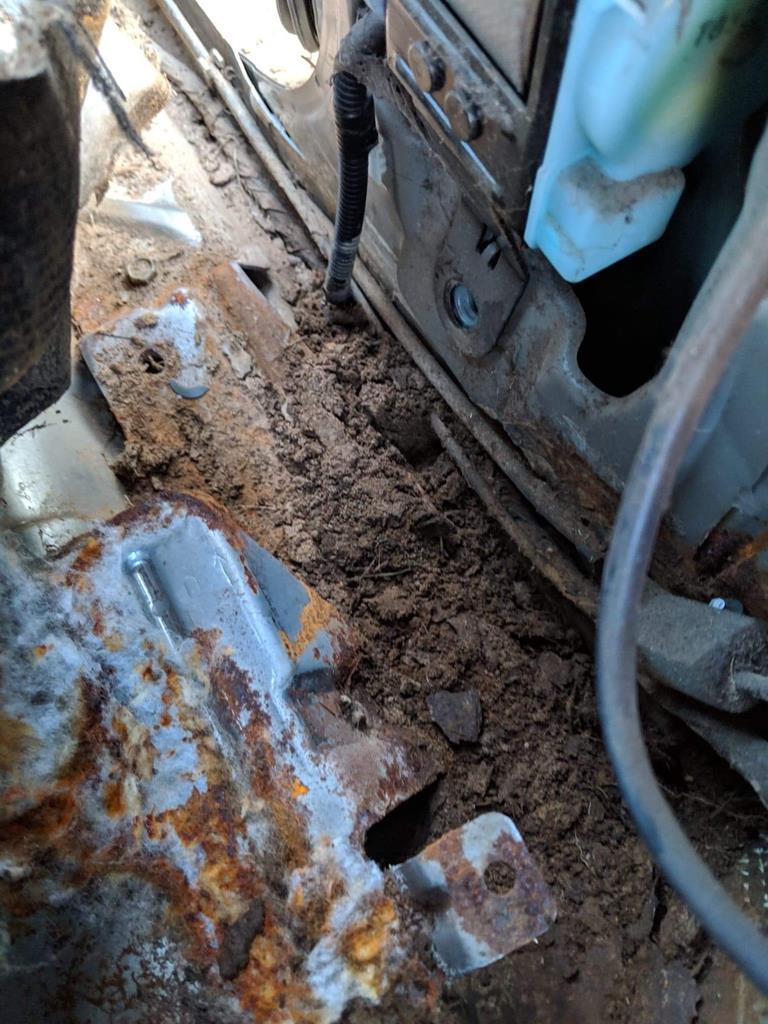 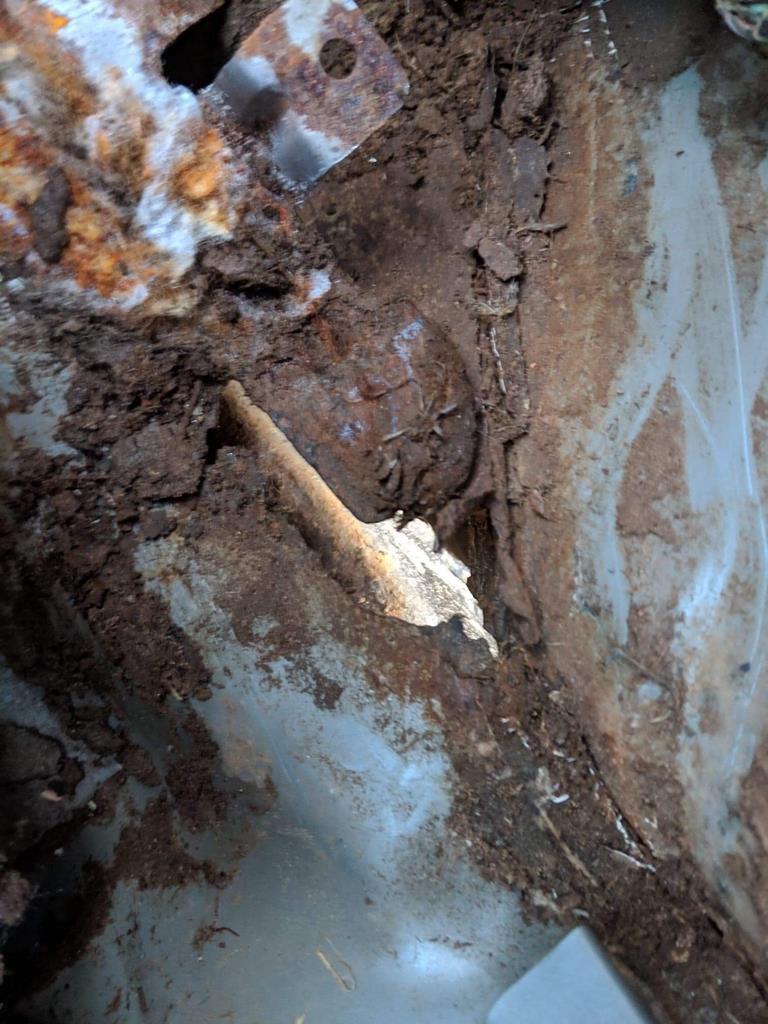 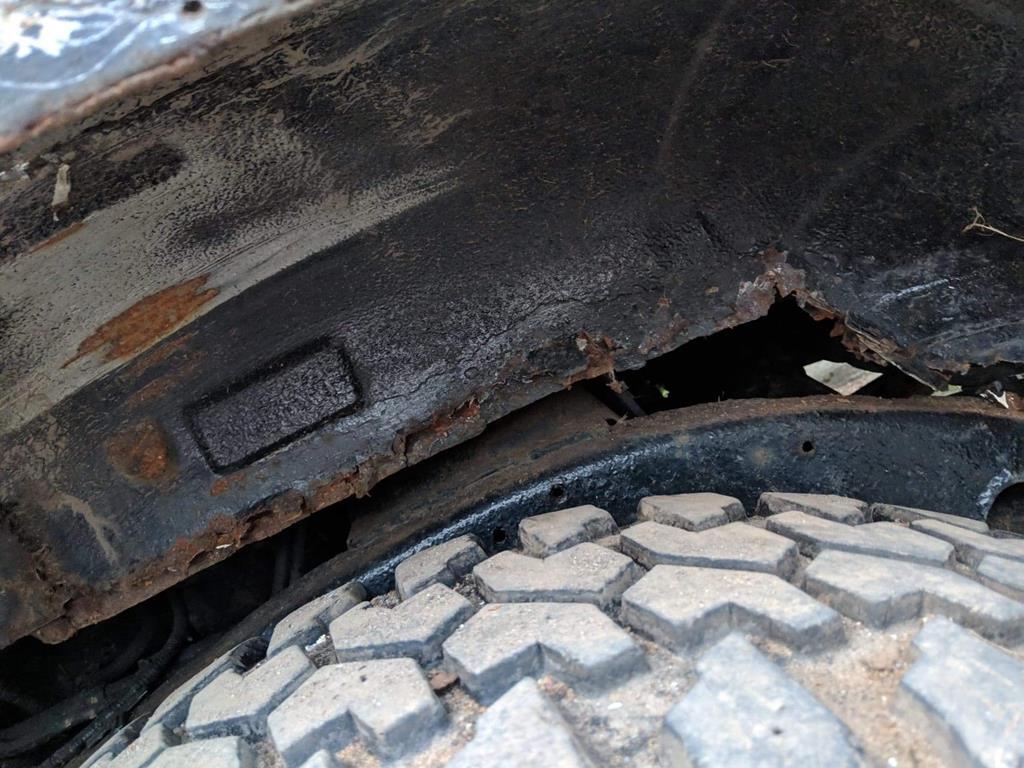 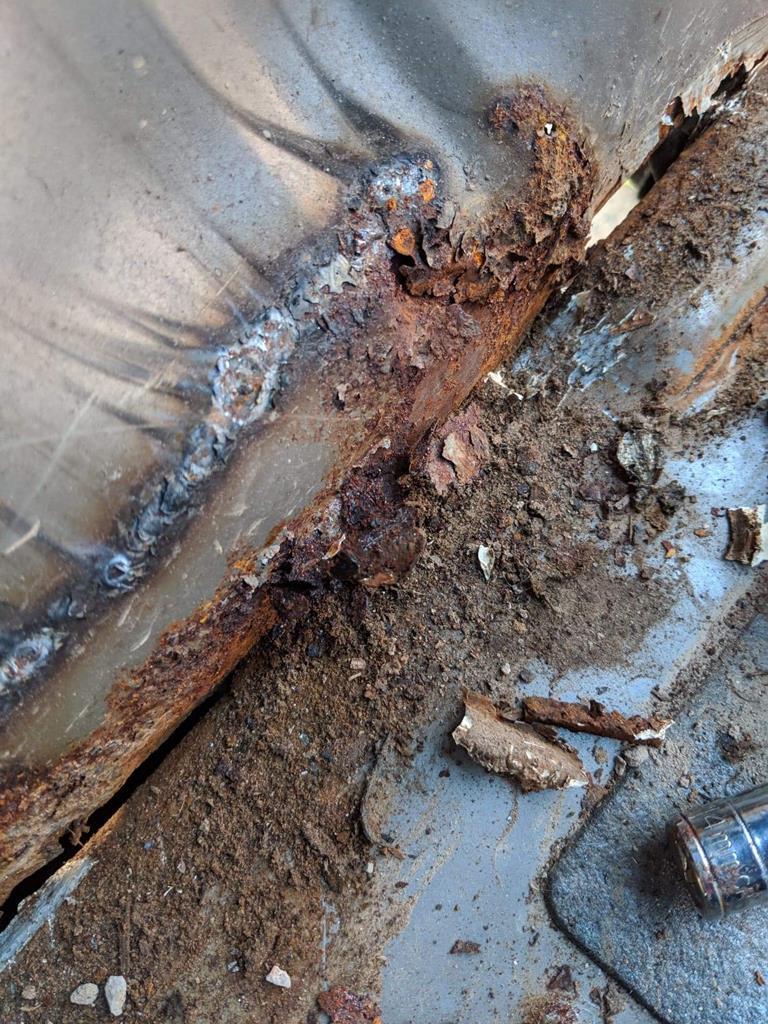 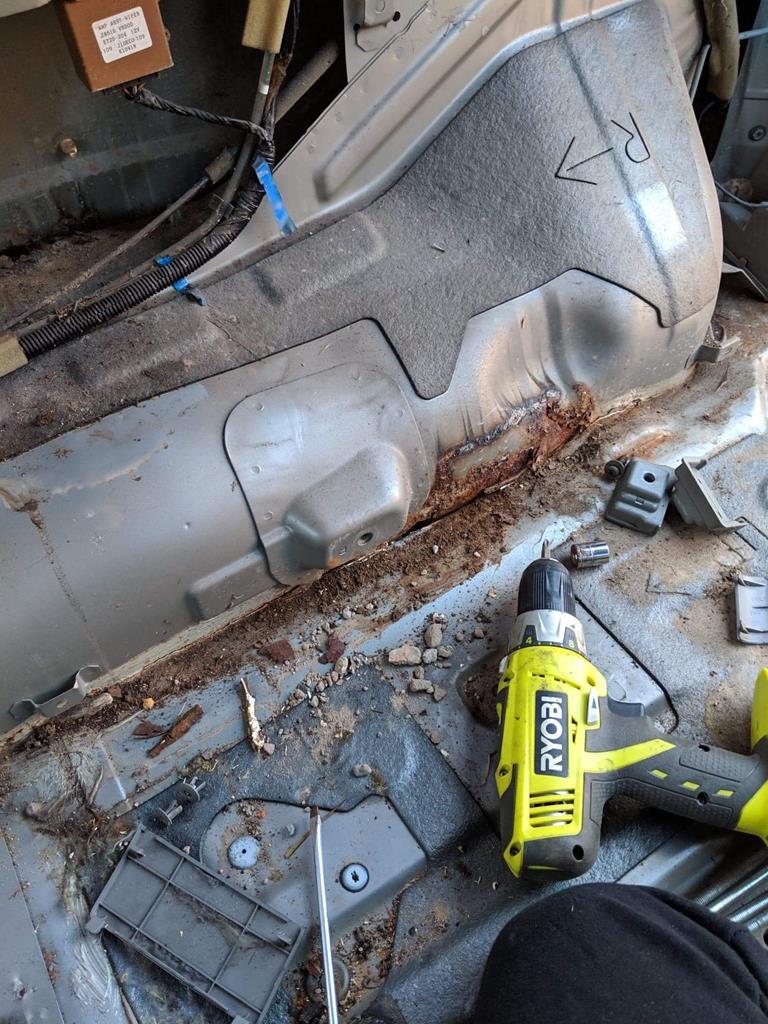 As you can see the inner rear arch was hidden, and worse than expected, there’s also a fair bit of mud trapped in places, which would hold water against the panels (it is used for offroad, and the previous owner used it offroad too) This was along the inner sill to the floor (drivers side) 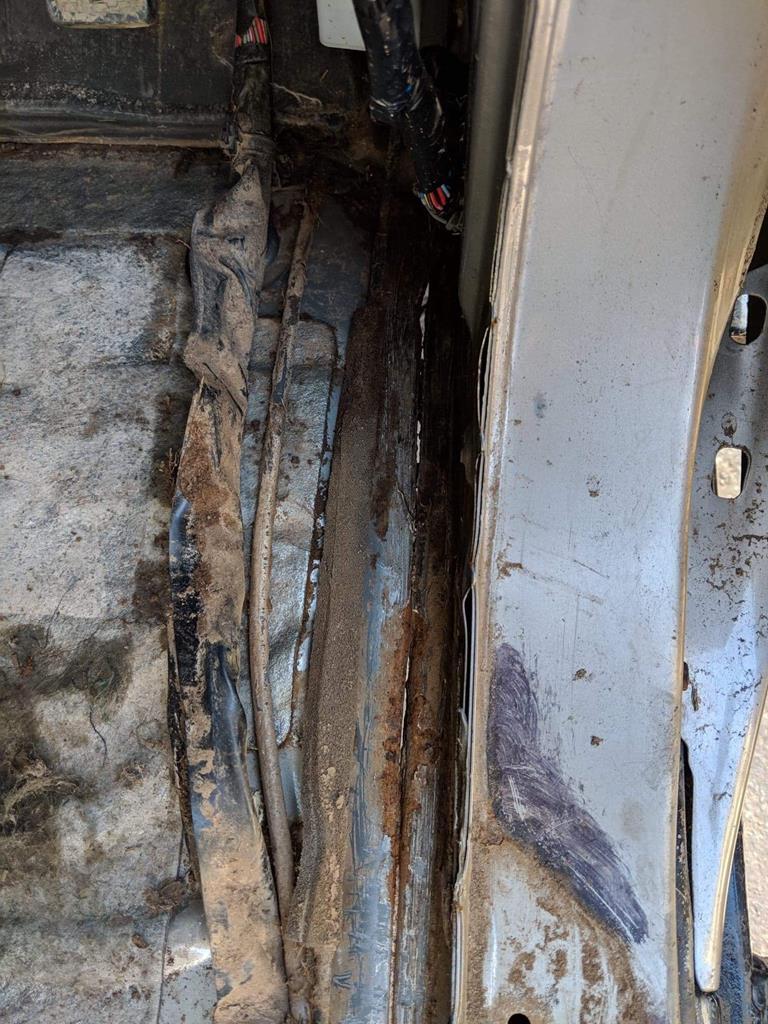 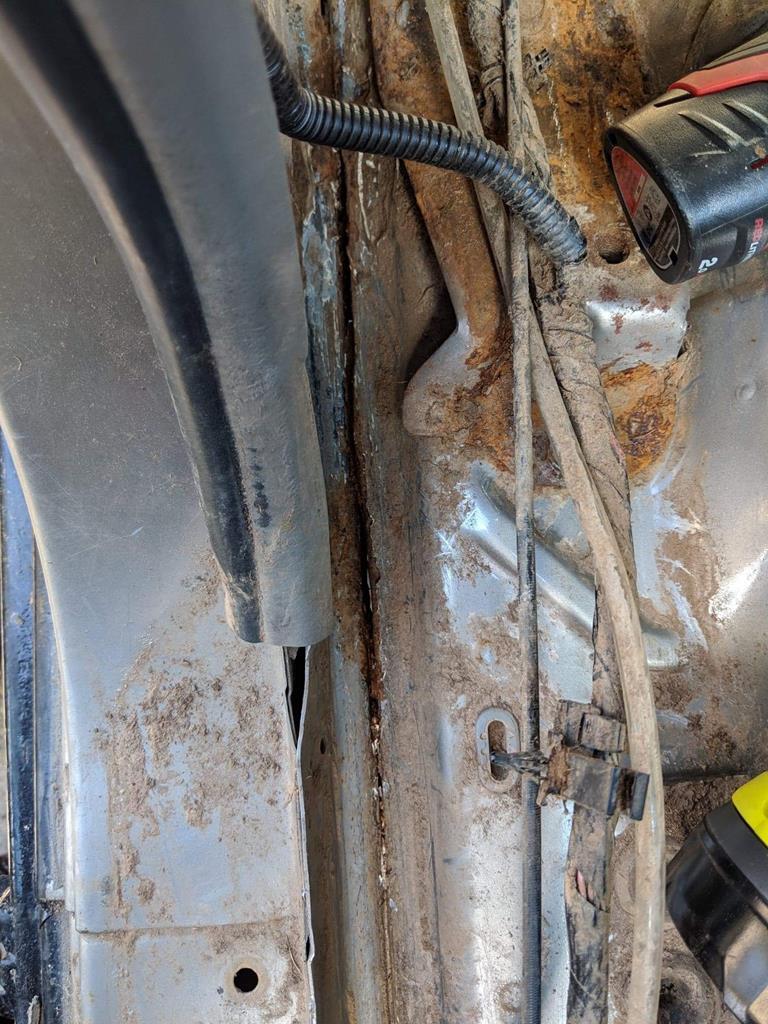 |
| |
|
|
keyring
Part of things
 
Posts: 913
Club RR Member Number: 47
|
|
Apr 27, 2019 21:18:32 GMT
|
So... I thought best way, get rid of all the rust I could, I probably didn’t have to be so drastic on the arch tub, however, I wanted a bit more clearance for the bigger tyres I plan to order, as once it starts to flex, things soon start rubbing (I’ve got a bigger lift kit to fit aswell) So, all the rust cut out, including cutting off the box section sill (the box section was all fine, it was just the metal it was welded to that wasn’t) 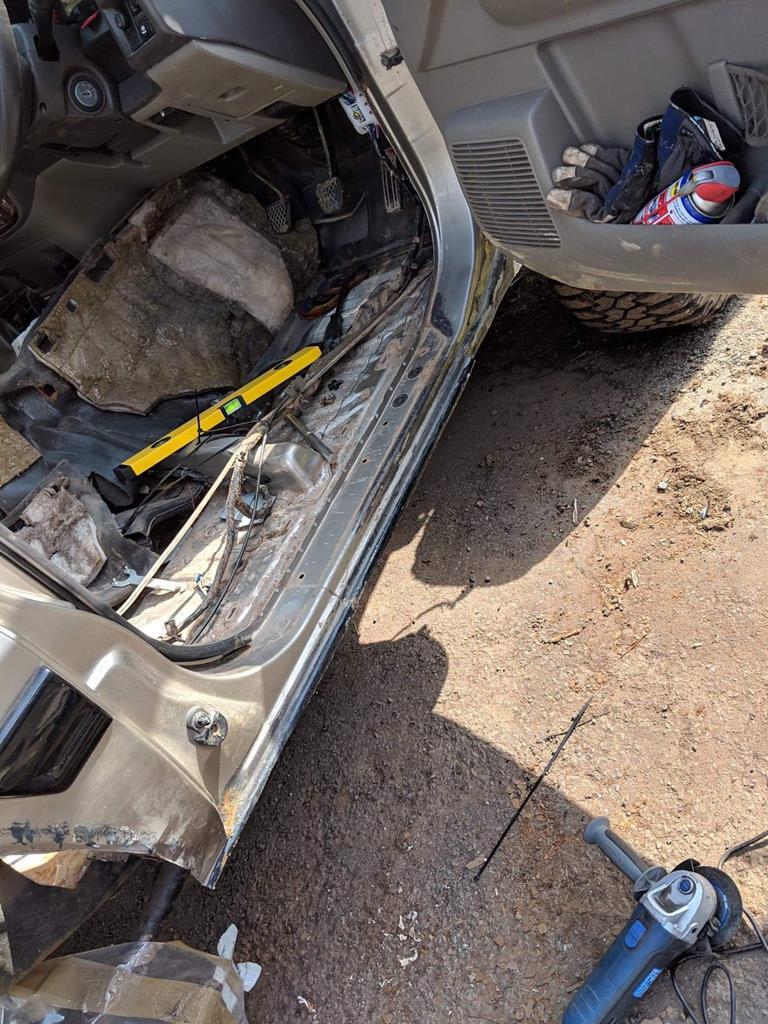 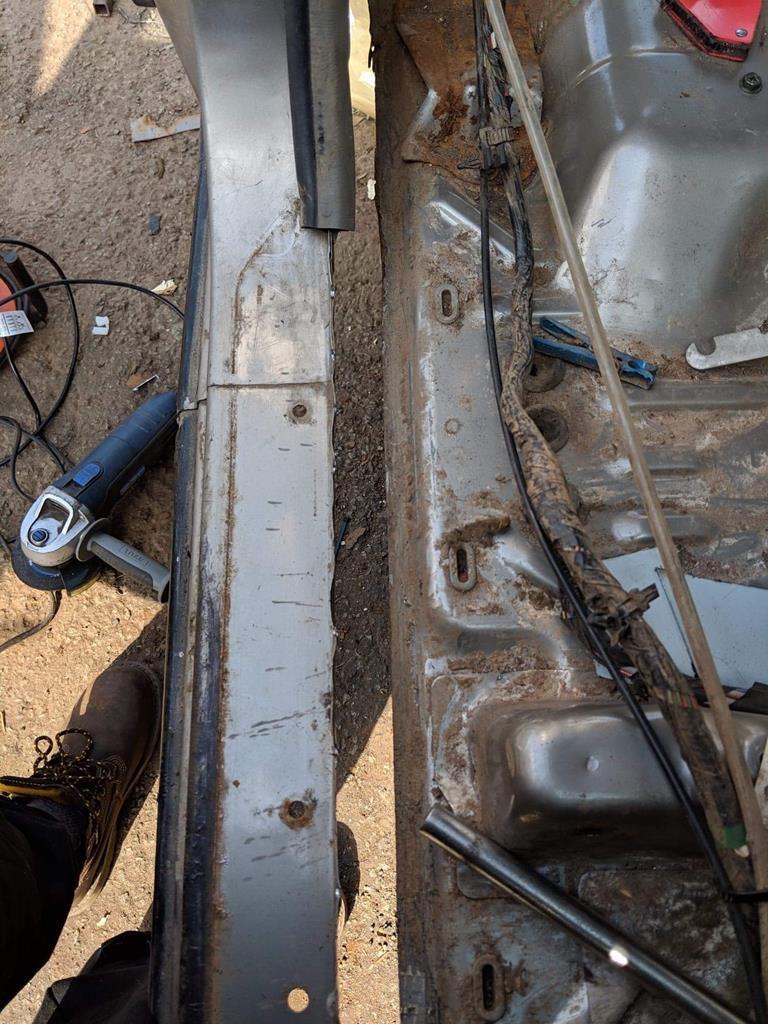 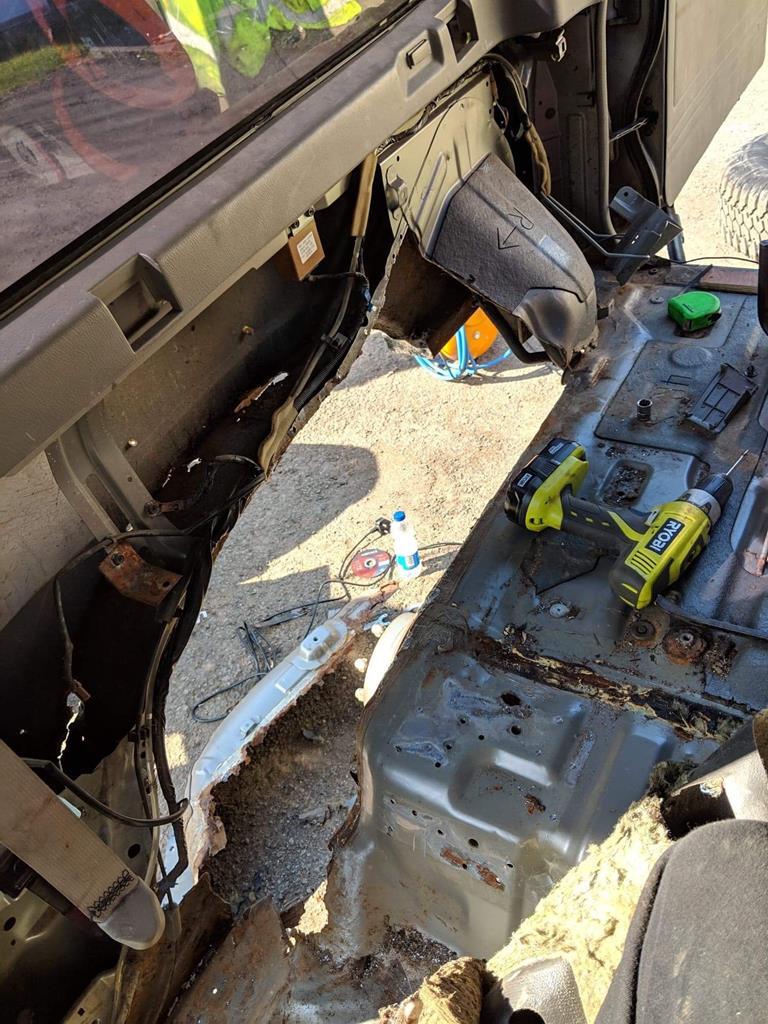 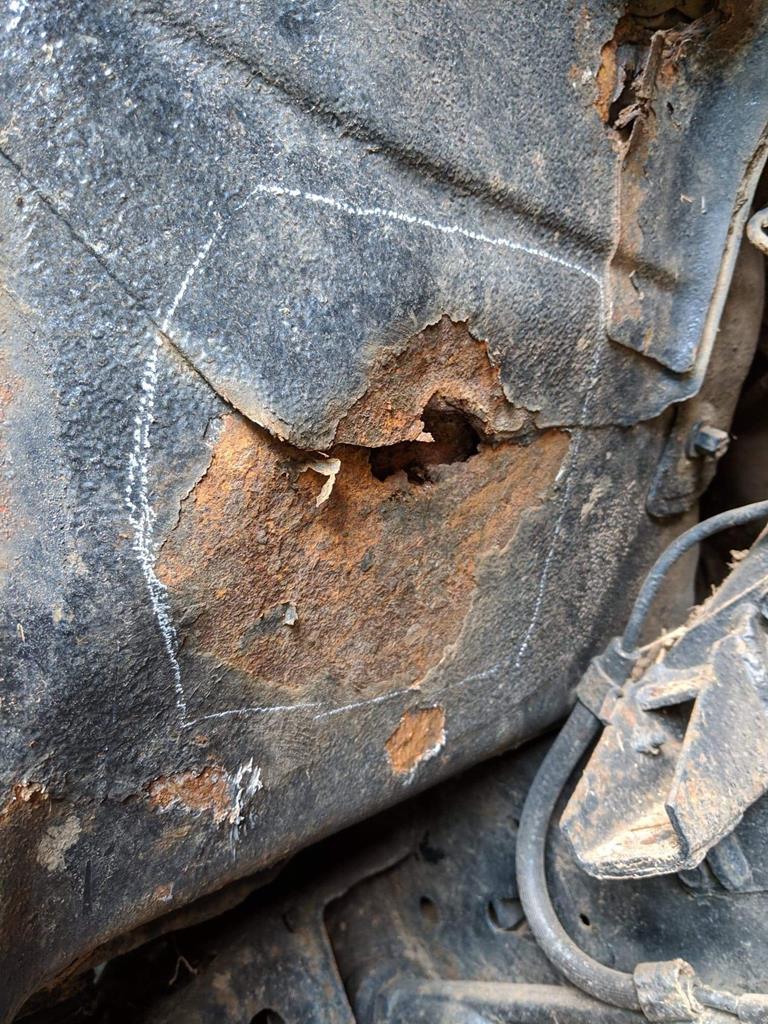 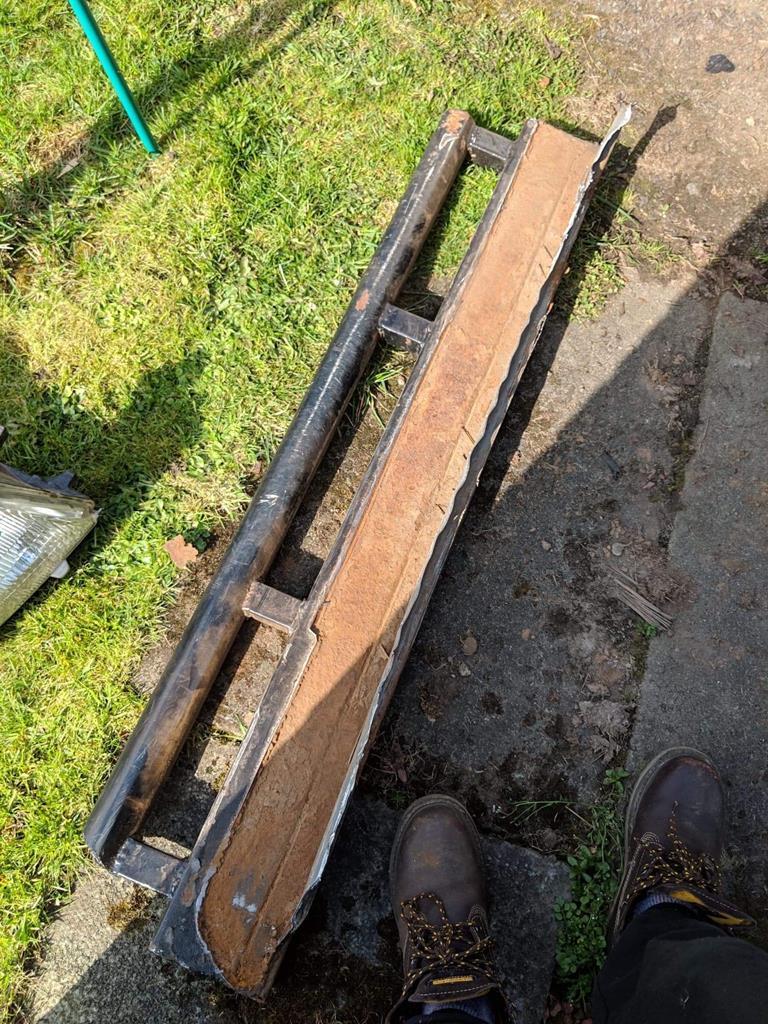 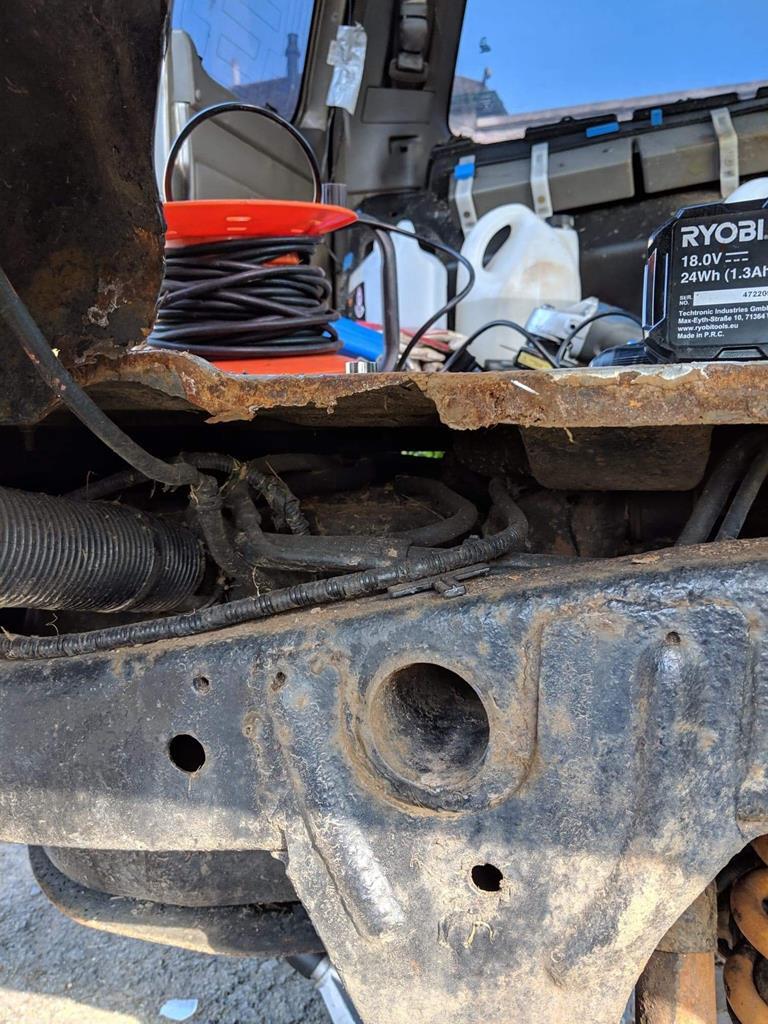 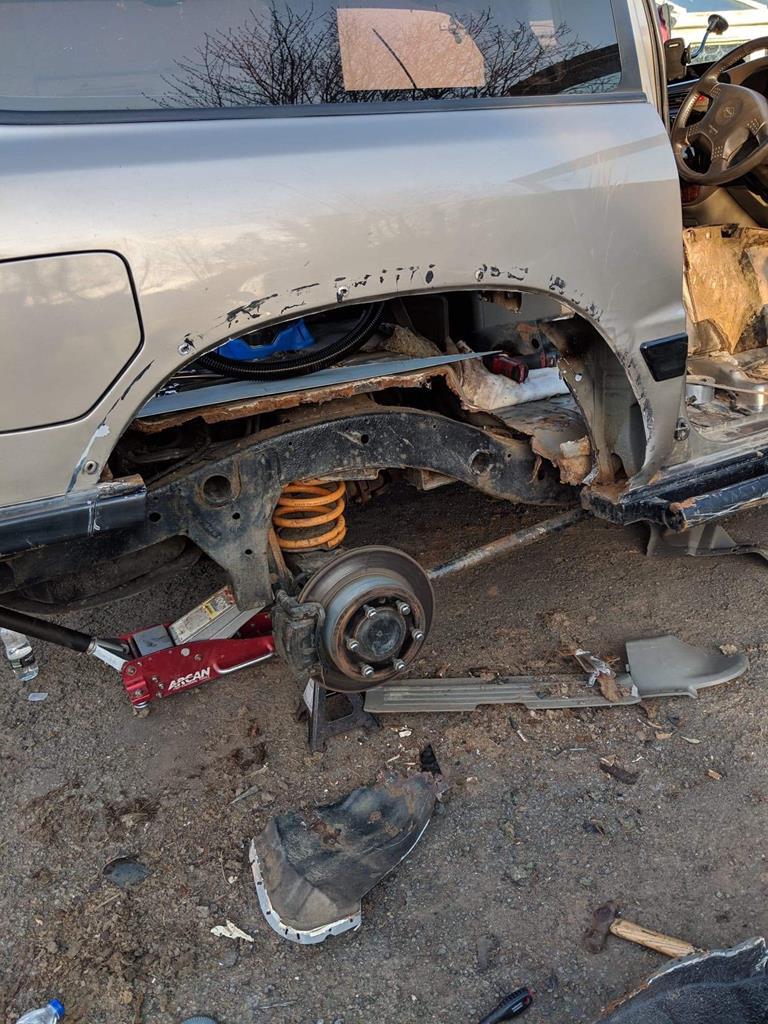 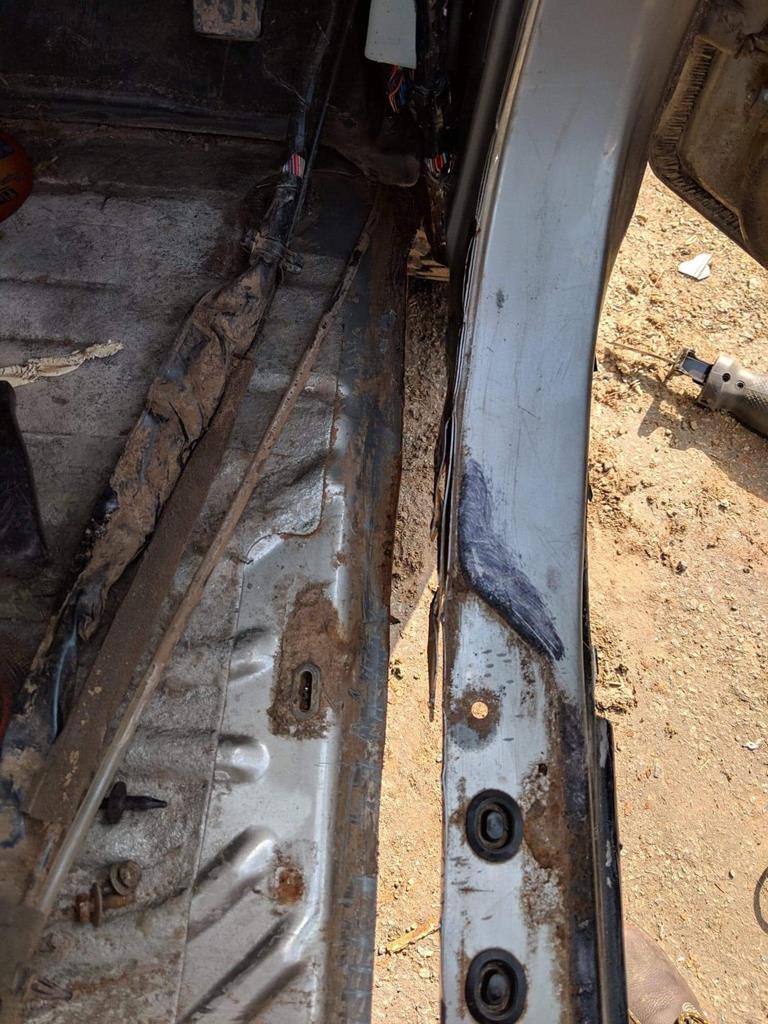 The body mounts on the patrol, originally would also have tied into the sills, these look like they rusted away, and then never got tied into the box section when the previous owner done the work... 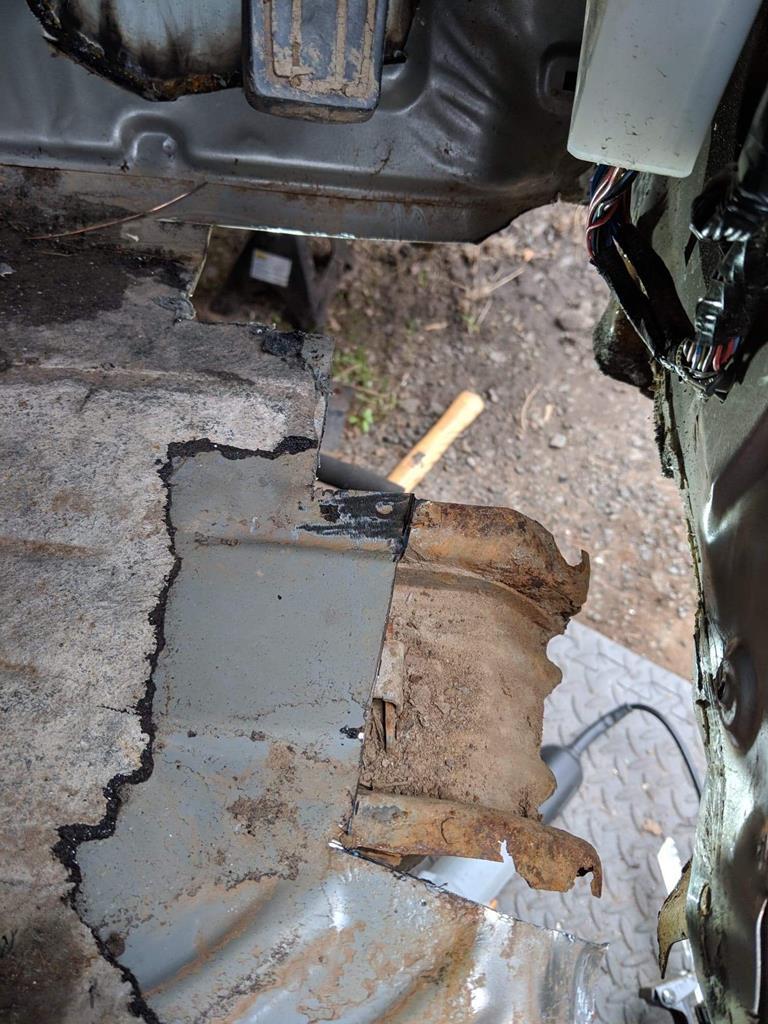 I did make a mistake and not brace the shell before making all these cuts, so I will have some adjustment to do on the door to get it to stop catching so much on the door latch, fortunately it’s more an off-road toy than a show car, but I’d still like to sort it as best I could.... |
| |
|
|
keyring
Part of things
 
Posts: 913
Club RR Member Number: 47
|
|
Apr 27, 2019 21:30:33 GMT
|
Now that the rust was all removed, I could start welding in some fresh metal.... Firstly in the front wheel arch 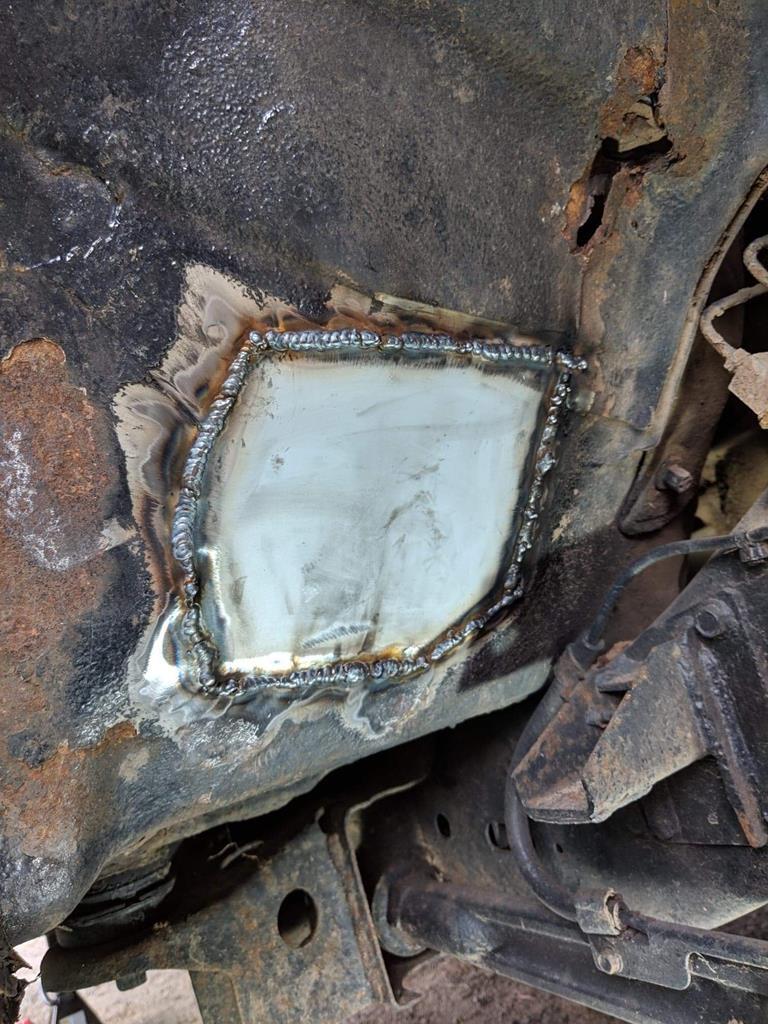 The rusty prt you see above the repair, goes into the engine bay and not the cabin, so I’ll sort this once I move to the front inner arch repairs I then got the box section sill mounted back up, and made an ‘inner sill’ out of 3mm flat bar. I seam welded this along both the box section sill, and the body, perhaps over kill and a pain if it ever needs removed.... 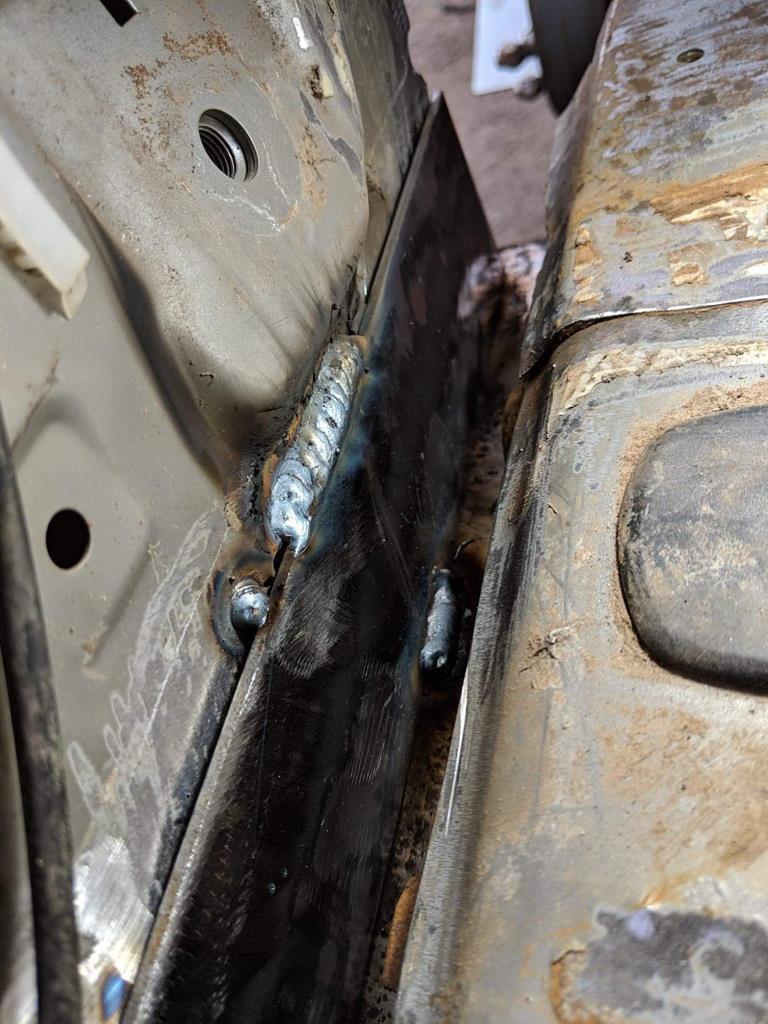 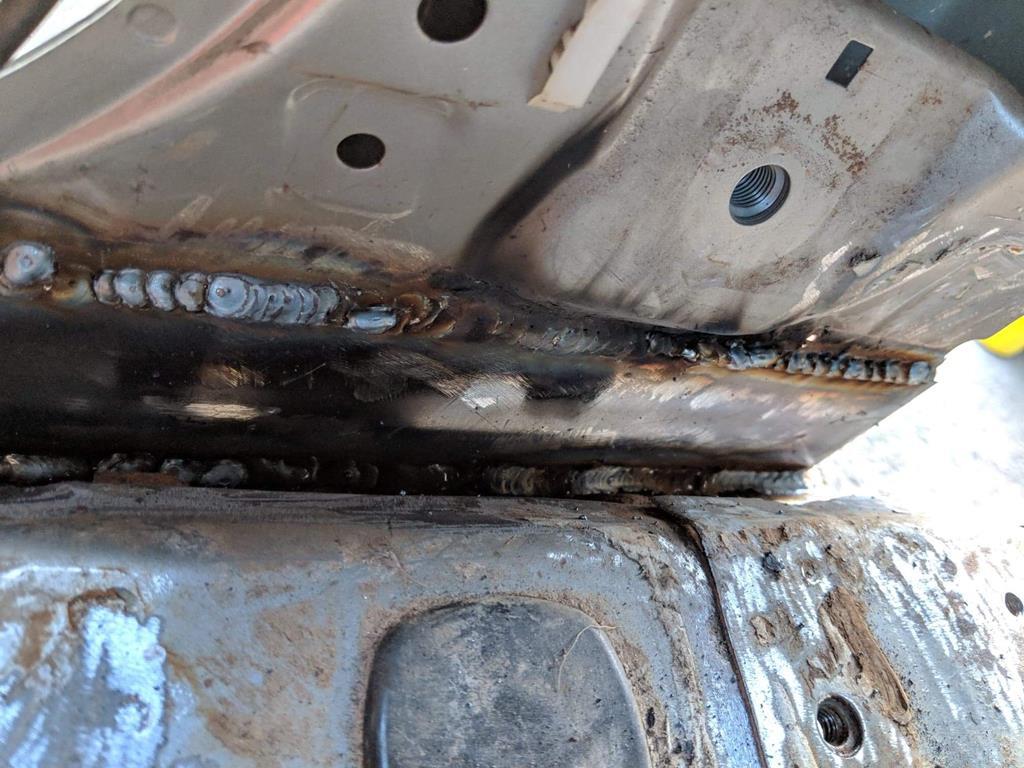 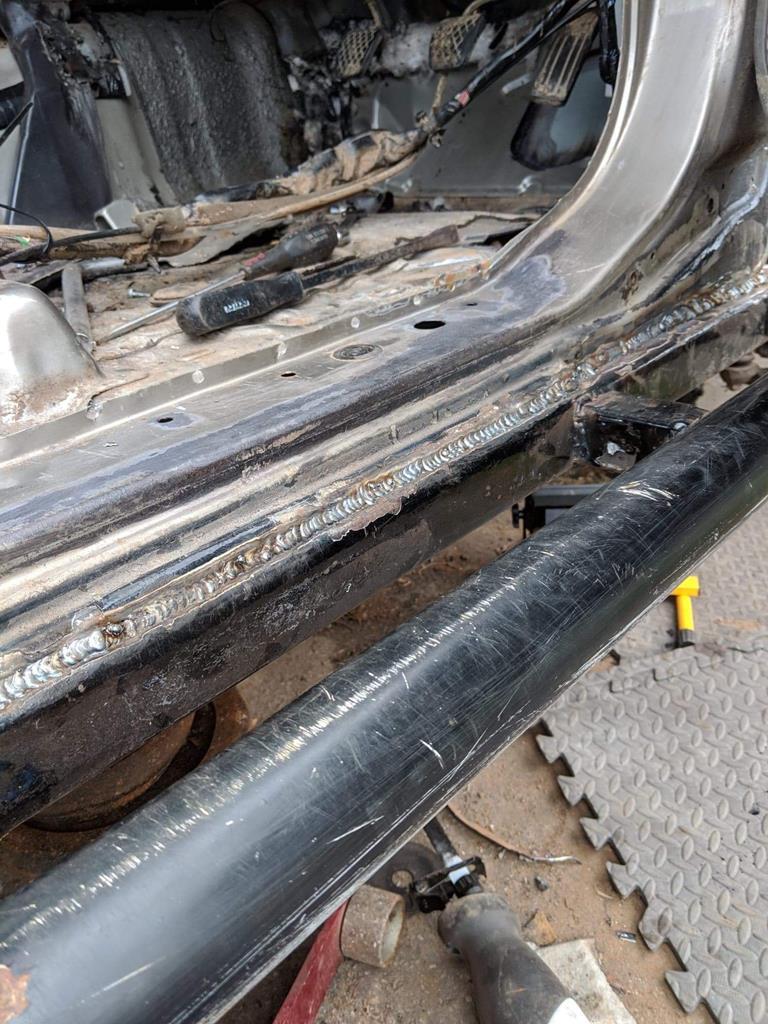 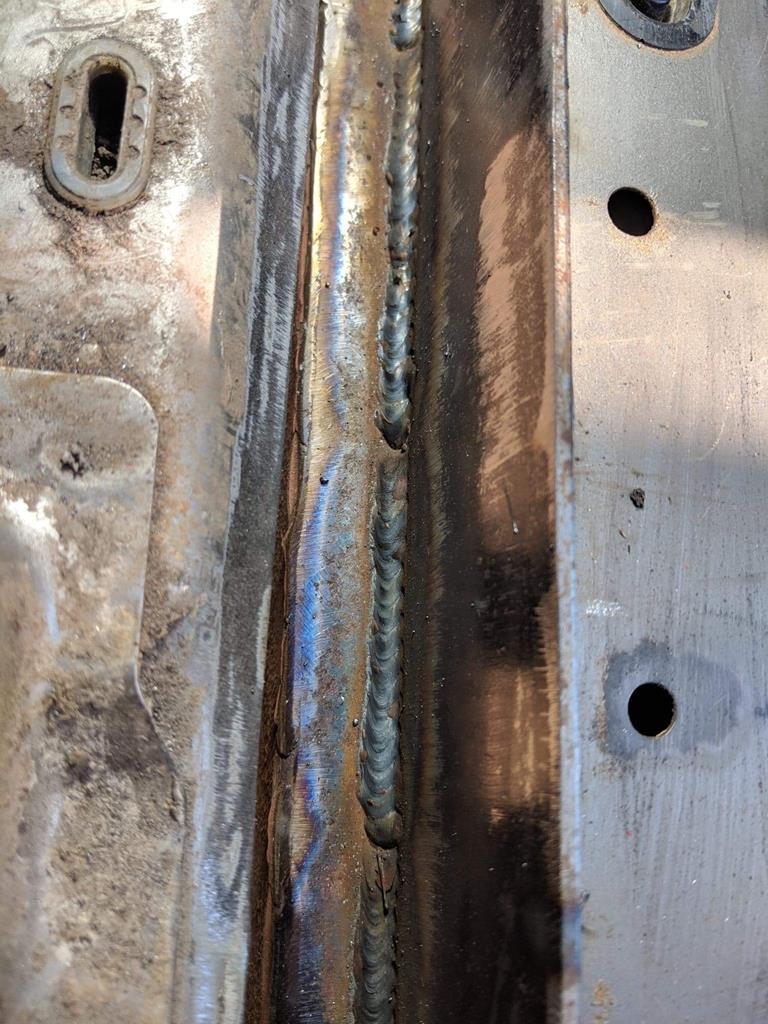 On the outer sill edge, I found I had to do constant spots as otherwise I was getting too much heat in the panel, probably doesn’t look the best, but I guess a dress back and some seam sealer then paint and it shouldn’t be too bad.... I forgot to get photos of the body mounts, but I used the same 3mm flat bar to extend these into the box section and ‘inner sill’ and again seam welded so should be fine for the future... I then got the first patch done on the floor 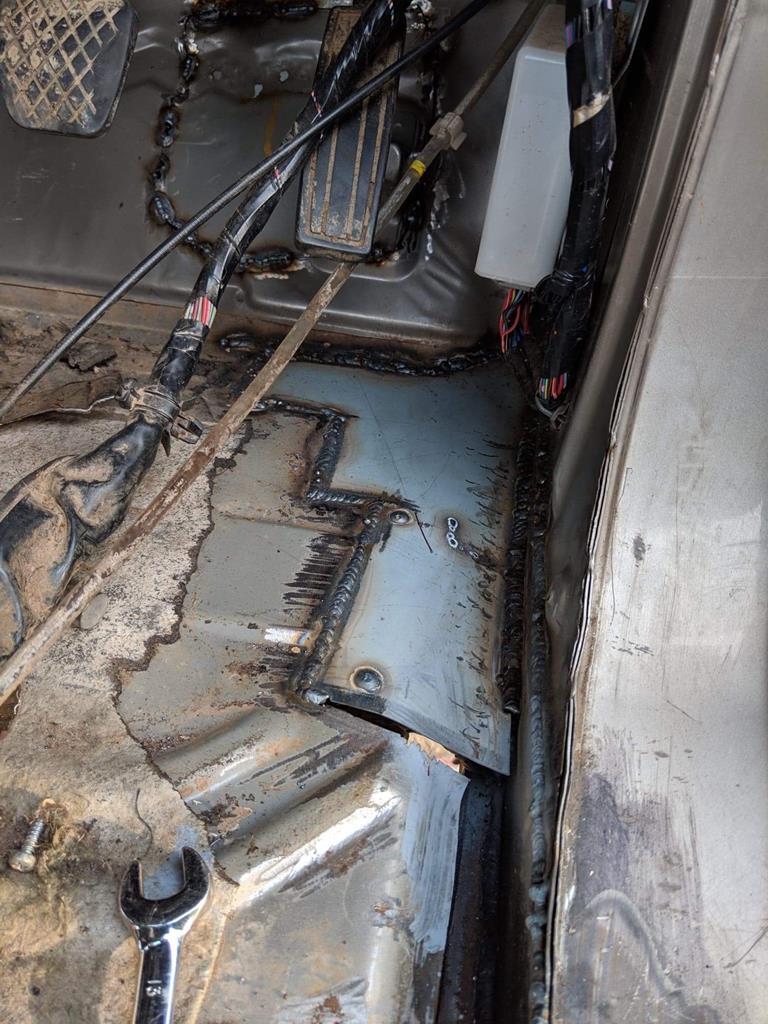 |
| |
|
|
|
|
|
Apr 27, 2019 21:50:57 GMT
|
|
Good on you for keeping t on the road. I had a 2000 GU LWB. They are great cars. Luckily they don't rust here
|
| |
|
|
|
|
keyring
Part of things
 
Posts: 913
Club RR Member Number: 47
|
|
Apr 27, 2019 21:54:56 GMT
|
There was then a strip along an inch wide running from the panel I welded into the floor, to the rear arch, I cut a strip of sheet steel, and welded this in too, I’m not sure why but I don’t seem to have any photos of that at all, I’ll get some once I’m home again... But anyway, after that, I could then make a start on the rear arch tub, I’m self taught at welding apart from a small bit of mig at college on thicker steel, and I don’t really do any fabrication/panel work in my job, so this was a bit daunting, but I don’t think it’s turned out too bad so far, and hopefully I can get some constructive criticism and find out I’ve not done anything too badly... So I cut out some steel and started to mock up an arch tub 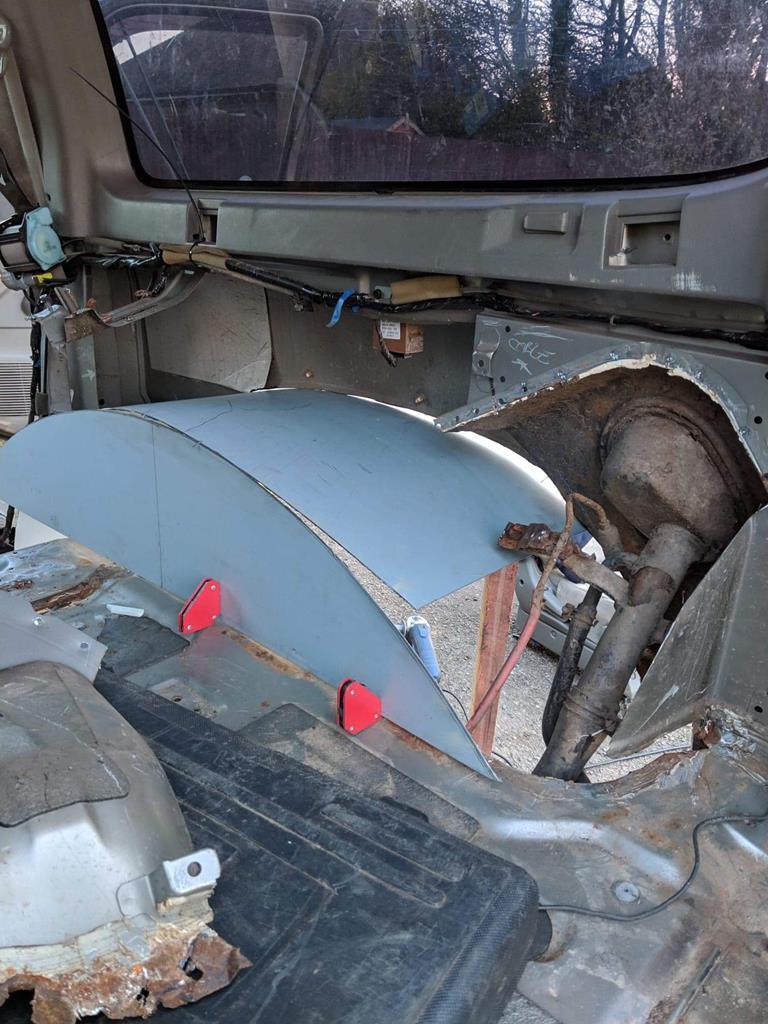 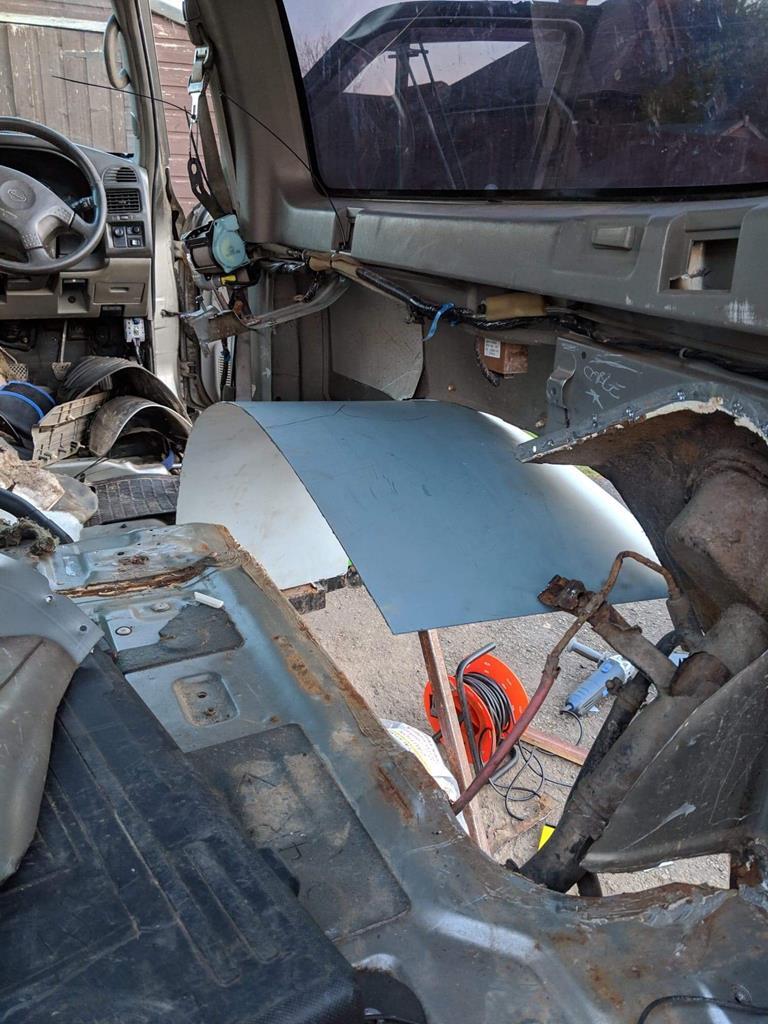 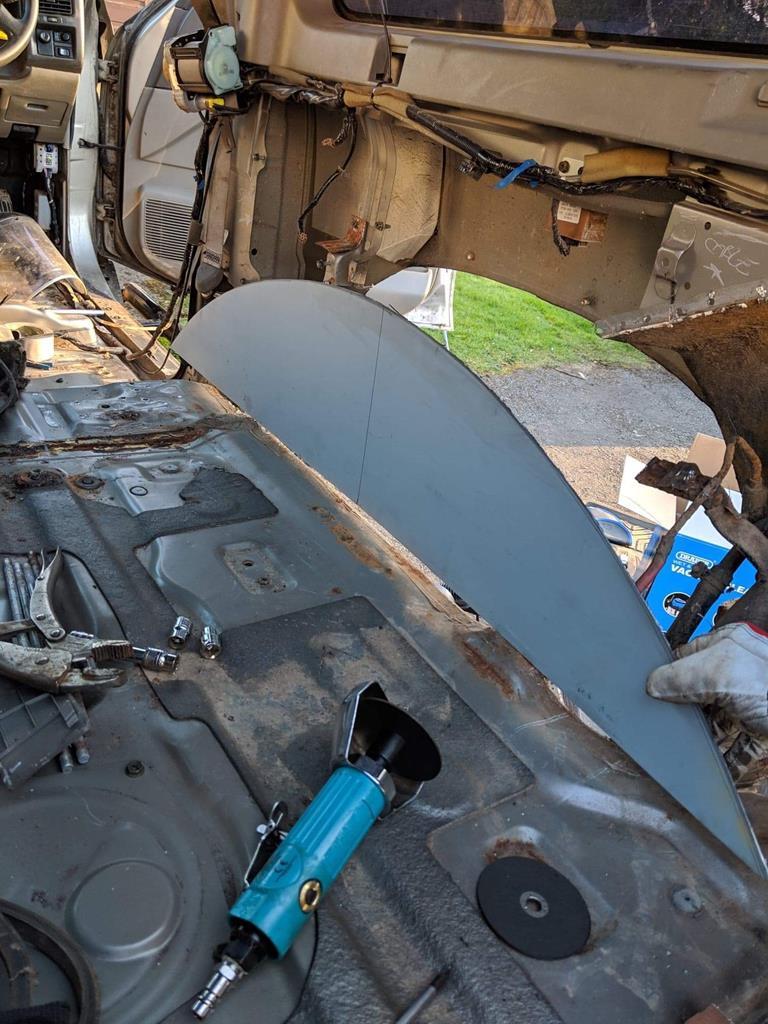 I was happy with that, so got it tacked 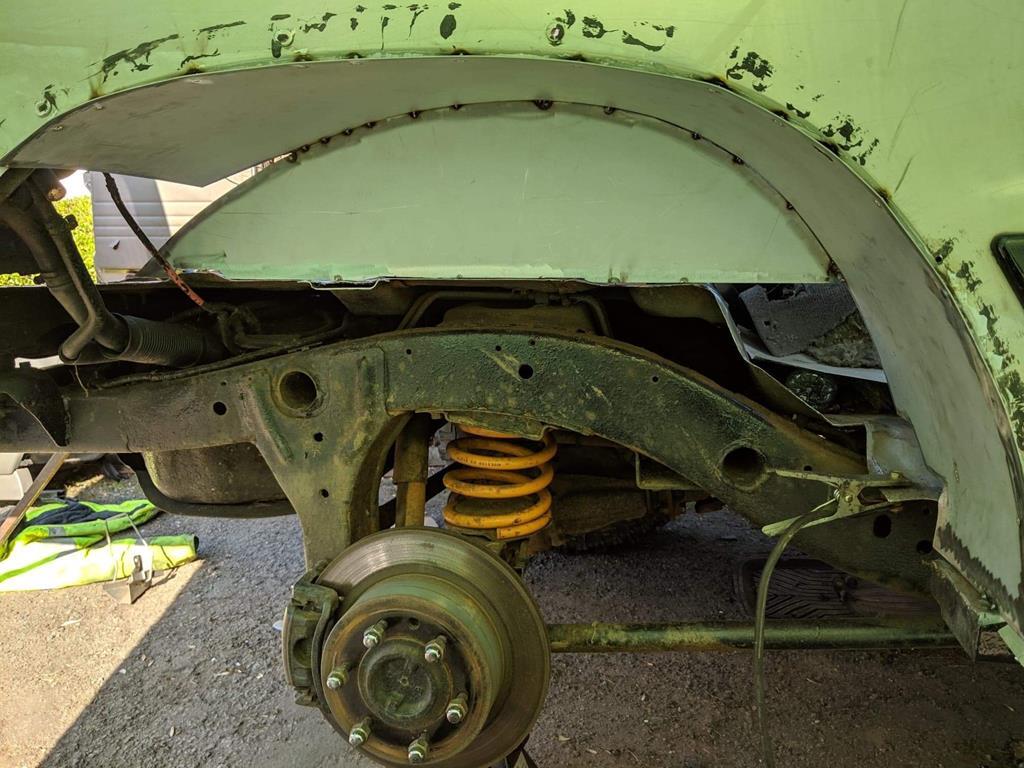 And then got the rest fully welded, again mostly doing spot after spot, on the outer side where the panel met the rear quarter I done random spots, cooling with an air line or leaving to cool in between to try and keep any panel warp to a minimum, I did get a little but nothing I’m massively worried about 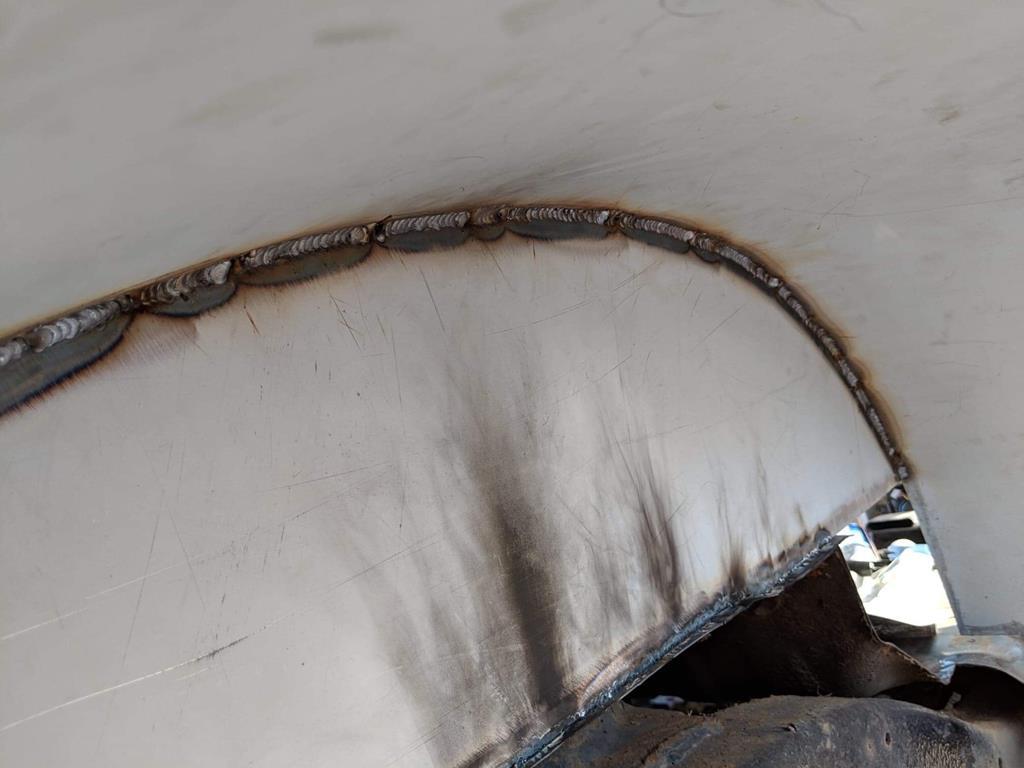 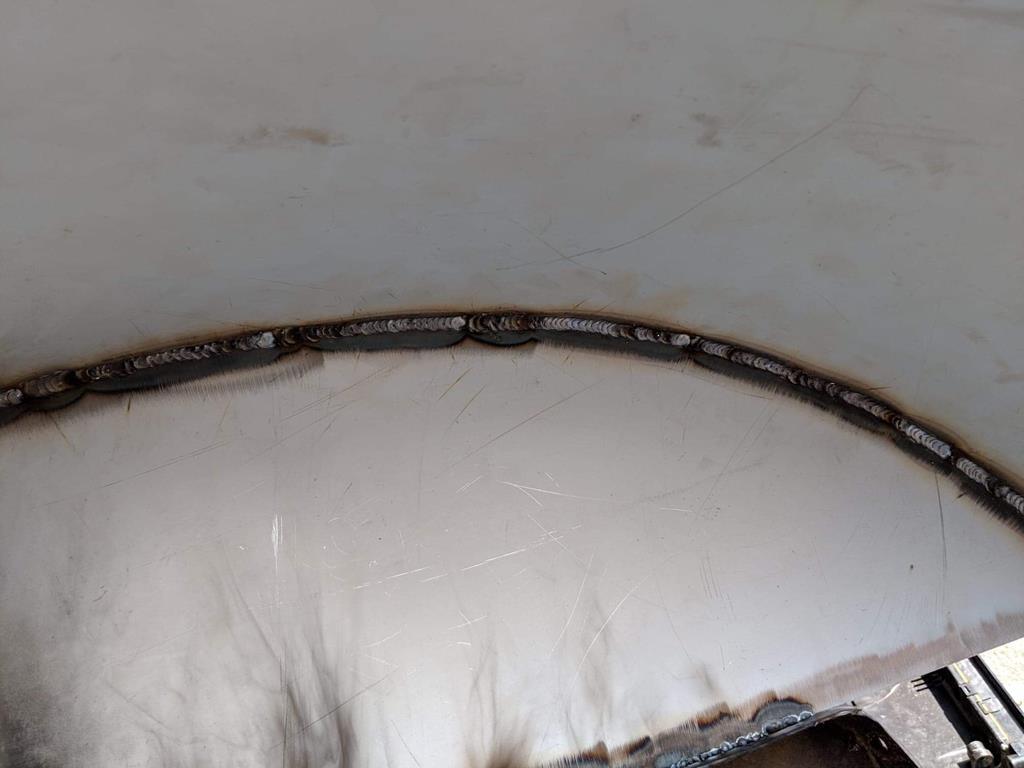 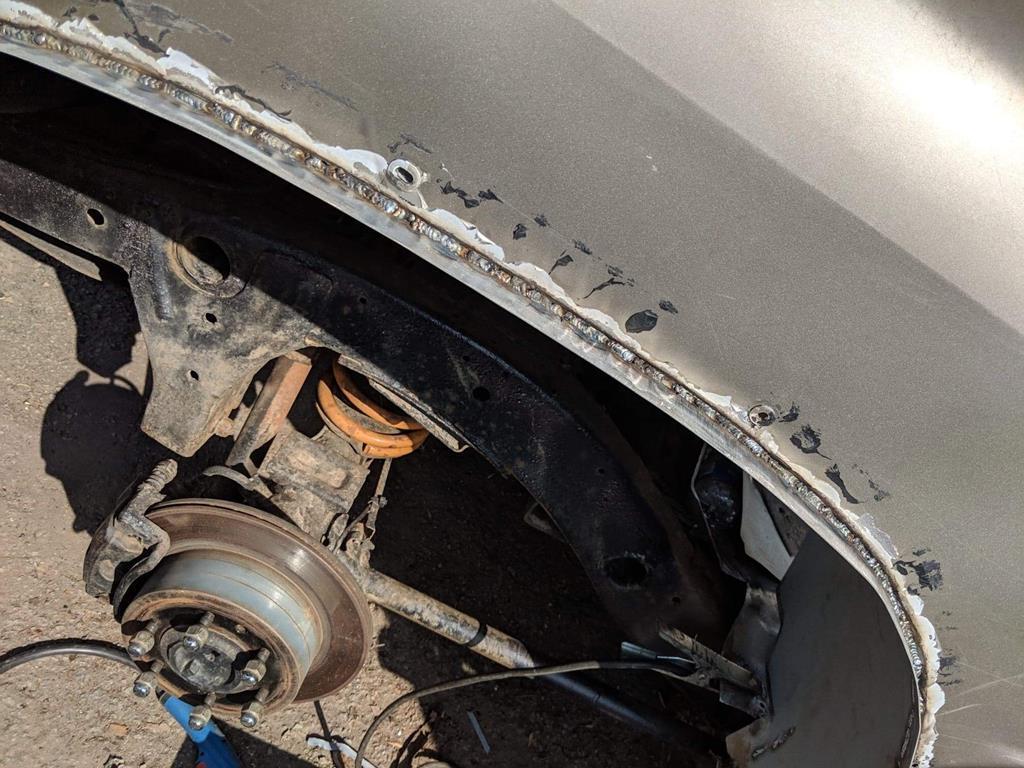 When I cut the arch, I cut it just at the base of the sewage line, so most of the weld shouldn’t actually protude the edge of the panel itself. The reason for leaving the lip is for if I choose to run some strips of conveyor belt in the future (if the wider arches don’t catch all the mud... I then ran out of time before coming back to work, I’ve still got sections to cut and weld in, and then for around the fuel filler neck, I think I’m going to repair the bottom edge of the original piece I cut out, and cut it into the new tub to save me having to make the curved panel. Before I left, I etch primed and seam sealed the parts I had welded(leaving a small undone bit up to where I knew I’d be welding once home again) 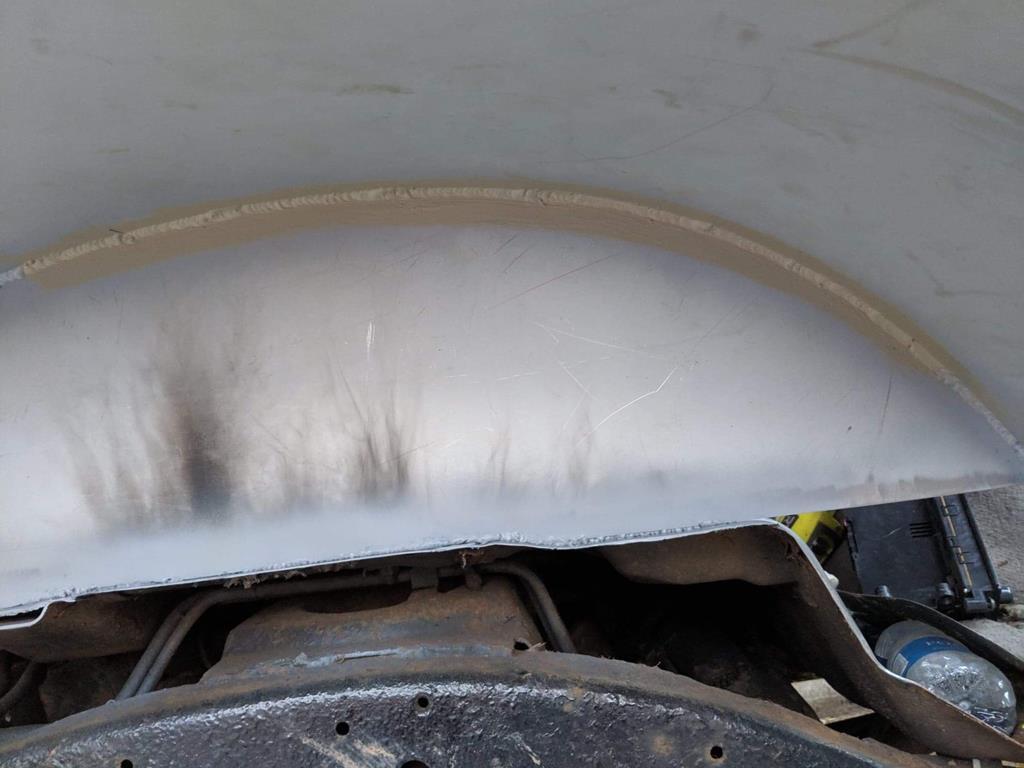 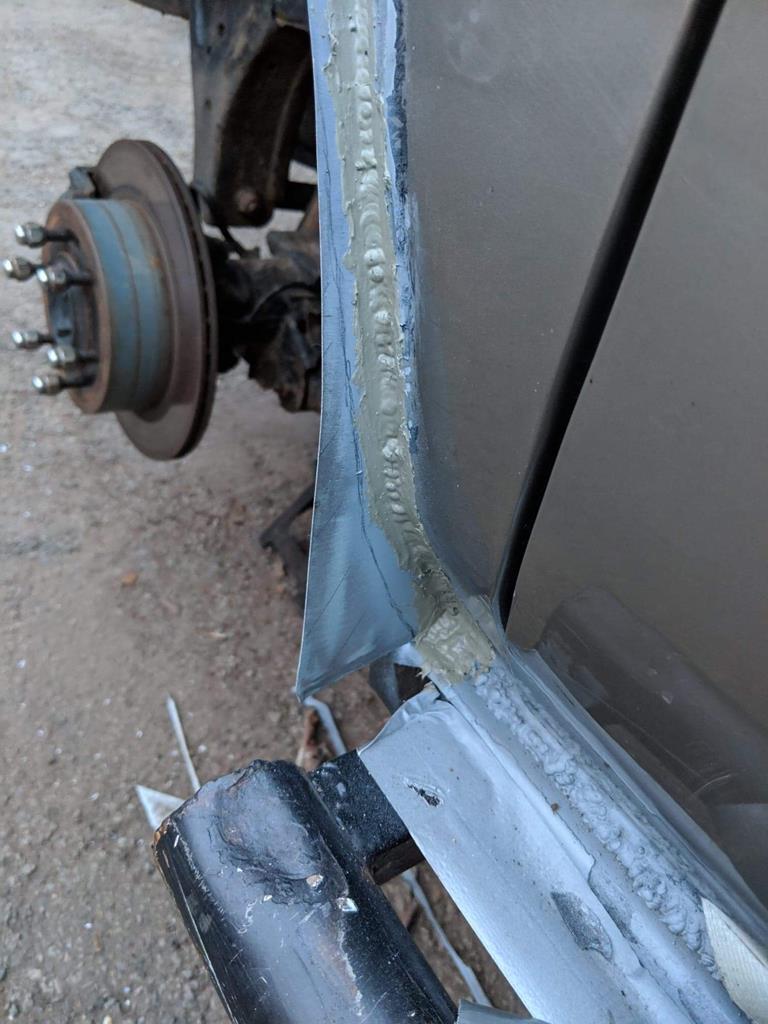 You can see in that photo where I plan to trim the lip back into the body... I’m hoping to be able to lightly sand the seam sealer to smooth it, and then paint in the body colour, as long as it’s solid and no change of water ingress or rust coming back, I’m happy, it doesn’t have to look perfect, as I will be getting a set of these arches (don’t want it to look a mess under the arches either of course) 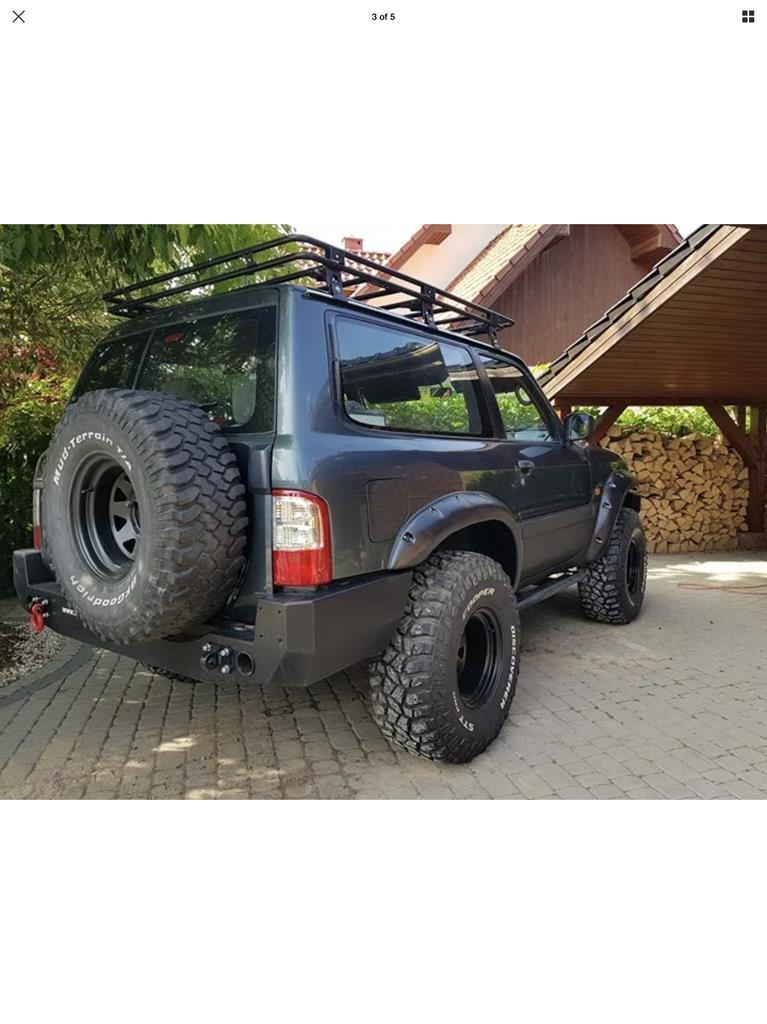 And finally. I chucked the tyre on just to see the sort of clearance I had 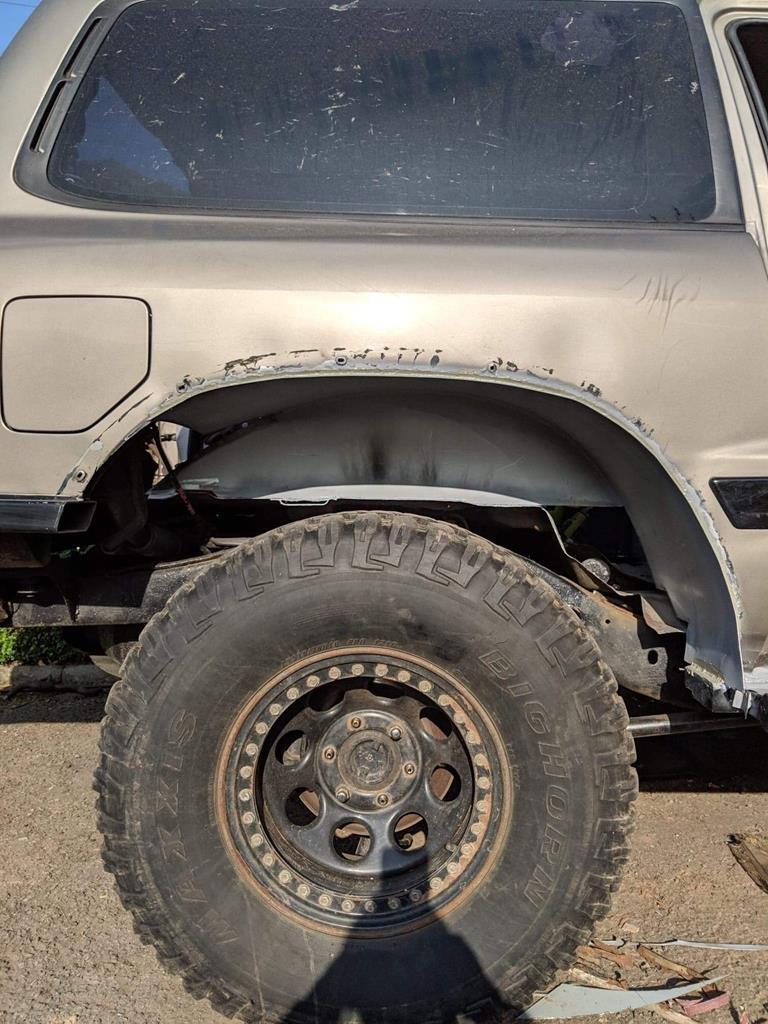 As I say, this isn’t my usual work, and I’ve got a lot to learn, but there’s a lot of knowledge on here, and if I can get feedback on what I’ve done, what I need to change, what I’m doing right etc, that would be amazing.... thanks  |
| |
|
|
keyring
Part of things
 
Posts: 913
Club RR Member Number: 47
|
|
Apr 27, 2019 21:57:24 GMT
|
Good on you for keeping t on the road. I had a 2000 GU LWB. They are great cars. Luckily they don't rust here Thanks! I’m extremely jealous of the trails you have in Auz for 4x4 driving, do you do much wheeling in it? I know it’s getting more and more advertisement based, but I’m a massive fan of 4wdaction, but I’ve heard the trails are even better when not seeing them through their camera! |
| |
|
|
|
|
|
Apr 27, 2019 22:04:28 GMT
|
|
Blinking heck. I've seen patrols with 300k miles and regularly beach driven with no rust/minimal. The salt you guys use would rot stainless steel!
But good to see it being used properly. Too many people buy big 4wds in the city and never venture off road.
|
| |
|
|
|
|
|
Apr 27, 2019 22:06:11 GMT
|
|
|
| |
Last Edit: Apr 27, 2019 22:07:43 GMT by rblote
|
|
|
|
|
Apr 27, 2019 22:17:28 GMT
|
|
|
| |
|
|
|
|
|
|
|
Nothing wrong in what you have got done - your welds are strong and have penetrated well - I see a lot worse attempts at welding by the so called professional motor trade - there's not much I can add - you have already realised your mistake of not bracing a bodyshell before removing structural sections - seam sealer wise I am assuming that you are using the useless stuff that comes in a one litre tin that you somehow have to get onto a brush before you can apply it - get yourself the cartridge type seam sealer that goes in a skeleton gun - (low modulus / MS type - NOT PU / Tigerseal or Skiflex) - you will find this easer to apply by the gun and brush out easily to replicate factor OE type seams see pic below - other than that it's a very good job to date - Chris 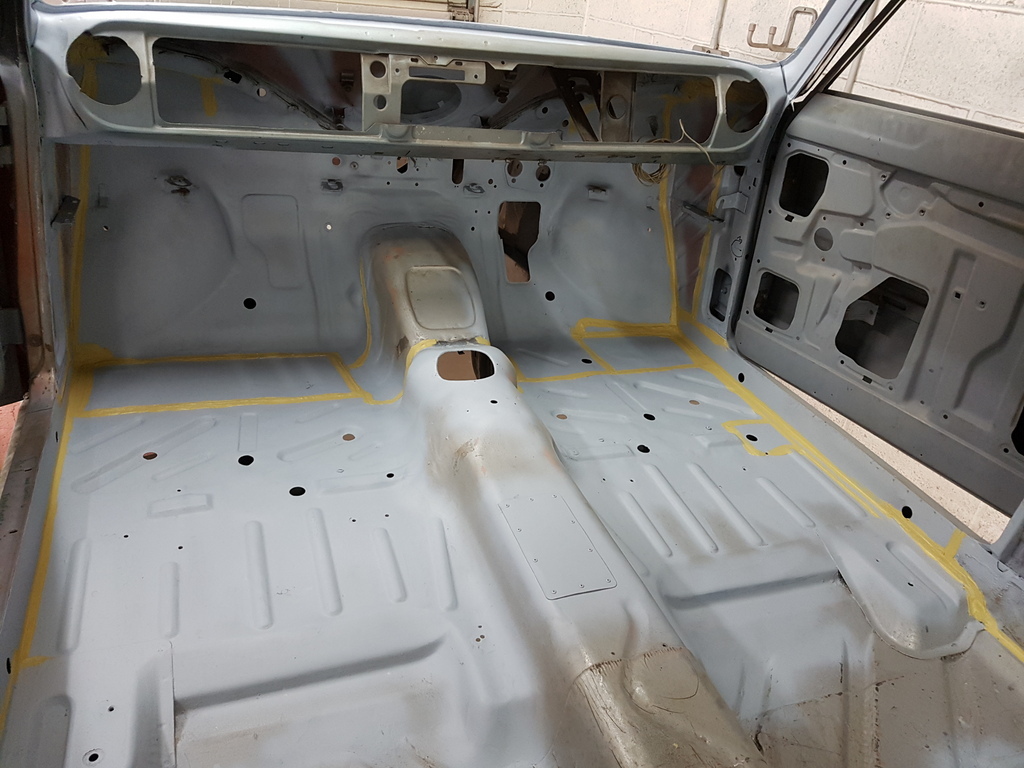 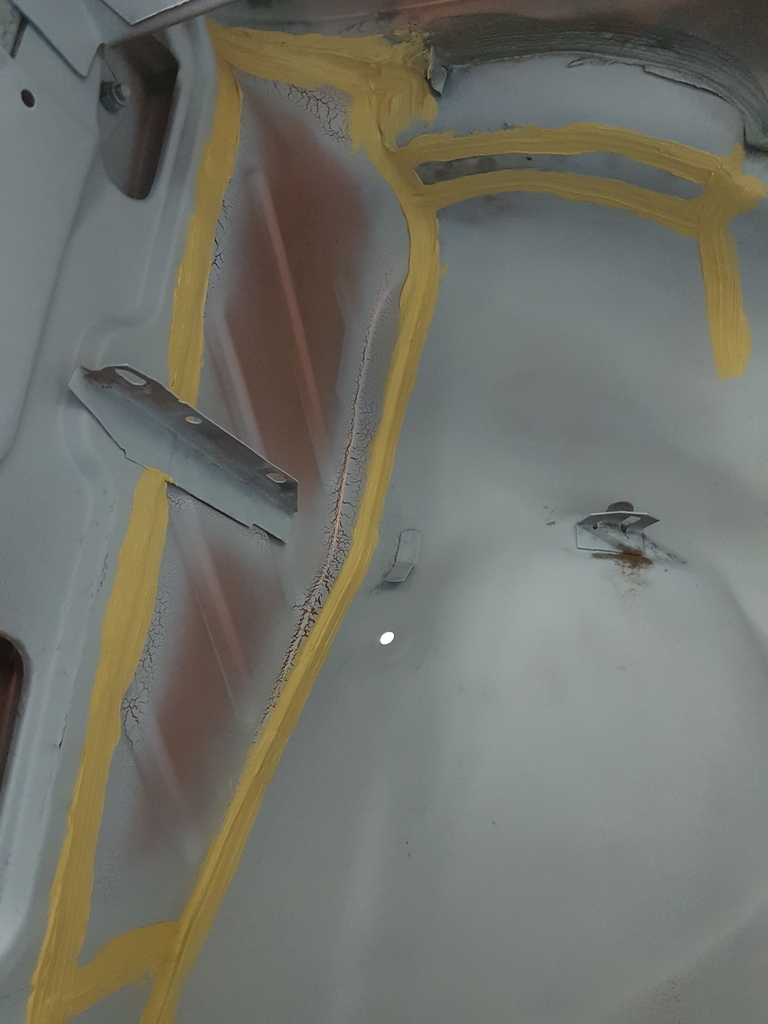 |
| |
|
|
|
|
|
|
|
|
Bloody good job considering its not your thing .Much better than what was done before on it ! And yes , nice welds , fairly flat with good penetration . fc
|
| |
|
|
keyring
Part of things
 
Posts: 913
Club RR Member Number: 47
|
|
Apr 28, 2019 19:31:55 GMT
|
Blinking heck. I've seen patrols with 300k miles and regularly beach driven with no rust/minimal. The salt you guys use would rot stainless steel! But good to see it being used properly. Too many people buy big 4wds in the city and never venture off road. Yeah, the uk roads aren’t friendly to cars  I’ve seen 4wd action go up there, the tracks look amazing!! And your truck looks awesome! I bet it does well with having front and rear lockers... uk patrols only have a rear locker, but I’m planning to fit a lsd in the front until I can justify a locker Nothing wrong in what you have got done - your welds are strong and have penetrated well - I see a lot worse attempts at welding by the so called professional motor trade - there's not much I can add - you have already realised your mistake of not bracing a bodyshell before removing structural sections - seam sealer wise I am assuming that you are using the useless stuff that comes in a one litre tin that you somehow have to get onto a brush before you can apply it - get yourself the cartridge type seam sealer that goes in a skeleton gun - (low modulus / MS type - NOT PU / Tigerseal or Skiflex) - you will find this easer to apply by the gun and brush out easily to replicate factor OE type seams see pic below - other than that it's a very good job to date - Chris   Well I’m happy with that! I’m glad it’s turned out well, I felt it took a lot of time to make not a lot of progress, but that’s always the way with something new... it doesn’t help the garage at the folks is full of my mk2, so I’m hoping to finish off this side, and then do the other side once I move into my own place as there is a lot more room in the garage. It is the tinned seam sealer I’m using  but it is a pain to put on, and with how much better your sealer looks, it looks like that should be my next purchase! Thanks for the feed back, I’m hoping I’ll learn from this for when I do the mk2 Bloody good job considering its not your thing .Much better than what was done before on it ! And yes , nice welds , fairly flat with good penetration . fc Thanks mate! Glad to hear it’s looking ok, hopefully I can improve over time  |
| |
|
|
|
|
Ritchie
Club Retro Rides Member
Posts: 771  Club RR Member Number: 12
|
|
Apr 30, 2019 13:00:39 GMT
|
- get yourself the cartridge type seam sealer that goes in a skeleton gun - (low modulus / MS type - NOT PU / Tigerseal or Skiflex) Grumpy,
Do you have a particular brand / type you prefer? I'll be need some of this soon.
Cheers.
|
| |
|
|
|
|


 )
)


