|
|
|
Apr 29, 2015 10:57:12 GMT
|
|
hey dezz, cheers for comments!
i intended the tailgate to sit abit higher than it does, i havent got the balls to cut it length ways haha, ive started on a small dress panel on the sides, with some swaged holes that will come round the bottom of the tailgate, with a tiny tiny skirt underneath the tailgate itself to meet.
i would have loved to have to some original style hinges on, I'm going to make some that sit on the dress panel I'm making and come into the tailgate, hopefully turn out nice and different.
cars looking good btw!
|
| |
|
|
|
|
|
|
|
|
|
|
Thanks mate, appreciate it!
|
| |
|
|
|
|
|
|
|
got the tailgate mounted yesterday and sat it on the car for the first time, very happy : 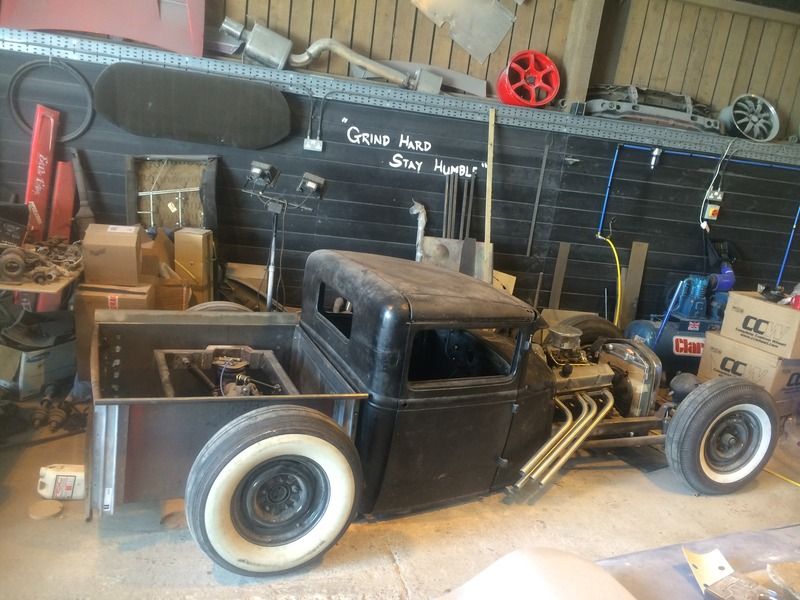 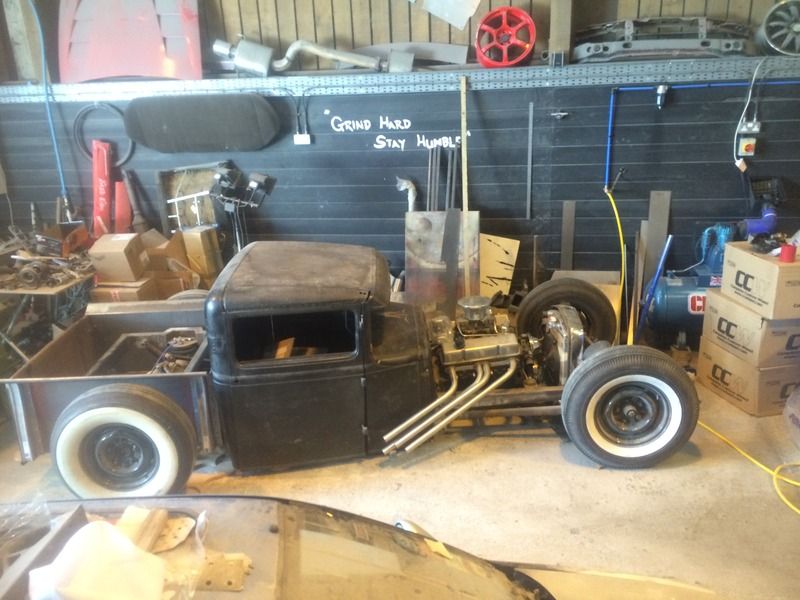 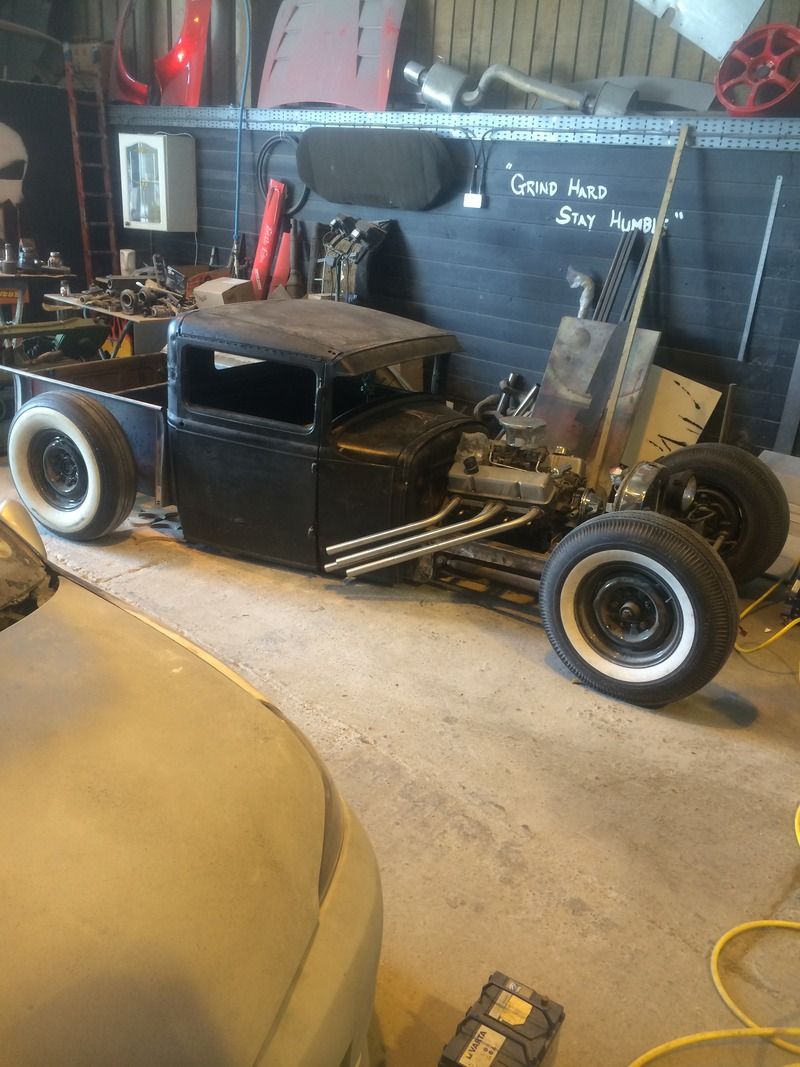 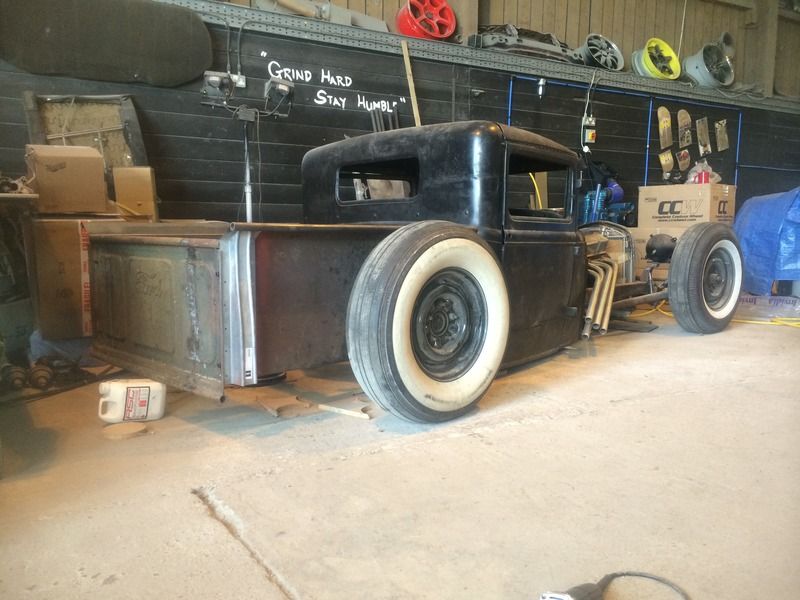 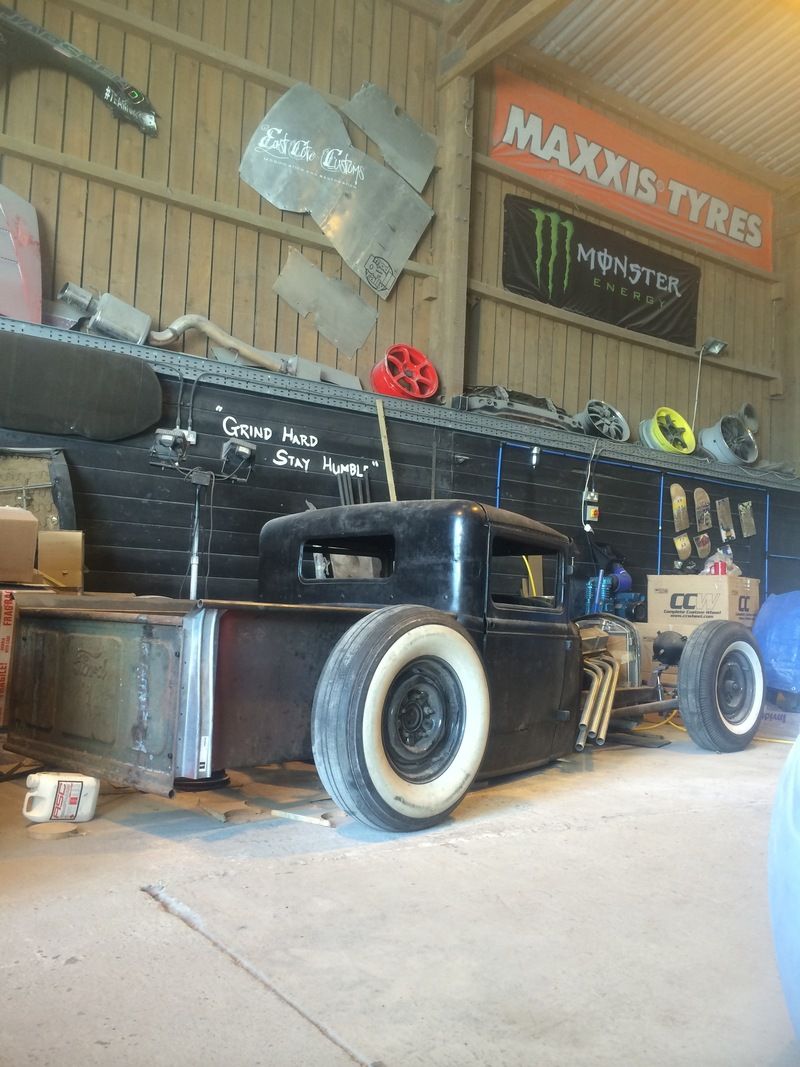 next i will be making the inside framework and lower skirt to sit around the pickup bed to get the bodyline back close to how it was, thanks for looking ant |
| |
|
|
|
|
|
Apr 28, 2015 11:56:31 GMT
|
|
thanks for comments.
i plan to put the currently front tyres onto the back and get some thinner onces for the front, my issue is i want a thinner tyre but still roughly the same height, as when the car is "aired out" i still need the ground clearance on the chassis.
more updates soon
|
| |
|
|
|
|
|
|
|
update on the truck! still plodding along trying to get my house sorted so been slower than last year with this build, but.. got some more progress done on my pick-up bed, made the rear panel and my first attempt at rolling beads, i finally got my beadroller back together and made myself a guide: 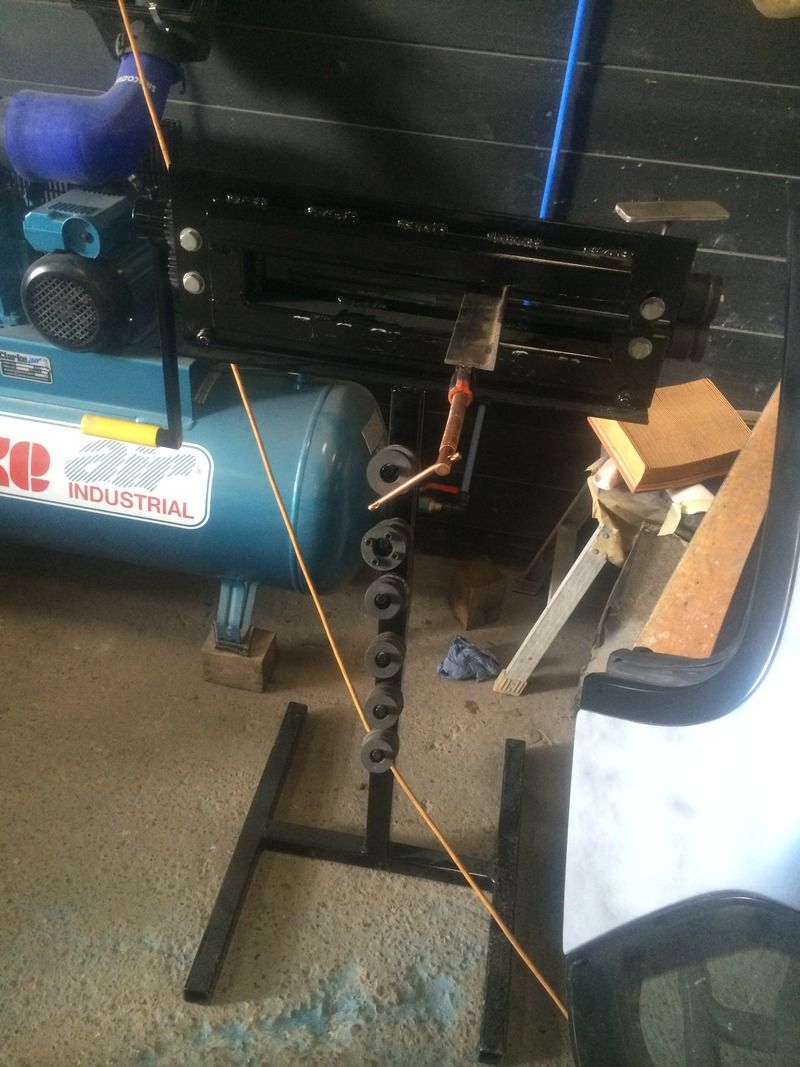 only simple lines for now but I'm happy how its came out : 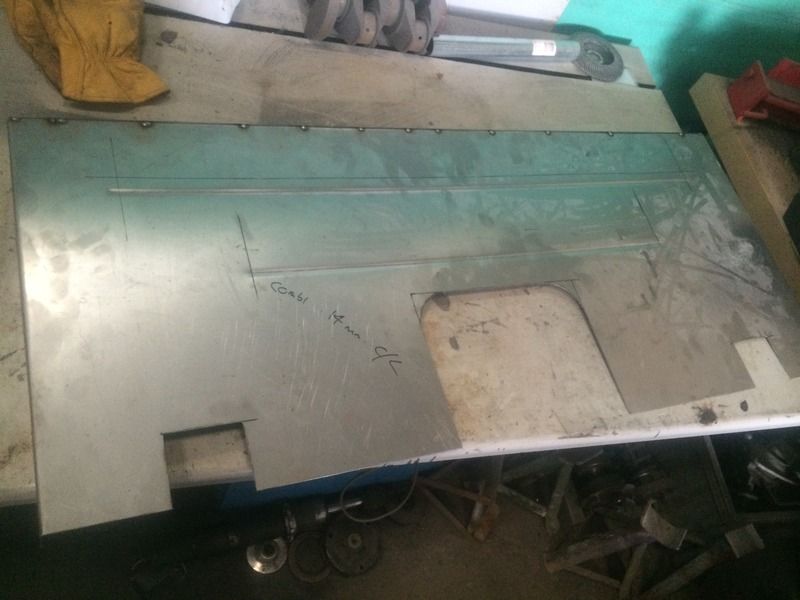 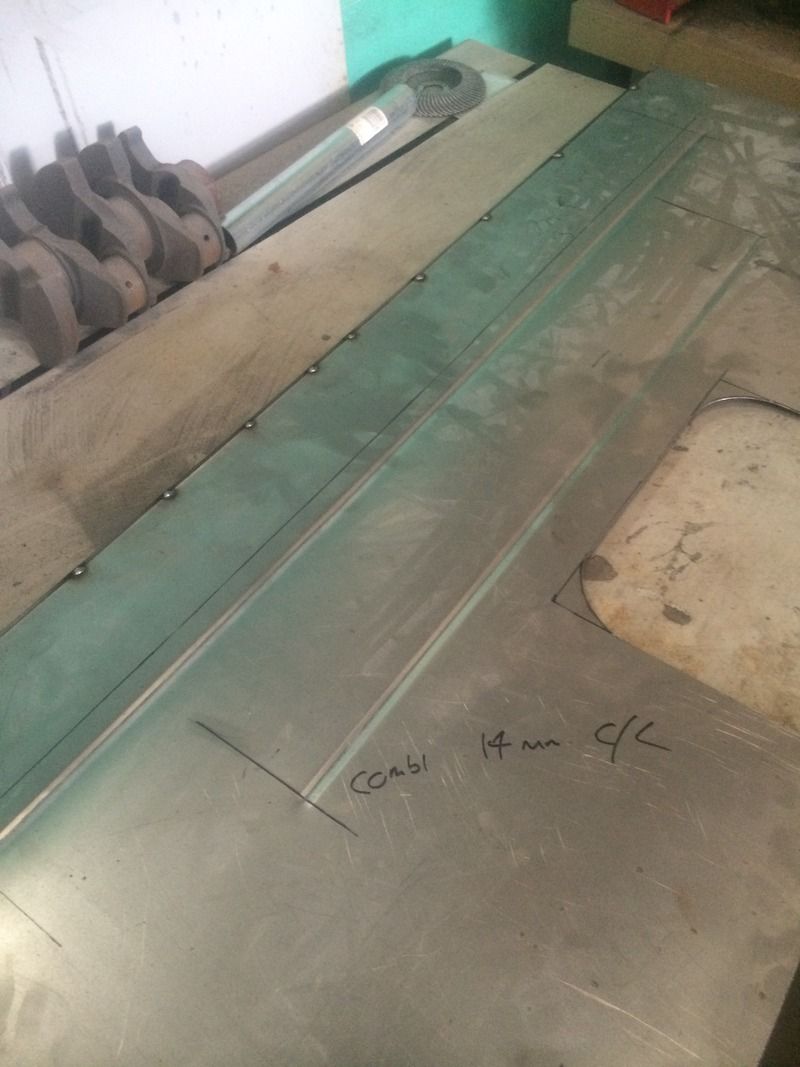 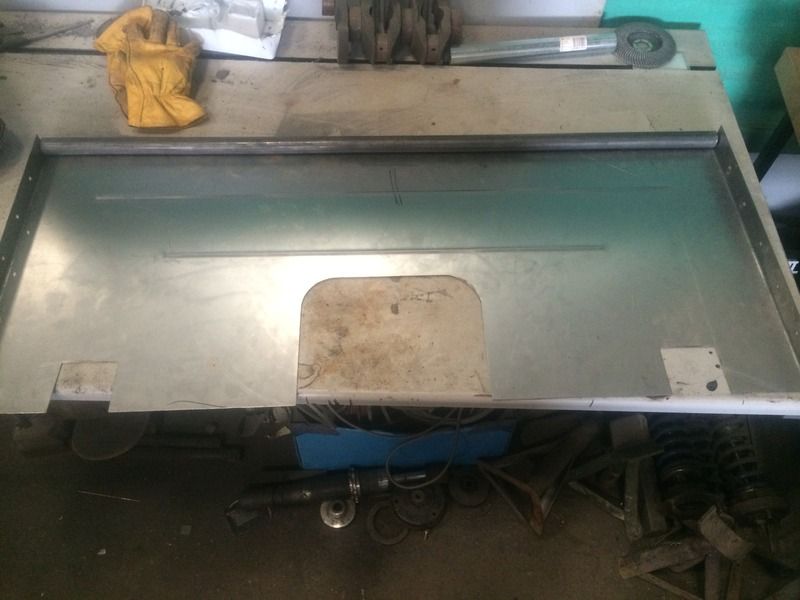 same as the pickup sides, lots of short stitches and flapdisk/ orbital sander to finish, got a slight warp in this one but nothing than cannot be straightened out with some man sized g-clamps and some packing. now the bed is starting to take shape: 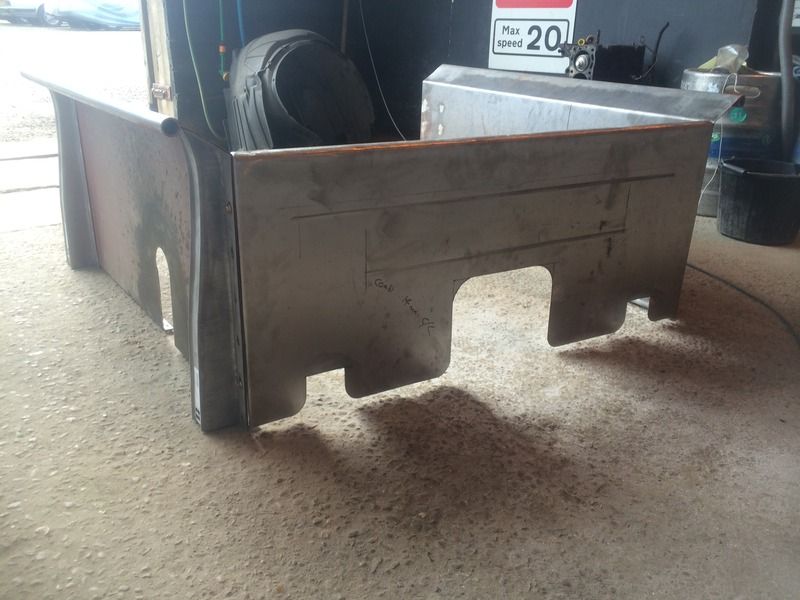 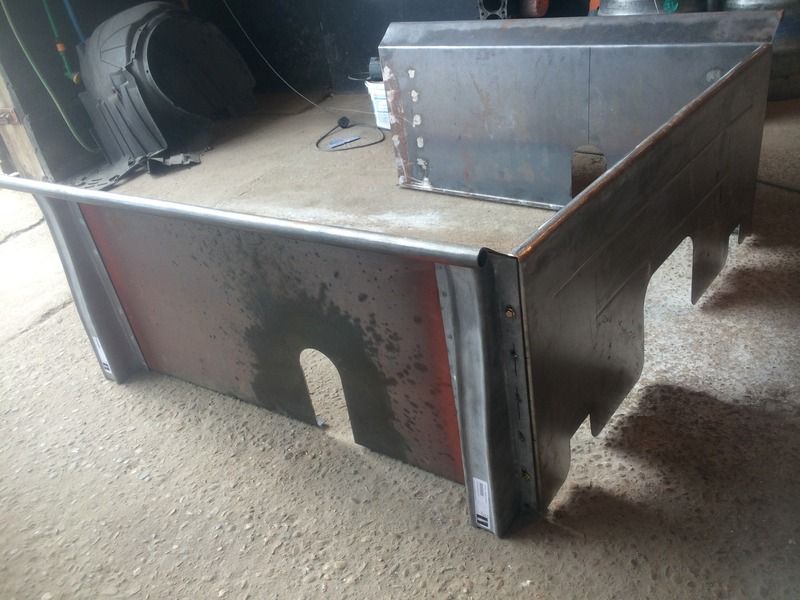 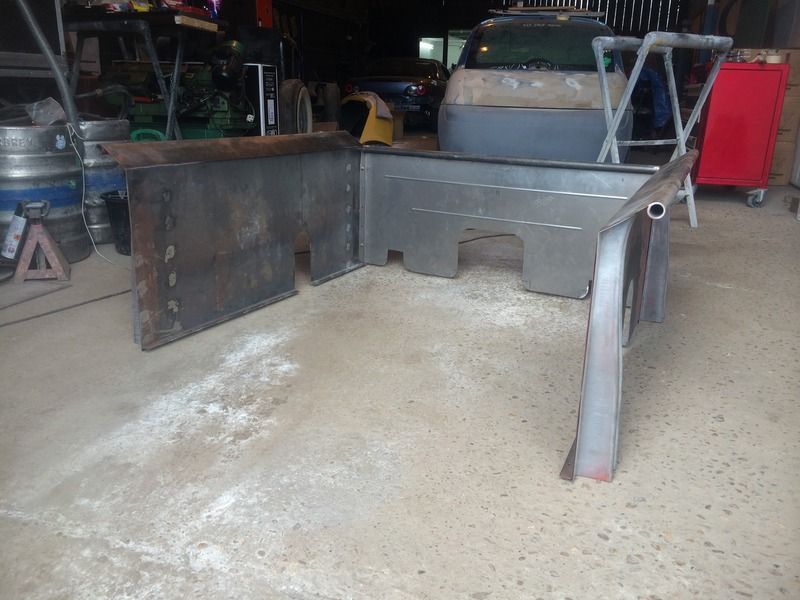 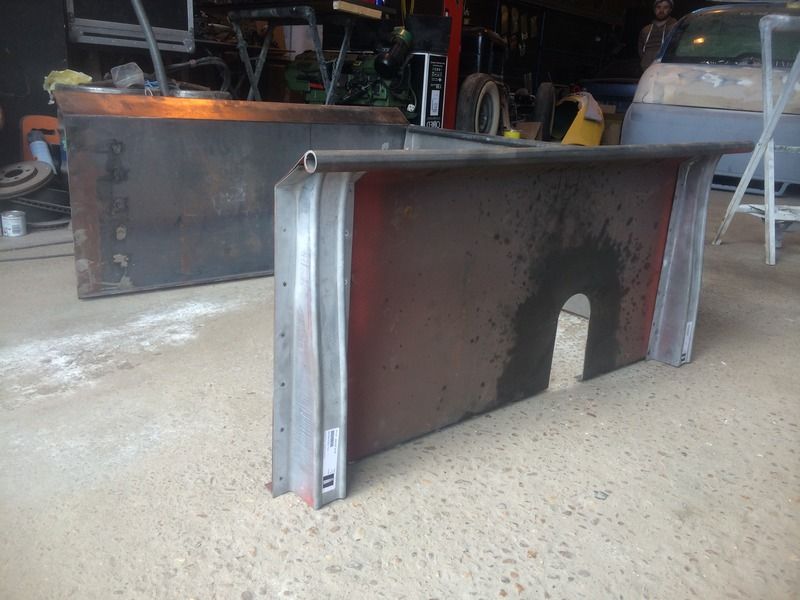 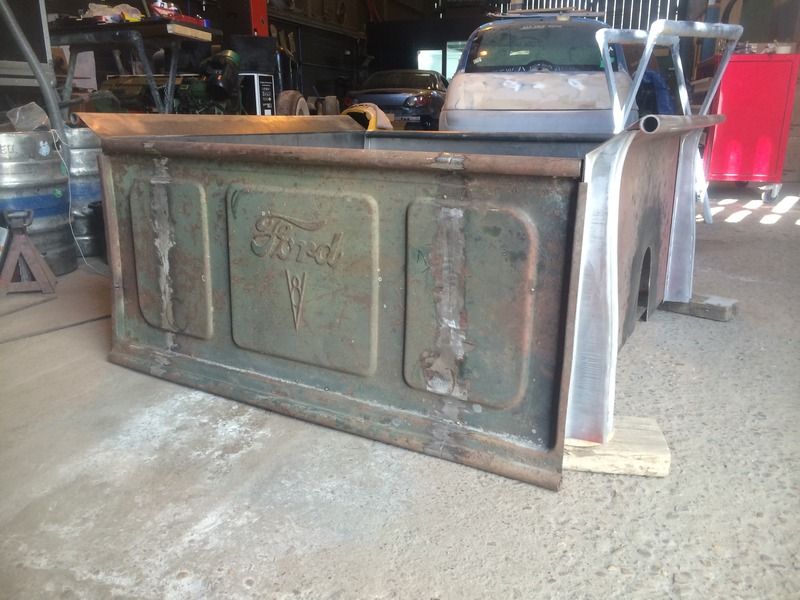  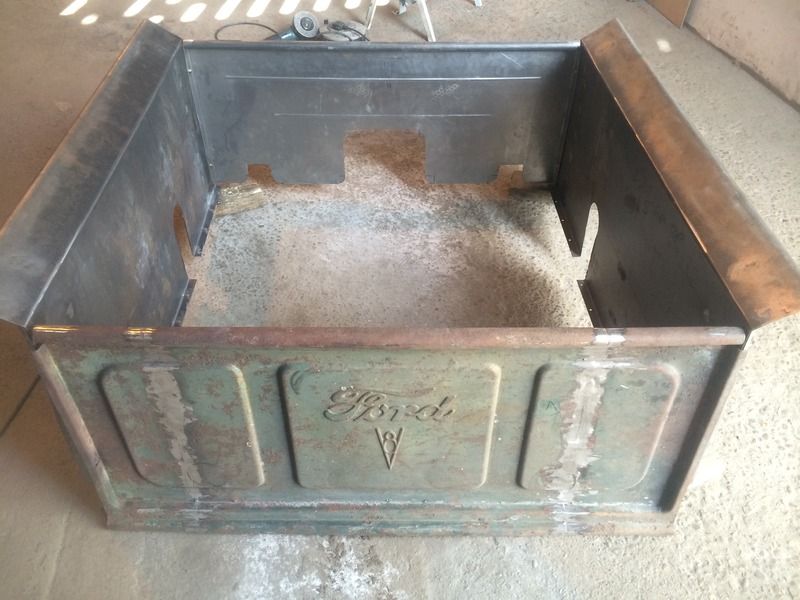 just need to get the tailgate bolted on somehow and its all together ready to have a frame put inside, i was thinking of bolting the tailgate to the sides same how the rear panel has been mounted by nut and bolting the sides together but i didnt want the nuts and thread to be on show, so i think ive decided one to attach the tailgate lid to the sides with some coach bolts through the face of the tailgate and onto L shaped brackets welded onto the inner sides of the bed. once painted this will look alot cleaner than nuts and bolts ( i hope lol).. just rested on its taking shape, plenty of room for a slimline air ride tank to be placed along the back of the chassis and fit inside the bed: 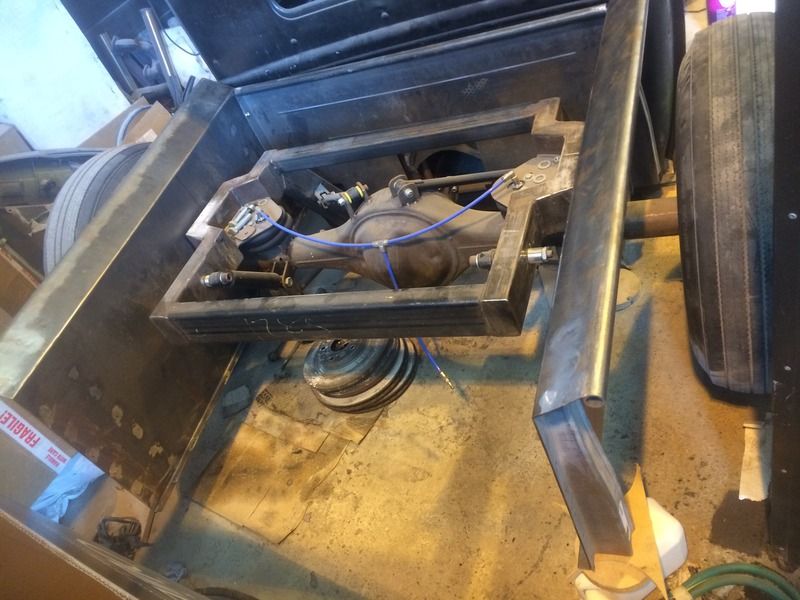 more pics and progress soon! thanks for looking! |
| |
|
|
|
|
|
Apr 20, 2015 19:43:04 GMT
|
|
any updates dezz?
|
| |
|
|
|
|
|
|
|
|
looks a very nice example, i drove one of these a few years ago, couldn't believe how lively they are!
|
| |
|
|
|
|
|
|
|
|
fantastic build, cant believe how muhc better it looks just by changing a colour! top job!
|
| |
|
|
|
|
|
Feb 20, 2015 14:16:19 GMT
|
|
absolutely fantastic project!, is that dimma where the car is now?
|
| |
|
|
|
|
|
Feb 14, 2015 10:57:15 GMT
|
been cracking on with the bed sides this week. got some 1.5mm steel sheet cut to size then folded on an 60 year old manual folder, this included lots of setting up, marking and a few choice swear words, somehow they both managed to come out pretty much perfect  always like to put faith on old tools! i plan to put a lower skirt on the sides with some swaged holes in the future so put an additional lip on the bottom ready for this.. went down to the local steel stockists then to get the tubes to the rolled lip. didnt have much in stock but picked up some 27mm 2mm walled tube, decided this would be ample for the job. marked out, clamped down and tacked in place: please excuse the mess of the workshop! spring cleaning time soon! 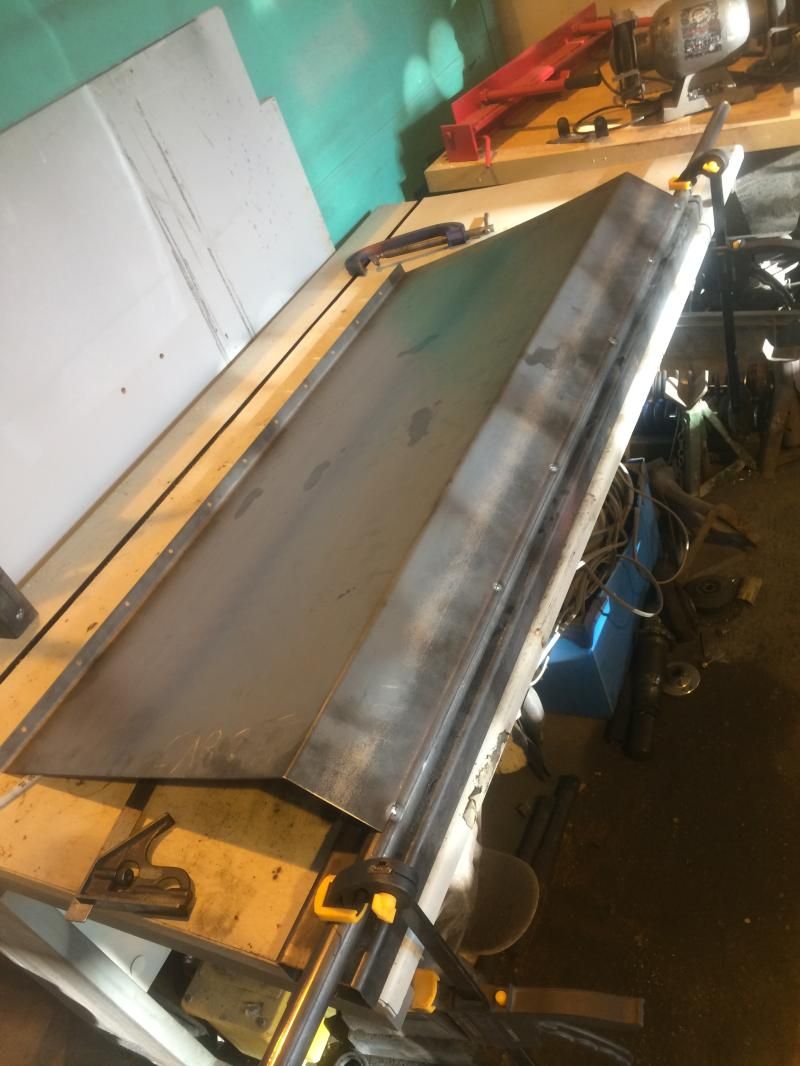 then ran a series of 6mm stitches. let them cool then added another 6mm to them, again let cool, slowly but surely joining them together.. 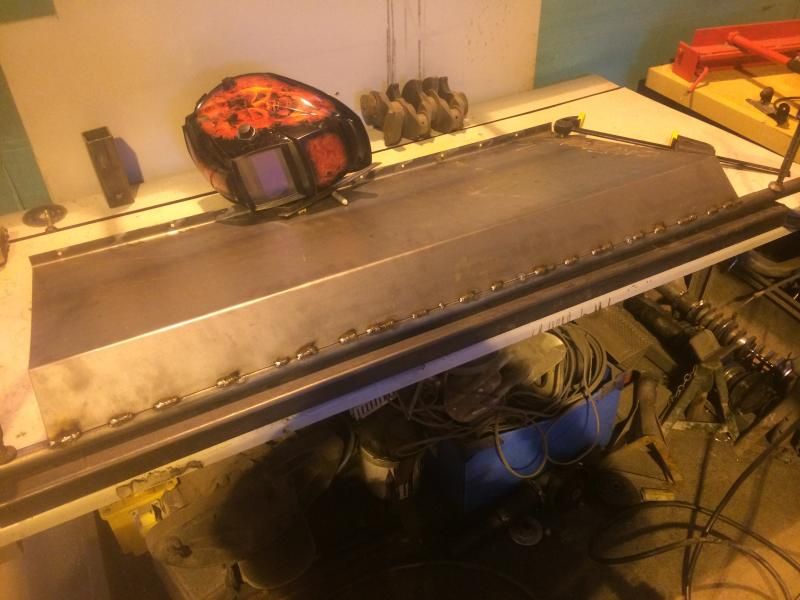 once completed i went over with various grade of flapdisk untill i got close, then some finishing with 40 and 80 grit pads on an orbital sander, 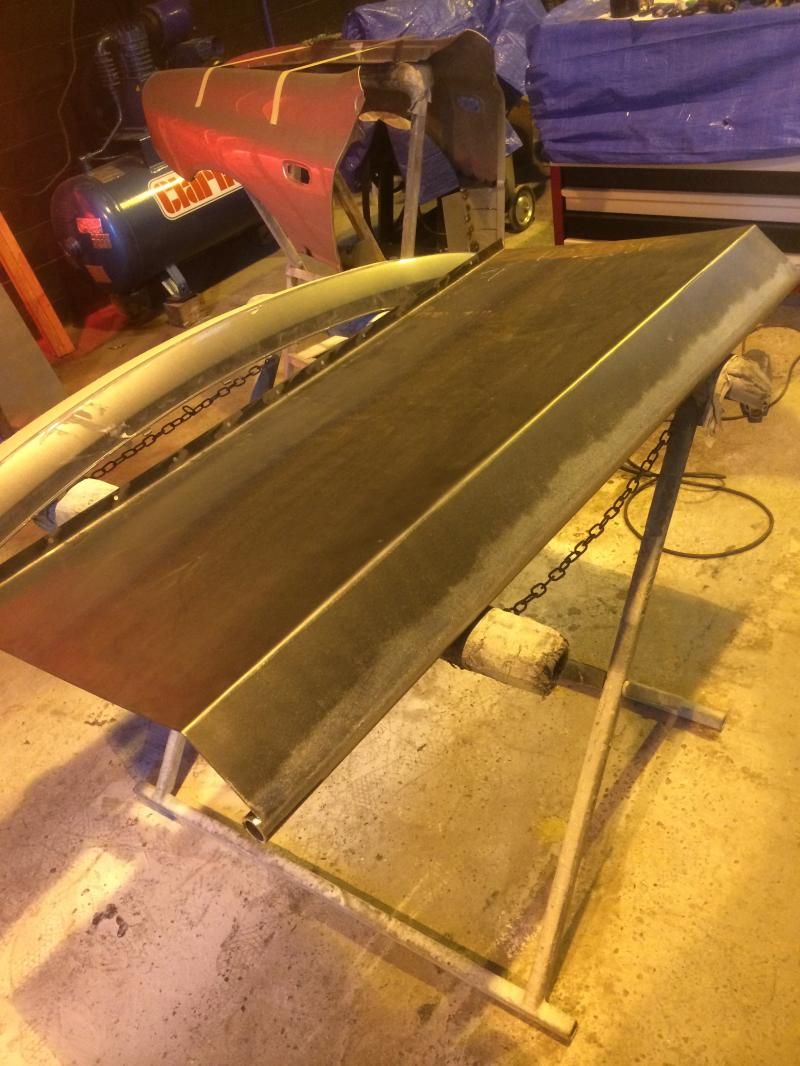 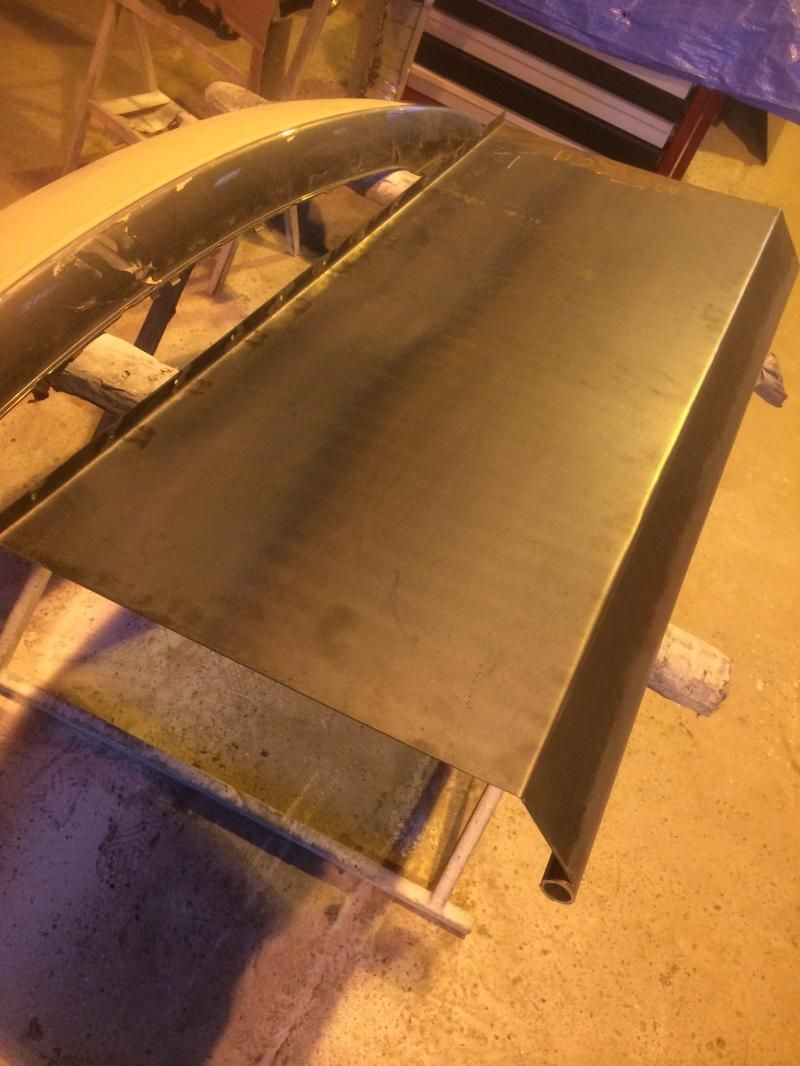 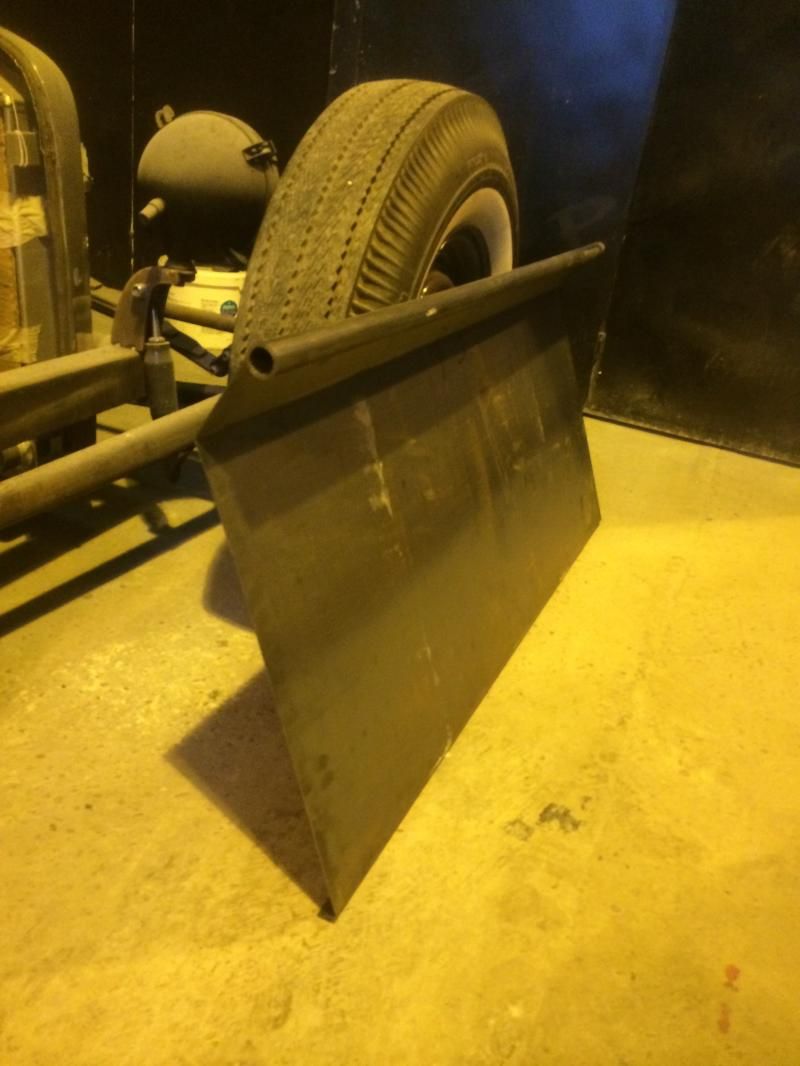 still needs some metal finishing and the tube ends squaring up, will get to that laters. again, followed the same process for the second one and i now have a pair: 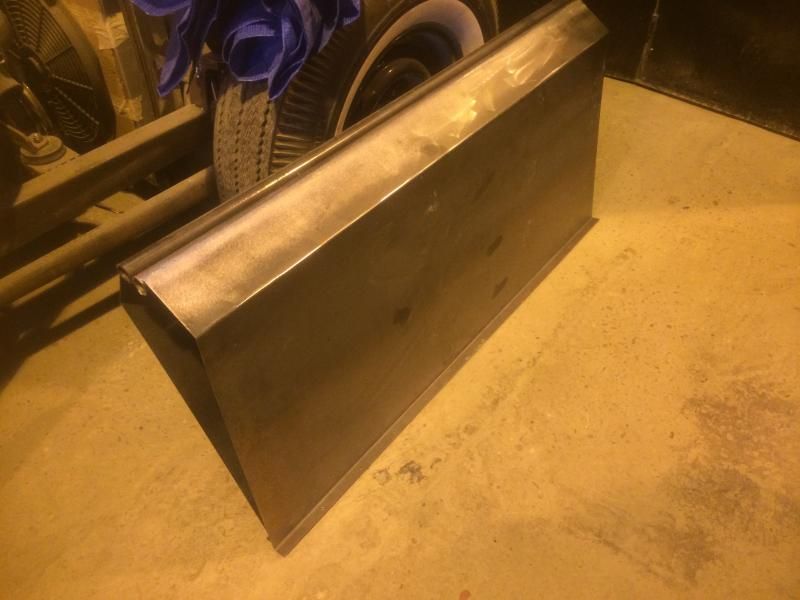 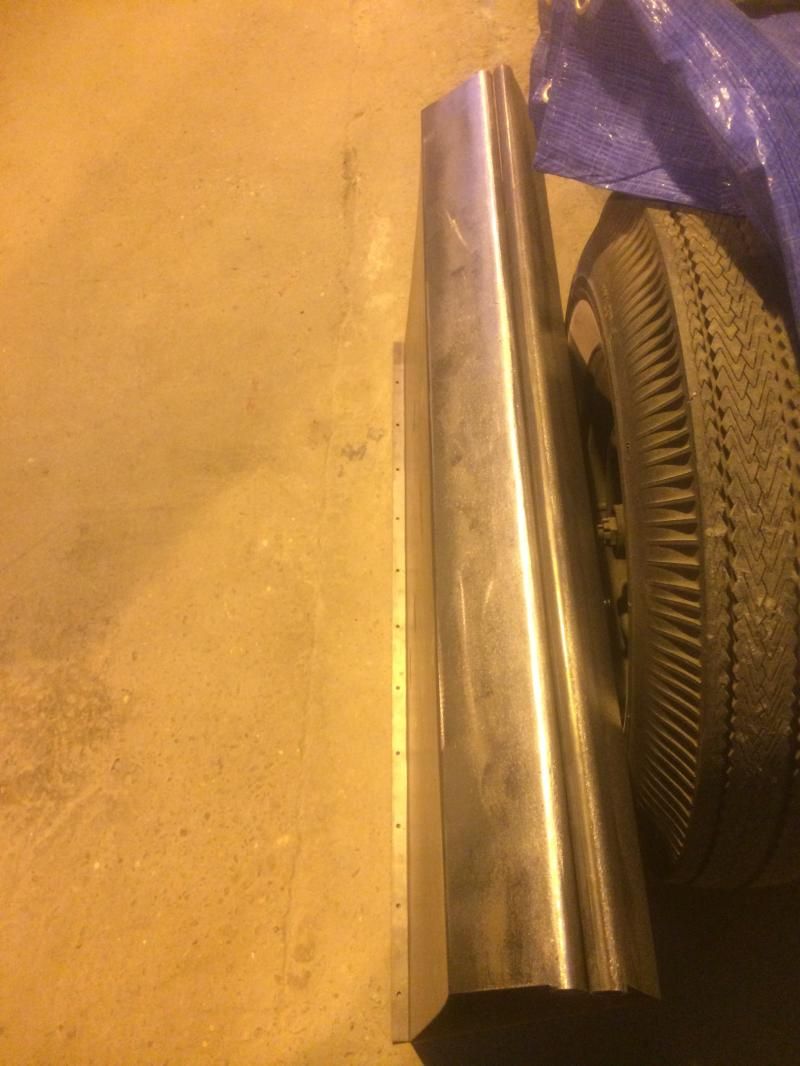 a friend of mine popped sema this year and he grabbed me some bed stakes, time to take these out the wrapper! 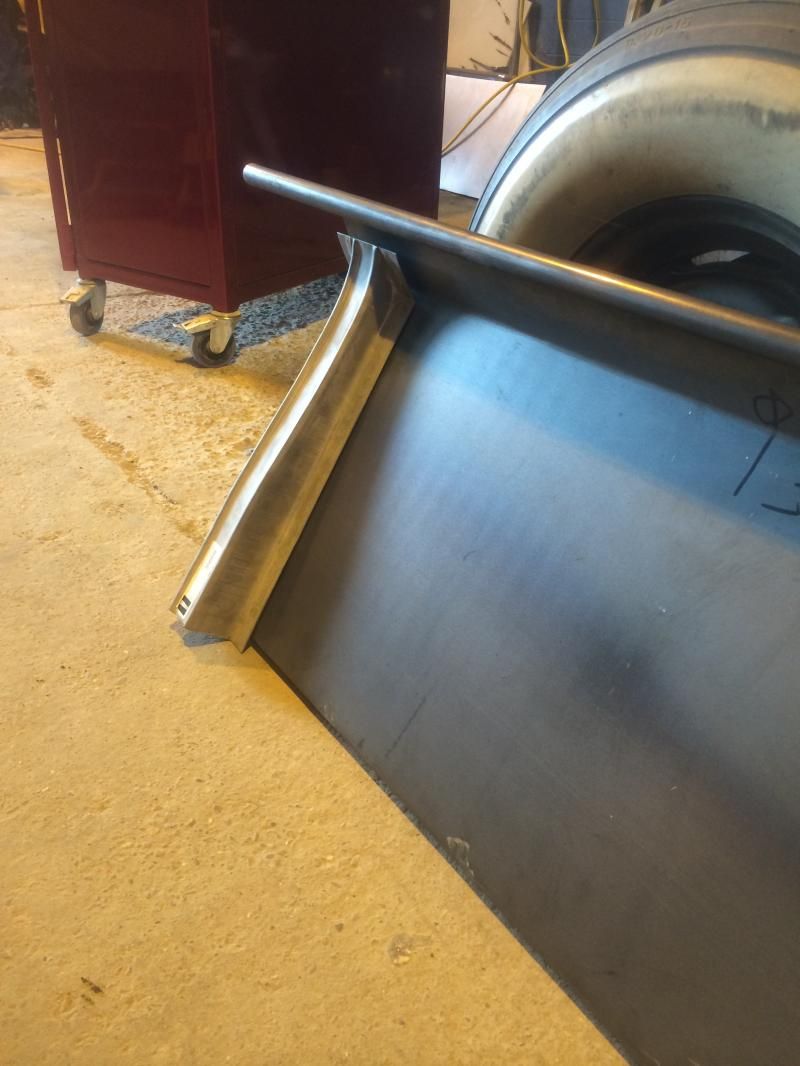 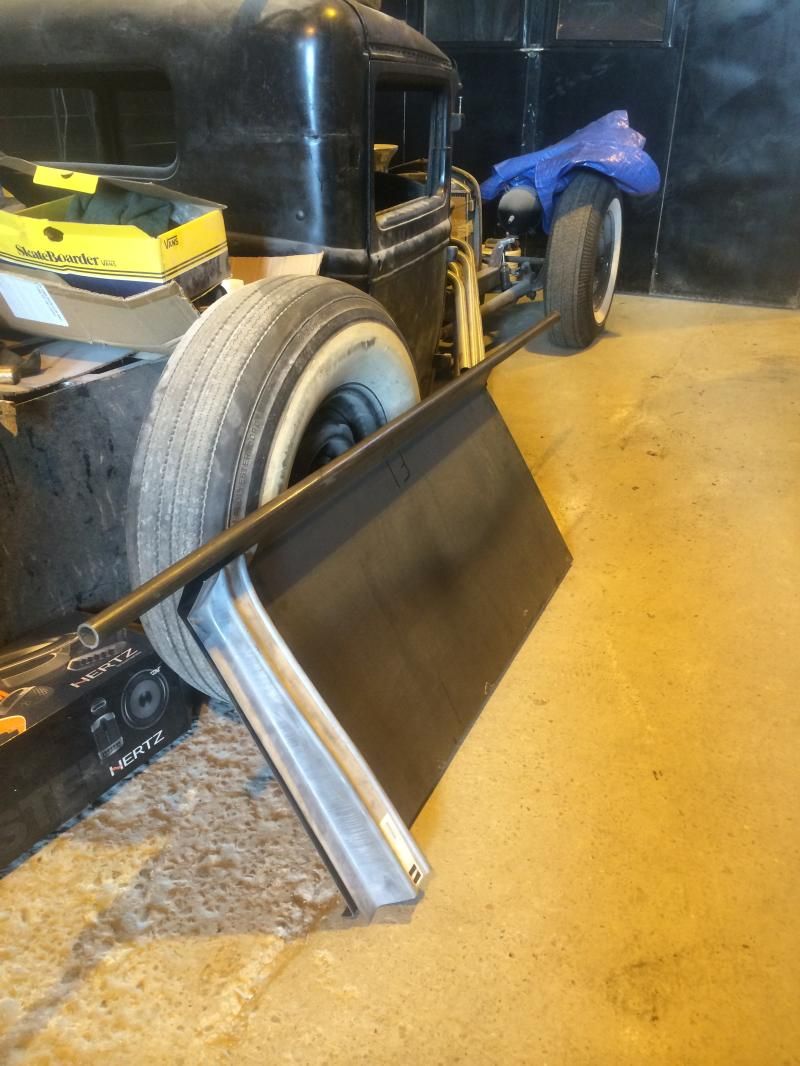 currently where i am at is marking the holes to plug weld the stakes on, then i need to notch the sides for the axle travel. 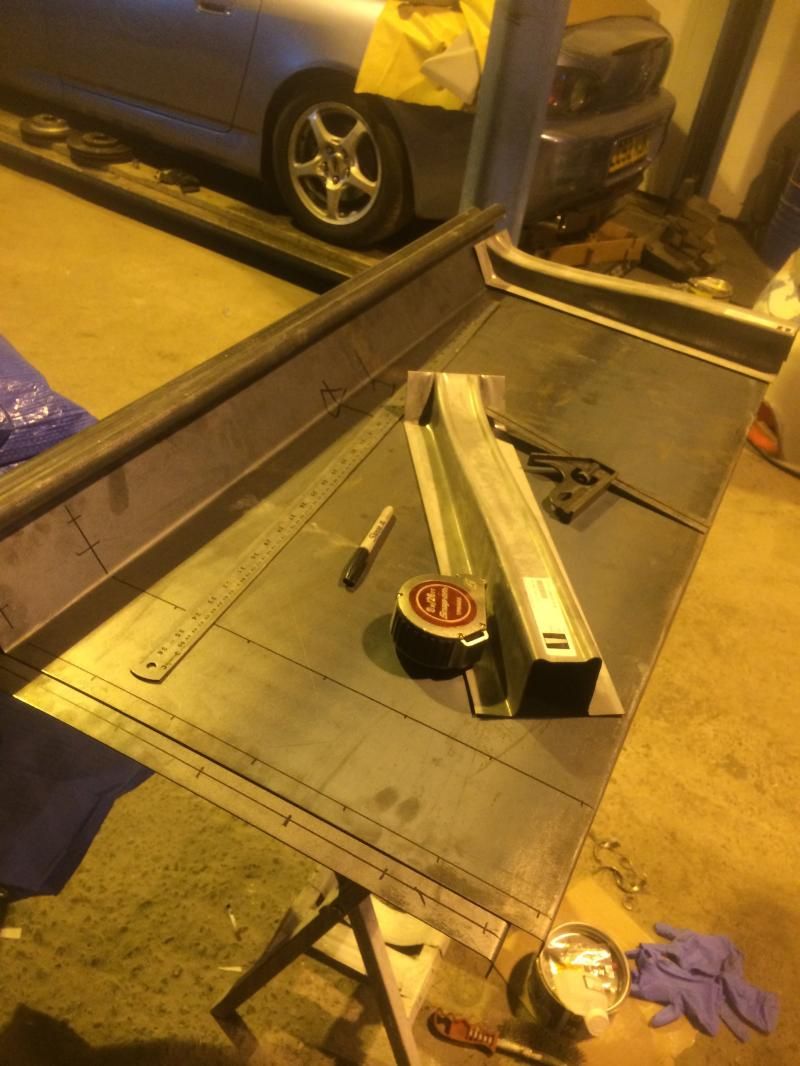 more of an update soon, thanks for looking! |
| |
|
|
|
|
|
|
|
|
|
|
thanks for nice comments guys, more of an update soon!
|
| |
|
|
|
|
|
Jan 22, 2015 19:27:03 GMT
|
Got the next part of the tunnel done. Need to wait for for a smaller diameter distributor to turn up now so I can get the firewall set correctly and finish the front of the floor. At the minute the huge hei one is fouling and because of how high it sits it wouldn't look good trying to recess it in.. 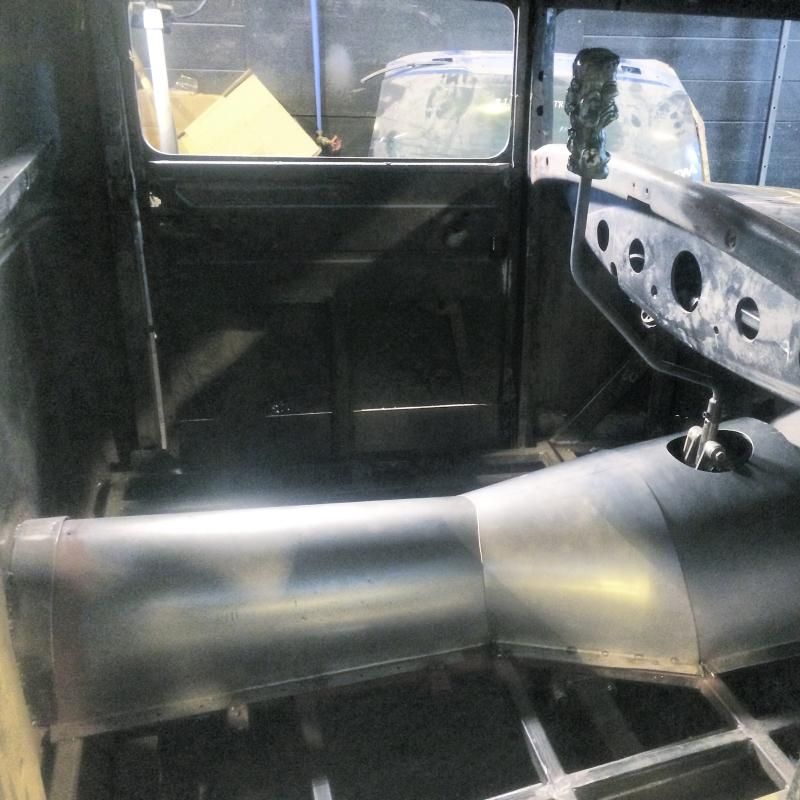 While I'm waiting for the dizzy to turn up I'm going to start on the pickup bed, as shown previously in the build thread, I had a late 30's tailgate imported. I sold my original model a pickup bed because even channeling it as far as I could over the rear Kickup it would still have sat miles off the floor, I want the side on view of the truck to flow nicely and have a constant body line. so I decided to use a deeper tailgate and make my own bed, the 39 ford truck was perfect for this as it was a lot deeper, the only problem is that it was too wide for the model a, so came the time to narrow it. To keep it looking even it would mean cutting it into 3 pieces, trimming the parts I didn't want out, then welding back together.. Started by marking out the sections to be removed, the cutting very carefully .. (Sorry for bad picture quality) 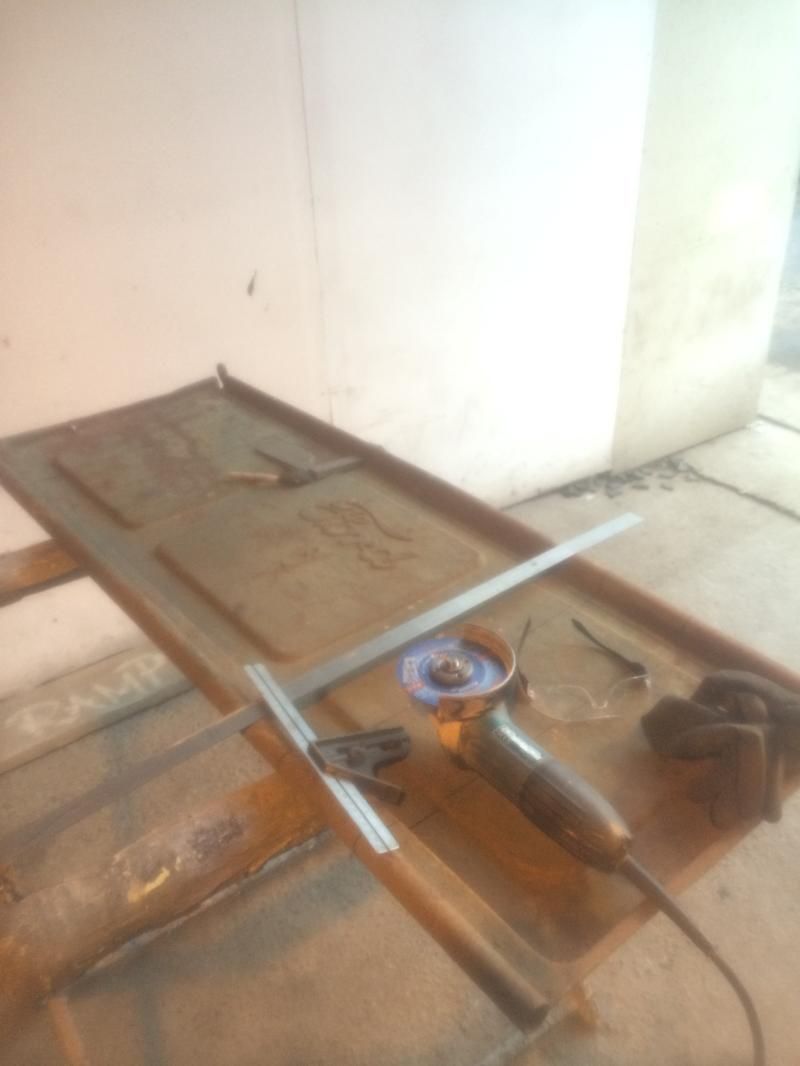
once dissected I clamped it back together and double checked it was going to be the correct width I was after.. 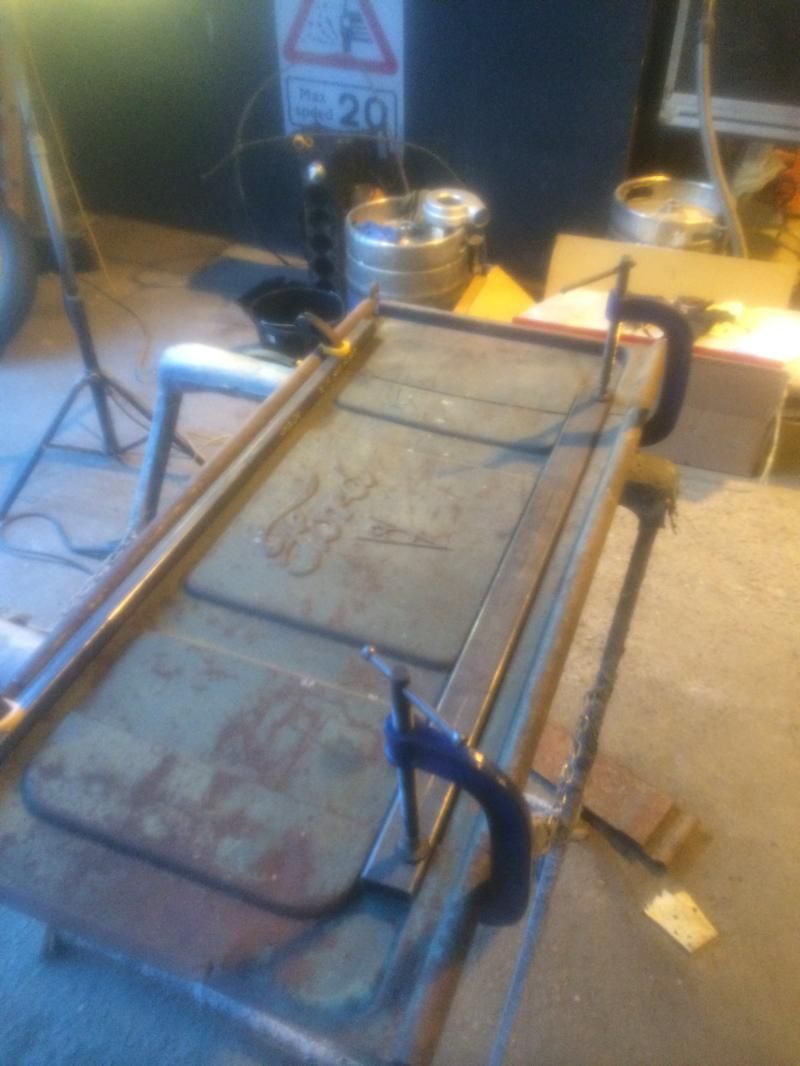 cleaned paint off, prepped the area. Clamped the parts flat and square as I could. This came off a truck that has worked for a living as has some battle scars, dents and knocks, I'm more then happy with that, lots of character.. 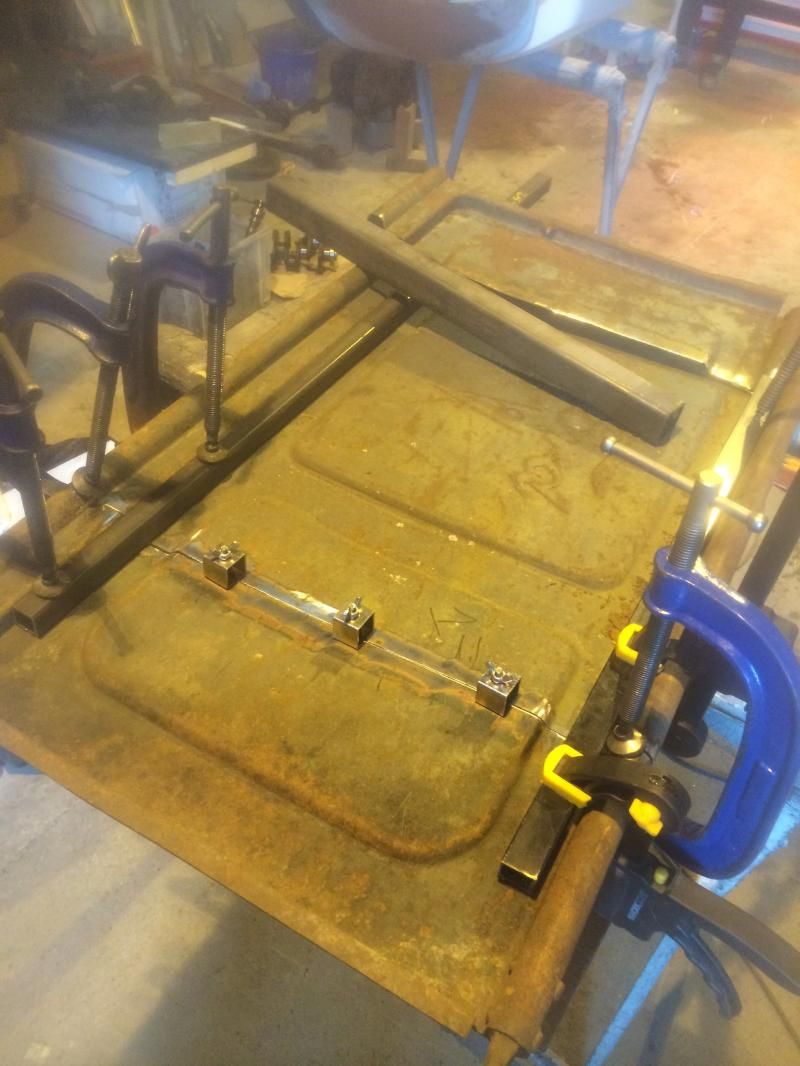 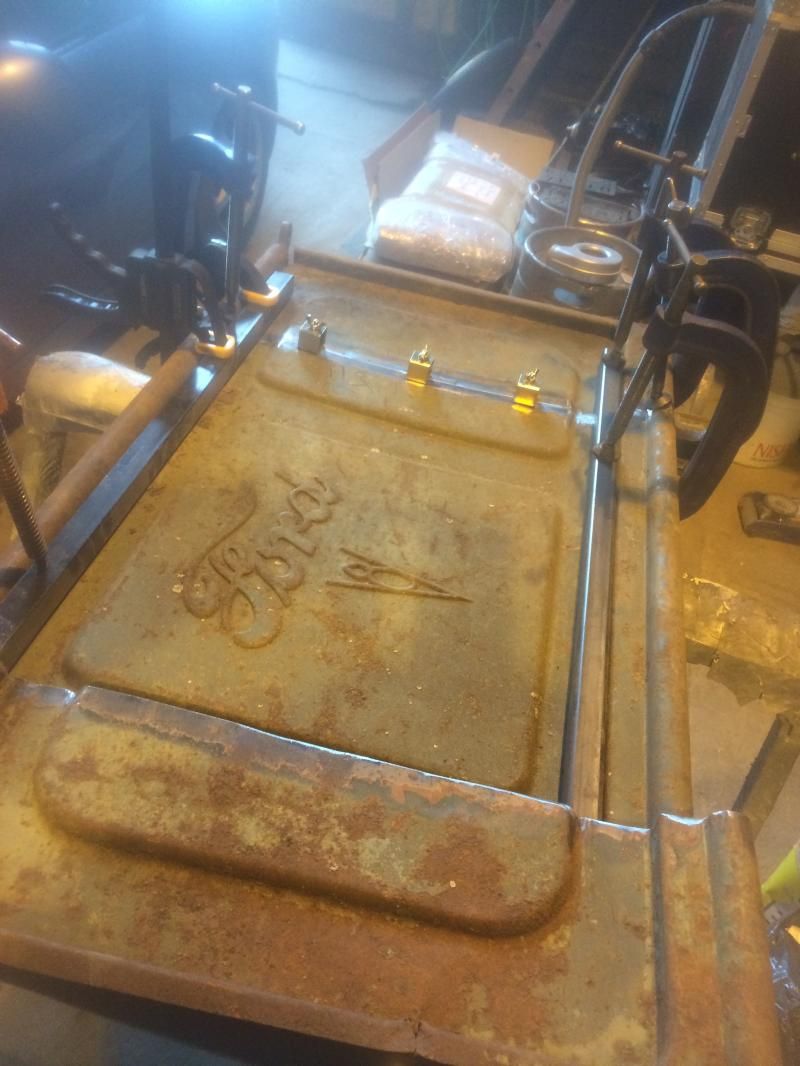 then layed a series of tacks along the join, allowing to let the metal cool, even with the base metal pretty thick and the tailgate clamped in place it's not hard to warp stuff like this, after I'd layed down the tacks I started putting down 6-8mm runs. Again letting it cool and slowly joining them up.. 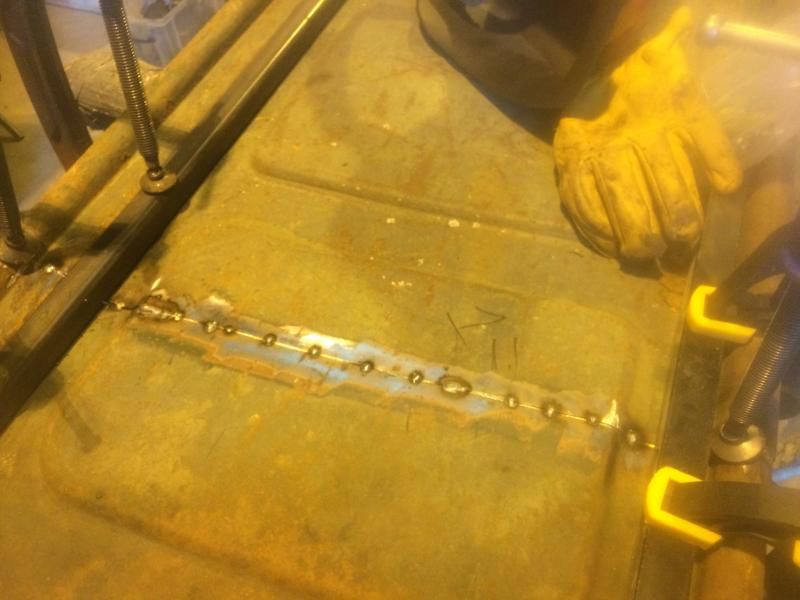 a few cups of tea later and it's back together!  next some dressing with a flap disk, will finish the corners by hand when it comes to painting. Overall looking pretty good! Nothing a small skim couldn't sort out if I decide to paint it.. 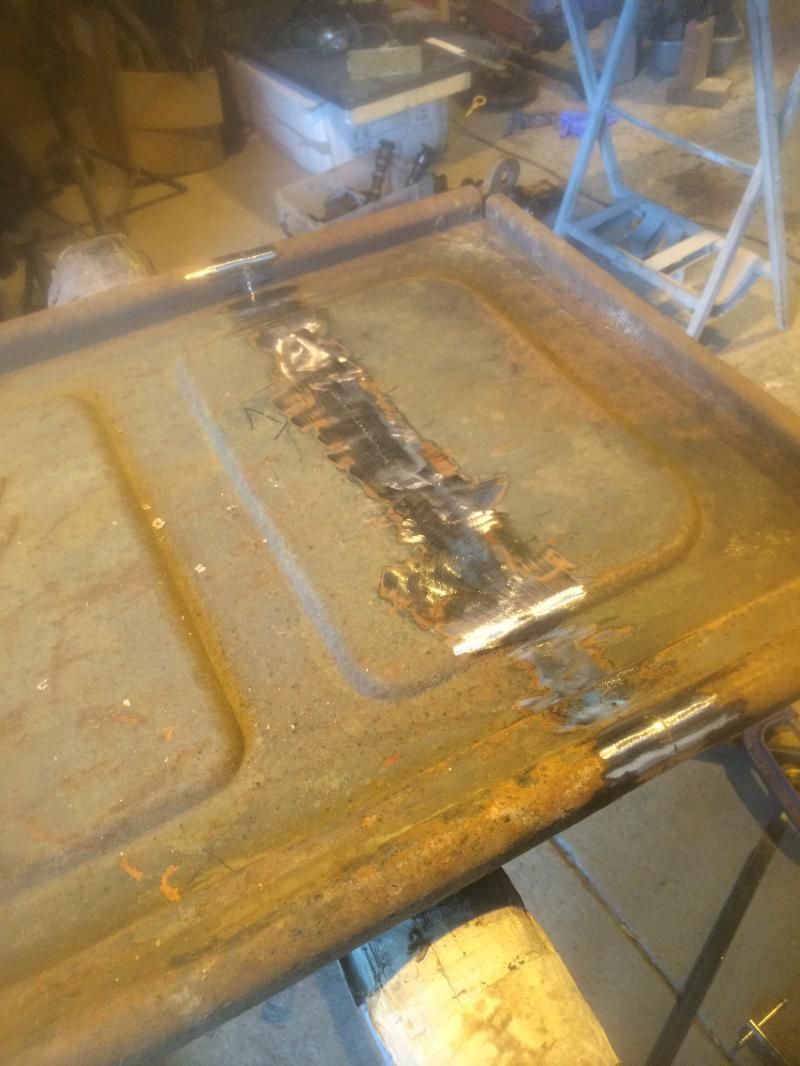 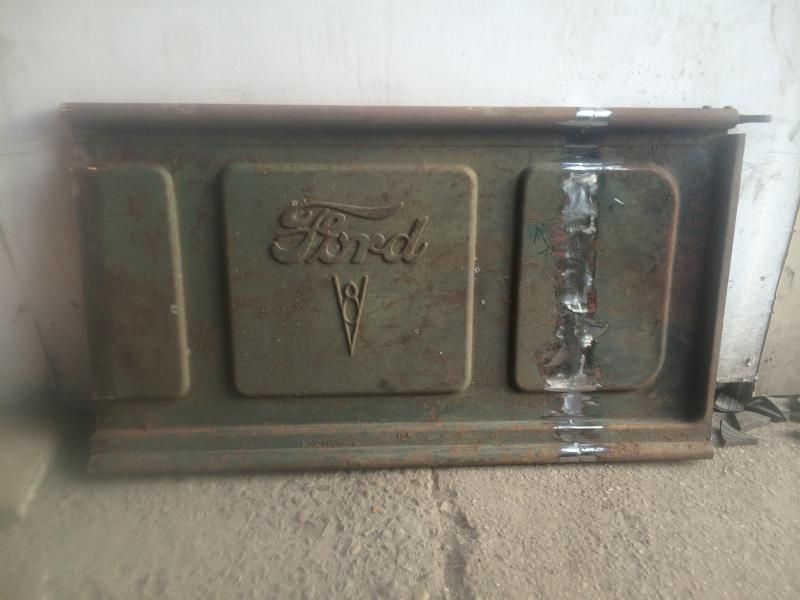 tomorrows job is the other side! Thanks for looking! |
| |
|
|
|
|
|
Jan 22, 2015 10:24:46 GMT
|
Thanks buddy, the closer I get to completion the more I'm considering a nice paint job, we have a booth at our little workshop and a friend of mine is a bodywork god. Extra few months work getting it straight could add a lot more to its value and appearance with some nice gloss paint! I managed to pick up the truck for 3k with a correct title . Imported by a guy I know, it was for sale for considerably more but because off the proportions and how much work it needed it failed to sell. It went onto ebay and I got a lucky bid. What you can't see in the pictures are the hinges are all damaged and most or missing, gonna be a big job getting all those bad in and the old ones drilled out, few badly fitted patch panels here ans there ect, nothing that cannot be tidied up though Update soon |
| |
Last Edit: Jan 22, 2015 10:25:32 GMT by pittaway
|
|
|
|
|
Jan 22, 2015 10:08:02 GMT
|
|
Great thread! Just read from start to finish! Looking forward to more updates
|
| |
|
|
|
|
|
Jan 19, 2015 22:45:26 GMT
|
|
|
| |
|
|
|
|
|
Jan 19, 2015 19:31:08 GMT
|
|
Thanks for comments, pickup bed progress this week I hope
|
| |
|
|
|
|
|
Jan 18, 2015 17:09:49 GMT
|
|
Great looking truck, lots of fun to be had in that!
personally I'm not bothered in the slightest about period styled cars, must have the correct this and the original that, seen lots of snobbery on other forums regarding traditional styling ect.
these cars are nearly 100 years old and the vintage speed equipment well over 50. Living in the uk it's near impossible to get certain parts nevermind afford them when they do come around. Just make it you own and get out and enjoy, that's my take on It all.
|
| |
|
|
|
|
|
Jan 18, 2015 13:19:35 GMT
|
|
I think they are 8.20-15 at the moment, so at a guess 15 inch wheels, I'll have a proper look this week when I go the shop, try and find out if I can get something slightly narrower but keep the height
|
| |
|
|
|
|
|
Jan 18, 2015 12:39:59 GMT
|
this is actually turning out pretty nice. i cringed a bit when i saw the first pics, as the proportions were pretty horrible, but i think youve turned it around pretty well. gives me food for thought too as i was considering air on my next build. only thing id say to change is the huge front tyres- itll look and drive much better with something considerably smaller. 5.25-600 width, those must be at least 6.70s youve got on there? thanks dezz! big fan of your build mate very inspiring. yeah it took a while to get it sat and looking how i wanted, the original chassis had the rear wheels nearly touching the back of the cab, in hindsight i would still have liked them abit further back, but I'm happy with it for now. ive played with air on a couple of cars previous and had quite a few parts around me ready to use on this, lines, tanl, compressor ect. it was a no brainer in the end. get it sat how i wanted but still adhere to scrub lines and curse word roads. thats definately the plan with the tyres, i think I'm gona put the current fronts on the back, as the rear ones are very old. and then get some narrower ones up front, it will help with the steering arm clearances aswell. I'm pretty new to the world of vintage tyres, do you know if i could get a same sized tyre - height wise, but narrower? if that makes sense? so the car will still sit how it does, but just narrower tyre width? thanks for feedback! |
| |
|
|
|
|
|
Jan 18, 2015 11:59:31 GMT
|
dormer for me |
| |
|
|
|
|


 always like to put faith on old tools! i plan to put a lower skirt on the sides with some swaged holes in the future so put an additional lip on the bottom ready for this..


