adam73bgt
Club Retro Rides Member
Posts: 4,879
Club RR Member Number: 58
|
|
Dec 18, 2023 16:48:57 GMT
|
Got a few days off as I've been slack in using my holiday this year, have mostly been trying to get the Kawasaki finished, engine is now in so that's a big step forward  Crossfire still needs welding when the weather plays ball, and I've started a "to do" list for the MGB, I needed a rather larger piece of cardboard than the one I used for the Crossfire...   |
| |
|
|
|
|
adam73bgt
Club Retro Rides Member
Posts: 4,879
Club RR Member Number: 58
|
|
Dec 16, 2023 20:47:15 GMT
|
Short but big update, mate came round today as we were doing a coolant flush on his Hiace and hopefully getting the engine back in the bike  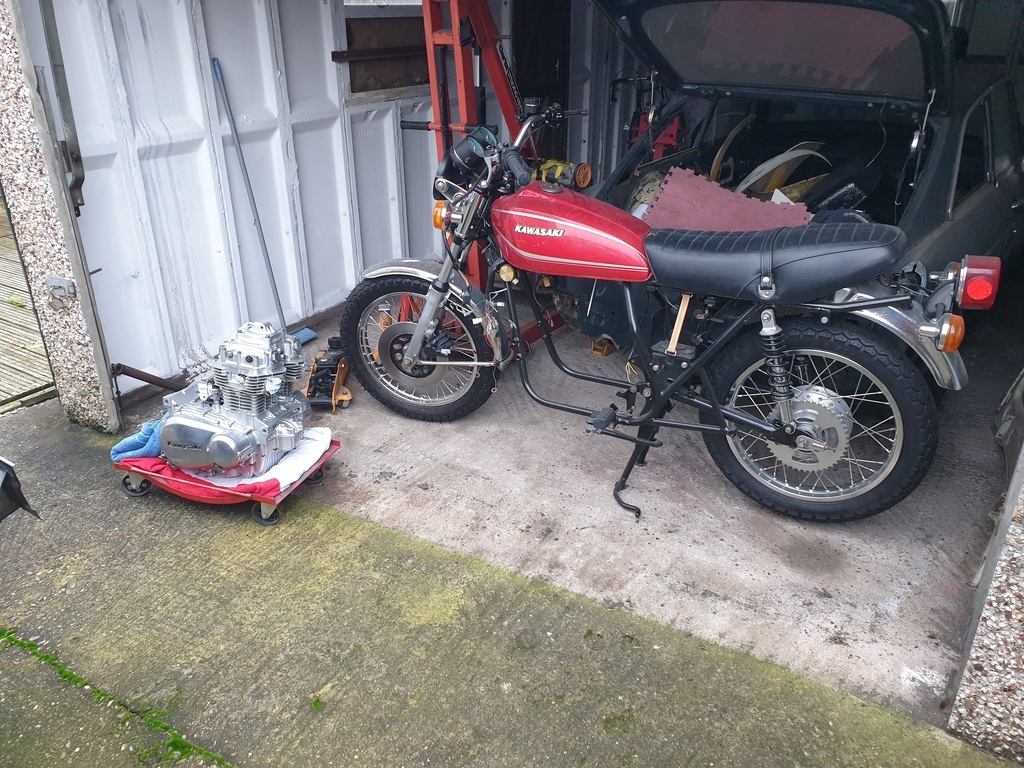 There wasn't all that much to it really, turned the bike around as the engine was going in from the other side, put a couple of towels on the lower frame rails to protect the paint, put a trolley jack between the frame rails with some wood on top to balance the engine on. Between the two of us, the weight of the engine was manageable and with a bit of pivoting and angling, it went in pretty easily. There might be a bit of scuffed paint on the frame but I can touch that in. Consulted my old photos to see how the various engine mounting bolts and brackets were arranged, and it's installed 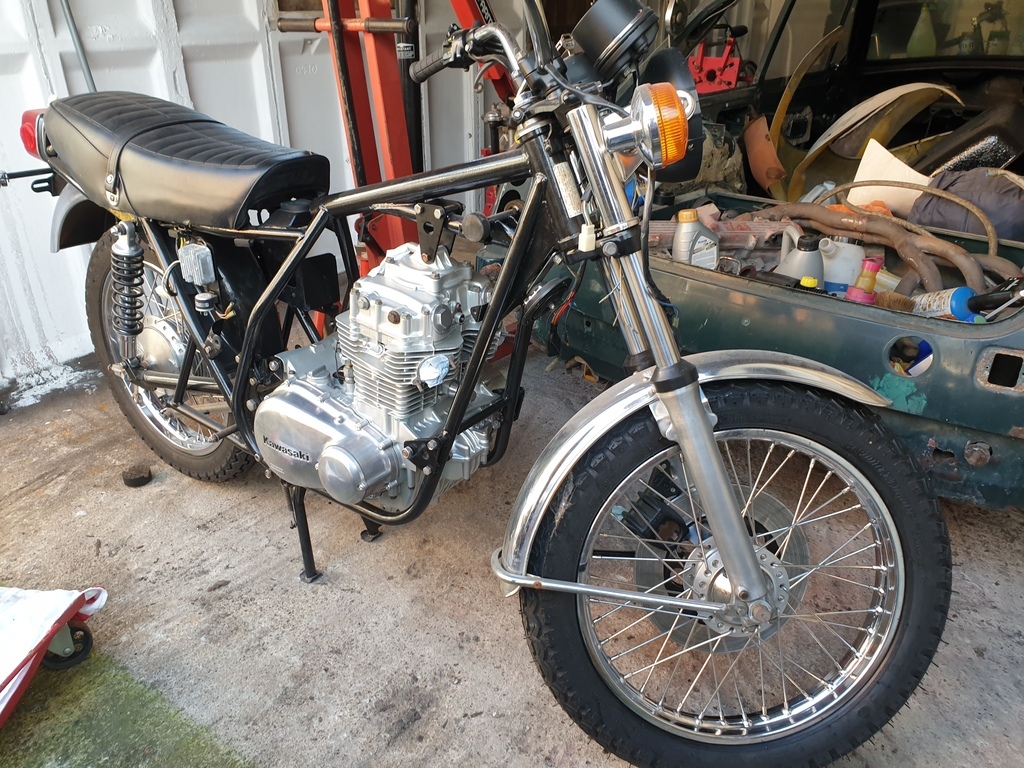 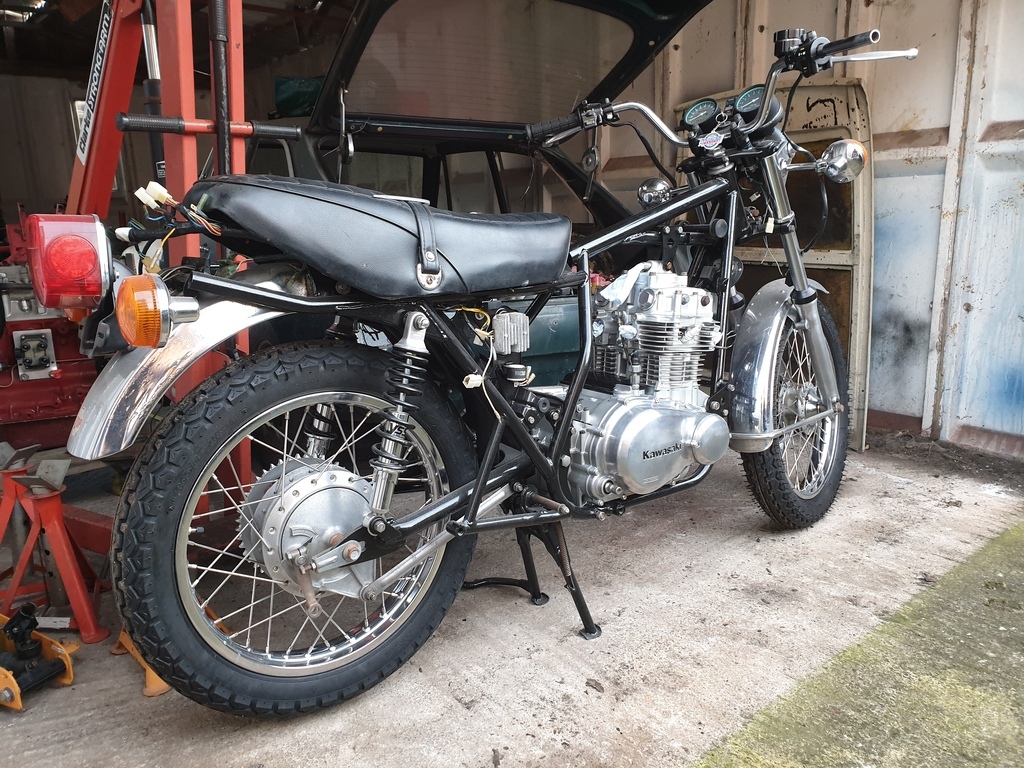 Now the engine is in, I can get moving on a load of bits, fitting the chain, rear brake lever and rod, start final installation of some of the wiring etc. so things should move relatively quickly there. Also got a rebuild kit for the carbs on order after a bit of head scratching to work out exactly what I have. They're Mikuni VM28's which I believe were from a Yamaha RD350 or RD400. I have been trying to research jetting info from others who have done Mikuni swaps on KZ400's so at least I can be pretty close on first start. The VM30's are a bit more common and seem to be a more popular swap so a bit harder to find info on the VM28 swap but should be able to get there in the end. |
| |
|
|
adam73bgt
Club Retro Rides Member
Posts: 4,879
Club RR Member Number: 58
|
2023 Archives : Bicester 2023adam73bgt
@adam73bgt
Club Retro Rides Member 58
|
Dec 14, 2023 10:54:08 GMT
|
|
Very nice selection, if I remember rightly the Aston MGB had an O series engine? I could have done with poking around the engine bay of that 😅
Liking the X type as well, they've been appealing to me somewhat of late
|
| |
|
|
adam73bgt
Club Retro Rides Member
Posts: 4,879
Club RR Member Number: 58
|
Mazda Xedos 9 Miller adam73bgt
@adam73bgt
Club Retro Rides Member 58
|
Dec 14, 2023 10:51:51 GMT
|
|
It's a tricky one to price as they're rare, but many will have forgotten about them so there's perhaps only a small pool of potential buyers out there.
There's been a couple come up for sale on Facebook marketplace around the 3-4k region although those were the 2.5 not the miller so slightly more common but maybe more attractive in terms of a maintenance point of view.
With the low miles and given how clean it looks in the photos, I would personally try for up to 5k, but be prepared for it to take a while to sell
Just a question of finding the right buyer!
|
| |
|
|
adam73bgt
Club Retro Rides Member
Posts: 4,879
Club RR Member Number: 58
|
|
Dec 14, 2023 10:47:09 GMT
|
|
So cool seeing this getting about and used
I ended up driving past Sturgate straight by accident recently after hitting a couple of closed road diversions on the way to seeing some family 😂 had no idea where I was then thought, hey I've seen this place on RR haha
|
| |
|
|
adam73bgt
Club Retro Rides Member
Posts: 4,879
Club RR Member Number: 58
|
|
Dec 13, 2023 12:40:20 GMT
|
Great to see the engine back together. Only hours away from a running bike surely! Thanks 😊 and hopefully! Got the carbs to reassemble and figure out throttle cables for, get a battery and hook up the wiring, put some oil and petrol in it and should be good to go I think.. |
| |
|
|
adam73bgt
Club Retro Rides Member
Posts: 4,879
Club RR Member Number: 58
|
|
Dec 11, 2023 23:28:27 GMT
|
Thanks guys  Following on from my last update, I got the oil pressure relief valve reassembled and installed, before installing the primary chain and clutch assembly 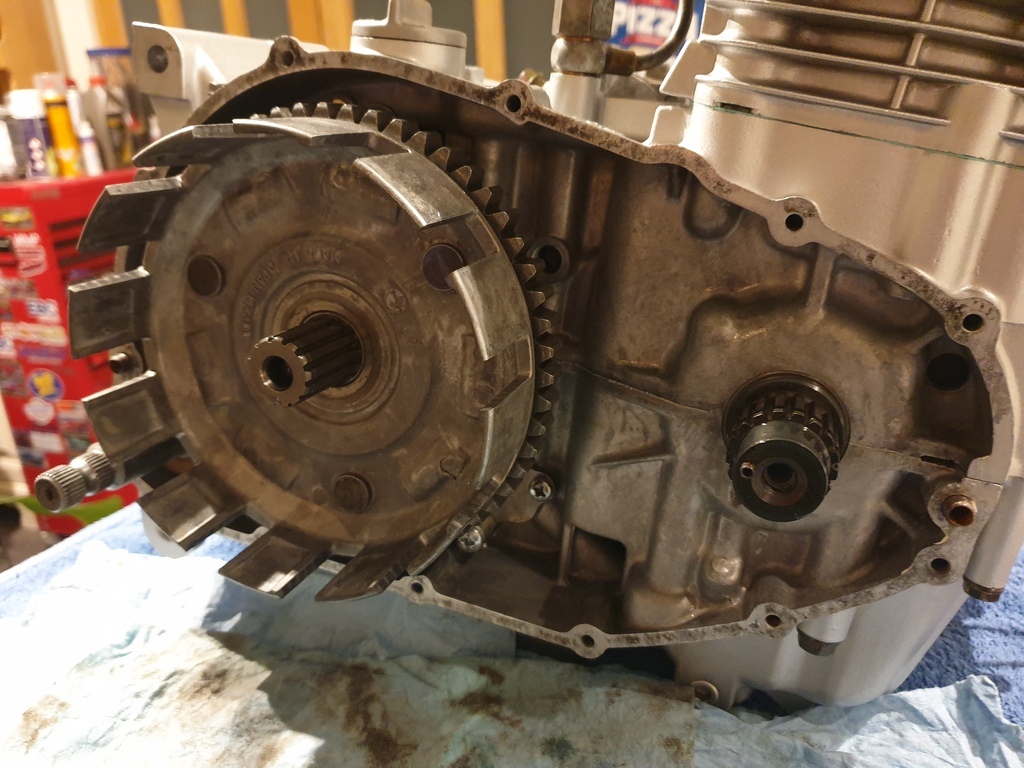 Lacking a bit in photos as particularly once I got into soaking the clutch plates in oil before installing, things got rather messy That was just trial fitting the clutch basket as the basket and the crank sprocket have to be fitted together as one with the chain. Was all pretty straightforward though. The KZ400 is a little odd in that the basket and the sprocket are retained by circlips so there's no difficulty in trying to hold them still while torquing up bolts. I've fitted all new clutch plates, and springs as the old plates had started to corrode into each other from sitting for so long. Got both the side covers temporarily fitted while I waited for a new set of screws to arrive 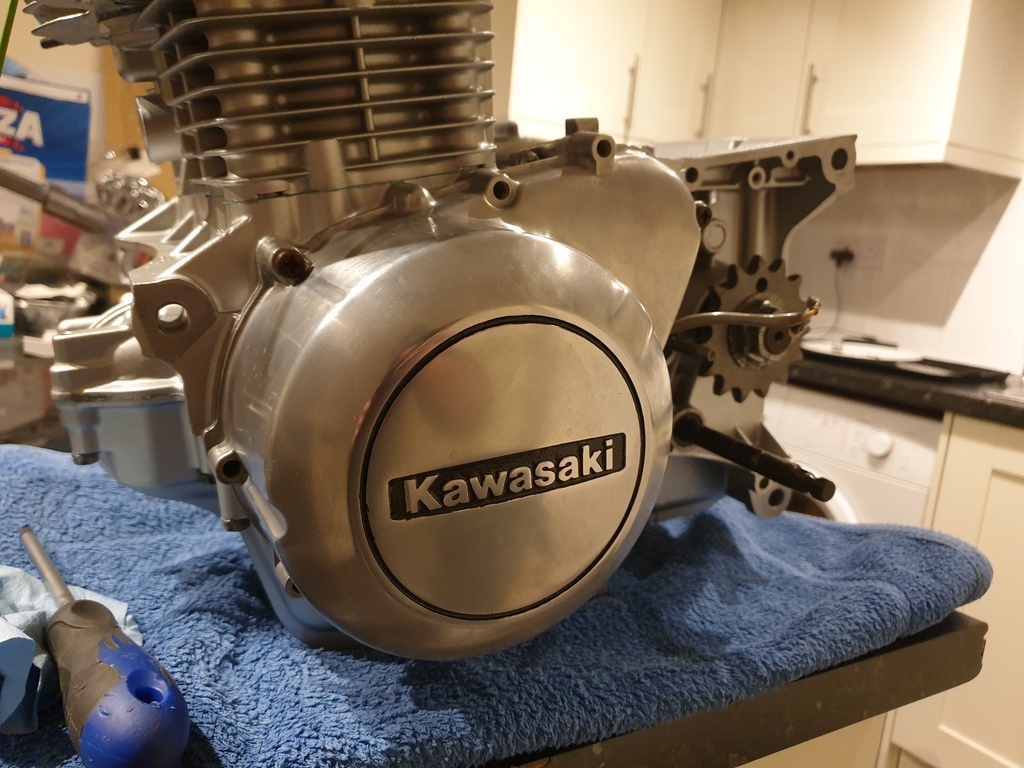 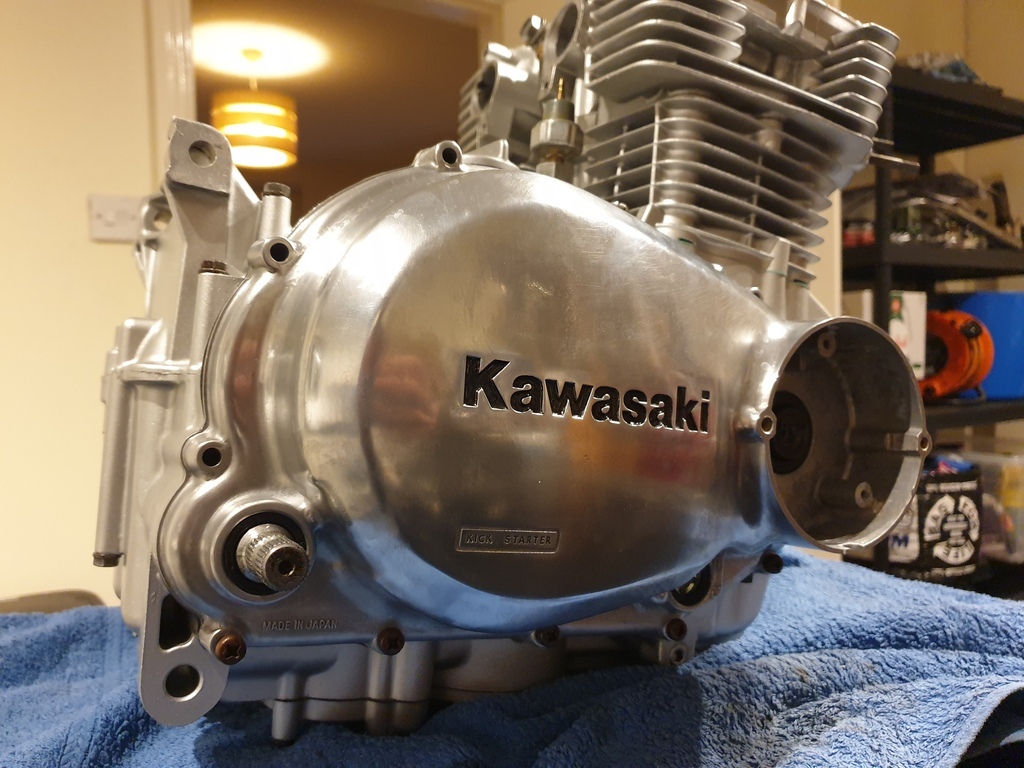 Fitted the timing advance unit as I needed the timing marks to be able to fit the camshaft. The original looked like it had been at the bottom of the sea, the replacement is a slightly different design but was sold as being from the same year and spec bike so should be fine. 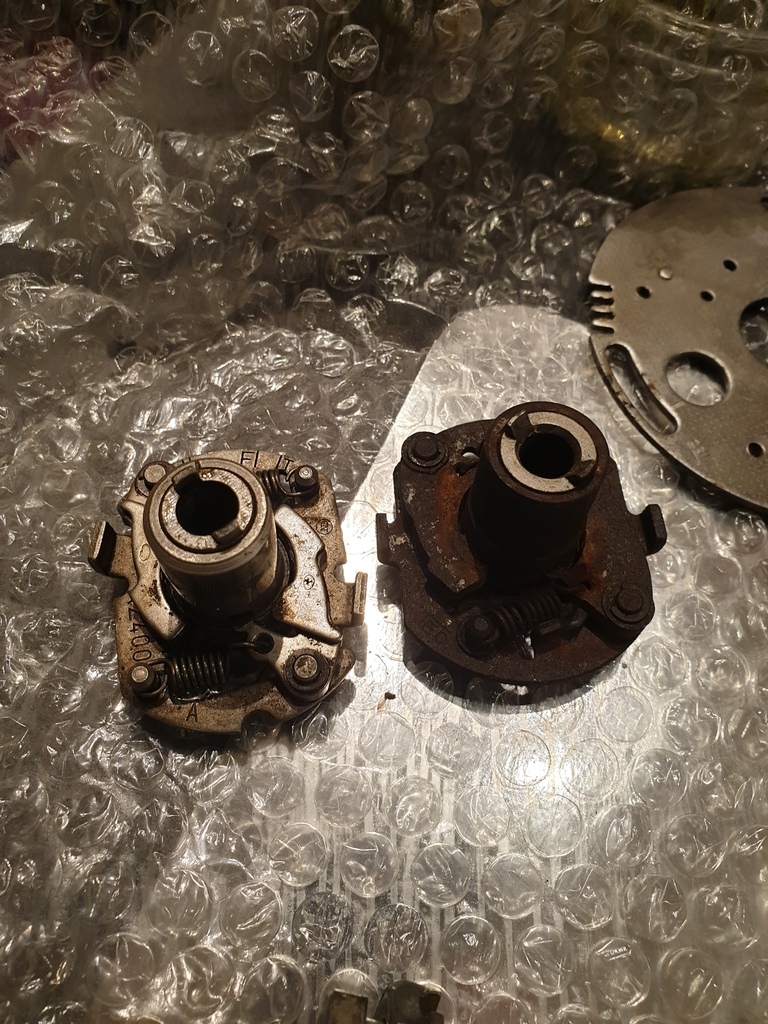 The NOS camshaft got a quick clean to remove the protective sticky oil residue that was on it from storage, and I shot some brake cleaner through the oilways just to check they were all clear 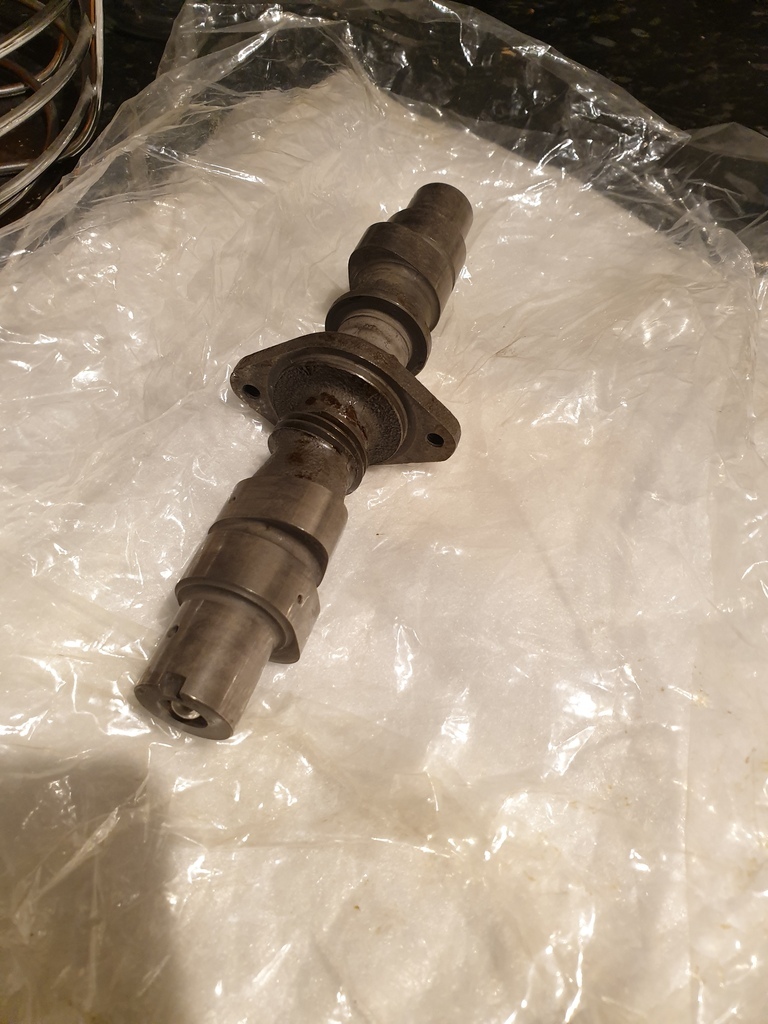 A bit of a fiddle to get the cam and cam sprocket installed. Had to feed both through the chain, then try to time up the sprocket to the correct point on the chain without turning the crankshaft at all, with the marker lines all pointing where they should be, the camshaft is rotated to align the bolt holes on the sprocket and it should all be timed correctly. I did spin it through a couple of rotations after I'd put the caps on, to be sure. 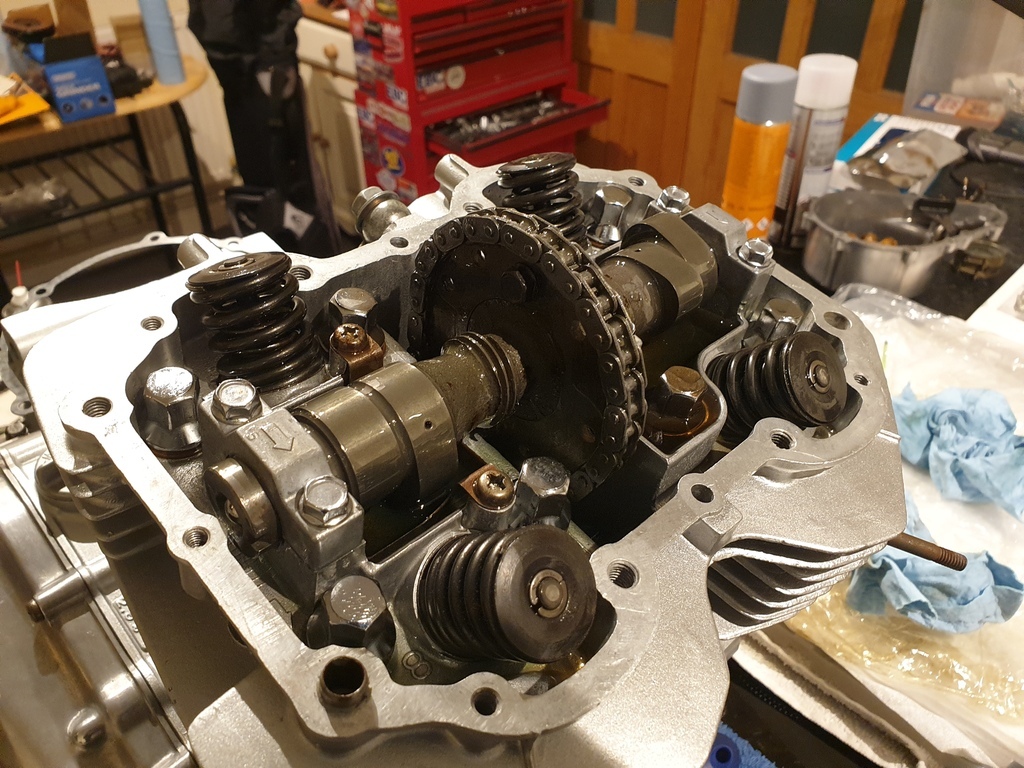 With the cam installed, the timing chain tensioner could then go in. A fairly straightforward design, had to get the centre plunger of the tensioner perfectly level with the body then lock it down with the locknut. I did this then went through a full rotation a couple of times and checked it to be certain. 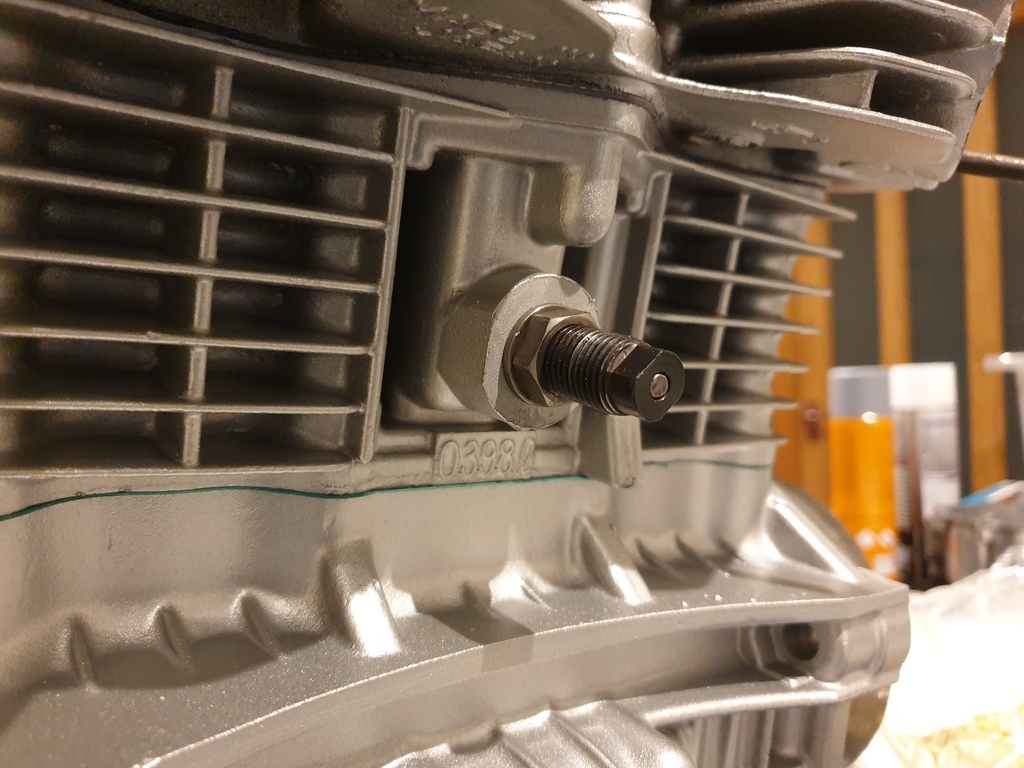 I was then able to put the cam cover on, with the followers and set the valve clearances. After I'd bought a set of feeler gauges with the bent end as there isn't a lot of room offered by the inspection caps. As my bike is a later 400 the adjustment is done with a screwdriver and locknut, much like the rockers on my MGB so was nice to brush off some old memories there. 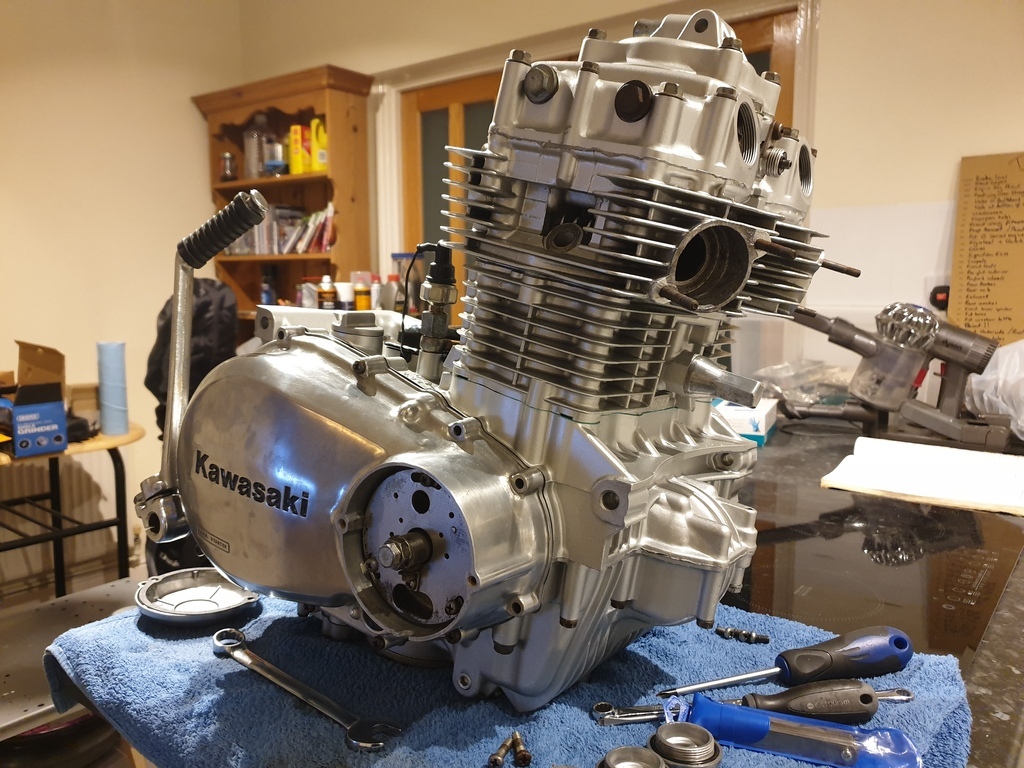 At this point it should have been a straightforward job to fit the new screws in the side cases once they arrived. However, there was some junk in some of the threaded holes, I think this must have been left over from the vapour blasting although I thought I'd chased all the threads.. In any case, they were soon sorted with some brake cleaner and a small brush, or in the worst cases a quick thread chase with a tap. I went with Zinc Plated JIS screws as I don't want any of the potential galvanic corrosion issues of Stainless, and they just look "right" compared to allen head cap screws that many use as an "upgrade" 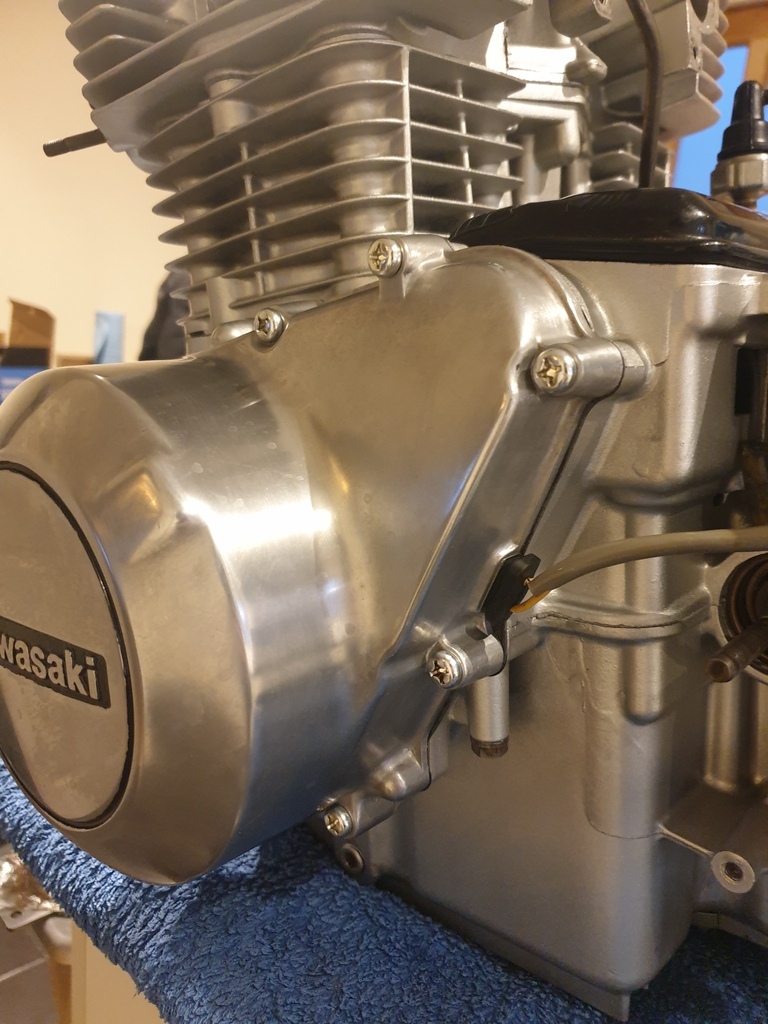 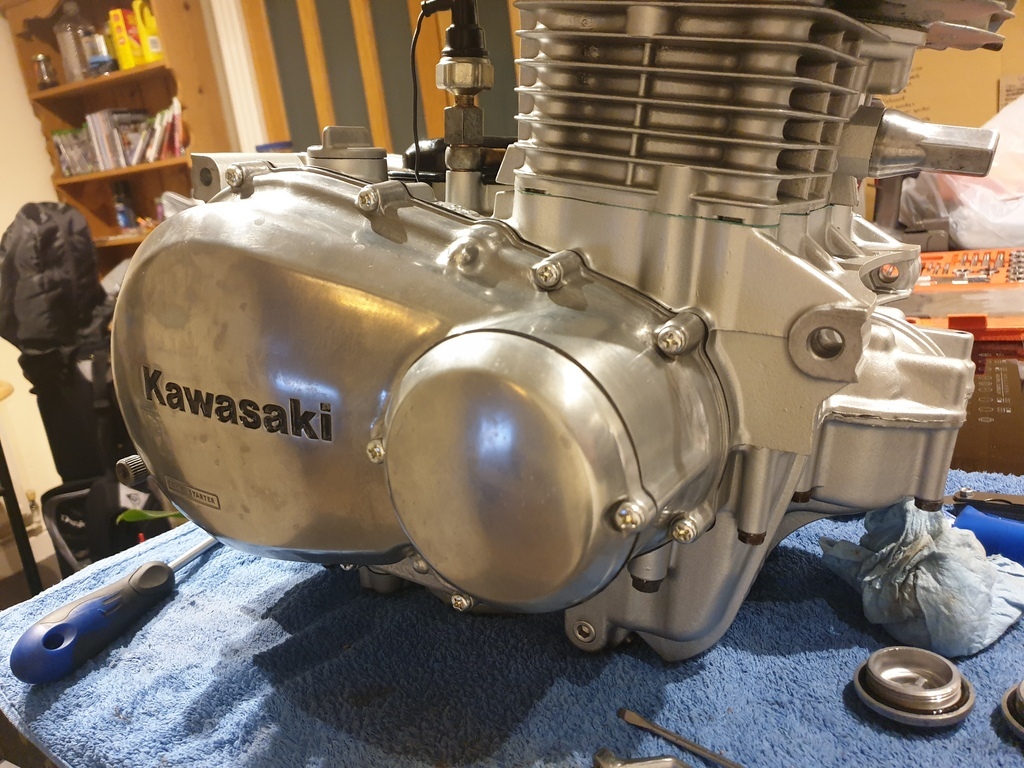 Condenser and points also turned up and have been fitted on the timing plate, but I'll set the gap properly once the engine is in the bike. All that was left, was to carefully put the engine down on my makeshift trolley made from a wheel dolly  and it's ready to go back in the frame! I may need a friend or two to assist with that though, or I'll see if I can use my engine crane somehow.. |
| |
|
|
adam73bgt
Club Retro Rides Member
Posts: 4,879
Club RR Member Number: 58
|
|
|
|
|
|
| |
|
|
adam73bgt
Club Retro Rides Member
Posts: 4,879
Club RR Member Number: 58
|
|
|
|
Did a bit more in the last couple days while I wait for the ball bearing to arrive. The cylinder barrels took a bit of fiddling with the piston rings to get on, but I got there eventually. Ended up using a couple of cable ties as makeshift piston ring compressors to help with the thickest of the rings 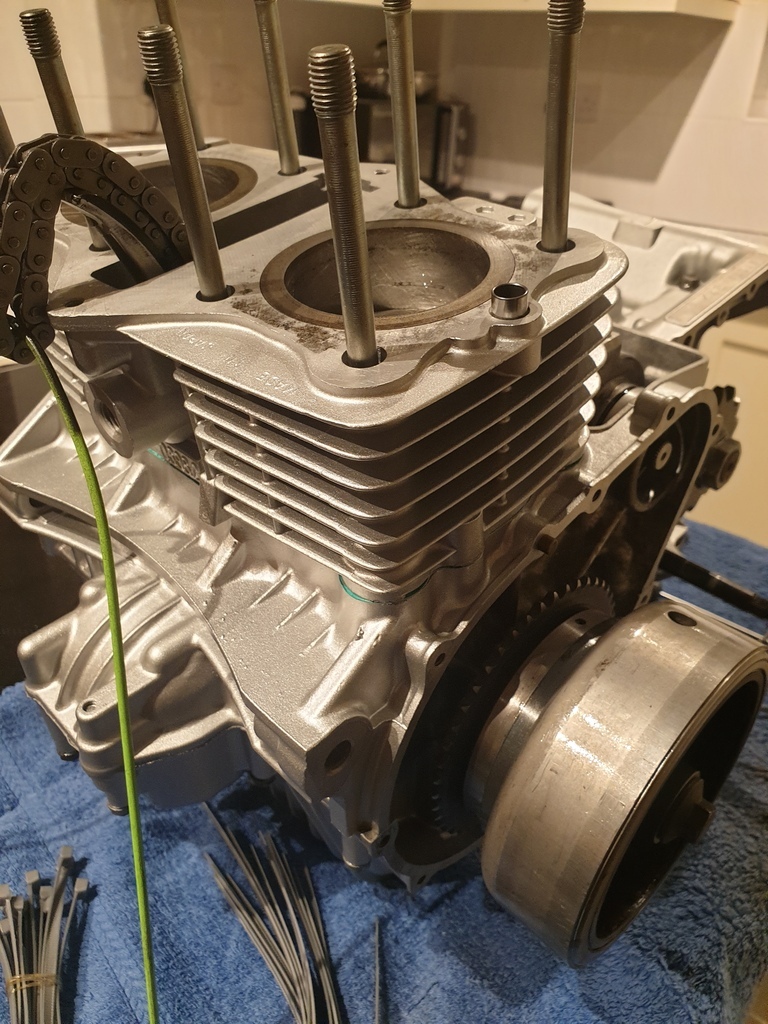 I then realised I'd forgotten to fit the rear cam chain guide but I was able to lift up the barrels with the pistons in to be able to slip the guide and it's retaining pins in 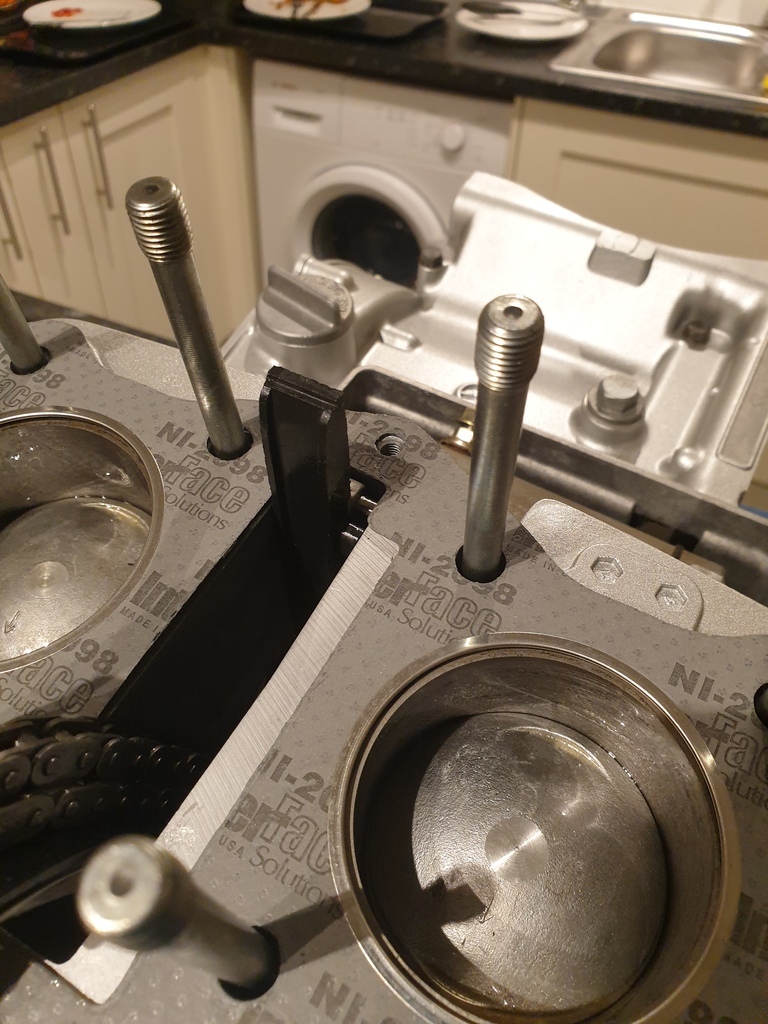 Figured while I had my other half here to help thread the cam chain through, I may as well fit the cylinder head as well!  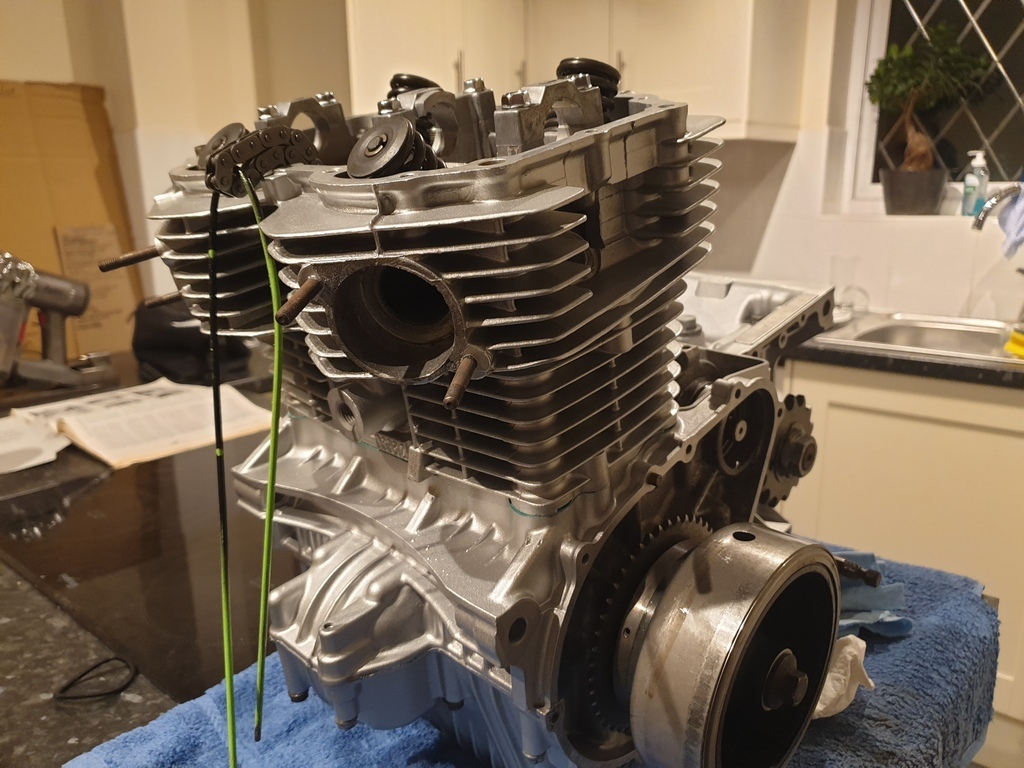 That's now torqued down, plus I fitted the oil pressure light sender along with the oil feed to the head 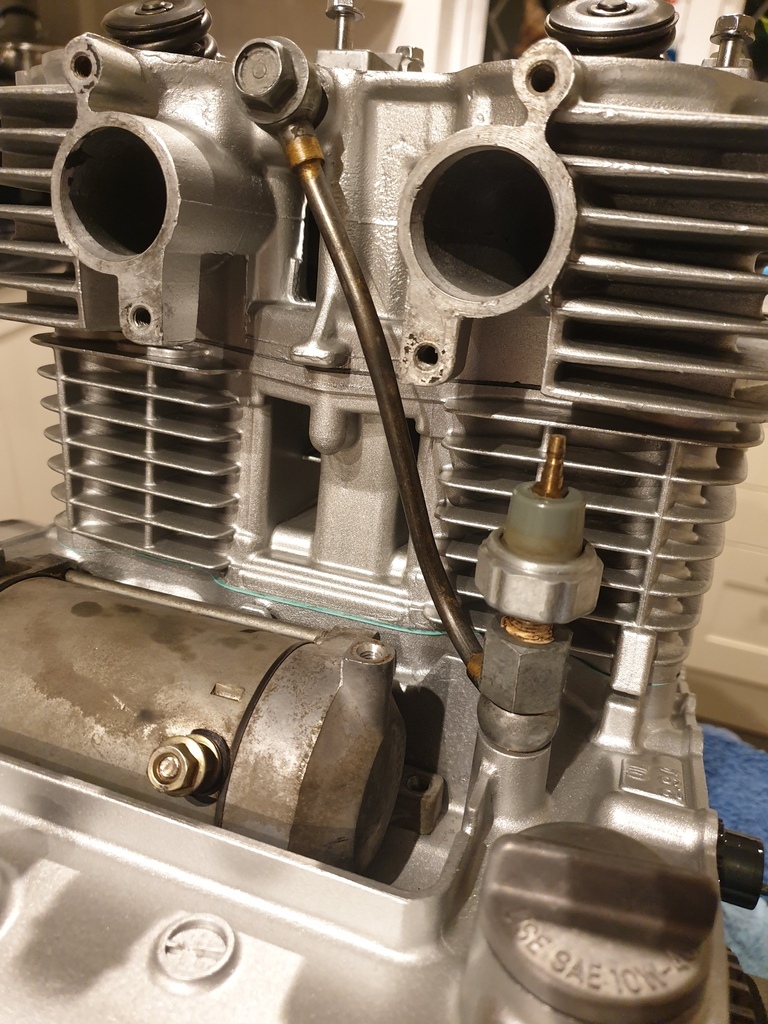 Lastly I went out and bought some better needle nose pliers tonight and finally managed to get the kickstart spring seated. Loosely put the lever on and gave it a couple spins and it all works great so I'm happy with that |
| |
|
|
adam73bgt
Club Retro Rides Member
Posts: 4,879
Club RR Member Number: 58
|
|
|
|
That's the same issue I've been having Sweetpea but only on my android/chrome phone, currently able to get around it using incognito mode as you say Hopefully it's all related and one fix sorts it all 🤞🏾 |
| |
|
|
|
|
adam73bgt
Club Retro Rides Member
Posts: 4,879
Club RR Member Number: 58
|
|
|
|
A month on, what's been happening? Some of the last engine brackets that hadn't been refurbed got a rub down, prime and paint  The new plugs for the crankshaft arrived so they went in with some loctite and were staked. Then took the opportunity to install the rods 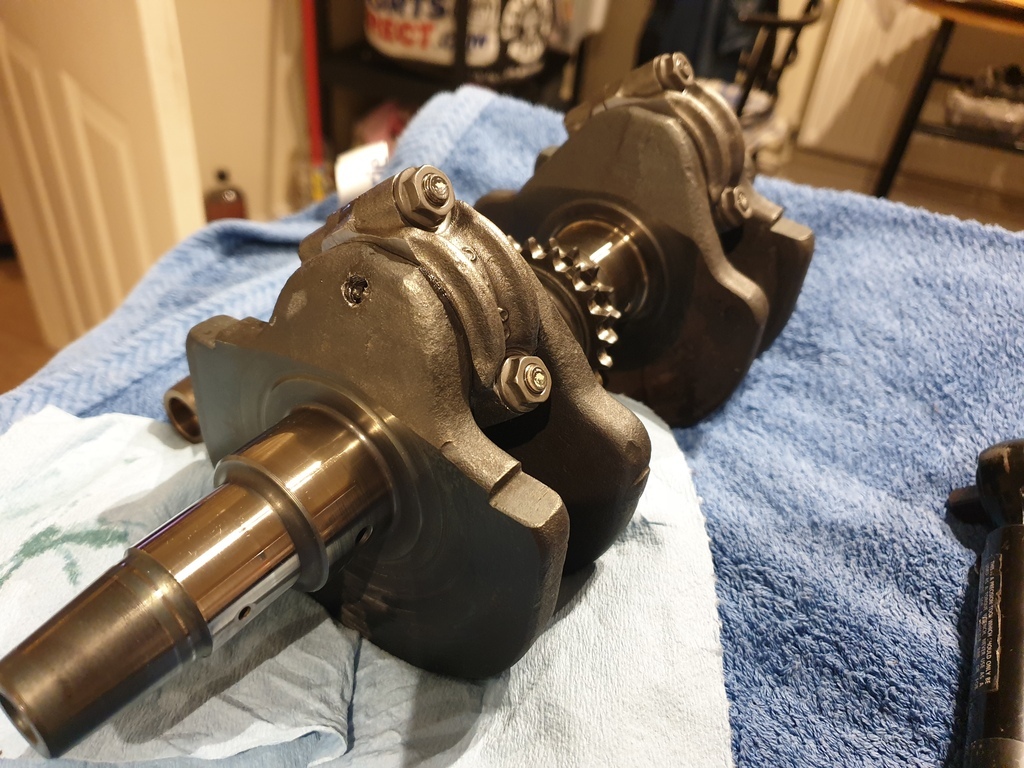 At this point I installed the crank along with the balancer weights into the upper crankcase 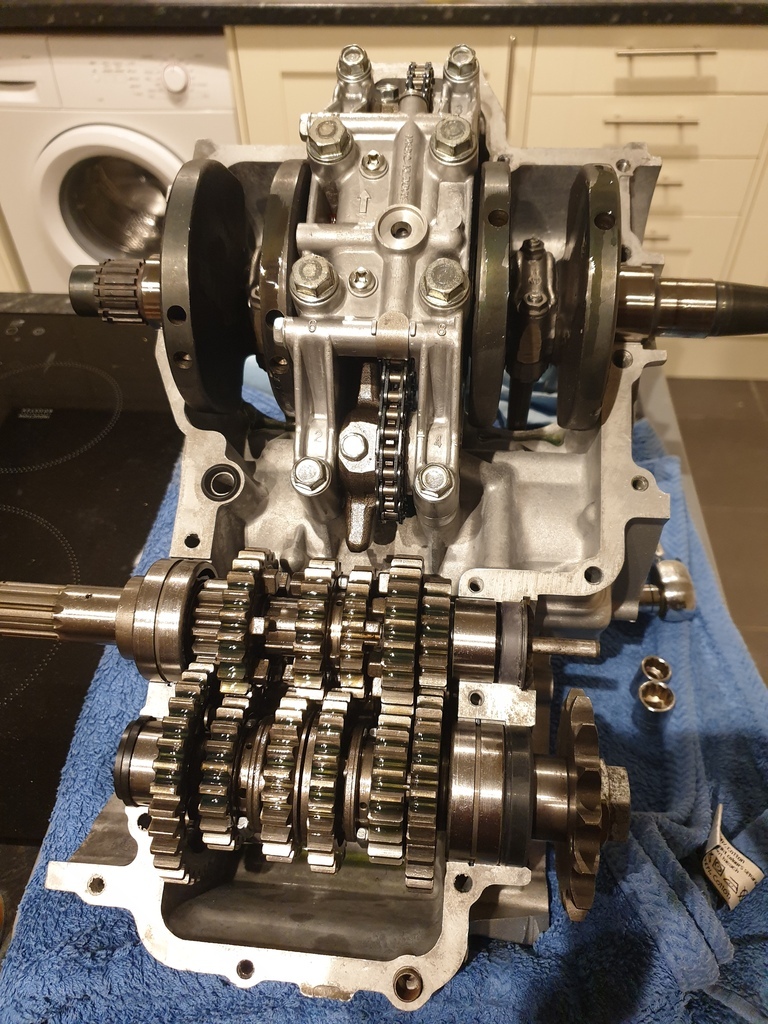 I had actually made quite a major mistake here which I didn't realise until later, more on that in a moment. I was stuck here for a bit as I'd forgotten to order one of the O rings that seal the oil feed to the centre main bearings from the lower crankcase so I tidied up the rocker arm adjustment and cam chain tensioner caps. 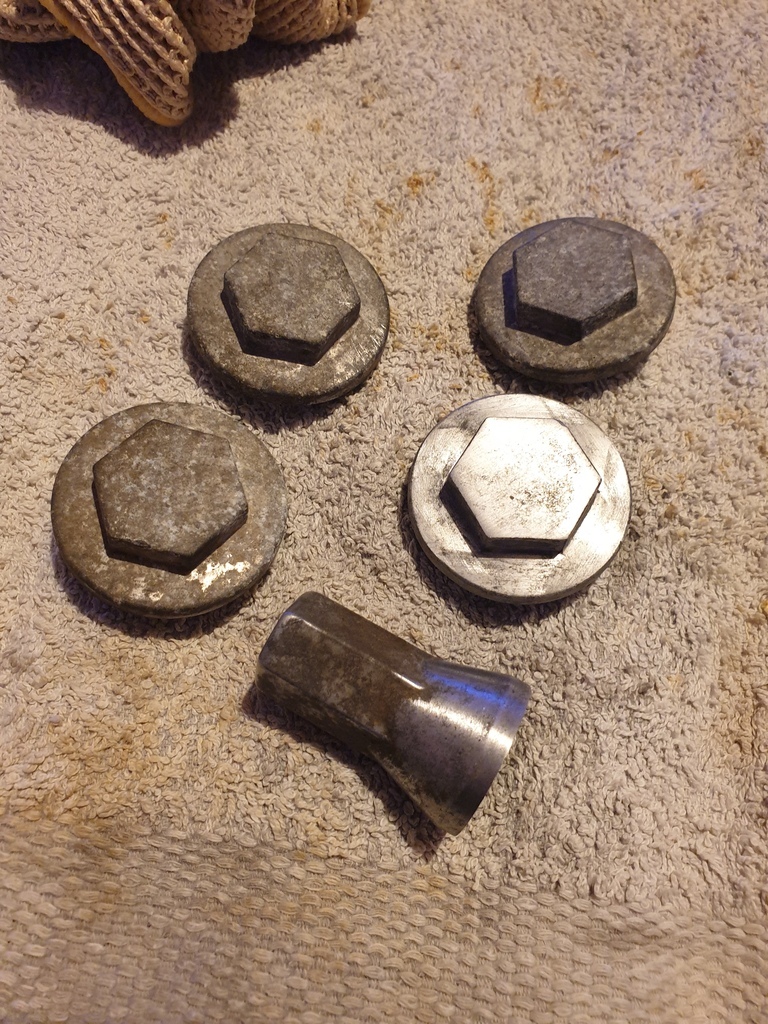  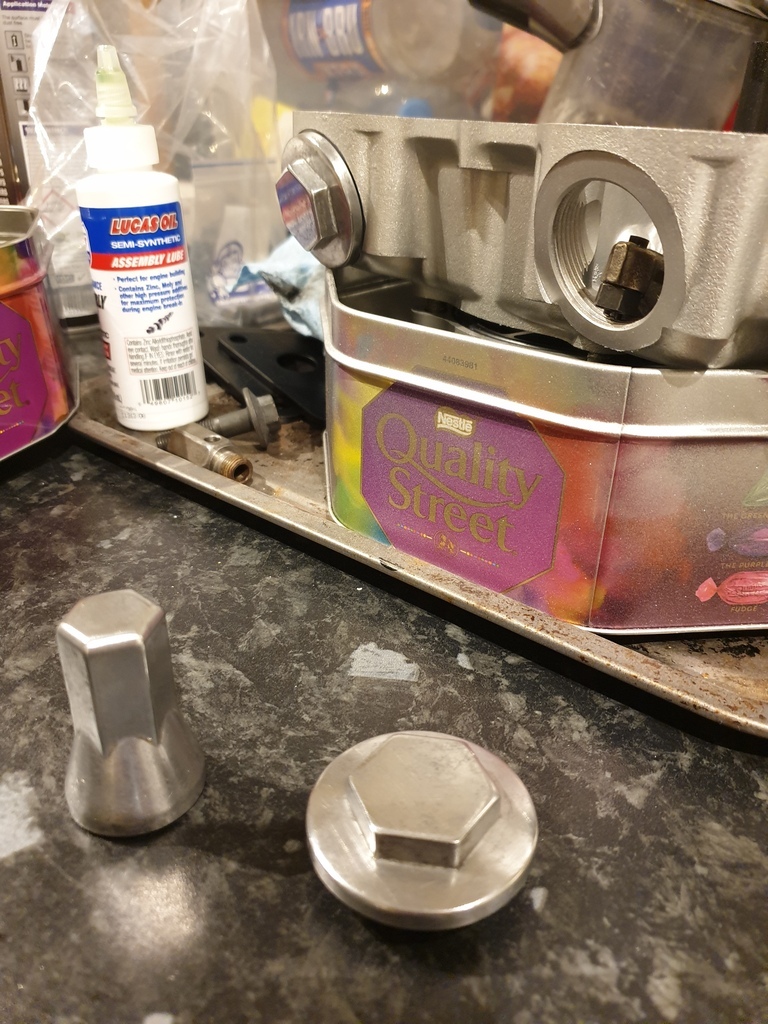 Didn't go crazy with them, bit of 240, then 480 grit wet and dry paper before a going over with the autosol. Blends in well enough with the painted bits. So the mistake I'd made with the engine assembly. The balancer weights have to be timed to each other by lining up a small marker hole on each sprocket with one of two bright links on the balancer chain. My balancer chain actually has four bright links but they have the same spacing. I'd timed the weights to each other, the crank was set to the position as outlined in the manual, flywheel webs upwards, oil holes in the journals half obscured by the surface of the crankcase. What I'd neglected to do was check that I had the weights correctly timed to the crankshaft... I'd also put the chain on the "wrong" way round so it was tricky to see the marker hole and bright links as they were on opposite sides of the chain. Took the balancer assy off, turned the chain around, re-timed the weights to each other, then aligned the bright links with the small markers cast in to the balancer assembly body 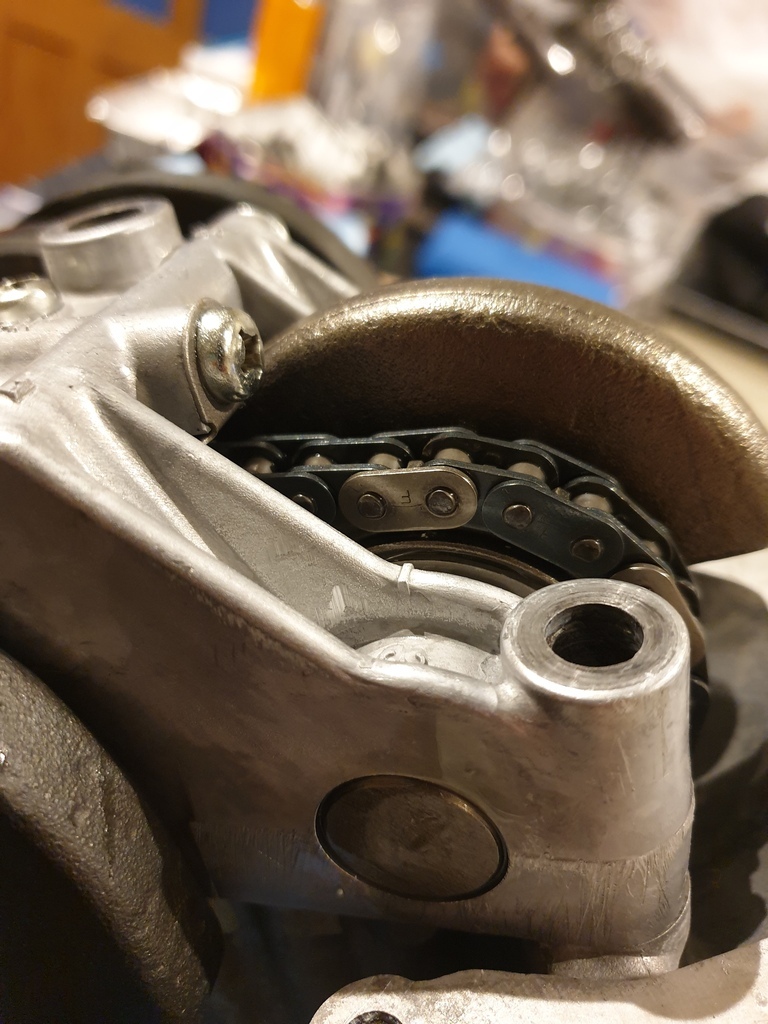 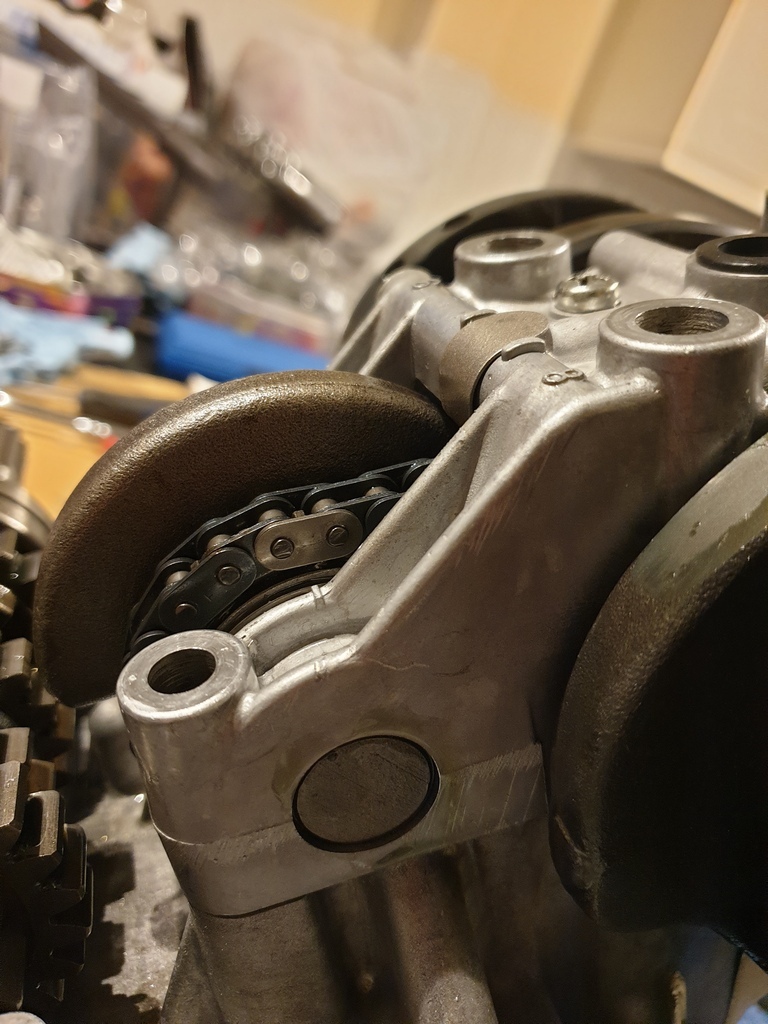 And finally refit to the crankcase. Glad I caught that now rather than after I'd build everything up! Not long after this, the missing O ring arrived and it was time to rejoin the crankcases. Not many photos as I was trying to make sure I hadn't missed anything else, but made sure the bearings had oil, cleaned the mating surfaces, applied a thin layer of Permatex ultra grey to the upper crankcase then lowered the other half on top. Went round torquing all the bolts and it looks somewhat more like an engine again  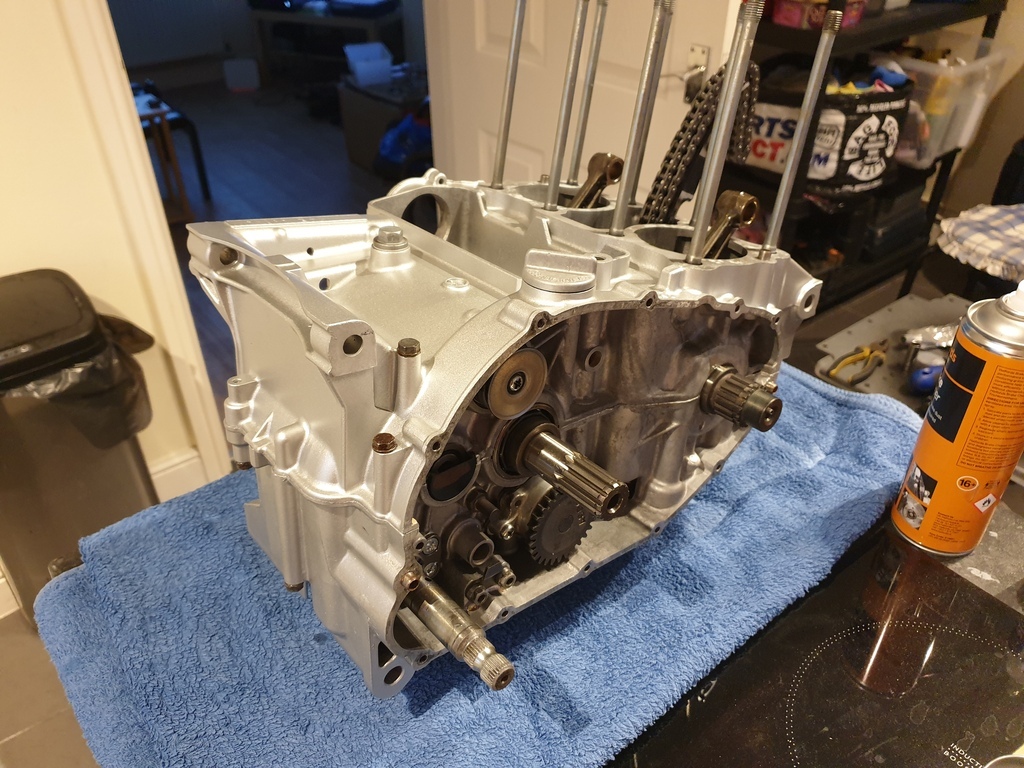 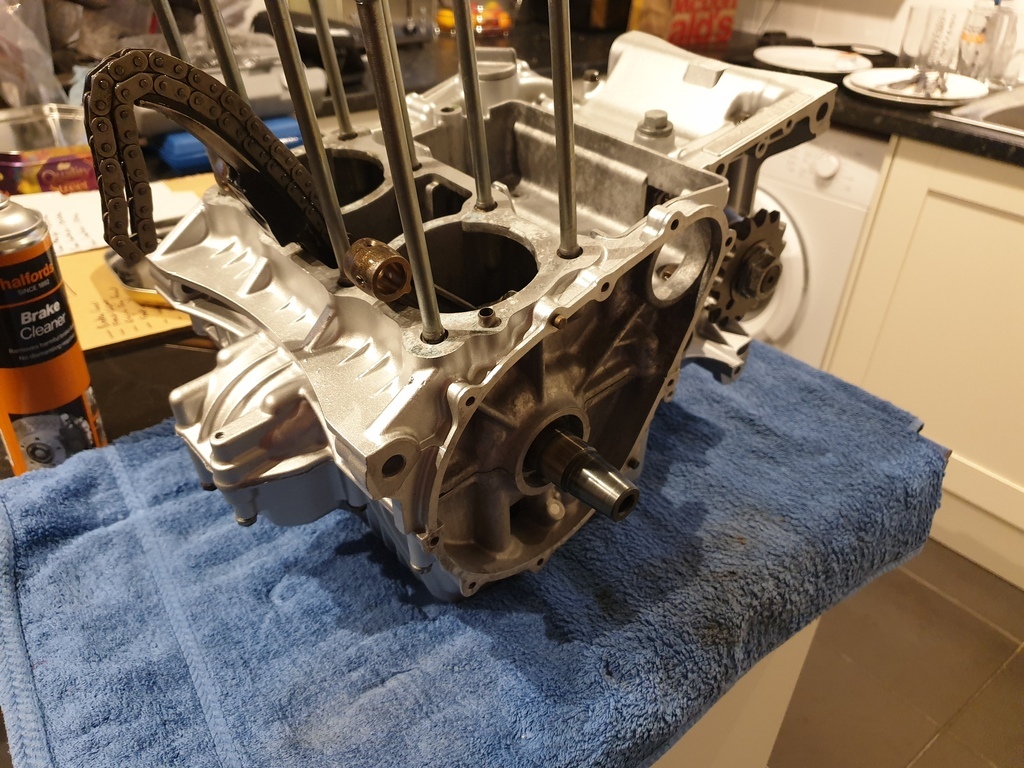 On the primary drive side, I slotted the gearchange shaft through and engaged it with the shift drum, fitting it's retaining plate afterwards. I've also tried to fit the kickstart spring but it's currently proving a bit of a curse word! I think I need some better needlenose pliers 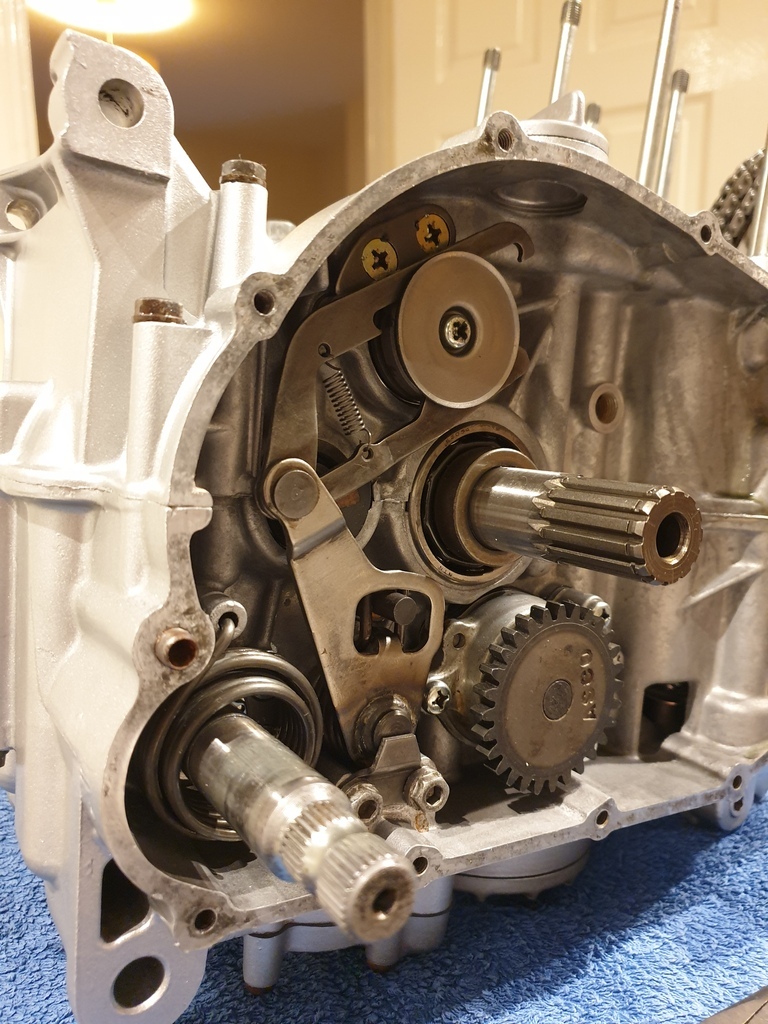 On the alternator side, the rotor is on along with the starter clutch. The starter chain needed a bit of cleaning up, one link was a little gummed up but I think it's serviceable for now. The starter motor is just placed there for the moment, it doesn't seem to turn freely by hand so I might have to look into that. 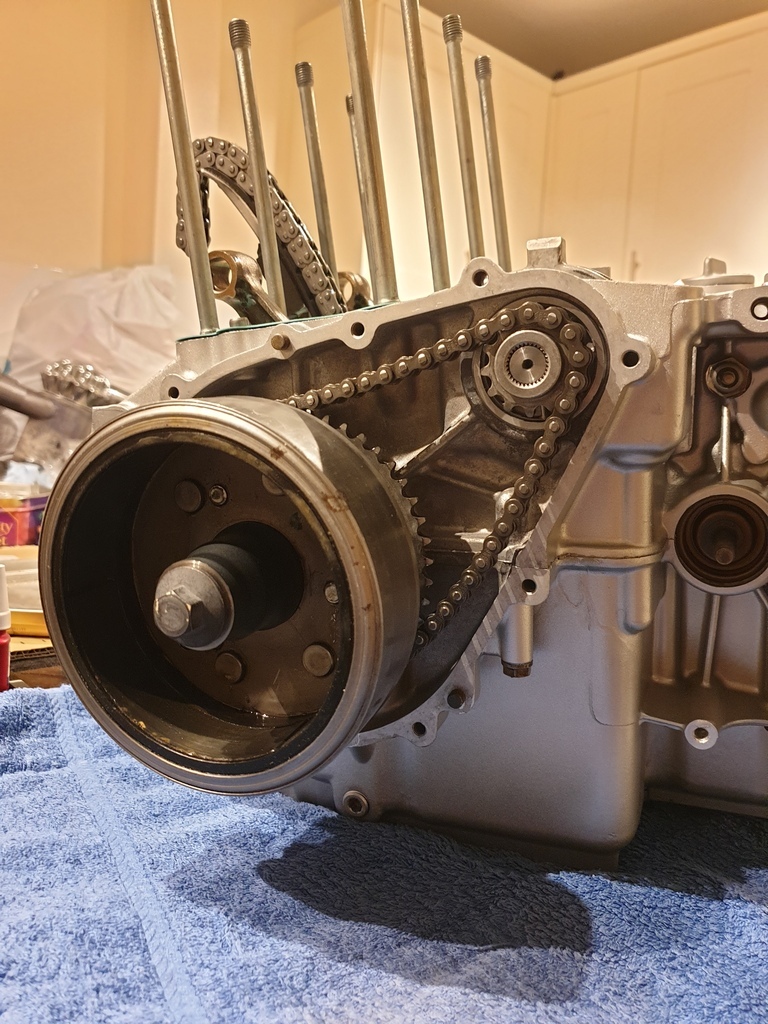 Pistons went on next, oiled up the little ends, piston bores and new gudgeon pins and it all went together nicely. Circlips weren't particularly difficult to fit either, though I still stuffed some rags into the open crankcase just in case one decided to try and drop down there! 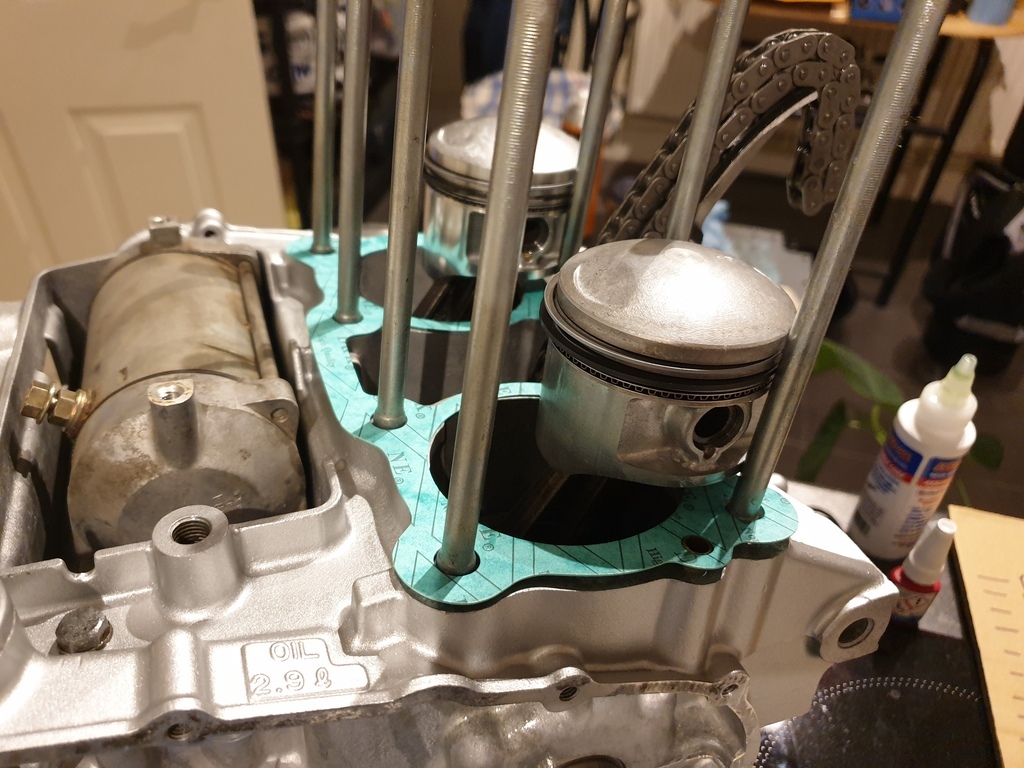 I'll try and get the cylinder barrels on next, also waiting on a new ball bearing for the oil pressure relief valve, once that's rebuilt and fitted (as well as the aforementioned kickstart spring) the primary drive chain, sprockets and clutch can go on also |
| |
|
|
adam73bgt
Club Retro Rides Member
Posts: 4,879
Club RR Member Number: 58
|
|
|
|
|
In case it helps with troubleshooting, I'd been having the same issue on my phone earlier (Android Galaxy S9/ Google Chrome) and now I actually can't even login on my phone, got a "too many redirects" error, with a suggestion to delete cookies, which didn't help.
Conversely, on my *ahem* retro PC (Windows 7/ Firefox) the forum is working entirely normally
|
| |
|
|
adam73bgt
Club Retro Rides Member
Posts: 4,879
Club RR Member Number: 58
|
|
|
|
It was bothering me as it looked like a US LE as you say and the plate felt oddly familiar I can bet these days to do something similar would involve a very expensive conversation with the bespoke department of your chosen manufacturer  Hmm can't recall if I had to give mine up when I left or not, I'll have to have a look around! |
| |
|
|
adam73bgt
Club Retro Rides Member
Posts: 4,879
Club RR Member Number: 58
|
|
|
|
Turns out that black MGB "jubilee" was done as a one off based on the look of the American special edition www.mgb-register.org/portfolio-item/abingdon-jubilee-special/I do need to get over to gaydon at some point to look around the "new" bit that opened, have only ever been around the original museum previously but the odd prototypes in the other building look very interesting |
| |
|
|
adam73bgt
Club Retro Rides Member
Posts: 4,879
Club RR Member Number: 58
|
|
Nov 30, 2023 16:51:22 GMT
|
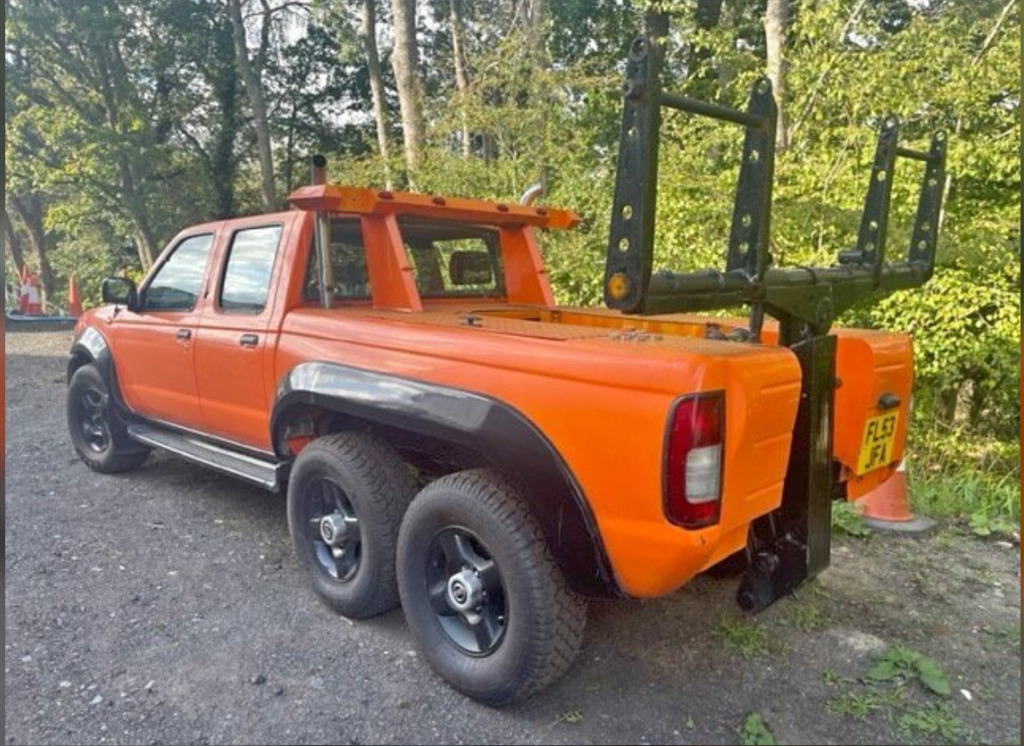
Really annoyed with myself, didn't grab a screenshot earlier this week but on of the FB groups threw out a 6 wheel 70s Charger or Challenger... saw it, thought it needed to be shared here and now can't find it🙄 Ha! Was just browsing Instagram and saw this, same car? Can't imagine there's many 6 wheel Chargers about 😅 http://instagram.com/p/C0JTBWeuk5- |
| |
|
|
adam73bgt
Club Retro Rides Member
Posts: 4,879
Club RR Member Number: 58
|
|
Nov 29, 2023 22:53:57 GMT
|
|
|
| |
|
|
|
|
adam73bgt
Club Retro Rides Member
Posts: 4,879
Club RR Member Number: 58
|
|
Nov 14, 2023 23:32:53 GMT
|
Thats a great effort for some of your first ever welds... Mine did not look anything like as good! Although learning on HGV's in a carpark probably didn't help... Nice to see this getting some updates! If you can afford/ store a big bottle I would seriously consider it. You'll become best friends quickly with the supplier of hobby bottles.... Thank you I'm on a bit of a motivation boost at the moment so trying to keep some sort of progress going, yes I don't see the value in continuing with the little disposable bottles at the moment, especially as theres a fair bit of rust to contend with! It's good to see some progress. If you are getting a Hobbyweld bottle, do you need a regulator? I'm happy to lend mine if required. That's a good point, I ought to get a decent regulator at the same time.. I'll probably look to buy one as knowing me it could take me a while to get through the welding needed on this (and the MG!) but I'm all ears for any tips on what makes a good regulator! |
| |
|
|
adam73bgt
Club Retro Rides Member
Posts: 4,879
Club RR Member Number: 58
|
|
|
|
This is so cool with the O series turbo, I've got an NA O series to go in my MGB at some point Nice, I didn't know that was a thing. What gearbox can you use? Yeah I believe the engine was originally from a rover sd1 2000, previous owner rebuilt it with a cam and a manifold for dual Webers which should be a laugh, I can use the original mgb 4 speed +o/d, just needed a Sherpa backplate to make it fit |
| |
|
|
adam73bgt
Club Retro Rides Member
Posts: 4,879
Club RR Member Number: 58
|
|
Nov 13, 2023 21:54:10 GMT
|
This is so cool with the O series turbo, I've got an NA O series to go in my MGB at some point |
| |
|
|
|
|