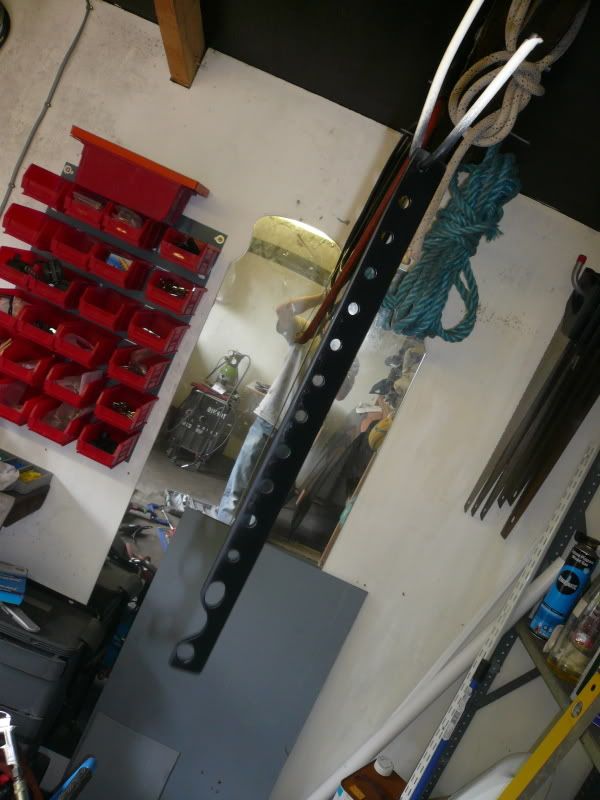
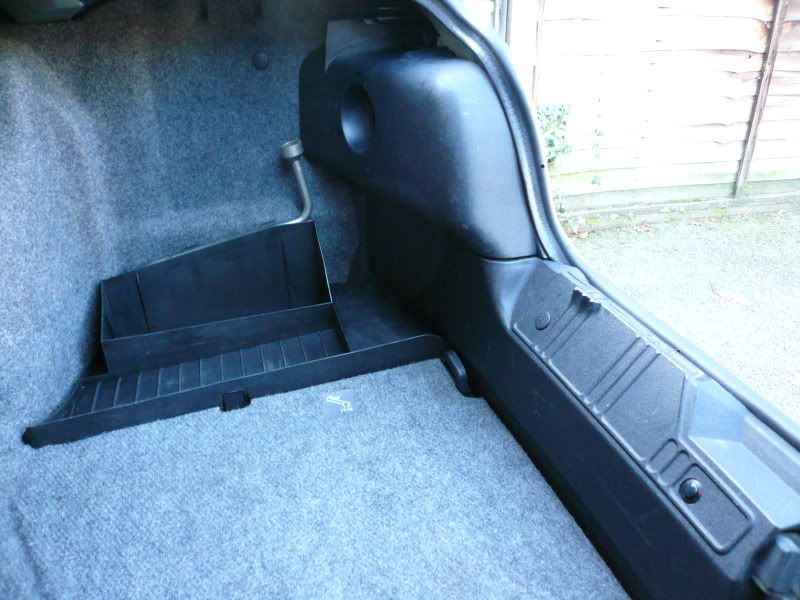
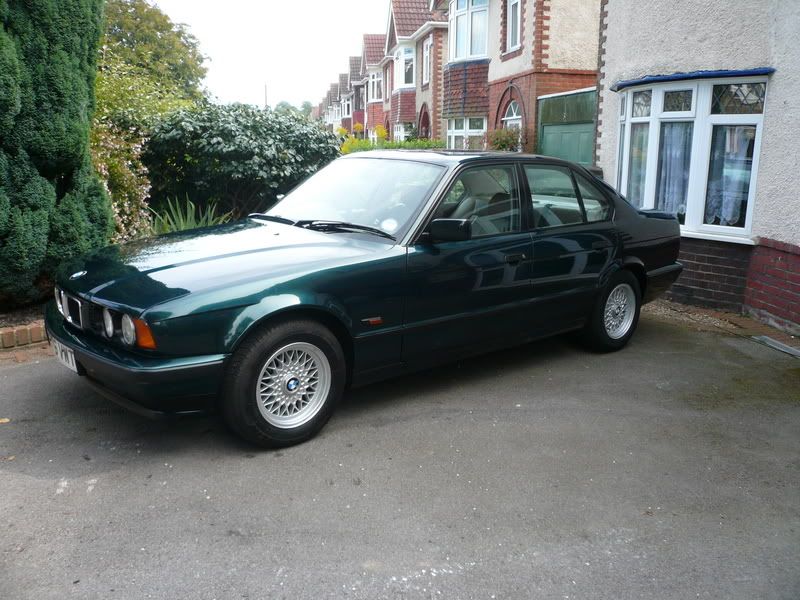
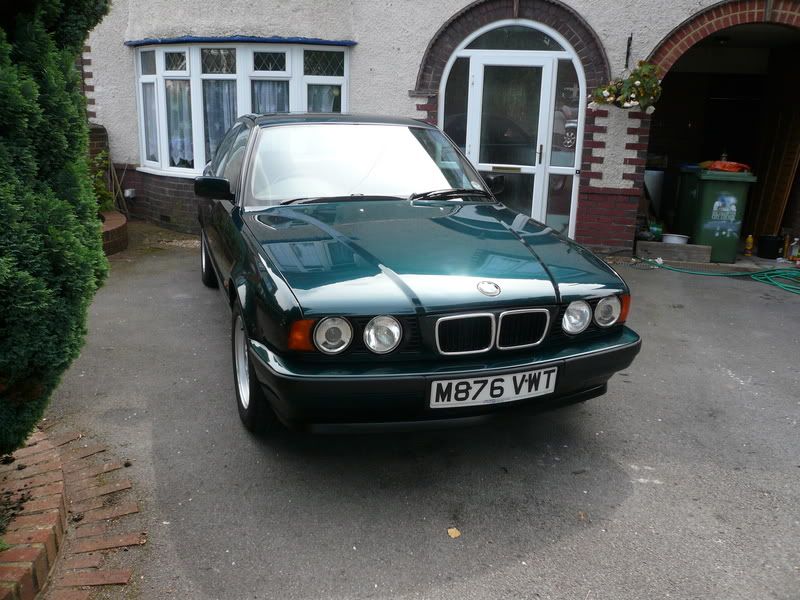
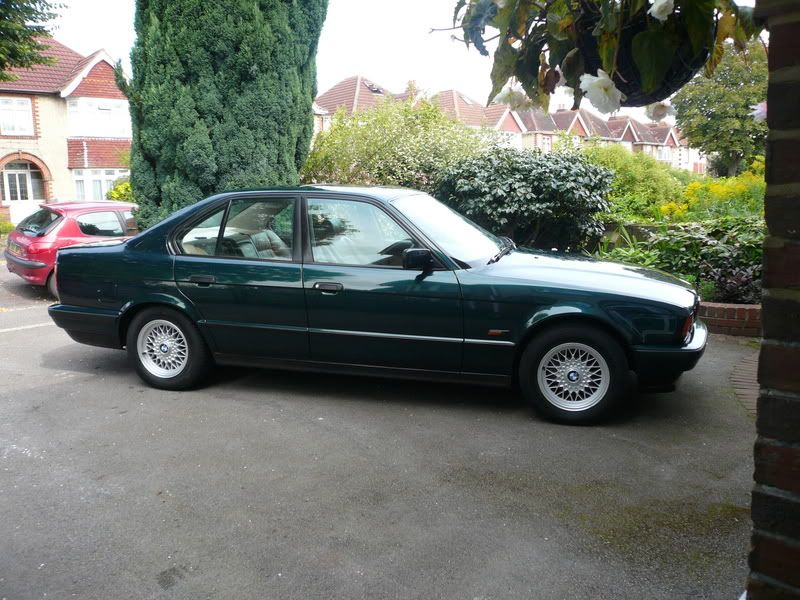
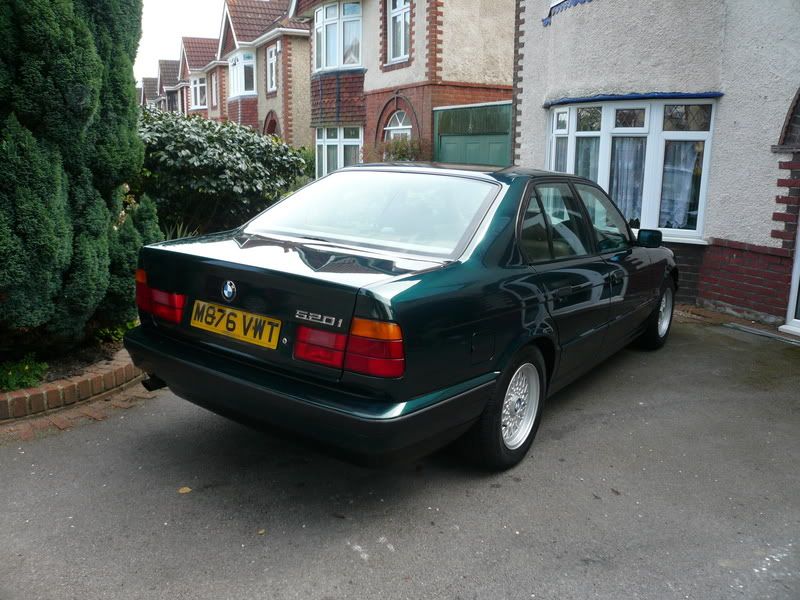
(splitting this into several posts)
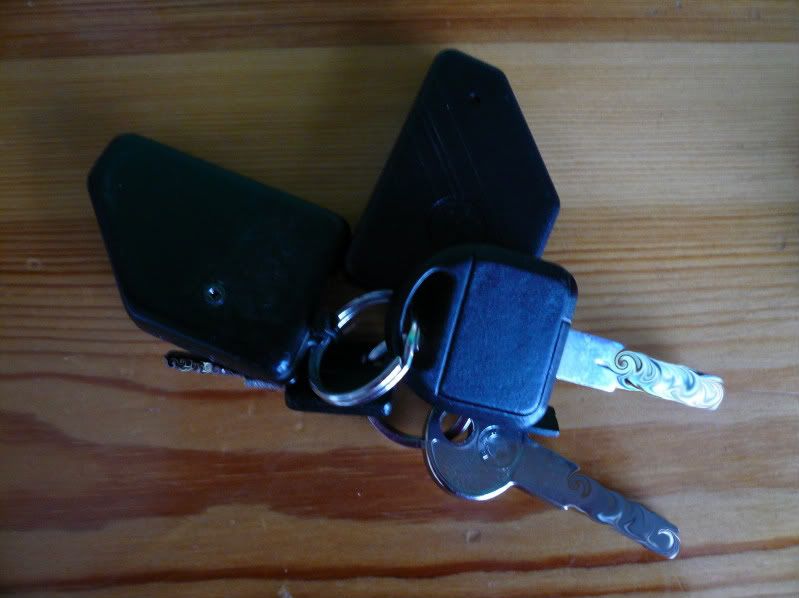
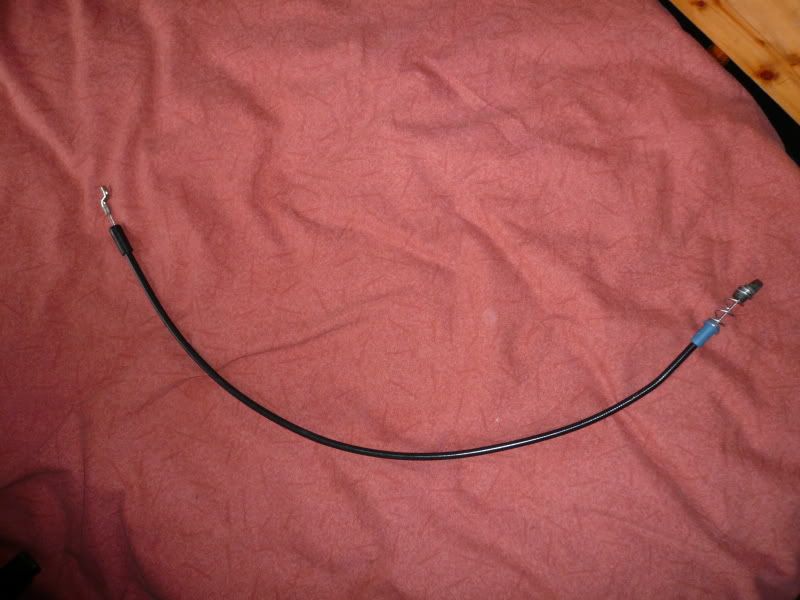
Although it's having a few teething issues I've now got remote locking/alarm and 2x working fobs

It's the little things:
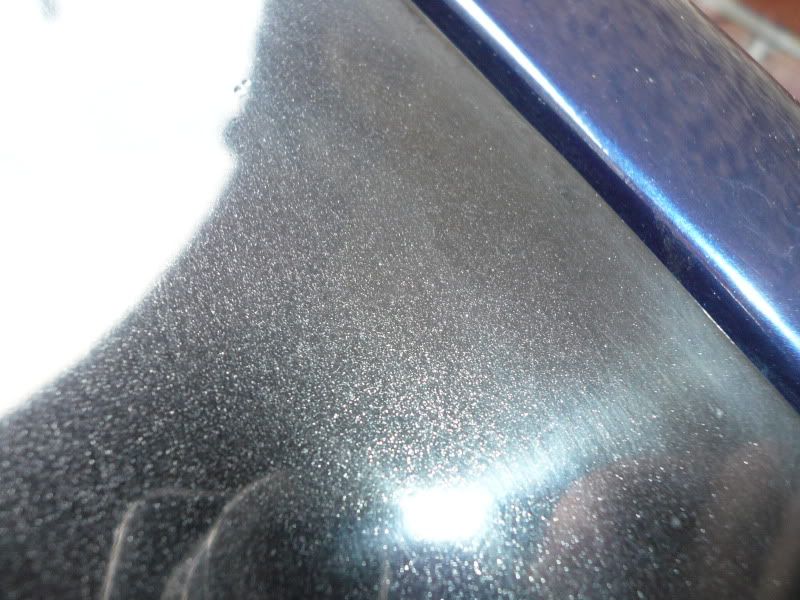
My battery was weak and then I notice it was leaking :sarcastic
Although the paint under the battery was fairly scuffed and scratched at it was, the leak caused bit of it to dissolve so I cleaned it all up, wire brushed it all and then keyed the rest of the area too. As usual, kurust and then some hammerite:
Ps, the brown bits you can see aren't rust, they're the colour of the factory seam sealer once the affected paint was removed.
Tomorrow I'v got a PDR guy coming to remove all the annoying little dings so it's slowly getting there.
Bit of annoying news: One of the most annoying dents couldn't be removed due to it's location

we stripped the door down to no avail.
So I'm pretty gutted about that because it means it'll have to be done at a bodyshop which is a nightmare for me because I've no idea where would do the job up to my standards.
If anyone knows of any fantastic bodyshops in Hampshire who are willing to a) do a good job for a realistic price and b) willing to let me do some of the prep to keep the costs down then please let me know.
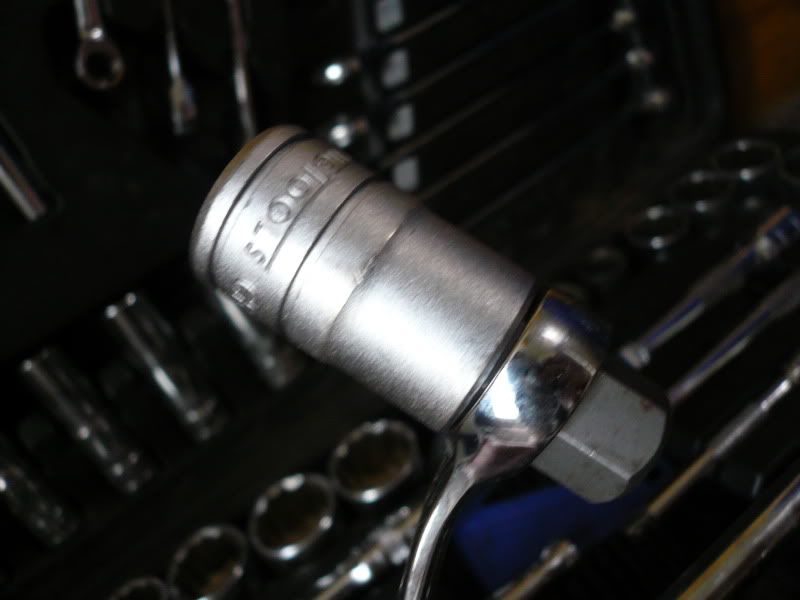
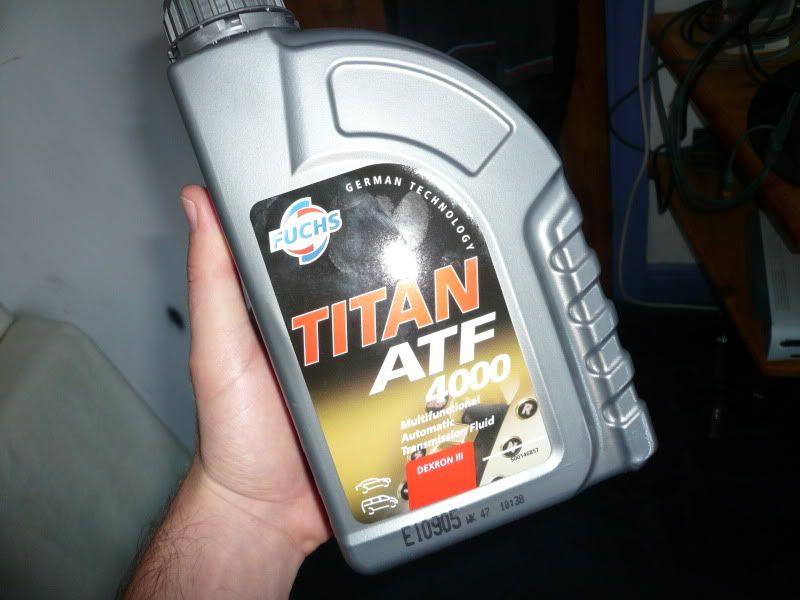
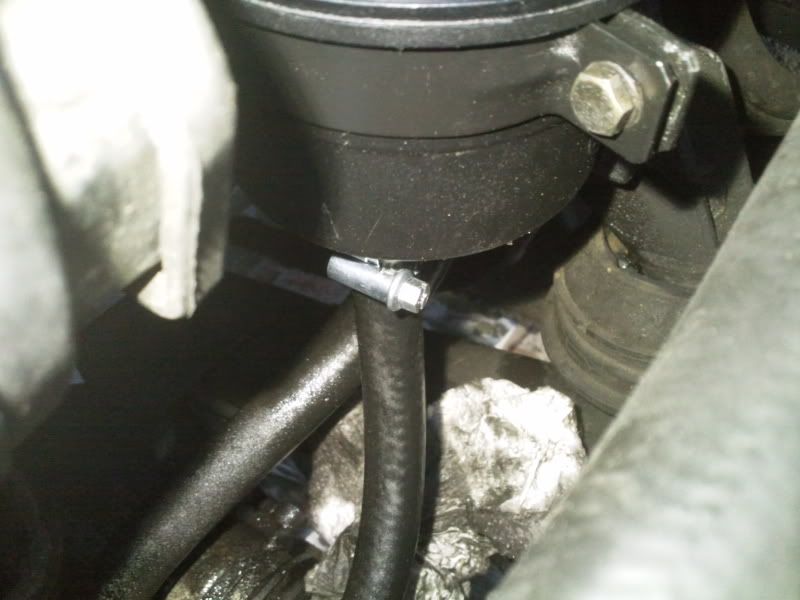
Diff oil done today. So I don't forget, it was done at 106717miles.
The old oil didn't look too bad really but I'm glad it's done now for peace of mind.
The Oil:
![]() img.photobucket.com/albums/v609/FiestaTom/Run
img.photobucket.com/albums/v609/FiestaTom/Run arounds/325i/Exterior/Mechanical/P1010738.jpg[/img]
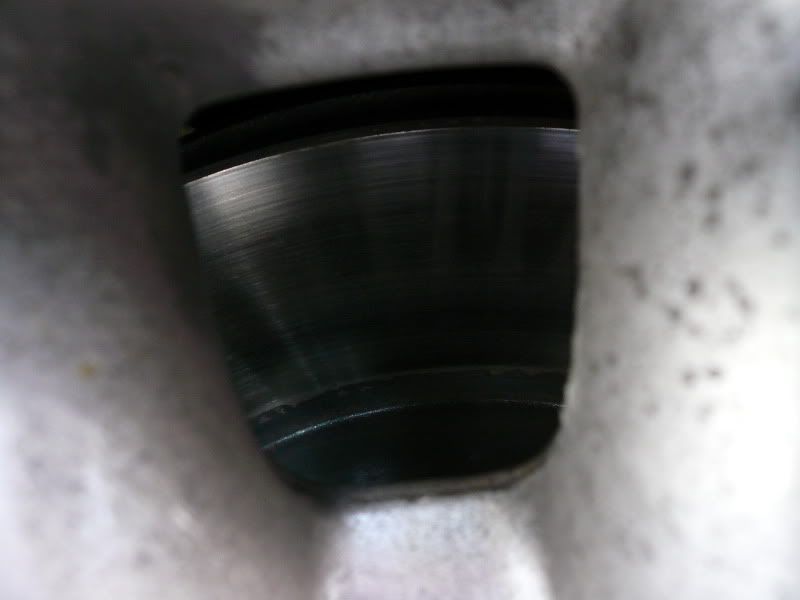
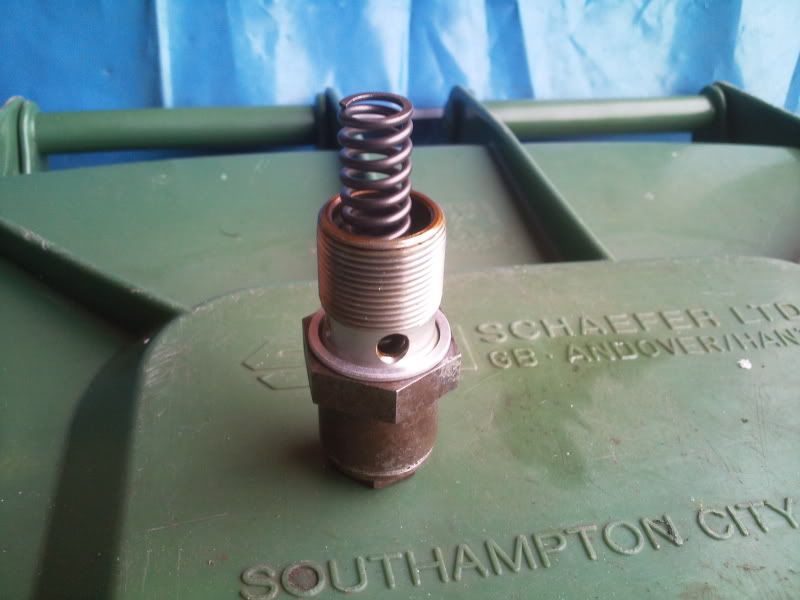
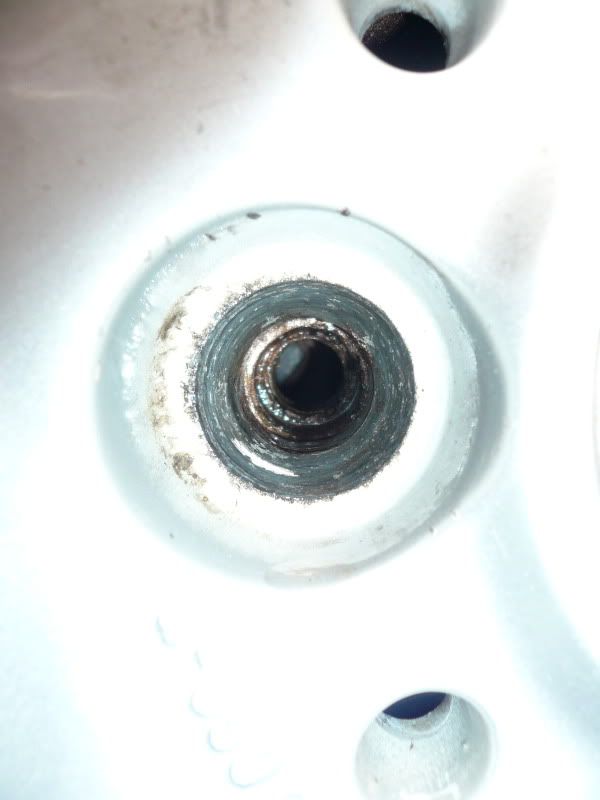
The socket needed ends up being pretty large when you put a ratchet on it and it doesn't fit between the filler plug and the floor of the car, answer?
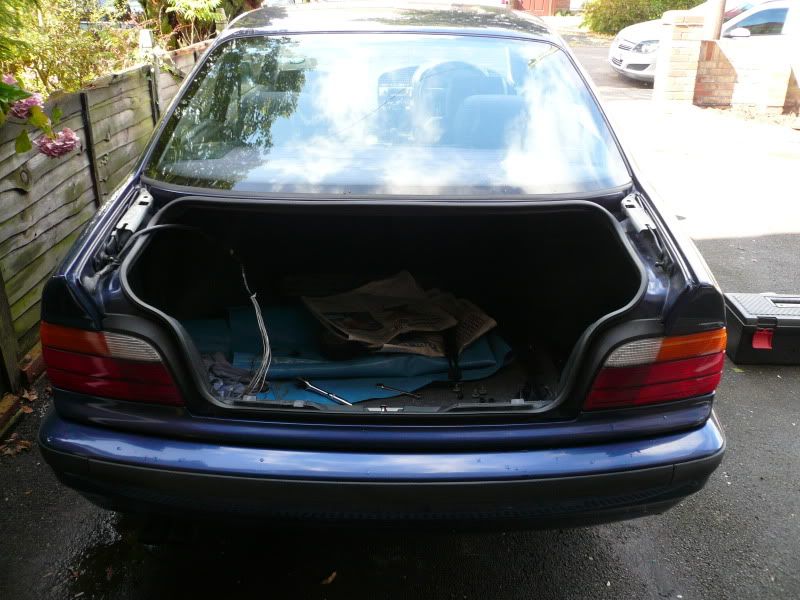
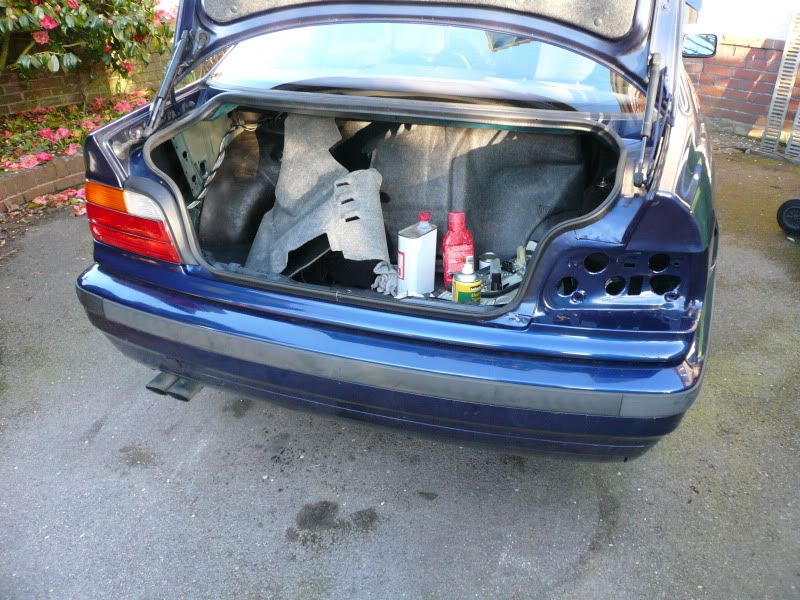
Well it's nothing too technical but I took the spoiler off to see how it looked until I get it sorted properly, so for now it's just got some tape over the holes :hihi ghetto.
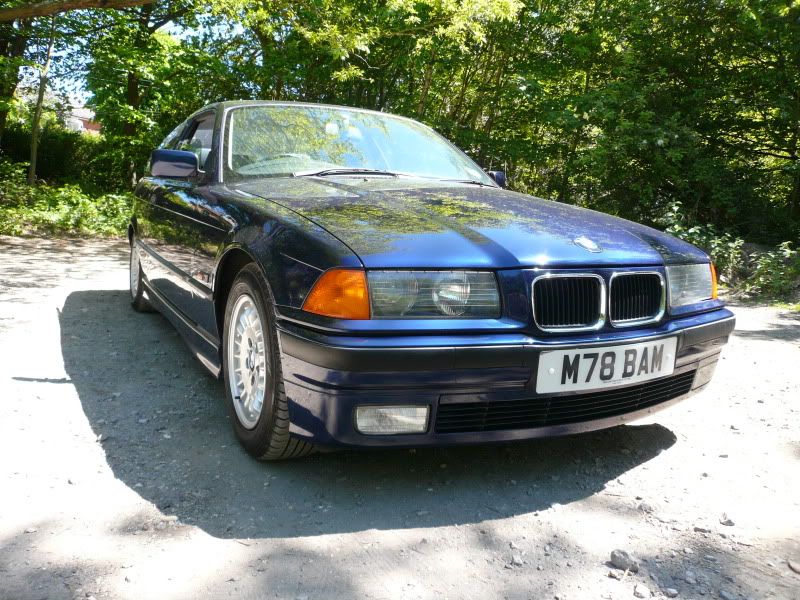
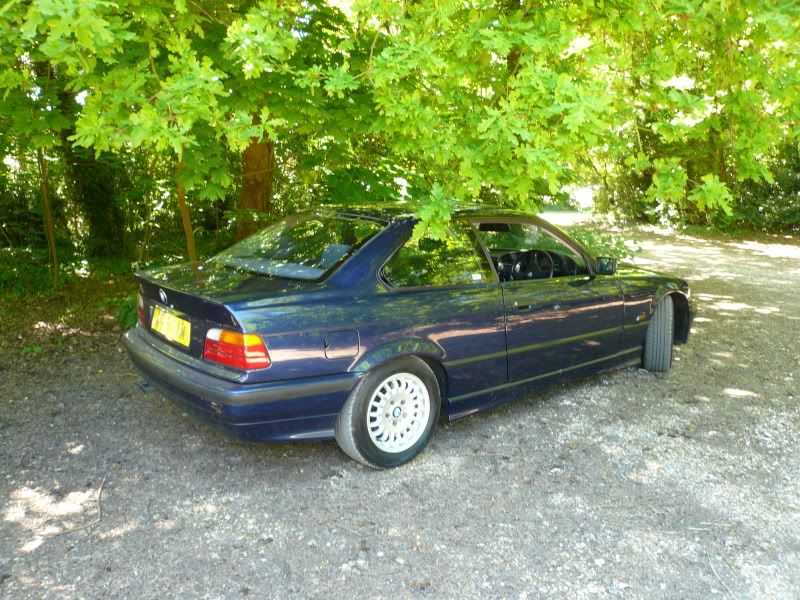
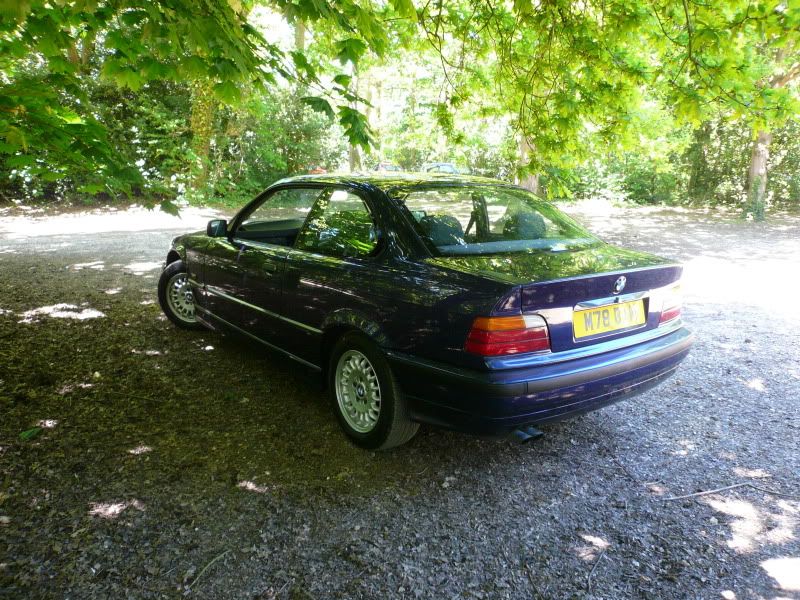
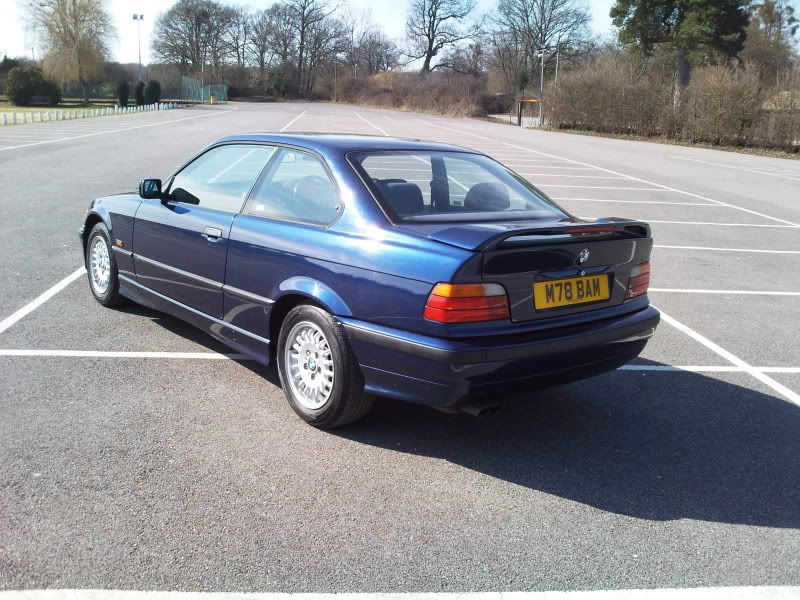
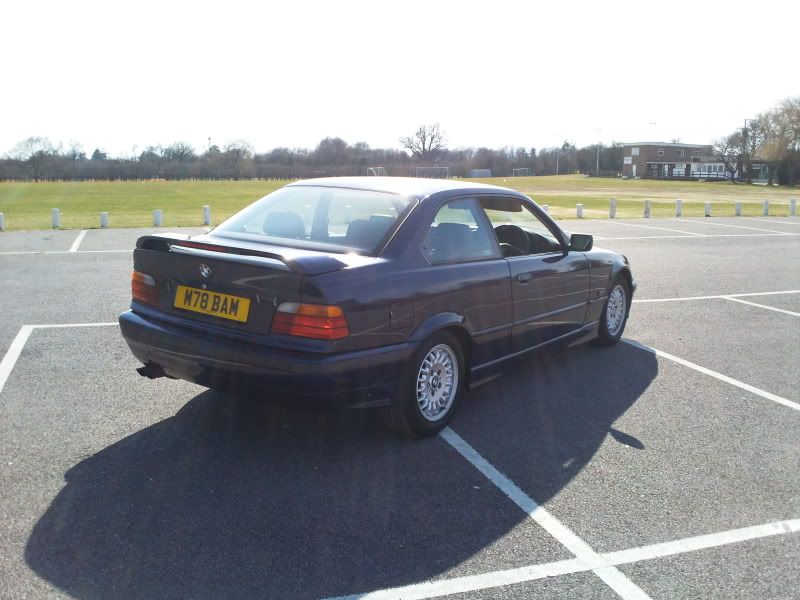
Now all of the dents (bar one :mad ) have been sorted I've spent the last few days going over the car removing tar spots, minor mark etc etc and gave it a polish, went for a spin and took some pics:
1st Location:
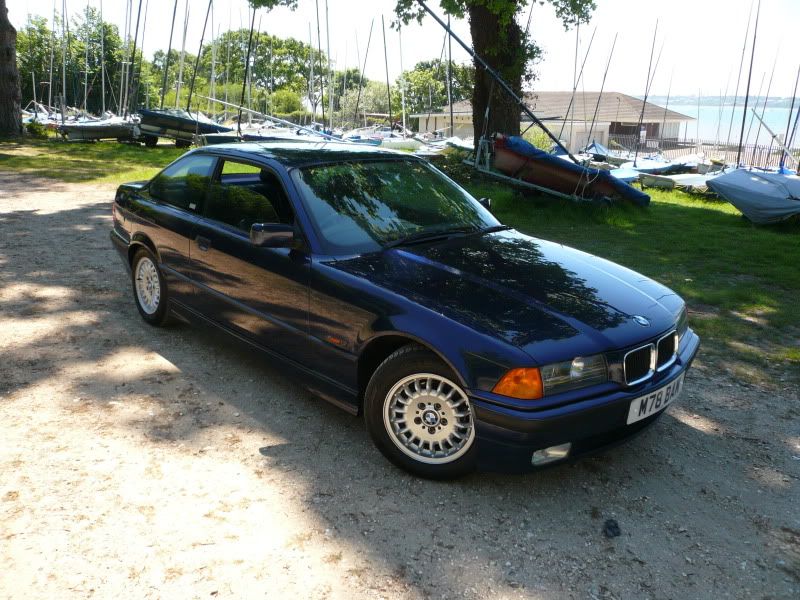

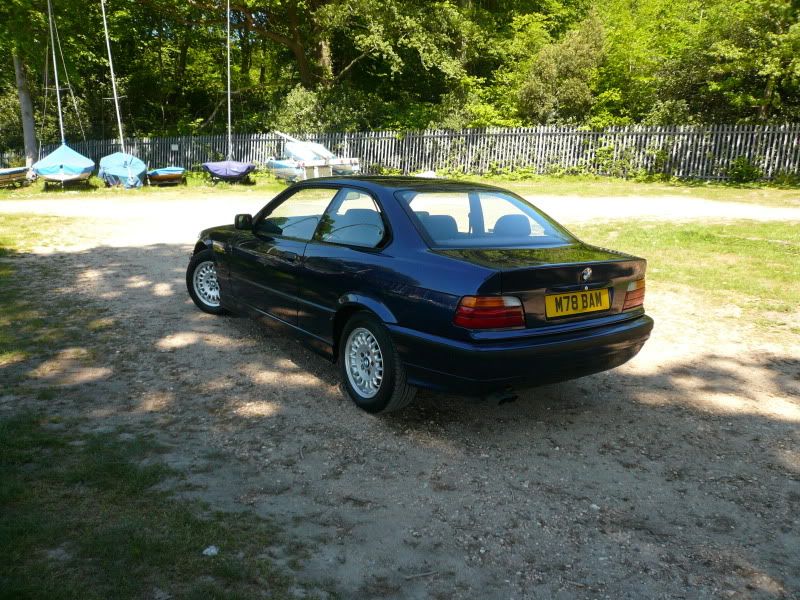
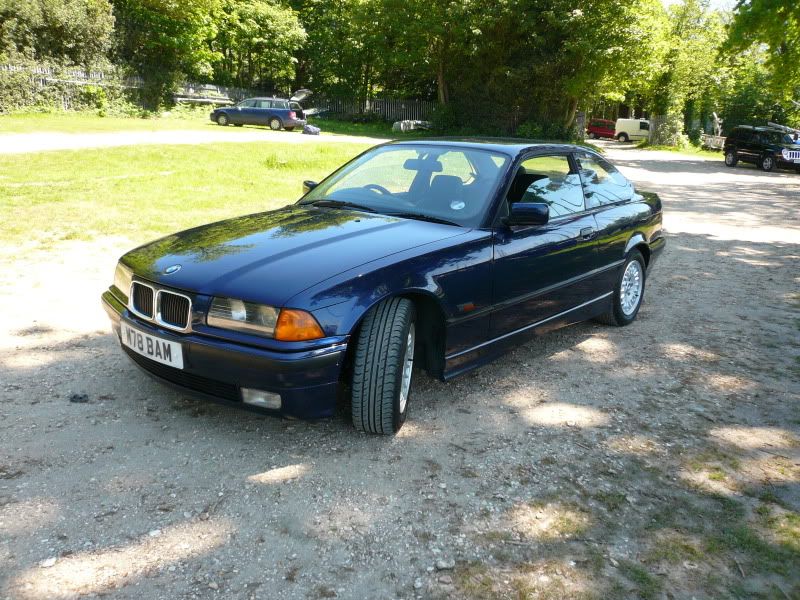
2nd Location:
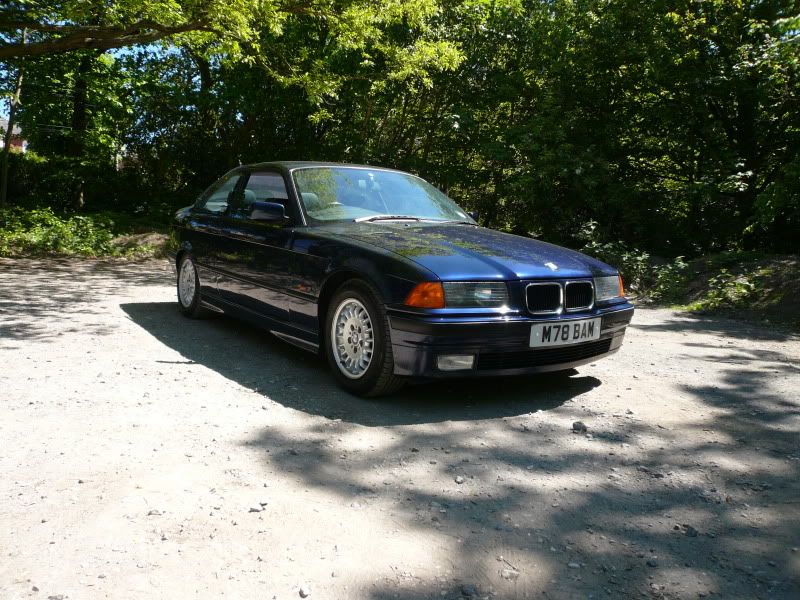
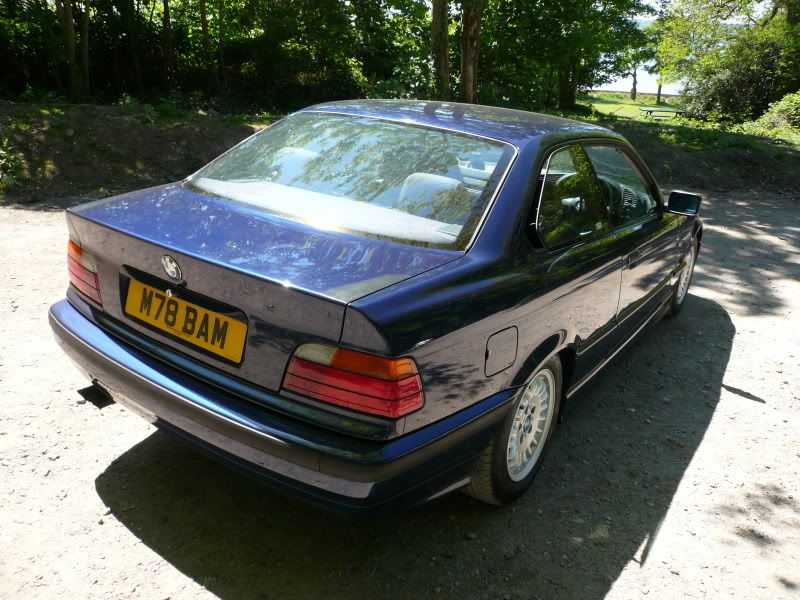
3rd Location:

I've been getting tempted to do some crazy (for me) things to it but now I look at it I'm not sure.
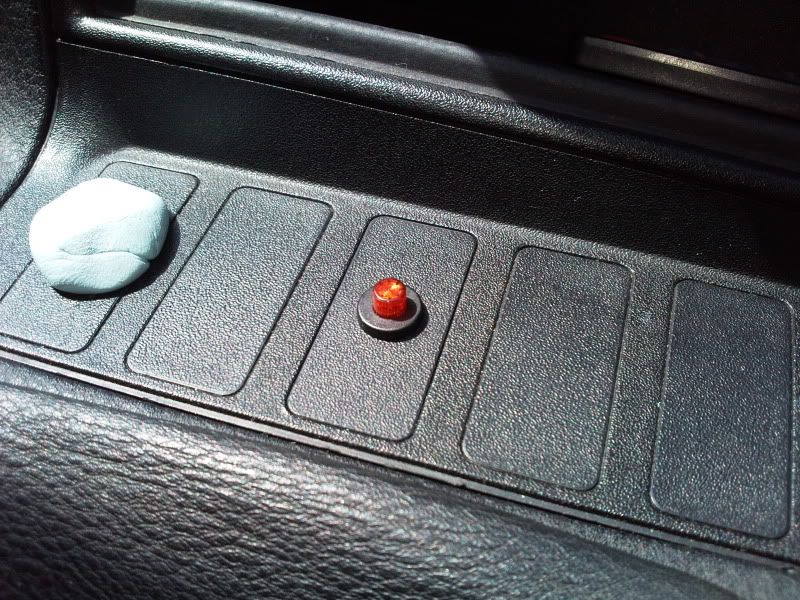
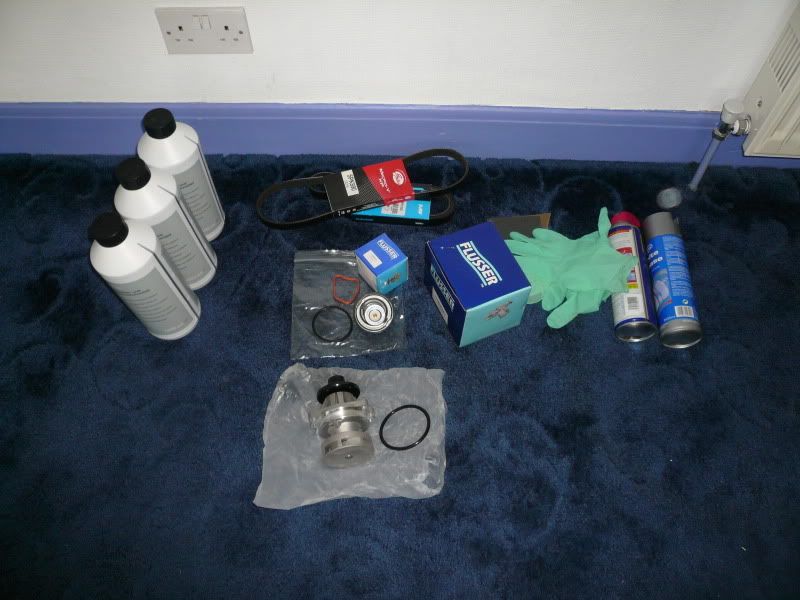
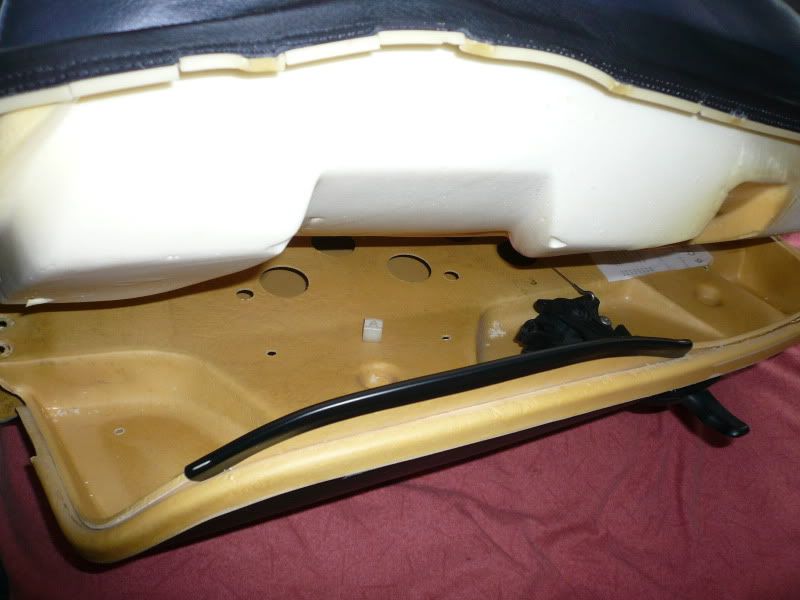
Alarm button and the slowest waterpump change in the world:
The interior button/light for the alarm had been broken for a while, you can see the surround is missing meaning there's nothing to hold the button in place but the spring and mechanism inside was also knackered.
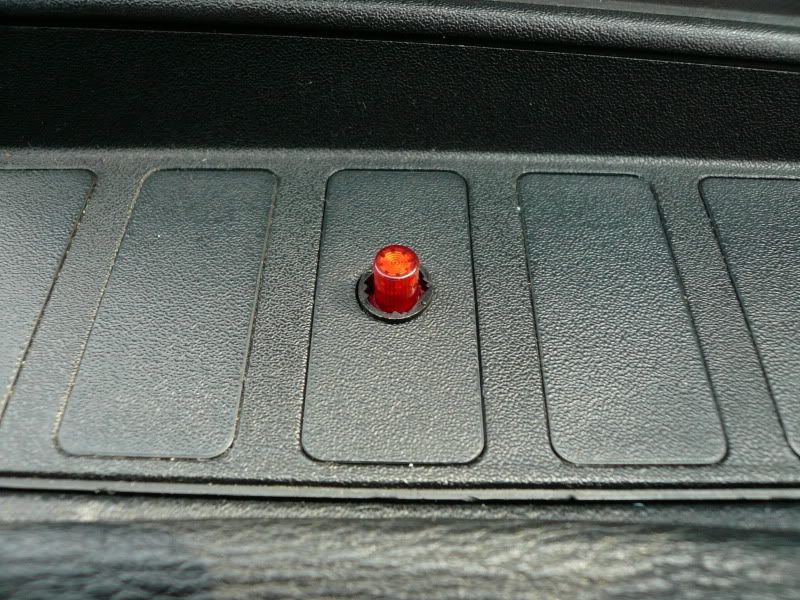
A new button was spliced in and now working perfectly.

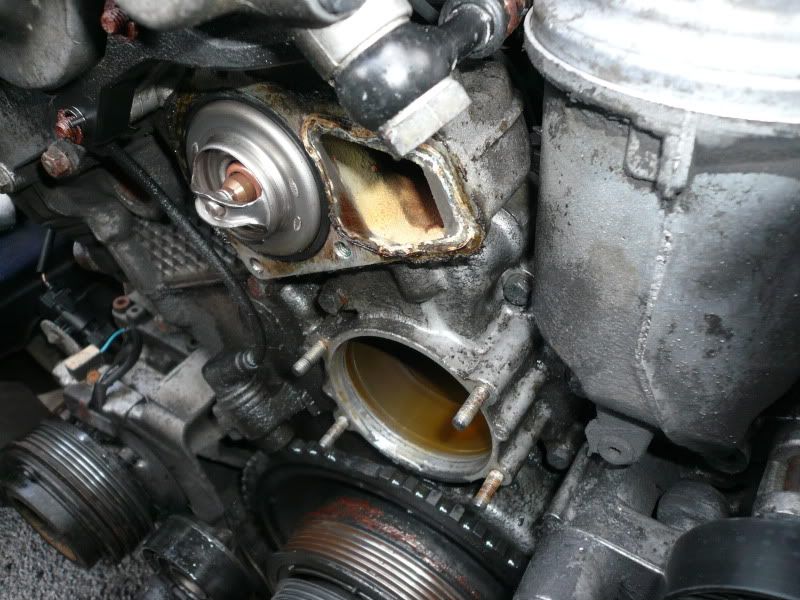
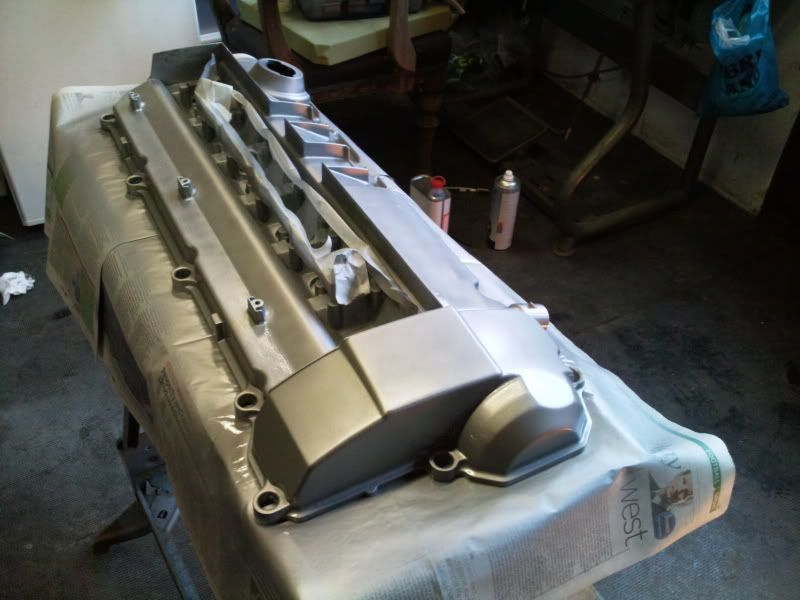
Now the coolant/water pump/thermostat and belt change all ready to go:
Firstly I didn't have a spanner big enough to get the fan off, then once I had one I couldn't get the leverage at all, so I made this:
Take a nice thick L shaped piece of joining section and cut it at the bend to create this:

Drill out the holes and grind down the middle to give the shaft clearance:
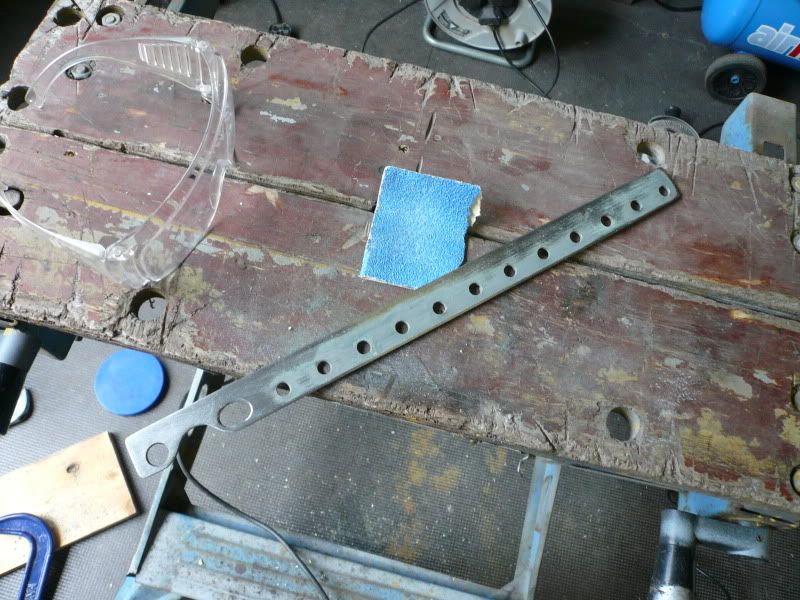
The holes on the pulley/pump aren't evenly spaced, I made my tool to fit in the biggest gap just to make things a little easier with shaft clearance/amount of meat around the holes in the tool:
Paint it becuase it's started raining and you can't be arsed doing the actual job and getting wet:
Now I'm just waiting for the weather to clear so I can do the job.
Update 22/06/10
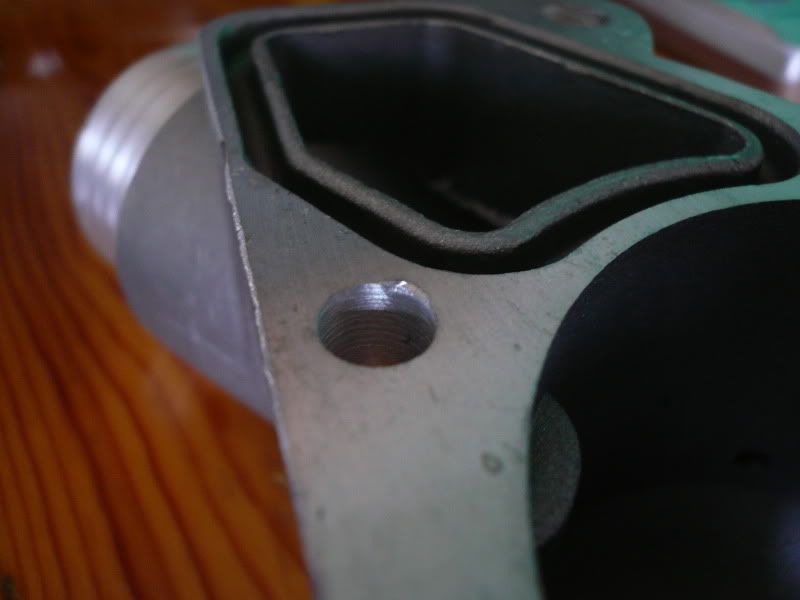
After the most ridiculous amount of hassle over a thermostat housing, I think it's done (fingers crossed)
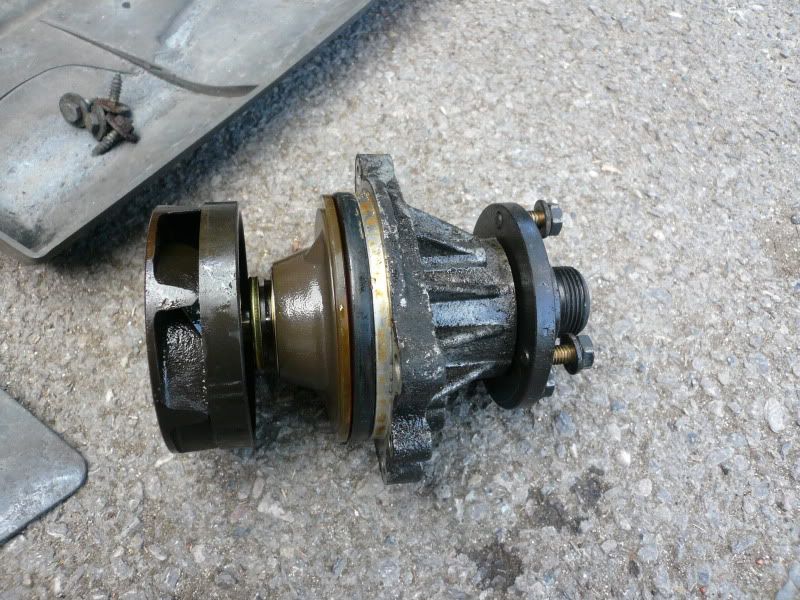
My tool worked a treat and I was then able to remove the fan, god it was on tight! and I started removing everything:
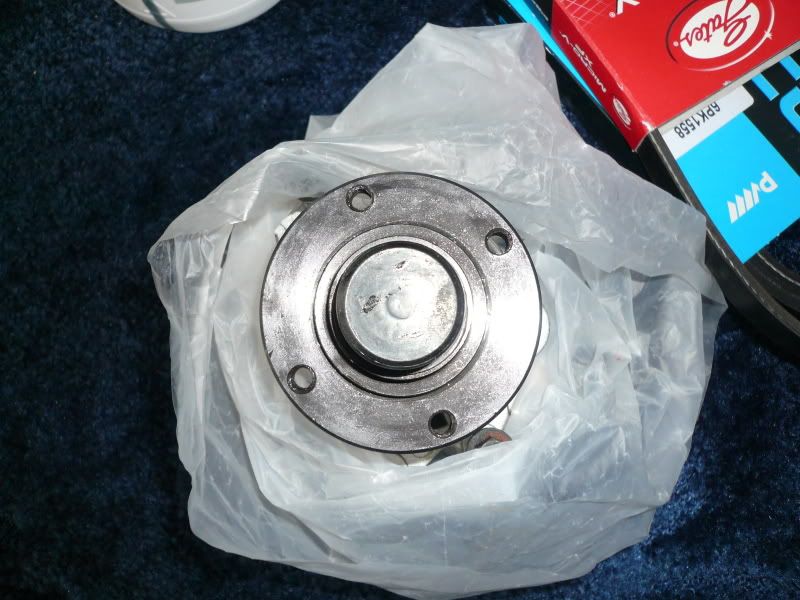
The main reason for doing this is that I wasn't sure when/if the waterpump was changed for a metal item, so I was slightly disappointed when I removed a perfectly usable metal impeller pump :sarcastic
This gives you an idea of how old the belts were :eek

Then the problems started :embarrassed
Upot fitting the original (genuine plastic bmw item), as it was compressing the O-ring the bottom lug cracked. OK I thought, it's old and brittle.
Got one from GSF, gingerly nipping up the bolts bit by bit to spread the load out...crack. I was using a mirror too and the gap between the head the housing was still about 1mm so it wasn't even compressing the O-ring. Oh and I had the torque wrench set to just under 10Nm to be 'safe'.
OK, GSF item isn't as good as the genuine item so I ordered a BMW one. Being even more careful tightening it up, torque wrench set to 8Nm going round in a circle doing each bolt a bit at a time...crack :jaw-dropping
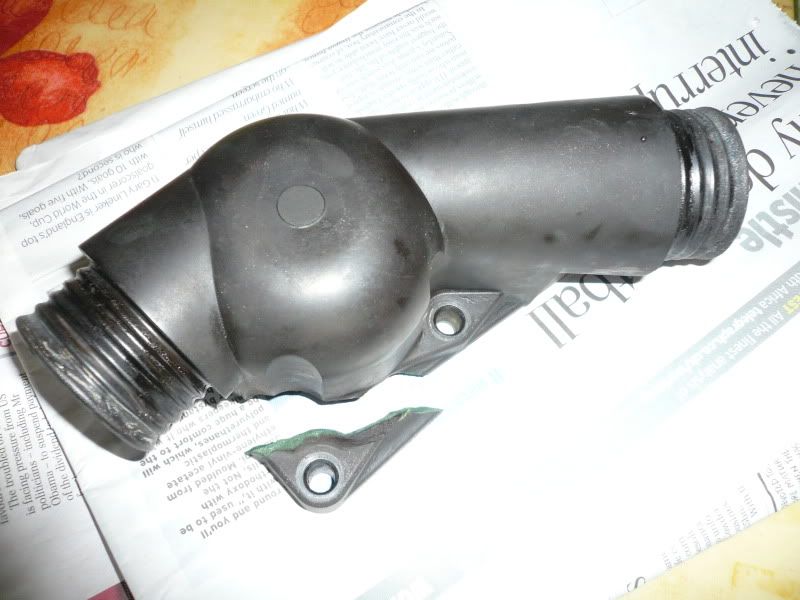
After all that ball-ache I ordered an alloy housing from the US and it arrived just under a week later :thumbsup The casting was a bit raw though with a few imperfections:
I resurfaced the mating face with some 1200 emery paper on some MDF. Because MDF is cut perfectly flat, it's a great surface to do this on. Use some spray glue to hold the paper in place, spray some oil on the surface and then just work the piece in various directions to get a nice flat surface.


I also went over the whole thing with a scotch pad just to smooth it out slightly.
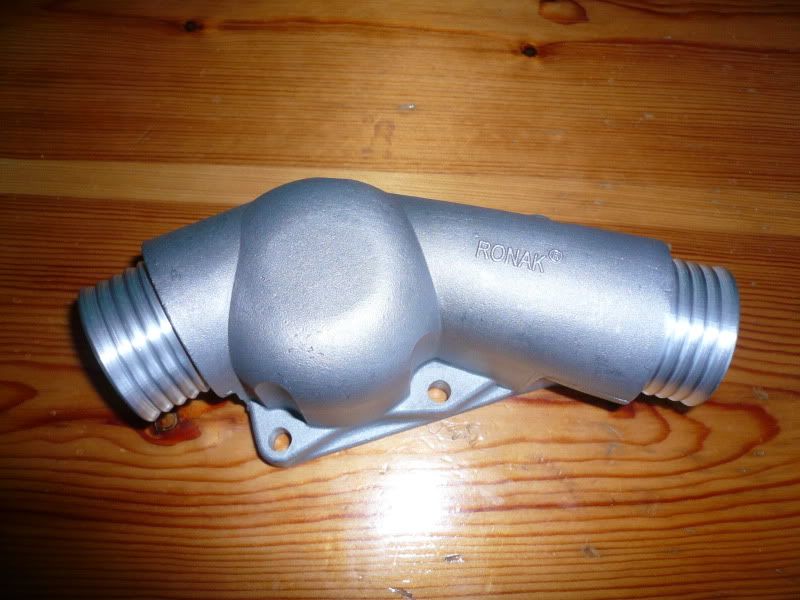
Back to fitting; I didn't dare go up to 10Nm, as I was doing everything up, it felt tight so I checked around with a mirror and the sealant was starting to squeeze out so I left it there. With the alloy housing, I thought there might be a risk of the torque finding the next weakest link, which would be the bolts or thread and I didn't want to strip anything. I'm PARANOID about stripping threads!

Filled up the coolant as per the Bentley manual and took the car for a little spin. It came up to temp, blew nice hot air quickly and when I got back I opened up the bleed screw and let it hiss and bubble for a bit, then topped up the coolant.
I can tell you're all getting bored of this now :hihi no modifications = no replies :frown
Well sod ya! Here are some more pics!
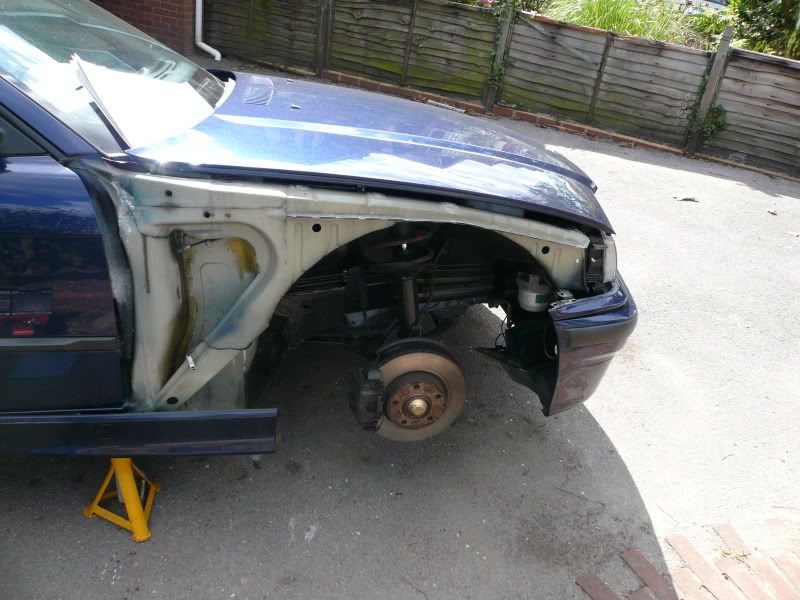
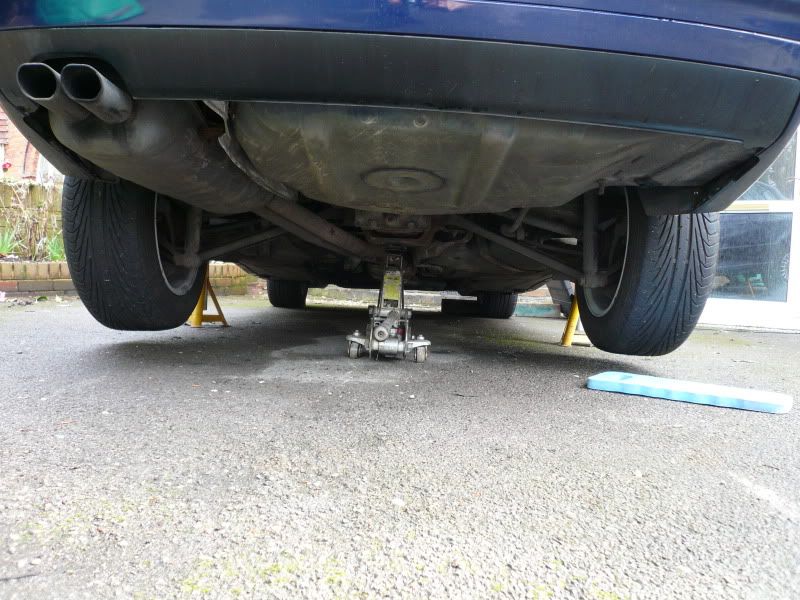
The front brakes were making some noise when hot so I wanted to get the front end in the air and check it all out. While I was there I thought I'd clean everything up in the same way I did with the rear end.
As the drivers side jacking point is a little rusty (which I will weld up soon) this caused a slight problem with where to jack up and place axle stands. Sooooo I had a 5mm plate in the shed and thought 'that should work!'
Took off the jacking pad and slid the plate in place to strengthen it up, jacked up the front on the 'lollypops' and put the axle stands in place:
![]() img.photobucket.com/albums/v609/FiestaTom/Run%20arounds/325i/Exterior/Mechanical/Underbody
img.photobucket.com/albums/v609/FiestaTom/Run%20arounds/325i/Exterior/Mechanical/Underbody cleaning/P1010704.jpg[/img]
![]() img.photobucket.com/albums/v609/FiestaTom/Run%20arounds/325i/Exterior/Mechanical/Underbody
img.photobucket.com/albums/v609/FiestaTom/Run%20arounds/325i/Exterior/Mechanical/Underbody cleaning/P1010705.jpg[/img]
![]() img.photobucket.com/albums/v609/FiestaTom/Run%20arounds/325i/Exterior/Mechanical/Underbody
img.photobucket.com/albums/v609/FiestaTom/Run%20arounds/325i/Exterior/Mechanical/Underbody cleaning/P1010706.jpg[/img]
![]() img.photobucket.com/albums/v609/FiestaTom/Run%20arounds/325i/Exterior/Mechanical/Underbody
img.photobucket.com/albums/v609/FiestaTom/Run%20arounds/325i/Exterior/Mechanical/Underbody cleaning/P1010707.jpg[/img]
Ready for work:
![]() img.photobucket.com/albums/v609/FiestaTom/Run%20arounds/325i/Exterior/Mechanical/Underbody
img.photobucket.com/albums/v609/FiestaTom/Run%20arounds/325i/Exterior/Mechanical/Underbody cleaning/P1010708.jpg[/img]
Arch liners out and brakes apart:
![]() img.photobucket.com/albums/v609/FiestaTom/Run%20arounds/325i/Exterior/Mechanical/Underbody
img.photobucket.com/albums/v609/FiestaTom/Run%20arounds/325i/Exterior/Mechanical/Underbody cleaning/P1010709.jpg[/img]
![]() img.photobucket.com/albums/v609/FiestaTom/Run%20arounds/325i/Exterior/Mechanical/Underbody
img.photobucket.com/albums/v609/FiestaTom/Run%20arounds/325i/Exterior/Mechanical/Underbody cleaning/P1010710.jpg[/img]
![]() img.photobucket.com/albums/v609/FiestaTom/Run%20arounds/325i/Exterior/Mechanical/Underbody
img.photobucket.com/albums/v609/FiestaTom/Run%20arounds/325i/Exterior/Mechanical/Underbody cleaning/P1010711.jpg[/img]
I found a few bits of rust under the arches, mainly where the retaining screws for the liners go. They screw into some plastic lugs that clip through the bodywork, these square holes tend to rust so I had to sort them before I could get any further.
I only got one side finished today but the rest should be done tomorrow.
![]() img.photobucket.com/albums/v609/FiestaTom/Run%20arounds/325i/Exterior/Mechanical/Underbody
img.photobucket.com/albums/v609/FiestaTom/Run%20arounds/325i/Exterior/Mechanical/Underbody cleaning/P1010715.jpg[/img]
Well the front is now finished, any rust was ground down, treated and painted. I painted the majority of the arch while I was at it, just not the strut tower (I'll do that if I ever take it out, but for now that wasn't the goal) Ignore the drips on the face of the disc, the lumps were sanded off and the rest will come off the first time I brake.
![]() img.photobucket.com/albums/v609/FiestaTom/Run%20arounds/325i/Exterior/Mechanical/Underbody
img.photobucket.com/albums/v609/FiestaTom/Run%20arounds/325i/Exterior/Mechanical/Underbody cleaning/P1010717.jpg[/img]
![]() img.photobucket.com/albums/v609/FiestaTom/Run%20arounds/325i/Exterior/Mechanical/Underbody
img.photobucket.com/albums/v609/FiestaTom/Run%20arounds/325i/Exterior/Mechanical/Underbody cleaning/P1010718.jpg[/img]
![]() img.photobucket.com/albums/v609/FiestaTom/Run%20arounds/325i/Exterior/Mechanical/Underbody
img.photobucket.com/albums/v609/FiestaTom/Run%20arounds/325i/Exterior/Mechanical/Underbody cleaning/P1010720.jpg[/img]
Now for the noises (well, some of them) :embarrassed
There was a rattle coming from the rear which I know can be...well basically anything on an e36 :shifty: pads, springs, bushes, shoes etc. My plan was to investigate all of this on Sunday before the GP obviously.
On a completely unrelated note I've always found that with the handbrake adjusted to hold on the 4th-5th click, it ends being a bit awkward with the arm-rest in the way. For this reason I decided to take off the leather handbrake surround and nip up the bolts to take up the slack thereby making the handbrake hold on the 2nd-3rd click.
Once I'd done this I noticed there was no rattle from the rear. I'd inadvertently fixed it :hihi This means that the shoes had a bit too much slack so I jacked up the rear and adjusted it all properly and checked a few things.
I fairly common issue is for the backing plates to rust where the brake shoe locating pins go through; I was pretty sure these would be fine on mine as I'd already been through it all a few months ago, luckily I was right and they were fine, so it was just a case of adjusting it all.
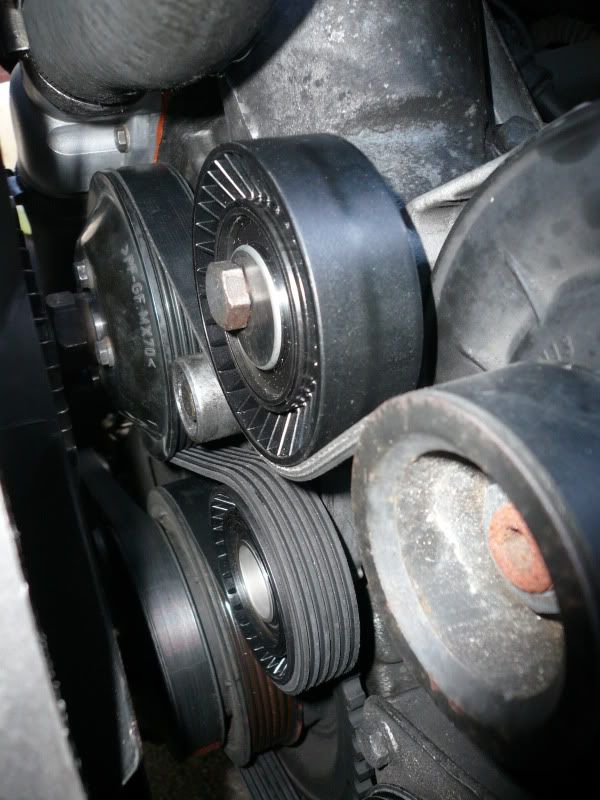
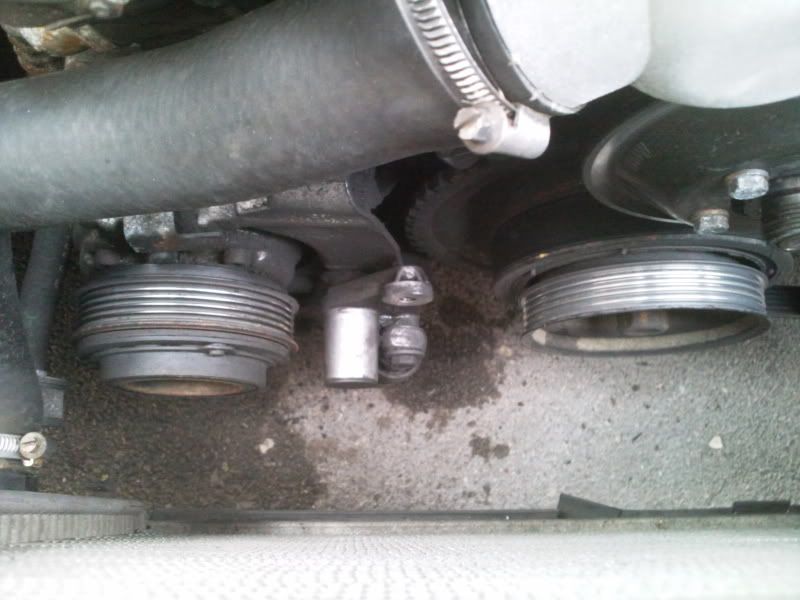
Next up was the annoying pulley squeak, I wasn't sure which one was making the noise but figured it was best to replace them both anyway.
Old
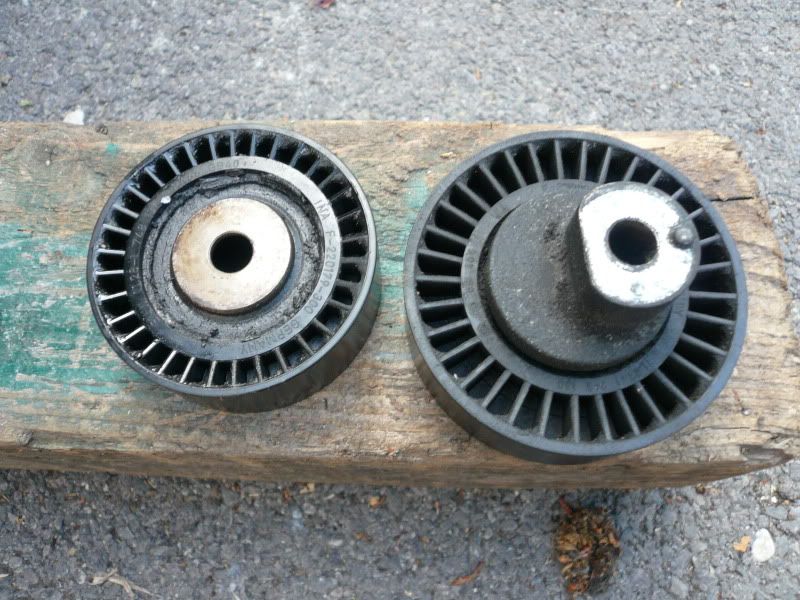
You can spin these both freely and the tensioner pulley does make a slight rattle, I tried making a video of this but couldn't pick up the sound. In short the bearings are dry and there's a risk of failure, which I'm not too fond of as that would take out the waterpump, alternator and PAS pump :jaw-dropping
New
If you try and spin these they will turn easily but stop as soon as you let go.
I do however have a funny feeling the air-con tensioner pulley may be on it's way out (would fit in really as with the others, it's probably never been changed) but I'm leaving it for now as a) More important things to do and b) worst case scenario is I lose the air-con belt, no biggy.
Also, the squeaky brakes were doing my head in and no amount of cleaning and copper grease would shut the f**kers up!
So today I fitted new discs and pads (no pics) which was nice and easy as I've taken them apart about 3 times already :hihi Comparing old with new, the pads had minimal wear but the discs were a little worse than I thought, still hardly what I'd consider 'worn' though. Ah well.
Edit:
I took a picture of the new brakes through the wheels (dirty bottletops!)
Not that you can make out much lol but I did paint the bells of the discs to stop them rusting and looking nasty in a few miles.
107535 miles (for my own records)
Gearbox oil replaced
Only two bolts so nothing really to show...well I may upload a picture my mate took of me...
The old oil was pretty brown and 'orrible, never been changed I would guess. The gear change now feels slightly smoother and nicer, not that it was bad before but this can only be better.
The oil:
My new tool to help get the oil into the gearbox:

This worked a treat! and I couldn't have done the job without it!
Update, job done on 19/07/10 but I've only been able to update today:
Got my numberplate lights working!!
I checked the boot wiring aaaaaaages ago and noticed most of the wires were mangled and some had snapped. I got some fresh lengths of wire and replaced a long section; otherwise the soldered joints would have been at the bend which isn't ideal.
Even after that they still didn't work :frown and I was a bit stumped as everything looked completely fine.
Well with the help of a friend we finally got to the bottom of the problem! (I didn't want to just splice into the rear lights live wire as that's a bodge)
See if you can spot the problem:

That's right, the light control module casing for the check control has melted slightly :eek
Inside:
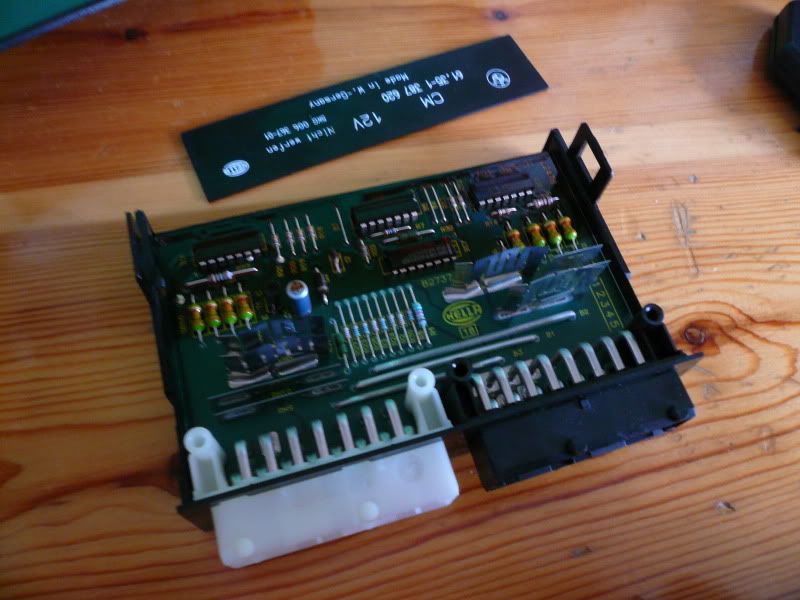

The wiring at the boot hinge which was broken must have shorted this out :sarcastic
So, a new module later (checked part numbers etc) aaaaand
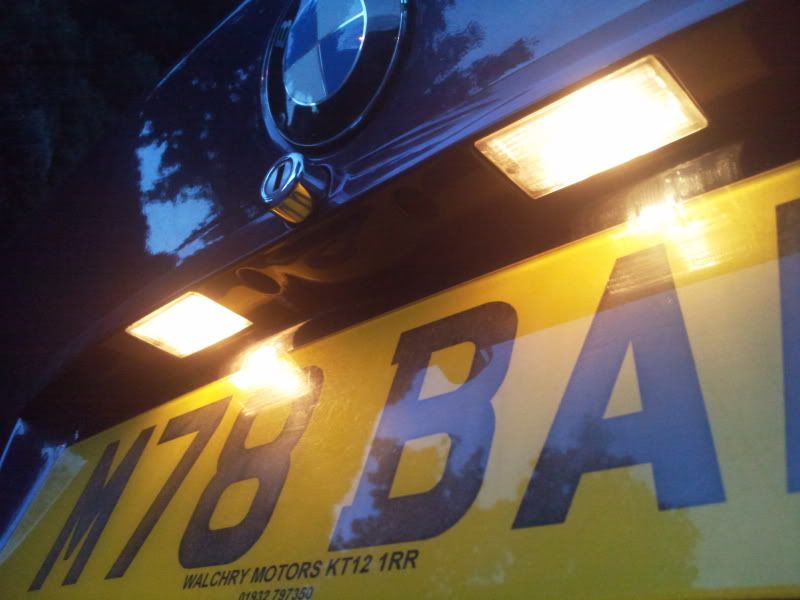
Woooohooooo
Time for a job I've been putting off for a while.
During winter I took all the jacking pads off and gave everything a clean but I found some rust under the drivers side front pad :frown I stabbed it with a screwdriver and it went through in places so to patch it up during the winter I put some gaffa tape on it and waxoyled over :hihi (that's what the red stuff is in the pics)
So, pics:
First up was to take the skirt off; with a bit of WD40 and some careful prying it came off with no broken clips:
![]() img.photobucket.com/albums/v609/FiestaTom/Run
img.photobucket.com/albums/v609/FiestaTom/Run arounds/325i/Exterior/Mechanical/Jacking%20point%20rust/P1010752.jpg[/img]
The rust:
![]() img.photobucket.com/albums/v609/FiestaTom/Run
img.photobucket.com/albums/v609/FiestaTom/Run arounds/325i/Exterior/Mechanical/Jacking%20point%20rust/P1010754.jpg[/img]
The other issue is that some numpty has jacked up the car under the wing at some point and dented it. Inside the arch has rusted from all the cracked paint too:
![]() img.photobucket.com/albums/v609/FiestaTom/Run
img.photobucket.com/albums/v609/FiestaTom/Run arounds/325i/Exterior/Mechanical/Jacking%20point%20rust/P1010753.jpg[/img]
(this is after I beat the worst of back down when I did the arches)
I'm going to cut the lower section of the wing off and weld in a whole new piece:
![]() img.photobucket.com/albums/v609/FiestaTom/Run
img.photobucket.com/albums/v609/FiestaTom/Run arounds/325i/Exterior/Mechanical/Jacking%20point%20rust/P1010750.jpg[/img]
On to the rust, I took the jack pad off and cut back to good metal. Took a long time using jenolite (rust removing acid) to make sure everything inside is clean before it gets covered back up:
![]() img.photobucket.com/albums/v609/FiestaTom/Run
img.photobucket.com/albums/v609/FiestaTom/Run arounds/325i/Exterior/Mechanical/Jacking%20point%20rust/P1010755.jpg[/img]
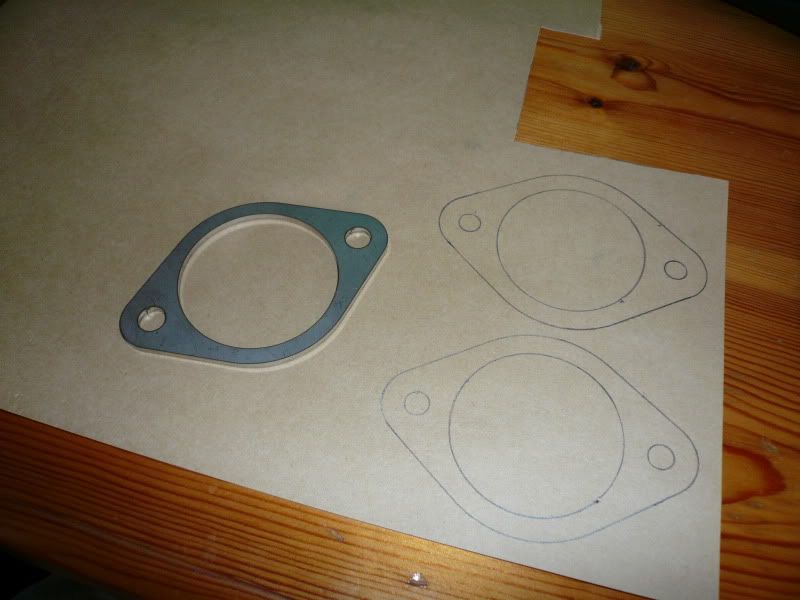
I don't want to just weld a plate over; I want it all flushed in and hidden so I made a template:
![]() img.photobucket.com/albums/v609/FiestaTom/Run
img.photobucket.com/albums/v609/FiestaTom/Run arounds/325i/Exterior/Mechanical/Jacking%20point%20rust/P1010756.jpg[/img]
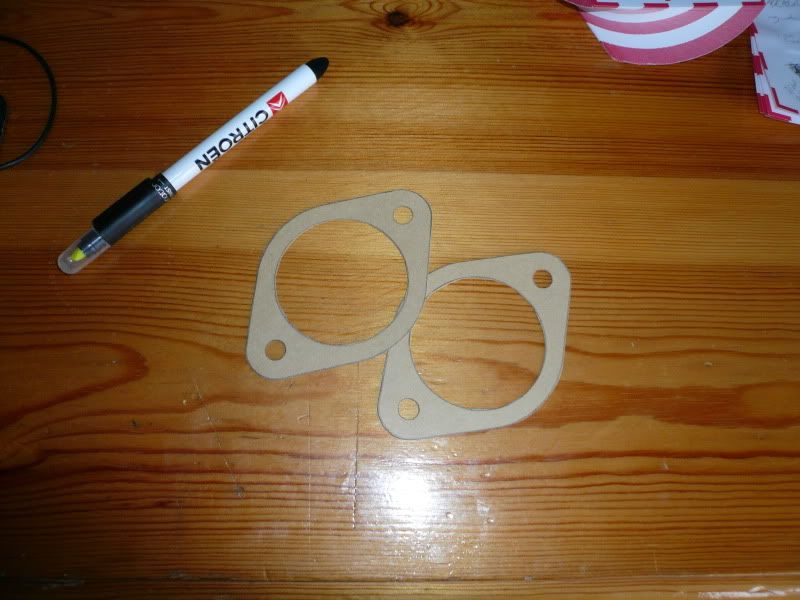
Cut the shape out of steel:
![]() img.photobucket.com/albums/v609/FiestaTom/Run
img.photobucket.com/albums/v609/FiestaTom/Run arounds/325i/Exterior/Mechanical/Jacking%20point%20rust/P1010757.jpg[/img]
I've test fitted it and tweaked it in places but the first cut was pretty close amazingly :hihi I've still got to drill some more holes for plug welds but the basic shape is there. It's worth spending time on bits like this as the better the fit the easier it'll be to weld...well that's the plan.
That's as far as I got. Hopefully I'll weld it tomorrow but I want to get some practice in first (not welded in a few months) before I go near the car.
Despite the atrocious weather I've managed to get it pretty much done; all that's left is a coat of paint and to fill the sill with some wax.
I
planned to take pictures of every stage but as I was doing it in-between rain showers I just wanted to get on with it. Packing everything up, then moving it back out and setting it all back up again 3 times really was NOT fun :mad
Anyhoo, small plate tacked in place:
![]() img.photobucket.com/albums/v609/FiestaTom/Run
img.photobucket.com/albums/v609/FiestaTom/Run arounds/325i/Exterior/Mechanical/Jacking%20point%20rust/P1010758.jpg[/img]
Fully welded:
![]() img.photobucket.com/albums/v609/FiestaTom/Run
img.photobucket.com/albums/v609/FiestaTom/Run arounds/325i/Exterior/Mechanical/Jacking%20point%20rust/P1010759.jpg[/img]
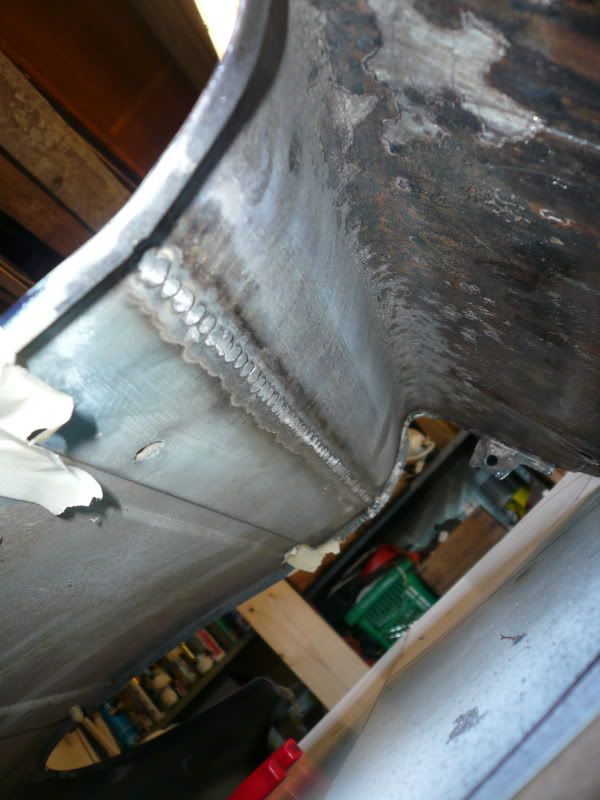
This is my first go at overhead welding and although I practiced in the shed, nothing prepared me for what it was like on the car. I set up the welder on the practice pieces and then it was a case of getting comfortable and taking things steady.
Then the main plate was welded in:
![]() img.photobucket.com/albums/v609/FiestaTom/Run
img.photobucket.com/albums/v609/FiestaTom/Run arounds/325i/Exterior/Mechanical/Jacking%20point%20rust/P1010760.jpg[/img]
Kurust and seam sealer
![]() img.photobucket.com/albums/v609/FiestaTom/Run
img.photobucket.com/albums/v609/FiestaTom/Run arounds/325i/Exterior/Mechanical/Jacking%20point%20rust/P1010762.jpg[/img]
It was all welded using a technique for thin metal I learned on another forum. It's hard to get a seam going due to the cramped position under the car and relatively poor visibility. I blew through twice :frown but soon sorted that. The main plate was plug welded 8 times in strategic places so it's firmly attached to the structural metal underneath.
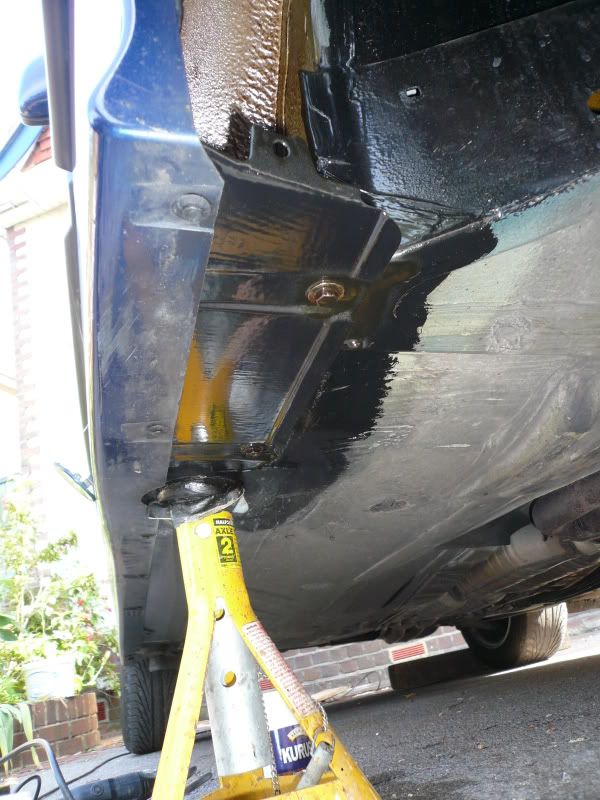
Little bit of an update on this; I cleaned the rust off the rear jacking point (only surface rust) and gave them both a coat of primer and hammerite top coat. I'm still waiting on my DynaxS50 to arrive which I'll pump into the entire sill but externally it's done...well, that's a lie. I'm going to clean up the passenger side jacking points too and then paint both floor pans either side of the tunnel just to look pretty.
![]() img.photobucket.com/albums/v609/FiestaTom/Run
img.photobucket.com/albums/v609/FiestaTom/Run arounds/325i/Exterior/Mechanical/Jacking%20point%20rust/P1010763.jpg[/img]
![]() img.photobucket.com/albums/v609/FiestaTom/Run
img.photobucket.com/albums/v609/FiestaTom/Run arounds/325i/Exterior/Mechanical/Jacking%20point%20rust/P1010764.jpg[/img]
I love Dynax :goodvibes
![]() img.photobucket.com/albums/v609/FiestaTom/Run
img.photobucket.com/albums/v609/FiestaTom/Run arounds/325i/Exterior/Mechanical/Jacking%20point%20rust/P1010765.jpg[/img]
Jacking pads drilled and smothered in underbody seal around the edges.
![]() img.photobucket.com/albums/v609/FiestaTom/Run
img.photobucket.com/albums/v609/FiestaTom/Run arounds/325i/Exterior/Mechanical/Jacking%20point%20rust/P1010766.jpg[/img]
Passenger side done

Flap wheeled, bilt hamber rust removing gel, kurust, paint, sills filled with wax, jacking pads drilled and put back on with lots of underbody seal.
![]() img.photobucket.com/albums/v609/FiestaTom/Run
img.photobucket.com/albums/v609/FiestaTom/Run arounds/325i/Exterior/Mechanical/Jacking%20point%20rust/P1010778.jpg[/img]
![]() img.photobucket.com/albums/v609/FiestaTom/Run
img.photobucket.com/albums/v609/FiestaTom/Run arounds/325i/Exterior/Mechanical/Jacking%20point%20rust/P1010779.jpg[/img]
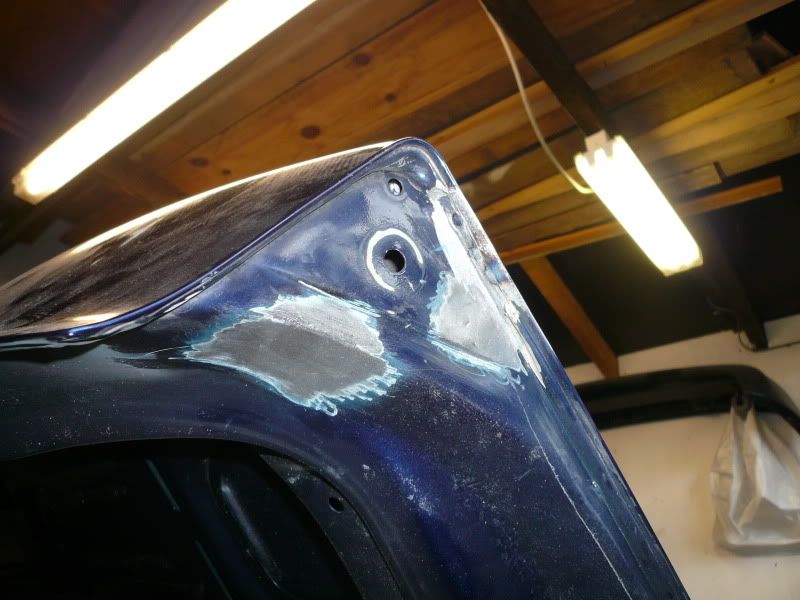
Bootlid welding time.
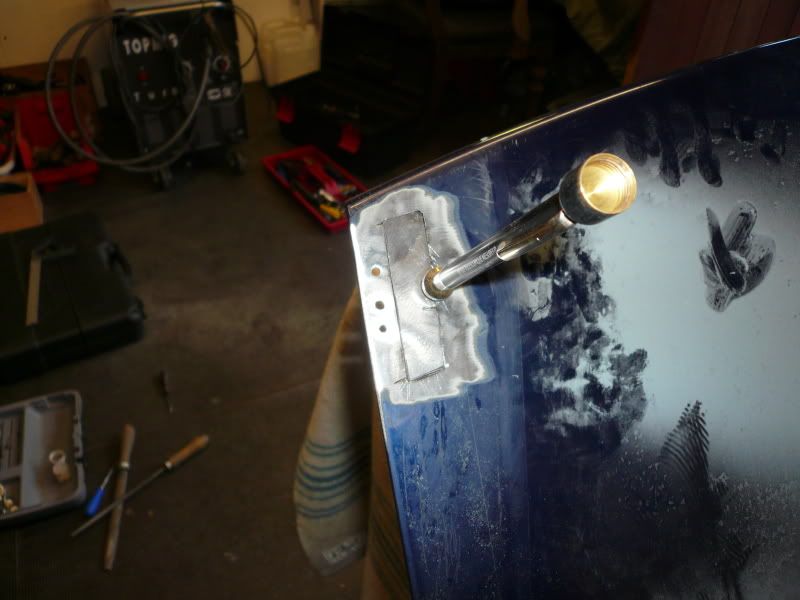
The car was fitted with a small spoiler at the factory and then the previous numpty, I mean owner, put an M3 spoiler on there.
He did this by closing his eyes, placing the drill on the bootlid and going 'about there will do.' :shifty:
I removed the spoiler a few months ago and performed a ghetto repair of putting tape over the holes that were left :cool Today was time to get it sorted properly.
Off we go.
The damage:
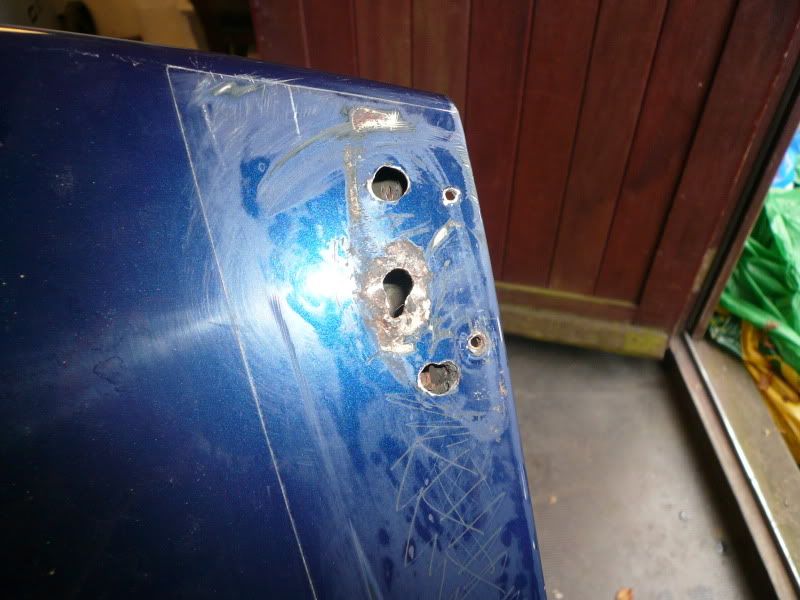
:duh
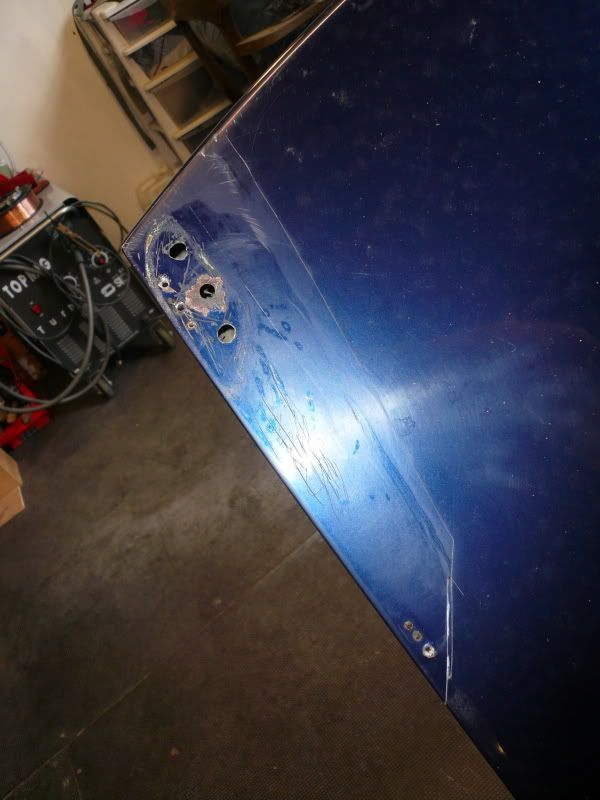
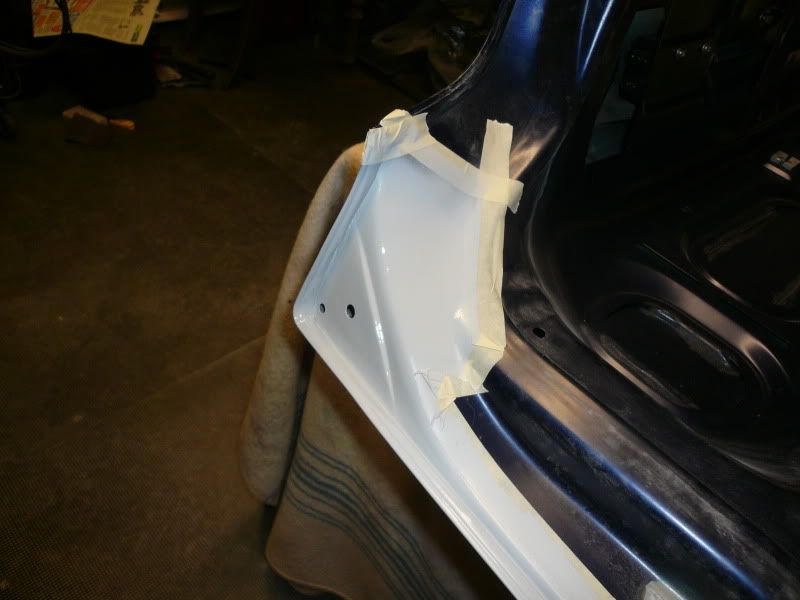
Becuase the holes were mangled I thought it best to just cut a square out and flush another one in. I've got the pieces sorted so tomorrow I'll weld them in.
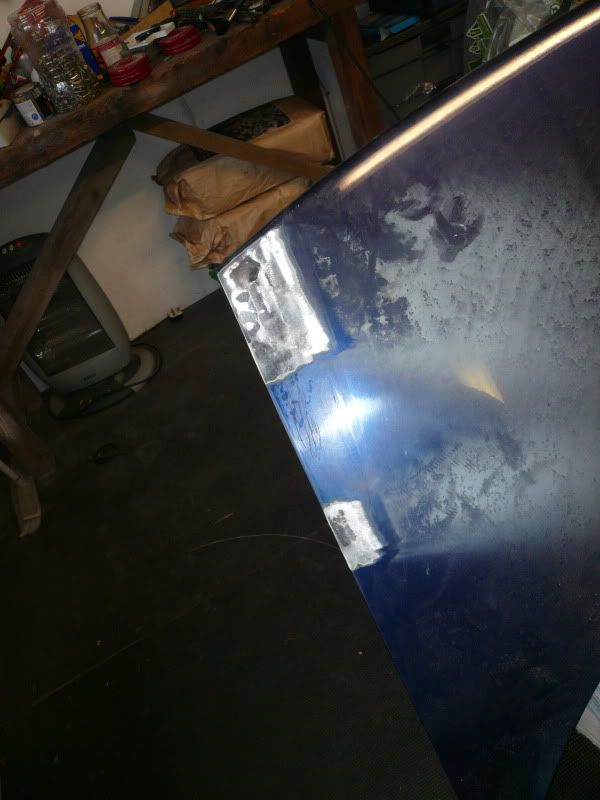
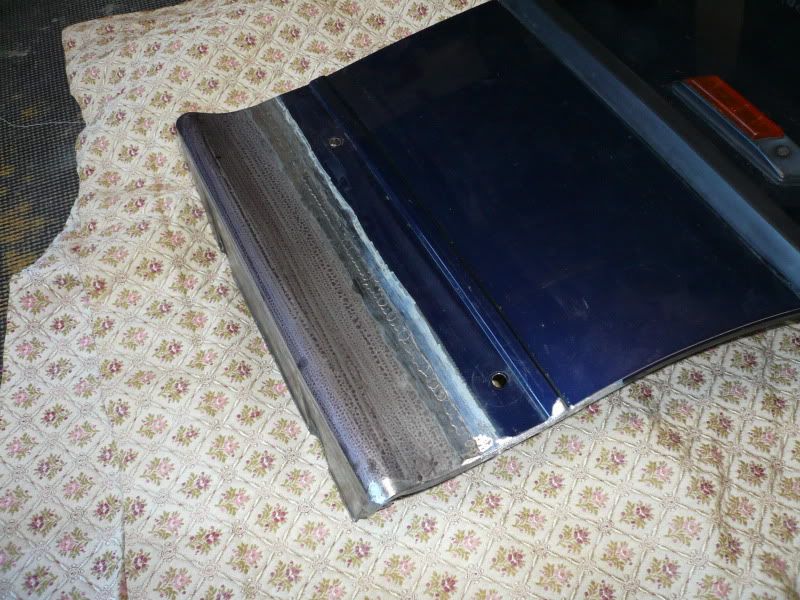
Finished
.....well sort of. I'll slap any old dark coloured top coat on there to protect the primer but it will be painted when the car goes in for a few other things. At least this way I know the welding has been done right.
So I made all the pieces, tacked them in, then welded them fully and then a little skim of filler before the etch primer.
Talkin' 'bout my penetration


Last little update on the bootlid.
Bear in mind that this isn't finished, it's just better than the tape I had covering the holes :cool
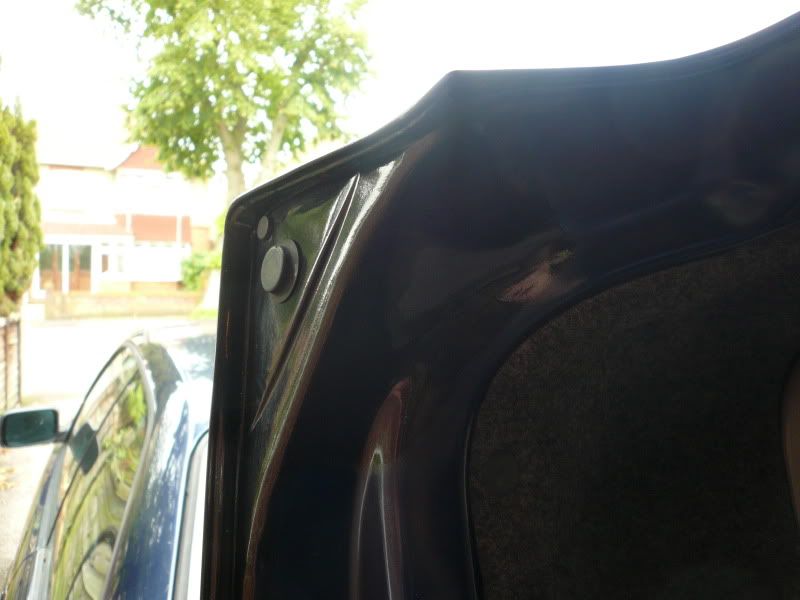
As you can see, not the best paint match :hihi
A few more niggles sorted.
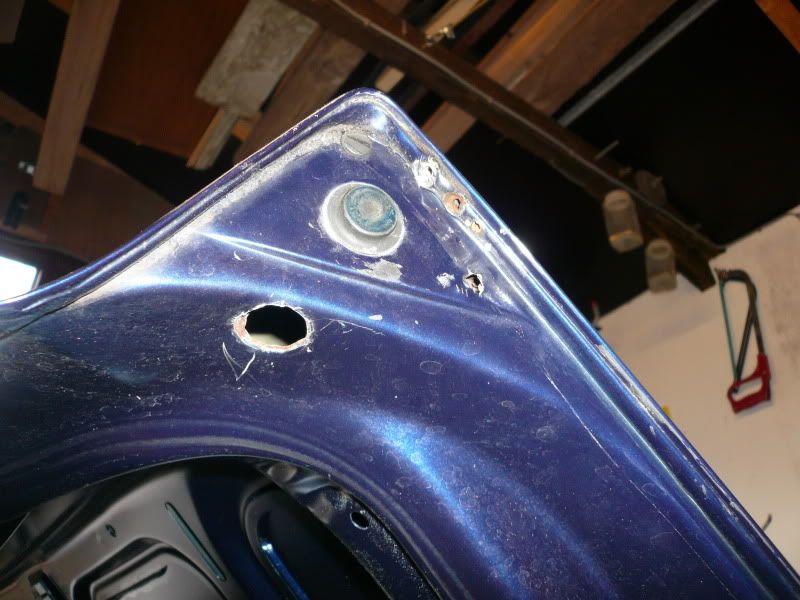
When I stripped the bootlid down I found the plate had been stuck on with tape and the plastic 'lugs' for the screws to thread into were missing. Got some and fitted the plate properly.
:hihi It just means I can take it off a lot easier when it comes time to paint it.
The interior fan has been iffy since I bought the car; settings 1 and 2 were the same and only 3 and 4 increased the speed. Turns out the analogue climate control has a different resistor to the digi ones. Anyhoo, got a spare, fitted it and I've not got all 4 speeds.


Lovely simple 5 minute job that fixes an issue, just the kind of jobs I like
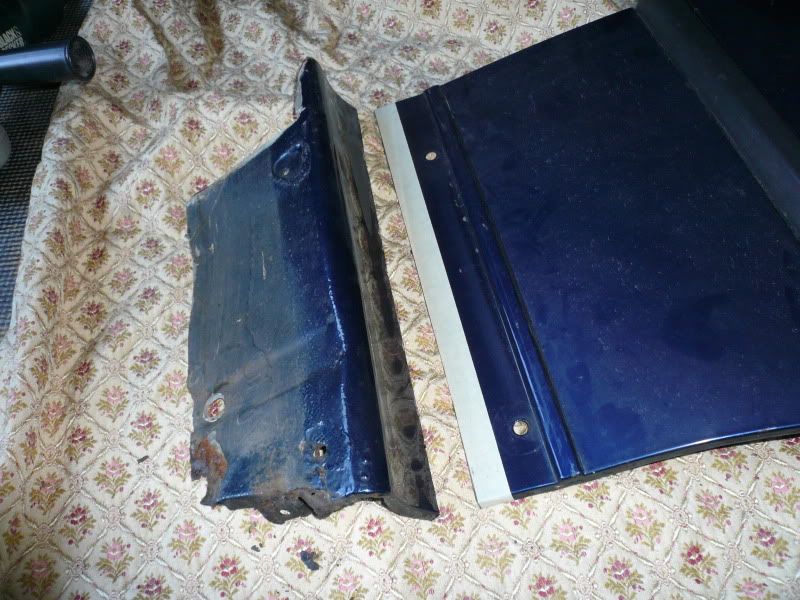
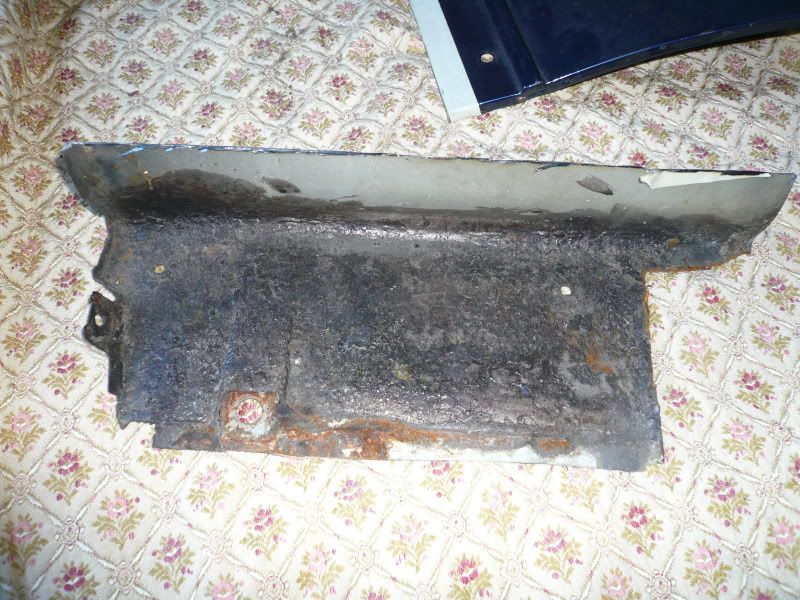
Along with the rust on the body of the car, the bottom of the wing was also pretty bad due to a previous owner jacking the car up in the wrong place, cracking the paint and letting moisture in.
As the wings are only bolted on I removed it and replaced the damaged/rusty lower section in the comfort of the shed:
Axle stand is under my previous repair and holding strong :cool:
This was a bit daunting:
Salvaged piece offered up just to see:
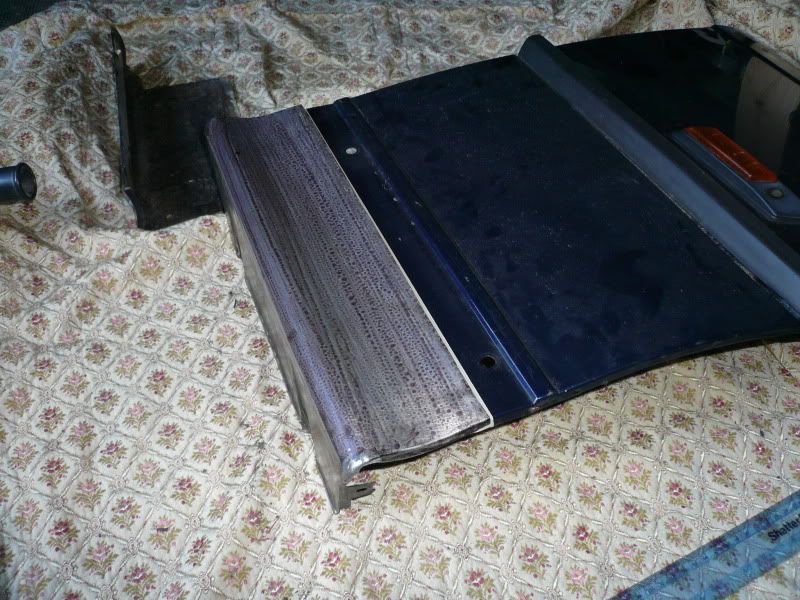
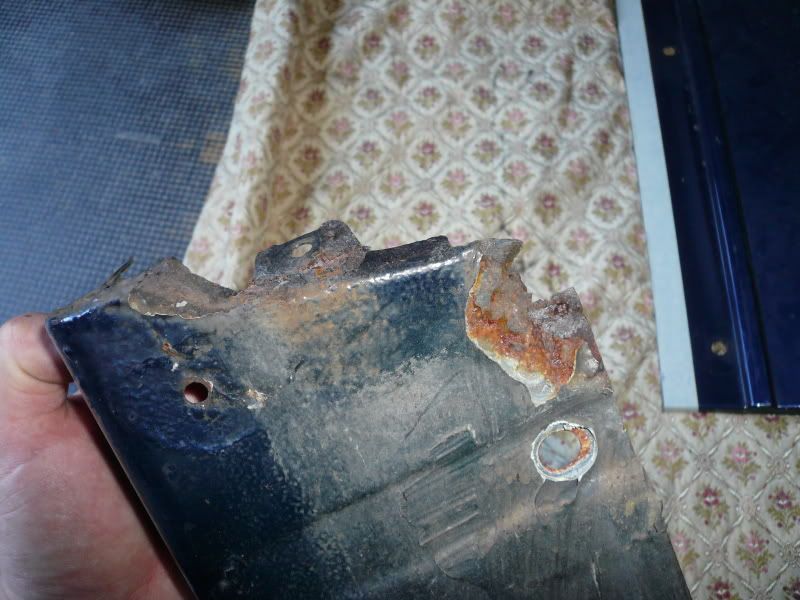
The reason:
The corner was cut off when I repaired the jacking point. I knew I'd be replacing that section anyway so it made the previous job easier.
Pretty crumbly.
Set up and ready to weld:
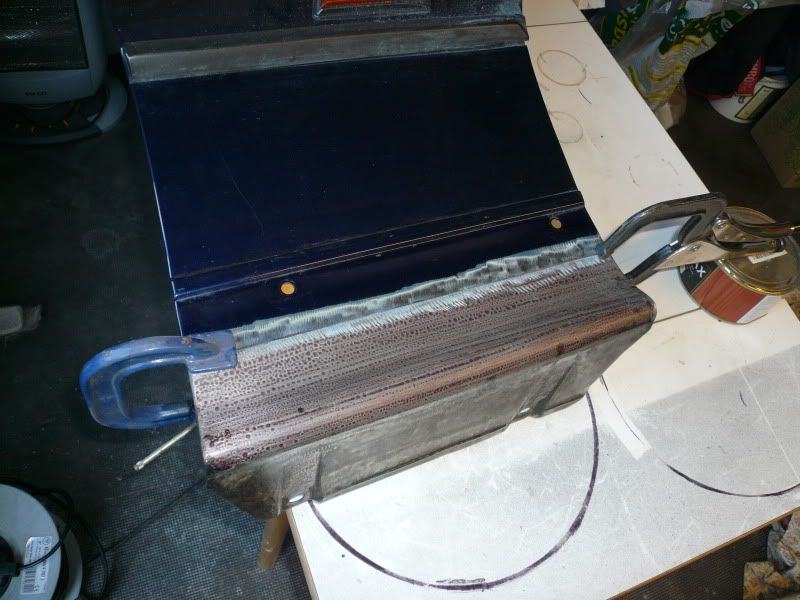
Welding:

It was interesting welding something where you have access to both sides to see what's going on. One thing I found was that after several welds the heat dispersed more than before and penetration wasn't as before. I flipped the wing over and welded the parts I wasn't happy with on the back side.
Painted, fitted, holes drilled for skirt, everything filled with wax:

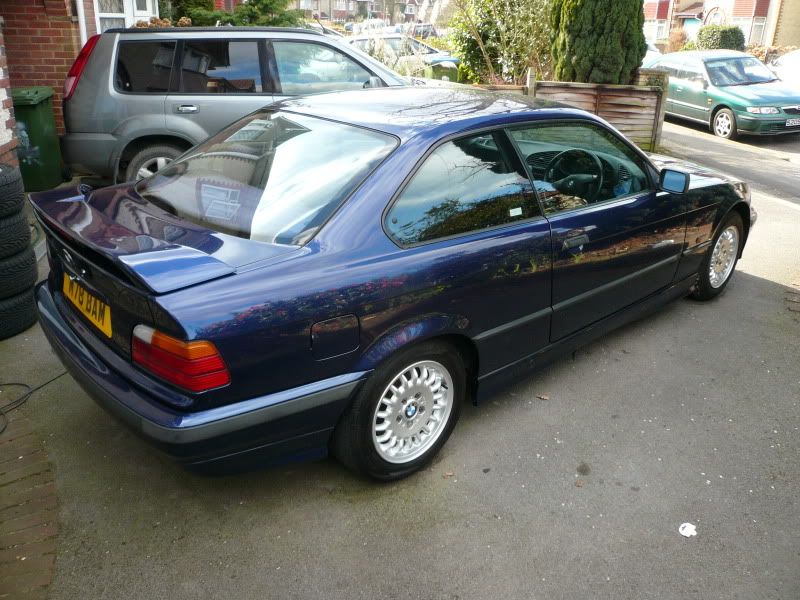
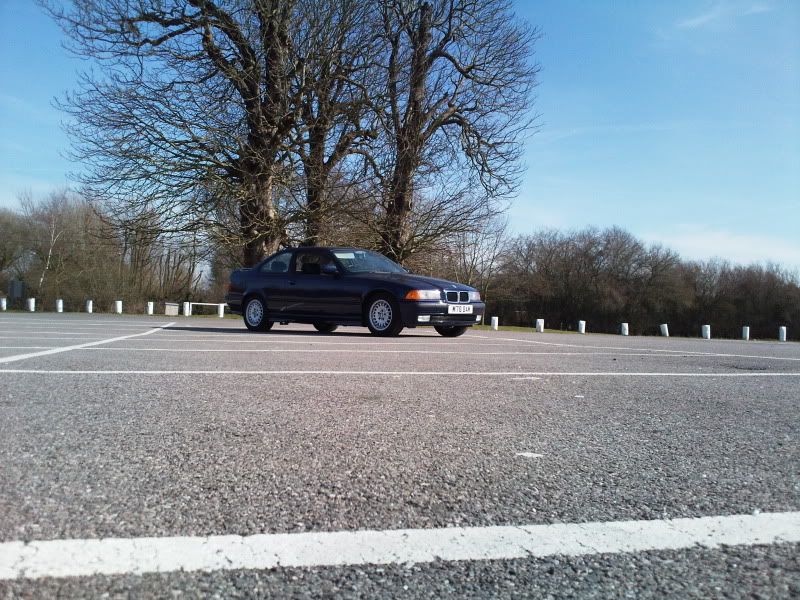
I think that brings it all up to date…and there’s still loads more to do.


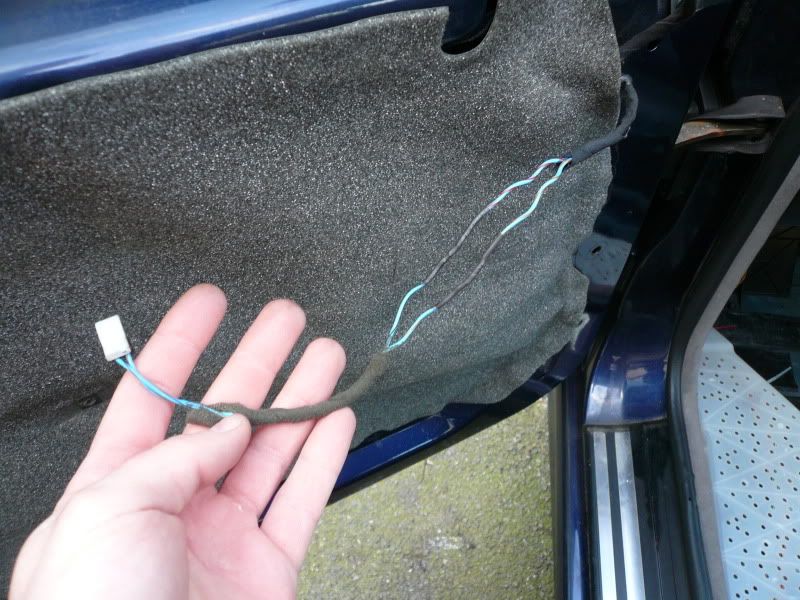
 It's the little things:
 we stripped the door down to no avail.

 ]
]


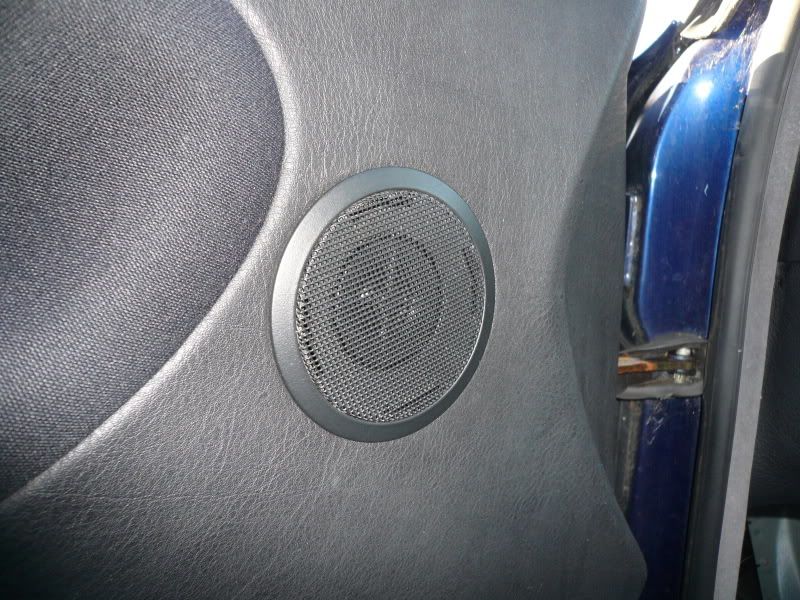
 to take apart.
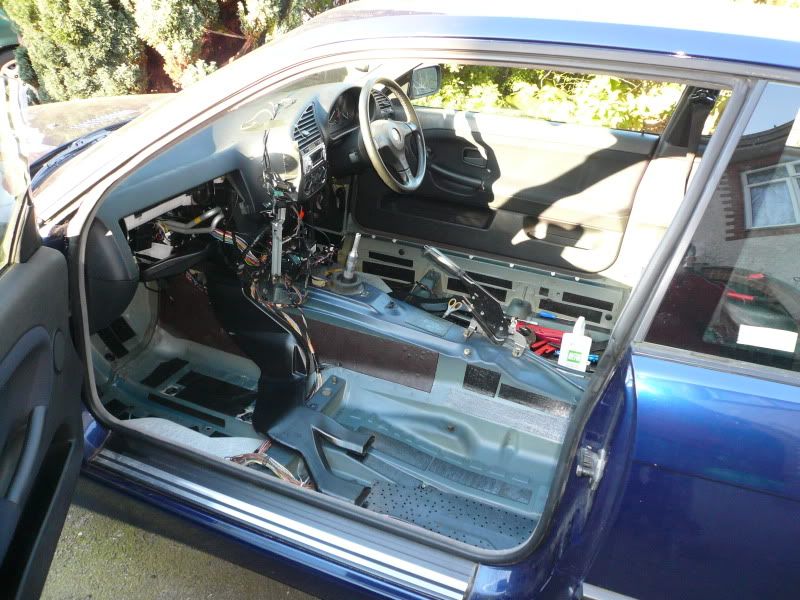


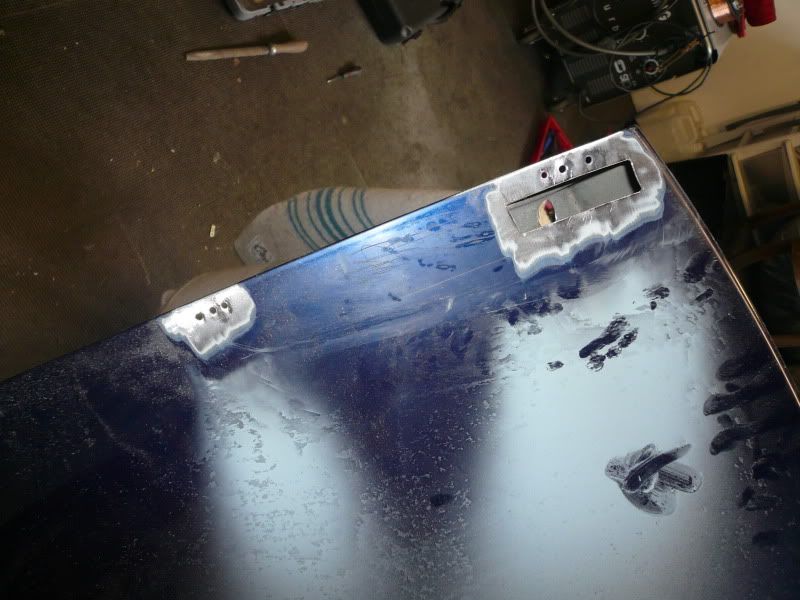
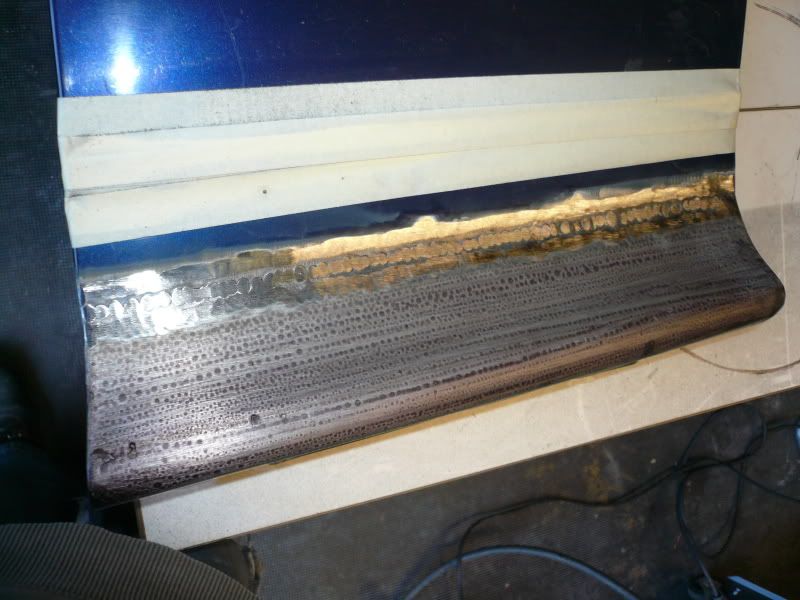
 When I removed the spoiler I had to weld up the 15 odd holes.