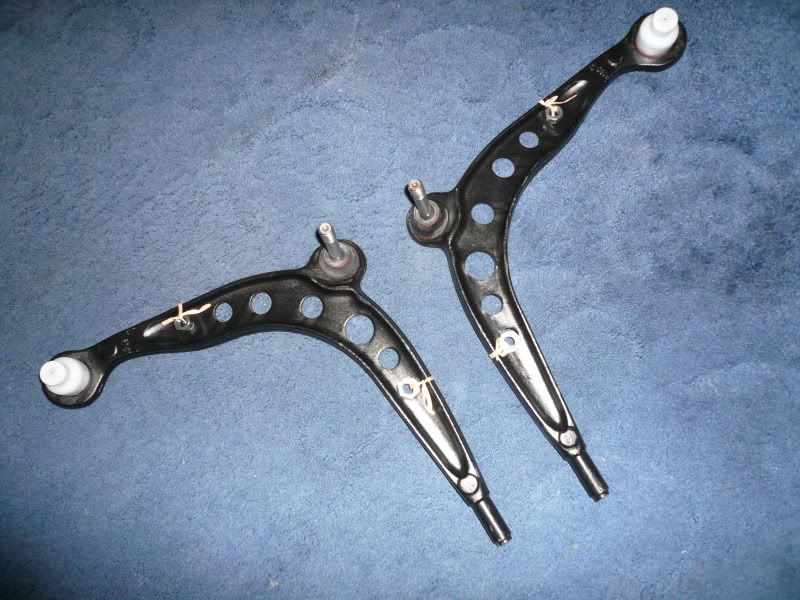
OK, so we left off at the new arms being fitted so it's time for another 58 updates rolled into one :? :
Some retrofits:
Thanks to a UK forum member, I now have PDC and cruise.
Factory PDC, the gong is missing from the picture as I swapped my standard one over with Mitch.
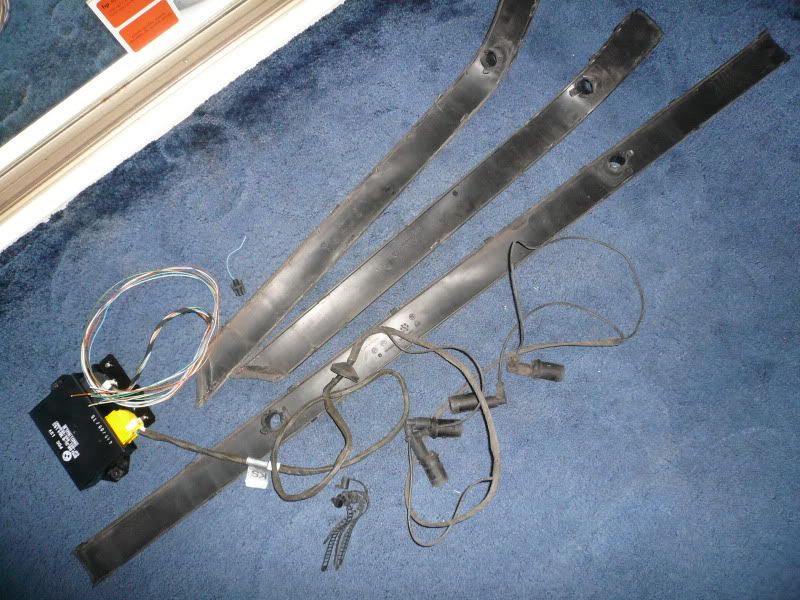
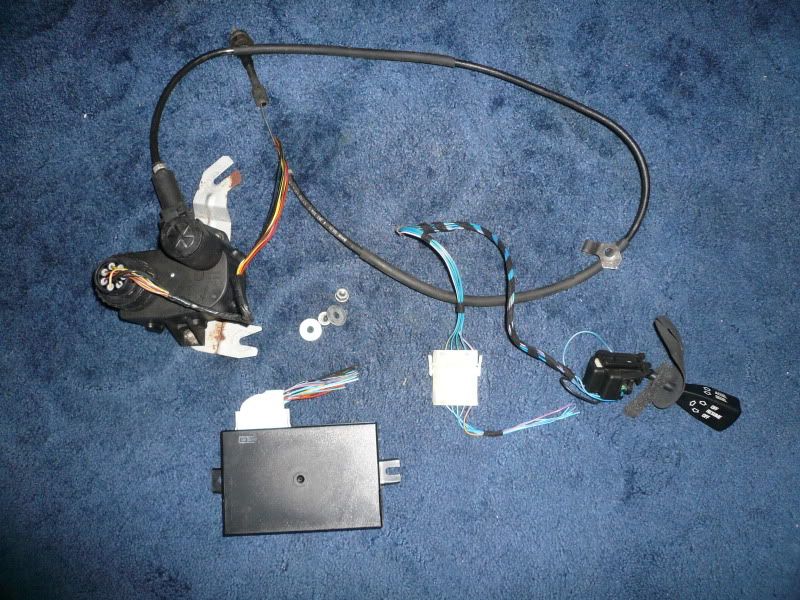
Cruise control, the clutch switch is missing as I forgot to take it out

but he's sending it to me soon.
He was also kind enough throw in a set of locking wheel nuts as he noticed my rears were missing, giving me competition for the
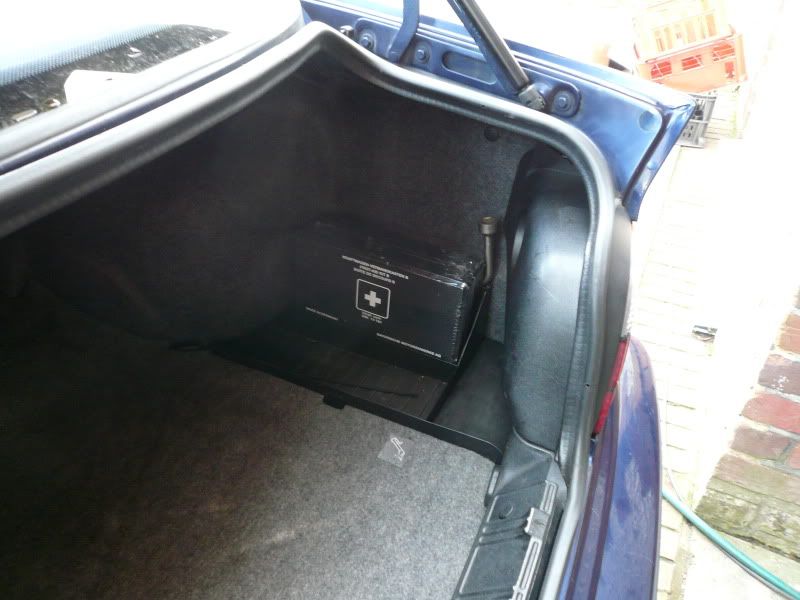
'eye for detail' awards :lol: and also this first aid kit, still in the cellophane

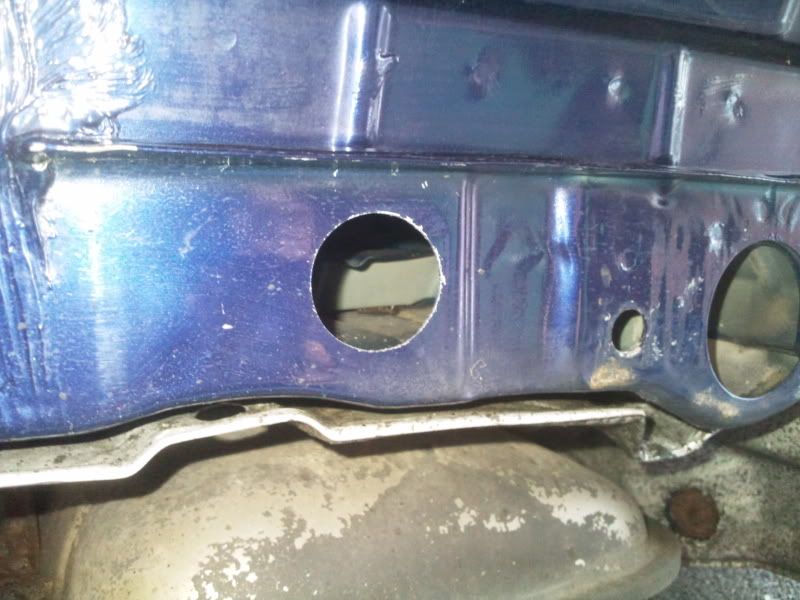
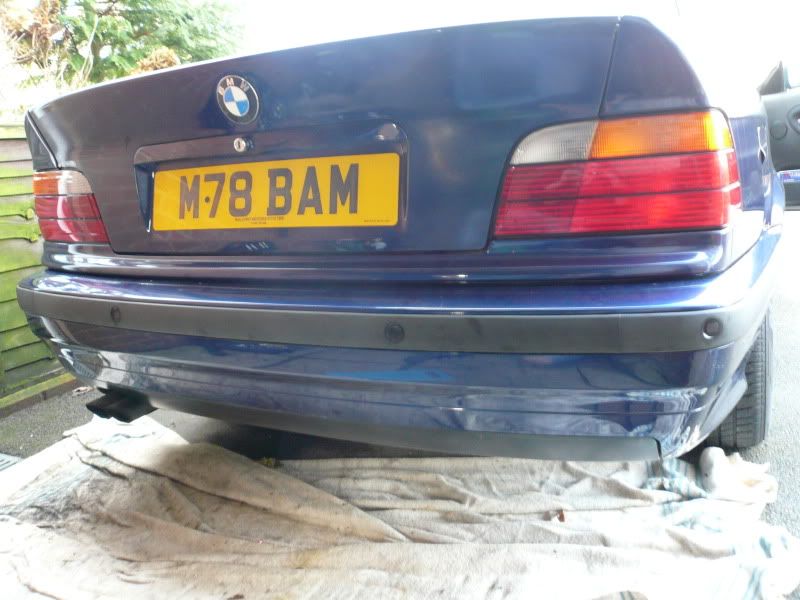
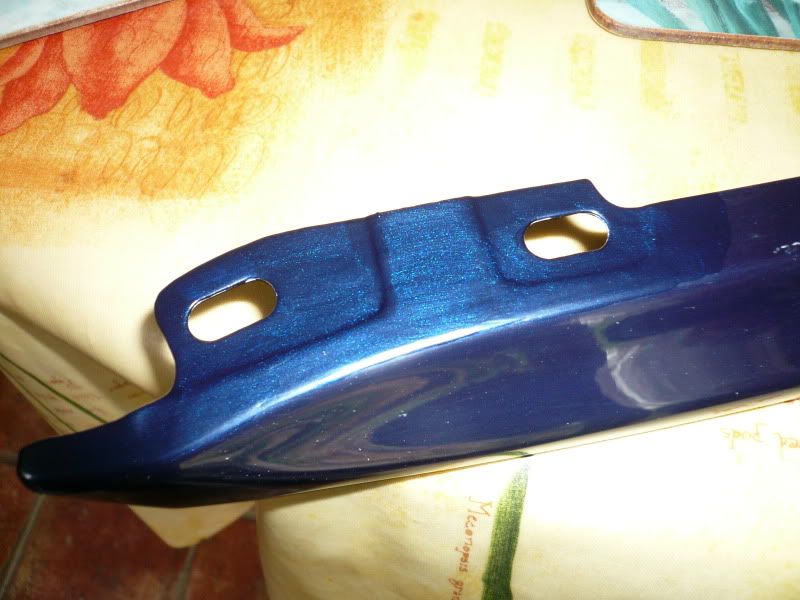
Even though they're not wired in yet, I couldn't resist fitting the parking sensors and mounting the module etc. After taking the bumper off the first job was to clean everything and drill a 36mm hole for the grommet:
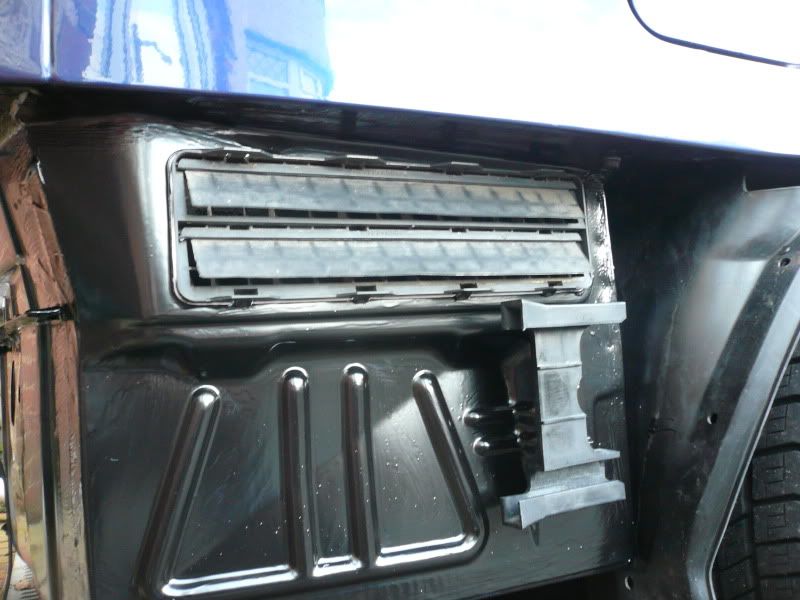
The vents, mounts and blanking grommets were all taken off, any surface rust treated (thankfully only a tiny amount) and then the whole panel painted:

Things re-fitted, vents were sealed with a bit of silicone, bumper brackets had some wax put between mounting surfaces before bolting on and the grommet (where sunroof drain tubes would exit if I had one) were put back on with a little wax also:
Sensor wiring all put in place:
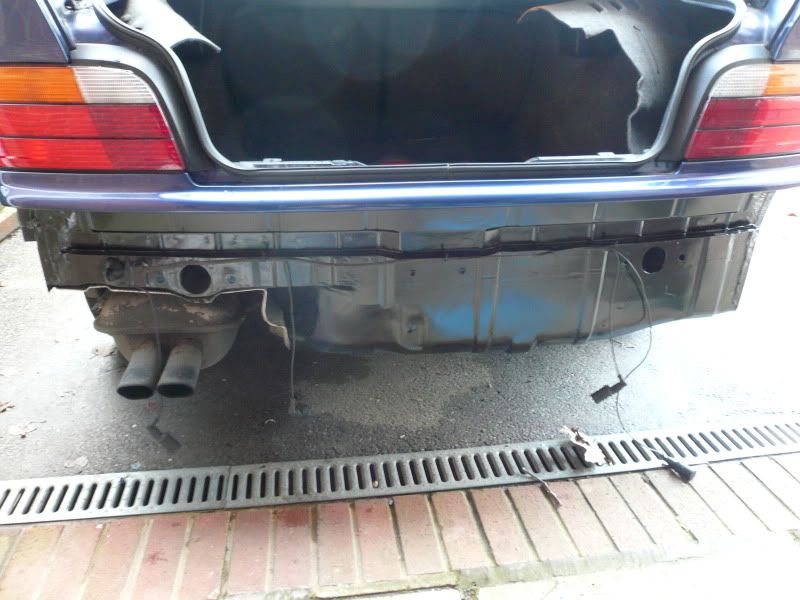
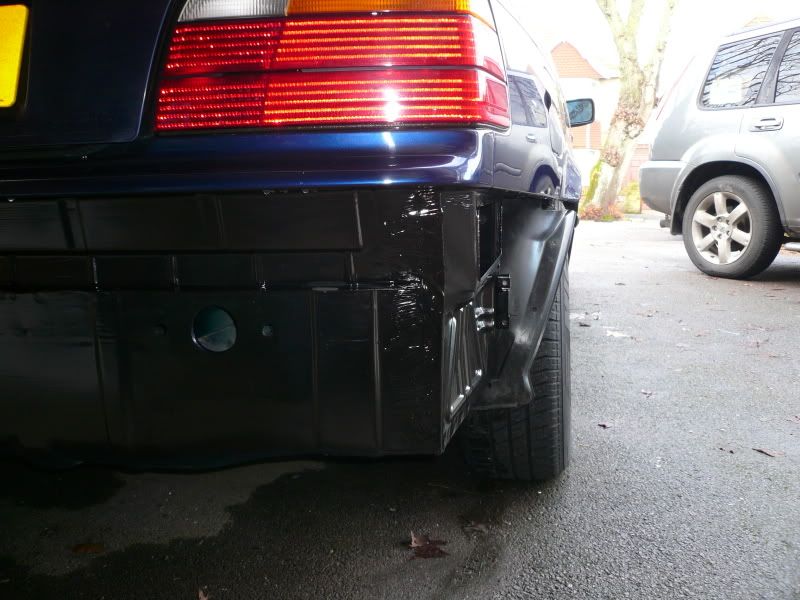
Stripped the bumper down, drilled the holes and put it back together along with some new 'shocks' as mine weren't the best (one of the bolts had snapped and a nut/bolt was used) oh and jet-washed the underside of the bumper before putting it back on...
All put back together:
Another little job the other day, I mounted the cruise control stalk. Again, it's not wired it, just fitted so it's one thing less to do.
Interesting design feature that the steering column trim has an outline on the reverse of the plastic showing where the hole should be if the car had the extra stralk. A sharp knife and some 400 wet/dry later and I had a factory sized hole in the trim

The wiring and plugs are all clipped into position, again having the mountings for the plugs already there helped.
![]() img.photobucket.com/albums/v609/FiestaTom/Run
img.photobucket.com/albums/v609/FiestaTom/Run arounds/325i/Interior/Cruise%20control%20retrofit/P1010986.jpg[/img]
![]() img.photobucket.com/albums/v609/FiestaTom/Run
img.photobucket.com/albums/v609/FiestaTom/Run arounds/325i/Interior/Cruise%20control%20retrofit/P1010988.jpg[/img]
![]() img.photobucket.com/albums/v609/FiestaTom/Run
img.photobucket.com/albums/v609/FiestaTom/Run arounds/325i/Interior/Cruise%20control%20retrofit/P1010987.jpg[/img]
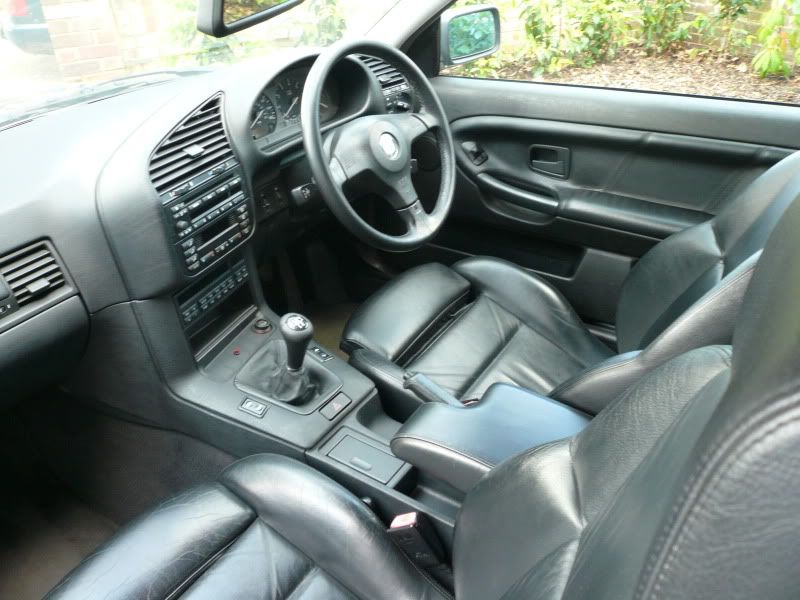
God that steering wheel is huge :lol:
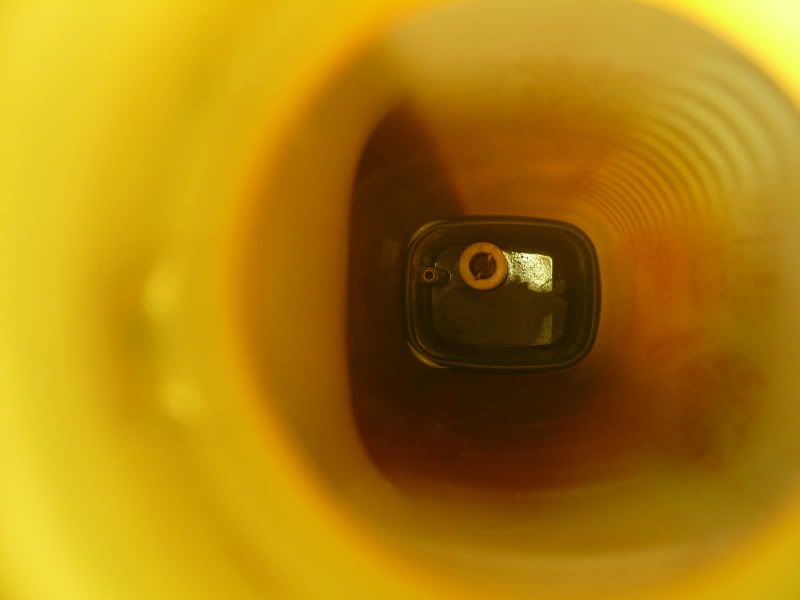
Well I WAS going to clean the ISCV today but, well I couldn't be bothered, so I did the boot lock instead.
The key has never worked in the boot lock, the button pushes in but the key didn't turn. I tried WD40 a while ago and it didn't do anything so took the lock out to investigate. Then decided to strip the lock apart to really see what's what.
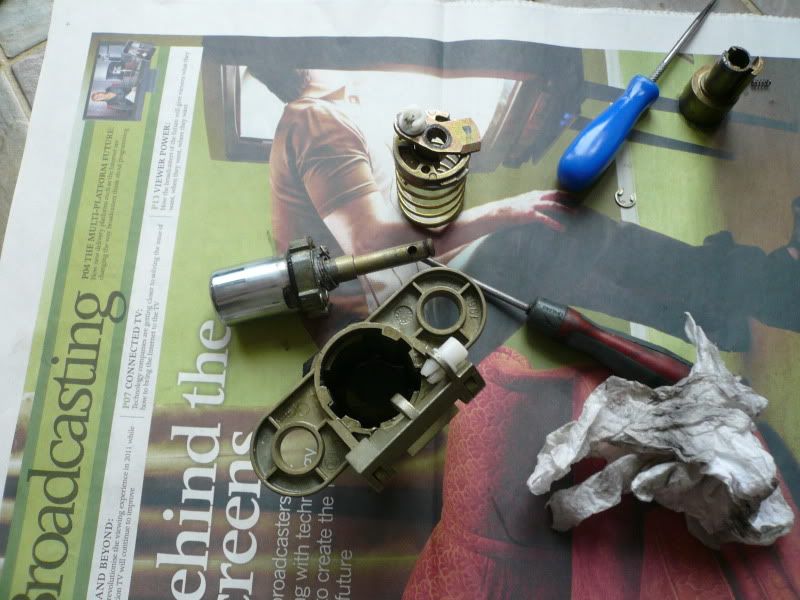
Oh FYI, when you take off the circlip and start to slide the end off the shaft, do it slooooowly otherwise the teeny tiny ball bearing will ping off accross the room. Ask me how I know
I was starting to think the lock might have been changed as there was zero movement! but then I noticed this:

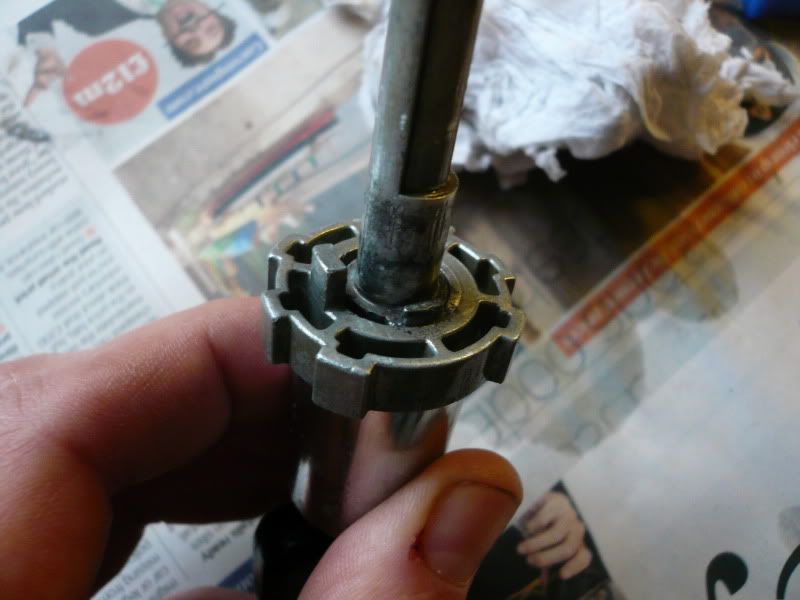
Soaked it in vinegar:
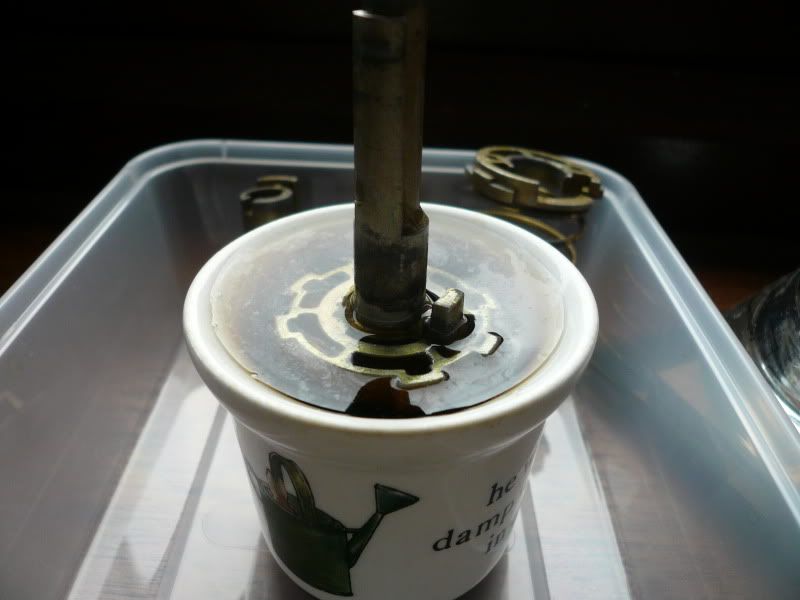
After about an hour in there I took it out, put the key in and got some mole grips on it. You have to be very careful as the metal is quite soft but eventually it came free:
Now I can open the boot with the key
It's the little things :lol:
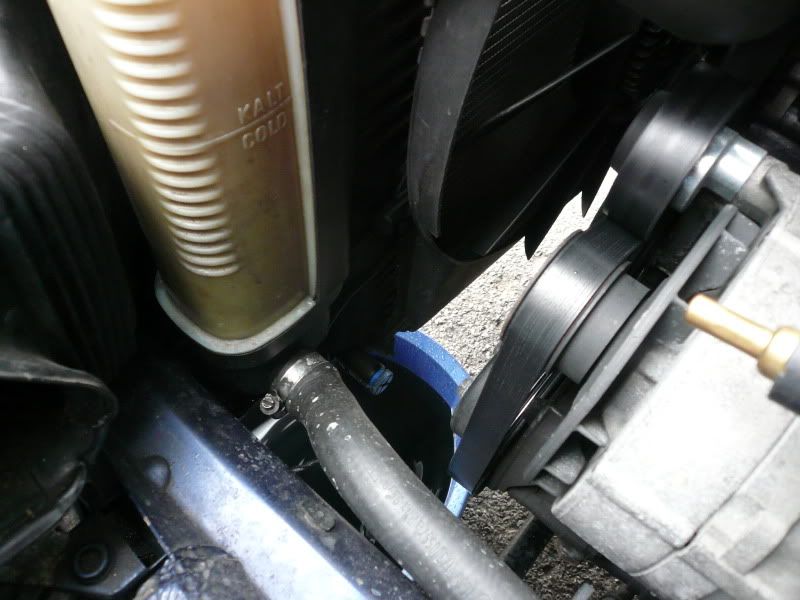
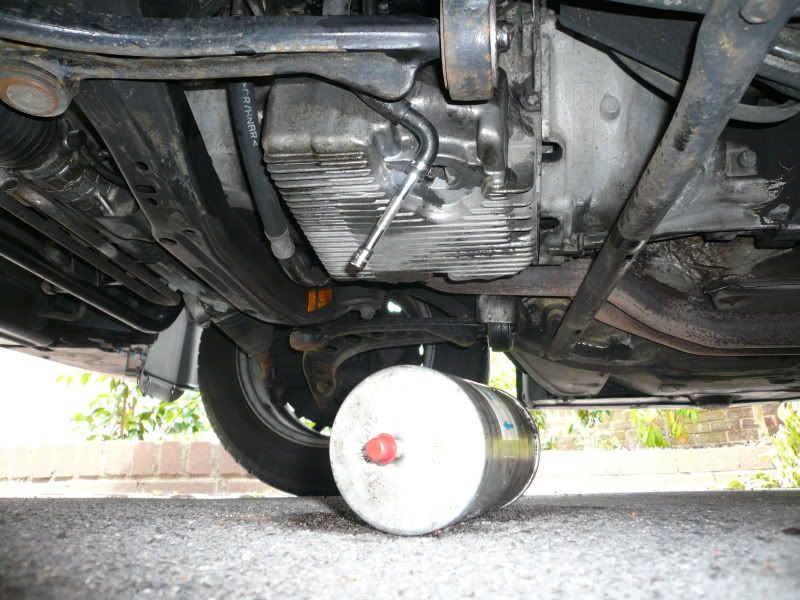
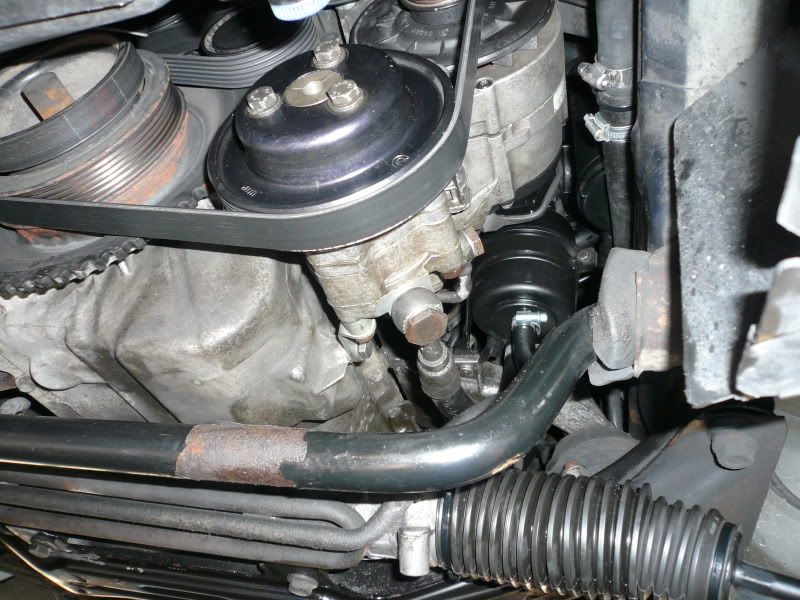
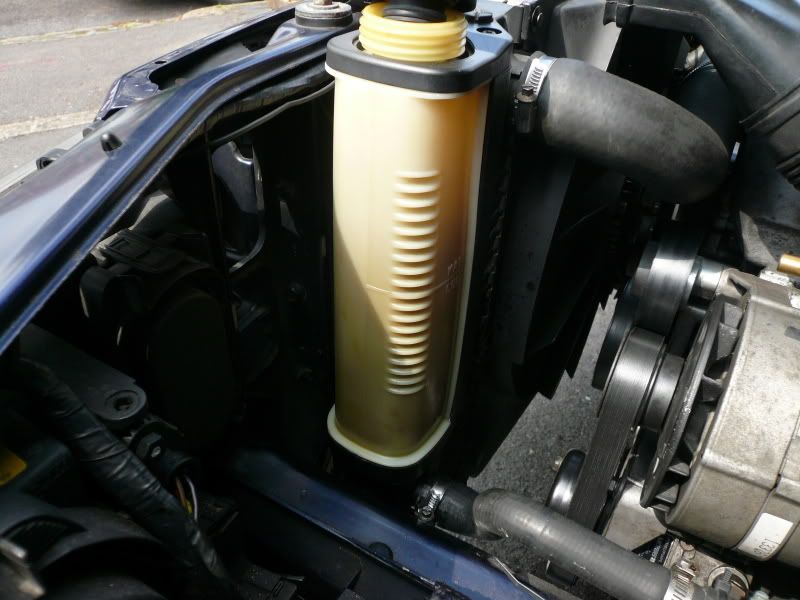
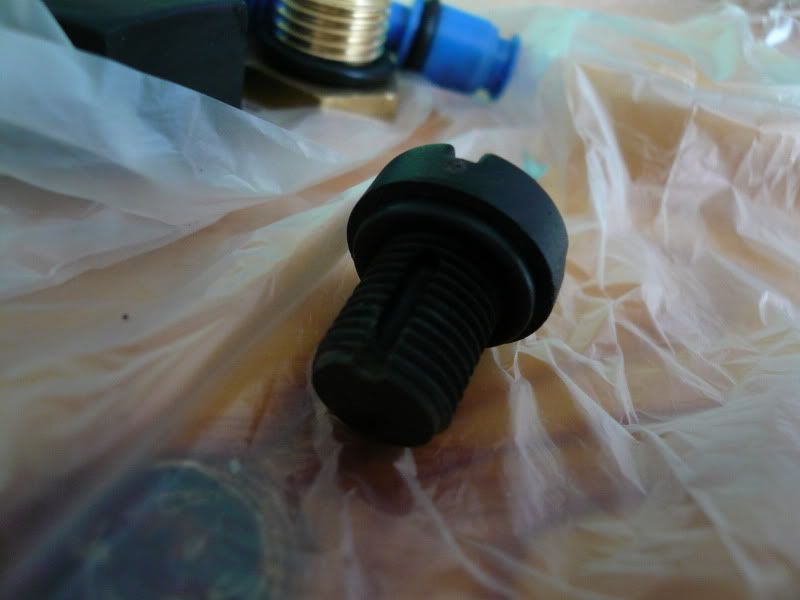
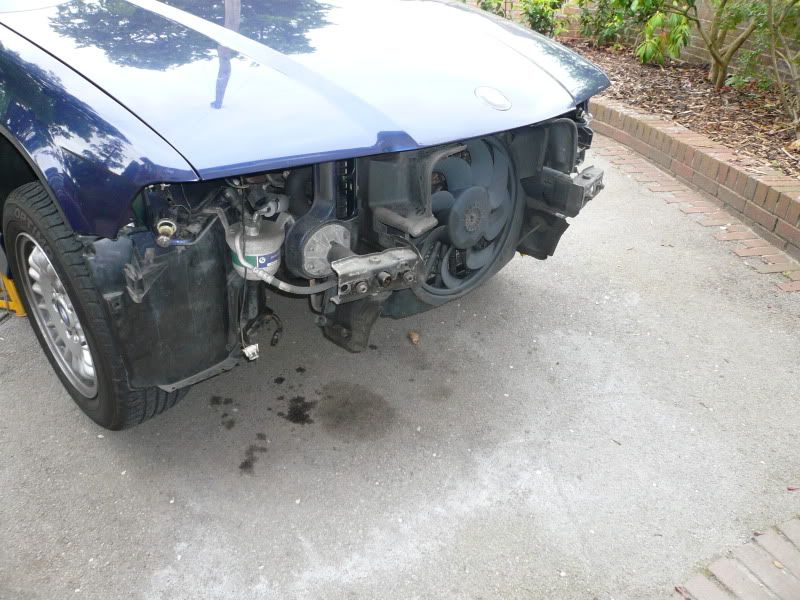
Well as the car was leaving little puddles wherever I parked this next job had to be done.
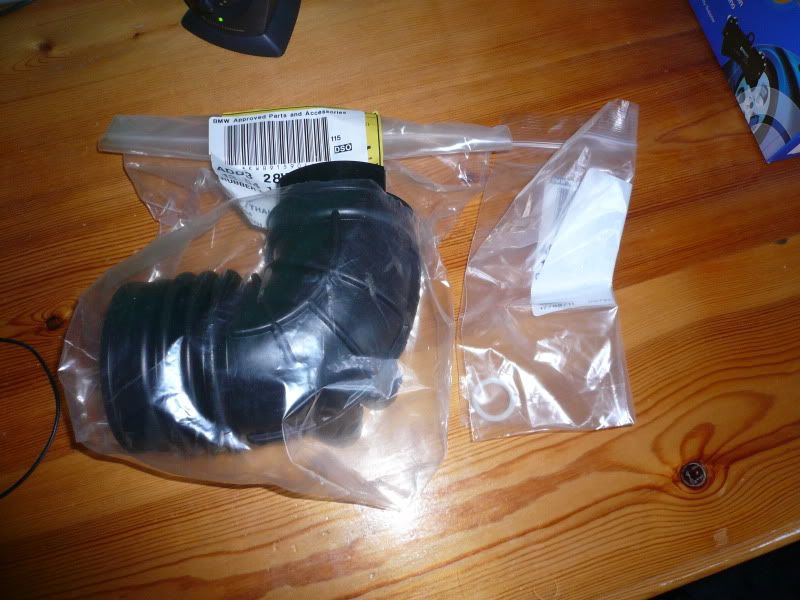
The expansion tank has two seals where it's held to the side of the rad, I ordered some new ones from BMW and set about replacing them.
Draining the coolant:
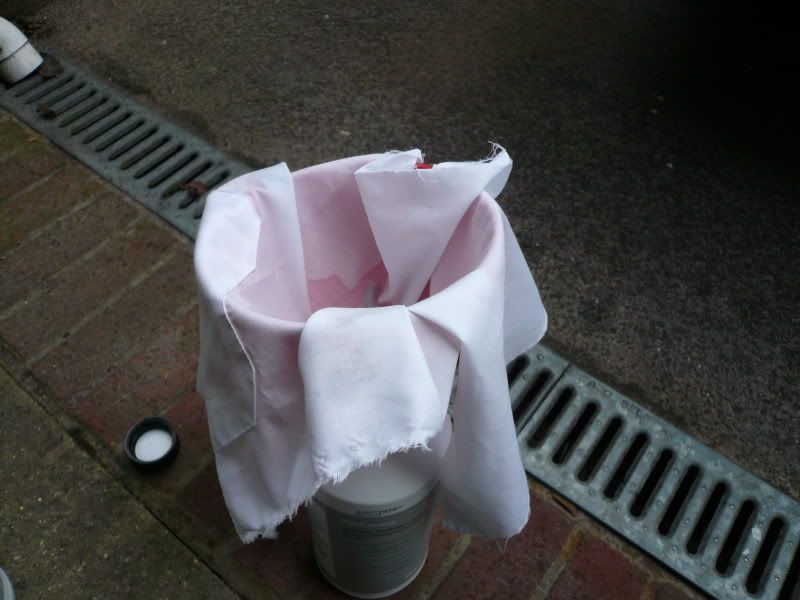
As this coolant has only been in a few thousand miles it was perfectly fine to re-use. Once it'd drained into a bowl, I used the old empty bottles with a funnel and some cloth to act as a sieve; this means any tiny bits of dirt etc don't get put back in.
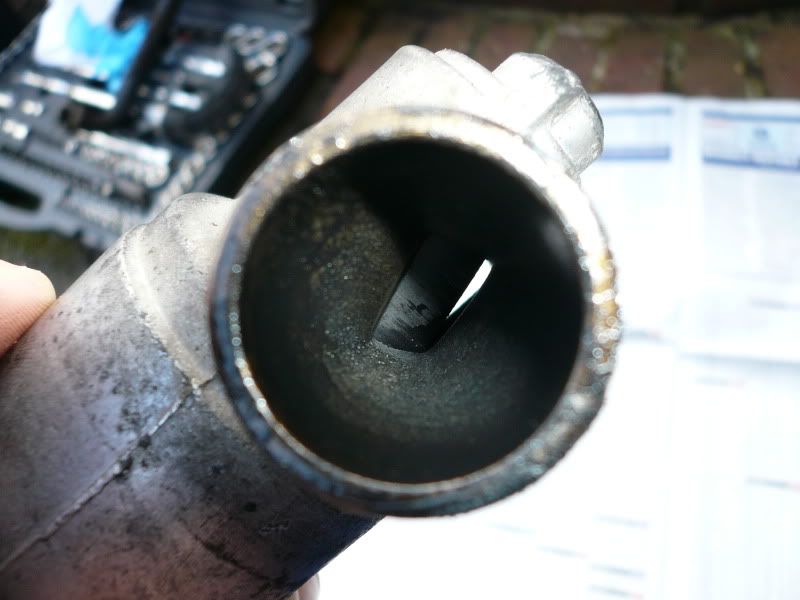
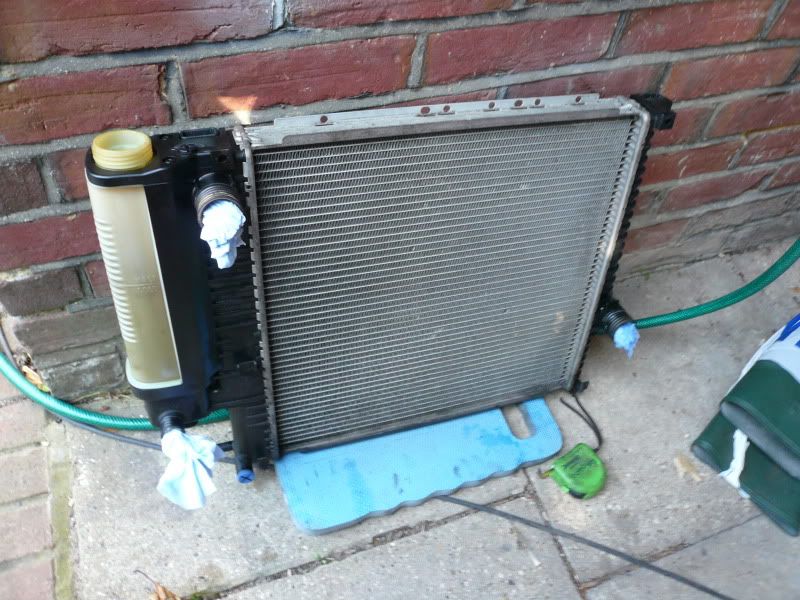
Took the side of the expansion tank apart and after some
pulling it came out:
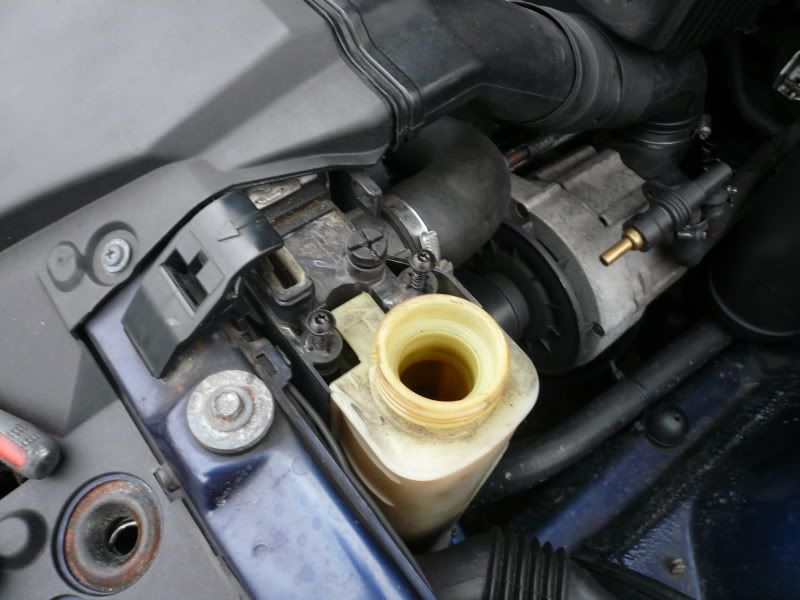

You can see how flat the seals have become and also how grotty they are.

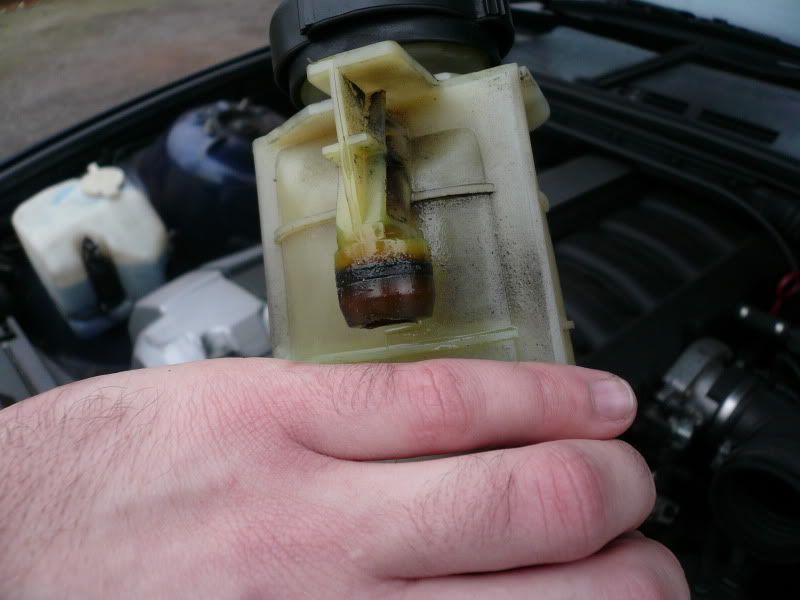
Everything cleaned up, new seals put on and a smear of silicone grease (not sealant) just to ease them back in.


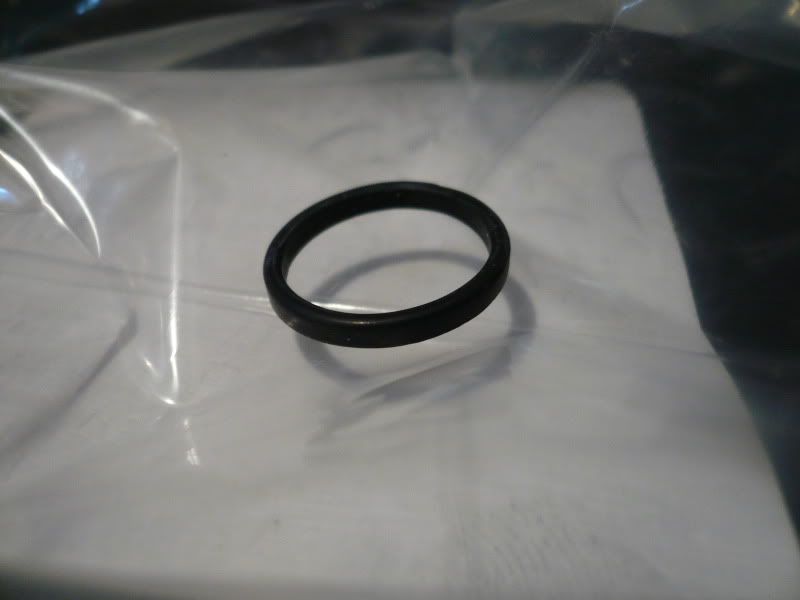
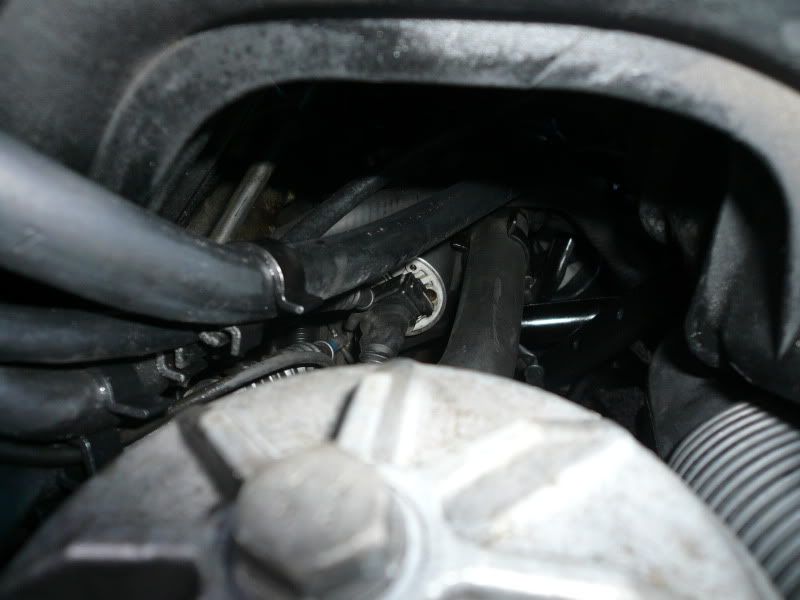
The tank is now back on but that's it for today. A friend has a new coolant level sensor which he never got around to using so I'm swapping my temperamental one for it along with a new o-ring before it's all put back together and filled up.
Well I finally put things back together.
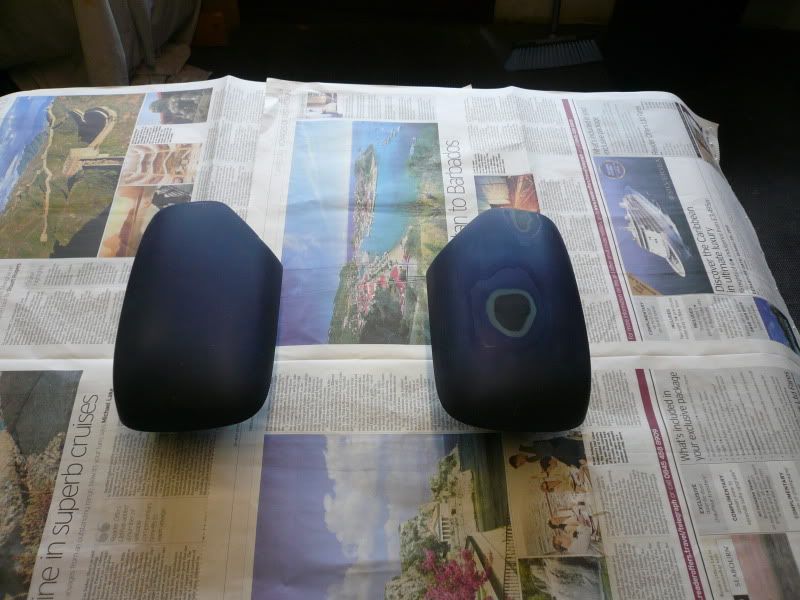
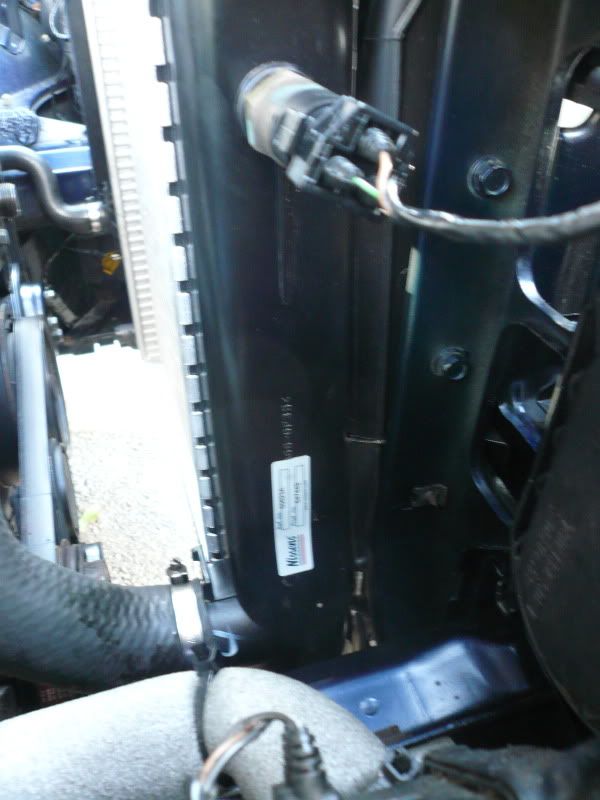
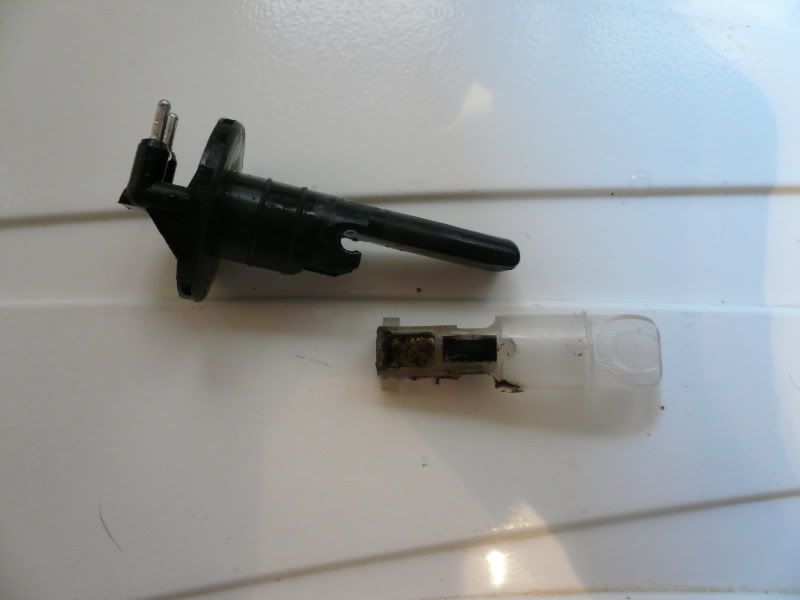
First issue was the coolant level sensor I had lined up was for a 328i which as it turns out, is different :sarcastic the connections are slightly different.
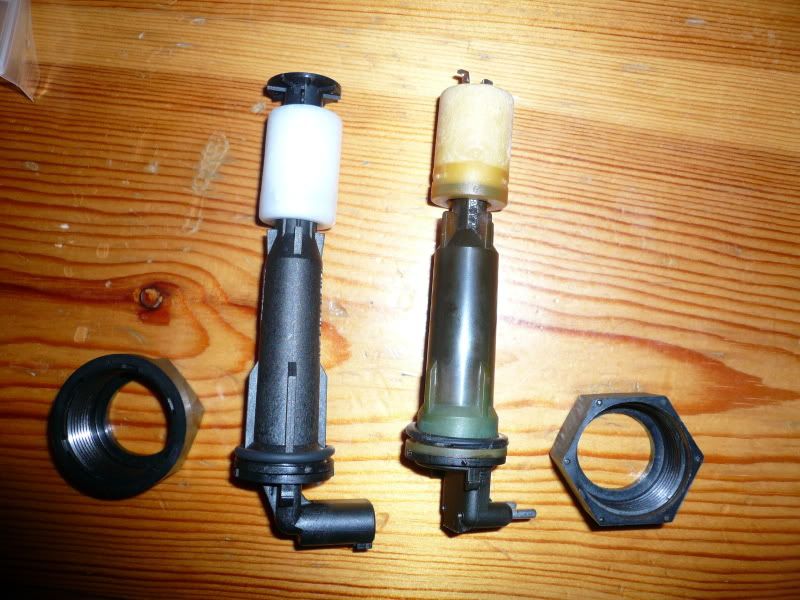
328i on the left, mine on the right.
Although I
could solder a new plug onto my loom, I really couldn't be bothered. Instead I cleaned up my original sensor, which was a bit gunked up and tested it with a milti-meter; it seemed to work absolutely fine so I replaced the O-ring and re-used it.
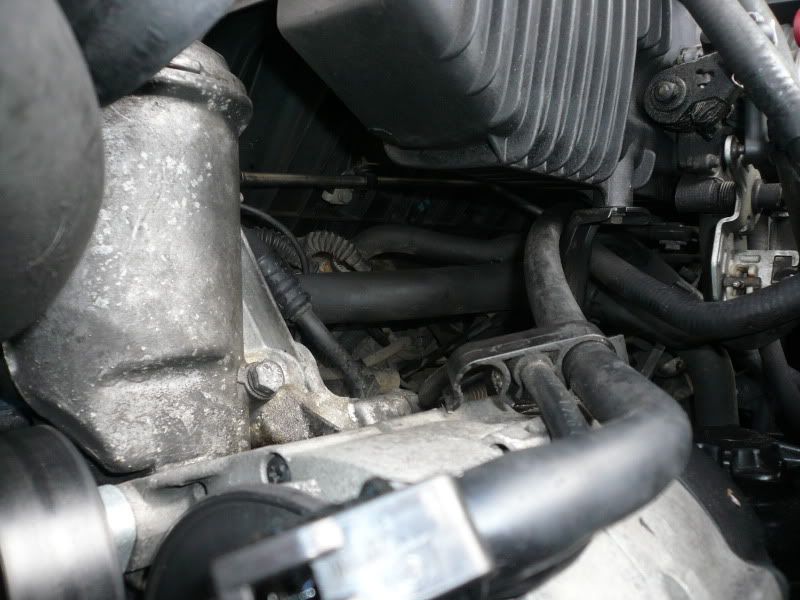
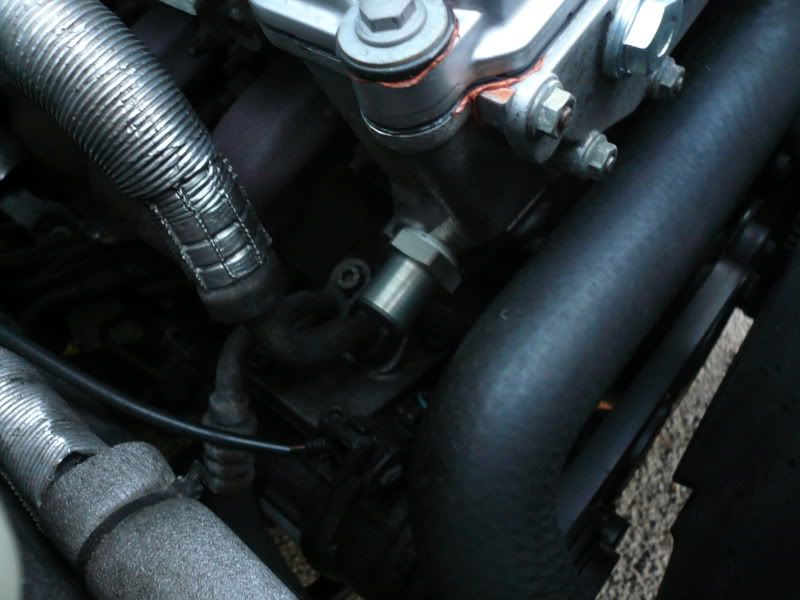
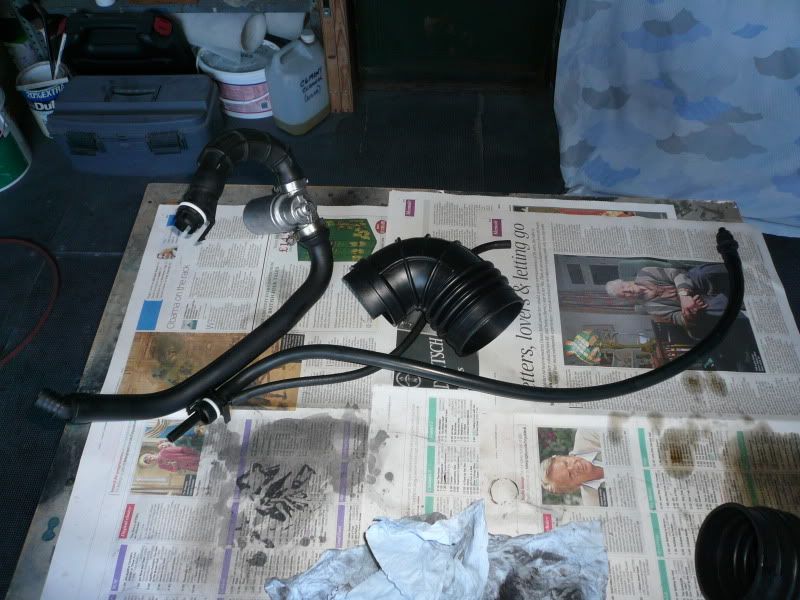
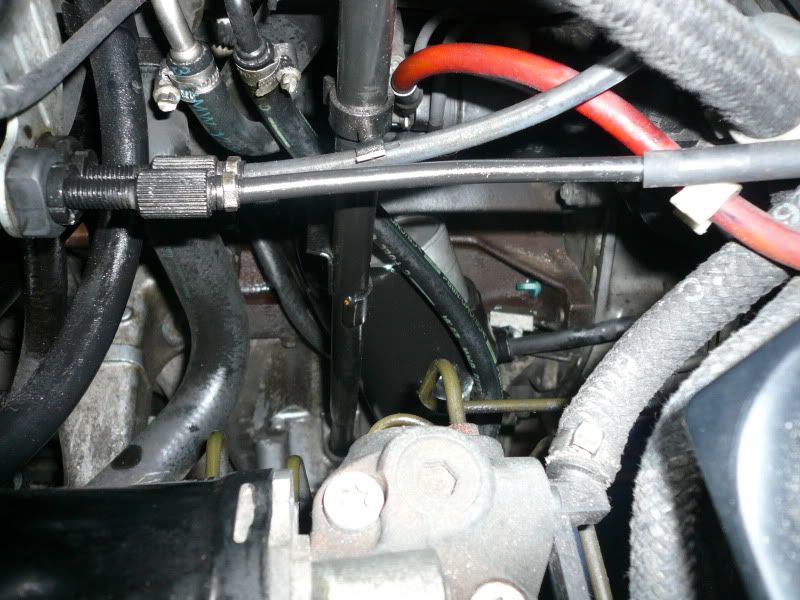
The next thing was the lower rad hose which as I've mentioned before in this thread, was leaking a while back. The end of the hose had been cut by the jubilee clip so I cut the bad section of hose off and re-attached it. I was never happy with that because I had to cut about 50mm of hose of which meant the new join was on a bend.
To replace the entire length of hose would have been a pain because it goes up under the manifold, towards the bulk head and generally in other awkward places. Instead I used another good hose and joined them together with a hose connector.
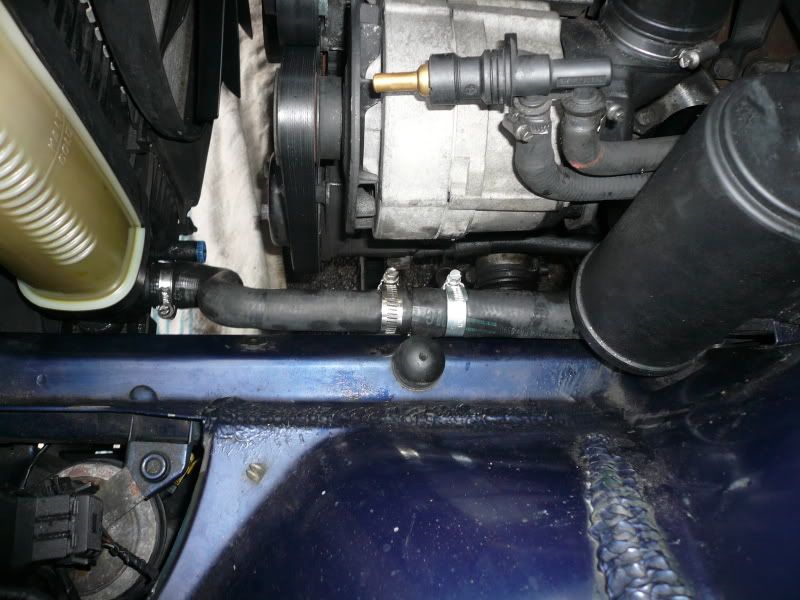
Although one looks thicker than the other, they're actually the same internal diameter, just the 325i has a thicker walled hose.
With that, I filled it up with coolant sloooowwwwwly and started it up.
I've got to be honest, all these methods of taking off one hose, rotating it, filling it up through said hose, then doing the same with another hose etc etc may indeed work but I just used a simpler method of filling it up slowly with the bleed screw out.
It helps that the drive I work on is on a slight slope so I jacked the front of the car slightly more but that was about it.
The coolant never actually came out of the bleed screw hole as I was filling it (didn't the last time either) as the expansion tank would get full beforehand. I squeezed some hoses as I was doing it and when I'd put in the same amount that I'd drained out, I started it (heater on). Periodically opening the bleed screw where coolant and tiny bubbles would seep out. Took it for a drive up and down the (bumpy) road to give it all a good jiggle and then parked up again with the nose facing up, opened the bleed screw again and some more bubbles came out but mainly just coolant.
By this point the temp had got to half way and stayed there so I switched it off and am letting it cool. I tend to rinse off the area with clean water so you don't have dry coolant marks all over the side of the rad but over the next few runs, I'll undo the bleed screw at the end of the journey and just let any air out that's worked it way up.
This isn't a guide as to how it
should be done but so far it's worked for me, fingers crossed :hihi but I'm happy to be corrected if I've missed something obvious and there is a chance there's a huge bubble of air in the block slowly cooking.
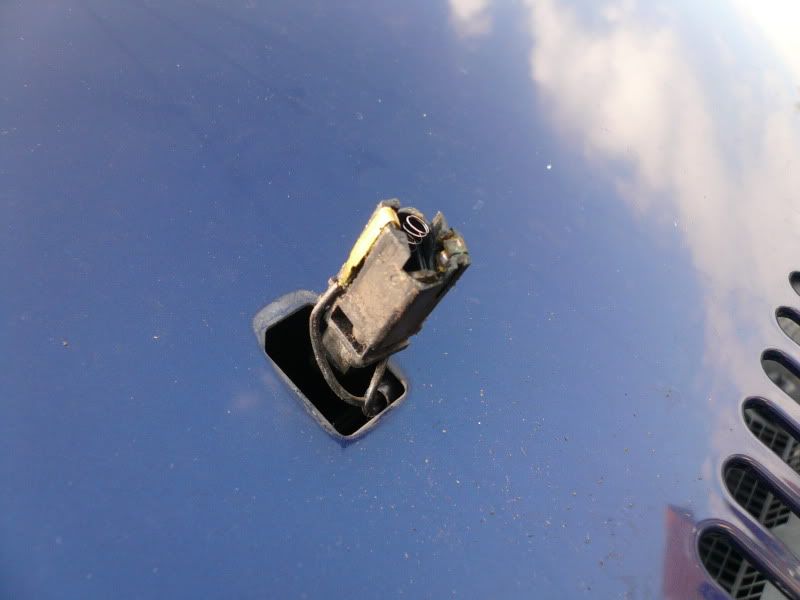
I noticed there was a slight leak from the coolant level sensor where I'd not quite done it up tight enough (plastic bolt onto plastic threads so didn't want to take any chances!), nipped it up and seemingly sorted that.
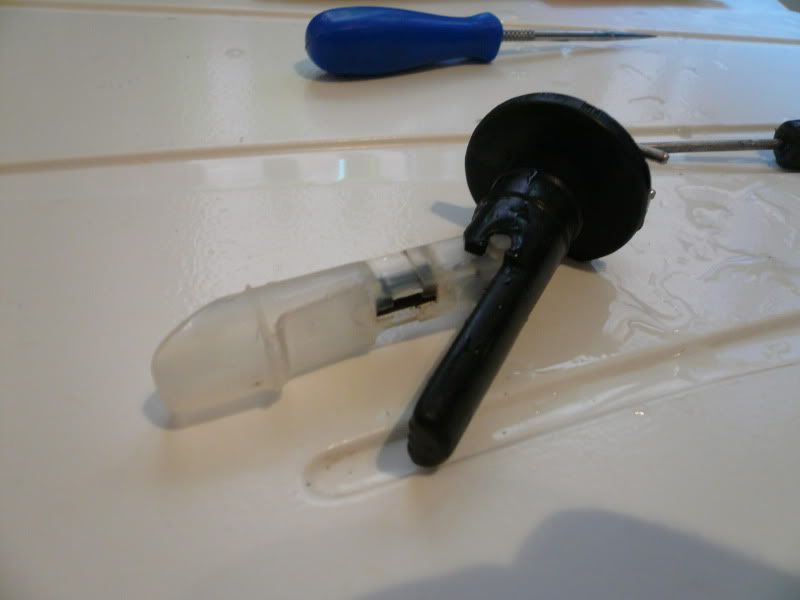
Next was to take the plug off and clean it up; it was full of gunk and still soaked inside.
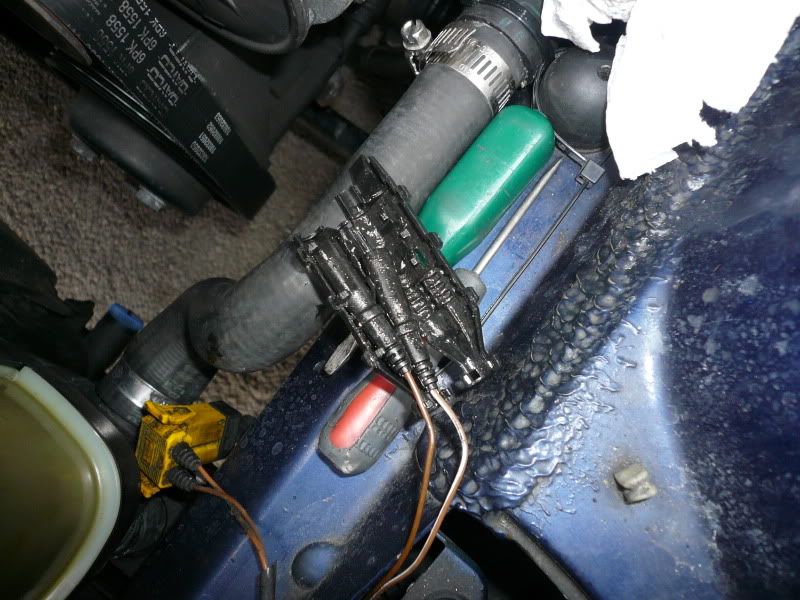
So I cleaned it all up, wrapped it in tape and plugged it back in.
I'm almost afraid to say this but...so far no 'low coolant' warning on the obc. But of course now I
think I've fixed it, it will surely go wrong.
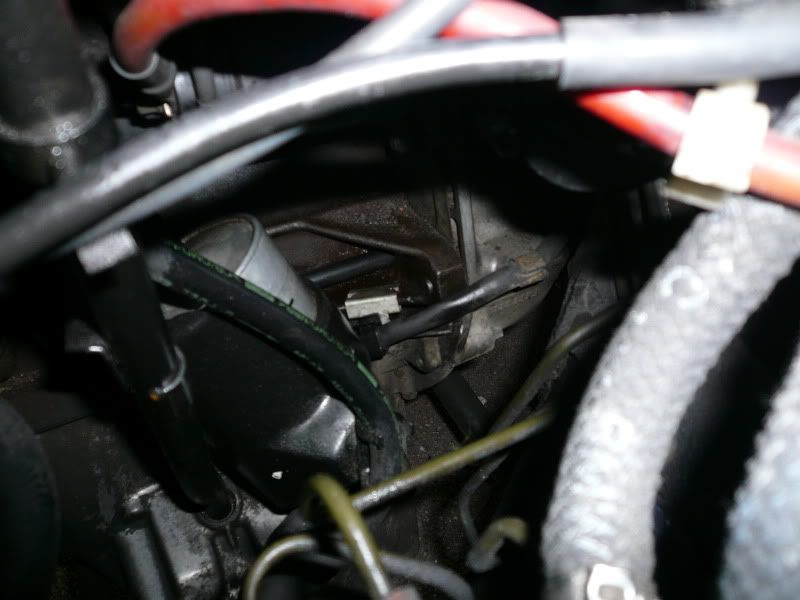
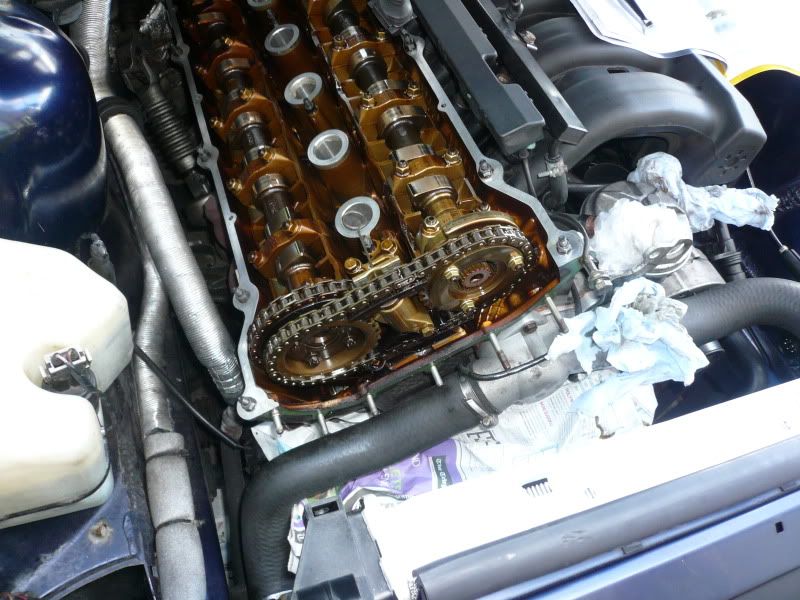
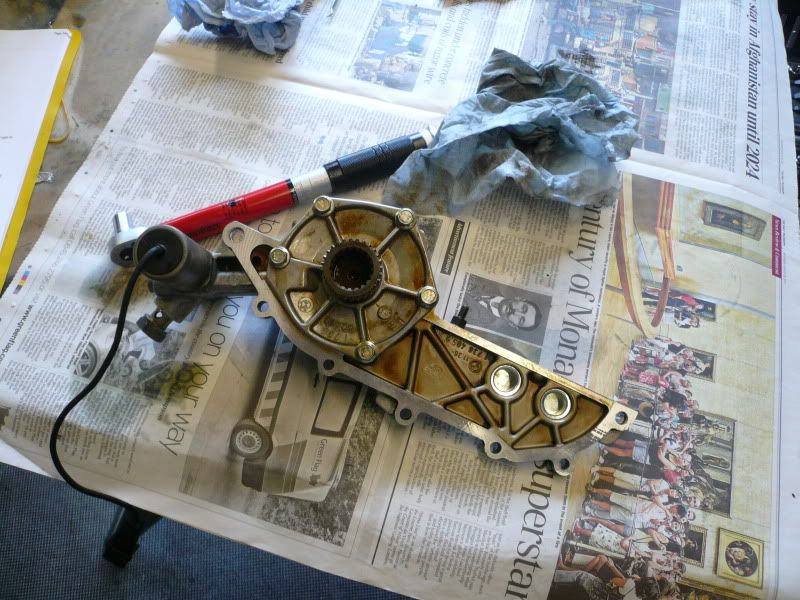
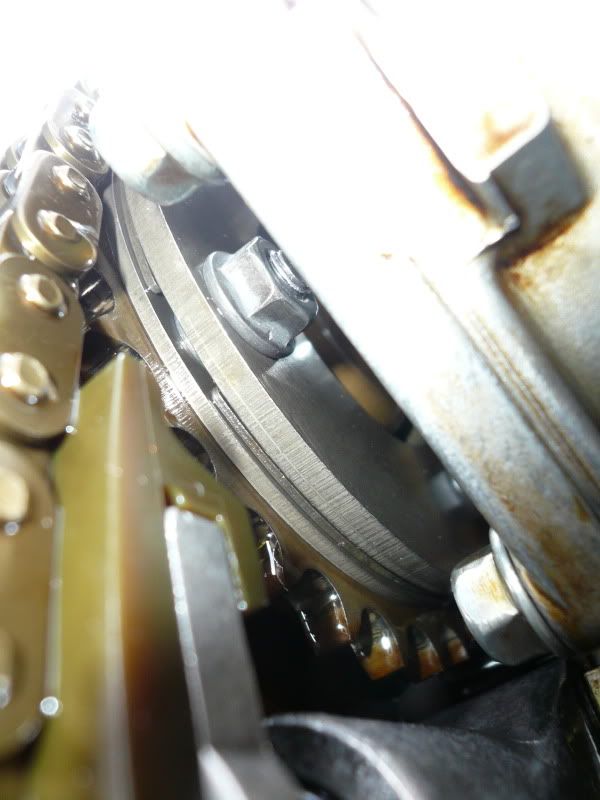
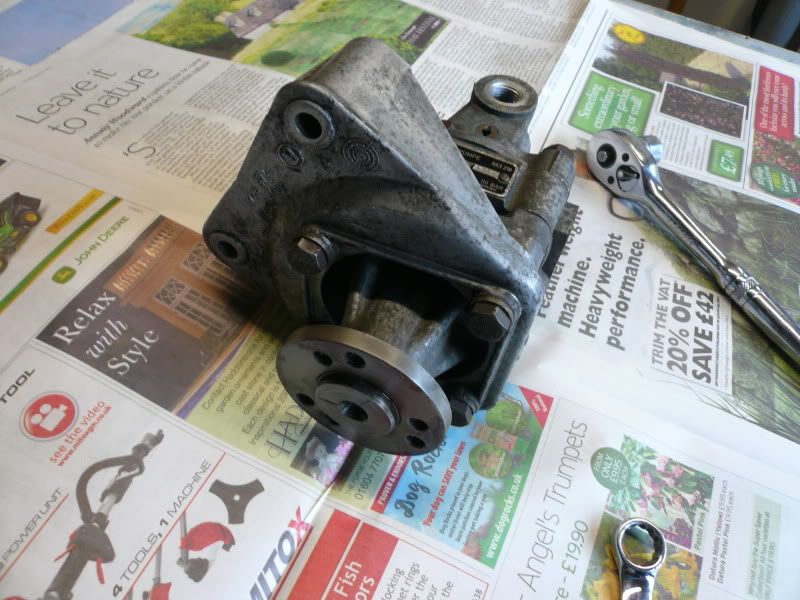
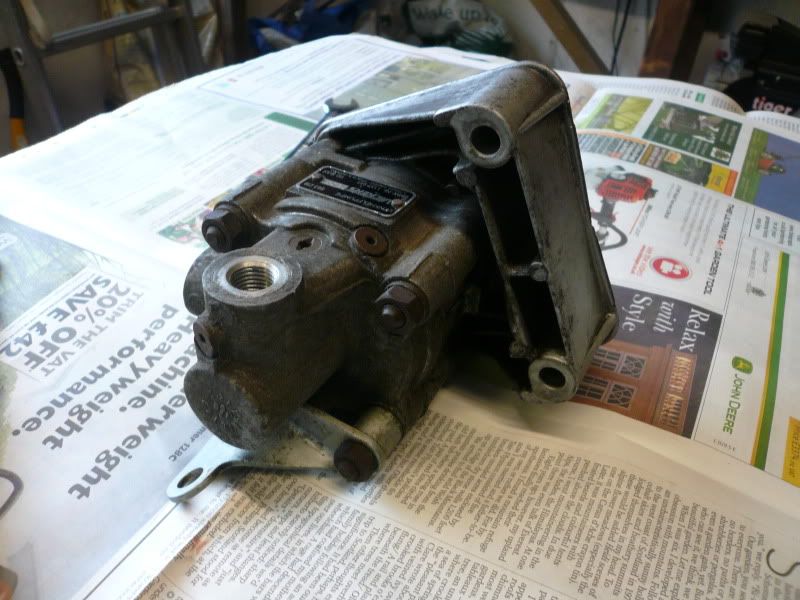
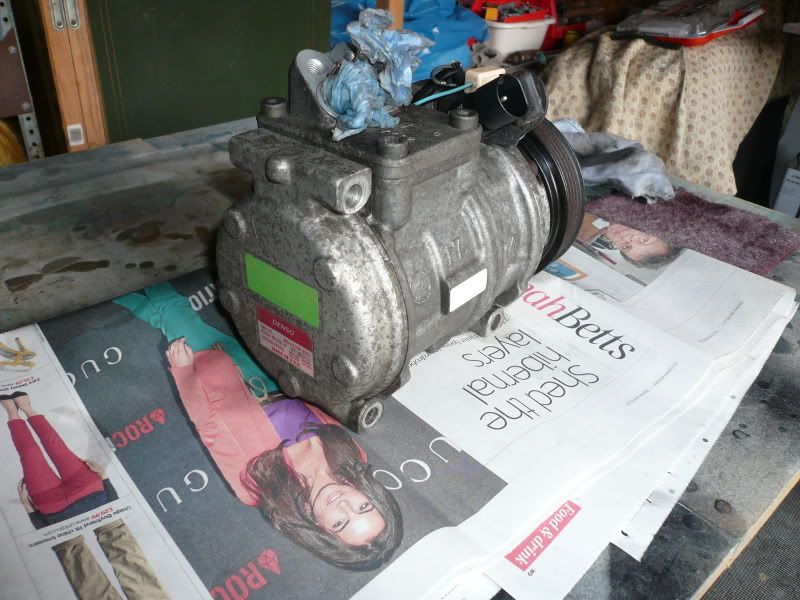
The final piece of the puzzle was sorted today; took just under 3 hours to get it out but that was from a car with no engine and a couple of bits of interior already removed, so I'm thinking 4 at least to get my original one out. Not fitted yet obviously but now I have everything ready (bar a few new o-rings and seals etc that will be replaced before it's fitted.)
![]() img.photobucket.com/albums/v609/FiestaTom/Run
img.photobucket.com/albums/v609/FiestaTom/Run arounds/325i/Interior/Digital%20climate%20retrofit/P1020026.jpg[/img]
![]() img.photobucket.com/albums/v609/FiestaTom/Run
img.photobucket.com/albums/v609/FiestaTom/Run arounds/325i/Interior/Digital%20climate%20retrofit/P1020025.jpg[/img]
![]() img.photobucket.com/albums/v609/FiestaTom/Run
img.photobucket.com/albums/v609/FiestaTom/Run arounds/325i/Interior/Digital%20climate%20retrofit/P1020035.jpg[/img]
![]() img.photobucket.com/albums/v609/FiestaTom/Run
img.photobucket.com/albums/v609/FiestaTom/Run arounds/325i/Interior/Digital%20climate%20retrofit/P1020034.jpg[/img]
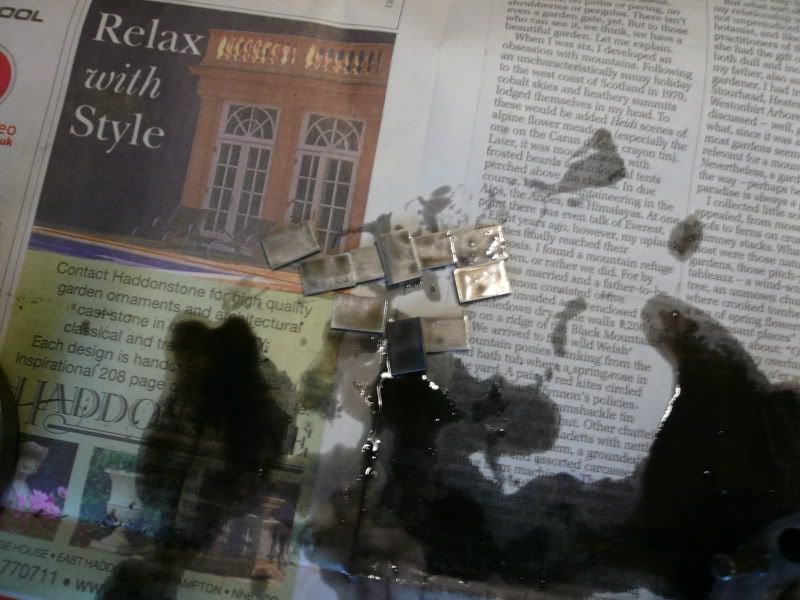
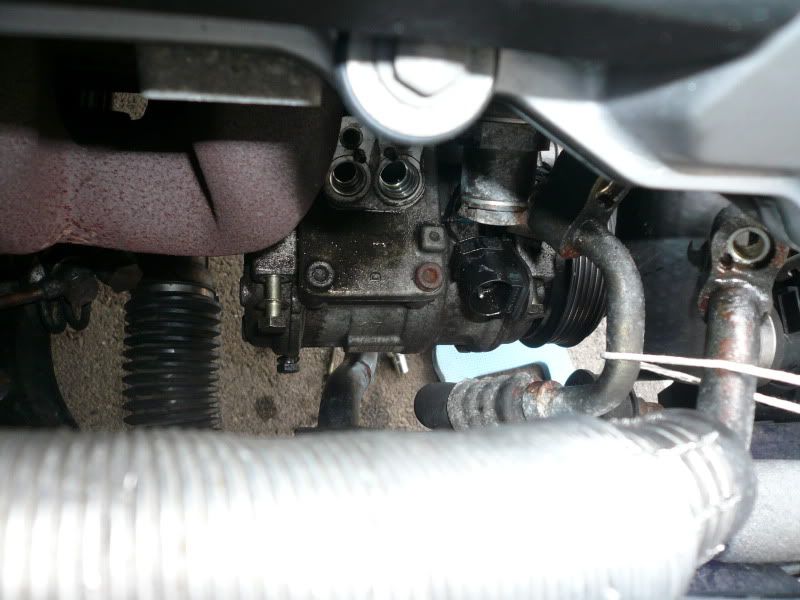
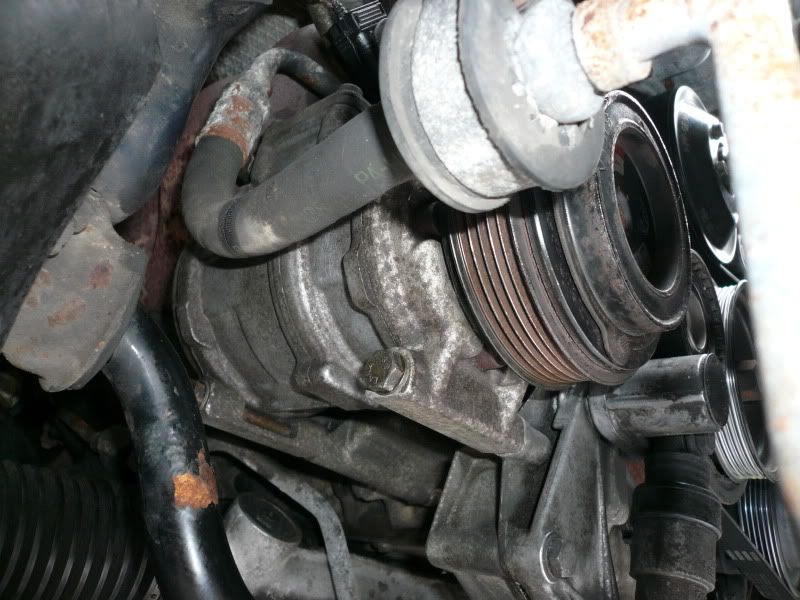
I've removed the O-rings from the coolant and air-con connections as they're going to be replace. Oh and cleaned everything up.
![]() img.photobucket.com/albums/v609/FiestaTom/Run
img.photobucket.com/albums/v609/FiestaTom/Run arounds/325i/Interior/Digital%20climate%20retrofit/P1020037.jpg[/img]
![]() img.photobucket.com/albums/v609/FiestaTom/Run
img.photobucket.com/albums/v609/FiestaTom/Run arounds/325i/Interior/Digital%20climate%20retrofit/P1020036.jpg[/img]
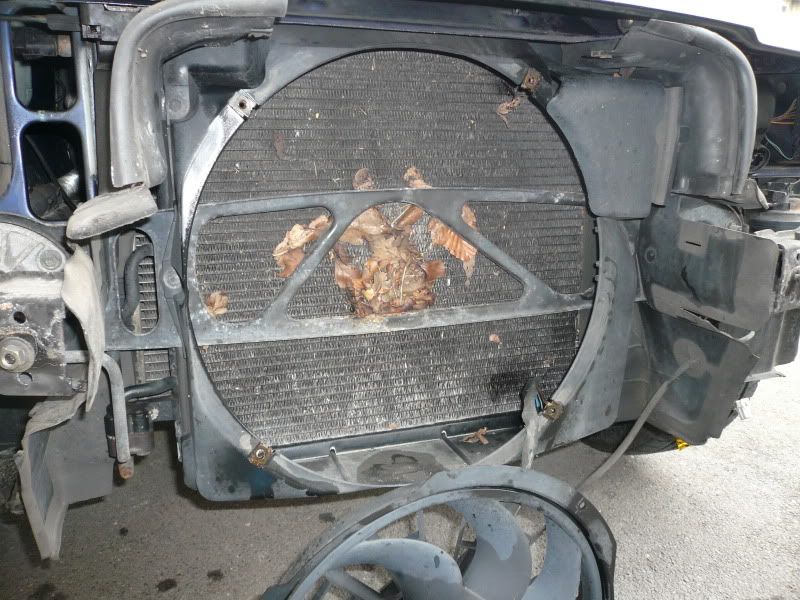
Figured it best to check the heater matrix while it was soo easy to do so:
![]() img.photobucket.com/albums/v609/FiestaTom/Run
img.photobucket.com/albums/v609/FiestaTom/Run arounds/325i/Interior/Digital%20climate%20retrofit/P1020028.jpg[/img]
Looks good to me, but found this little critter in there too, christ knows how he got there!
![]() img.photobucket.com/albums/v609/FiestaTom/Run
img.photobucket.com/albums/v609/FiestaTom/Run arounds/325i/Interior/Digital%20climate%20retrofit/P1020029.jpg[/img]
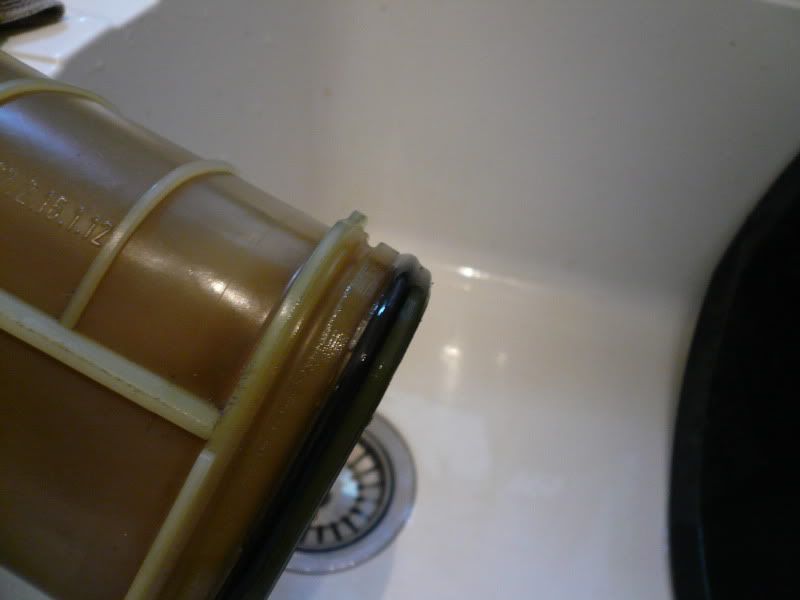
Then the pollen filter, which was filthy. I've blasted out the inside and I'll get another filter when I get the o-rings:
![]() img.photobucket.com/albums/v609/FiestaTom/Run
img.photobucket.com/albums/v609/FiestaTom/Run arounds/325i/Interior/Digital%20climate%20retrofit/P1020033.jpg[/img]
![]() img.photobucket.com/albums/v609/FiestaTom/Run
img.photobucket.com/albums/v609/FiestaTom/Run arounds/325i/Interior/Digital%20climate%20retrofit/P1020032.jpg[/img]
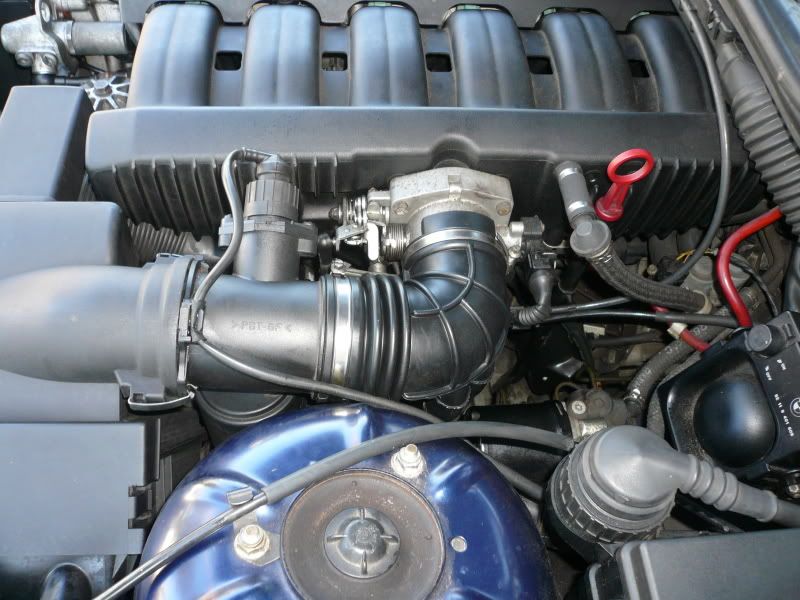
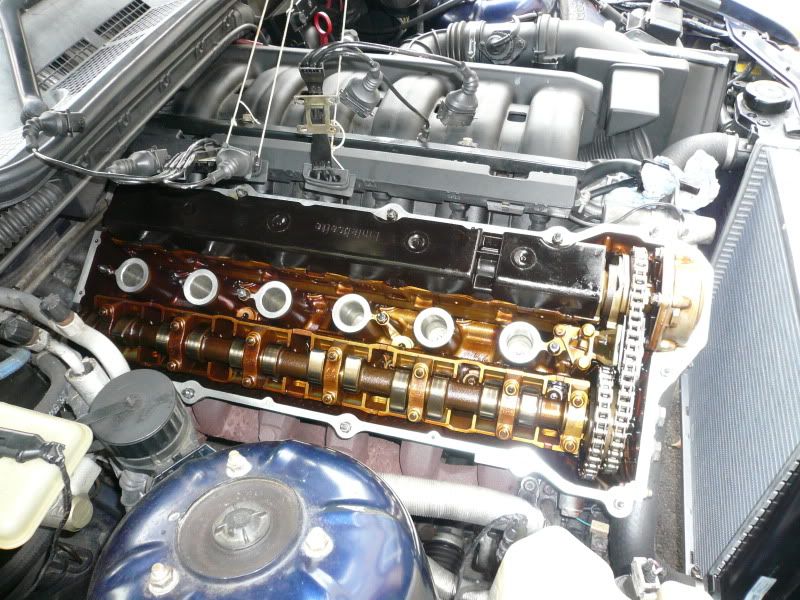
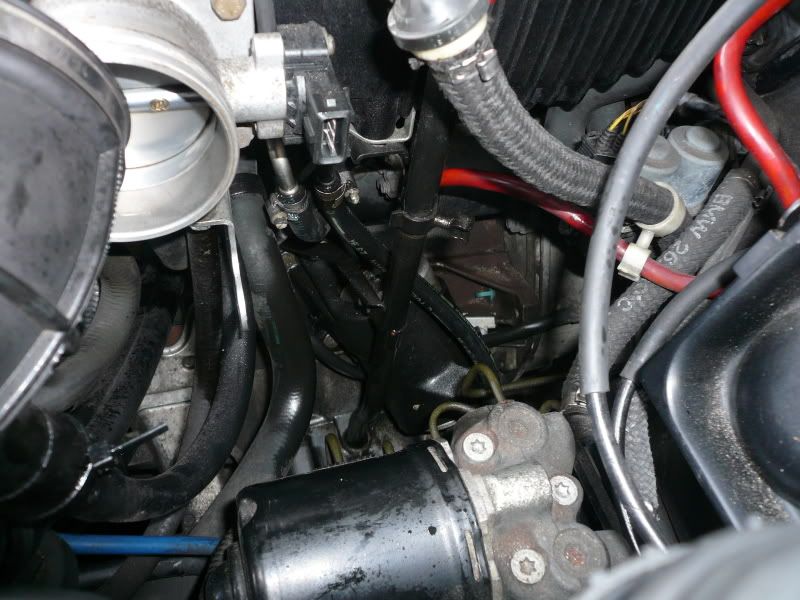
Today was 'ISCV' day, or 'I really need baby sized hands and arms to do this job' day.
The idle was never really bad, occasionally when the revs were dropping back down it would hunt up and down between say 500 and 1000 a few times, then settle. Still, best to get it done as it was bound to be gunked up.
Taking it off was fiddly to say the least! :shifty: You can't get to the jubilee clips so you have to take it off with the hoses, which get in the way.
Just to test me, as I un-plugged it the little rubber gasket in the plug pinged off into the engine bay somewhere and I couldn't find it for love nor money!
I ended up having to bring the compressor up the garden to blast air around the depths of the engine to try and force it out of whatever little crevice it had hidden in, eventually I found it though! :hihi
The valve was pretty black inside so I shook it around and something free'd and it started moving. I cleaned it with brake cleaner and then WD40 until it rotated freely and then put it all back together.
I'm not sure if it's a psychological thing but I'm sure the engine sounds a bit quieter/smoother now :confused The idle is bang on, the difference now is that when you rev it and let the revs die back down, they come down and 'land' rock solid with no fluctuation. It made me realise that before, they would drop back down and then rise at the end fractionally.
Another piece of the puzzle was sorted today. A black, completely un-cut coupe carpet 8)

The carpet in my car at the moment is...well...curse word. It's been cut either side of the heater box which is fine as the trim covers it up, but it's ripped around the rear of the tunnel below the arm-rest. While the interior is completely stripped for the climate swap I'll be putting the new carpet in.
I spent this weekend doing the climate and carpet swap which was a much bigger job than I expected :lol: so it's time for the write up; this isn’t really a how to as apart from being very time consuming and a bit fiddly in places, the process isn’t that technical.
I’ve been lucky in that I was able to get the parts I needed for ‘free’ in payment for some welding I did. This included a digital climate box, control panel and vent all from the same car:
![]() img.photobucket.com/albums/v609/FiestaTom/Run
img.photobucket.com/albums/v609/FiestaTom/Run arounds/325i/Interior/Digital%20climate%20retrofit/P1020026.jpg[/img]
![]() img.photobucket.com/albums/v609/FiestaTom/Run
img.photobucket.com/albums/v609/FiestaTom/Run arounds/325i/Interior/Digital%20climate%20retrofit/P1020025.jpg[/img]
My carpet was also ripped so needed replacing. You can see in this picture that there is a diagonal rip coming from just under the corner of the rear centre console:
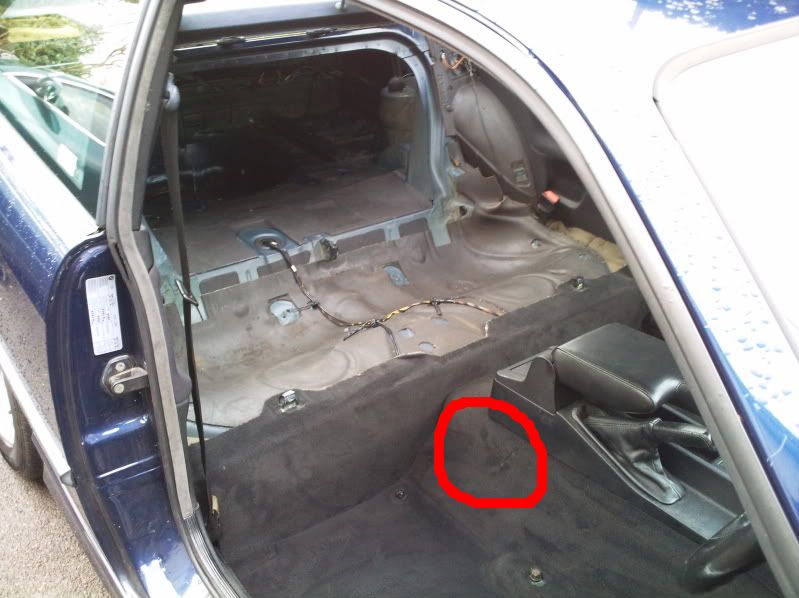
There was also another rip on the other side in the same place.
So again, from the same car I got the heater from, I took the carpet out without having to cut it. After a vacuum and shampoo it was looking nice:
To prep the parts ready for fitting I ordered a new seal and new O-rings for all the coolant and air-con connections. It’s worth nothing that the coolant o-rings are black and the air-con ones are green, however one of the new air-con rings was silver; still the same size but just a different material to cope with the chemicals in the gas. These were fitted:
![]() img.photobucket.com/albums/v609/FiestaTom/Run
img.photobucket.com/albums/v609/FiestaTom/Run arounds/325i/Interior/Digital%20climate%20retrofit/P1020072.jpg[/img]
![]() img.photobucket.com/albums/v609/FiestaTom/Run
img.photobucket.com/albums/v609/FiestaTom/Run arounds/325i/Interior/Digital%20climate%20retrofit/P1020073.jpg[/img]
![]() img.photobucket.com/albums/v609/FiestaTom/Run
img.photobucket.com/albums/v609/FiestaTom/Run arounds/325i/Interior/Digital%20climate%20retrofit/P1020055.jpg[/img]
![]() img.photobucket.com/albums/v609/FiestaTom/Run
img.photobucket.com/albums/v609/FiestaTom/Run arounds/325i/Interior/Digital%20climate%20retrofit/P1020056.jpg[/img]
Now for the task in hand. First job was to drain the air-con gasses which I had done at the local garage, you’re going to be disconnecting the gas lines so you don’t want any gas pressure in the system. You also need to drain the coolant system and one last ‘pre-job’ task was to disconnect the air bag, something that makes me twitch every time lol
With everything ready I stripped the dash and took it out.
![]() img.photobucket.com/albums/v609/FiestaTom/Run
img.photobucket.com/albums/v609/FiestaTom/Run arounds/325i/Interior/Digital%20climate%20retrofit/P1020060.jpg[/img]
With the dash out I loosened the steering column support bar and un-plugged the multi-plug for the heater box, along with popping out the drain tube.
Then from the engine bay side I took off the wiper, scuttle trim, alarm box and other general things to make space to undo the coolant and air-con pipes and also the 4 bolts that hold the heater box to the bulkhead.
(note, these pictures were taken when I fitted the new seal and box but they show the same bolts etc)
![]() img.photobucket.com/albums/v609/FiestaTom/Run
img.photobucket.com/albums/v609/FiestaTom/Run arounds/325i/Interior/Digital%20climate%20retrofit/P1020067.jpg[/img]
![]() img.photobucket.com/albums/v609/FiestaTom/Run
img.photobucket.com/albums/v609/FiestaTom/Run arounds/325i/Interior/Digital%20climate%20retrofit/P1020078.jpg[/img]
![]() img.photobucket.com/albums/v609/FiestaTom/Run
img.photobucket.com/albums/v609/FiestaTom/Run arounds/325i/Interior/Digital%20climate%20retrofit/P1020079.jpg[/img]
![]() img.photobucket.com/albums/v609/FiestaTom/Run
img.photobucket.com/albums/v609/FiestaTom/Run arounds/325i/Interior/Digital%20climate%20retrofit/P1020077.jpg[/img]
![]() img.photobucket.com/albums/v609/FiestaTom/Run
img.photobucket.com/albums/v609/FiestaTom/Run arounds/325i/Interior/Digital%20climate%20retrofit/P1020069.jpg[/img]
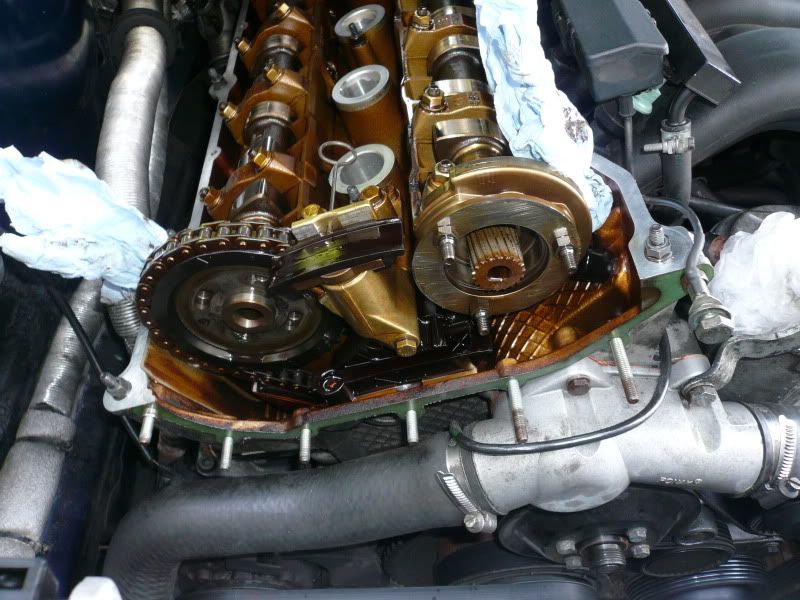
With a lot of pulling and pushing I got the old heater box out:
![]() img.photobucket.com/albums/v609/FiestaTom/Run
img.photobucket.com/albums/v609/FiestaTom/Run arounds/325i/Interior/Digital%20climate%20retrofit/P1020064.jpg[/img]
![]() img.photobucket.com/albums/v609/FiestaTom/Run
img.photobucket.com/albums/v609/FiestaTom/Run arounds/325i/Interior/Digital%20climate%20retrofit/P1020065.jpg[/img]
![]() img.photobucket.com/albums/v609/FiestaTom/Run
img.photobucket.com/albums/v609/FiestaTom/Run arounds/325i/Interior/Digital%20climate%20retrofit/P1020066.jpg[/img]
After removing a few more bits of trim and the seats, I ripped the old carpet out:
![]() img.photobucket.com/albums/v609/FiestaTom/Run
img.photobucket.com/albums/v609/FiestaTom/Run arounds/325i/Interior/Digital%20climate%20retrofit/P1020070.jpg[/img]
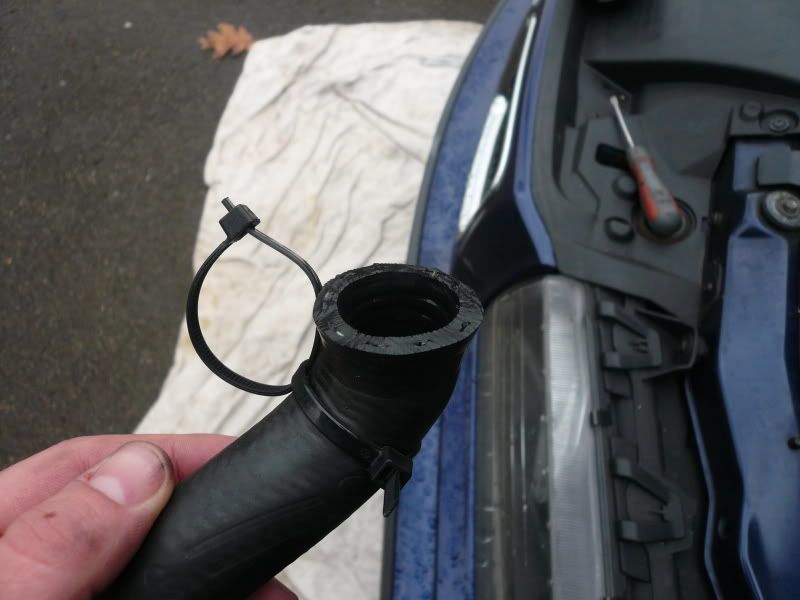
Then came the long and tedious task of cleaning everything. As I’d sprayed a lot of waxoyl around the scuttle to try and stop the leak before, I had to clean this all off. I also took out the centre drain tube and cleaned that as I couldn’t get to it before (the other two were done a while ago.)
![]() img.photobucket.com/albums/v609/FiestaTom/Run
img.photobucket.com/albums/v609/FiestaTom/Run arounds/325i/Interior/Digital%20climate%20retrofit/P1020071.jpg[/img]
I put the new carpet in, which was a real pain in the

! It took a lot of fiddling, moving and swearing to get it to sit correctly as I didn’t want to force anything. With the carpet in I smeared some silicone around the mounting surface and then bolted the digi heater box in.
Again, this wasn’t as straight forward as I’d have hoped. The default setting of the digi box with the ignition off is for the flaps to remain half open. This means they get in the way when trying to fit through the bulkhead. I had to plug the box in, turn the ignition on and select the recirculate button to close the flaps.
![]() img.photobucket.com/albums/v609/FiestaTom/Run
img.photobucket.com/albums/v609/FiestaTom/Run arounds/325i/Interior/Digital%20climate%20retrofit/P1020075.jpg[/img]
Then I reconnected the coolant and air-con pipes and called it a night.
Next day.
With the scuttle all clean I decided to spray some Dynax S50 around to try and make any water run out quickly.
![]() img.photobucket.com/albums/v609/FiestaTom/Run
img.photobucket.com/albums/v609/FiestaTom/Run arounds/325i/Interior/Digital%20climate%20retrofit/P1020089.jpg[/img]
![]() img.photobucket.com/albums/v609/FiestaTom/Run
img.photobucket.com/albums/v609/FiestaTom/Run arounds/325i/Interior/Digital%20climate%20retrofit/P1020091.jpg[/img]
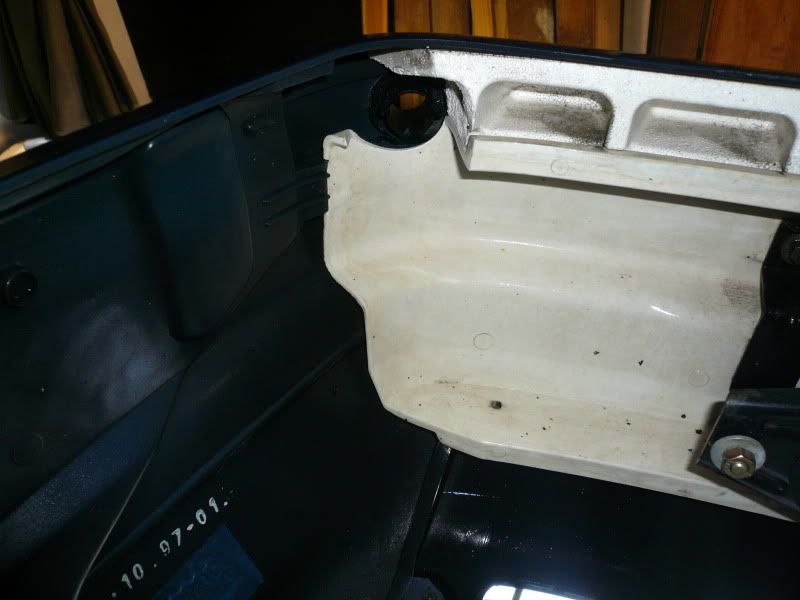
I also added a little cover; the scuttle panel metalwork on a coupe is slightly different to the saloon and coupe in that it doesn’t have a little lip on the edge. Because of this, water runs straight down the screen directly on-top of the weakest part of the unit.
![]() img.photobucket.com/albums/v609/FiestaTom/Run
img.photobucket.com/albums/v609/FiestaTom/Run arounds/325i/Interior/Digital%20climate%20retrofit/P1020093.jpg[/img]
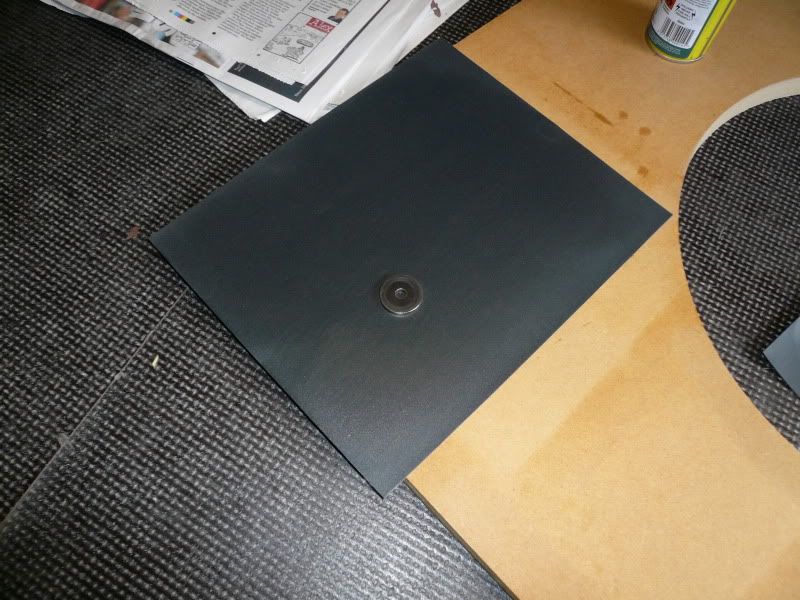
To try and guide the water away at least I silicones a sheet of plastic over the area trying not to affect any air-flow:
![]() img.photobucket.com/albums/v609/FiestaTom/Run
img.photobucket.com/albums/v609/FiestaTom/Run arounds/325i/Interior/Digital%20climate%20retrofit/P1020094.jpg[/img]
I also sprayed some white grease over some of the moving parts like the wiper mechanisms and in particular the recirculate flap hinges of the heater box:
![]() img.photobucket.com/albums/v609/FiestaTom/Run
img.photobucket.com/albums/v609/FiestaTom/Run arounds/325i/Interior/Digital%20climate%20retrofit/P1020088.jpg[/img]
It was then a case of getting the interior back in, ‘refitting is the reversal of removal’ as Haynes would say.
![]() img.photobucket.com/albums/v609/FiestaTom/Run
img.photobucket.com/albums/v609/FiestaTom/Run arounds/325i/Interior/Digital%20climate%20retrofit/P1020100.jpg[/img]
![]() img.photobucket.com/albums/v609/FiestaTom/Run
img.photobucket.com/albums/v609/FiestaTom/Run arounds/325i/Interior/Digital%20climate%20retrofit/P1020101.jpg[/img]
Those are all the pictures I have but you can fill in the blanks lol
After a complete stroke of luck, I have a CD43 from a Rover 25. As some may know, they are identical to the BMW Business CD head units, the only difference being there is a Rover symbol instead of 'BMW Business'. There are some cheeky ebay sellers who get these, stick a M badge over the Rover symbol and charge up to £140 for the privilege
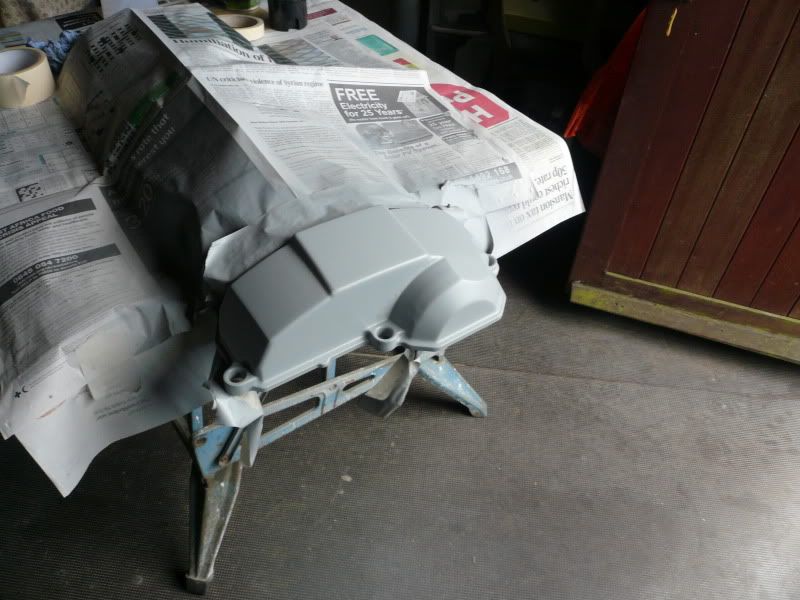
After trying white spirit and thinners I couldn't get the transfer off so I stripped it down ready to paint it satin black:

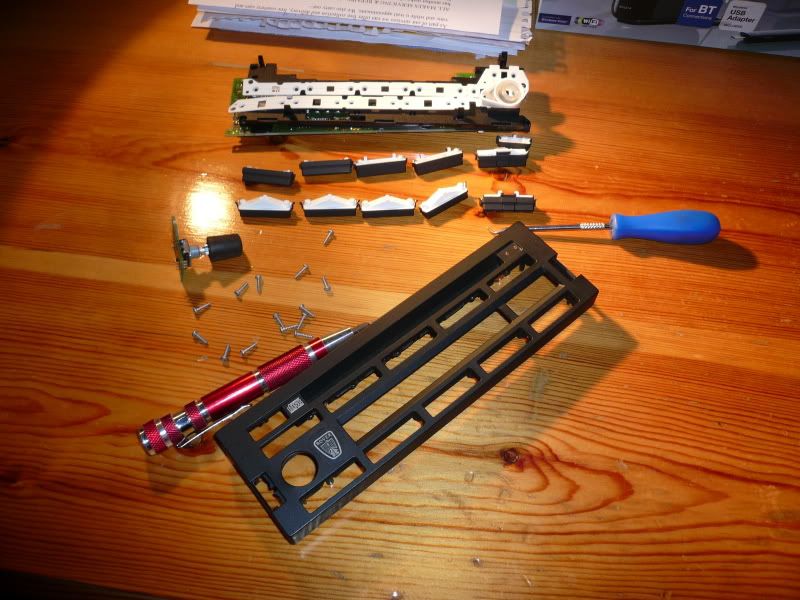
However, while I was sanding it with some fine scotch pad I thought '
I'll just sand it down!', so I lightly sanded the entire thing. The transfer is gone and it's the same colour with no paint edges
It's such a good head unit! Really happy soo far!
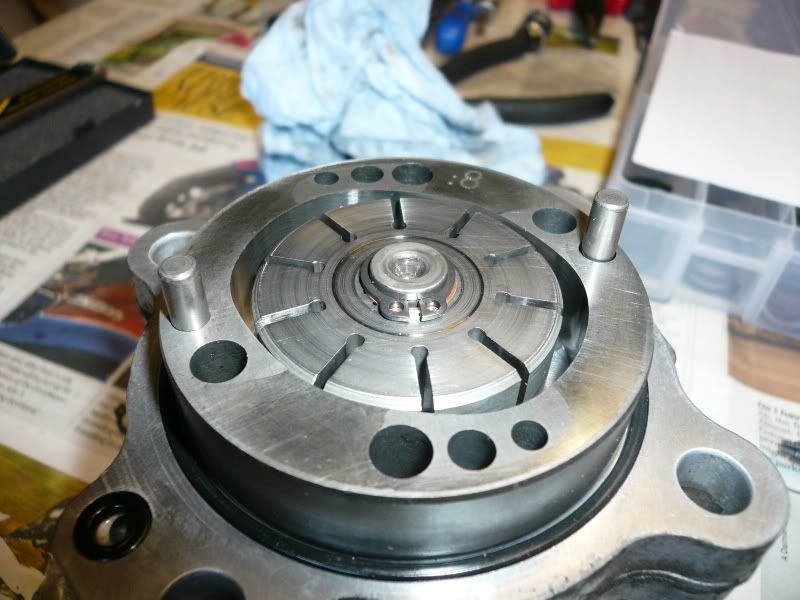
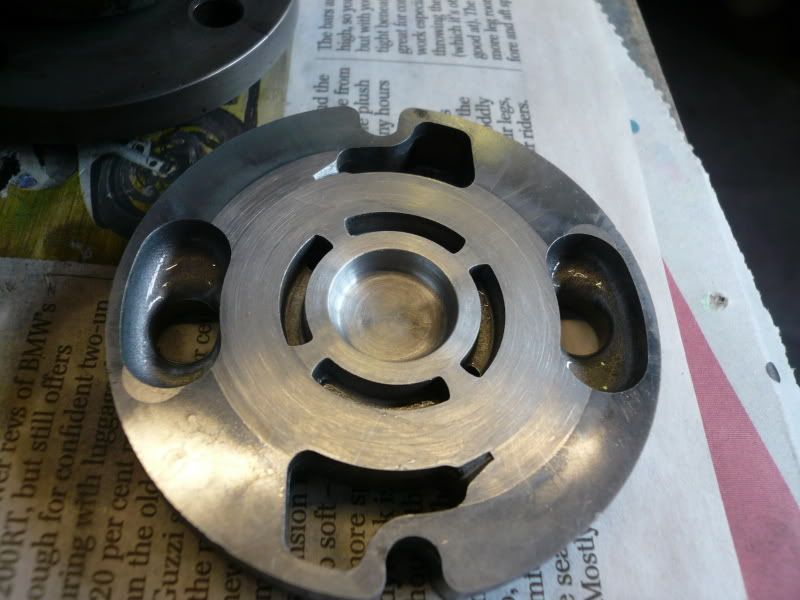
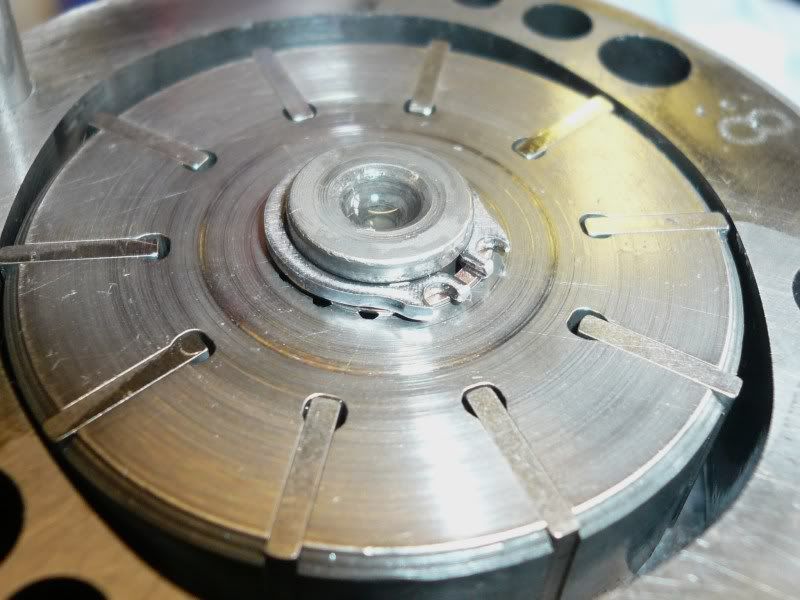
Next was the Climate unit. The little fan inside that helps regulate the temperature gets clogged up:
![]() img.photobucket.com/albums/v609/FiestaTom/Run
img.photobucket.com/albums/v609/FiestaTom/Run arounds/325i/Interior/Digital%20climate%20retrofit/P1020140.jpg[/img]
![]() img.photobucket.com/albums/v609/FiestaTom/Run
img.photobucket.com/albums/v609/FiestaTom/Run arounds/325i/Interior/Digital%20climate%20retrofit/P1020141.jpg[/img]
All cleaned up with a fine paint brush. I doubt I'll see a difference as there wasn't a problem per sey, just nice to clean it out.
For reference too, the circuit board has AUC functionality which is great news if I ever want to fit that as I thought I'd have to replace the control panel.
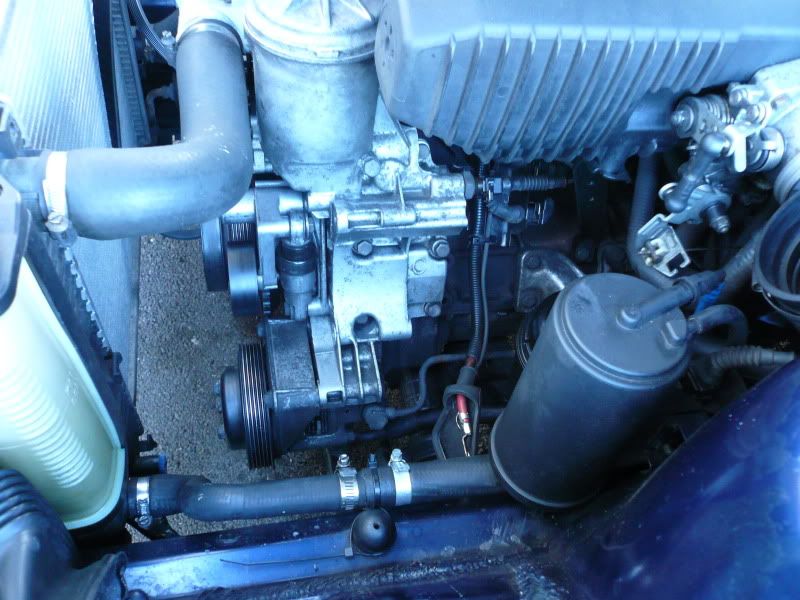
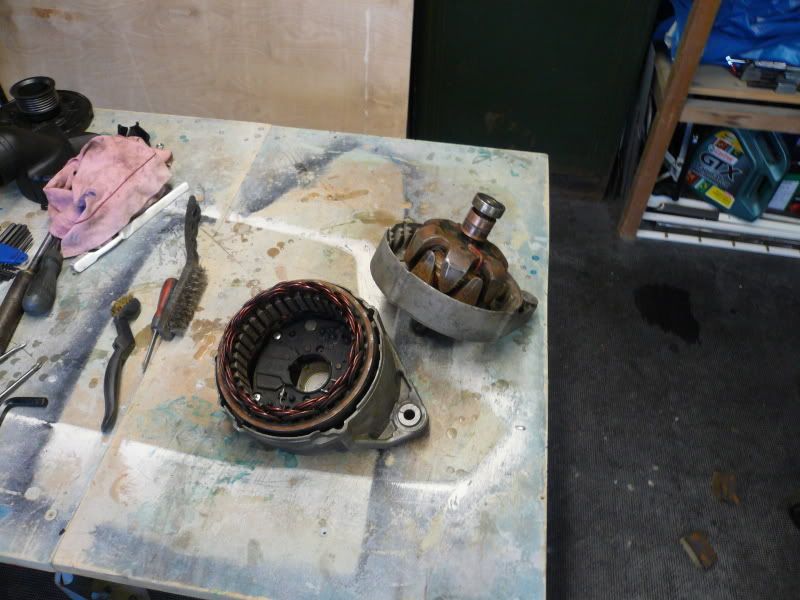
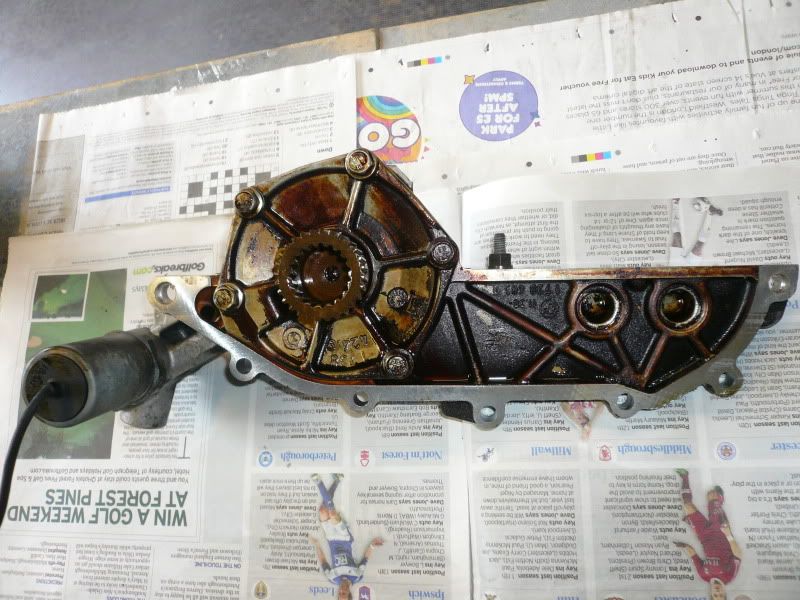
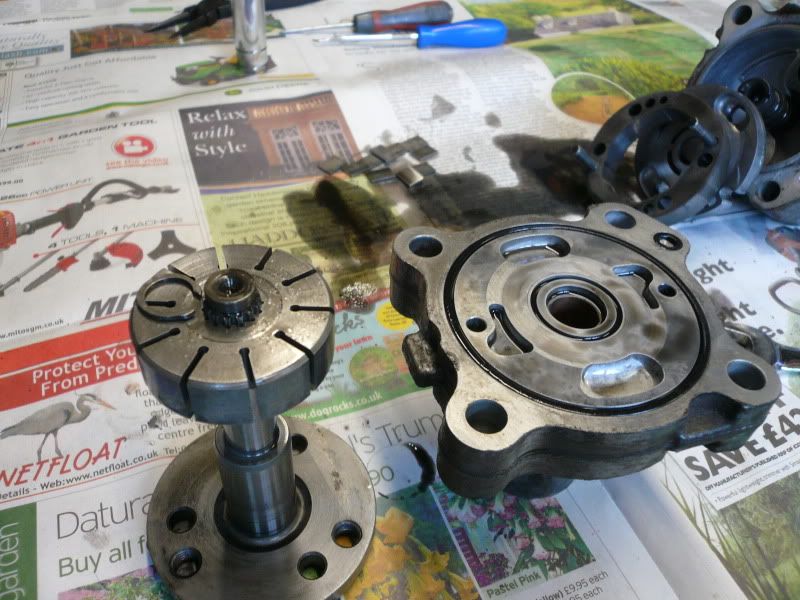
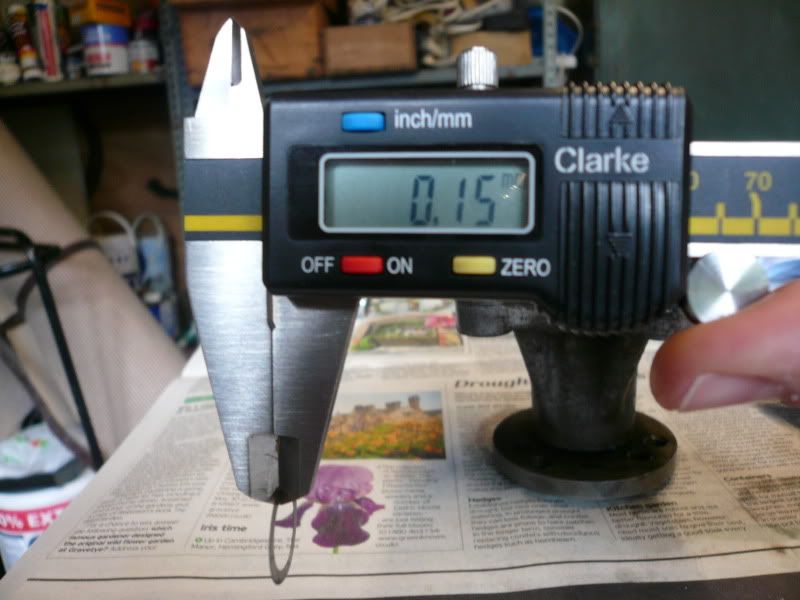
Alternator re-build time.
I'm not sure I've mentioned in this thread but I've had a problem with flickering lights ever since I bought the car. Every light on the car, dash lights, obc etc etc would flicker slightly at idle and with the headlights on you could see them flicker if you pulled up behind someone at night. If I turned on something like the heated rear screen it would smooth out slightly but then return. The alternator wasn't making any strange noises and I wasn't keen on just throwing another one in as it could last a year or an hour, best to stick with the devil I know so to speak.
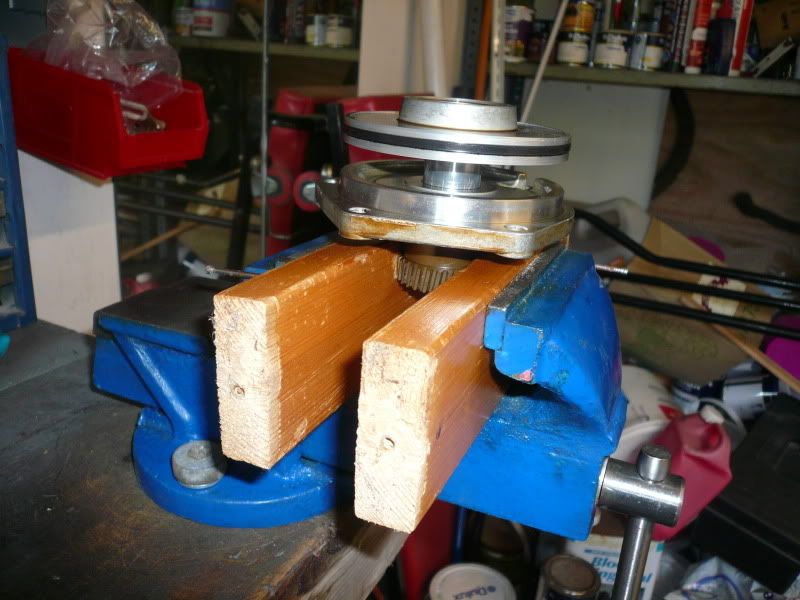
I whipped the alternator out ('whipped' is pushing it, the lower bolt is a bit of a pain to undo as you need to hold the nut at the back with a spanner.) and starting tearing into it.
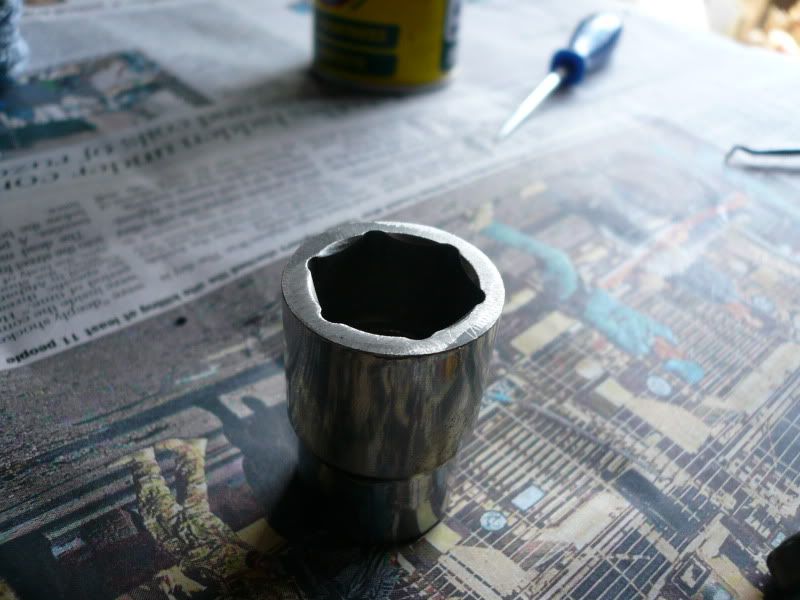
The windy gun got the pulley bolt off but I had to heat it up to get it off as it was pretty stuck. I then removed the voltage regulator which has obviously been replaced at some point as it should be a BOSCH item. I noticed that the connections were pretty rusty but the brushes were much better than I as expecting; I had bought new brushes thinking they would need replacing but the ones on there were hardly worn and the springs were still fine too, so I left it as it (after a good clean obviously)

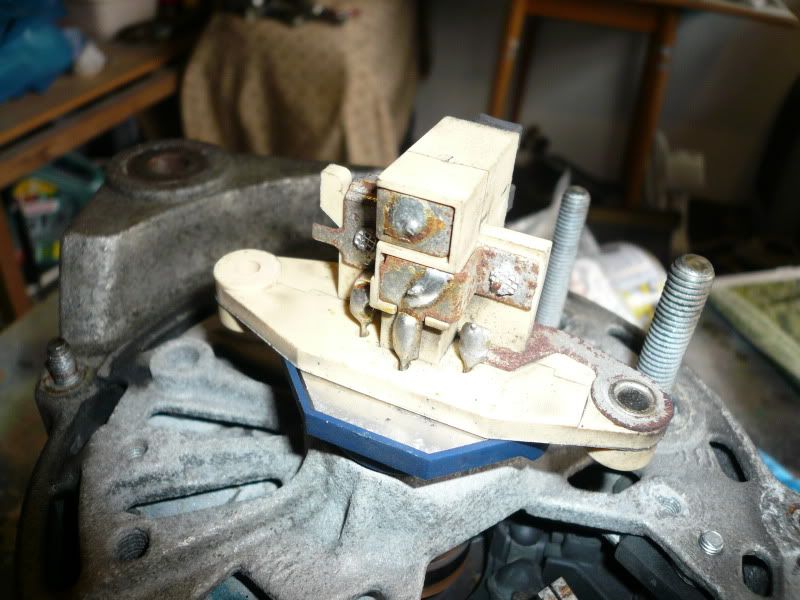

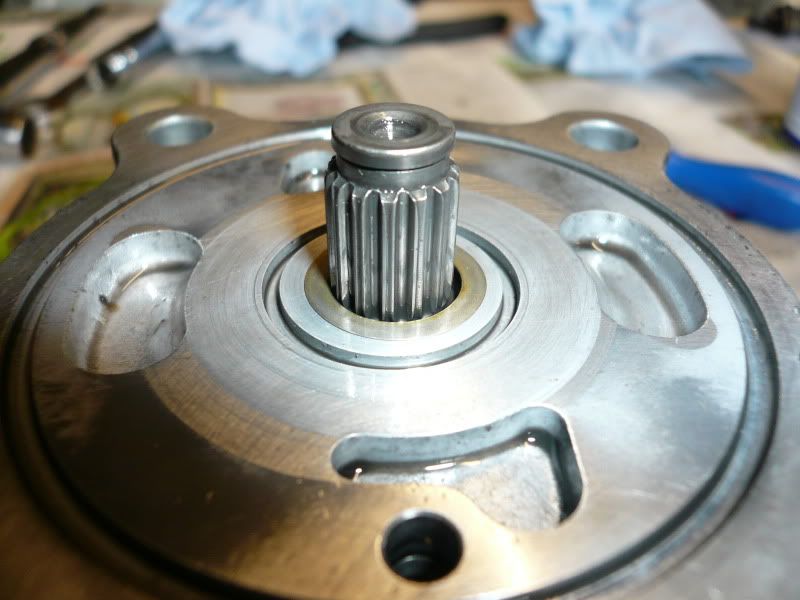
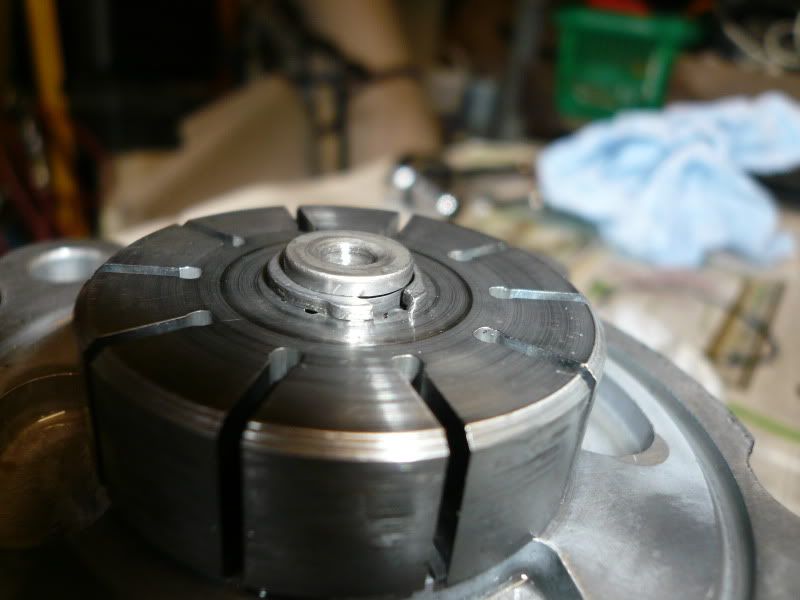
With the pulley and 'fan' off I could get to the screws holding the two halves together.
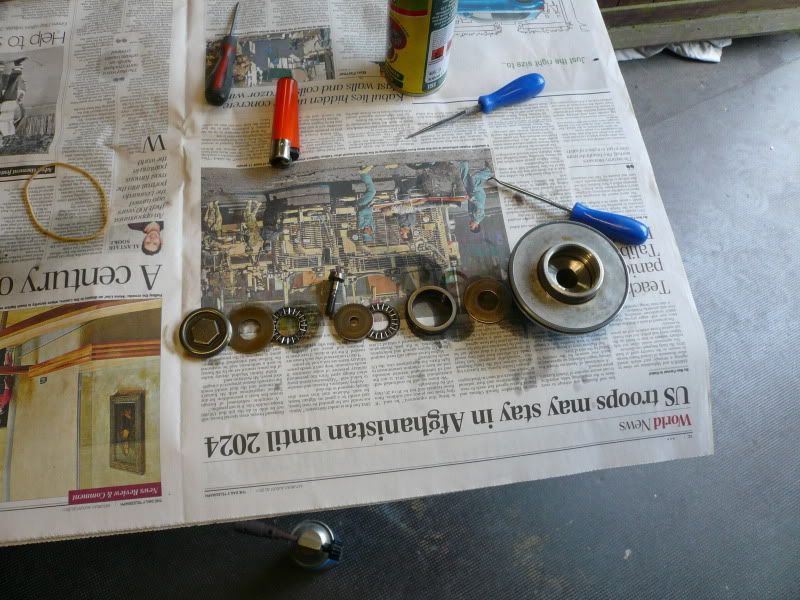
Once pulled apart the inside was pretty dirty/rusty so I cleaned everything with a wire brush, sandpaper, electrical cleaner and WD40.
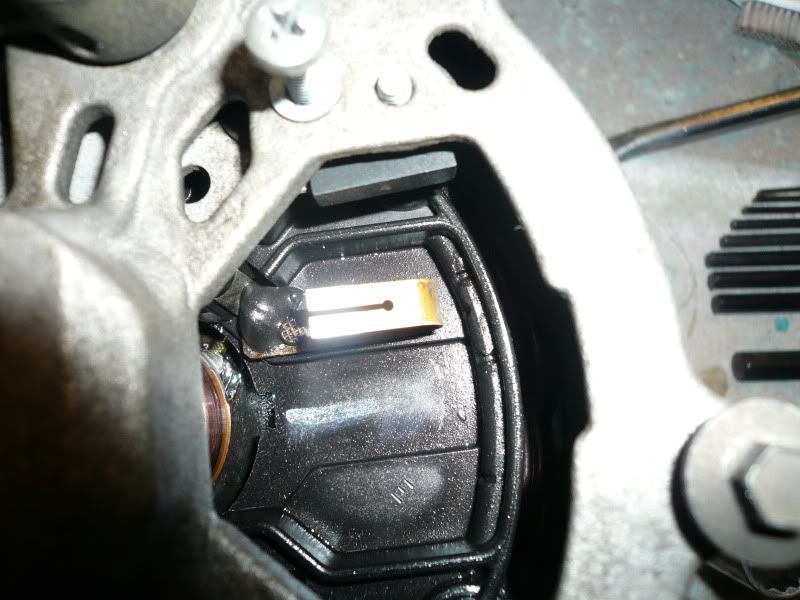
After looking at the some pictures I realised the noise suppression capacitor was missing too. A friend had a knackered alternator from his 328i which I thought I could salvage some bits from, as it turned out the capacitor is different so I had to solder a wire to it and fit a spade on the end. With that done it's pretty much the same as the one that should have been on there in the first place.

There was also a broken stud that holds the rear cover on so I got that out and replaced it with a small bolt.
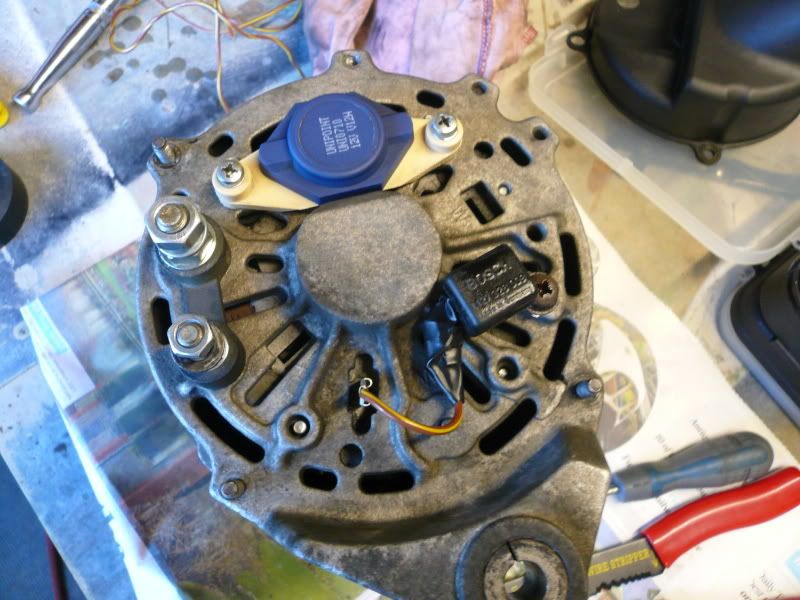
All put back in, fired up and woohoo
no more flickering.
Why I didn't do this when I had the heater box on the bench I'll never know :roll:
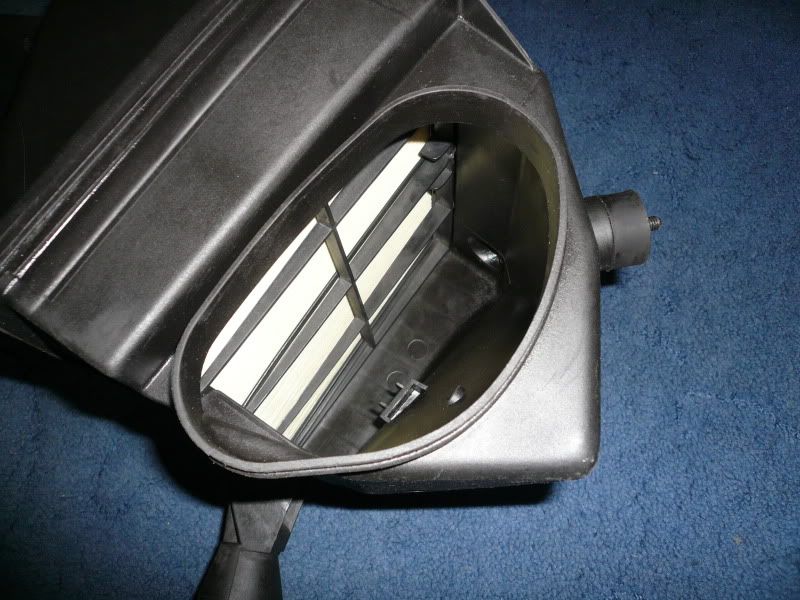
I took the old pollen filter out before I swapped the box over but didn't replace it at the time because I was being lazy/cheap. I wanted to actually get the thing in and working beforehand.
Decided to tackle this job and to be honest, it's really not bad at all.
New filter in place:
![]() img.photobucket.com/albums/v609/FiestaTom/Run
img.photobucket.com/albums/v609/FiestaTom/Run arounds/325i/Interior/Digital%20climate%20retrofit/P1020161.jpg[/img]
Compare with the old:
![]() img.photobucket.com/albums/v609/FiestaTom/Run
img.photobucket.com/albums/v609/FiestaTom/Run arounds/325i/Interior/Digital%20climate%20retrofit/P1020162.jpg[/img]
:shock: and that was only replaced a few years ago too (got the whole unit from a friends' car so know the history.)
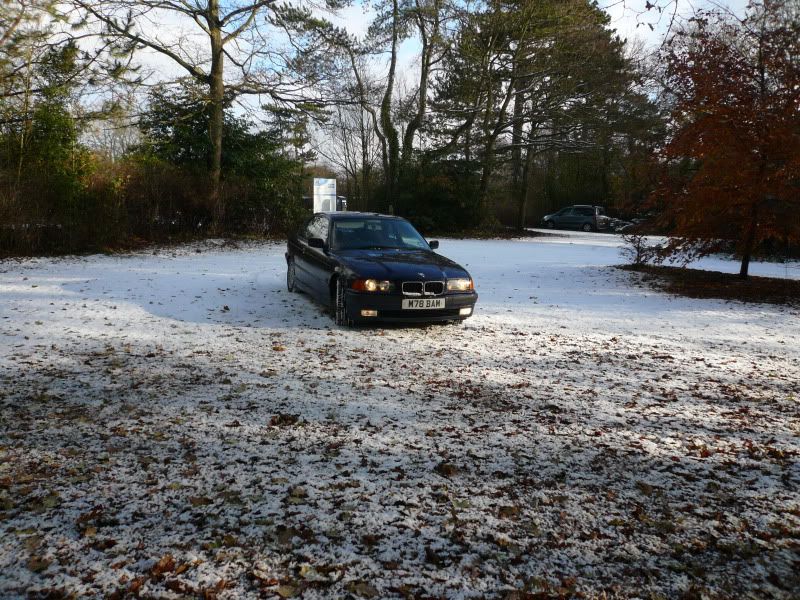
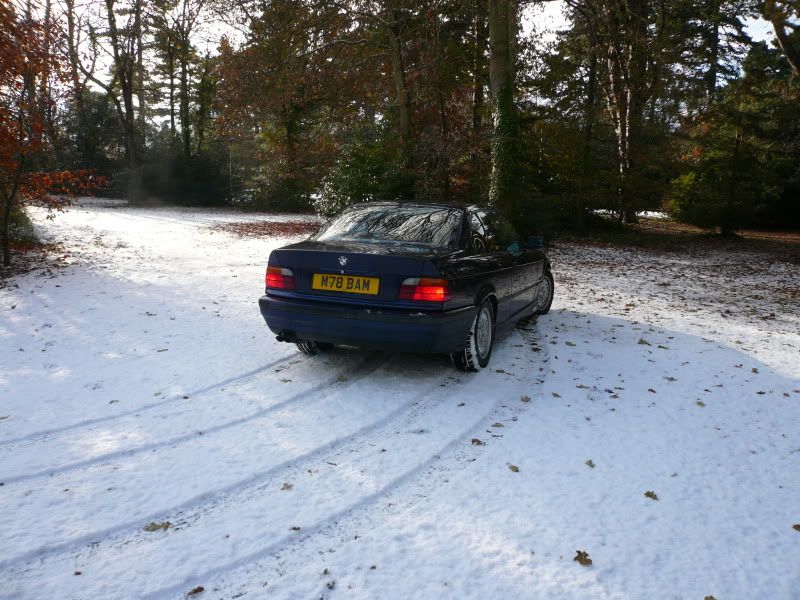
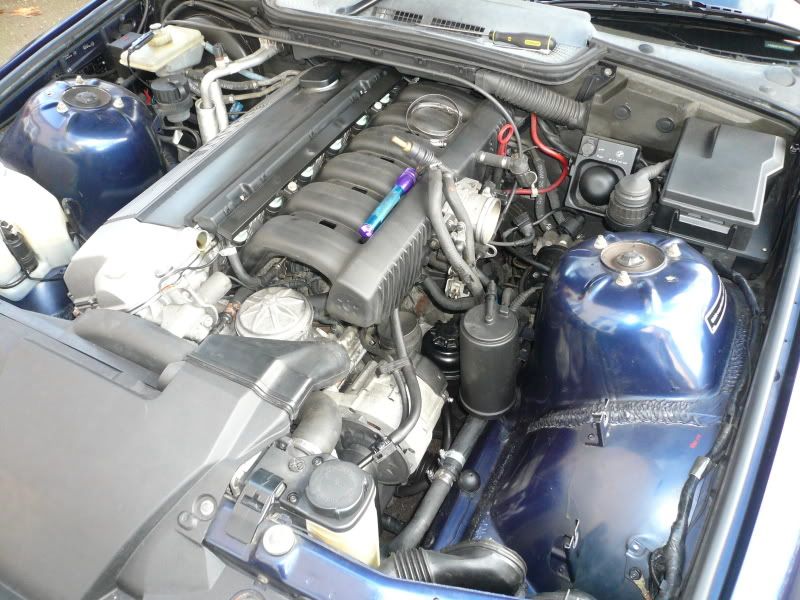
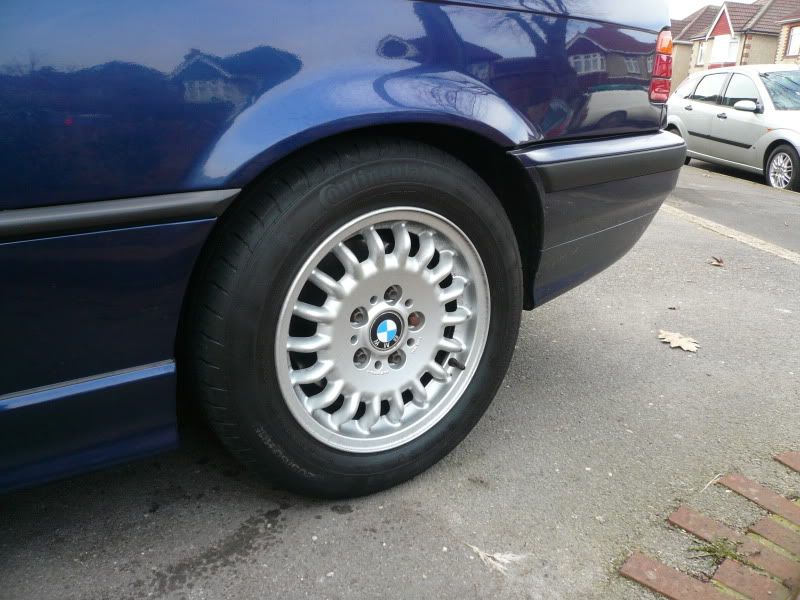
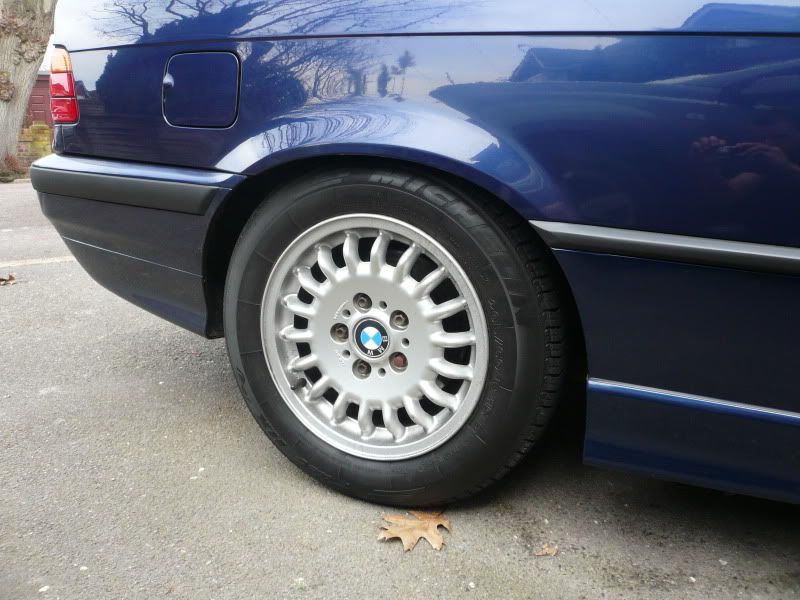
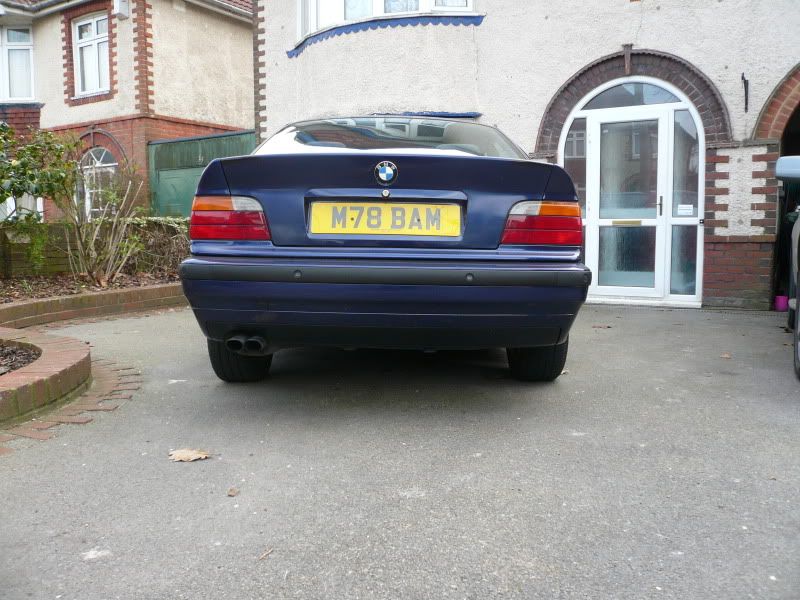
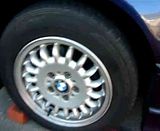
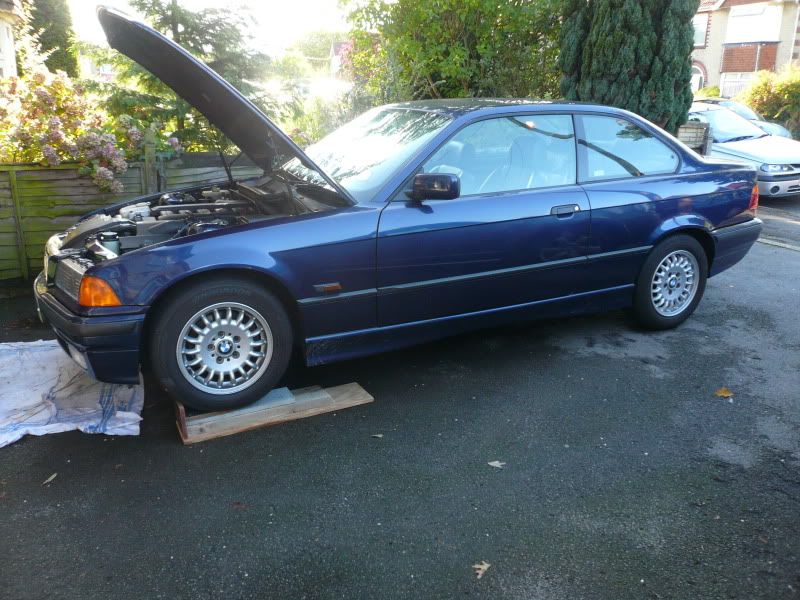
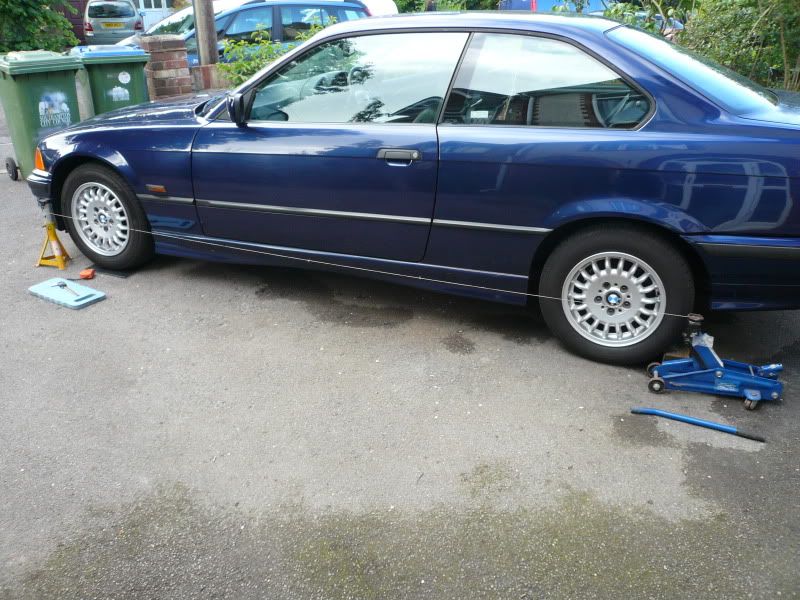
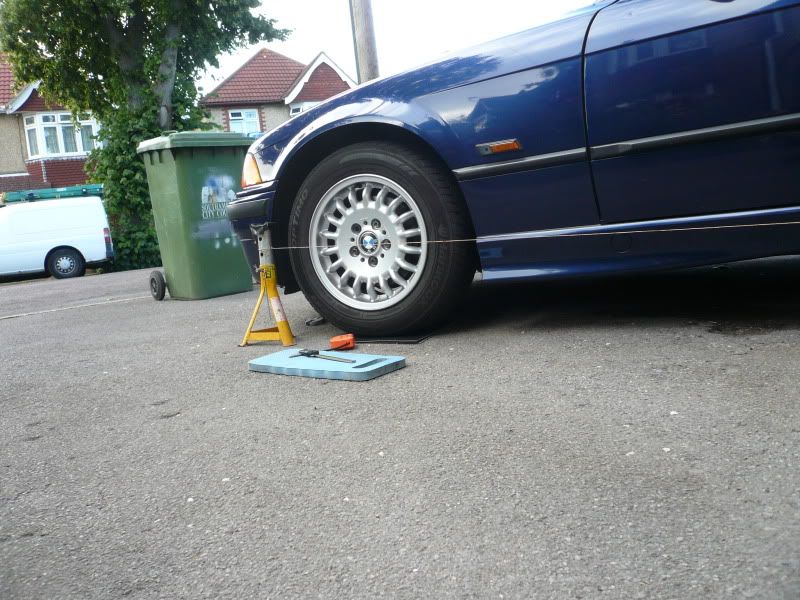
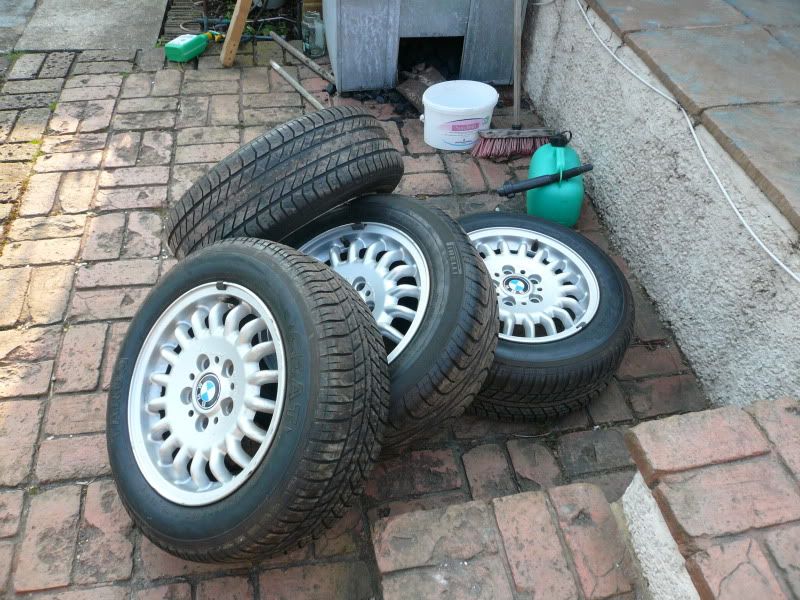
Lean mean German machine:
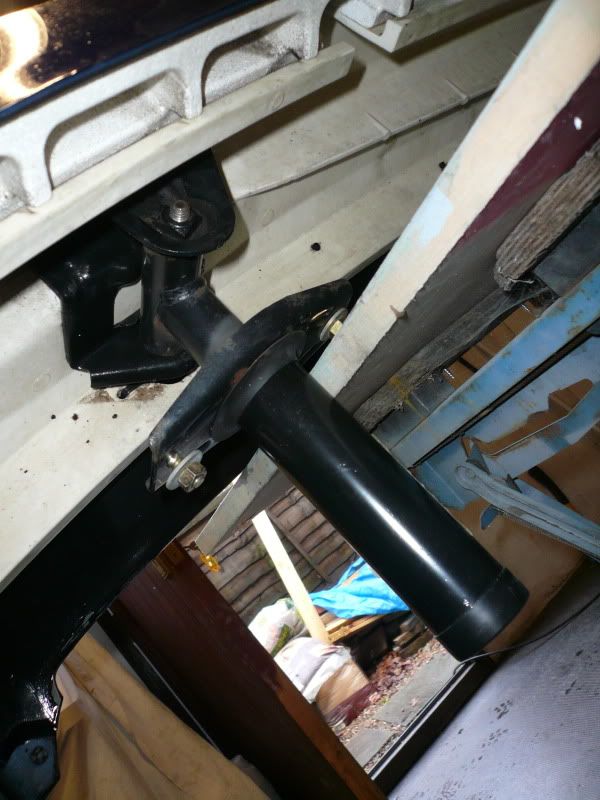
Like a lot of other 3 series out there, mine was leaning towards the drivers side...by 3cm
Walking up to the car in level car parks etc and noticing it was really starting to annoy me :lol:
(excuse the mismatched tyres, they're on my list.)
:roll: German engineering my
.
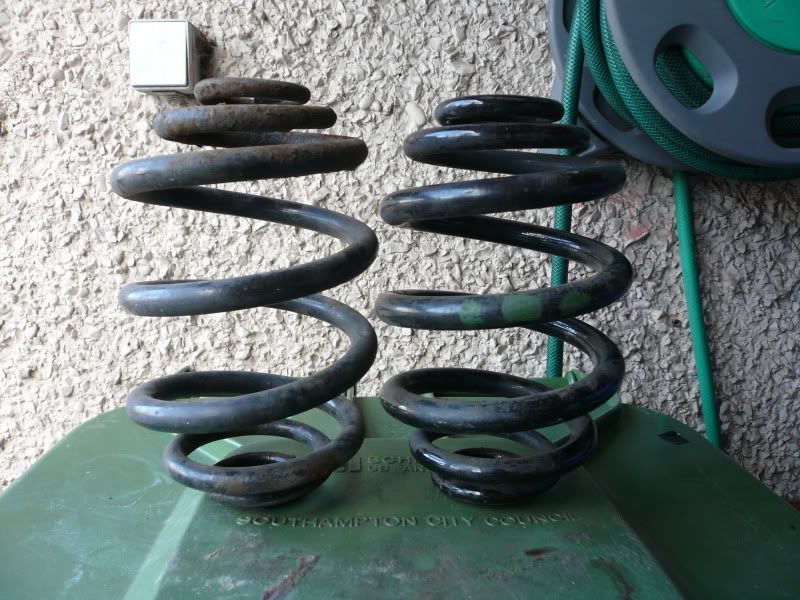
When I first got the car I found the drivers side rear spring was snapped so I replaced that with one from a saloon in the breakers yard; the car had obviously had a fair few new parts before it ended up in the scrap yard and the rear spring looked nearly new which is why I grabbed it. So at that point the rear springs were all fine and looked the same with regards the coils, thickness etc etc but had different markings on them for some reason (more on that in another post later.)
Anyway, my friend had a pair of rear springs apparently from a touring, most importantly they looked fairly clean and they matched (3 green stripes.) so I figured I'd put them on while I was doing this job.
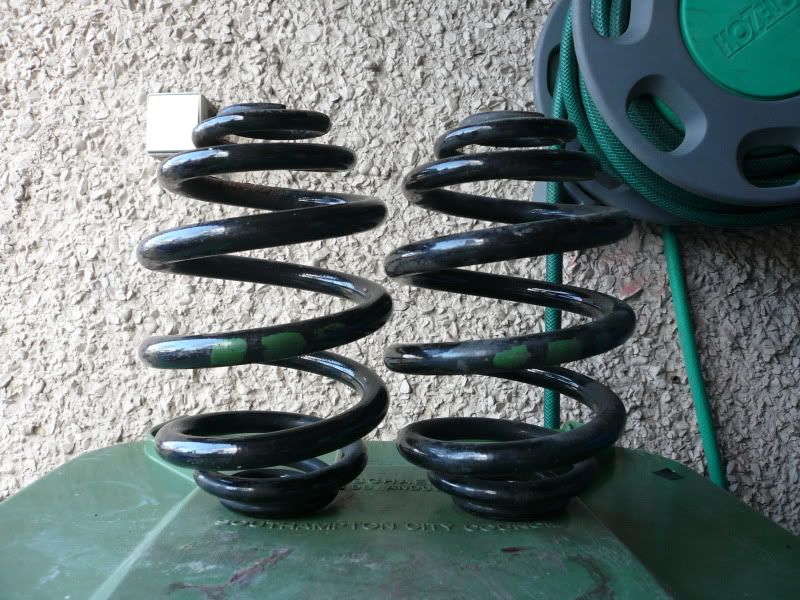
New on the right, ones that were on the car on the left:
I had an assortment of upper and lower spring pads so I fitted a thinner upper pad on the passenger side and thicker pad on the drivers side. There's only soo much you can make up in the upper pads as they, along with the top coil of the spring, locate on the 'nipple' on the chassis.
I also cut the centre from an old bottom pad and 'padded' the drivers side lower pad too.
Thinner (new) pad vs thicker original pad:
![]() img.photobucket.com/albums/v609/FiestaTom/Run
img.photobucket.com/albums/v609/FiestaTom/Run arounds/325i/Exterior/Mechanical/P1020170.jpg[/img]
Centre cut and added around base of existing lower pad:
![]() img.photobucket.com/albums/v609/FiestaTom/Run
img.photobucket.com/albums/v609/FiestaTom/Run arounds/325i/Exterior/Mechanical/P1020171.jpg[/img]
Drivers side (thicker set-up) on the right:
![]() img.photobucket.com/albums/v609/FiestaTom/Run
img.photobucket.com/albums/v609/FiestaTom/Run arounds/325i/Exterior/Mechanical/P1020172.jpg[/img]
All fitted:
![]() img.photobucket.com/albums/v609/FiestaTom/Run
img.photobucket.com/albums/v609/FiestaTom/Run arounds/325i/Exterior/Mechanical/P1020174.jpg[/img]
![]() img.photobucket.com/albums/v609/FiestaTom/Run
img.photobucket.com/albums/v609/FiestaTom/Run arounds/325i/Exterior/Mechanical/P1020173.jpg[/img]
![]() img.photobucket.com/albums/v609/FiestaTom/Run
img.photobucket.com/albums/v609/FiestaTom/Run arounds/325i/Exterior/Mechanical/P1020177.jpg[/img]
![]() img.photobucket.com/albums/v609/FiestaTom/Run
img.photobucket.com/albums/v609/FiestaTom/Run arounds/325i/Exterior/Mechanical/P1020175.jpg[/img]
![]() img.photobucket.com/albums/v609/FiestaTom/Run
img.photobucket.com/albums/v609/FiestaTom/Run arounds/325i/Exterior/Mechanical/P1020176.jpg[/img]
I'm hoping it settles a bit as at the moment it's 10mm higher in total but more importantly the difference now is only 5mm, which I can live with.
Another few updates rolled into one:
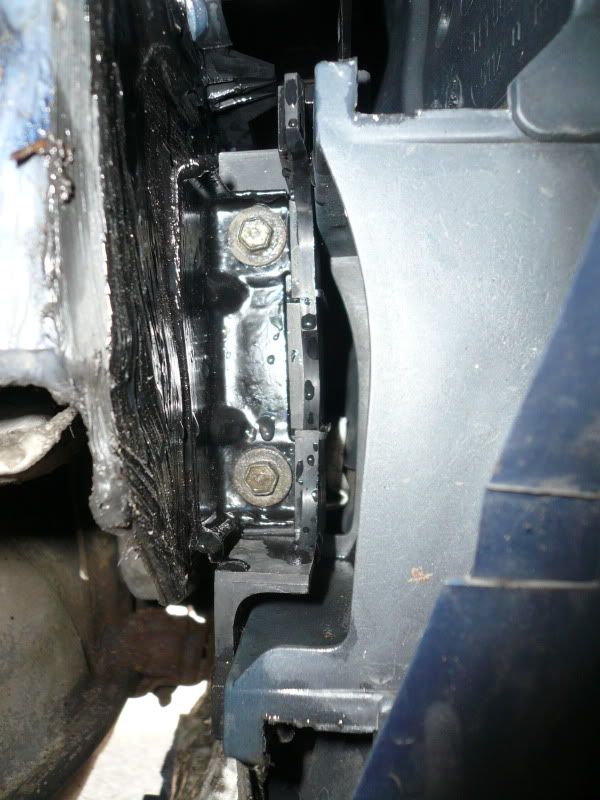
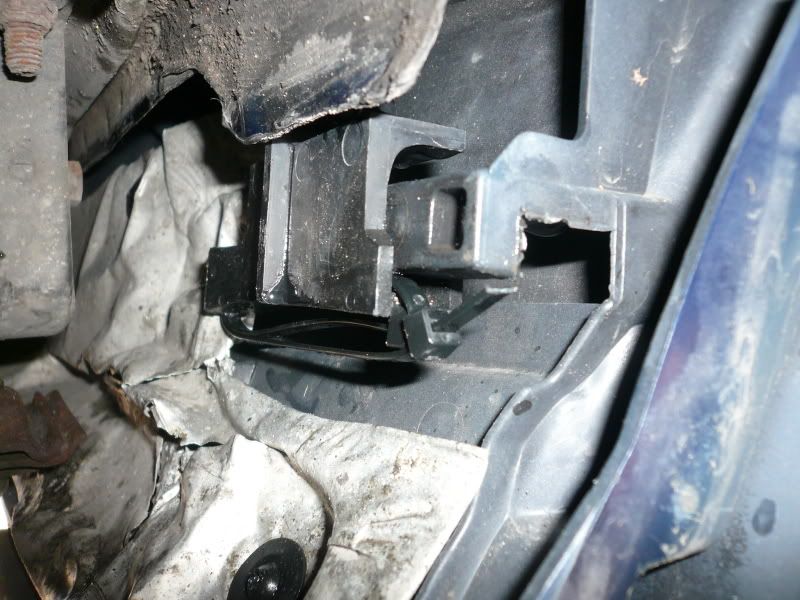
I adjusted the handbrake again :sarcastic to try and cure the rattle and while I was there fixed this little issue:
![]() img.photobucket.com/albums/v609/FiestaTom/Run
img.photobucket.com/albums/v609/FiestaTom/Run arounds/325i/Exterior/Mechanical/Underbody%20cleaning/P1010462.jpg[/img]
Using a bit of old exhaust sheilding I had laying around I made this little washer:

Not that it was making any noise, it just bugged me.
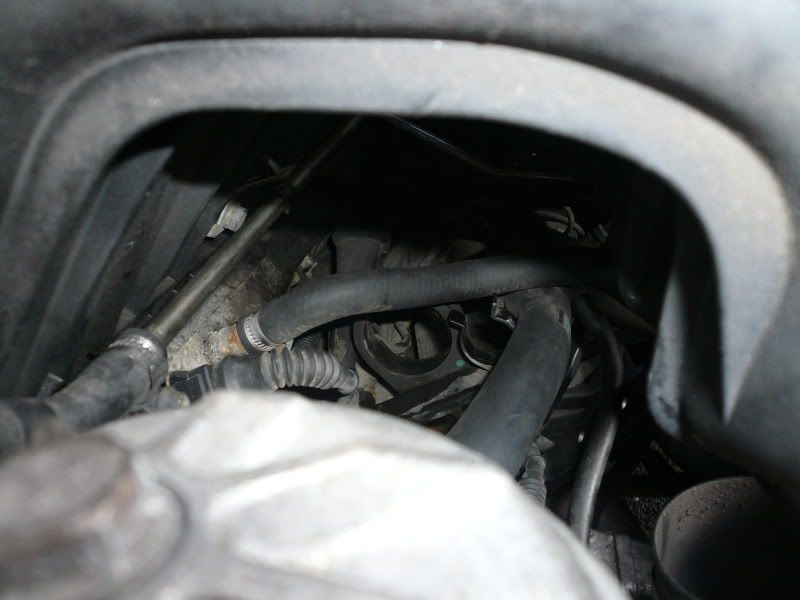
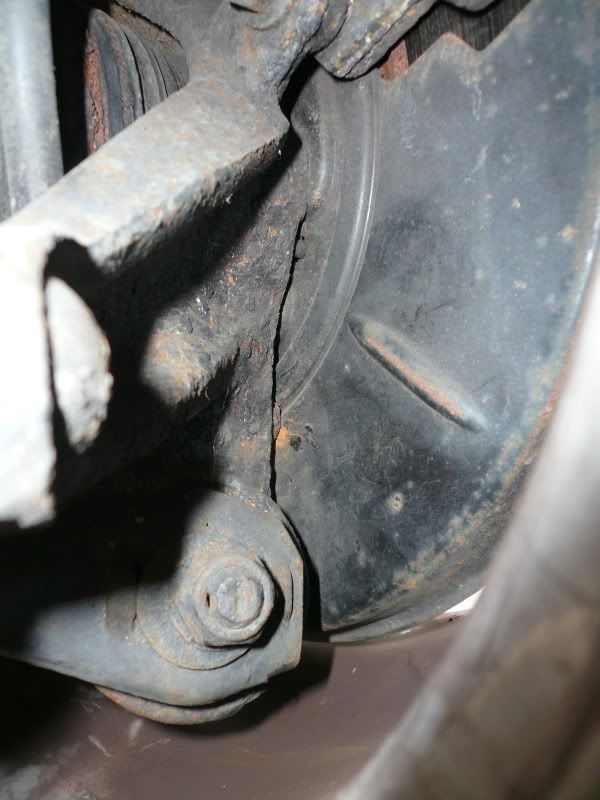
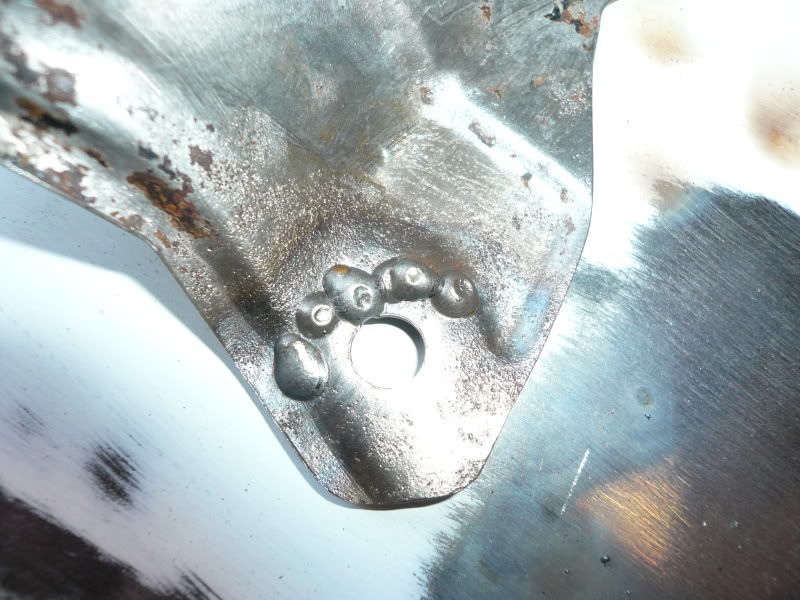
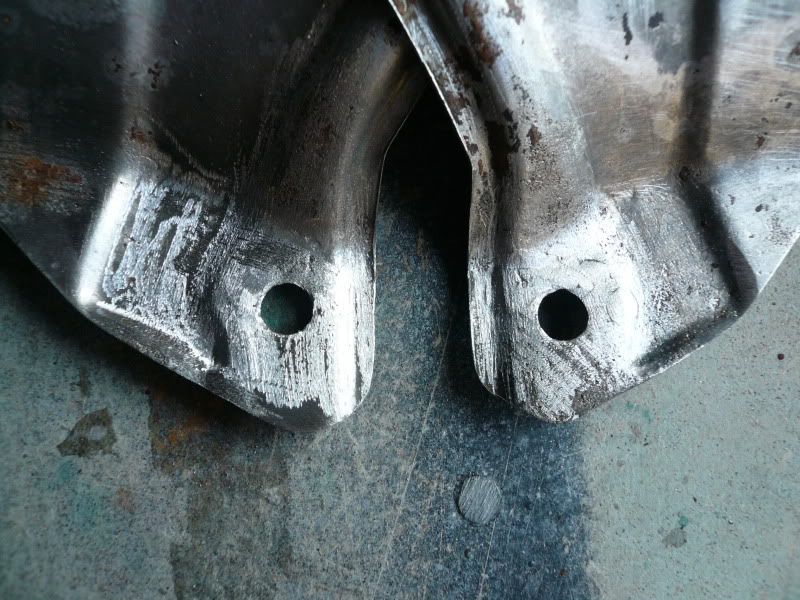
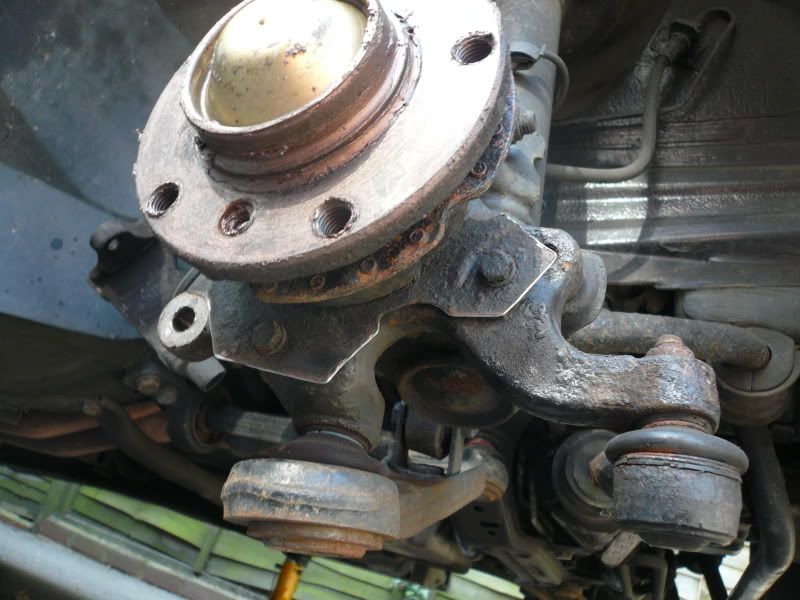
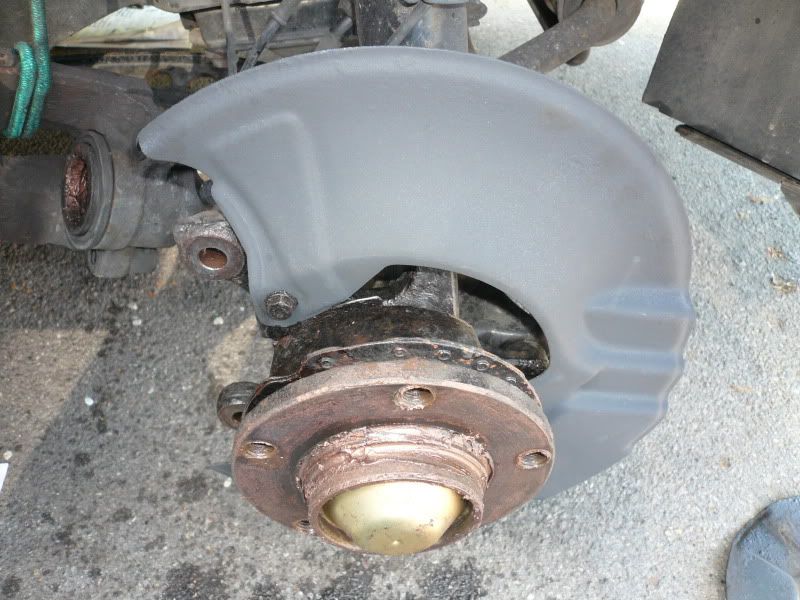
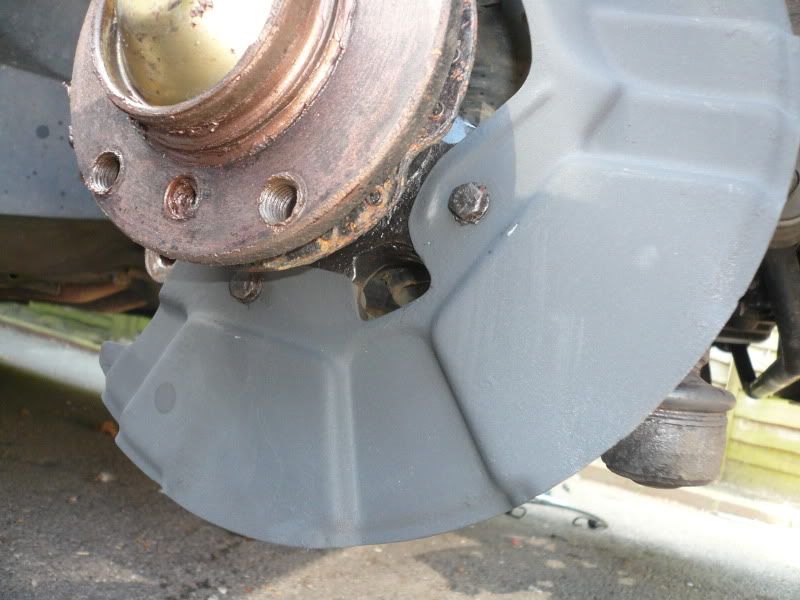
Then I set about finding where various rattles were coming from and discovered this (video):
:sarcast//imgic
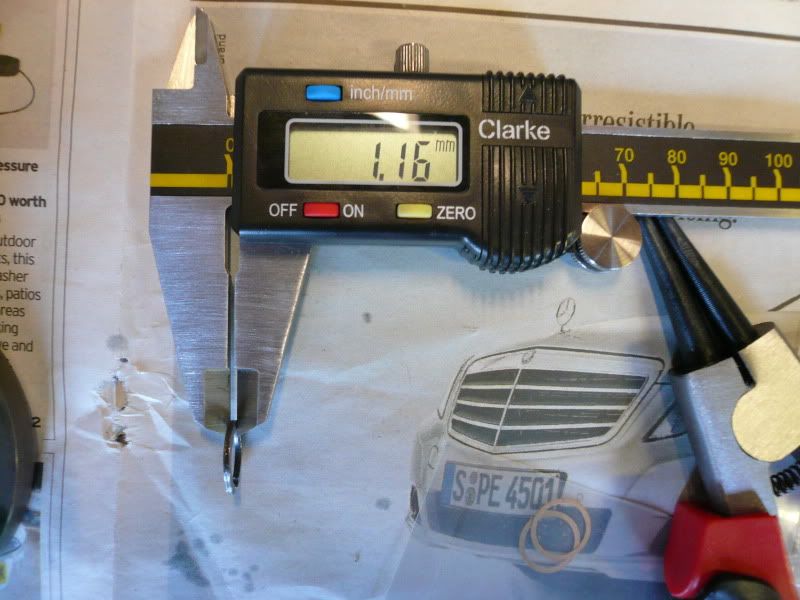
Turns out there is a crack in each backing plate so they're on my list of things to fix once I've found out exactly what needs to be done with regards with removing the hub/bearing.

-----------------------
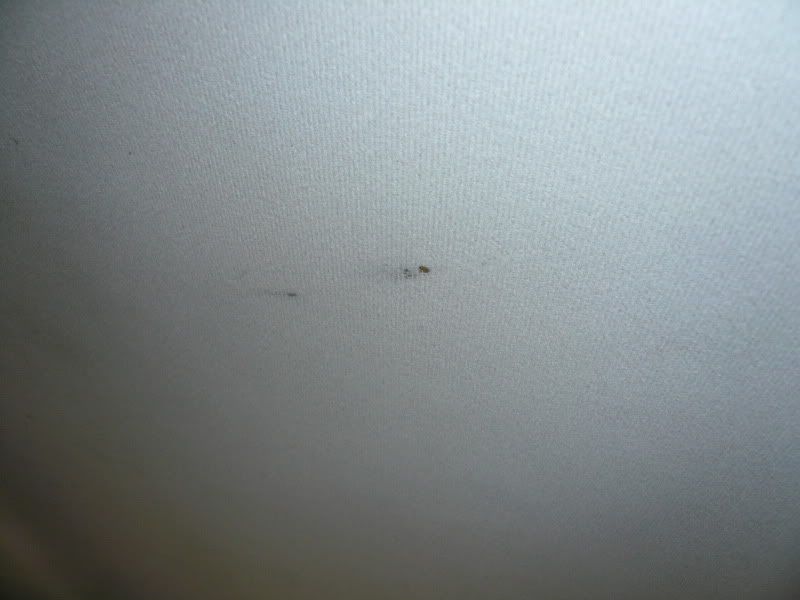
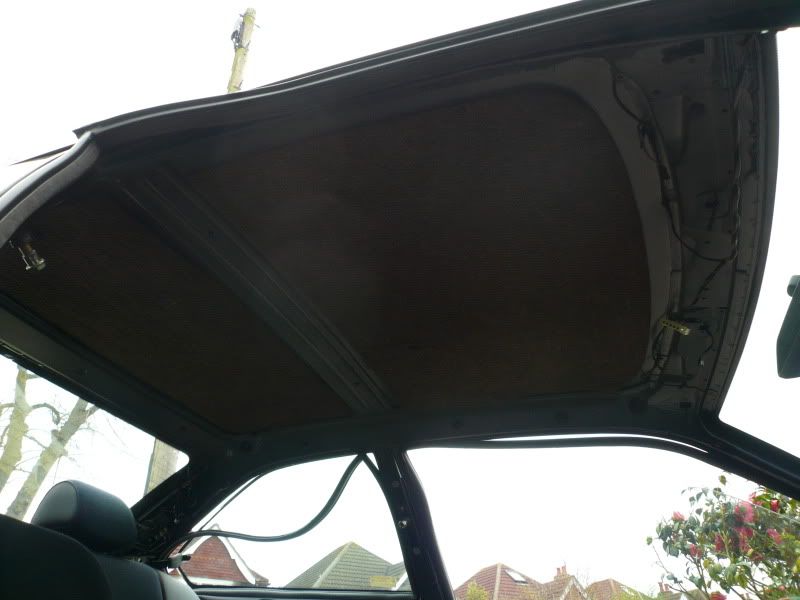
Well with a sagging rooflining and purple parcel shelf, the car was starting to look like boudoir :sarcastic
The headlining started to sag last summer and it had a small hole too (from some fag ash I assume) so it was time to replace it.
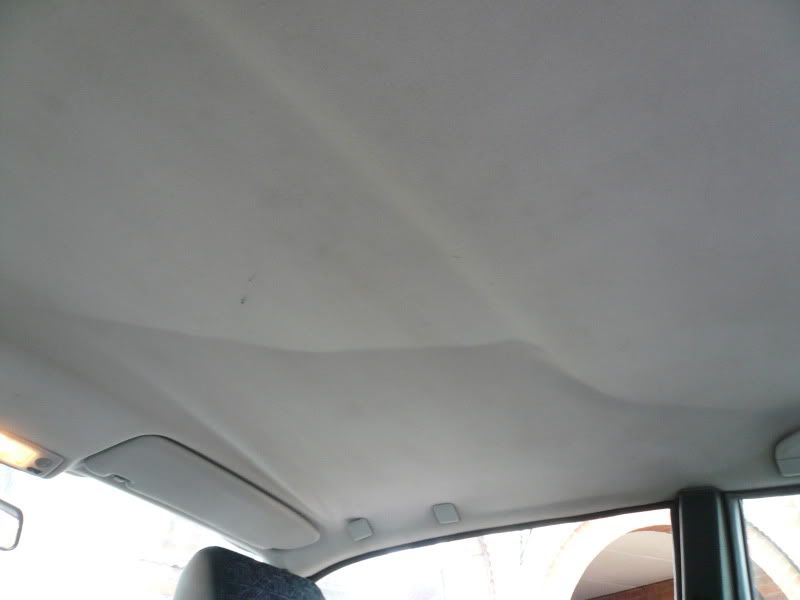
Out with the old:
In with the new:
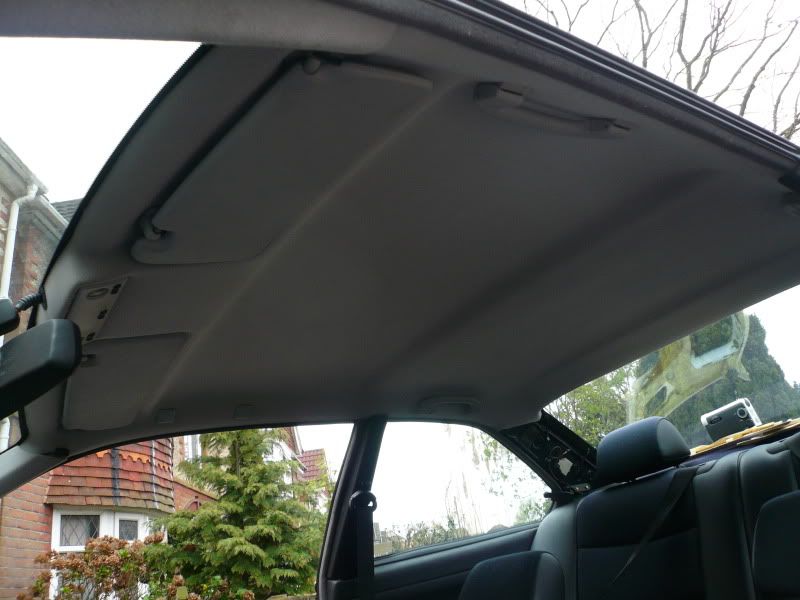
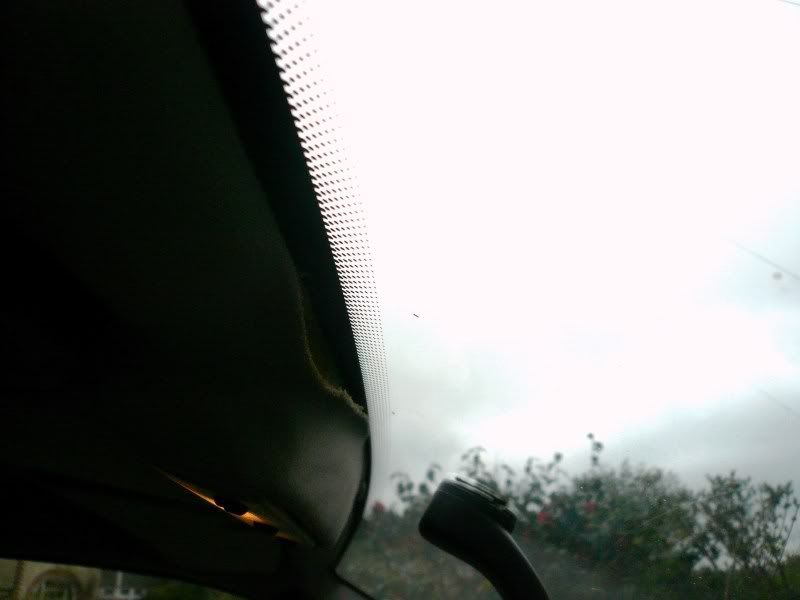
Oh yes, and I also fitted an auto-dimming mirror and routed the wires while it was all out. Not wired in but all positioned and ready.
It was real case of 'square peg, round hole' getting the new one in (the old was bent to take out as it was being binned.)
I ended up taking the wheel off to get the space needed but all was well
As I'd removed it all from another car, I fitted the updated sun visor fittings:
Old:
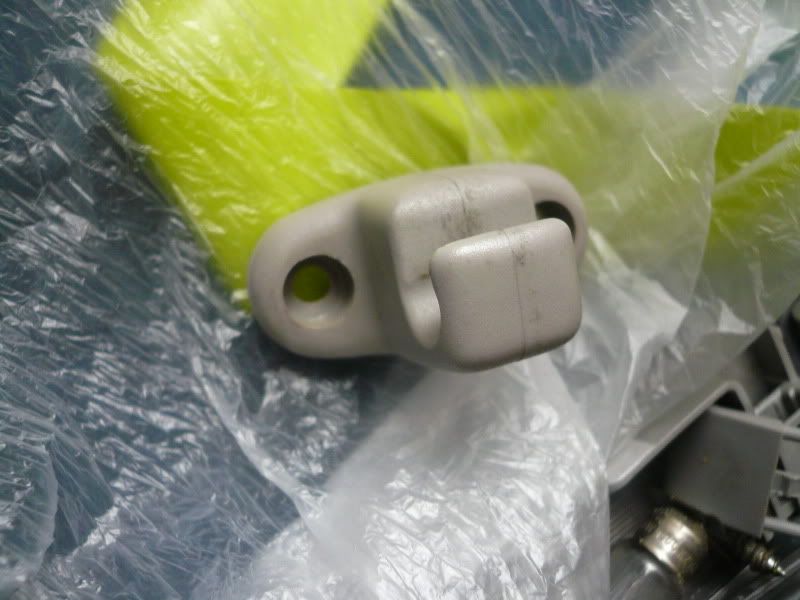
New:

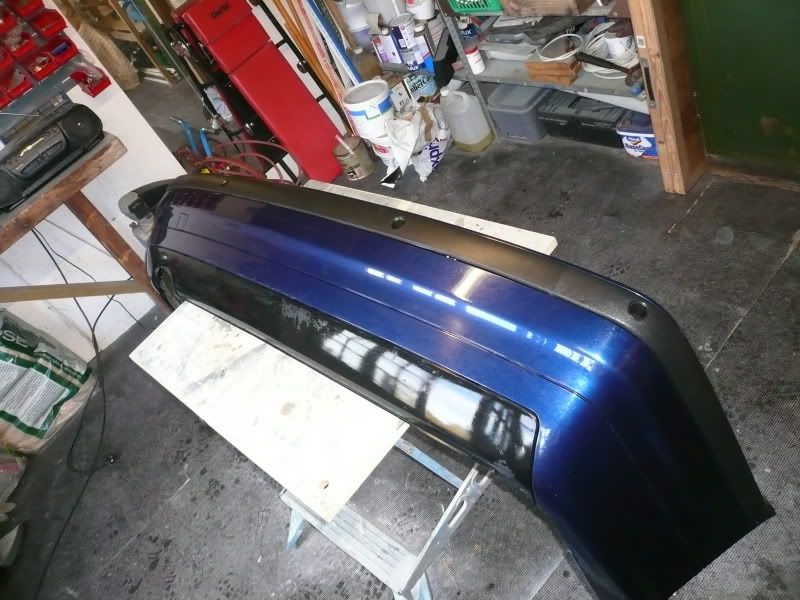
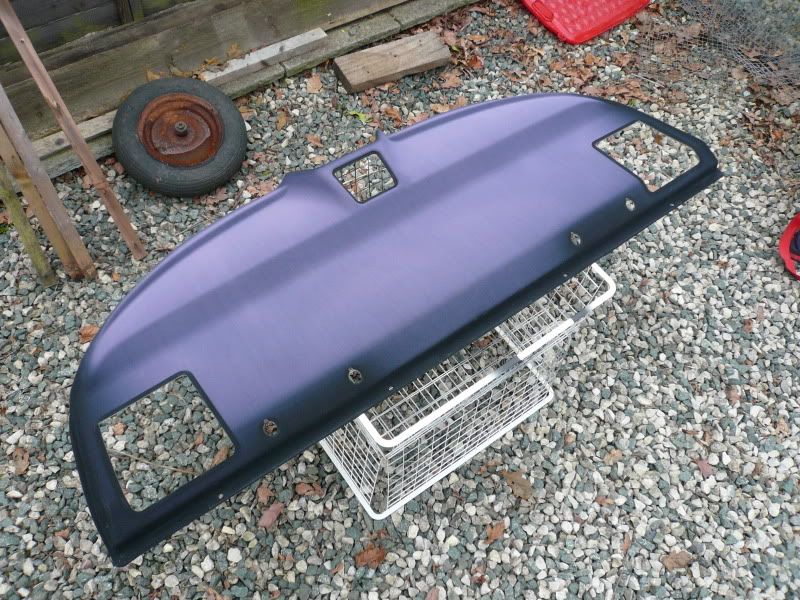
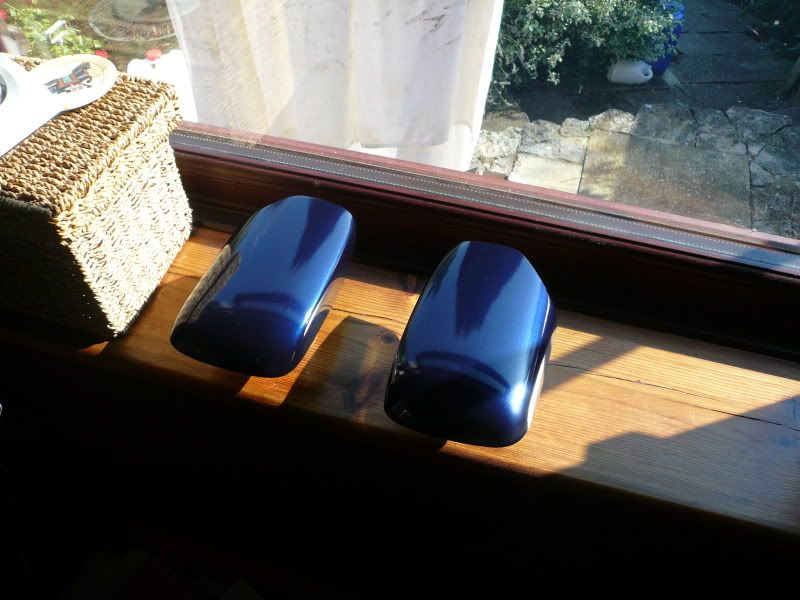
Now for the parcel shelf; it had faded and turned a nice shade of purple:
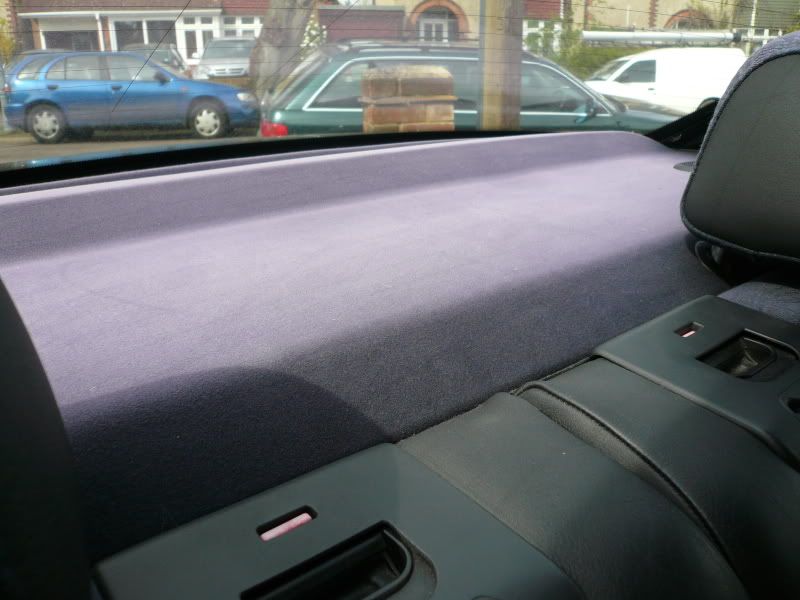
Again, I removed another one with the 3rd brake light but it still had to be painted:
:sarcastic
After it was all cleaned I used about 4 light coats of matte black paint. Between coats I used a clean paint brush to brush the surface and smooth things out before the next coat. Otherwise the paint builds up on the ends of the fibres and you get a very rough finish.

(This was after the 3rd coat.)
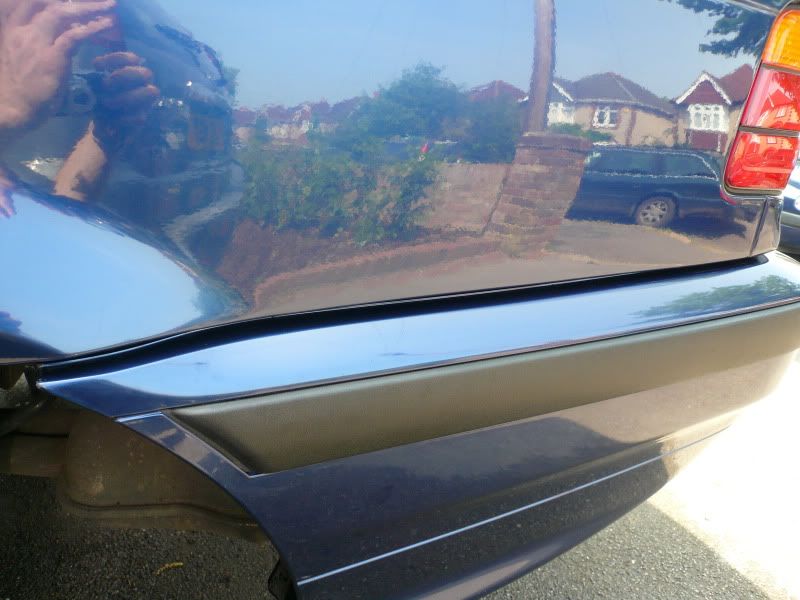
Now comes the fun part; as I was fitting a 3rd brake light I wanted to do something
clever with the rear screen by using some black sticky back plastic to make the 'frame' that the factory glass has.
I traced it from the car I got the light from and then cut it out of the plastic:
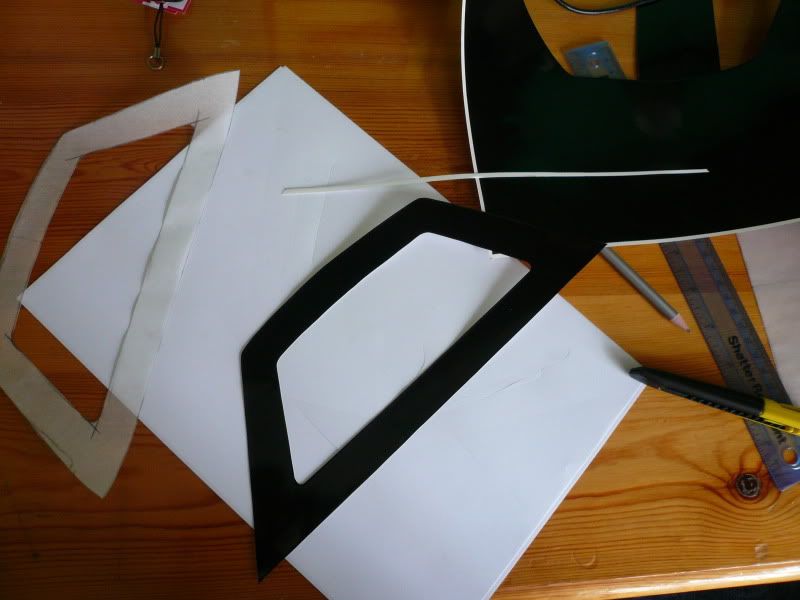
The plan was to stick this to the inside of the glass but it's in a very hard to reach place so I sprayed some soapy water to give me a chance to adjust it.
Clever huh? I thought so.
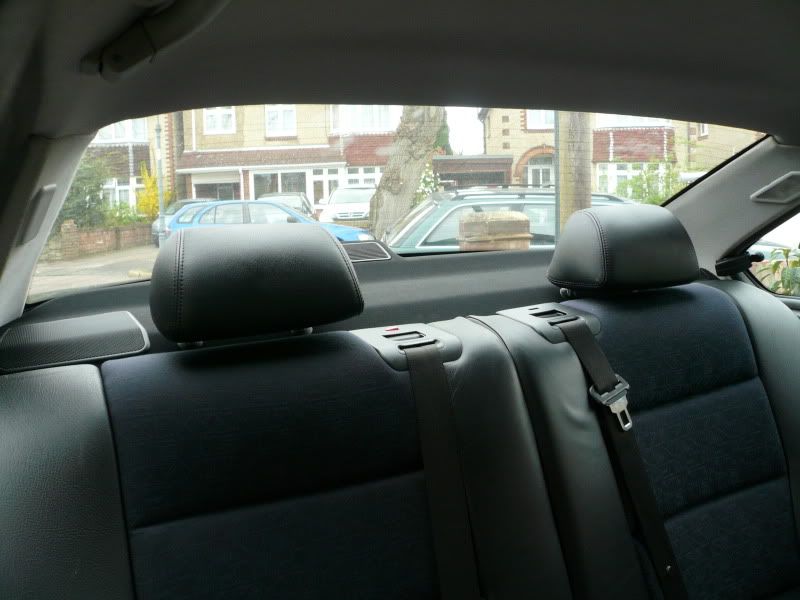
Anyway, the theory of using some water worked a treat and I could slide the shape around to get in the perfect position...but the water made the glue go cloudy and when I went to fit the brake light, the pressure it puts on the screen moved and wrinkled the plastic :frown I tried all sorts but gave up in the end.

It doesn't look as bad I feared from the outside, you'd have to be really fussy to notice the lack of 'frame' on the glass.
All back together, the head rests should give you a clue as to my next modification

-------------------
Well I
was going to swap it all over in one go but couldn't wait :hihi
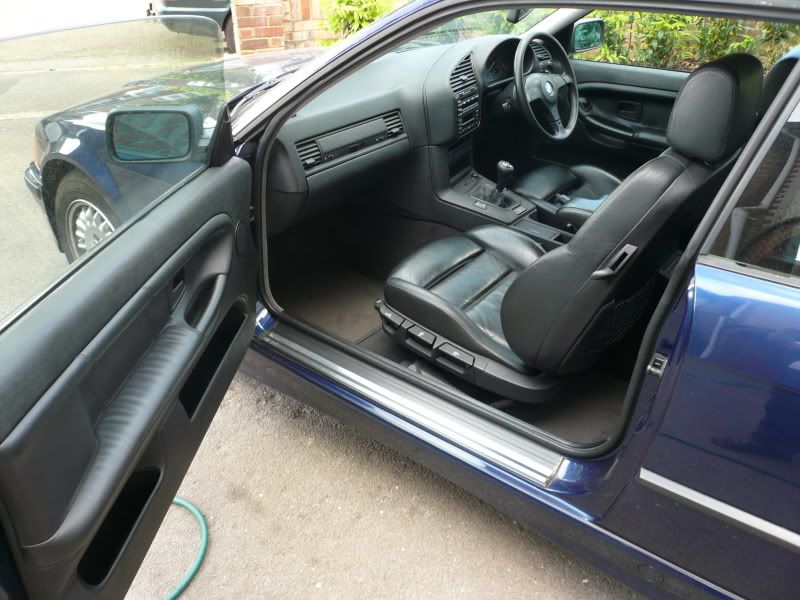
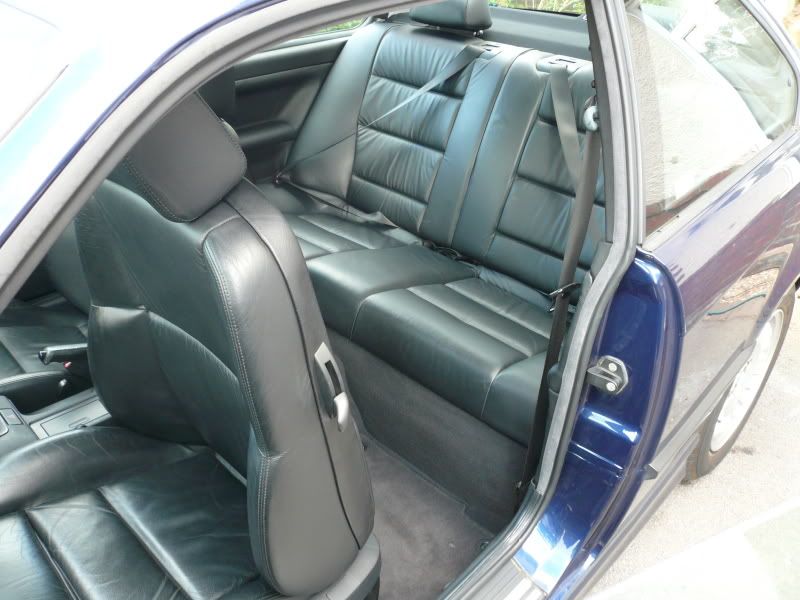
I cleaned and conditioned the rear seats and door cards and fitted them, so I have leather in the back and half leather in the front :silly
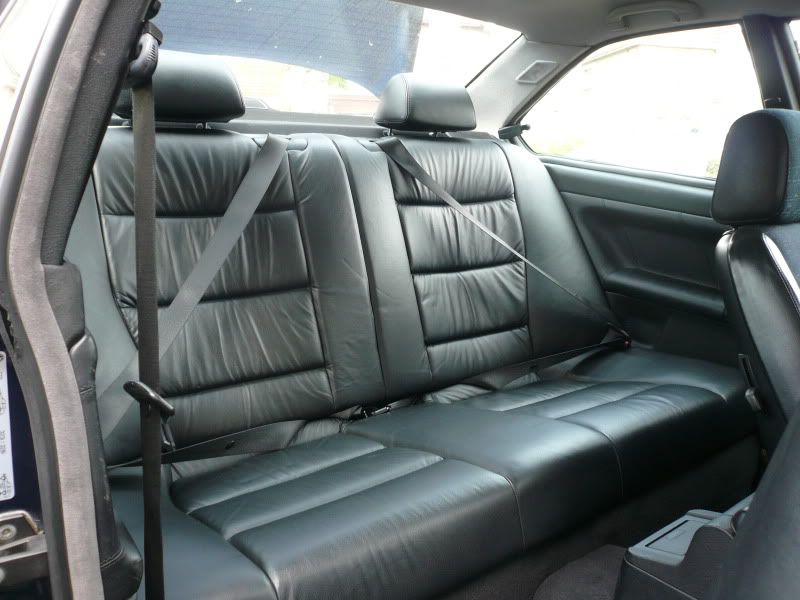
I also re-glued the top sections on the front door cards (the piece that normally comes off and stays clipped to the door.) ready for when I fit them.
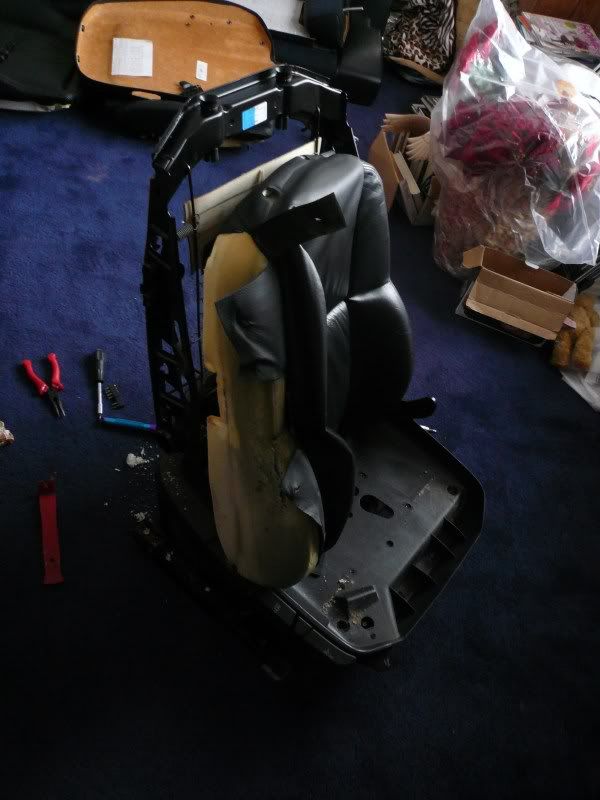
Also decided to make a start on the front seats; I'm doing the same thing I did on my previous seats only with a slight difference being that they're facelift seats and constructed differently.
I've finally mastered the art of removing the seat bases without destrying the 'christmas tree' clips. You need to crack them down the centre so they can squeeze together enough to remove. Saves a trip to the dealer :thumbsup
So I stripped both seats down, took the bases and backs off in order swap them around (to even out wear.) but before that I wanted to check and repair the foam on the bolsters. This means peeling the leather off the clips around the edge, which is slighly tricky when you cut your finger tip the previous day :embarrassed
The drivers seat back was pretty good, only the usual creases and seperation in the foam underneath. Some spray glue and tape later and I put the leather back on and swapped the backs over:
The drivers seat base looked pretty good externally but you could feel the foam was weak underneath. The foam rubs against the metal frame and wears away completely to leave you with a little hole:

Insert a trimmed piece of foam to pad it back out:

Use some
upholstery tape (read: really strong sticky gaffa tape.) to seal it:

Then pull the leather back over:
No more
dip.
Next up is to scuff-master them, put them back together, swap the pre-tensioners overs from my old seats and get them in the car.
While I wait for my scuffmaster dye I realised there were another few jobs needed on the seats.
Firstly the bases were a bit chipped/rusty so I cleaned them off and painted them:

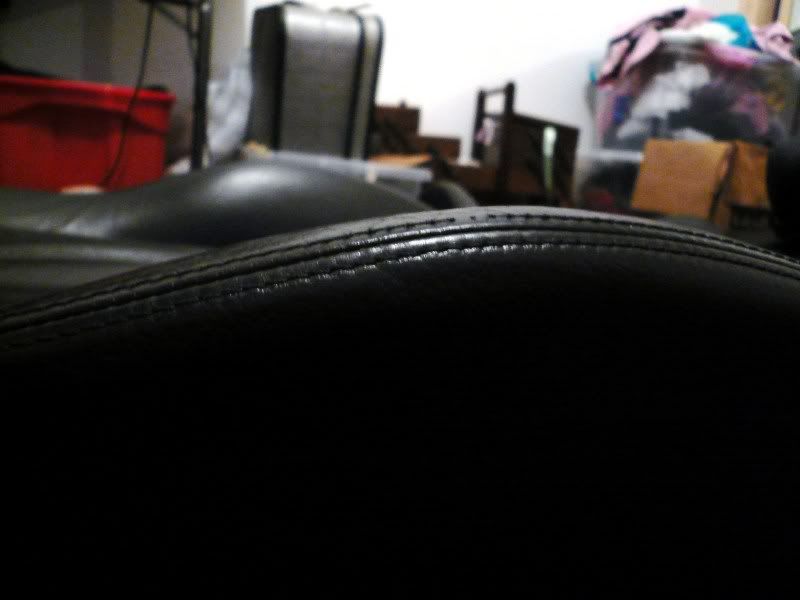
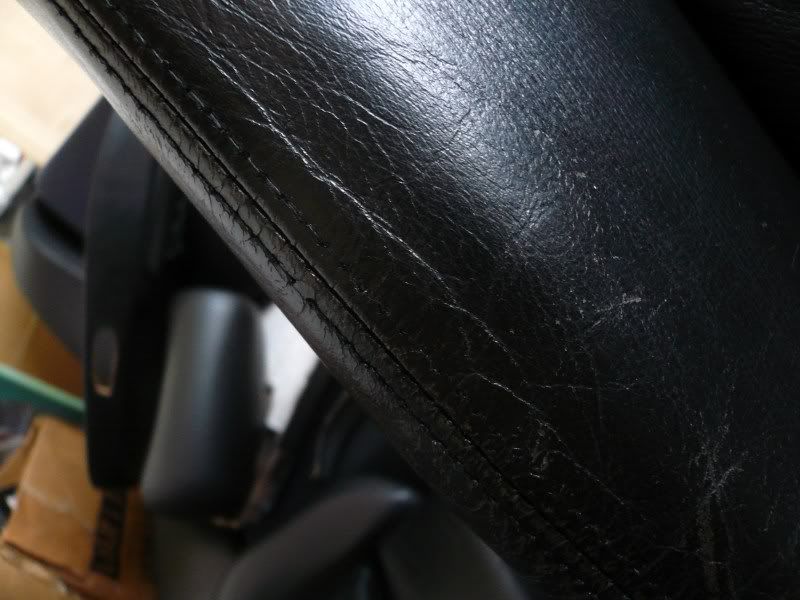
Then once I'd cleaned and condition the leather I realised the stitching had worn in places, so I peeled the leather back off and got my sewing kit out :hihi
Before:

See the two missing stitches.
After:

Same with the front:
Peel the leather from it's tabs:
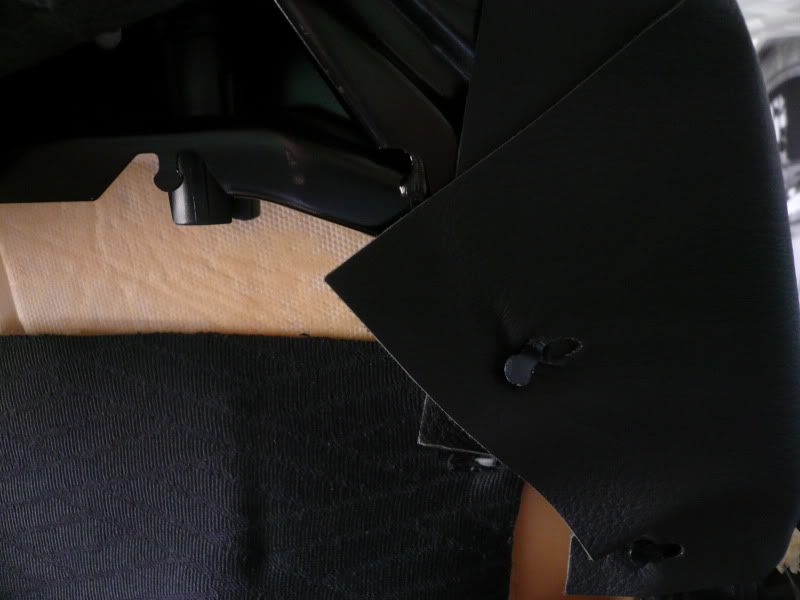
This took me a long time as I'm no seamstress :hihi

I think we're all up to date now...finally


 CCTV? Wait for the same car to turn up again? OK it may take a while but think of the satisfaction that could be had...
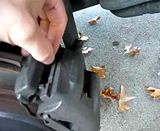


 2) I had an idea.


 but he's sending it to me soon.