jamesd1972
Club Retro Rides Member
Posts: 2,921  Club RR Member Number: 40
|
|
Sept 20, 2022 6:52:11 GMT
|
|
You need someone to hold the other end of your pole. Could have got there much quicker than on your own.
Anyway, in for the long haul on the BMW ? Looks like good progress but is there much to do now ?
James
|
| |
|
|
|
|
teaboy
Posted a lot
   Make tea, not war.
Posts: 2,126
Member is Online
|
|
Sept 20, 2022 20:21:00 GMT
|
You need someone to hold the other end of your pole. Could have got there much quicker than on your own. Anyway, in for the long haul on the BMW ? Looks like good progress but is there much to do now ? James Cheers James. Sadly I'm having great difficulty in getting the lovely Doctor interested in holding my pole, but I will keep trying. As you say, there has been some progress and any progress is good but I still have plenty to do on it, I've really just been messing around up to now. I shall attempt to be a bit more diligent in future. |
| |
|
|
teaboy
Posted a lot
   Make tea, not war.
Posts: 2,126
Member is Online
|
|
Sept 20, 2022 21:09:29 GMT
|
Oh I forgot to mention, despite the cack-handed assembly it has not fallen over, yet... 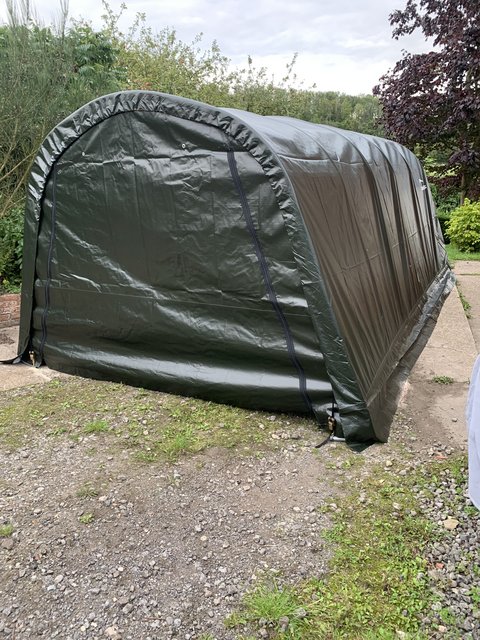 That has to be worthy of a French Fancy, or two. I prefer the lemon ones. 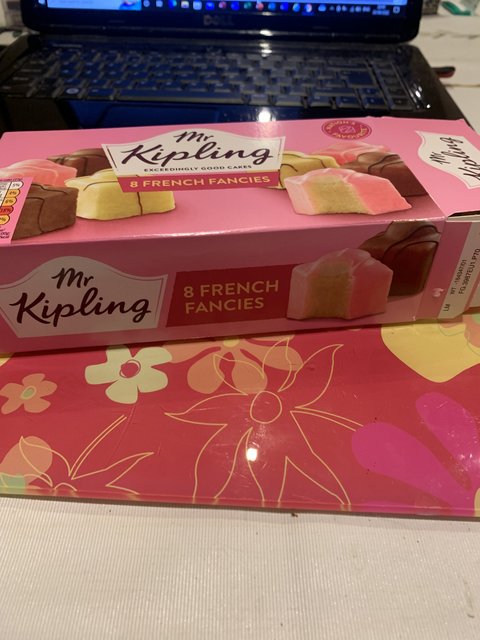
I haven't had the opportunity to do anything inside it yet as I had to go to the docs after work. The real Doctor, not the lovely Doctor. He said I'm past my best and I should slow down a bit. I don't know about that, If I go any slower time will start to run in reverse. |
| |
|
|
bstardchild
Club Retro Rides Member
Posts: 14,976
Club RR Member Number: 71
Member is Online
|
|
Sept 21, 2022 19:28:02 GMT
|
Looking for something steady to do after work today there was my new battery box. It had two holes in the bottom for grommets and, as it was said grommet holes which killed the original one I decide that they needed removing. is 'removing' a hole actually a thing? I'm not sure but, nevertheless, I shall attempt it. First cut a couple of discs. 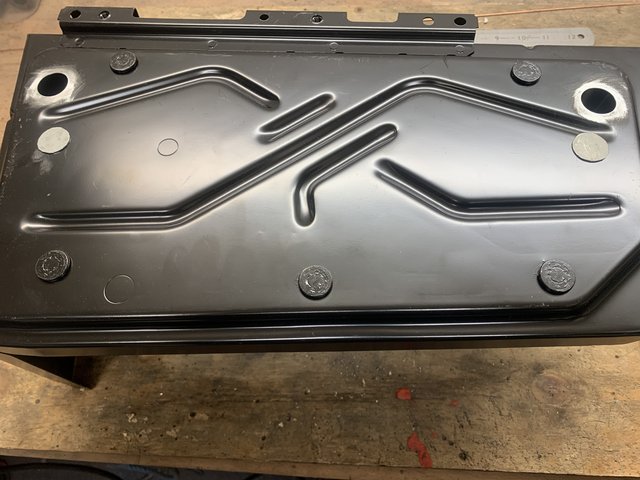 Then weld them in quite badly, did I mention that I can't see what I'm doing? 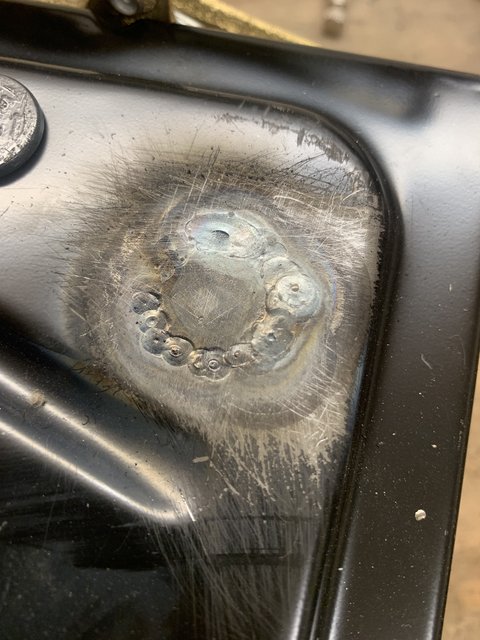 Have you tried a cheater lens for the welding helmet - I got sick and tired of putting on glasses behind a welding helmet and then taking them off for anything further than a foot away - cheater lens was brilliant for me |
| |
|
|
teaboy
Posted a lot
   Make tea, not war.
Posts: 2,126
Member is Online
|
|
Sept 21, 2022 22:32:31 GMT
|
Have you tried a cheater lens for the welding helmet - I got sick and tired of putting on glasses behind a welding helmet and then taking them off for anything further than a foot away - cheater lens was brilliant for me Actually I already have a cheater lens in there, it used to be fine but it has probably gone weak or something... I might go for a higher magnification one. I wear varifocals and the reading bit is at the bottom of the lens. You don't tend to be looking through the bottom part of your specs when welding, hence I got the cheater. Besides all that, I cant even see to read through the bottom part of my specs anymore so.. I think what I'm trying to say with all that waffle is, I think I might be past my prime.  |
| |
|
|
thomfr
Part of things
  Trying to assemble the Duett again..
Posts: 695
|
|
Sept 22, 2022 7:01:49 GMT
|
|
Have the same bugs.. New pair of vario focus contact lenses (whopping money btw!) did do the trick and it is really a relief to be able to read in not perfect light again.. ;-)
Thom
|
| |
73' Alfa Giulia Super
64' Volvo Duett
65' Volvo Duett
67' Volvo Amazon 123GT
09' Ford Focus 1.8
20' VW ID4
71' Benelli Motorella
65' Cyrus Speciaal
The difference between men and boys is the price of their toys
|
|
teaboy
Posted a lot
   Make tea, not war.
Posts: 2,126
Member is Online
|
|
Sept 24, 2022 19:58:47 GMT
|
What's happening, dudes? There has been a job that I have not been looking forward to because I wasn't sure that I would be able to do it on my own. It is something which has prevented me from doing a lot of other jobs. Now really was the crunch, it had to be done. The job? Removing the fuel tank. Now, as things went the tank happened to be absolutely full to the brim with one million dollars worth of Shell V-Power and this is what had been making me avoid the job. A friend of mine volunteered to come over to help me and today was the day. I had done some prep work by removing the prop shaft and handbrake cables last night. In order to get psyched up for the job the first thing to do was to go to Ten Acres.  After a proper fry up it was time to get on with it. My friend had brought a power probe which he used to power up the fuel pump whilst I was underneath with three jerry cans and a funnel. We got most of the fuel out but because of the saddle shape of the tank there was still, according to my calculations, about 20 litres left in there. We decided that we could handle that so we removed the fixings and pulled it out. It wasn't a straight drop down because the filler neck curved over the suspension but it was straightforward enough to just wiggle it out.  All these breather pipes go through a tunnel in the chassis leg. I taped them together with some masking tape and they slipped through easily when the tank came down.  I emptied the rest of the fuel out through the filler neck into the jerry can (which was empty because the lovely Doctor had just got a free full tank of fuel in her car, the lucky girl!). That left me with a filthy looking empty fuel tank.  Which I turned into a less filthy looking one.  I also removed then cleaned all the rest of the fuel filler and emissions type gubbins.  You will have to believe me when I say I cleaned it all up because I didn't take a picture. Whilst all this was going on, the postie turned up with this.  It has the chassis number of the old banger on it so it doesn't get confused who it belongs to. After all that I was ready for a treat.  Mmmm, strawberry tart! Actually, I had two strawberry tarts. I like tarts!  |
| |
|
|
Darkspeed
Club Retro Rides Member
Posts: 4,883
Club RR Member Number: 39
|
|
Sept 24, 2022 20:12:17 GMT
|
|
You are what you eat !
|
| |
|
|
|
|
|
Sept 24, 2022 20:18:18 GMT
|
|
|
| |
|
|
teaboy
Posted a lot
   Make tea, not war.
Posts: 2,126
Member is Online
|
|
Sept 24, 2022 20:37:20 GMT
|
This is not just custard, this is... I will try to remember but I don't go in M&S that often, cheers Dude. |
| |
|
|
teaboy
Posted a lot
   Make tea, not war.
Posts: 2,126
Member is Online
|
|
Sept 26, 2022 20:48:45 GMT
|
Now that the tank is out I can get in to plug weld the back of the jack point strengthener but I haven't done that yet because of this. 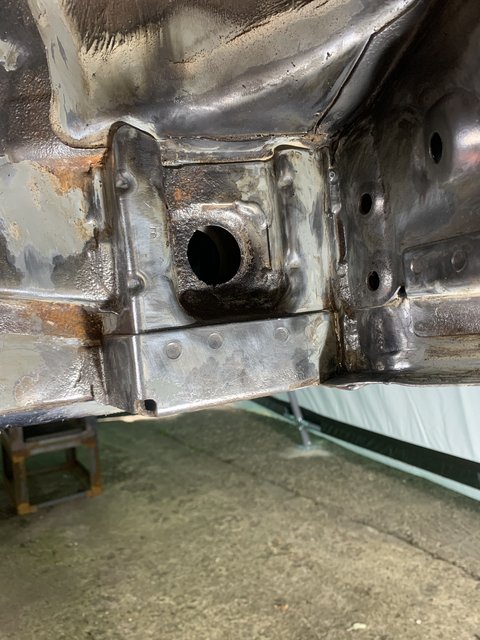 The hole in the boxy bit is where a grommet goes to allow the pad wear and ABS sensor wires to come through and it is a bit frilly. The boxy thing is quite hefty 2mm steel because it is where the chassis V brace bolts to. It is called a V brace because it is, amazingly, V shaped. There is one of those boxy things on each side and the apex of the V bolts to the diff cradle. In order to get to the frilly hole I decided to remove the boxy bit. (I hope I'm not confusing anyone with all this technical terminology).  I made a meal of removing it because firstly I wanted to do as little damage to it as possible and secondly, I wasn't completely sure how it was fixed on. Anyway, I should have just gone at it because I couldn't get it off without doing some damage to it.  I ended up losing some tabs off the side of it and the (almost) square hole in the middle took a beating because there was a weld in each corner. First job was to resurrect the boxy thing with some new tabs and a remade squareish hole.    It should be ok, I'm going to run it through the blast cabinet before it goes back on as the underside is a bit pitted but it is plenty strong enough due to the thickness of the steel. 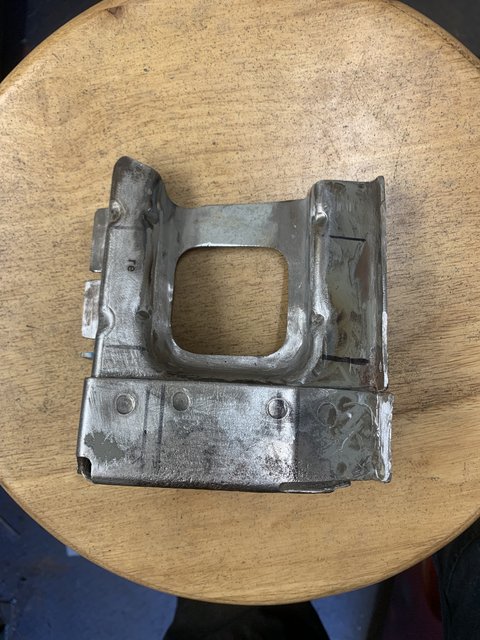 Now I could think about the bit I wanted to repair in the first place, the round hole. It is not a flat piece, the hole part is recessed. I had a rummage through my shed and found a spacer from a four post lift pulley and an old wheel bearing race, which I had saved for just such an occasion. I drilled the hole with a step drill before I used my scrap along with a BFH to form the recess.  Unfortunately, the hammering made the hole stretch and it ended up far too big. I wasn't going to let that happen a second time so I just drilled a pilot hole but...  That left the metal unable to stretch enough and it ripped through. The third one I drilled a Goldilocks hole. Not to big, not too small but just right.  The arrow is to remind me that one side of the recess needs to be pushed deeper than the other. Like this.  It turned out reasonably well, I think.   The hole had pulled slightly off centre but because it was slightly undersized I was able to open it up with the die grinder and the angry end then finish it off with a file. The grommet fits like so.  It also needs another bit knocking into it because the tabs on the boxy thing are slightly stepped.  It is going to go in here but it is currently covered in wet weld through primer.  That deserves a cream slice, I think.  Cheers. |
| |
|
|
bstardchild
Club Retro Rides Member
Posts: 14,976
Club RR Member Number: 71
Member is Online
|
|
Sept 27, 2022 6:03:18 GMT
|
1. Impressive replication fabrication 2. Stunning cakes/pastries 3. Who knew that from the humble beginnings of an oil tank the path would lead to here?  |
| |
|
|
jamesd1972
Club Retro Rides Member
Posts: 2,921  Club RR Member Number: 40
|
|
Sept 27, 2022 8:51:22 GMT
|
|
***Don't mention the Oil Tank****
Some great fabrication going on, cakes well deserved.
James
|
| |
|
|
teaboy
Posted a lot
   Make tea, not war.
Posts: 2,126
Member is Online
|
|
Sept 27, 2022 20:29:02 GMT
|
Right then, I mentioned that the bottom of my boxy thing was pitted.  I decided to replace the blasting media (glass) in my blast cabinet because it was as old as the hills and wasn't much good at cleaning things. This is the old stuff. 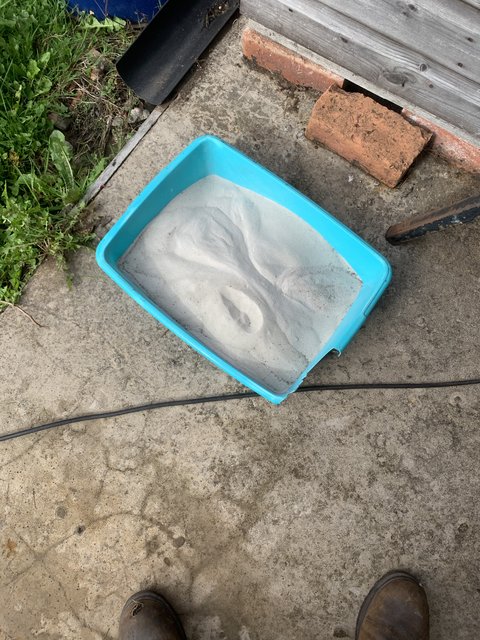 The new stuff looks like that but it is inside the cabinet now. For some reason I didn't take a picture of the boxy thing after it was blasted. I did decide to do a couple more repairs to it once it was cleaned up. There was a hole in one of the factory welds.  Obviously, I couldn't leave it like that.   I also decided to replace another one of the tabs which was cut whilst removing it from the car. 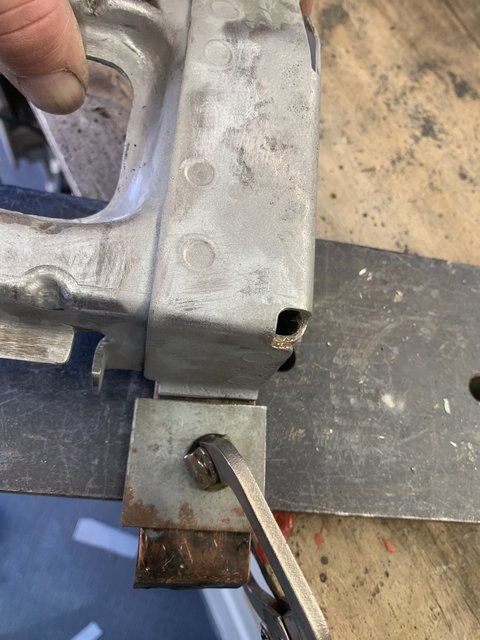  You will have to take my word for it that I trimmed it back down to size because there is no picture. After all this procrastination, it was time to weld on that piece I made.  Yay it fits! I just blobbed it on without much regard to distortion so it is not the neatest repair ever.  But most of it is going to be covered up anyway, so f-it!  I think the main reason that I forgot to take some of the pictures that I normally would have is that I have banged my head on the diff that many times whilst crawling under the car that I feel punch drunk. I didn't forget to have a vanilla slice though. 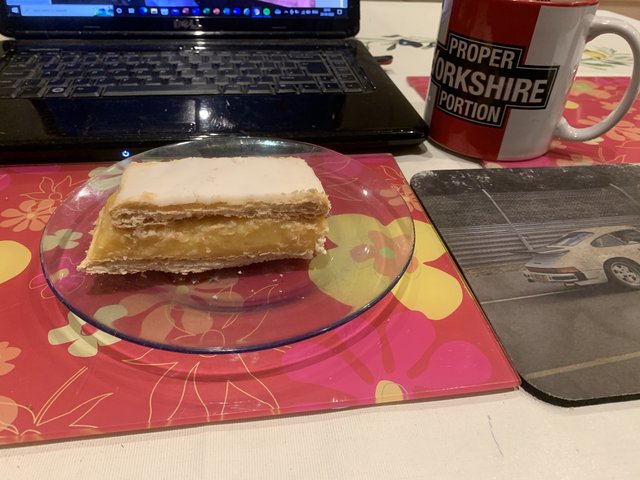 Cheers. |
| |
|
|
teaboy
Posted a lot
   Make tea, not war.
Posts: 2,126
Member is Online
|
|
Sept 28, 2022 20:54:08 GMT
|
I thought it was time to look at one of the holes in the floor. This was the first one I discovered and which started this whole escapade.  I had to scrape off that tar board stuff on the inside, that was horrible. 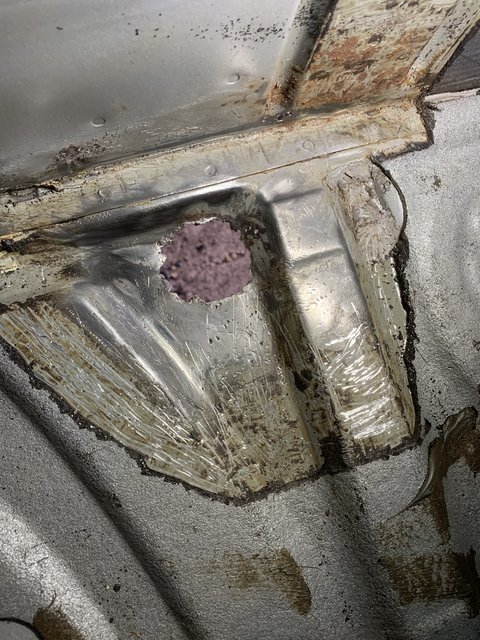 To make the repair section I made two folds. I did these using the vice and just bending it by hand so as not to put too sharp a crease in it. 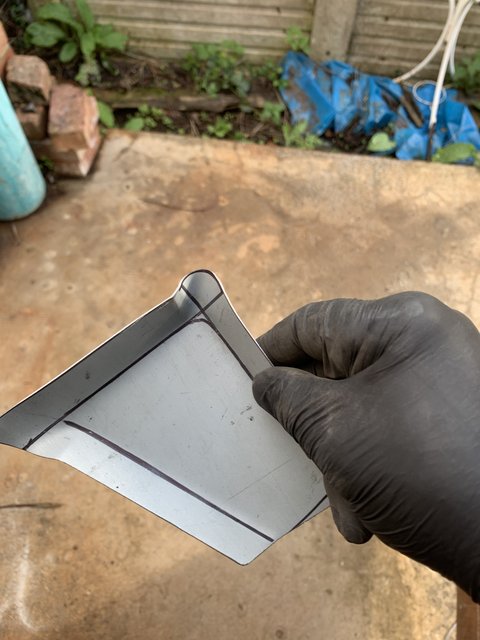 As you can see, this leaves a puckered bit in the corner and we need a nice radius. There is also too much metal there, so it needs shrinking. I tried using a ball pein hammer to shape it over.  There was too much metal to cold shrink it so I heated it with a mapp gas torch.  It took a couple of goes to shrink it down. I used a softish glancing off hammering technique to both shrink the metal and move it towards the outside edge. If you hit it too hard the metal will get thinner and stretch instead of getting fatter and shrinking into itself.  I switched to a home made T dollie so I could tap the sides straight and work the radius at the same time.  This was all lovely but the problem was that it produced too tight a radius in that corner, I needed something bigger to work against. I had another root through the nipper's marbles and found this.  Cut a bit of scrap metal up.  Ground a slot in the bearing.  Welded them together and ground it smoothish. 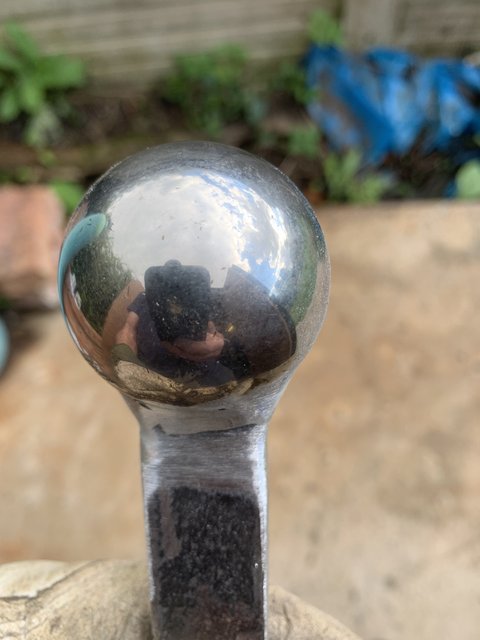 That gave me the radius I wanted.  I thought that I should cover up the windows before I started cutting.   And the dash.  My work light went flat at this point and it started raining to I jacked in for the evening. Not been to the creamy bun shop so it was back to the old favorite.  Cheers. |
| |
|
|
bstardchild
Club Retro Rides Member
Posts: 14,976
Club RR Member Number: 71
Member is Online
|
|
Sept 28, 2022 21:27:01 GMT
|
Right now I really don't understand why an oil tank has taken so long  |
| |
|
|
teaboy
Posted a lot
   Make tea, not war.
Posts: 2,126
Member is Online
|
|
Sept 28, 2022 21:32:58 GMT
|
Right now I really don't understand why an oil tank has taken so long  It's a conspiracy!  |
| |
|
|
teaboy
Posted a lot
   Make tea, not war.
Posts: 2,126
Member is Online
|
|
Sept 29, 2022 21:39:13 GMT
|
Hello and welcome to tent life. 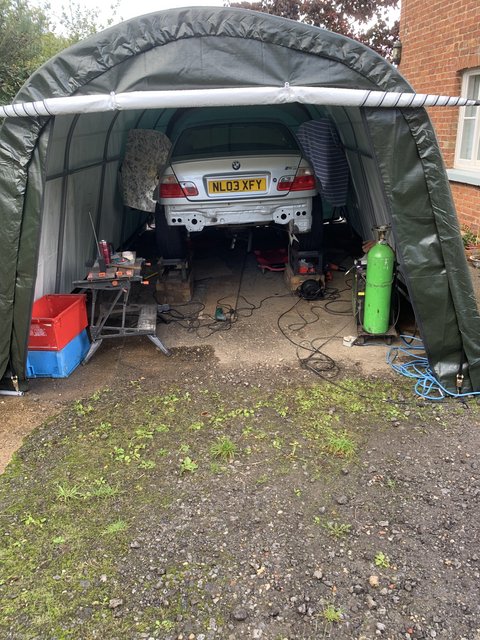 We have all the mod cons here. If I could draw your attention to the workmate bench on the left you might see a lovely cup of tea in the red Thermos travel cup. It keeps it that warm that it is too hot to drink for the first hour unless you leave the lid off for a bit first. Also on there is a digital radio, tuned to Planet Rock. Over on the right of the tent there is my old welding set, tuned to pigeon poop... Anyway, I was on with this.  I stuck it in but it was a bit of a bum job because I burned through in several places. It turns out that I needed another bit, here.  I thought that would be an easy bit, just two folds on a bit of tin but it needed to be curved. 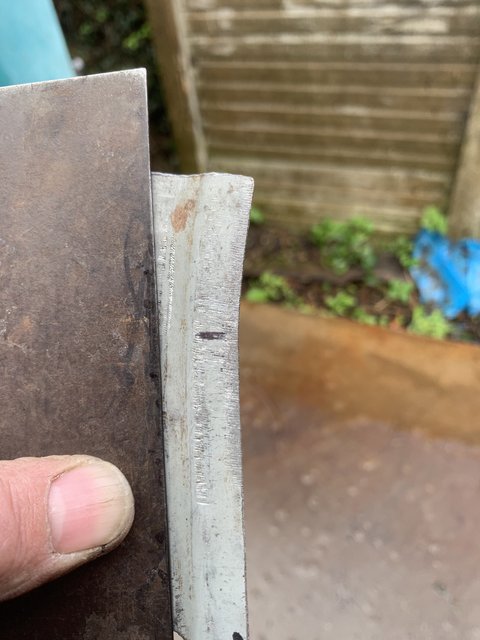 Actually it was easy because a few years ago my dad got me a shrinker and a stretcher for Christmas. These were bench mounted and hand operated ones but I built a stand for them and converted to foot operation.  Stretched one edge, shrunk the other and Bob's... actually Bob is my brother-in-law, but you know what I mean. It fitted nice.  You might notice on the top right of the repair that there is a bit that I haven't welded. That is because it needs another piece putting in. I cut it out from underneath.  A fair bit of bashing ensued.   It started to look something like.  But that sticky up lump bit was too narrow. So I moved it, twice...  It's not mega neat and if it was going to be in a place where it would be visible I would have called this a prototype and made it again but back of the floor, covered in raptor on the outside and anti-drumming on the other - it will do. Hopefully it will go in here tomorrow.  Right then, time for a cream horn I think. Possibly two.  Cheers. |
| |
|
|
teaboy
Posted a lot
   Make tea, not war.
Posts: 2,126
Member is Online
|
|
Sept 30, 2022 18:49:23 GMT
|
It isn't so thrilling to be in a tent in the middle of a hurricane and torrential rain, that's a fact. I stuck that newest bit in and didn't go too mad on cleaning back the weld because it is just the floor.  You can just see that I haven't welded the end of it where it goes under that flange because, as you also might see, that bit with the flange on it is full of holes and will be coming off. I then spent far too much time scraping off that tar board anti-drumming stuff. That was horrible. I've ordered some freeze spray to aid the removal but it has yet to arrive.  This has revealed a bonus extra hole for me to sort out. 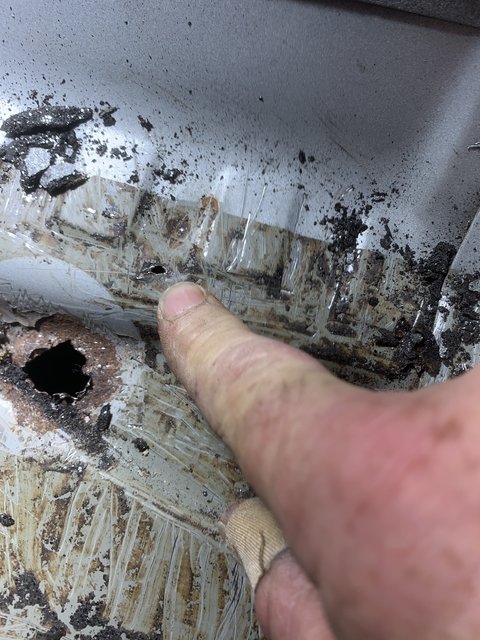 I cleaned the tar residue up with a bit of WD40 then cleaned up the WD40 with some brake cleaner.  That big round plate is held in with seam sealer and three bent over tabs. This is another area that is ripe for letting water between to two pieces and going rotten so in a pre-emptive strike I'm going to weld it in place. I popped the plate off and gave it a bit of a clean up.   Then marked it out for trimming to fit flush in the hole to eliminate the lap joint. 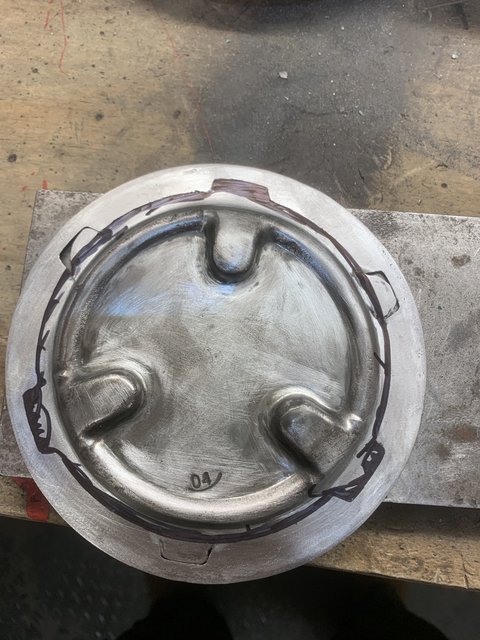 In a moment of clarity I decided not to proceed with that until I have sorted the rusty holes next to it because that big hole will be handy to use for hammer and dollie work on the rust repair. It was getting cold by this point so I decided to leave that for another day. I'm thinking Lemon Madeira tonight.  Cheers. |
| |
|
|
teaboy
Posted a lot
   Make tea, not war.
Posts: 2,126
Member is Online
|
|
|
|
It's the weekend yay! The lovely Doctor was at work today so I went in to town for some cakes and things then off for a leisurely breakfast at Ten Acres Cafe. It was early afternoon before I got out into the tent. I fancied an easy job today so I had a look at this. BMW put these slot like things in the floor and they just gobbed them up with sealer.  There were two of these in the rear footwell, this is/was the other one.  I didn't want the first one to end up like the second one so I hammered it flat and welded it up.  Like it never happened.  The second one I thought would be an easy job but, as ever, there is always more to it than meets the eye. The narrow end of the pressing sloped upwards making it shallower, like this. 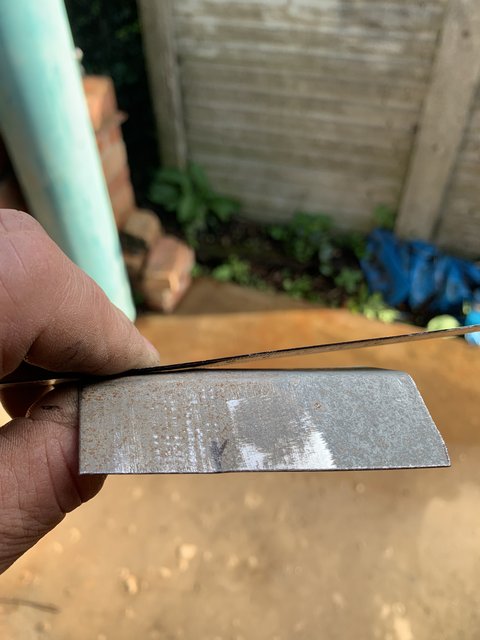 The folded up sides looked straight at first glance but they are curved, like this.  This was a pain to do because I don't have a jenny roller, especially on the side with two folds in it. My first attempt got hammered to death and thrown in the bin. The second was a bit better.  After a few trips up to the shed to work it then back to the car to try it on it was starting to get something like.  Eventually it was acceptable.  My decision to leave that big hole open for now seems to have been a good one. After all that messing about, welding it in and tidying up was the easy bit. 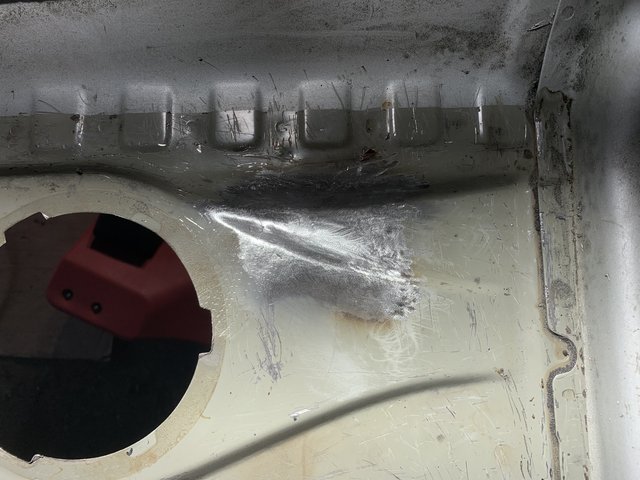 I covered that and a few other bits with some rust converter spooge just to cover it up for now.   I'd had enough by then so I packed up for the night, just in time to miss the torrential downpour as luck would have it. I'm going to have a good go at this large egg custard.  Cheers. |
| |
|
|


