ChasR
RR Helper
motivation
Posts: 10,309
Club RR Member Number: 170
|
|
Apr 25, 2022 21:34:30 GMT
|
This is bringing back some memories. It's a little annoying when the jobs begin to build up. I had to treat those areas on mine when I did them. The rear bit where the body mounts through, luckily were good on mine  . |
| |
|
|
|
|
teaboy
Posted a lot
   Make tea, not war.
Posts: 2,126
|
|
Apr 25, 2022 23:23:22 GMT
|
To put Darkspeed 's mind to rest, I have ordered the full kit from WeldTech. It looks like this.  It does come with a usb stick of instructions but Lewis from WeldTech sent me a few preview pictures. I won't bore you with all of them, I can do that when I get round to fitting the kit. 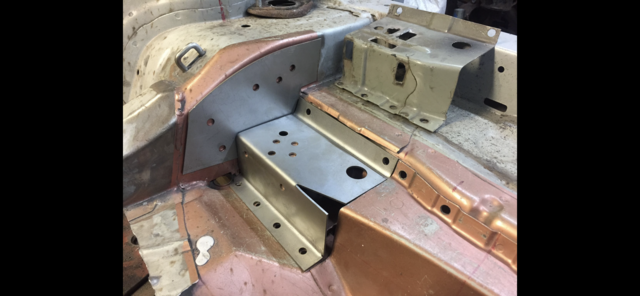  Remember the rusty tank strap bracket that looks like it came off the Titanic? This one.  Well those and the brake pipe brackets are quite scabby. You can't get them from BMW so the options were to drill them off, shot blast them and repair as needed then re-fit or try to make some replacements. But recently, Redish Motorsport have reproduced them. They look quite good. 
I've ordered a set of those too. |
| |
|
|
Darkspeed
Club Retro Rides Member
Posts: 4,883
Club RR Member Number: 39
|
|
|
|
Phew - I was already beginning to lose sleep....... Silly of me really as you only work the one way of monumentally overdoing things..... teaboy completes repair on oil fuel tank support strap corrosion... 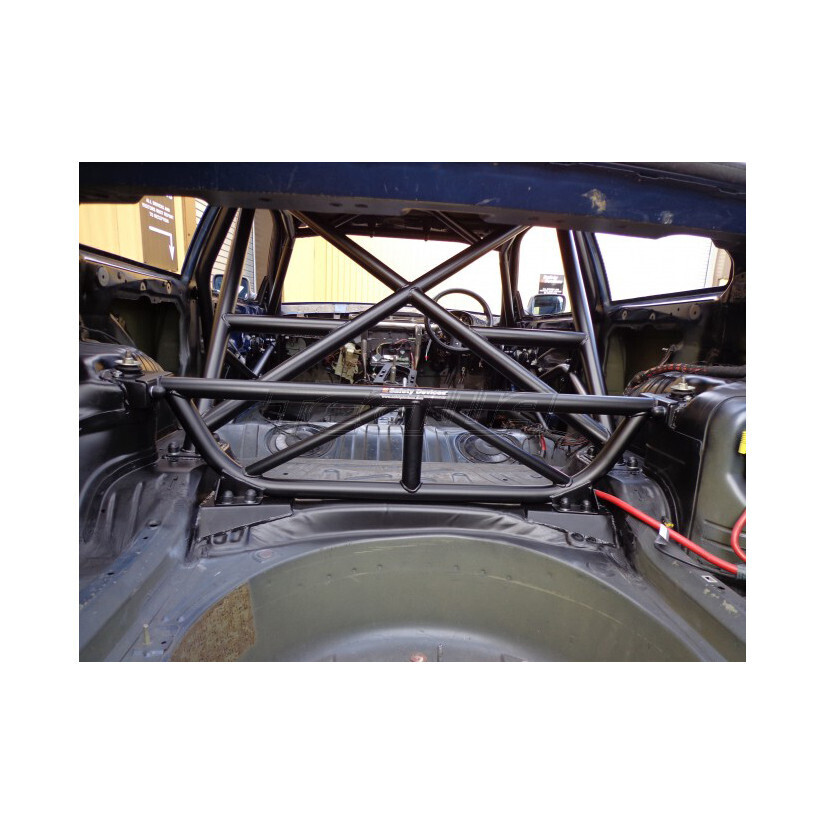  Top job |
| |
|
|
teaboy
Posted a lot
   Make tea, not war.
Posts: 2,126
|
|
Apr 27, 2022 23:38:53 GMT
|
It's been a funny old week. I phone my Dad every morning to see how he is. He is well into his 80s but whenever I call he is out and about somewhere, usually shopping and spending my inheritance. That is good because when that time eventually comes, I hope there is nothing left and he has enjoyed it all. Anyway, I couldn't get hold of him for three days. He's gone off the radar before, phone problems or whatever so I just kept trying. When I finally got through he said he has been unwell and been in bed all that time. I was quite concerned, naturally, so I went over to see him after work (I live a good hour from him). Anyway, much to my relief, he seems to be on the mend and has made it downstairs at last. I don't know why I've mentioned this, perhaps it is my excuse for lack of progress with anything... Back to the car... I am still stripping things down. The exhaust has to come off and it has been a real struggle, I don't think the rear silencer has ever been off before. The mountings for the back box have a 2002 date stamp on them. Every fixing was as bad as you would expect after being under a car for 19 years. I had to take the back bumper off to gain access. 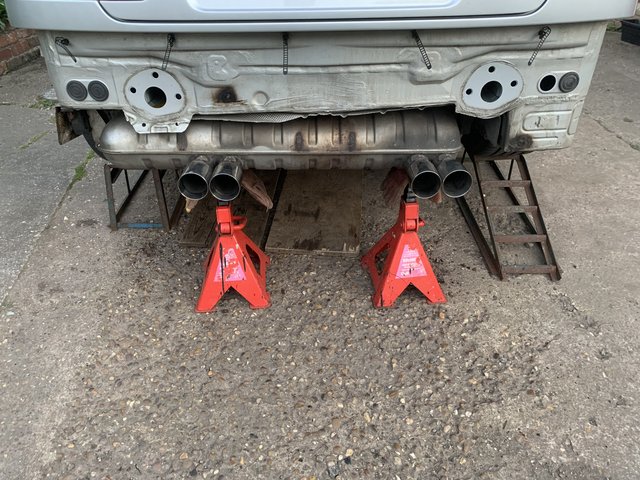 I wrapped it in bubble wrap then stashed it in the shed. 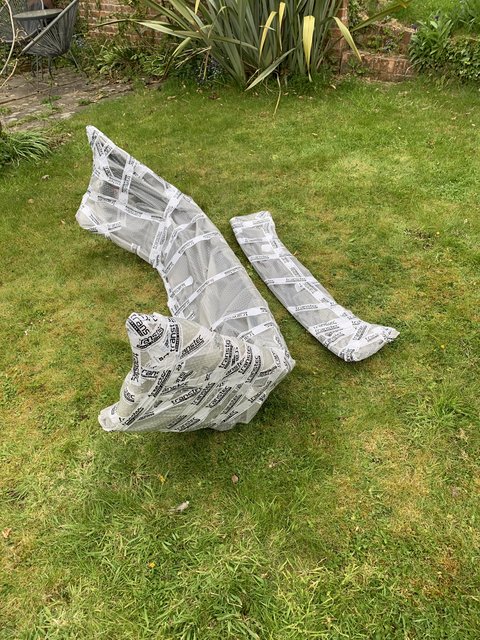 This is what I had to undo times six, and that is one of the better ones. 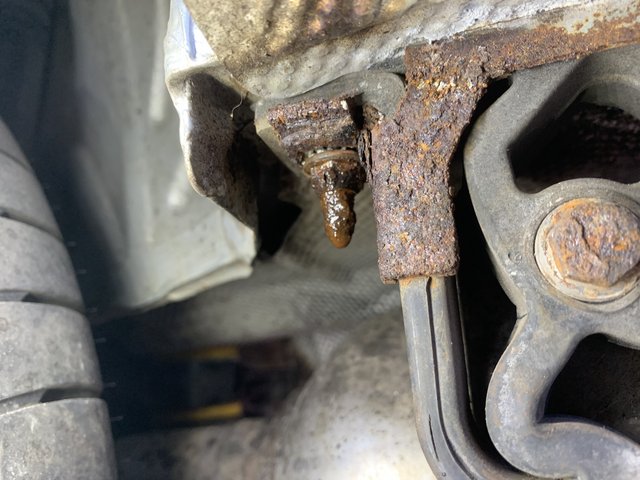 It has taken me three evenings to finally get it off. 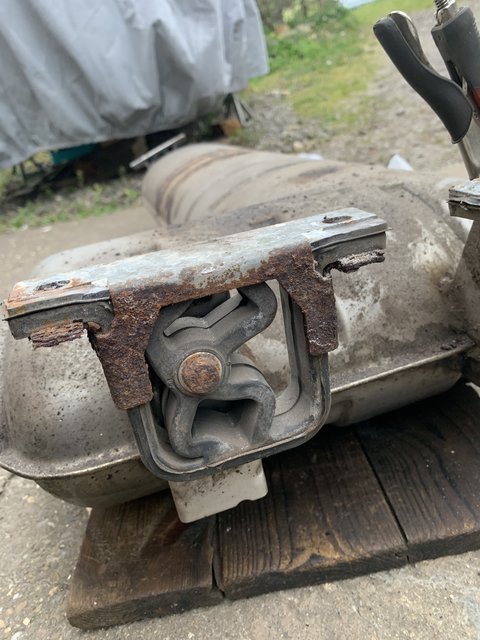 It is really heavy, I nearly bust a gut getting it off.  The heatshield above it is pretty much goosed, I haven't dared to look how much it will cost to replace. In other news, some bits turned up.  This contained the tank and brake pipe brackets.  I'm very pleased with them, they are nicely made. A friend gave me a heater relocation panel for fitting a double din stereo but that is well on the back burner now for the time being as the budget has been used up on the repair job.  I know it doesn't look like I've done much but I've spent a fair few hours laid under it having muck drop in my face. Exhaust centre section off next, I think. Now that does look to have been off before, we'll see how that goes. |
| |
|
|
nze12
Part of things
 
Posts: 193
Member is Online
|
|
|
|
|
|
| |
1986 BMW E30 refreshed to original spec
1973 BMW E12 520 converting to Motorsport 530
1982 XJS V12 converting to 5 speed manual
Many landscaping projects overriding above!
Cogito cogito ergo cogito sum!
|
|
Darkspeed
Club Retro Rides Member
Posts: 4,883
Club RR Member Number: 39
|
|
|
|
That must have been a nifty donut-handbrake manoeuvre to get the car up on the stands like that! Practice run. 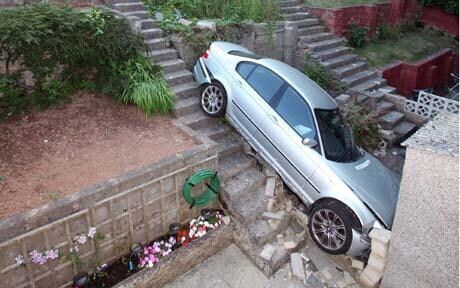 Those pictures brought home something to me. I was about to type - How things have changed, 20 years ago taking bumpers off was the way to improve the looks of a car! Then I thought. Ah! that is a 20 year old car. ....30 years ago taking.... Nope - 40 years ago tak.... nope until finally... I forgot what I came upstairs for - in a bungalow.... |
| |
|
|
teaboy
Posted a lot
   Make tea, not war.
Posts: 2,126
|
|
Apr 28, 2022 23:40:58 GMT
|
I had a very exhausting day at the coalface today and was really aching. I didn't feel like doing much when I got home but I needed to at least do something to keep the momentum. I had no energy to go crawling under the car so I thought I'd do something less strenuous. I started wrapping up bits of removed interior trim with bubble wrap to protect it from damage. It took a surprising amount of time to do. I got quite a lot of it squared away but I eventually ran out of bubble wrap, and tape.  There was more of it than this but it isn't the most exciting of things to look at. What was more exciting was when I went into the coal shed, it's been quite nippy in recent evenings, I found that someone had left a parcel. These are some, but by no means all, of its contents. 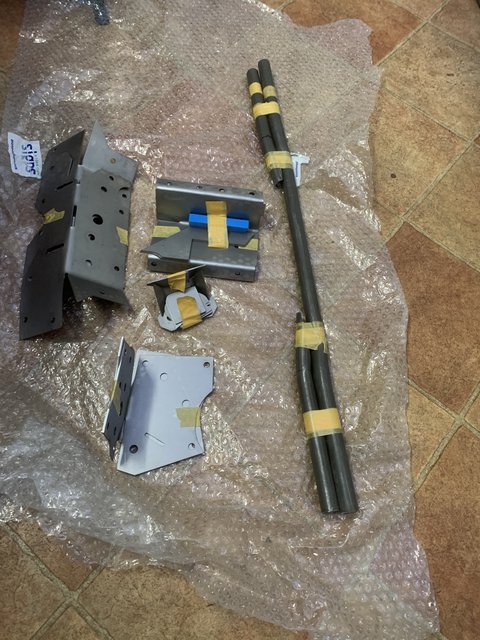 It is a thoroughly comprehensive kit that you get from Lewis at WeldTech, it even has a spot weld drill, a cutting disc and a flap disc in there. There is quite a bit if ironwork involved and I'm not sure Colin Chapman would have approved but a bit more weight has got to be better than having the rear axle falling off, I trust you'll agree? |
| |
|
|
gazzam
Part of things
 
Posts: 745 
|
|
|
|
|
I’m always surprised at the underside condition of cars in your country. It must be heartbreaking.
A guy that used to work with me had one of those Beemers, with 100k kilometres on it. It was like new underneath. That was probably 7 years ago, but I’d bet it would be about the same now.
I think I’d cry if the bolts etc looked like that on my cars. You must be made of sterner stuff!
Going back to the Porker any time soon?
|
| |
|
|
16grit
Part of things
 
Posts: 215
|
|
|
|
Speaking as someone whose reach has regularly exceeded his grasp and still occasionally smarts (even twenty years on) from the barely healed scars after my time experimenting with one of the finest of the fruits that the south of Germany has to offer, I must say I am in awe of the audacity of a man who at the same time as having one of the most achingly beautiful German mistresses of all time barely clothed in one room of his house, brings a much younger model, just into her twenties, onto the premises and before barely getting to know her with only the briefest of 'rides', is now undressing her under the same roof.
Make no mistake, beneath those oh so subtle but beguiling curves you now have not one, but two of the most demanding mistresses that anywhere in Europe has to offer. Forget the overblown histrionics of those Italian beauties where everything is put on show but where the temper tantrums can quickly be rendered temporary with a little attention and application of the appropriately sized tool. Just like our own, home grown roses, where the problem is much more likely to be generating the enthusiam to be bothered to 'get the thing going'. No. This sir, is serious. So if you will be kind enough to indulge me, a little advice. Steel yourself man. The younger one has to go. The promise of pleasure may be great, but in truth she's an over-complicated little thing, who'll run you ragged and empty your pockets so quickly you'll forget what it feels like to smile, and who, repeat after me, "will get along just fine in the company of men closer to her own age." So a quick coffee, say what needs to be said and show her the door.
|
| |
Last Edit: Apr 29, 2022 7:07:58 GMT by 16grit
|
|
teaboy
Posted a lot
   Make tea, not war.
Posts: 2,126
|
|
Apr 29, 2022 22:30:29 GMT
|
I’m always surprised at the underside condition of cars in your country. It must be heartbreaking. In England it was ever thus, it's all I'm used to. Doesn't stop it being very annoying though. Going back to the Porker any time soon? Hmm, I'll get back to you on that...  I am in awe of the audacity of a man who at the same time as having one of the most achingly beautiful German mistresses of all time barely clothed in one room of his house, brings a much younger model, just into her twenties...
...show her the door.
Wise words no doubt and I would be a fool to ignore your sage counsel... The thing is, when a middle aged man has the chance to get his hands on the bottom of a good looking and athletic 20 year old lady, it takes a stronger man than me to dismiss the opportunity...  I had a slightly less gruelling day at work today so when I got home I took a bit more exhaust off. 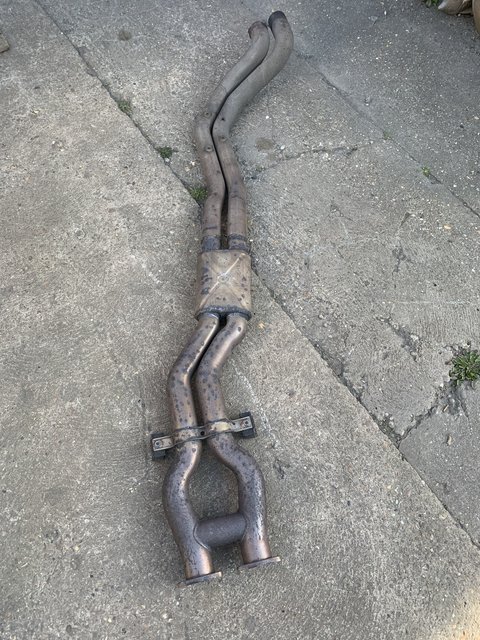 I had a quick look over it and found a couple of problems that will need to be attended to. The swaged end where it joins the rear box has cracked. The swage normally retains a flange which clamps to a similar flange on the back box, with a sealing ring between. Over the years said flanges rot away but there are replacements available which are split into two parts so they can easily be fitted to the already swaged pipe.  I could weld a repair section on if only I could find anyone who will supply one. The pipe has a 60mm O/D but for some reason the UK still seems to be using imperial sized tube... If anyone has any leads on that it would be appreciated. I suspect that the damaged end was caused by the person who fitted the replacement flange because they did it like this. 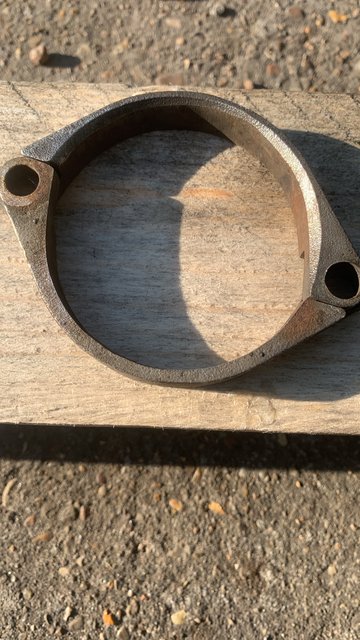 There is a chamfer on the inside edge to mate up to the swage. Clearly the chamfer isn't going to mate up nicely with anything if is pointing in the opposite direction due to the doobie who fitted it getting one half of it on back to front! The next thing is this. 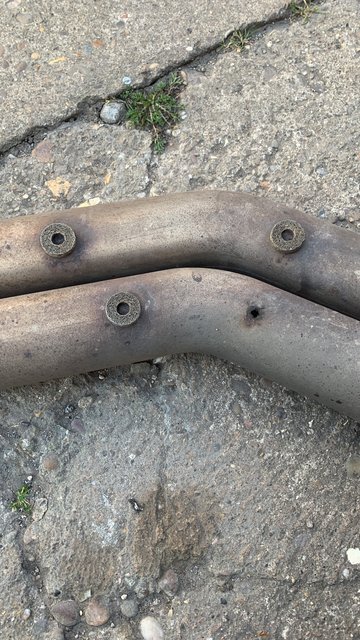 There are three woven compressed wire washer things on it but it looks like there used to be four. The missing one has also left a hole in the pipe. I messaged a pal of mine who is a bit of an M3 guru and asked him what they were for. He told me there should be a plate on them. 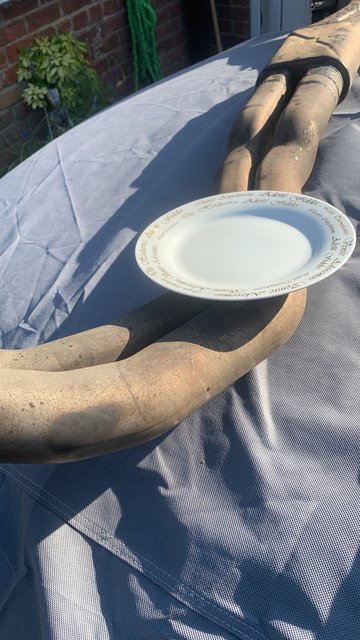 That was an easy fix... He called me something unspeakable and sent me this picture. 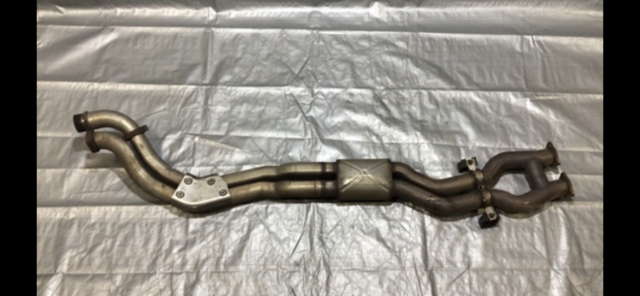 It should be relatively straightforward to make a new one of those. The problem will be finding one of those compressed woven wire washers. It is 20mm O/D, 8mm I/D and 6mm thick if anyone has any ideas... Only one of the two pipes are swaged, the other slides into the one on the rear box, which should be swaged to retain its flange. This is the other problem, my rear box is missing its swage so yer man held the pipe in with a self tapper through this hole that he has drilled in it. Mint! 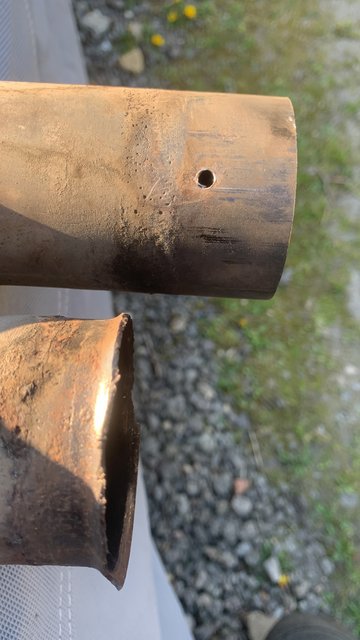 It is mildly annoying but it isn't the end of the world. |
| |
|
|
16grit
Part of things
 
Posts: 215
|
|
|
|
The thing is, when a middle aged man has the chance to get his hands on the bottom of a good looking and athletic 20 year old lady, it takes a stronger man than me to dismiss the opportunity...  Well if you must then.....
Here's a 'butt weld' thing that might suit your needs...
or the 'lap weld' version...
Or just call them and tell them what you are trying to do....
If you need any persuasion to visit a BM dealer for the sake of a tuppenceha'penny part...
|
| |
Last Edit: Apr 30, 2022 6:41:49 GMT by 16grit
|
|
ndg
Part of things
 
Posts: 109
|
|
|
|
|
You could start with 'Hutchinson stopchoc or 'knitted wire isolator' for your missing heatshield mount.
|
| |
|
|
|
|
|
|
|
|
From the thread title, having not dipped into this one yet I was excited to see the 911 with M3 motor in the back. Especially with the early pages involving angle grinders and stuff.
Still great seeing all this care and attention being put into an old porker.
|
| |
|
|
teaboy
Posted a lot
   Make tea, not war.
Posts: 2,126
|
|
|
|
As I currently have very little to do with my time... I decided that it would be a good idea to replace the clutch and flywheel on the lovely Doctor's Audi. I have had the bits in stock for a while and whilst it hasn't gone, it is getting ready. The take-up is right at the top of the pedal travel and the mileage is getting to where the clutch did 'go' on her previous Audi. We have two weddings coming up, in Devon and Essex, which are both miles from home in Lincolnshire so I thought it would be a good idea to get it sorted now rather than risk it letting us down. My pal Jamie kindly volunteered the use of a bay in the shed in his back garden. 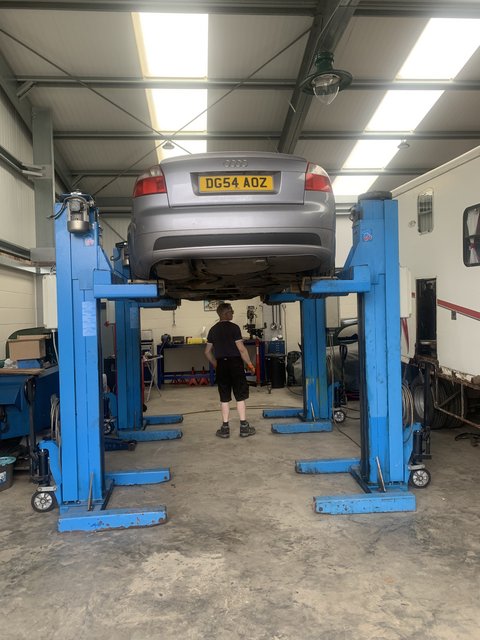 The gearbox isn't the easiest thing to remove.  Unfortunately, we have a leaking crankshaft oil seal, a slave cylinder that dropped to bits on removal and a water leak from the coolant flange at the back of the head.  You can see the traces of red coolant around that nut. As I was unable to get the parts straight away that means her car is still in bits and I'm in the doghouse. I also had to get my daughter to come down from York, where she is at university, to rescue me and give me a lift home. Perhaps doing the clutch whilst my car is in bits wasn't such a good idea after all... |
| |
|
|
|
|
|
|
|
|
Ah, Audi…….. working tirelessly to advance the cause of maintenance hostility. Always more pieces than necessary to do the job, and more complicated and expensive pieces at that. I hate those plastic elbow flange things (they buckle and weep, then fail), but I hate the push-hose connections more.
They usually use (small) bolts for those applications to maximise your chances of snapping the them flush with casting. The stud could even be one of what VAG call a “multi-purpose fastener” which is a bolt with another thread (often a different size to the main bolt) sticking out of its head, usually used for attaching random bracketry/cable tidies.
I like my older (1996) Audi, but very much less keen on the others in the fleet from the mid 00s when they start to get daft.
Even the older one is on its third plastic thermostat cover (warp, weep, fail as above). One day I’ll find one of the early aluminium versions!
Is your clutch itself actually knackered? They can last very well. Mines the original at 341k, hydraulics included…..
Nick
|
| |
1967 Triumph Vitesse convertible (old friend)
1996 Audi A6 2.5 TDI Avant (still durability testing)
1972 GT6 Mk3 (Restored after loong rest & getting the hang of being a car again)
|
|
teaboy
Posted a lot
   Make tea, not war.
Posts: 2,126
|
|
|
|
Ah, Audi…….. working tirelessly to advance the cause of maintenance hostility. Always more pieces than necessary to do the job, and more complicated and expensive pieces at that. I hate those plastic elbow flange things (they buckle and weep, then fail), but I hate the push-hose connections more. They usually use (small) bolts for those applications to maximise your chances of snapping the them flush with casting. The stud could even be one of what VAG call a “multi-purpose fastener” which is a bolt with another thread (often a different size to the main bolt) sticking out of its head, usually used for attaching random bracketry/cable tidies. Is your clutch itself actually knackered? They can last very well. Mines the original at 341k, hydraulics included….. Nick Oh yeah, too much stuff on it and too many fixings. Clutch is not totally gone but our drive is quite steep and we reverse up it. I think that takes about 50k miles of life out of the clutch. |
| |
|
|
teaboy
Posted a lot
   Make tea, not war.
Posts: 2,126
|
|
|
|
Well here we are three months down the line and no, I haven't fixed it. Spare time has, for one reason or another, been in very short supply. I'm not going to bore you with the details but you can be assured that it isn't my fault!  So what, if anything, have I done? Firstly, the exhaust. I was looking for those knitted wire isolator things so I could replace the missing heat shield. These things.  I did manage to lay my hands on a replacement heat shield.  It even had a couple of those washers still attached, but I still didn't have enough. I spent far too much time searching for them but the only ones I could find were in the US. They were $25 for four which isn't the end of the world but it was also the same again to have them posted to me. There was free postage to anywhere in the mainland USA, so I had them sent to my Nephew who conveniently lives over there. I also had a very expensive, hand made to my spec Autosolutions gear shifter sent to him.  I had ordered that some time ago, before I had realised that my car was made of Swiss cheese and that an average gear change was the least of my problems. My nephew brought them over when he came to a wedding that we went to in Exeter (one of the weekends of lost car work that I didn't bore you with earlier}. Also for the exhaust, I needed some repair sections for the damaged flared bits.  I contacted several specialist exhaust manufacturers but they either couldn't do it or couldn't supply the size I need. Right, I'll make them myself then! I got some pipe of the correct sizes. I needed 60mm ID for one and 60mm OD for the others. 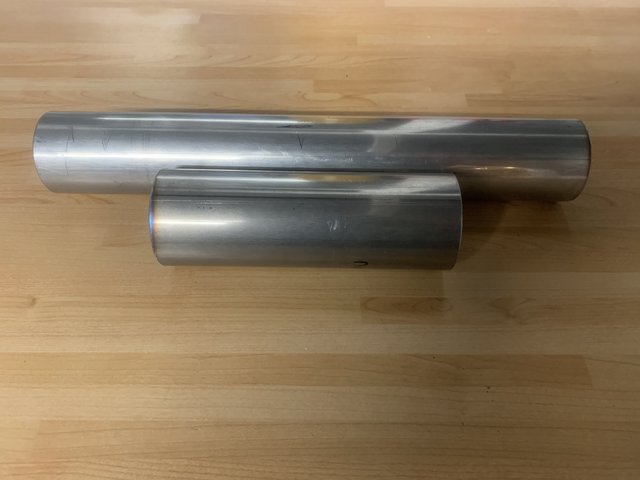 I decided to use 409 stainless because it is a bit more malleable than 316. In order to create the flare I got a large ball bearing.  It is 85mm, if you were wondering. Then if you stick it on the end of the pipe and put it in a press. 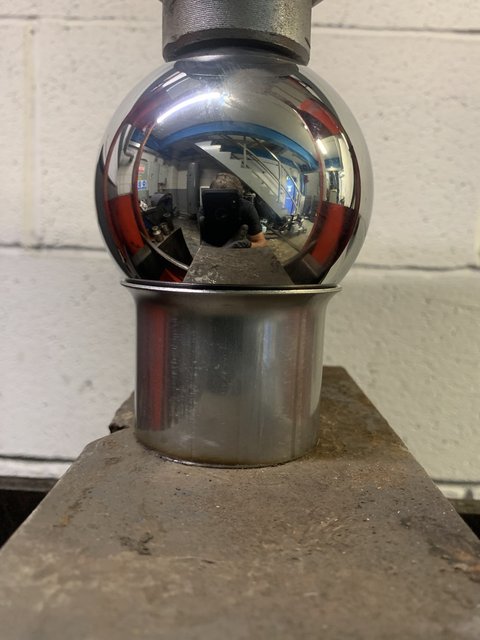 You end up with some of these. 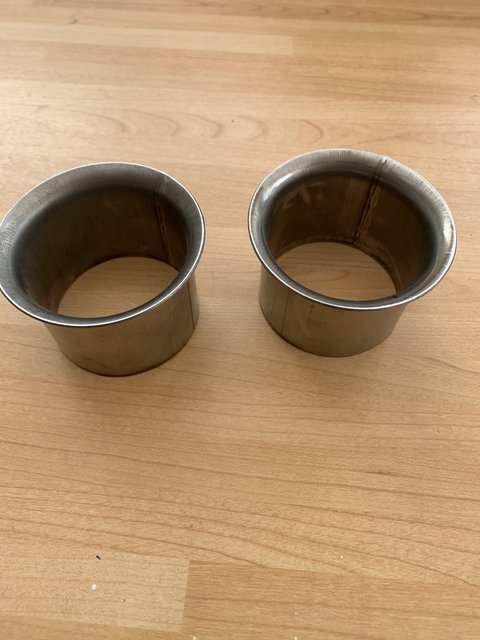 The reason for the two diameters of pipe is that one of them has to slide inside the other.  I have yet to execute the repair because my shed is a complete s**t tip and I can not get to either my bench nor the TIG plant. With regard to the car itself, I was really struggling getting underneath it and getting back out was even more troublesome. It was this high up, you may remember. 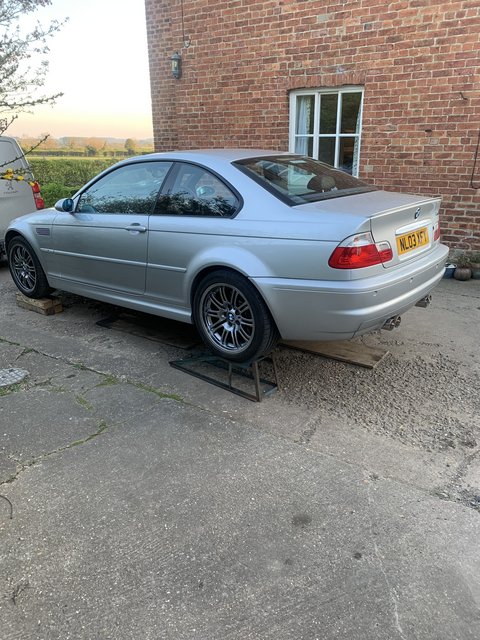 When I restored the underside of the Lovely Doctor's Audi a few years ago,  I did it using just normal sized axle stands and I don't remember it being a major problem. It would appear that I am a lot less agile than I once was and that my back legs have gone, so I needed to get it up higher in the air. I got a set of pad extensions from a scrapped two post lift, one of which I got my pal to turn down so I could fit it in place of my jack saddle.  I could slowly work the car higher up by fitting another extension on the jack. It looks far more precarious than it was, but it did the trick. I got it up onto some stackable stands that I made. 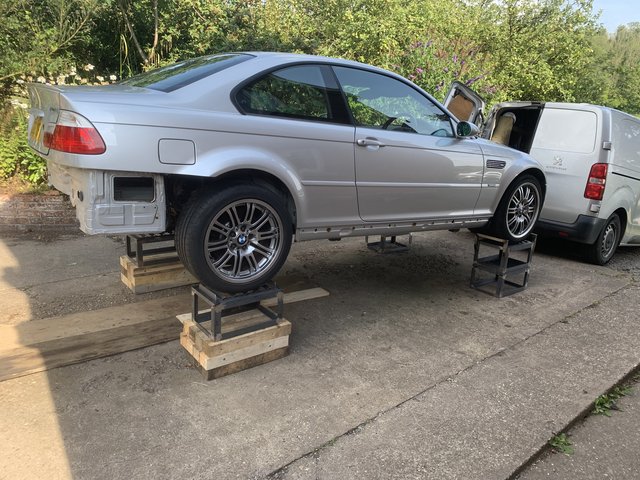 Making those stands also took a fair bit more time than I would have liked. The back end is on wood for no other reason than I ran out of steel. Those wooden blocks are screwed together to make it more secure. You might have noticed that I have removed the plastic sill covers. As you can see... 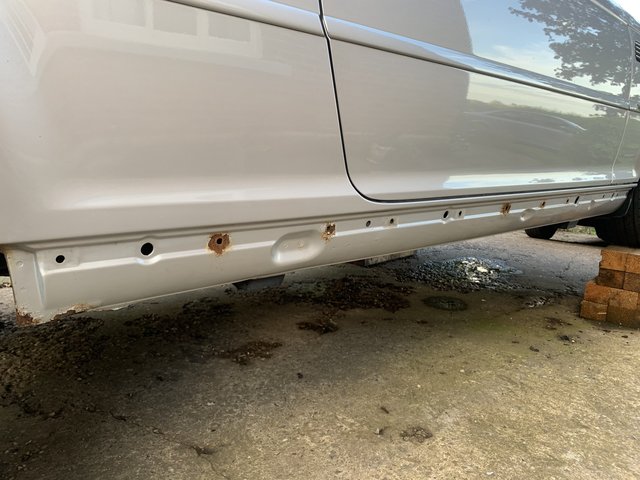 More fun revealed. 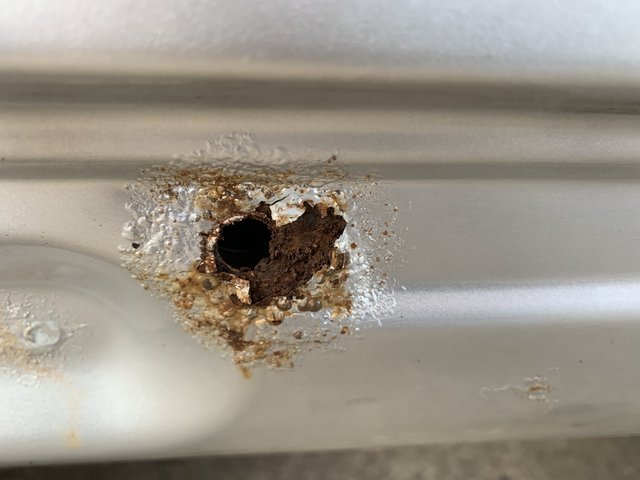 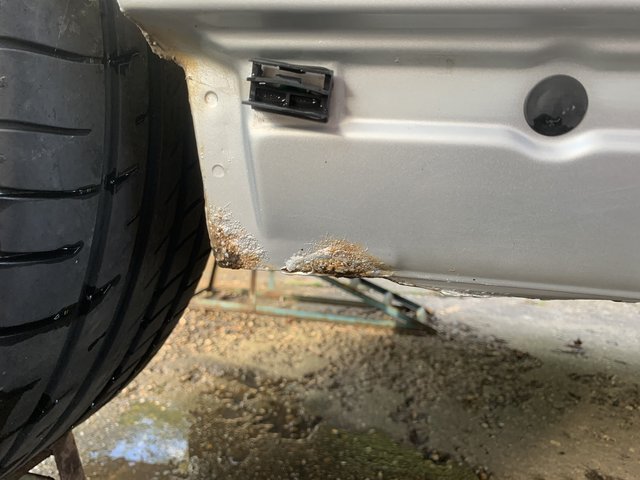 That's just excellent! I'll show you some more next time, thanks for looking. I |
| |
|
|
zeberdee
Club Retro Rides Member
Posts: 1,042  Club RR Member Number: 2
|
|
|
|
|
I have the same trouble getting under cars at a height a few years ago would have been ok .
A couple of accidents over the last few years , added to age , have definitely left me a bit less flexible .
Think i need to borrow your jack & stand idea .
👍
|
| |
|
|
norm75
Part of things
 
Posts: 668
|
|
Aug 11, 2022 20:05:32 GMT
|
I have the same trouble getting under cars at a height a few years ago would have been ok . A couple of accidents over the last few years , added to age , have definitely left me a bit less flexible . Think i need to borrow your jack & stand idea . 👍 just get some concrete blocks, Jack car up and put on axle stands, then put blocks under Jack and lift the car up again then put blocks under axle stands or car ramps. |
| |
|
|
teaboy
Posted a lot
   Make tea, not war.
Posts: 2,126
|
|
Aug 13, 2022 22:18:28 GMT
|
I have the same trouble getting under cars at a height a few years ago would have been ok . A couple of accidents over the last few years , added to age , have definitely left me a bit less flexible . Think i need to borrow your jack & stand idea . 👍 A friend of mine gave me one of these.  It has been an absolute godsend, I don't know how I managed without it. Now, where was I? Ah yes looking at rusty bits of car. When I took the sill covers off I was greeted with things like this. 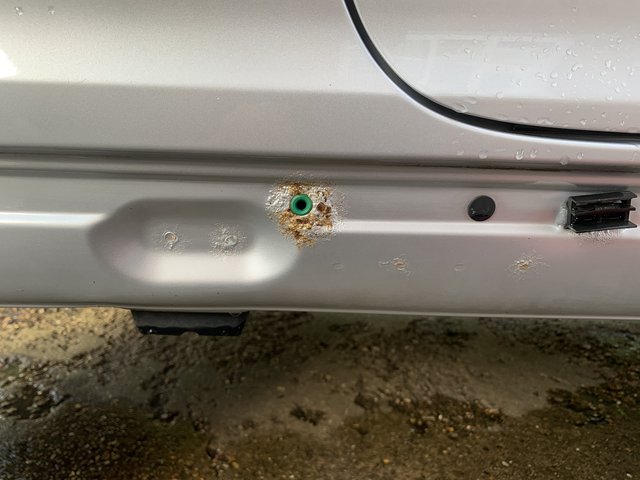 I took out the green things and started to clean away the crusty bits. 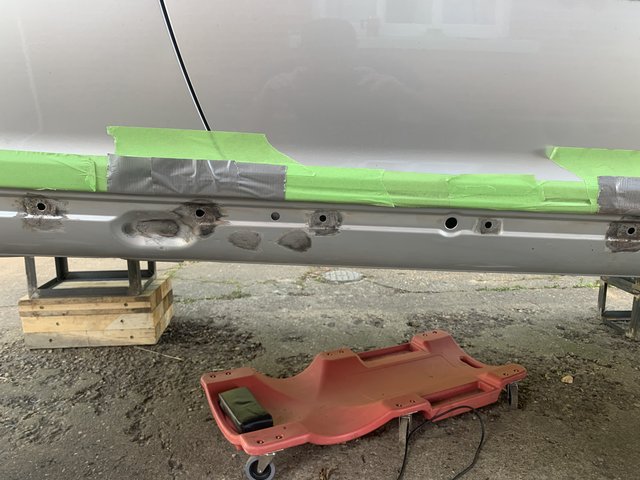 Most of the holes will be ok but a few will need some attention. 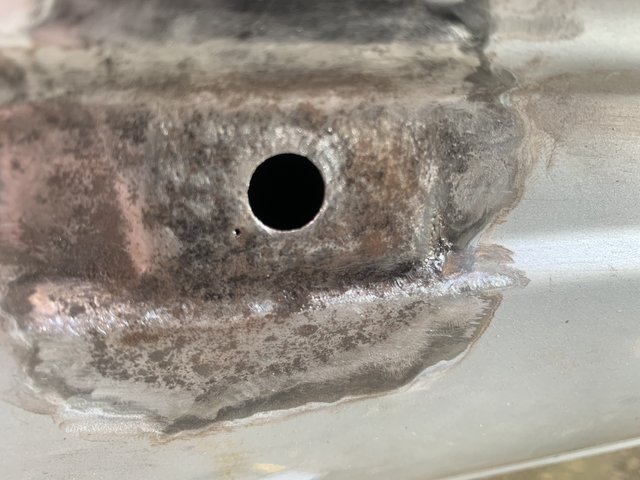 There were a few scabby bits at the rear end of the sill.  Which have gone through. 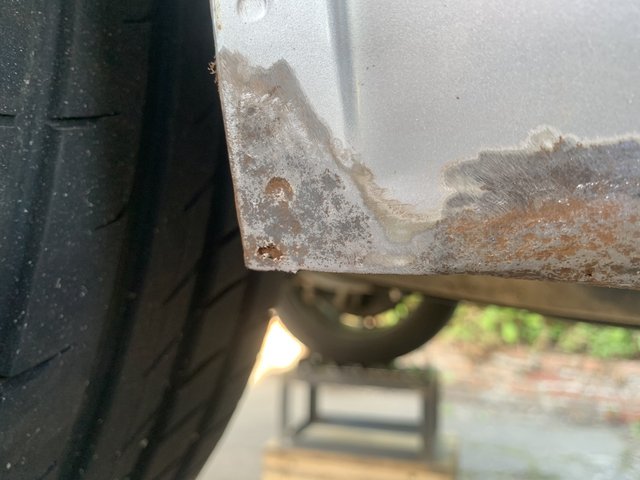 The front end of the passenger side sill was bubbling a bit too, but it turned out to be totally solid so it got some stuff painted on it. 
I had to take out the front wheel arch liners to get at the front of the sills and that in itself was a right royal pain in the backside. The screws holding them in didn't look to have been out for a long time, if ever and they had shrunk from 8mm to about 7.5. I cut slots in them to get them out with a screwdriver.  There were a couple of scabby bits in the wheel well.  But on the whole, it is reasonably good in there.  The front end of the driver side sill is mint.  The staining you can see is just the remains of some waxoyl type stuff. I thought that I would make a start on the battery box and make my way forward from there. On the outside there was a bit of bubbling where th battery vent pipe comes through.  I cleaned it off and treated it. This was part way through cleaning  On removing the battery tray there was a bit of rust on it.  This had come from another one of those grommets which wasn't even secure in the hole. 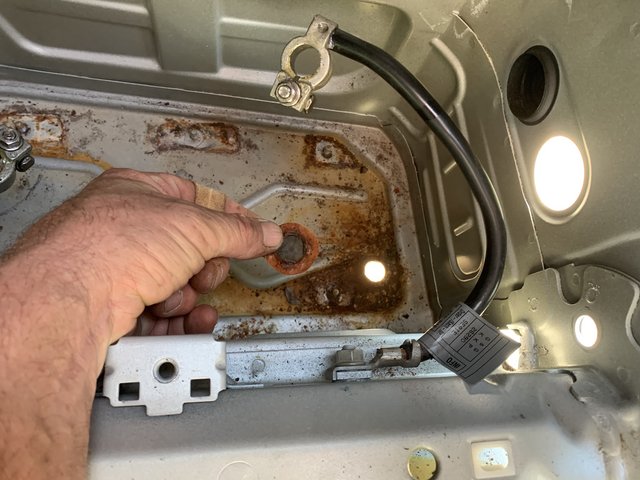 It wasn't in particularly good condition because when I squeezed it.  Never mind, the hole it came from looks pretty solid, I just needed to clean off the underbody sealer from the bottom of the box then I can weld up the hole and get rid of the first on many trouble causing grommets. 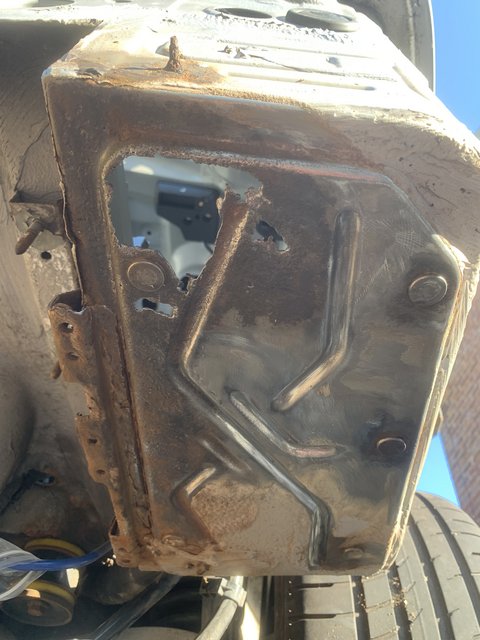 Oh, right then, not as solid as I'd hoped... |
| |
|
|
 .
. .
.


