PhoenixCapri
West Midlands
Posts: 2,685
Club RR Member Number: 91
|
|
Jan 20, 2011 21:06:21 GMT
|
Good evening Retro Riders, I should be down the barn, and was until 20mins ago, but alas it's bloody freezing out and even a hot pie couldn't keep me going so I've wimped out and come to sit in a warm place! Fortunately I have done two 6-11pm nights down there and so have made a bit more progress  Detailed for your delight in the medium of photos (I think the cold has made me go a bit strange...) So I've been concentrating on the boot carpet - admittedly getting the engine back in might make more sense, but I wanted to get one bit of the car done so I could fill a bit like the end was nearing! So after much faffing since I wanted to do a fair job and carpets have never been my strong point, I've ended up with this 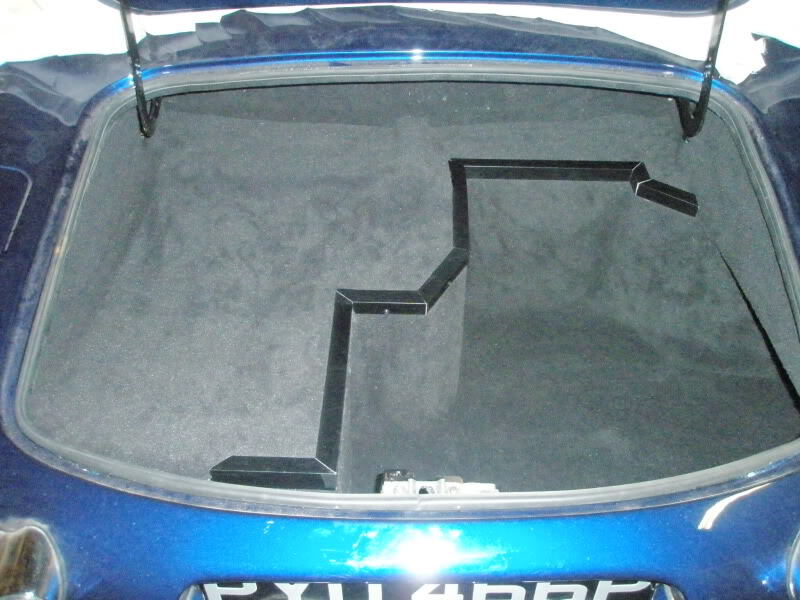 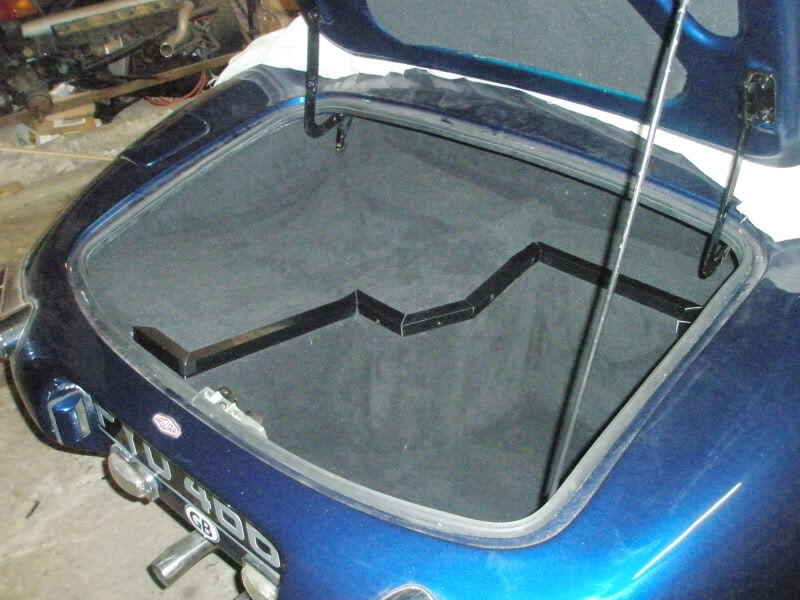 and to finished it off, I did the boot lid as well 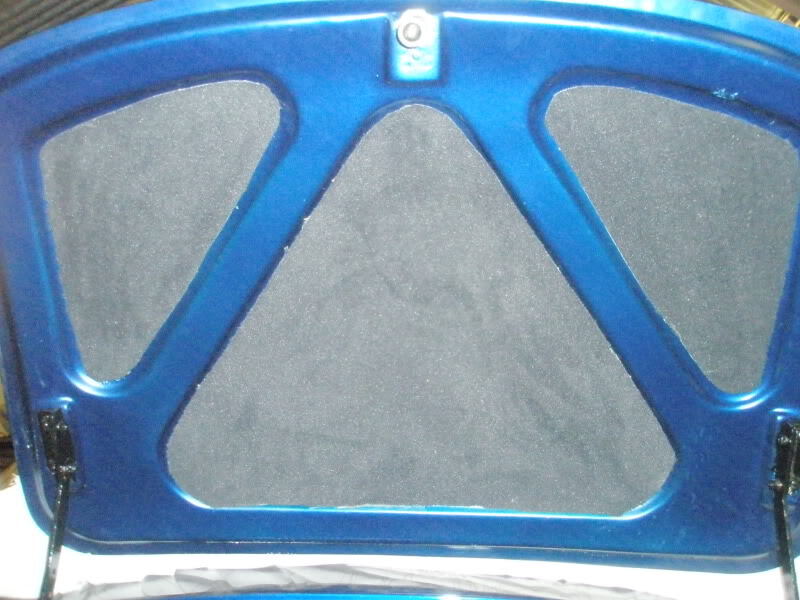 Pretty happy with how it's turned out actually, which is good. Only cost about £20 to do as well, which also makes a nice change on this project! Other than that, I have been getting on with the stuff that needs doing before the motor goes back in, which is basically the engine bay wiring. Now there isn't actually much to do here, but I thought it'd be nice to make it all look like it had been done properly, so have set about sheathing everything - this it turns out isn't a quick job either! Here's a photo of one of the bits I've finished 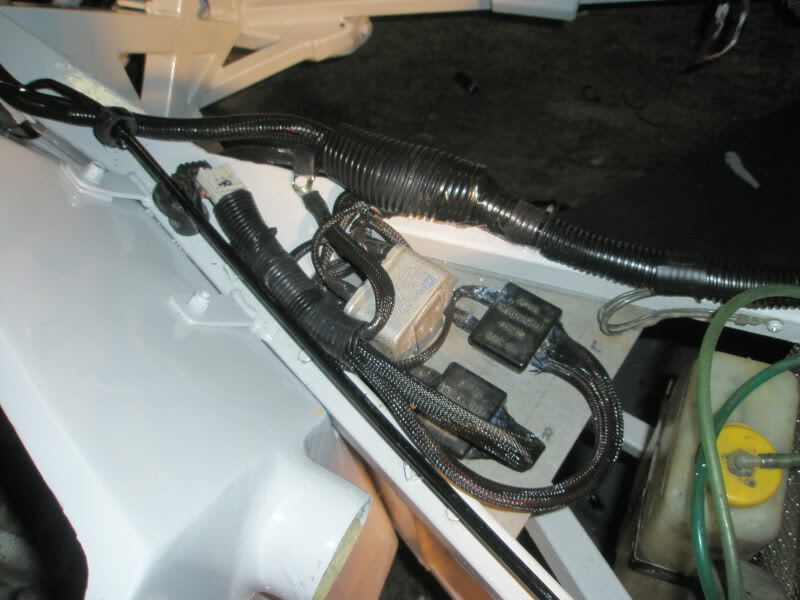 Much better than the sprawling mess that it was before!  Hopefully a few more hours should have all the wiring done, then it's onto some sand blasting and getting the motor back in - so mebbe end of next week there will be light at the end of the engine bay tunnel ;D (wishful thinking if it doesn't warm up!) |
| |
|
|
|
|
PhoenixCapri
West Midlands
Posts: 2,685
Club RR Member Number: 91
|
|
Jan 23, 2011 21:18:00 GMT
|
So another day another update. Today's plan was to get on with lots of blasting, but thanks to a water leak in the barn it seems all of my blast media is soden - so my flat is now full of boxes of media drying on the radiators! I only had enough dry to get one cam cover done, but it came up pretty well 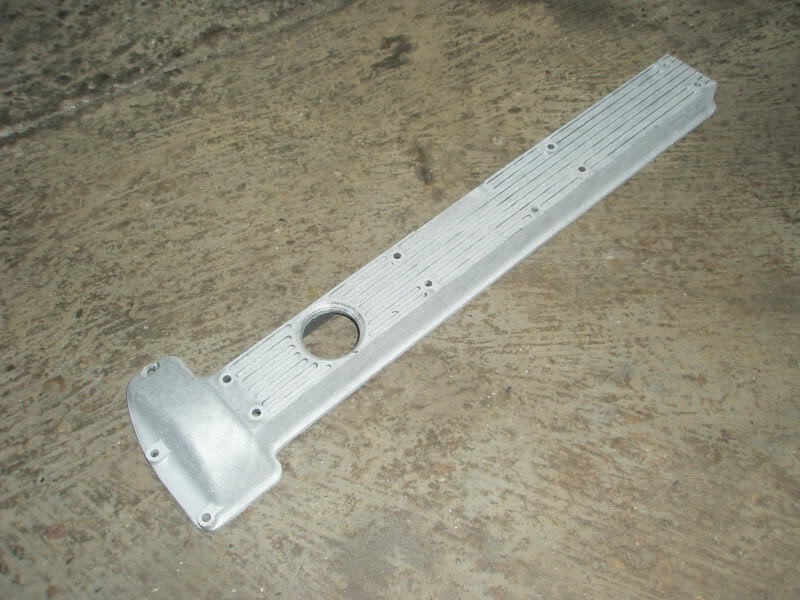 So having found my plans in tatters I decided to do a few odd jobs that have been building up. 1st off was the horn, the car did have one, but it was a bit rubbish, so I've now fitted these (found for the lovely price of free  ) they're more than a little loud! 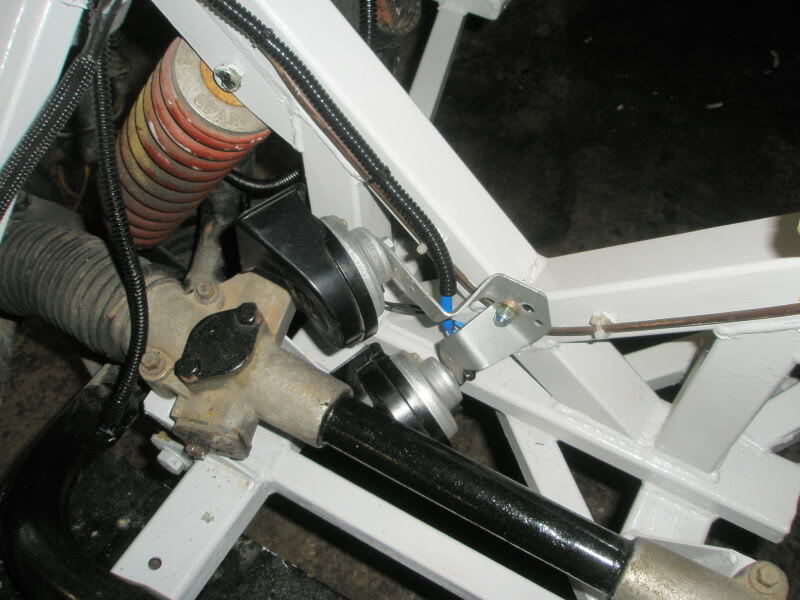 Following that, I fancied a little mojo boost, so tried the new wheel on for size. Looks good, and I've rewired it all to get the new horns working from the centre button as well  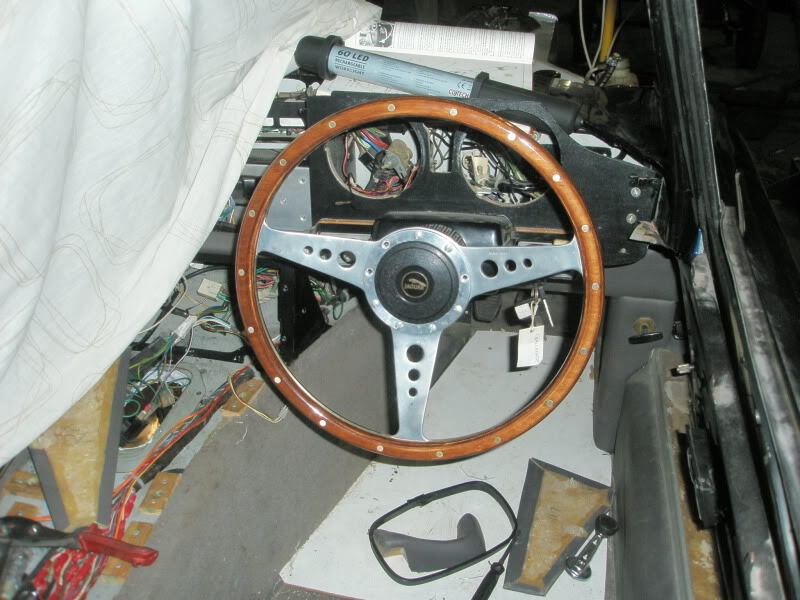 Next I popped the seats out to try the new ones in for size. A perfect fit (thank goodness) so now I only have to decide if they'll be getting done in another colour or not. Here's a side by side with the old ones, the new ones are a fair bit deeper and longer on the base - much more comfortable. 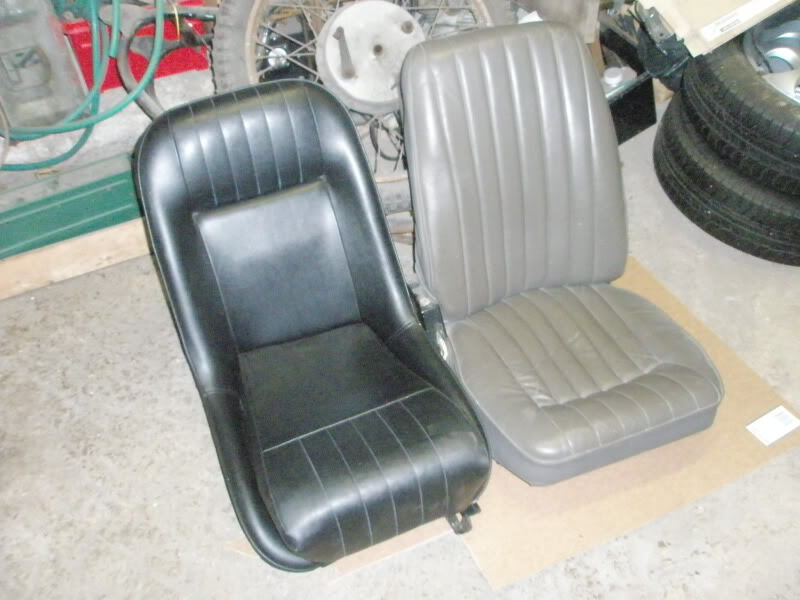 Then I decided to finish of the paint on the body tub - which meant painting up the floors. Nothing fancy, just black underbody paint. As I'm planning on using the car a fair bit I'm going for protection rather than looks here! 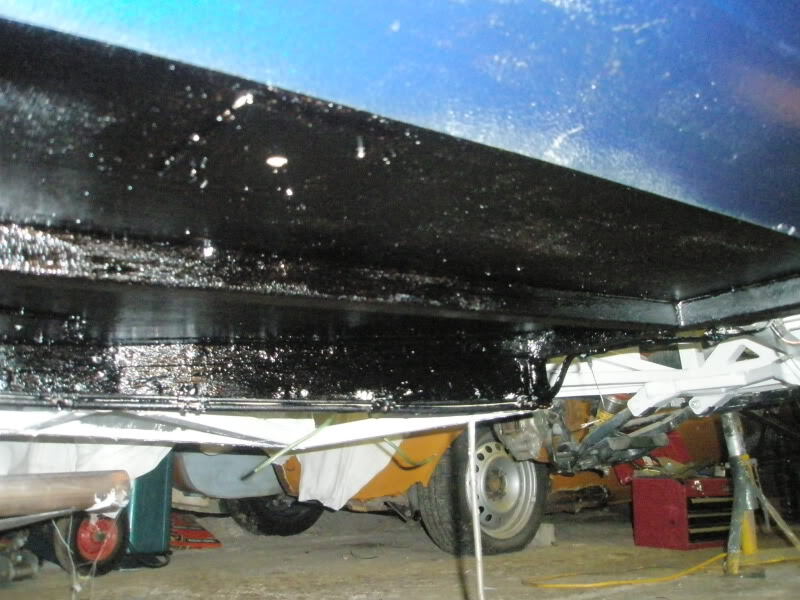 Next, well I've started takign the dash to bits to sort out a better looking one, so that will have to get done, and hopefully the blast media will dry out so I can get all the engine bits done. Need to get the engine back in aswell, the list never seems to get shorter! |
| |
|
|
|
|
|
Jan 23, 2011 21:45:48 GMT
|
|
"hello my car restoring chums...today on a car is reborn i fit the......" hang on..that was Mark Evans that did the E-TYPE!!!!
|
| |
|
|
ewokracing
Part of things
  Snuffling for food in a river
Posts: 502
|
|
|
|
"hello my car restoring chums...today on a car is reborn I fit the......" hang on..that was Mark Evans that did the E-TYPE!!!! Mark Evans makes me want to bury a screwdriver in his face. Repeatedly. Why copying that smarmy accent of his while I scream profanities at him. THIS on the other hand is awesome. I like the carpeted boot lid. |
| |
|
|
bstardchild
Club Retro Rides Member
Posts: 14,975
Club RR Member Number: 71
|
|
Jan 24, 2011 13:46:13 GMT
|
|
Any progress is good progress - looking great - me I appear to be constantly waiting on parts but it ups my Mojo no end to see what other are up too so thank you
|
| |
|
|
PhoenixCapri
West Midlands
Posts: 2,685
Club RR Member Number: 91
|
|
Feb 11, 2011 23:08:13 GMT
|
I totally agree, but lots of progress is even better  so on that note time for an update. Been two weeks since the last, but mostly due to me forgetting the camera and not getting back from the barn till nearly midnight (it was 12.30 on monday - I must be nuts) so there has been progress. So I'll start with a photo 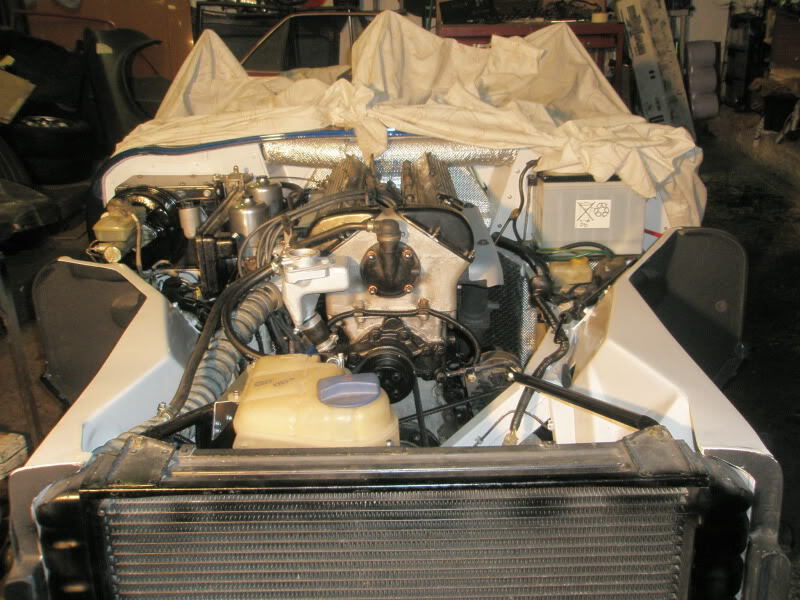 Engine is back in ;D and as of a couple of hours ago is now running - needs a hell of a tune up, and I had to mess with wiring far longer than I should have had to, but it's all good now To be honest a lot of this project has been about refining what was already there rather than making something new - afterall it was already pretty good so why bother making extra work? But here are a couple of the latest mods First a new header tank and coolant routing 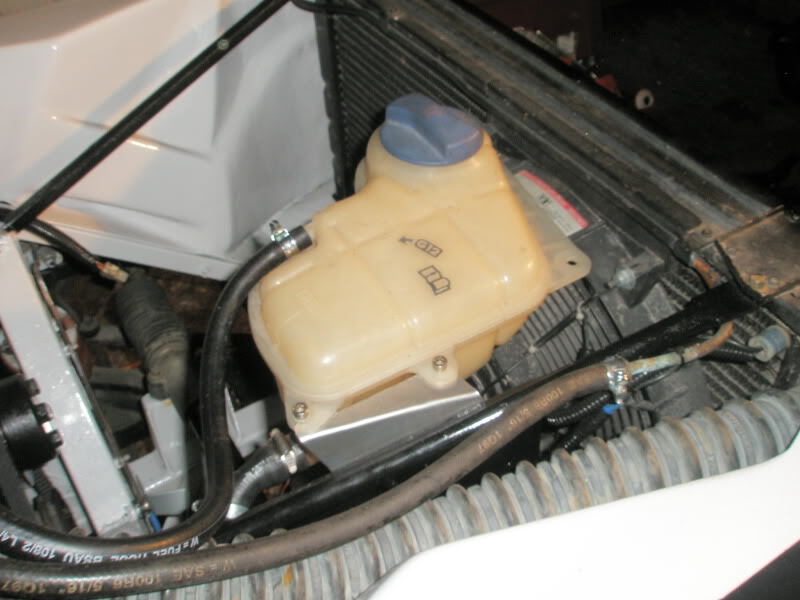 Tank is from an audi of some kind (basically what seemed to look about right down the scrap yard) and the system is now plumbed to have a continuous small flow through the tank to remove bubbles from the system - so hopefully it should work well, there's enough coolant in it, took 2 buckets to fill it! 2nd mod is a new air filter: the old one worked, but was restrictive. I was going to mod the casing and have a filter further upstream, but then I realised I had a very nice filter laying around doing nothing (read not being used as the car it was attached to might have been mistreated last year.....) so I wiped it off and made a new backplate. Here's a few pics Backplate in progress 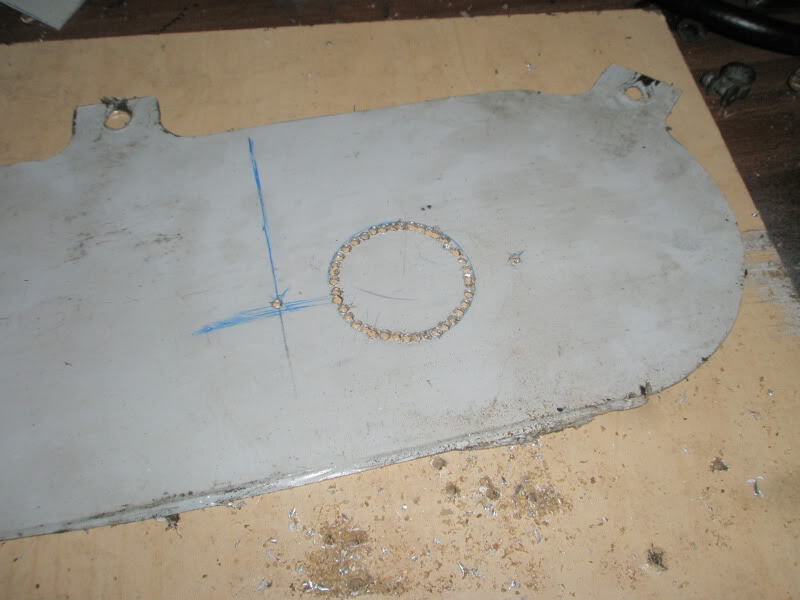 Bolted on 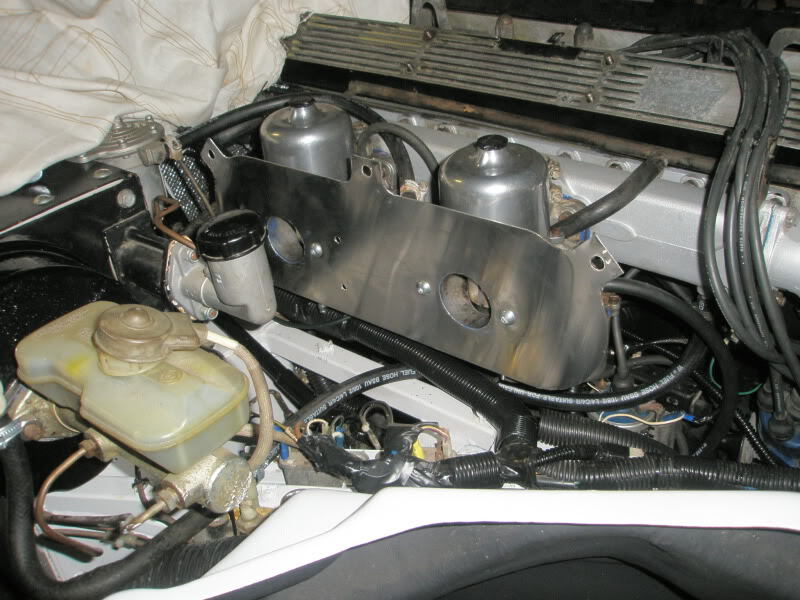 and all finished 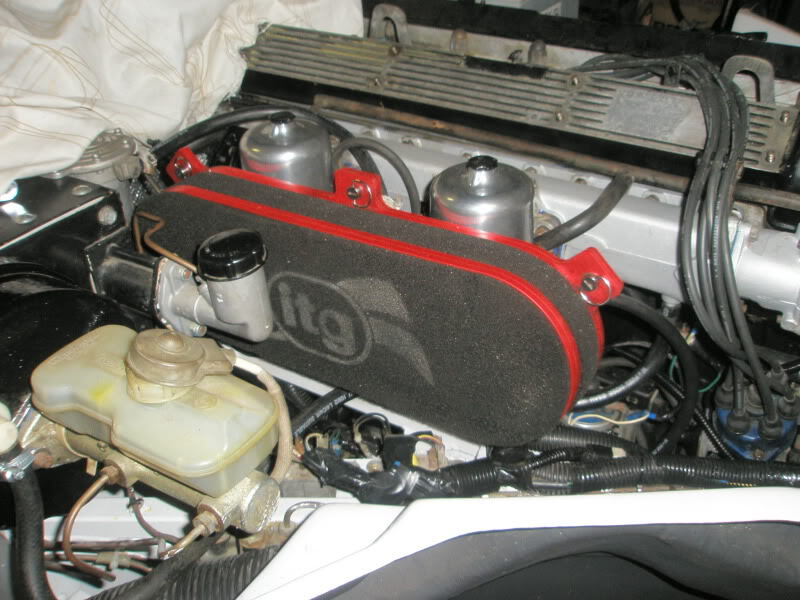 As you can probably tell I've also spent ages painting and polishing various bits to make it look nice under the bonnet - seems worth it on this one. Last thing to finish are the earlier type rocker covers. These are 2/3's painted, so just need a bit of sanding back to bare alloy on the fins and some detailing, hopefully I'll get some pics on at the end of the weekend. Next up;seats, engine tune; dash; and the rest of the interior - so still tons of work then! |
| |
|
|
bstardchild
Club Retro Rides Member
Posts: 14,975
Club RR Member Number: 71
|
|
|
|
2nd mod is a new air filter: the old one worked, but was restrictive. I was going to mod the casing and have a filter further upstream, but then I realised I had a very nice filter laying around doing nothing (read not being used as the car it was attached to might have been mistreated last year.....) so I wiped it off and made a new backplate.  Excellent work  Were you not tempted to use the carbs of the scort too  Next up;seats, engine tune; dash; and the rest of the interior - so still tons of work then! Blimey you are going to be busy  |
| |
|
|
PhoenixCapri
West Midlands
Posts: 2,685
Club RR Member Number: 91
|
|
Feb 14, 2011 22:21:29 GMT
|
Excellent work  Were you not tempted to use the carbs of the scort too  Yes as it happens  but to do it properly would mean getting another 45 (not cheap) - I did think about building a 6 bike carb setup, even have a spare inlet manifold and some carbs under the bench. But I decided that was a little silly for a car I want to use a lot, and get some economy out of! So another little update. Didn't dedicate much time to car stuff this weekend (read I was enjoying beer and hot meals instead!) but I did get the seat bases made to fit the new seats. So take one old seat that fits, and weld a basic frame onto it to keep all of the mounting points in the right place 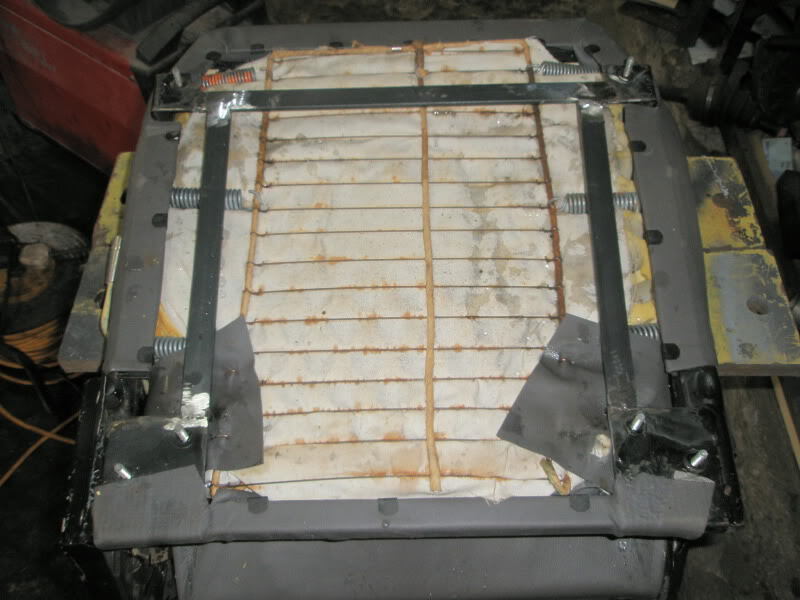 Modify new seat to make it fit (the piece behind the seats is quite upright, and this needed doing to give better leg room!) ;D 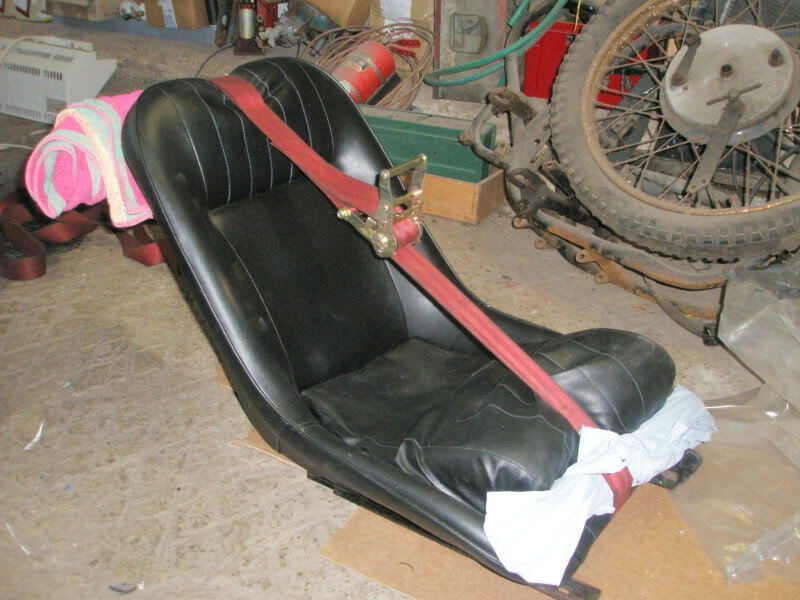 Then drill holes, add a couple of tags for the front mounts on the new seat, et voilà 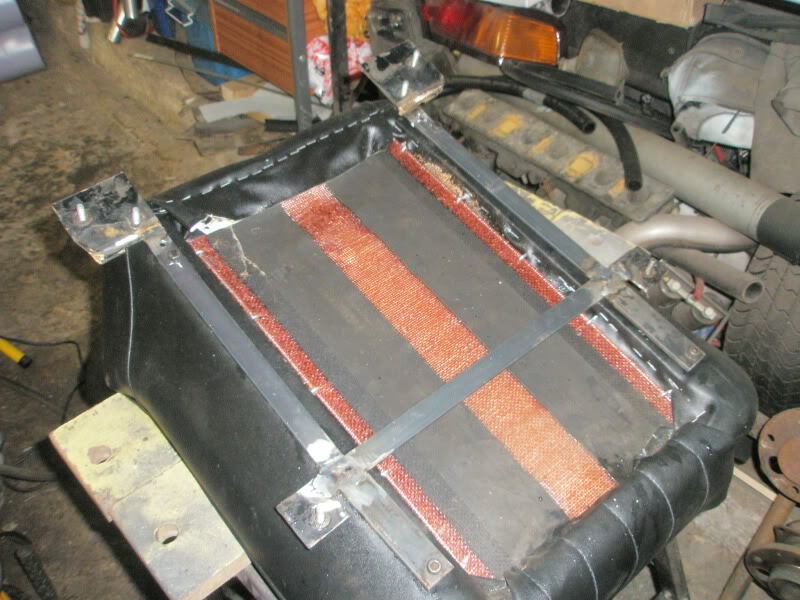 Repeat and paint  so that's one of the jobs down. I also got the wheels back from being dipped to get the chrome off. 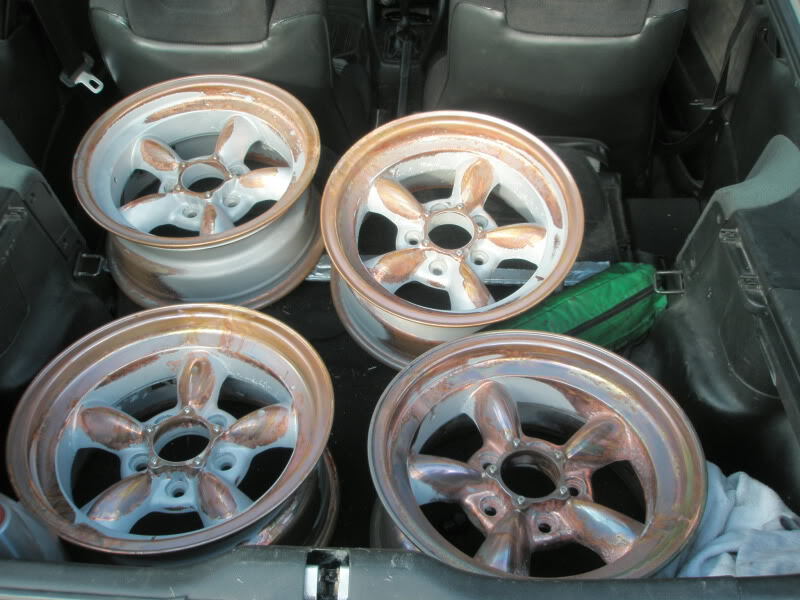 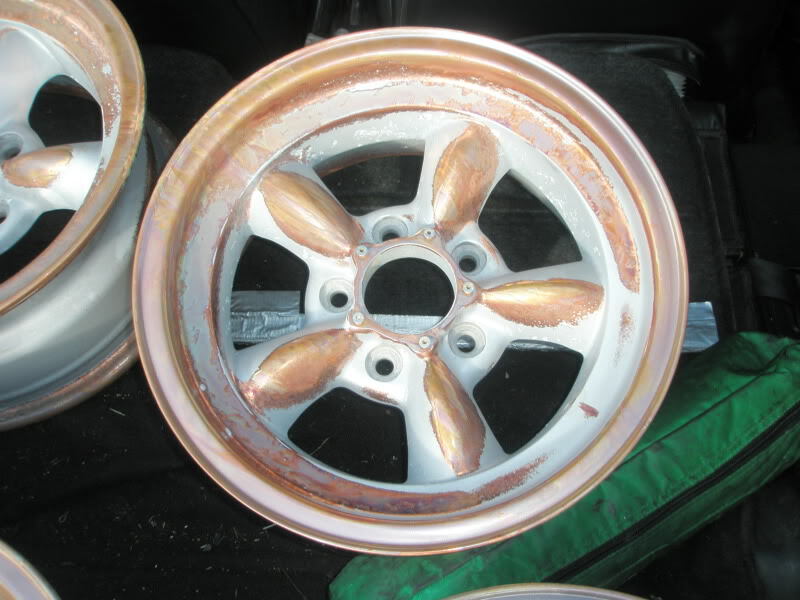 Got to say I love the way the copper and nickel looks, so tempted just to lacquer them as is - but well this is a pretty car build so they'll get blasted and powered coated next week. And yes I was tempted to buy a slightly ratty V8'd muscle car to fit them to and cruise about in, it's certainly confirmed an idea I was having for a future project  |
| |
|
|
|
|
|
Feb 14, 2011 23:15:05 GMT
|
Bolted on  in this picture you have forgotton to drill the holes for the dashpot breathers*. quite important  E types are a real pain to work on as nothing seems to fit even if they were removed from the car in the first place. so at least you can say it's similar in that way to a real one when you're struggling to fit parts ;D *unless you've now done them then ignore me  |
| |
|
|
stealthstylz
Club Retro Rides Member
Posts: 14,961
Club RR Member Number: 174
|
|
Feb 14, 2011 23:46:03 GMT
|
|
Torque Thrusts on E-Type is going to be perfect, hopefully you're fitting some suitably large tyres too.
Matt
|
| |
|
|
|
|
PhoenixCapri
West Midlands
Posts: 2,685
Club RR Member Number: 91
|
|
|
|
in this picture you have forgotton to drill the holes for the dashpot breathers*. quite important  Ah good point, sort of overlooked that - thanks for pointing it out! will get that done tonight  Torque Thrusts on E-Type is going to be perfect, hopefully you're fitting some suitably large tyres too. Matt Of course  probably 185 or 195/70/15's (they can't be the stock 205's due to clearence, so won't be quite as ballony as they should, but won't be stretched either. |
| |
|
|
cyd
Part of things
 
Posts: 46
|
|
Feb 15, 2011 18:02:00 GMT
|
|
Nice to see you back at it!!!
All your projects are excellent - just waiting to see them happen ;D
Lovely job.
Jim
|
| |
|
|
|
|
|
Feb 15, 2011 18:31:06 GMT
|
This is a great project - some quality work going on here!  |
| |
|
|
Seth
South East
MorrisOxford TriumphMirald HillmanMinx BorgwardIsabellaCombi
Posts: 15,543
|
|
Feb 15, 2011 20:19:08 GMT
|
Five spokes will indeed look mega cool. Great work  |
| |

Follow your dreams or you might as well be a vegetable. |
|
|
|
|
Feb 15, 2011 21:16:09 GMT
|
|
I love catching up with this. Looks like its going well, will be a treat to see when its finished!
|
| |
|
|
PhoenixCapri
West Midlands
Posts: 2,685
Club RR Member Number: 91
|
|
Feb 18, 2011 22:30:53 GMT
|
Just a small update, not really progressed much with photo worthy stuff - got the engine all tuned up this afternoon and it's running 1000 time better now  sounds lovely with the new air filter. But I have finally finished the rocker covers - these have been a background project, I'm pretty happy with how they turned out 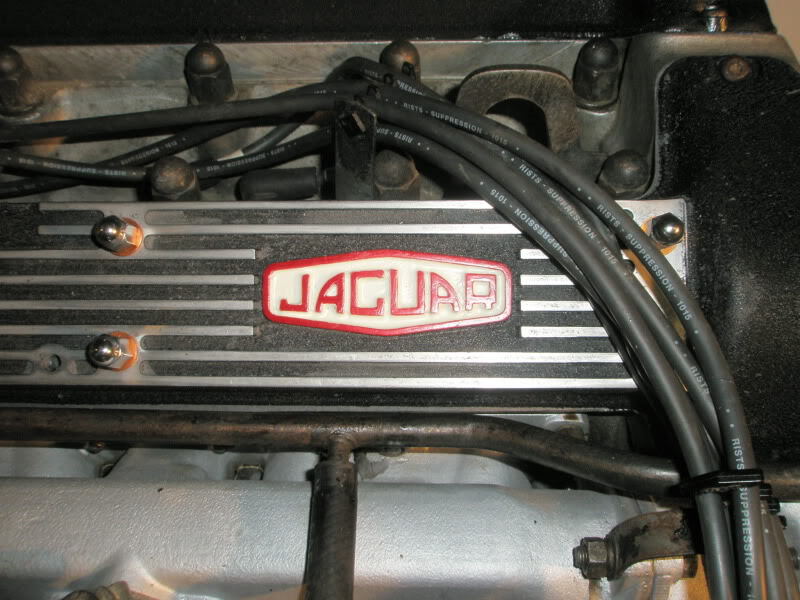 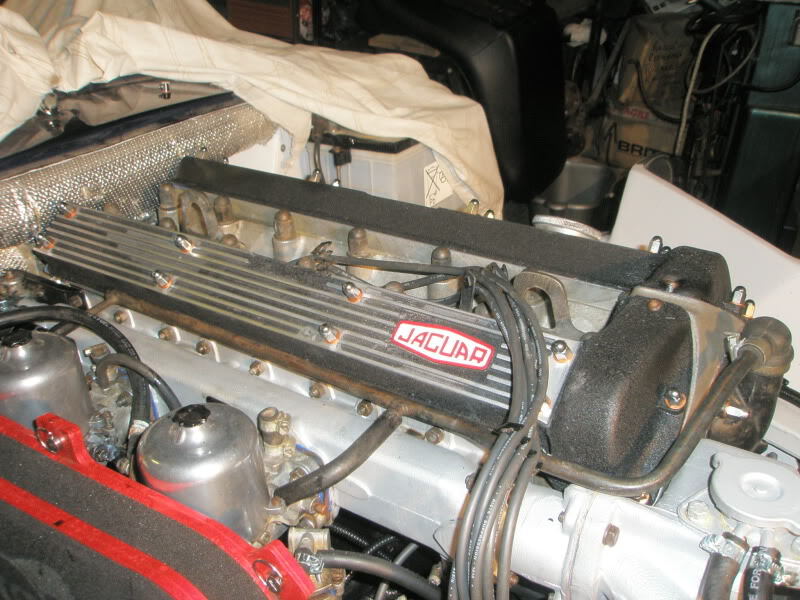 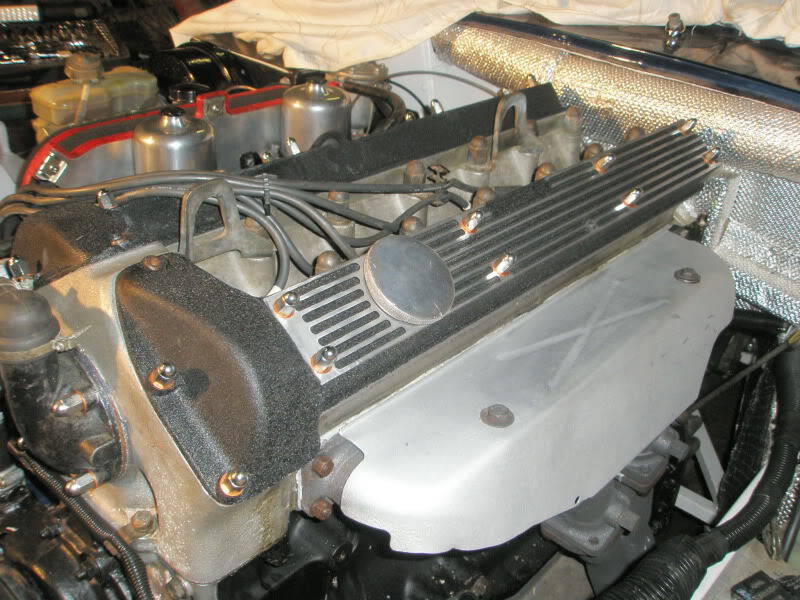 so tomorrow it's onto the dash and interior - best yet some vinyl ordered!  |
| |
|
|
luckygti
Posted a lot
   I need to try harder!
Posts: 4,912
|
|
Feb 18, 2011 23:23:16 GMT
|
Looking good, those wheels will look awesome, and those rocker covers have come up a treat  |
| |
|
|
|
|
|
Feb 19, 2011 20:08:51 GMT
|
|
Looking goooood, hows the bonnet comming along?
|
| |
1987 Mini with Suzuki Swift GTI engine
2005 BMW E91 320D Touring
|
|
roofus
Part of things
 
Posts: 58
|
|
Feb 19, 2011 20:26:12 GMT
|
|
Lovely work matey!
|
| |
|
|
PhoenixCapri
West Midlands
Posts: 2,685
Club RR Member Number: 91
|
|
Feb 22, 2011 23:07:20 GMT
|
Thanks for the comments guys, much appreciated as they keep the mojo going, especially on the cold nights  So another week, another update. It seems like I've not made much progress, not sure why, think it's because I'm onto the interior and I've never done scratch built interior bits before, so takes ages to do even an ok job. Having got everything to bits (which takes ages on a car that has no manual and seems to be modified in a million ways from the original plans!) I've started on the dash. 1st the drivers side - the lower left area used to house the light switch - this was very ugly and plastic, so I'm moving this to the centre of the dash using period bits, this were it should be for an early E-type. To cover up what was there, I'm extending the dash surround bit, here's the start 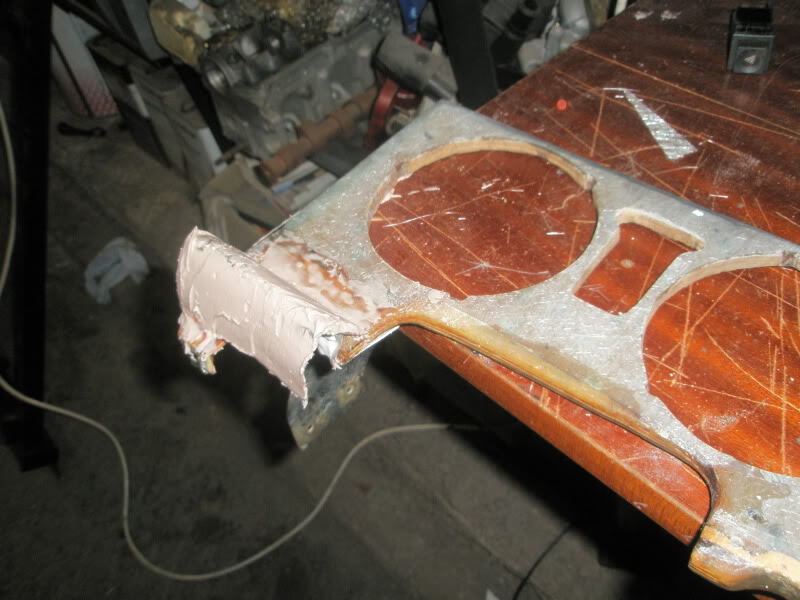 I'm also changing the warning lights to chrome surrounded, recessed ones from RS as they look nice. Easiest way to do this was to make a new front alloy piece - like so 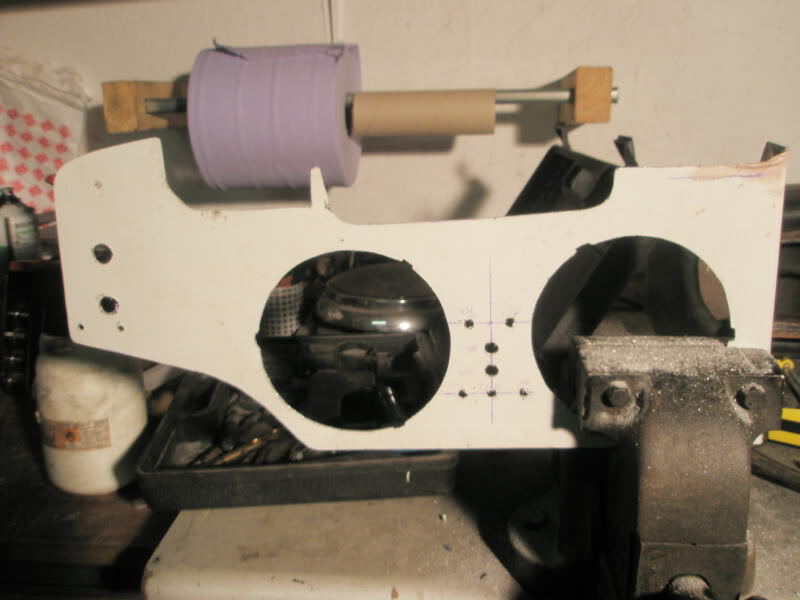 this will get a coat of wrinkle black paint before fitting. Plan is for the centre area to be brushed alloy, and the sides wrinkle black - fairly like a real 1961 E-type basically. On the left hand side there was just a cubby hole. I bought a pretty knackered Daimler S-Type dash of the right vintage a while back to steal parts of, and since this had a glove box I decided to make a door and transfer all the fittings, again like so: 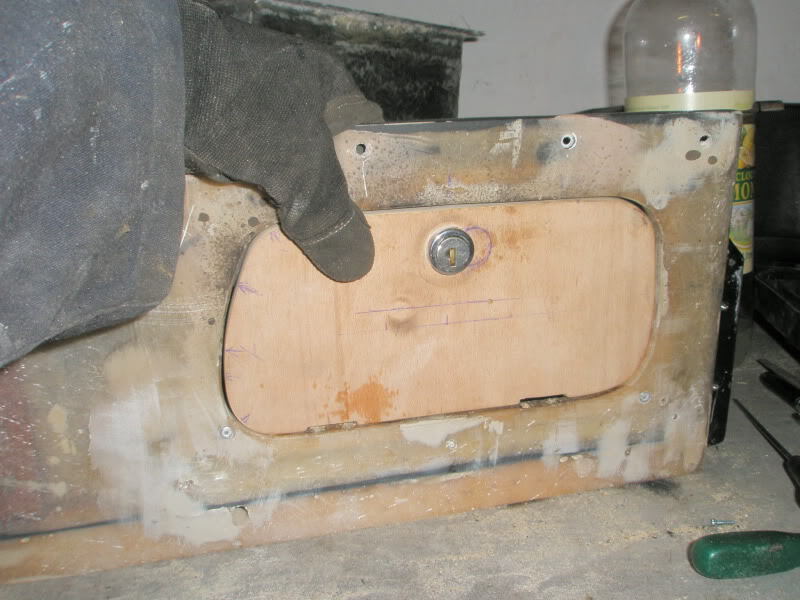 Came out pretty well, but took hours to get right! This needs a good sand down and some paint as well - and lots of chrome bits polishing, joy.... lol Finally, tonight I've fitted a plumbed in fire extinguisher - bit overkill for a road car you might say, but if you've ever seen how fast fibreglass catches fire and burns, and how quick a car turns into a chassis covered in burnt goo, you'll know why I went to the expense! It's an FEV kit from Rally Design, and at £79 it's pretty cheap for piece of mind. Has two nozzles, which I've lined up either side of the engine so that all the electrics and the fuel system should get covered should it ever be used. Have a couple of pics So tank, hidden away where the washer bottle used to be (that had to be moved a bit further outboard) 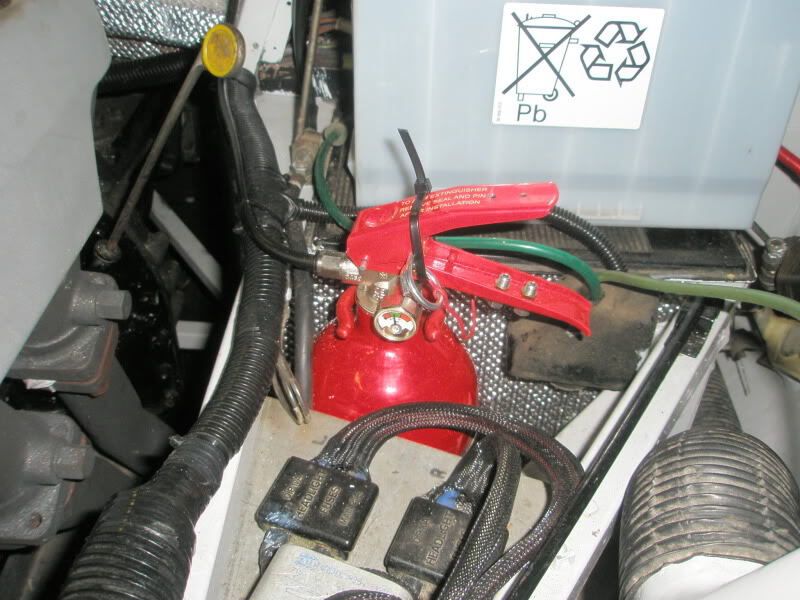 and one of the nozzles aimed at the intake side 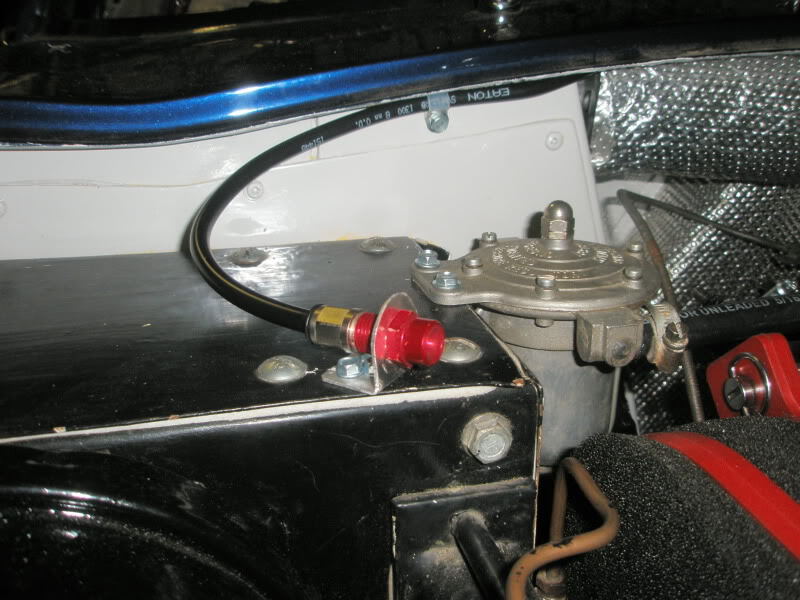 So that's it so far, next week or so is going to be spent making new bits for the dash/centre console, trimming and painting. But once that's done it's the home stretch I hope - time to spend a ton of cash on a tonneau cover and some tyres, how my wallet loves me.... ;D |
| |
|
|
|
|
 Detailed for your delight in the medium of photos (I think the cold has made me go a bit strange...)


 Hopefully a few more hours should have all the wiring done, then it's onto some sand blasting and getting the motor back in - so mebbe end of next week there will be light at the end of the engine bay tunnel ;D (wishful thinking if it doesn't warm up!)
 Detailed for your delight in the medium of photos (I think the cold has made me go a bit strange...)


 Hopefully a few more hours should have all the wiring done, then it's onto some sand blasting and getting the motor back in - so mebbe end of next week there will be light at the end of the engine bay tunnel ;D (wishful thinking if it doesn't warm up!)


