|
|
|
|
|
Has to be plan C; Megasquirt!  Plan A is currently in action. Plan C is definitely the fallback, though. After Plan B. In that order  There's nowhere I know around here that I would trust to correctly map a Megasquirt, either. That and if I can make a broken Renix box work I can fix anything, apparently. It'll be a good datum for "difficult". --Phil |
| |
|
|
|
|
|
|
|
|
|
|
Found some assistance from some Jeep owners in the form of circuit diagrams and test schematics for the car's wiring.
Tested the throttle position sensor's resistance at the ECU plug under the dash.
The manual says the sweeper arm has a 2k resistance, and the sweep is 4k. So, measuring from one half of the sweep to the sweep arm returned max and min values of 2.1k and 5.6k, with a nice smooth action and no flat spots.
That seems satisfatory.
Next up, MAP sensor. That requires a 5.1v supply.
--Phil
|
| |
|
|
|
|
|
|
|
Made a little bit of progress today, so here's a rundown of what's happened lately. Got a little concerned that someone had mentioned a bad alternator burned up an ECU. Pulled the alternator off and took it to local auto parts store. Thought, for the hell of it, test it once more (first time it was tested it failed) Stuck it on the test machine and took part this time (last time I stood back and let the guy do it). Noticed the diagram on the test machine was wrong, it said to connect the main output wire to the ground peg. Corrected that, span it up. Passed, two times in a row. No new alternator today. Took a look at the ICM the store had in stock. Was about to buy it because mine was stuck. Noticed it had a manufacturing flaw. Didn't buy it. Came home, took the ICM off the car and brought it in, and began to pull it apart. Nothing's broken, it's just very dry, dusty and rusty. Cleaned it up, cleaned out the commutator and polished it. Greased it all back up again and stuck it together again. Spent five minutes excersising it with a pp3 9v battery. Checked the throttle-closed contacts. No contact when pushing down on the shaft. Adjusted the mechanism because it was worn. Pushing down on the shaft now generates a BEEEEEEP on my multimeter. Result. That'll be why the ICM circuit was always on. The thing was jammed and the switch wasn't making contact. Checked the progress via UPS of the replacement driver IC. It's in Idaho right now, should be here by Friday. Going to reassemble it after work tomorrow, so alternator back in and ICM back in. Then to desolder the IC and fit the new one. That's going to be a stinky job. --Phil Yes, I know I suck. I was covered in grease and didn't fancy asking SWMBO to take pictures of me messing about with old greasy bits. So instead have a mildly related picture  My current desktop and the inspiration for this build  |
| |
Last Edit: Aug 18, 2010 2:50:10 GMT by PhilA
|
|
|
|
|
|
|
Aug 18, 2010 19:12:14 GMT
|
No chance of buying it, but it gets a definite thumbs-up from me!  |
| |
Last Edit: Aug 18, 2010 19:12:35 GMT by PhilA
|
|
|
|
|
|
|
Remember this? 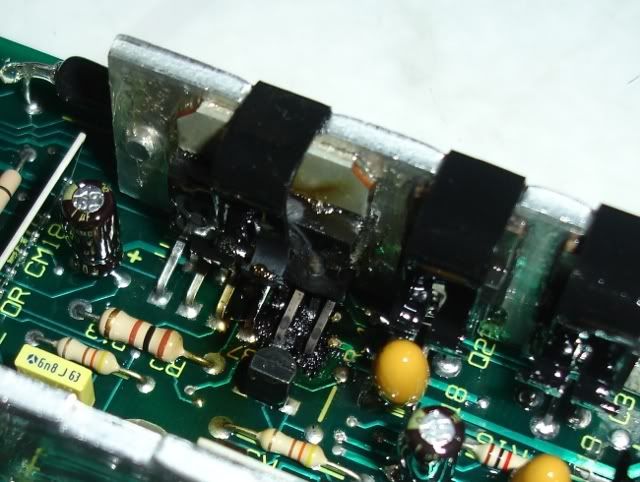 The replacement came in the mail today. Well, one to go in the box, one to be as a spare. 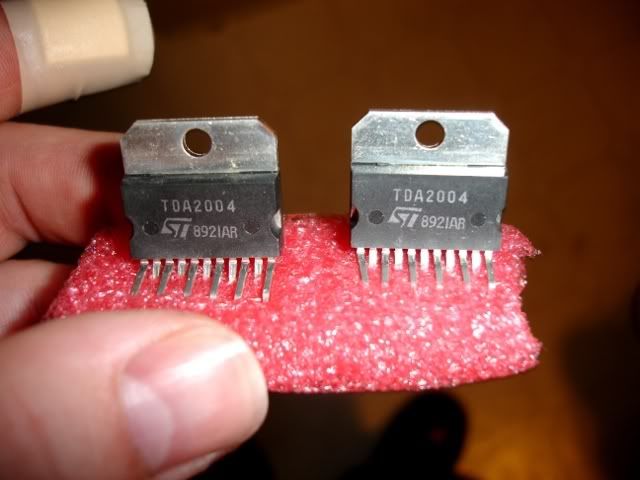 Fairly bizarre looking things but apparently they do the trick. Run the ICM: 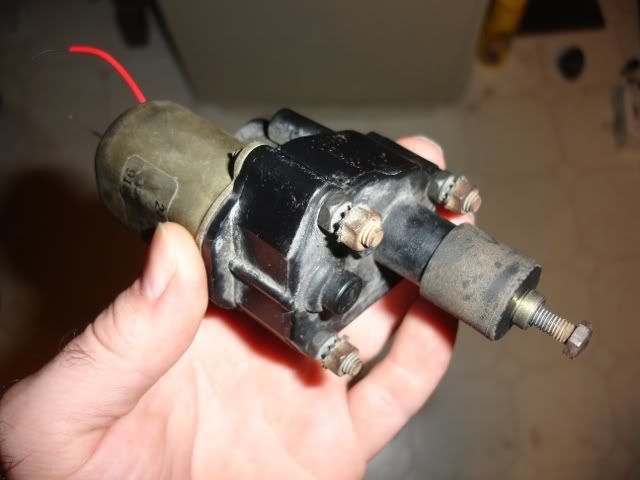 Went to the local auto place again (thankfully manager is best friends with the wife and I and tolerates the curse word I go into the store asking for) and found that the gauges they have to measure fuel pressure either measured 0-10 psi or 0-100 psi. The fuel pressure on this system is supposed to be regulated to 14.5psi (1 BAR). Nowhere locally had anything particularly worthwhile. Ended up buying a tyre pressure gauge (5-60psi), a few fittings, two tyre valve stems and a T-piece. The tyre gauge is calibrated in BAR, thankfully, so I just have to line up the 1. Got home, wanted to test everything so assembled a hotchpotch of bits, sliced my finger open, redesigned and ended up removing the schraeder from the tyre valve, taking the adaptor off the gauge, ziptieing the valve to the gauge, screwing in a fitting for one of my compressed air blowguns onto the valve, which neatly fit the test cap on the throttle body. It needs a bit of PTFE because it piddled fuel everywhere but initial results show closer to 25-30psi of fuel pressure. No wonder the dratted thing refuses to run! It's flooding itself. 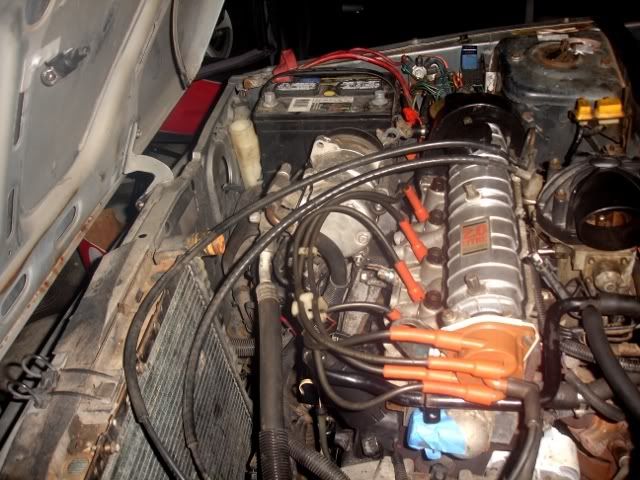 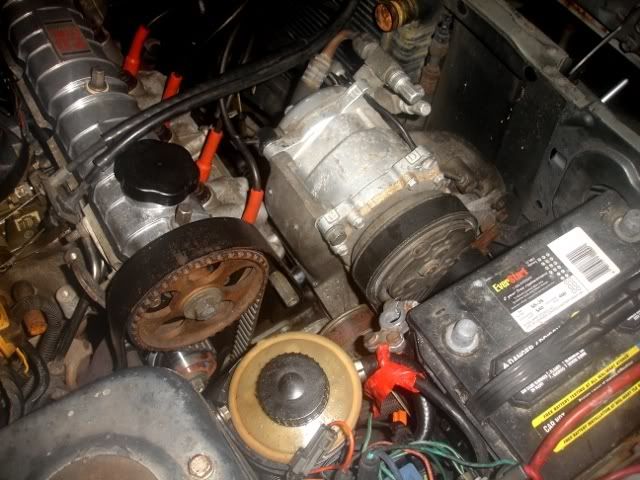 Even managed to get a couple shots of the engine before the battery in the camera died too. Next up: New fuel pressure regulator. --Phil |
| |
|
|
|
|
|
|
|
Hey all, Finished assembling my fuel pressure gauge assembly! Having read the fuel injection manual, I made myself certain of the method of operation of this fuel injection system. The fuel injection is fairly simple. A single throttle body injector (TBI) that has a constant fuel pressure behind it, which is opened by the computer for a specific time. A constant pressure through an opening of a known flow rate for an amount of time guarantees you know how much fuel has just been injected. So long as the first two things remain the same! If the injector blocks up the flow rate drops, if the pressure falls, the flow rate drops, and if you open the injector for a set amount of time, you'll get less fuel than you expected, and a lean-running situation. So, with the tolerances for the fuel pressure in mind, I put some PTFE on the gauge fittings and screwed it into the test point. 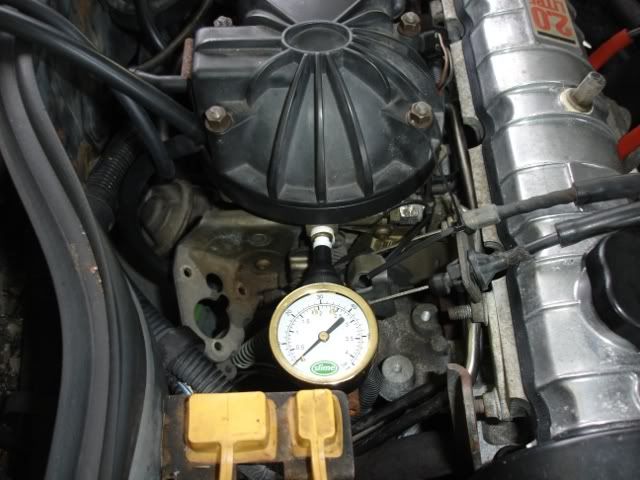 I'm slightly embarrassed by the bodginess of the part but it serves a purpose. Yes, a car wheel valve stem zip-tied to a gauge with a brass fitting from my air blow-nozzle. Ran the fuel pump up. 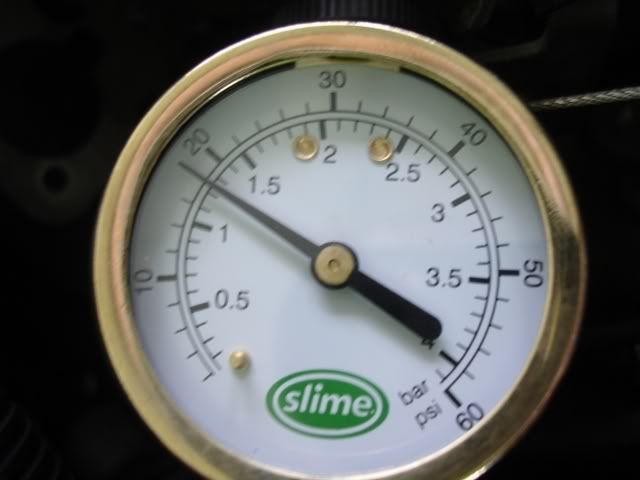 That's not good! Too high, 18psi. This was achieved after walloping the regulator a few times. It settled at about 25psi initially. Must have been properly jammed up. Factory spec states the fuel pressure should be 14.5psi give or take 0.5psi max. 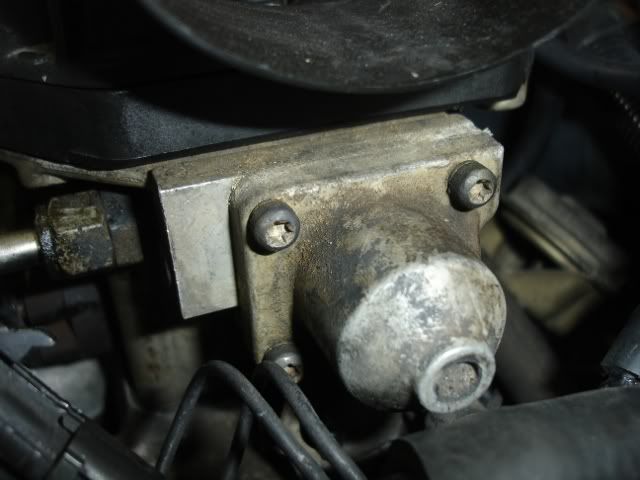 The offending item lives here. Fuel pressure regulator housing. Looks to have been on the engine since it was built. A few hard knocks with a 10lb hammer-handle and it split off. 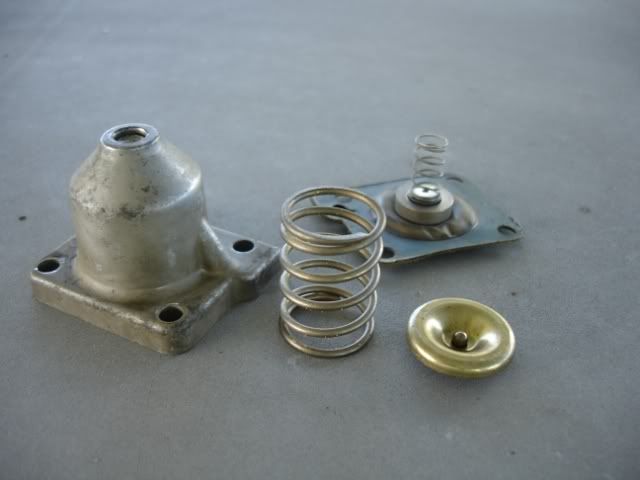 The parts of the regulator. Cleaned it all up and took a look at the end of the housing; there's an adjustment screw hiding behind a metal bung. There was quite a lot of curse word in the pressure side too. 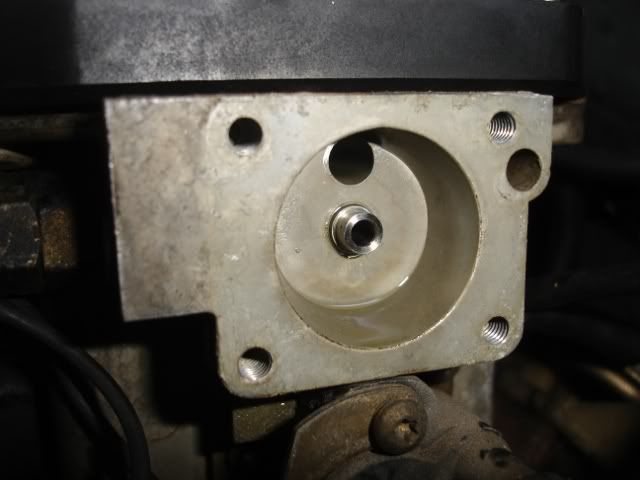 The body of the pressure regulator, the accurate shiny bit in the middle is where the fuel comes out from past the fuel injector itself. The flat part of the small semicircle presses against this and how hard it is pressed against regulates the pressure behind it, the same as holding your finger over a tap. Drilled out the metal bung and stuck it all back on. 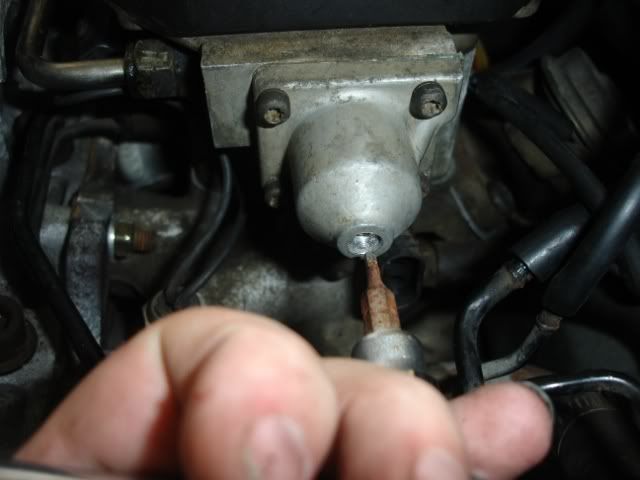 Carefully adjusted it all up. Lots of knocking the housing with a screwdriver handle to settle it, powering the pump on and off. 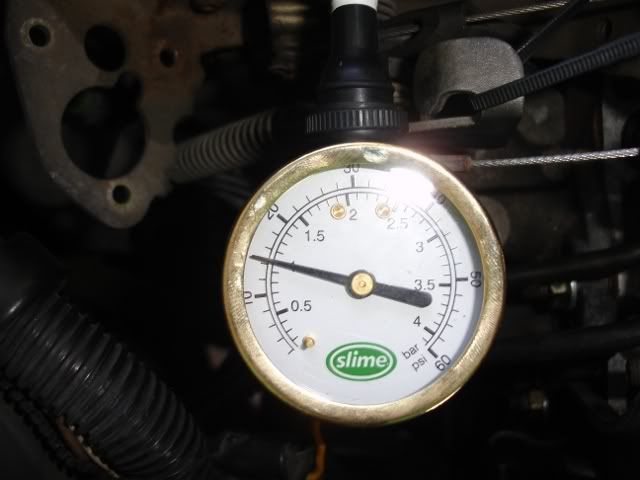 Right on the money. 14.5psi, or 1 BAR. 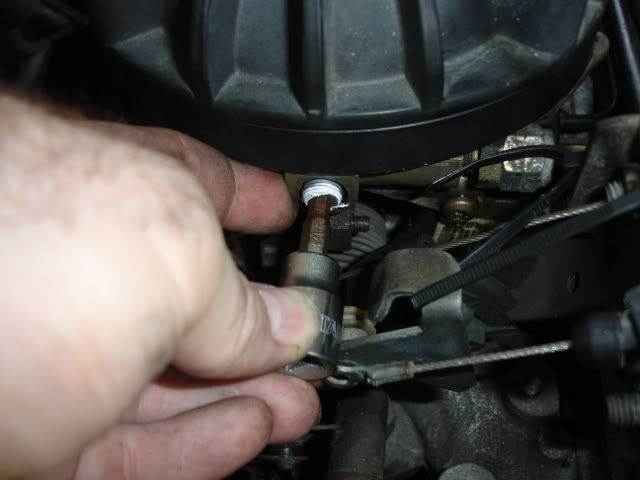 Stuck the plug back in and tidied up. Next up, repairing ECU electronics. --Phil |
| |
Last Edit: Aug 20, 2010 1:15:10 GMT by PhilA
|
|
|
|
|
Aug 21, 2010 20:17:09 GMT
|
|
Well, there you go. Replaced the burned piece in the ECU, the ICM now clicks and moves as it should... and a faulty rotor arm and distributor cap were causing my non-running.
Managed to get it to start successfully enough to videotape:
FTW
New rotor arm and cap Monday
--Phil
|
| |
|
|
86mike
Part of things
 
Posts: 453
|
|
Aug 21, 2010 23:35:03 GMT
|
|
Nicely done. ;D
|
| |
|
|
|
|
|
|
|
Thanks!  |
| |
|
|
|
|
|
|
|
Climbed underneath today, got the exhaust properly supported, the new sealing ring on and it all clamped into place. Got it running again, and took a short video. I'm either losing fuel or spark when I push on the throttle. Probably spark. Distributor cap and rotor on order, should be here Wednesday! Just a cherrybomb in the middle of the exhaust, need to extend the pipe out to the back of the car but I think that sounds alright. Inlaws disagree  --Phil |
| |
|
|
|
|
|
|
|
|
Your accent's gone all weird... but some epic fault finding and fixing happening here, I barely understand any of it but I can at least see you're getting there with it. Does sound good in that last video too.
|
| |
|
|
|
|
|
Aug 24, 2010 17:47:07 GMT
|
I think my accent was kinda weird to begin with. Moving here certainly didn't help that  Further to discussion with a few people it has been decided that the exhaust note and volume is "obnoxious" so thus a new muffler is on the books at some point. Gunna see about starting to plumb everything back in this afternoon and flush the radiator. --Phil |
| |
|
|
|
|
|
Aug 25, 2010 23:26:09 GMT
|
|
New rotor arm and distributor cap resolved the non-starting and running problems.
Also the aircon compressor works, the pressure side of the pump got hot in about 20 seconds of running so there must be a little bit of a charge in there but not a whole lot.
Gotta get a tight angle-piece for the heater hose so I can fill up with coolant. Being able to run it for a few seconds at a time sucks.
--Phil
|
| |
|
|
|
|
|
|
|
|
Stirling work!
An inspiring piece of troubleshooting - well done.
Monkey
|
| |
|
|
|
|
|
Aug 26, 2010 23:29:35 GMT
|
|
Thanks
It seems as though I'm going to end up doing what I said I wouldn't- strip the interior out and leave it barebones, possibly get a rollcage etc.
This has come after I accidentally broke about six pieces of interior trim just by leaning against them.
It would seem old plastic doesn't stand up to the heat of Louisiana summers for 23 years...
--Phil
|
| |
|
|
|
|
marksparks999
Part of things
  I aim to live forever, or die trying!
Posts: 656
|
|
Aug 29, 2010 10:53:04 GMT
|
|
great work... a lot of dedication, and understanding from SWMBO!
|
| |
Retroless at the moment... but on the hunt for something old!
|
|
rodney
Posted a lot
   https://www.facebook.com/RD-vehicle-transport-and-recovery-services-525622614268010/
Posts: 1,677
|
|
Aug 29, 2010 13:05:19 GMT
|
|
i used to have one of these , english version is the renault 11 , mine was a 1.4 turbo as found in the 5gtt ,
the engine block you have is the same as the volvo 480 turbo 1.7 , would be a very easy and cheap conversion if you can find one over there,.
|
| |
facebook: rodney dean / rd transport  |
|
|
|
|
Aug 29, 2010 14:59:14 GMT
|
great work as always Phil  if you get stuck with parts etc ,don't hesitate to give me a shout mate i always keep spares of everything ,lol |
| |
|
|


