|
|
|
May 24, 2012 11:19:17 GMT
|
|
Excellent - as they are Cords I suspect it'll be fine.
One thing to be aware of is that Cords have a reputation for accelerating bore wear - you won't get as many miles out of it as you might otherwise expect. Should be fine for a good few miles though. ;D
|
| |
|
|
|
|
Seth
South East
MorrisOxford TriumphMirald HillmanMinx BorgwardIsabellaCombi
Posts: 15,543
|
|
May 29, 2012 21:41:18 GMT
|
Well, at this point in time I'll just be happy to get the rest of this year out of it. Time is moving on and there's camping trips to be had... I hadn't been able to do anything with this since last week but did go to the Enfield Pageant on Friday and got a couple of relevant items in the autojumble and my second recent order from Speedy Spares also came. So today it was time to start putting together. First job was to get the bare block off the stand again and fit the new rear core plug. I had also dislodged the cam blanking plug so figured a new one (at 75p) was a sensible thing to do so that also went in, both with some red, semi hardening sealant. We'll see if they are fluid proof when either water oil or both pour out of the bellhousing... 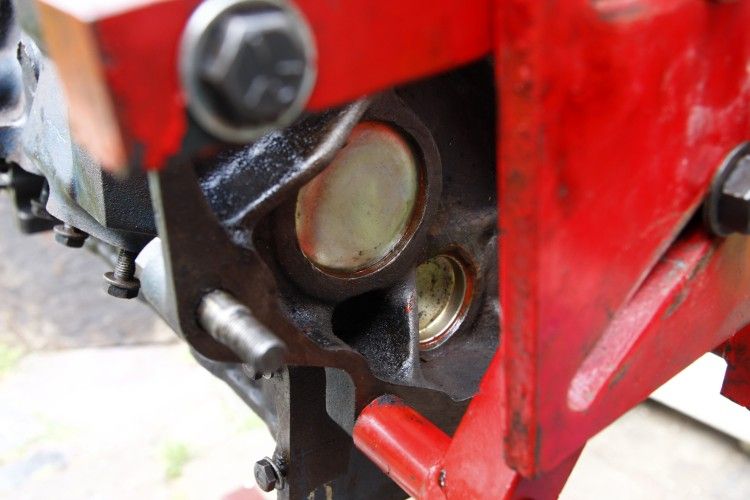 Then it was time to slot the alloy head cam in, and fit half the new main bearings. 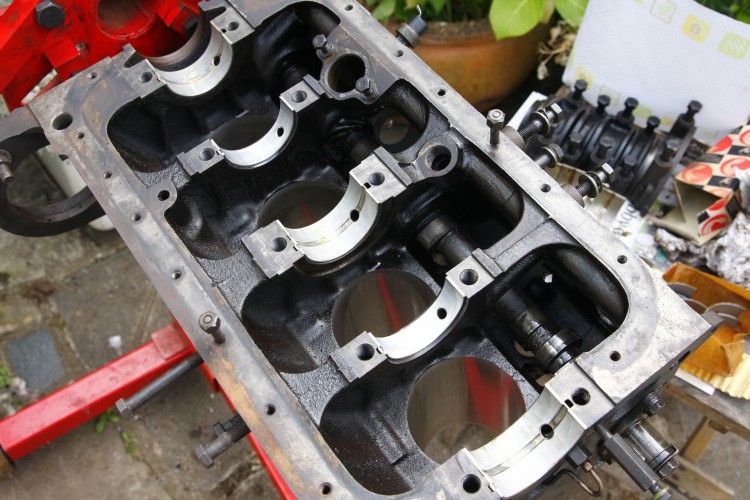 A bit of a jump as I neglected to take photos, but the crank went in without too many difficulties, checked that it still rotated OK as each bearing cap was fitted. Oil pump/dizzy drive fitted so that timing appeared to match the diagrams in the manuals. Then on with the timing chain and sprockets. I bought a new chain and tensioner in the end. 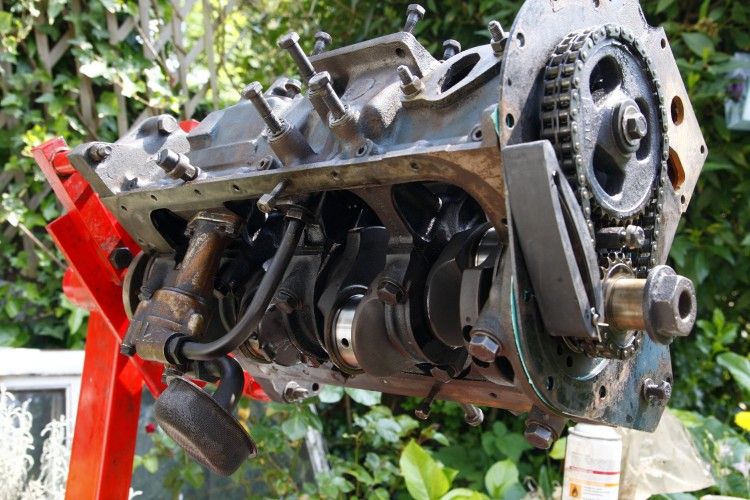 With the timing cover on and the water pump housing temprarily in place I did the final crud removal and degreasing of the block. 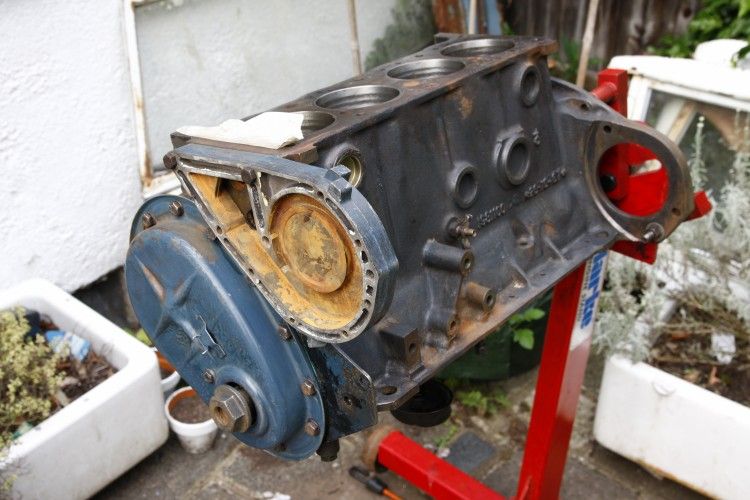 Because I had got this at Enfield. 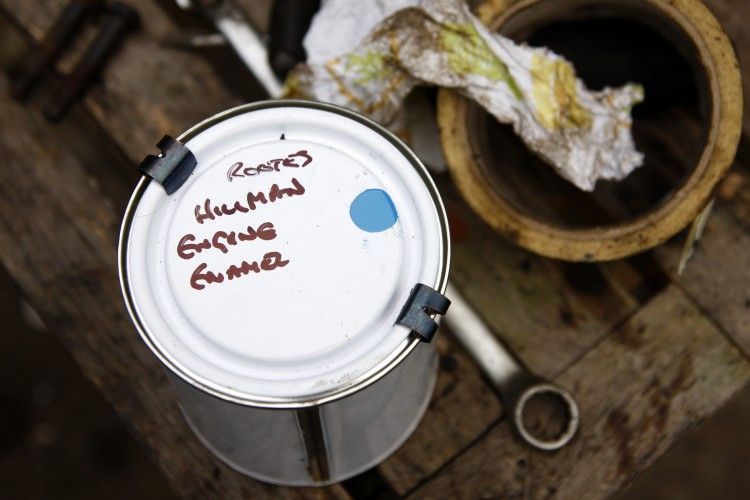 There were three factory shades, including one metallic which I knew was wrong. It might be that I plumped for the wrong one as it is a bit bright! The other one just looked grey to me though. Ho hum. 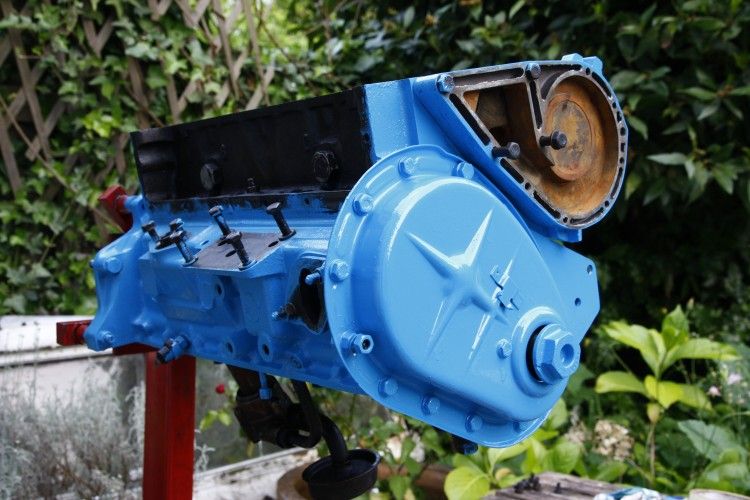 I fitted the new rings to one piston today as well. Maybe tomorrow I will do the other three and get them in the block. Also need to paint the side cover and crank pulley so plenty to get on with in between half-term childcare. She's going to grandmas on Thursday though so I'm kinda hoping I can get the short block slotted back into the car then. |
| |

Follow your dreams or you might as well be a vegetable. |
|
bstardchild
Club Retro Rides Member
Posts: 14,971
Club RR Member Number: 71
|
|
May 29, 2012 21:51:20 GMT
|
There were three factory shades, including one metallic which I knew was wrong. It might be that I plumped for the wrong one as it is a bit bright! The other one just looked grey to me though. Ho hum.  Sometimes pictures and colours lie but if that's how it really looks I'd be very happy - looks excellent I've painted a few blocks in my time and colour is more important than you think Gold - gloss (like gold seal reconditioned I thought) stupid idea couldn't see a blooming oil leak when the oil was fresh so took me a while to realise it even had one Black - gloss - couldn't see an oil leak with new or old oil which was a bit of a pain when it had several  Silver - matt - current Monza 24V engine - stupid idea I knew it wouldn't be oil tight and it's obvious it isn't I'm going with matt white/cream on my next 24V engine build - yeah I know ;D - but at least I'll see the leaks early enought to want to fix them |
| |
|
|
Seth
South East
MorrisOxford TriumphMirald HillmanMinx BorgwardIsabellaCombi
Posts: 15,543
|
|
May 30, 2012 18:59:36 GMT
|
Curing oil leaks sounds to me much like stemming the flow of auto rust proofing fluid  In between science experiments with a seven year old I carried out further works today. 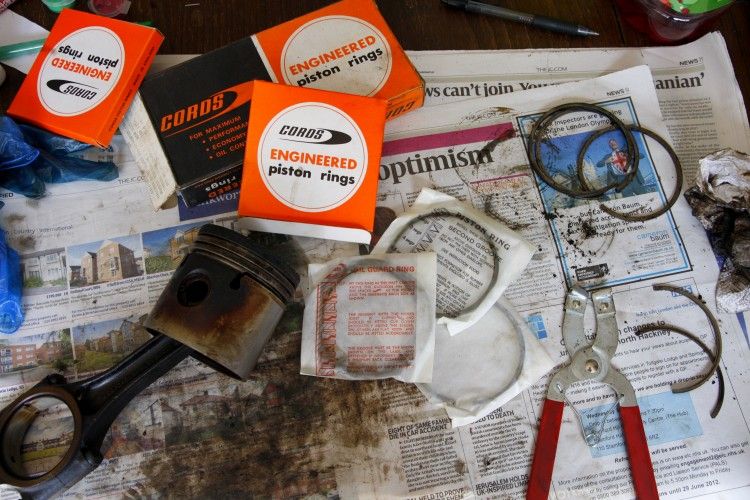 I realised that the old broken piston ring was a perfect shaped and sized scraper for cleaning out the old ring grooves. 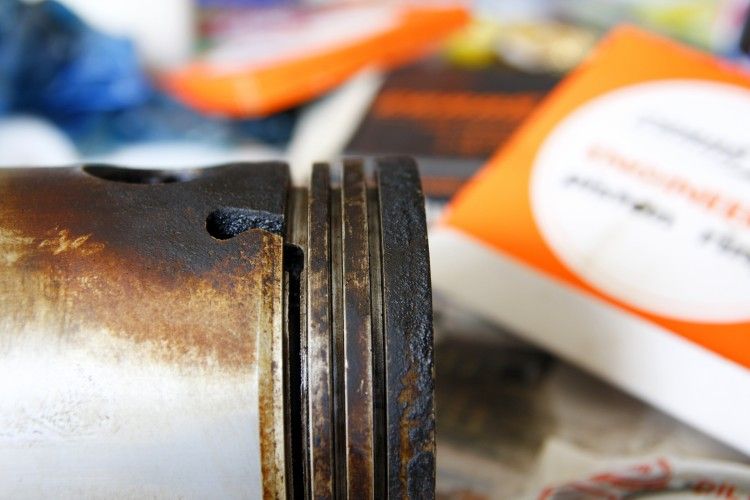 Here's two I made earlier. The Cords middle and lower rings are multi-part so the bits need to go on in the right order. 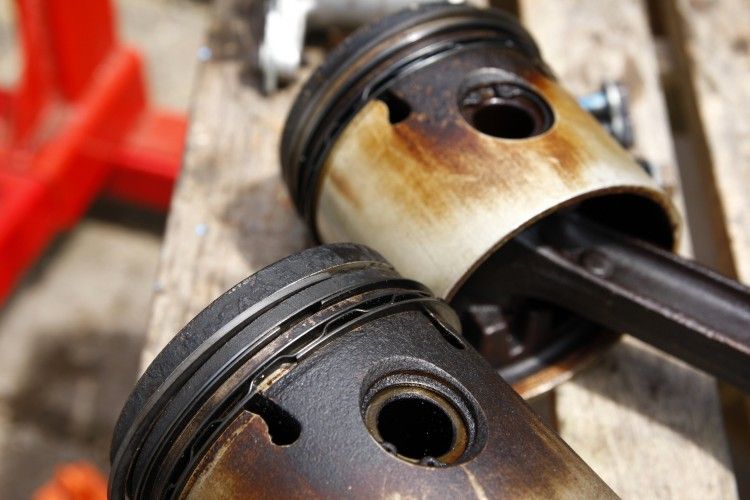 Borrowed ring compressor made fitting the pistons nice and easy. New big end shells fitted. 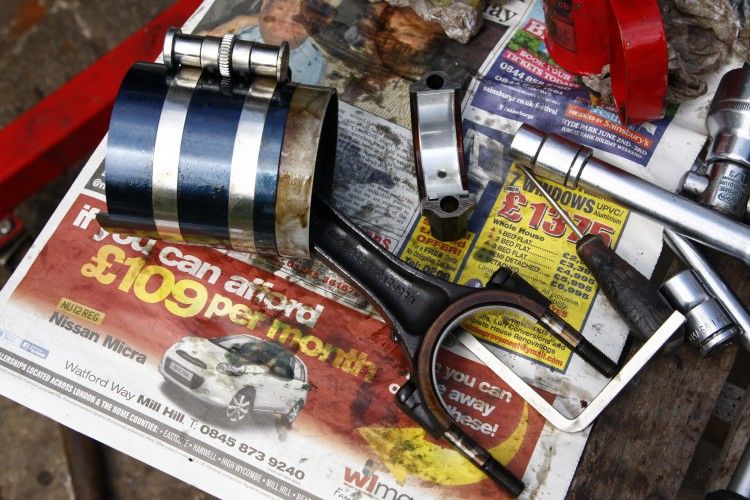 All in and torqued. The factory manual says to use new nuts on the big ends. The ones that came off were slotted locking types, the new ones I'd ordered from Speedy Spares possibly a later spec, 12 sided but non-locking (the same as were fitted to the 'spares' engine). After some pondering I opted to re-use the originals as there was still some stiffness to the locking and so I'd have though they'd resist undoing a bit better. 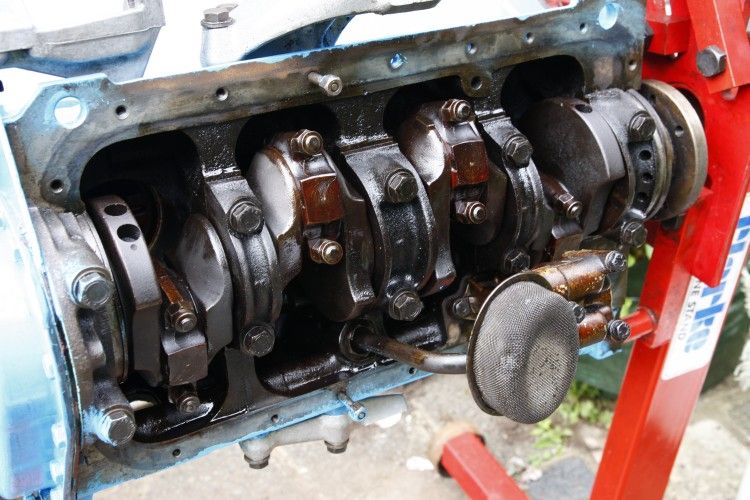 Also did some more painting. 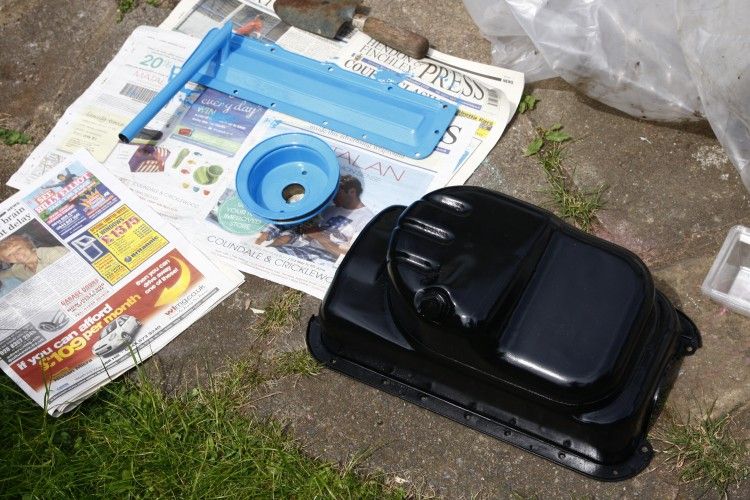 And finally got some externals back in place before thunder/rain came. 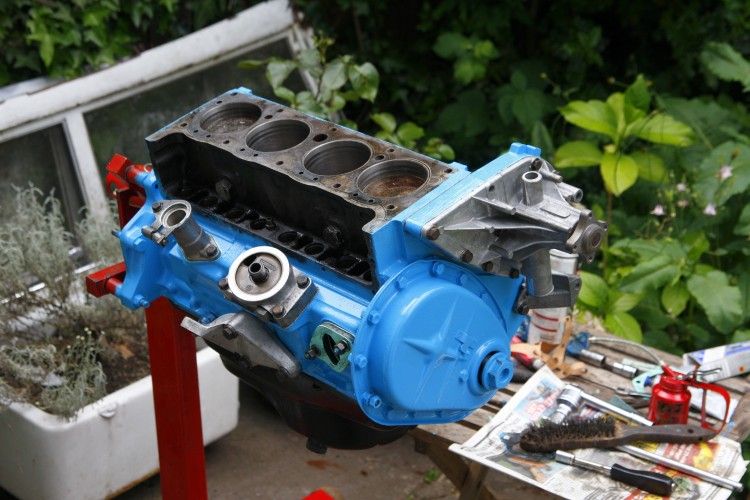 Once the engine is in the car I'll 'prime' the oil system a bit by squirting a load in the supply/feed holes in the oil filter housing. (Edited to say I wasn't carrying out scientific experiments on a seven year old but was helping her do some things with recent birthday presents, sticky backed plastic, empty bottles, magnets etc.  ) |
| |
Last Edit: May 30, 2012 19:01:56 GMT by Seth

Follow your dreams or you might as well be a vegetable. |
|
bstardchild
Club Retro Rides Member
Posts: 14,971
Club RR Member Number: 71
|
|
May 30, 2012 22:57:44 GMT
|
Curing oil leaks sounds to me much like stemming the flow of auto rust proofing fluid  You have a point but I actually like a nice clean engine In between science experiments with a seven year old I carried out further works today.  ;D (Edited to say I wasn't carrying out scientific experiments on a seven year old but was helping her do some things with recent birthday presents, sticky backed plastic, empty bottles, magnets etc.  ) She should have been learning engineering skills - shells and conrods and how proper stuff works |
| |
|
|
Seth
South East
MorrisOxford TriumphMirald HillmanMinx BorgwardIsabellaCombi
Posts: 15,543
|
|
May 31, 2012 21:23:11 GMT
|
Worry not BC, she has been taking keen interest in what I've been up to, following each step of the way and asking questions  I do like a clean engine too. Hoping this one does keep most of its fluids in. I spent some time soon after taking the engine out getting rid of most of the accumulated muck from the engine bay. Finished off today. Yeah, it'd be nice to re-paint in there etc but I really haven't got the time and this is no show car. Finished up a bit back round the steering box this morning and also fitted the new clutch thrust bearing. Exhaust all came off after taking this too. 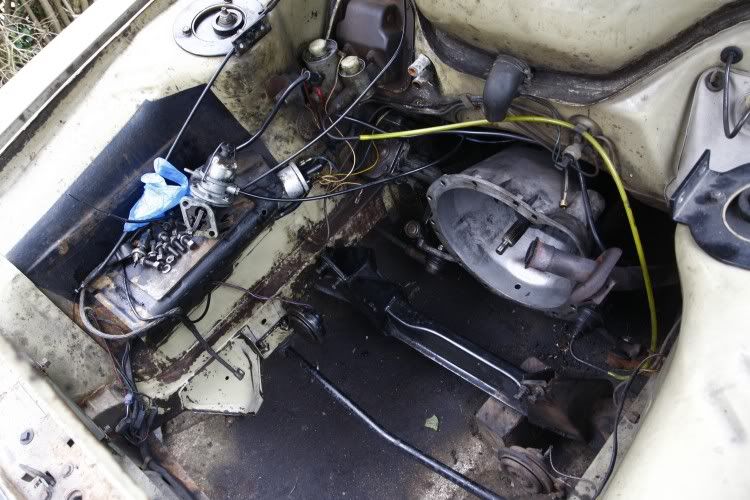 With the engine off the stand I could fit the flywheel and clutch. New mounts fitted too that I bought at Enfield last week. 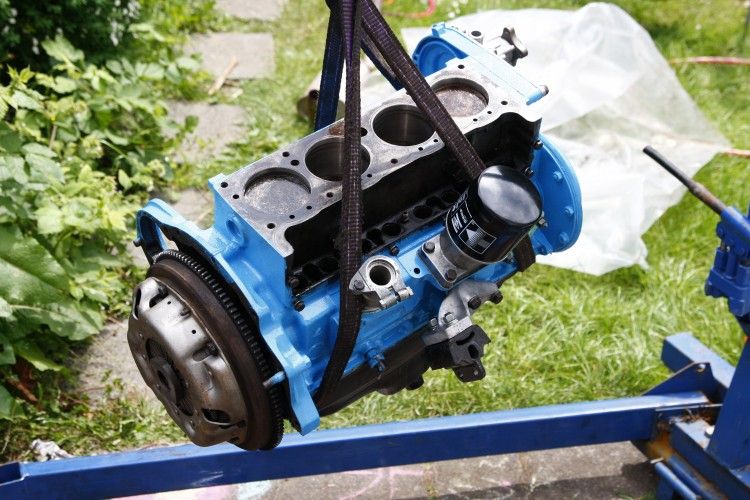 Clutch was centrered by eye using a screwdriver. Always worked for me before. 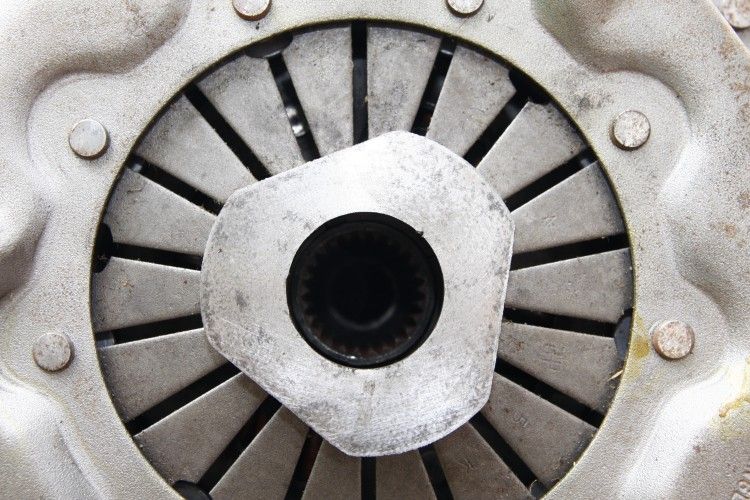 Time to put it in the hole then. (Nothing obviously newer than about 40 years old in this photo except for that dormer roof ;D ) 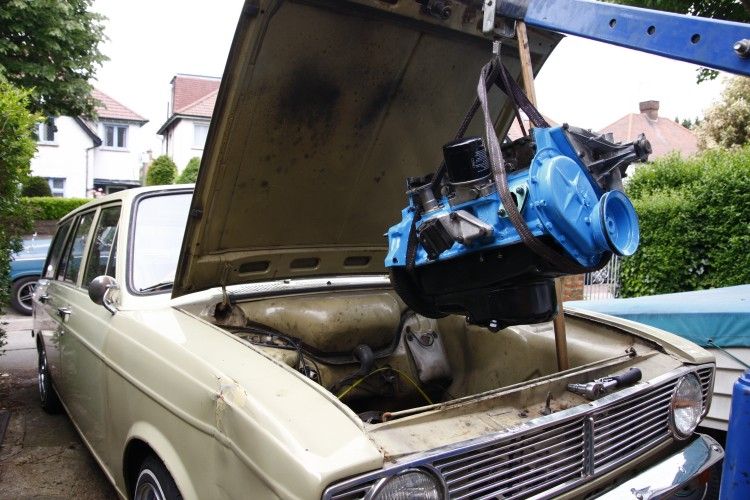 Almost there. Managed pretty well on my own with a little jiggle-ing. Jack under the box to adjust its angle. In practice for when I do the Oxford (which will be shinier!) I took care to dry and not mark paint etc. 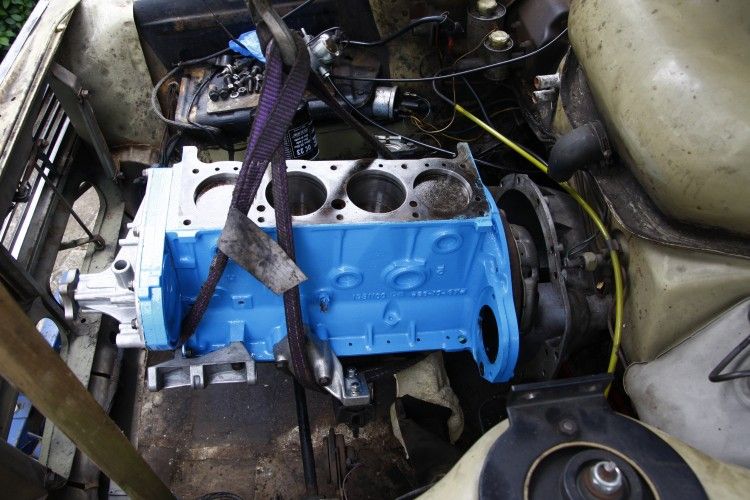 Actually got the block slotted in and bolted up in less than an hour, including getting it and the crane through from the back garden. Then spent some more time fitting a few bits back on, fuel pump, cam followers (that all needed crud removal first) rocker oil feed pipe, oil sender etc. 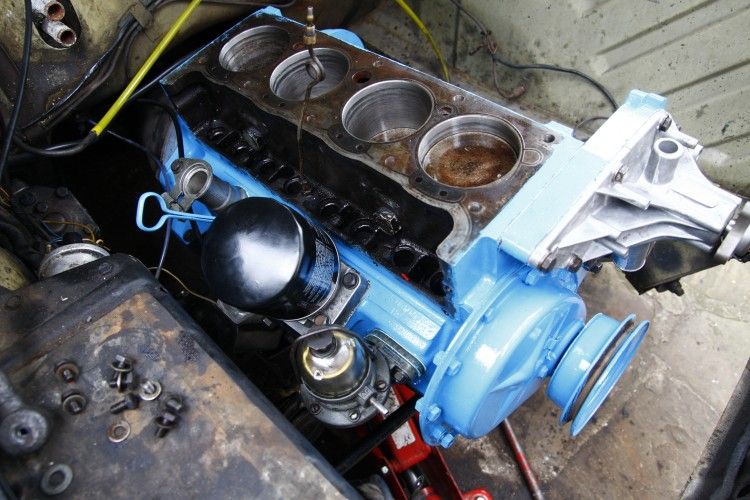 That's a much cleaner place under there than it used to be! 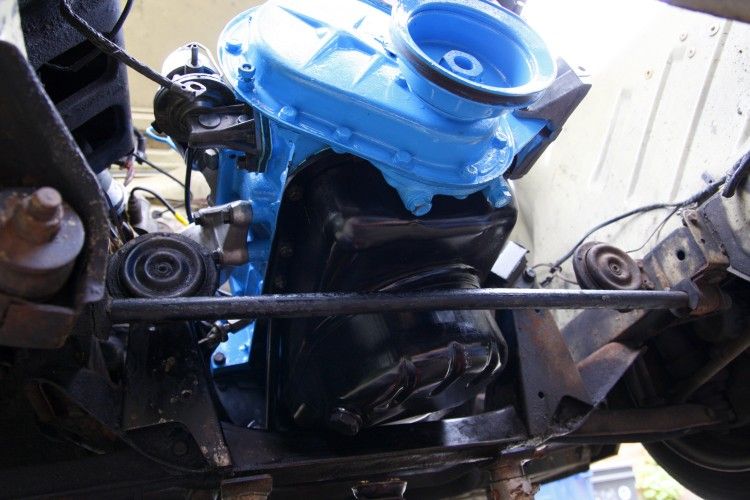 Valves to grind and a few other bits to paint before assembly can continue. |
| |

Follow your dreams or you might as well be a vegetable. |
|
ChasR
RR Helper
motivation
Posts: 10,309
Club RR Member Number: 170
|
|
|
|
Not too far away from being fired up then? Excellent stuff  . |
| |
|
|
Seth
South East
MorrisOxford TriumphMirald HillmanMinx BorgwardIsabellaCombi
Posts: 15,543
|
|
|
|
Not too far away from being fired up then? Excellent stuff  . Getting there, slowly. On-off weather, chores and motor racing over the past couple of days have got in the way a bit. I got this far with fitting bits back on the car yesterday, rad, fan, pulley, tappet cover, distributor with new bits etc. 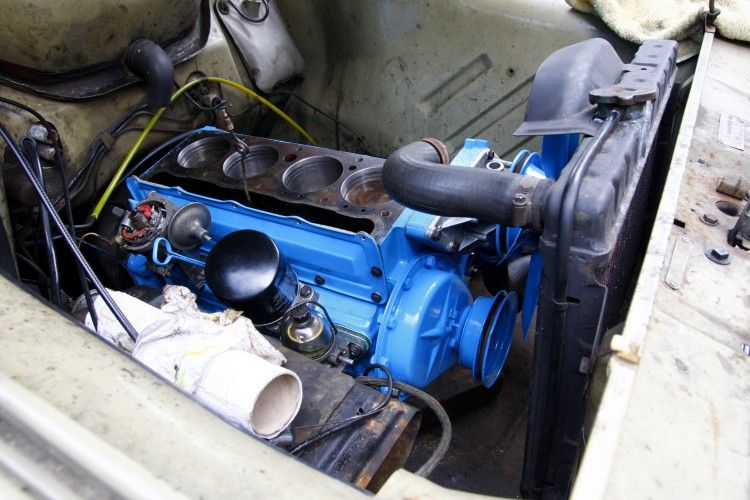 But then with the wet stuff descending I finally hid myself in the shed and got the new valves all ground in and the head assembled. 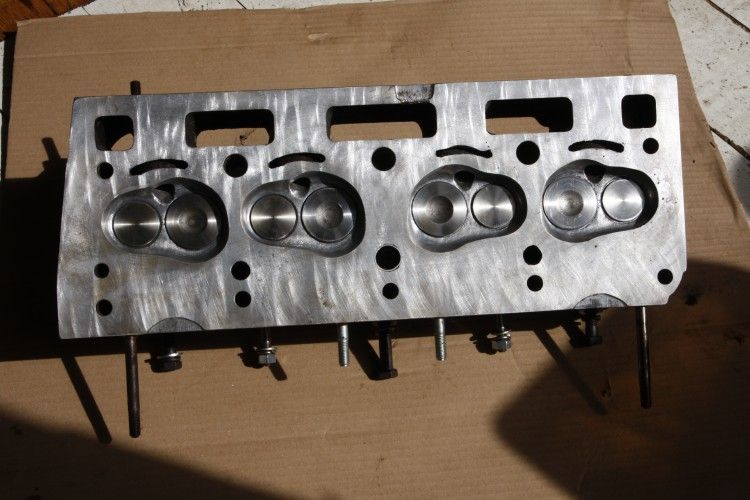 New 'Terrys' double springs. 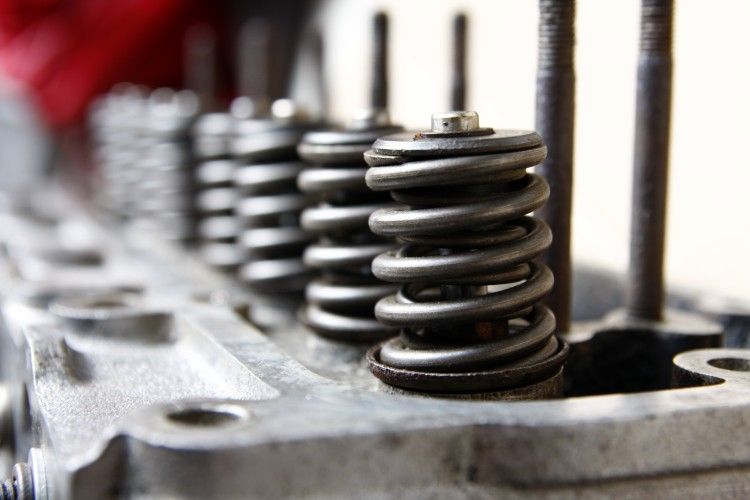 Oh, here's a neat detail I had found earlier in the build. The casting core must have had a date plate screwed to it. So I know my car was built between the end of October '67 and the end of December as it was supplied right after new year. Not quite visible in this shot, the starter motor also has 10 67 stamped into it.  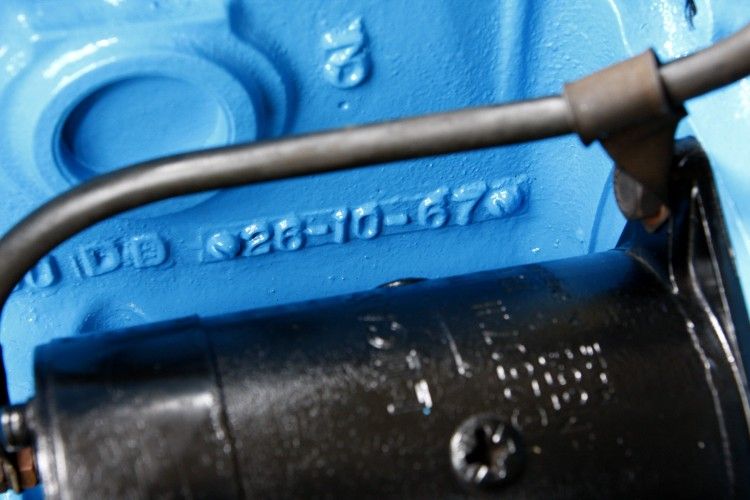 Finally today the engine got its head. Valve clearances and timing set about right. 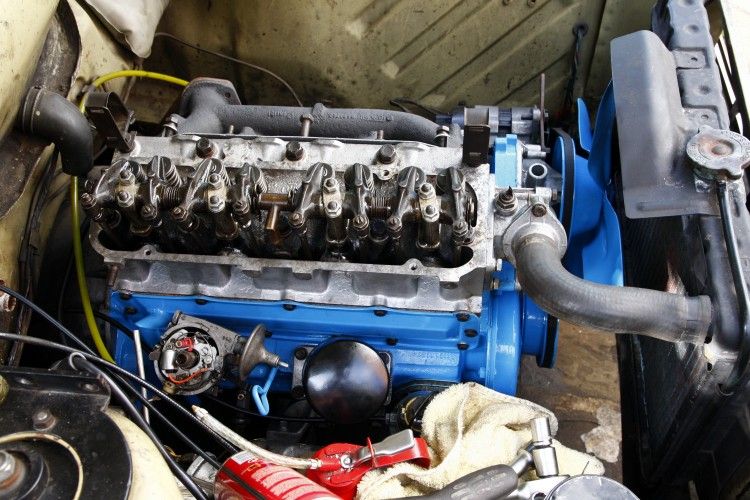 Also plonked the exhaust manifold and down pipe on for a look see. 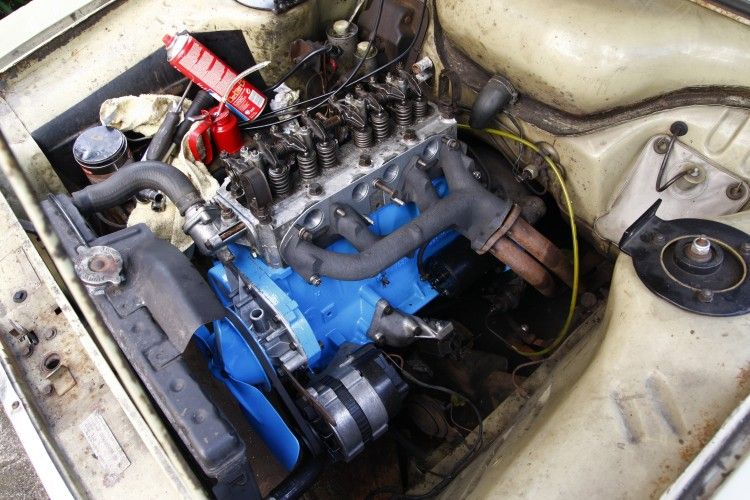 So the engine bay is filling up. If the weather is good tomorrow I'll probably get it all together, and then just need to adapt the downpipe to my system. But the forecast ain't great.  |
| |

Follow your dreams or you might as well be a vegetable. |
|
barrett
Part of things
  Plastic cars with metal doors BEST
Posts: 390
|
|
|
|
|
Yay! Seemed like you had a pretty busy weekend so I wasn't sure if we were gonna get much of an update or not.
bad weather tomorrow? Can't you build yourself some sort of makeshift tarp-tent and get stuck in anyway?
|
| |
Somebody find me a Watling. £££ waiting! (Seriously, I want a Watling. Help me plzzzzz)
|
|
|
|
|
|
|
Good work sir! Will this shiny 'new' engine be making its debut at the Ace next Tues?  |
| |
|
|
|
|
Seth
South East
MorrisOxford TriumphMirald HillmanMinx BorgwardIsabellaCombi
Posts: 15,543
|
|
|
|
Getting very close now. I had about two hours on it this morning before the heavens opened and it rained constantly all afternoon. (not really practical to errect a shelter Barrett) Manifolds and carbs on and various plumbing jobs done. 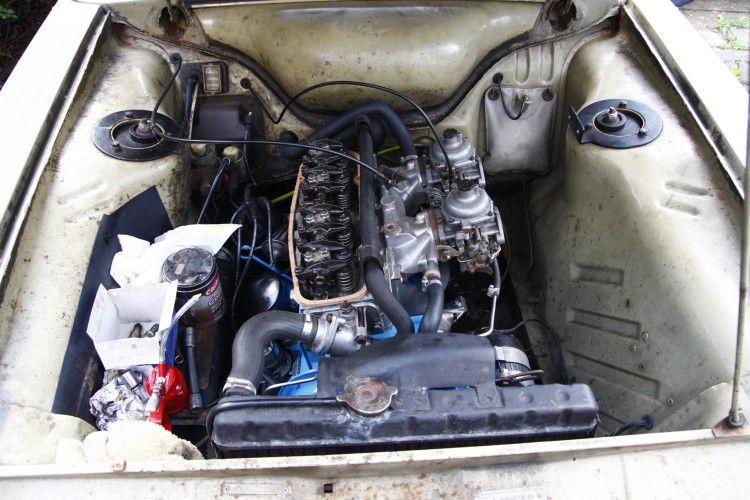 I rescued a bit of bent stainless pipe that I think was originally a fuel line I'd made for the Herald. Just needed a kink to clear the heater hoses and it fits a treat. 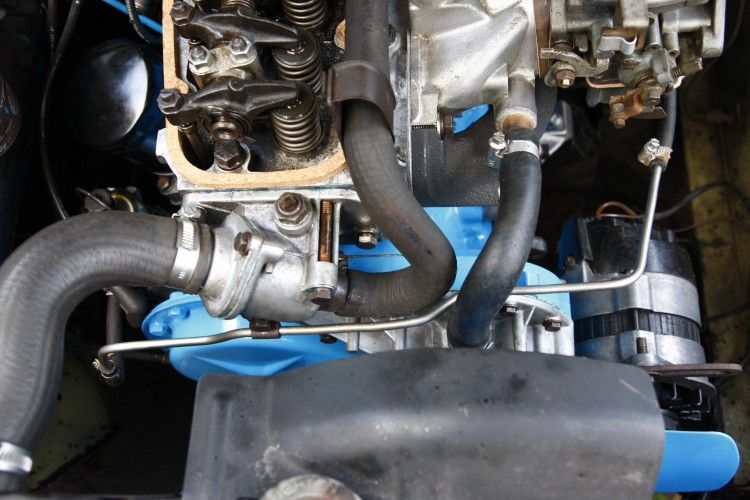 This evening I've plugged the servo take off, and put some oil in. Figured I may as well get the battery on and see if I could crank it over with the plugs out and get some oil pressure. That mission was swiftly accomplished.  Well, I may as well stick the plugs in and give it a go, even if its half past nine and there is only about 2 foot of exhaust beyond the manifold... It coughed a few times but I suspect needs timing tweaking and with light fading I figure it'd be better to wait until I can see what's happening (and not annoy so many neighbours) before I really do fire it up. But goes to show that with about an hour more earlier today without rain I'd probably have a running (if noisy) car right now. Do hope it makes it to the Ace Paul. |
| |
Last Edit: Jun 7, 2012 21:08:55 GMT by Seth

Follow your dreams or you might as well be a vegetable. |
|
|
|
|
|
|
|
YOW!!! I bet this is gonna run like a swiss watch!!! (see what I did there?)
|
| |
1974 Lancia Beta Saloon
1975 Mazda 929 Coupé
1986 Mazda 929 Wagon
1979 Mazda 929 Hardtop
1982 Fiat Argenta 2.0 iniezione elettronica
1977 Toyota Carina TA14
1989 Subaru 1800 Wagon
1982 Hyundai Pony 1200TL 2-dr
1985 Hyundai Pony 1200 GL
1986 Maserati 425 Biturbo
1992 Rover 214 SEi 5-dr
2000 Rover 45 V6 Club
1994 Peugeot 205 'Junior' Diesel
1988 Volvo 760 Turbodiesel Saloon
1992 Talbot Express Autosleeper Rambler
2003 Renault Laguna SPEARS OR REAPERS
|
|
|
|
|
|
|
|
Looking spot-on there, Seth. Hope it all goes well tomorrow. ;D
A quick suggestion in case it's a pain to start, check over the igntion paying close attention to the condensor. I'm sure you know this, but many reproduction* ones fail early, although it's unusual for them to be dead out of the box.
Most of the running trouble I've seen on old cars has been down to poor quality reproduction ignition components. Intermotor points are terrible - with them in the Imp (also a 25D4 dizzy) I found I had to adjust the gap every couple of hundred miles. With old-stock ones I've left them alone for 3,000 without trouble. Also, if the new rotor arm has a rivet in it to hold the brass arm down (and came in a green Lucas box), throw it away and either put the old one back or buy a new red one from the Distributor Doctor (no affiliation).
*Yes, I can tell that it's repro. How sad is that? The givaway is the moulded-in wire terminal - most period ones have the wire soldered to a metal button instead.
|
| |
|
|
Seth
South East
MorrisOxford TriumphMirald HillmanMinx BorgwardIsabellaCombi
Posts: 15,543
|
|
|
|
Thanks Bo11, revil. Almost 20 (gulp!) years of daily driving old stuff mean I am well up on ignition parts. I always keep and carry the old ones in the car when I replace distributor bits, assuming they were working OK. I do have a 'red' rotor arm in this. I don't think you can really claim one brand as being better or worse than others though as I have heard from a trader (who I trust and normally buy these things from) that its all much the same these days whatever box they come in. I think it comes down to duff batches more than anything else. Also, we bought NOS lucas points once and they lasted about 30 miles! They were a bit too 'O' and the cam follower had become brittle and snapped.  |
| |

Follow your dreams or you might as well be a vegetable. |
|
Seth
South East
MorrisOxford TriumphMirald HillmanMinx BorgwardIsabellaCombi
Posts: 15,543
|
|
|
|
Decided not to give in to the weather, just popped out as it was only light drizzle at the moment and IT RUNS!!! YAY!!!!!!   Only needed a little pedalling on the throttle and what-not. Can't run it up much due to the exhaust but seemed pretty happy at a fast idle for a minute or so.  Should've listened to the vilerug about the viton carb O rings though as both carbs had dribbled in the night.  |
| |

Follow your dreams or you might as well be a vegetable. |
|
|
|
|
|
|
 ;D ;D |
| |
|
|
|
|
|
|
|
 ;D ;D +1 (and then some!) Good work Seth, really glad to hear it's in & running....well worth braving some rain for I reckon.  |
| |
|
|
|
|
|
|
|
|
are you keeping the patina'd wing??
or will it get the seff treatment??
nice work on the motah
|
| |
2001 HONDA CT110 (NOT RCV)
|
|
|
|
|
|
|
 ;D ;D +1 (and then some!) Good work Seth, really glad to hear it's in & running....well worth braving some rain for I reckon.  ^This. ;D ;D |
| |
|
|
Seth
South East
MorrisOxford TriumphMirald HillmanMinx BorgwardIsabellaCombi
Posts: 15,543
|
|
|
|
Ta chaps. A small break in the rain and I was out there seeing if I could at least start to cobble an exhaust together. I cut the front section off the original pipe and could then slot the remaining part (with silencer) into the new downpipe. There's a slight angular difference in a bend so I'm going to have to wedge cut the pipe but there's no way I'm going to get to weld it today. So I left the pipes pushed barely together and started it up again. ;D Quiet enough to let it get properly warm and check for leaks etc. After Nomad's experience with his car I was a bit worried about lack of oil up to the rockers but it did seem to come through eventually and was running down the pushrods to the cam and followers. Only drip seemed to come from the top hose so that got tightened a bit more. With it warm I could get the carbs adjusted a bit though it started raining harder so I will leave that for another day and get my carbalancer out. Had a quick try with the timing light but it seems to have stopped working which is a bummer. I probably only need a couple of properly dry hours to get the exhaust together but can't do it tomorrow. Really want to go for a drive! are you keeping the patina'd wing?? I have a new wing to go on but since it will probably be quite an involved process I'm not sure its going to happen soon. I've hardly done any work while doing the engine and need to earn some money again now. Can't really afford to take the car off the road again so near holiday times. So it may just get bashed out a bit more. |
| |

Follow your dreams or you might as well be a vegetable. |
|
|
|




 ;D
;D I do like a clean engine too. Hoping this one does keep most of its fluids in.


 [*]
[*] [*]
[*]
