Seth
South East
MorrisOxford TriumphMirald HillmanMinx BorgwardIsabellaCombi
Posts: 15,543
|
|
|
|
|
Thanks Rob, Pid.
Yeah I remember having a conversation with you about doing half wings and that was part of my consideration. The back end of the wing will be altered a bit anyway to suit the different lights so it may not matter if I start with the curved end but I'll measure them up to see where the curve starts in relation to the squared off end of the Oxford one. I do actually have a drivers side A55 rear wing too but I think it is too badly pitted through bad storage in the past to be useable. Its yours if you want it.I'll get it down and take some photos but may not get to the car this week.
|
| |

Follow your dreams or you might as well be a vegetable. |
|
|
|
Pid363!
Posted a lot
   Madness is all in the mind!
Posts: 1,052
|
|
|
|
|
Yes please seth. Thanks
|
| |
Stupid is as stupid does!
|
|
brc76
RR Helper
Posts: 1,108 
|
|
|
|
|
Seth, does gromit's nose still change to red when hot? Mine stopped doing that some years ago...
|
| |
|
|
Seth
South East
MorrisOxford TriumphMirald HillmanMinx BorgwardIsabellaCombi
Posts: 15,543
|
|
|
|
Dunno brc. Don';t think I'll be using him for hot drinks. In other news, no turning back now! 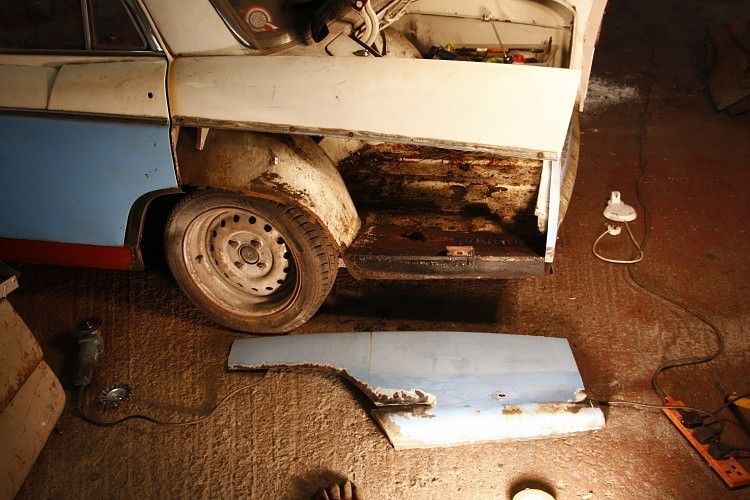 |
| |

Follow your dreams or you might as well be a vegetable. |
|
bstardchild
Club Retro Rides Member
Posts: 14,971
Club RR Member Number: 71
|
1970 Morris Oxford - 20/9/24 - bstardchild
@bstardchild
Club Retro Rides Member 71
|
|
|
Dunno brc. Don';t think I'll be using him for hot drinks. In other news, no turning back now!  Ha ha been there done that............. |
| |
|
|
Seth
South East
MorrisOxford TriumphMirald HillmanMinx BorgwardIsabellaCombi
Posts: 15,543
|
|
|
|
Ha ha been there done that............. I'm trying to decided whether to take that as encouragement or a suggestion to give up now....  |
| |

Follow your dreams or you might as well be a vegetable. |
|
bstardchild
Club Retro Rides Member
Posts: 14,971
Club RR Member Number: 71
|
1970 Morris Oxford - 20/9/24 - bstardchild
@bstardchild
Club Retro Rides Member 71
|
|
|
Ha ha been there done that............. I'm trying to decided whether to take that as encouragement or a suggestion to give up now....  Oh encouragement always |
| |
|
|
brc76
RR Helper
Posts: 1,108 
|
|
|
|
|
We've all been there with it marked out and just before cutting thinking -
Do I really want to do this?
It's still slightly scary starting a repair / mod.
|
| |
|
|
Seth
South East
MorrisOxford TriumphMirald HillmanMinx BorgwardIsabellaCombi
Posts: 15,543
|
|
Nov 16, 2015 21:24:14 GMT
|
Well with that big lump out of the way one of the first things I did was this: 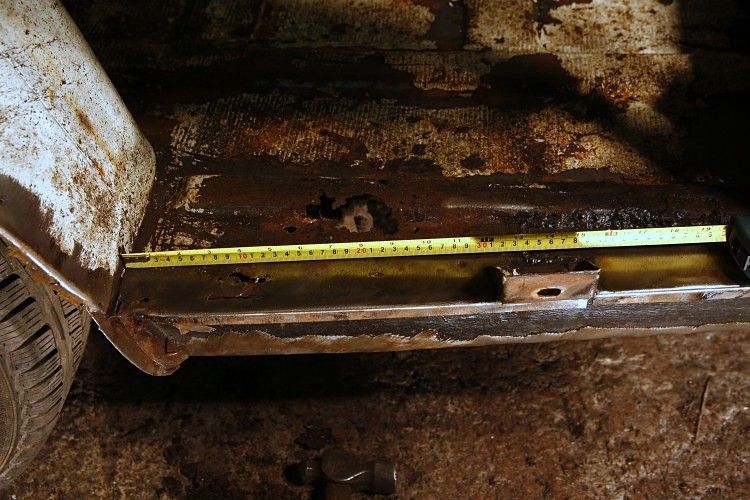 A reference for that bumper mounting bracket in case I end up chopping it off at some point without noting where it was. I also marked on the upper wing section the position of the small internal brackets which hold the interior boot trim panel and whilch will come off when I remove the remaining piece of the lower panel.  I had to think for a while about how I was going to tackle the repairs to the inner arch but at least access was now much easier. 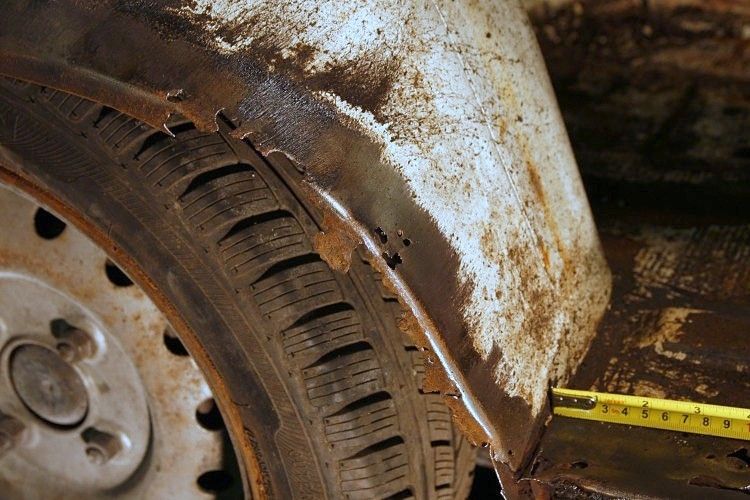 I quickly decided I would struggle to make it all in one so again like the front section I started with an easy bit. There was a small piece of the original lip that was still quite sound and so rather than being all gung-ho and chopping it all out in one I retained this as a reference from which to work.  Then came the part from the door to the reference poin which is only slightly curved and was made to match the new rear wing. 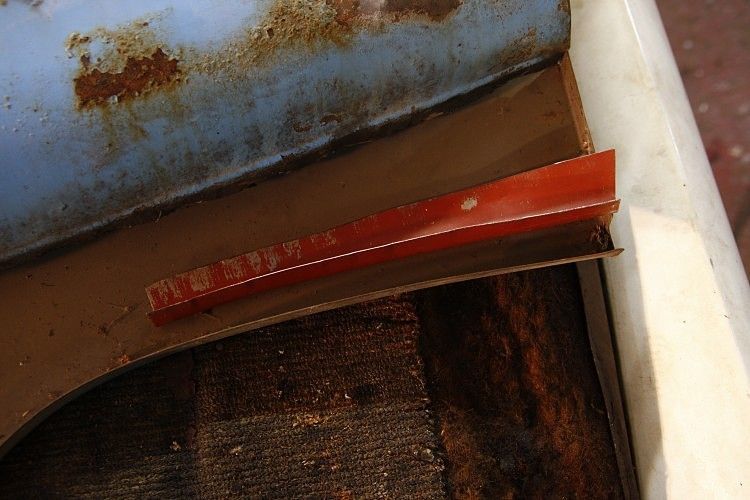 But I didn't take any pictures when I welded that on. Then I did the next part for which I could use the NOS inner wing I have for the other side and make a mirror image of the part I needed. As you can see the flat section gets wider around the corner.  I made sure to check this against the new outer panel too. 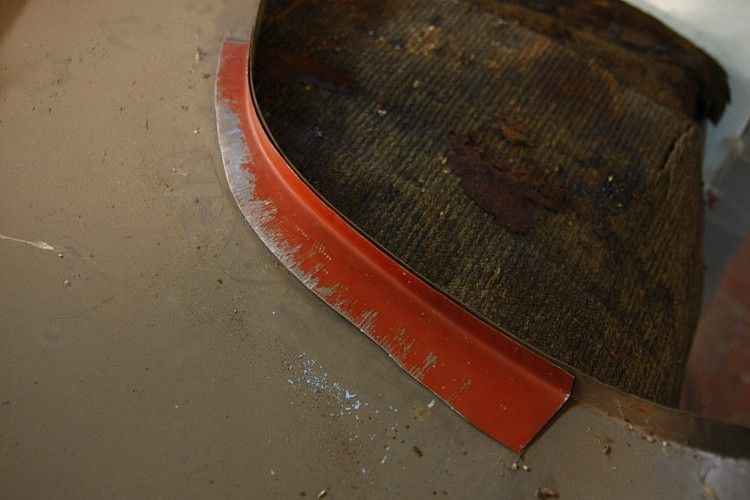 I also extended it so it would go right down to the end of the arch in one sweep but didn't take any pictures of that either. Eventually after quite a bit of double checking and measuring I welded it all on. 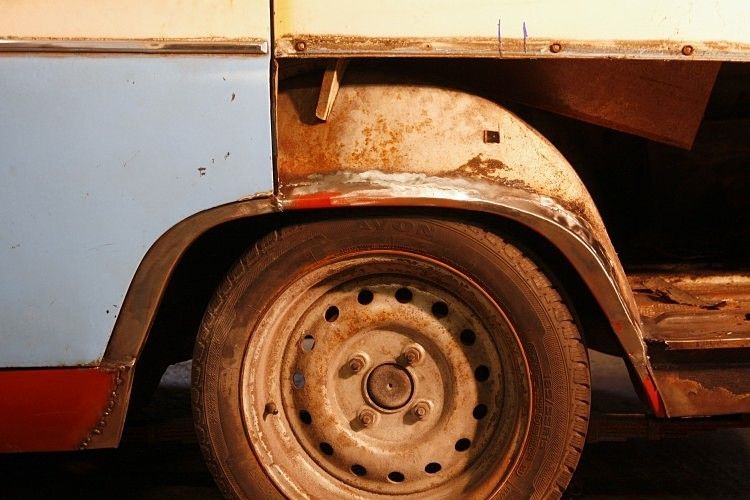 Hopefully the measurements all worked out and it will line up properly when I can offer the outer wing in place. I didn't weld right the way to the bottom to give me a little leeway there when trial fitting but will have to zap that up before the outer is finally welded in place. 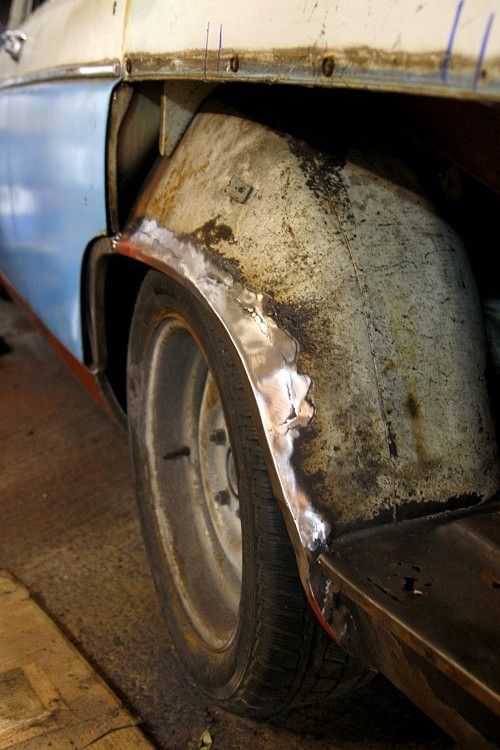 Pretty pleased with how its come out though. That section of boot floor will be next I think. |
| |

Follow your dreams or you might as well be a vegetable. |
|
|
|
|
|
|
|
|
|
|
Nov 25, 2015 21:07:09 GMT
|
|
Nice job Seth, keep going.
|
| |
|
|
qwerty
Club Retro Rides Member
Posts: 2,419
Club RR Member Number: 52
|
1970 Morris Oxford - 20/9/24 - qwerty
@qwerty
Club Retro Rides Member 52
|
Nov 25, 2015 23:19:19 GMT
|
|
This thread is always a pleasure to catch up with. Keep up the good work Seth.
|
| |
|
|
Rob
Posted a lot
   You know, for kids!
Posts: 2,515
|
|
|
|
|
Great stuff - your updates make me feel calm and make me want to get stuck into my rusty heap in the garage!
|
| |
|
|
Seth
South East
MorrisOxford TriumphMirald HillmanMinx BorgwardIsabellaCombi
Posts: 15,543
|
|
Nov 29, 2015 22:01:45 GMT
|
Thanks guys. Still trying to keep on keeping on. Been very busy with work recently so have had to cut down on dungeon time a bit but still making some progress. Urgh! Rusty floor! I remembered I'd bought a spot weld drill so that made neat work removing that section.  Here's one I made earlier. 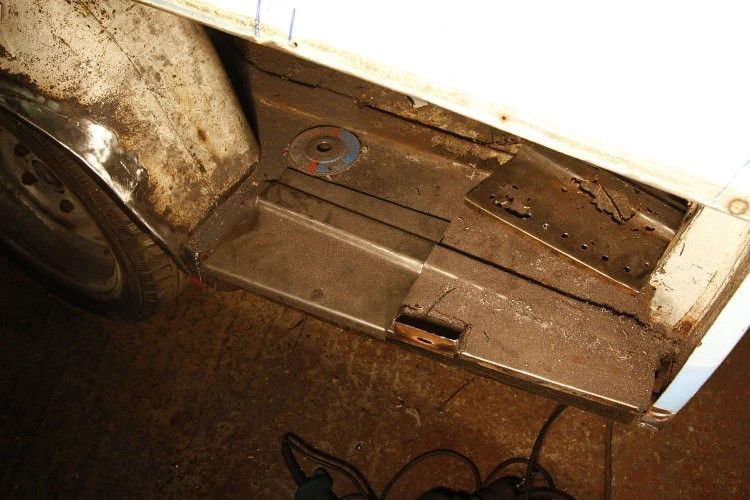 But I didn't want to weld that in yet as I needed to decide what I was going to do with this olde repair work  To make that decision I needed to know if the inner arch was all in the right place so that meant offering up the new panel. Here's the NOS wing cut in half. 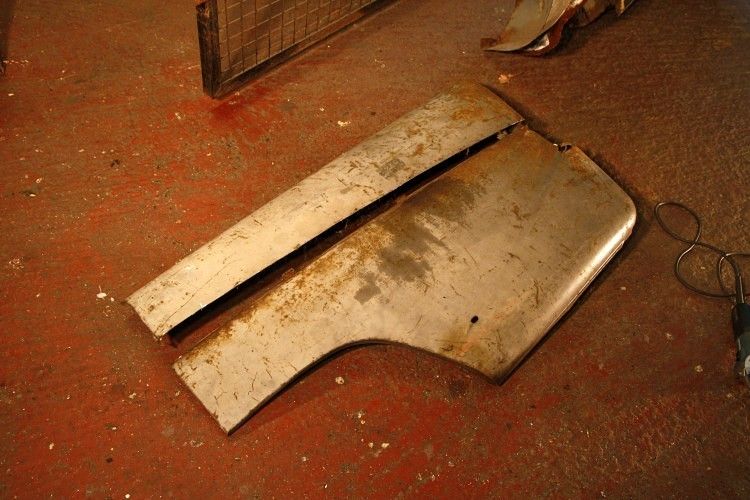 The next task was the most unpleasant one of trying to neatly remove all remnants of the old lower wing from the seam. Rather than being spot welded together they appear to have had some sort of roller welding device so that meant having to try and carefully grind back all the excess material without removing the upper wing flange I needed to keep. I nearly managed this. ie, I cocked up in one area that will require welding up at a later date. No photos 'cos it basically meant lying on my back chucking grinding sparks in my face for an hour or so. First trial fit. 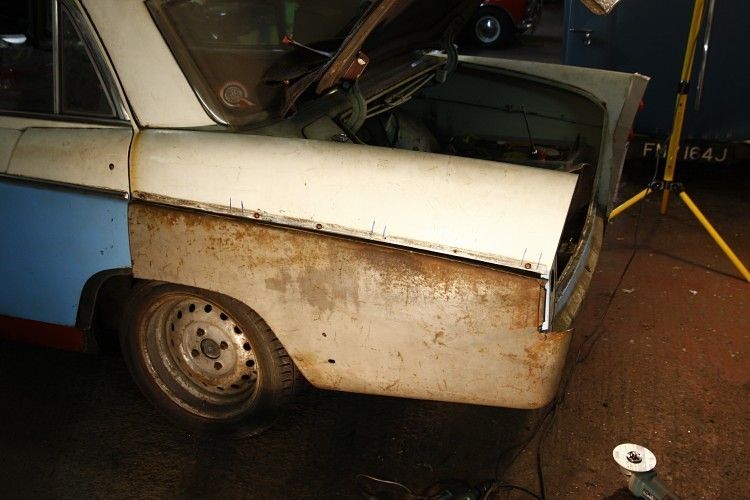 With a bit of trimming here and there it was getting pretty close. This is the back door edge which is following quite nicely. 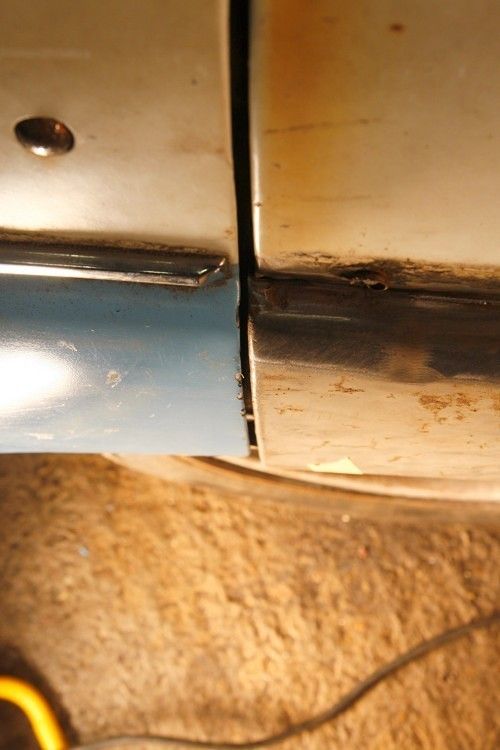 Bit of an overlap still left at the back to cut in and butt weld later. (heh, heh. He said butt. heh, heh, heh.) 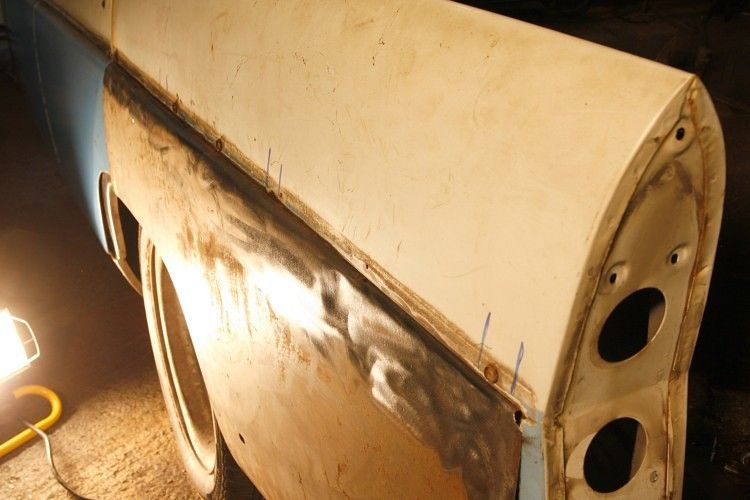 The inner wing edge was a bit to far forwards at the lower quarter. 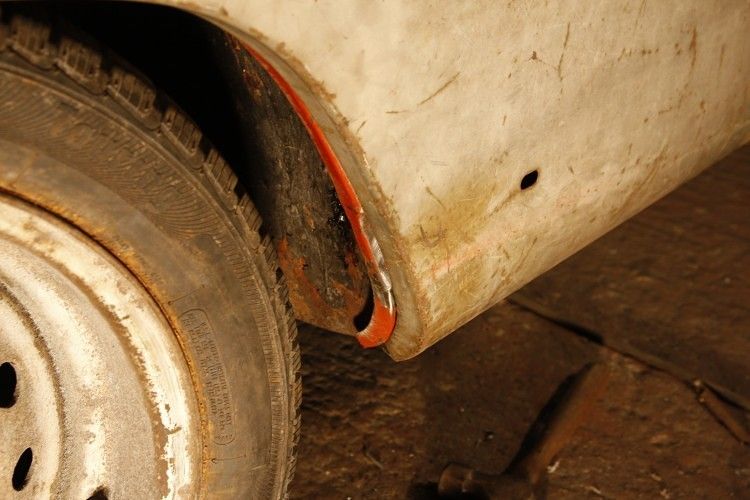 So that helped me decide to chop out a good section from that olde overlaped inner panel repair so that I could fine tune the arch fit and make up a much better repair. So before finishing off today I was at least able to clamp the new panel pretty much into position and be satisfied that it should all come together OK.  |
| |

Follow your dreams or you might as well be a vegetable. |
|
|
|
Seth
South East
MorrisOxford TriumphMirald HillmanMinx BorgwardIsabellaCombi
Posts: 15,543
|
|
|
|
Thanks Vulga. A bit more done in the last week. I chopped out that old repair to the bottom of the inner wing/inner sill kinda section. Its so handy having that NOS panel (for the other side) to see how the panels ought to be shaped and fitted together. Anyhow, I welded in a bit to finish off the inner wing in the right place to suit the outer panel. 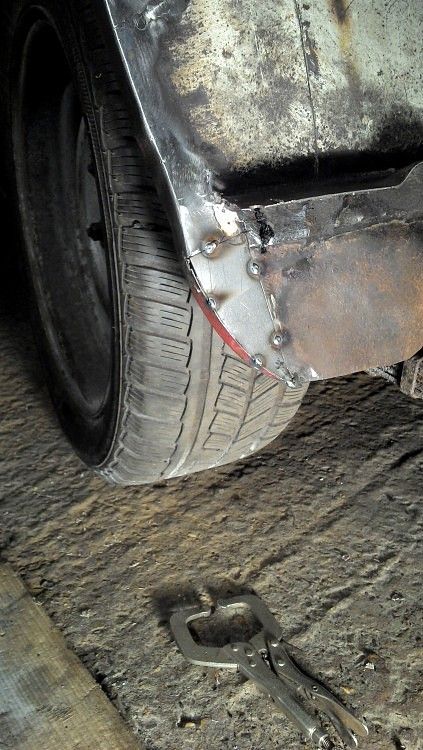 Then folded up a new 'inner sill' piece. Took a couple of goes to get the folds just so.  Oh, while I've been faffing about with the mostly compete inner wing I jacked the car up and offered up a 'proper' wheel to see how clearance will be. Obviously now would be the time to do any thing if needed to make sure there is clearance. I've brought one of these wheels home now to get a tyre fitted so I can get an even better idea and also choose a final tyre size for them.  I needed to finish of that edge of the boot floor while half the wing is still out of the way so trimmed and welded in the repair I made a couple of weeks ago. There's quite a clear difference between my current work and the sort of, err, standards I was happy with 15 odd years ago... 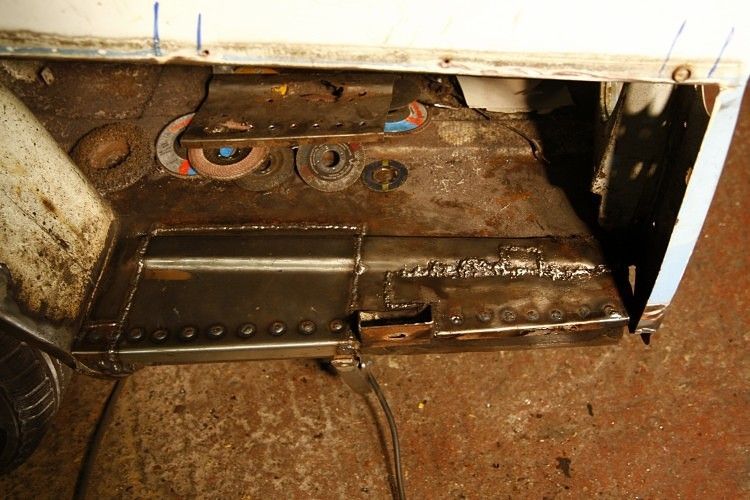 I cleaned that lot up and its all looking reasonably good now. 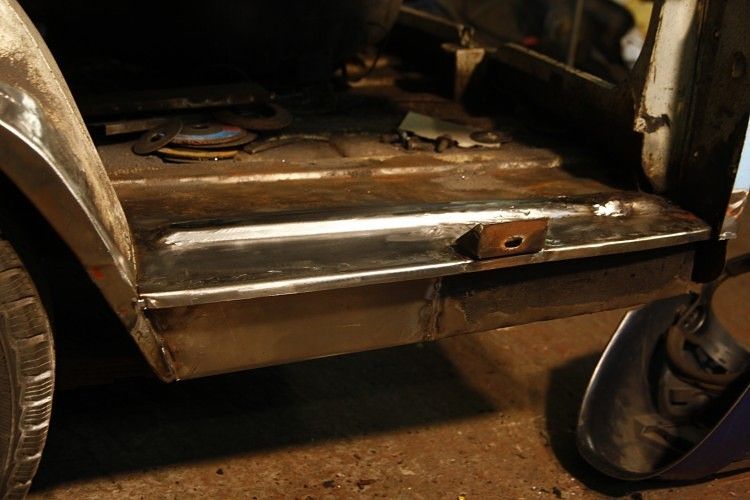  With the half wing still off I attacked the rear edge of the boot floor where I knew I had holes to see what I was dealing with. 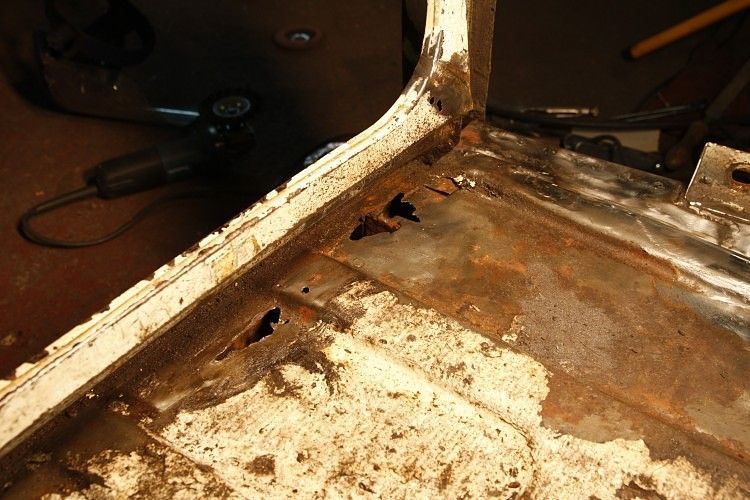 I left it at that so I could mull over the best way to go about sorting that out since access is tricky back there from top or bottom and now have a cunning plan of attack for the next visit. |
| |

Follow your dreams or you might as well be a vegetable. |
|
|
|
|
|
|
|
Such skills, I wish I had a tenth of your ability.
|
| |
|
|
|
|
1970 Morris Oxford - 20/9/24 - Mercdan68
@forddan68
Club Retro Rides Member 68
|
|
|
|
Fantastic work, just wish I had half as much patience and skill, such a great car to be rebuilding, my dad had a two tone brown estate back in the early 70s when I was about 4 years old, just a proper British legend, great work lots of respect for your work on it, Dan
|
| |
Last Edit: Dec 7, 2015 21:36:55 GMT by Mercdan68
Fraud owners club member
2003 W211 Mercedes E class
1989 Sierra sapphire
1998 ex bt fiesta van
|
|
vulgalour
Club Retro Rides Member
Posts: 7,285
Club RR Member Number: 146
|
1970 Morris Oxford - 20/9/24 - vulgalour
@vulgalour
Club Retro Rides Member 146
|
|
|
|
It's really nice to see the difference in welding over 15 years there, highlights just what perserverance, practice and proper tools can do to the standard of work.
|
| |
|
|
|
|


